Patterns for Pirates

P4P stylish, modern, wearable patterns

  • Home
  • Blog
    • Frequently Asked Questions
    • Pattern Releases
      • Free Patterns
    • P4P University
      • Fitting
      • Sewing with Stretch, Knit Fabrics
      • Sewing with Woven Fabrics
      • Sewing Machines
    • Sew-A-Longs
    • Fabric for Pirates
    • Pattern Hacks
    • Announcement
      • Blog Tours
      • Contest/Giveaway
  • Shop
  • Bundle Discounts
  • Flash Friday
  • Gift Cards
  • My Account
  • Cart

Thank you to our Sponsors- 30k Members “Sew it, Win it, Build it” from P4P

October 12, 2016

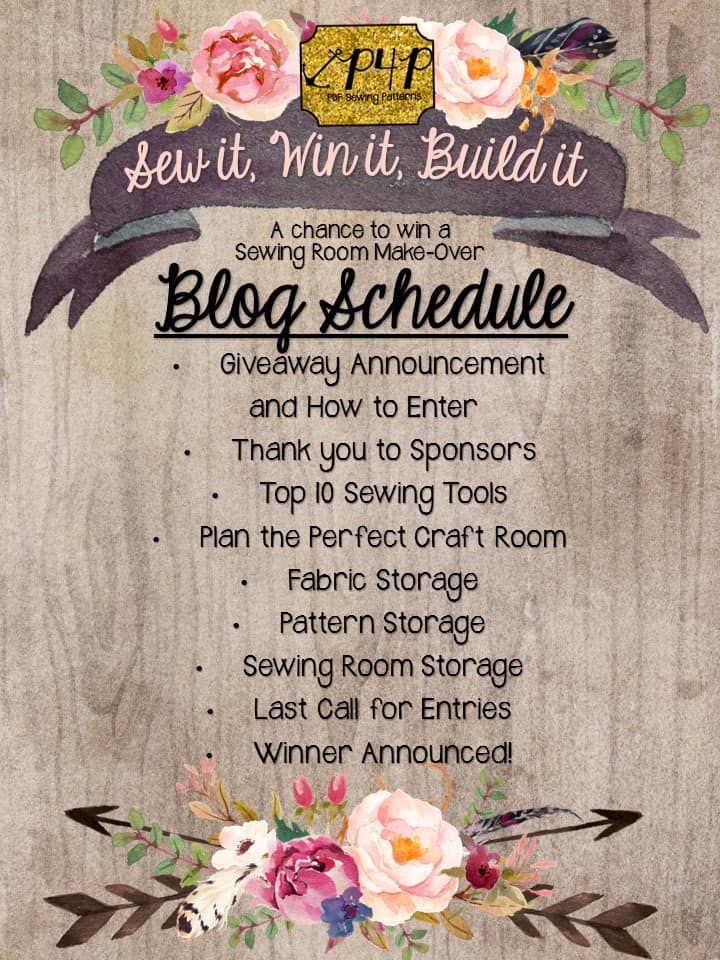
We’re in the midst of our biggest, most exciting giveaway yet here at P4P! The Sew it, Win it, Build it giveaway celebrating our Facebook Group hitting 30,000 members is this week!

slide3

We have a HUGE grand prize for one lucky P4P fan that includes an amazing fabric stash worth a little over $1000.

slide2slide1

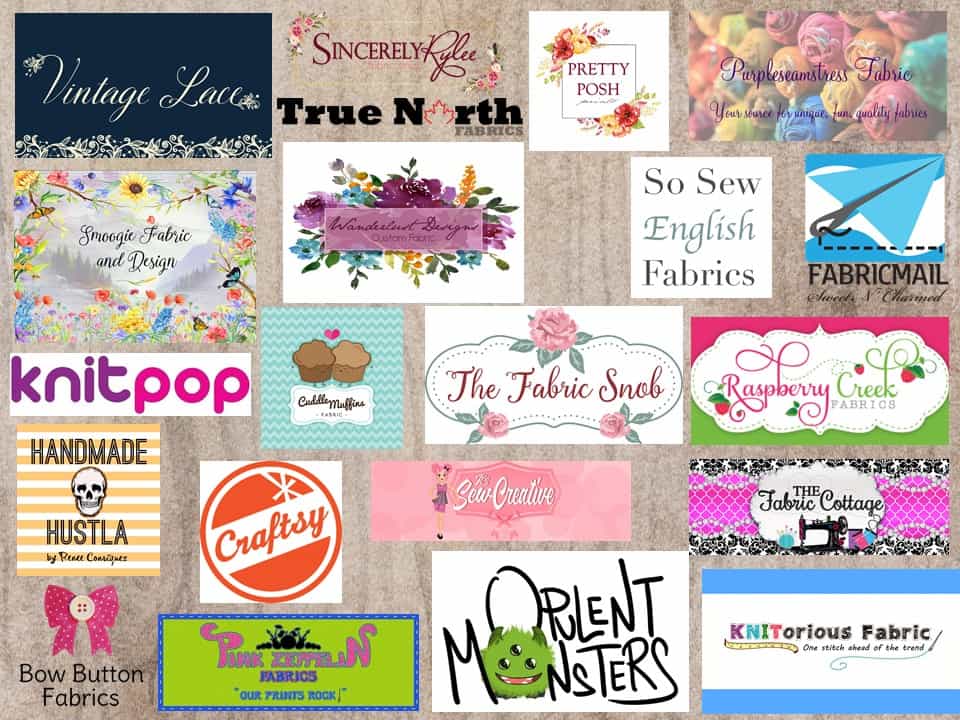
To say thank you to our wonderful sponsors we’d like to take a minute to share their shops with you! Check them out! Here they are in no particular order 🙂

150-x-300

$50 gift card. Find Raspberry Creek’s Etsy shop here and their Facebook here.

541932_401609243202616_455105738_n

$50 shop credit. Find Purpleseamstress’s Facebook Page here and Facebook group here.

10599546_1052531948097149_2492396411479889445_n

$50 shop credit. Find Opulent Monsters site here and their Facebook here.

12231195_10201060670475516_716483683_n

$50 shop credit for retail only. Find Pink Zeppelin’s site here and Facebook here.

12243963_10153642252998592_1395039218_n

$100 shop credit. Find Cuddle Muffins site here and Facebook here.

12244179_10101085504507264_1147457827_n

$50 shop credit. Find Sweet N Charmed site here and Facebook here.

12841329_1069635746429411_3999264971409083711_o

$50 shop credit. Find Smoogie Farbic and Design’s site here and Facebook here.

14315958_10206824177794539_1376768129_o

$100 shop credit.  Find So Sew English’s site here and Facebook here.

14527380_1791540657801638_1424215908_n

$50 shop credit. Find Knitorious site here and Facebook here.

bbf_logo

$50 shop credit. Find Bow Button Fabrics facebook here.

download

Donated 2 Free Craftsy classes.  Find Craftsy here.

flower-logo

$50 shop credit. Find Wanderlust Designs site here and Facebook here.

fullsizerender

Donated a set a set of 8 pattern weights.

image1-1

Donated $50 shop credit. Find Sincerely Rylee’s site here and Facebook here.

image1

Donated $50 shop credit. Find Vintage Lace’s  Facebook here.

image1

$50 shop credit for retail only.  Find It’s Sew Creative site here and Facebook here.

img_4541

$50 shop credit. Find Pretty Posh Prints site here and Facebook here.

tfs_logo1-final

$50 shop credit. Find The Fabric Snob’s site here and Facebook here.

thefabriccottageregtimeline

$50 shop credit for retail only.  Fine the Fabric Cottage site here and Facebook here.

true-north-logo-final

$50 shop credit. Find True North Fabrics site here and Facebook here.

14593551_10153696188706685_1847319444_n

$75 shop credit. Find Knitpop Facebook here. 

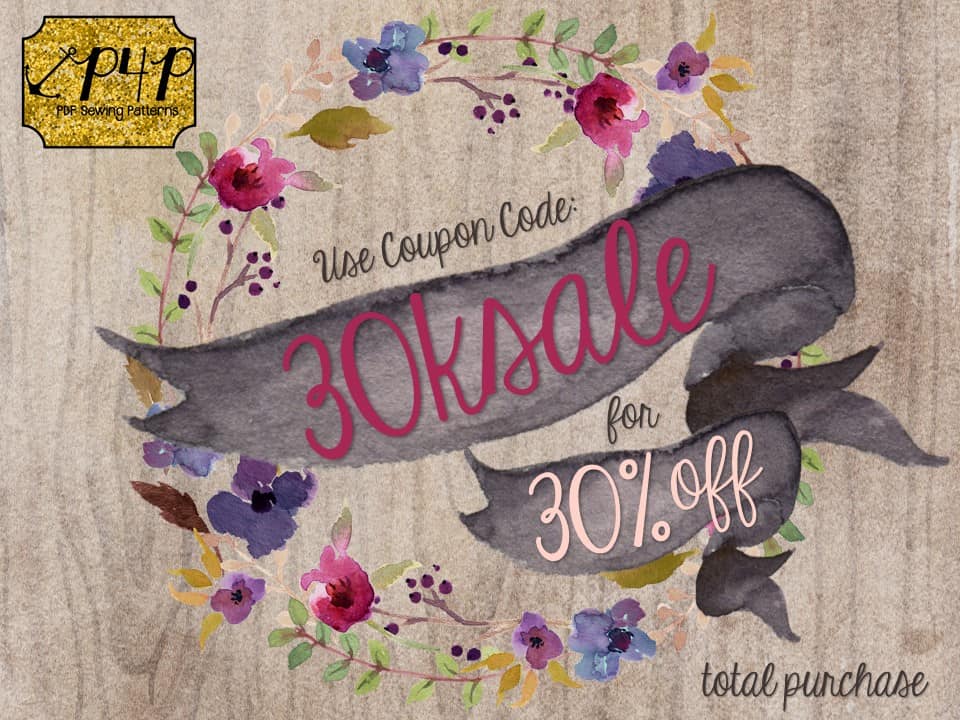
We have a full week ahead of us while you grab some patterns on sale and are busy sewing up your #P4PSewWinBuild entries don’t miss our other posts!

schedule

Filed Under: Contest/Giveaway 3 Comments

Sew it, Win it, Build it- A Chance to Win a Sewing Room Make-Over from P4P

October 11, 2016

I’m so excited to announce that we’ve hit another milestone in our P4P Facebook Group of 30,000 members!  I’m so very honored to have so many ladies interested in P4P it makes my heart (and maybe my eyes) swell!!

slide3

I brainstormed on how we should celebrate for a LONG time!  In the past we’ve done free patterns for group members, big giveaways, sales… but I kept thinking about how much fun I was having planning and designing my new sewing room at our new house we’re in the process of building.  Here I am in my soon-to-be new sewing space!

14183971_10102883630937373_5359873050865180300_n

I get giddy every time I think about that new bigger space! So I came up with the idea to give away a new sewing room for one lucky member!

slide1

What is included in a Sewing Room Makeover?

We all thought long and hard about what we love in our current sewing rooms (and what we’d love to upgrade in them if we had the opportunity) and here is what we thought you needed for a brand new or upgraded sewing room!

slide4

We included an Ikea gift card to help furnish the space. I’m planning on doing a big U shape for my machines in my new room from Ikea! I will share some more on how I planned my room as well to help you!

We also included a Joann’s gift card to help get those supplies like scissors, good lighting, notions, and whatever else you may be missing that don’t have those extra funds for!  Don’t worry if that sounds a little daunting to pick out- we will be sharing some of our favorite things this week during the contest to help you plan and pick!

We added a Hobby Lobby gift card so you can pick up some cute decor for your new space as well! Grab one of those signs, clock, mirror and jazz up the place 🙂

We will be sending a few things straight from Amazon to the winner to help fill out your new room!  How about a great new printer and ink? Need some paper? I love this extra large Alvin Cutting Mat I’ve been eyeing for my room and I can’t wait to get a new iron too!  And of course a brand new machine- a Brother 420, which is what I sew on! You will LOVE that automatic cutter ladies!! (*These are affiliate links*)

Last, but not least, is an ample fabric stash for your room! Thanks to all of our wonderful sponsors, which we will be highlighting with links to their shops this week, we have a HUGE stash for your new room. So make sure you get some great storage pieces from Ikea!

Speaking of storage, we will be sharing some of our favorite sewing storage tips this week as well to help get those sewing rooms organized and tidy… well, as best we can, creative minds can be messy right ladies? 😉

****Note**** With a prize this large, P4P will need a W9 filled out by winner prior to prizes being sent. Winner must claim prize on taxes per US law.  International winner will have to remit up to a 30% tax withholding of prize winnings and subject to US tax/treaty agreements.

So, are you ready to enter? Here is how:

slide6


A few rules to highlight:

The item sewn up and shared must be a P4P pattern.

You need to sew it up as is, with only fit changes (so no hacks or mods ladies).  Adding embellishments is great, just no major changes.

Your picture must be in your current sewing space showing off where you sew currently.

Share your pictures on one or all of the social media networks for more chances to win with hashtag #P4PSewWinBuild — it must be EXACT to come up in our search for the winner!

Let us know what P4P pattern you sewed up and what you’re most looking forward to winning or changing about your sewing space!

You can share as many sews as you can for more chances to win–but ALL items/images shared must be sewn AFTER the giveaway starts 10/11/2016! Any older sews will be disqualified from winning the grand prize. Last entries accepted will be Sunday 10/23/2016 at Midnight US Central Time.

Since you might need to grab a new pattern to get motivated we have a SITE WIDE SALE through the end of the giveaway! This will be the last site wide sale this year so grab them up while you can 😉 !! Sale ends Sunday 10/23/2016 at Midnight US Central Time.

Winner will be random lottery winner! So everyone has a chance from a beginner who might be sewing their first P4P to a seasoned apparel seamstress!

30kcouponcode

We will have a few more posts throughout the week to keep reminding you to sew up your P4P contest entries AND to help you plan your new sewing room or your sewing space makeover!

schedule

Filed Under: Announcement, Contest/Giveaway 49 Comments

P4P Raglan Week: Adding Stripe Accent

September 25, 2016

We’re rounding out the end of #RaglanWeek and I’m excited to share another way you can add some flare to your raglans!

I love the sporty look for my little guy since he is so active!  Adding a simple stripe accent to raglan sleeves is such an easy, cute, sporty look!


raglan-week-day7


Here is how you can add them to your raglans!

img_9596

img_9622

Decide how thick you would like your stripes.  Cut your stripe of knit fabric double that for the length and as wide as your sleeves where you will be adding the stripe.

Example: I wanted my stripes just a bit over 1″- so I cut my strip 2.5″ and the width matching the sleeve width.

img_9422

Press the strips in half lengthwise and create a crease. Please excuse my ironing board… I swear taking pictures of it makes it look 1000X dirtier than it looks in person!

img_9424

Press bottom raw edge up to center crease.

img_9425

Press top raw edge down to center crease.

img_9426

I used a fabric pen to mark a straight line across my sleeve.  Since they’re both knit fabrics you can find your self ever so slightly off easily, so I’d highly recommend this for a flawless stripe!


Pin your stripes carefully along your marked line or lines if you’re doing multiple stripes.  I did 2 on each sleeve for mine. You can also use a wash away hem tape to hold them in place while you stitch.  I recommend not doing this with your baby in the room— or you MIGHT sew the stripes onto the back piece of the shirt rather than the sleeve 😉 OOPS!!

img_9429

img_9439

Edge stitch along the top and bottom fold of your stripes.  I used my single chainstitch on my coverstitch for mine- you will want a stretch stitch since we’re working with knits.

img_9445


Complete the shirt as the tutorial directs you— only noting to align your stripes carefully along the sleeve seam when you stitch up your sleeve and side seam.

img_9636

I also added a little number 4 since Little Guy is about to turn 4 next week.

img_9614

He also picked out the pirate theme lining for the hood for a little pop of “coolness” 😉 .

img_9617

His Jolly Roger is a size up from his width measurement in a thick and cozy sweatshirt fleece.  I kept the length what he measures on the chart, this is the banded shirt length, long sleeve with cuffs and regular hood from the new Jolly Roger Add on Pack.

img_9656img_9665 img_9663

He’s not much for modeling for Mama!

But, we were both so happy with his new hoodie he has already requested another one!

If you’ve added some fun stripes to the sleeves of your raglan during P4P Raglan week, we would love for you to share it with us!  Head over to the Facebook Group or share on Instagram.  And be sure to use the tag#P4PRaglanWeek so we can find you!

Curious about what else has been happening during our raglan-loving week of fun?

Just take a look at our schedule!

Monday, September 19:Jolly Roger Raglan Pattern Update + Jolly Roger Add-On Pack Pattern Release

Tuesday, September 20:JRR Woven Fabric Hack

Wednesday, September 21: JRR Animal Faces Add-On

Thursday, September 22: Contrast Band Hack for Kangaroo Pockets

Friday, September 23:Women’s Keyhole / Scoopback Raglan Hack

Saturday, September 24:Off-The-Shoulder Raglan Hack

Sunday, September 25: Adding Stripes to Your Raglan Sleeves

We’ve had such a blast seeing everyone’s raglans this week! We will be picking a winner from those who shared with hashtag #P4PRaglanWeek! Tonight is the last chance to pick up any of the P4P Raglans on sale- though midnight US CST.

Filed Under: Frequently Asked Questions, Sew-A-Long 1 Comment

P4P Raglan Week: Off-The-Shoulder Raglan Hack

September 24, 2016

raglan-week-day6

IMG_0881 Did you start your fall sewing, pirates? Even though it doesn’t look like fall outside I like to tell myself cooler weather is coming. One of the staples in my fall/winter wardrobe is the raglan tunic. It is perfect for wearing it with Peg Legs (and we all know peg legs are practically fall uniform) and SOS pants. For my blog today I’ll show you how to get an “off the shoulder” look using the Relaxed Raglan. You can certainly use the Slim Fit Raglan if you prefer. I just am going for a looser, more casual look so I used the Relaxed Raglan pattern.

Screen Shot 2016-08-30 at 9.13.22 AM

First off, select your size, print and cut the pattern pieces according to the instructions. Don’t cut the fabric just yet! We’ll now make some small hacks to the pattern to get a wider neckline. Take the front pattern piece and measure 3 inches down on the center fold and mark that spot. Then measure 3 inches down on the sleeve part and mark that point too. Using a french curve (or just going slowly) and following the original pattern, draw a curve line between the two points. Repeat with the back and the sleeve pattern pieces.

testraglan

Once you drew the new cut line, remove the top part and cut the fabric following the new pattern pieces. At this point you will have a front, back and two sleeve pieces plus and additional cuffs or waistband you may need depending on the style raglan you chose. Do not cut the neckline as per the original pattern suggestion. If you do, the neckband will be too small for the new neckline.

Sew the raglan according to the instruction, leaving the neckline as is. Once sewn, take the shirt/tunic, lay it flat on a table and measure the neckline opening circumference. You will calculate the new neckband based on this measure. The new neckband will be 85% of the opening plus seam allowance. So you will do Opening X 0.85 + 1 (for SA). You now have the new length of the neckband. The width stays the same as the pattern.

You’re almost there. All you have to do now is cut the neckband and attach it to the shirt. Tadah! All done, you have a cool new off the shoulder raglan.

IMG_0903 IMG_0882 IMG_0888

I can’t wait to see what you create.  Don’t forget to show off your raglan in the group and keep an eye out for all the surprises during this Raglan Week.

IMG_0905

If you’ve hacked a sexy off-the-shoulder look of a raglan during P4P Raglan week, we would love for you to share it with us!  Head over to the Facebook Group or share on Instagram.  And be sure to use the tag#P4PRaglanWeek so we can find you!

Curious about what else has been happening during our raglan-loving week of fun?

Just take a look at our schedule!

Monday, September 19: Jolly Roger Raglan Pattern Update + Jolly Roger Add-On Pack Pattern Release

Tuesday, September 20: JRR Woven Fabric Hack

Wednesday, September 21: JRR Animal Faces Add-On

Thursday, September 22: Contrast Band Hack for Kangaroo Pockets

Friday, September 23: Women’s Keyhole / Scoopback Raglan Hack

Saturday, September 24: Off-The-Shoulder Raglan Hack

Sunday, September 25: Adding Stripes to Your Raglan Sleeves

Filed Under: Pattern Hacks, Uncategorized 4 Comments

P4P Raglan Week: Jolly Roger Raglan Update + Add-Ons Release!

September 19, 2016

Welcome to the first day of the P4P Raglan Week!  It’s looking like you are just as excited as we are!  Let’s get the party started with Day 1: the Jolly Roger Raglan update + Jolly Roger Raglan Add-On pattern release!

raglan-week-day1

Let’s talk the Jolly Roger Raglan update first!  It’s one of the most tried and true patterns for kids in the Pattern for Pirates family, and we did a little tweaking to make it even better.  First, we added the layers feature!  We also gave the entire tutorial and pattern an overall facelift to make sure everything was perfect from neckband to hem and everything in between.

14425408_10102913036683023_4848683499498318168_o

img_7894

We have also adjusted the angle of the raglan-sleeve to better match the style of our two women’s raglans (the Relaxed Raglan and the Slim Fit Raglan).  Our testers went through several rounds of the sleeve being adjusted before we all agreed on the fit.  I think you will all love it too!

**If you already own the Jolly Roger Raglan, you will not need to re-purchase to get the updates.  If you bought here (PatternsforPirates.com) or on the Craftsy store, you will simply need to sign into your account and re-download the file.  If your purchase was via Etsy, email help@patternsforpirates.com (WITH PROOF OF PURCHASE) and you will get an updated file.


Now let’s talk the highly requested Add-On Pack for the Jolly Roger Raglan!  You are going to love it so much!  **You must own the Patterns for Pirates Jolly Roger Raglan as well, since this is an add-on and not a stand-alone pattern.

14311484_10102912545716923_6741414687456728065_o

The Add-On Pack is full of super fun options:

  • Two hood types (traditional and cross-over funnel hoods)

14424963_10104358521989049_3747064700530049573_o 14289941_10210944418675163_8315798585323290006_o

  • Kangaroo Pocket

14311306_10207007364604832_362004355791744599_o 14305368_10153988962242877_9154033479605197205_o

  • Cowl Neck

img_9684 14242208_10210516508814415_2927786901913388326_o

  • Inseam Pockets

img_9693 14289893_10154511902671972_2765528919065172778_o

  • Funnel Collar

14324360_10153919372931033_8759815284094426481_o14289782_10154456917283433_4894254594844709762_o

  • Thumbhole Cuffs

14289845_10101035850150252_4649496919678406481_o 14352397_10104358521954119_8025388624738965920_o

  • Ruffle Hem

14324251_10210565851973658_6020903452005956770_o 14242252_10101029350026552_5253696604094059063_o

You can mix-match these options a million times over and still want to make more!  (Just ask our fabulous testers!)

The Jolly Roger Raglan is available for purchase HERE.
Find the Jolly Roger Add-On Pack for purchase HERE.
Or, you can bundle the Jolly Roger + Add-On Packs together HERE.

Be sure to head over to our Facebook Group and check out all of the amazing tester creations for the Jolly Roger Raglan and the Jolly Roger Add-On Pack!  They will provide for endless amounts of inspiration if you’re ever needing it!

listing-pictures-updated-1 listing-pictures

Are you joining us for P4P Raglan Week?  Be sure to share your creations on Instagram or in our Facebook group and use the tag: #P4PRaglanWeek !!  One lucky person will be featured on the blog and win a P4P pattern of their choice!

Here’s the rest of the schedule for the week:

Monday, September 19: Jolly Roger Raglan Pattern Update + Jolly Roger Add-On Pack Pattern Release

Tuesday, September 20: JRR Woven Fabric Hack

Wednesday, September 21: JRR Animal Faces Add-On

Thursday, September 22: Contrast Band Hack for Kangaroo Pockets

Friday, September 23: Women’s Keyhole / Scoopback Raglan Hack

Saturday, September 24: Off-The-Shoulder Raglan Hack

Sunday, September 25: Adding Stripes to Your Raglan Sleeves

Filed Under: Announcement, Blog Tours, Pattern Release, Sew-A-Long 3 Comments

Timeless Hacks

September 13, 2016


We are so excited to share the Timeless Tunic with you guys that we couldn’t help but share just a few easy mods you can do to have even more fun with this new woven pattern!

timeless-tunic-pattern-hacks


First up is the Crop Length: This is a super easy mod that is great for pairing with high-waisted bottoms.


img_3002img_2943

img_2987


Cut bodice pieces and skip the 2 skirt pieces.  Sew up the bodice following the tutorial like normal.  When you’re at the point of attaching the skirt you will instead create a casing with just the bottom edge of the bodice (just like the 3/4 and long sleeve options).

img_9407

Fold up the bottom raw edge 1/2″ to wrong side, and again another 1/2″ hiding raw edge.

img_9409

Edge stitch along top fold, leaving about 1.5″ un-stitched.  Feed your waist elastic in, around and out of the casing using a safety pin or other tool.

img_9410

Stitch elastic ends together using a wide zigzag (Make sure not to flip or twist your elastic as you’re guiding it through and stitching into a circle).

img_9414

Pull elastic all the way into the casing.  Stitch remaining 1.5″ closed.

img_9416

Wah-Lah!

img_9418

Now you have an adorable crop length that you can pair with your favorite high-waisted bottoms and not have to worry about tucking i in and getting any lumps and bumps from the bottom. I paired mine with the Pirate Pencil Skirt in the high waist and midi length option.

img_2948

img_2980


Split Sleeve and Curved Dress Hemline by Angela.

cover2

A big fashion trend that I’ve been seeing recently is a pretty split sleeve and the new Timeless Tunic and dress is the perfect pattern to easily add a split sleeve.  I’m also a big fan of a curved hem, so I’m also going to show you how to add the curved hem to the dress length.  Let’s get started!

First thing we are going to do is draw a line from the shoulder seam directly down the middle all the way down to the bottom of our sleeve piece.  This is going to be our extra cut line to create 4 pieces.  Now, if you’re lazy like me, you can just cut your sleeve out as normal and then cut down the center line that you created right thru your pattern and fabric. Make sure you don’t forget your notches!! It’s really easy to make a mistake without those notches as you will now have 4 sleeve pieces.  Next you’re are going to need to create your binding strips. To do this, I just measured that line we created on the pattern to determine how long the binding needs to be and I added a inch extra just to be safe.  As we are binding a straight piece you don’t have to worry about cutting your binding on the bias.  I just cut mine the length of my piece by 1.5 inches wide.

img_54241

Next you’re going to press your binding just like you would any other binding or bias tape. Fold in half lengthwise and press and then press the edges into the center.

img_54341

You’re going to pin the right side of the binding to the wrong side of your sleeve and sew in the first pressed line which is a 3/8″ seam.

img_54381

Once you have sewn the seam, press the seam allowance up towards the binding and then fold your binding down and repin so that the fold on your binding meets the seam line.  I like to pull mine just slightly over the seam so that when you edge stitch you don’t see the seam underneath.  You will then edge stitch your binding down.  You are going to do this on all 4 of your sleeve pieces.

img_54391img_54401


Time to sew the sleeves on! Easy peesy- you just match the top of your binding to the top center of your sleeve and make sure that your sleeve binding are right against each other.  Make double sure that your notches match here too, ask me how I know!  Now you will continue constructing as shown.  When you get to your sleeve casings you can sew your casing flat and insert your elastic.  I then sewed the elastic together to form your circle and then pull your casing over the elastic so you can’t see it.

img_54471img_54481 img_54501


On to the curved hem! This is super simple too.  I started by tracing off the tunic curve on the front skirt and then lined up the curve to the side seam so that the bottom of the curve was at the bottom of of the dress length and traced it on. You will need to extend your line just a tad at the center as the dress is aline so it doesn’t match on both edges. (This is going to make your dress length a bit shorter on the sides so if you are worried about that add a little length) I then cut my new curved hem.  For the back you want to also trace off your tunic curved hem but as it is a different curve then the front you want to make sure that your side seams are going to match.  The back hem will dip a bit lower then the dress length so you will need to tape some paper onto the bottom of your back piece so that you can trace your curve easily.  I found the easiest way to get your hems to match was to take your front piece and place it on your back piece, matching the side seams and mark where your front curve starts on the back piece and then place you back curve on that mark and trace.  Cut your new hem line and continue constructing as normal.

img_54201img_54211img_54231img_54311

img_55401

img_55361

Hope you enjoyed these easy hacks and please share your creations in the Patterns for Pirates Facebook group, we love seeing what you make!


V Neck Modification by Alex.

IMG_1214

The much anticipated woven tunic and dress is finally here! The Timeless Tunic includes 3 sleeve lengths, a sleeveless option and two hem lengths. So why not add a V-neckline to the mix? 😉 I am a very big fan of V-necklines, I find them flattering on all sizes and shapes so today I will show you how I hacked the Timeless Tunic to get a V-neck look.

First of all print your pattern in the size needed, grab a ruler, a marker and some paper because we’ll do some light drafting. Ready?

IMG_1180

Tape your pattern as per the instructions and set aside the front facing. We will  draft another front facing shortly. Grab the front bodice piece and mark 3 inches. You can do less or more depending on how deep you’d like the cleavage. For my example I lowered the neckline about 3 inches. Once you mark that point on the center fold line, draw a straight line from where the neckline begins to curve to your marked point. Cut along the line and discard the little pieces.

TIP: If you prefer to save the original front bodice piece, then just fold along the marked line and tuck the little piece under the pattern. This way you can re-use this pattern for the regular curved neckline again simply by unfolding it.

IMG_1181-1

Now that you have your front bodice piece ready, all we have to do is draft the front bodice facing. My V-neck Timeless dress is the sleeve option so you’ll see the sleeve facing throughout this tutorial. You can use the same suggestions and draft the sleeveless front facing option, too. Grab the original front facing, lay it over the front bodice and mark the shoulder width on it.

IMG_1184

Now lay a piece of paper (preferably  tracing paper but good ole printer paper will do, too, as you can see) over the V-neck front bodice. Trace the shoulder and the V-neckline on the paper. Mark about 2.75 inches down where the fold line will be. Using a French Curve (or drawing very slowly), draw a curve from the outer shoulder point to the bottom point of the center fold. That’s it! You’ve now drafted a new V-neck front facing.

IMG_1185 IMG_1187-1

Cut the fabric (and interfacing) using the V-neck bodice and the new V-neck front facing you just created. The rest of the pattern pieces and elastic will remain the same as the original pattern.

IMG_1189

Sew your dress or tunic following the pattern’s directions. When sewing the bodice to the facing around the neckline, I prefer to start from the V point, sew around the neckline and end at the V point where I started. If you start at the shoulder seam, make sure to pivot when you get to the V point of the neckline.

IMG_1194-1

TIP: When you snip the seam allowance around the neckline, don’t forget to cut a little V piece at the pointed spot. It will make your neckline lay nice and flat once you press it.

IMG_1195

Finish sewing the tunic or dress as per the pattern tutorial. Now you have your very own Timeless Tunic with a V-neckline. As always, I can’t wait to see your creations in the group . Sew like a pirate!


Sheer Overlay by Nicole

img_6704

There are some gorgeous woven fabrics available but some may be a little too sheer to wear sans under-layer or finish the neck and armholes with the facings method found in the pattern.  With a couple of easy changes, you can use fabrics like chiffon or lace.  I chose to use a chiffon and left my sleeves sheer but needed the extra coverage in the bodice and skirt.

Once you decide on your fabrics (that’s the hard part, right? 😉 ) you will cut the following:

(1) Main fabric bodice – front and back, (1) Main fabric skirt – front and back, (1) lining – front and back, (1) lining skirt – front and back ( I shortened the hem by 1″ as I used a rolled hem on the edges and did not want it to peek out the bottom edge)  (1) front and back facing (2) main fabric sleeve mirror image.  Note: Lightweight woven fabrics like chiffon are delicate.  When ironing the fusible interfacing, proceed with caution and use a pressing cloth.

img_6603 img_6606

For assembly of the bodice, you will treat your front and back as one piece.  Place main fabric and lining right sides up (wrong side of main fabric touching right side of lining) and baste along the edges or using a washable basting spray to keep the two layers together.  Construct main bodice as shown in pattern.

img_6608

For the skirt, I did not want them attached at the side seam so I stitched the side seams of both the main fabric and lining separately, creating two skirts.  Slip your lining skirt inside your main fabric with right sides out (wrong side of main fabric touching right side of lining).  I serged my two skirt together at the top edge to make attaching them to the bodice a little easier.  Continue construction as shown in the pattern.

img_6612  P4P Timeless Tunic PDF Pattern Sheer Overlay


Easy enough….right?! The constructions doesn’t change any and should not be any more difficult to put together.  Working with slinky fabrics is the hard part but with a little patience you’ll get through it in no time.

P4P Timeless Tunic PDF Pattern Sheer Overlay P4P Timeless Tunic PDF Pattern Sheer Overlay


Make it in knit!

We all love the quick and ease of sewing up a knit, right?! You can sew this pattern in a knit with no modifying! Here is Alex’s in a rayon spandex with no modifications other than about 1.5″ added to skirt length for a personal preference on skirt length.  She kept the dart and facings as is in the pattern exactly and sewed her size on the measurement chart.  With knits you can have less wearing ease and be comfortable, so you could size down if you wanted a more fitted look compared to the woven option.  She looks fabulous and she didn’t have to iron it 😉 lol!

14310375_10153881465478317_8390996610783788831_o 14231855_10153881465828317_6125367821420674475_o

Filed Under: Pattern Hacks 2 Comments

How to Sew a Faux Layered Look using Just One Pattern

September 9, 2016

IMG_0856- p4p

The other day I was browsing Pinterest for some fall inspiration outfits but since I am now a resident of the sunshine state many of the fall looks I liked were not weather friendly. So what better way than to add “faux” layering to my shirts to pretend fall is in the air? 🙂

IMG_0869

Today I’ll show you how I used the Women’s Henley shirt to make myself a “layered” shirt. I chose the simple crew neckline and the rolled sleeves option but this style would look amazing with the Henley style neckline or the hooded style.

listing pictures

Start by cutting the pattern based on your measurements. Ohh, by the way…did you see that the Henley got an updated? It now has layers so you can just print your desired size. Cut the hemmed shirt option and grab a piece of paper so you can draft the faux layers part. It’s easy-peasy, don’t be scared! Simply trace the curved hem option of the front pattern piece, measure 1.25 inches on the side seam and draw a straight line from that point to the center seam. Repeat the procedure with the back piece of the pattern. Now you will have two extra pattern pieces (front and back) that you need to cut on fold at the center.

fauxlayeredpieces

IMG_0786

Sew your shirt according to the pattern instruction, iron the 1 inch memory hem and set it aside before stitching it. We will now prepare the “faux” layer. With the right sides together sew the side seams with 1/2 inch seam allowance.

IMG_0789

Once you have a loop-like piece you can go ahead and stitch the curved hem with your coverstitch or sewing machine. Press it! You are almost done. All you have left to do now is attach the layered part to your main shirt. Lay the main shirt on a flat surface and insert the faux layer piece matching the side seams. You can match the raw edges inside the shirt and pin all around the hem.

IMG_0798


If you prefer your faux layer to be just “peeking” from under your shirt you can certainly place the layer a little higher inside the main shirt and pin in place. Stitch the bottom hem of the shirt and the faux layer together at about 1 inch above the fold.


IMG_0799

You just made yourself a beautiful shirt that takes you from summer to fall. This style shirt pairs beautifully with the SOS pants and the Pirate Pencil skirt. As always, don’t forget to show off your layered creations in the group. Happy sewing, pirates!

Alex

IMG_0845-1IMG_0857

Filed Under: Pattern Hacks 9 Comments

P4P: Now Offering Gift Cards!

August 25, 2016

You’ve asked and we are delivering: gift cards are now available via PatternforPirates.com !!

Patterns-For-Pirates-Gift-Cards2

One of our most requested features is the ability to purchase gift cards.  For yourself, your friends, your family, as a prize for followers with your business…you name it.  And now you can!

Currently, cards are offered in quantities of $5, $10, $15, and $2o.  Add us to your Christmas / birthday wish lists, and your loved ones will appreciate the ease of gift-giving from here on out.

HEAD OVER AND GIVE THE GIFT OF P4P TODAY!!


Filed Under: Announcement 2 Comments

Sunshine Dress- Hacks

July 28, 2016

hacks

You know we love to show you how to take your P4P patterns that are filled with options and stretch them even further!

Here are a few easy hacks to the newest P4P pattern the Sunshine Dress!

IMG_36084

Hello there! For those who don’t know me, my name is Erinn and I have a confession to share with you… I love dresses! Ok, truth: I love them September through June when I have to wear “real clothes” for my job as a teacher and not live in my comfy summertime clothes! So when the Sunshine Dress came out, the first thing I thought of was, “How can I make this work for a teacher?”. I absolutely love the cross-over bodice, but knew I would need to wear a cami under it for work, which would just mean more laundry (another confession: I hate laundry!). So, I give to you my friends- the modesty panel! It provides you with the extra coverage of a cami, minus the bulk of layering (again, not to mention the extra laundry of one more shirt- isn’t that reason enough to make one?).

IMG_3571

What You’ll Need:

  • Partially finished cross-over bodice (Complete through attaching the neckband)
  • Pattern piece for Strapless liner (front only)
  • Coordinating fabric

Creating Modesty Panel

Modpattern2First up, you will need to create your modesty panel. To do this, you will need to make a few quick changes to the strapless liner piece. Cut along the armscye line that would have be used for the halter version. Next, remove 1” from the bottom of the pattern- there is already a lot of layers once the skirt is attached, so this will allow you to reduce some of “extra bulk”- nobody wants that!

Cut out your modesty panel using your new pattern piece as well as the binding for the top of panel. For the binding, you will want to cut a strip that is 2” wide and long enough to go across the top of panel.
panel3

Fold binding in half and iron, then attach to the top of the panel- make sure to stretch slightly as you attach. Trim the excess binding to align with your armscye.  Press seam down.

Attaching Modesty Panelattaching2

You should have your cross-over bodice finished through attaching the neckband. Layer pieces in order according to pattern, then place the modesty panel as the top layer. Pin in place (no one will judge how many you use- that’s a lot of layers to keep in place!). Run a basting stitch down both sides- be careful on armscye, making sure to not baste all three layers together. Check the fit/placement of your panel and once everything looks good, sew your side seams together.

IMG_3584Voila! You have now created your modesty panel. All that’s left to do is attach the armbands and skirt, then enjoy your Sunshine dress… with a little added coverage.


Bodice with No Ruching:


no ruchingThis is a SUPER simple hack! All you need is your Sunshine pattern, no measurements, no guessing and just one quick change! For halter and strapless instead of cutting 1 main fabric bodice (front and back) simply cut out 2 lining pieces front and back.

IMG_7743

Assemble exactly the same skipping the ruching steps in the tutorial. Done! For cross over bodice just cut out 2 under/not gathered front pieces, making sure to make them mirror image. Skip ruching steps and assemble normally. 🙂 Was that the easiest hack or what?!?! Now you have 3 more bodice choices with this already option packed pattern!

IMG_8683-2


Making a separate skirt from the Sunshine pattern: 

Maxi skirts are all the rage right now and with this simple hack, you can use the Sunshine Dress Skirt portion to create your own.  (of course it works great for the other lengths too!)


13717335_10154373393944666_3392408374222849681_o


Cut 1 waistband and 2 skirt panels. Construct the skirt in the same manner as the tutorial.  Instead of attaching to a bodice, you will attach to the waistband.  To create your waistband, sew short ends together, creating a circle then fold in half with wrong sides together.  Find the 1/4 points of both the waistband and skirt and match skirt side seams to the waistband.   I like to gather my skirt while it is pinned to the waistband to help ensure even gathers along each of the 1/4 points.   Your skirt will be gathered to the same width as the waistband.  Stitch with 1/2″ seam allowance.  Pull basting threads.  All finished!


Sunshine Skirt waistband P$PP4P Sunshine Skirt Hack

Filed Under: Pattern Hacks 2 Comments

Sunshine Dress | New Pattern Release!

July 28, 2016

Happy Release Day!  After teasing you relentlessly with sneaks of the Sunshine Dress, it’s finally here!  (Insert happy pirate dance here.)

Slide1

Don’t worry, the Patterns for Pirates crew would never leave you short on options.  The Sunshine Dress is an endless amount of style options, neatly packaged in one pdf pattern download.

The pattern is drafted for sizes XXS – Plus 3X.  There are THREE hem lengths (above knee, below knee, and maxi), THREE bodice types (halter, cross-over tank, and strapless), and optional pockets!  On top of all of that, we have also included a  PDF layers feature for printing.  Want to learn more about how to measure yourself for this pattern?  We’ve got you covered with an in-depth blog HERE.


Slide35sunshine-features

Are you sold on the Sunshine Dress pattern’s versatility yet?  Here are some ideas, showing that you can truly make this pattern fit so many different style needs:


Go grab yourself a copy of the Sunshine Dress.  It will be discounted through the end of the weekend, no coupon needed.

Hoping for more inspiration?  Head over to the Sunshine Dress Album on Facebook for more photos from our fabulous testers.  Happy sewing!

Filed Under: Pattern Release 7 Comments

  • « Previous Page
  • 1
  • …
  • 24
  • 25
  • 26
  • 27
  • 28
  • 29
  • Next Page »

connect with me

  • Email
  • Facebook
  • Instagram
  • Pinterest
  • YouTube
Privacy & Cookies: This site uses cookies. By continuing to use this website, you agree to their use.

To find out more, including how to control cookies, see here: Cookie Policy
  • Privacy Policy
  • Refund Policy
  • Contact Us
  • About

Copyright © 2026 Patterns for Pirates

Copyright © 2026 · Genesis Framework · WordPress · Log in