Patterns for Pirates

P4P stylish, modern, wearable patterns

  • Home
  • Blog
    • Frequently Asked Questions
    • Pattern Releases
      • Free Patterns
    • P4P University
      • Fitting
      • Sewing with Stretch, Knit Fabrics
      • Sewing with Woven Fabrics
      • Sewing Machines
    • Sew-A-Longs
    • Fabric for Pirates
    • Pattern Hacks
    • Announcement
      • Blog Tours
      • Contest/Giveaway
  • Shop
  • Bundle Discounts
  • Flash Friday
  • Gift Cards
  • My Account
  • Cart

Exposed Seams Boutique Look Hack

March 8, 2016

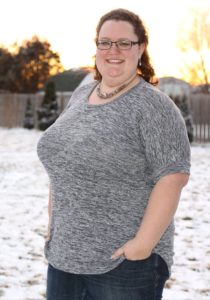
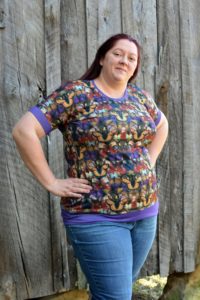
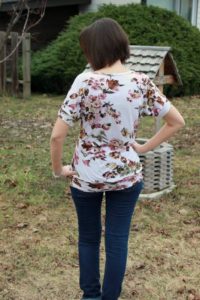
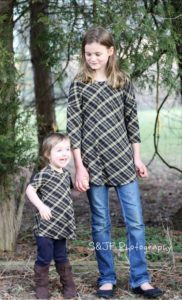
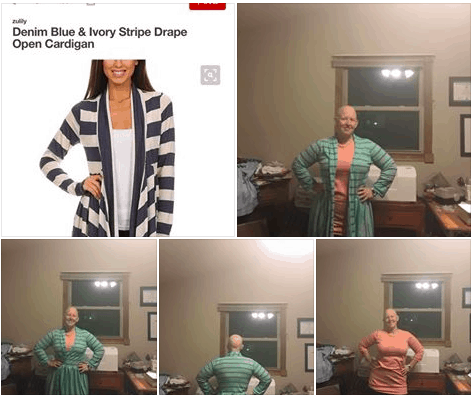
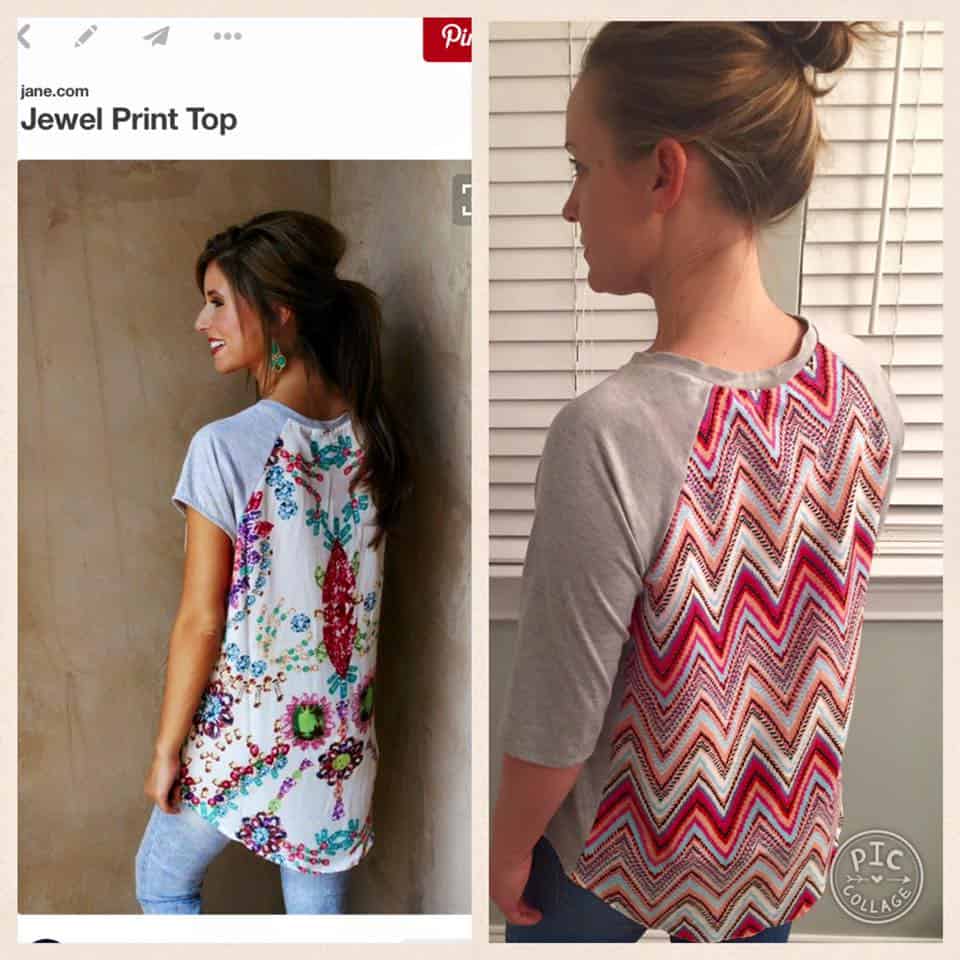
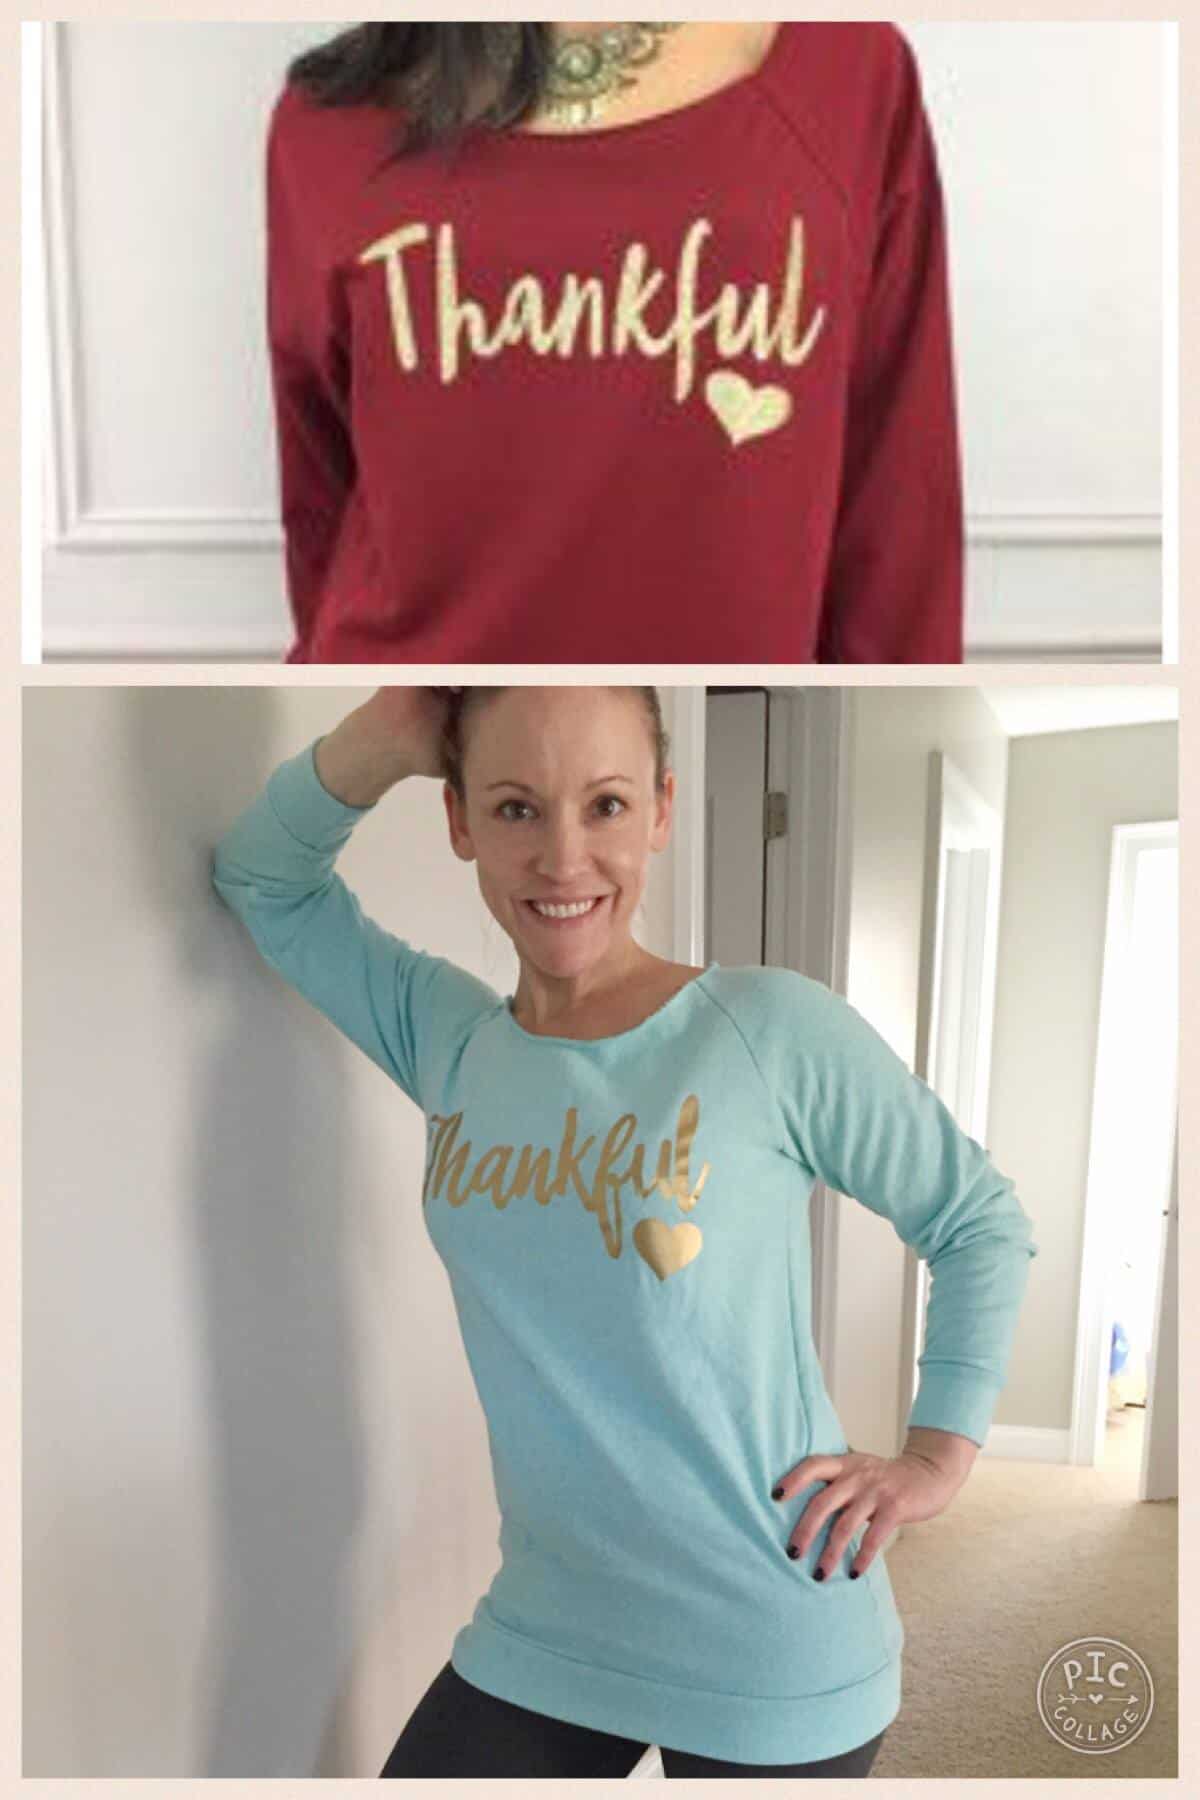
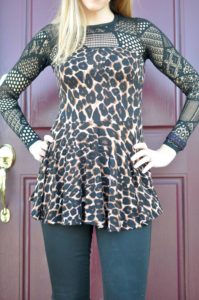
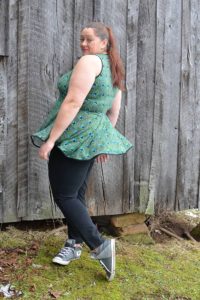
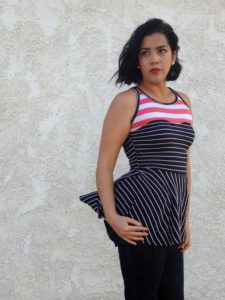
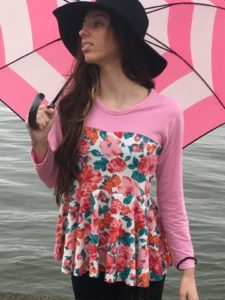
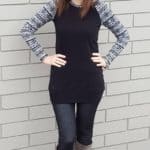
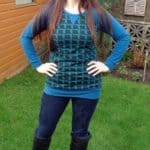
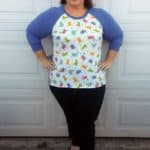
I’ve seen the boutique french terry raglan with exposed seams countless times in the group, pinterest, and other sewing boards over the past couple years! I made one about a year ago, but never wrote up a blog about how to get the look.  We’re still asked for it all the time, so I did another one while we’re updating the Women’s Raglan to include the extended plus sizes and new features our newest P4P patterns have, like layers. It’s looser fit is perfect for french terry, which is what the boutique ones are always made of and gives the same “slouchy” looser fit.header

Overall, it is a really basic “hack”.  But, I’m going to have to beg forgiveness for the photos! Apparently I did not check my photos as I was taking them and they are not great quality!  Hopefully you can enjoy my Peter Pan-esque comedic shadow in them!

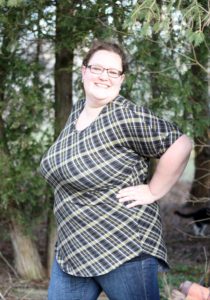
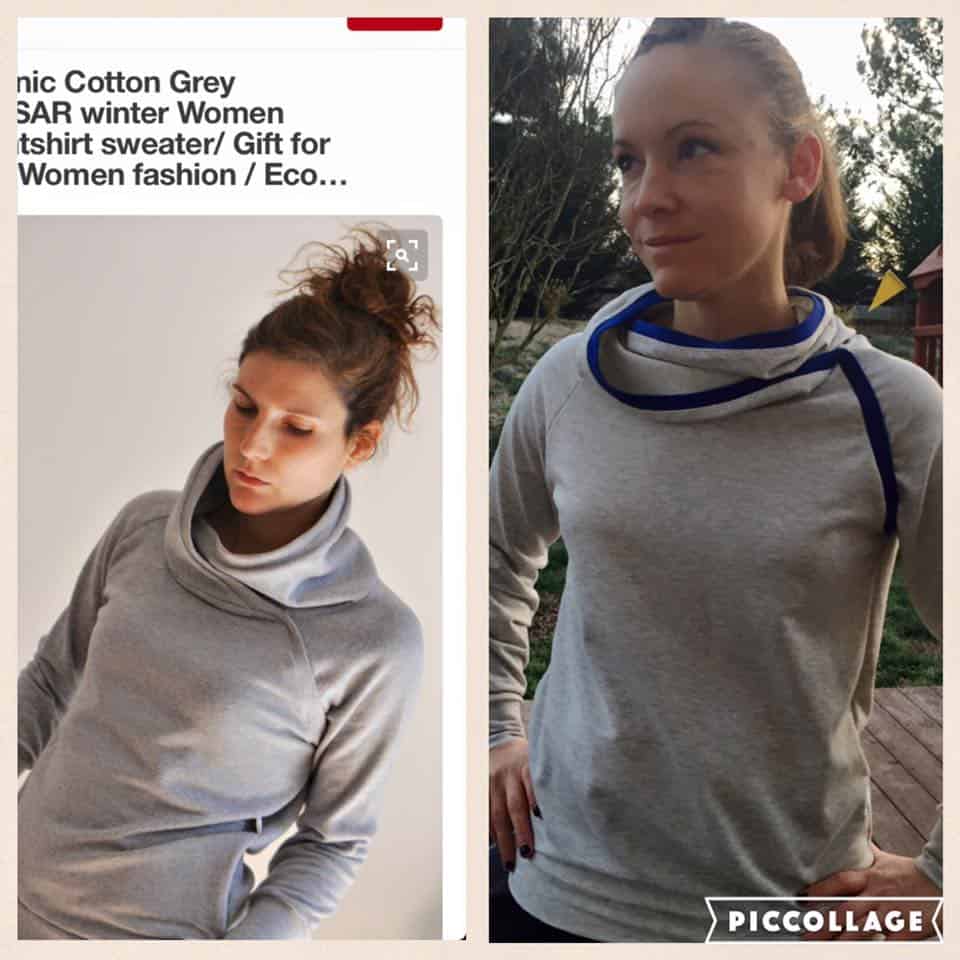
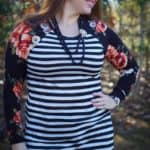
You will cut out your pieces exactly the same as a normal raglan for the main shirt.  If you want to add the cowl with unfinished bottom edge you will cut 2 like the pattern states, but NOT on the fold.  You could still cut on the fold to keep the fullness and just not sew in the bottom edge as well.  Depending on how thick your fabric is and how big you want your cowl.  I easily get claustrophobic with things around my neck, so one layer not on the fold was an easy decision for me ;).

SAMSUNG CAMERA PICTURES

When assembling the sleeves to the bodice front and back you will put WRONG sides together and stitch with your sewing machine using your favorite stretch stitch.

SAMSUNG CAMERA PICTURES

Trim the notches and smooth out your seam allowance.

SAMSUNG CAMERA PICTURES

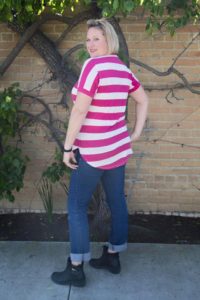
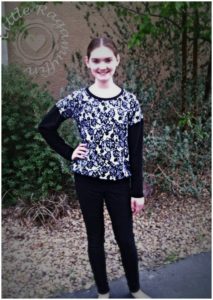
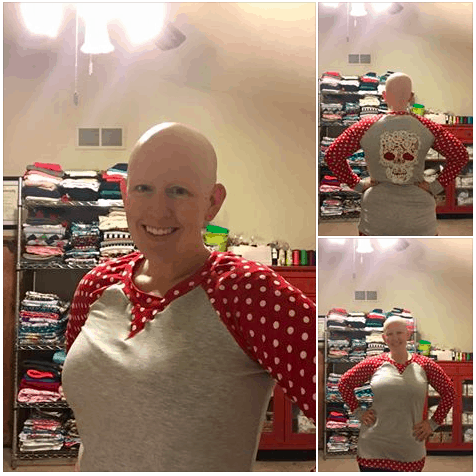
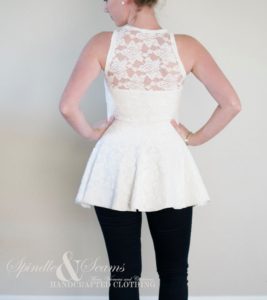
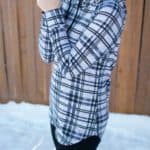
Press seams out.  You could top-stitch here if you preferred, but I left it open and free 😉 I thought it went with the look better.

SAMSUNG CAMERA PICTURESSAMSUNG CAMERA PICTURES

Sew down side seams with right sides together, like you would normally.

SAMSUNG CAMERA PICTURES

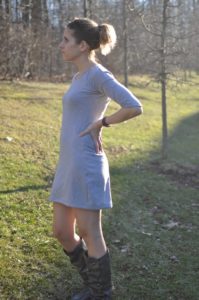
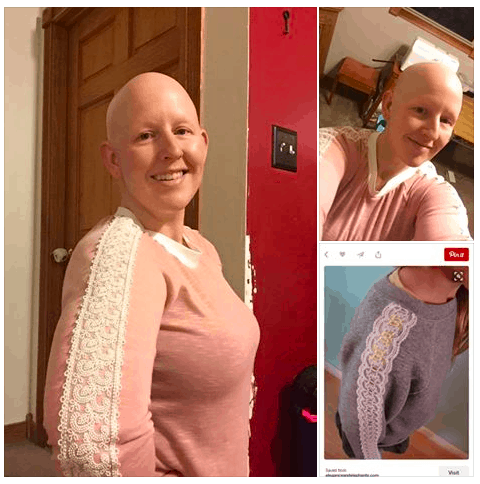
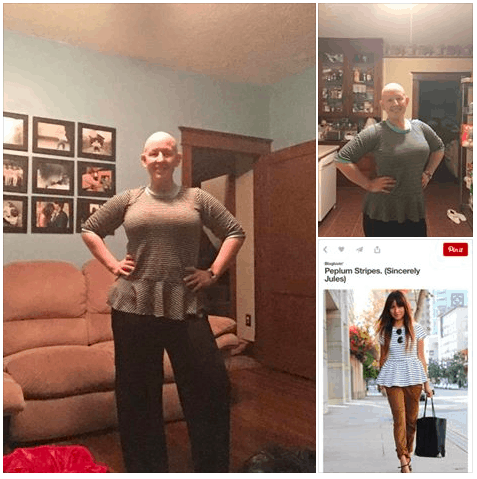
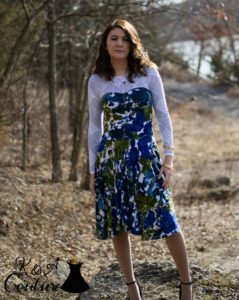
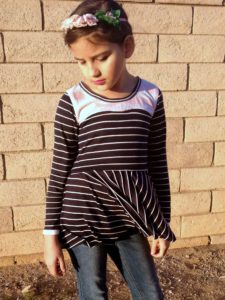
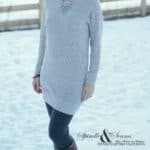
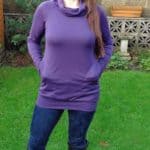
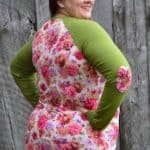
I added the inseam pocket option from the Add on Pack as well (I can’t seem to make a tunic length without this option anymore!).  I went with hemming the front to the right side to show the wrong side there as well.

SAMSUNG CAMERA PICTURES


IMG_9031

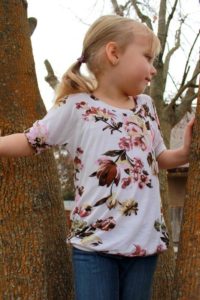
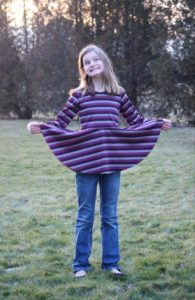
For my hems I left them all raw and allowed them to roll up towards the front to show the wrong sides there too.

SAMSUNG CAMERA PICTURES

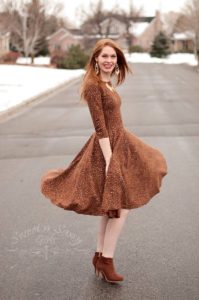
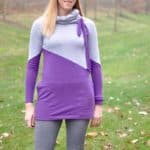
I attached the cowl the same way as the tutorial states, but only attaching one raw edge of the cowl to the neckline instead of two.

SAMSUNG CAMERA PICTURESSAMSUNG CAMERA PICTURES

IMG_9048

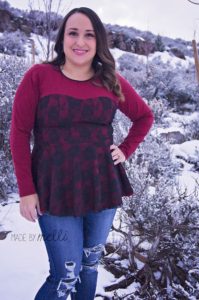
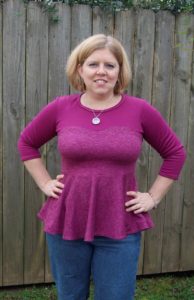
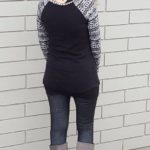
Done! Now you have a lovely boutique look that was such an easy sew and hack!

IMG_9025  IMG_9042 I

Filed Under: Pattern Hacks, Sewing Techniques, Uncategorized 1 Comment

Sweet Tee + Sugar Pie Dolman Pattern Release!

March 8, 2016

Guess what today is? You betcha! It’s a P4P pattern release day!

We are coming at you live with another double release, for both women and girls. Remember the sneak peek at the we had in last month’s newsletter? It’s finally here!

listing picturesbundle

The Sweet Tee (women’s) and Sugar Pie (girl’s) tops (Bundled here) will quickly create a dolman-sewing addiction. They are incredibly quick and super darling on all body types. The pattern features a semi-fitted silhouette and a dolman-style sleeve…as well as our tried-and-true jam packed amount of options.  You’re bound to become as obsessed with this top as we are.

12495232_10153974845589666_4952358084081993666_n

Multiple sleeve options (short, 3/4 and long), multiple hems (curved/tall and short waistbands/shirt length/dress length) and a variety of finishes for the neckband will give you endless options.  There is nothing better than having a trusted pattern you can use over and over again, and the Sweet Tee + Sugar Pie will not disappoint.

Just ask our fabulous testers!


And we can’t leave our our mini models:


Make sure to head over to our Facebook Group and check out the tester albums there!  You’ll never fall short of inspiration with our amazing group of sewists.  (But you know that already. Am I right?)

What are you waiting for?  Go grab yourself a copy of the newest dolman tees!

Find the women’s Sweet Tee HERE
Find the girl’s Sugar Pie HERE
And best of all…find the Sweet Tee/Sugar Pie Bundle HERE (gotta love mommy and me versions!)

We can’t wait to see what you make!

Filed Under: Pattern Release 3 Comments

15K Member Celebration!!

February 24, 2016

I’m pretty sure we blinked and the Patterns for Pirates Facebook Group welcomed it’s 15,000th member.  And then we blinked a few more times and we’re closer to the 16K mark at this point!  It’s been amazing being surrounded by a bunch of women (and some men too!) who love sewing, supporting each other, and the patterns that we’ve put out over the last few years.

We wanted to thank you for being so awesome.  And what better way to do that than by having an AMAZING giveaway?

12687867_10102520555009443_3987517031139904711_n

Get ready to drool, you guys.  ONE lucky winner will walk away with a crazy amount of prizes.

This wouldn’t be possible without our fabulous sponsors:

Girl Charlee | Sincerely Rylee Fabric Shop | Knitpop | Zenith & Quasar Fabric | Pink Zeppelin Fabrics | KNITorious Fabric | Fabric Stache | Sweet N’ Charmed | The Fabric Snob | Craftsy | PurpleSeamstress | Raspberry Creek | Fabric Snob | Rikki Prints | Edge Custom Apparel and Accessories | Handmade Escapade | Fabric Worm | My Vinyl Direct

12728959_10102520555019423_3214329718776747699_n

And on top of it all, P4P is sponsoring by giving away a Silhouette Cameo.  Now you can sew up your favorite Patterns for Pirates designs and put some awesome HTV designs on them yourself.  No longer will you envy everyone else’s graphic tees…because you can create your very own!

12711113_10102520555368723_2512737393670057854_o 12688027_10102520555044373_4781542453339271836_n

Be sure to enter into the giveaway and don’t forget to leave our sponsors some love!  Good luck!

a Rafflecopter giveawa
y

Filed Under: Contest/Giveaway 34 Comments

#PINspiredPirates :: The Winners!

February 9, 2016

The moment you’ve all been waiting for…..can I get a drumroll please?!?
I’m here to announce the winner of the #PINspiredPirates contest.  Well, WINNERS.  Because we couldn’t pick just one.  There were so many amazing entries!

Most Entries: Kelly Stevens


Most Swoonworthy Replica: Jenny Sherman Richards

12552759_10153958882072481_3725283600904844961_n

Most Patterns Used for a Single Look: Alex Radu

Screen Shot 2016-02-09 at 12.45.35 PM

Best Copycat: Nicole Adams @ThePaperDollCo

Screen Shot 2016-02-09 at 1.01.01 PM


Best Admission of Guilty Pleasures: Megan Thoman

12646838_10110101190031094_2144822289946145568_o

Honorable Mentions: Amanda Travaglini


Meg McFadden Sterk


CONGRATULATIONS to all of the winners!  And thank you so much to everyone who played along with us.  It was a fun month full of sewing and creative inspiration!

Filed Under: Contest/Giveaway 1 Comment

Have you signed up for our Newsletters?

February 9, 2016

Don’t miss out on any news from P4P by signing up for our monthly Newsletter!

We send one at the end of every month to keep you guys up to date on what we’re working on.

newsletes

We will also be sending out SALES through them, so if you’re ready to never miss out on a P4P sale then make sure you sign up today!

Here is a screenshot of where to subscribe on the Home Page on a desktop view:

newsletter sign up

And mobile view:

newsletter sign up mobile

You will receive an email verifying subscription, so check those junk/spam folders for it if you don’t see it right away!


And to give everyone a heads up! Our next site wide sale will be announced through the newsletter!

So make sure you sign up today!

If you have already signed up, but haven’t seen a newsletter make sure to search your junk/spam folder and send it to your inbox!

newsletter

newsletters

Filed Under: Announcement 9 Comments

Calling All Sweethearts!

February 3, 2016

P4P is releasing a new pattern.  Well wait, TWO new patterns!  And they’re super sweet.  Pun intended.

 Sweetheartdress1

The Sweetheart Dress + Peplum for women and the Me Hearties Dress + Peplum for girls are releasing today and we are down right excited about it.  Every single tester, no matter the size or age, looks amazing in this style…and you will too.  No joke.

Like all Patterns for Pirates designs, the Sweetheart and Me Hearties patterns are as full of options as they come.  Several skirt lengths, a peplum, multiple sleeve lengths, and a color block option make for an endless amount of choices for your perfect feminine (or girly!) look.

Sweetheartdress3

The silhouette is incredibly flattering on all figures.  Just look at our testers!  The bodice is meant to hit at your true waist (aka: your skinniest point) and the easy-to-attach circle skirt flows perfectly down from it.  Try not to drool while looking at all of these amazing sews!


Just wait until you see the girlies in their Me Hearties!!  All the heart eyes, right?


Make sure to head over to our Facebook Group and check out the tester album there!  There are even more pictures and styles to draw inspiration from while you start to dream up your perfect peplum/dress.

Find the women’s Sweetheart Dress + Peplum HERE
Find the girl’s Me Hearties Dress + Peplum HERE
And best of all…find the Sweetheart/Me Hearties Bundle HERE (and go make a million mommy and me versions!)

We can’t wait to see what you make!

Filed Under: Pattern Release Leave a Comment

NEW Pattern Release :: The Women’s Slim Fit Raglan

January 12, 2016

Hooray!  It’s a Patterns for Pirates release day!
The Slimfit Raglan is exactly what everyone has been begging for.  It is a super quick sew, has a feminine fit and super flattering on all body types.  It is a classic look with trendy and modern options to choose from.
listing pictures 1
And like all P4P patterns, it is PACKED full of options!  Includes sleeve options of short, 3/4 hemmed or banded, long hemmed or banded, so you can wear this year round. Has both shirt length (hits at mid-booty) and tunic length (hitting below booty–perfect to wear with leggings) so you can pair with all kinds of bottoms perfectly. Both lengths have a hemmed or banded option. Also includes a curved hem option.

This raglan also fits with our Raglan Add On Pack and combined can give you endless options!

Here’s a handful of photos from our AMAZING testers.  If you want to see more (and to learn what size, options and fabric they used) head over to the Patterns for Pirates Facebook Group!


The Slimfit Raglan is on sale through the end of the week and also comes with the option to bundle it with the Add-On pack.  Can’t wait to see what you make!  Don’t forget to share it in the P4P Facebook group with us!

Filed Under: Pattern Release 3 Comments

How to use the new Layers feature

January 9, 2016

header

Patterns for Pirates has added a brand new feature to their newest upcoming patterns! The Layers Feature! This means you can choose to print one size, a couple, or all of them if you’d like.  They will still be the “No Trim” style.

Here is a few screenshots to help you use the new feature.

As always, you will need to open and print your PDF from Adobe PDF Reader (a free download if you don’t have it yet).

This is what your screen should look like viewing the PDF pattern pieces:

Patterns for Pirates how to print layered pdf sewing patterns using adobe (3)

Patterns for Pirates how to print layered pdf sewing patterns using adobe (1)

Patterns for Pirates how to print layered pdf sewing patterns using adobe (2)

Patterns for Pirates how to print layered pdf sewing patterns using adobe (4)

Now you can print just the sizes you need and save some ink and time tracing off your size! 🙂

As requested, here is our on-going list of patterns that have the layers feature (These are also the patterns that include the A0 Copy Shop File Size):

Freebies:

  • Pirate Pencil Skirt
  • Peg Legs
  • Peg Legs- Add Ons
  • Peg Legs- Maternity Add On
  • Tulip Tee
  • Tiny Tulip- Youth
  • Wee Lap Tee
  • Petite Pegs
  • Teeny Beanie
  • Walk the Plank- Adult
  • Walk the Plank- Youth

Youth:

  • Jolly Roger Raglan
  • Jolly Roger Add-On Pack
  • Sugar Pie Dolman
  • Spice Cake Dolman
  • Me Hearties Dress + Peplum
  • Yo Ho Henley
  • Tiny Timeless
  • Baby Bear Joggers
  • Fav Tee
  • Butterfly Cardigan
  • Heart Breaker Cami
  • Little Loungers
  • Sweet Bow Dress
  • SOS Knit Pants- Youth
  • So Classic Sundress- Youth
  • Go To Jacket- Youth
  • Cpt. Mack’s Cardigan

Womens

  • Slim Fit Raglan
  • Relaxed Raglan
  • Raglan Add-On Pack – for women
  • Sweet Tee Dolman
  • Pumpkin Spice Dolman
  • Sweetheart Dress + Peplum
  • Siren Swim Top
  • Hello Sailor Swim Bottoms
  • Layer Me Up Shirt
  • Women’s Henley
  • Essential Tank
  • Sunshine Dress
  • Free Spirit Tank
  • Women’s Henley
  • Timeless Tunic
  • Mama Bear Joggers
  • Carefree Cardigan
  • Granpda Cardigan
  • Summer Kimono
  • Cocoon Cardigan
  • Cross my Heart Cami
  • Favortie Tee
  • Linen Loungers
  • SOS Knit Pants
  • So Classic Sundress
  • Go To Jacket- Womens
  • Ragdoll Raglan

Mens:

  • Go To Jacket- Mens
  • Papa Bear Joggers
  • Men’s Henley

Filed Under: Frequently Asked Questions 70 Comments

Raglan Colorblock Tutorial (Guest Post)

December 15, 2015

Today’s post is a fun one!
We are giving you all a special guest post from a Patterns for Pirates fan, who sewed up this adorable colorblocked version of the Women’s Raglan.  Ashley posted this on the P4P facebook group and we couldn’t help but want her to share it on here.

raglan-colorblock-tutorial-cover

Ashley’s tutorial is specifically for the women’s raglan, to achieve the look that she has masterfully come up with.  BUT, you can take information from this and colorblock anything with these techniques!  (For instance, P4P’s Katy shows you how to do a curved colorblock with the women’s henley on her blog HERE.)

Without further ado, take it away Ashley!

Front Colorblock

a. Start with the Front of the Raglan Pattern. Mine is cut for the Small size. I then take a sheet of wax pattern and unroll it until it’s just about the size of the pattern piece. Trace the existing pattern onto the wax paper and decide what length and neckline you would like. In this example, you’ll see the curved hem and a modified V Neck (see step 2 for instructions on doing the V-­‐Neck prior to going onto step b).

b. From the end of the arm hole measure 2.5 inches Draw a line straight across the pattern piece (shown as the green line in Figure 1). . Then measure ¼ of an inch down from that line and draw another line. ( Shown as the blue line on Figure 1. Here you are adding on ¼ seam allowance for when you add your stripe pieces).

c. Cut on the pattern on the 2 ¾ line (blue). Continue with cutting the rest of the pattern. Make sure you make all of the original marks like fold lines and notches so that you can line up the pattern correctly. I also label what each piece is so that I don’t get confused later on. d. FT = Front Top, FB= Front bottom.

V-­‐Neck adjustment

a. I personally don’t like a deep V-­‐neck. So what I did on the Front is where the flat part (small pink line) is on the top of the pattern, where the front scoop (green line) and the armhole meet, I extended it to the left, approximately 1/4inch. I then eye balled it where I wanted the V to end on the middle front of the shirt and drew a diagonal line from that point to beginning of the new flat part (long pink line).

Microsoft Word - P4P Raglan Colorblock Shirt with Striped Arms.d

Sleeve alterations

a. Start by taking the sleeve piece and unroll two pieces of wax paper. You’ll have to tape them together in order for it to be wide enough.

b. Trace the outline of the existing sleeve.

c. Measure 2.5 inches down from the left shoulder seam that will eventually meet the front seam ( green line). In my example it’s the short sleeve line for the red dots line on the original pattern.

d. Measure ¼ inch from the green line and draw a straight line across the pattern (blue line). Again here we are just adding a seam allowance. In my example it’s the short sleeve line for the red dot dash on the original pattern.

e. RT= Right Top

Microsoft Word - P4P Raglan Colorblock Shirt with Striped Arms.d

f. I then used the existing solid red short sleeve line for where I wanted my stripe to end. I drew a line across there (green) and also ¼ of an inch down from there (blue). The middle piece with the seam allowances added is equal to 2.5 inches wide, which when sewn, will give you an ending piece of 2 inches.

Microsoft Word - P4P Raglan Colorblock Shirt with Striped Arms.d

g. Now that we have the top and bottom sections of the arm we need to do the middle part with the stripe. What I did to make things easier was draw lines across in the middle of the middle sections and shaded it in so that I could see how wide the stripe was going to end up being on the finished product. (See photo)

Microsoft Word - P4P Raglan Colorblock Shirt with Striped Arms.d

h. After I was happy with it I cut the pattern on the GREEN line of the RT and the BLUE line of the RB. Now here’s the tricky part. If you were to just cut out that piece you would end up with a middle piece that’s too small and therefore our sleeve length will be short. I took the RM in the wax paper and taped it onto two pieces of computer paper. I then measured ¼ inch on the top and ¼ inch from the bottom. I extended the lines out in order to make the total width of the RM 2.5 inches.

Microsoft Word - P4P Raglan Colorblock Shirt with Striped Arms.d

i. For the stripe in the middle of RM I measured the shaded in part of it and then traced the measurements onto a piece of computer paper so that I had a hard copy and not just the wax paper.

Microsoft Word - P4P Raglan Colorblock Shirt with Striped Arms.d

Cutting

a. Whew! The hard part is over. Now would be a good time to eat a donut or whatever your favorite snack is because you just made it through the hardest part of the hack (in my opinion.)

b. Now that you have all of your pieces you need to decide what color you want the top and bottom parts of the front. In my example the top is plaid and the bottom is black. I then took all the parts for plaid, FT, RT, RB, & stripe and made those into a pile. Then FB, RM, and Back in another pile for black.

c. When you lay out your pattern pieces make sure that if it needs to be on a fold, like the FT, FB, or back that you put it on a fold. For all of the sleeve pieces I just doubled up my fabric so that I end up with a Right and a Left once cut instead of mirroring (too much work).

Microsoft Word - P4P Raglan Colorblock Shirt with Striped Arms.d

d. I added about 1.5 inches to the bottom of RB also so that I could hem the sleeves. You do not need to add as much as I do it’s your preference. You can do anywhere from .5 inch to 1.5 here because we aren’t attaching cuffs.

Microsoft Word - P4P Raglan Colorblock Shirt with Striped Arms.d

e. The only thing you need to remember with cutting FB is that you need to measure up ¼ inch in order to account for the seam allowance when you sew them together. All of my seam allowances are ¼ inch until you sew the side seams and sleeve seams. Those you would do your normal ½ inch.

f. You also want to cut out your RM pieces. Those do not require a fold.

Microsoft Word - P4P Raglan Colorblock Shirt with Striped Arms.d

g. Once you have everything cut out, keep the pattern pieces for the sleeves pinned so that it’s easier to put all the left and right pieces together.

Sewing machine/Serger time!!!

a. Time to put this shirt together. The first thing I always do is my hems, so that they are out of the way. You can do them however you want but I find it easiest to iron first, then use hem tape, and finish with a straight top stitch. I avoid zigzag stitches at all costs just because that’s the easiest way for me to tell between a store bought and homemade shirt. Personal preference only.

b. Now that the shirt hems and sleeve hems are finished let’s start with the easier pieces. Take TF and BF with right sides together and sew at the seam. Always remember rights to rights.

c. I serge everything when it comes to apparel so when that is finished I press the seam and top stitch so that it lays nicely when you wear it. This is optional.

d. Now it’s time to do the sleeves. I took a strip of Heat N’ Bond Lite (or Wonder Under) and with the wrong side of the stripe on the sticky side, iron on the Heat N’ Bond. Let cool and then peel off paper backing. Then line up in the middle of MR and press to adhere to MR. Top stitch or zigzag around edges in order to secure (optional).

e. Line up TR bottom edge with MR top edges, rights to rights, and sew. Open seam, press, and top stitch

f. Line up MR bottom and BR top edges, rights to rights, and sew. Open seam, press, and top stitch. Repeat with Left sleeve pieces.

You are in the home stretch.
Now all that’s left is to follow the same steps you would take with any other raglan. Attach the sleeves to the front and back panels and then sew sleeve seams and side seams.

The VNeck I treated similar to any other neckband except I didn’t start with a loop nor did I measure it out beforehand. I just cut a strip about 1.5 inches wide, folded in half, and press, then starting at the V in the front attach like you would binding on a quilt or other necklines.

I hope everyone enjoys this new colorblock design and if anyone has any questions I’d be happy to help out or explain something!

Microsoft Word - P4P Raglan Colorblock Shirt with Striped Arms.dMicrosoft Word - P4P Raglan Colorblock Shirt with Striped Arms.d

***Next time I think I’ll just make the MR and Stripe one piece similar to the elbow patch instead of spending so much time sewing each piece of the sleeve together and topstitching. That way you could cut full sleeve pieces and then attach the MR/ML with Heat N’Bond and zigzag stitch down.

Filed Under: Pattern Hacks Leave a Comment

Straight Palazzos Pattern Hack (Three Ways!)

December 8, 2015

Winter is coming, no matter if we are embracing that fact or not.  The change in seasons means that we are putting away our warmer weather clothes and finding things that are much more cozy.  Think: flannels, lounge wear, snuggling by a fireplace, drinking hot chocolate…the works.  But being cozy doesn’t mean wearing frumpy clothes…not one bit.  The Straight Palazzo pants are your answer to putting comfy and cute together.

Think: maxi skirt in pant form.  Heaven, right?

p4p-palazzo-hack-tutorial

Inspiration is everywhere and the online boutiques are full of different styles of palazzos.  Here are three different ways you can take this very pattern and put a tiny twist on it, to mimic the styles that you’ve been drooling over.

Hack #1: Flannel Fabric + No Side Seams

Because the pattern is made to hug the booty and is a straight leg all the way down, there is more than enough wiggle room to use a flannel fabric…for the ultimate home/lounge/pj pants.  Flannel in NO WAY can fully replace knit for sewing, but it has a little more give than say, a quilting cotton, and can sometimes work for different pieces of clothing.  It does work for the palazzos, just make sure to check the size chart BEFORE cutting into your precious fabric.  Verify that your full hip measurement will easily fit into the size you’re wanting to use, as that will be the most important measurement.  Personally, I’ve been brainstorming ways to tackle our traditional Christmas pj’s for the entire family, and I believe this was my answer.

P4P Palazzo Hack-006

Eliminating the side seam was SUPER easy.  And it made this one of the quickest pairs of pants to sew ever!  Take your pattern and line the straight edges up together, overlapping them by 1/2″ on both sides.

(Why 1/2″?  The pattern is built with 1/2″ seams all the way around.  Since we aren’t using side seams, we don’t need that extra fabric.)

Lay your pattern pieces on your fabric, now just cutting out two pieces for the legs.  Make sure to cut mirror images or you will end up with two of the same leg!

P4P Palazzo Hack-003

Sew each leg to itself on the inner, long, straight edge.  Then place one leg inside of the other (right sides facing) and sew the crotch seam.  Follow the rest of the directions in your pattern and attach a waistband, based upon the type you’re wanting.

P4P Palazzo Hack-004 P4P Palazzo Hack-005

BAM, you’ve got yourself a snazzy, comfy new pair of pants!

P4P Palazzo Hack-009

Hack #2: Add a Drawstring

I love to add a quick drawstring to pants that I’m worried might creep over into the “pj look” instead of “sweatpant look” on adult and kids clothing I make! And it is a super simple mod too 🙂

I cut all my pieces normally, but added my drawstring piece.  I did about an inch thick long strip that is long enough to go around my hips and then some more to tie.  I did a very long drawstring just for the certain look I was going for.

IMG_6096

Since my knit doesn’t ravel, I didn’t finish it at all, but you can sew it right sides together and turn to create a tube.  I just folded my end under and tied into a knot.

IMG_6106IMG_6107Next, I cut a small rectangle of interfacing.

IMG_6097

For placement, I folded the waistband in half width wise to find the front center and pressed a crease.  Then folded in half lengthwise like it would be when attached to the pants.  I placed my interfacing right under that crease in the center for the look I wanted.  (I had did a yoga band that I planned on folding down, and wanted the drawstring to be tucked under.)

IMG_6099IMG_6100IMG_6098Next, I marked my buttonholes.  I did about 1/2″ from the center for each.  I choose a smaller button so that my holes weren’t too big (I hate when I tie a drawstring and the holes gap open!).

IMG_6103IMG_6101You will need to use a knit button hole.  Here is what mine looks like on my machine.  The zigzag sides let the knit stretch without popping the threads.

IMG_6102IMG_6104Now just sew up your pants exactly as the pattern tutorial instructs.  The only thing to consider is to make sure you’re placing your button holes correctly when attaching the waistband to the pants.  After they’re all sewn up, you can put your drawstring through your button holes and around the waistband.  I always use a safety pin to help guide it through.

IMG_6105IMG_6112
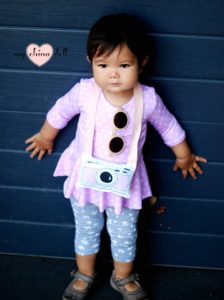
Tada! Now you can wear your ever so comfortable, stylish sweatpants without fear they might look like you stepped out in your pjs 😉

Here I am in my SUPER soft, rayon blend floral french terry palazzos with a ribbing waistband and drawstring!

12120250_977021242372670_988239226_n(1)

Hack #3: Add Front Patch Pockets

I’m a minimalist when it comes to taking things with me while running quick errands and let’s face it, as a mom of three, I’m lucky if I get dressed up. 😉  I grab my clutch and my keys and off I go.  The Straight Palazzo Pants are so comfortable and I could wear them everyday but leave me with no pockets and I’m left worrying about where to put my things.  Added front patch pockets…problem solved!

IMG_2002 copy

You will cut your leg pieces and waistband as the pattern instructs but will need to create your pocket piece.

I used the size 14 pocket from the Pirate Playground Shorts and Pants and made a few adjustments to the length to fit my pants. For placement, center pocket between front rise and out-seam with the bottom edge of the pocket lined up at the shorts length cut line and extended to top.

pocket1pocket2Cut your Pocket Pieces.

Unlined/raw edge pocket ~
CUT 2 MIRROR IMAGE

For Pocket with Lining ~
CUT 2 MIRROR IMAGE, MAIN FABRIC
CUT 2 MIRROR IMAGE, LINING FABRIC

pocket3lined pocket

Unlined Pocket                                                                                                 Lined Pocket

Unlined Pocket:  Hem pocket edge. I folded mine to the right side of the fabric to show the wrong side of the fabric for added detail.

Lined Pocket: Stitch pocket main and lining with right sides together along top and bottom curves. Flip right sides out and topstitch along top curve.

pocket4

Stitch Pocket on front leg.  Continue construction of the legs and waistband as shown in the pattern tutorial.

Voila! You now have the perfect pair of comfy pants with pockets large enough to hold your phone, cash or in my case, most likely one of my kid’s toys!

palazzo


There you have it!  Three different ways you can take one pattern and make it to fit your needs.  Now you can have the [coziest] pants of your dreams.  (Make sure you have a copy of the Straight Palazzo Pants pattern first.)

Followed one of these hacks?  Or came up with something of your own?  We are DYING to see it!  Share your latest make on the Patterns for Pirates facebook group and let us see.

Filed Under: Pattern Hacks 4 Comments

  • « Previous Page
  • 1
  • …
  • 26
  • 27
  • 28
  • 29
  • Next Page »

connect with me

  • Email
  • Facebook
  • Instagram
  • Pinterest
  • YouTube
Privacy & Cookies: This site uses cookies. By continuing to use this website, you agree to their use.

To find out more, including how to control cookies, see here: Cookie Policy
  • Privacy Policy
  • Refund Policy
  • Contact Us
  • About

Copyright © 2026 Patterns for Pirates

Copyright © 2026 · Genesis Framework · WordPress · Log in