Patterns for Pirates

P4P stylish, modern, wearable patterns

  • Home
  • Blog
    • Frequently Asked Questions
    • Pattern Releases
      • Free Patterns
    • P4P University
      • Fitting
      • Sewing with Stretch, Knit Fabrics
      • Sewing with Woven Fabrics
      • Sewing Machines
    • Sew-A-Longs
    • Fabric for Pirates
    • Pattern Hacks
    • Announcement
      • Blog Tours
      • Contest/Giveaway
  • Shop
  • Bundle Discounts
  • Flash Friday
  • Gift Cards
  • My Account
  • Cart

2020 Holiday Freebies :: Hickory Hat Tutorial

December 3, 2020

Happy Holidays, Pirate Friends!  We are excitedly back for another year and another round of holiday freebies to share with you!  Over the years, we’ve compiled different tutorials and patterns that we think would make *perfect* gifts for your friends and family. Curious about what we’ve already released in the way of holiday freebies? Head right here to see all of them: Holiday Freebies Roundup.

Today, we are bringing you the: Hickory Hat!

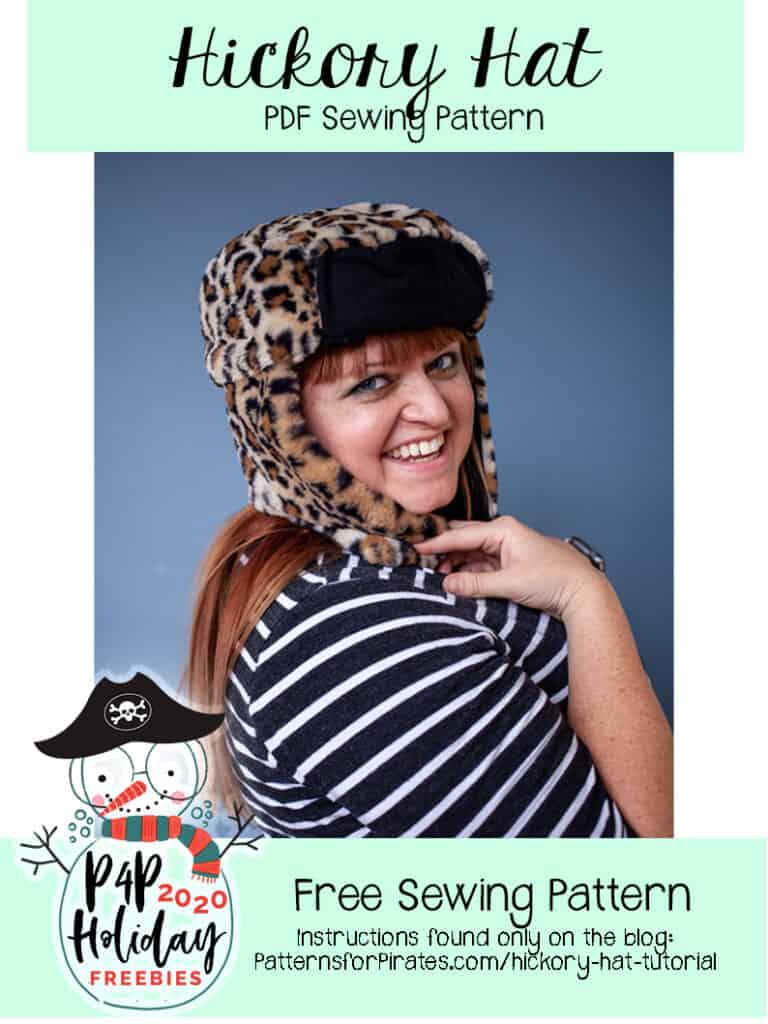
The Hickory Hat is a classic “aviator” or “lumberjack” style cap. It is available in four sizes, for head circumferences 18″ – 24″ and was drafted for non-stretch fabrics. Grab all of your favorite fun furs + fleeces, because this pattern is perfect for those!

**If using a super plush / thick fabric, you may want to size up — as those fabrics take up a bit more space and leave less room for your noggin.

Supplies Needed:

  • Hickory Hat pattern pieces
  • 1/3 yard fabric each (outer and lining)
  • Optional Buttons

TUTORIAL

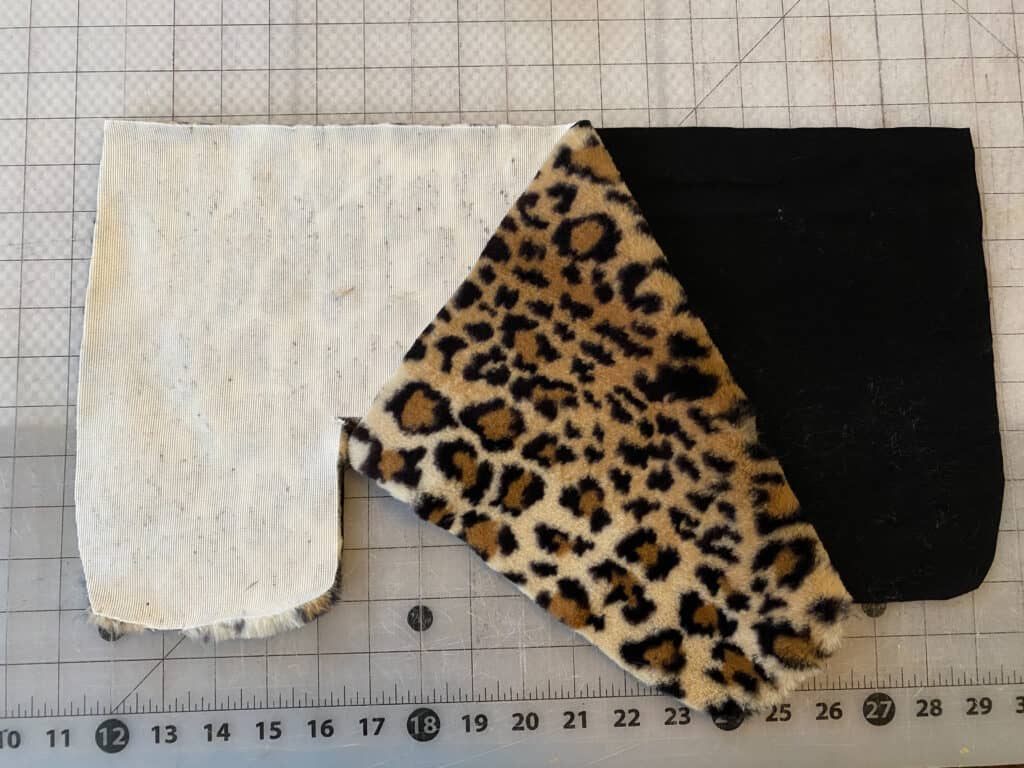
Cut all of your pieces. The assembly for the lining and outer cap will be the same for the first few steps.

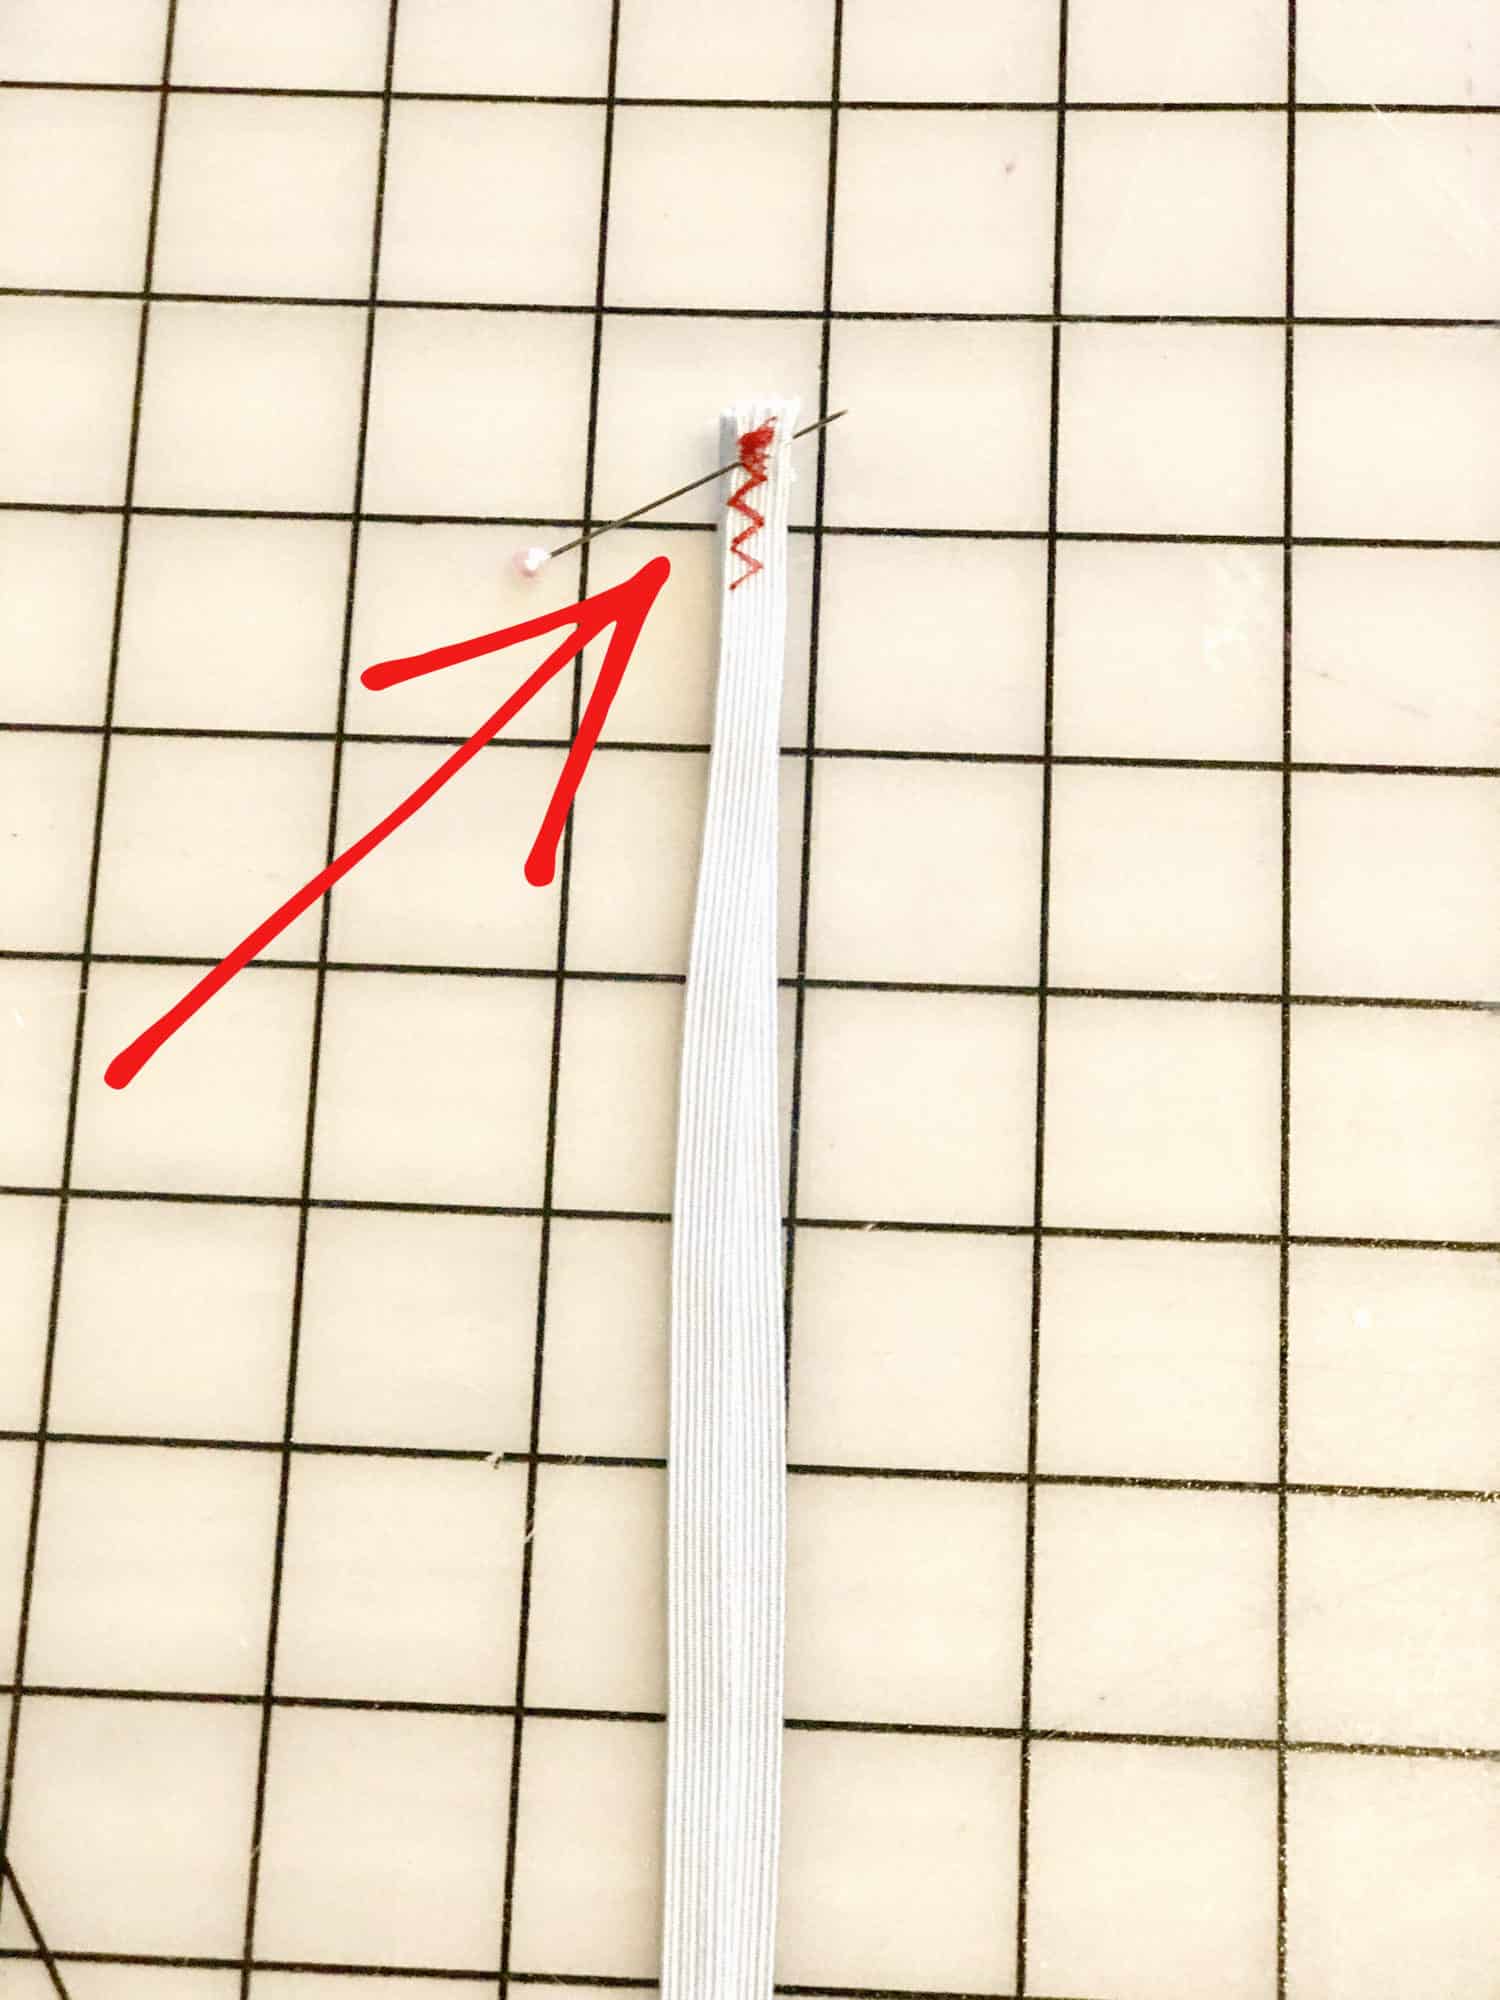
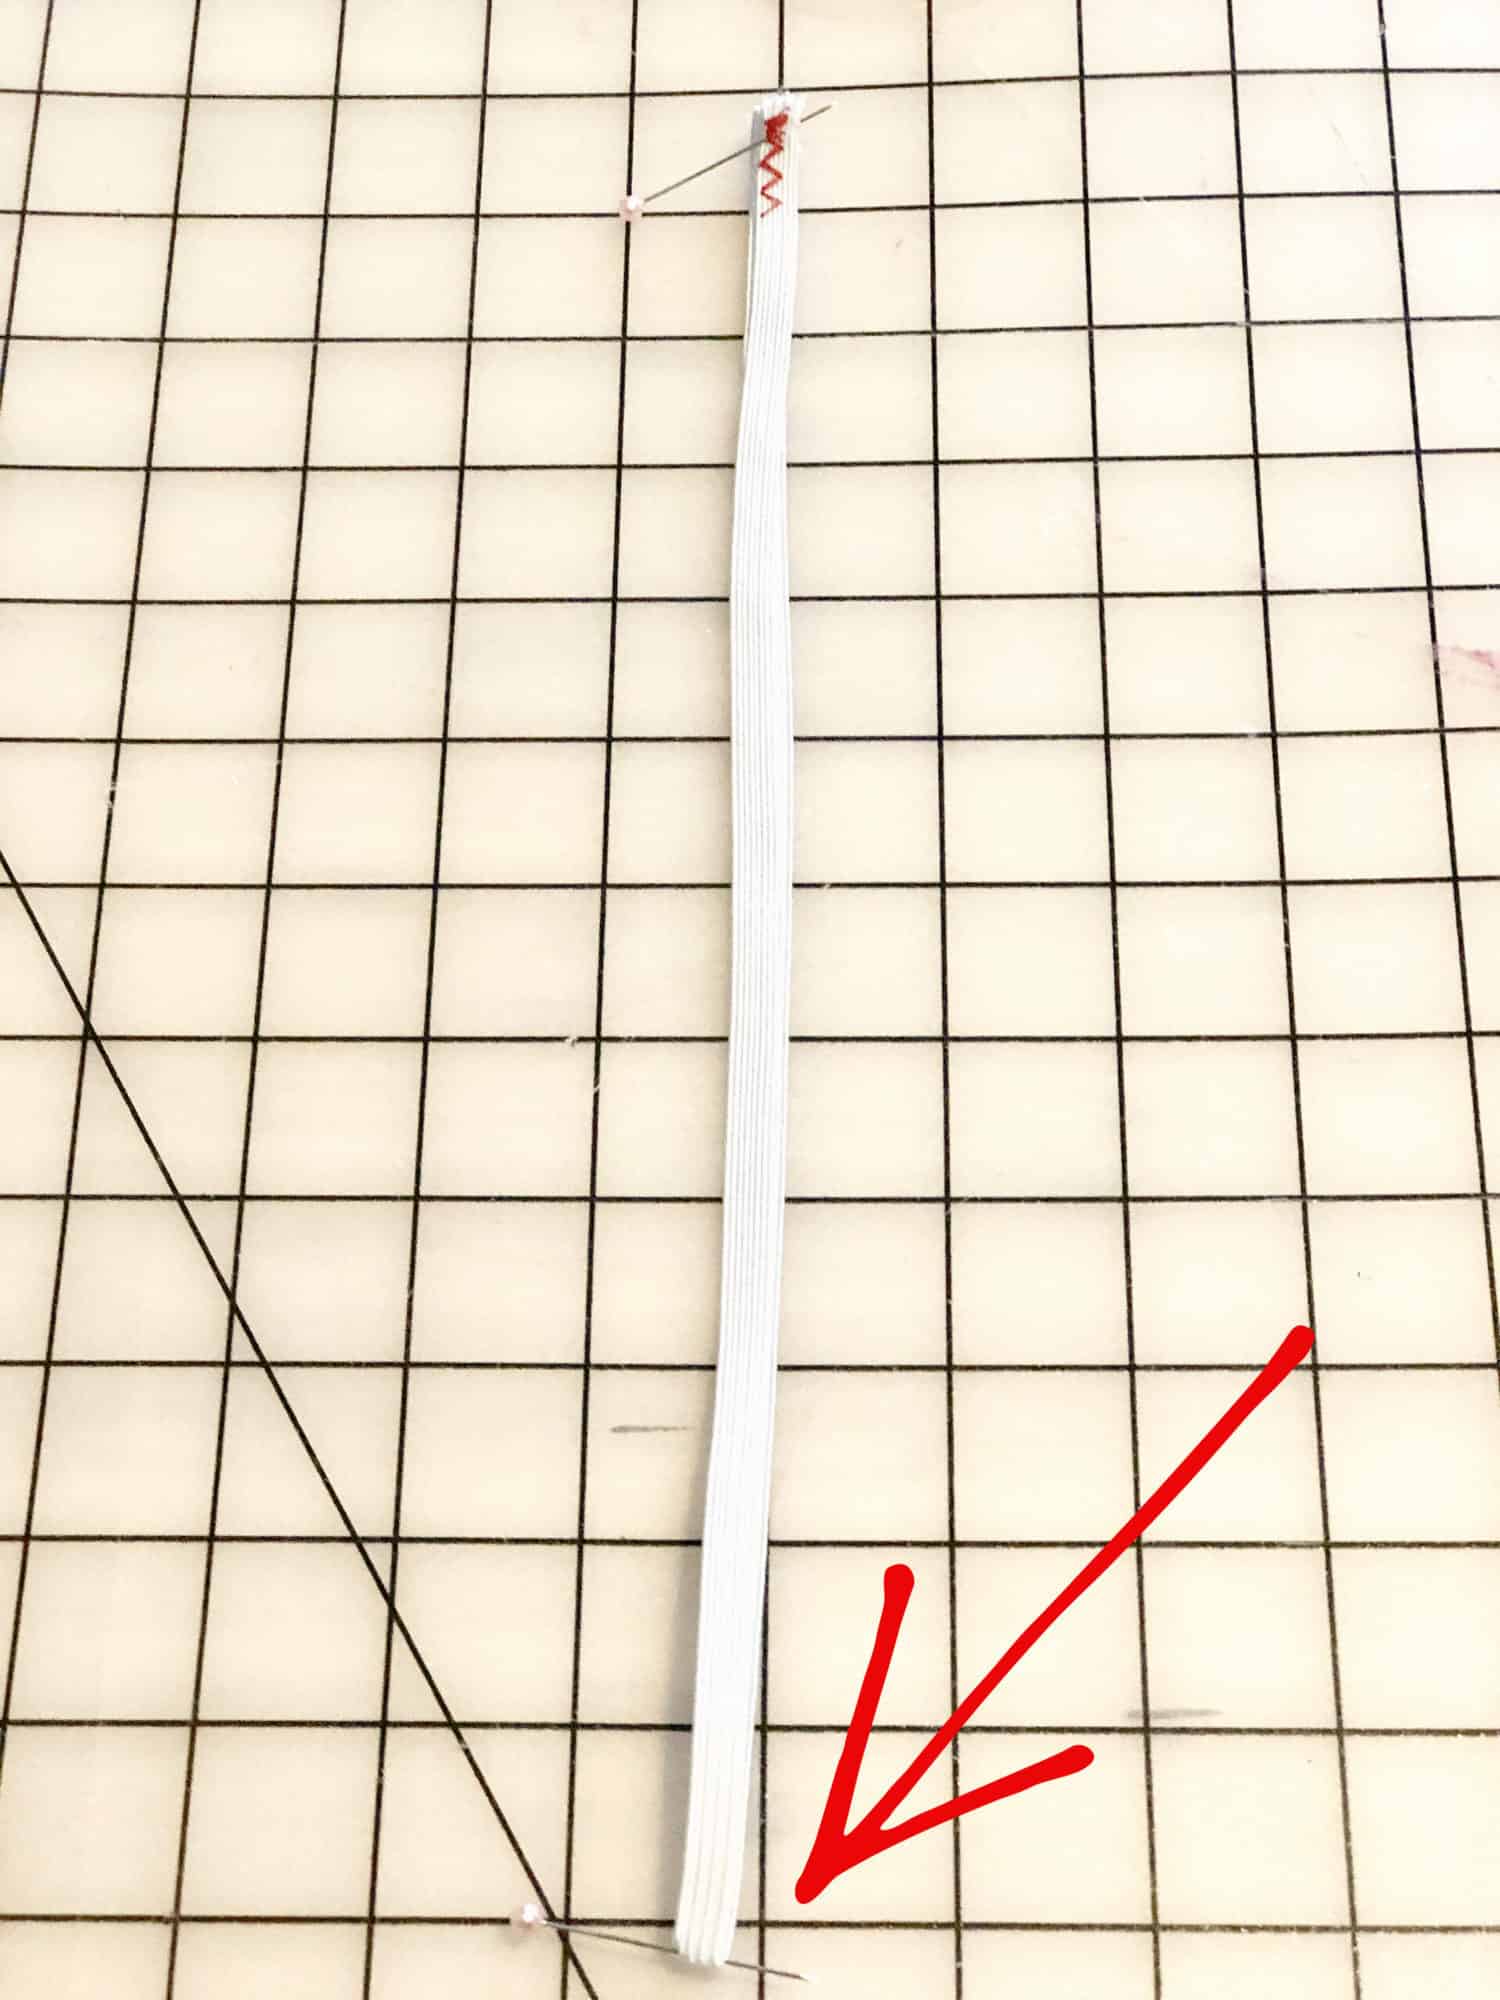
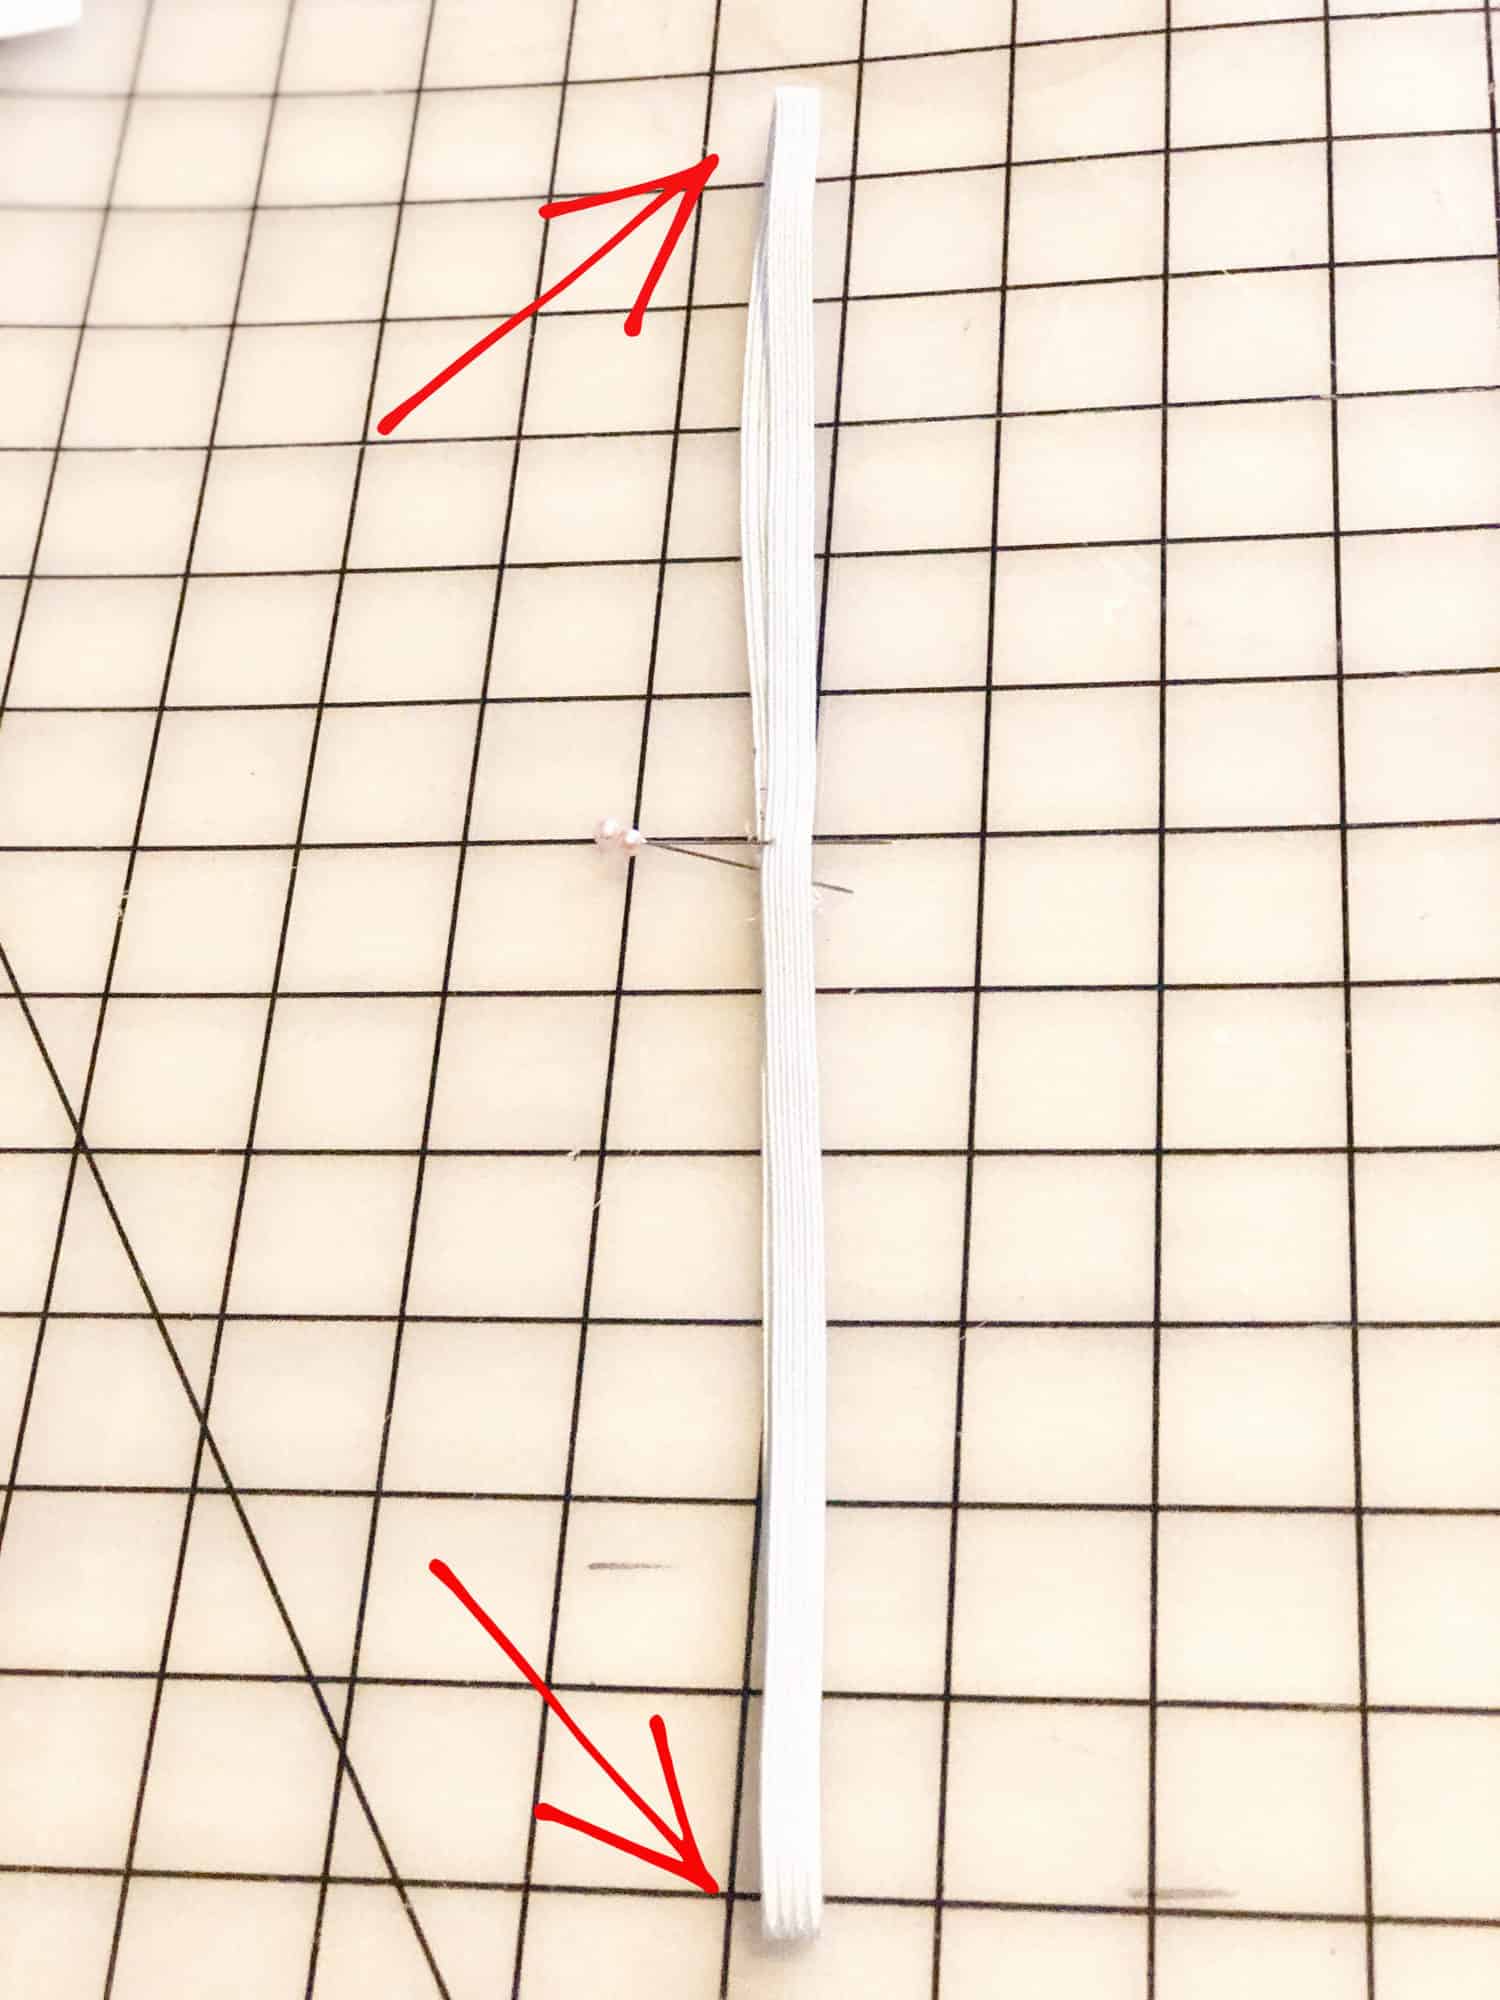
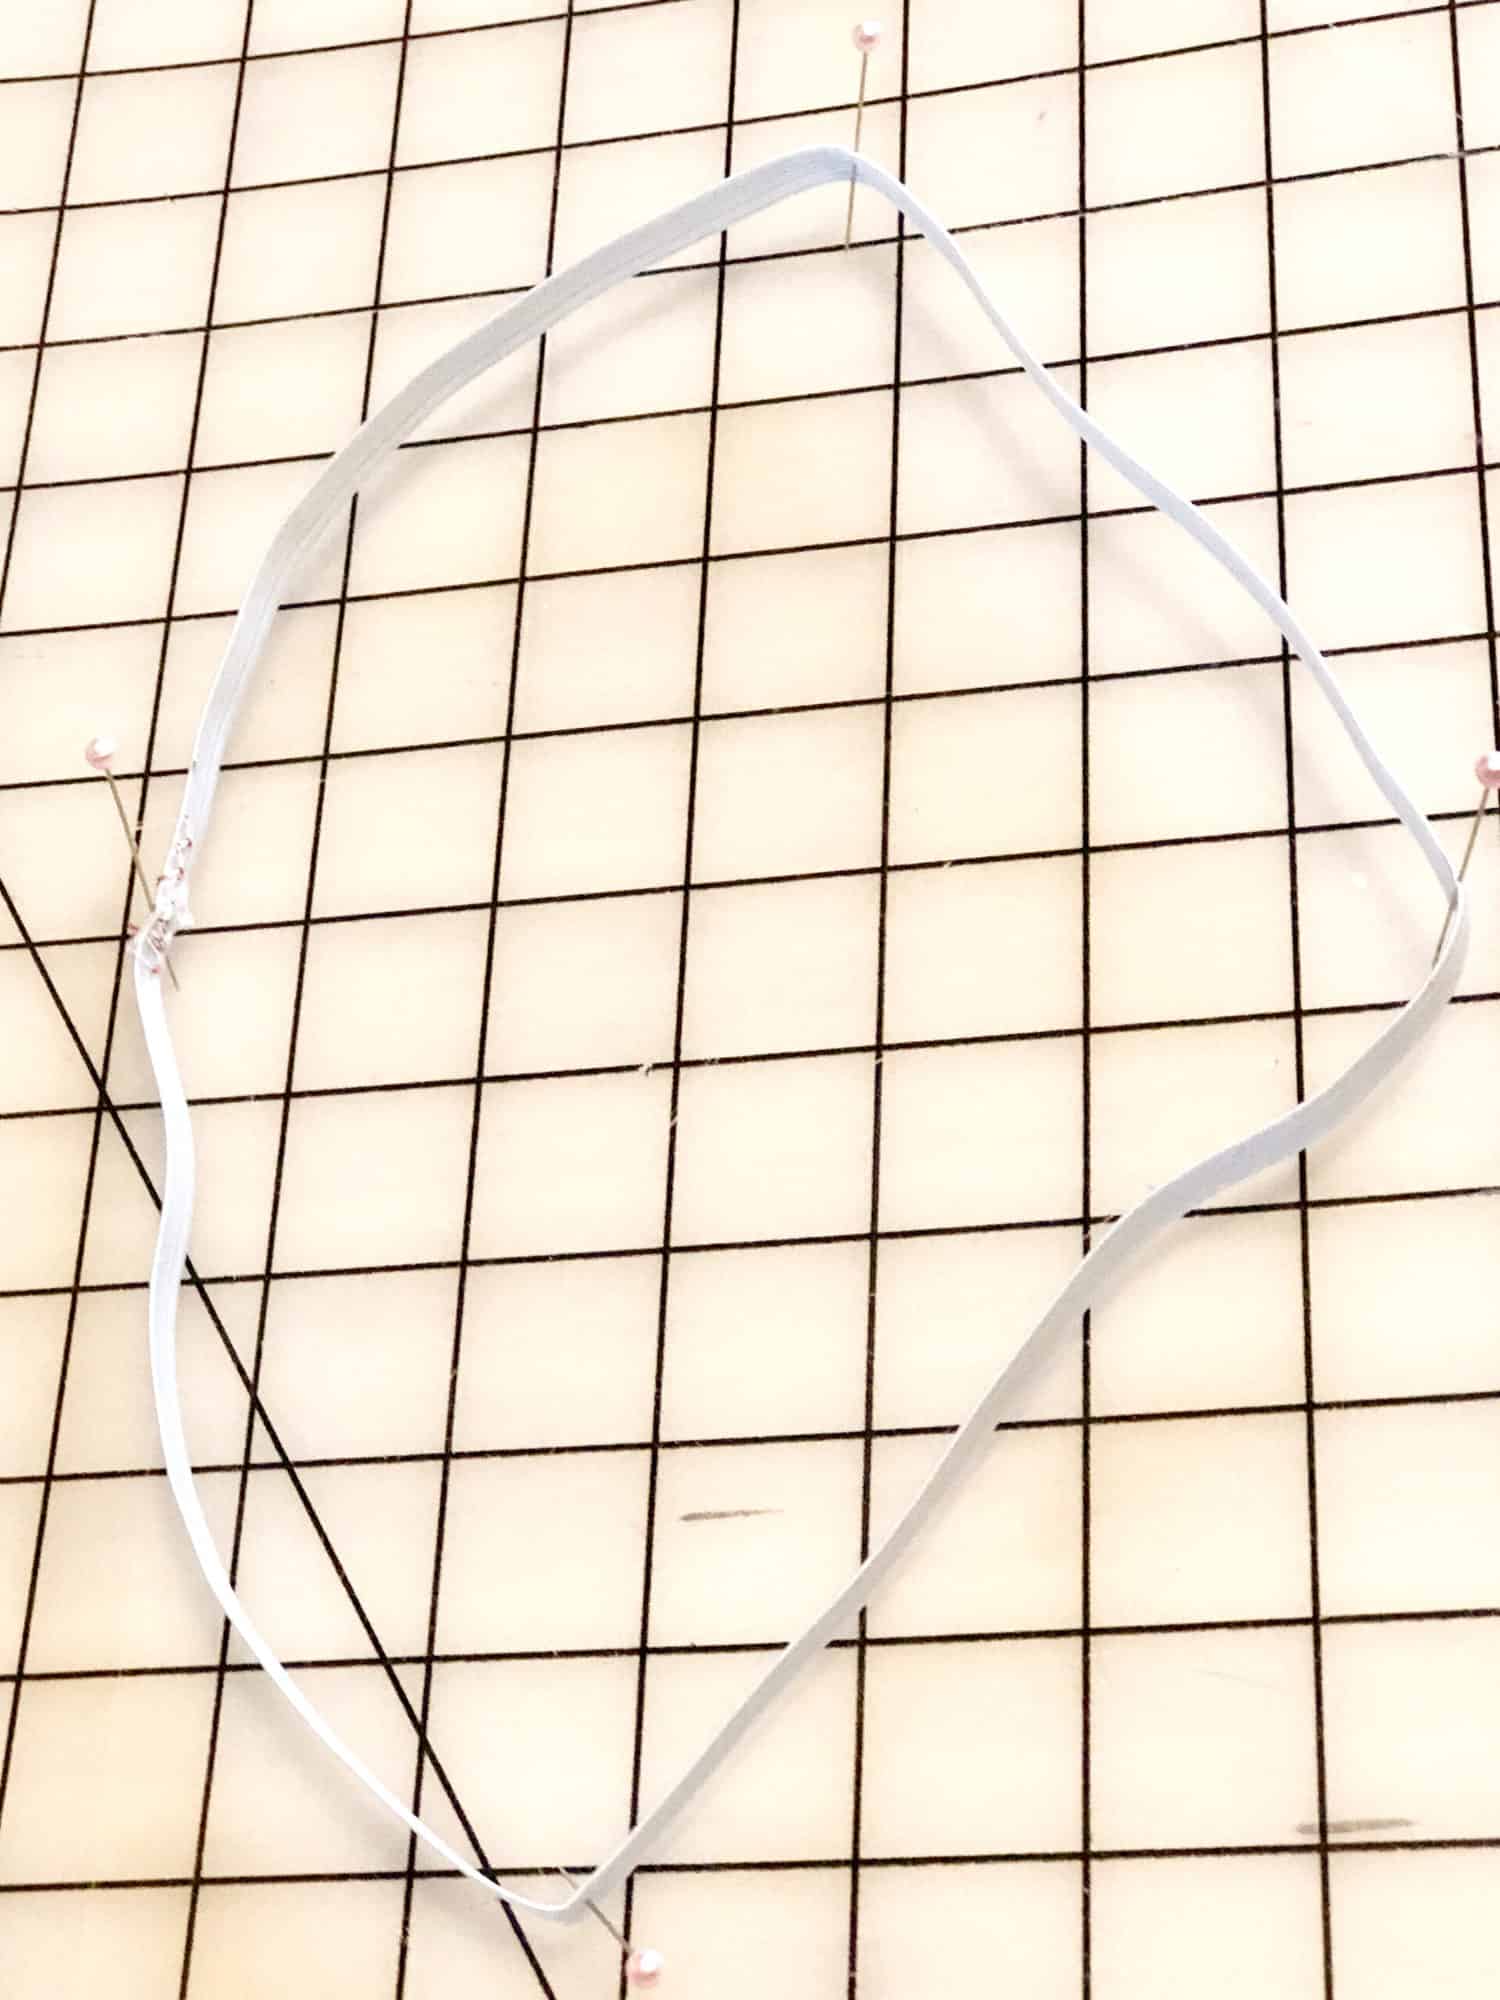
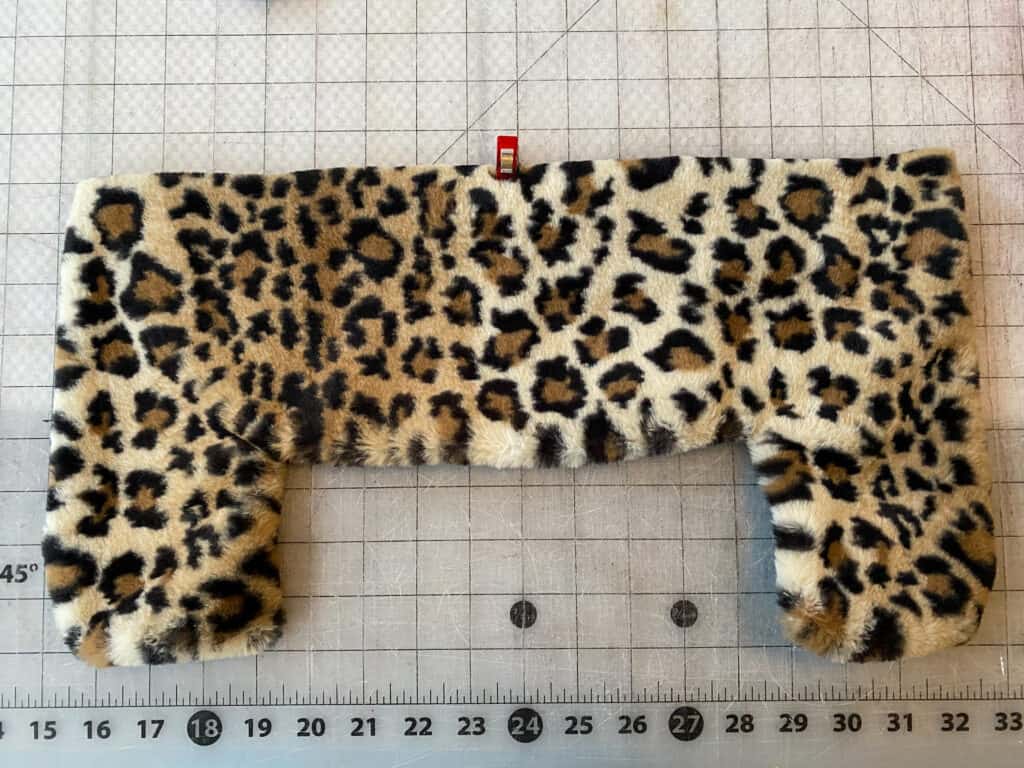
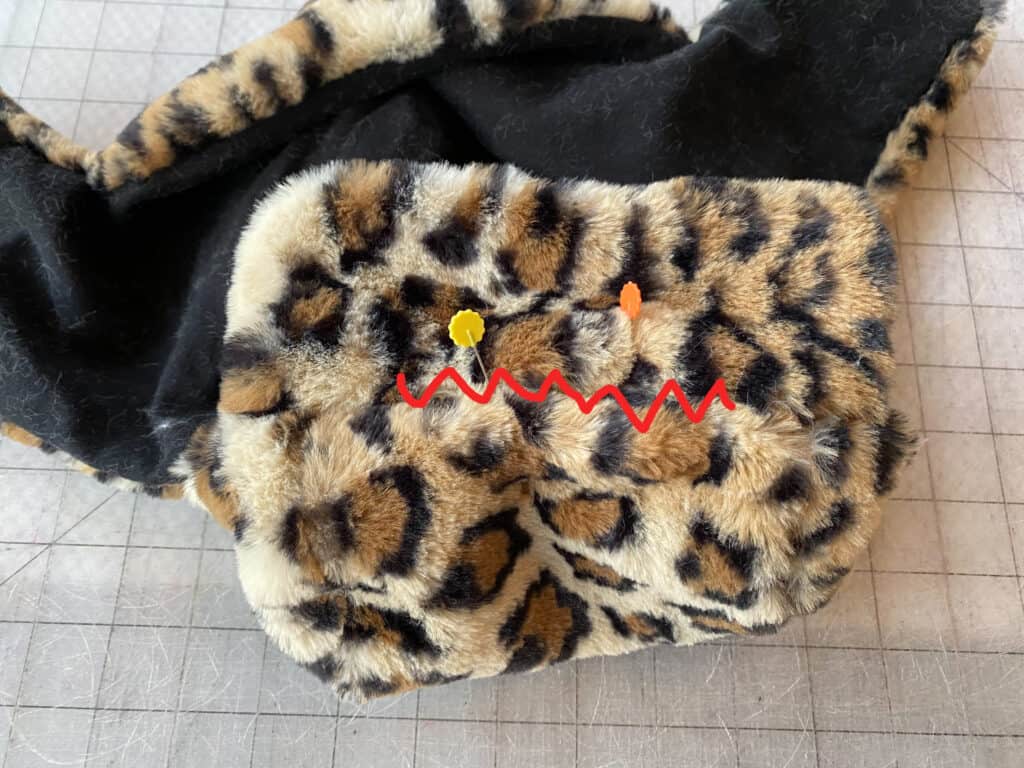
With a pin or clip, mark the middle points of the curved side cap pieces, and both sides of the middle cap of your lining fabric.

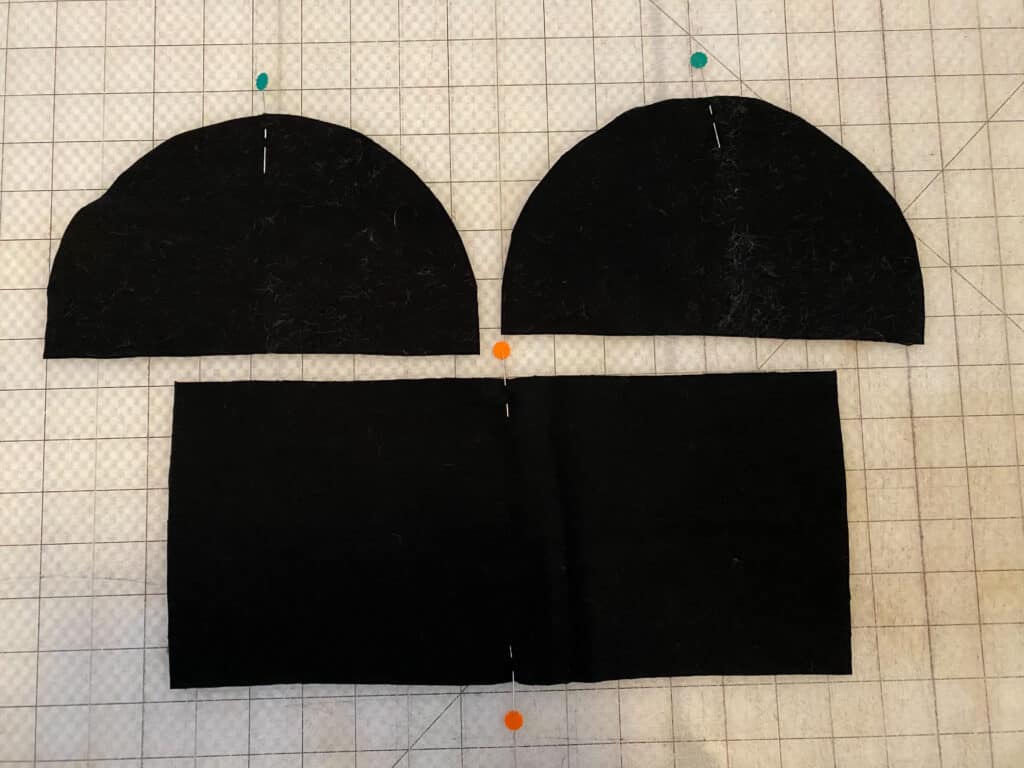
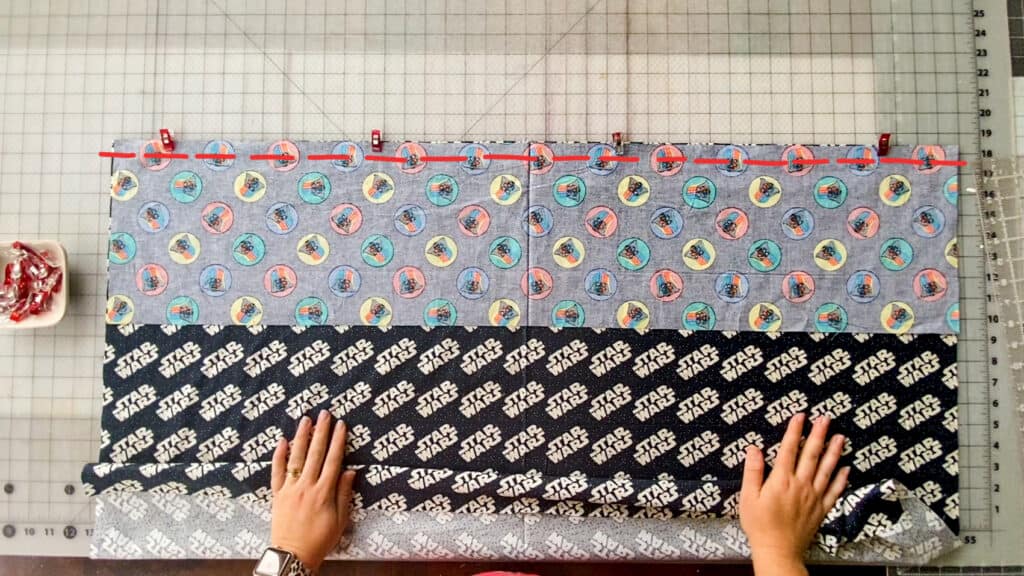
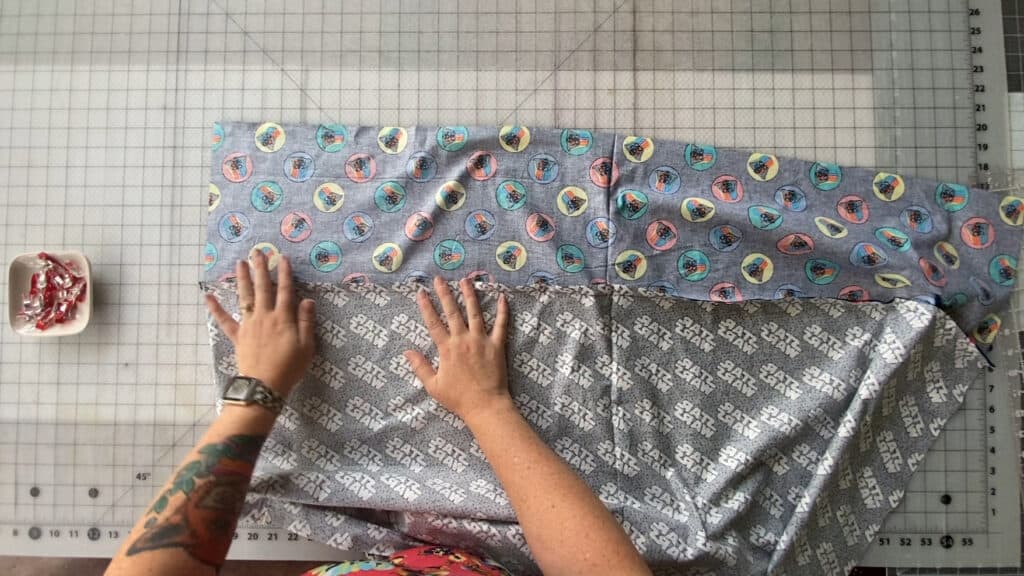
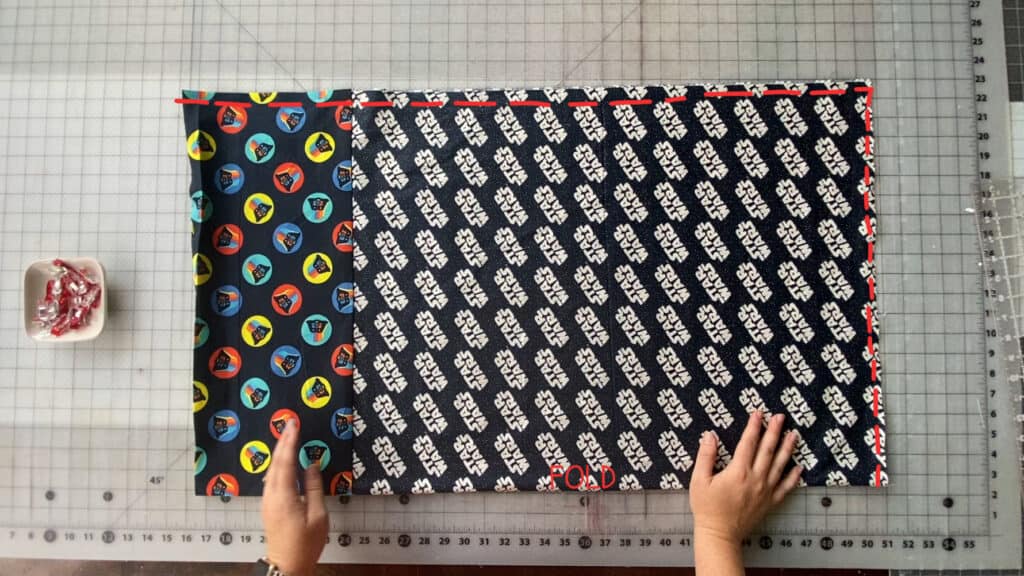
With right sides together, place the side cap piece on top of the middle cap. Aligning them at the center points.

Ease the pieces together, and sew using 1/2″ seam allowance.

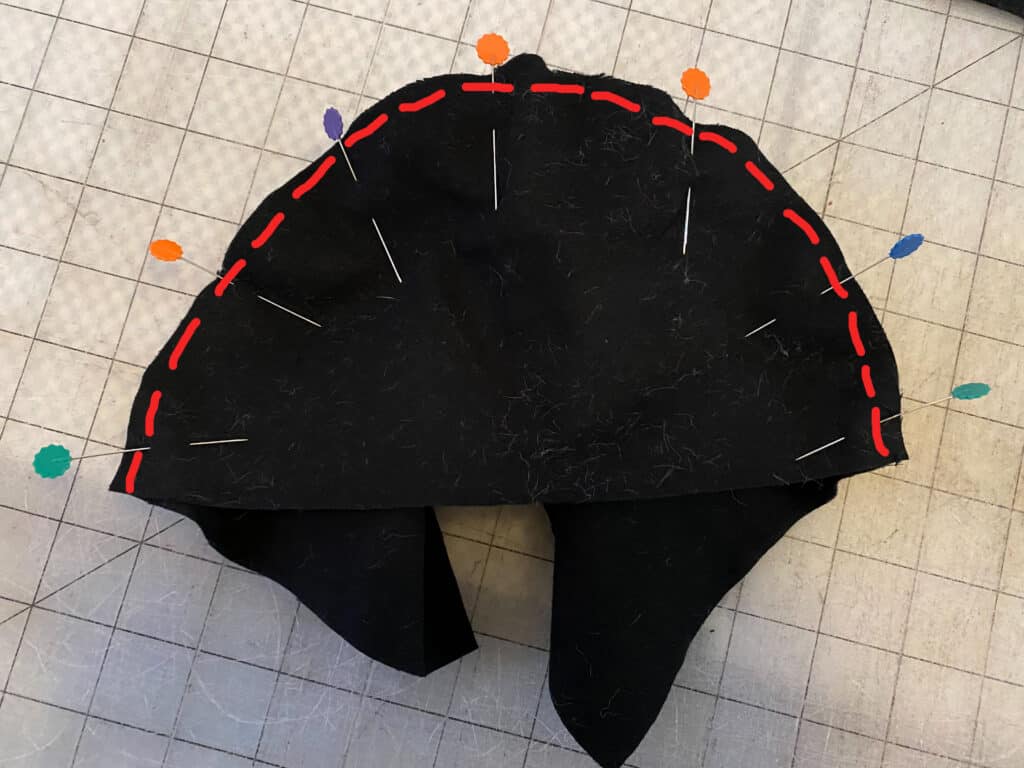
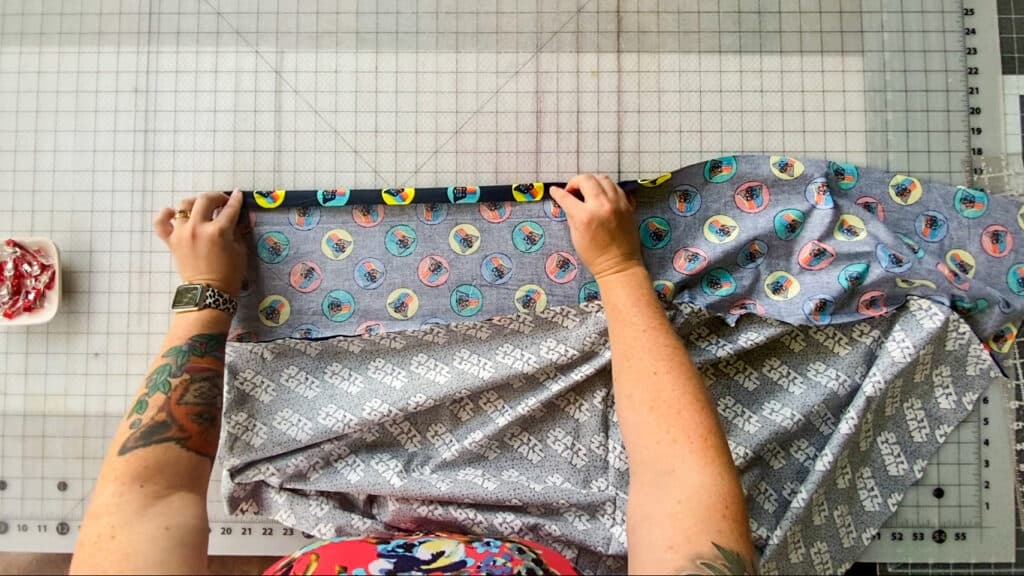
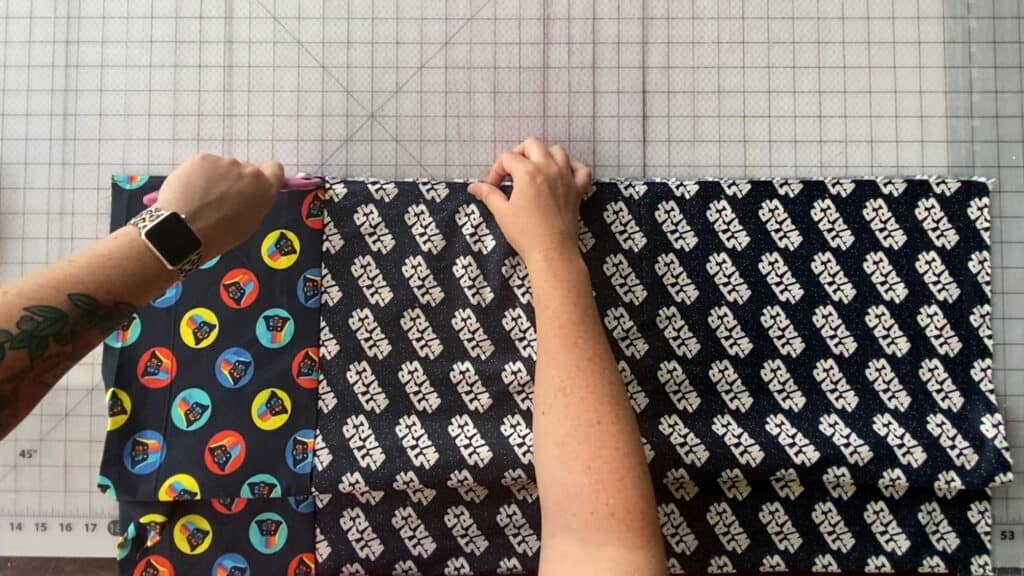
Using pinking shears, or cutting with a “v”, trim excess fabric along curved edge.

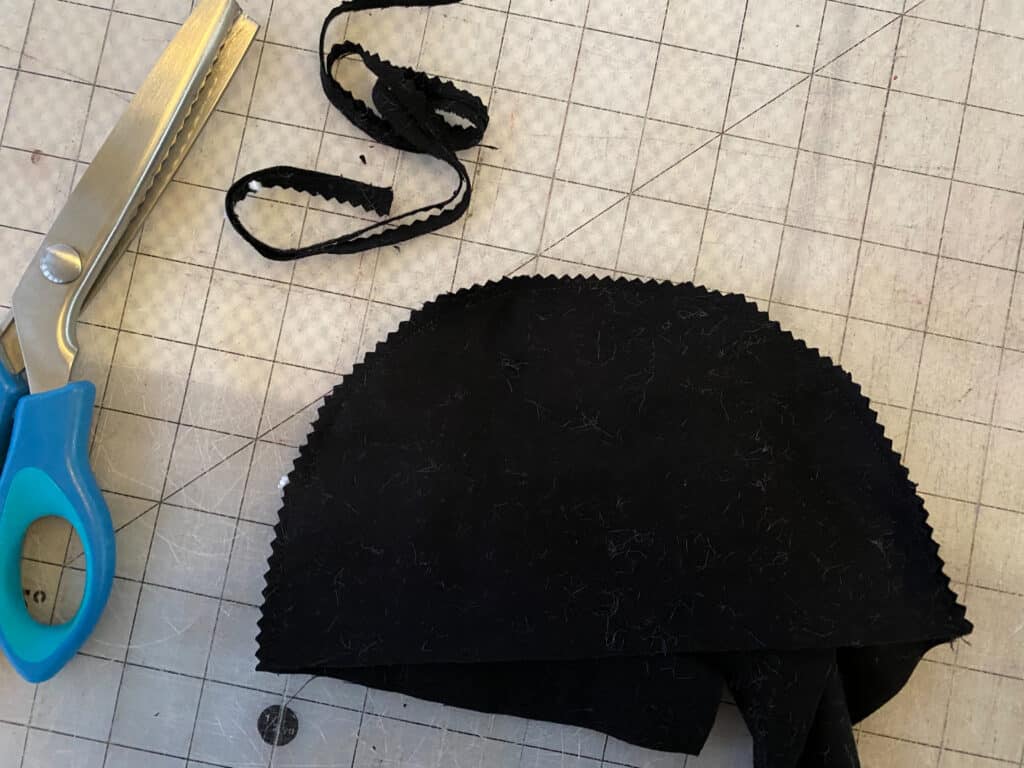
**Repeat with second side cap piece. And repeat all steps with outer fabric.

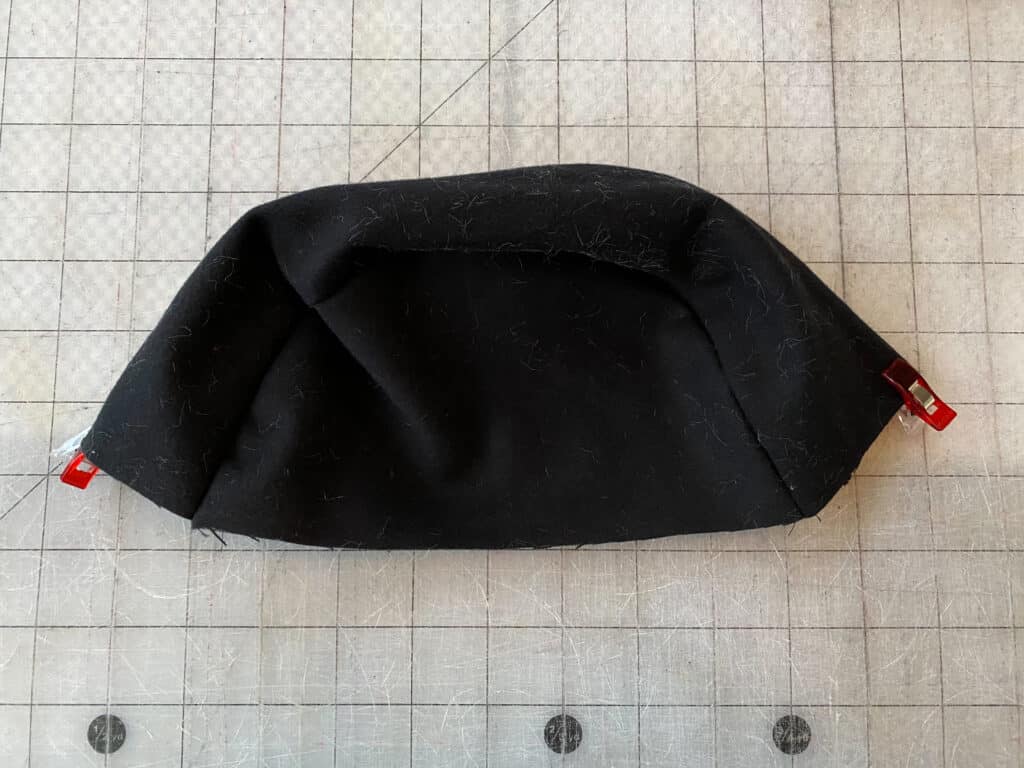
Place the ear flap pieces with right sides together.

Using 1/2″ seam allowance, sew along entire side and bottom edges. Leave the top, straight edge open.

Trim all excess seam allowance, making sure to pay special attention to the corner points. Clip as close to your stitches as you can, without going through them.

Turn right sides out. With a pin or clip, mark the middle point of the top, raw edge.

Place the brim flap pieces with right sides together.

Using 1/2″ seam allowance, sew along entire outer edge, leaving the top, straight edge open.

Clip excess seam allowance. Turn right sides out.

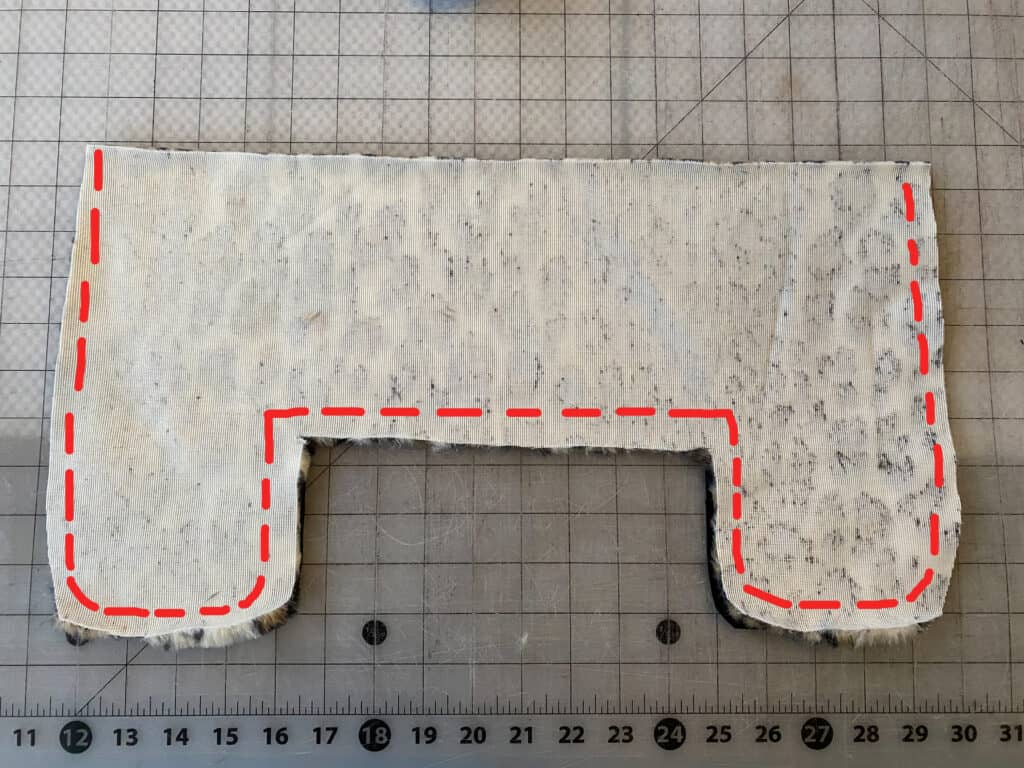
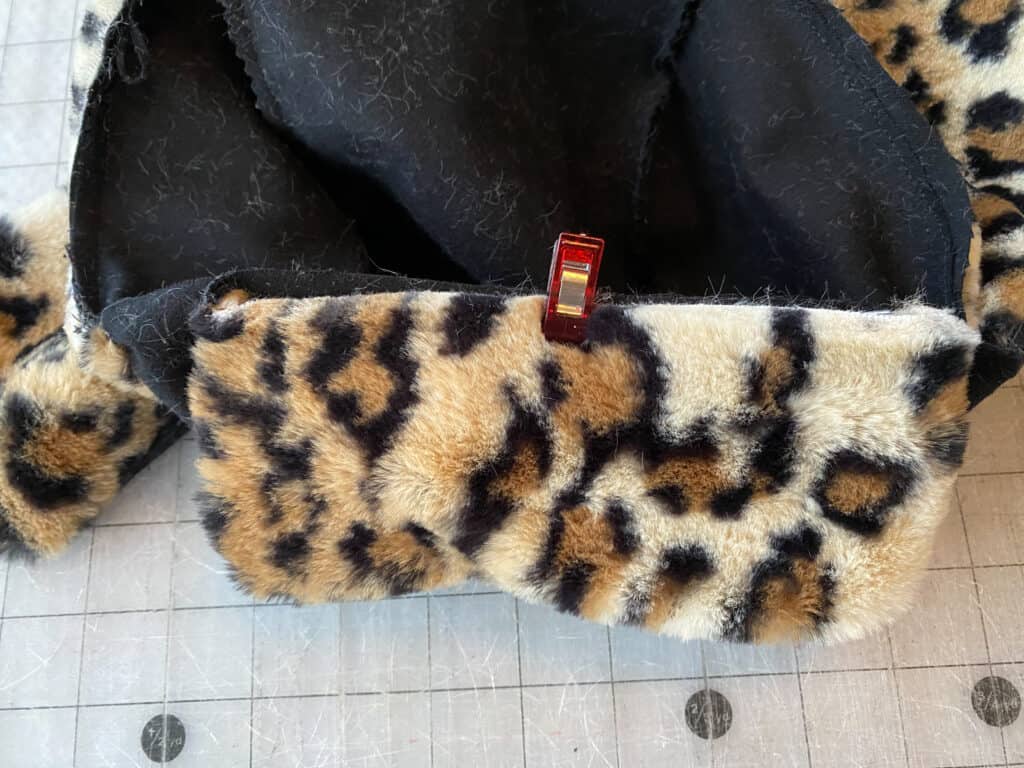
Locate the middle front and back of the cap lining piece and mark with clips / pins.

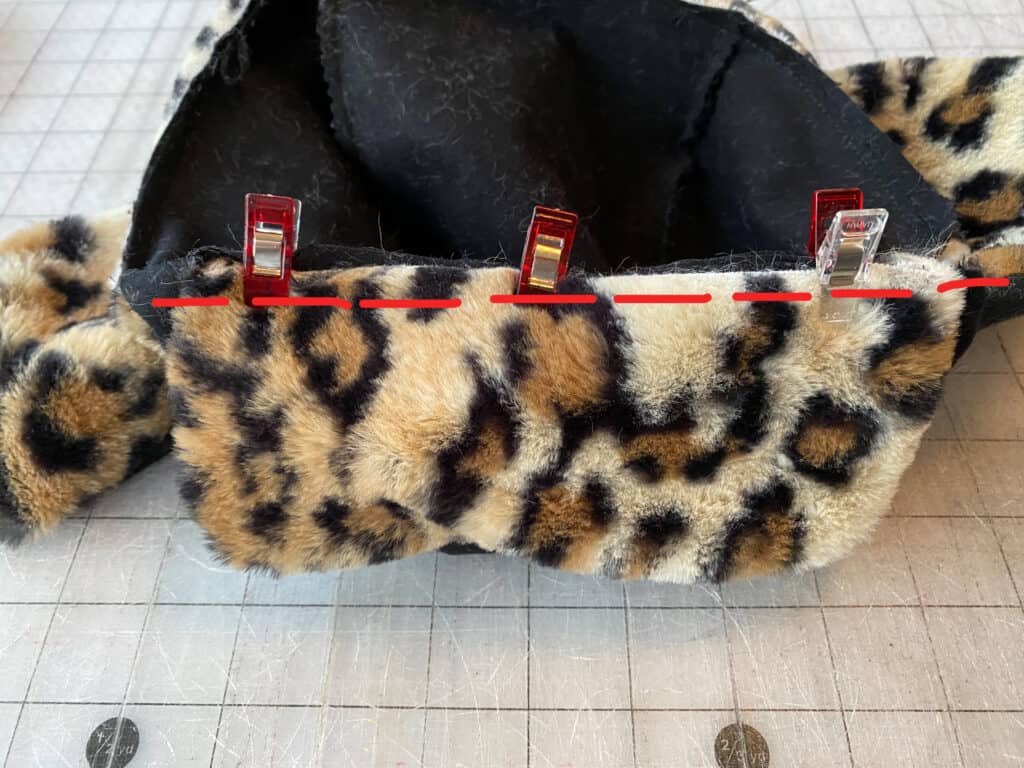
With lining fabrics right-sides-together, match the ear flap piece to the lining cap piece.

Baste in place.

Repeat with the front flap piece. With lining fabrics right sides together, match front flap piece to the lining cap piece at the middle front point.

Baste in place.

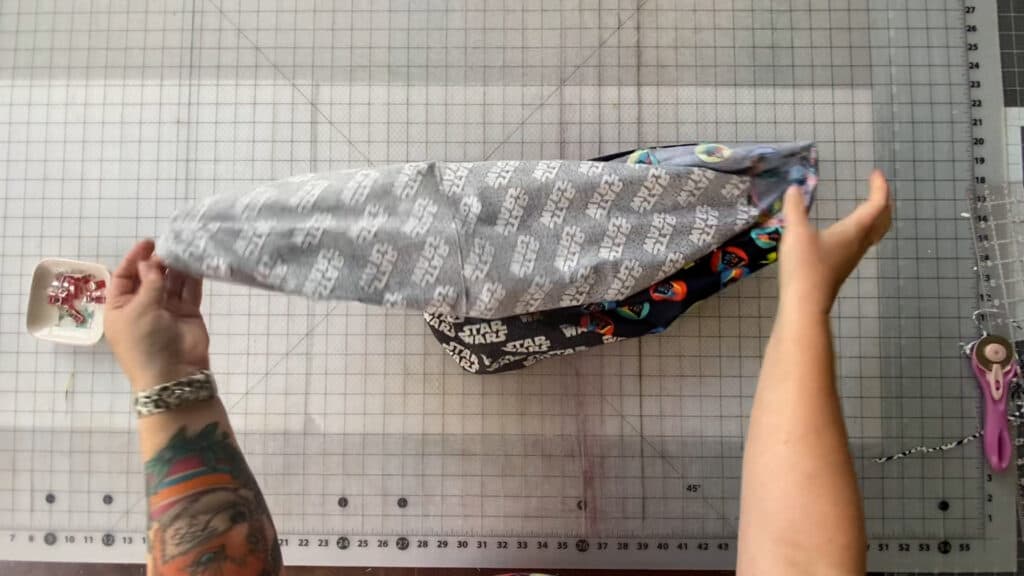
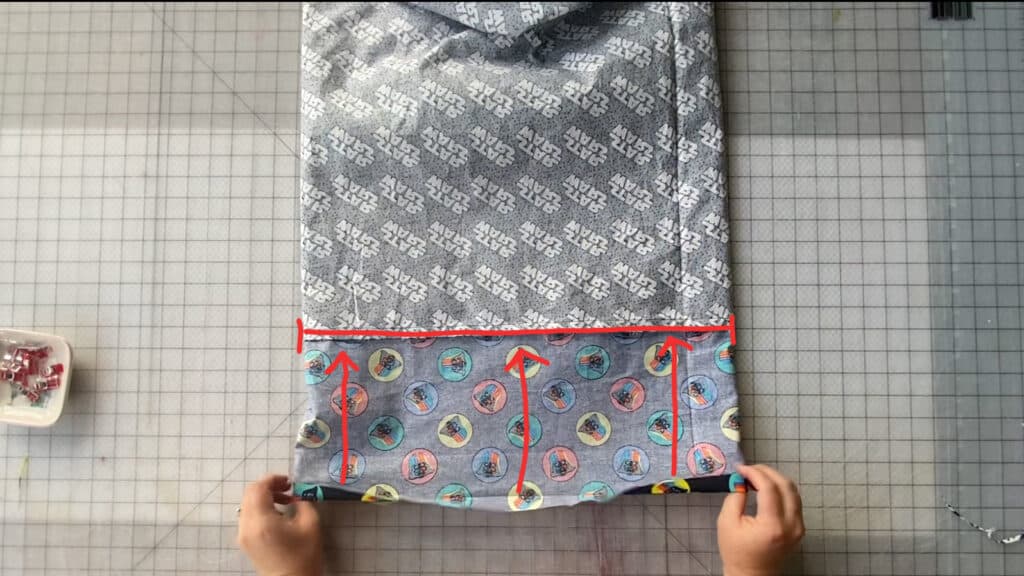
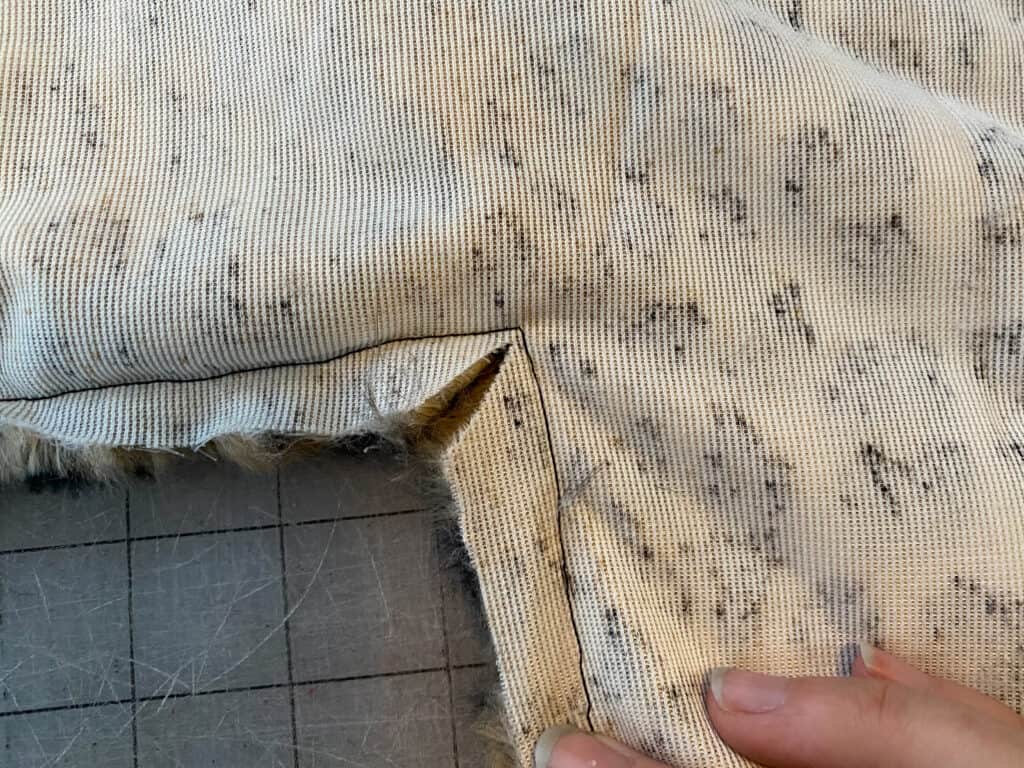
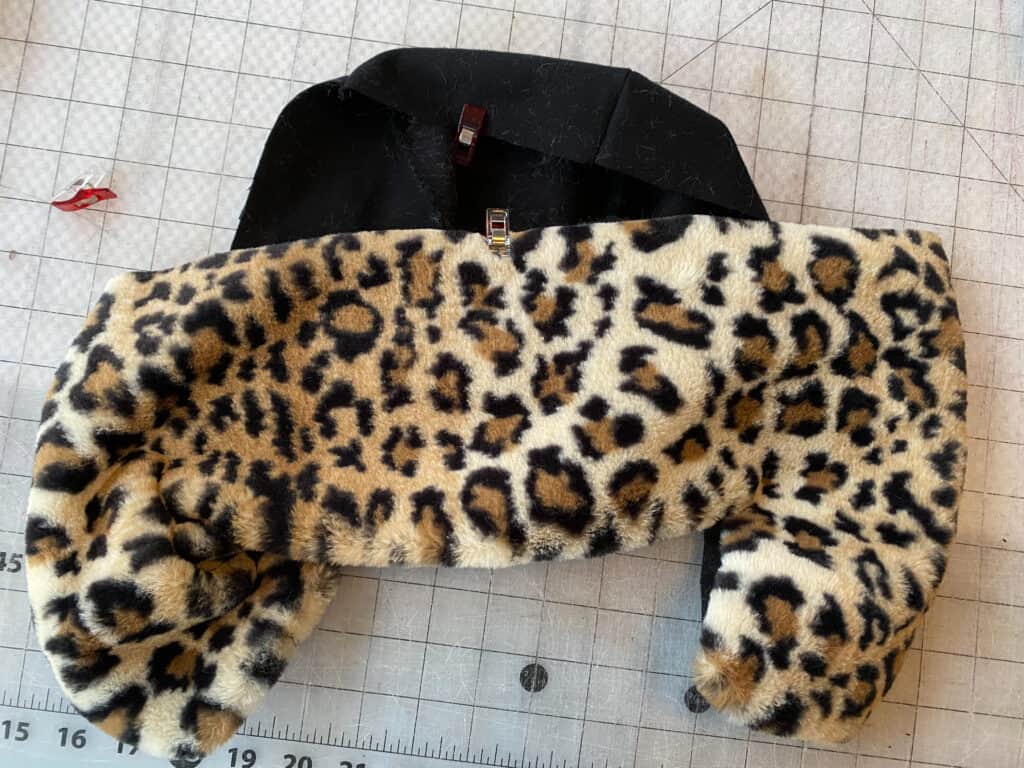
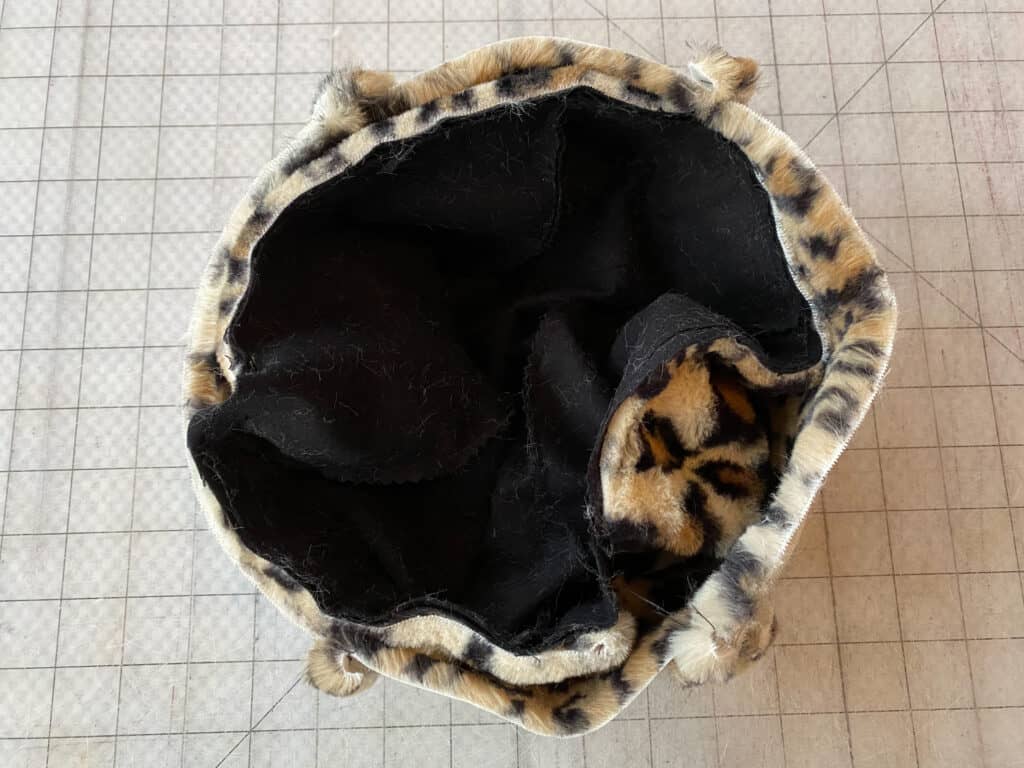
Locate the outer cap piece. Place it in front of you, wrong sides facing out.

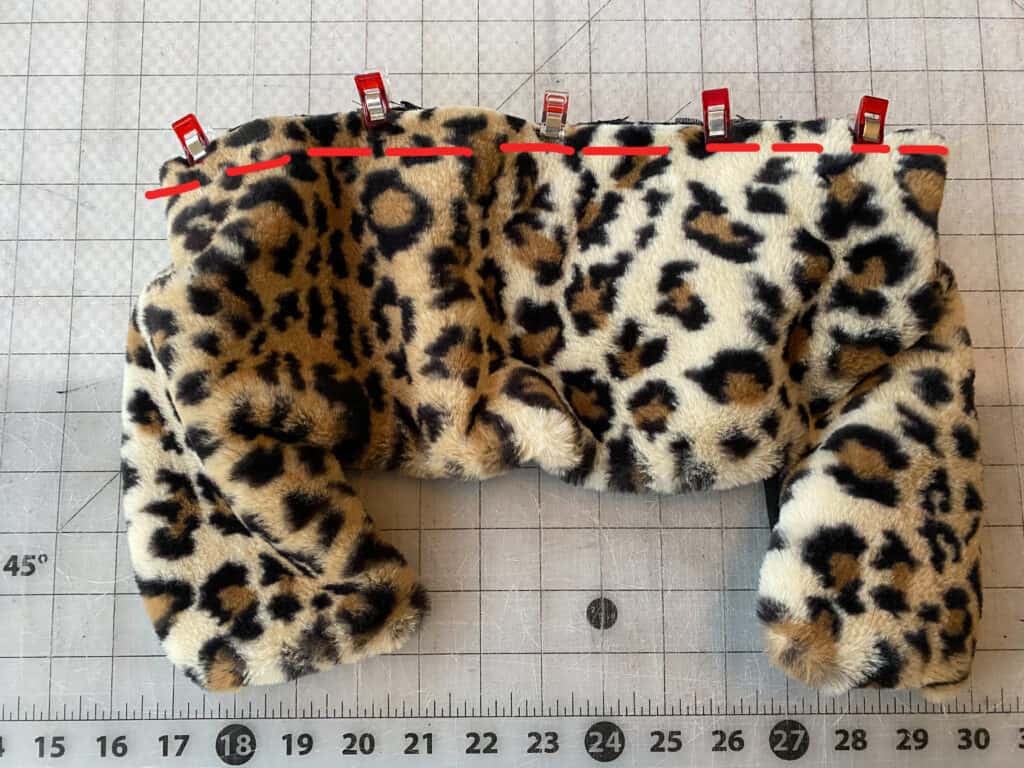
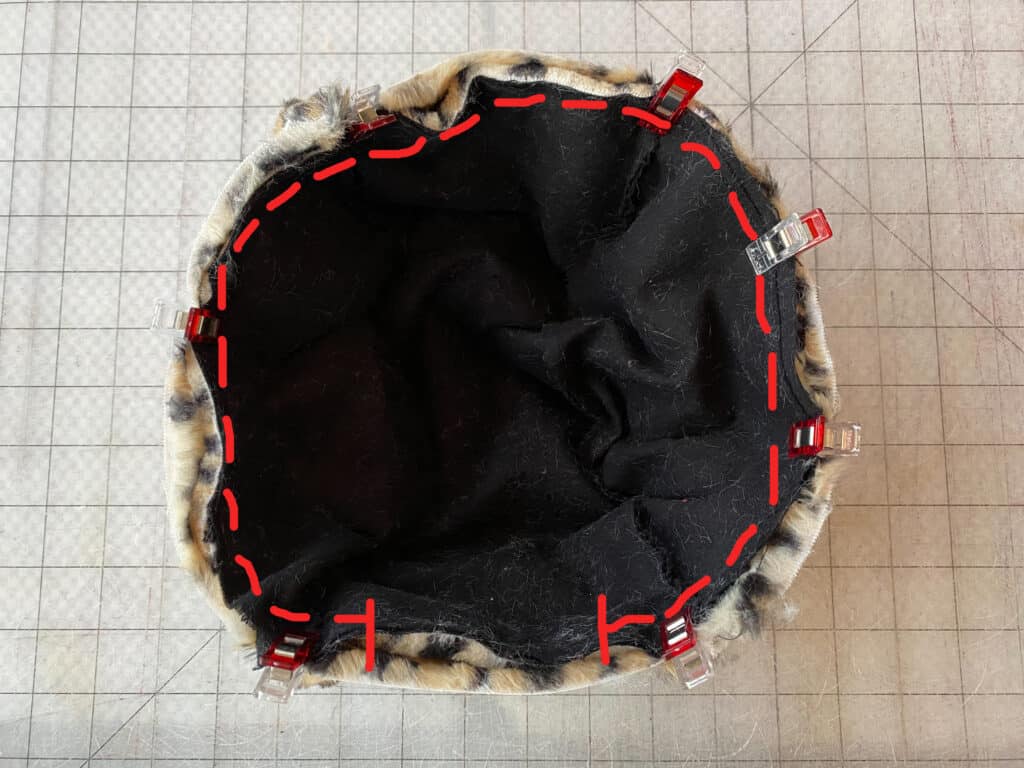
Place the lining piece (with the ear flap and front flaps basted onto it) inside of the outer cap. Tuck the flap pieces inside and align the seams against each other.

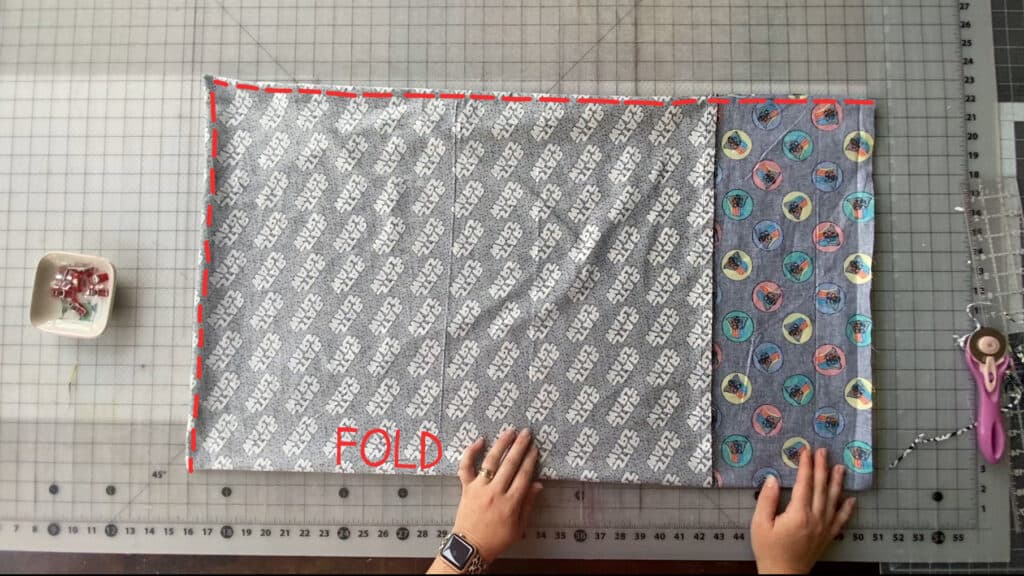
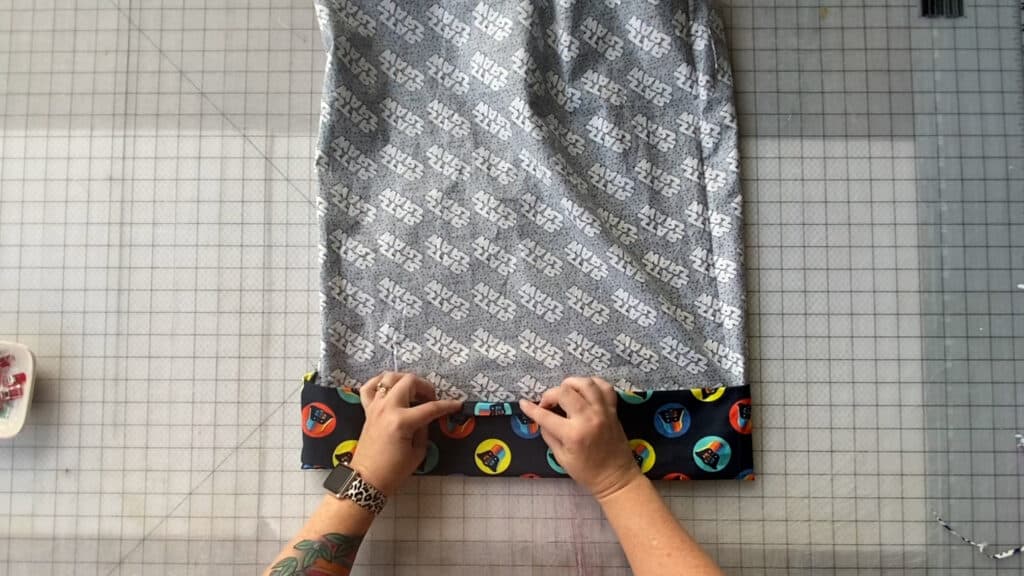
Using 1/2″ seam allowance, sew along entire circle, leaving 3″ opening for turning.

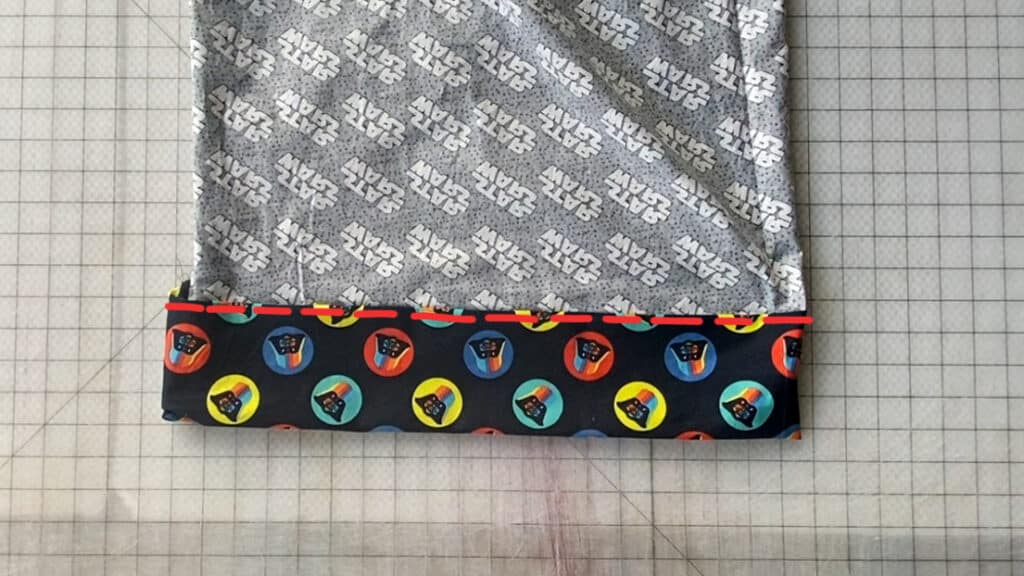
Turn right sides out. Tuck opening seam allowance in. Pin, and blind stitch the opening shut.

If desired, tack the front flap up — using buttons or a quick hand stitch.

You’re finished! Go wear your new Hickory Hat and then make 10 more. You know you want to!

——–

In case you consider yourself a more “visual learner” here’s a video tutorial that walks you through the entire tutorial, start-to-finish.

Check out what our fabulous testers were able to create with this very same tutorial!

I la-la-love when you share your photos with me!  Head over to the Patterns for Pirates Facebook Group and show us what you’ve made!

Happy Holidays, Pirates!

Filed Under: Free Pattern, Pattern Release Leave a Comment

2020 Holiday Freebies :: Pirate Pillowcase Tutorial

December 2, 2020

Happy Holidays, Pirate Friends!  We are excitedly back for another year and another round of holiday freebies to share with you!  Over the years, we’ve compiled different tutorials and patterns that we think would make *perfect* gifts for your friends and family. Curious about what we’ve already released in the way of holiday freebies? Head right here to see all of them: Holiday Freebies Roundup.

Today, we are bringing you the: Pirate Pillowcase!!

Pillowcases are such a fun, quick sew. And they make perfect gifts because they’re easy to customize to anybody’s liking. My mom used to be in a “Pillowcase of the Month Club” when I was in college and she would send me a new pillowcase each month. It was so fun to have something from home, and a fun surprise to see what fabrics she selected for me each time.

Pillowcase SizeCuff (L x W in inches)Body (L x W in inches)
Standard9″ x 41″23″ x 41″
Queen9″ x 41″27″ x 41″
King9″ x 41″33″ x 41″

You will need: 1 Cuff Piece and 1 Main Body piece.

With right sides together, align the top long edge of the main body and bottom long edge of the cuff piece.

Sew along long, raw edge, using 1/2″ seam allowance.

Open up the sewn pieces. Using an iron, press the seam allowance up, away from the main body.

Using your iron, create a 1/2″ memory press the top raw edge of the cuff piece.

With wrong sides together, fold in half, matching the short ends together — creating your pillowcase shape.

Using 1/4″ seam allowance, sew along side and bottom seams.

Trim seam allowance down to 1/8″. Careful not to clip through your stitches.

Turn the pillowcase inside out.

Using 1/4″ seam allowance, sew along entire bottom and side seams, enclosing all raw edges.

Keeping the pillowcase inside out, fold the cuff piece down toward the body.

Use the 1/2″ memory press you created earlier to fold the top raw edge under.

Align the folded edge along the seamline.

Using a scant 1/8″ stitch, topstitch around the entire cuff.

Turn the pillowcase right sides out. Press. And stuff it with a pillow! You’re done!

In case you consider yourself a more “visual learner” here’s a video tutorial that walks you through the entire tutorial, start-to-finish.

Check out what our fabulous testers were able to create with this very same tutorial!

I la-la-love when you share your photos with me!  Head over to the Patterns for Pirates Facebook Group and show us what you’ve made!

Happy Holidays, Pirates!

Filed Under: Free Pattern, Pattern Release Leave a Comment

Protected: Fabric for Pirates :: November 2020 Reveal

November 5, 2020

This content is password protected. To view it please enter your password below:

Filed Under: Fabric for Pirates, Uncategorized 6 Comments

Protected: Fabric for Pirates :: October 2020 Reveal

October 10, 2020

This content is password protected. To view it please enter your password below:

Filed Under: Fabric for Pirates 10 Comments

New Pattern Releases :: Vintage Jumper

October 1, 2020

Happy October, y’all!  We are beyond thrilled to be sharing with you our newest release: the Vintage Jumper!  The youth sizes range from 3m – 14 and the adult sizes are for the full, newer size chart, extending from XXS – Plus 5X!  If you haven’t sewn with us in a while, please make sure to check the size charts, as there were slight adjustments made to accommodate the new size range for adults.


The Vintage Jumper gives you an adorable retro feeling with a snug waistband right on the natural waist, slim through hip and flares out down the legs. The simple cross strap back adds to the vintage look along with the pocket styles. You can create a cute jumper with the skirt options or an overall/dungaree with the pant options! You can layer under for warm or cold weather and keep these in your wardrobe year round! Drafted for a stretch woven you can pick up so many different adorable fabrics to sew up.

Options include: mini skirt, above-knee skirt, shorts, capri and pants lengths.  There are also all the pockets you could ever need, with optional front, back and bib pocket options!

Also included in these patterns are videos, to help compliment our tutorials and help you on your way to some happy sewing!  You don’t have to fear the zipper anymore because this tutorial includes TWO videos with step by step guide on both methods on inserting the zipper.


**Want to learn more about how to measure yourself for this pattern?  We’ve got you covered with an in-depth blog HERE.  And in case you’re new to Patterns for Pirates and PDF patterns in general, we have a great blog full of new-user tips HERE to help you get started!  As with all of our current releases and updates, the pdfs now include our layers feature and can be found in Letter, A4, A0 and projector sizes.  And for even more helpful fun, we have a *free* printable that you can use to help record your measurements as you take them.

Let’s take a quick look at the different lengths and features!

MINI + ABOVE-KNEE SKIRTS
SHORTS LENGTH
CAPRI LENGTH
PANTS LENGTH

What are you waiting for?  Head on over and grab yourself a copy of these delightfully retro patterns!  The Vintage Jumpers are available on sale (no code needed) through 11:59pm CST, October 8, 2020.

VINTAGE JUMPER | VINTAGE JUMPER – YOUTH | VINTAGE JUMPER – BUNDLE

Maybe hoping for a little more inspiration before you make the purchase?  Head over to our Facebook group where you can see tester albums full of amazing images!  Adult Album / Youth Album

If you’re looking for even more options, we show you a few more ways you can use this pattern in our Vintage Jumper Easy Hacks post including how to skip the zip or buttonholes!

Filed Under: Pattern Release Leave a Comment

P4P University- Waistbands

September 21, 2020

Ahoy Pirates! Today, we’re talking waistbands. We’ll cover some of the different types of waistbands that you’ll generally see in P4P patterns, the best fabrics and materials for constructing them, and some helpful tricks and tips to getting the very best results.

Types of Waistbands

There are many different types of waistbands out there in the wide world, but today I’ll cover some of the most common ones you’ll see in apparel sewing and in many P4P patterns.

First off, let’s talk about knit waistbands. These waistbands can be normal or high-rise, and are stretched to fit a garment’s waist.  Knit waistbands will need to be made with knits with excellent stretch and good recovery. You’ll want to look for fabrics like brushed polyester, cotton lycra, or cotton ribbing to make these. This type of waistband is easy to sew, with no casings, elastic or fancy stitching required. Hurray!

Generally with this type of waistband, you’ll line up the short ends of the waistband piece, right sides together, and stitch. Next, flip the waistband so the right side is up, then fold in half lengthwise, wrong sides together, and press. From there, you will quarter the band with pins and attach (more on quartering waistbands and other tips later)!


Here, I’ve used double brushed poly to sew a knit waistband onto a pair of Peg Legs. I’ve simply attached it by stretching it evenly, and sewing it to the garment with my serger, although a sewing machine will work just as well. Make sure to use a stretch stitch, like the lightening bolt, at the longest length setting!


Next up, we have  tall/yoga waistbands. Yoga waistbands are made and constructed similarly to regular knit waistbands, but are simply “taller” and meant to be folded over for a even more comfortable fit. I especially like using yoga waistbands on clothing for children, as they are super comfy to wear! Brushed polyester and cotton lycra are excellent choices for these. I’ve used a yoga waistband here on a pair of Baby Bear Joggers, using brushed polyester.


Next,  we have enclosed elastic waistbands. Generally, this type of waistband is used for knit garments that have a little less vertical stretch or recovery and need a little “help” holding the garment up around the wearer’s waist.

To construct, you will sew together the short ends of the waistband casing, right sides together. Next fold lengthwise, wrong sides together, and press. Set aside. Take your elastic piece, and sew short ends together, using instructions for the specific pattern being used. Generally, you will be instructed to either overlap the two short ends and sew, or “butt up” the ends- pushing them together and sewing with a wide zig-zag stitch, but not overlapping. Next you will slip the elastic loop into your knit waistband casing, and sew together as one piece onto your garment. You may topstitch this seam afterwards, if desired.

Here, I’ve made a pair of SOS Knit Pants with an enclosed elastic waistband. Although the fabric I used was a jegging material with little vertical stretch, the added elastic I used helps give the little bit of extra “oomph” needed to keep the pants up around my waist and snug-fitting.


Another style of waistband you’ll see often in apparel sewing is exposed elastic waistbands. These are waistbands that you’ll see in many applications, such as athletic shorts or undergarments. These will be generally created using plush back, underwear, or soft waistband elastics. It’s important to use these types of elastic, especially for undergarments, as they are much more comfortable and soft, and elastic will be up directly against the wearer’s skin.

On patterns such as the Fierce Undies pictured here, the elastic used will be “butted” together before being sewn, not overlapped. This is because overlapping will make the exposed elastic waistband too bulky.


Tips and Tricks

Just as there are many different types of waistbands out there in the sewing world, there are just as many tips to make sewing them easier! Here are just a few to help you along the way:

1. With knit, yoga, and enclosed elastic waistbands, serge or baste the raw edges together once you’ve folded lengthwise, wrong sides together, and before attaching to the garment. This will essentially take those two layers of fabric of the folded waistband and turn them into one, making it easier to attach them to the garment in a clean and professional-looking way. Remember, if you serge the raw edges of your waistband before attaching it to your garment, DO NOT CUT ANY OFF!

2. ALWAYS quarter your waistbands before attaching them to a garment! What is quartering? It’s equally dividing the waistband into fourths, so you can better ensure that the waistband will be evenly stretched across the garment’s waist.  It’s easy to do:

 First, sew the waistband or elastic together at the short ends, as directed by the pattern. Pin or mark the point of the seam.

Next,  fold in half to find the half point. Pin or mark the half point.

Now, take the two marked points (the seam and half point) and fold the waistband or elastic so that they meet in the center. Pin or mark the folded edges on either side to find the quarter points.

And there you have an evenly quartered waistband! This might sound like an extra step, but trust me, it’s one that will save you time by                          ensuring that you don’t have an unevenly stretched waistband (hello, seam ripper!) and will give you the most professional- looking finish.


3. SAVE your scraps! Especially with youth apparel, waistbands usually take very little fabric, and can be excellent scrap-busters. So next time you make something with a stretchy fabric with great recovery, make sure to stash those extras away for a rainy day!


That’s it for now! Just a few examples of some of the waistbands you’ll encounter while sewing some gorgeous, handmade apparel. No matter which waistband is required for your pattern, always make sure to quarter those bands, have fun, and share your beautiful makes with us over at Patterns for Pirates’ Facebook page!

Caitlin

Filed Under: Frequently Asked Questions, P4P University, Uncategorized Leave a Comment

Fabric for Pirates:: A Monthly Subscription Box

September 15, 2020

We couldn’t be more excited to announce our newest Pirate fun to all our Pirate Friends!  You can now sign up for our super fun and simple monthly subscription: Fabric for Pirates.  You will get a few things at the beginning of every month to brighten your month and give you some motivation to get some sewing done! The subscription is charged at the first day of each month (you can sign up or cancel anytime between) and we will ship your goodies to you by no later then the 10th of each month.

What will you get?

You will receive 2 yards of knit fabric.  This could be any kind of knit fabric from french terry, double brushed poly, cotton jersey, sweater knits, etc… We promise that it’ll always be seasonally appropriate, and we will avoid sending duplicate fabric types within consecutive months.  We want this to be a learning experience as well, so we want you to try out as many fabric types as you can!

Most months we will be sending 2 continuous yards of fabric, but we could throw in two 1 yard coordinate pieces too! The options are endless!


Along with the fun mystery fabric we will be adding a little “sewist swag”… just a little something extra we think most sewists will love! This could be a pin, patch, sewing tool, vinyl press on, etc.

We will also be working hard to provide some exclusive inspiration for your fabrics by showing you videos and pictures of what the pirate crew made each month, and maybe throwing in some tips for working with the different fabric types.

Maybe you immediately knew the ::perfect:: pattern to go with your fabric that month, but didn’t have it in your pattern stash yet.  Well don’t worry!  Because we are also going to include an exclusive discount code for you just in case you need to pick up a pattern for your new fabric!

The spots are limited! So don’t wait to sign up! <3

FABRIC for PIRATES MONTHLY SUBSCRIPTION

Want to hear how cute Katy is explaining our new subscription? Here she is!

https://www.patternsforpirates.com/wp-content/uploads/2020/09/video-1600133633.mp4

Filed Under: Announcement 3 Comments

The Peg Event :: Casual Style Inspiration

September 8, 2020

Welcome back to another day of The Peg Event! We hope you are loving our newest release of the Peg Legs – Colorblock Pack and update to the beloved Peg Legs, and Peg Legs – Add-On Pack!

Before we get to the main event, I’d like to remind you that we’ve got a sitewide sale happening from now until Saturday, September 12.  In addition to that, we’ve got an awesome giveaway happening, with 14 amazing prizes (and 14 amazing prize winners)!  You can read all about The Peg Event HERE.


We’ve got another set of incredible testers that wanted to help provide some P4P Style Inspiration!  They always seem to know just what to wear, and how to look amazing at all times.  So we asked what their favorite things to pair the Peg Legs / Peg Legs – Colorblock Pack / Peg Legs – Add-On Pack with were…and here’s what they came up with for some casual, every day looks.

Lindsay Chalmers paired her Peg Legs with an Essential Tank.

Kim L Pomeroy paired her Peg Legs with a Favorite Tee + Cocoon Cardigan.
Amy Highsmith paired her Peg Legs – Colorblock Pack with a Ragdoll Raglan.

Feeling inspired yet?  I am!  Here are some links to all of our FREE leggings patterns, so you can get to sewing!

PEG LEGS | PEG LEGS – ADD-ON PACK | PEG LEGS – COLORBLOCK PACK

Before you go, we’ve got giveaway prizes to tell you about!  Sponsoring today’s portion of The Peg Event are two amazing fabric companies!


PURPLESEAMSTRESS FABRIC – www.purpleseamtressfabric.com
FACEBOOK GROUP | FACEBOOK PAGE

Purpleseamstress Fabric sells knit fabrics of all kinds:  cotton/lycra, cotton/lycra French terry, double brushed poly spandex, rayon spandex, hacci sweater, ponte, etc., in solids and in prints.  For Peg Legs they highly recommend the 4way stretch ponte, my solid cotton/lycra in 12 or or my solid cotton/lycra black 16 oz.  There is also a fabulous supplex, which is a very nice athletic, high performance knit.

One lucky winner will receive a $75 gift certificate!

BOW BUTTON FABRICS – www.bowbuttonfabrics.com
INSTAGRAM | FACEBOOK GROUP

Bow Button Fabrics offers premium knit fabrics, sewing notions, hand-picked style boxes monthly and lots more. The shop recently relocated to Fort Irwin, California and just reopened this month! There are lots of incoming fabrics in Sept/October to restock fully now that the cross country move is complete. The best fabrics that BBF carries for peg legs would be the Athletic Brushed Polyester Spandex in 265 gsm. It has 4-way stretch, is anti-microbial, wicks moisture and has +50 UV protection. They have been described as the best basic black legging fabric, it’s opaque and not too thick so you can wear it year round. There are almost 40 colors that ABP comes in and though the preorder just closed (9/5) there will be some retail later this month or by early October. Black, as well as some other staple colors, are typically carried year round in the BBF shop.

Three lucky winners will receive ABP 265 gsm in Black (international shipping will be at cost of the winner minus $8).  On top of that, there is a 20% discount TODAY ONLY, using the code: P4P20.

**Daily and Grand Prize winners will all be announced together on Sunday, September 13.

Filed Under: Contest/Giveaway Leave a Comment

The Peg Event :: Sale, Release + Giveaway!

September 3, 2020

SURPRISE Pirate fans!  We are filling your next ten days with as much fun as we could think up!

Make sure you visit the blog each day because from September 3 – September 12 we’ve got:

  • GIVEAWAYS,
  • a SITEWIDE SALE,
  • a re-RELEASE of the beloved Peg Legs Leggings Pattern,
  • a NEW RELEASE of a Peg Legs – Colorblock Pack,
  • EASY HACKS for the Peg Legs,
  • INFORMATIONAL VIDEOS for your Peg Leg sewing assistance,
  • and STYLE INSPIRATION from some amazing sewists in our community!

Because this week is all about our love of the Peg Legs pattern, let’s talk shop first.  The Peg Legs Legging pattern has had a few tweaks, including an update that extends the sizing of it.  We now cover the size range of XXS – Plus 5X, which means that now even more pirate booties can fall in love with Pegs.  In addition to the size range adjustments, we’ve also added a brand new version of the Peg Legs, in the form of the Colorblock Pack!  Get ready, because you’re going to swoon.


Go grab the new Peg Legs – Colorblock Pack Now!

Just like the Peg Legs and Peg Legs – Add Ons, this is a FREE pattern…no code necessary.  What are you waiting for??

If you’re ready to hear more about the Peg Legs Update, or want to know all the details that come along with the Colorblock Pack…don’t worry.  We will be covering all of the details here on the blog tomorrow!


If you’ve never sewn Peg Legs before, or just need a little refresher course, I would highly recommend heading over to our Peg Legs 101 post.  It’s full of resources that will help you get to sewing your most perfect leggings ever.

You can also find some help on our website for things like: How To Measure Yourself | New User Tips | How To Use the Layers Feature in our PDF Patterns | A0 (Copy Shop Sized) Printing Help | A Free Printable Measurement Chart

Alright, let’s talk GIVEAWAY!  We’ve got a total of FOURTEEN prizes that can be yours.  And you can enter as many times as you want during the next ten days, in order to try for one of the prizes.  So exciting!

Thanks to our amazing fabric shop sponsors, we have daily prizes to give away!

Wanderlust Designs Inc | The Styled Magnolia Custom Fabrics | Sly Fox Fabrics | Over the Selvage | Raspberry Creek Fabrics | Sew Dynamic Fabrics | Purpleseamstress Fabric | Emerald Curtain Fabric | Hissy Fit Fabrics | So Sew English Fabrics | KnitFabric.com | Fabric Fairy | Bow Button Fabrics

Along with all of those amazing fabric prizes, we have a GRAND PRIZE for one lucky pirate!!  If you want to sew more Peg Legs and P4P clothing items, it’d help if you had some shiny new machines, wouldn’t it?  Someone is going to be receiving both of these machines, shipped straight to your home!  Brother 1034D Serger | Brother 2340CV Coverstitch  And, to sweeten the deal, you get to pick out 20 (TWENTY!!!) Patterns for Pirates patterns that you’d like dropped into your account for free.  How about them apples?

Are you ready to play?  Here’s how!

A few more details:

  • The item sewn up and shared must be a P4P pattern that creates a piece of clothing. Think: shirt, pants, jacket, swimwear, etc.  (This just means no accessories like hats, scarfs, etc.)  You can use a free pattern as long as it is clothing, like the Tulip Tee or Peg Legs.
    • You need to sew it up as is, with only fit changes (no hacks or modifications).  Adding embellishments is great, just no major changes, pattern mashes, etc.  We want to be able to tell what pattern you used without having to ask!
  • Share your pictures on one or all of the social media networks for more chances to win with hashtag #P4PThePegEvent — it must be EXACT to come up in our search for the winner!
  • Let us know what P4P pattern you sewed up and what you’re most looking forward to winning.
  • You can share as many sews as you can for more chances to win, but ALL items/images shared must be sewn AFTER the giveaway starts 09/03/20!  Any older sews will be disqualified from winning either prizes. Last entries accepted will be 09/12/2020 at 11:59PM US Central Time.
  • Winner will be random lottery winner! This way, everyone has a chance from a beginner who might be sewing their first P4P to a seasoned apparel sewist!
  • Daily prize winners and Grand Prize winners will all be announced at patternsforpirates.com on 09/13/20.

Since you might need to grab a new pattern (or two….or three….or ten!) we have a SITEWIDE SALE running the entire length of this event!  Enjoy 30% off of your total purchase from today until September 12!

  • This will be the last site wide sale this year so grab them up while you can!!
  • Sale ends at the same time as giveaway entries: 09/12/20 11:59PM at Midnight US Central Time. 
  • There is a coupon code: PEGEVENT but it will automatically pop up at checkout and you just need to click to apply the discount! 


Filed Under: Announcement, Contest/Giveaway 5 Comments

X Factor Sew Along – day 7

September 1, 2020

Congratulations to all participants in this month’s sew along. You are all winners in my book!  We absolutely loved seeing all the X Factor crop and dresses made last week. Without further ado…

Our first winner is Jeanne T Weidner! Jeanne won a $20 gift card from Patterns for Pirates and a $25 one to Mily Mae Fabrics. The X Factor was Jeanne’s first sew along and she did fantastic! 


Congratulations go out to Kaitlin Schwartz too! Kaitlin will receive a $20 gift card for Made for Mermaids and a $25 store credit to Milly Mae Fabrics. Her little girl just shines in her mini X Factor dress. 


A huge THANK YOU to our sponsor, Mily Mae Fabrics who set our winners up with store credit and provided the gorgeous bamboo Lycra I used during the videos. You too can grab some here.


September is Mermaids month in the M4M & P4P Sew Along group. Colleen will be announcing which pattern we will be sewing together this month. 

X Factor SAL | day 1

X Factor SAL | day 2

X Factor SAL | day 3

X Factor SAL | day 4

X Factor SAL | day 5

X Factor SAL | day 6

X Factor SAL | day 7

Filed Under: Frequently Asked Questions, Sew-A-Long, Uncategorized Leave a Comment

  • « Previous Page
  • 1
  • …
  • 4
  • 5
  • 6
  • 7
  • 8
  • …
  • 29
  • Next Page »

connect with me

  • Email
  • Facebook
  • Instagram
  • Pinterest
  • YouTube
Privacy & Cookies: This site uses cookies. By continuing to use this website, you agree to their use.

To find out more, including how to control cookies, see here: Cookie Policy
  • Privacy Policy
  • Refund Policy
  • Contact Us
  • About

Copyright © 2026 Patterns for Pirates

Copyright © 2026 · Genesis Framework · WordPress · Log in