Patterns for Pirates

P4P stylish, modern, wearable patterns

  • Home
  • Blog
    • Frequently Asked Questions
    • Pattern Releases
      • Free Patterns
    • P4P University
      • Fitting
      • Sewing with Stretch, Knit Fabrics
      • Sewing with Woven Fabrics
      • Sewing Machines
    • Sew-A-Longs
    • Fabric for Pirates
    • Pattern Hacks
    • Announcement
      • Blog Tours
      • Contest/Giveaway
  • Shop
  • Bundle Discounts
  • Flash Friday
  • Gift Cards
  • My Account
  • Cart

Sunflower Swim top SAL – day 3

June 23, 2021

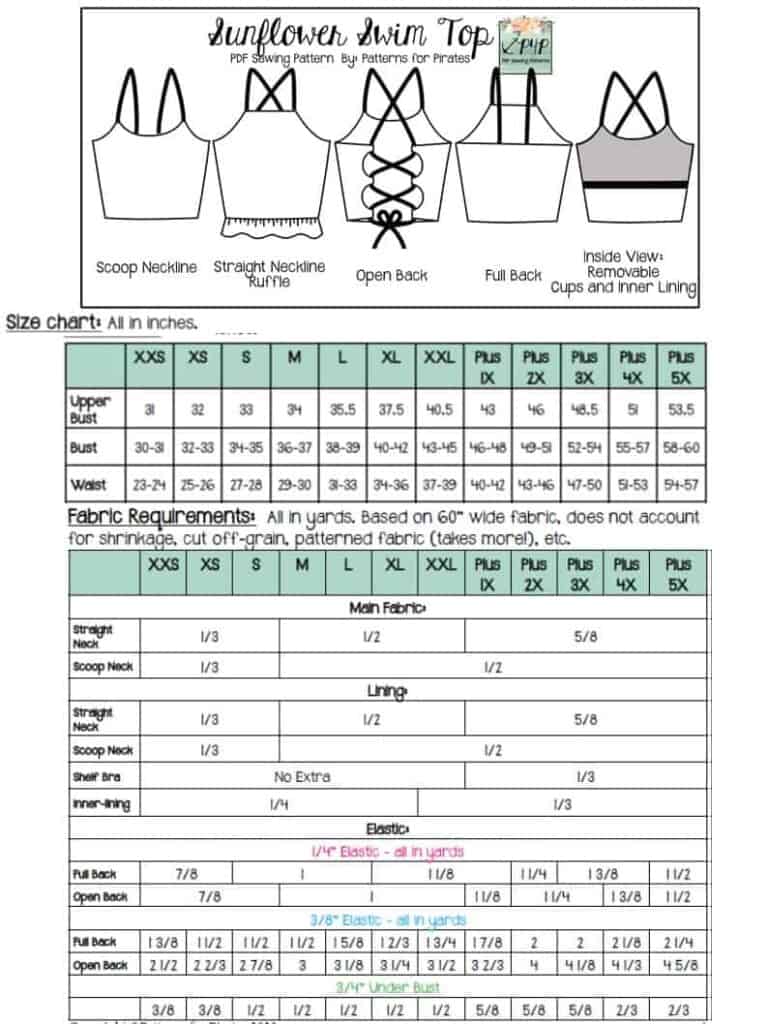
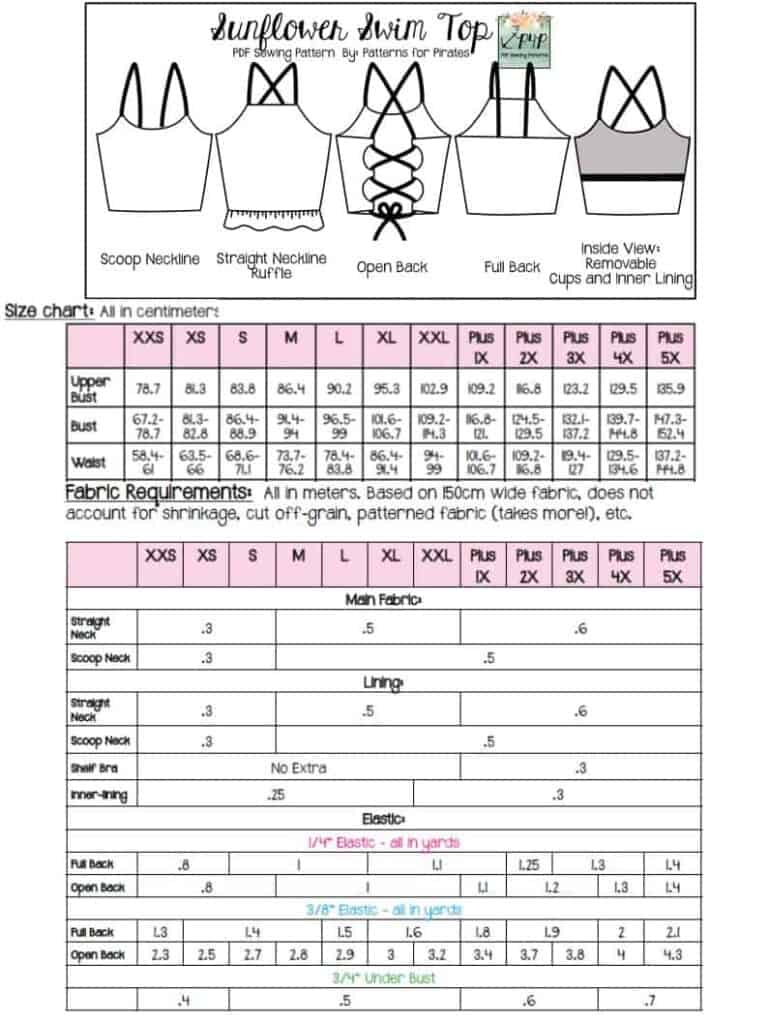
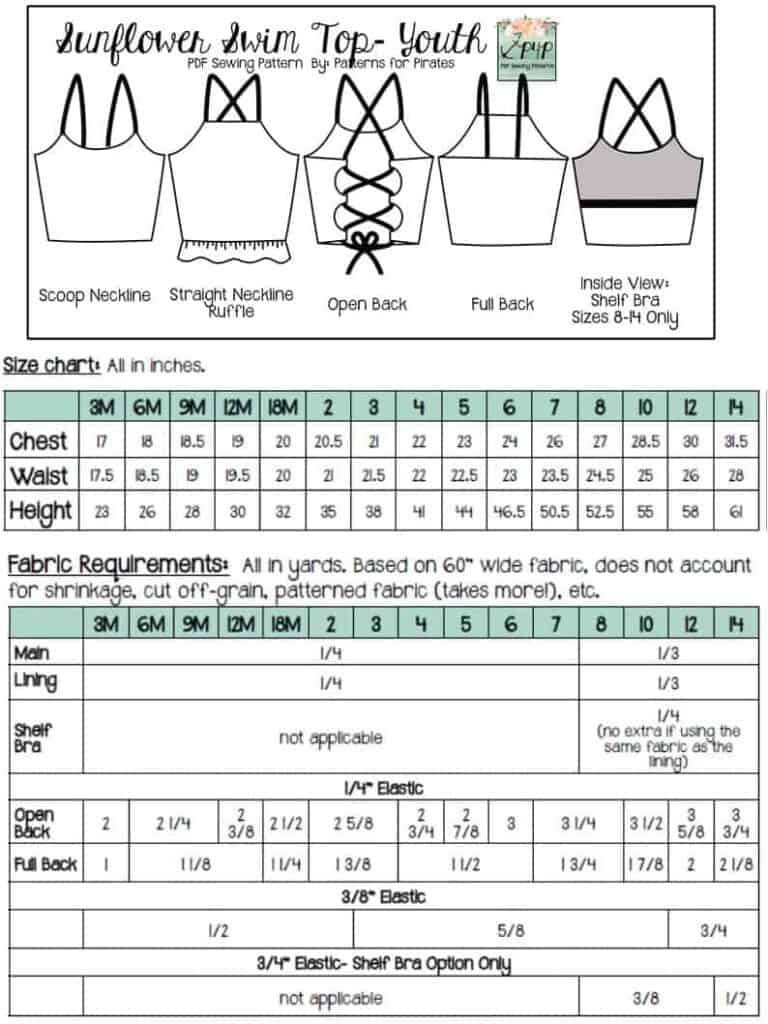
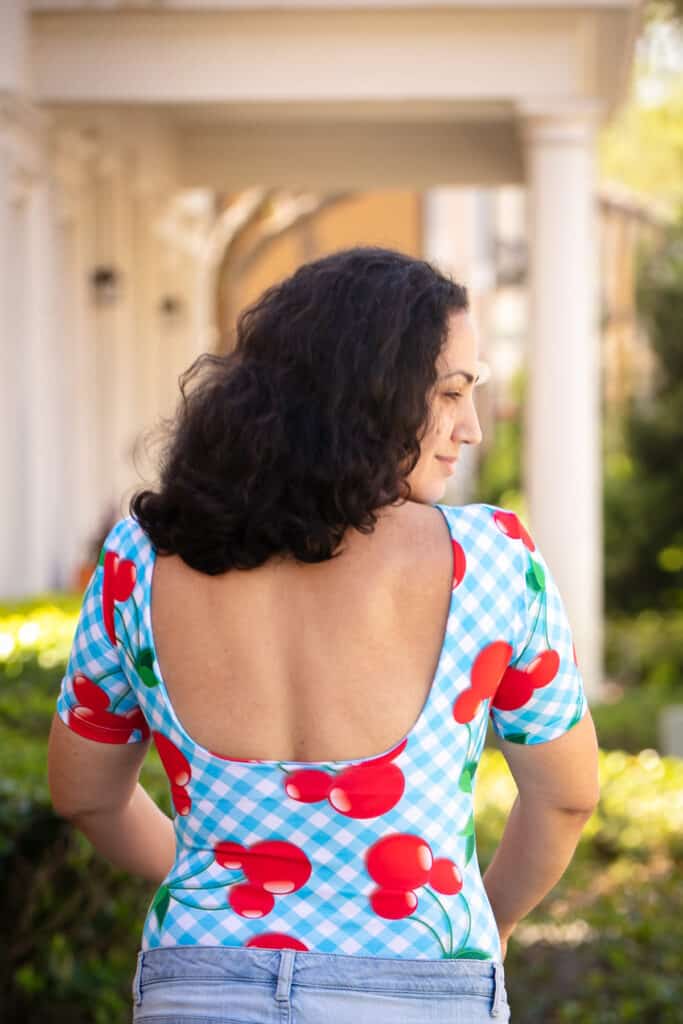
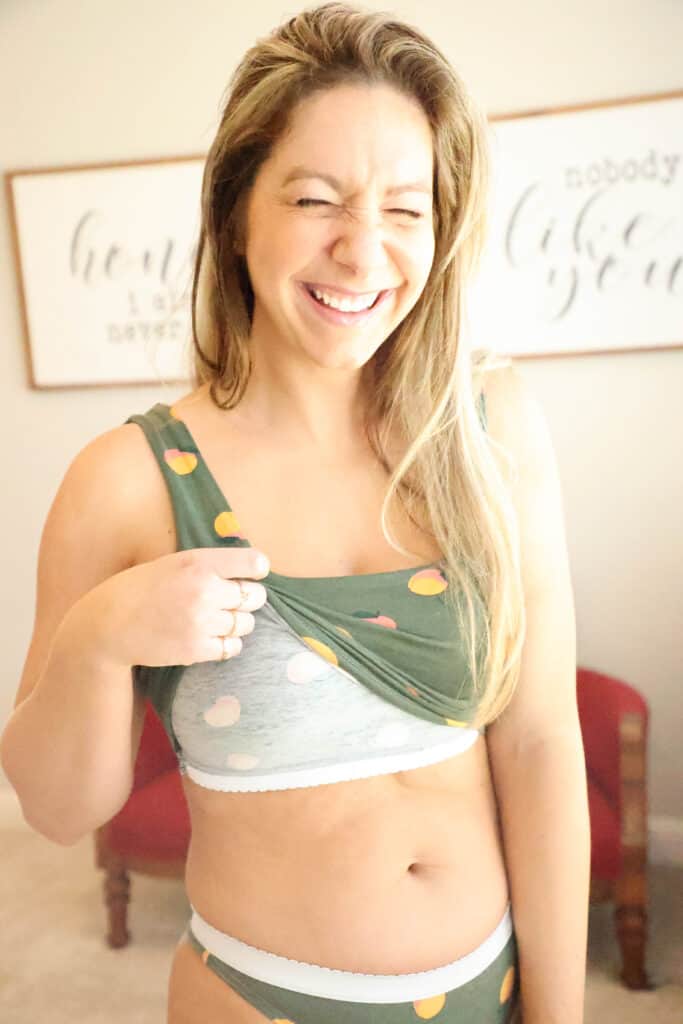
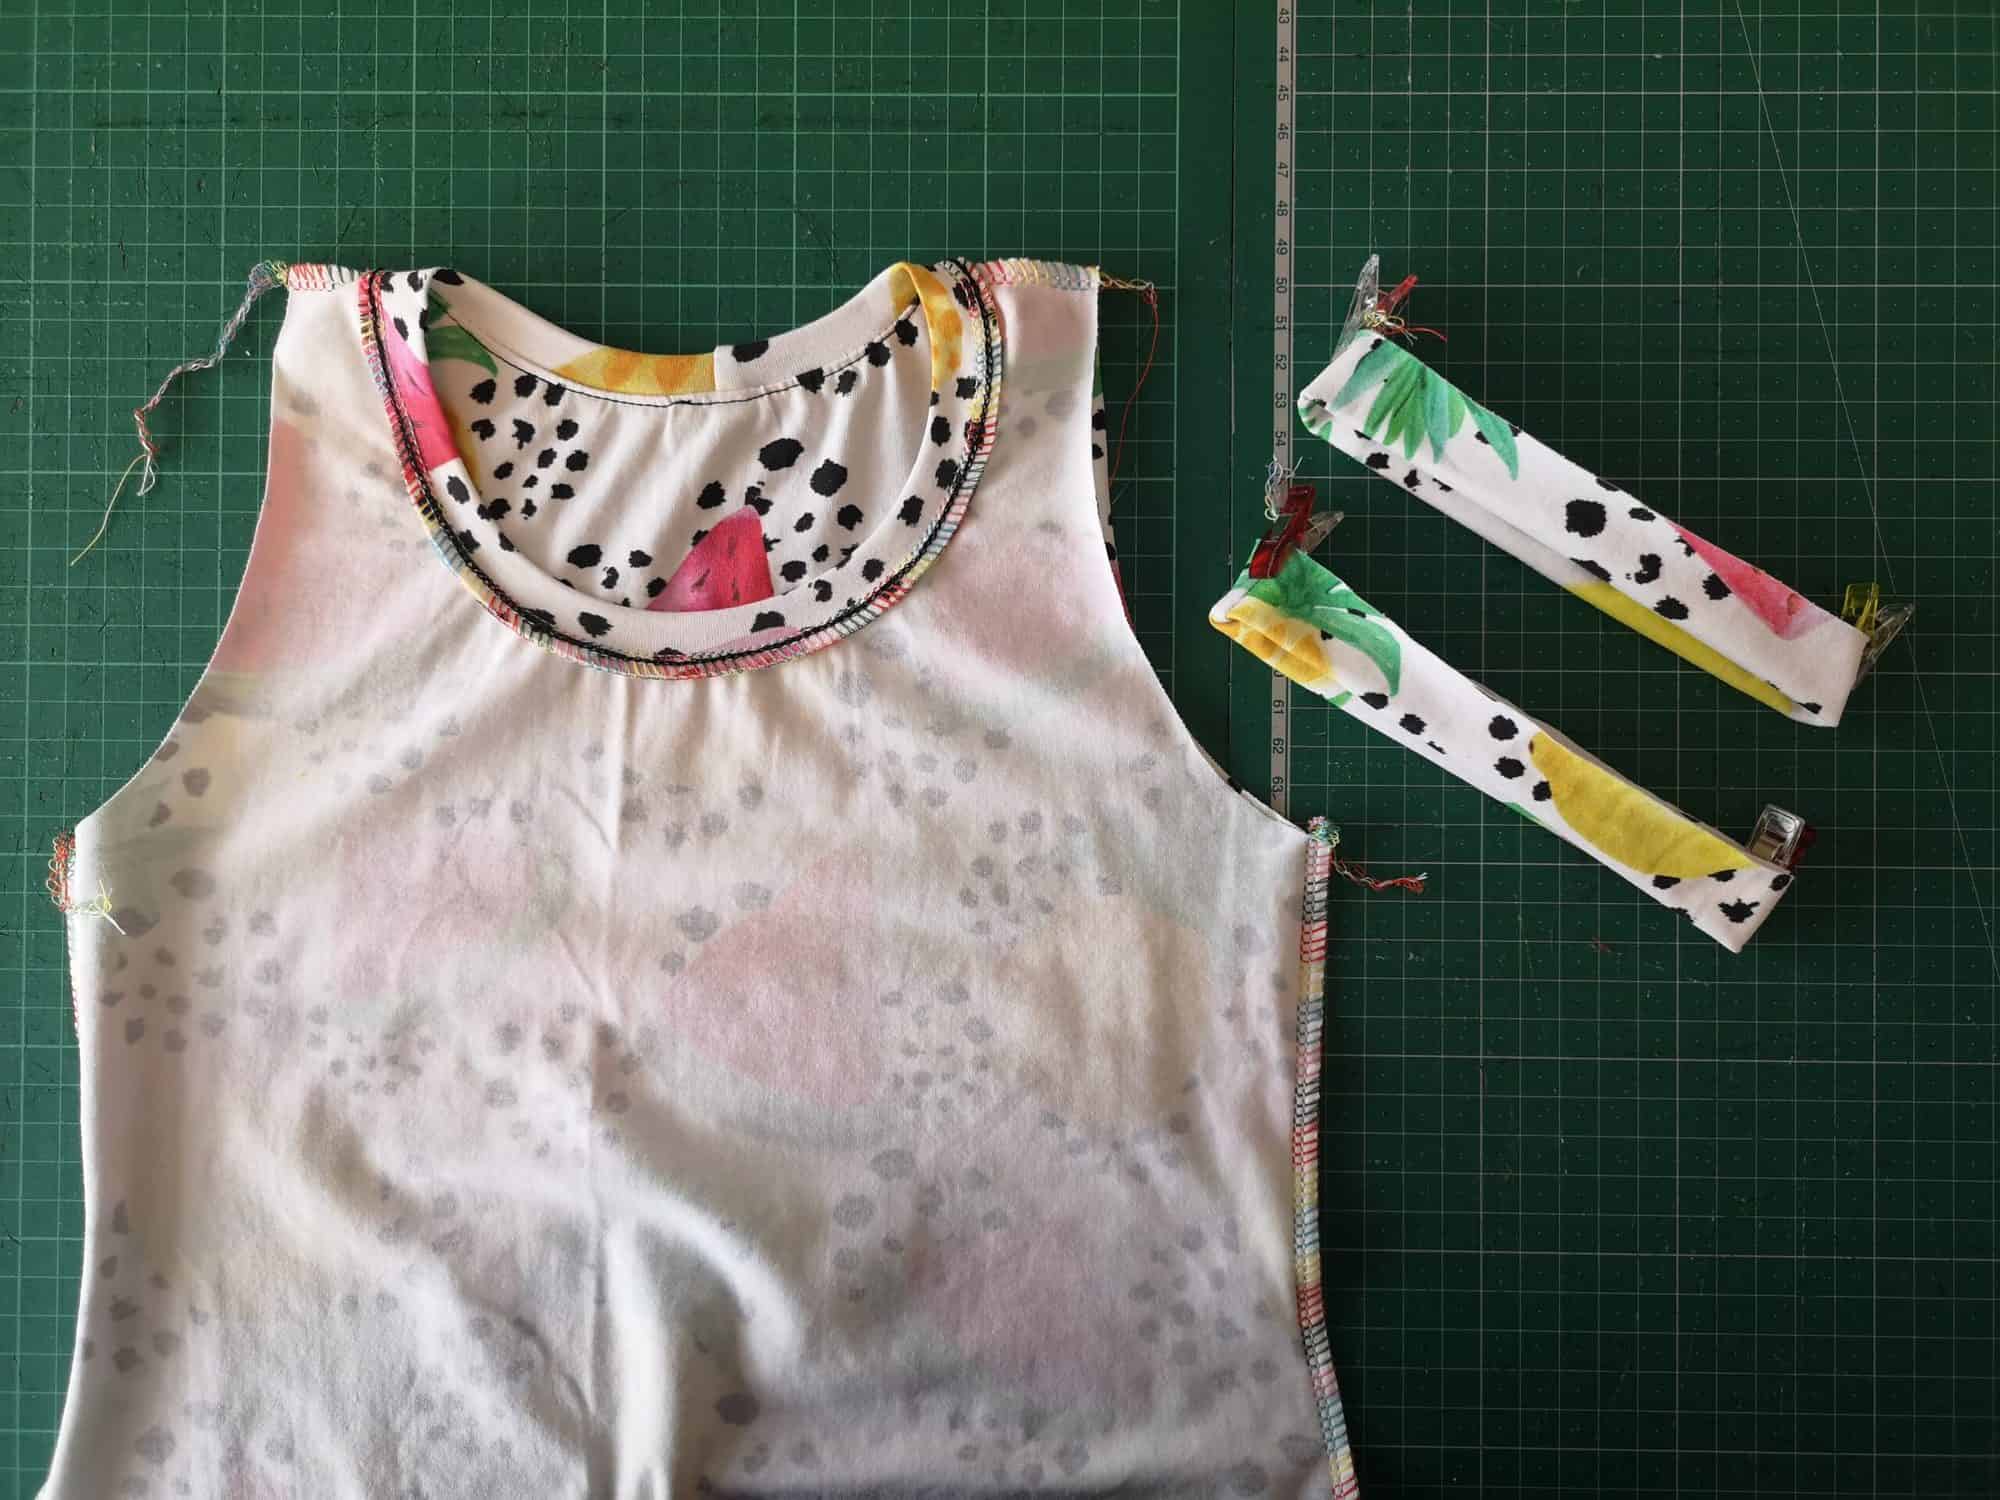
Hello, pirates! On day 3 we create the straps and sew the side seams. The Sunflower Swim top includes a full back and an open back option. The covered back straps are much shorter than the open back ones.

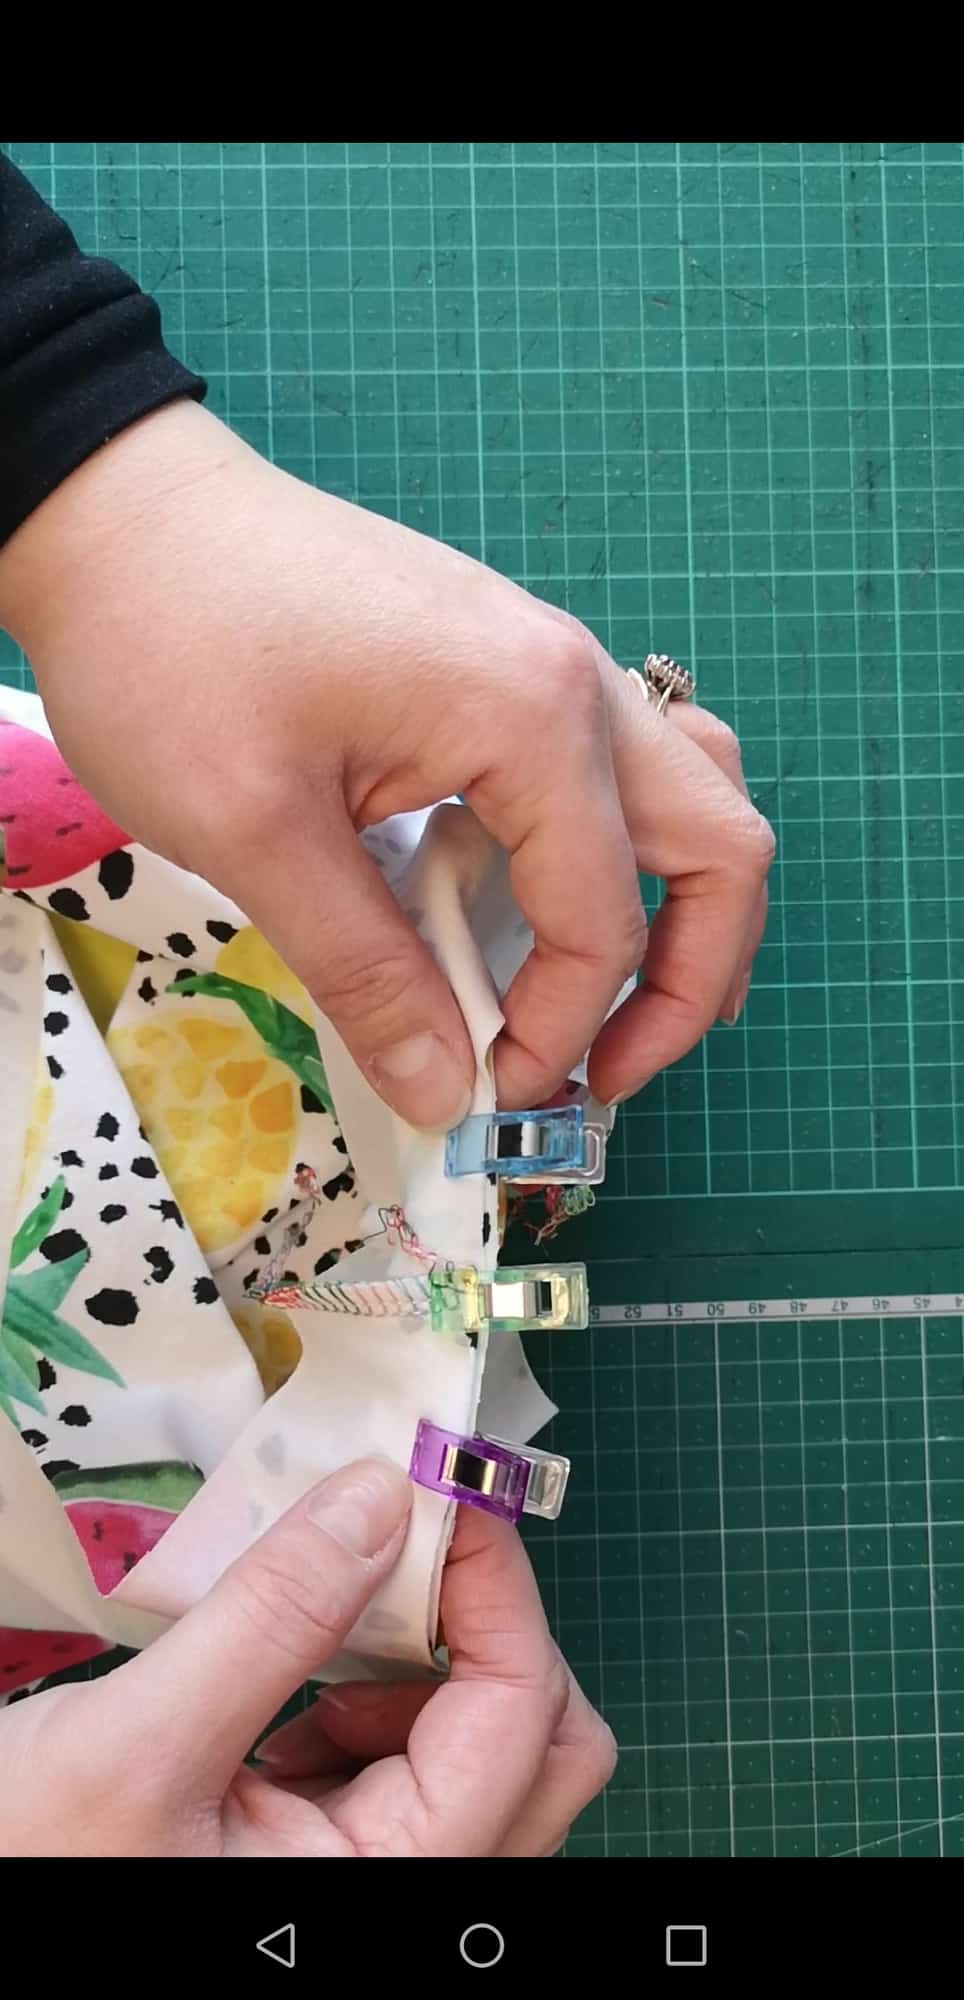
One of the most important tips I have for you for today is to not skip the elastic in the straps, regardless of which style swim top you chose. The straps are pretty much holding the rest of the suit in place. That, and the fact that swim fabric tends to “relax” in the water makes the straps elastic mandatory. 

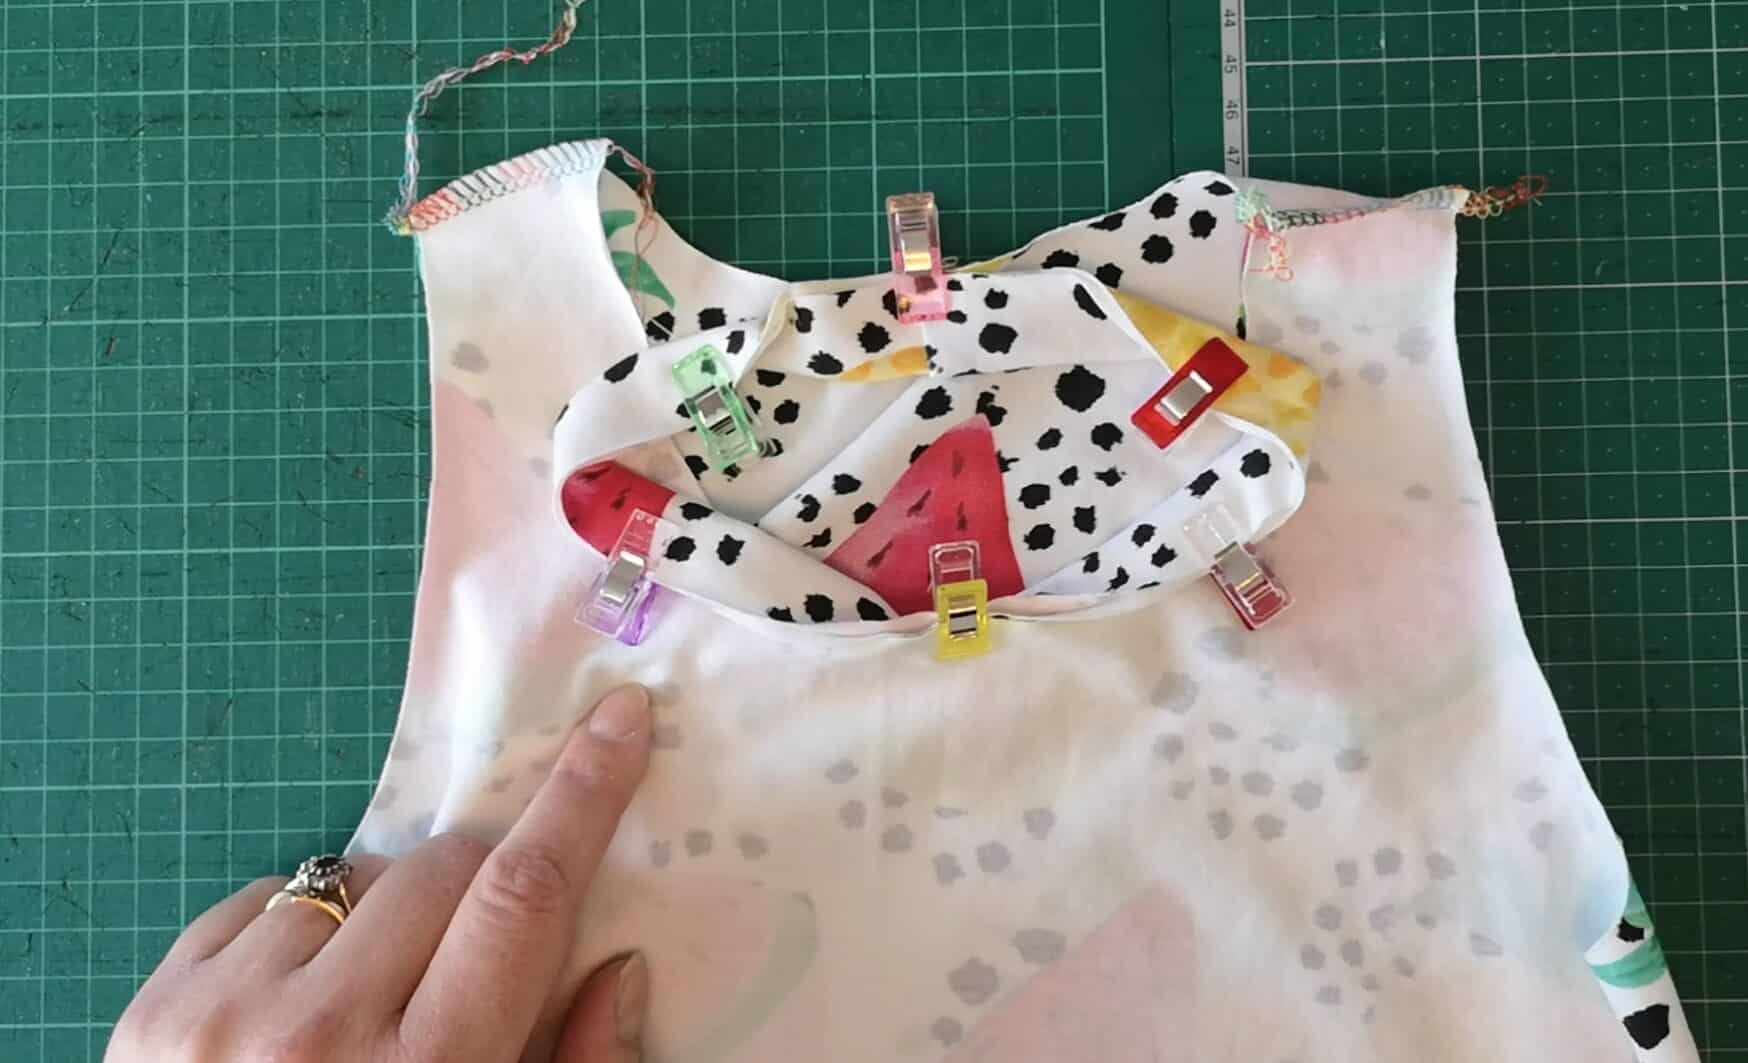
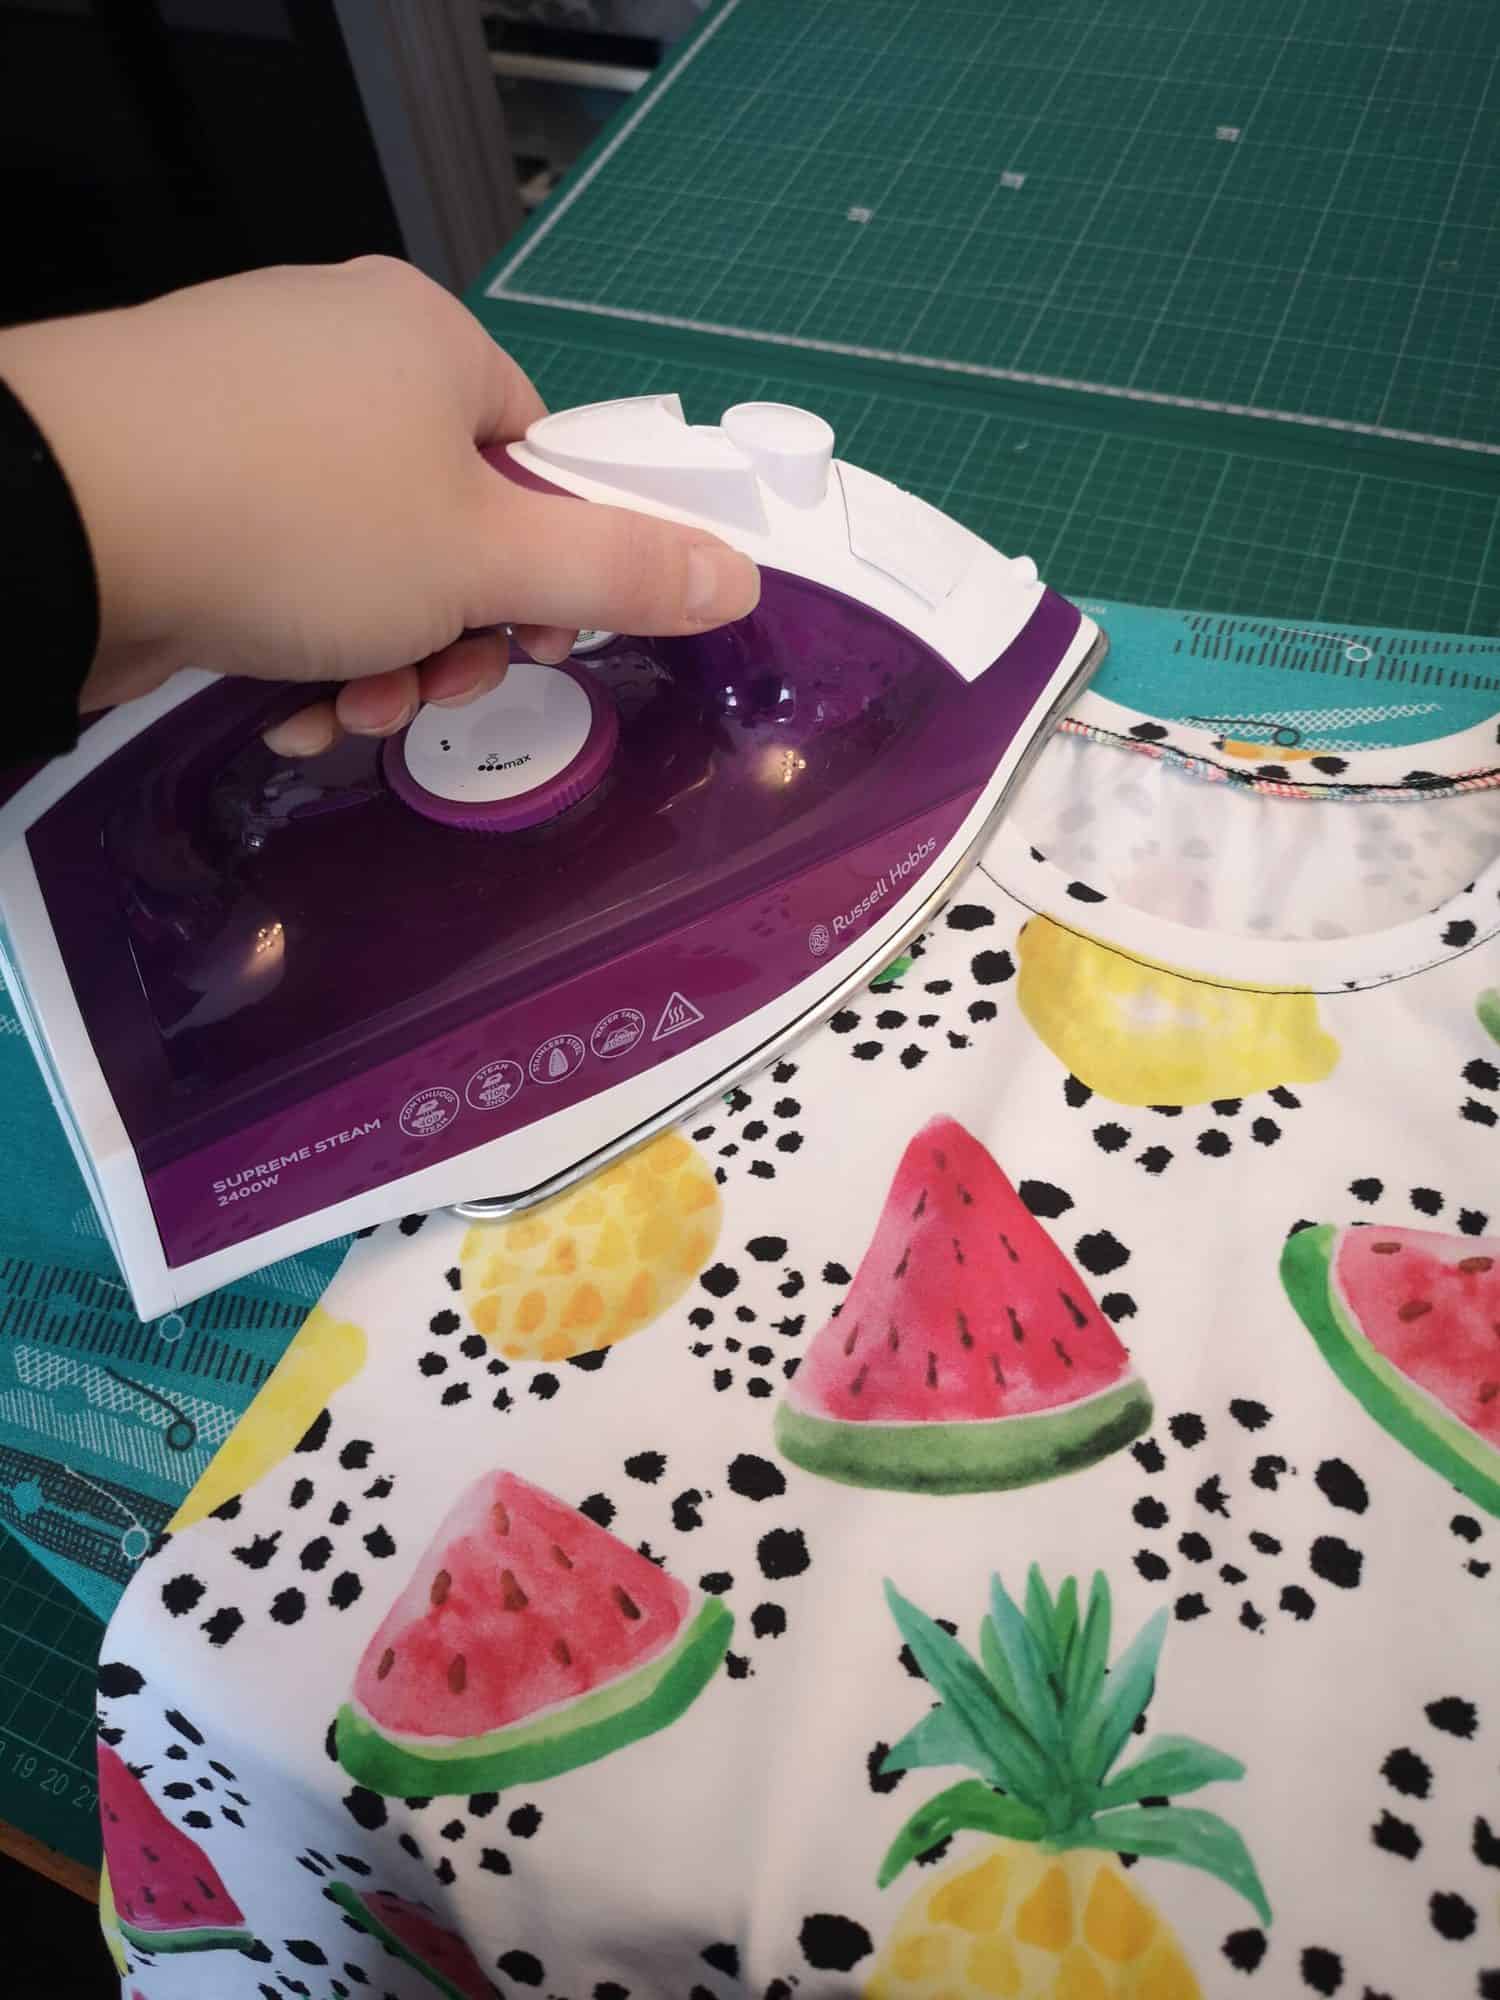
You can serge the elastic to the wrong side of the straps as Judy has in her videos or you can zig zag it on, as I did. Optionally, you can top stitch the straps along the center. Just make sure you use a stretch stitch or a chain stitch for that.

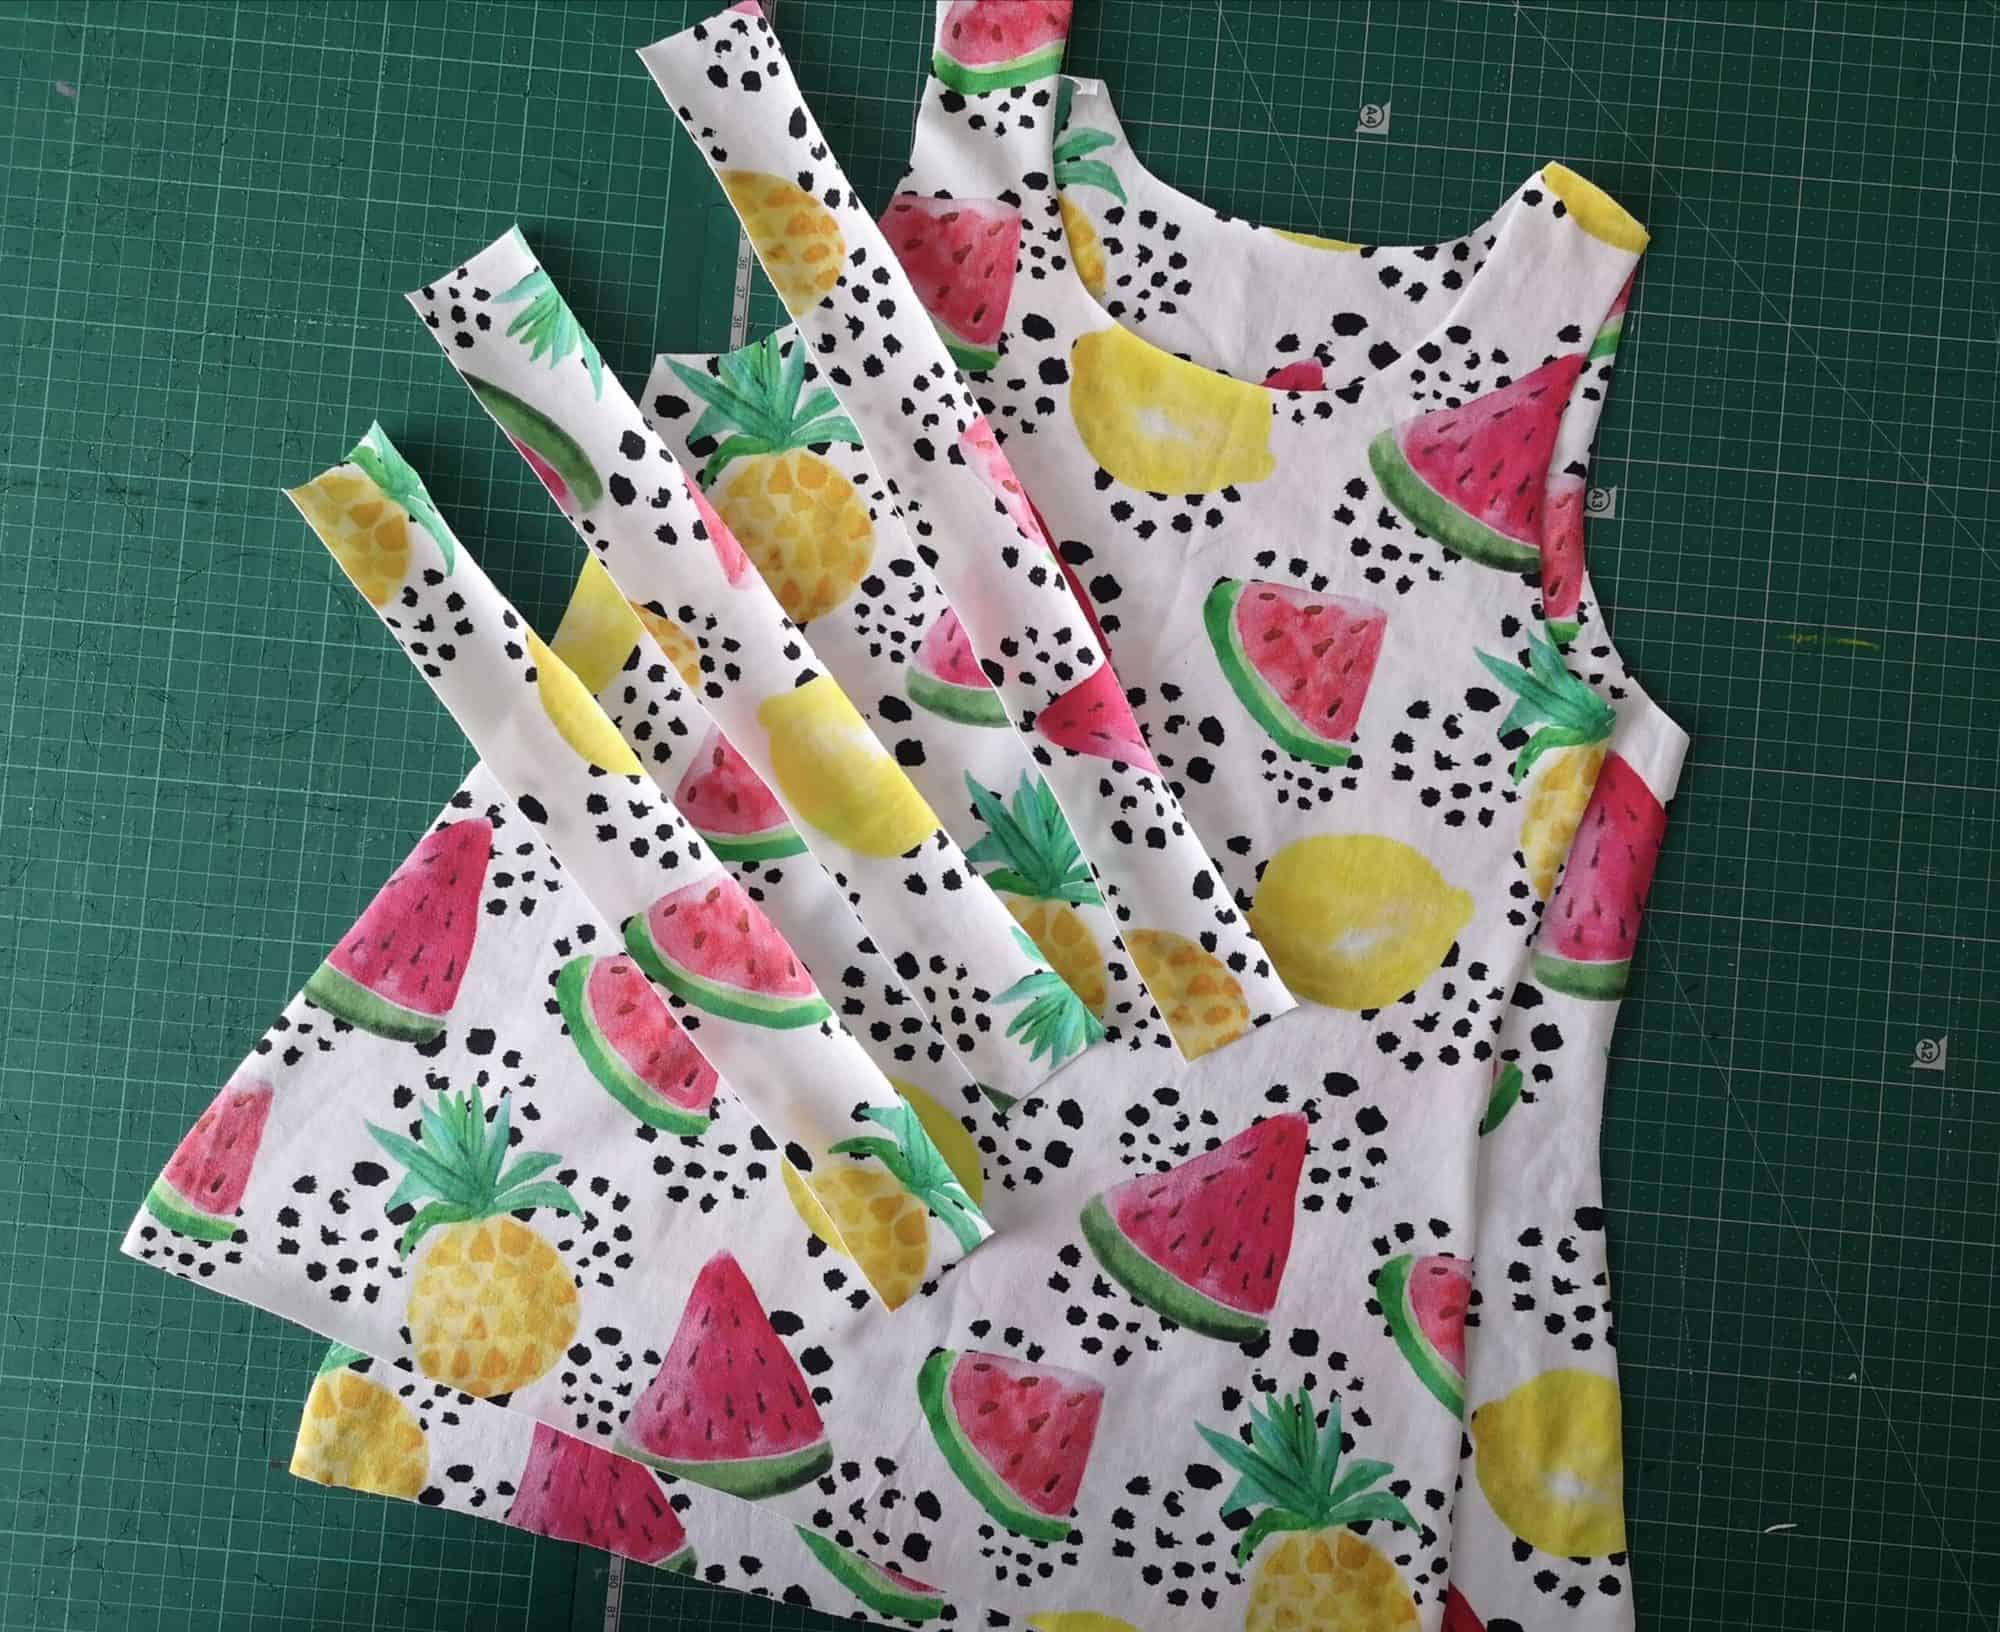
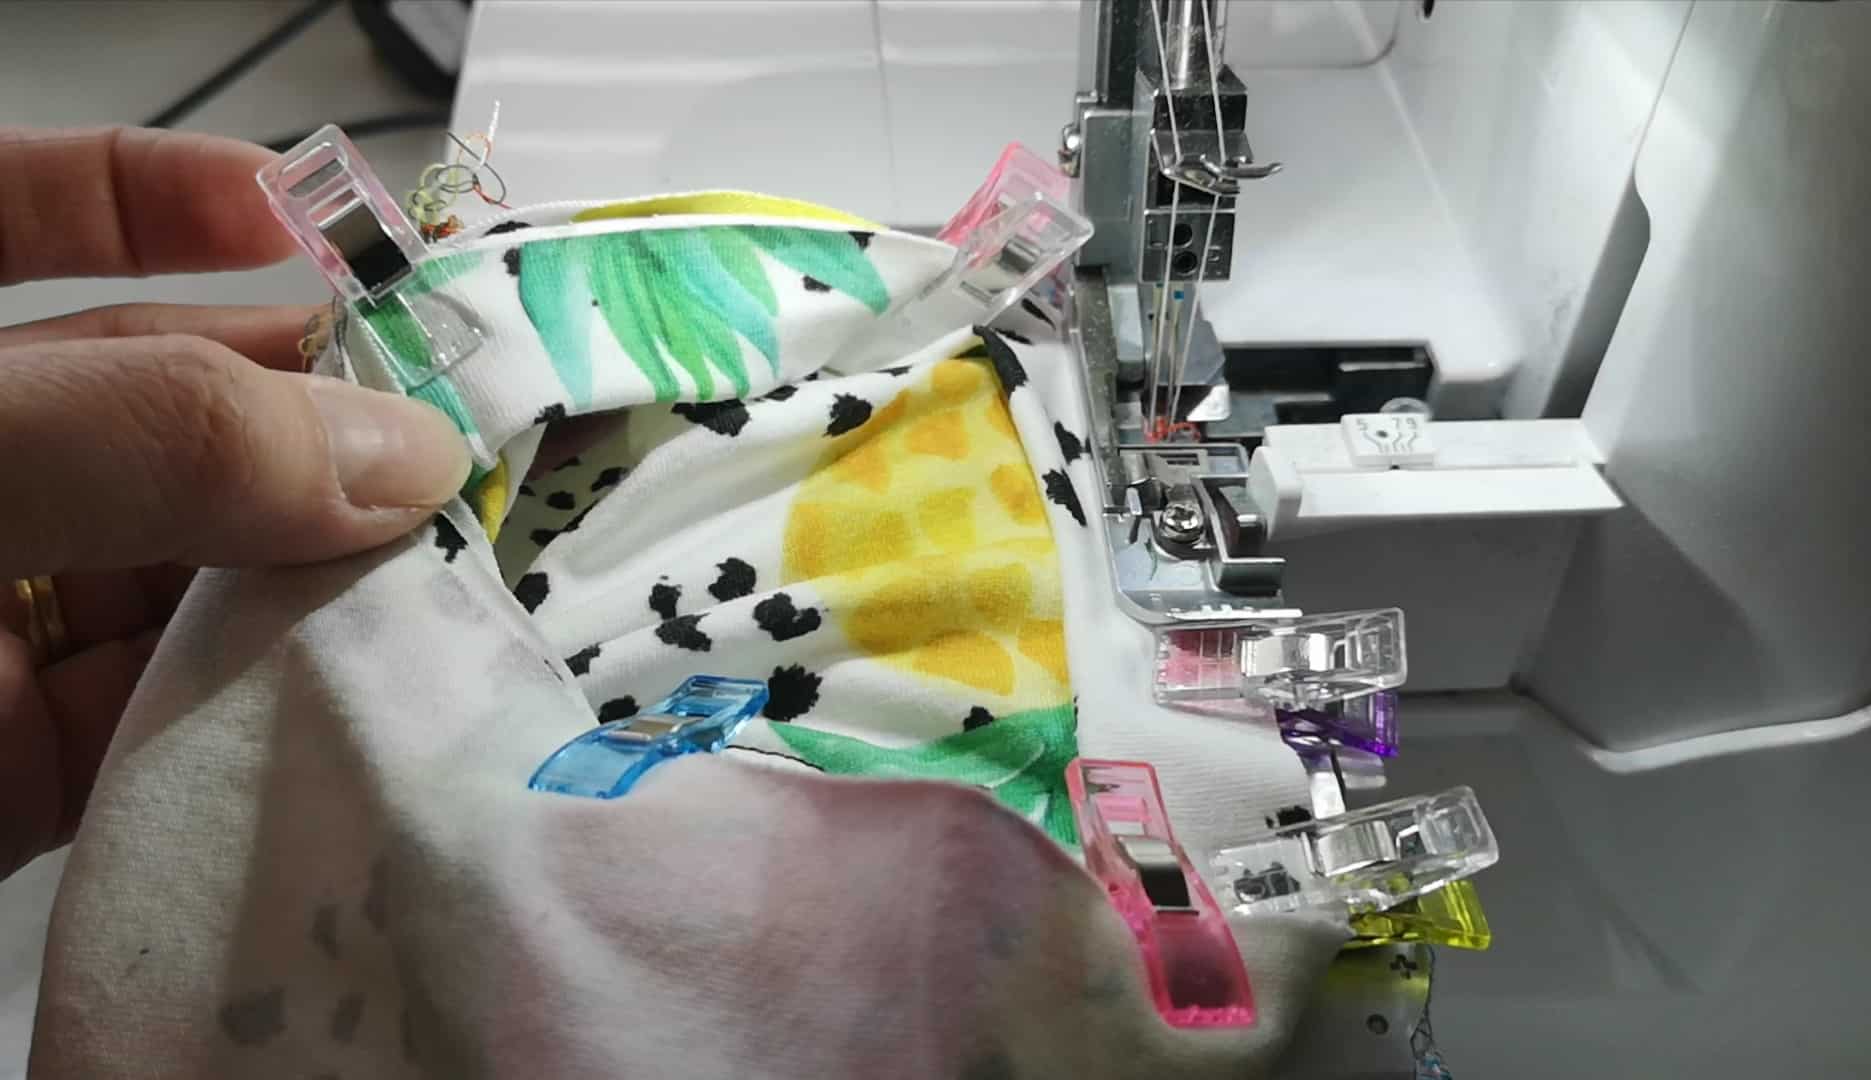
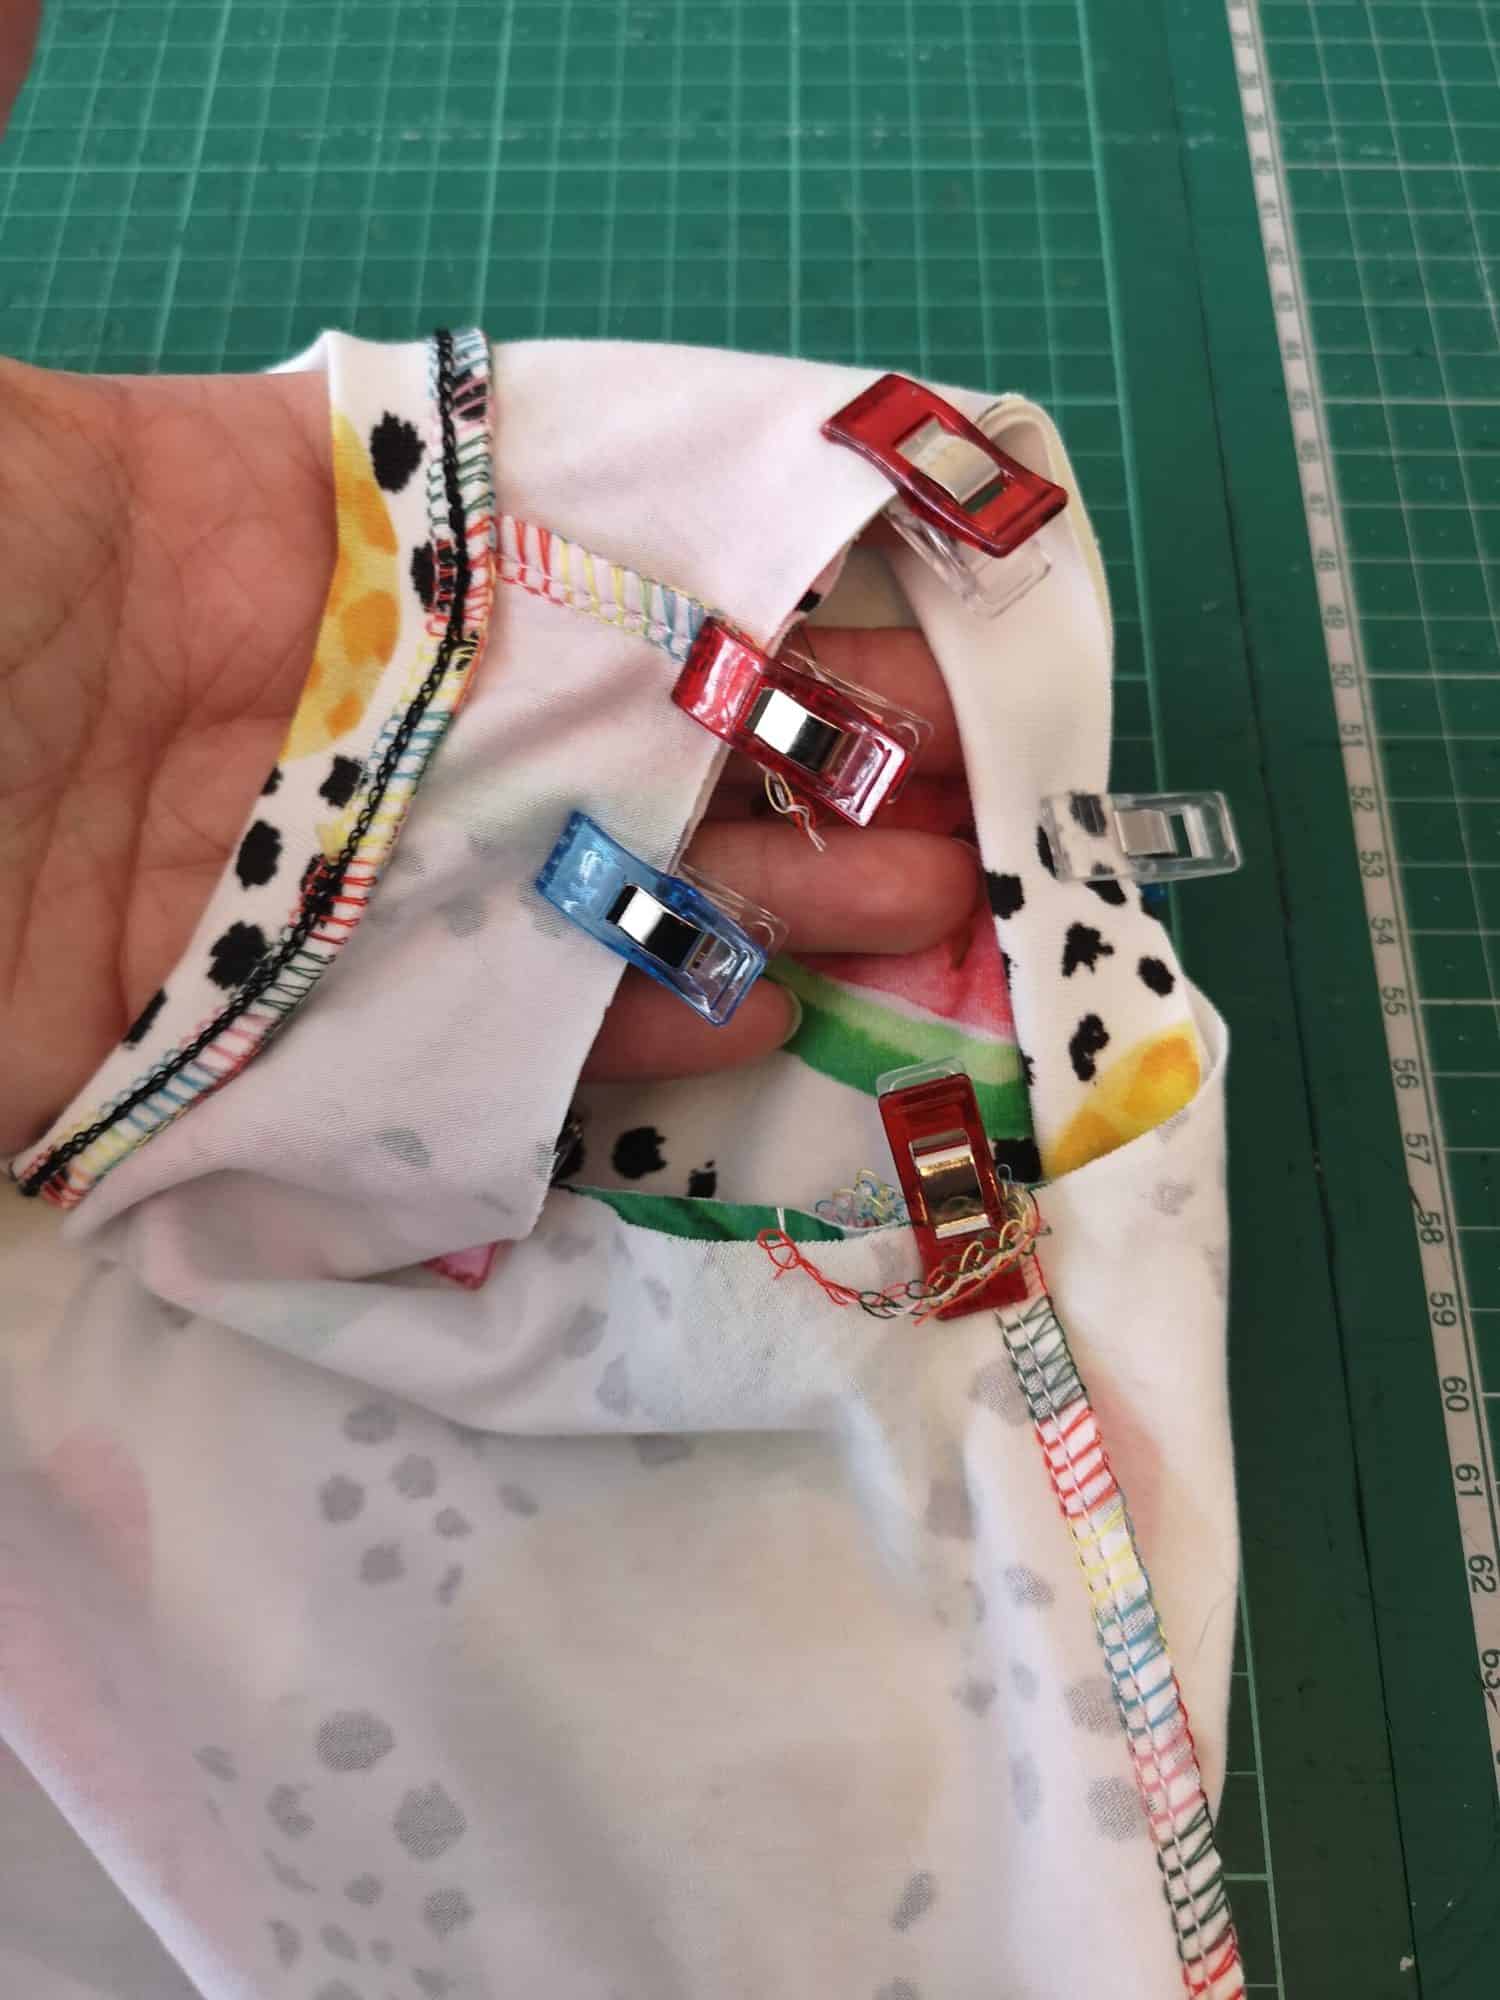
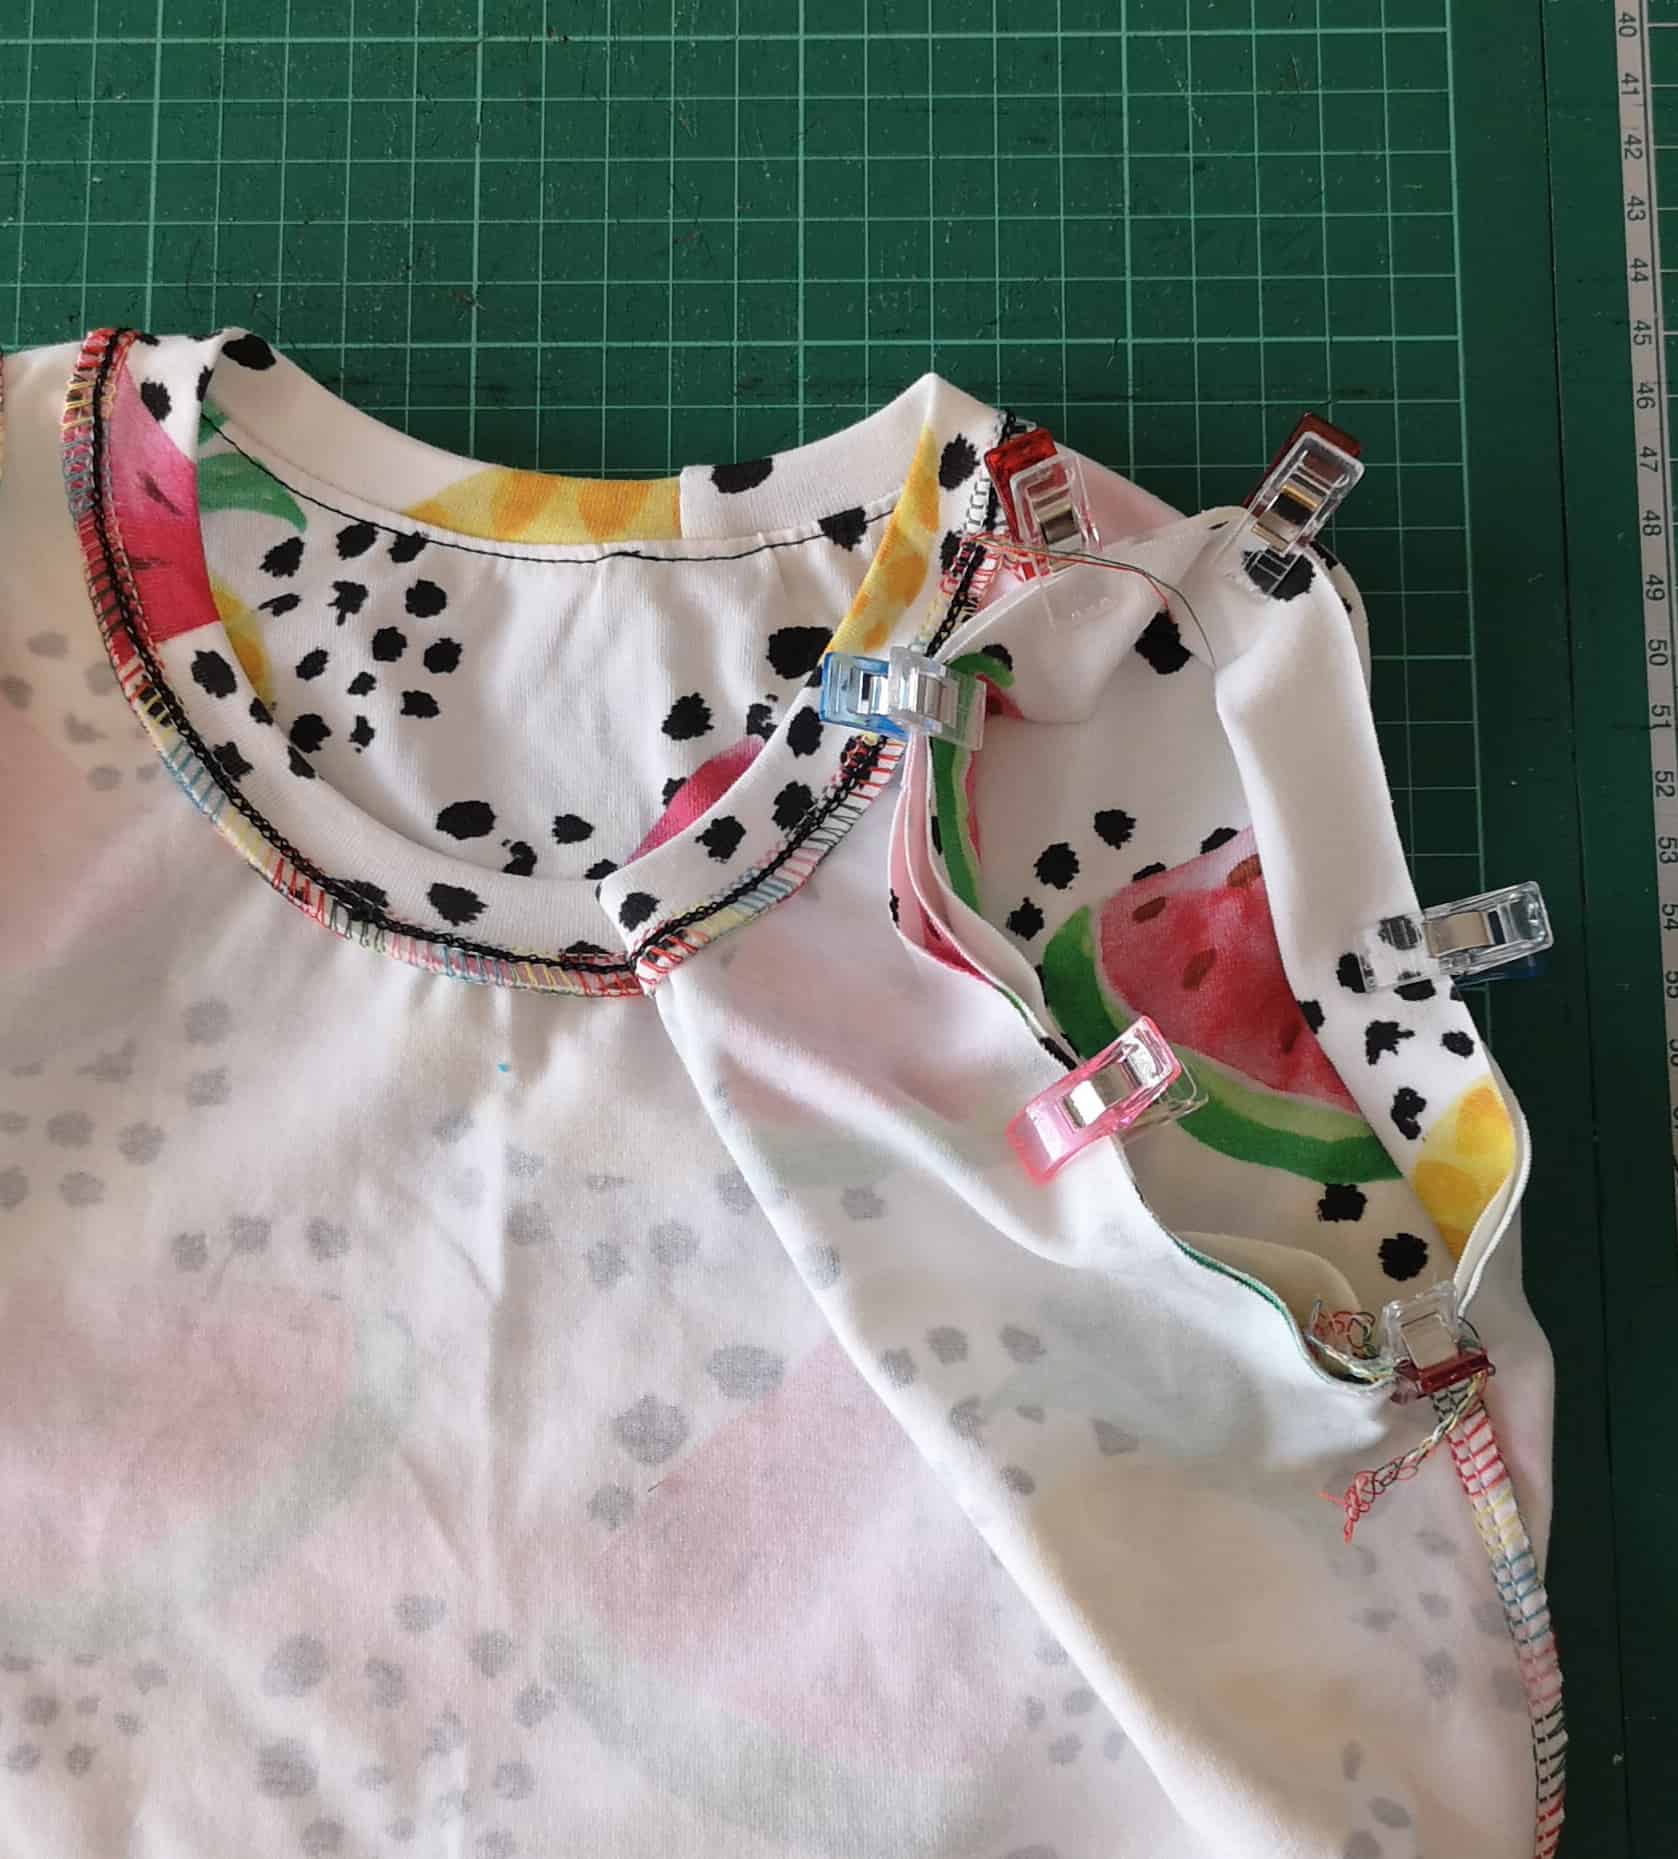
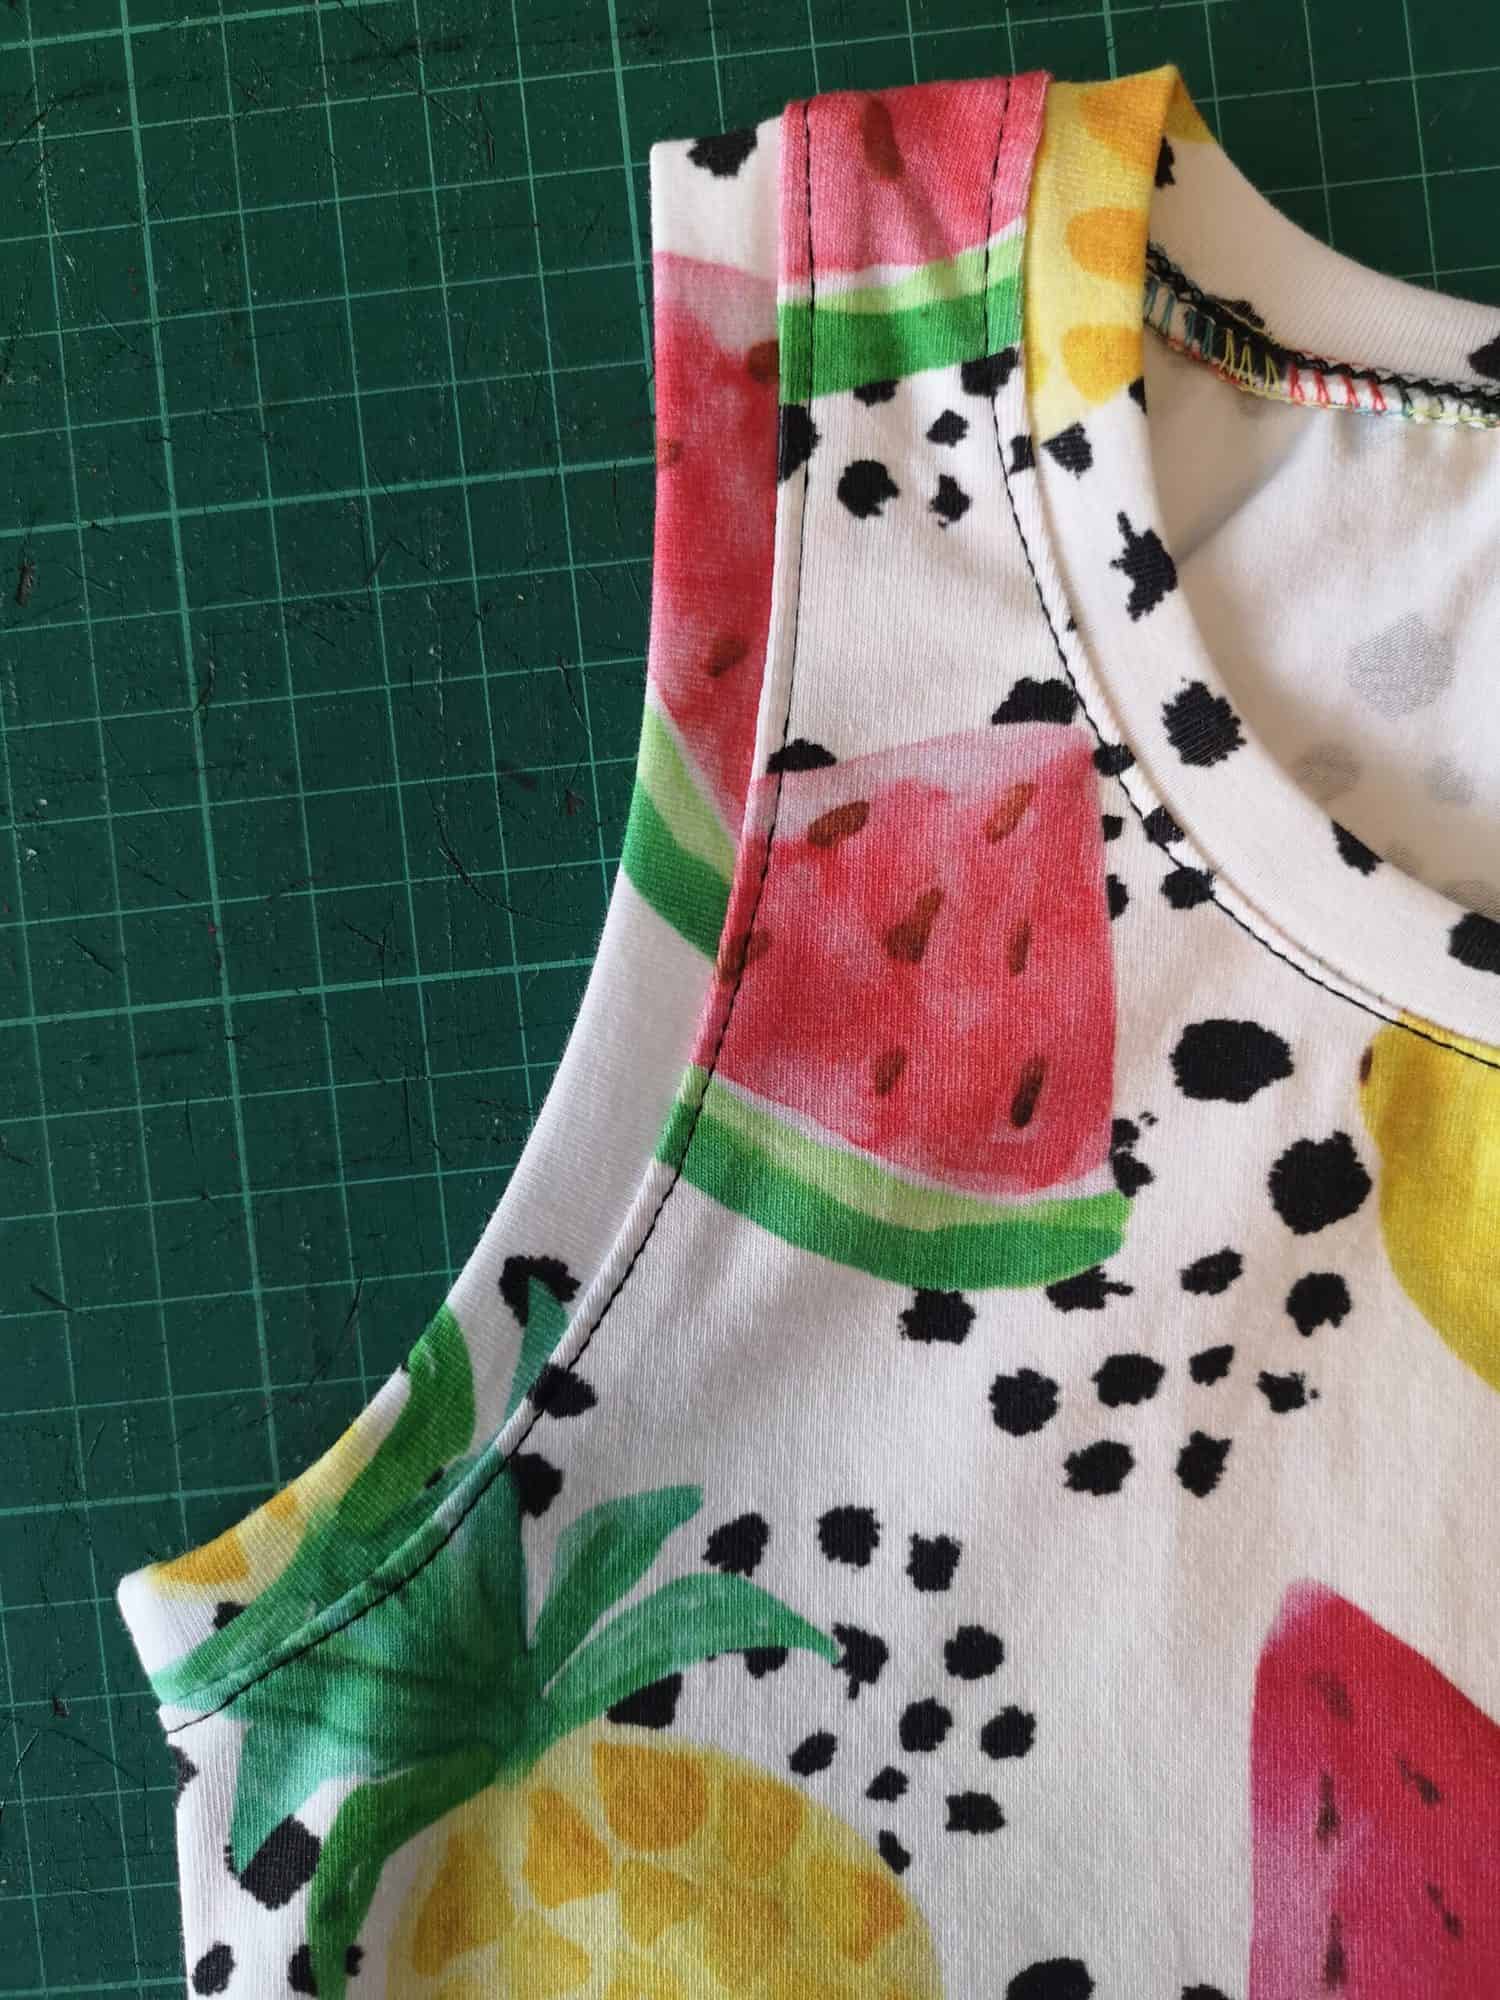
Last steps for today are sewing the side seams of the main and then of the lining. If you opted fro the open back style, your main and lining will be a flat piece. For the closed back style, once you sew the side seams you will have two “loops”. 

In today’s video you can see how I create the open back straps and sew the side seams. Keep in mind that if you are doing the closed back option, the Sunflower pattern does include videos for that option as well. Once you finish today’s steps, post a picture of your progress in the comments of day 3 photo of this Sew Along album. 

Sunflower Swim Top SAL day 1 | Cut fabric

Sunflower Swim Top SAL day 2 | Shelf bra

Sunflower Swim Top SAL day 3 | Straps and side seams

Sunflower Swim Top SAL day 4 | Attach lining 

Sunflower Swim Top SAL day 5 | Neckline and elastics

Sunflower Swim Top SAL day 6 | Add ruffle/hem and finish swim top

Sunflower Swim Top SAL day 7 | Winners announcement

Filed Under: Sew-A-Long, Uncategorized Leave a Comment

Sunflower Swim top SAL – day 2

June 22, 2021

Good morning and welcome to day 2 of our Sunflower Swim top SEW ALONG. Today we create the shelf bra, with or without the removable cups layer. If you are adding the cup pockets you will have 4 pieces for the front (one main, one lining, one inner lining and one shelf bra). If you are making the youth Sunflower  you will not have the cups option so your front will have 3 layers (main, lining and shelf bra).

This swim top can be sewn entirely with your sewing machine. If you own a serger and a coverstitch machine, some steps can be done with them. In my years of me-made swimsuit sewing and wearing I have found that swimwear created with the sewing machine tends to last longer than serged one. So my personal goal for this sew along is to utilize a zig zag and a triple stretch stitch 100% off the time. If you know me, you know that I am a huge serger/coverstitch fan so this is a big step 😉.

Tip: if you do not have 3/4″ swim elastic for today’s steps, you can use 1″ knit elastic in a pinch. Do keep in mind that swim elastic is treated to withstand chlorine water, while knit elastic is not,   

You can see in today’s video how I added the shelf bra to the lining, including the cup pockets. Once you complete all steps, snap a photo of your front lining and posted in the comments of Day 1 photo of this sew along album. You can find the album in the M4M & P4P sew along group on Facebook. 


Sunflower Swim Top SAL day 1 | Cut fabric

Sunflower Swim Top SAL day 2 | Shelf bra

Sunflower Swim Top SAL day 3 | Straps and side seams

Sunflower Swim Top SAL day 4 | Attach lining 

Sunflower Swim Top SAL day 5 | Neckline and elastics

Sunflower Swim Top SAL day 6 | Add ruffle/hem and finish swim top

Sunflower Swim Top SAL day 7 | Winners announcement

Filed Under: Sew-A-Long, Uncategorized Leave a Comment

Sunflower Swim top SAL – day 1

June 21, 2021

Welcome to the Sunflower Swim Top Sew Along! 

Day One of the sew along is for purchasing the pattern and cutting the fabric. If you did not buy the patterns yet, stop by the Sew Along Facebook Group to find an exclusive coupon code. You can grab the adult Sunflower Top here. If you plan to sew for a little one,  the Youth Sunflower Swim Top  or the Bundle is what you need. If you are still undecided which style to make, our Round Up blog will give you an overview of all options included, plus a look at the Busy Bee swim bottoms. You can also use the Easy Hacks blog for added options. As a matter of fact, I will be making my SAL top inspired by Dana’s hack. 

Now that we have the patterns it’s time to select which method of using them you would like to do. Both the Youth and the Adult come in A4 and Letter format to print at home, A0 format to print at a copy shop AND a projector file. If you use the projector file you will not have to print anything!! That’s definitely my favorite way! You can see in today’s video how I use the file to cut the fabric. We also have an excellent P4P University that will give you the basics of using a projector instead of printing the pattern. I highly recommend reading it and watching the included video. 

Let’s start by taking the measurements needed for the best fit. P4P has an amazing blog that gives you tips for accurately taking your measurements. You can read all about it here. If your measurements put you in a different size for chest and waist be sure to check out our P4P University blog and grade to achieve the perfect fit. P4P’s newest patterns come with videos throughout the tutorial, just click the link in the pattern to access them. 


For my Sunflower Swim Top I am using these cute Minnie Mouse inspired  Oh So Pretty swim knits. Oh So Pretty Custom Fabric is this sew along’s sponsor as well so our lucky winner will be receiving gift card to treat themself to their custom prints (must be a member in the OSP Facebook group to qualify). They stock solid swim fabric in retail as well. 


Judy made this very in depth video about various swim fabric, notions and how to accurately take your measurements to create the perfect custom swim suit. I highly encourage you to watch it:

TIP: write on your elastic where it will go (eg neckline elastic , armscye elastic, etc)

You can see day 1 video below. Once you cut all the fabric and elastics take a picture and post it in the comments of day 1 photo. This sew along album will be in the M4M & P4P Sew Along Facebook group. 

Sunflower Swim Top SAL day 1 | Cut fabric

Sunflower Swim Top SAL day 2 | Shelf bra

Sunflower Swim Top SAL day 3 | Straps and side seams

Sunflower Swim Top SAL day 4 | Attach lining 

Sunflower Swim Top SAL day 5 | Neckline and elastics

Sunflower Swim Top SAL day 6 | Add ruffle/hem and finish swim top

Sunflower Swim Top SAL day 7 | Winners announcement

Filed Under: Sew-A-Long Leave a Comment

P4P University- Facings

May 27, 2021

Today’s P4P University is all about facings. We will take a look at what facings are used for, how to draft your own, and where you can use them in your patterns. A facing is a way to finish the edge of a garment. Although you will often see tutorials for using a facing in necklines, they can be used in many other ways as well. Today we will look at both a simple neckline facing, an all-in-one facing, and how to use a hem facing.

P4P University Facing Pic

**A video tutorial is available at the bottom of this blog post. **

WHEN TO USE A FACING

You can use a facing when sewing a pattern to finish any garment edges (necklines, sleeveless armholes, hems, and more). While they are more common in woven garments, you can also attach a simple facing to a knit garment if you are looking to replace the neckline binding or band. Let’s see how we can draft and use a simple neckline facing on the P4P Brunch Blouse Pattern.

Neckline Facing

NECKLINE FACING

You will need the paper pattern, tracing paper, pencil, ruler

Begin by measuring 2 inches down all around the neckline of the paper pattern and placing marks. Draw a curved line to connect your markings. Trace this line, as well as the original neckline, onto your piece of tracing paper. This will now be your facing pattern piece. Repeat for the pattern back. **The Brunch Blouse uses a center back seam. To remove this in your facing, cut off 1/2 inch from the center back line on your pattern piece. Then cut the fabric on the fold at the new center back line.**

Neckline Facing Draft


Cut your pattern pieces and facing pieces from your fabric. Make sure you are cutting your facing pieces on the fold as you would your front and back bodice pieces. Apply interfacing to the back of your facing pieces. You can leave off interfacing if you would prefer as I did in this knit pajama top.  Make sure you use knit interfacing if applying to a knit garment.

Neckline Facing Construction


Sew the shoulder seams for your front and back bodice as well as the front and back facings. Press the seams open. Finish the outside edge of your facing with your serger, an overlock stitch on your machine, or your preferred finish. Place the bodice right sides out and mark the quarter points with pins. Repeat with your facing. Match your facing and bodice, right sides together at pins. Stitch together at 1/4 inch using a long stretch stitch for knit garments. **Note this will finish the neckline at 1/4 inch lower than if you were to use a band. If you do not want a deeper neckline, make sure you add the additional 1/4 inch to the neckline during the tracing stage**

Press the seam allowance towards the facing. Understitch. (See this tutorial for help with understitching) Fold the facing to the inside of the garment and press well. You can now topstitch along the facing edge or simply tack the facing down at the shoulder seams for a cleaner finish.

all in one facing title


ALL IN ONE FACING

An all-in-one facing is a great way to create a clean finish on your sleeveless tops. This will create a finished edge on both the neckline and armholes using one piece. Here is how you can create this facing using the P4P Brunch Blouse.

Begin by marking two inches down from the underarm seam and make a mark on your pattern. Continue marking two inches down around the arm and neckline edges, creating a soft curve to bridge the two areas. See the pictures below for how I marked both the front and back bodices. Trace this new facing piece onto tracing paper using your marks and the original pattern lines at the shoulder, neck, and arms.

All in one facing tutorial

Cut your pattern pieces as well as facing pieces from your fabric. Cut your facing pieces from interfacing as well. Sew your bodice together at the shoulders only and center back if you are using the Brunch Blouse. For this facing technique, we will be using our interfacing to create the clean finished edge– the steps will look slightly different from the neckline facing tutorial above. Feel free to use either method on your facings.

All in one facing


Sew only the shoulder seams on BOTH the facing pieces and the interfacing pieces- DO NOT FUSE the interfacing yet. Next, sew the interfacing to the facing, right sides together, along the outside curved edges using a 1/4 inch seam allowance. Clip the seam allowances around the curves. Finally, turn the interfacing and facing, right sides out. Your fusible side should now be facing the wrong side of the facing. Carefully align the pieces and press well. This will now give you a clean, finished edge along your facing without having to use your serger or machine.


All in one facing


Next, lay the bodice right sides out, flat on the table. Lay the facing on top, right sides together. Match all seams and pin around the neckline. Stitch with 1/4 inch seam allowance, then clip and grade seam allowance. Press seam allowance towards facing and understitch at the neckline. Once the neckline is done, turn the garment right side out and lay flat. Roll one side of the bodice in a tight roll towards the opposite shoulder seam. Wrap shoulder seam fabric around the rolled fabric, pinning right sides together. Stitch with a 1/4 inch seam, being careful to not catch rolled fabric while stitching. Carefully pull the fabric through the opening and understitch as far as possible on each side of the armhole. Then repeat on the opposite side.


All in one facing


Fold facing up away from the underarm, match seams and stitch the side seams per the pattern. Trim away any bulk and fold seam allowance back down. Tack at underarm. Repeat on other side. The all-in-one facing is now complete. Finish the top per the pattern instructions.


HEM FACING

The final type of facing I will show today is the hem facing. This simple finish is helpful when creating a curved hem like the Brunch Blouse.

To create the hem facing pattern pieces, take your front and back bodice pieces and mark 2 inches from the bottom edge working from side seam to center. Make sure to mark your fold line and trace your facing piece onto paper. Cut one front and back facing from fabric and interfacing. Fuse the interfacing to the back of the facing pieces. Sew the side seams of your facing and finish the narrow side of the facing. (Make sure you are finishing the top of your pattern piece and not the bottom edge. Otherwise, your piece will not fit inside your garment without bunching.)

Hem Facing Tutorial

Complete your top per the instructions until the bottom hem. Lay your facing and top, right sides together and sew the raw edges together at 1/2 inch seam allowance. Press seam allowance towards facing. Understitch. Press the facing towards the wrong side of the top. Finish with your preferred stitching. You can edgestitch the facing or handstitch a blind hem.

Hem Facing


This video will show you how to create the facings discussed in this blog post for those who prefer to learn that way.

Thank you for joining me today to learn all about facings. You can find more sewing tips and tricks on the P4P University blog posts.

Shannon 


Filed Under: P4P University, Sewing Techniques Leave a Comment

P4P University – Interfacing for Garment Sewing

May 17, 2021


The correct use of interfacing is one of the main things that takes your garment sewing to the next level.  Today we will be talking about different types of interfacing, why you might want to use it and how to correctly apply it.


The first thing we need to clarify is the difference between stabiliser and interfacing.  Getting these two confused is easy to do, and people can often buy the wrong one for their needs, but their uses are quite different.


STABILISER

Stabiliser is a type of textile used to add extra weight to a particular part of a piece of fabric, usually so some sort of decorative work can be added to that section.  For example, you might add stabiliser to the wrong side of the front of a pair of children’s pyjamas to add some embroidery or applique to the bodice.  The stabiliser helps keep the fabric from distorting when adding the decoration to it.  It can be left on, trimmed down or torn off after use, depending on it’s type.  The picture below shows some embroidery on the reverse of a pair of pyjamas.  You can see the tear-away stabiliser still sitting between the A and the Y, after the rest has been removed.


INTERFACING

Interfacing is a type of textile used on the wrong side of a fabric to make that particular area stronger/more weighty.  For example it is often used in shirt collars to help them stand upright.  The interfacing gives the fabric more rigidity and is not removed, it is permanently attached. 


There are two types of interfacing, differentiated by the way you attach them to your fabric.  ‘Sew In’ interfacing is sewn onto the wrong side of your main fabric, within the seam allowance so it is not visible when the garment is finished.  Alternatively it can be quilted on in a particular pattern of your choice, so that it is visible when completed.  It seems to be less popular these days, but is the traditional, couture interfacing.

More popular is ‘Fusible’ interfacing.  This is the same as ‘Sew In’ but it has a layer of heat activated adhesive on the wrong side, which means it can be ironed directly onto the wrong side of your main fabric and adheres permanently.  The instructions for ironing will either be printed on the selvedge, if you have bought it by the metre, or they will be on the packet if you have bought it bagged.  It is important that you ensure the interfacing is fully adhered before sewing the garment together because otherwise it can start to peel off and look messy. This picture below shows an example of an iron-on interfacing attached to the wrong side of a piece of cotton.


Interfacing comes in many different weights, from a light weight interfacing used to add a little extra body to the facing on a silk blouse, to a very heavy weight interfacing used to reinforce the brim of a cap/hat.  I used a medium weight interfacing along the placket of my So Classic Sundress to give added support for the poppers and stop it distorting with wear.

Pattern instructions will advise you which weight of interfacing you will need, so that you can ensure you purchase the type needed to get the finish shown in the pattern listing pictures. For example, the Timeless Tunic notions require a lightweight interfacing for adding body to the neckline facing to help it keep the correct shape.

You will also find interfacing used in woven patterns to add body/structure/strength to shoulder seams, around pocket openings, along plackets, in collars, and even over entire bodice and sleeve pieces in jackets and coats.

KNIT/STRETCH INTERFACING

As well as woven interfacing, you can also find knit/stretch interfacing used for adding greater structure or strength to knit fabrics.  It can be used to stop these fabrics from stretching out too far, for example it is often used around pockets in a knit dress, so that the dress doesn’t become misshapen with use.  I like to use it to add greater structure to the front of my Go To Jacket before sewing on the zipper, as it helps stop the fabric stretching out when attaching the non-stretch zipper to the stretch fabric.


In this video I discuss a few different types of interfacing and show how they are adhered to fabric.  Sometimes seeing the fabrics being handled can give you a much clearer idea of what they would be like to use in real life.

Whichever type or weight of interfacing you need, the pattern you are using will give you details of what you need and when you need to use it.


Now that you know more about how to use interfacing, why not take a look at one of these patterns above or the Timeless Tunic or Tiny Timeless and put your new found skills to use.


Happy Sewing!

Dana x


Filed Under: P4P University, Sewing Techniques, Sewing with Stretch, Knit Fabrics, Sewing with Woven Fabrics Leave a Comment

Protected: FABRIC FOR PIRATES :: MAY 2021 REVEAL

May 5, 2021

This content is password protected. To view it please enter your password below:

Filed Under: Fabric for Pirates 9 Comments

Protected: FABRIC FOR PIRATES :: April 2021 REVEAL

April 7, 2021

This content is password protected. To view it please enter your password below:

Filed Under: Fabric for Pirates 7 Comments

New Pattern Releases :: Be Bold Bodysuit!

March 10, 2021

We are so excited to be celebrating another release day with our favorite Pirate Crew!  We’ve been wanting to put out a bodysuit for forever now, and the day is finally here.  Let’s learn all about the Be Bold Bodysuits, available in both Adult and Youth sizes!


The Be Bold Bodysuit will have you feeling fierce in any option. This classic tight fit bodysuit is meant to feel snug and act as the perfect tucked in top without worrying about anything coming un-tucked. With all the options we’ve packed into this single pattern, you’ll be able to make a perfect bodysuit or crop to pair with any bottoms – skirts, pants, overalls, casual or dressy. You can pick from a higher or lower neckline on both the back and front for the adult pattern, and a higher or lower back neckline for the youth version.  You can also take this pattern from the hot summer with the multiple tank options to the cooler weather with longer sleeve options. You can finish the neckline with a simple picot elastic or with a lining and shelf bra.
Moving down for the adult pattern, you can have multiple bottom options as well!  You can do a thong or brief plus pick if you’d like the seam in the traditional back spot or add snaps with a front seam for ease of snapping. The bodysuit is partially lined so you can use the bodysuit as your undergarment.
Drafted for high stretch (4 way stretch) knit fabrics like cotton spandex, double brushed poly, ribbed knits, athletic knits, or swim knits.  Options include: crop length, bodysuit with thong (snaps or back seam), bodysuit with brief (snaps or back seam), lined neckline with shelf bra, unlined with picot finished neckline, thin strap tank, tank, short sleeve, 3/4 sleeve or long sleeve.
Enjoy several videos throughout the tutorial like fabric suggestions, options and cutlines video, how to add/remove length to pieces, sewing the picot on the shelf bra, neckline and leg lines, and lining the tank option.

The youth sizes range from 3m – 14 and the adult sizes are for the full, newer size chart, extending from XXS – Plus 5X!  If you haven’t sewn with us in a while, please make sure to check the size charts, as there were slight adjustments made to accommodate the new size range for adults.


*Want to learn more about how to measure yourself for these pattern?  We’ve got you covered with an in-depth blog HERE.  And in case you’re new to Patterns for Pirates and PDF patterns in general, we have a great blog full of new-user tips HERE to help you get started!  As with all of our current releases and updates, the pdfs now include our layers feature and can be found in Letter, A4, A0 and projector sizes.  And for even more helpful fun, we have a free* printable that you can use to help record your measurements as you take them.

Let’s take a quick look at all of the options!

There are three options available for the sleeves- short, 3/4, and long. If sleeves are quite the look you’re going for, check out the sleeveless options, including a classic tank strap as well as a thin strap tank. For the necklines, not only is it a fun squared design, there are several options that can be mixed and matched. If you’re feeling a bit daring, there is a low option available for both front and back bodices. If you’d like a little more coverage, there are also higher cutlines. You can use these options together to create your perfect look. To help finish the necklines, use either a simple picot elastic or finish with a lining and shelf bra. To round out the Be Bold Bodysuit, you have multiple leg options (available on the adult version).  This includes either a thong or brief plus you can choose if you’d like the seam in the traditional back spot or add snaps with a front seam for ease of snapping.  The bodysuit is partially lined so you can use the bodysuit as  your undergarment.

SLEEVED OPTIONS


SLEEVELESS OPTIONS


NECKLINES


ADULT LEGLINE OPTIONS


PICOT FINISHING


LINED w/SHELF BRA


What are you waiting for?  Head on over and grab yourself a copy of the perfect Be Bold patterns!  They are available on sale (no code needed) through 11:59pm CST, March 19, 2021.

BE BOLD BODYSUIT | BE BOLD BODYSUIT – YOUTH | BE BOLD BODYSUIT – BUNDLE

Maybe hoping for a little more inspiration before you make the purchase?  Head over to our Facebook group where you can see tester albums full of amazing images!

Be Bold Bodysuit | Be Bold Bodysuit – Youth

If you’re looking for even more options, we show you a few more ways you can use this pattern in our Be Bold Easy Hacks post.


Filed Under: Pattern Release Leave a Comment

Protected: FABRIC FOR PIRATES :: March 2021 REVEAL

March 2, 2021

This content is password protected. To view it please enter your password below:

Filed Under: Fabric for Pirates 25 Comments

P4P University – Armbands Tips and Tricks

February 10, 2021

P4P University – Armbands Tips and Tricks


I’m going to spend a little time today showing how I get the best finish on my armbands.  They can be quite tricky to get right and people often struggle with ‘bubbling’ over the shoulder, which can ruin the look of an otherwise perfect neckline.

The pattern I will be using to illustrate how I sew my armbands is the Youth Essential Tank.  There are many different cut lengths, from shirt to dress length and the option for a regular tank or a racerback cutline.  Today I will be sewing the shirt length tank option for my daughter, ready for the summer weather which we are all desperate for right now!

The first thing to remember is that there are pattern pieces for you to use for the neckband and armband options and these are calculated at 85% of the opening, but the fabric you use may need you to make some adjustments to those pieces to get the perfect fit.  A fabric like a 100% cotton interlock won’t have as much stretch as you may need and you will probably want to add a little length to your bands, perhaps recalculate at 90%.  Something like a ribbing/cuffing has lots of stretch and that could be cut at 75 or 80% to get the same look. Either way you will want to ensure that you sew the shoulder and side seams of your garment at the full ½” seam allowance or you will find that the bands won’t be long enough, as not using the full seam allowance will make your neck/arm openings wider than they were drafted to be.

If you prefer a video, I filmed the process of making my Essential Tank here:

https://www.patternsforpirates.com/wp-content/uploads/2021/02/2021-02-07-16-32-02.mp4

Sew your shoulder seams and then prep your neckband by sewing the short sides, right sides together to form a loop.  Fold your fabric wrong sides together around the long edge and then place a clip at the joining seam.  Place another clip at the other end of the band by stretching the band a little to find the centre point opposite the joining seam.  Unlike a regular neckband, we won’t be quartering the neckhole and the neckband, just halving. Find the centre front and centre back of your neckhole and place clips. You should have this.

Next, evenly stretch the neckband until it fits the neckhole and clip the neckband to the neckhole at the shoulder seam (this won’t be the normal quarter point as the shoulder seam will be further towards the back). Then also place clips 1 inch either side of the shoulder seam NOT STRETCHING THE NECKBAND BETWEEN THESE THREE CLIPS. (If making an adult sized tank I wouldn’t stretch for 2 inches either side of the shoulder seam), then ease the remaining neckband in between the clips either side of the shoulder seam and the centre front and back clips.

Sew the neckband on, making sure to use the full seam allowance, and remembering not to stretch the neckband over the shoulder seams.  This reduces the tension on the neckband here and helps to stop the ‘bubbling’ we spoke of earlier.  I prefer to sew with the band uppermost as it helps me keep an eye on the seam allowance. I also like to start sewing just before the shoulder seam as this is the area we will NOT be stretching as we sew.  It is easy to forget about this if you come to it at the end of sewing the neckband on, so I like to do this part straightaway so I don’t have to worry about forgetting about it later.

TIP – If you have difficulty managing the three layers when sewing the neckband on, or if your fabric has a tendency to curl badly, I recommend sewing the neckband together around the long raw edge before attaching it to the bodice.  You can either use your overlocker/serger without trimming any seam allowance off, or do a zig zag stitch with your sewing machine right at the edge (you may need to stretch the neckband slightly as you sew round, just to make sure it will still fit in the neckhole after sewing this temporary stitch).  It just keeps those two layers together whilst you are sewing it onto the bodice, then you simply trim if off with your serger blade when you attach it, or trim with scissors if using a sewing machine.

Press with steam and then topstitch.  You can either use a chain stitch as I have here, or a regular 2 or 3 needle coverstitch.  If you have a sewing machine then you can choose a twin needle, long straight stitch or zig zag/stretch stitch of your choosing.

Next we move onto the armbands which are sewn in the same way as the neckband.  First sew the short ends to form a loop, then fold wrong sides together and mark the seam and opposite point on the band with clips or pins.

The armbands are a little easier because more often than not you find the shoulder and underarm seams are opposite one another.  I like to put the armband seam at the bottom of the armscye, for comfort and so you cannot see it when it is worn, then clip in place.  Next clip the opposite end of the armband to the shoulder seam.  Again, clip the armband to the armhole WITHOUT STRETCHING for 1 inch either side of the shoulder seam (again for a larger sized adult tank, I would not stretch for 2 inches either side of the shoulder seam), then ease the rest of the armband into the armhole between the other clips.  The idea behind this is that it should allow the armband to run flat over the shoulder seam, but then the added tension around the bottom of the armband will encourage it to flip up and sit snug against the side of the body at the bottom and sides.  

Sew, using the full seam allowance, then press with steam and top stitch as before.

Finish the rest of your garment as usual, and you’re done.

I hope you found this tutorial helpful and don’t forget if you have any questions we have a large community on our Facebook page who are always happy to help.


Happy Sewing!


Dana x

Filed Under: P4P University, Sewing with Stretch, Knit Fabrics Leave a Comment

  • « Previous Page
  • 1
  • 2
  • 3
  • 4
  • 5
  • 6
  • …
  • 29
  • Next Page »

connect with me

  • Email
  • Facebook
  • Instagram
  • Pinterest
  • YouTube
Privacy & Cookies: This site uses cookies. By continuing to use this website, you agree to their use.

To find out more, including how to control cookies, see here: Cookie Policy
  • Privacy Policy
  • Refund Policy
  • Contact Us
  • About

Copyright © 2026 Patterns for Pirates

Copyright © 2026 · Genesis Framework · WordPress · Log in