Patterns for Pirates

P4P stylish, modern, wearable patterns

  • Home
  • Blog
    • Frequently Asked Questions
    • Pattern Releases
      • Free Patterns
    • P4P University
      • Fitting
      • Sewing with Stretch, Knit Fabrics
      • Sewing with Woven Fabrics
      • Sewing Machines
    • Sew-A-Longs
    • Fabric for Pirates
    • Pattern Hacks
    • Announcement
      • Blog Tours
      • Contest/Giveaway
  • Shop
  • Bundle Discounts
  • Flash Friday
  • Gift Cards
  • My Account
  • Cart

P4P University:: Grading Sizes

June 20, 2016

grading sizes

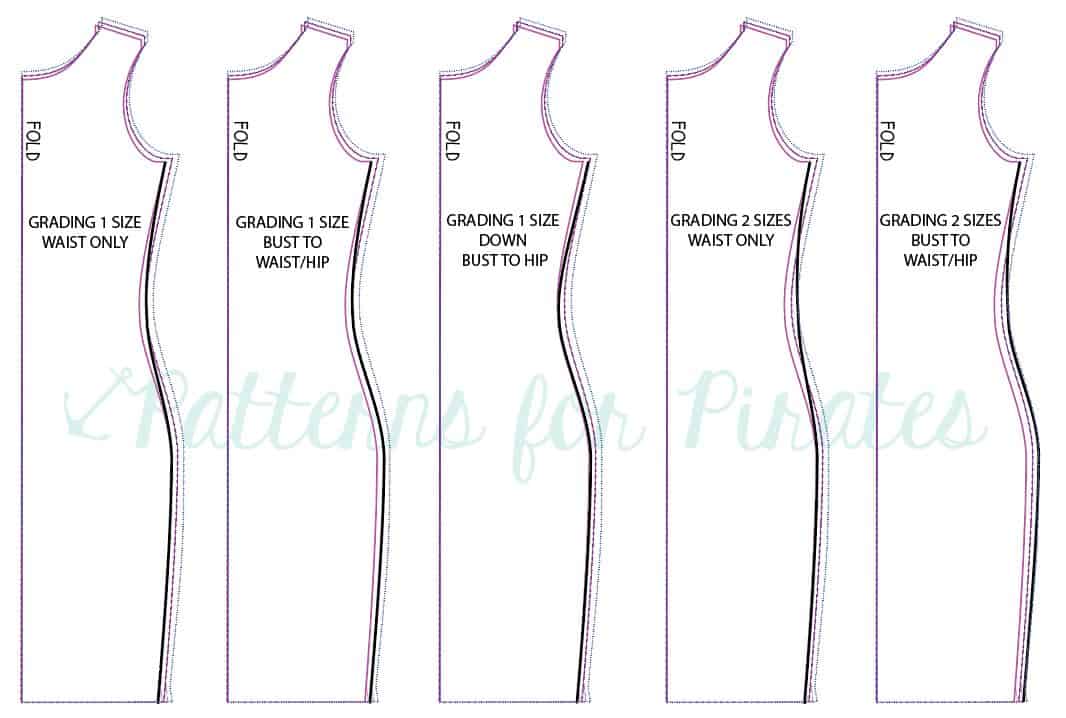
Patterns for Pirates grades to a true curvy, hourglass, 5’5″ frame.  Often times, one’s measurements may not fit within one size for bust, waist, and hip and in order to keep the intended fit of the garment, grading sizes is needed.  Is it always necessary to grade sizes? No, but depending on the fit and ease of the item, it may be worth taking the extra step to custom fit it to your measurements.  Unsure if you want to grade?  Check out the Shirt Fits Explained post and our post about Ease as they may help you decide if you are comfortable with a different fit.  For some of the looser cut tops like the Everyday Elegance and Relaxed Raglan, grading up a size for the waist is likely, not necessary as they are straight cuts from the bust down.  But a top like the Layer Me Up, that is very fitted to the body would fit the best if graded to your measurements/size.  Be sure to measure yourself prior to sewing!  Our measurements tend to fluctuate without us really noticing, so I try to measure myself every couple of weeks to be sure I am still sewing the same size my measurements put me.  Not sure where to measure? Read this: How to Measure Yourself.  Below is the size chart for reference.
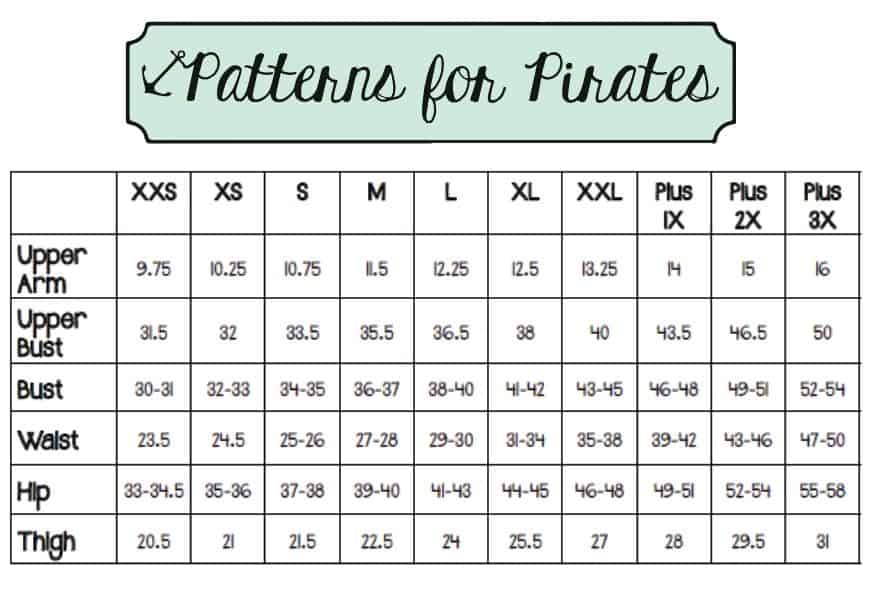
 

Now that you have determined your size and if you’d like to grade, how do you do it? Below are a few examples of grading for a larger waist and hip size.  Any adjustments should be made to both the FRONT and BACK pieces.  Do not be discouraged if your measurements put you within different or larger sizes than ready-to-wear store-bought clothes as pattern sizing does not translate the same.  Our bodies come in all shapes and sizes, and we are all uniquely beautiful.  The beauty of sewing for oneself is the ability to create an item custom fit to you.

P4P grading sizes, pdf patterns

Still need help or have more questions about P4P patterns?  Join us over in the P4P Facebook Group and get to sharing!


Filed Under: Fitting, P4P University, Uncategorized 19 Comments

#SewLikeAPirate :: Contest Winners!

June 20, 2016

Presentation1

Remember when we posted the #SewLikeAPirate freebies?  Well, someone (me…Katy) dropped the ball and forgot to announce the winners of our contest!  So here I am, eating crow and announcing the winners a bit late.  Whoops!  Sorry to leave you all hanging in suspense.

 We decided to reward Stephanie T. for being the Speediest Pirate, and sharing her adorable rainbow sleeved shirt!

Stephanie Troemel

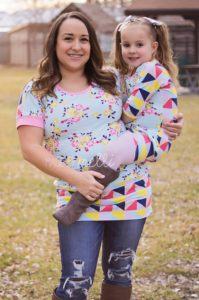
Our randomly selected winner was Becca N. with this darling mother/daughter combo!

Becca Neuharth

And thanks to all of our Pirate Friends for sewing along with us, and using our P4P designs for your own makes.  They were all AMAZING!  (Want to get your hands on these free designs?  Head right HERE to get your very own copy!)


Filed Under: Contest/Giveaway, Free Pattern Leave a Comment

Essential Tank- Open Back Hack

June 12, 2016

Presentation1

I’m excited to share another hack to the new Essential Tank pattern! I’ve seen this look in the popular athletic wear brands and love it! But being 5’10” means no way I can buy it off the rack, even if I wanted to splurge on the price tag 😉

So, I hacked the newest pattern in the P4P collection and I’m so in love with the result! I used a brushed polyester blend that is super soft.

listing pictures1 listing pictures3

I took the front and raise the neckline by 2″ (although the inspiration tank was probably 3″ higher I just can’t take a neckline that close!). Make sure your neckline ends at a straight angle or you will have a point when you open up your folded front.  If you have a french curve use it for a nice smooth neckline. If not, you can get it as smooth as possible.

IMG_6990

Next I cut the back. Here I cut the full piece to help demonstrate, but you can skip cutting the entire piece to save on fabric.

IMG_6993

I took my straight edge and alined it to the widest part of the racerback.  I sliced it straight from the top of the shirt to the bottom hem. (I’ll mention here I did shirt length cutline. but left it unhemmed).

IMG_6995

Then I cut another MIRROR image back piece.

I decided to leave my hem and back edges raw. If you wanted to hem, go ahead and hem those back center edges now.

Tip-I ALWAYS cut a center notch on the necklines of every shirt- they’re cut on the fold and you always need that center mark for attaching your neckband marked anyways.  It is such a quick, easy time to mark it with a notch!

With both right sides up and aligning the center, baste the overlapping sections along the neckline.  Looking back I would also advise to baste just outside the 3/8″ seam allowance as well to hold it in place while attaching the neckband. It’s such a small section that extra baste will really help keep it nice and neat.

IMG_6997

Then just sew up the shirt as the tutorial recommends, treating the back as 1 back piece.  If you make the neckline higher you will need to shorten your neckband a bit as well.  A good ratio is about 80-85% of the finished neckband plus your seam allowance.

IMG_6999 IMG_7001

And wa-lah! Now you can waer it open and loose or tie it at the bottom for a more fitted look! And a big bonus (for me anyways ;)) is that you can untie the back and it’s super nursing friendly! I already have 2 more fabrics that need to become this hack! I can see myself wearing these with some capri peglegs throughout the hot TX summer!  I have it paired with a cute Siren Swim Top I made for a sports bra!

13402172_151754171904282_974103483_n(1)

Don’t forget to share your final creations in the P4P Facebook group, tag me on Instagram, or in your favorite sewing forum! <3 I absolutely love to see your P4P creations!


Filed Under: Pattern Hacks Leave a Comment

20K Celebration : A Pirate Pencil Skirt!

May 25, 2016

Is today the best day ever or what?  The Patterns for Pirates Facebook Group just hit TWENTY THOUSAND fans!  That’s 20K women (and men!) who are learning, supporting, and sewing along with each other on a daily basis.  That’s so amazing!

13256412_10102686577129783_6823916064658558011_n

To celebrate, and to thank you all for being the best pirate seamstresses ever, we are releasing a new pattern.  AND (hint hint) if you’re a member of the Facebook group, there is a special discount code just for you for this pattern. (Please remember this is a thank you to group members.  So if you would like to share, please direct them to joining the group and not share the code 🙂 )

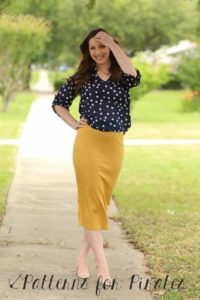
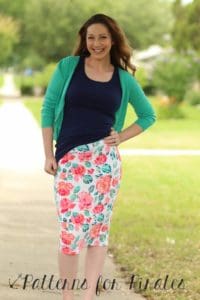
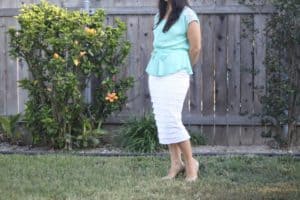
Now let’s talk about the new pattern: The Pirate Pencil Skirt.  It’s so fast, easy, and flattering on all body types that you’ll be sewing up a ton of them for yourself before summer is over.  Trust us.

Slide1

The pattern is drafted for sizes XXS – Plus 3X.  There are three lengths and two waist rises included in the pattern, as well as the new PDF layers feature for printing.  Want to learn more about how to measure yourself for this pattern?  We’ve got you covered with an in-depth blog HERE.

listing pictures

Pick up your copy of the Pirate Pencil Skirt: HERE (And don’t forget to head to the group for the discount code! We keep ALL current sale and promo codes in the COMMENTS of the PINNED POST! 🙂 )

Here are a few images from our fabulous testers for the Pirate Pencil Skirt.  Take a peek through for some styling inspiration!  Need more?  Head over to the Facebook album to see the rest!


Filed Under: Free Pattern, Pattern Release 14 Comments

Siren and Hello Sailor Hacks

April 25, 2016

swim hacks

We couldn’t help ourselves to a few hacks to the new Siren Swim Top and Hello Sailor Swim Bottoms during testing!  We loved them so much we decided to share a few of our favorite quick and easy mods.
The Double Strap Hack: (My favorite! I couldn’t stop using this one 😉    )

IMG_1473IMG_1412 P4P PDF Patterns Siren Swim Top double crossover strap

This one is super simple and quick! You have 4 straps per cutting instructions.  Instead of sewing them right sides together to create 2 straps, we sewed each strap folded in half width-wise down the long edge.

IMG_6678

Turn right sides out.

IMG_6680

And place both side by side on the top pick ups.

IMG_6683

IMG_6684

The Double, Straight and Cross Strap Hack:

IMG_1126

Then we had even more fun doing one set of straight straps and one set of criss-cross straps… cute right?!?!? Just baste and double check you have them all placed correctly before finalizing the stitching! I slipped swim elastic inside this navy/white top straps for more support.  It also keeps the straps in place and hold their shape (not get folded or wrinkled up).
IMG_1089


Fringe Hack:

The only change during construction is that I did not sew the flounce into the side seam.

IMG_6761

Once the top was compete I began in the center and used my rotary blade and clear quiting ruler to cut 1/4″ strips up to the seam line.  I continued all across the top, keeping my slits straight. I wont lie though, it was REALLY late and I was tired… I threw the ruler aside and went at it all crazy!
IMG_6762 IMG_6763

I went back with scissors and clipped all the way up through the pick ups (I couldn’t get my roatary up that far without cutting through the main top pieces. IMG_6764 IMG_6767

It was crazy windy on our picture day with my cousin (isn’t she the cutest?!?!) so we only caught a few where the fringe wasn’t wildly blowing around! You could do the slits as small as your patience allows for and you could also tug them a bit to let the knit curl to hide some imperfections too! It’s a fun, flirty mod! I hope you don’t mind the other watermark on her pictures, my amazing sister took these photos and edited for me :).

IMG_1249 IMG_1315


Double Flounce Hack:

Creating the double flounce is as simple as cutting 2 of the front and back flounce pieces.  I just kind of eyeballed  how much shorter I wanted the top layer flounce but ended up cutting about 1.5″ off the front and 1″ off the back. Depending on your size, you could also use a smaller size length as a guide.   Be sure to keep the side seams the same length on both the front and back flounce of the layer you cut.  For construction, I basted the two layers together to help keep them together as it is a little trickier to stitch 5 layers of fabric.

P4P Siren Swim Top Double Flounce Hack


HELLO SAILOR BOTTOMS

Piping Detail Hack:

This adds a bit of visual interest to those paneled options! Just cut strips at least as long as your seam where your front center and front side panels meet. The width is a personal preference, but you will need double what you’d like your finished width, plus double the seam allowance (3/4″).  I choose 1/4″ finished width for mine, so I cut a strip 1 1/4″ wide.

IMG_6724

Fold strip width-wise and place right sides together matching raw edges along seam where front center and side panel meet.

IMG_6727

Then place side panel on top and stitch with normal 3/8″ seam allowance. (You will be stitching through 4 layers of fabric)

IMG_6728

I choose to top-stitch mine down along the folded edge.

IMG_6731

I love the little, simple detail!

IMG_1032


Separate Skirt Cover Up Hack:

I created a separate skirt for my cousin to use as a cover up! I just cut 1 extra waistband than the pattern calls for and sewed it to the skirt just like the waistband (folded with right sides together along the top raw edge.)

Now she can slip on the skirt when she’s walking around and take it off when she’s ready to really go swimming 🙂

IMG_1241

IMG_1309


One-Piece Hack:

For some, a two piece suit is not their style, so we hacked the Siren Swim Top and Hello Sailor to create an on trend one piece. You will construct your top and bottom as in the tutorial but will not attach your bottom band of the top or the waistband of the bottoms.  I chose to keep the bottom band of the top for extra support, but you can omit if you choose.  We will be connecting the top and bottom with a connector piece so you do not need the waistband of the bottoms.  Try on your top and bottom.  p4p pdf patterns siren swim top hello sailor one piece hack

To determine the length of the connector piece, measure the distance between the raw edge of your top and the top edge of your bottoms at center front and center back.  You may need to find someone to help you with the back ;). Add double the seam allowance (0.75″)  My gap was about 3″ so the length of my connector piece was 3.75″.  I used the waistband measurement for the width of the band as I wanted it to be held tight there.   Note: if your hip is much wider than your under-bust and waist, it will be difficult to pull up over your hips so you may need to shimmy it on!


Connecting the top and bottom is the same construction as the bottom band and waistband but you will be using the connector piece instead.  Stitch short ends of the connector piece and bottom band.  On the bottom band only, fold with wrong sides together.

p4p pdf patterns siren swim top hello sailor one piece hack


Matching raw edges and wrong side facing up, slip bottom band over connector piece.  You should have 3 layers of fabric.  Mark in 1/4s and with right sides together, match raw edges of the connector piece to the Siren Top.  Stitch.  Flip open and press seam down.


p4p PDF patterns Siren Top and Hello Sailor One Piece Hack


Turn your Hello Sailor bottoms inside out. Matching raw edges of the connector piece, with right sides together, slip your Siren Top inside the bottom. Be sure to match the front of your top with the front of your bottoms. Stitch.


P4P PDF patterns Siren Swim Top Hello Sailor One Piece Hack P4P PDF patterns Siren Swim Top Hello Sailor One Piece Hack


Filed Under: Pattern Hacks 12 Comments

P4P University :: Peg Leg 101

March 21, 2016

peg leg 101

Have you heard about P4P’s Peg Legs?  And no, we are not talking about those wooden pirate legs!  P4P released the Peg Legs some months back in celebration of reaching 5k members in the P4P Facebook Group. (crazy right!?!? since we just celebrated reaching 15k members last month!)  If you don’t have them, you can grab them HERE and don’t forget to join the Facebook Group for a special promo code (check the pinned post for details)! In the last few months, we’ve seen the good, the bad, the fails and the “HAAALLPP” questions posted frequently.  So, just like any introductory 101 college course, we are going to give you all the basics with this crash course to make a successful pair of Peg Legs!

First and foremost, if you are new to P4P, check out our First Time User Tips.  Pattern Assembly, a few fabric shops, general cutting instructions, and sewing machine stitches are all discussed there.  So now that you’re familiarized with P4P, here we go!

  • What are Peg Legs?  A classic mid-rise, tight fit leggings pattern for 4 way stretch knit fabrics.  Options include 4 lengths: shorties, bike, capri and ankle with a no elastic waistband.
  • Sizes Included: XXS – Plus 3x
  • Fabric Recommendations: 4 way stretch knit with at least 50% stretch (vertically and horizontally).  Typically 5% spandex or more will work.
    • Cotton Lycra/spandex (note- Lycra=spandex). Medium weight is usually 10oz or more
    • Rayon spandex.  This is typically thinner so may not be opaque.  One of our tunic tops to cover your booty are a MUST 😉
    • Nylon spandex / Supplex – great for performance wear. This usually has a higher content of spandex and will feel tighter, much like compression wear. Some prefer to size up 1 for a more comfortable fit.
    • Polyester spandex – brushed polyester spandex is what many of the boutique leggings are made from however, it is a slightly harder to find the fabric in retail stores. Be sure to check the vertical stretch percentage as some may be less than the 50% require stretch.
    • Stretch Fleece – Fabrics such as Polartec Powerstretch are a 4 way stretch fleece.  Regular fleece, like blizzard, anti-pill and cuddle fleece found in retail stores are NOT recommended.

Fabric is extremely important to get an accurate fit.   Here is an example of the same size medium, capri length made from a 2 way stretch ponte de roma and a 4 way stretch rayon spandex.  You can see the overall fit of the 2 way stretch is much shorter in length and has a lower rise.  I am able to put on the 2 way stretch pair but because there is no vertical stretch, they do not stretch and bend with movement and tend to slip down over time.  While they are a super cute fabric, sadly, they sit in my drawer as they are not comfortable to wear.

image1 image2

STRETCH PERCENTAGES

So, you ask, how do I know if my fabric is 4 way 50% stretch knit?  A 4″ piece will stretch to a minimum of 6″ both vertically and horizontally.  Below is a stretch percentage guide.  Cut a scrap piece of your fabric 4″ x 4″.  Fold in half so it is now 2″ x 4″ and place at the end of the stretch guide.  Hold fabric at one end (where indicated) and grab the opposite end and stretch.  If you can stretch the fabric to 5.2″, your fabric has 30% stretch, 5.7 is 40% and so on.  Unfold and refold the opposite direction and test again.  To determine horizontal stretch, your grainline will run vertically with the stretch perpendicular and horizontal.   The vertical stretch is with the grainline.  For a printable copy, head on over to our Facebook Group and download a copy from the files section.  🙂  Need more help? Megan from Made from Mermaids has a great blog post with video about stretching fabrics.  You can check it out HERE.

knit fabric stretch guide P4P

PICKING YOUR SIZE

Now that you have checked your fabric, how do you pick your size?  If you are unsure on how to measure your body, check out our “How to Measure Yourself” post.  The peg legs use the high hip (where your hip bones are) and the hip (across the fullest part of  your booty) measurements to determine size.  If you are in different sizes for your high hip and hip, you can grade between the two or use one size for the waistband and the other for your “legs”.  This works best for those that have a high hip 1 size smaller than their hip.  If your high hip is larger than your hip, it would be best to grade your sizes.


ADJUSTING THE RISE AND LENGTH

The Peg Legs are a mid rise legging, meant to hit under your belly button.  For those wanting a higher rise or more tummy coverage, you can either add a taller waistband than the pattern calls for or increase the rise of the legs and use the existing waistband measurements.

  • Taller waistband: increase height of waistband to 10″ instead of 7″
  • Fold Over Yoga Band: double the height of waistband to 14″

To increase the rise of the legs: 1) follow the curve of the rise to a larger size on the pattern and blend. OR 2) Slash and Spread – Cut the pattern horizontally through the rise, add the desired amount and smooth out the curves.

 P4P patterns peg leg rise adjustment

Our patterns are drafted for a curvy 5’5″ frame.  Using the same principle as found in our Petite & Tall Fitting Adjustment post, you will adjust your length of the legs by 1/2″ for every 1″ over or under 5’5″.  The Peg Legs’ have a 28″ inseam for ankle length.  If your inseam is shorter or longer, you will adjust to your desired length in the same manner.

  • Determine the amount you need to adjust your length by.  Using the principle above – A 5’10” woman would need an additional 2.5″ (5’10” – 5’5″ = 5″ ~ 5″ x .5″ = 2.5″ ).  A 5″1″ woman would need  2″ subtracted (5’1″ – 5’5″ = 4″ ~ 4″ x .5″ = 2″).  It is best to split the total length that needs to be added or subtracted throughout the entire leg.  Slash and spread the pattern in equal parts and blend the lines. The most common areas to adjust are the shorties, bike, and capri lengths as there are cut lines already indicated on the pattern.  You may also need to adjust the rise, higher or lower depending on your desired height.

 P4P patterns peg leg length adjustment

CUTTING YOUR FABRIC

You will need the following: 2 legs (mirror images) and 1 waistband.  Note: the greatest stretch should be horizontal and what goes around the body.  To create mirror images you can cut your fabric two ways:

  • Cut 1 pattern piece with pattern writing face up.  Flip your pattern piece over and cut again.

P4P patterns peg legs mirror images

  • Cut your pattern piece with fabric on the fold to create mirror images with 1 cut.

P4P patterns peg legs mirror images on fabric


Once you’ve assembled your pattern, pre-washed your fabric and cut your pattern pieces you are ready to sew up a pair!  Because this is a great beginning knit project, we have included a quick video tutorial! Enjoy!


Sewn up a pair of Peg Legs?  We would love to see what you are all creating. Join the Facebook Group and share away.


Filed Under: Frequently Asked Questions 47 Comments

Sweetheart SAL: Day 1 – Fabric Selection

March 14, 2016

Welcome to Day 1 of the P4P Sweetheart + Me Hearties Sew-A-Long!  We are so glad you’re here.

Today, we are talking fabric.  Let’s be honest, if you’re here, fabric is probably your favorite thing to talk about already.  So this is going to be a fun topic.  Let’s get started!

floral

Fabric choice can really make or break a garment.  Not just the color or pattern, but the kind of fabric you use.

There are so many fabrics out there that you can get lost in the different options.  What helps is to familiarize yourself with how the fabric will look once it’s on you (how it will drape and fit).  Feeling fabric for the amount of stretch, thickness, and drape will help you pair it with the right pattern.

So what is the right fabric for the Sweetheart pattern?

We highly recommend a more stable knit.  Ponte de roma, jegging, scuba, liverpool, and thicker cotton lycras are fabulous for this pattern, specifically because of the circle skirt.  Fabrics with a higher drape will still work, but beware that the skirt could end up being a bit more clingy that you were hoping.

For the overlays and colorblocked top pieces, feel free to use any of the above listed fabrics, as well as stretch lace, mesh knits, rayon blends, etc.

Ponte de Roma: (or ponte, ponte roma, ponte di roma, etc) This fabric is a double knit in construction, and tends to look the same on both sides.  It’s a sturdy knit, generally with a horizontal stretch only, although can sometimes also be found with a vertical stretch.  It’s made up of poly, rayon and spandex blend (the more rayon the softer the feel).  It can pill easily, but if you hang dry should last you with normal wear.  The rayon gives it a good drape still, see how the skirt falls towards the body.

12628550_10102504185324423_8351966175370401791_o 12628346_10102504185264543_5866126737712076334_o

Jegging: Typically thought to be used for skinny pants and other bottoms, jegging is a medium-weight stretch fabric.  You can also find it labeled “denim knit” in some shops. Often, it has a denim-style look (think blues and blacks) and is meant to mimic jeans while keeping the comfort of stretch fabric.  It has some vertical stretch.  Weight of jegging knit can vary widely, so if you’re using it for the sweetheart you want to keep it a bit thicker.

P4P Sweetheart Dress-007 P4P Sweetheart Dress-008

Scuba: A highly structured, one sided fabric, made of neoprene (with a sleek surface, much like a scuba outfit).  Typically only has a horizontal stretch and is easy to sew with, however isn’t the most breathable fabric.  These types of knits have a great stretch and recovery, like ponte does, but doesn’t have as soft of a drape. Your skirt will stick out a bit more away from your body.

Other fabrics that are very similar are liverpool, true neoprene and techno.  They will all feel, stretch and drape about the same.

12525343_10153899880859666_5222518452642651603_o 12593664_10153899880569666_4239450917222915995_oIMG_1343 IMG_1452

Fukuro: Soft to the touch with a nice stretch. The face of fabric has texture to it while the back has a smooth finish.  It is a more structured knit and skirt will again stick out away from body more.

P4P Sweetheart Dress-001sweetheart1812671946_10102504187619823_4858393398156320516_o12640304_10102504187689683_8808865272049818705_o

Cotton Lycra: This semi-opaque knit has a soft hand. Most commonly has both horizontal and vertical stretch. The word “lycra” is a brand/trademark of spandex. Any time you see this fiber listed on a label, expect comfort, movement, and shape retention that won’t wash away.  Depending on weight you may feel a bit more “revealed” in cotton lycra on the top half, because it isn’t as thick as those listed above.  Your skirt will have moderate drape towards the body.  The vertical stretch could cause your bodice to pull slightly longer with the weight of the skirt pulling it down. (It was very windy, so the dress is being blown under my booty by the wind! It is not the fabric draping under there naturally!)

IMG_1846 IMG_187312657784_10153762639841539_5006425083970972547_o

You can choose a fabric with a softer drape, like ITY, poly blends, rayon spandex, etc. But they will drape down towards your body.  Your skirt will hang on your body instead or stick out away from it.  We still recommend one that has good weight for the bodice to hold shape well and since it is fitted to help not show lumps,bumps,bra lines, etc.

12654626_10153395070101033_549842879252157341_n12644727_10153395070911033_5174640141178014175_n12642790_10110111939733604_7674037351535059589_n  12646734_10208163864478984_2507199640927830679_o


Now that you’ve chosen your fabrics, share them with us!  Tag @PatternsforPirates and #P4PSWEETSAL on Instagram.  And be sure to post your fabric picks in our event page: Sweetheart SAL on Facebook.

Thanks for sewing along with us!  We look forward to a week worth of sewing with you!

Day 1: Fabric Selection.
Day 2: Printing + Measuring.
Day 3: Cutting Fabric.
Day 4: Bodice + Sleeves.
Day 5: Skirt + Hemming.
Day 6 & 7: Catch-Up Days.
Day 8: Recap + Winners Announced!

Filed Under: Sew-A-Long 5 Comments

Sweet Tee + Sugar Pie Dolman Pattern Release!

March 8, 2016

Guess what today is? You betcha! It’s a P4P pattern release day!

We are coming at you live with another double release, for both women and girls. Remember the sneak peek at the we had in last month’s newsletter? It’s finally here!

listing picturesbundle

The Sweet Tee (women’s) and Sugar Pie (girl’s) tops (Bundled here) will quickly create a dolman-sewing addiction. They are incredibly quick and super darling on all body types. The pattern features a semi-fitted silhouette and a dolman-style sleeve…as well as our tried-and-true jam packed amount of options.  You’re bound to become as obsessed with this top as we are.

12495232_10153974845589666_4952358084081993666_n

Multiple sleeve options (short, 3/4 and long), multiple hems (curved/tall and short waistbands/shirt length/dress length) and a variety of finishes for the neckband will give you endless options.  There is nothing better than having a trusted pattern you can use over and over again, and the Sweet Tee + Sugar Pie will not disappoint.

Just ask our fabulous testers!


And we can’t leave our our mini models:


Make sure to head over to our Facebook Group and check out the tester albums there!  You’ll never fall short of inspiration with our amazing group of sewists.  (But you know that already. Am I right?)

What are you waiting for?  Go grab yourself a copy of the newest dolman tees!

Find the women’s Sweet Tee HERE
Find the girl’s Sugar Pie HERE
And best of all…find the Sweet Tee/Sugar Pie Bundle HERE (gotta love mommy and me versions!)

We can’t wait to see what you make!

Filed Under: Pattern Release 3 Comments

15K Member Celebration!!

February 24, 2016

I’m pretty sure we blinked and the Patterns for Pirates Facebook Group welcomed it’s 15,000th member.  And then we blinked a few more times and we’re closer to the 16K mark at this point!  It’s been amazing being surrounded by a bunch of women (and some men too!) who love sewing, supporting each other, and the patterns that we’ve put out over the last few years.

We wanted to thank you for being so awesome.  And what better way to do that than by having an AMAZING giveaway?

12687867_10102520555009443_3987517031139904711_n

Get ready to drool, you guys.  ONE lucky winner will walk away with a crazy amount of prizes.

This wouldn’t be possible without our fabulous sponsors:

Girl Charlee | Sincerely Rylee Fabric Shop | Knitpop | Zenith & Quasar Fabric | Pink Zeppelin Fabrics | KNITorious Fabric | Fabric Stache | Sweet N’ Charmed | The Fabric Snob | Craftsy | PurpleSeamstress | Raspberry Creek | Fabric Snob | Rikki Prints | Edge Custom Apparel and Accessories | Handmade Escapade | Fabric Worm | My Vinyl Direct

12728959_10102520555019423_3214329718776747699_n

And on top of it all, P4P is sponsoring by giving away a Silhouette Cameo.  Now you can sew up your favorite Patterns for Pirates designs and put some awesome HTV designs on them yourself.  No longer will you envy everyone else’s graphic tees…because you can create your very own!

12711113_10102520555368723_2512737393670057854_o 12688027_10102520555044373_4781542453339271836_n

Be sure to enter into the giveaway and don’t forget to leave our sponsors some love!  Good luck!

a Rafflecopter giveawa
y

Filed Under: Contest/Giveaway 34 Comments

How to use the new Layers feature

January 9, 2016

header

Patterns for Pirates has added a brand new feature to their newest upcoming patterns! The Layers Feature! This means you can choose to print one size, a couple, or all of them if you’d like.  They will still be the “No Trim” style.

Here is a few screenshots to help you use the new feature.

As always, you will need to open and print your PDF from Adobe PDF Reader (a free download if you don’t have it yet).

This is what your screen should look like viewing the PDF pattern pieces:

Patterns for Pirates how to print layered pdf sewing patterns using adobe (3)

Patterns for Pirates how to print layered pdf sewing patterns using adobe (1)

Patterns for Pirates how to print layered pdf sewing patterns using adobe (2)

Patterns for Pirates how to print layered pdf sewing patterns using adobe (4)

Now you can print just the sizes you need and save some ink and time tracing off your size! 🙂

As requested, here is our on-going list of patterns that have the layers feature (These are also the patterns that include the A0 Copy Shop File Size):

Freebies:

  • Pirate Pencil Skirt
  • Peg Legs
  • Peg Legs- Add Ons
  • Peg Legs- Maternity Add On
  • Tulip Tee
  • Tiny Tulip- Youth
  • Wee Lap Tee
  • Petite Pegs
  • Teeny Beanie
  • Walk the Plank- Adult
  • Walk the Plank- Youth

Youth:

  • Jolly Roger Raglan
  • Jolly Roger Add-On Pack
  • Sugar Pie Dolman
  • Spice Cake Dolman
  • Me Hearties Dress + Peplum
  • Yo Ho Henley
  • Tiny Timeless
  • Baby Bear Joggers
  • Fav Tee
  • Butterfly Cardigan
  • Heart Breaker Cami
  • Little Loungers
  • Sweet Bow Dress
  • SOS Knit Pants- Youth
  • So Classic Sundress- Youth
  • Go To Jacket- Youth
  • Cpt. Mack’s Cardigan

Womens

  • Slim Fit Raglan
  • Relaxed Raglan
  • Raglan Add-On Pack – for women
  • Sweet Tee Dolman
  • Pumpkin Spice Dolman
  • Sweetheart Dress + Peplum
  • Siren Swim Top
  • Hello Sailor Swim Bottoms
  • Layer Me Up Shirt
  • Women’s Henley
  • Essential Tank
  • Sunshine Dress
  • Free Spirit Tank
  • Women’s Henley
  • Timeless Tunic
  • Mama Bear Joggers
  • Carefree Cardigan
  • Granpda Cardigan
  • Summer Kimono
  • Cocoon Cardigan
  • Cross my Heart Cami
  • Favortie Tee
  • Linen Loungers
  • SOS Knit Pants
  • So Classic Sundress
  • Go To Jacket- Womens
  • Ragdoll Raglan

Mens:

  • Go To Jacket- Mens
  • Papa Bear Joggers
  • Men’s Henley

Filed Under: Frequently Asked Questions 70 Comments

  • « Previous Page
  • 1
  • …
  • 16
  • 17
  • 18
  • 19
  • Next Page »

connect with me

  • Email
  • Facebook
  • Instagram
  • Pinterest
  • YouTube
Privacy & Cookies: This site uses cookies. By continuing to use this website, you agree to their use.

To find out more, including how to control cookies, see here: Cookie Policy
  • Privacy Policy
  • Refund Policy
  • Contact Us
  • About

Copyright © 2026 Patterns for Pirates

Copyright © 2026 · Genesis Framework · WordPress · Log in