Patterns for Pirates

P4P stylish, modern, wearable patterns

  • Home
  • Blog
    • Frequently Asked Questions
    • Pattern Releases
      • Free Patterns
    • P4P University
      • Fitting
      • Sewing with Stretch, Knit Fabrics
      • Sewing with Woven Fabrics
      • Sewing Machines
    • Sew-A-Longs
    • Fabric for Pirates
    • Pattern Hacks
    • Announcement
      • Blog Tours
      • Contest/Giveaway
  • Shop
  • Bundle Discounts
  • Flash Friday
  • Gift Cards
  • My Account
  • Cart

Spring Mini Capsule Sewing & Contest

March 27, 2017


Hey ya’ll- Judy’s sister, Megan here from Made for Mermaids! Judy and I have been talking about how badly we needed to start sewing warm weather clothes. Our kids have simply outgrown all their Spring (aka Summer in Dallas 😉 ) clothes. While we are constantly sewing for new pattern releases, most the time we’re using prints to show in tutorial and testing photos. Many times pieces end up not making any sense in our wardrobe and I find myself wearing the same staple, simple tops I have in my closet over and over. We decided a mini capsule was the perfect solution!

What is a capsule wardrobe? 

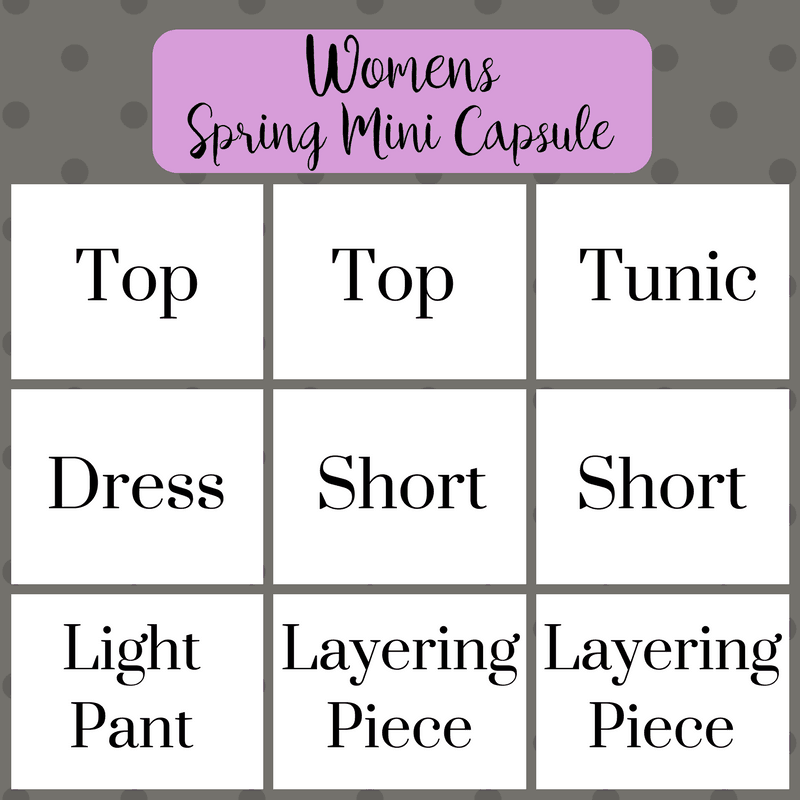
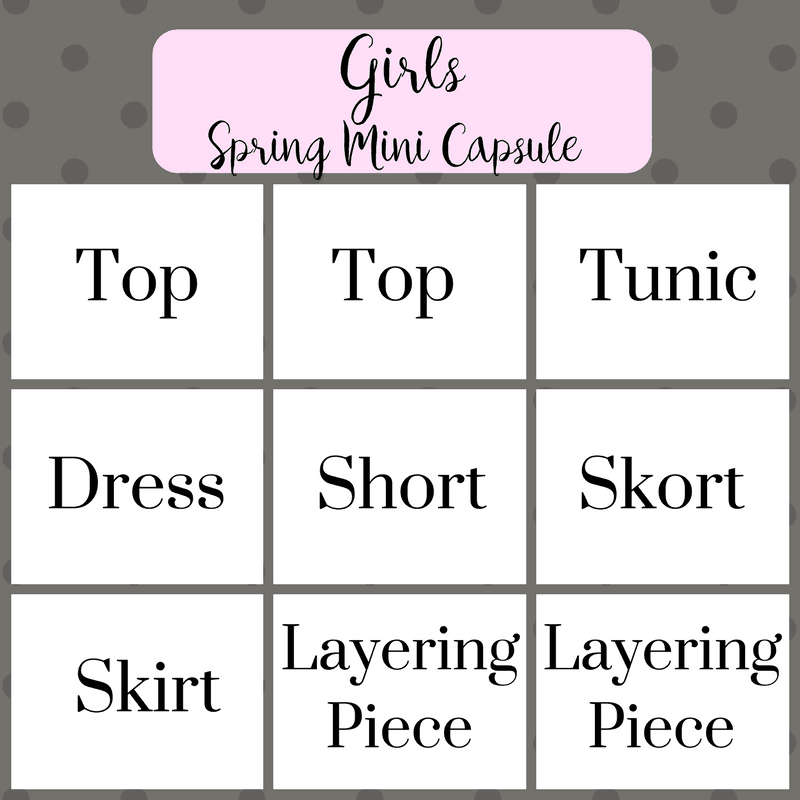
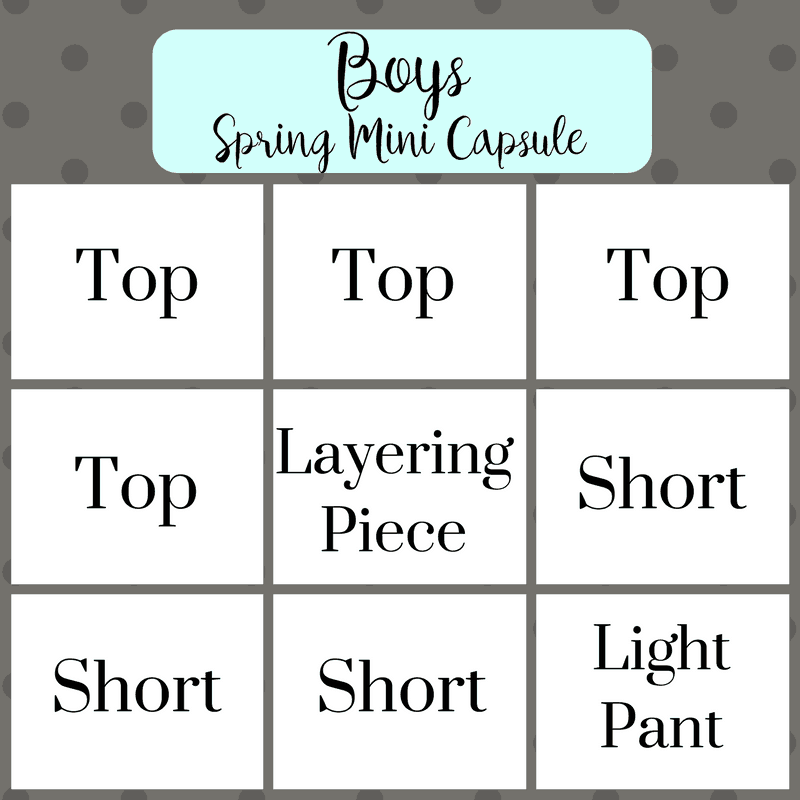
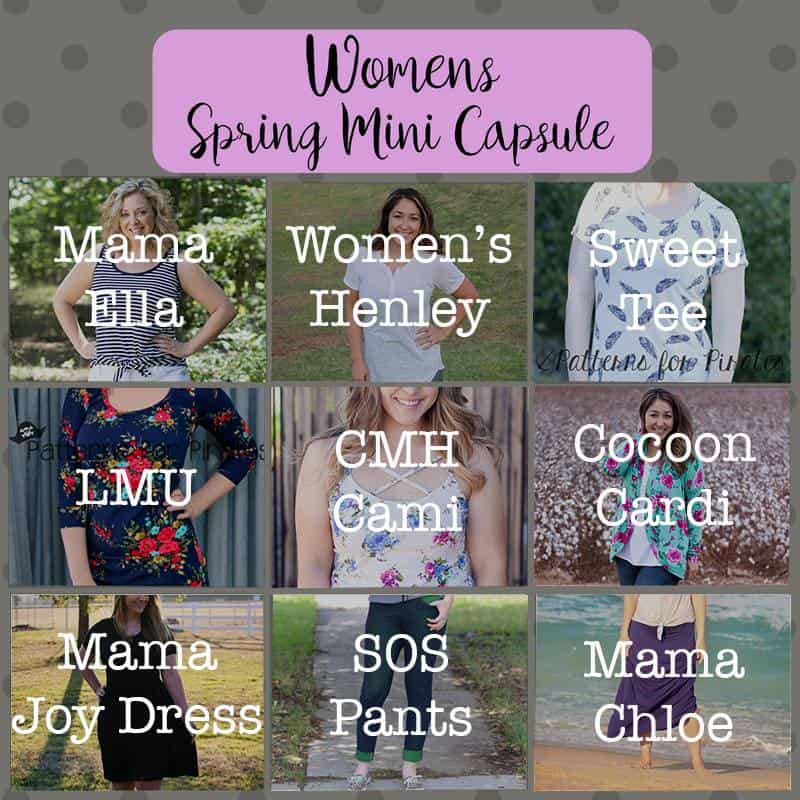
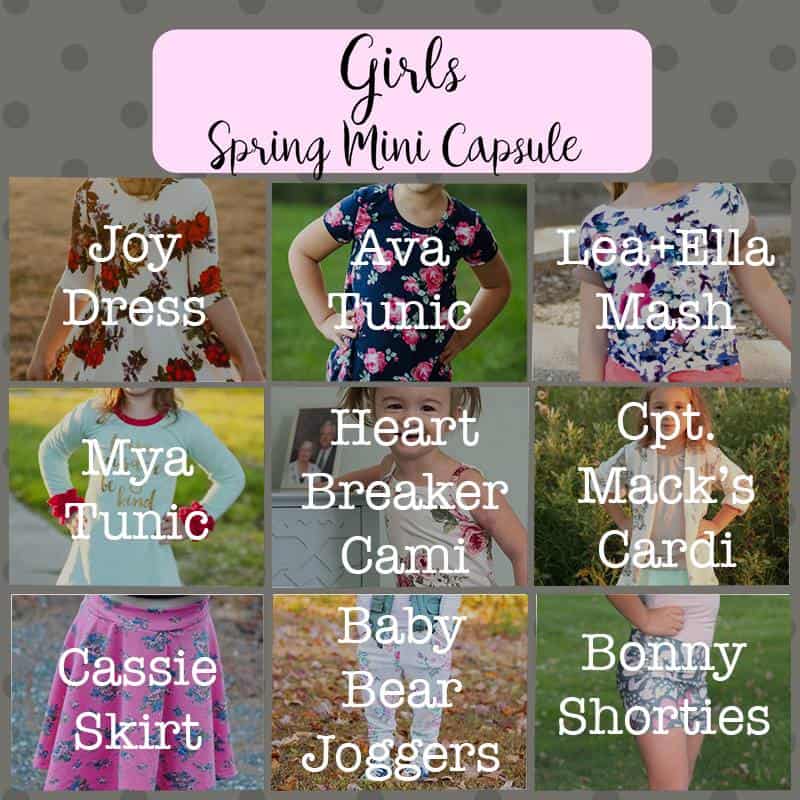
It’s a wardrobe made up of really versatile pieces that you completely LOVE to wear. Pieces that are simple; they can be mixed, mashed and worn several different ways. It’s about quickly and effortlessly being able to put an outfit together.  Now a full capsule wardrobe is made up of jewelry, shoes, accessories, everything you need to wear on a day to day basis. What we’re going to be doing is sewing 9 staple pieces for your closet. I’m trying to sew 3 mini capsules… I know I know, but we really need these so I’m hoping I can get them all done! One for myself, one for my daughter and one for  my son. 

How do you plan capsule sewing?

This will be different for everyone, depending on where you live, lifestyle and personal preferences. I can tell you how and what I have chose for our mini capsules. I love to have a board to help me plan. The visual really helps me be able to put it together exactly how I want. Don’t worry, I have FREE Photoshop templates if you’d like to make your own with photos or text. You can also use picmonkey or another editing/collage type site to help you. If you need directions on how to use the template, check the bottom of this post. Simply click each link below and they will download.

M4MWomensCapsuleTemplate

M4MGirlsCapsuleTemplate

M4MBoysCapsuleTemplate

First I decided what pieces I wanted to sew. I looked in my closet (and kid’s) and tried to see what was missing. Now I just typed these out, but you can do more of a suduko style where each row and column make an outfit, so you can REALLY make sure all your pieces can be worn together.

How do you choose patterns?

I choose patterns a few different ways.

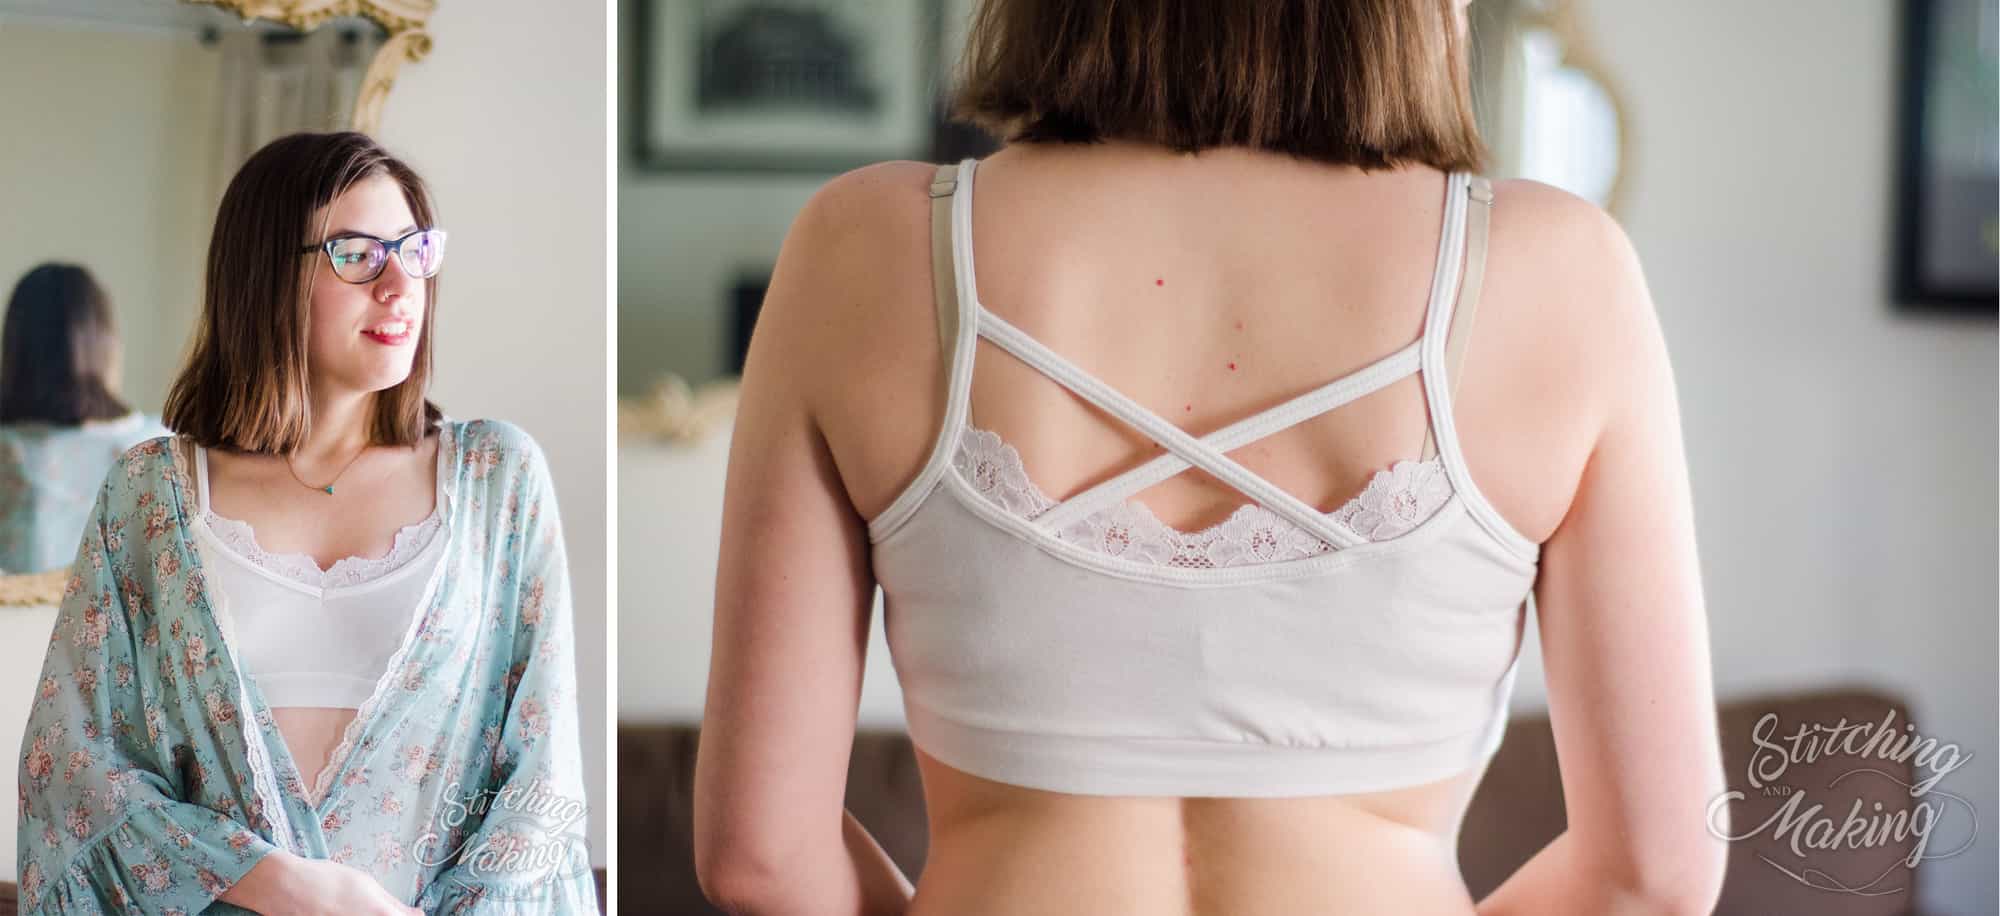
1- What do I LOVE to wear and feel GOOD in? What do I find myself always pulling out of the dryer to wear again? Same for my kiddos. I find them asking to wear the same shirts and dresses all the time.

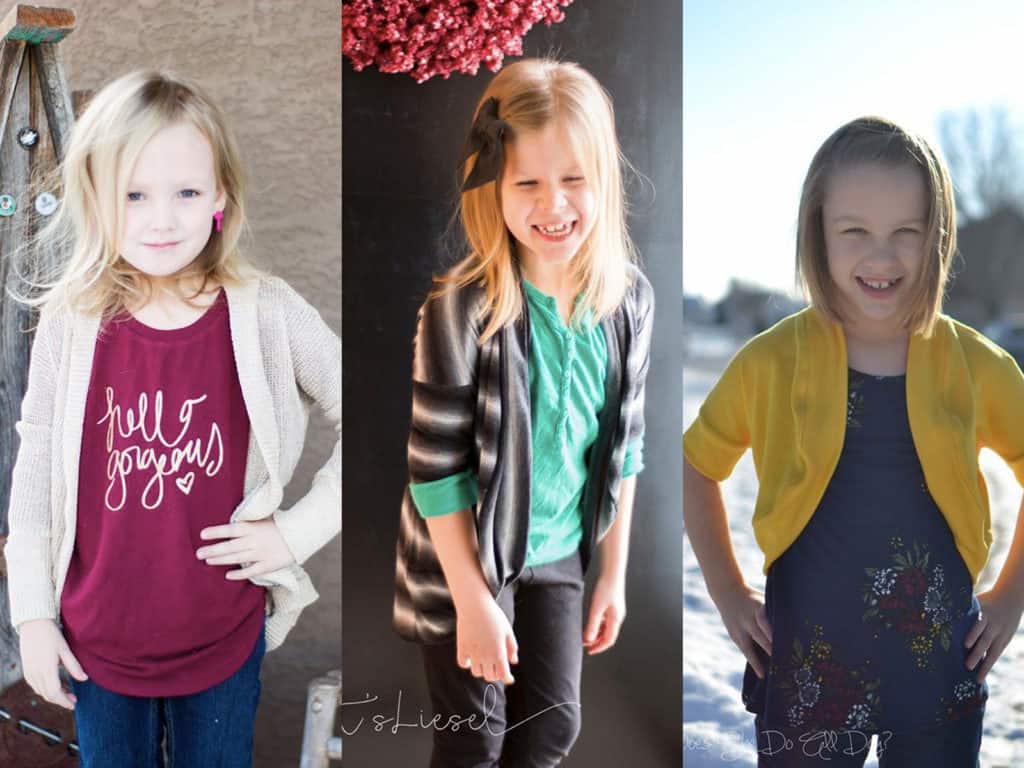
2- What is my wardrobe lacking? Do I need shorts, tanks, tees? We moved last Fall and my daughter’s new school dress code is much more strict than her last. She can’t wear any sleeveless tops or dresses, which throws out 90% of her Spring wardrobe from last year. I know I sound like a broken record…  but it’s HOT here in Dallas so I plan on making her a LIGHT cardi to be able to throw over tanks.

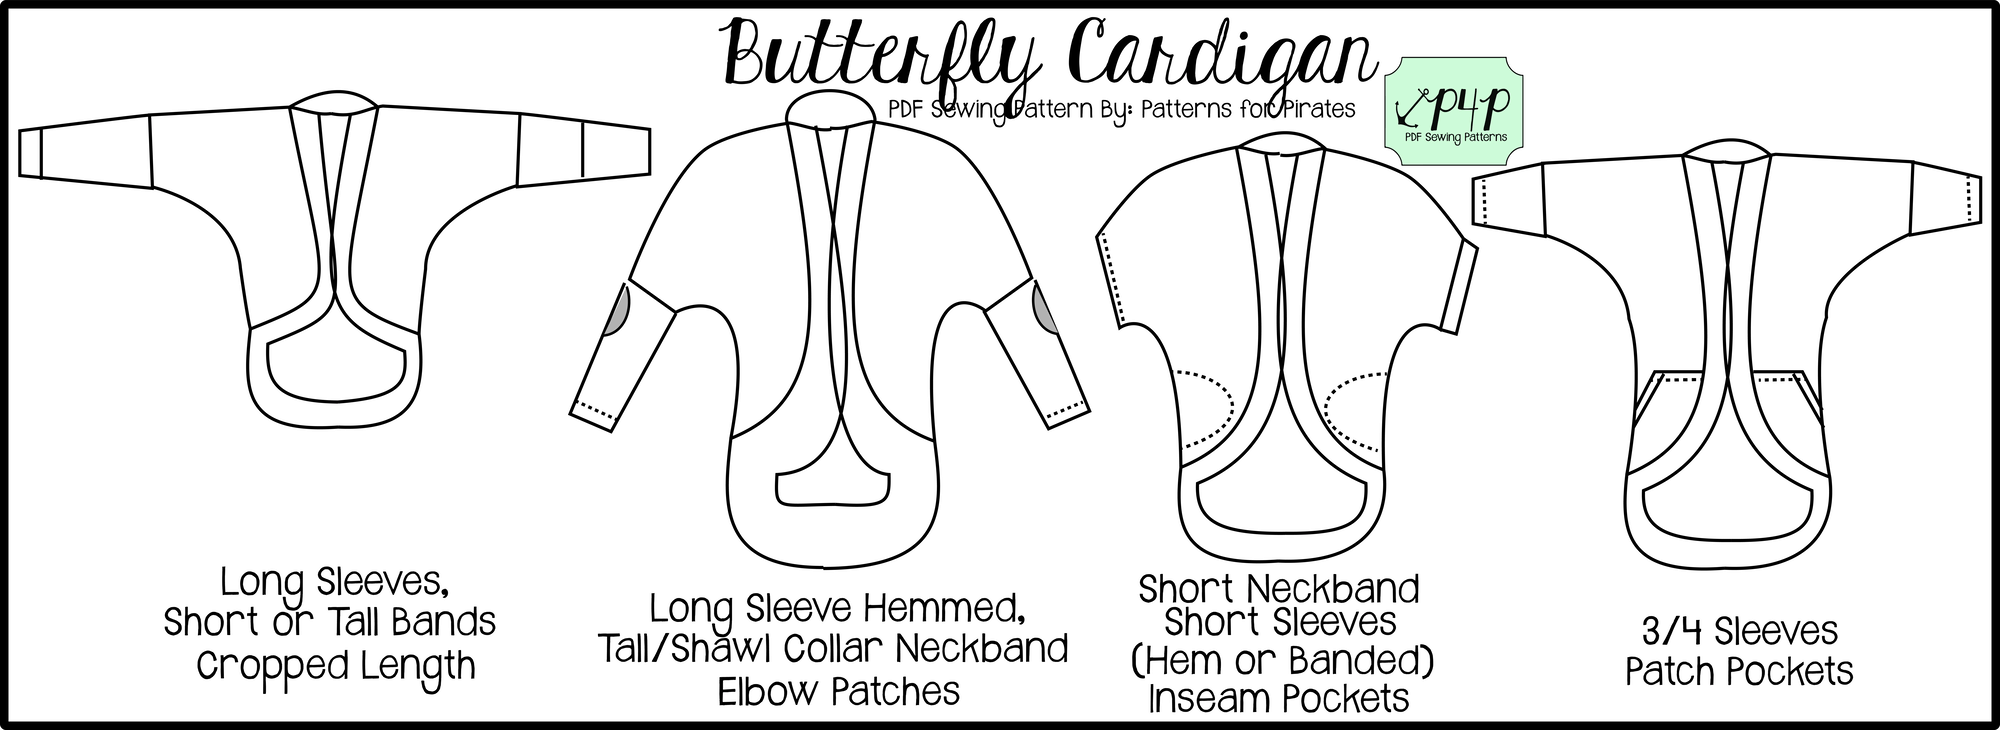
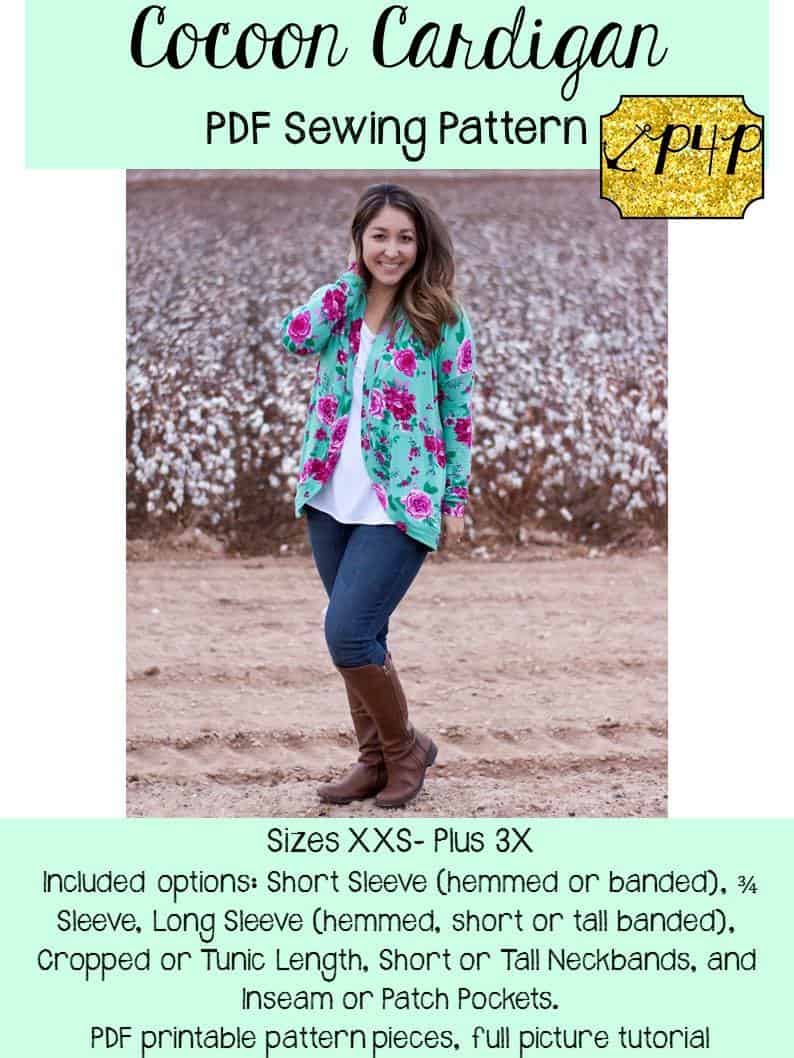
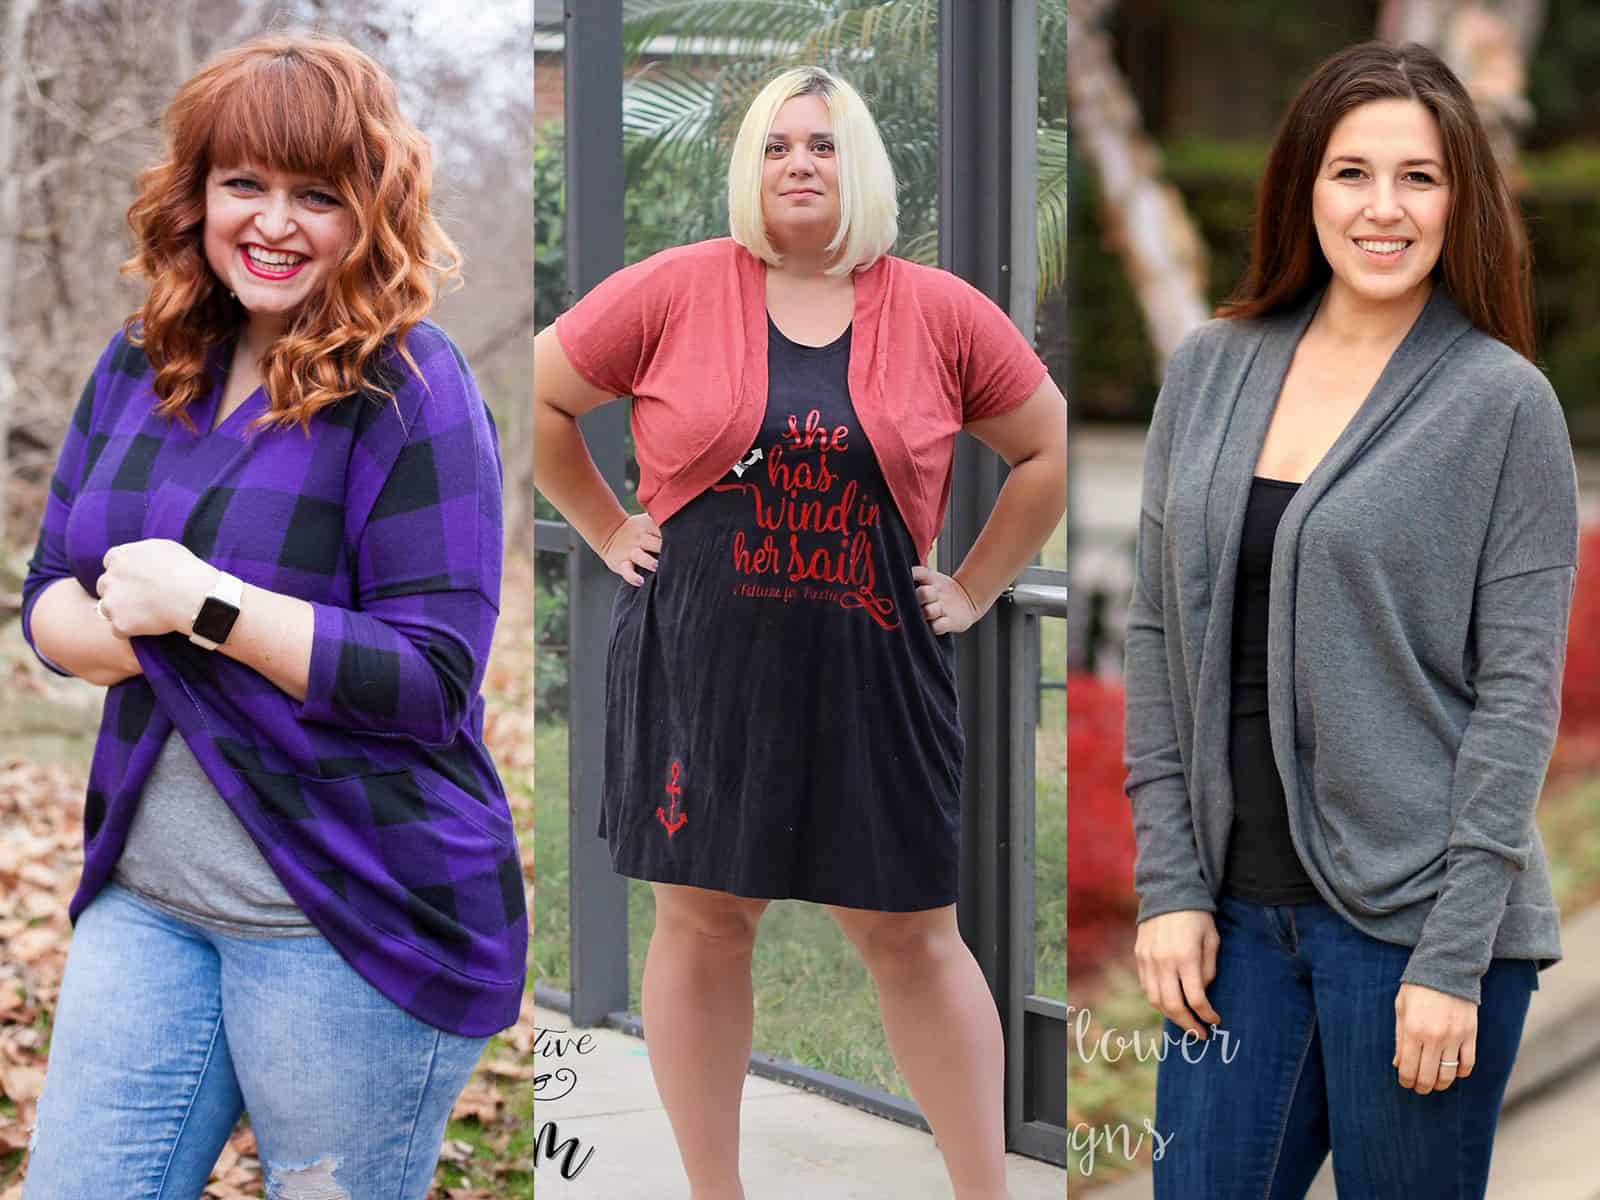
3- What will work with the warmer weather? Luckily for both M4M and P4P most our patterns have tons of options with different sleeve and hemlines that can be worn year-round 😉

How do you choose fabrics?

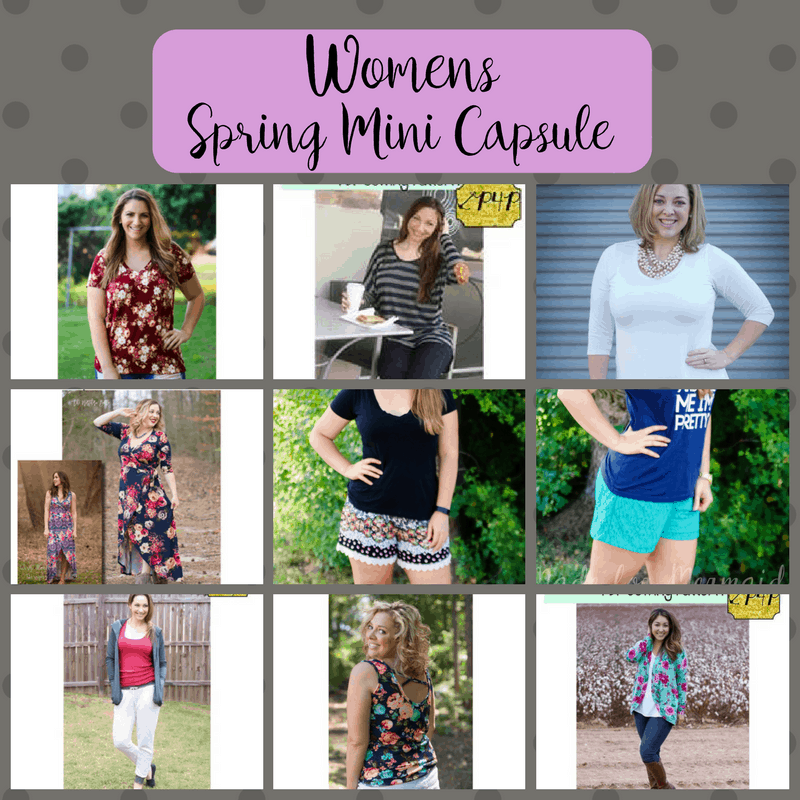
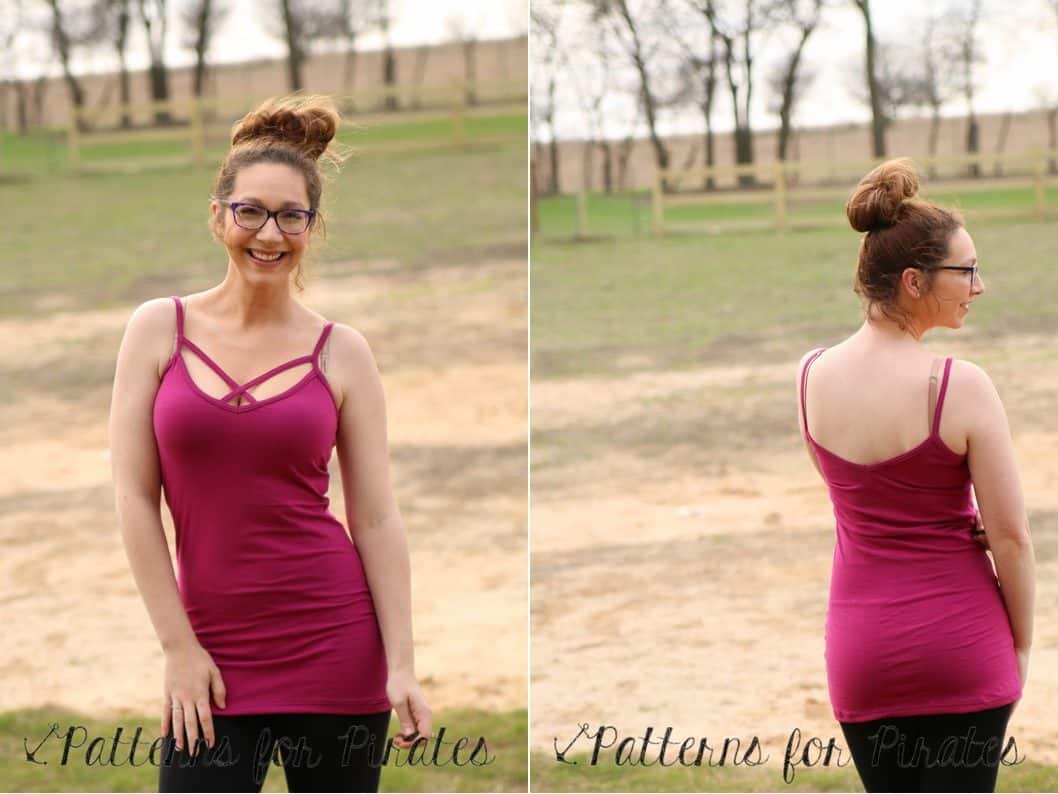
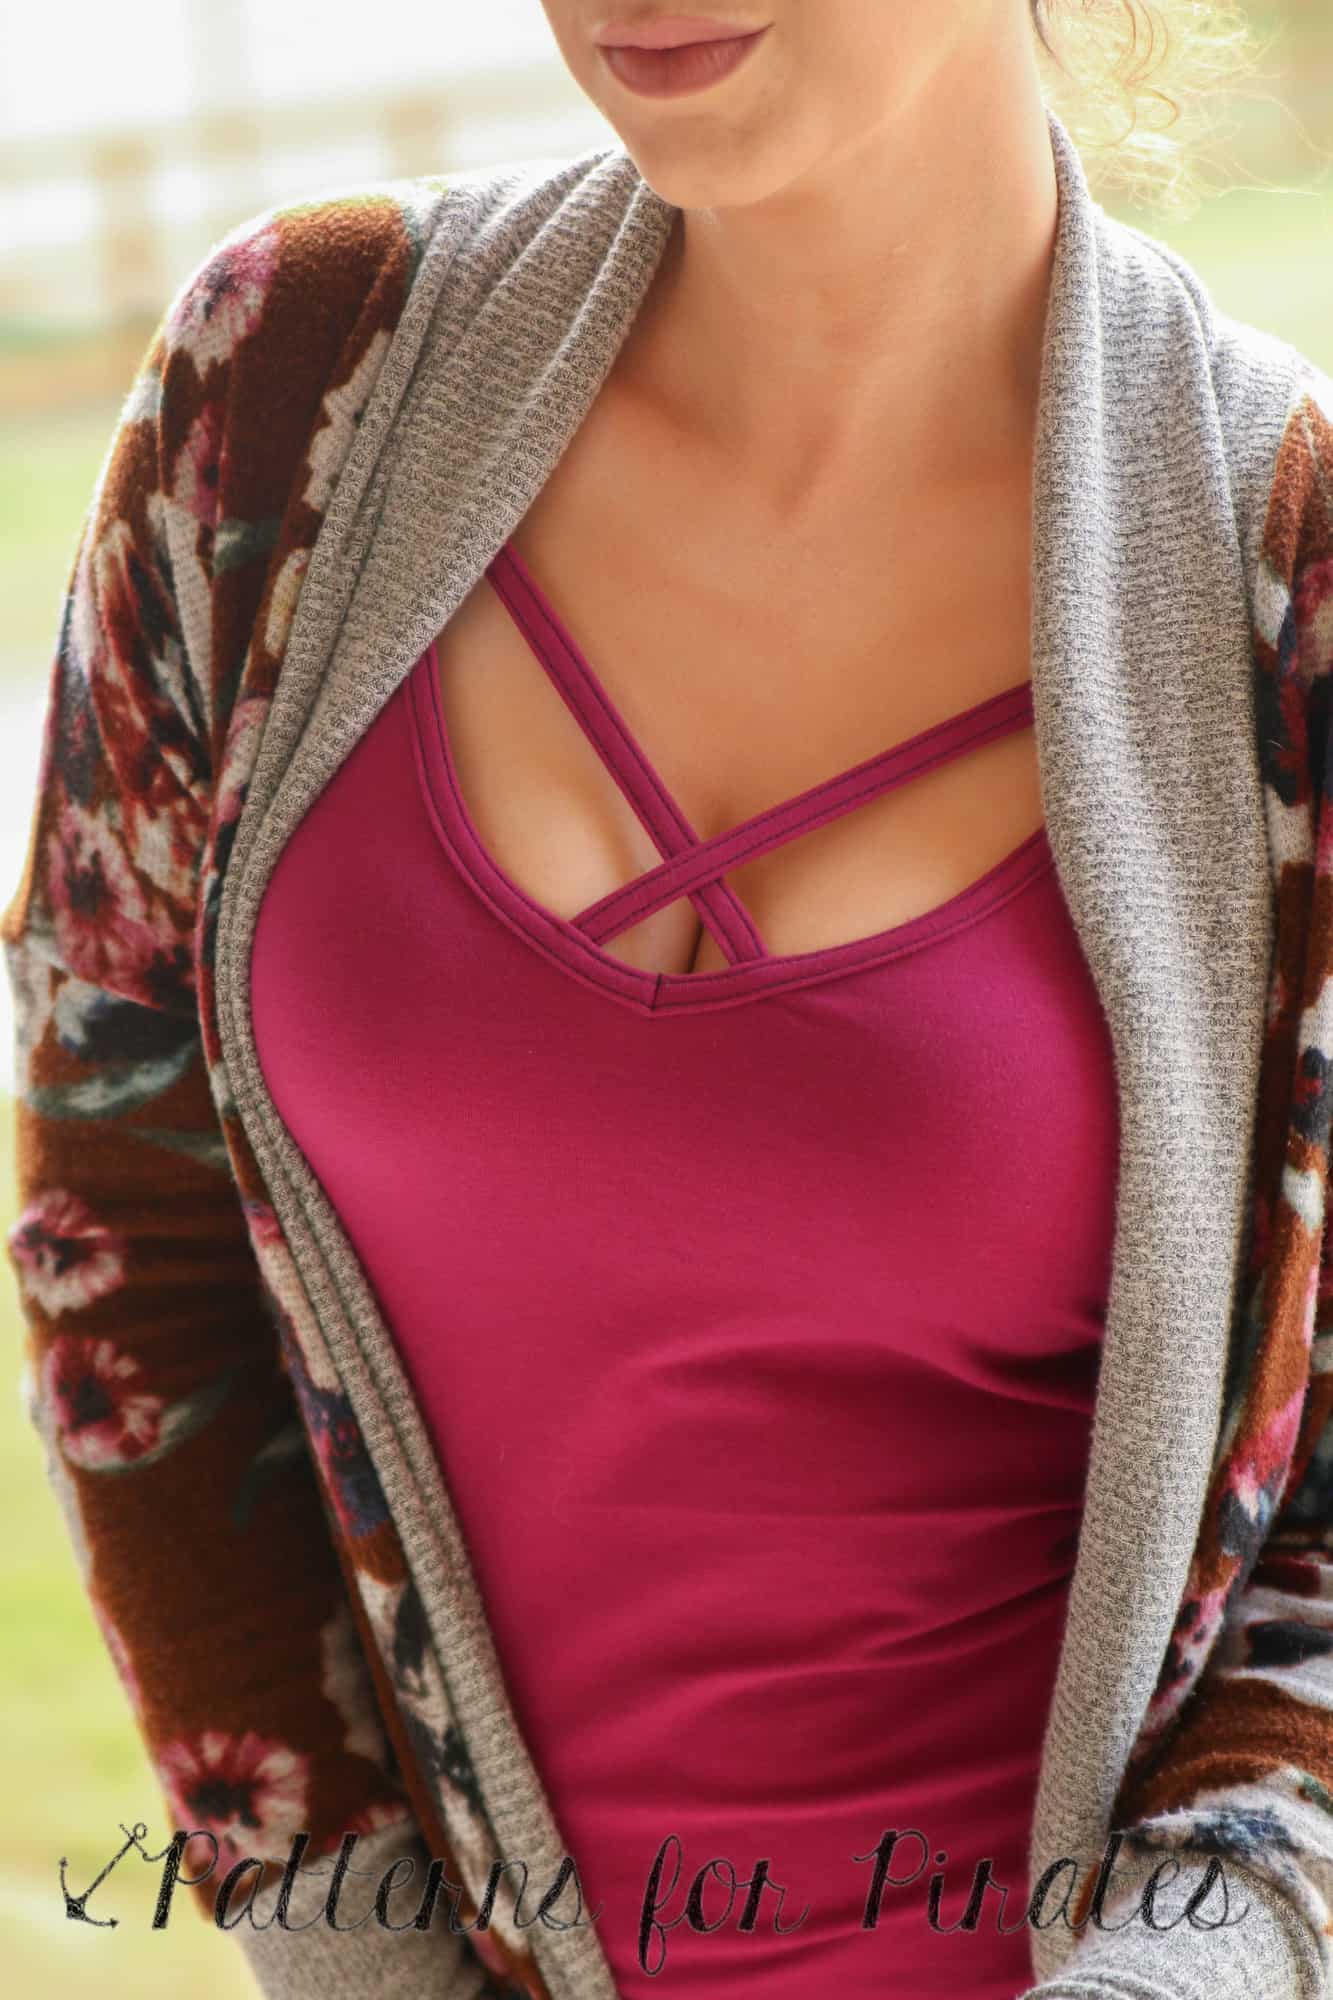
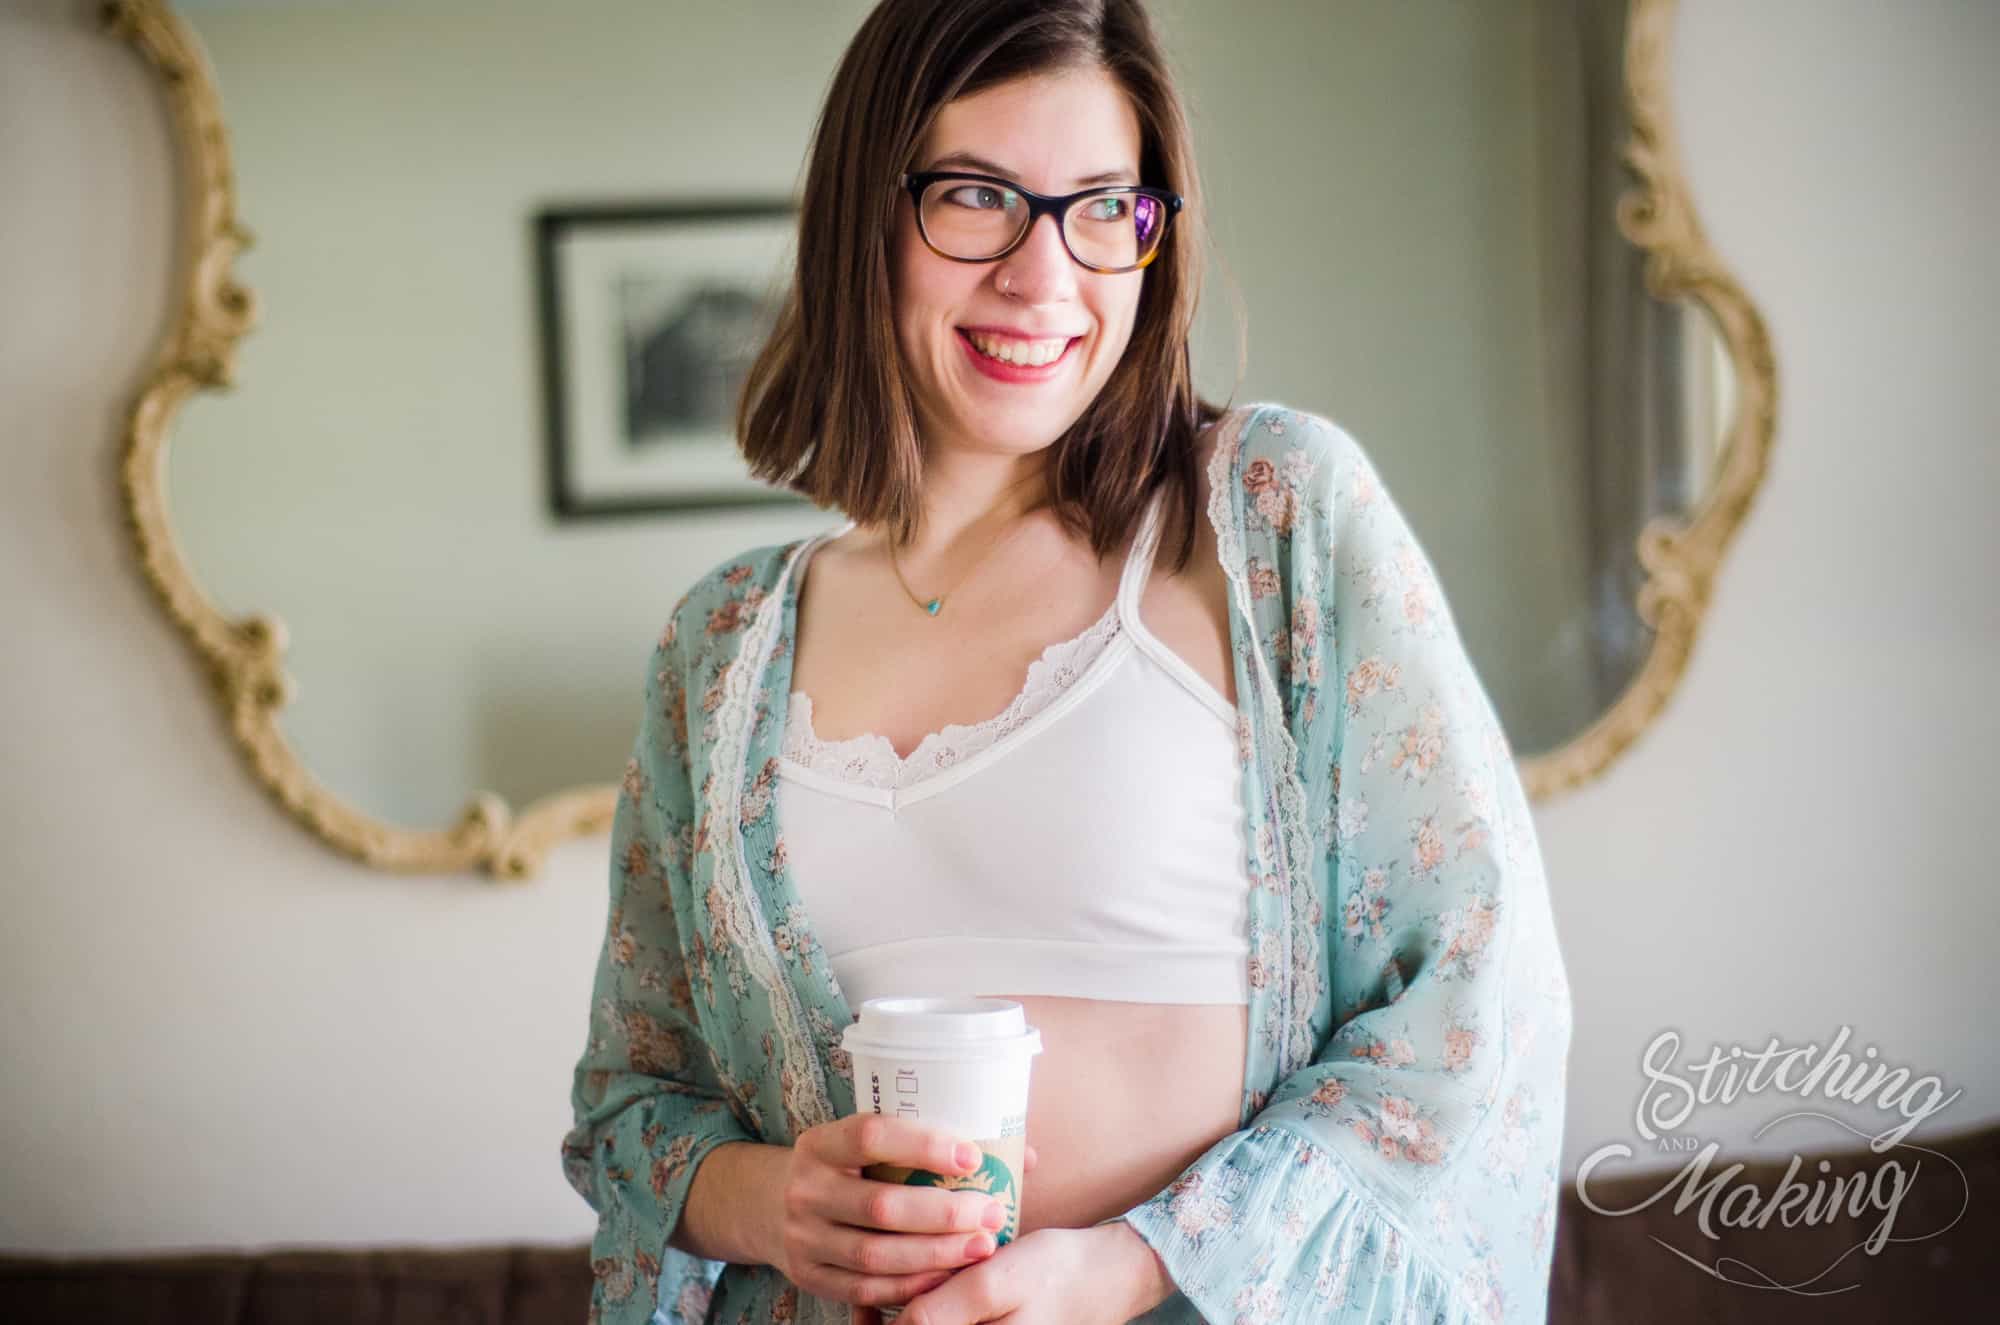
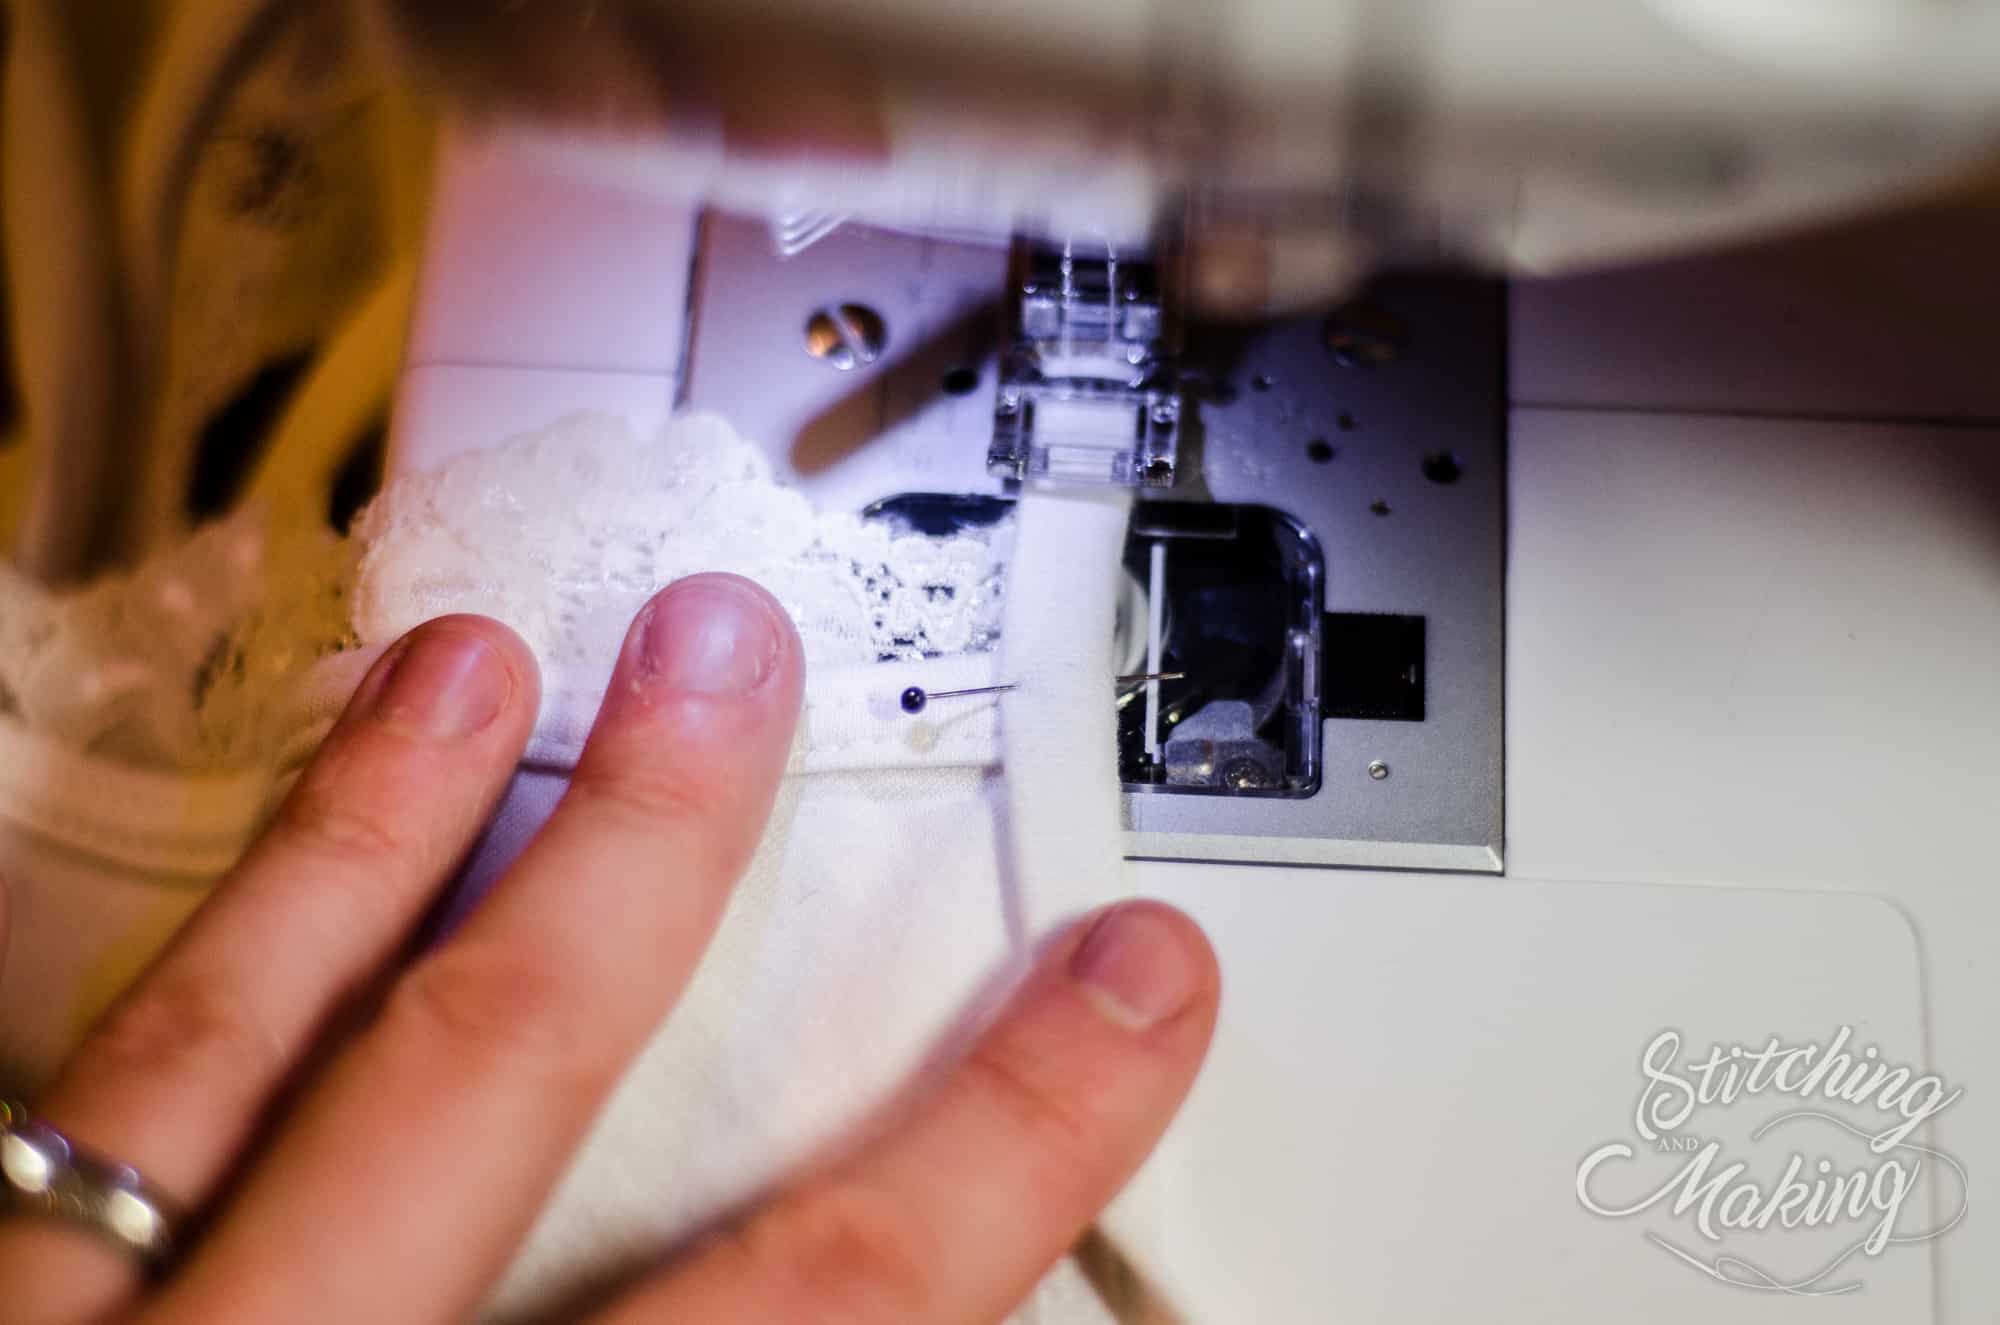
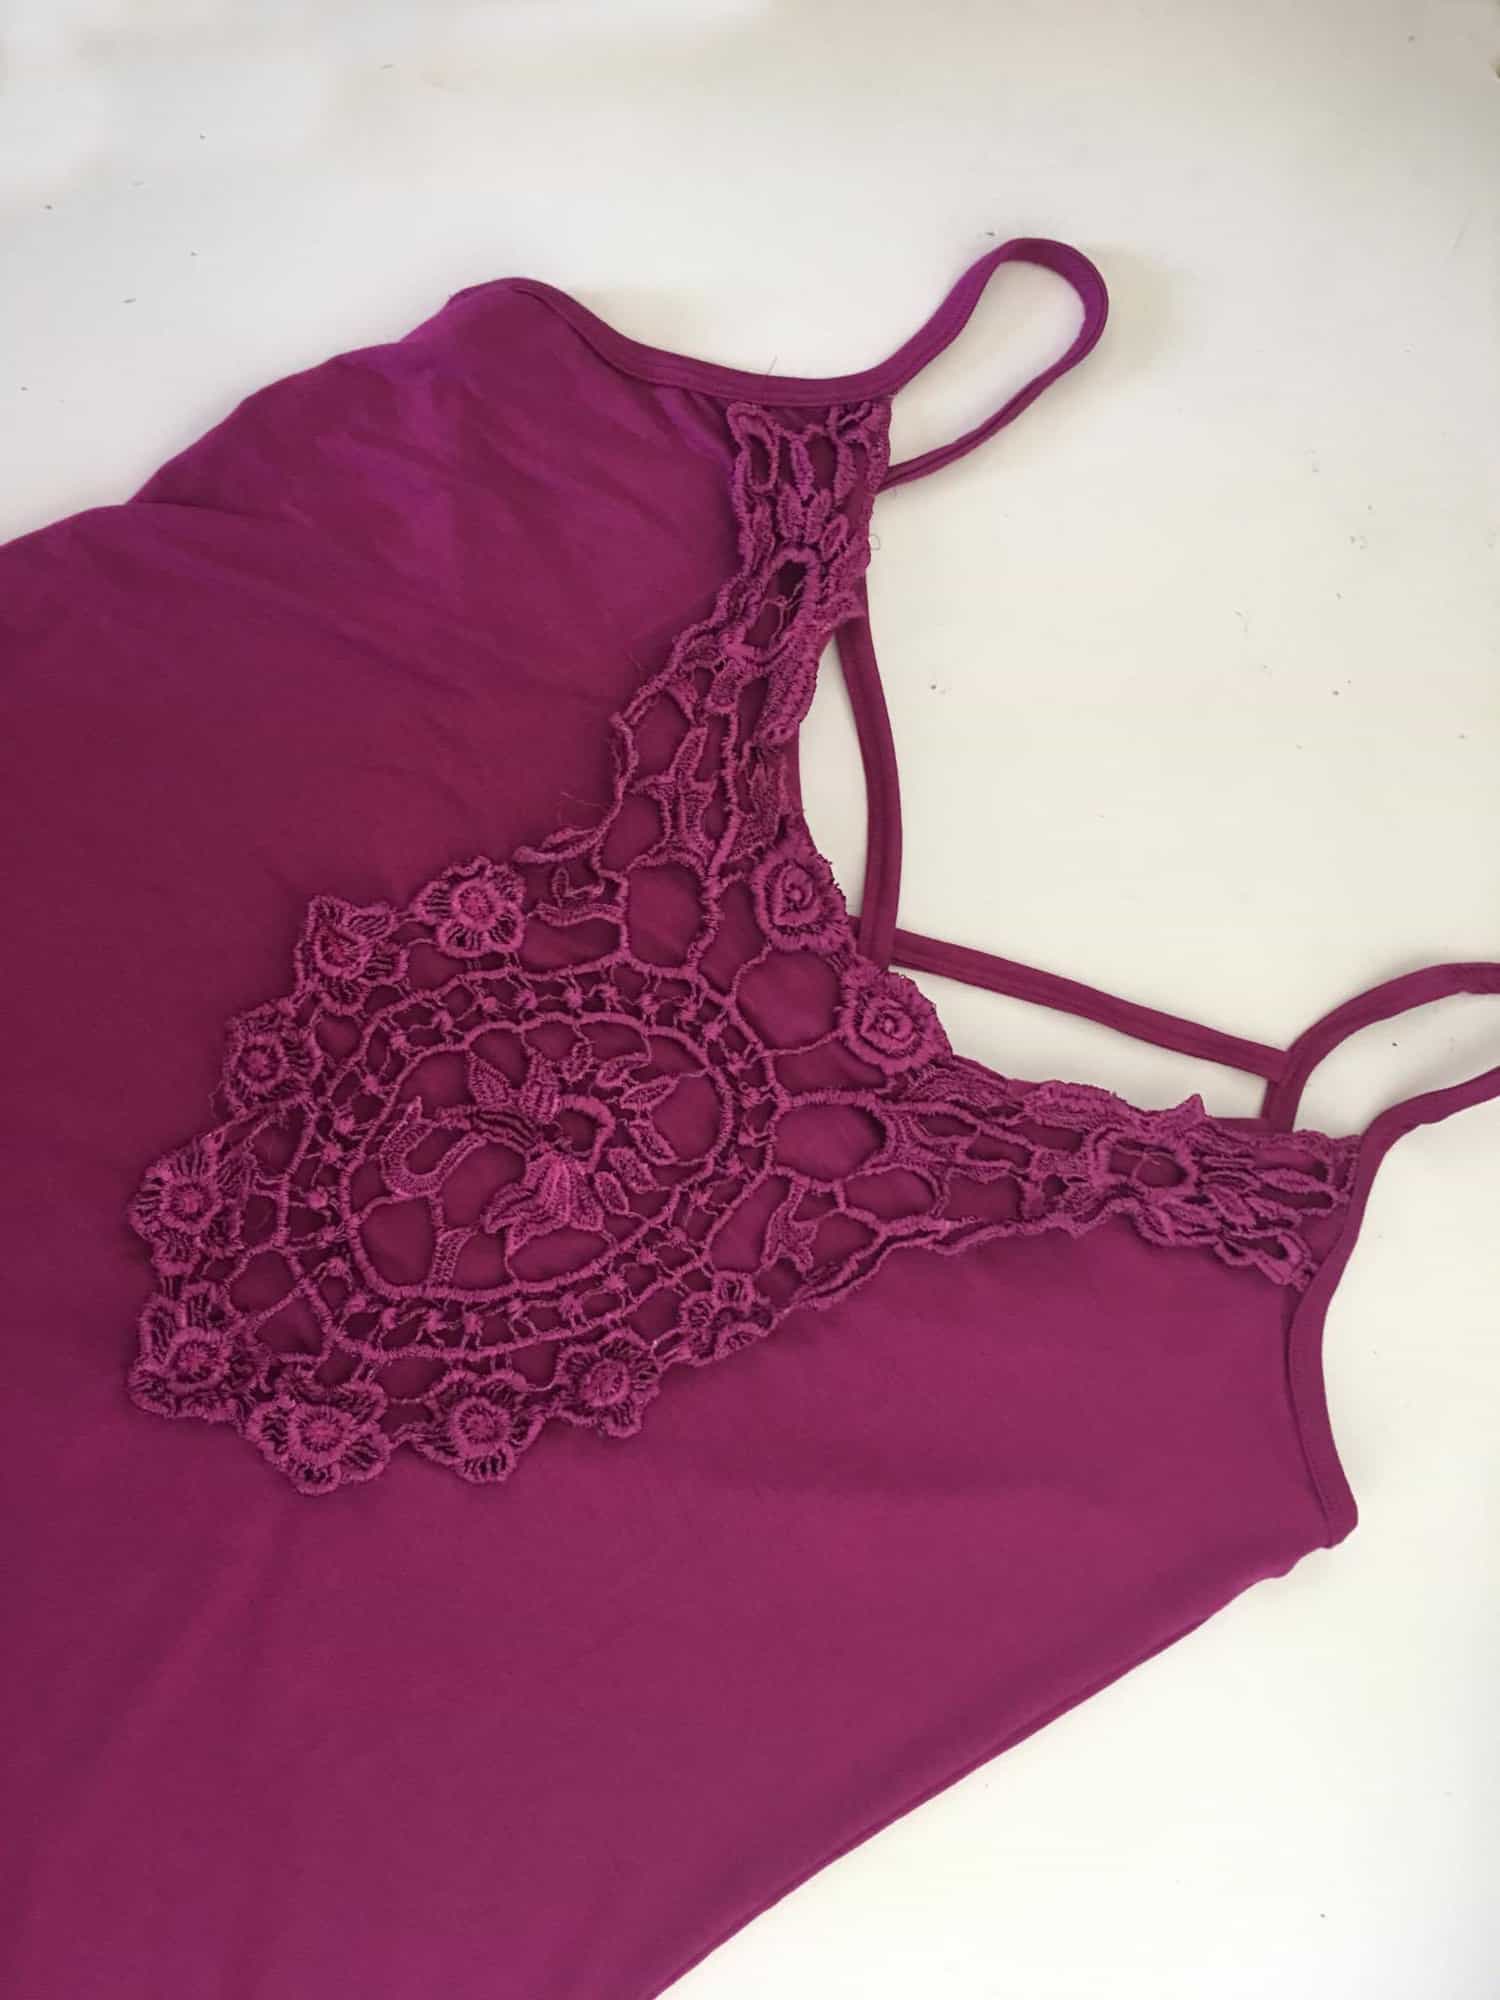
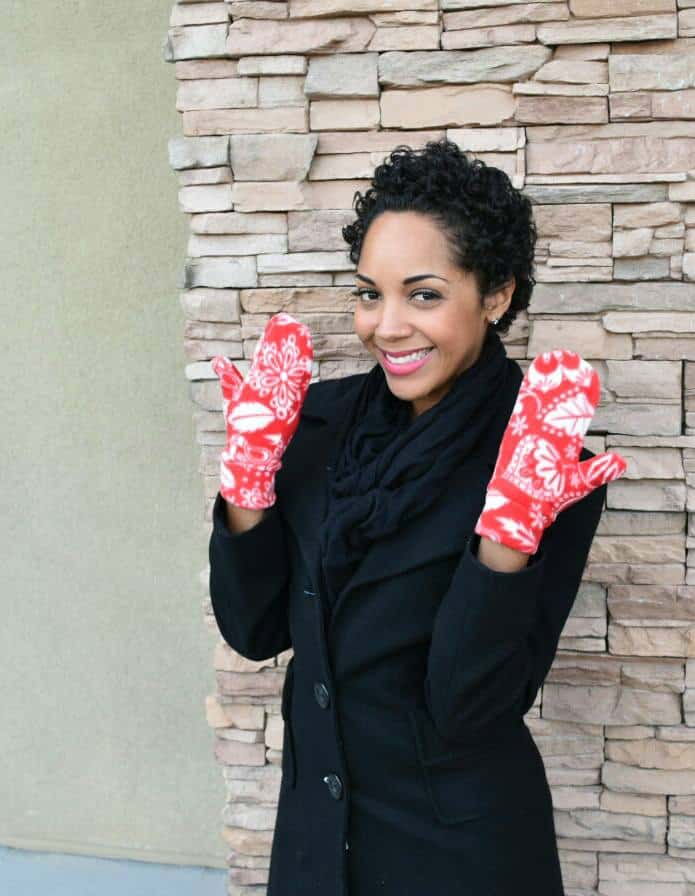
What makes capsules great is they are no fuss. So you don’t want to choose fabrics that clash, but rather coordinate and compliment each other. Think solid or solid-like fabric for most of your mini capsule. What am I talking about with “solid-like”?? A print that reads as a solid to blend the other fabrics together and something that coordinates with the focus fabrics. Think subtle: stripes, dots, heathered, burn-outs, etc. Also think about using different textures, so even if the fabric is solid or plain, it looks different against another piece. Choosing different types of fabrics will help your wardrobe not look or feel too bland. Remember to think about the weather and choose fabrics that won’t feel too warm. I know you know, by now that Dallas is HOT 😉 so I like to use ITY, rayon spandex, rayon challis, georgette, model, bamboo jersey, chiffon and light, open weave sweater knits when moving into warmer weather.

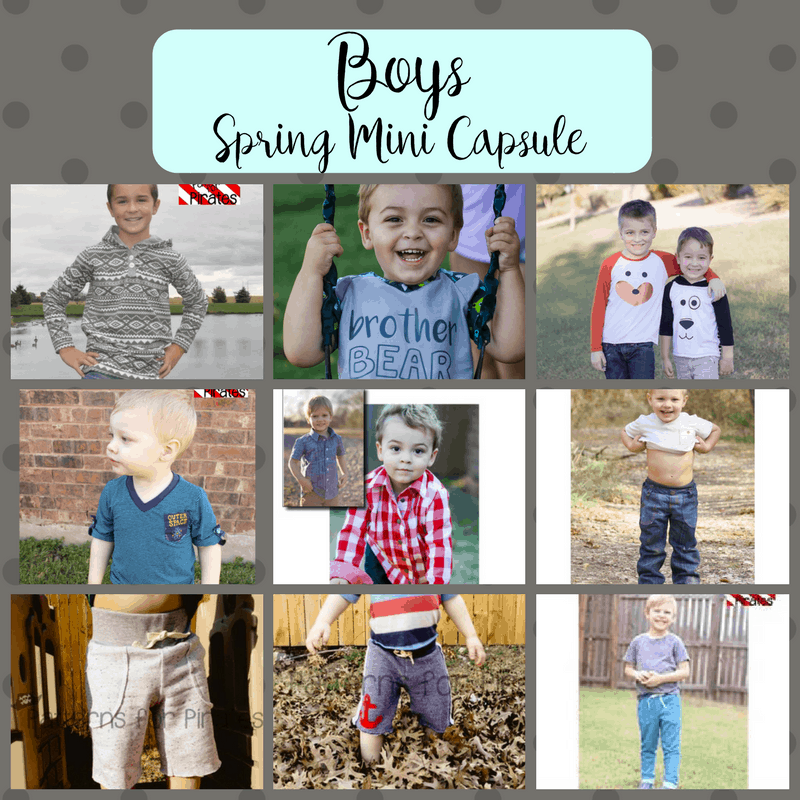
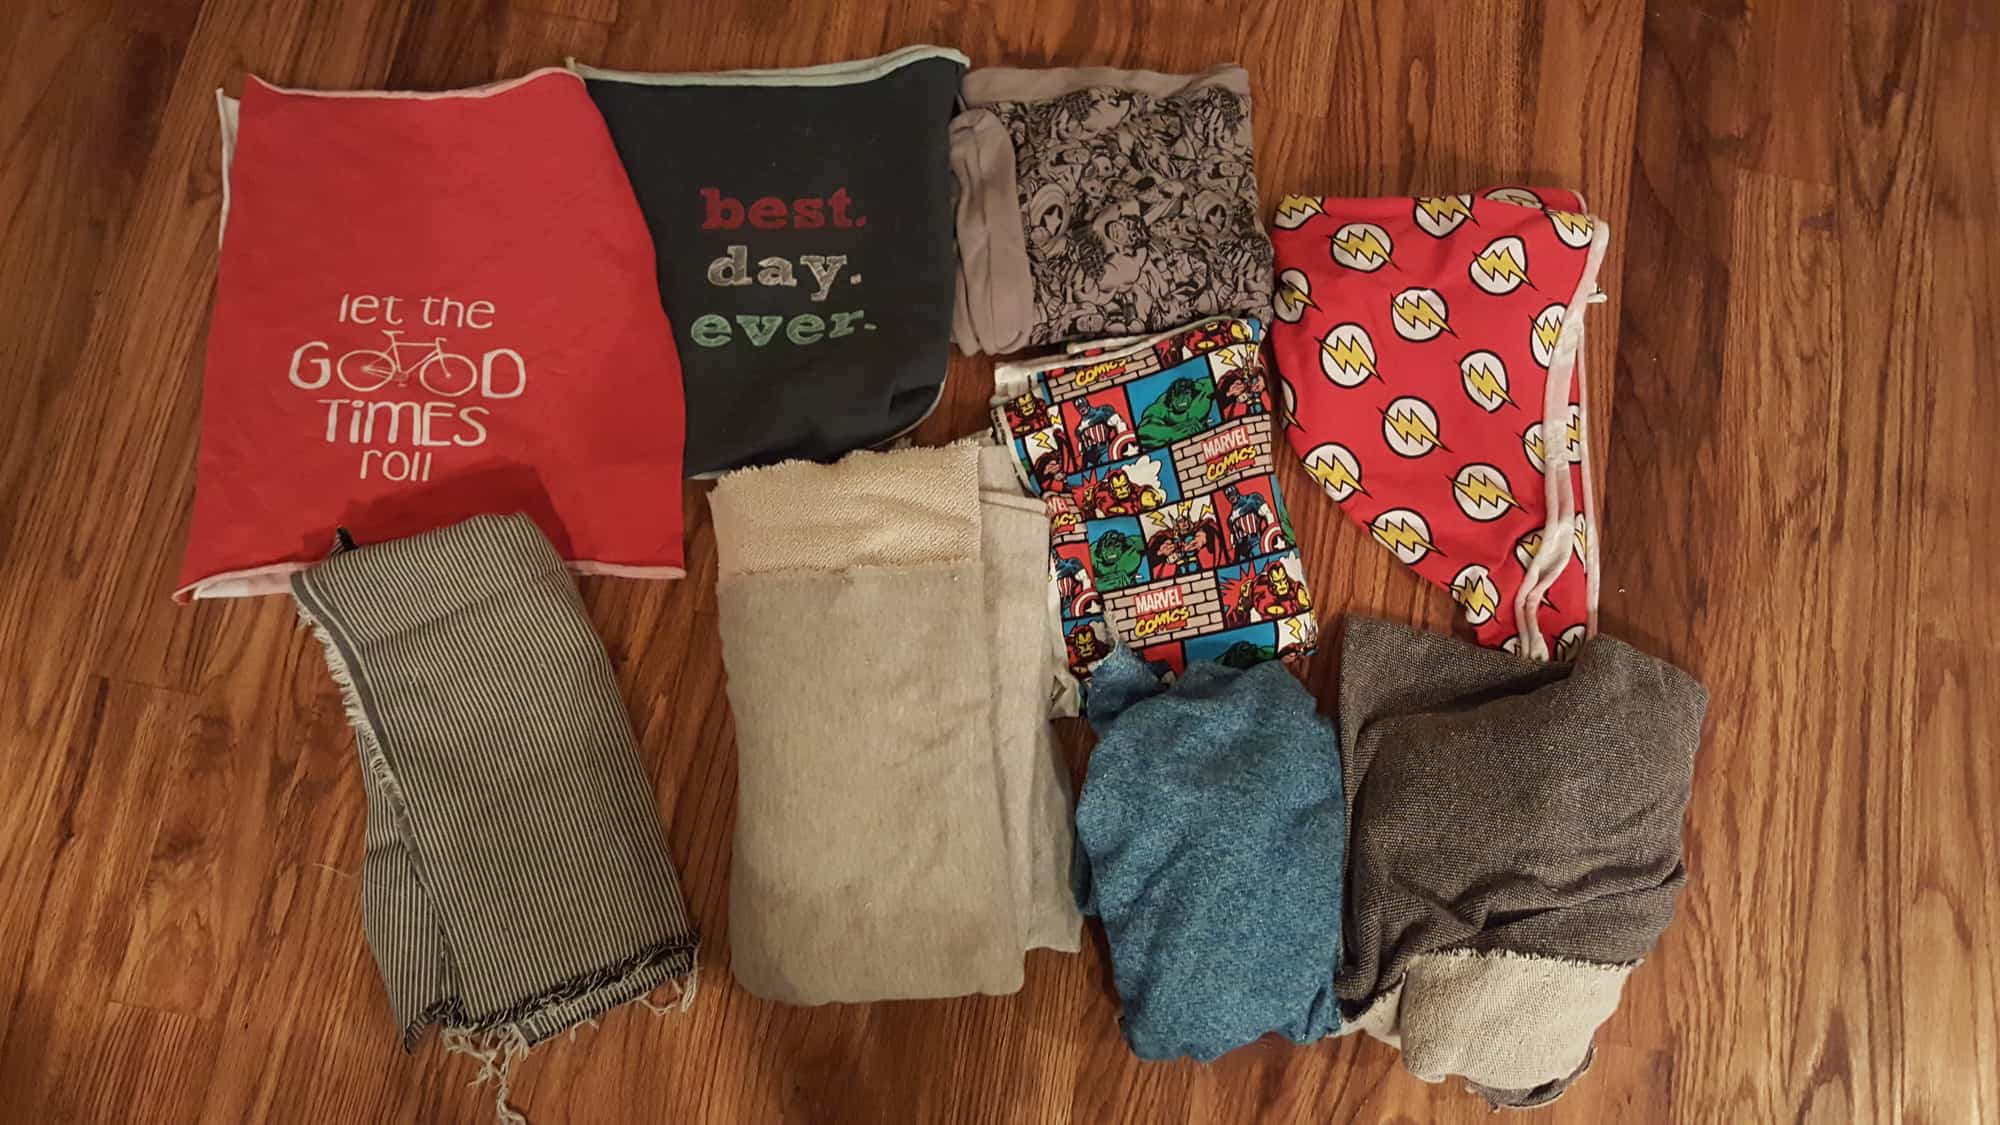
Here is Judy’s mini capsule fabric laid out for her Little Guy!  He’s old enough that he wanted to help pick! So, lots of superheros going on, which he considers a neutral 😉 She managed to keep in within a color scheme to help the tops and bottoms coordinate with each other.

How does the contest work?

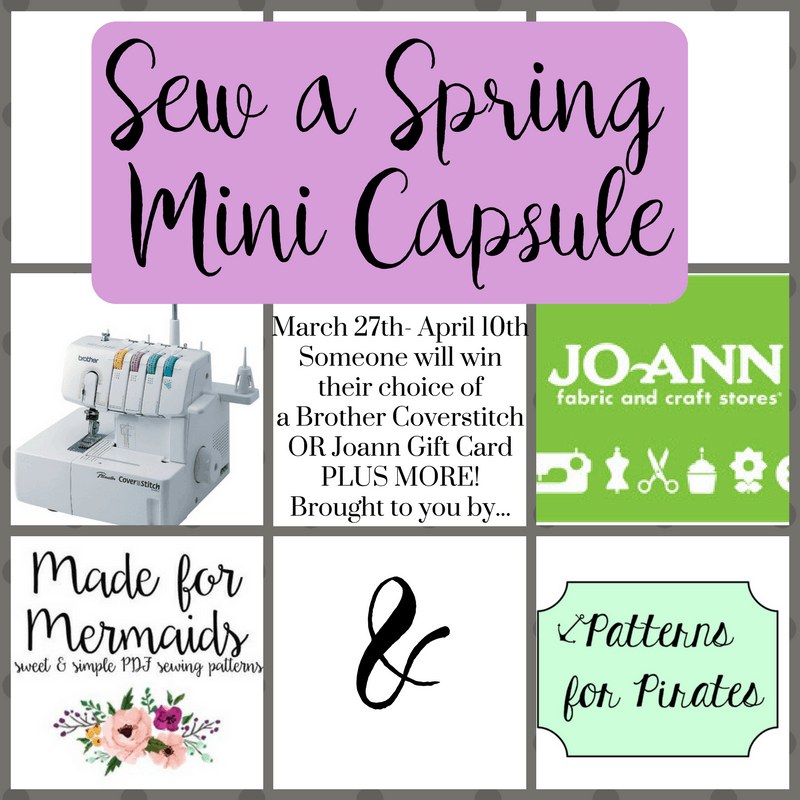
We have several random participant prizes for you! To enter, all you need to do is sew a 9 piece mini capsule using all M4M and/or P4P patterns…now if you already have a favorite, staple piece you’ve sewn from one of our patterns and MUST have it in your capsule, that’s ok. They can be mash ups or a combo of our patterns. Then post your final capsule in our FB groups (P4P and/or M4M). The final post must be in a collage format. You can also share on Instagram, Pinterest, Twitter or other sewing/fabric FB groups. You MUST use the hashtag #sewminicapsule and we would love if you would tag M4M and P4P, and use #madeformermaids and/or #patternsforpirates . If you don’t use the hashtag we won’t be able to find your entry! You can sew multiple capsules for yourself and little one/s for more than one entry. Contest ends April 10th. We will have 12 random winners, open to international friends. Are you ready for prizes??

5 winners will get 1 pattern of choice from EACH P4P and M4M.

3 winners will get 3 patterns of choice from EACH P4P and M4M.

1 winner will get a $50 store credit to Sincerely Rylee Fabric Shop.

1 winner will get a $50 store credit to Pretty Posh Prints.

1 winner will get a $100 store credit to Knitpop.

Our grand prize winner will get their choice of a Brother Coverstitch 2340cv OR $100 gift card to Joann Fabric!

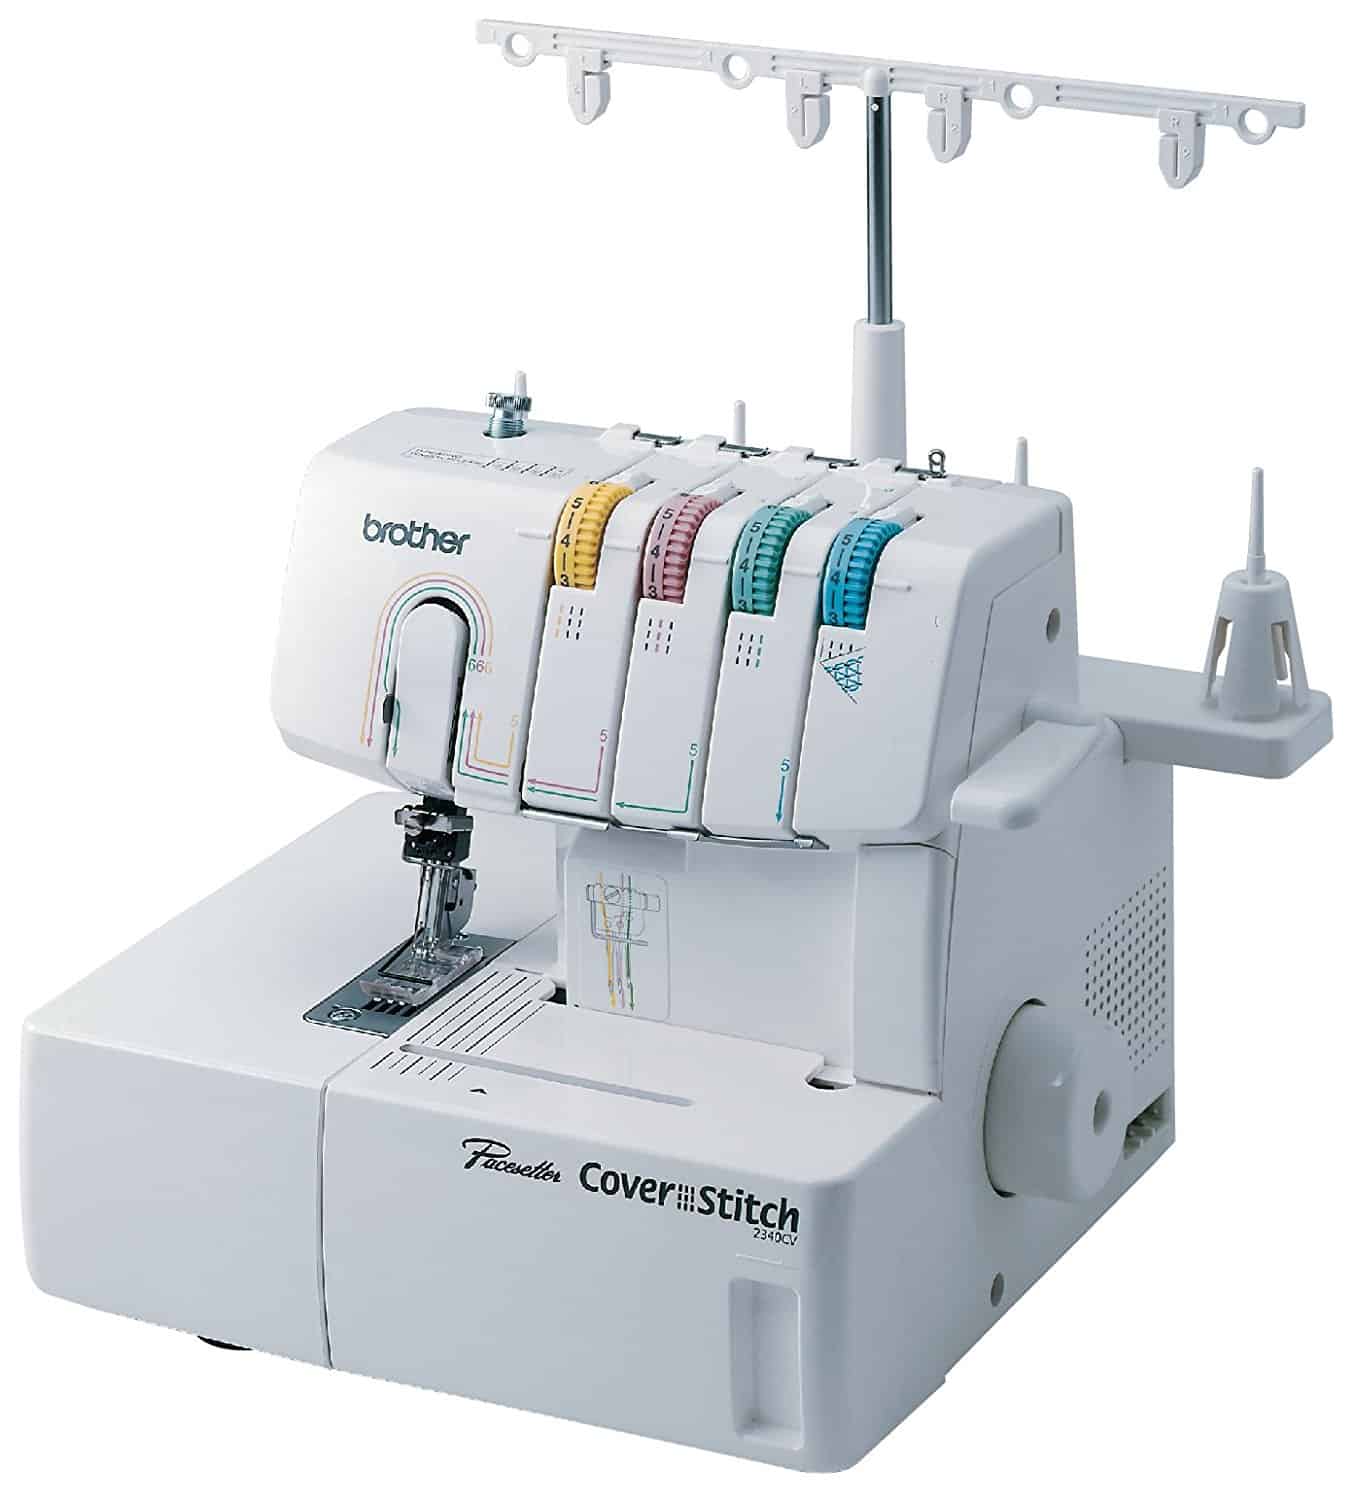
We can NOT wait to see what you make! If you have questions, need advice, inspiration, make sure to post in our FB groups, (P4P or M4M) we would LOVE to see what you’re sewing for your capsule!!
How to use the Photoshop templates-

Open file in Photoshop. Download all the photos you may want to put on your board. Click on the layer that says ‘Place Photo Here’. Click “File”, “Place” and then choose the photo you’d like. You can resize the photo by holding Shift and dragging the corners. Repeat with each box. Then save as a photo file so you can share with us!

If you want to just add JUST text to the board, click on the layer that says ‘Place Photo Here’ then add your text there for each box.

If you want to add text on top your photo, add a new layer above the layer that says ‘Place Photo Here’. Then add your text there for each box.

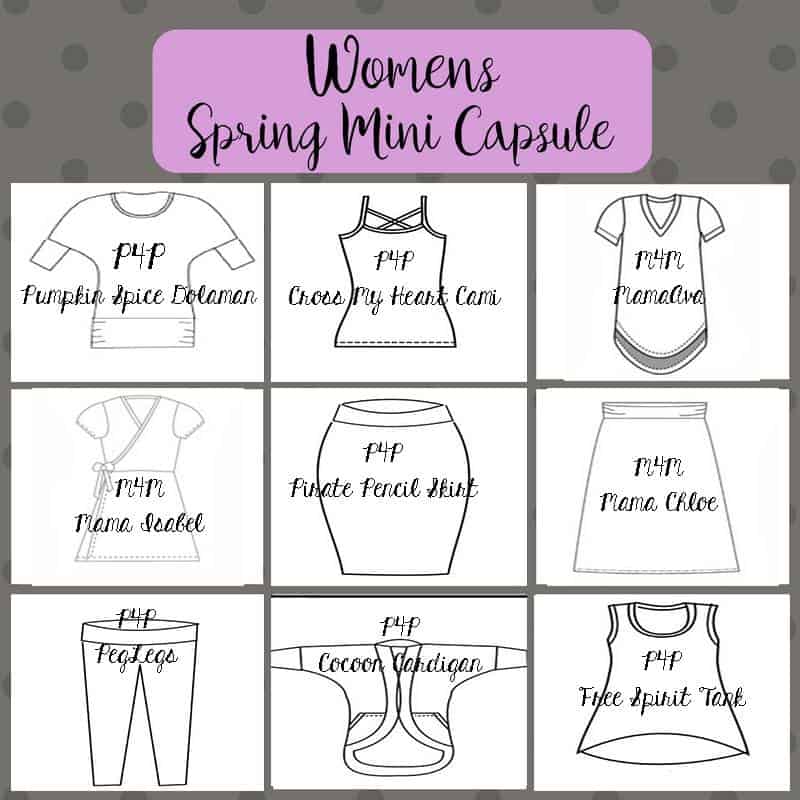
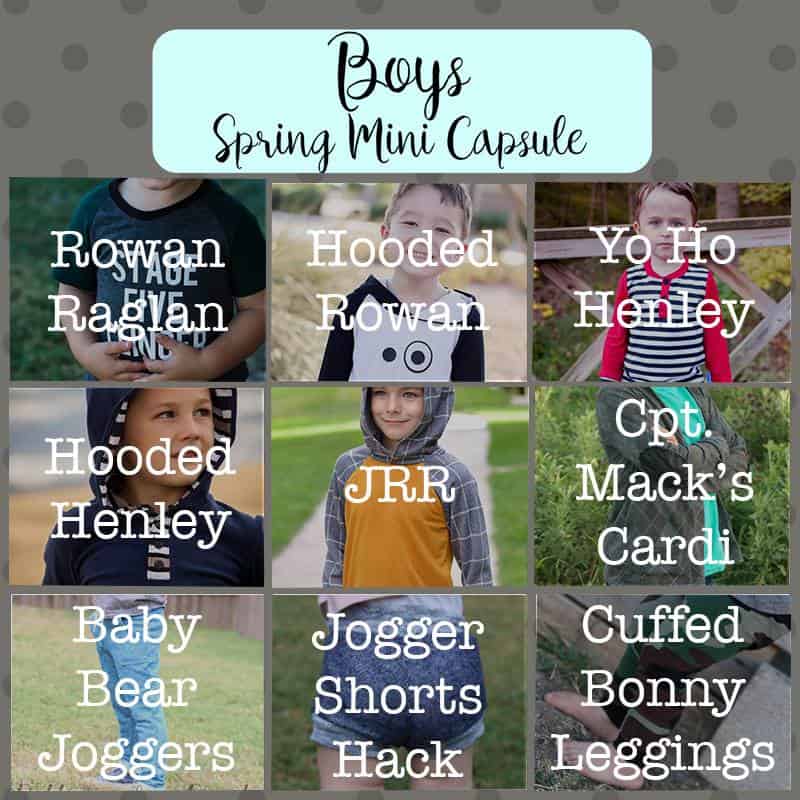
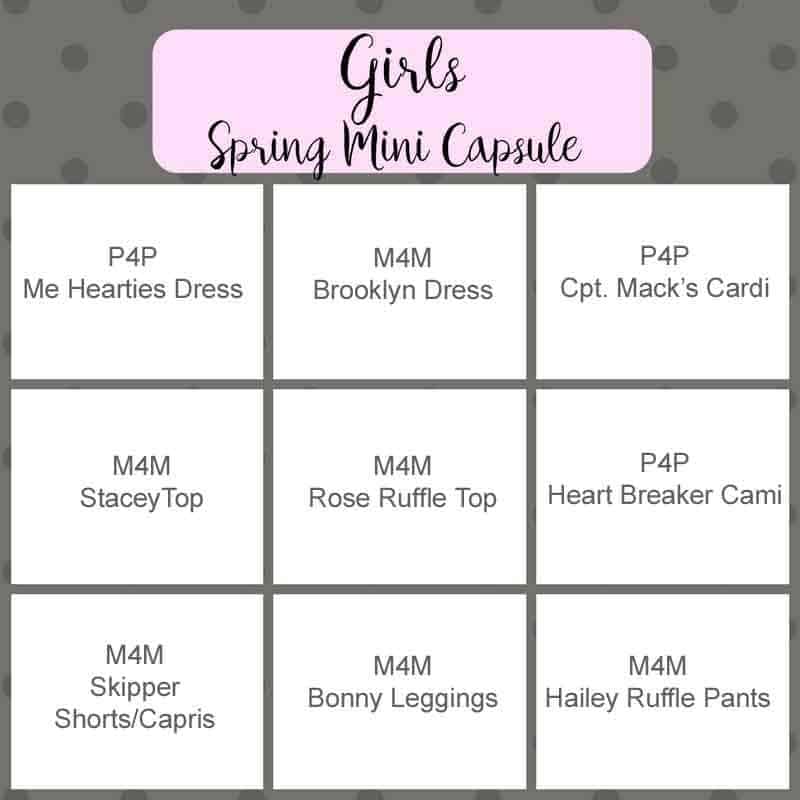
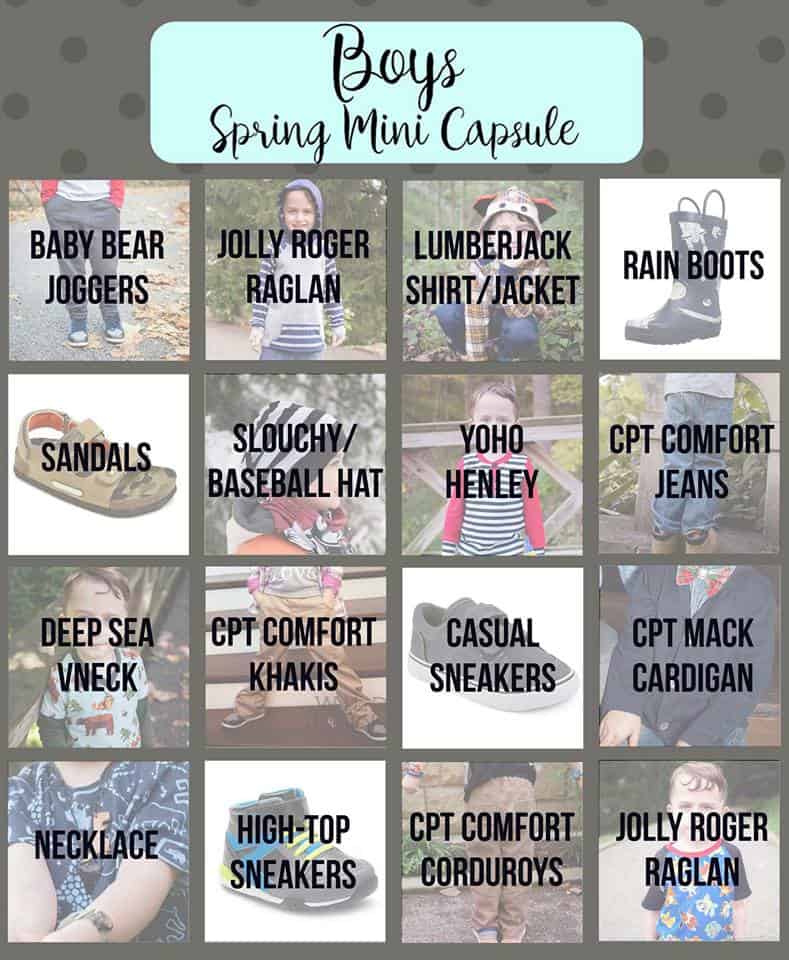
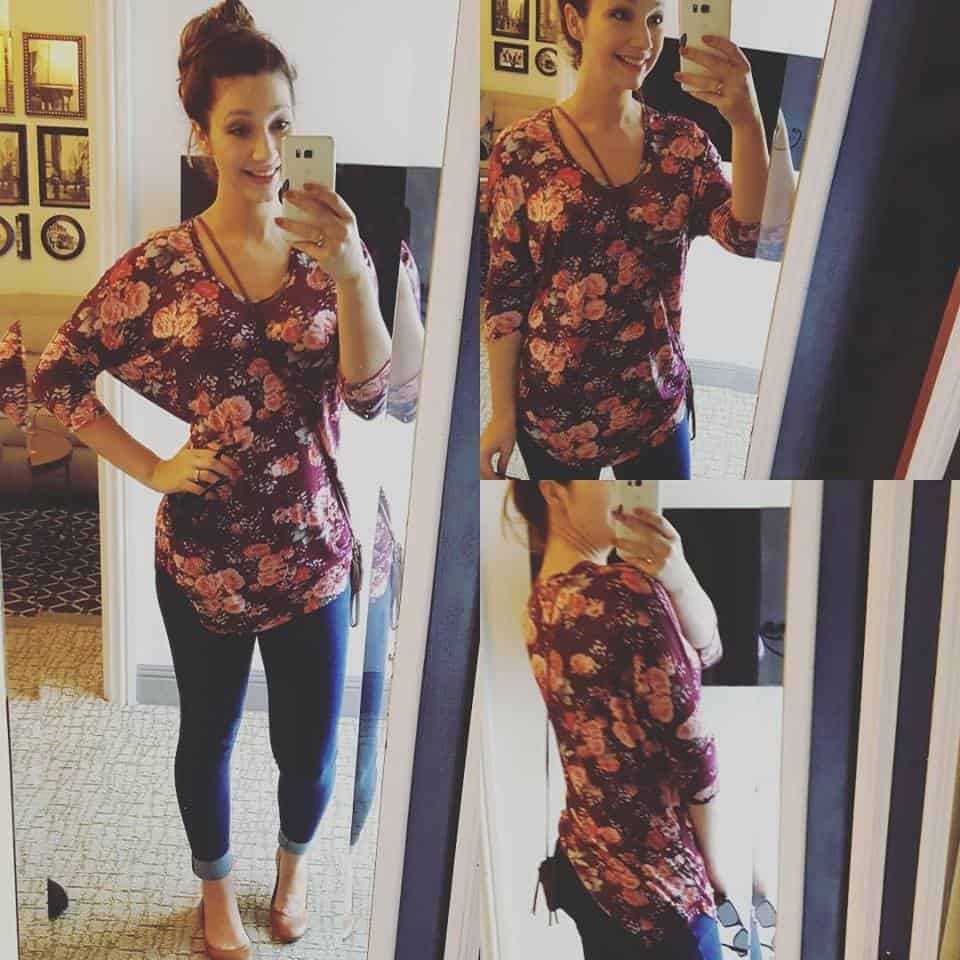
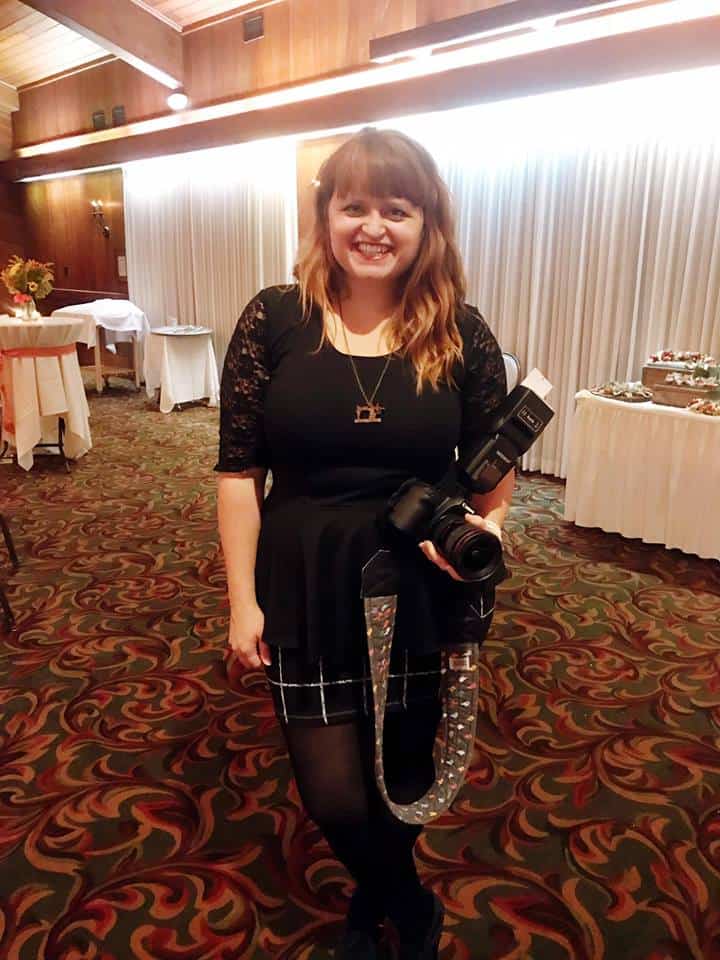
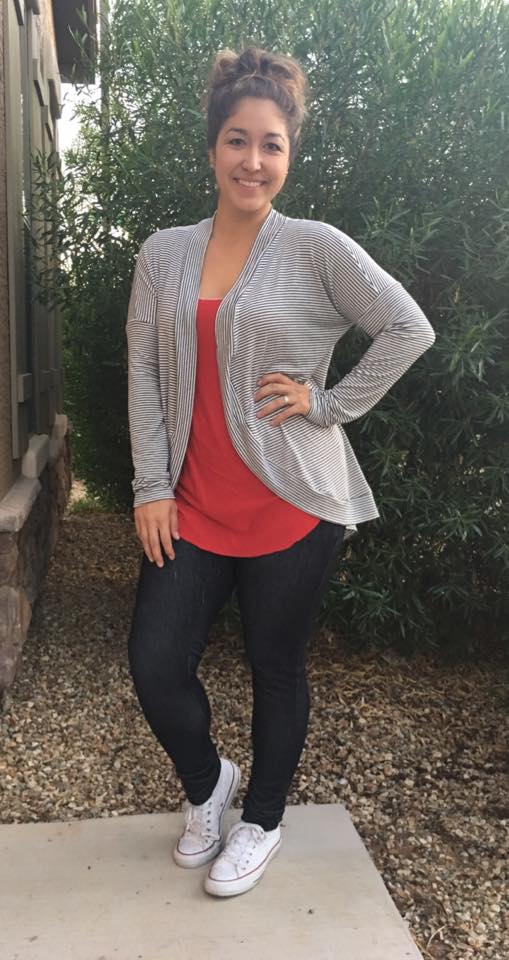
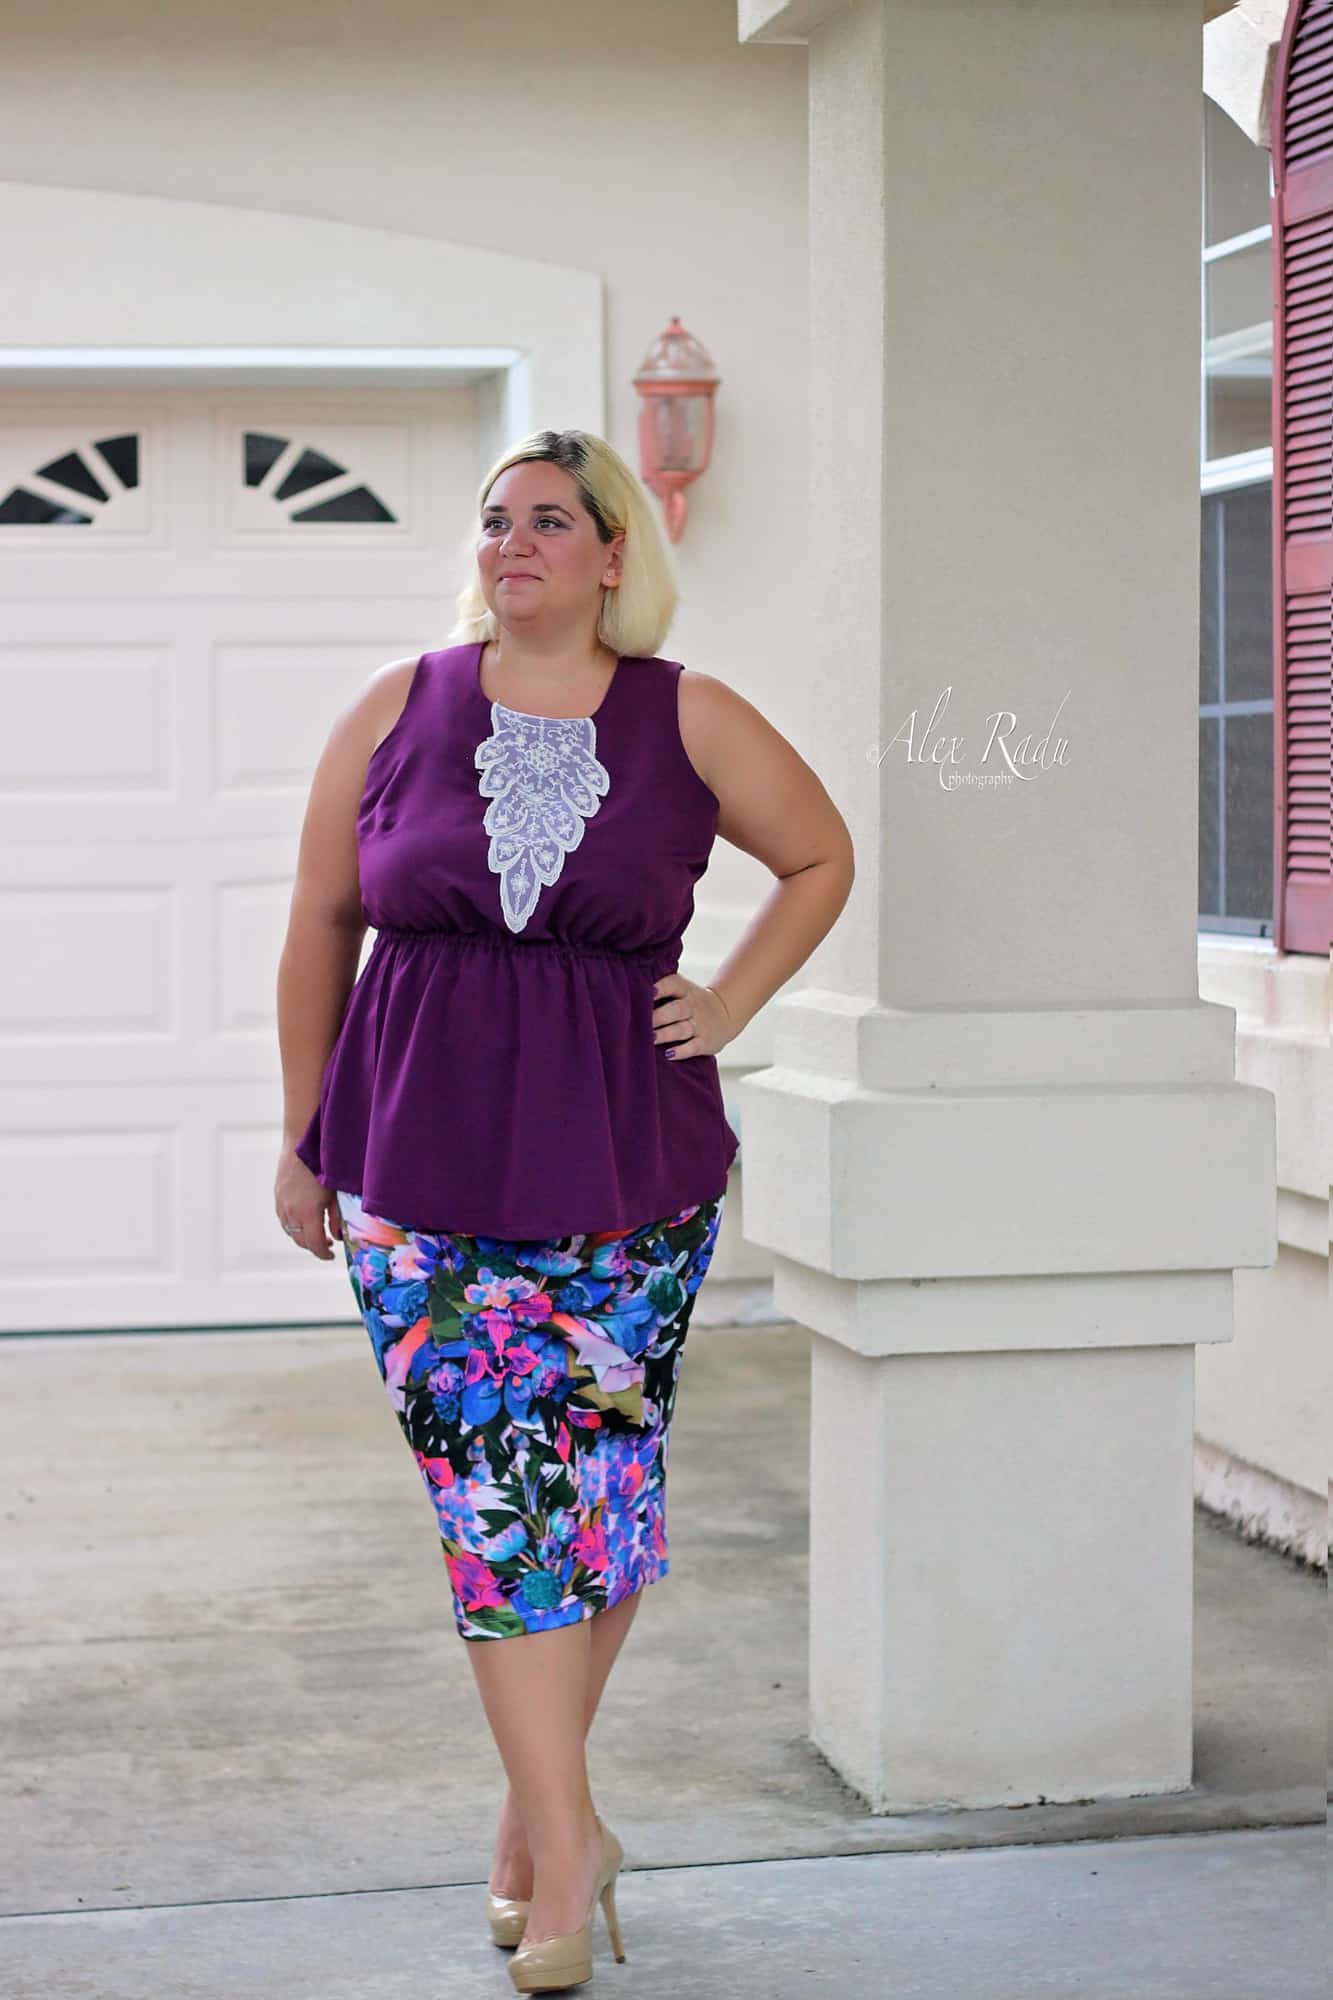
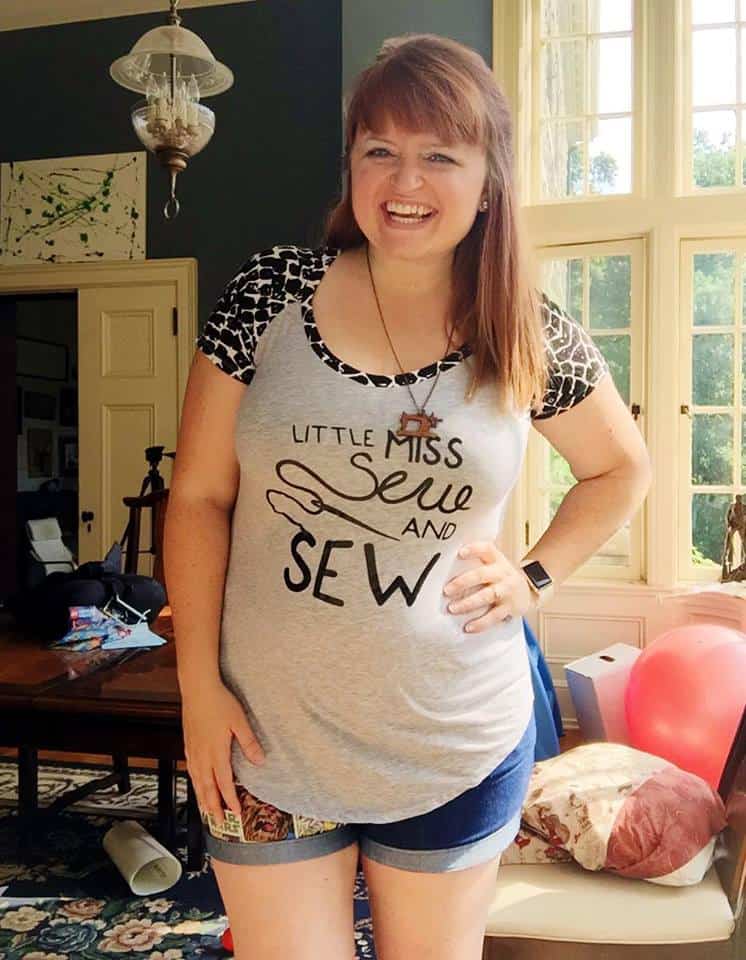
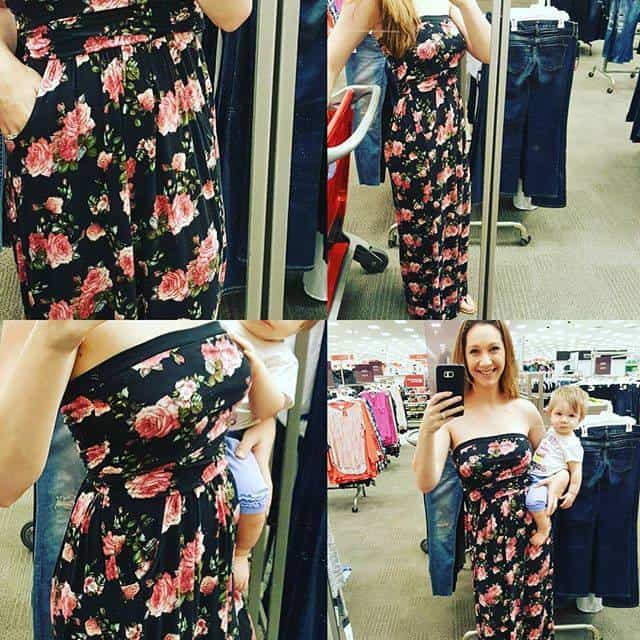
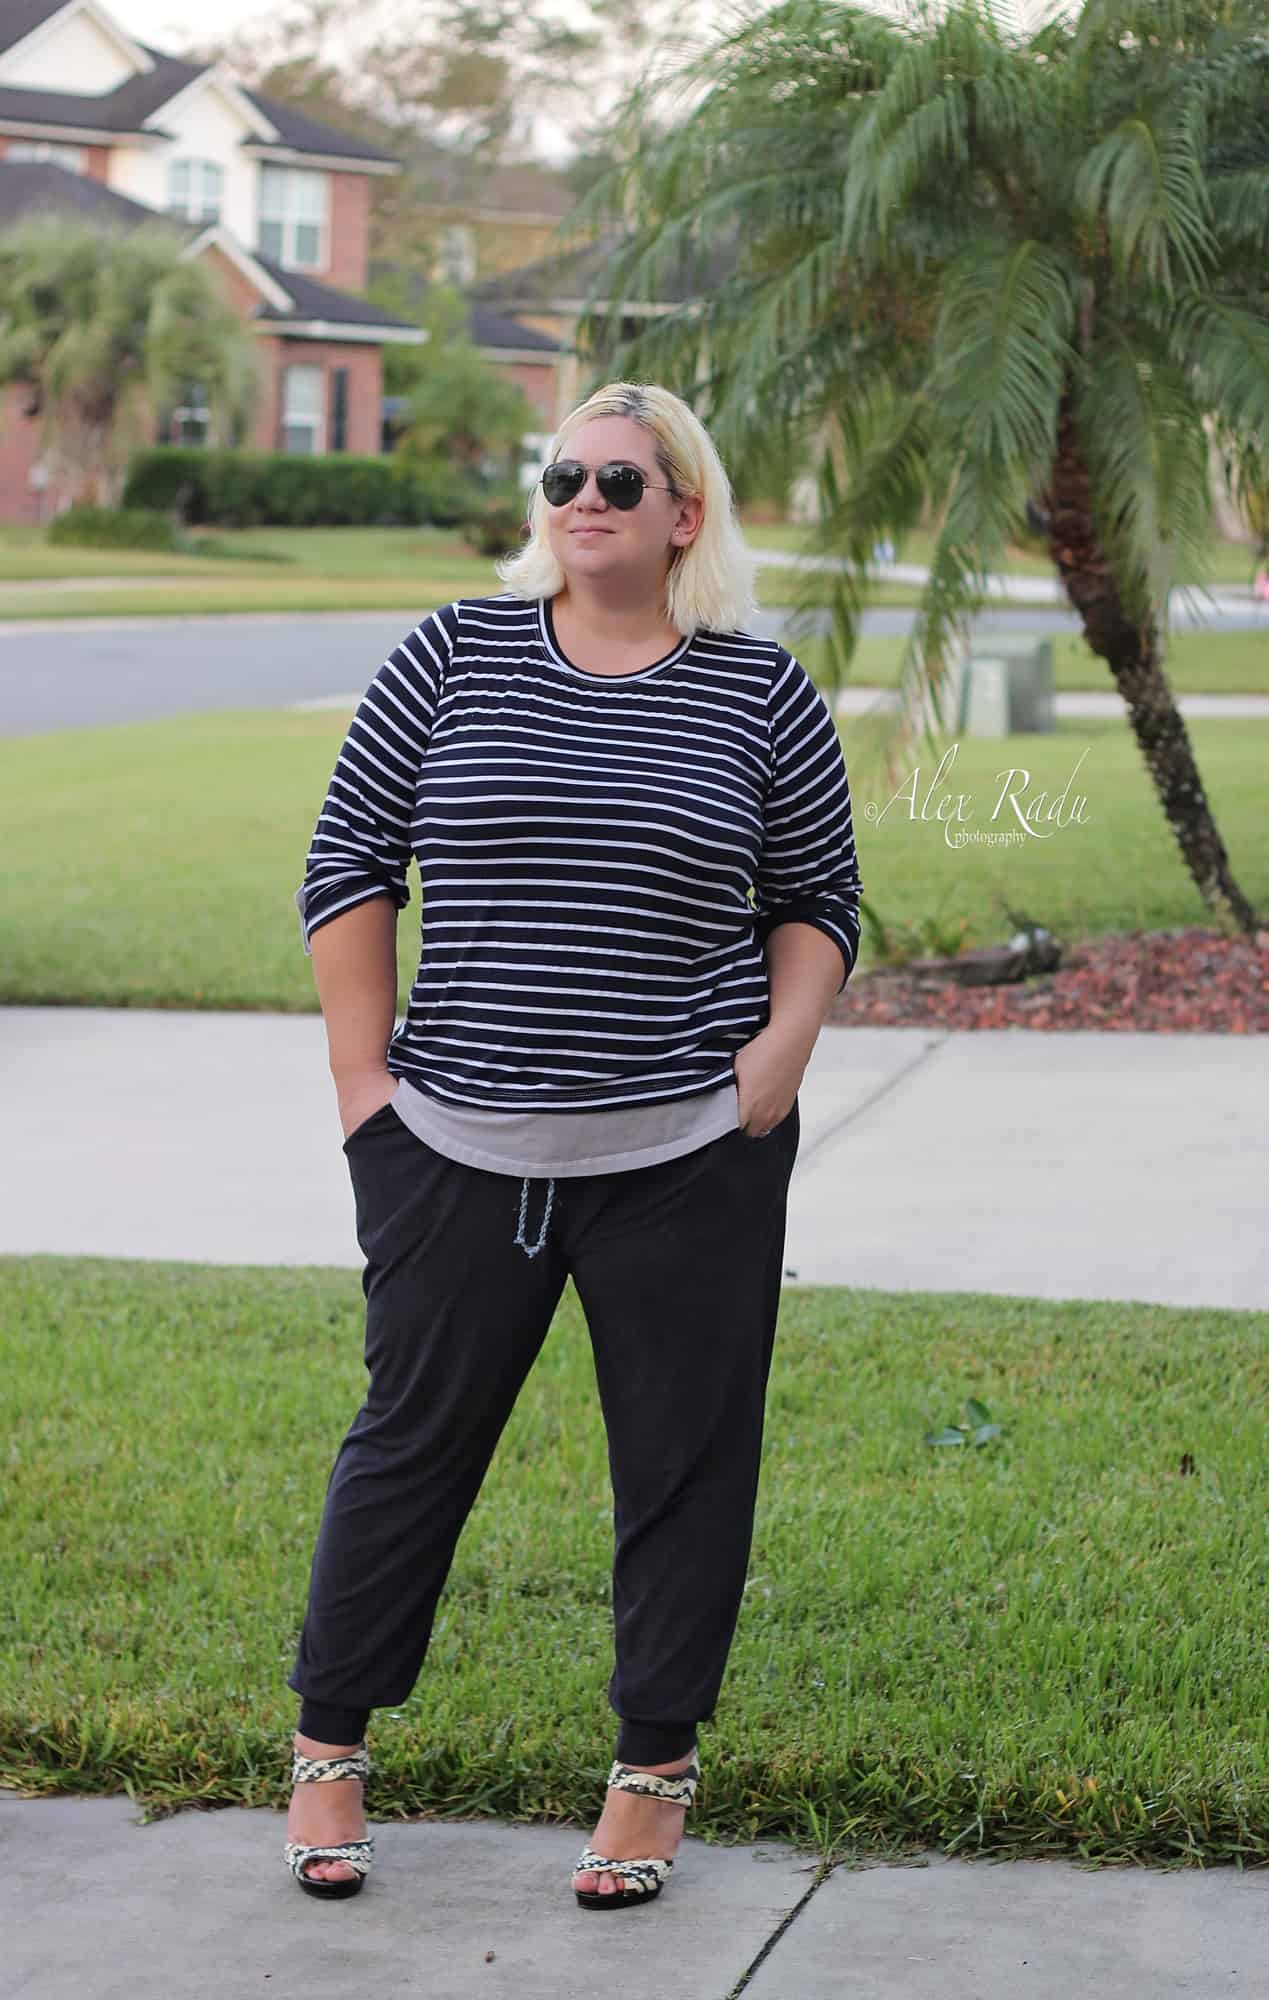
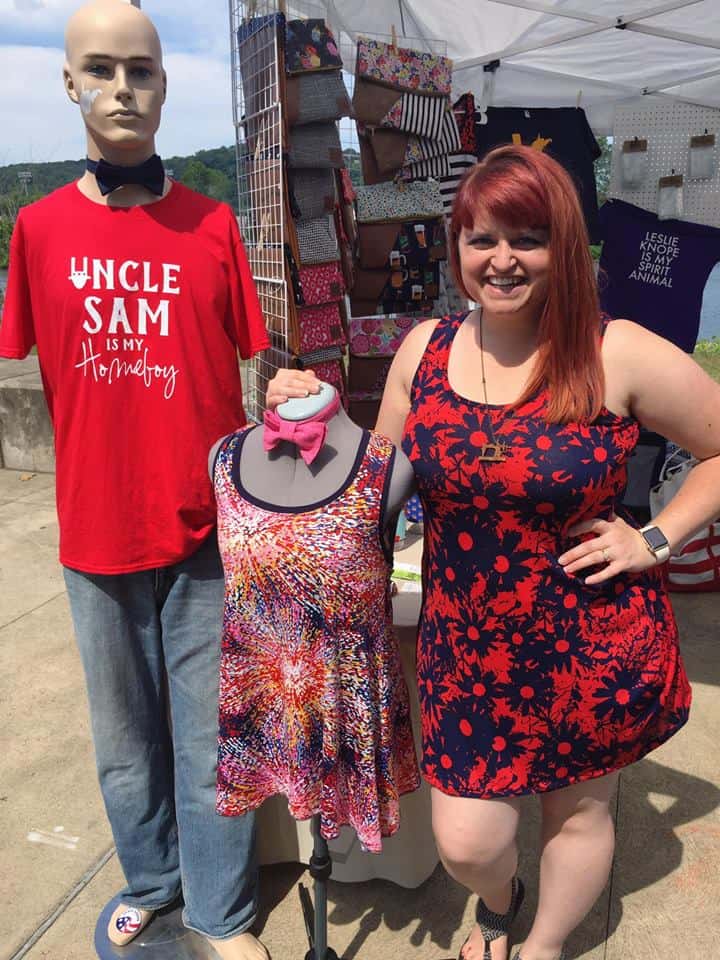
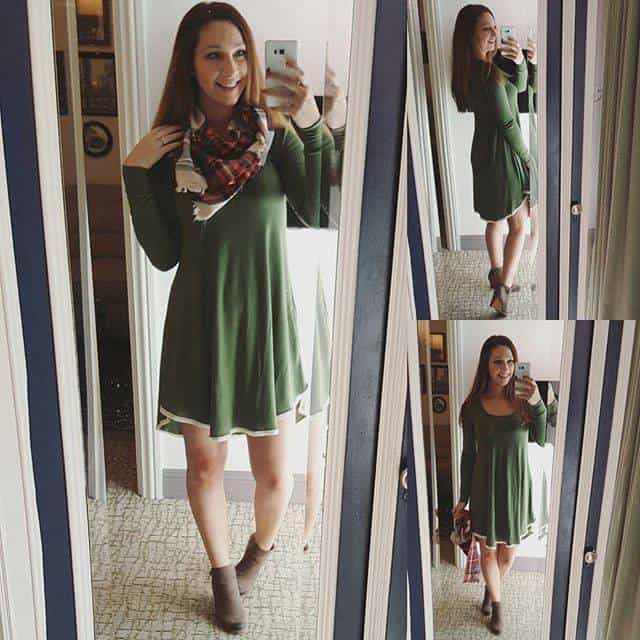
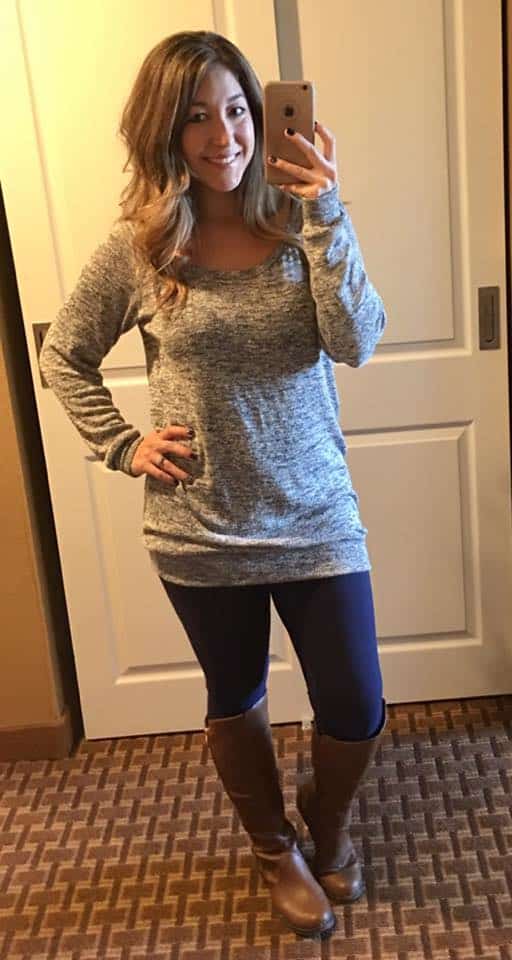
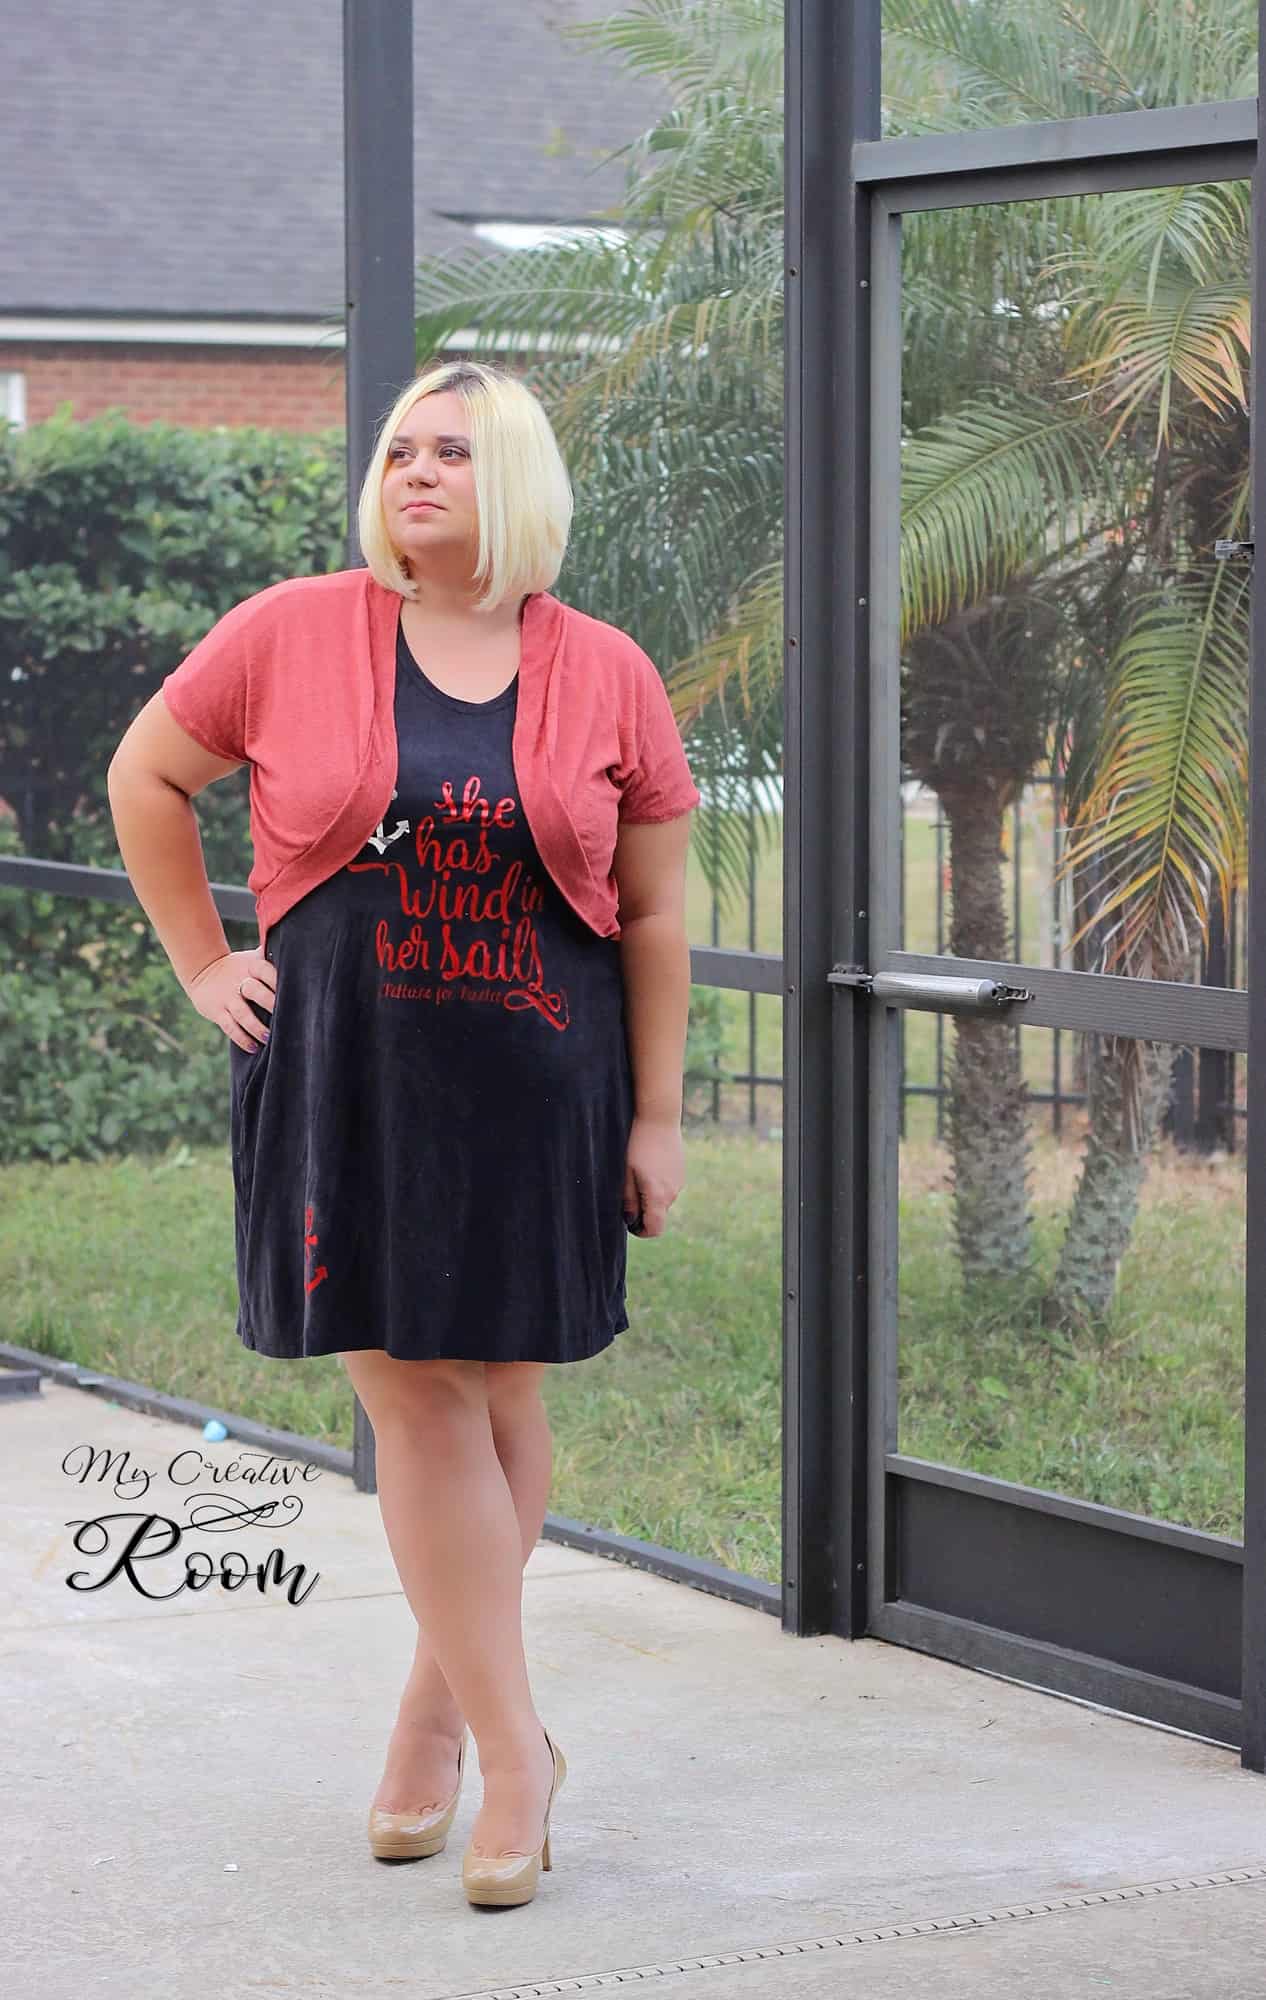
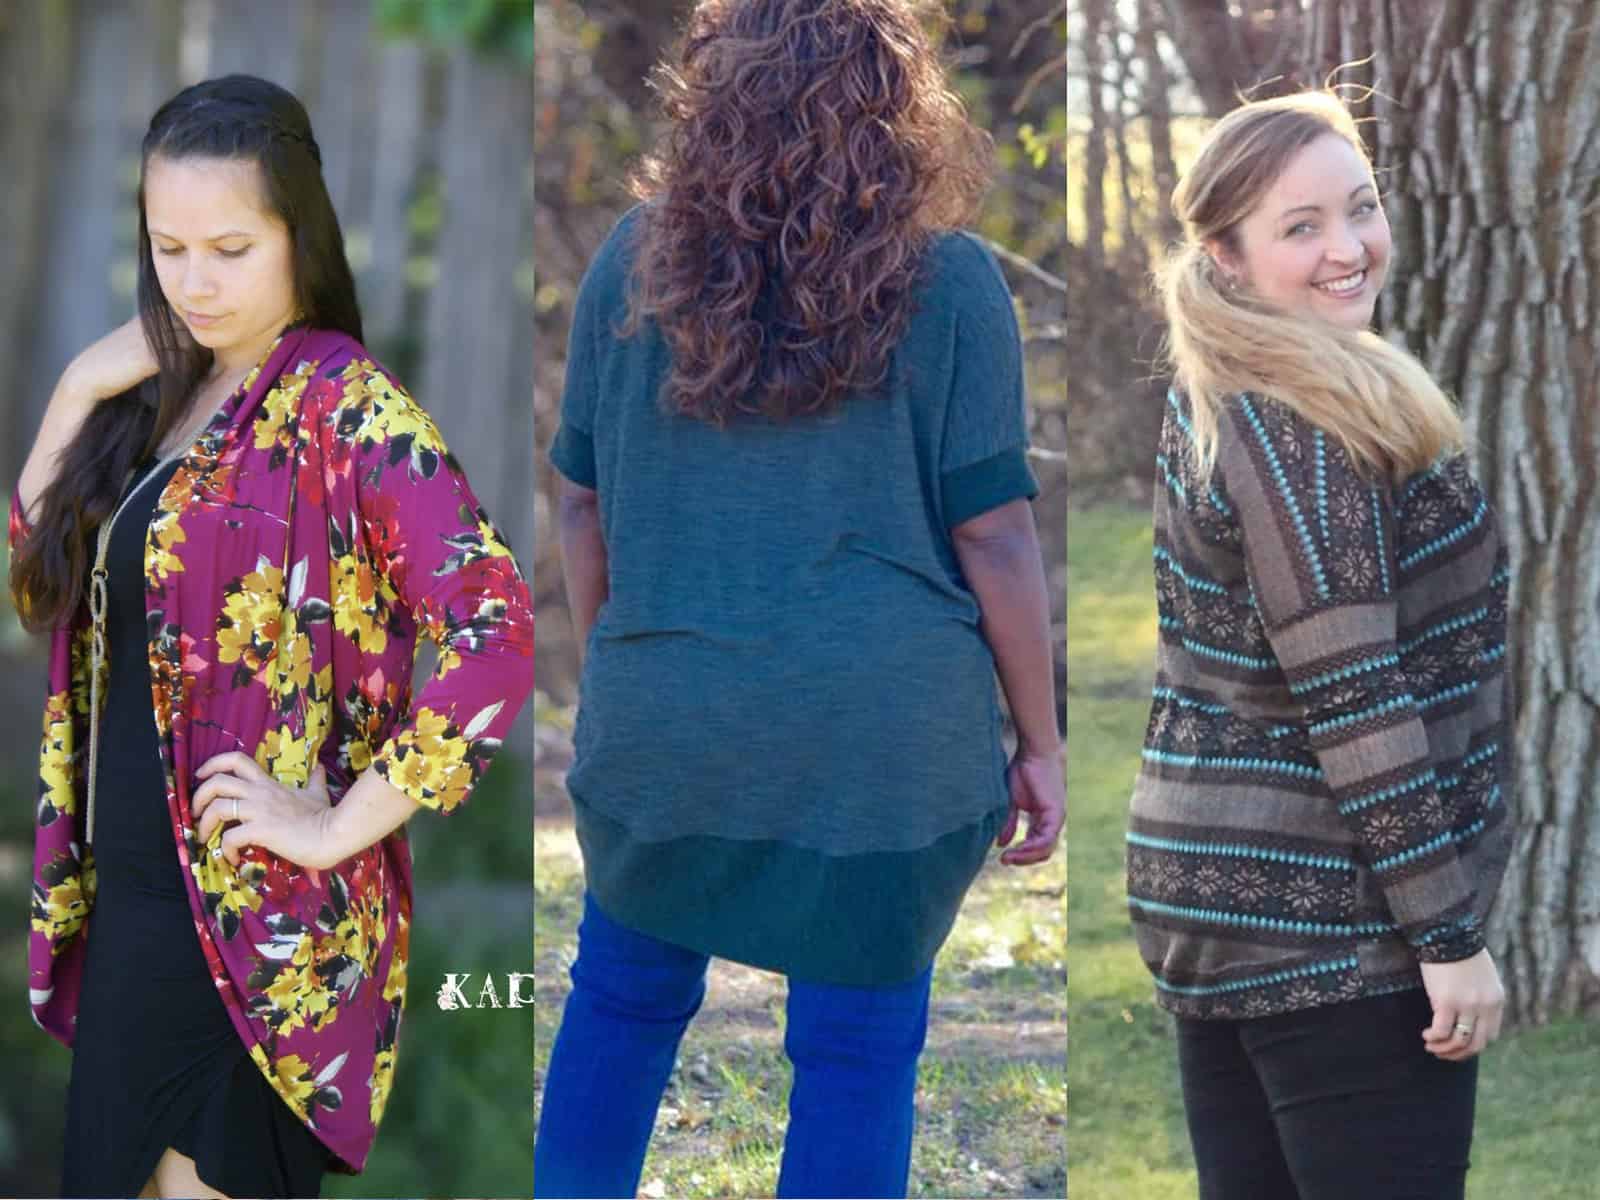
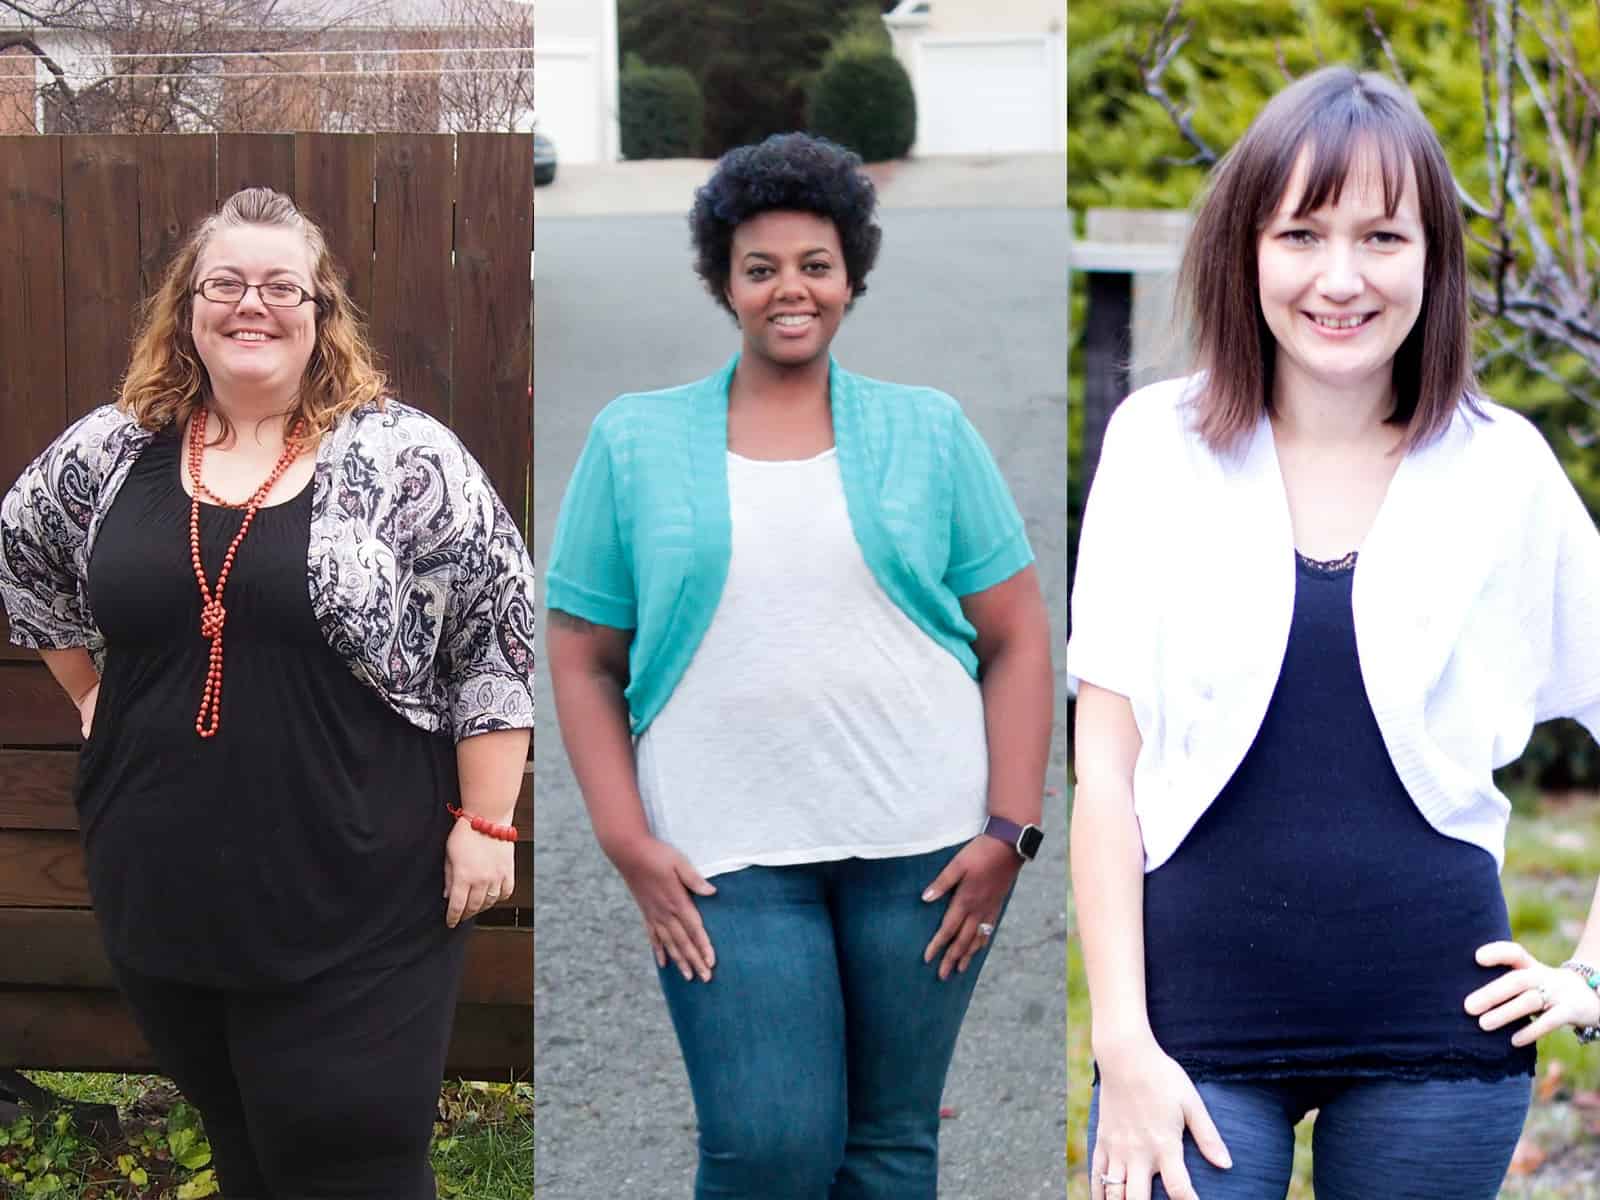
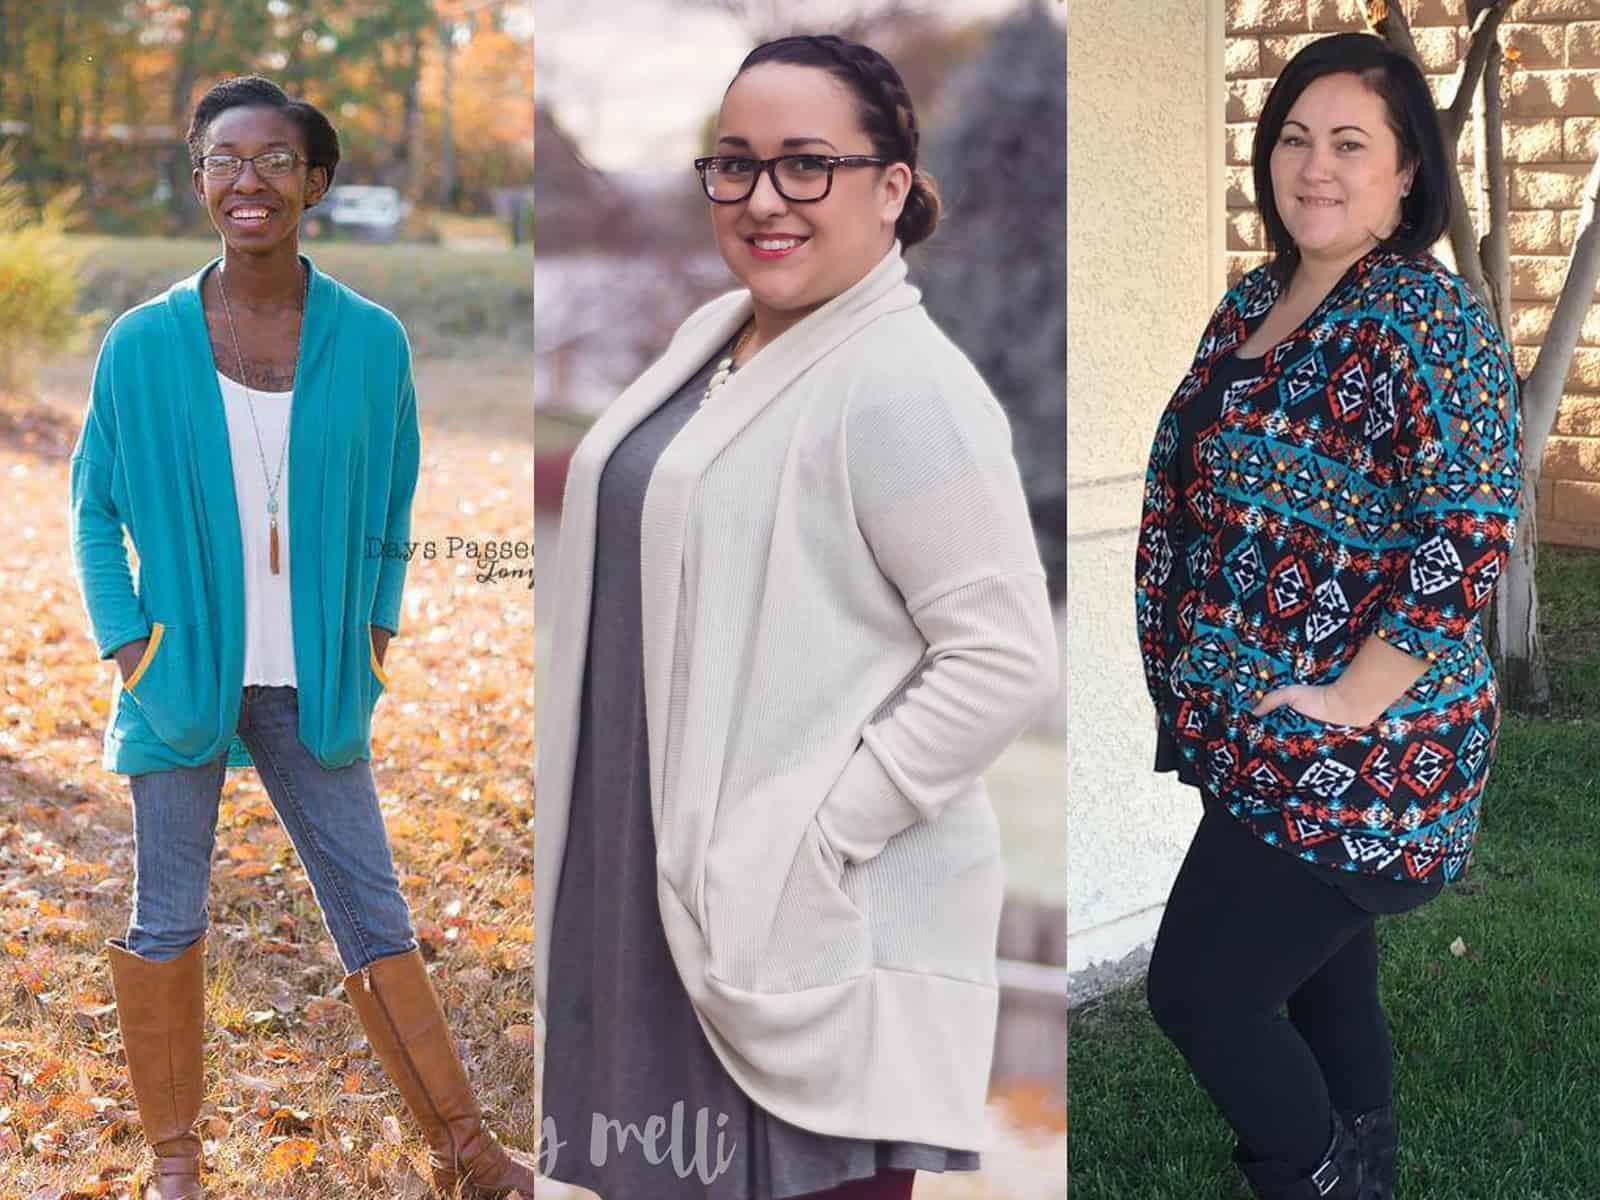
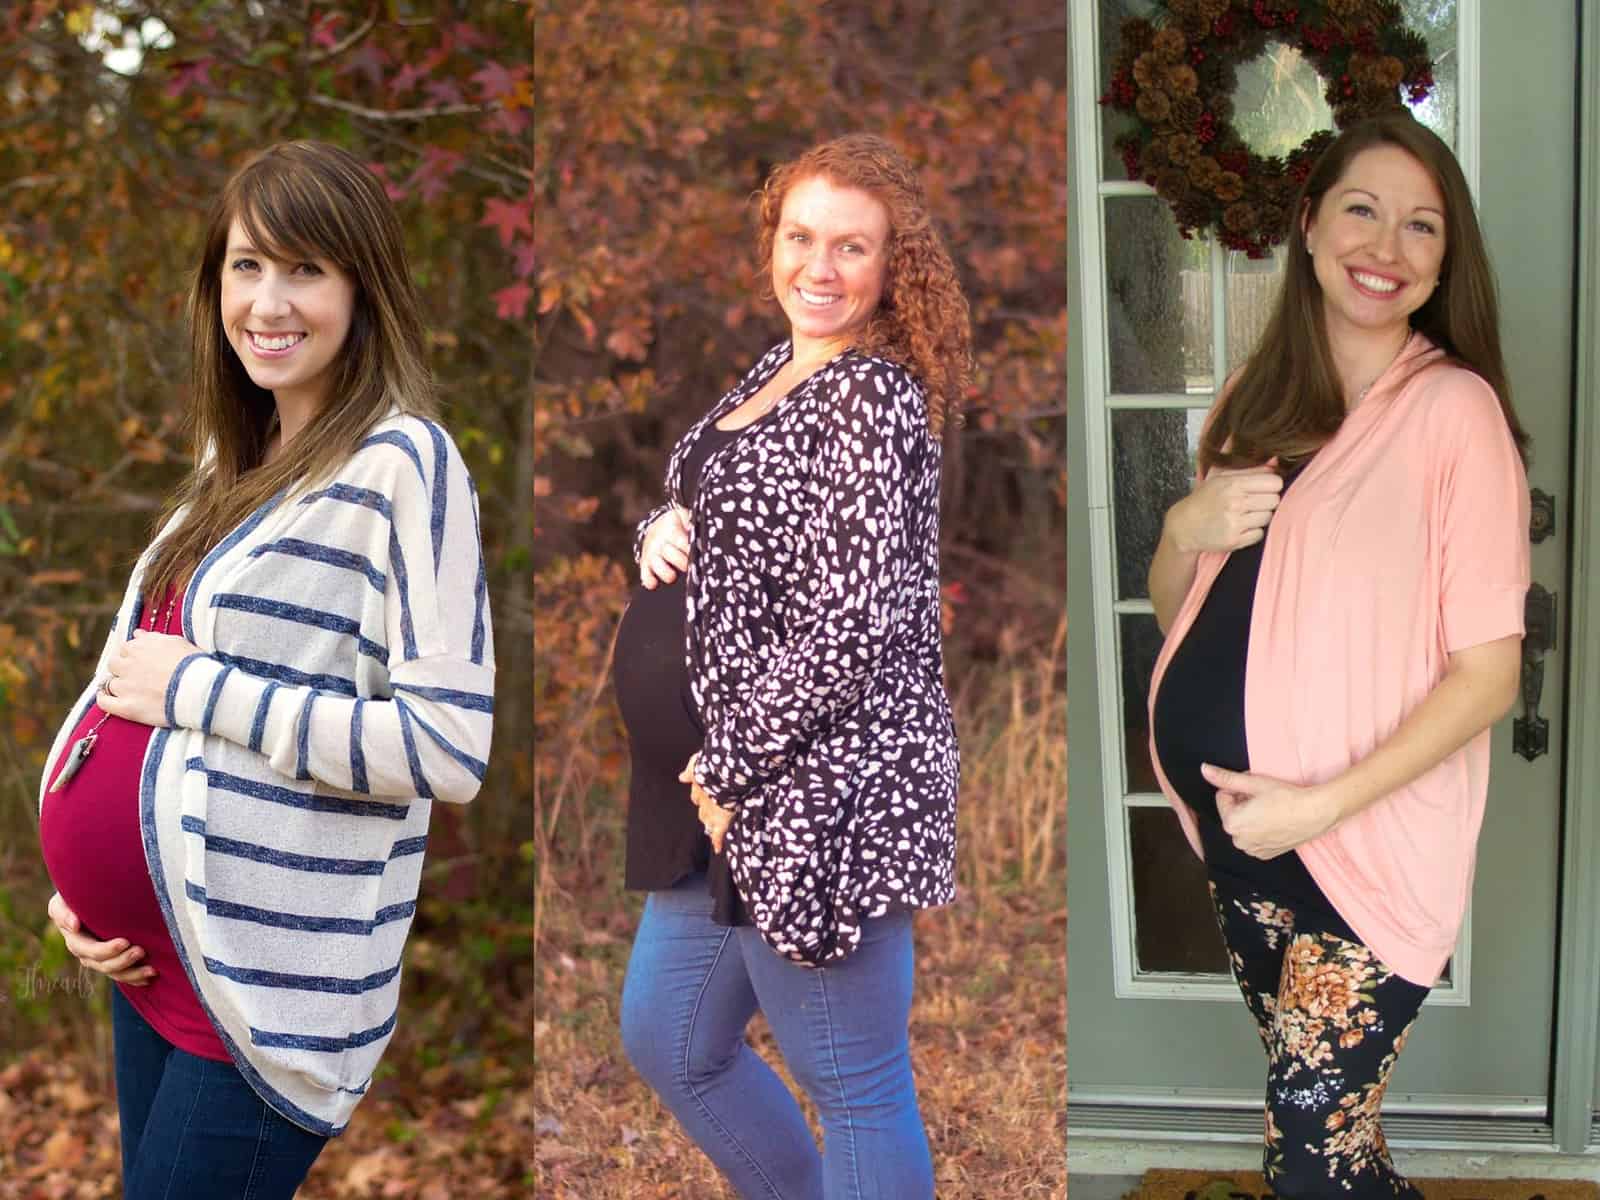
Want some inspiration?? Check out these boards from our team and/or blog contributors!


Filed Under: Contest/Giveaway 17 Comments

Cross My Heart Cami Hacks

March 14, 2017

So you love the X option but you also love the T option of the Cross My Heart Cami and now you’re in a pickle…which one do I make? The answer is obvious, you make both! And if you’re anything like I am, you make both style in one cami! 🙂

IMG_6658

IMG_6671

The beauty of the CMHC pattern is that you don’t even need to make any modifications to achieve this look. Simply cut two pieces of the front pattern and follow the directions for adding the T and the X details to the pieces. Finish the cami as per the tutorial and voila! You made yourself a brand new cami that can be worn both way. You can wear the X in the front and the T in the back like I did or you can wear the T in the front.

cami 2fronts

I paired this cami with a Pirate Pencil Skirt and a Sweet Tee with curved hem and an off the shoulder mod. Which styles will you be making first?

Judy made this one with two backs! Such a simple mode that can add so many more options to this pattern!

The V front and low x makes a sizzler! I mean, who doesn’t love to have that piece of clothing that you can pull out, slip on feel a little sexy every once in a while?

Are you looking for a more delicate, feminine feel?  Grab some stretch lace for an easy hack!

Here’s a simple how-to:

1. Cut the lace the same length as your binding pieces, for whichever neckline you are using.

2. After you’ve attached and folded over the binding as directed in the tutorial, pin the right side of the lace to the wrong side of the neckline/binding. In the picture below, the fabric is right side up.


3. Repeat for the back as well, if you’d like.  Then, sew it on as you top-stitch the binding, per the pattern tutorial.  Here’s how it should look all said and done; wrong side up shown on the bottom of the picture, right side up shown at the top.


4. Be sure to catch the edge of the lace on the side of the shoulder binding as you attach it.


5. Finish the shirt as the pattern tutorial directs.  That’s it – easy peasy!

~ Elisabeth


Not sure what to do with all those pretty lace appliques? Attach one to the front or back of the cami.  I happened to up-cycle one from an old shirt that didn’t fit anymore and have some knit on hand that matched perfectly!  I used to V back because of the shape of the applique.  I left the front neckline raw and stitched the lace just overlapping the top edge using a zigzag stitch.  (Knit does not unravel so no need to finish those edges).  Attach to the right side of the cami prior to doing the shoulder binding if your applique extends to the armholes.  For the main body of the applique, I chose to tack down in a few areas (center of the flowers) as the applique itself was pretty open throughout.  Easy Peasy!


Filed Under: Frequently Asked Questions, Pattern Release, Uncategorized 1 Comment

all p4p today

March 1, 2017

p4pcontest

One of our biggest joys is seeing you wear P4P outfits and feeling beautiful! From Slim Fit Raglans to SOS pants, from Timeless Tunics to Free Spirit tanks, we love them all!

Are you wearing head to to P4P today? Will you be rocking a full Patterns for Pirates outfit tomorrow? Post a picture in the Facebook group or on Instagram of your outfit and hash tag it #allP4Ptoday. We will pick our favorite each month. In order to qualify for the contest, the photo must be taken when you’re wearing the outfit, whether it’s at home or out and about. Selfies in the mirror in your sewing room will not count. We want to see you wearing what you’re sewing and love it!😊 The lucky winner will be receiving a P4P pattern of their choice! Sounds fun?

Just in case you need some inspiration here is some of our “all P4P” looks that we rocked this past year.

judypsd

Pumpkin Spice Dolman and SOS Pants

katy 1

Sweetheart peplum and pirate Pencil skirt

Nicole3

Boundless maxi dress and Men’s Henley

Nicole1

Essential Tank, Cocoon Cardigan and SOS Pants

Timeless Tunic and pirate Pencil Skirt

Timeless Tunic and pirate Pencil Skirt

Slim Fit Raglan

Slim Fit Raglan and SOS pants (adjusted for shorts)

Sunshine dress

Sunshine dress

Mama Bear Joggers and Women's Henley with faux layers

Mama Bear Joggers and Women’s Henley with faux layers

Essential Tank - dress length

Essential Tank – dress length

judy3

Free Spirit Tank dress with the LMU sleeves hack and the free scarf (available on the blog)

Nicole2

Relaxed Raglan and Peg legs

Sweet Tee dress and Cocoon cardi

Sweet Tee dress and Cocoon Cardigan


So get to sewing and show off your outfits, pirates! Don’t forget to hashtag #allP4Ptoday !

Alex

Filed Under: Contest/Giveaway, Uncategorized 8 Comments

P4P Cardi Week is here!

January 22, 2017

We had so much fun when we ran #P4PRaglanWeek that we decided to do it again.  But this time, we are focusing on our favorite layering pieces: Cardigans!  That’s right, Pirates!  We are asking you to dig out your Grandpa/Cpt Mack, Carefree, and Cocoon/Butterfly Cardigan patterns…and the Kimono pattern too!  Let’s get busy sewing!

cardi logo

We are giving you a full week of cardigan sewing, with hacks and add-ons and easy tutorials.  This is going to be so much fun!

Take a look at our jam-packed schedule of cardigan love!

Saturday, January 21: #P4PCardiWeek Announcement

Sunday, January 22: Cocoon / Butterfly Ruffle + Lace Hems

Monday, January 23: Ribbon Tie Closure Hack

Tuesday, January 24: Carefree Cardigan Fringe Hack

Wednesday, January 25: Duster-Length Adjustment

Thursday, January 26: Kimono Ruffle Sleeves

Friday, January 27: Varsity Sweater Style Hack

Saturday, January 28: Carefree Cardigan Flannel + Vest Hack

Monday, January 30: #P4PCardiWeek Winner Announcement

You can follow along on the blog here, or in our Facebook group.  Search #P4PCardiWeek to be able to find our posts all over social media.  And please feel free to sew-along with us on one or all of the days.  The more the merrier!


To sweeten the deal, we’ve gone through and updated the older patterns to include the layers feature, as well as the international and copy shop files.  How do you get the updated copies from previous purchases?  That’s easy!

  • If you purchased from PatternsforPirates.com or Craftsy, log into your accounts and download the updated file.  It’s already in there, waiting for you!
  • If you purchased from Etsy, email a copy of your receipt to help@patternsforpirates.com and the Pirate crew will email you with your updated files.

But wait, there’s more!  We wanted to create a friendly pirate-y competition with our P4P Cardi Week!

Between tomorrow and Saturday, January 28, sew up a Patterns for Pirates cardigan using one of our hacks, or by keeping the pattern as-is.  Share your photo with us on Instagram or in our Facebook group and use the tag#P4PCardiWeek We will pick our favorite and the winner will win a free P4P pattern of choice AND be featured on this blog.  Fun right?

To make it even better we have put all the cardigan patterns in the shop on sale all week (no code needed)!

Grandpa Cardigan | Cpt. Mack Cardigan | Carefree Cardigan | Cocoon Cardigan
Butterfly Cardigan | Summer Kimono

Now get out there and sew some cardigans, matey!

Filed Under: Announcement 8 Comments

Butterfly Cardigan :: New Pattern Release!

January 17, 2017

We are celebrating another pattern release day and you’re going to love it!  Remember the Cocoon Cardigan that we put out right before the holidays?  It’s in mini size now!  Meet the Butterfly Cardigan!

listing pictures youth

The pattern is drafted for girls sizes 3M – 14.  It’s a dolman style sleeve, so it’s got a looser fit and is quick to put together, just like other dolman style tops.  There are THREE sleeve lengths (short, 3/4 and long — each with multiple band options), TWO hem lengths (cropped or tunic length), TWO neckband options (short or tall), and optional pockets (patch or inseam)!  On top of all of that, we have also included a  PDF layers feature for printing.

line drawing

The three different sleeve length options will take your littles from one season to the next.  Choose between short sleeve, 3/4 length, and long sleeves and your littles can easily transition between all four seasons.

butterfly-sleeves

With two different hem lengths, you’ve got all of your bases covered.  Get more coverage with a longer-length tunic…

butterfly-tunic

…or make it in a short and sweet cropped length!

butterfly-cropped

Don’t worry, we made sure to include pockets (!!!) in the Butterfly Cardigan! Who doesn’t love pockets?

butterfly-pockets

Not quite convinced yet?  Go check out all of the rest of the adorable tester images in our Facebook group HERE and get inspired!

Can’t take it any  longer and need the pattern right now?!  Go grab your very own copy of the Butterfly Cardigan and get to sewing!  Don’t have the Mama version of the Cocoon Cardigan yet?

Go grab a special bundle pricing for the Butterfly + Cocoon Cardigans HERE.  Butterfly and bundle will be on sale (no code needed) through Monday January 23,2017.

And don’t forget to share your gorgeous makes with us over in the Patterns for Pirates Facebook group!

Filed Under: Pattern Release Leave a Comment

2016 Holiday Freebies: Fleece Mittens Pattern!

December 8, 2016

The Pirate Crew is here to bring a little more “yo ho ho” into your holiday with some freebies!  Today is the first of three patterns we are releasing, for FREE!  In case you were stumped on Christmas sewing ideas, here is the first of our scrap-busting, super quick, free patterns.

p4p-fleece-mittensp4p-fleece-mittens2 p4p-fleece-mittens3

These mittens are a one-size fits most.  We’ve also provided a cuff and a non-cuff version, so you can mix other fabrics into these easily if you’d like.  The pattern is written for a basic fleece fabric, though some of our testers have had success with sweater knits and other various fabrics.

Grab your free pattern pieces here. If you need help putting the pattern together, pop over to the First Time Users Tips page or ask in our facebook group .

Note: I use my sewing machine for the construction of the mitten body, because the thumb area can be really tricky if you’re using a serger.   When using fleece, it helps to use a walking foot in your machine to help reduce pulling.  It also makes feeding the fleece through your machine a more even process.

Recommended fabrics: Fleece, cuddle/minky, sweatshirt fleece, upcycled sweaters, etc. I suggest washing your fabric before you begin to pre-shrink & help prevent color bleeding in the future.
(Optional cuff) Any knits with at least a 20% stretch.


Supplies needed:

1/3 yard Fleece fabric
(optional cuff) less than 1/4 yard required

Step 1: Assemble your pattern and cut your pieces out.  You will need two sets of mirror images of the main body pieces.

mitten1

Step 2: Lay two mirror images, right sides together.  Using 1/2″ seam allowance, sew around the entire outside of the mitten body.  Make sure to leave the bottom open.

mitten2

Step 3: Clip the corner between the thumb and fingers, making sure not to cut into your stitching, but getting as close as you can to it.  This step is super important, otherwise the mitten will fit really strange in the thumb and it’ll be super uncomfortable.

mitten3

Step 4: [If doing the cuff version, skip to step 6] Turn the opening up 1″ and hem.  (Optional: turn 1/2″ and then another 1/2″ to enclose raw edge.)

mitten4

Step 5: Turn mitten right-side-out.  Repeat with second mitten.

mitten5

Step 6: CUFF VERSION ONLY Complete steps 1-3.  Also cut 2 cuff pieces, one for each mitten.

mitten6

Step 7: Fold your cuff piece, right sides together, meeting the shorter ends together.

mitten7

Step 8: Stitch (using 1/2″ seam allowance) short ends together.

mitten8

Step 9: With wrong sides together, fold the raw edges together to meet each other.

mitten9mitten10

Step 10: On both your mitten body and cuff pieces, mark raw edges into halves.  (The mitten body will be the two seams.  The cuff will be one seam and the halfway point on the opposite side.)

mitten11

Step 11: Slide the cuff over the mitten body, aligning the raw edges and matching the half-marked points.  Note: The cuff is slightly smaller than the mitten body.

mitten12

Step 12: Stretching the cuff only, stitch through all three layers of raw edges.

mitten13

Step 13: Flip cuffs down.  Repeat with other mitten.

mitten14

Step 14: Sit back long enough to admire your handiwork, and then go sew a million more pairs of these comfy mittens!

mitten15


Check out the adorable mittens that our gorgeous testers made!  (And check back with us next week, because we’ve got more freebies coming your way!)


As always, we love when you share what you’ve made with us.  Head over to the Patterns for Pirates Facebook group and show off the fabulous mittens you’ve managed to make from our freebie pattern!

Filed Under: Free Pattern 2 Comments

Cocoon Cardigan :: New Pattern Release!

December 1, 2016

Lately, we seem to tease you a lot with patterns in-the-making.  Tease.  It’s what we do.  The Cocoon Cardigan was a long, drawn out tease, with multiple appearances in our Instagram feed.  But guess what?  It’s here!  The wait is over!  No more teasing, we promise.

15304627_10103072937769963_6207666889718635781_o

Oh boy, you are going to LOVE this cardigan.  It’s like wearing a hug.  A hug that is full of customizable options, that is!

The pattern is drafted for sizes XXS – Plus 3X.  It’s a dolman style sleeve, so it’s looser fitted and insanely fast to put together.  There are THREE sleeve lengths (short, 3/4 and long — each with multiple band options), TWO hem lengths (cropped or tunic length), TWO neckband options (short or tall), and optional pockets (patch or inseam)!  On top of all of that, we have also included a  PDF layers feature for printing.

**Want to learn more about how to measure yourself for this pattern?  We’ve got you covered with an in-depth blog HERE.

15137489_10154721002299666_8899097620736985124_o

The three different sleeve length options will take you from one season to the next.  Choose between short sleeve, 3/4 length, and long sleeves and transition between all four seasons.

cocoon-sleeves

With two different hem lengths, you’ve got all of your bases covered.  Get more coverage with a booty-covering tunic…

cocoon-tunic-length

…or take it a little shorter and a whole lot sassier with a cropped length!

cocoon-cropped-length

And ladies.  Have we talked pockets yets?  POCKETS!  Doesn’t that make literally every outfit better?  We have included both in-seam and patch options.  So you can go wild!  (As wild as one could go with pockets on a cardigan, haha.)

cocoon-pockets

Were you wondering if the Cocoon Cardigan would work for maternity wear?  Yes, yes, a million times yes!  It’s perfect, no alterations required!

cocoon-maternity

Not quite convinced yet?  Go check out all of the rest of the gorgeous tester images in our Facebook group HERE and get inspired!

Can’t take it any  longer and need the pattern right now?!  Go grab your very own copy of the Cocoon Cardigan and get to sewing!


Filed Under: Pattern Release 9 Comments

P4P Halloween Costume Contest: The Winners!

November 3, 2016

Halloween costume sewing is basically my (Katy) favorite type of sewing.  It’s allowed to be over-the-top, silly, and super creative.  And I feel like it pushes sewists out of their usual comfort zones.  We held a costume contest in a thread on the Patterns for Pirates Facebook group!  If you were curious about all of the costumes shared, head HERE to find all of the amazing sews.

costume-contest

I have a hard time choosing just one winner.  So I decided to let my husband and son pick their favorites too this time around!  Here are our picks!

Louis’ Favorite (in the least surprising choice…from my Pokemon obsessed 6-year old): Jennifer Rowe with her Pikachu, made from the P4P Jolly Roger Raglan + Add-Ons, and the Pirate Playground Pants!

14695579_10211083149336893_9114943008414542237_n

Bennett’s Favorite (another non-surprise from my Star Wars nerdy husband): Jennifer Richardson with her Darth Vader / Rebel Pilot dresses using the Me Hearties Peplum/Dress pattern.

14902904_1120397181411499_9071670995202499178_o

Katy’s Favorite (I couldn’t help but die a little bit over this unicorn.  I think the hooves sold me.): Jamie Grey with her Unicorn made from the Sweet Tee and Peg Legs.

14900463_10209583853211881_6198337319903692706_n

Congratulations to the winners!  I’ll be contacting you about your winnings!

And thank you so much to everyone who shared their amazing creations.  I’ve now got a lot of new ideas for next year’s costume sewing extravaganza!

Filed Under: Contest/Giveaway Leave a Comment

Pattern Testing: How to become part of the Crew

August 6, 2016

P4P-Pattern-Testing


So you want to be a Pirate?

“Ooooo! I would love to test for you.” and “How do I become a tester?” are frequent posts in the P4P Facebook Group.  We are constantly on the look out to add talented ladies to our testing pool so we thought we’d give you the nitty gritty of what it takes to be a pattern tester and how to get picked.

Why do we need Pattern Testers?  All patterns are drafted based on average body measurements but we need people to sew them up and try them on to ensure the proper fit.  We also want to be sure that the instructions are not only grammatically correct but understandable by all levels of seamstresses.

The Pattern Testing Process:

  • Pre-testing: Once a pattern has been drafted, it is pre-tested.  Before we even send out the pattern to our testers, we sew them up to determine if the fit and ease of the pattern is what we are looking for. We usually sew up one of each of the options to be sure to work out any issues before it goes in to live testing.  In some cases, we will modify a pattern numerous times before deciding on the final versions.  This is also where we really hash out what options, finishing methods, fabric suggestions we will include in the pattern.  Our phones are filled with tons of pre-test and fit pics so we thought we’d share a few!  😉
    pre-test
  • Tester Call: We are ready to do a full test on the pattern.  We post a call in our tester pool and our testers sign up for the size and options they’d prefer.  Our testing period usually runs about 1 week, unless we find there are issues and it needs to be extended.  It is crucial to be sure that the deadlines are able to be met as well as having updated and current measurements.  We rely on feedback from the testers regarding fit so is very important to be testing the item in the proper size. We usually have 20-40 testers per pattern depending on the options and size range.
  • Testing: Sizes and options are assigned to testers.  This is when all fit issues and edits to the tutorial are completed.  Testers are to provide feedback about the the overall tutorial as to if its understandable and concise as well as any fit issues. Some fit issues that we may run into are too low of an armscye, too much or not enough ease, gaping armholes and necklines, etc. so some patterns will require multiple revisions.   Although a tester is only required to complete one full item, many decide to sew up the revised and final versions during the testing week.  This means, the pattern pieces are printed multiple times and lots of fabric is used.  Any photos that will eventually be used for promotion (listing pictures, pattern covers, Facebook and blog posts, etc.) are typically only the final version, or one that reflects the final version of the pattern.  This was not quite the norm for us, but the slim fit raglan went through close to 5 versions in testing and 7 in pre-testing.  Not everyone sewed up all versions but we did have a few that ended up making more than 5 shirts that week.  During the testing week we have two deadlines; one for fit and one for feedback and final styled photos.   Fit pictures are basic photos of the garment being worn and point out any issues one may have. We ask for at least 5 final styled photos that showcase the front, back, side and any details of the pattern (like pockets).   These do not have to done by a professional photographer or taken with a high end camera but clear photos of the item and model are a must. We also like clean editing, so no over the top filters or photo-shopping.  An example of fit and styled photos are below.    P4P pattern testing photo example
  • Pattern Release: All fit issues and tutorial edits have been addressed, testers final pictures have been submitted and we are ready to release to the public.  We work behind the scenes to get the pattern files ready, website listings and round up blog posts and then we release.  A new release is usually on sale for a week and we ask testers, if they love the pattern to share it.  Some have their own blogs and will provide their own “review” and write-ups and other simply post their pics in our Facebook Group as well as other sewing groups.  Final photos are also posted in an album in our Facebook Group for inspiration and promotional purposes that the members can access at any time. Check out some of our awesome testers from one of our last releases. Essential Tank Facebook Photo Album.
  • Celebrate:  We wouldn’t be able to get this point without all our awesome testers!  Testing is voluntary and not a paid position.  Upon completion of the test, the tester will receive the final pattern and a big thank you.


So now that you see what we do in testing, you ask, “How can I become part of the testing pool?”

  • When a new pattern is ready to go in to testing, we do a call in our testing pool first.  Sometimes we fall short on volunteers so will do a wide spread call in our Facebook Group to fill in where we need.  This is rare, but has happens a few times and if the test is successful, we add those ladies to the testing pool.
  • Facebook Members are given the first opportunity to test. We hand pick a few ladies from the group and ask if they would like to test the next pattern.   We “get to know you” by your posts in the group.  We are constantly looking for familiar faces that show off their P4P items in the group to add to the group! We look for the following:
    • Active group members who are familiar with our patterns and help out in the group by answering questions (Why? Testers are often asked a lot of questions about the new release and we love for the testers to be available and active in the group!)
    • Posting pics of their completed P4P projects
    • Ladies who are in the size range that we need to fill-in

Check out some of the gorgeous ladies we recently hand picked to test for us from our Facebook Group!!

13391387_10156987531095282_9212836292458574362_o 13717189_10207102251900050_8188682876773372792_o 13403763_10100540252776242_6199973707243297559_o 13723870_10103163709956739_3747945316400350143_o 13734906_10100188299473497_1585660700122181296_o  13698299_10157292206150599_225019478249495708_o


We currently have over 100 ladies in our testing pool so I asked them to share a few things about what they felt anyone that has never tested before should know. Here’s some of  what they had to say:

  • You’re going to use a lot of fabric, ink, tape, and paper. You’re going to take 10000000 pics that you hate and settle on 3.
  • It costs the tester quite a bit. It’s not just a time commitment, but a financial one as well. Also, MAKE THE PATTERN AS-IS. Its impossible for a designer to test their pattern correctly if the actual pattern is never actually tested. It doesn’t matter if you’re afraid that you or your child will grow out of it in a few months. You are testing and that’s a sacrifice you have to make.
  • People will expect you to know everything about the pattern. All the options, best fabric to use, where to get fabric, how it fits on various sizes etc. Sale info.
  • You can’t be shy! If you see a fit problem you have to say something. I know when I first started testing I felt bad saying something that might come across negative but had to get over that fast! 
  • Remeasure for EVERY test. 
  • Don’t wait until the last minute to make your garment. You never know which kid will start puking, which needle will break, or when the power decides to go out. Start ASAP and get it done on time. When in doubt of time, opt out of volunteering. There are many people that would love to take your place for that test. Making a commitment you can’t keep is way worse than politely declining and maybe trying again next time.
  • You need to sew step by step with the tutorial steps as written. It takes me 10x longer than if I were sewing on my own but you need to be as precise & exact to what’s instructed & as the pattern prints.
  • Get a remote clicker for your camera or find a buddy because most husbands don’t understand this process!
  • Most patterns are not perfect the first run, so patience with fitting and adjustments are a must. You are a tester… Testing by trial and error. Take it for all the pain and glory.

Pattern testing is a lot of WORK, but it is also fun and can be so rewarding! Our testers agree.

  • I enjoy testing because having a deadline really helps to motivate me to sew!
  • My absolute favorite is being a part of the team that helps these fabulous mamas succeed in their dreams!
  • Pros: making friends all over the world, being part of the design process, sharing and being proud of your work, learning new techniques and improving my sewing and photography skills
  • I think the biggest thing to realize is that it’s not about the “free pattern” or getting it first- testing for me is truly about being a part of the process! It is so much fun to see the behind the scenes, how much work it takes to get the pattern perfect (which often means a lot of fabric, printing, taping= $$ which counteracts the notion of a free pattern!), learning from all of the amazing women in the group, but most of all- getting to know all of the amazing women!

Phew! So there you have it!  Are you ready to join the crew?  Show us what you got and share you creations in the P4P Facebook Group. You might just be the next member to be given a chance. Happy Sewing!


Filed Under: Frequently Asked Questions, Uncategorized 6 Comments

Siren and Hello Sailor Hacks

April 25, 2016

swim hacks

We couldn’t help ourselves to a few hacks to the new Siren Swim Top and Hello Sailor Swim Bottoms during testing!  We loved them so much we decided to share a few of our favorite quick and easy mods.

The Double Strap Hack: (My favorite! I couldn’t stop using this one 😉    )

IMG_1473IMG_1412 P4P PDF Patterns Siren Swim Top double crossover strap

This one is super simple and quick! You have 4 straps per cutting instructions.  Instead of sewing them right sides together to create 2 straps, we sewed each strap folded in half width-wise down the long edge.

IMG_6678

Turn right sides out.

IMG_6680

And place both side by side on the top pick ups.

IMG_6683

IMG_6684

The Double, Straight and Cross Strap Hack:

IMG_1126

Then we had even more fun doing one set of straight straps and one set of criss-cross straps… cute right?!?!? Just baste and double check you have them all placed correctly before finalizing the stitching! I slipped swim elastic inside this navy/white top straps for more support.  It also keeps the straps in place and hold their shape (not get folded or wrinkled up).

IMG_1089


Fringe Hack:

The only change during construction is that I did not sew the flounce into the side seam.

IMG_6761

Once the top was compete I began in the center and used my rotary blade and clear quiting ruler to cut 1/4″ strips up to the seam line.  I continued all across the top, keeping my slits straight. I wont lie though, it was REALLY late and I was tired… I threw the ruler aside and went at it all crazy!

IMG_6762 IMG_6763

I went back with scissors and clipped all the way up through the pick ups (I couldn’t get my roatary up that far without cutting through the main top pieces. IMG_6764 IMG_6767

It was crazy windy on our picture day with my cousin (isn’t she the cutest?!?!) so we only caught a few where the fringe wasn’t wildly blowing around! You could do the slits as small as your patience allows for and you could also tug them a bit to let the knit curl to hide some imperfections too! It’s a fun, flirty mod! I hope you don’t mind the other watermark on her pictures, my amazing sister took these photos and edited for me :).

IMG_1249 IMG_1315


Double Flounce Hack:

Creating the double flounce is as simple as cutting 2 of the front and back flounce pieces.  I just kind of eyeballed  how much shorter I wanted the top layer flounce but ended up cutting about 1.5″ off the front and 1″ off the back. Depending on your size, you could also use a smaller size length as a guide.   Be sure to keep the side seams the same length on both the front and back flounce of the layer you cut.  For construction, I basted the two layers together to help keep them together as it is a little trickier to stitch 5 layers of fabric.

P4P Siren Swim Top Double Flounce Hack


HELLO SAILOR BOTTOMS

Piping Detail Hack:

This adds a bit of visual interest to those paneled options! Just cut strips at least as long as your seam where your front center and front side panels meet. The width is a personal preference, but you will need double what you’d like your finished width, plus double the seam allowance (3/4″).  I choose 1/4″ finished width for mine, so I cut a strip 1 1/4″ wide.

IMG_6724

Fold strip width-wise and place right sides together matching raw edges along seam where front center and side panel meet.

IMG_6727

Then place side panel on top and stitch with normal 3/8″ seam allowance. (You will be stitching through 4 layers of fabric)

IMG_6728

I choose to top-stitch mine down along the folded edge.

IMG_6731

I love the little, simple detail!

IMG_1032


Separate Skirt Cover Up Hack:

I created a separate skirt for my cousin to use as a cover up! I just cut 1 extra waistband than the pattern calls for and sewed it to the skirt just like the waistband (folded with right sides together along the top raw edge.)

Now she can slip on the skirt when she’s walking around and take it off when she’s ready to really go swimming 🙂

IMG_1241

IMG_1309


One-Piece Hack:

For some, a two piece suit is not their style, so we hacked the Siren Swim Top and Hello Sailor to create an on trend one piece. You will construct your top and bottom as in the tutorial but will not attach your bottom band of the top or the waistband of the bottoms.  I chose to keep the bottom band of the top for extra support, but you can omit if you choose.  We will be connecting the top and bottom with a connector piece so you do not need the waistband of the bottoms.  Try on your top and bottom.  p4p pdf patterns siren swim top hello sailor one piece hack

To determine the length of the connector piece, measure the distance between the raw edge of your top and the top edge of your bottoms at center front and center back.  You may need to find someone to help you with the back ;). Add double the seam allowance (0.75″)  My gap was about 3″ so the length of my connector piece was 3.75″.  I used the waistband measurement for the width of the band as I wanted it to be held tight there.   Note: if your hip is much wider than your under-bust and waist, it will be difficult to pull up over your hips so you may need to shimmy it on!


Connecting the top and bottom is the same construction as the bottom band and waistband but you will be using the connector piece instead.  Stitch short ends of the connector piece and bottom band.  On the bottom band only, fold with wrong sides together.

p4p pdf patterns siren swim top hello sailor one piece hack


Matching raw edges and wrong side facing up, slip bottom band over connector piece.  You should have 3 layers of fabric.  Mark in 1/4s and with right sides together, match raw edges of the connector piece to the Siren Top.  Stitch.  Flip open and press seam down.


p4p PDF patterns Siren Top and Hello Sailor One Piece Hack


Turn your Hello Sailor bottoms inside out. Matching raw edges of the connector piece, with right sides together, slip your Siren Top inside the bottom. Be sure to match the front of your top with the front of your bottoms. Stitch.


P4P PDF patterns Siren Swim Top Hello Sailor One Piece Hack P4P PDF patterns Siren Swim Top Hello Sailor One Piece Hack


Filed Under: Pattern Hacks 12 Comments

  • « Previous Page
  • 1
  • 2
  • 3
  • 4
  • 5
  • Next Page »

connect with me

  • Email
  • Facebook
  • Instagram
  • Pinterest
  • YouTube
Privacy & Cookies: This site uses cookies. By continuing to use this website, you agree to their use.

To find out more, including how to control cookies, see here: Cookie Policy
  • Privacy Policy
  • Refund Policy
  • Contact Us
  • About

Copyright © 2026 Patterns for Pirates

Copyright © 2026 · Genesis Framework · WordPress · Log in