Patterns for Pirates

P4P stylish, modern, wearable patterns

  • Home
  • Blog
    • Frequently Asked Questions
    • Pattern Releases
      • Free Patterns
    • P4P University
      • Fitting
      • Sewing with Stretch, Knit Fabrics
      • Sewing with Woven Fabrics
      • Sewing Machines
    • Sew-A-Longs
    • Fabric for Pirates
    • Pattern Hacks
    • Announcement
      • Blog Tours
      • Contest/Giveaway
  • Shop
  • Bundle Discounts
  • Flash Friday
  • Gift Cards
  • My Account
  • Cart

5 ways to finish a serger hem

March 9, 2017


IMG_6554

“How do you finish your serger stitch since you can’t back stitch?”; “What do I do with the long serger tail ?” ….just a few of the  serger questions we’ve seen in our group. So, today in the blog I will show you 5 easy ways to finish your serger seam. These techniques will definitely come in handy when your seams will not be enclosed in a hem or they won’t be serged over in a subsequent pattern step.

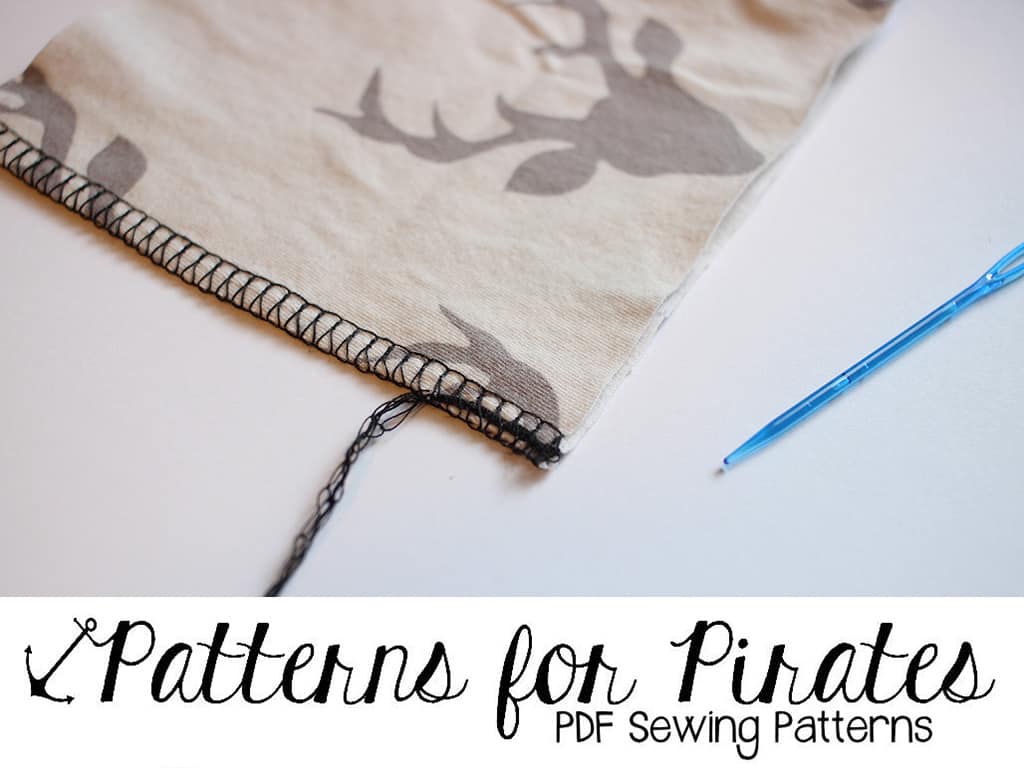
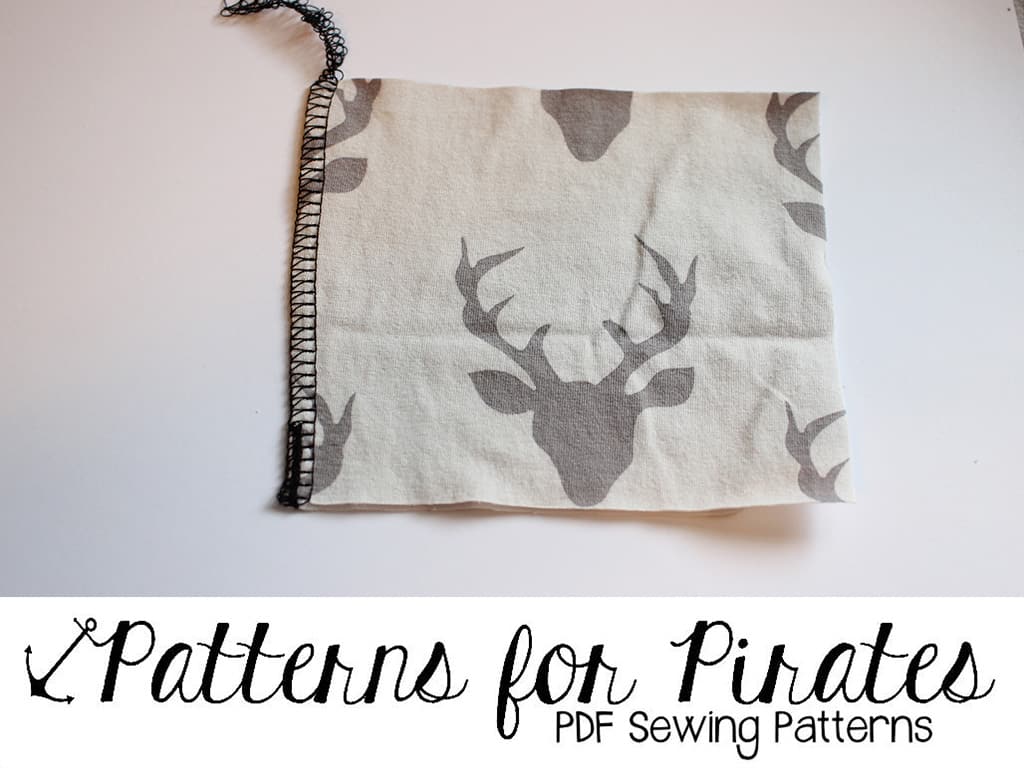
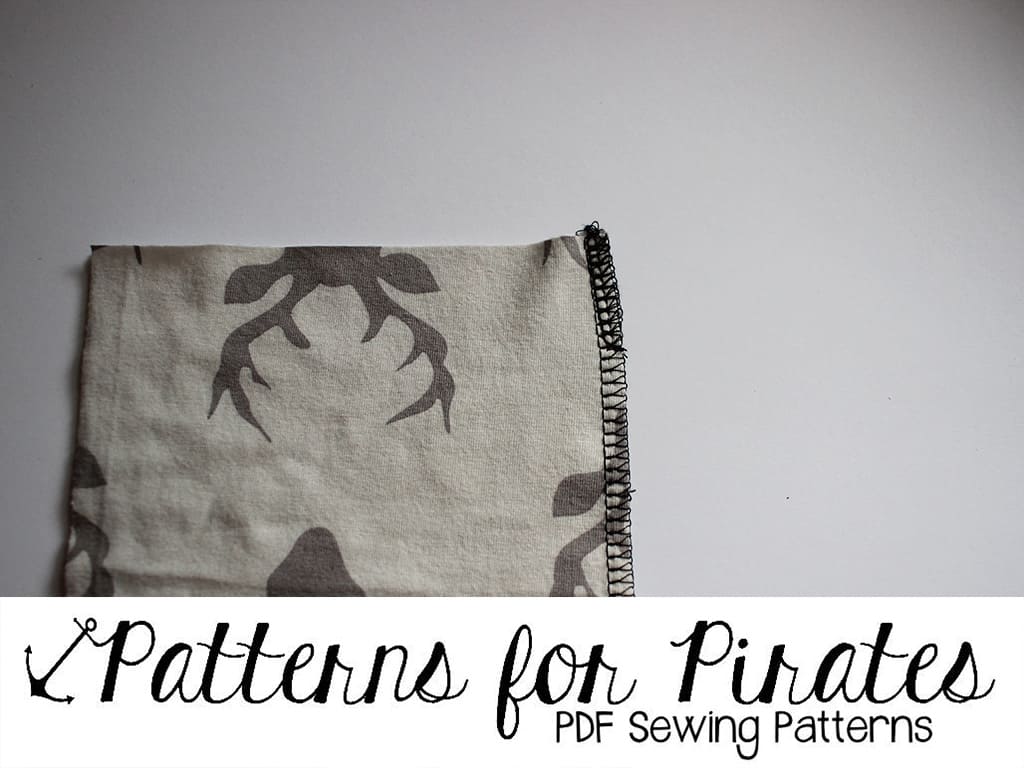
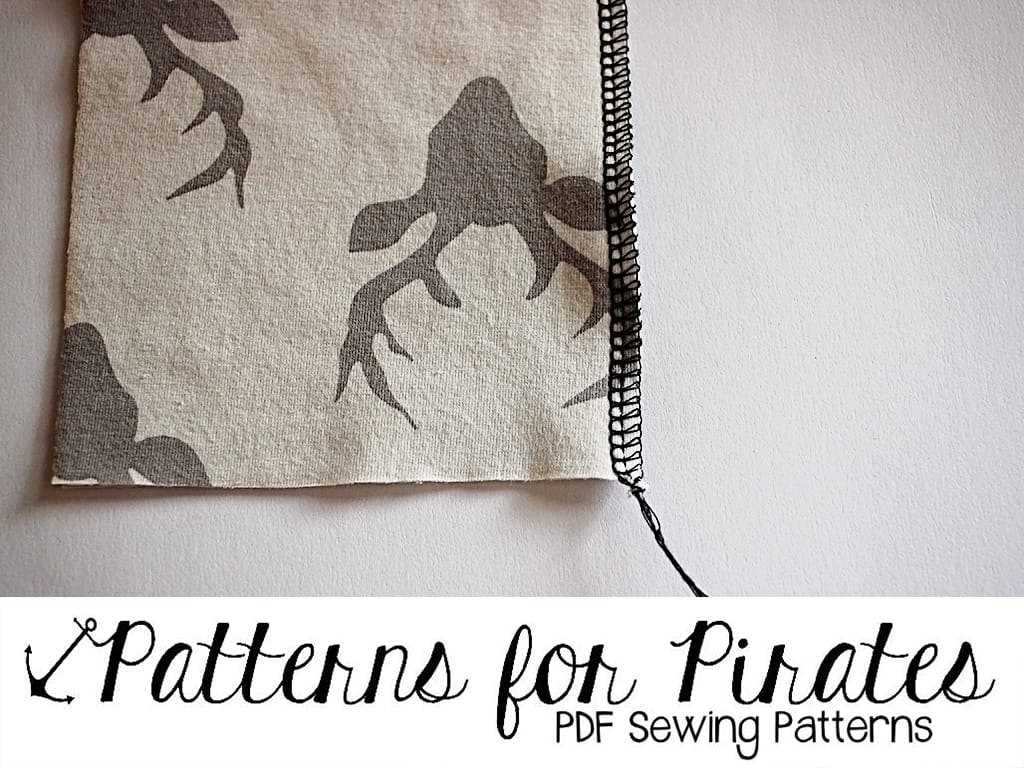
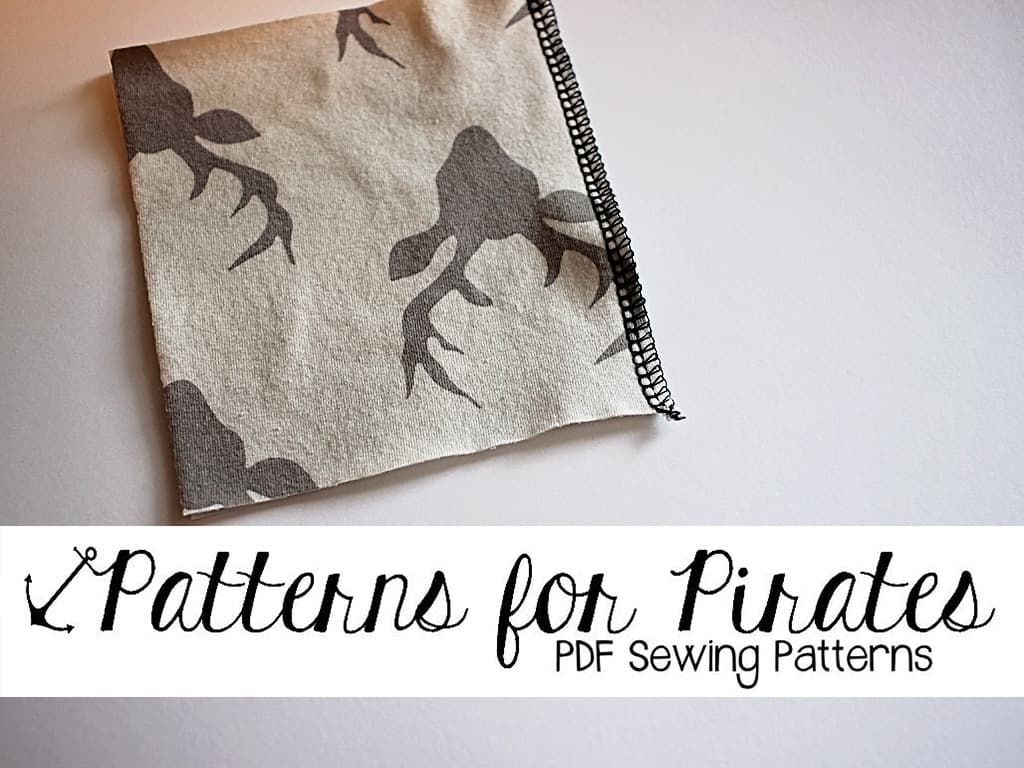
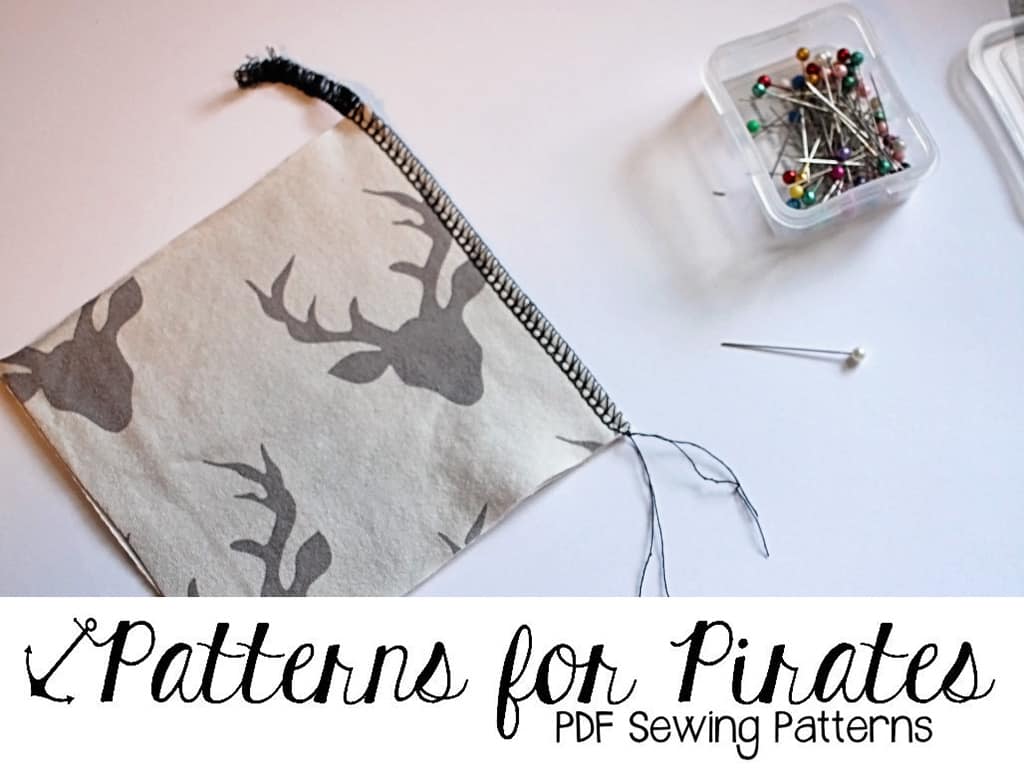
1. Let’s start with my most used one, and the easiest method since it does not involve any other tools. Serge your fabric together and chain off a 5- 6 inches tail. Simply tie a knot as close as possible to the edge and done! It will not unravel and it took you 20 seconds to do. 🙂
IMG_6537

IMG_6538

TIP: For a cleaner look you can tack down the seam with your sewing machine. Simply stitch down the serged edge half an inch  towards the back.

2. Another simple way to finish your serged seam is to snip the tail close to the edge and then add a little dab of Fray Block or Fray Check. This will prevent your seam from coming undone. This method is my least favorite since it takes a while for the liquid fray block to dry and they are not always 100% secure.

IMG_6539

3. A third way to insure that you have a nice smooth finish to your serged seam is to chain off 4-5 inches then using a needle gently unstitch the chain so you have 4 threads. Take the two needle threads and the two looper threads and tie a double knot. Carefully snip the threads as close to the knot as possible.
IMG_6540

IMG_6541

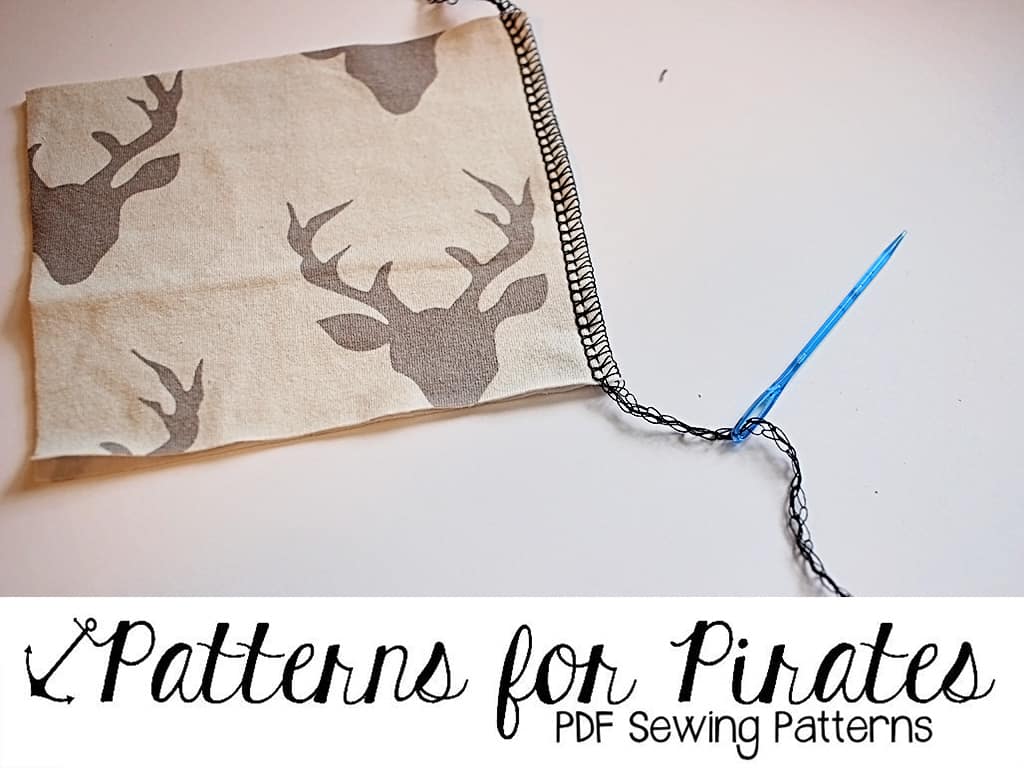
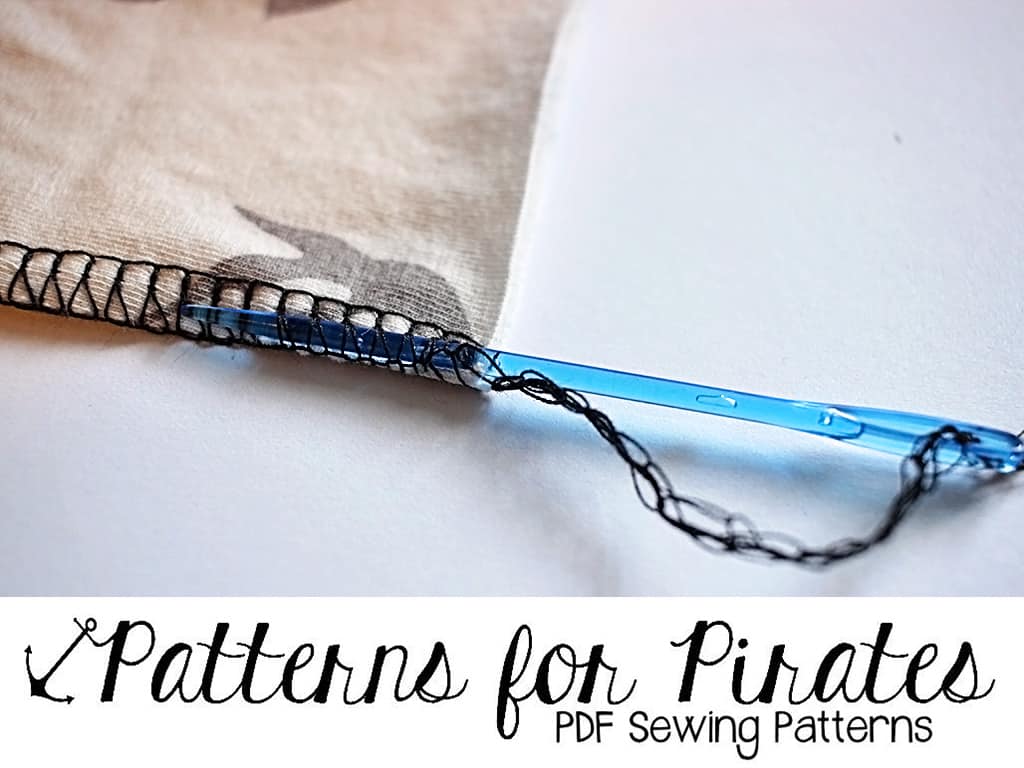
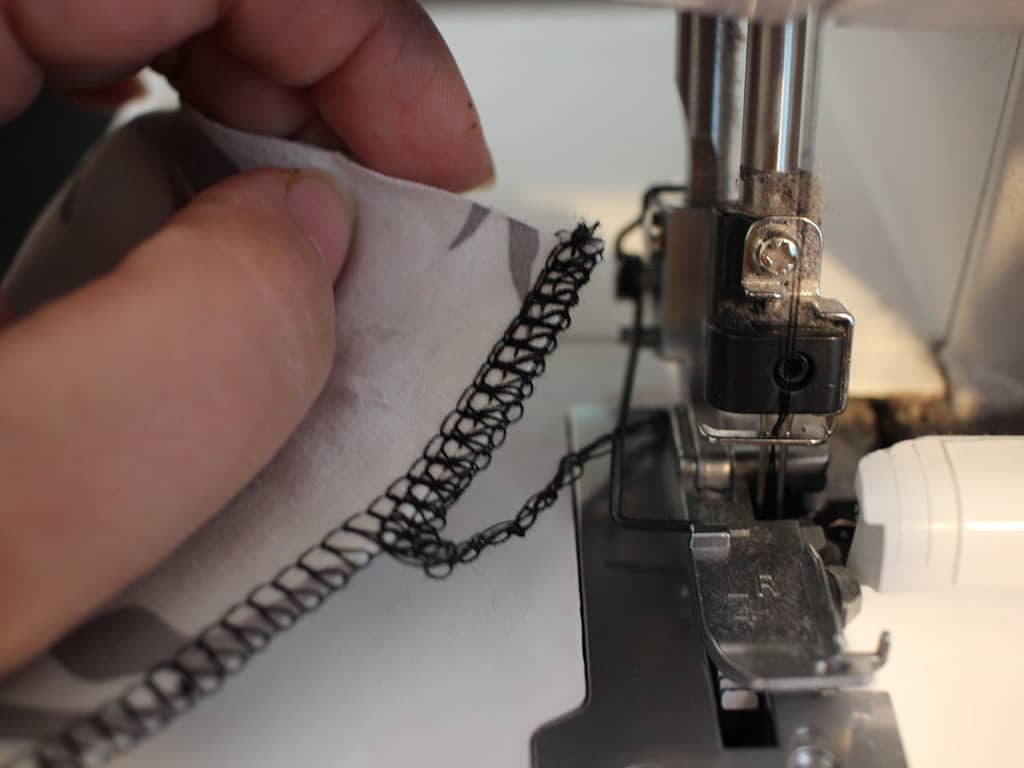
4. One of the most popular ways to finish a serger seam is the “weaving through” method. In order to do that you will be chaining off your stitches about 5 inches, then you will be using a knitting or crochet suture needle to weave the chain in the looper stitches. Grab the needle and thread the chain through the needle eye. Slowly weave the chain through the looper stitches about an inch or so. Carefully trim the rest of the chain stitch.
IMG_6542 IMG_6543 IMG_6544 IMG_6545

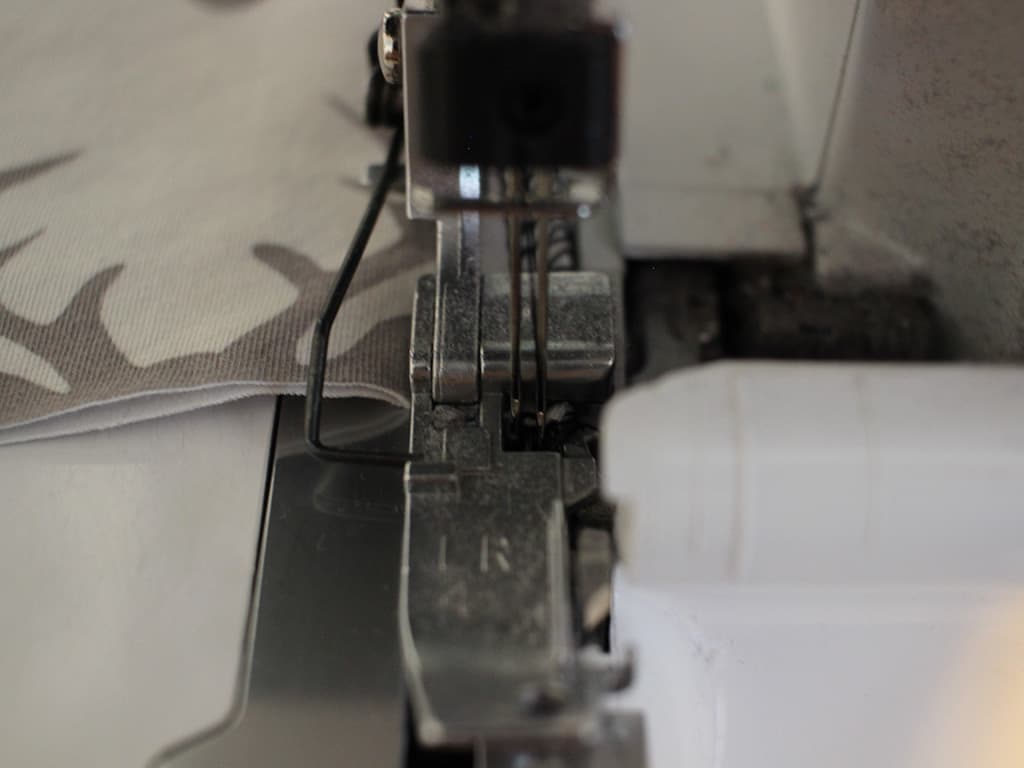
5. The last finishing method is the most “complex” one and it will need a bit of practice. It is not difficult, you just need to pay extra attention. Serge your seam and when you get to the end of the edge, lift your presser foot, gently but firmly pull the fabric just enough that you can flip it on the other side. Disengage the serger knife and serge in the opposite direction for an inch or two. Stop, lift your presser foot and carefully pull the fabric on the side away from the foot. Chain off a couple of inches and then cut the chain as close to the fabric as possible. In doing this “faux backstitching” you will end up with a beautiful finish that is also very secure.
IMG_6547 IMG_6548 IMG_6549

There you have it! Hope you found these 5 easy ways to finish off your seam helpful and that you’ll refer back to them when you’ll be sewing the new cami patterns that Judy sneaked on the P4P Instagram page. 😉

Alex
 

Filed Under: Frequently Asked Questions, P4P University, Sewing Techniques, Uncategorized 12 Comments

Knit Types

January 13, 2017

We get a lot of questions about knit fabrics since most our patterns are drafted for a stretch knit!  We’ve done a few other blog posts trying to answer those questions that get asked most frequently like, What fabric pairs best with this top pattern?” We have our P4P Shirt Fits Explained blog about all the P4P top patterns, their intended fit and what my favorite fabrics are for them.  We also have Different Fabric, Different Fit post all about drape, thickness and stretch and how it can affect the fit of your top/dress.

knit types

Now I bring you a Knit Fabric Cheat Sheet– this is a printable, quick reference guide to knit fabric types that are popular.  I did not encompass every kind of knit fabric available, but I tried to put all the knit fabrics you might see at local stores and what most of us will be ordering online for home apparel sewing.

Sometimes different textile companies like to name/call fabrics by different names as well- so in turn the fabric shop will call it that name.  It can get confusing, but often if you ask the shop what it’s most like in terms of a more popular/well known fabric you will be able to find something to compare it to on this list.

For example: Liverpool.  Liverpool is something that I personal had never heard of in my years of fabric shopping until about a year ago.  It began popping up and becoming popular in LA fabric shops that buy from local textile companies directly and sell in their shops. It is what the textile companies were calling their “textured polyester” (this is what you’re most likely going to see it labeled as at a Joann) and so it’s what the fabric shops were calling it as well.  If you walked into a Joann and asked for “Liverpool” they most likely will not be able to point you in the right direction.

So in short, the fabric industry is constantly finding new ways to create fabrics and each textile company is going to name it what they want 🙂 If you learn the most popular knit types, what the fibers feel like and act like (poly, cotton, rayon, ect), terms like stretch percentage, drape and what that means, different ways to tell the weight/thickness of fabric it will be easier for you to order knit fabric online and know exactly what you’re expecting to receive in the mail! I added some notes at the very beginning of the print out about stretch percentages and weights of fabrics to help as well!

I still recommend going to your local stores and feeling as much knit fabric as possible.  Here I am walking into a Joann Fabrics and looking through a big chunk of their knits.  I tried to grab a variety and talk about them for those who are new to knits:

Same thing at a local Wal-Mart and their knit selection:

I will try to do a few more local stores and maybe some unboxing from online shops one day! 🙂

Here is your printable Knit Fabric Cheat Sheet again.  You can save on your phone or computer and pull it up when trying to order online and are feeling unsure or print it out and take it to your local store to make sure you’re getting what you need for a certain project!

I hope this helps everyone out there just beginning to dip their toes into sewing knit garments! I LOVE my knit pieces for myself, kids, even hubs gets some from time to time 😉 They’re more forgiving with fit, quicker to sew, comfortable to wear and usually require no ironing in the morning! 😉 I’ll try to make knit lovers out of all you!!! <3 <3 <3


Filed Under: P4P University, Sewing with Stretch, Knit Fabrics, Uncategorized 15 Comments

Tips for working with sweater knits

November 25, 2016

img_3505

Have you seen the sneak peek Judy posted on Instagram? Check it out if you haven’t already. If you did you might have noticed that soon you will be sewing those pretty sweater knits you’ve been saving. In the blog today I will give you some of my tips and tricks to work with this kind of fabric.

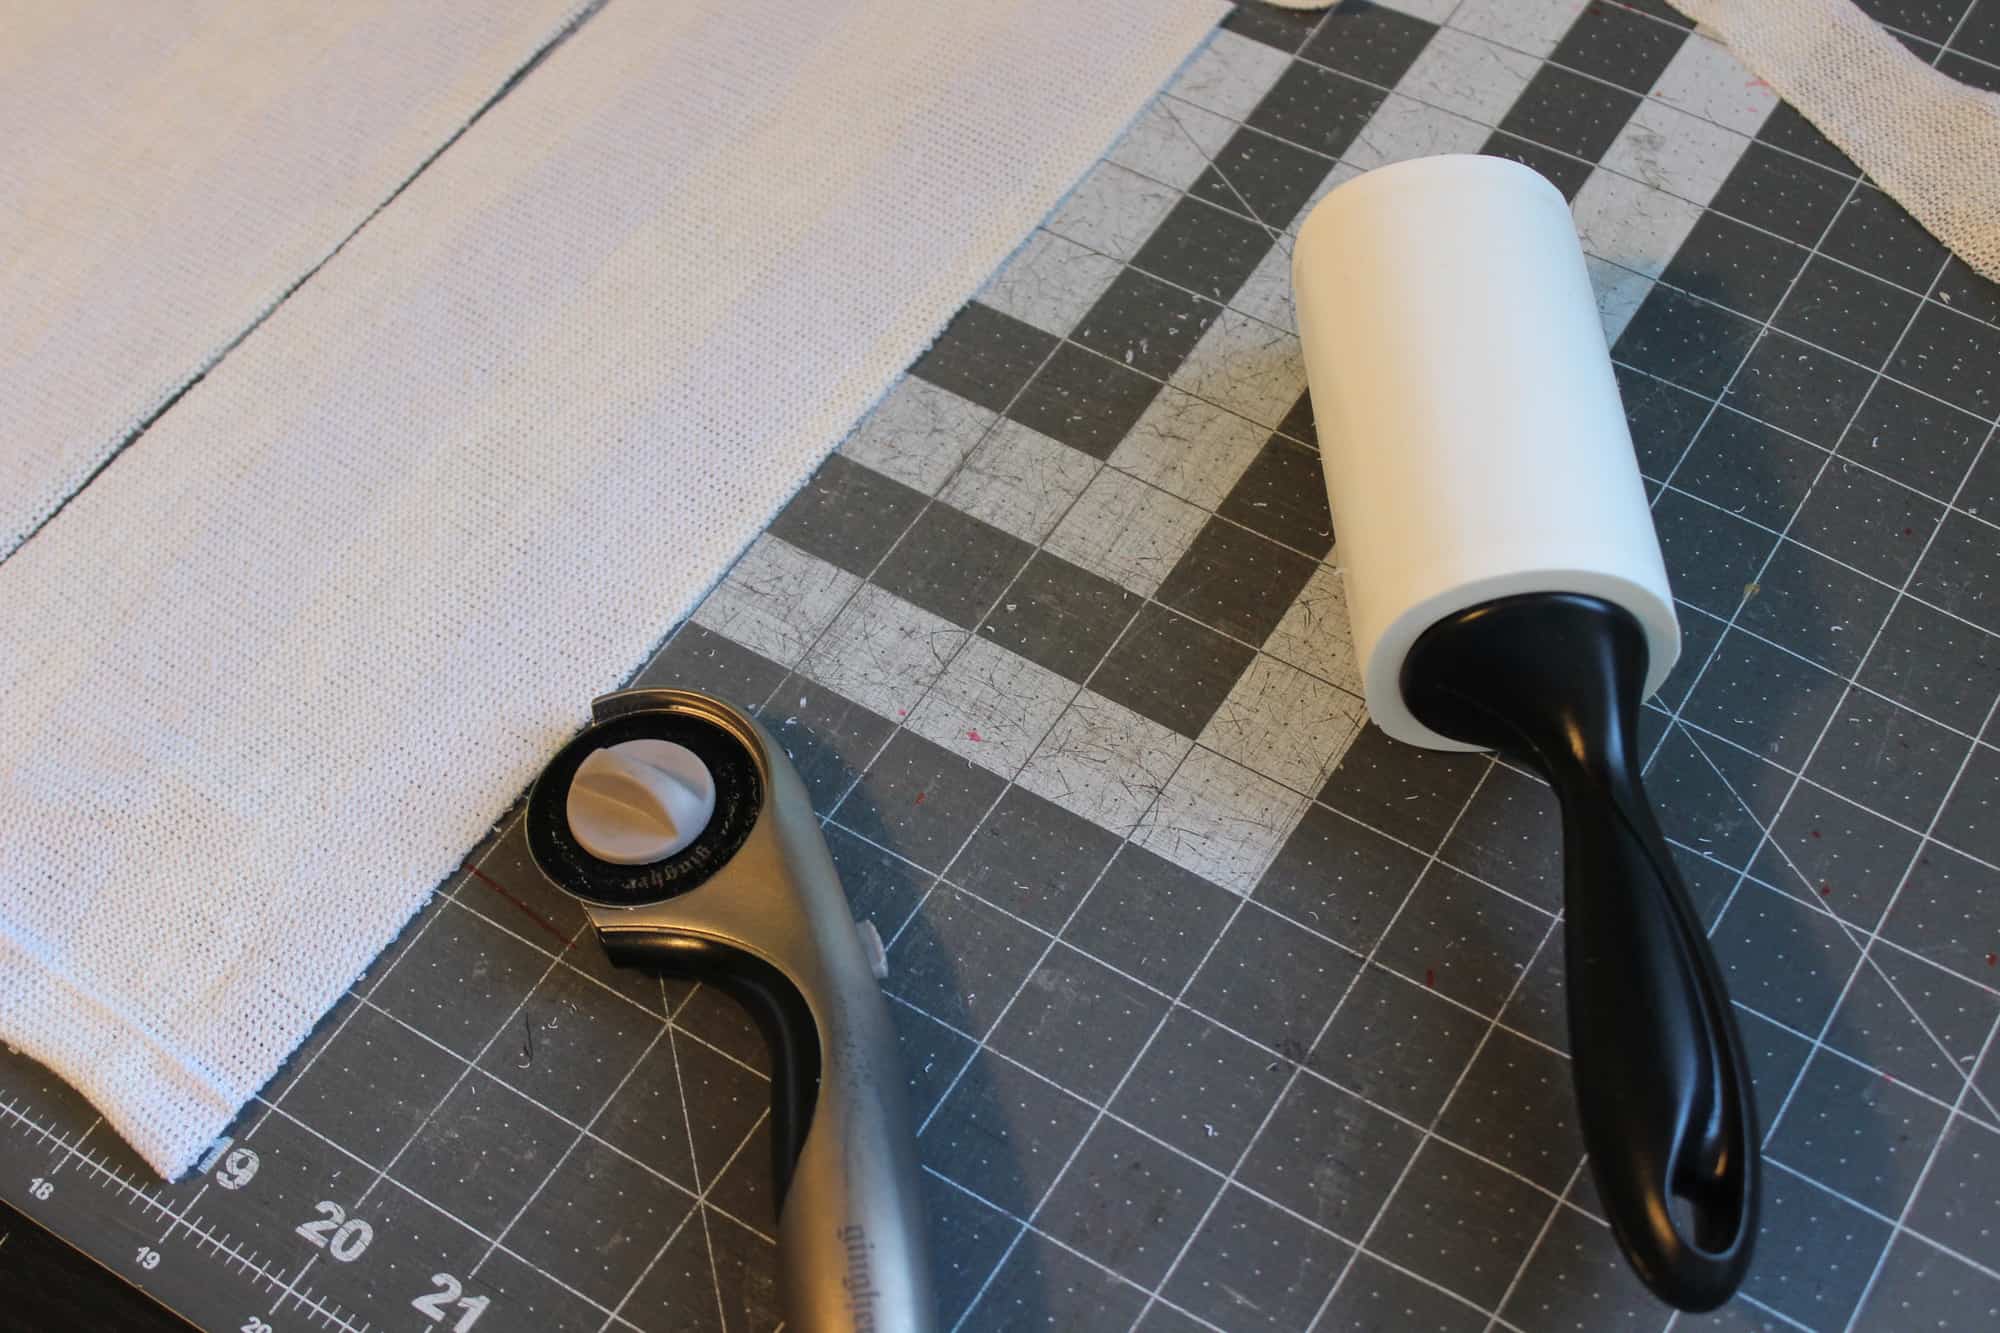
1.Grab the lint roller! No, I have not lost my mind…believe me, you will want the lint roller close by when you cut sweater knit. Whether it’s a open weave or a dense one, sweater knits tend to leave a lot of residue when being cut.

img_3488

TIP: Use the lint roller to not only clean your cutting mat but also the edges of the fabric pieces you just cut. That will help keep your sewing machine cleaner.

img_3491

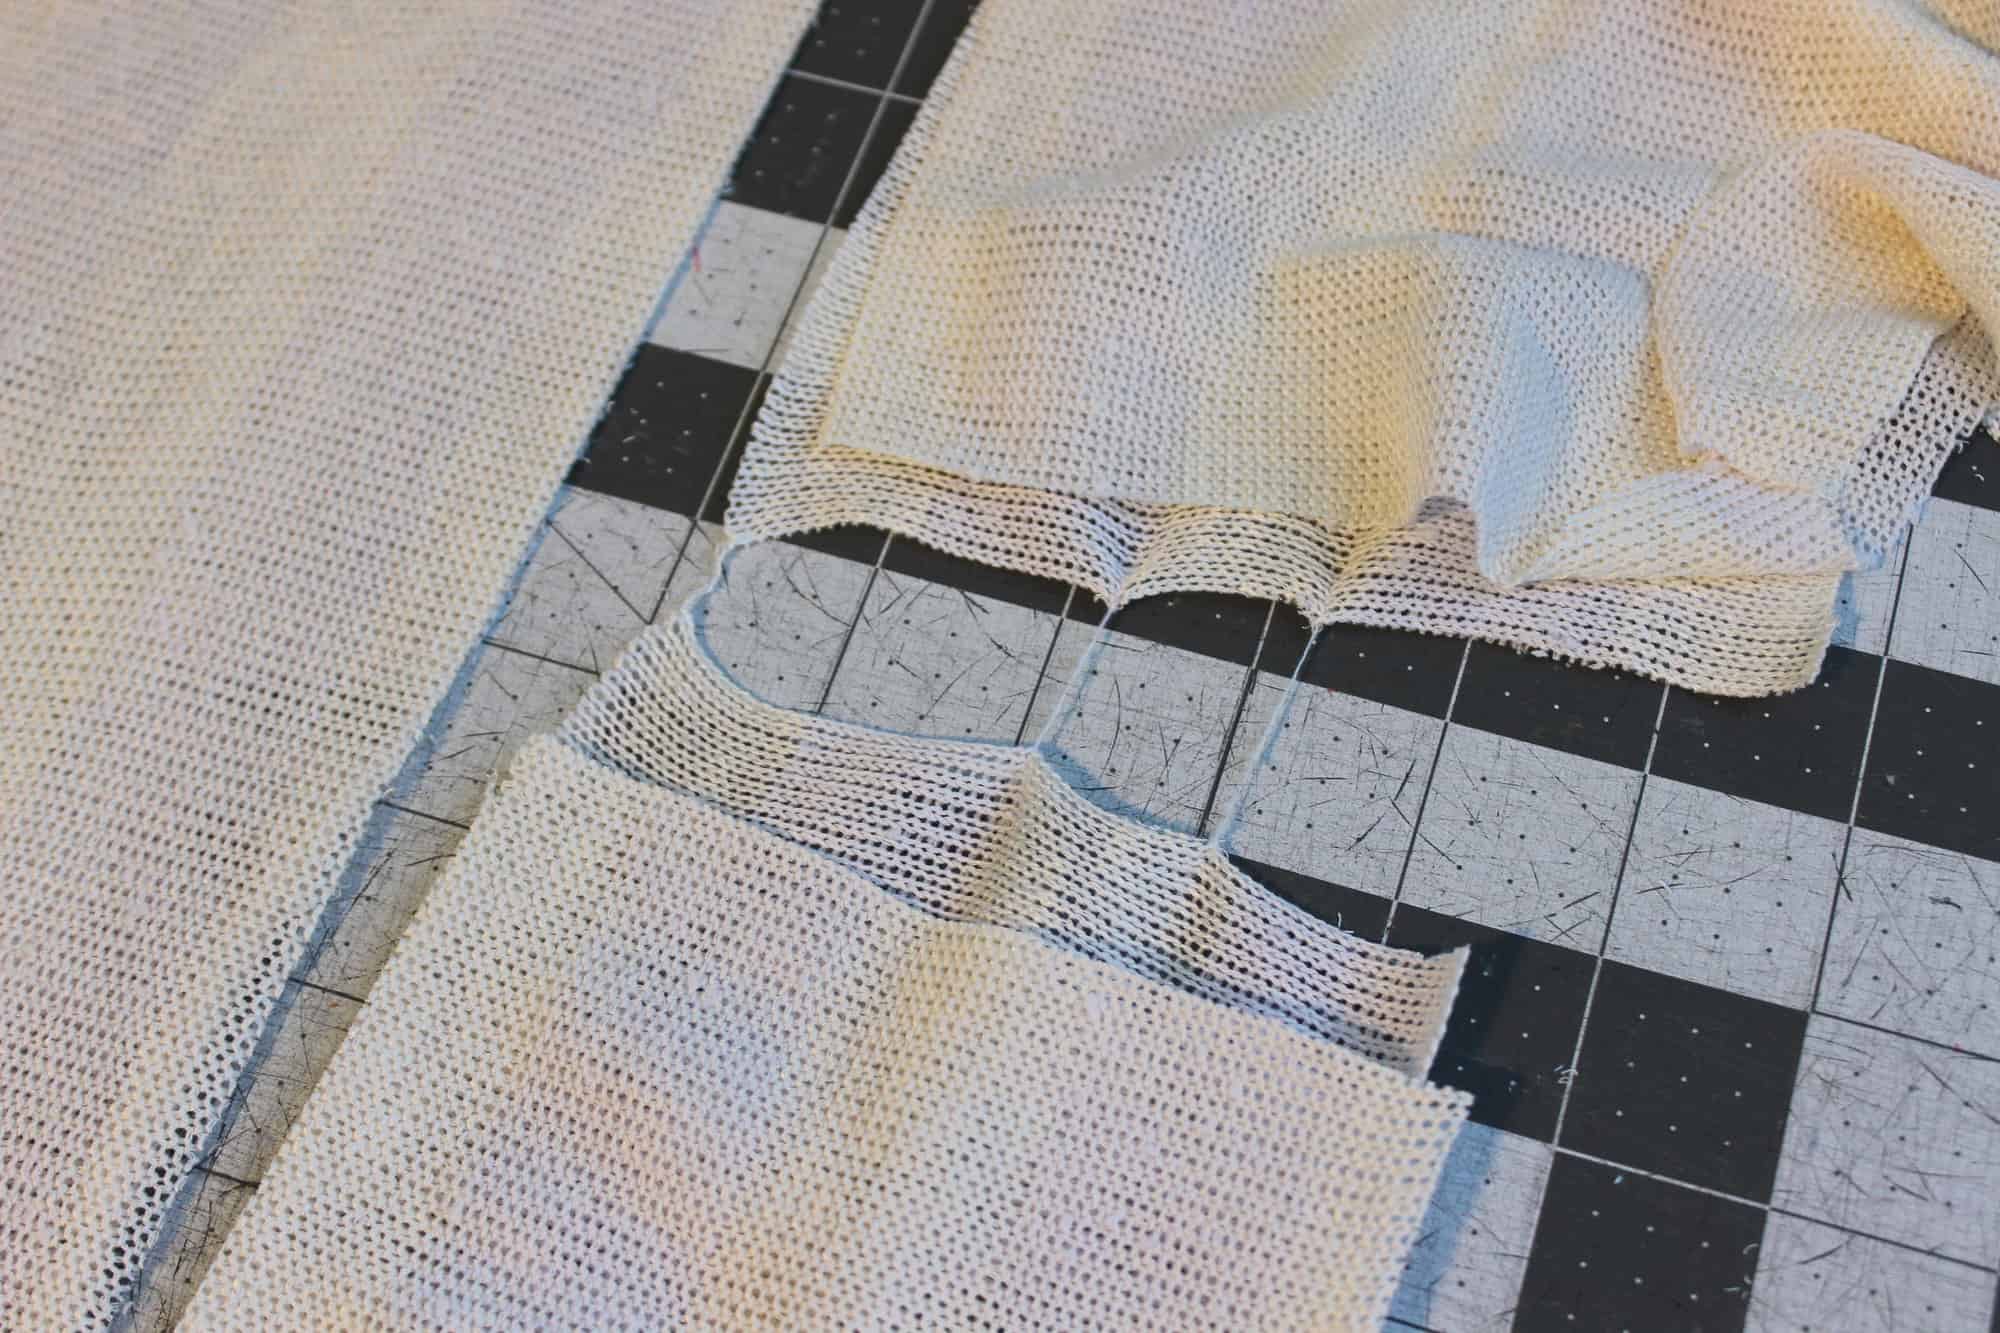
2. If cutting with a rotary cutter, use a new or very sharp blade. I find sweater knits to be more prone to getting a run in the fabric if  the cutter or scissors is not very sharp.

img_3489

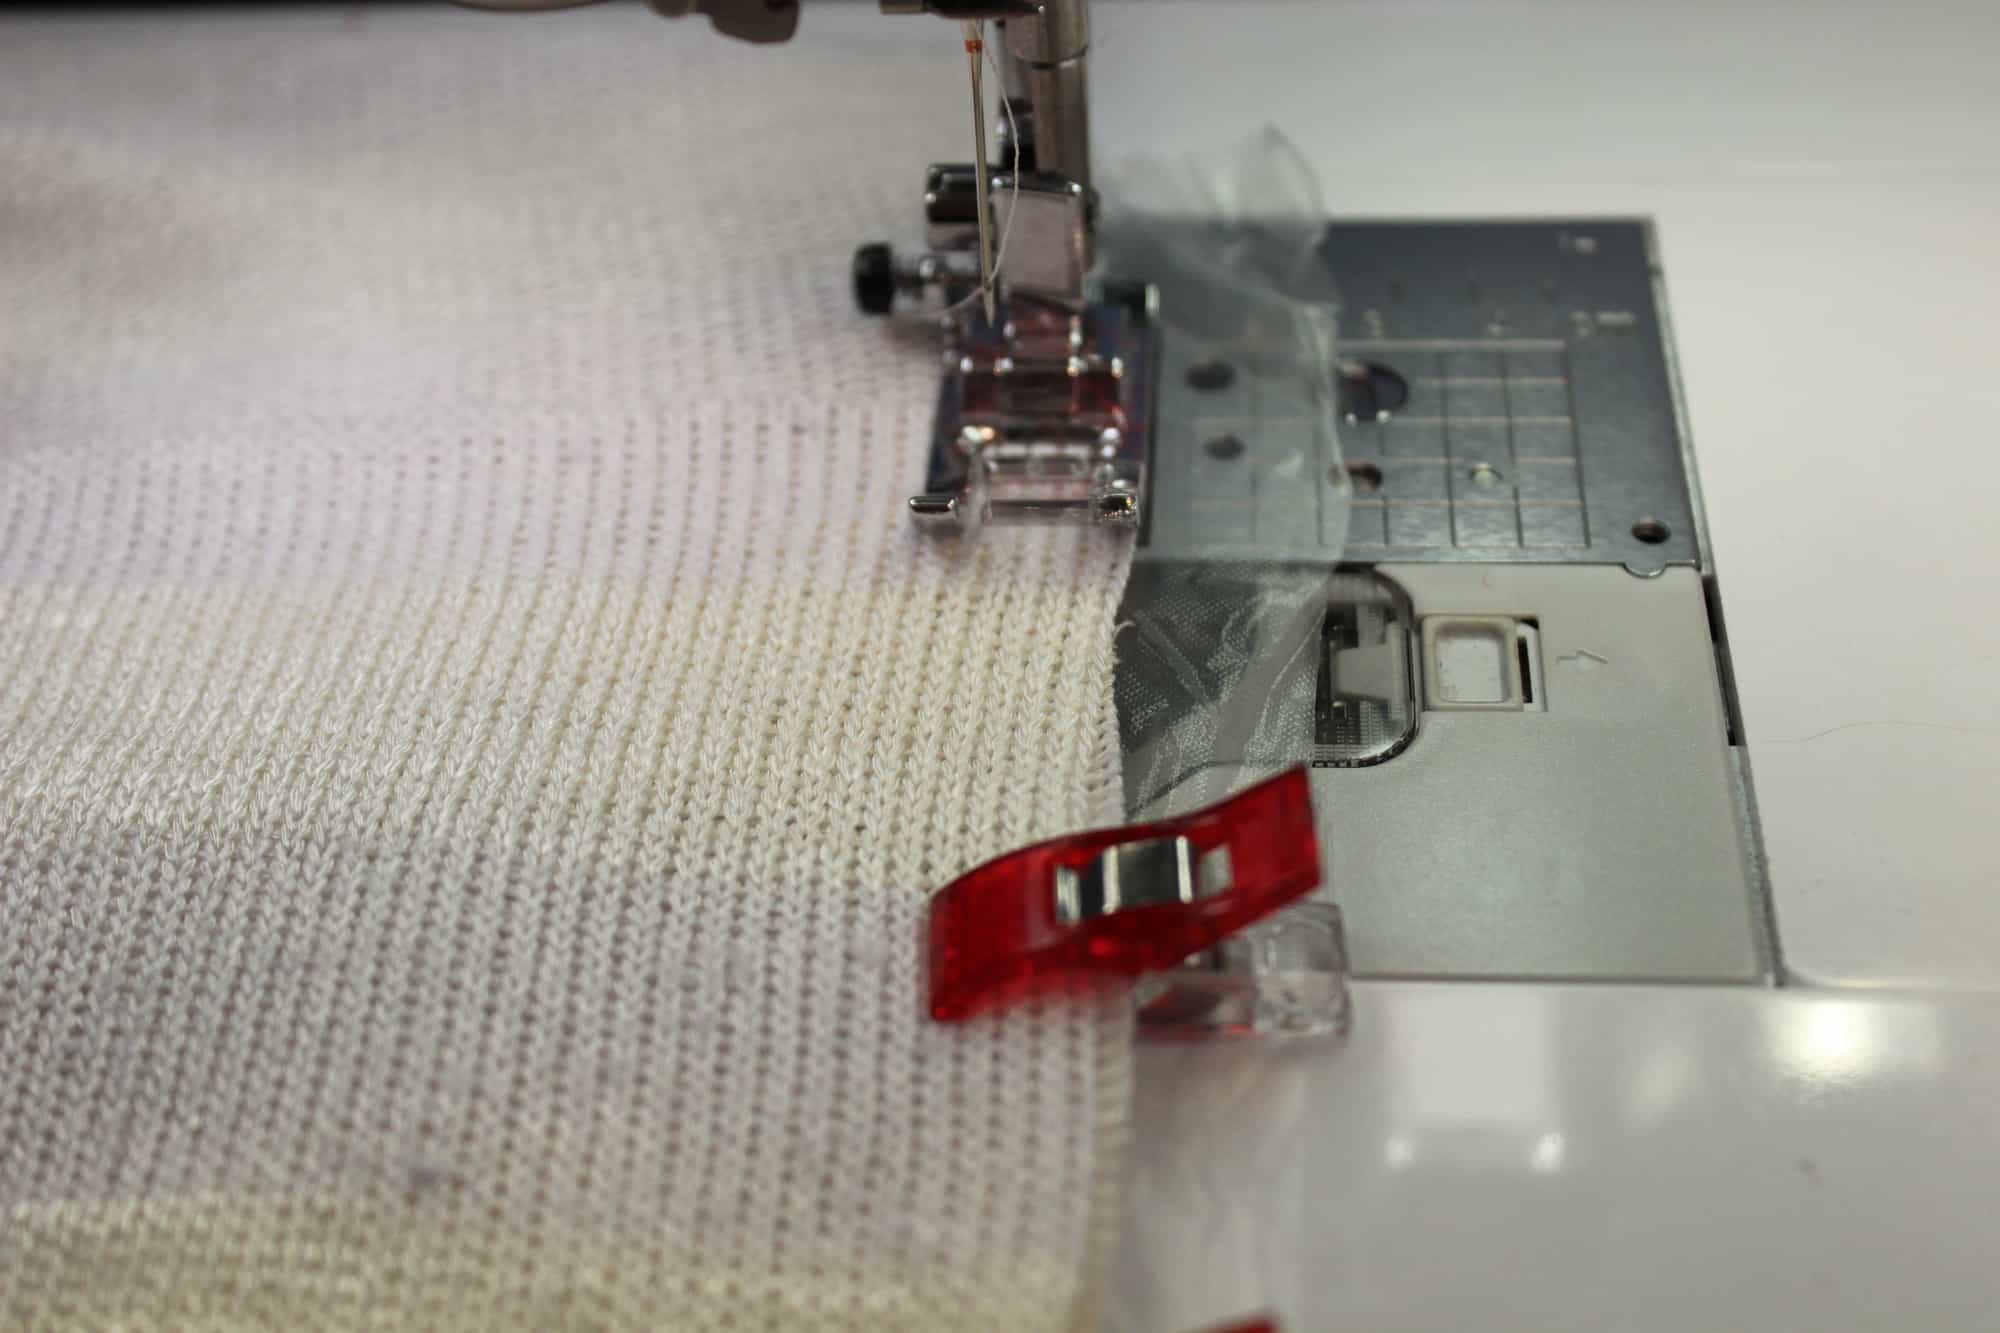
3. Water soluble stabilizer is not just for embroidery! When working with sweater knits on your sewing machine I highly recommend placing a piece of WSS under your fabric. This will not only make sewing it easier but it will also prevent puckering and even more important it will stop your machine from “eating” your fabric. Sweater knits, especially open weave ones have a lot of “holes” so your machine is basically sewing through air.

img_3493

Tear away the excess, the remaining water soluble stabilizer will disappear when you first wash the garment. I prefer transparent WSS but opaque ones work just as well.

img_3494

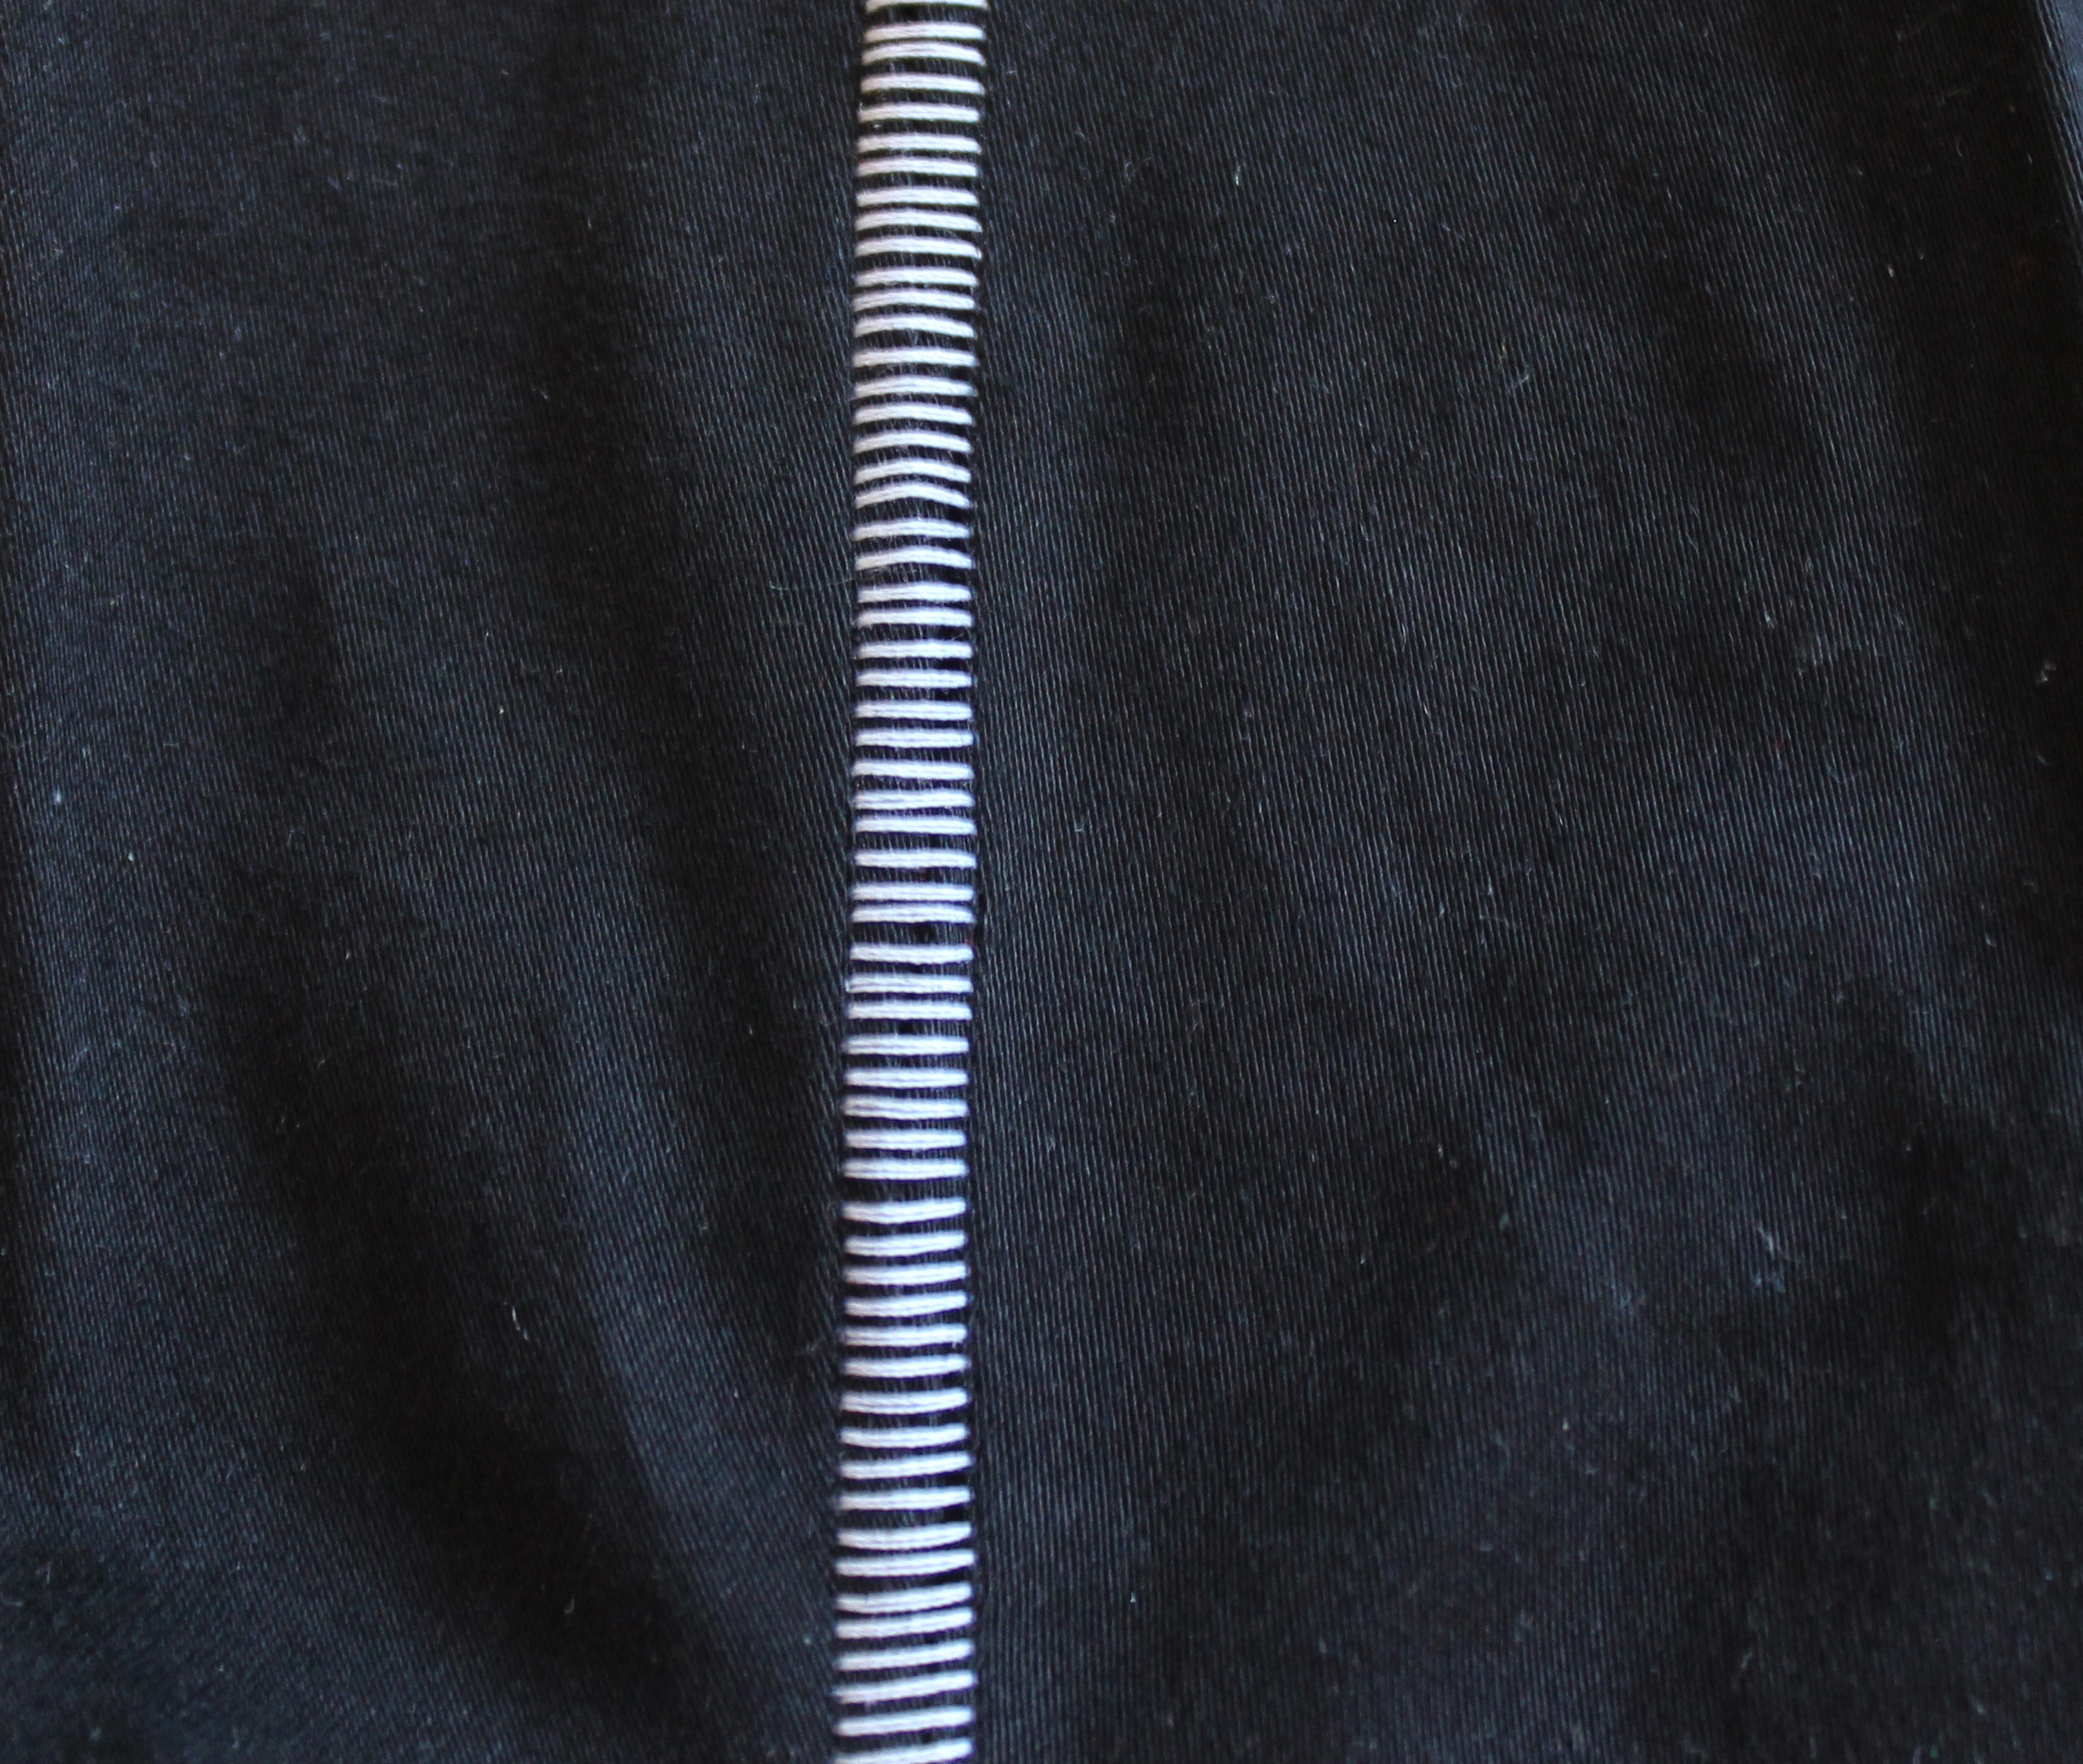
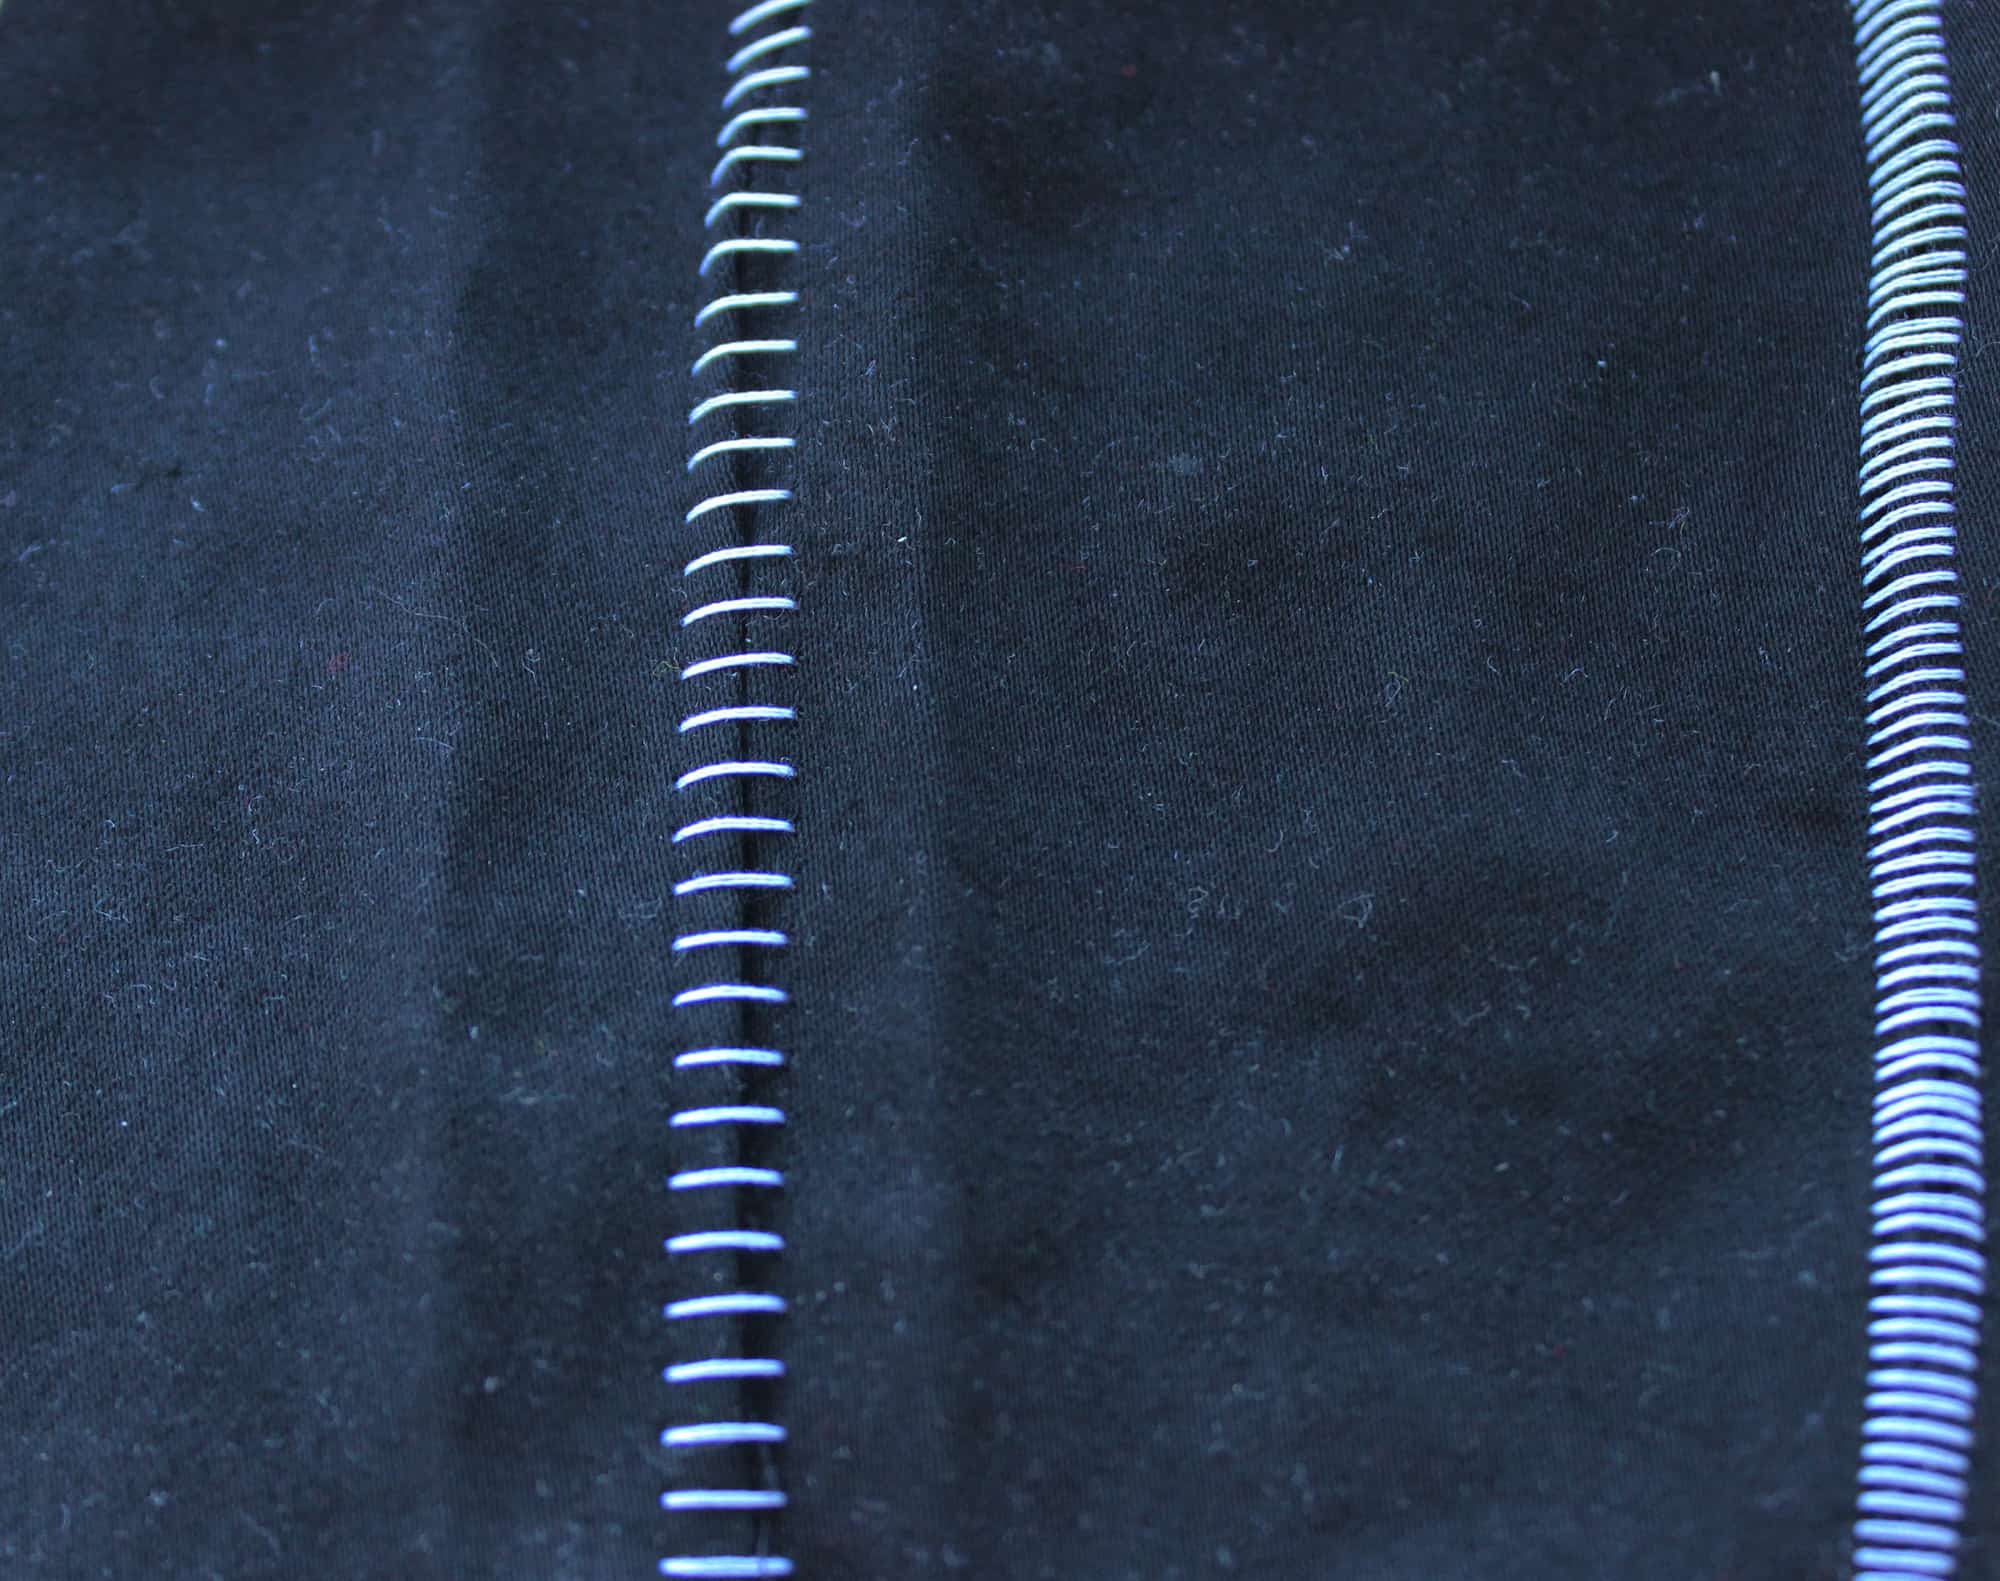
4. You can sew sweater knit entirely with your sewing machine however a serger will make the process faster and easier. You might need to adjust your settings a bit to accommodate this type of fabric. My favorite serger stitch when sewing sweater knits is the FLATLOCK stitch. Check your serger user manual to make the proper settings for a flatlock stitch, they will vary from model to model. Here is an example of how a white thread flatlock stitch looks like on a black piece of fabric.

img_3498

A narrower flat lock stitch

img_3501

A wider flat lock stitch

I use this type of serger stitch when I make sweater knit bands and hems. Use a matching thread so the stitch will blend in with the fabric.

img_3504

5. Just as with all knits, always use a ball point needle in your sewing machine and serger. You’ll also need to lower the pressure foot tension of your sewing machine.

6. The markings on open weave sweater knits will need to be added with chalk/ a tailor pen or by adding tailor tacks. Notches are impossible to see on sweater knits.

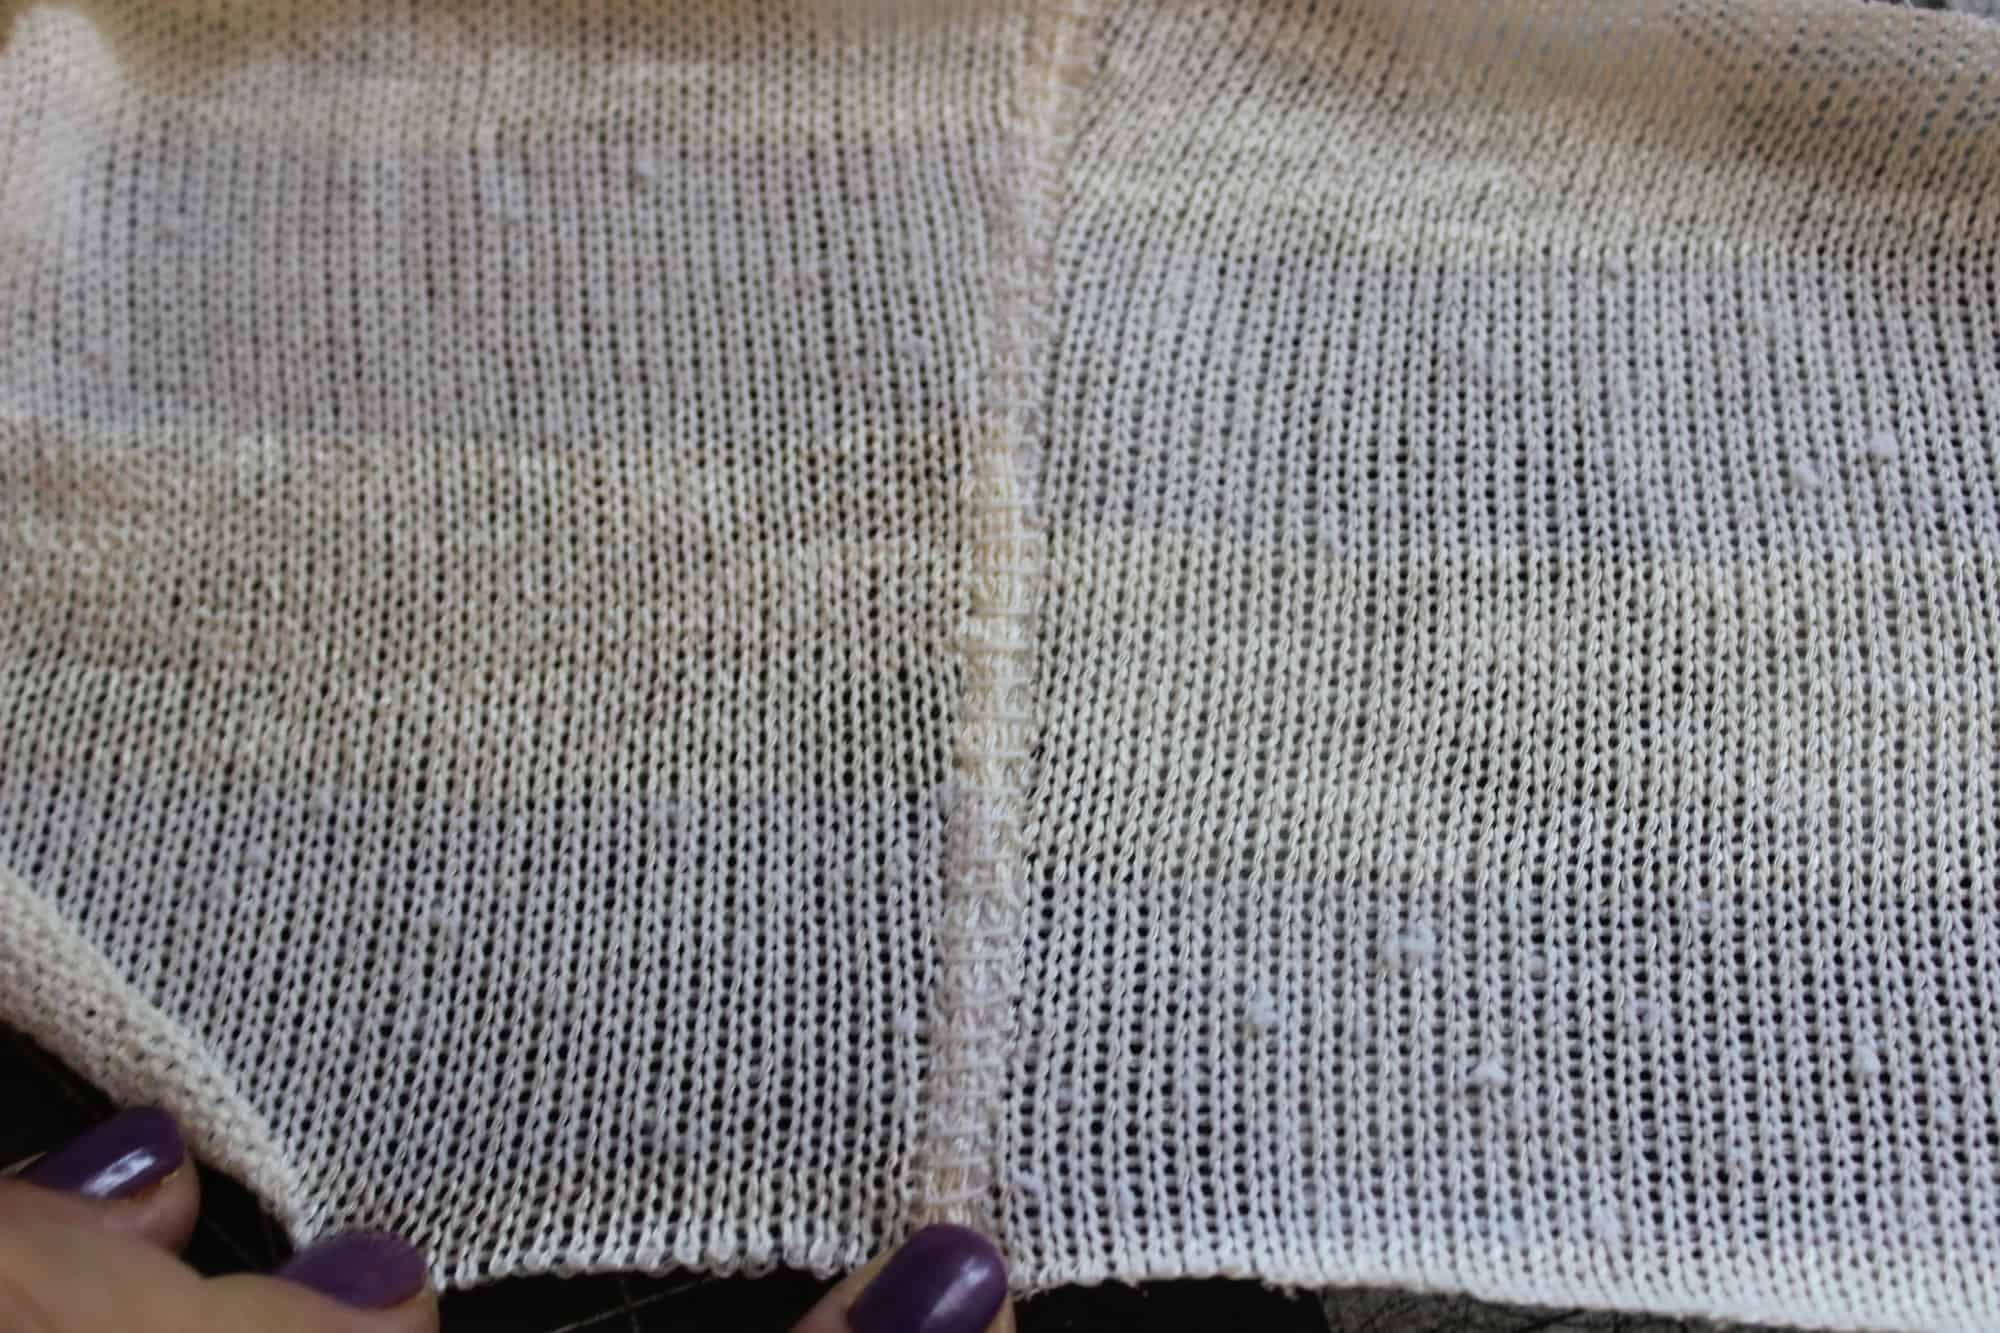
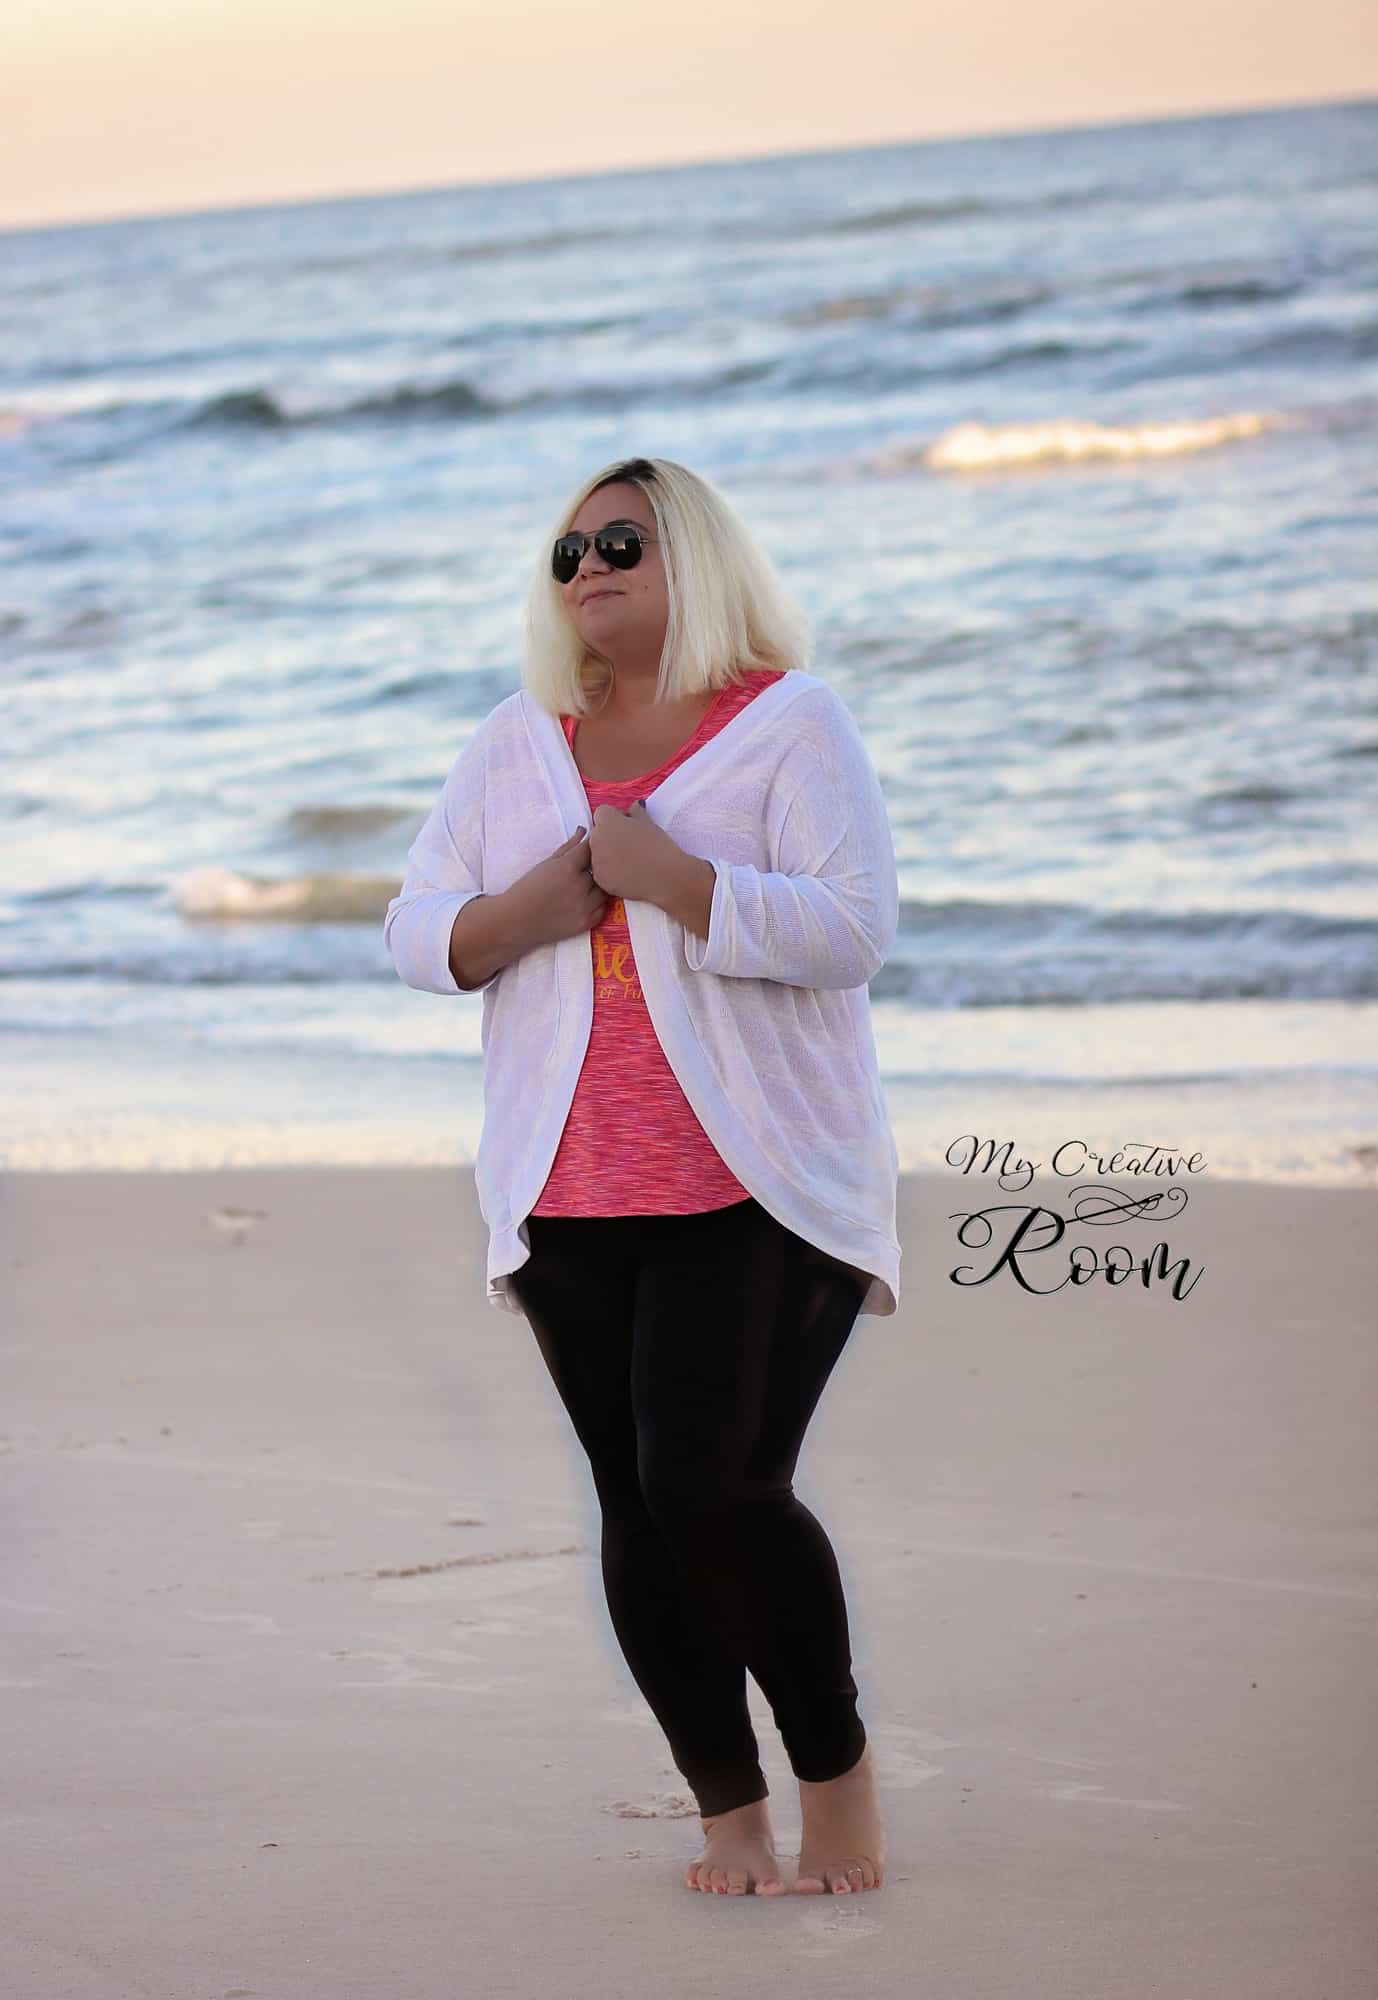
I hope you find these tips helpful when you will be sewing the new Cocoon pattern releases soon. I will leave you with another sneak peek of this amazing cardigan. Now get the sweater knits stash out and as always post your creations in the group so we can all ohh and ahhh over them.

img_3638img_3518

Alex


Filed Under: P4P University, Sewing with Stretch, Knit Fabrics, Uncategorized 1 Comment

Darts 101

August 10, 2016

13886338_10102825780914283_2473314520084428633_n

You may have already heard, but Patterns for Pirates has some ladies woven patterns in the works! Woven patterns tend to use a few techniques that are not often used in sewing knits.  One common technique on woven patterns are darts and I’m here to give you a few tips on how to make the perfect dart.  Darts are used to create contour and shape in your woven fabrics and accentuate your curves. You will find them quite often used in ladies patterns at the bust, and often on the back of pants or skirts.  Don’t be intimidated by darts as they are actually very easy to sew!

I am using the Everyday Elegance Pattern for my example today and we will be focusing on the front piece. The first thing that I like to do before I even start cutting out my pieces is poke a little hole right thru my pattern piece at the tip of the dart.  I usually just use a pen and make a hole big enough that I’ll be able to put the tip of my marking tool into it after I cut my pieces.dart

Once you have your front piece cut out you don’t want to remove your pattern piece from your fabric.  I’m going to show two ways that I like to mark the dart depending on the type of fabric that I’m using.  First, if I’m using something that is a bit more stable like a quilting cotton, chambray, or shirting fabric I will just take my marking pen (I use washable crayola felt pens or a disappearing tailors pen) I poke my pen thru the little hole that I made in the pattern piece. I then take a pair of scissors and make a 2 little snips in right where your darts end, on the side seam of your piece.  You will then flip your fabric over, still folded, and repeat the same process on the other side.

IMG_5014

IMG_5017

If my fabric is slippery or really lightweight and tends to slip I will mark where I made the little hole with a needle and thread. Yes, I said needle and thread but I promise that it is much easier then trying to flip your fabric over and lining it all up again with your pattern piece.  You are just going to make a little cross stitch with your needle and thread, keep it nice and loose and leave a long tails.  Then as above make your two little snips on the side seams.

IMG_5029

You’re now ready to remove your pattern piece.  If you used the needle and thread method to mark the point of your dart gently pull your fabric apart and snip the threads that connect the 2 sides.  Next we are going to connect the tip of the dart to where we snipped at the side seams.  I use a ruler and draw from my point to the side seam on both sides. I then like to draw a line from the point straight down the middle.  Now you are going to fold on that center line and press it with your iron making sure that your snips line up together.  I then secure my dart with a few pins.  Time to sew!

IMG_5018IMG_5021
I like to decrease my stitch length just a bit, usually I sew at a 2.4 stitch length but for darts I go down to a 2 stitch length, this is just to make sure that when you press it after you’re done none of your stitches show.  We are going to start at the side seam and sew right on the line that we drew earlier.  When you get to the tip of the dart, DON’T BACK-STITCH!  You want to sew right off the end of the dart, leave long thread tails.  You can back-stitch at the side seams but never back-stitch at the tip of the dart.  You want to tie off the end of the dart and then trim your threads.  I usually knot my threads 3 times.  This helps keep the very tip of your dart nice and clean/crisp.

IMG_5025

Now we are done sewing the dart we want to press it.  I like to use something that curves to press my dart.  I have this little pressing tool that is used to press sleeves but it works great for darts to, you could also use a tailors ham.  Don’t have anything? You can roll up a bigger piece of fabric you have in your stash.  You want to press the dart down towards the bottom of the top from the wrong side.  Then I flip it over and press it from the front and you’re all done!

IMG_5033IMG_5035IMG_5036
Not that bad right?!  Take the time to be accurate and press well.  If you try to rush or skip out on the pressing you’ll be sorry!

Now go and practice your darts and get ready for the new woven patterns coming really soon!


Filed Under: Frequently Asked Questions, P4P University, Sewing Techniques, Uncategorized 1 Comment

5 TIPS for successfully hemming knits

July 28, 2016

IMG_9357

We have seen a lot of questions in the group about getting the perfect hem on your knit outfits. Most hems are sewn perpendicular to the grain and on the bias in the case of curved hems…this makes hemming sometimes appear stretched out, puckery or wavy.

I needed to sew a shirt to showcase this fabric so the first pattern that came to mind is the Women’s Henley. The only modification I did was to shorten the neckline placket so it would not interfere with the design of the fabric.listing pictures

I will give you my 5 best tips for avoiding stretched out hems (especially curved hems) and getting the perfect finish.

1. You IRON is your best friend!

Always have your iron hot and with plenty of water in the steamer. Iron your hem before your sew it, it will make hemming easier! This process is called a memory hem. Be sure to follow your pattern’s directions for the amount of fabric that needs to be folded. Pressing and steaming the seams once sewn will also remove the puckering and waviness back and make them look beautifully finished. Ironing and steaming your garment every step of the way is one of the most important parts of sewing. While steaming your hems may not fix all issues it will definitely fix most of them.

IMG_9203

Before pressing and removing excess fabric.

IMG_9210

After a good steam and press.

2. CLIPS and PINS galore!

When hemming, I clip/pin my fold over fabric almost every two inches. Having a stable seam will make sewing it a breeze. Whether you are using your coverstitch machine or your sewing machine having your fabric pinned every inch and a half or so will make your hemming experience much more pleasant. Sewing clips vs. pins is a matter of personal preference. I like sewing clips best because I find them to help me secure my hems faster than pinning used to. So, are you a “pin-er” or a “clip-ser”? 🙂 – insert pictures of the clipped hem

IMG_9197-1

3. HEMMING TAPE is magical!

Stitch Witchery or Easy Knit Tape will become your go to notions for hemming. Stitch Witchery is great for stabilizing and fusing together knit fabric. Simply lay the tape inside the memory hem and press it. This will not only fuse it but it will also give it more stability, making sewing so much smoother and hassle free. It is very important to make sure that the hemming tape you use it’s sew-able. Some no-sew tapes may leave a gooey residue that will damage your needles. Insert photo of hemming tape and photo of ironing it.

I also like to spray Best Press when I press my hems. The starch in it makes the hem more stable so it becomes easier to sew.

IMG_9193-1

Hemming tape can be transparent or opaque.

IMG_9196-1

4. Length of the STITCH and TENSION matters!

Whether you are using your sewing machine or your coverstitch machine, you must remember to adjust the stitch length and tension according to the type of fabric you use. Some coverstitch machines will adjust the tension automatically but most of them will not, so be sure to test your hemming on a scrap piece of fabric. It’s imperative that the scrap fabric you use is the same as your project. Usually hemming knits will require you to lower the tension and length the stitch. Some machines will prefer a longer stitch, some will work great with just a 3.0 length.

IMG_9199-1

If your machine will allow you to set up the stitching speed, do it!

IMG_9207-1

I tend to coverstitch at about 1/2 to 3/4 inches away from the fold so I remove the excess fabric with my applique scissors. You can use your regular scissors too, just be careful not to snip your stitches.

5. Last but not least, have PATIENCE! Go slow!

We all know that rush feeling we get when reach the hemming part of the project…one more step and then it’s ready!! Well, last thing you want is for this last step to ruin your hard work. Take a little more time and go slowly when hemming. Coverstitch machines sew pretty fast so remember to slow down and guide your fabric through.

IMG_9339-1

IMG_9211 IMG_9213-1

I hope you find my tips helpful and that you will tackle your next P4P project with more confidence. Don’t forget to post your creations in the group. Sew like a Pirate!

Filed Under: P4P University, Sewing Techniques, Sewing with Stretch, Knit Fabrics, Uncategorized 8 Comments

Pivot and Slide FBA Method`

June 22, 2016

fba header picture

We get a lot of questions about Full Bust Adjustments.  Since I draft for a true hourglass, curvy figure lots of our ladies have bigger busts. So here is a quick and easy method for knit tops if you need a FBA.

Do you need a FBA?

I see a FBA suggested A LOT in sewing groups, even though it’s not always the problem/solution for ladies (Especially for a P4P pattern that already drafts for a bigger bust.)

So, how do you know?  I began putting both upper/over bust and full bust in my measurement charts to help! (Need a refresher on these measurement terms? Here is our How to Measure Yourself post explaining them.)

If your upper bust is a size smaller than your full bust- you need a FBA.  If you don’t have those measurements on your pattern then you will have a neckline and shoulder fitting too large when choosing your size from your full bust measurement.

I do NOT advise “choosing your size based on your upper bust measurement” and doing a FBA for that many inches.  Indie patterns like mine are much more “true to size” than traditional paper patterns that tend to have a lot more ease built into them. With traditional paper patterns it is often very easy to size down 1-2 sizes on them and still have enough wearing ease.  Most indie patterns are not drafted with that much extra ease.  I draft my patterns right from that measurement chart meaning if I picked my size based on my upper bust (34.5) I would choose a size small, but I don’t need a small! Both my upper and full bust fit into a medium on the full size chart.  I do not need a small with a FBA becuase my frame/upper body isn’t a small.  It’s a medium 🙂 This is why I began adding the upper bust measurement into my patterns, to take out that guess work when I saw this recommendation quite a lot.  And while it might work well for those traditional paper patterns with more ease- I do not suggest using this method for P4P patterns-or most indie patterns in general.

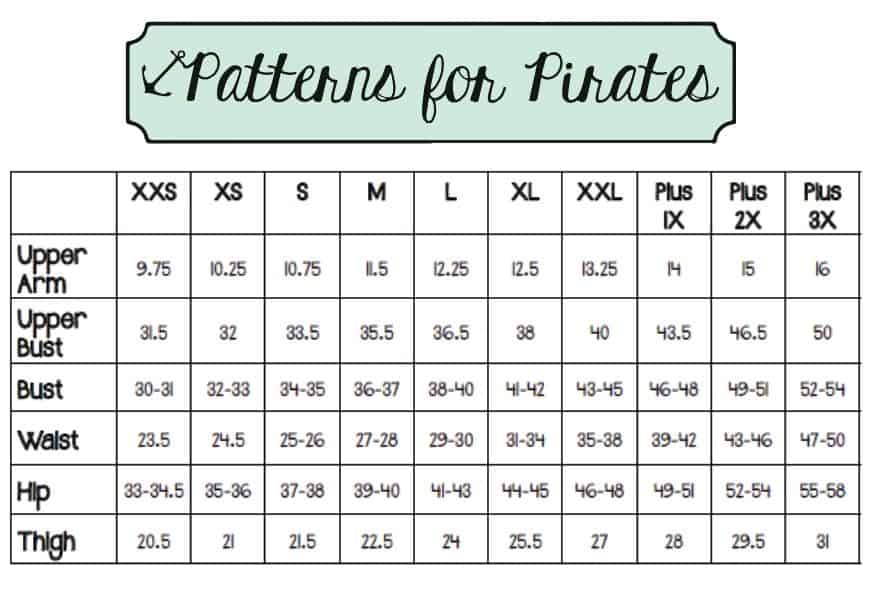
Here is my size chart with both upper/over bust and full bust.

listing pictures3

Got some wrinkles on the full bust area? A FBA is NOT always the answer 🙂 There are a lot of other reasons you might have some wrinkling there!

Both raglan and dolman style sleeves will naturally have some wrinkling there. No matter who that pattern designer is, who is wearing it, fabric choice, or even gender wearing it! The drafting of these two sleeves lay flat when arms are out, which means when arms are down it naturally creates some wrinkling in the armpit area. No biggie 😉

IMG_0238 IMG_0413 IMG_9552 IMG_3842 IMG_4147 IMG_4387

Length is the armsyce is another reason one might have some gaping or pulling.  If you are shorter or taller then the height the pattern is drafted for (P4P drafts for average 5’5″), or if you happen to have a different proportion there. You might need to adjust the length of your pattern from the top of shoulder to the armpit rather than needing a FBA.   This is difficult to tell just from a picture.  It is however much easier in person to see.  If you’re not sure try pinching at the shoulder seam to take out some length if you think it might be too long.  If it is too short you will feel like the entire shoulder area is too tight and that armpit seam will be up touching your armpit too tightly.  For both it is easy to see if you try on the shirt prior to putting the sleeves in.  If it is a tank, remember the bands will pull the armysce in though.

Here my lovely tester and model has a little wrinkling because she is a bit shorter than the drafted height. She would benefit from taking just a touch of length from the armsyce.

11036978_10207178765452450_6301409831053611894_o

Here my lovely tester would benefit from the opposite, a bit more length in the armsyce.

11807358_10207360915846870_5189633883074489071_o


You might have some issues with fit through the armsyce and bust if you are wide chested/through the upper back.  You would find your upper bust measurement in a bigger size than your full bust.  You would need a Small Bust Adjustment (follow the same method just pivoting and tracing to the smaller full bust size).

Here is a gorgeous tester of mine who has begun to trace off a size larger through the neckline and shoulders and adjust down to her smaller bust. This is prior to doing so. You can see it is a bit tight across her shoulders and upper chest area. but fits well in her full bust.

12512545_10156480108785282_629169134466680487_n12669689_10156480108610282_565742808129966782_n


The last reason you might be having fit issues through the bust is not using the appropriate fabric for the top.  If your pattern suggest 50% and you sew up a cotton jersey with only 20% you might have pulling at the chest.  The opposite problem would be using a very stretchy fabric like a lightweight rayon spandex with a lot of horizontal and vertical stretch making the armsyce droop lower or even gape.

Here I am in the exact same size, but the feathers are a more stable cotton jersey with very little stretch and the grey is a rayon spandex with a ton of stretch and drape.  The armsyce is an 1-1.5″ lower in the drapey, stretchy rayon spandex.

IMG_7635 IMG_7920

One more thing I see sometimes is the drag lines from bust to waist.  This is something you will get naturally with an hourglass figure. You have a large difference from your full bust to waist.  If your shirt/dress is semi-fitted then you will see those drags pulling into that smaller measurement at the waist.  This isn’t asking for a FBA, it’s asking for a dart 🙂 But, most knit shirts don’t have darts, just curves along the side seams. You can’t get as drastic of a change from full bust to waist without a dart.  But that’s okay! It’s the nature of a semi-fitted knit top.  It doesn’t mean it is ill-fitting.  Here are some pictures showing those drag lines, but I have room for my bust and the armsyces are fitting perfectly for my frame.  My side seams aren’t pulling drastically to the front of my body on my bustline and it isn’t too tight across my back at the bustline.  I don’t need a FBA for my patterns (yay! I do need them on patterns drafted for a more rectangular figure like traditional paper patterns! Just one reason why I love drafting for a curvy figure).

IMG_7564 IMG_7753 IMG_1758 IMG_1791 IMG_1804

Okay, now if you’re still with me 😉 and you need a FBA here is my favorite, quick and easy method for a knit top. This only adds a bit of width right at the bust.  It doesn’t add length.  For most women and most knit tops this is sufficient.  If you have 2 sizes difference in your upper and full bust you might also add some length to the front center at the bust line and ease it back into the side seam (making the front center curve down). To give your bust some extra length as well.

Here is one of my favorite testers.   She has a smaller size upper bust than full bust.  Here she did not do a FBA.  You can see she has a bit of pulling pointed right to the apex of her full bust. She is your classic case of needing a FBA 🙂 Her side seam will be pulling towards the front of her body instead of laying more evenly along her side.

12109259_10156165083900790_2794494373974819072_n  12094846_10156165083630790_3745559963982436088_o


Here is the “Pivot and Slide FBA Method”:


Step 1: Choose your sizes based off the measurement chart.

z

Step 2: Pivot

fba pictures-02

Step 3: Trace

fba pictures-03

Step 4: Slide back

fba pictures-04


Now you have a new armsyce that goes wider at the bust, but the same smaller neckline/shoulder fit as the smaller size.

I hope this helps those out there needing this fit adjustment! Once you’ve got it down it really is a very quick and easy method to adding a bit more room for the ladies 🙂

Filed Under: Fitting, P4P University, Uncategorized 35 Comments

P4P University:: Grading Sizes

June 20, 2016

grading sizes

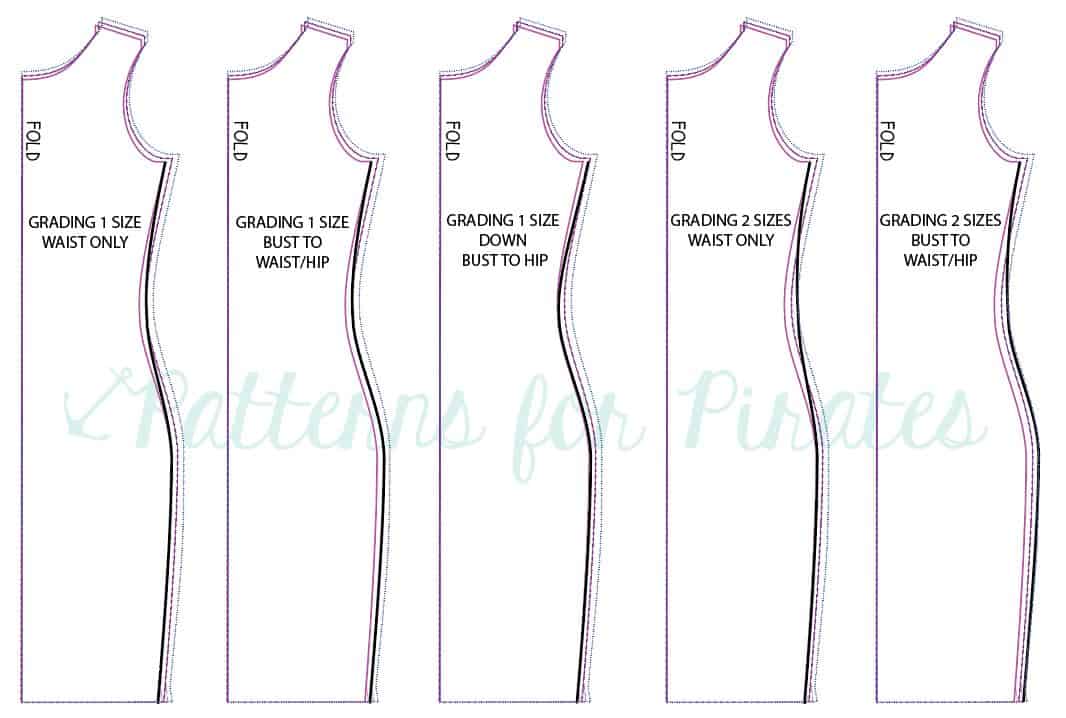
Patterns for Pirates grades to a true curvy, hourglass, 5’5″ frame.  Often times, one’s measurements may not fit within one size for bust, waist, and hip and in order to keep the intended fit of the garment, grading sizes is needed.  Is it always necessary to grade sizes? No, but depending on the fit and ease of the item, it may be worth taking the extra step to custom fit it to your measurements.  Unsure if you want to grade?  Check out the Shirt Fits Explained post and our post about Ease as they may help you decide if you are comfortable with a different fit.  For some of the looser cut tops like the Everyday Elegance and Relaxed Raglan, grading up a size for the waist is likely, not necessary as they are straight cuts from the bust down.  But a top like the Layer Me Up, that is very fitted to the body would fit the best if graded to your measurements/size.  Be sure to measure yourself prior to sewing!  Our measurements tend to fluctuate without us really noticing, so I try to measure myself every couple of weeks to be sure I am still sewing the same size my measurements put me.  Not sure where to measure? Read this: How to Measure Yourself.  Below is the size chart for reference.


Now that you have determined your size and if you’d like to grade, how do you do it? Below are a few examples of grading for a larger waist and hip size.  Any adjustments should be made to both the FRONT and BACK pieces.  Do not be discouraged if your measurements put you within different or larger sizes than ready-to-wear store-bought clothes as pattern sizing does not translate the same.  Our bodies come in all shapes and sizes, and we are all uniquely beautiful.  The beauty of sewing for oneself is the ability to create an item custom fit to you.

P4P grading sizes, pdf patterns

Still need help or have more questions about P4P patterns?  Join us over in the P4P Facebook Group and get to sharing!


Filed Under: Fitting, P4P University, Uncategorized 19 Comments

Different Fabric, Different Fit!

May 22, 2016

Fabric choice can really make or break a garment.  Not just the color or pattern, but the kind of fabric you use.

I remember begging my mom to sew a pattern intended for knits with a woven, or a flowy top with ponte roma… of course she would try to explain that it wouldn’t work, but the begging continued!

It’s not until you use the WRONG fabric that you really understand using a fabric other than what is suggested in a pattern that you’re going to alter the final outcome.  It will fit and look different than intended.  I almost feel like it’s a right of passage to make a few mistakes with fabric choice to really understand how important it can be! But, I will try to help you out before you make those mistakes 😉

There are TONS of fabric types out there… I mean A LOT… too many for most seamstresses to remember.  But if you can familiarize yourself with what the fabric will look like made up (how it will drape and fit) then you can really help yourself when picking fabrics for a project.  Feeling fabric for the amount of stretch, thickness and drape will help you pair it with the right pattern.  Once you get to know the fabrics you like, you can more easily order them online for a bigger variety.

fabric choice

I have sewn up the exact same pattern in the same size, modeled on the same body to help show how different weights and fabric types can affect the fit and look of a garment.

I sewed up a ton of the new P4P release, the Sweet Tee, because it is such an easy, quick sew and has a semi-fitted silhouette so it can take a wide range of stretch and be wearable. So, here we go!

I will start with the fabrics with the most drape.  Drape is a term meaning how the fabric falls to the body when worn.  Fabrics with soft drape will be fluid and drape towards your body.  Think looser fits.  They will fall beautifully, and still show off your curves without needing to be tight at all. This is my FAVORITE kind of fabric for myself.  I love a little looser fit with a drapey fabric.  It means I can feel comfortable (not sucking in all day ;)) with a looser fit, but still not look sloppy or like I’m wearing baggy clothes- I still want to show my curves a little to be flattering. But, this is a very personal preference of course! My sister prefers more stable knits for her tees usually.  Think about what shirts/garments you like and how that fabric feels and drapes and it will help you understand what you prefer!

Slub Jersey.  One of my favorites to work with, it doesn’t have a ton of stretch (which makes cutting and assembling a bit easier), but has drape because it is thin and lightweight. It is light and airy to wear, but doesn’t cling and show off every lump and bump. Another fabric that fits in here would be a lightweight poly/cotton jersey blend :).

IMG_9451 IMG_9485 IMG_9507


Very thin sweater knit on beige and a lightweight rayon spandex on back.  You can see on both these that they drape under my bust towards my body/waist showing off curves. The loose-ness around the hips doesn’t look flared, but just relaxed.  Both are a little harder to work with during cutting and assembling.  The very thin sweater knit usually needs some extra support in the seams baring any weight (like shoulder seams).  You can use a clear elastic to reinforce them so they don’t stretch out with wear.  The rayon spandex blends are one of my all time favorites as well- I used to want my mom to make me every thing in it 😉 .  It has a slinkier feel because it has such a soft drape and can be difficult to fold on grain and cut without some movement. Rayon blends are also notorious for being “clingy”, because they drape so much they also tend to show lumps and bumps you might now want to show. So, I tend to pick rayon blends for a looser fit I know has plenty of room to not cling. Or a tight fit I know will be showing off everything anyways.

IMG_4091 IMG_4137


Tissue Jersey on front and rayon spandex blend on back. The tissue jersey is a bit of mix, it is not at stretchy and fluid as the others, but so lightweight that is still has some good drape. But the very thin fabric also showed my bra line a bit in front there as well, so you take the good with the bad sometimes with the thin stuff ;).  I like the light airy feel of tissue jersey living in a hot climate.

IMG_4015 IMG_4036IMG_4037

ITY Knit– Ity knit is a poly blend that is knitted to have a smooth face, soft drape and lots of stretch. It’s commonly used in RTW for maxi dress and skirts b/c its flows so nicely. It tends to not be as “clingy” as a rayon blend and usually a little thicker weights (although all fabrics can be found in different weights).  I like an Ity knit, especially for a nicer look.  When I taught kinder and wore more professional attire Ity was a great, comfortable fabric that looks a bit dressed up even with a simple tee silhouette.

IMG_4772 IMG_4774 IMG_4777


On to the sweater knits! I love a sweater knit for fall, winter and even early spring! Most sweater knits have good drape, especially light to medium weight sweater knits. They tend to be thicker than a rayon spandex and might do better if you’re worried about the thin fabric showing/clinging to any lumps/bumps/bra lines.

This is a very light weight sweater knit with almost an open weave.  Again, a tad see through, I will wear this one with a cami under after seeing the pictures ;).  But the looser weave also feels a little looser in fit, so putting on a cami under doesn’t make it feel too tight for me.

IMG_4185 IMG_4162 IMG_4180


Light weight hacci sweater knit. Again, you can see it drapes under the bust towards the waist for a flattering silheoutte.  This sweater knit is plenty thick for me to not worry about having to wear a layer under as well and a bit more comfortable that it doeesn’t show quite as much detail on lumps and bumps too.

IMG_3911 IMG_3896 IMG_3884


Medium weight sweater knit. This is a super soft ribbed sweater knit- It has tons of stretch and drape.  As you can see it looks a bit looser because it has so much stretch and drape.  I love this for a cozy sweater-I can’t wait to wear it in the fall (here in the hot south we’re already way past sweater weather!)  Even though it is a thicker weight it does show my bra lines b/c it’s so drapey.

IMG_4373 IMG_4387 IMG_4405


Medium weight sweater knit. This feels like an acrylic blend (it was bought from a LA detash page- so I’m guessing on content) so it has a little more body to it and doesn’t drape quite as well as the other sweater knits.  It also feels a little tighter, because it doesn’t have quite as much stretch as the others. You can see it still drapes on my deeper curves (like my sway back) but goes more straight down from my bust rather then draping under.

IMG_4482 IMG_4489 IMG_4491


Onto more stable knits 🙂

Cotton Spandex/Cotton Lycra.  Lycra is a name brand of spandex, so they are essentially the same fabric (much like tissue is to kleenex). This has good stretch and recovery with the spandex in it, but has much more body.  Meaning it will not drape towards your body, but stick out more stiff and hold it’s own shape.  I prefer to use cotton spandex on tighter fits, since there is no need for drape.  I find it not very flattering on a looser fit because it doesn’t drape under bust as well and will feel a bit tighter due to the thicker, more stable feel.  A lot of seamstress love this fabric because it is easy to find in great prints and a wide variety of colors, as well as a bit easier to work with because it is thicker.  And I love it for youth, but not for myself.  If we can all gang up on the knit companies to print their amazing customs on fabric with more drape I’ll sign the petitions 😉 I just can’t feel great in most cotton spandex shirts. I didn’t even hem this one because I knew it would quickly be cut up into something for baby girl! With that said, my sister likes a cotton spandex tee because she doesn’t like her fabric to drape to her waistline/under her bust. She prefers the more stable knit. Again, all personal prefence and learning to pair it with the right pattern for yourself!

IMG_4316 IMG_4323 IMG_4344


Stretch French Terry.  This is a medium weight french terry with good horizontal stretch.  French terry is a very popular fabric right now, and I share the love of it! But when using french terry you need to be aware that it doesn’t have great drape.  As you can see, it doesn’t fall under the bust to the body, but straight down. And my sway back pooling is much more obvious. It feels tighter on as well even though it has some stretch because it is thicker.  Now there are some with rayon in the blend which helps give it drape.  But most french terrys are much more stable on the knit spectrum and do better as something that needs a thicker, more stable fabric like pants, shorts, jackets, sweatshirts, etc… I added a cowl on this one for a fall/winter look since french terry is a thicker, warmer fabric.

IMG_4289 IMG_4298 IMG_4300


Liverpool.  This is also a very popular fabric right now. It is a poly spandex blend with high horizontal stretch and a texture on the right side. It has a feeling close to scuba/techno/neoprene. It is a more stable knit without much drape.  This is better suited for something that needs stretch and stability, like a tighter dress, pencil skirt, ect.  It does not have good drape, as you can see it goes straight down from my bust instead of falling toward my body under towards my waist.  It also makes the tiny “wings” on the dolman very bulky/poofy.  I was sad to cut into this gorgeous liverpool for this example, because I knew it wasn’t a great match for this pattern-but for the good blog post I did it!!! I hopefully still have enough for something that does work well with it! It is also all polyester, so it doesn’t breathe well. So, for me in TX I can only handle a thick poly knit during winter months.

IMG_4724 IMG_4730 IMG_4738

Ponte Roma would also belong in this high stretch, but more stable category.   It is a poly, rayon, spandex blend and is great for the same things: tighter dresses, pencil skirts, pants, etc.

Pictures coming soon!

Cotton Jersey.  This is a thinner cotton jersey.  It doesn’t have a lot of stretch or recovery since there is no spandex in it.  It doesn’t have great drape.  This is thinner cotton jersey so it has a touch of drape just because it is thin, but anything medium weight is considered more a “t-shirt jersey” without much drape or stretch at all (think traditional t-shirts).  I like this best for boys and men.  I don’t love drape on a man usually, they’re shirts are cut straight and they are meant to hang pretty straight as well (Unless they have some amzing abs to show off 😉 ).  For myself though I don’t love cotton jersey, but I do use it for a traditional t-shirt style from time to time.  Notice is looks and feels tighter because it has very little stretch.  it also sticks out from bust and booty instead of draping towards body.  I have a sway back, which I didn’t alter for here (you can see the pooling of fabric on my lower back) and it is much more obvious in a stable knit then a soft, drapey knit.  So if you’re still learning to perfectly alter for your body shape more stable knits are less forgiving to those alterations you may need, including full bust adjustments.  I do have some tees in a jersey I love though, I like to pair it with something only semi-fitted throughout the whole body so it doesn’t feel too tight on my chest and doesn’t miss the drape on a looser area.

IMG_4420 IMG_4461

From top- the more stretch and drape the looser and more flowy it will look – to the bottom–the more stable and less stretch will be more stiff and tighter feeling garment.  Keeping this general rule in your mind when pairing fabric to patterns will help you decide what will give you the best look and fit!

This isn’t even close to all the fabric choices that are out there, but I tried to include the most popular knits I see in the shops and being asked about in the P4P group on a daily basis!  I hope it helps you when picking fabric to pair with a pattern for the perfect look and outcome!

And remember that practice makes perfect- so if you make a few garments with the wrong fabric choice, use it as a great learning experience and know you’re a better/more knowledgeable seamstress after that mistake 😉


Filed Under: Fitting, P4P University, Uncategorized 27 Comments

Basics of Sewing Swim

April 25, 2016

As I’m approaching my very first swimsuit pattern release, I realize there will be a lot of questions about sewing swim!

So here are some bullet points you’ll need to know before you jump into your first suit! 🙂

swim

Common Questions:

  • What type of fabric do you need? 
    • Nylon Spandex is the traditional swim knit. There are also some polyester spandex blends that are capable of with standing the chlorine and can hold up to the activity.
    • My favorite suit I made was out of supplex, a nylon spandex.  I almost always use a nylon spandex rather than the poly blends, it’s just my personal preference.
    • Just like all fabric types you will have a wide range of quality.  Great swim knit can be a breeze to work with, while cheaper/thinner/slinkier swim knit can really test your patience ;). If you’re sewing swimwear for the first time, I’d recommend buying a good quality swim knit even if you’re nervous.  It is much easier to work with!
    • How can you tell if it will be easy or more difficult to work with online? Watch the weight- steer clear of lightweight, drapey descriptions and try to stick with medium weight knits.
    • Lining- You can use a swim lining or just self line with more swim knit.  The self lined suit will most likely fit and feel a bit tighter because usually your swim knit is a bit more stable than the swim lining.
  • Do I need special thread?
    • Nope 🙂 You can use standard poly thread like always.
    • You can use a stretch thread in your loopers or bobbin for more stretch. I’ve done both and haven’t ever had issues with threads popping, but I recommend it if you’re planning on getting tons of wear and being very athletic in it.  (I highly recommend it for youth- they wear them more often, are more active and they often get passed down to other kids throughout the years.)
  • What is the best stitch?
    • You can use your serger or your favorite stretch stitch.
    • When using my machine I usually use the lightening stitch or regular zigzag stitch. I use my coverstitch as well for finishing hems.
    • I baste with a stretch stitch as well, you can technically baste with a traditional long straight stitch, but if you don’t pull  your basting stitches you will hear those threads pop when you try on/wear…which can be scary ;).
    • stretch stitches
  • What kind of needle should I use?
    • You need to use a stretch needle. These are best when sewing fabric with high spandex content.
  • What other notions will I need?
    • You will need a SWIM elastic.  Even if you are using the top as a sports bra, I still recommend using the swim elastic.  It has more stretch then regular elastic and will withstand the wear and tear much better.
    • I highly prefer the cotton swim elastic to the clear plastic kind. It is so much easier to work with and softer.
    • IMG_0010
    • Don’t let the elastic scare  you!
    • And don’t skip it! I know a lot of ladies will use bands on swim in place of elastic, but I don’t recommend it.  Elastic keeps it shape always- wet or dry.  Swim fabric on the other hand gets heavier and stretches out when wet (and depending on quality can stretch enough that it is loose while swimming.) So, if you don’t ever want to loose your bottoms or have to constantly tug back in place don’t skip the elastic!!
    • Here is a little video of me putting in some swim elastic to help!

  • How can I make sure the top is supportive enough to hold me up?
    • Follow the tutorial and use all the suggestions to add more support.  If you skip any, you might regret it if you’re looking to be very active or have a larger bust to hold up.
    • Power mesh- this is an inner lining mesh spandex that you can use to add more support to a suit. It stretches less than swim knits, so it will hold in your body better on that section you place it. I only recommend using it in some of the suit and for adults only.  I like to use it on the front of both the top and bottoms.  If you have a smaller bust, you most likely will not want it in the top.  It is something that will “smoosh” you like a minimizer.  There are varying degrees/quality of power mesh as well. You can get looser and stronger depending on how much activity and “smoosh” you’d prefer in your suit.  There is also “power net” which is an even tighter mesh.  Use this one with caution as you might need to go up a size to accommodate the amount of stretch.
    • Swim cups- I used a sew in swim cup in almost all of my suits and sports bras too.  I like the tighter feel (the cups don’t stretch like swim knit- so it will feel and be tighter across the chest if you sew them in.) and the thicker layer of coverage for my bust.  I HIGHLY prefer the soft cups.  I find the molded cups to be really unforgiving in perfect fit (lets just say the D/DD was no where NEAR fitting my D cup bust… I was really channeling the Madonna cone look :/ ) and are much more difficult to get placed perfectly and to sew in nicely and neatly.  For larger then a D/DD cup you’re really only getting some coverage for the “important part”.  You will need to slip your lining on  (I recommend wearing a bra/sports bra) to get a good placement and make sure it’s covering that important part, pin in place, and sew in.
    • Remember you’re looking for your sewing cup size- which is the difference between your upper and full bust (NOT under and full bust).  You don’t want your cups oversized.  They will take up too much of your top and you will loose too much stretch that you need for a good fit.
    • IMG_0081
    • I also have an option for adding boning to the side seams, my other sister Megan loves this one! You’ll just need lightweight boning:
    • IMG_6694
  • Where can you get these supplies?
    • Here is a Note on my sister’s (the swim suit sewing queeen ;)) FB page with tons of suppliers:
      • https://www.facebook.com/notes/coles-creations/buying-swimsuit-fabric/10150740266823620
  • How tight should it be?
    • Traditional swimsuit fit has negative ease, meaning the finished measurement of the suit will be smaller then your body.  It will have to stretch to get on.  Suits are generally 20-25% negative ease.  Some athletic ones (think Speedo, Nike, etc) have 30% for more intense work out/swimming needs.  Don’t size up if you plan on swimming at all in it, you will need that negative ease to keep the suit in place when wet.  If you are at the lower end of your size range you might even need to take a bigger seam allowance to make it snug enough (this will depend on quality of swim knit as well, the super stretchy thinner fabric will mean you will need it tighter).
    • The elastic around the edges of the suit are there to help keep everything in place as well.  It might “squeeze” you a bit when not wet, but again you will want that very snug to make sure your suit isn’t shifting while you’re swimming.

Have FUN sewing and swimming!  

IMG_1335 IMG_092913040907_10103939304773709_3823376724495832161_o IMG_099613041099_10154119162434666_7968371201553453968_o (1)

Filed Under: P4P University, Pattern Release, Sewing with Stretch, Knit Fabrics, Uncategorized 15 Comments

Exposed Seams Boutique Look Hack

March 8, 2016

I’ve seen the boutique french terry raglan with exposed seams countless times in the group, pinterest, and other sewing boards over the past couple years! I made one about a year ago, but never wrote up a blog about how to get the look.  We’re still asked for it all the time, so I did another one while we’re updating the Women’s Raglan to include the extended plus sizes and new features our newest P4P patterns have, like layers. It’s looser fit is perfect for french terry, which is what the boutique ones are always made of and gives the same “slouchy” looser fit.header

Overall, it is a really basic “hack”.  But, I’m going to have to beg forgiveness for the photos! Apparently I did not check my photos as I was taking them and they are not great quality!  Hopefully you can enjoy my Peter Pan-esque comedic shadow in them!

You will cut out your pieces exactly the same as a normal raglan for the main shirt.  If you want to add the cowl with unfinished bottom edge you will cut 2 like the pattern states, but NOT on the fold.  You could still cut on the fold to keep the fullness and just not sew in the bottom edge as well.  Depending on how thick your fabric is and how big you want your cowl.  I easily get claustrophobic with things around my neck, so one layer not on the fold was an easy decision for me ;).

SAMSUNG CAMERA PICTURES

When assembling the sleeves to the bodice front and back you will put WRONG sides together and stitch with your sewing machine using your favorite stretch stitch.

SAMSUNG CAMERA PICTURES

Trim the notches and smooth out your seam allowance.

SAMSUNG CAMERA PICTURES

Press seams out.  You could top-stitch here if you preferred, but I left it open and free 😉 I thought it went with the look better.

SAMSUNG CAMERA PICTURESSAMSUNG CAMERA PICTURES

Sew down side seams with right sides together, like you would normally.

SAMSUNG CAMERA PICTURES

I added the inseam pocket option from the Add on Pack as well (I can’t seem to make a tunic length without this option anymore!).  I went with hemming the front to the right side to show the wrong side there as well.

SAMSUNG CAMERA PICTURES


IMG_9031

For my hems I left them all raw and allowed them to roll up towards the front to show the wrong sides there too.

SAMSUNG CAMERA PICTURES

I attached the cowl the same way as the tutorial states, but only attaching one raw edge of the cowl to the neckline instead of two.

SAMSUNG CAMERA PICTURESSAMSUNG CAMERA PICTURES

IMG_9048

Done! Now you have a lovely boutique look that was such an easy sew and hack!

IMG_9025  IMG_9042 I

Filed Under: Pattern Hacks, Sewing Techniques, Uncategorized 1 Comment

  • « Previous Page
  • 1
  • 2
  • 3
  • 4
  • 5
  • Next Page »

connect with me

  • Email
  • Facebook
  • Instagram
  • Pinterest
  • YouTube
Privacy & Cookies: This site uses cookies. By continuing to use this website, you agree to their use.

To find out more, including how to control cookies, see here: Cookie Policy
  • Privacy Policy
  • Refund Policy
  • Contact Us
  • About

Copyright © 2026 Patterns for Pirates

Copyright © 2026 · Genesis Framework · WordPress · Log in