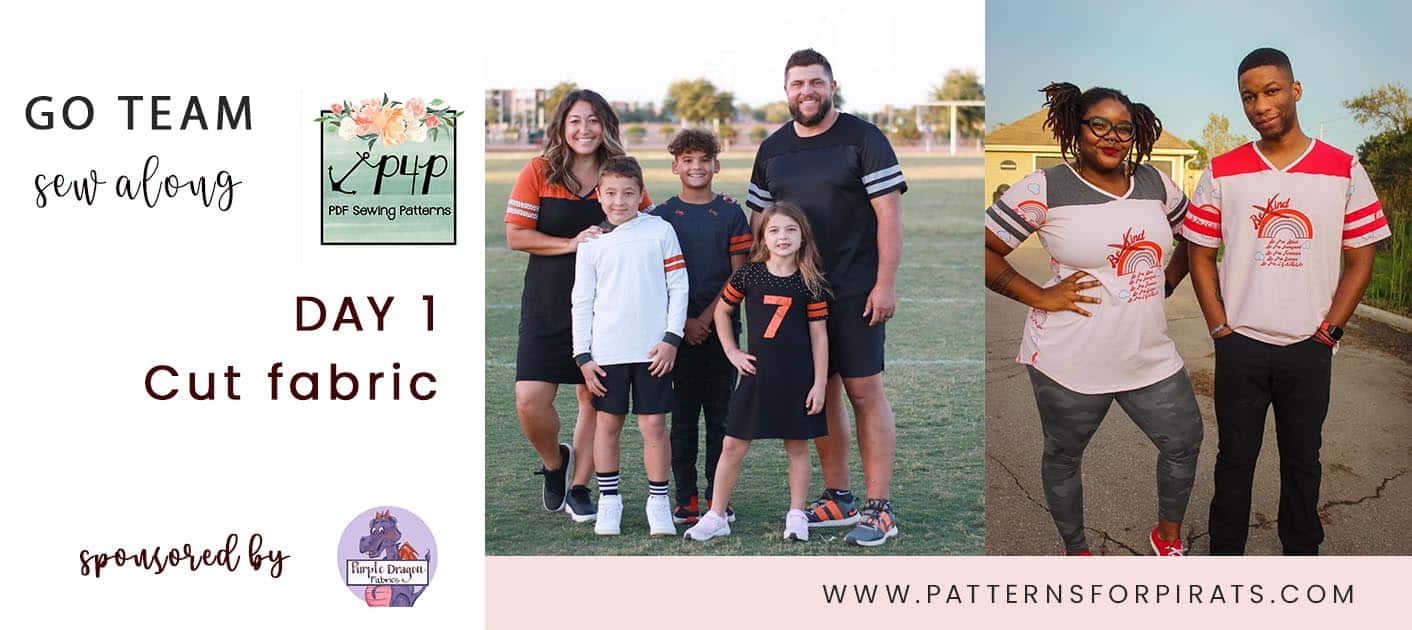
Welcome to the 🏈 Go Team 🏀 SEW ALONG!
On day 1 we print the pattern and cut the fabric. But first, if you have not purchased the Go Team pattern(s) you can grab them here:
And of course, our bundle for the whole family
Before you select which style you are sewing along, browse over the Round Up Blog where we show you all options available.
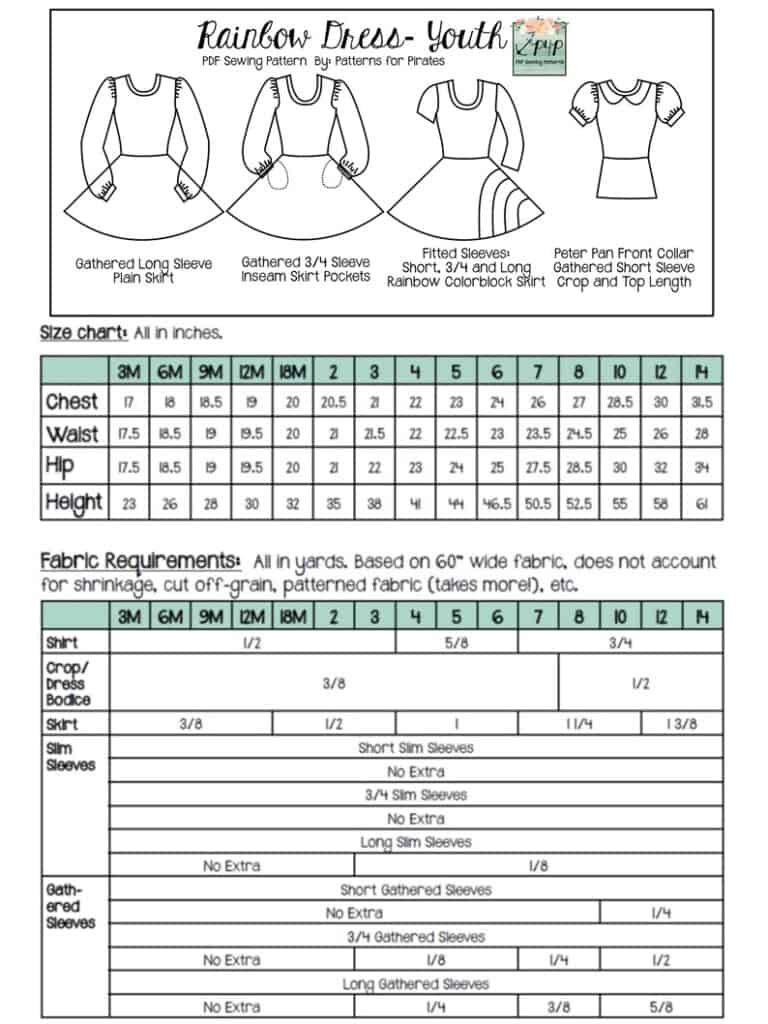
Now that you have the patterns it’s time to select which file format you would like to use. Both the Youth and the Adult come in A4 and Letter format to print at home, A0 format to print with a plotter or at a copy shop AND a projector file. If you use the projector file you will not have to print anything!! That’s definitely my favorite way! You can see in today’s video how I use the file to cut the fabric.
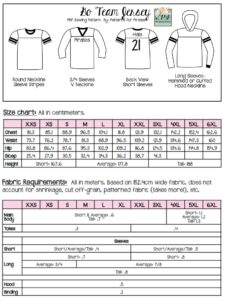
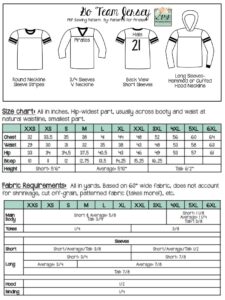
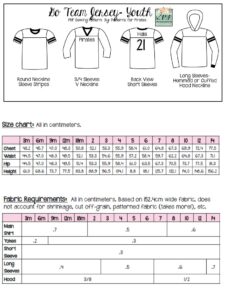
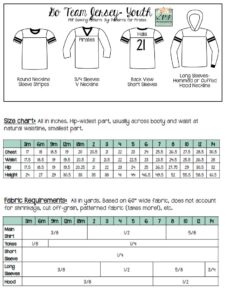
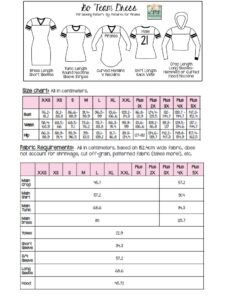
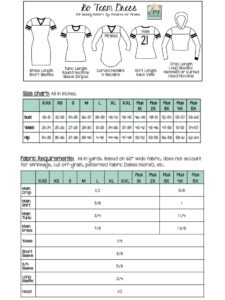
Let’s start by taking the measurements needed for the best fit. P4P has an amazing blog that gives you tips for accurately taking your measurements. You can read all about it here. If your measurements put you in a different size for chest/waist/hips be sure to check out our P4P University blog and grade to achieve the perfect fit.
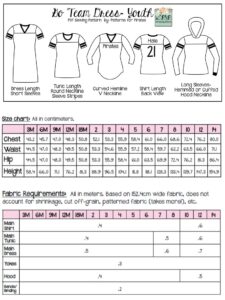
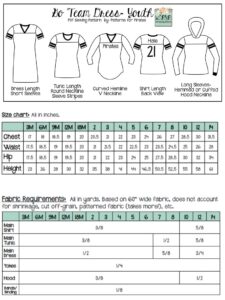
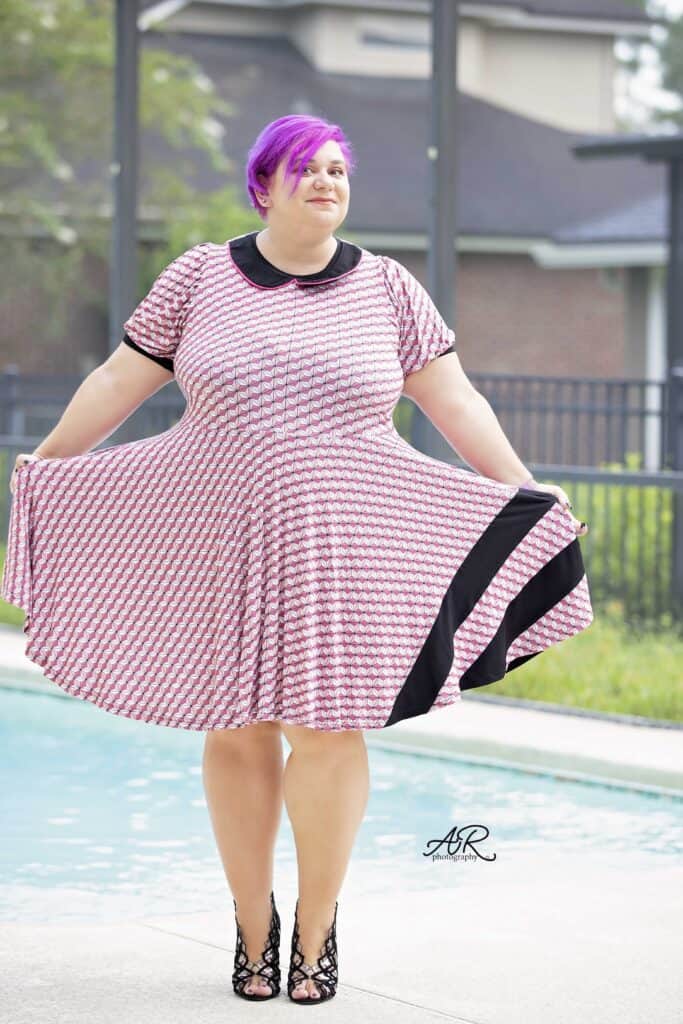
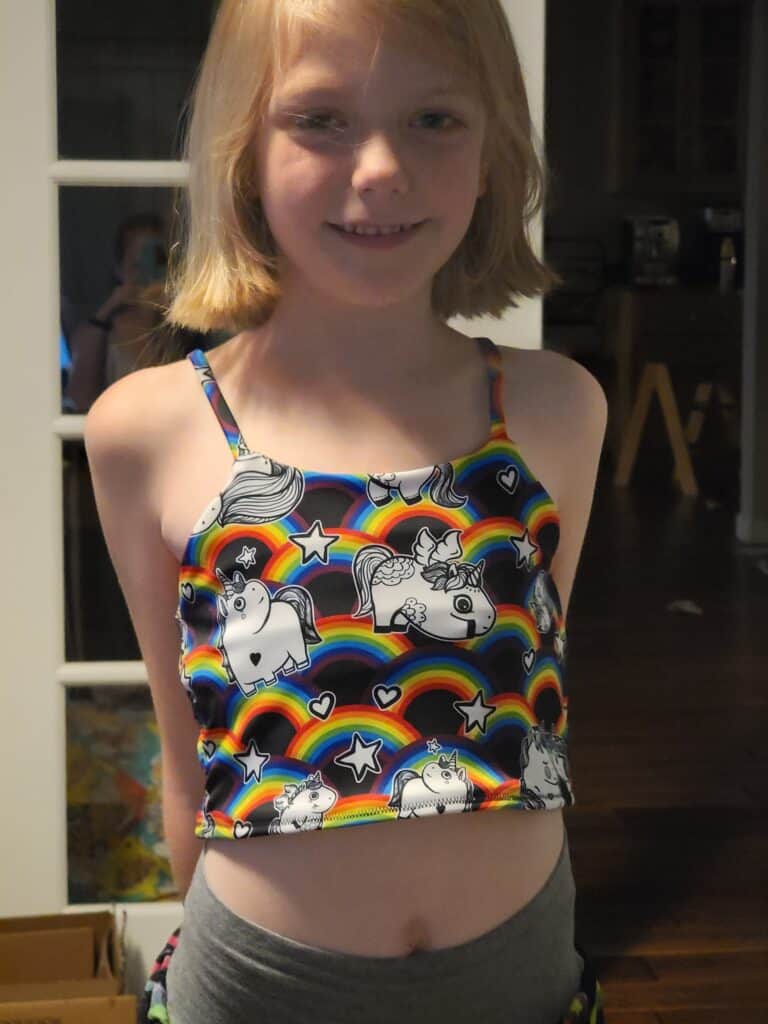
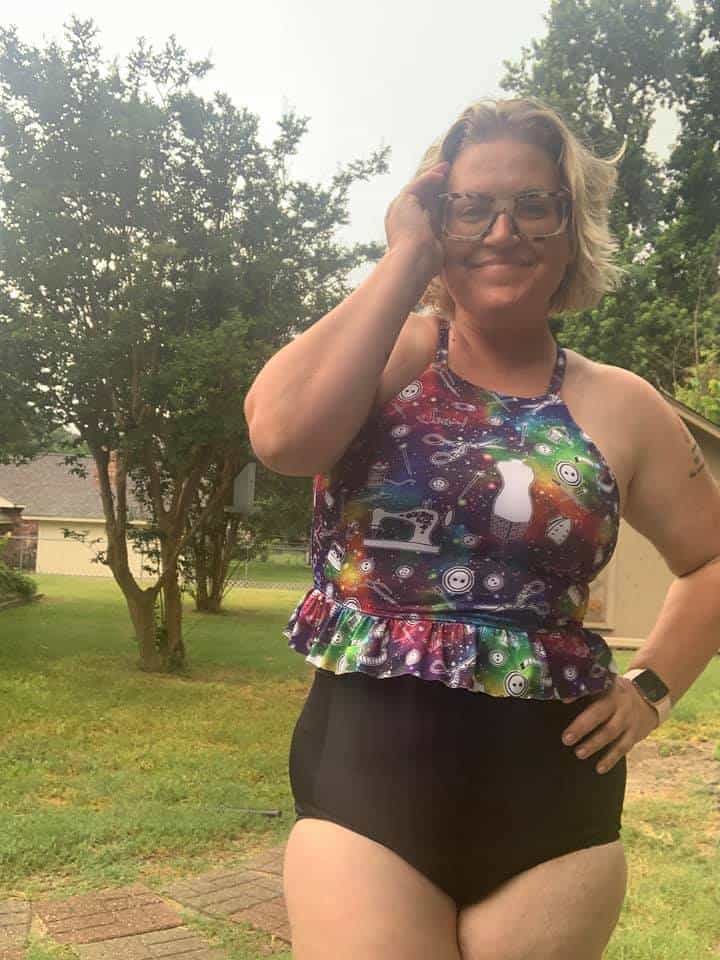
Let’s talk a little about the fabric! This is a great pattern for your coveted cotton spandex or any of your favorite t-shirt knits like tri-blend, interlock or poly blends. For my kiddo’s shirts I am using custom cotton spandex from Purple Dragon Fabrics. If you know me, you know we are big Disney fans around here so what better Go Team shirt than a parks one? 😉
Purple Dragon Fabrics is also the sponsor for this sew along so our two lucky winners will receive gift cards to their shop. So fun!

If you are unsure about which knit type will work best for your desired look, take a look over our P4P University Knit Types blog. Judy also included a cheat sheet that you can print. If you are like me and sometime are just keen on using a specific print for a specific pattern, read our Different fabric, different fit blog post before you cut your fabric.
Tip: if you have some stretch heat transfer vinyl (HTV) you can cut it using the pattern and use it for the sleeves accent instead of fabric. Just make sure you only cut the inner part of the strip, you won’t need the hem.
Day 1 video is posted below. Check it out and once you are done cutting your fabric post a picture of it in the comments of the Day 1 photo of the Go Team SAL album in the M4M & P4P Sew Along group. If you sew more than one, post each one in a separate pic!
Go Team SAL – day 1 | cut fabric
Go Team SAL – day 2 | shoulder seams & neckline
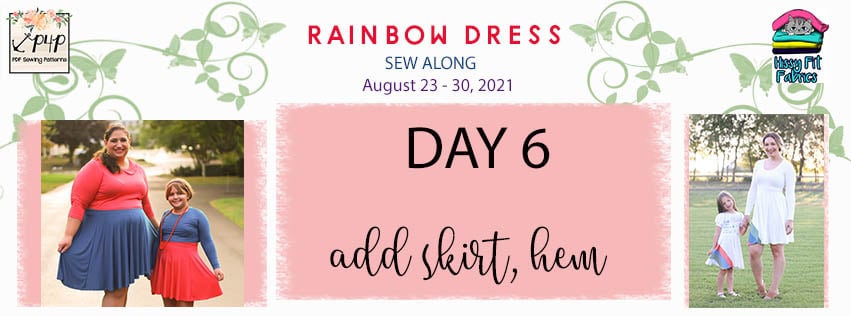
Go Team SAL – day 5 | side seams & hem bottom
Go Team SAL – day 6 | hem sleeves or add cuffs
Go Team SAL – day 7 | winners announcement