Petite Pegs – easy cuffs hack
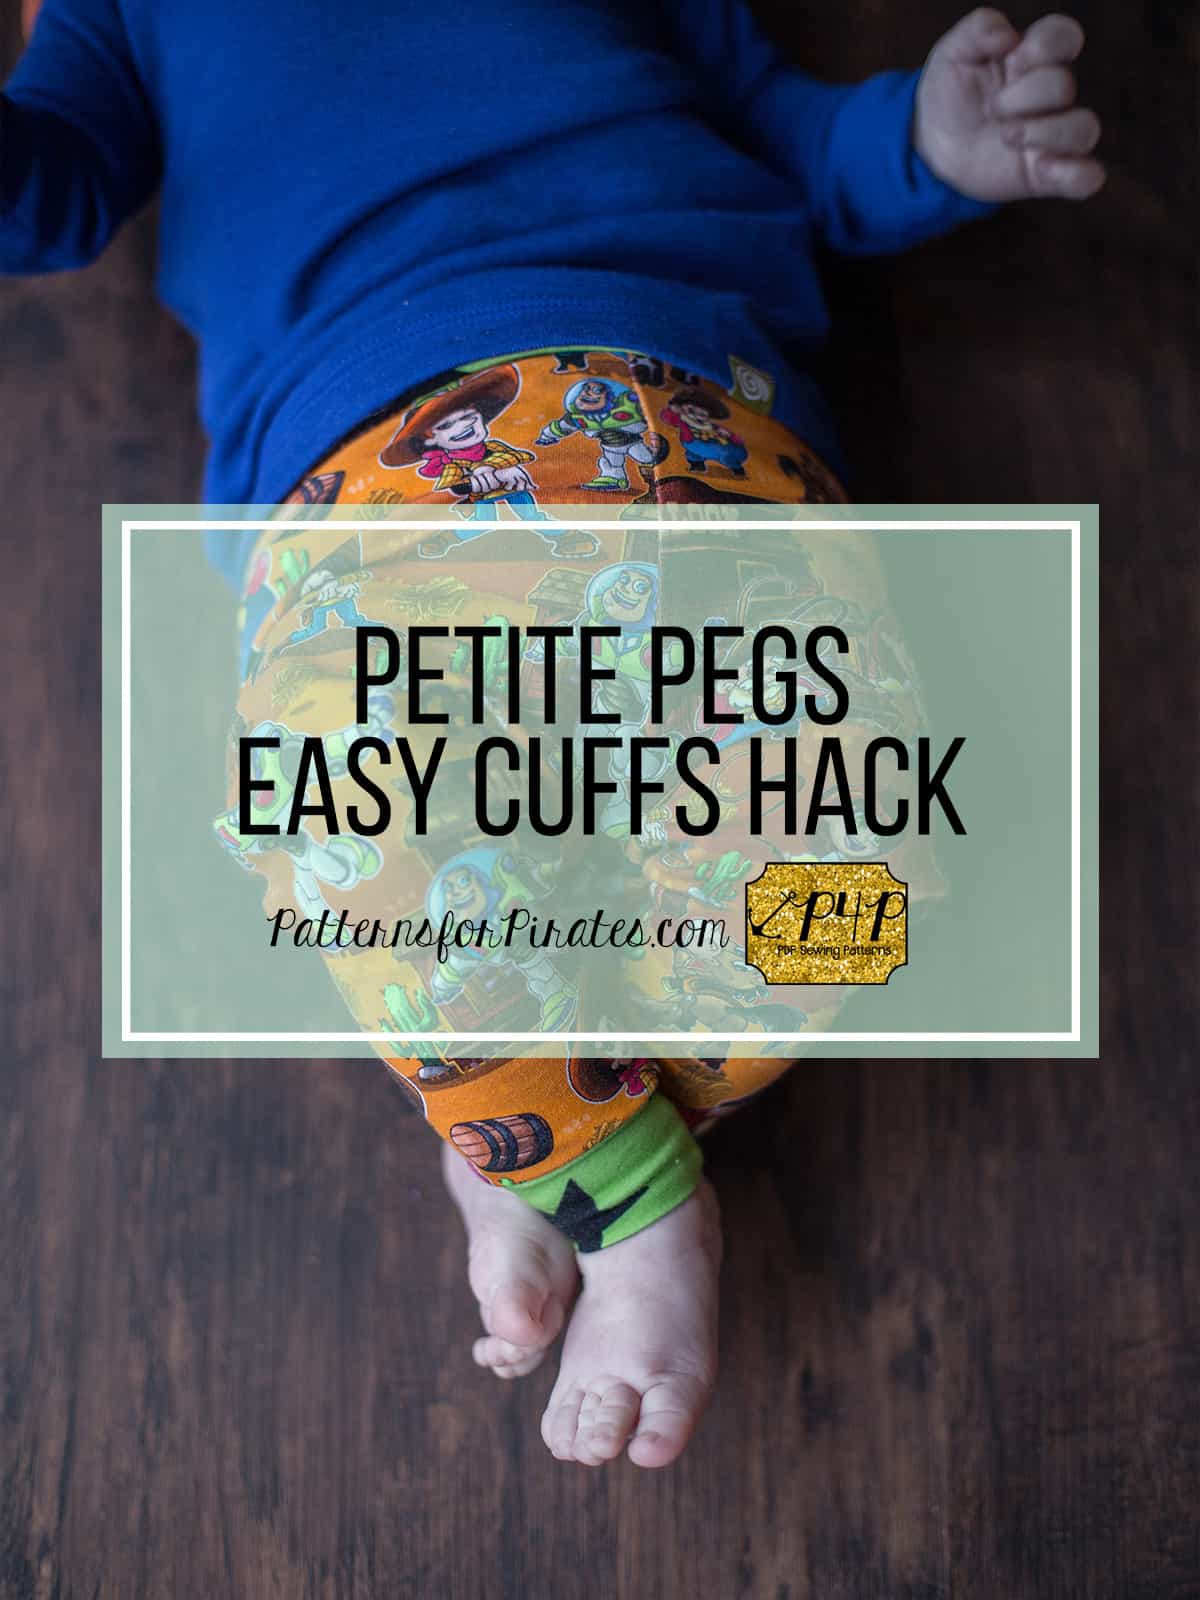
How adorable are the new Petite Pegs? So much cuteness in such a small package. If you haven’t downloaded your FREE copy, do that here. Today on the blog I wanted to show you how to add cuffs to the Petite pegs.

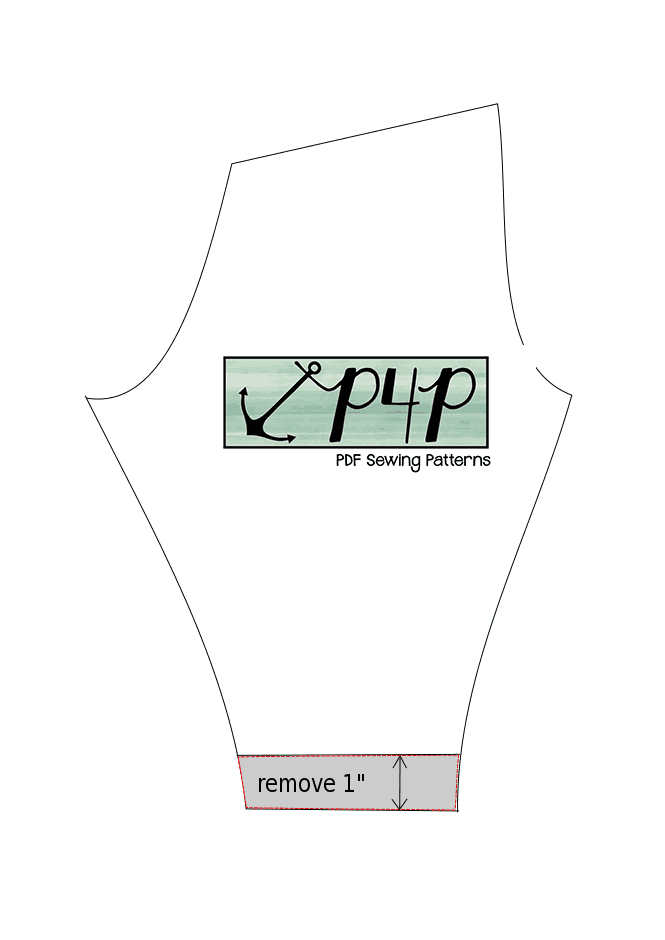
We will start by shortening the length of the Petite Pegs by 1″. To do that simply grab a ruler and draw a line 1 inch above the ankle cut line. This will be your new pegs ankle length. Cut the two mirrored legs using this new cut line.
You will now be cutting the cuffs. I did the math for you so just follow the cutting chart below. Remember to cut two cuffs, one for each leg.
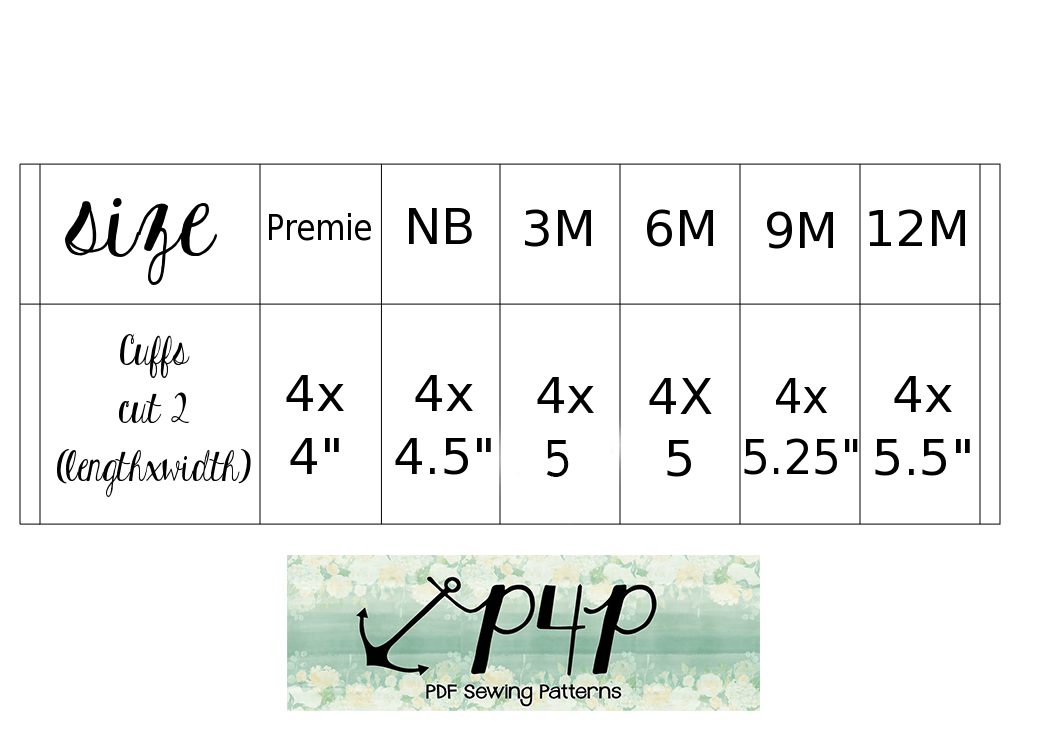
*If you babywear a lot you might find it helpful to double the cuff length. This way the long cuff can be folded down over the heel. It’s a popular way to wear pants when you’re babywearing because otherwise the pant legs hike up and then the baby ankles stick out.
Sew the Petite Pegs as per the tutorial. Grab your little cuffs and fold them to create a memory hem. Press and steam.
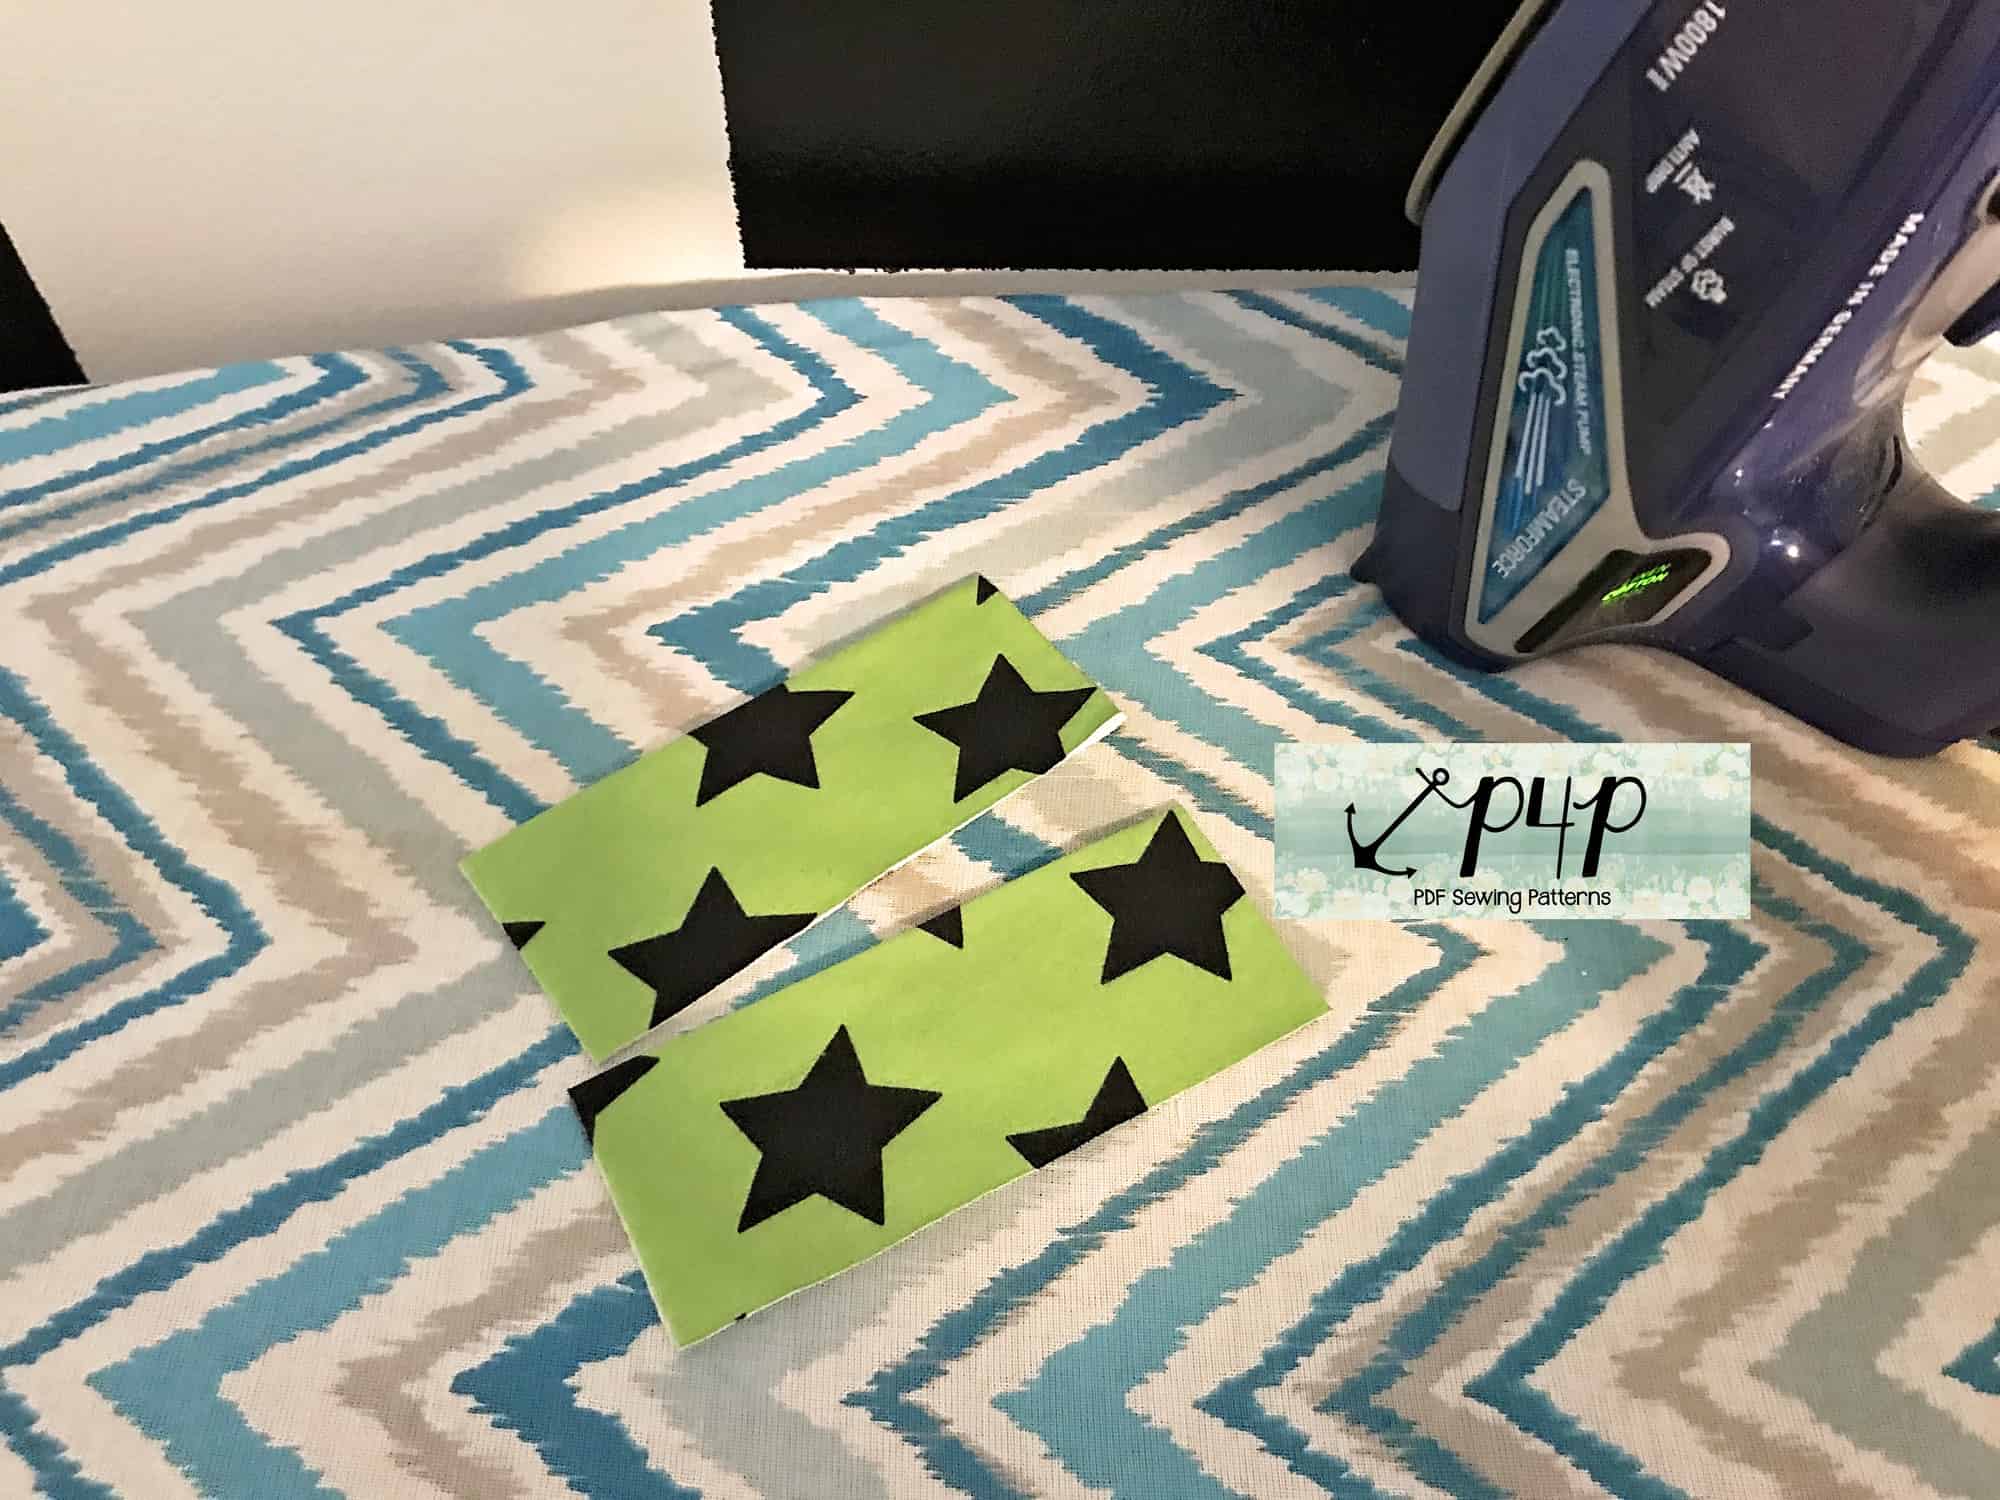
Sew the cuffs to create a loop and fold them. Take a moment to look over the tips I gave you in the Knit Cuffs 101 blog. They will definitely come in handy when attaching these itty bitty cuffs to the little pegs.
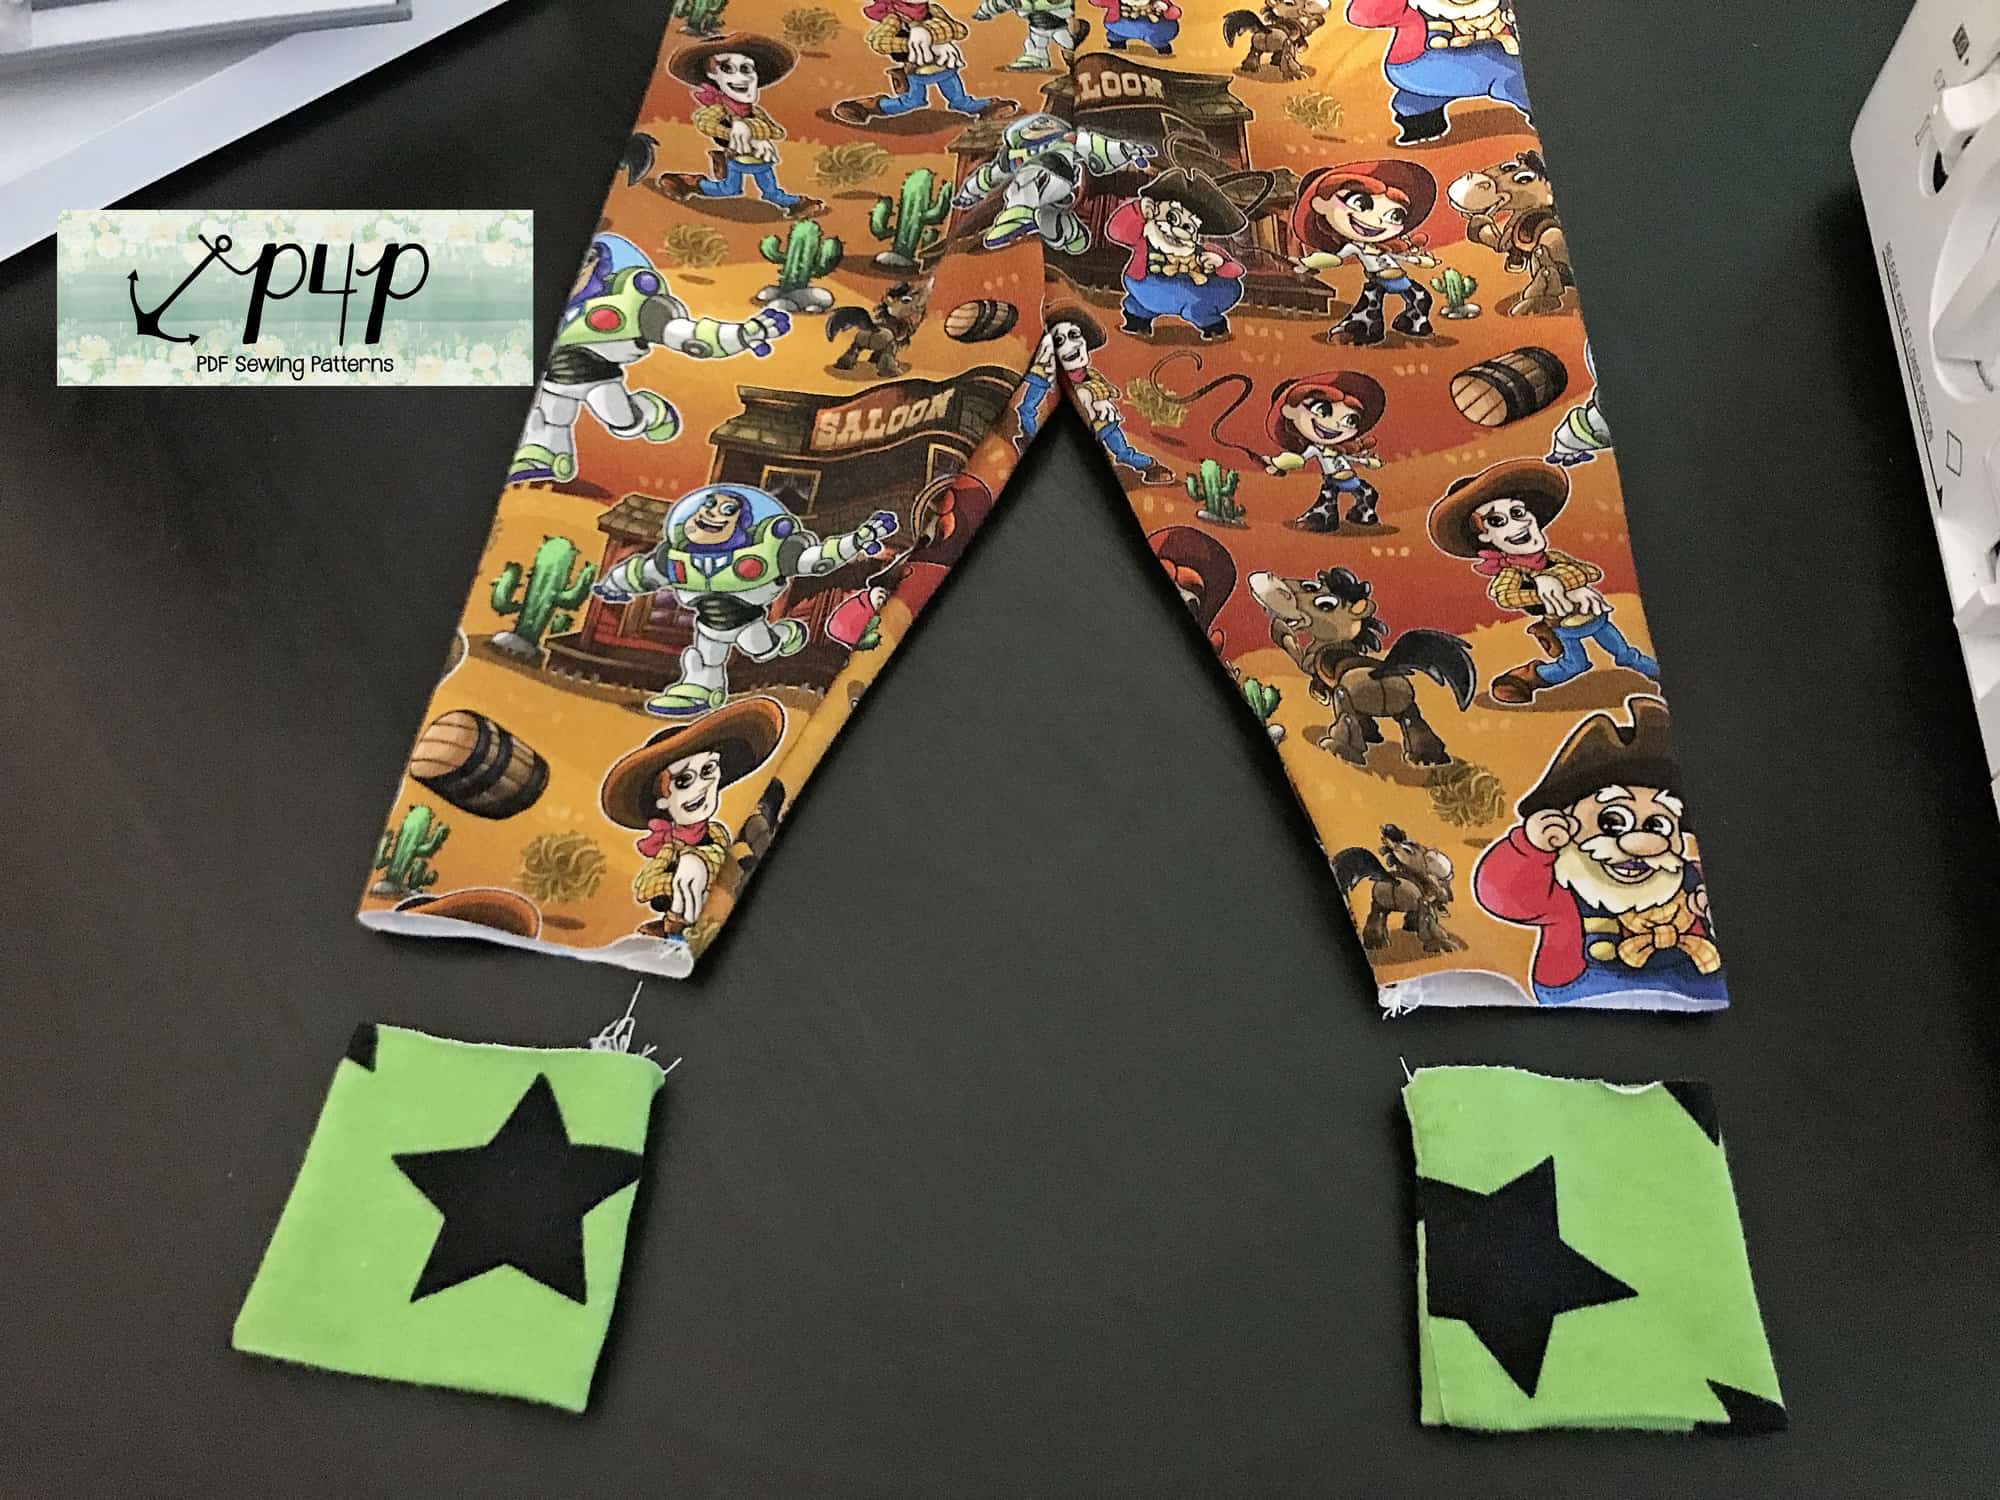
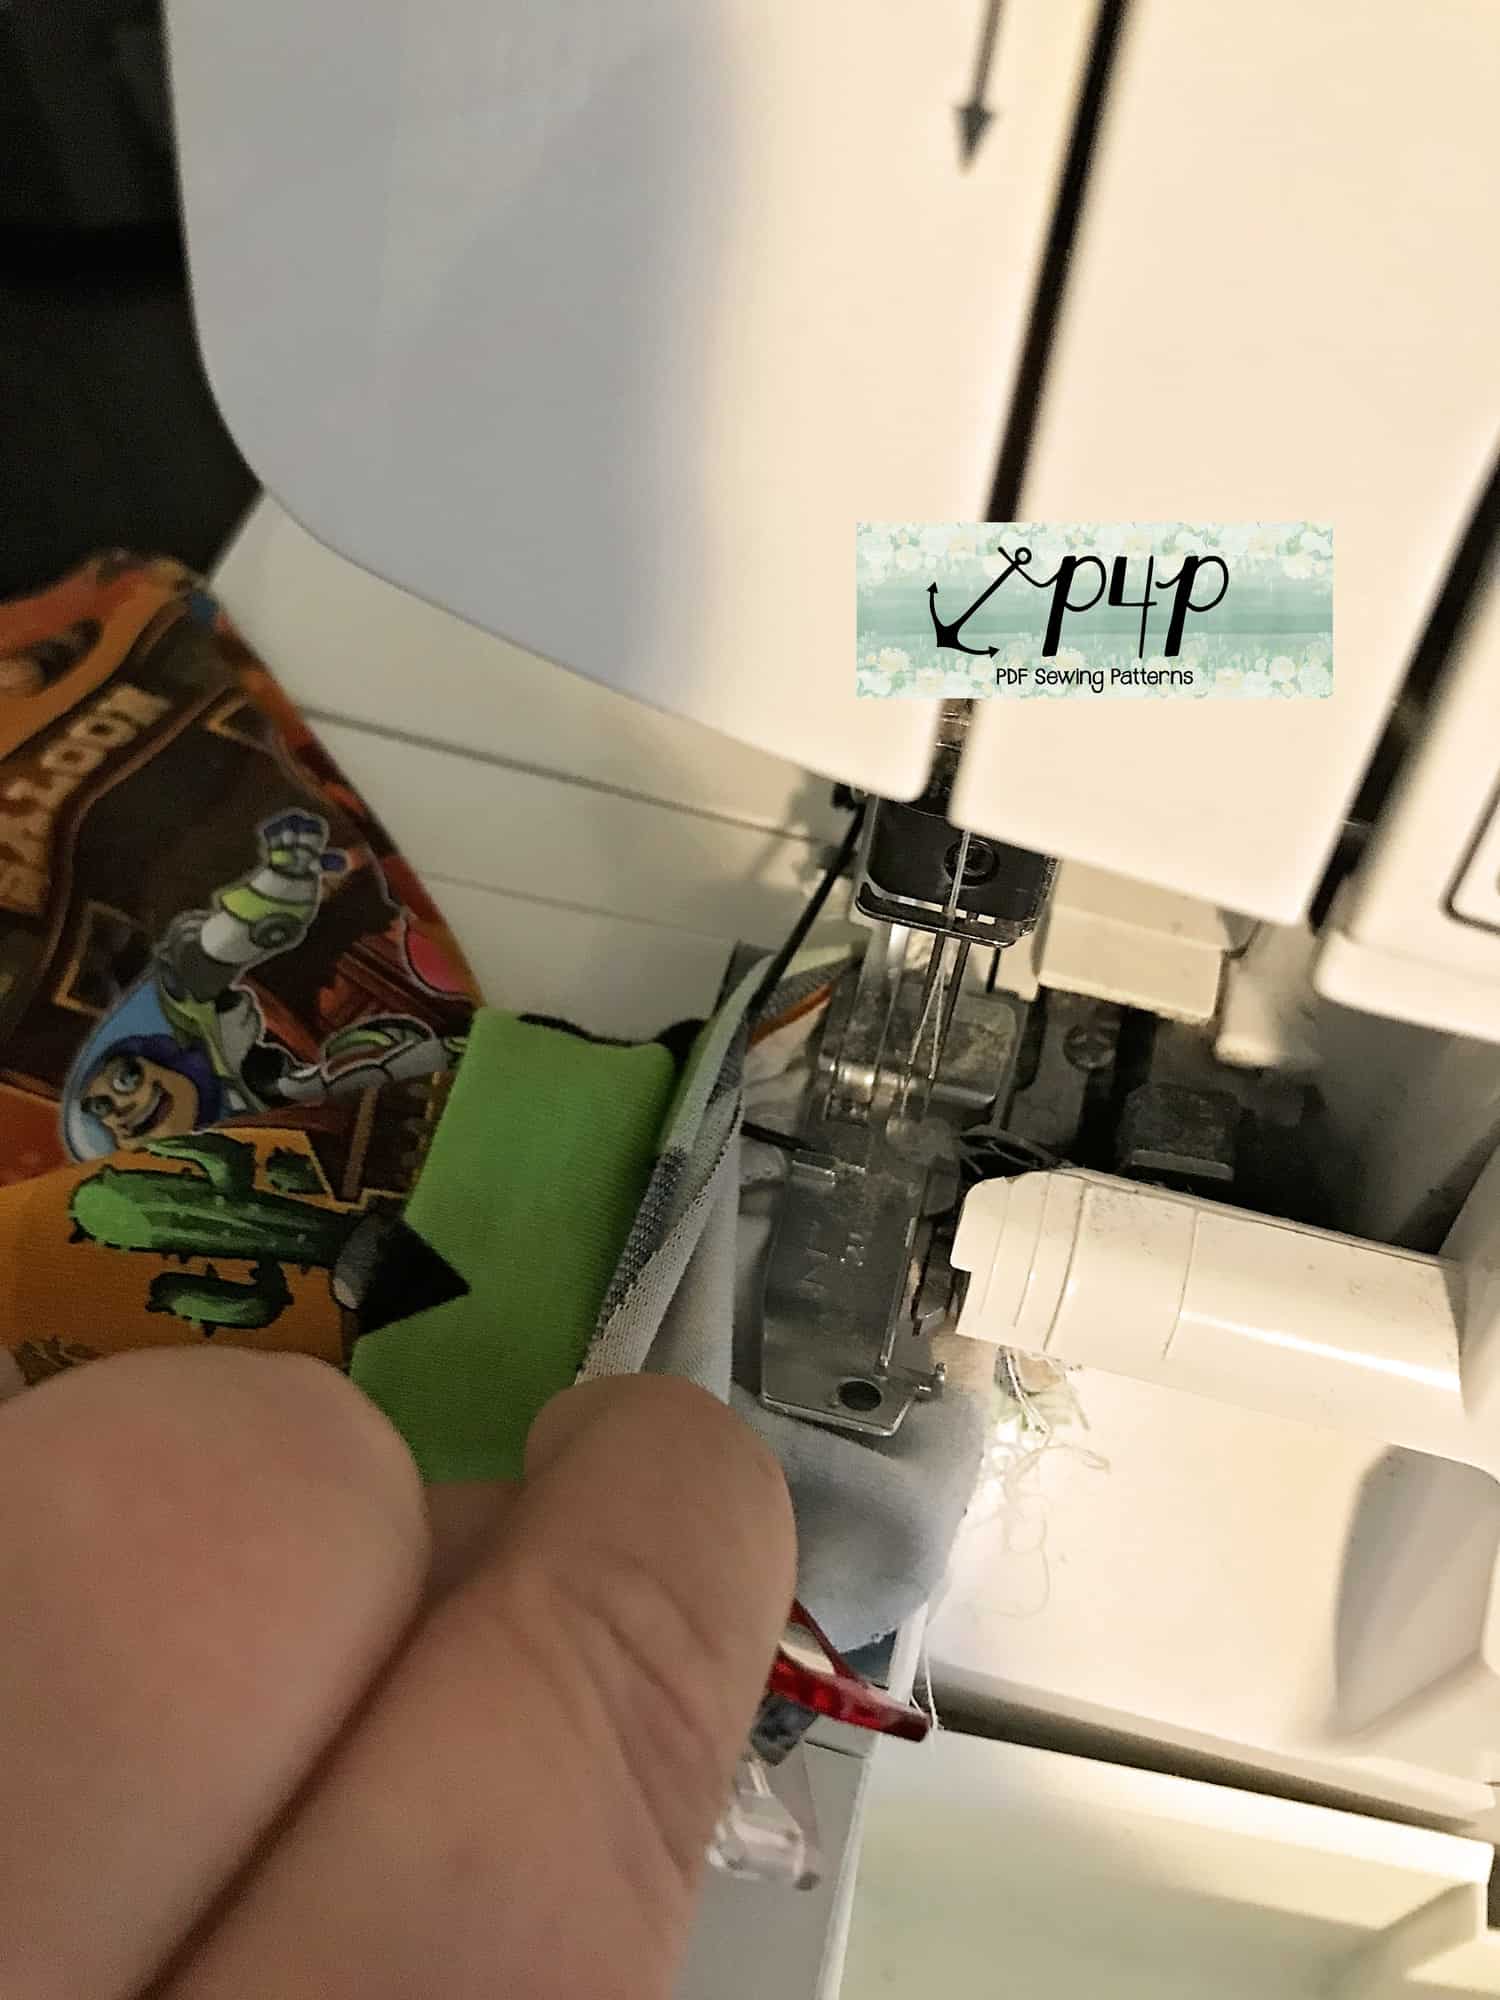
Attach the cuffs to the leg opening with your serger or the sewing machine following a 1/2″ seam allowance. Make sure you match the cuffs’ side seams to the leggings inseam. Stretch the cuff to fit the leg opening.

When attaching the cuffs you can place your serger foot on the outside of the leg (as pictured above) or inside the leg (as pictured below). You will be working with a pretty small loop so go slow!
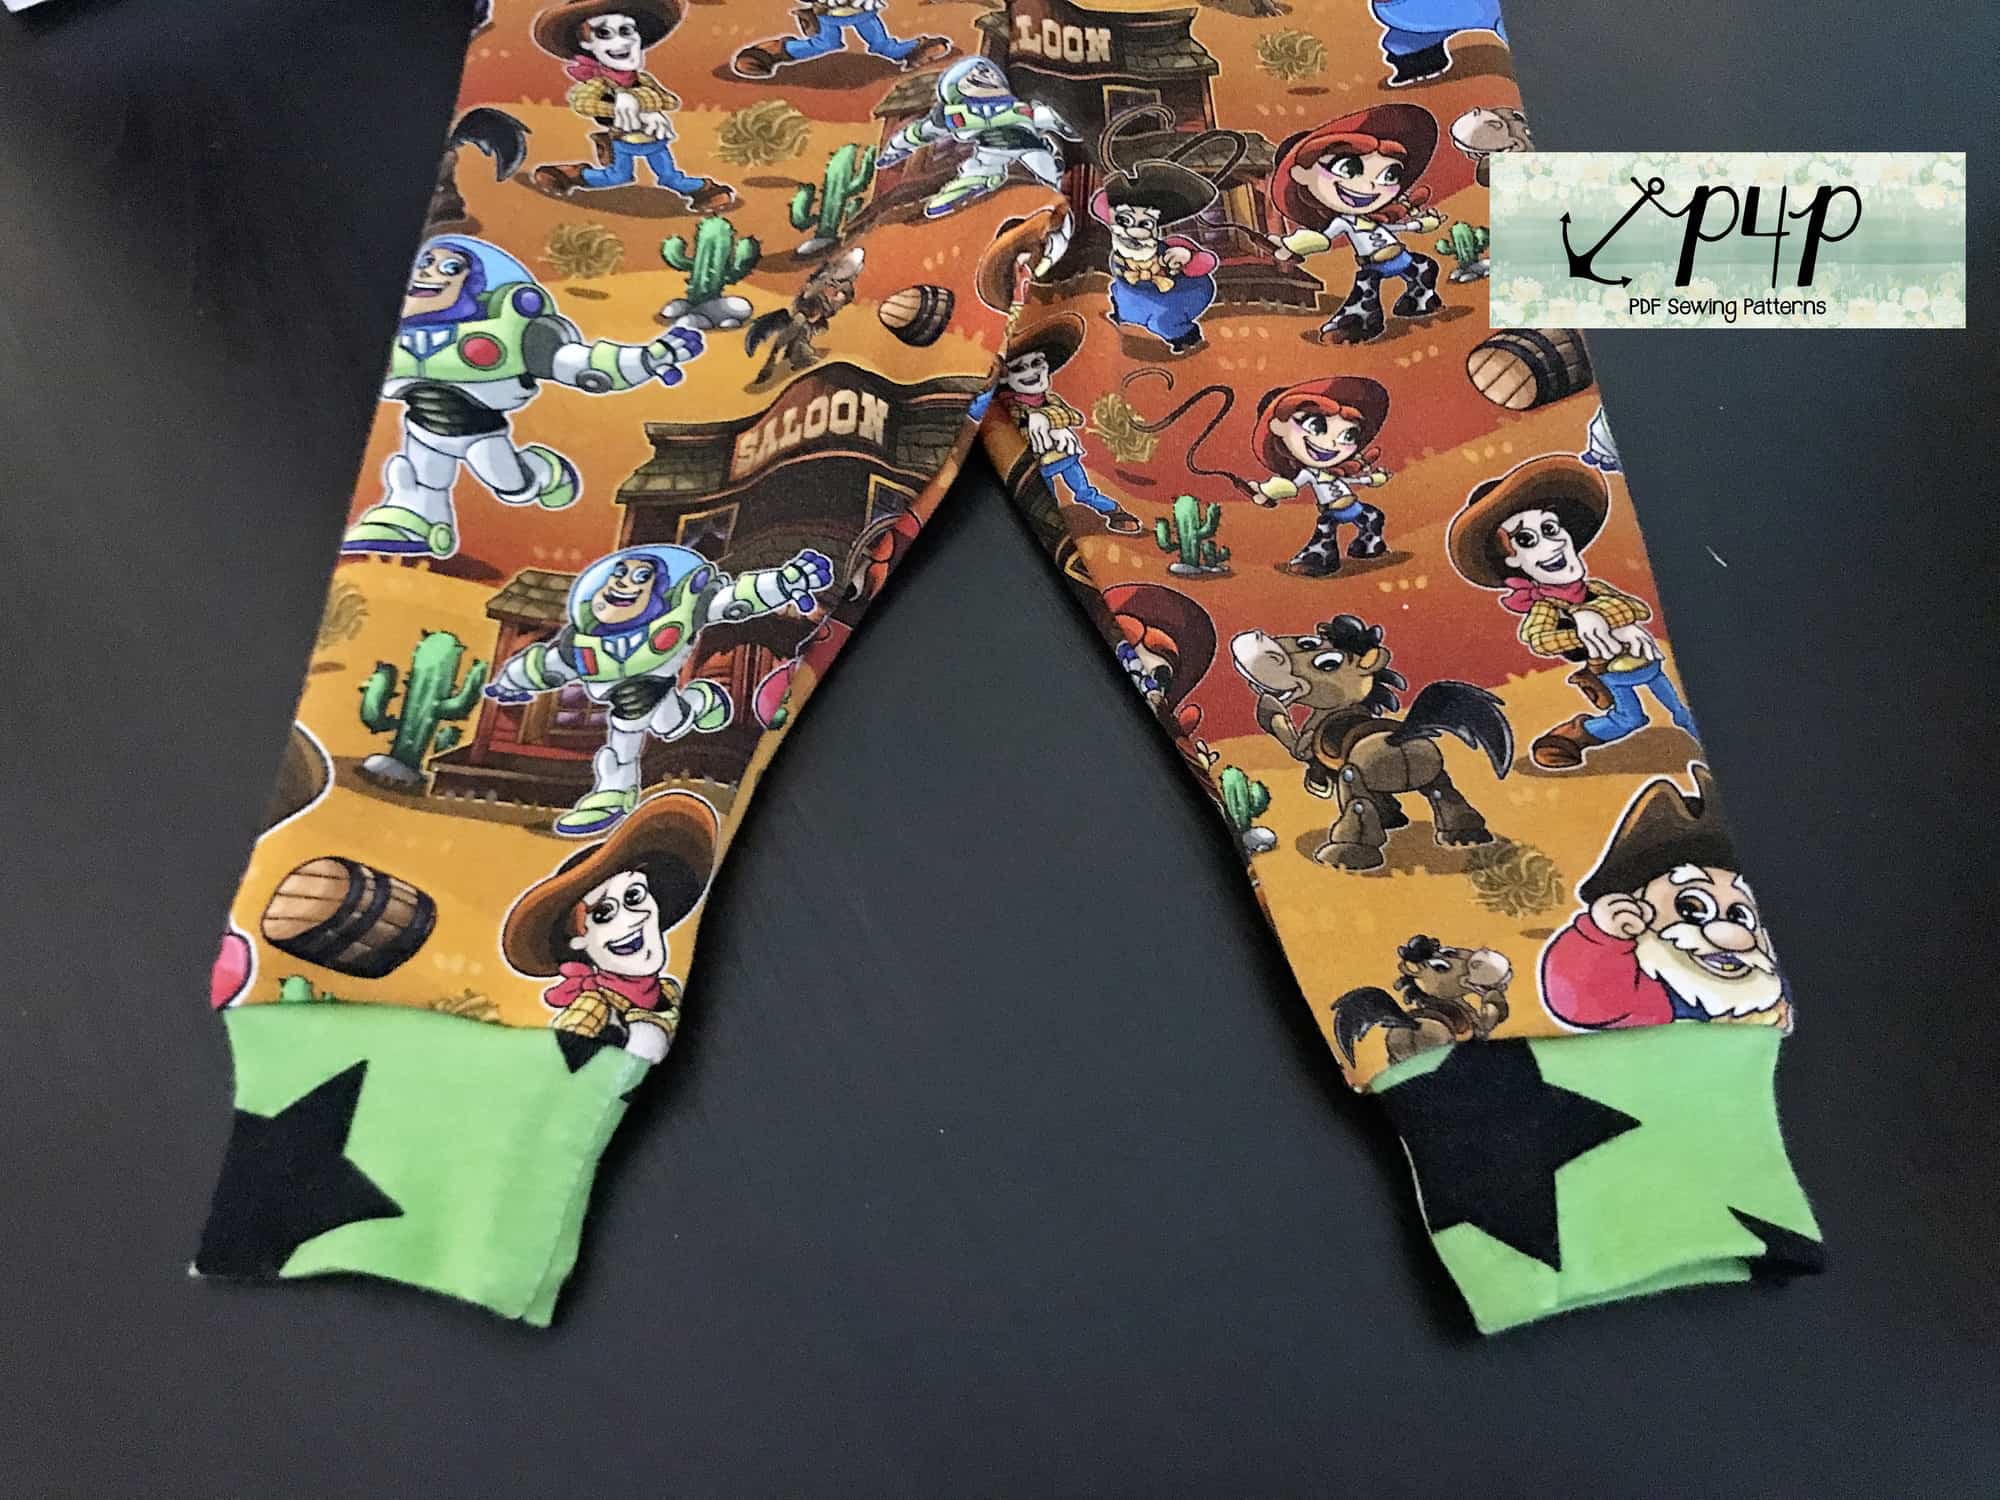
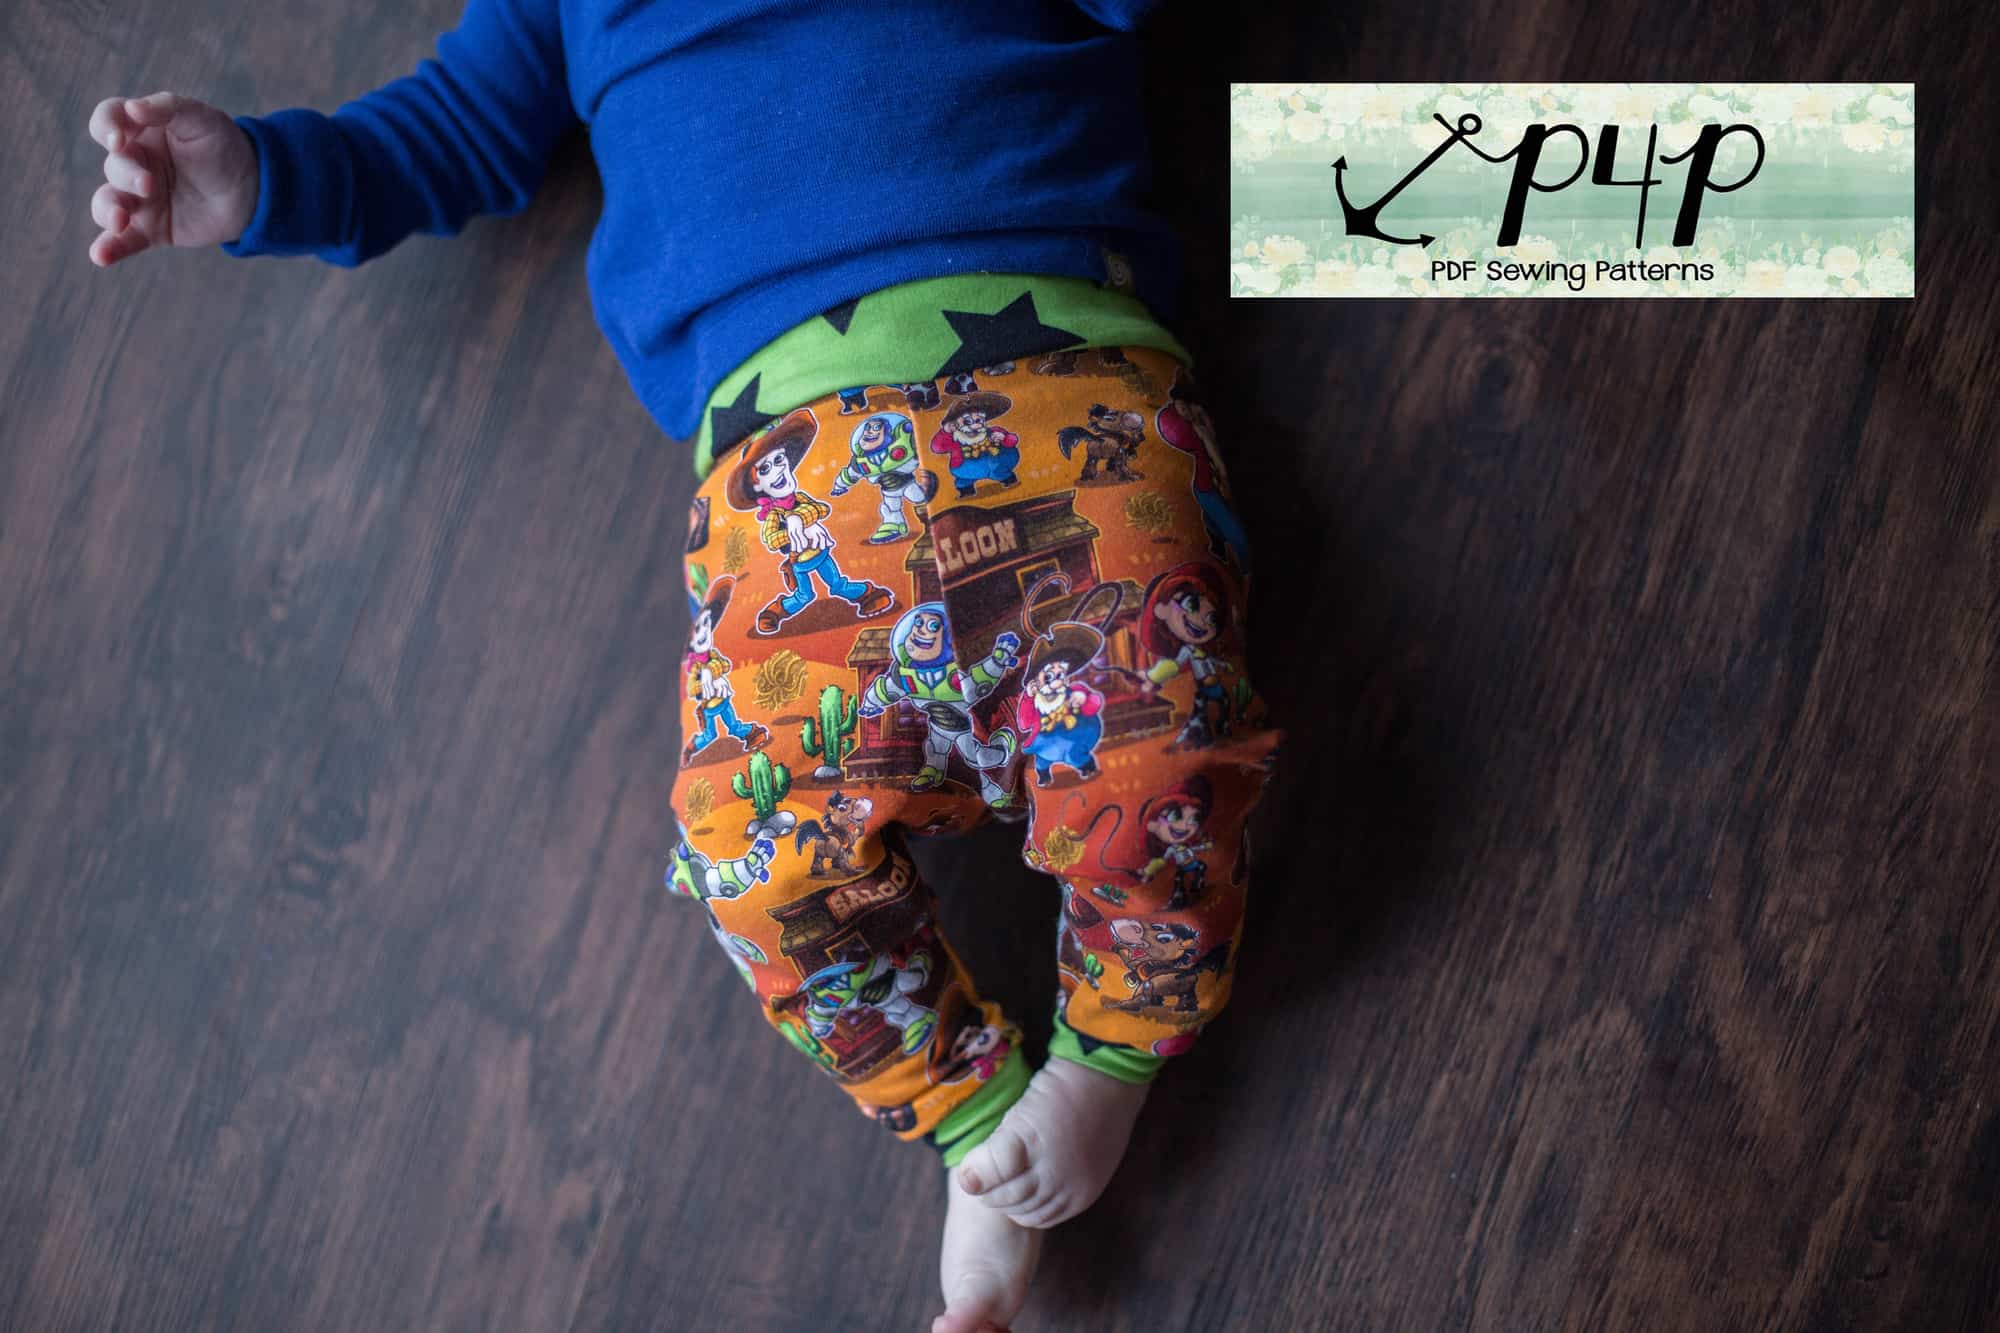
Tadah! There you have it, Petite Pegs with cuffs! I can’t wait to see your little creations!
Note: You may find it easier to attach the flat cuff to the leg instead of sewing the inseams and the cuff in a loop. You can certainly do that, you will be sewing the inseam after you attach the cuffs. You can read about some ways to finish your serger seam here.

P4P Henley Sew-Along | Attaching Neckband + Hood
Welcome to the day 5 of the P4P Henley sew along. Today’s steps include adding the neckband or the hood.
-
Crew Neckband
If you have done the solid front shirt (no placket) you will now be adding the neckband as in the pattern tutorial. For additional tip, check out our P4P University Neckbands 101 blog and videos here.
-
Henley Neckband
If your sew along choice was a Henley style shirt then you would now be adding the henley neckband. This neckband is not sewn in a loop like the crew neckband was. Take a moment to watch the video below. The most important thing to keep in mind when adding this neckband is to go very slow and baste!
-
Hood (with or without the placket)
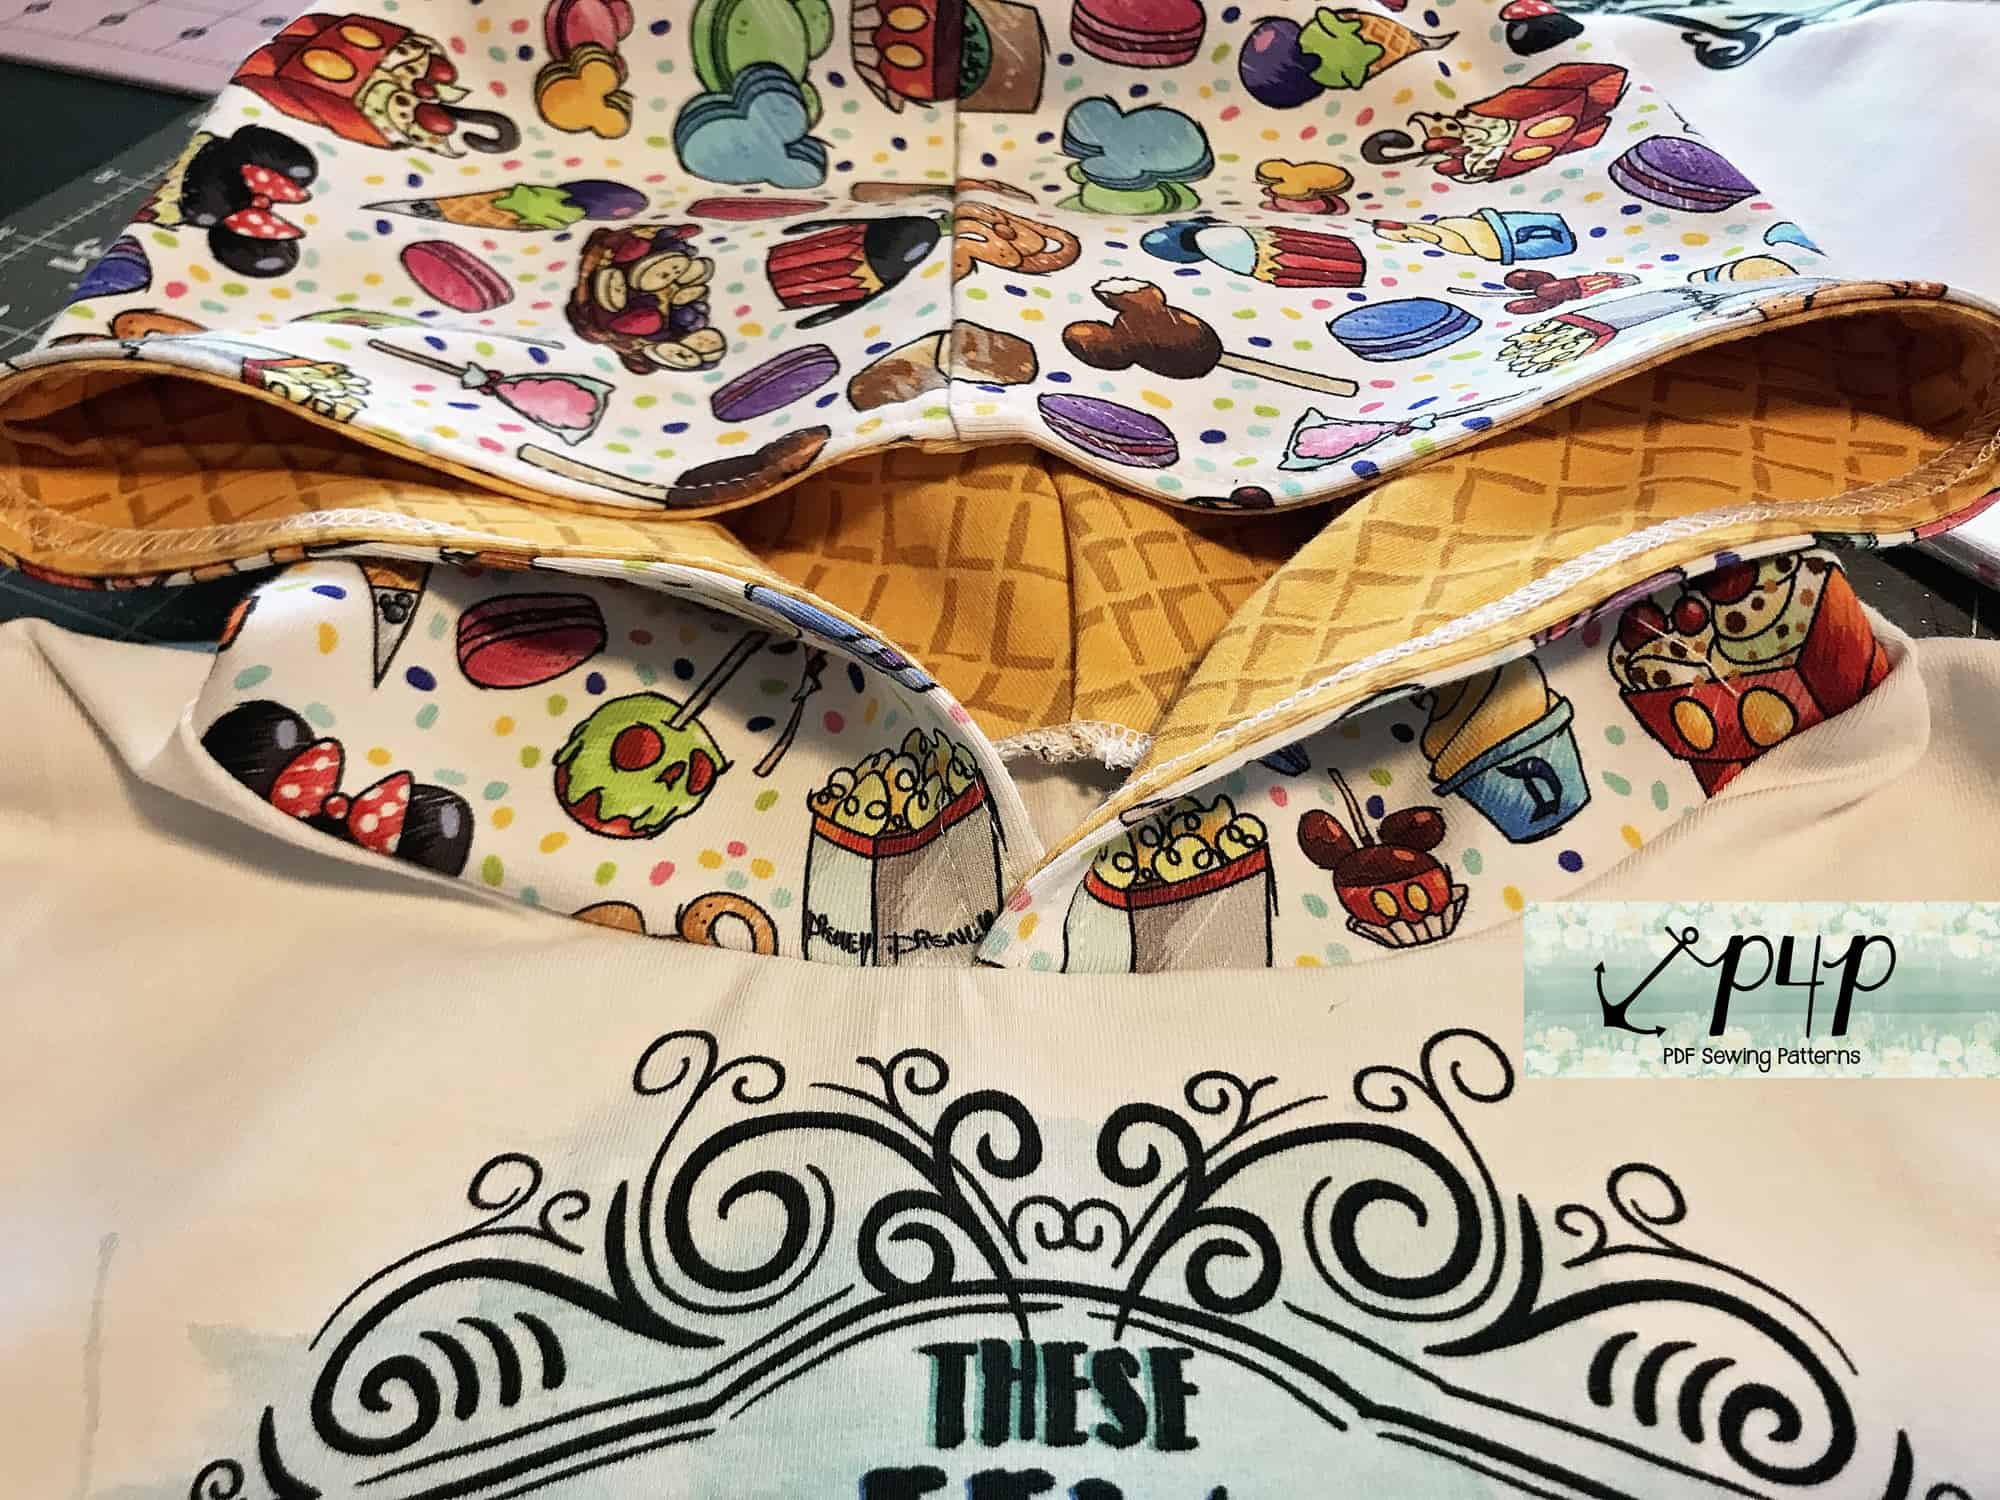
The Henley patterns include a hood for the placket option. For this sew along we wanted to show you how easy it is to add a hood to the solid front option. The only pattern modifications you will need to make is to extend the front of the hood by 1/2″.
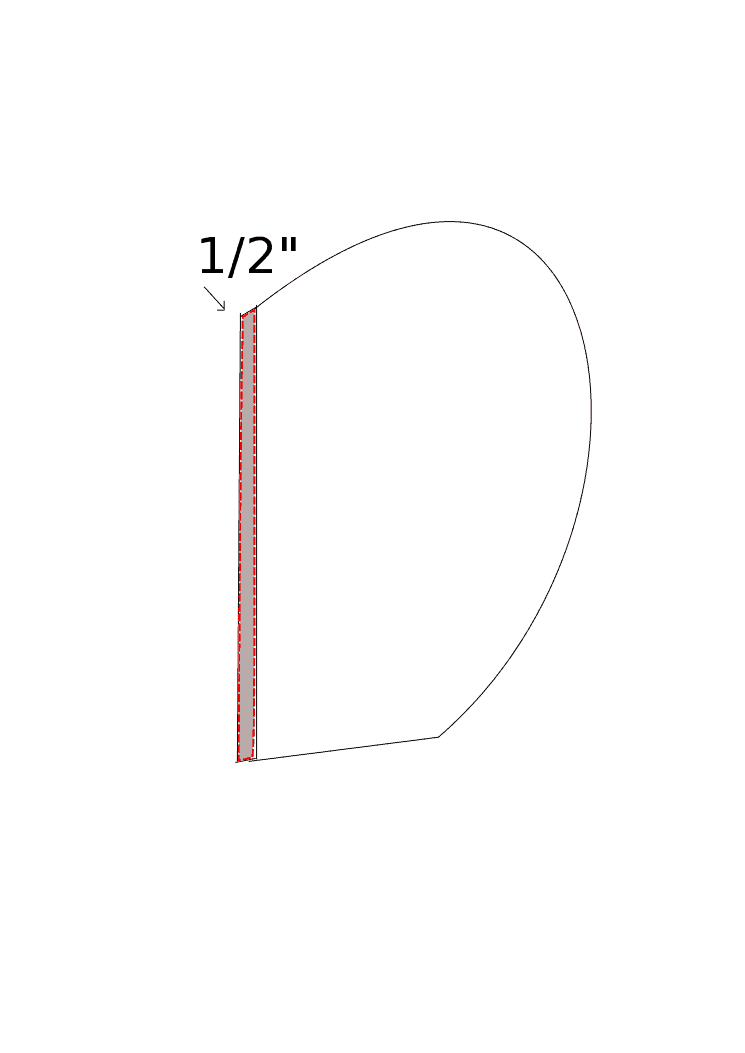
Sew the hood as per the pattern tutorial. Overlap the front neckline 1/2″ and baste in place.
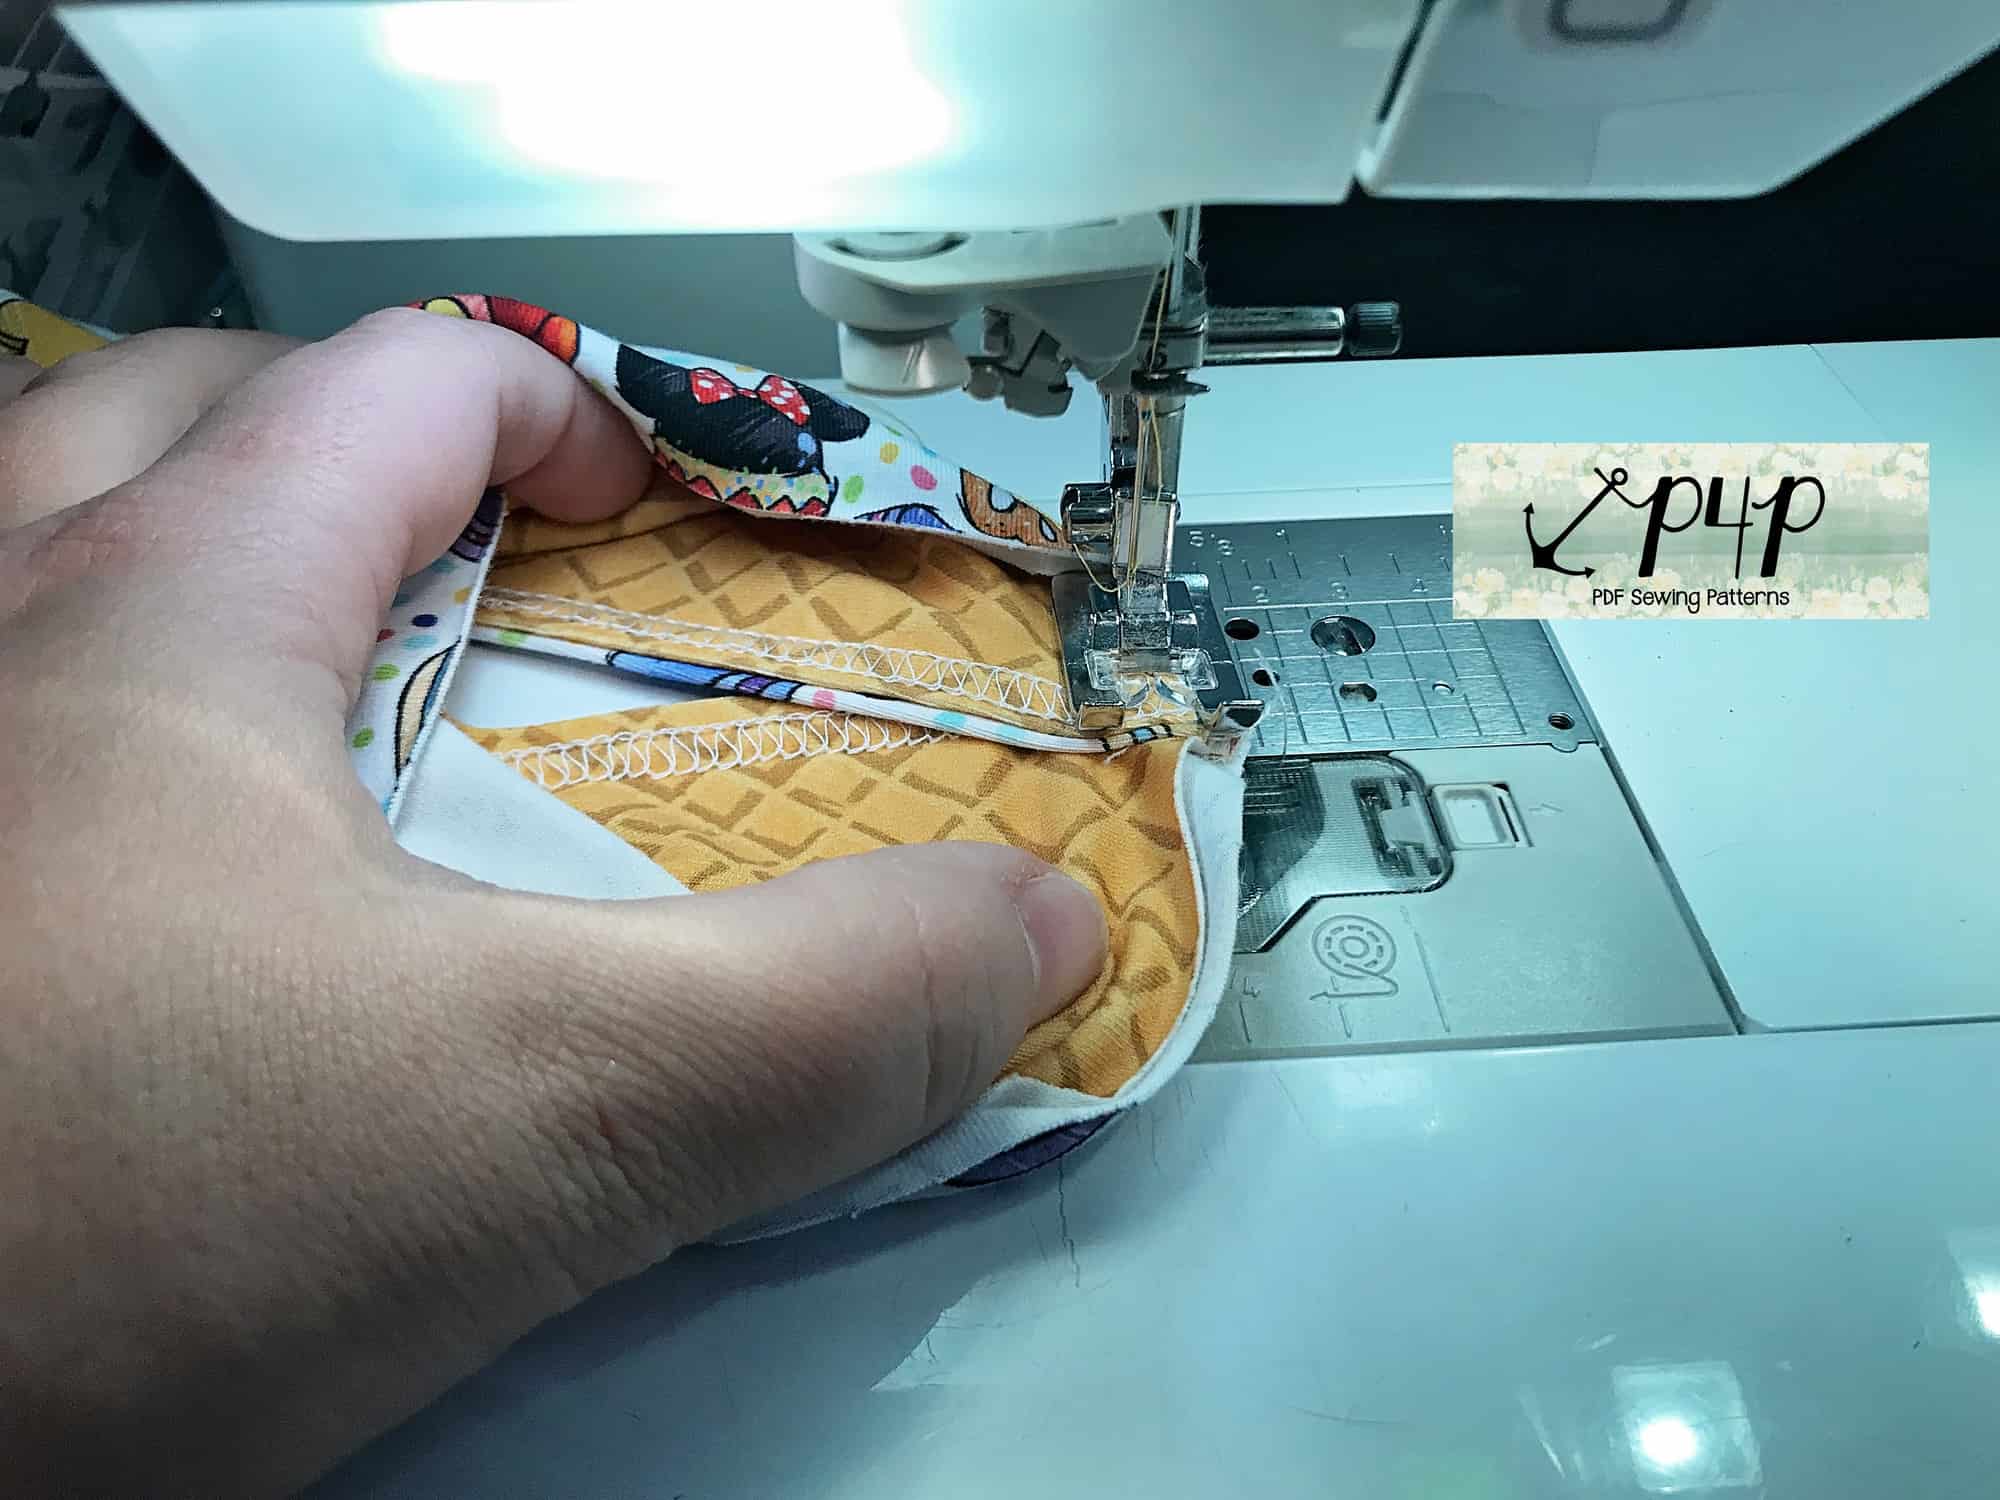
Mark the quarter points of the hood and the neckline. Turn your shirt inside out and place the hood right sides together, matching the quarter points.
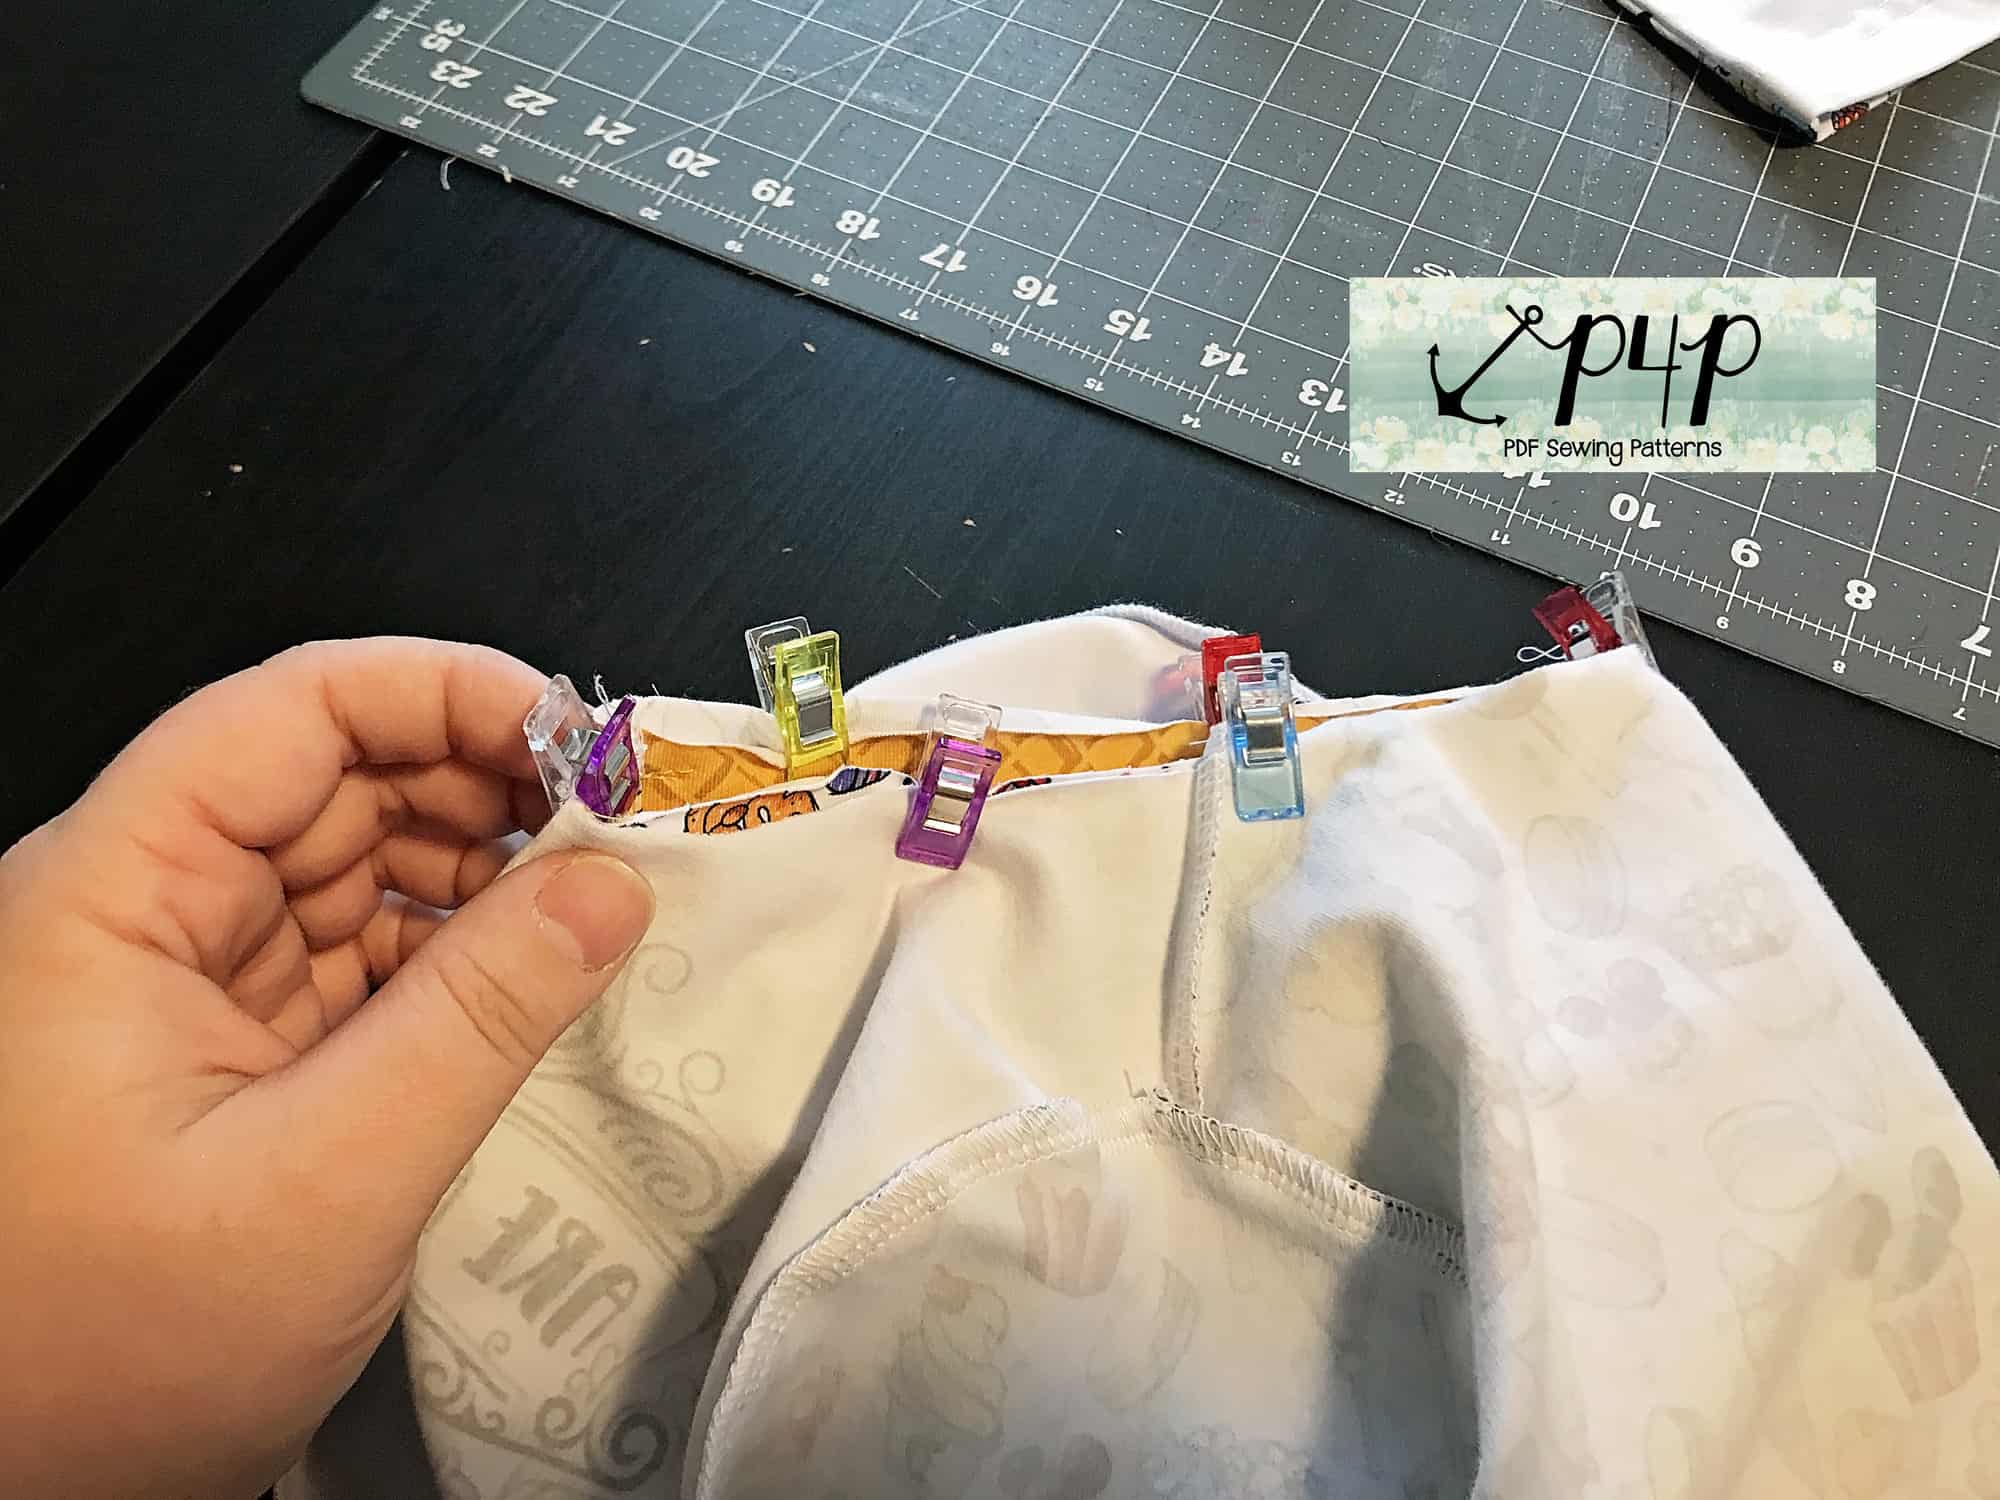
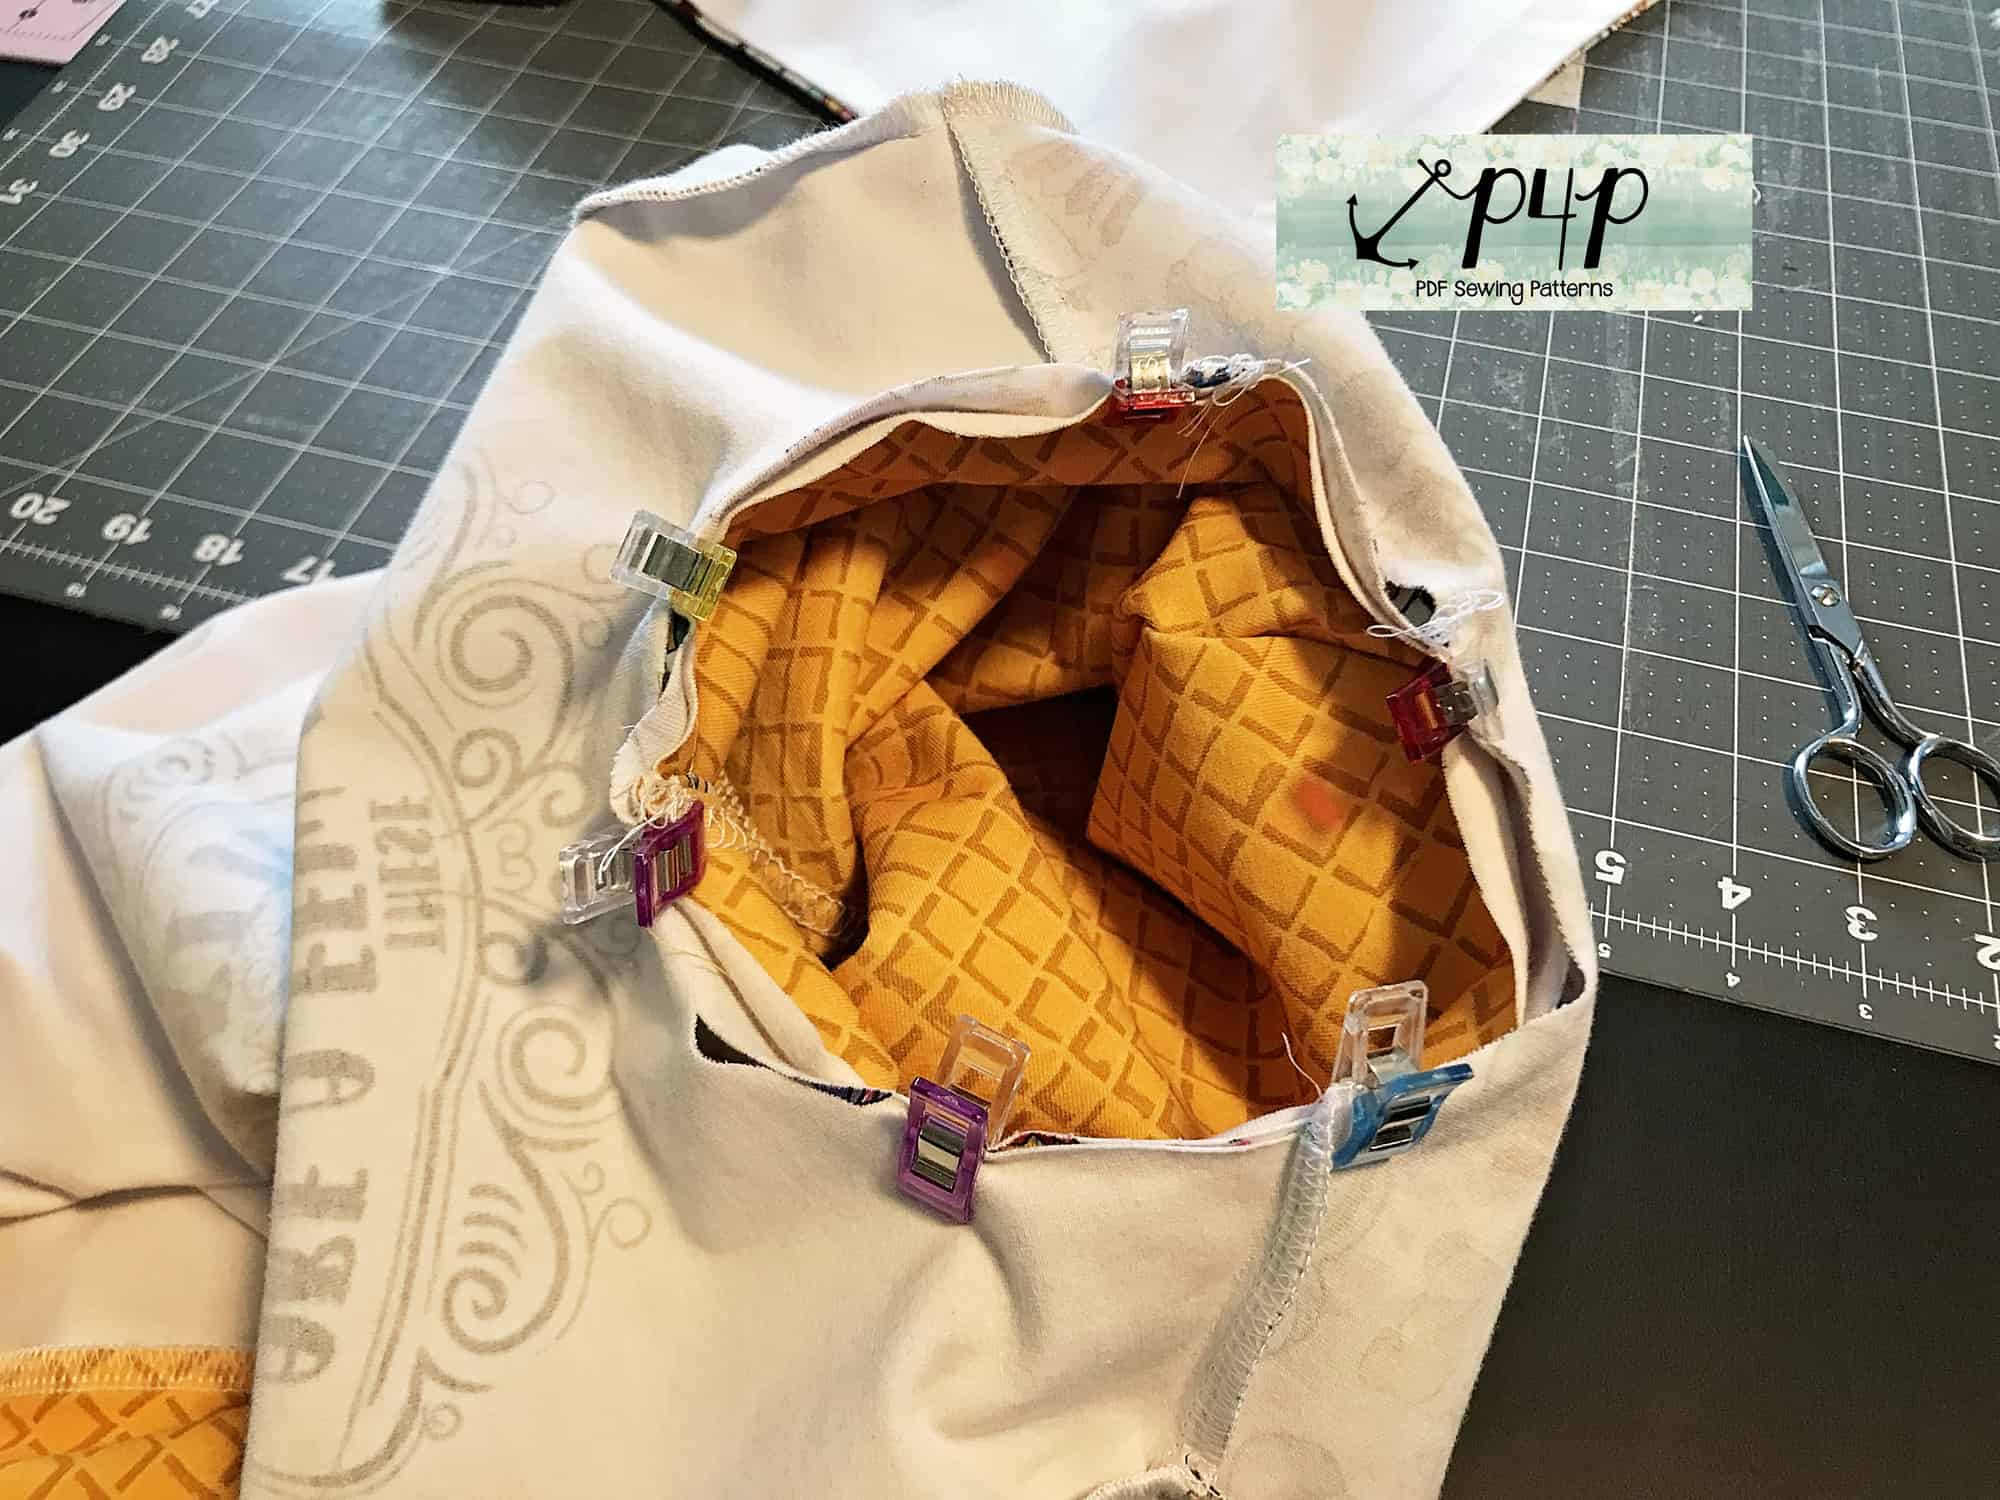
Sew or serge the hood to the neckline following a 1/2″ seam allowance. See how easy it was to add a hood to the plain front shirt?
**The links won’t be active until the scheduled date.
January 14: Announcement.
January 15: Choosing Your Fabrics, Printing + Measuring.
January 16: Cutting Fabric.
January 17: Placket.
January 18: Sleeves.
January 19: Attaching Neckband + Hood.
January 20-21: Catch-Up Days.
January 22: Recap + Winners Announced!
P4P Henley Sew-Along | Sleeves
We’re back and working on the sleeves today! We get quite a few posts in the main Facebook Group about having issues with the sleeve so I made a quick video about easing the sleeve to the bodice. I hope this helps!
If you’re doing a cuffed version, be sure to hop on over to our Knit Cuffs Blog Post for more tips. 🙂
We’re in the home stretch now…only one more day to go!
**The links won’t be active until the scheduled date.
January 14: Announcement.
January 15: Choosing Your Fabrics, Printing + Measuring.
January 16: Cutting Fabric.
January 17: Placket.
January 18: Sleeves.
January 19: Attaching Neckband + Hood.
January 20-21: Catch-Up Days.
January 22: Recap + Winners Announced!
P4P Henley Sew-Along | Cutting Fabric
Welcome back! So far, we’ve learned how to pick the perfect fabrics and get the perfect fit. Today, we are diving right in and cutting into your beautiful fabrics. We’re also sharing two new hacks so before you cut into your pretties, check them out first!
Is this your first time using one of our patterns? Check out our Pattern Markings 101 and Grainline blog posts for more tips about cutting out your fabric correctly. Now, on to the hacks…..
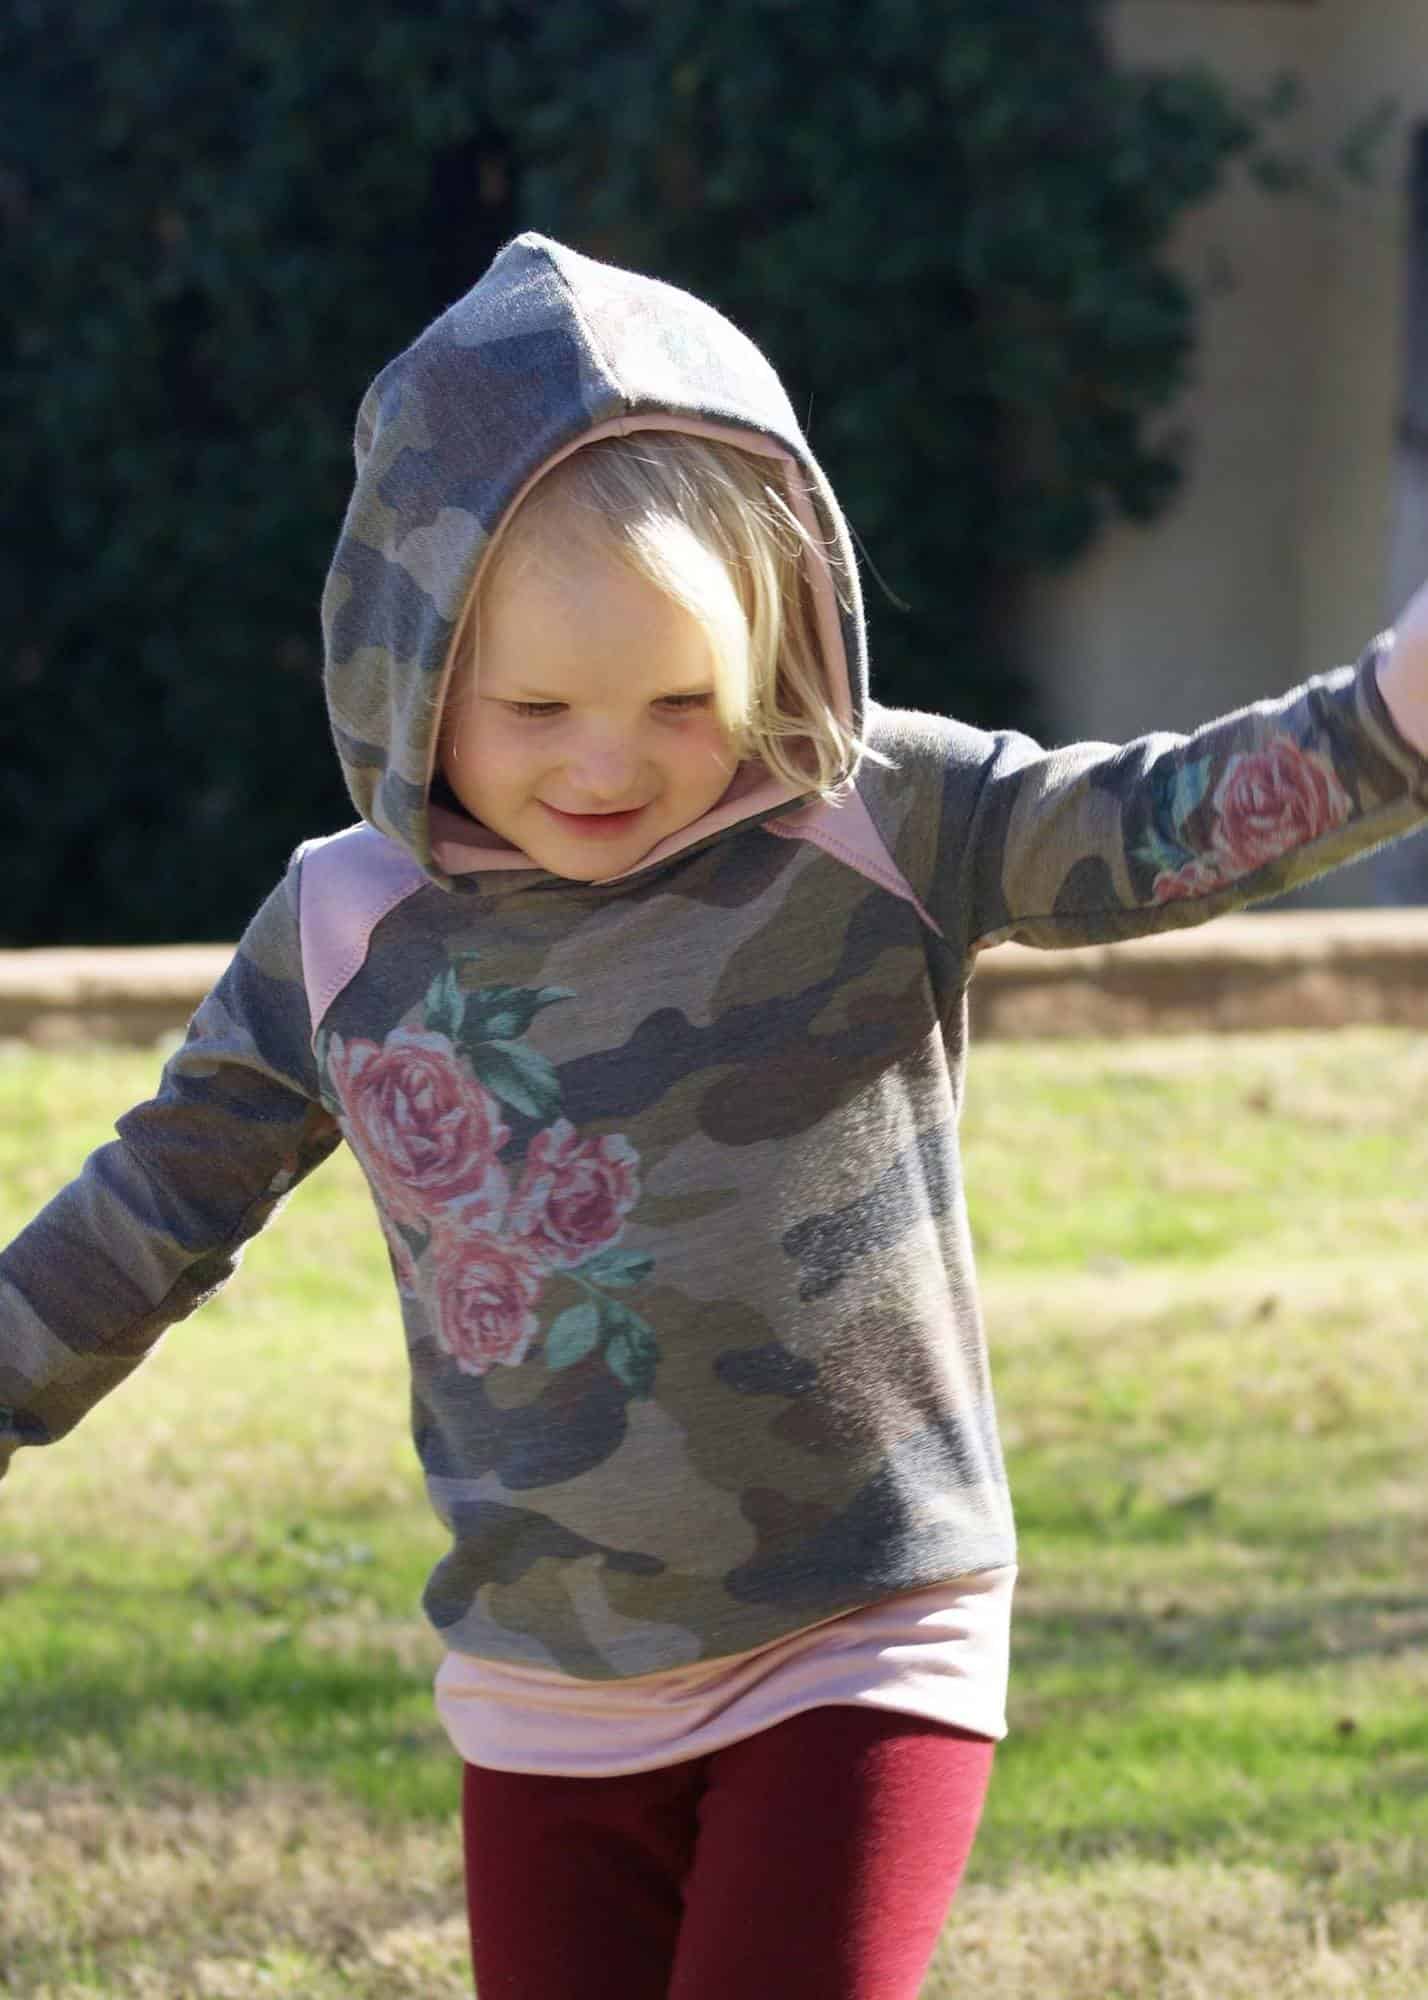
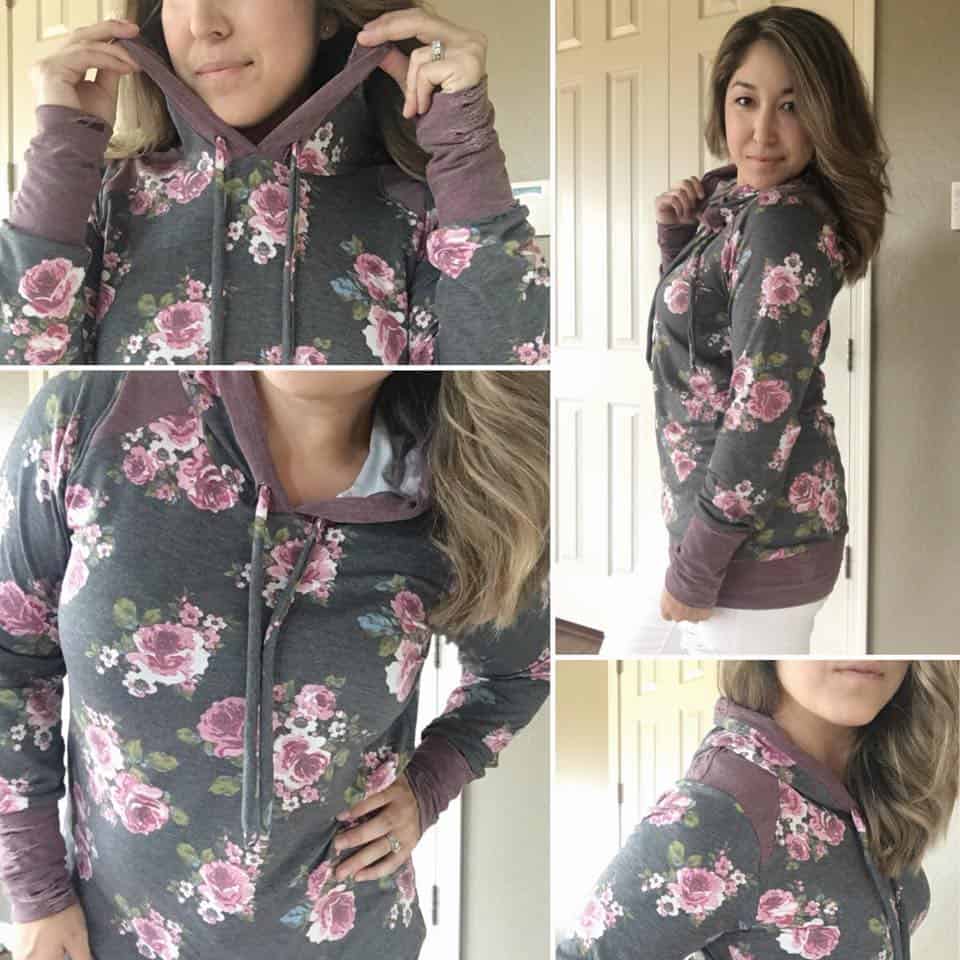
Henley Raglan Color Block Hack
Download the Color Block Pieces for the Women’s Henley and Yo Ho Henley HERE.
-

- French Terry
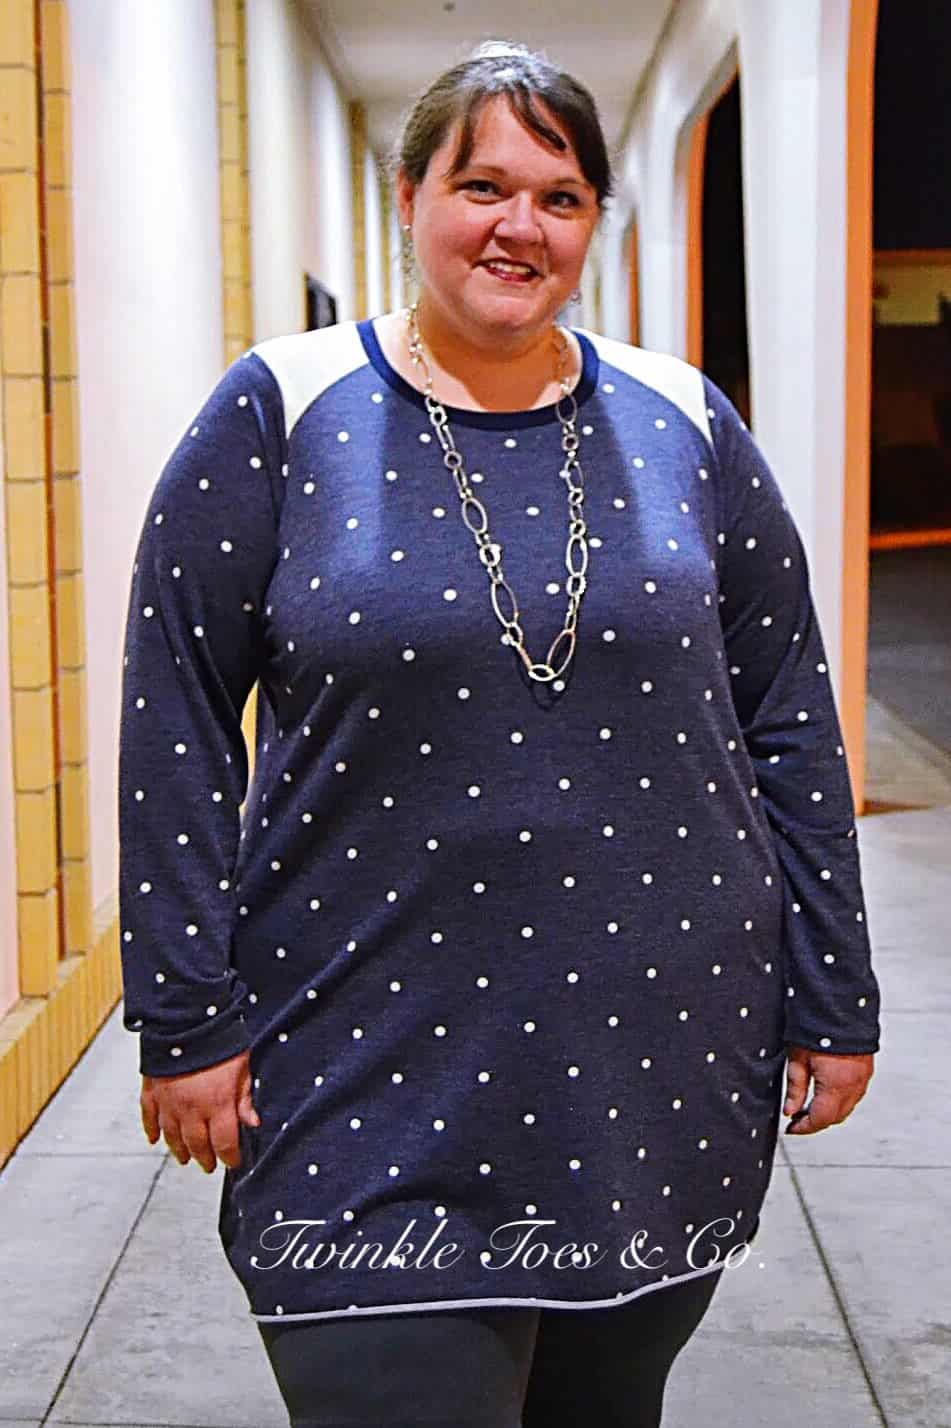
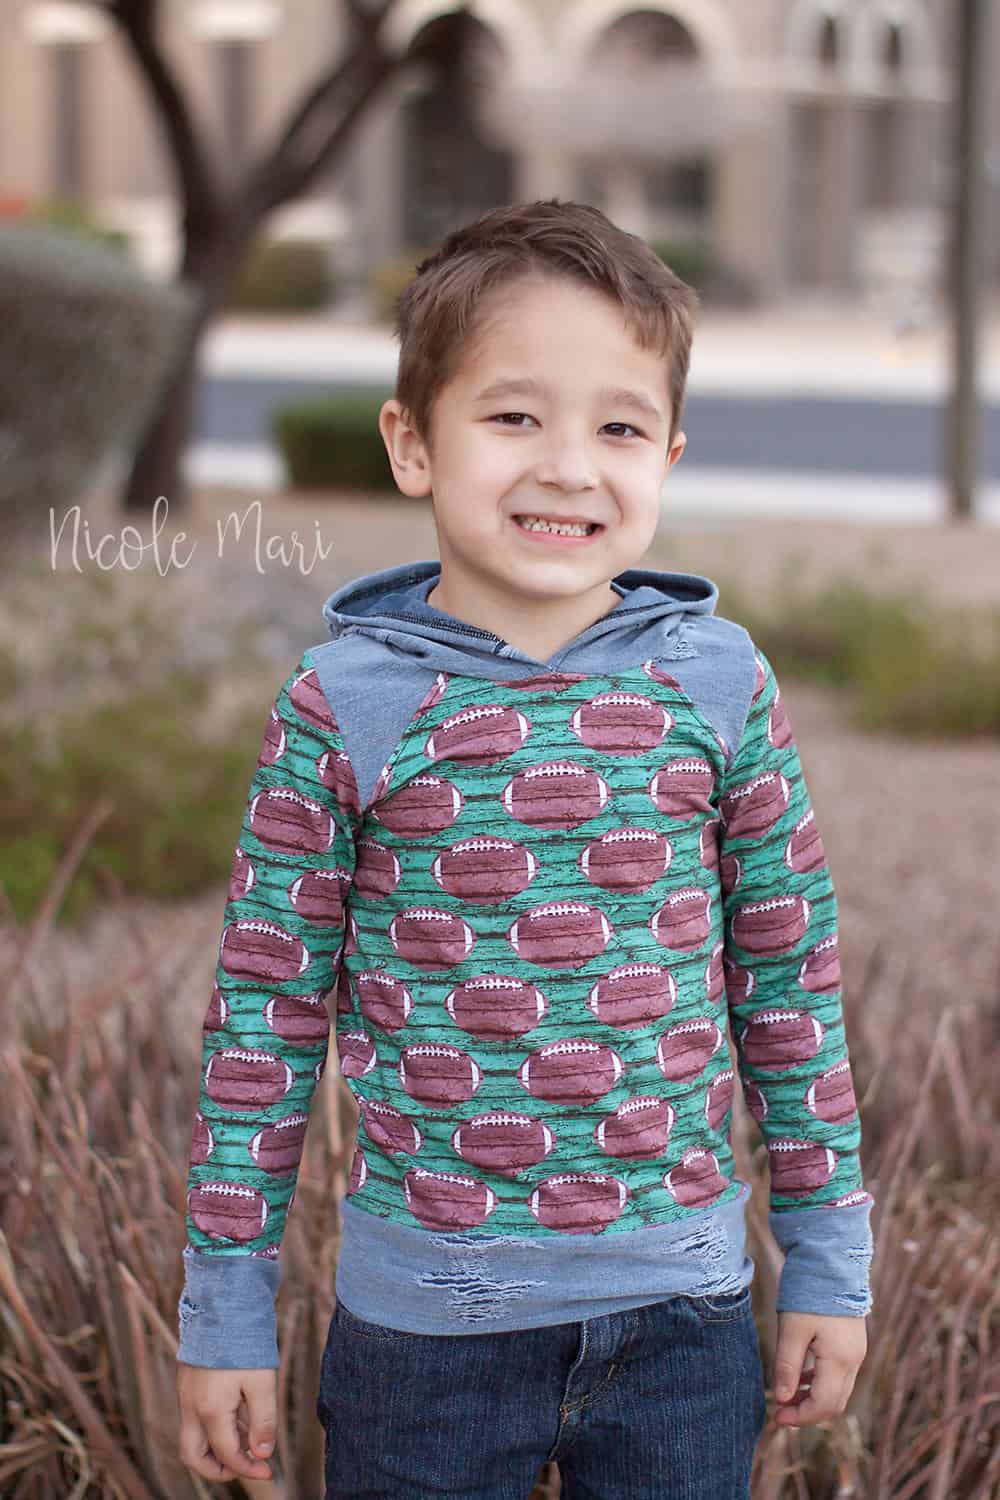
-

- Sweater Knit and Suede accents
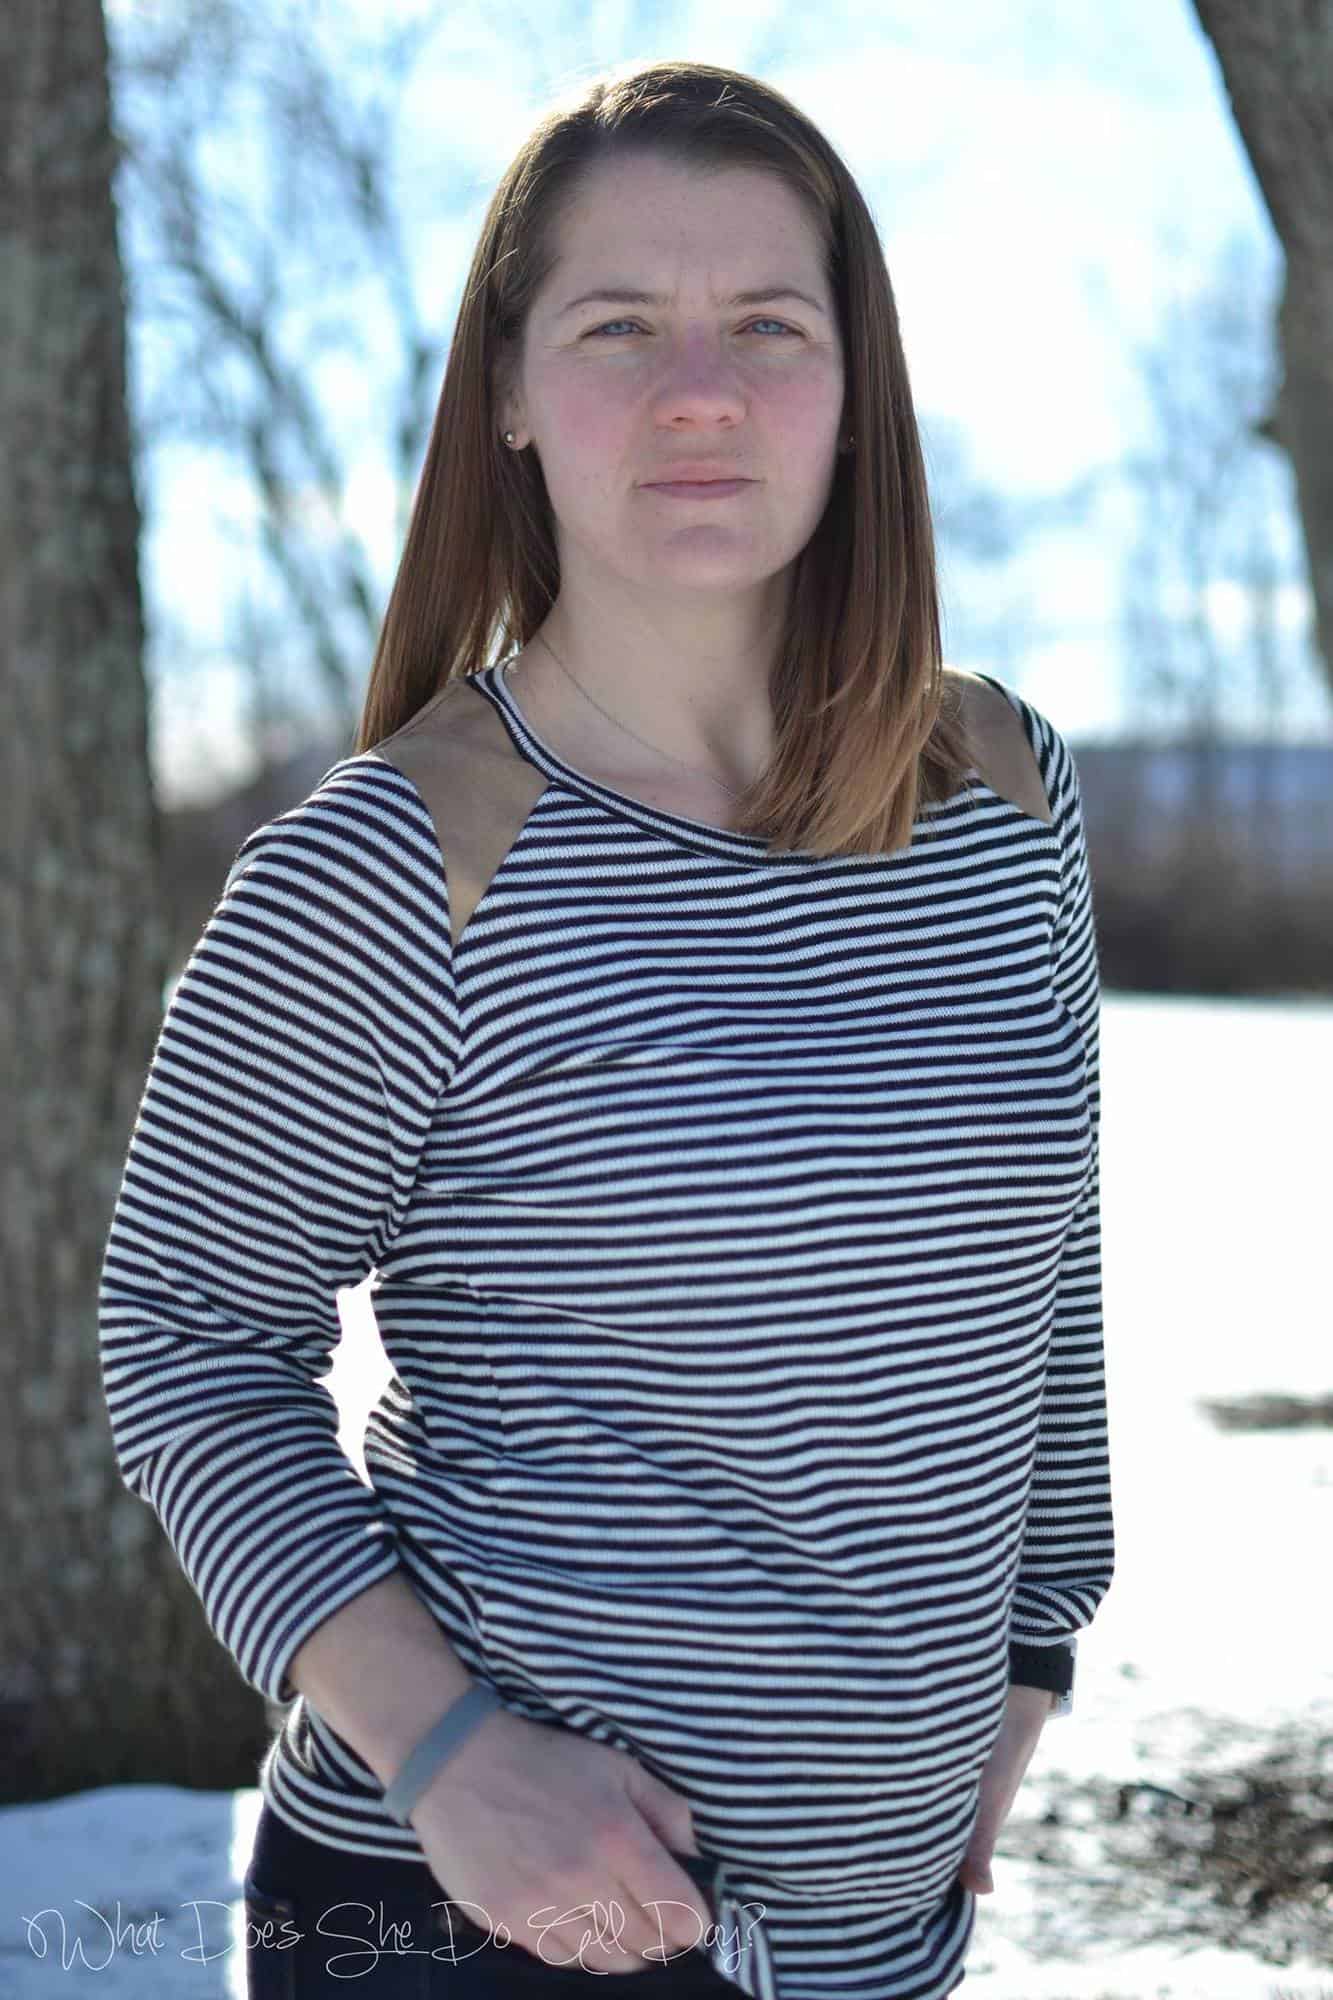

Here we go!
-

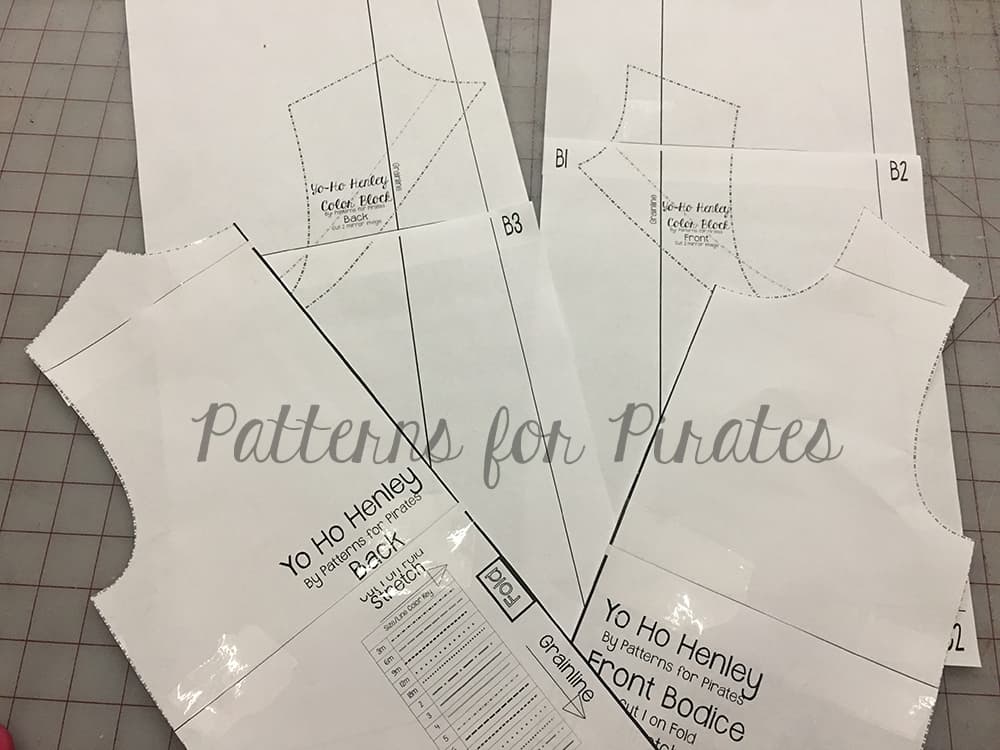
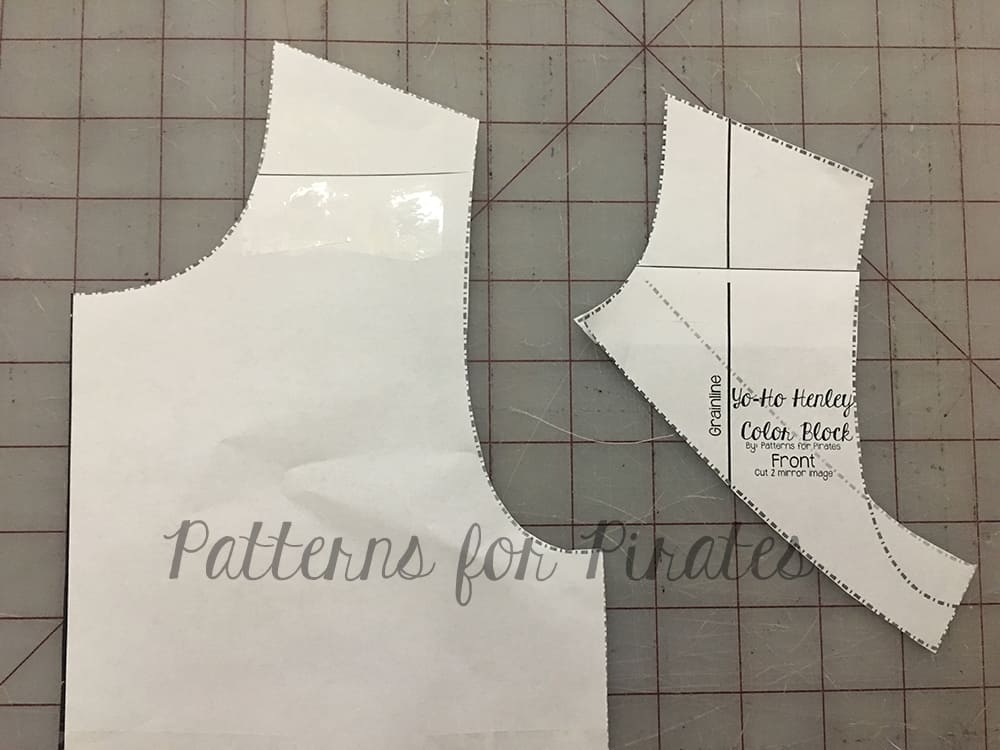
- Print out the Henley Main and Color Block pieces
-
- Picture of Back Main and Color Block Pieces
-
- Picture of Front Main and Color Block Pieces
-
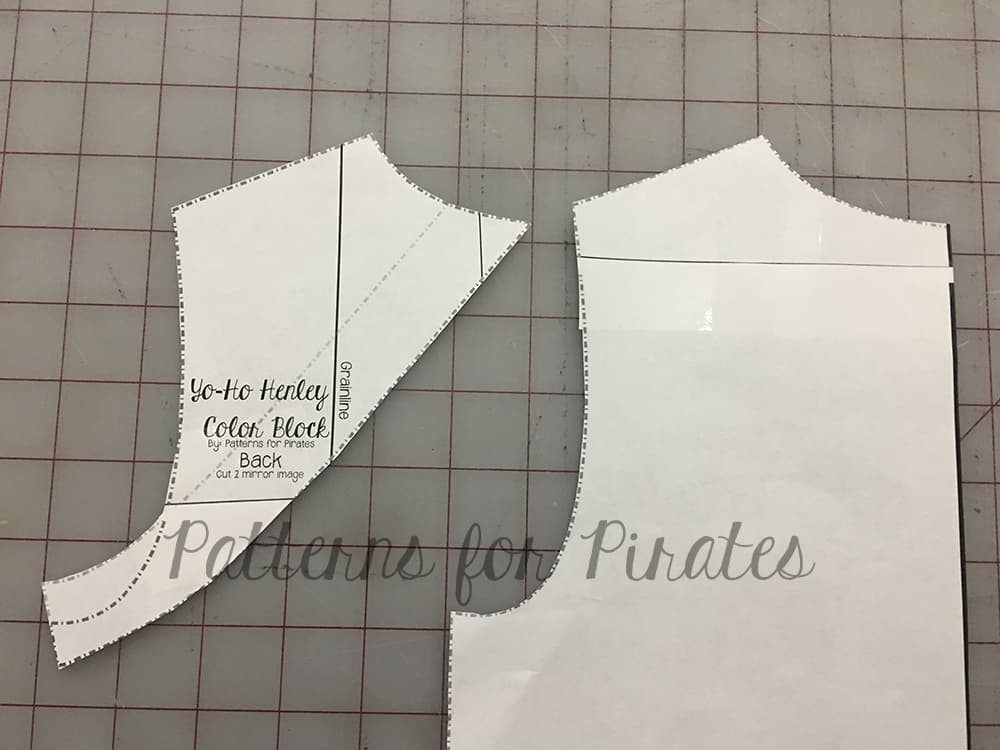
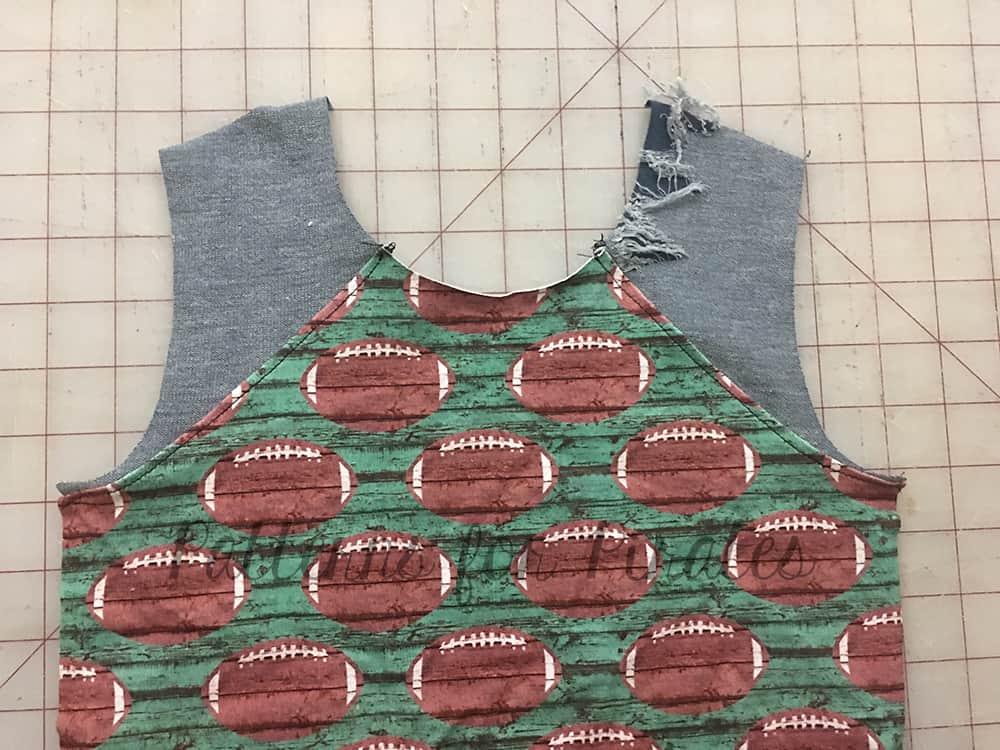
- The Color Block Pieces should line up at the shoulder seam with the main body.
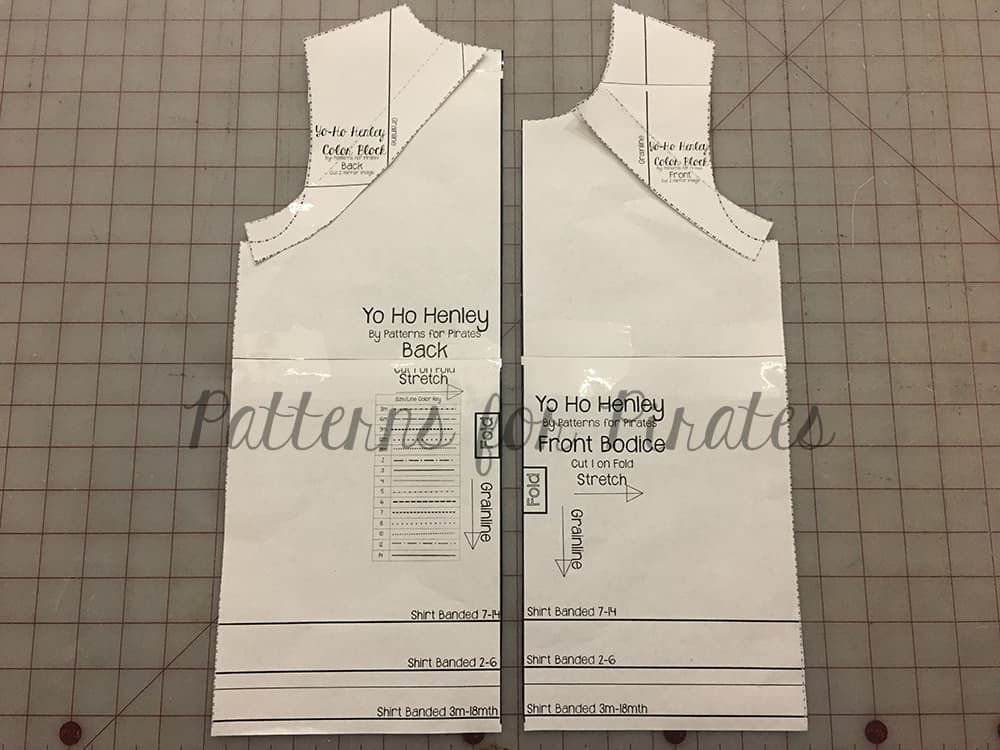
-
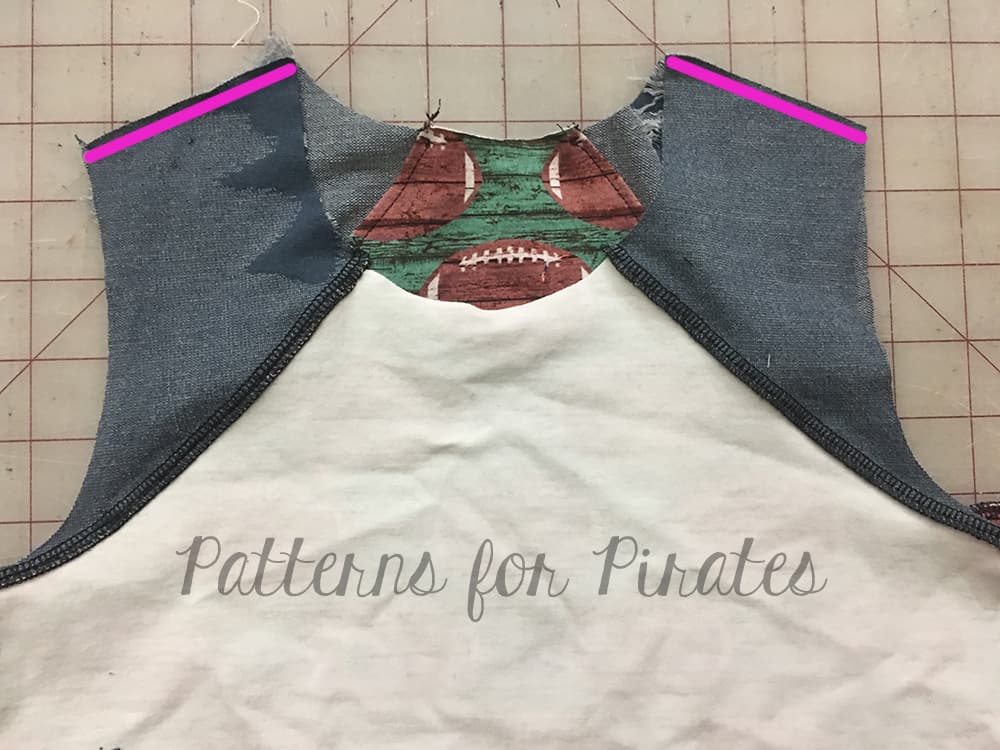
- Transfer the faded line (shown in pink here) to your main body as this will be your new bottom color block. If you do not want to cut your main pattern piece you can also fold it along that line when you cut your fabric.
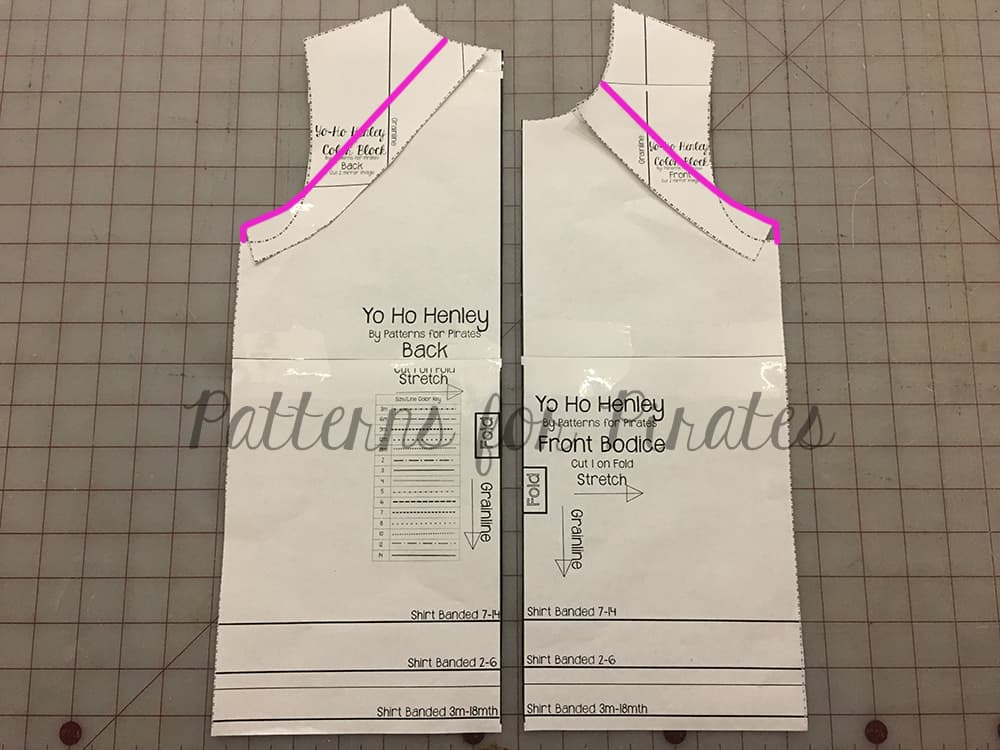
-
- Cut 2 (mirror image) of the top color block. Follow the darker size line along the armscye.
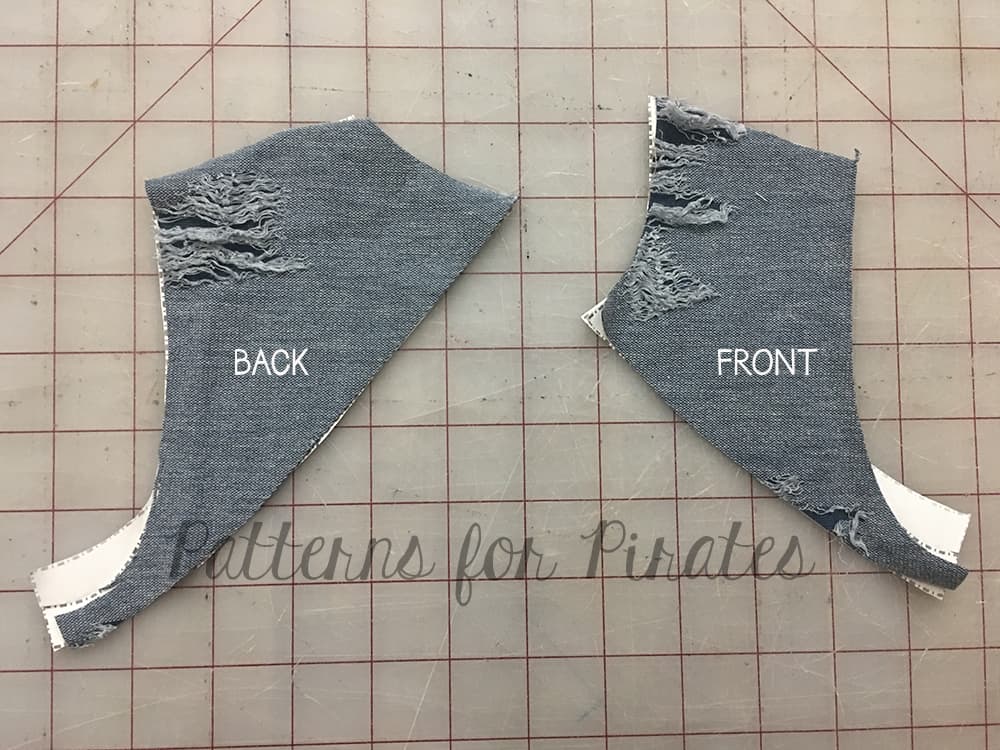
-
- Cut 1 Front on the fold along the line you transferred in the previous step.
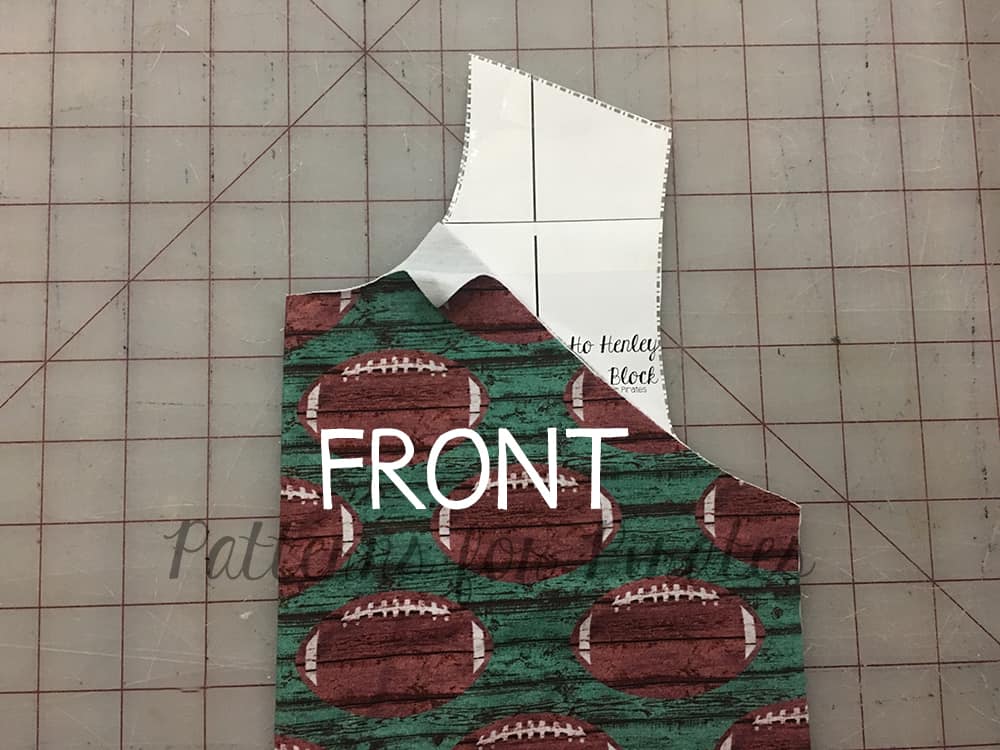
-
- Cut 1 Back on the fold along the line you transferred in the previous step.
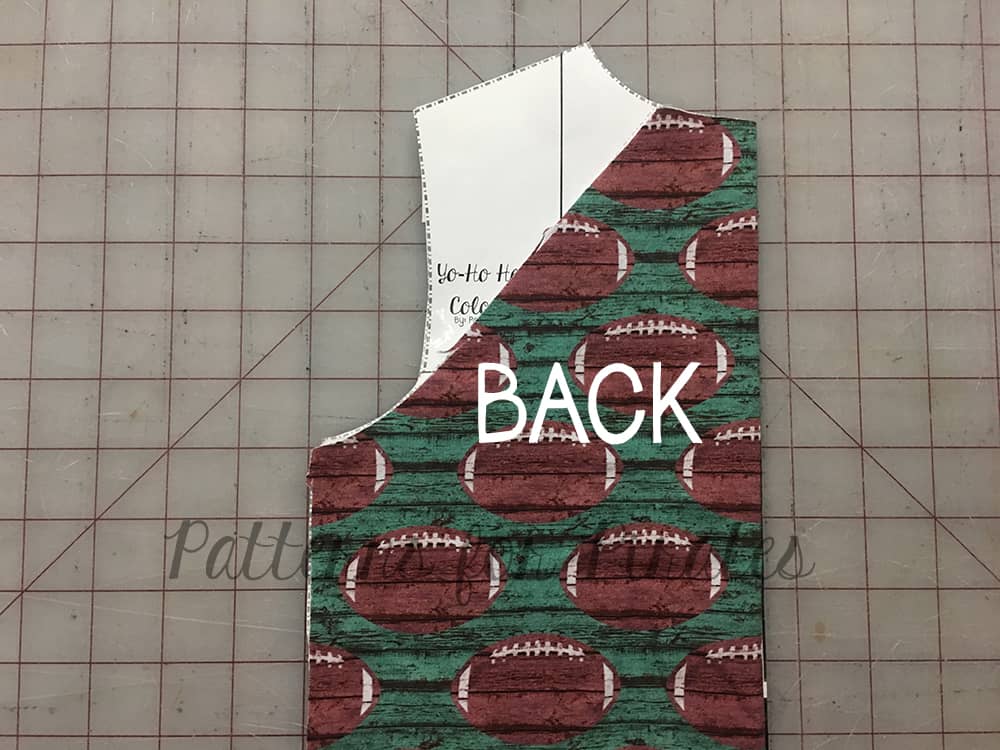
-
- With right sides together, and using a 1/2″ seam allowance, stitch top color block to front bodice.
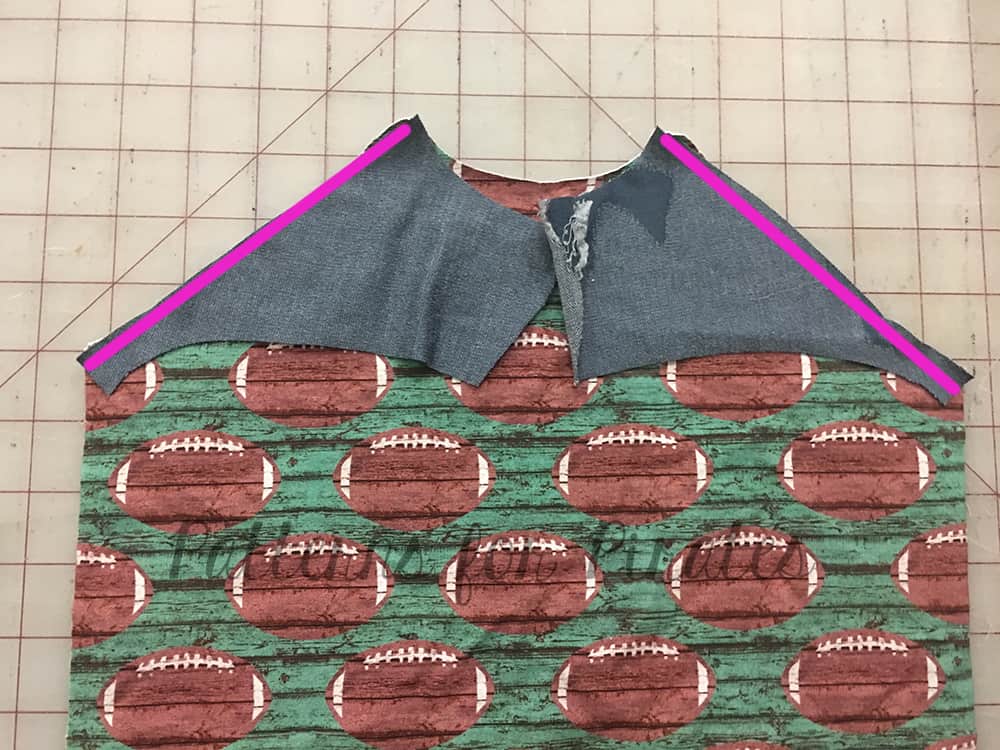
-
- With right sides together, and using a 1/2″ seam allowance, stitch top color block to back bodice.
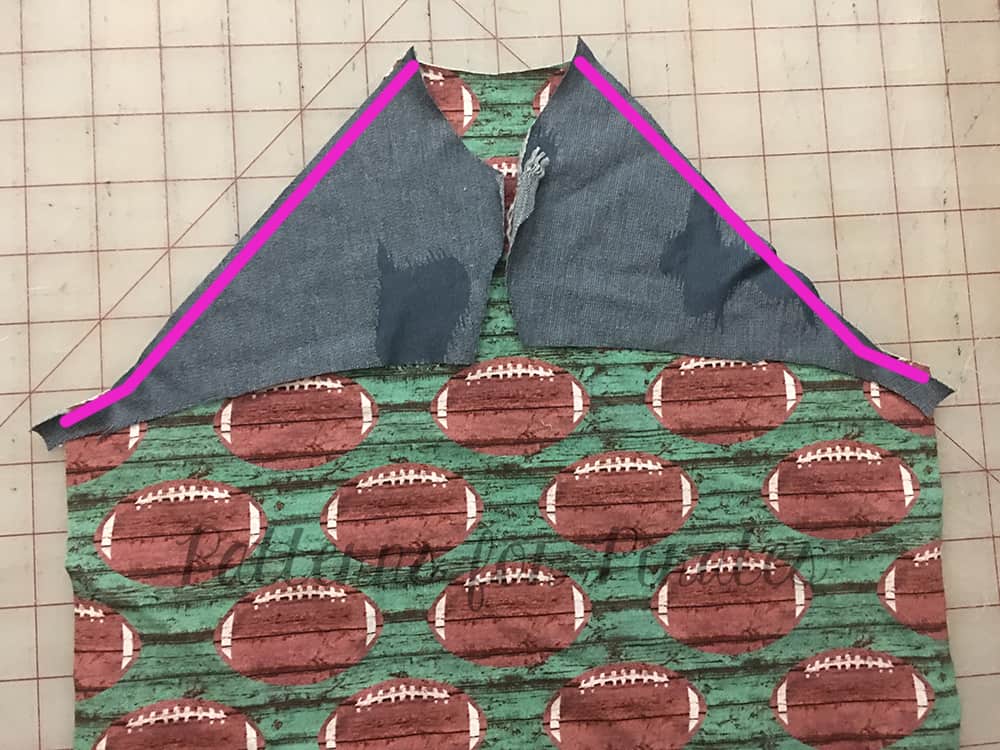
-
- Press seam allowance down and top-stitch. Repeat for the back.
-
- Continue as instructed in your pattern.
Women’s Long Sleeve Tall Cuffs Hack
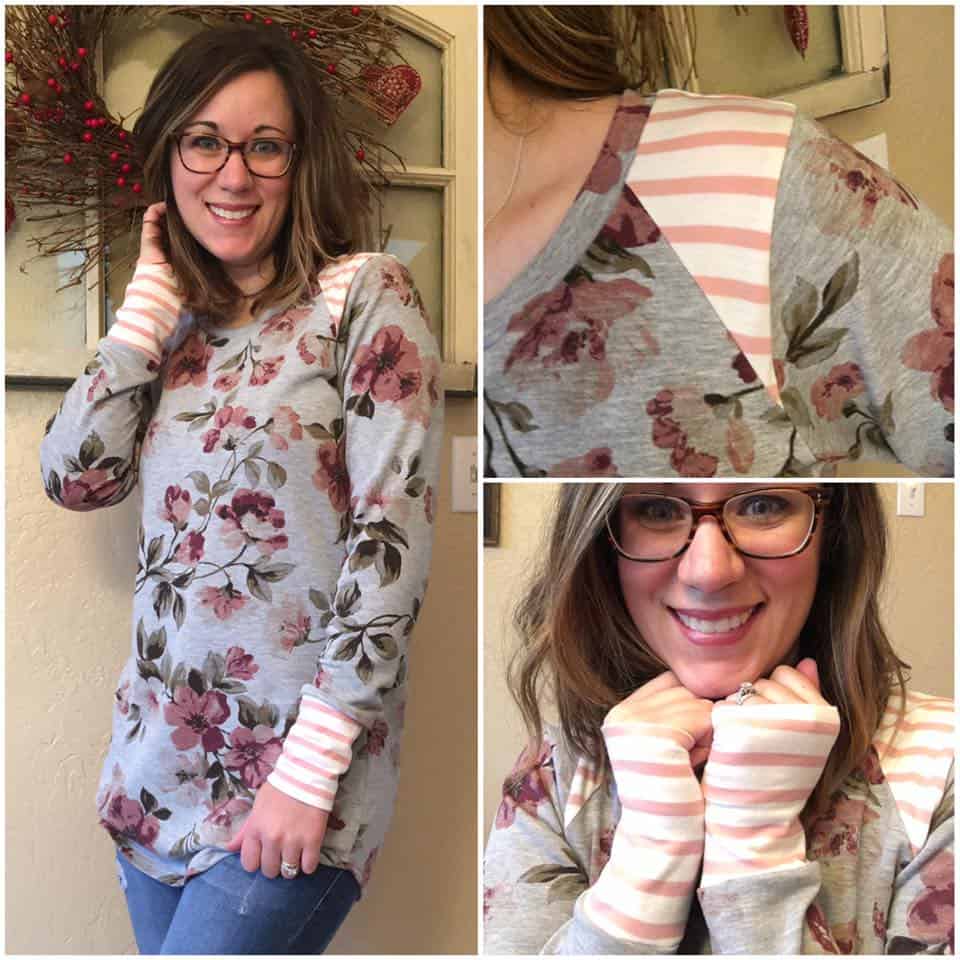
If you’ve been following in the main Facebook Group, a few weeks ago I hacked the Henley and upsized it for a more looser top! With that, I also did a longer cuff. It received lots of love, so we thought we’d make it easy on y’all and share the new cuff measurements. Cut your sleeve on the “Roll up” Cut line and use the measurements below for your cuffs. Construction is the same as the other cuff/band options. 🙂
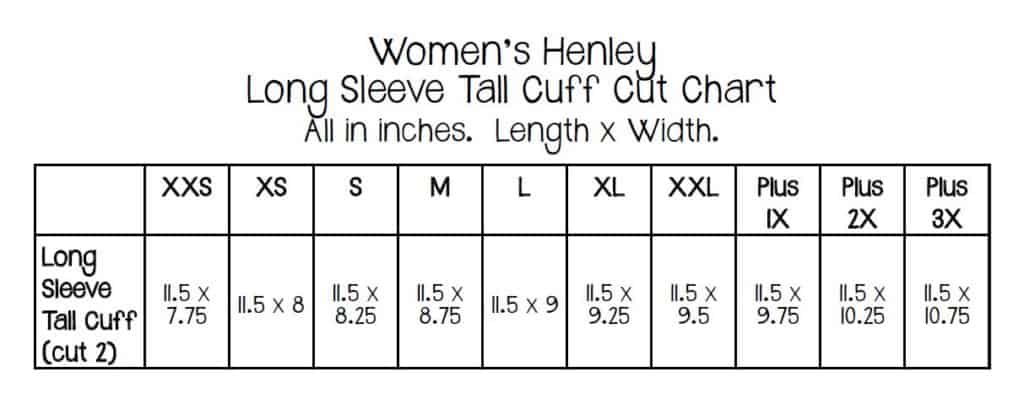
We hope you love these hacks as much as we do! Check back tomorrow for more details on the Placket….. It’s really not as tricky as you think 😉
**The links won’t be active until the scheduled date.
January 14: Announcement.
January 15: Choosing Your Fabrics, Printing + Measuring.
January 16: Cutting Fabric.
January 17: Placket.
January 18: Sleeves.
January 19: Attaching Neckband + Hood.
January 20-21: Catch-Up Days.
January 22: Recap + Winners Announced!
P4P Henley Sew-Along | Choosing Fabrics, Printing + Measuring
Today is all about prepping your pattern and fabric and making sure you get the best fit before you even cut a single fiber!
LET’S TALK FABRIC
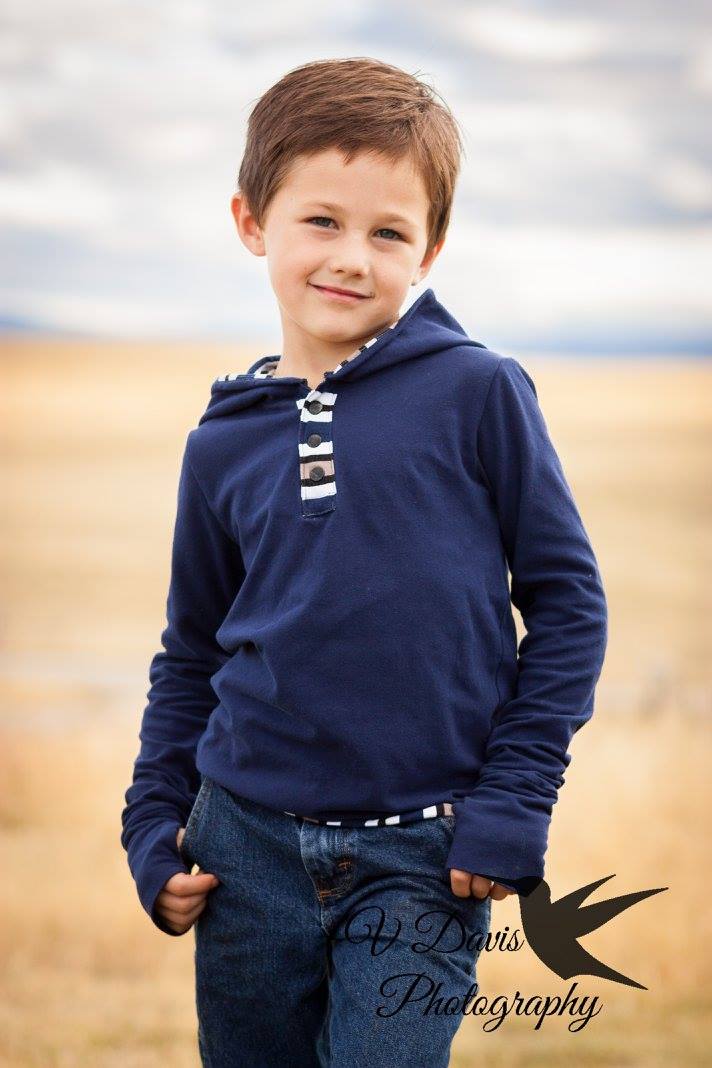
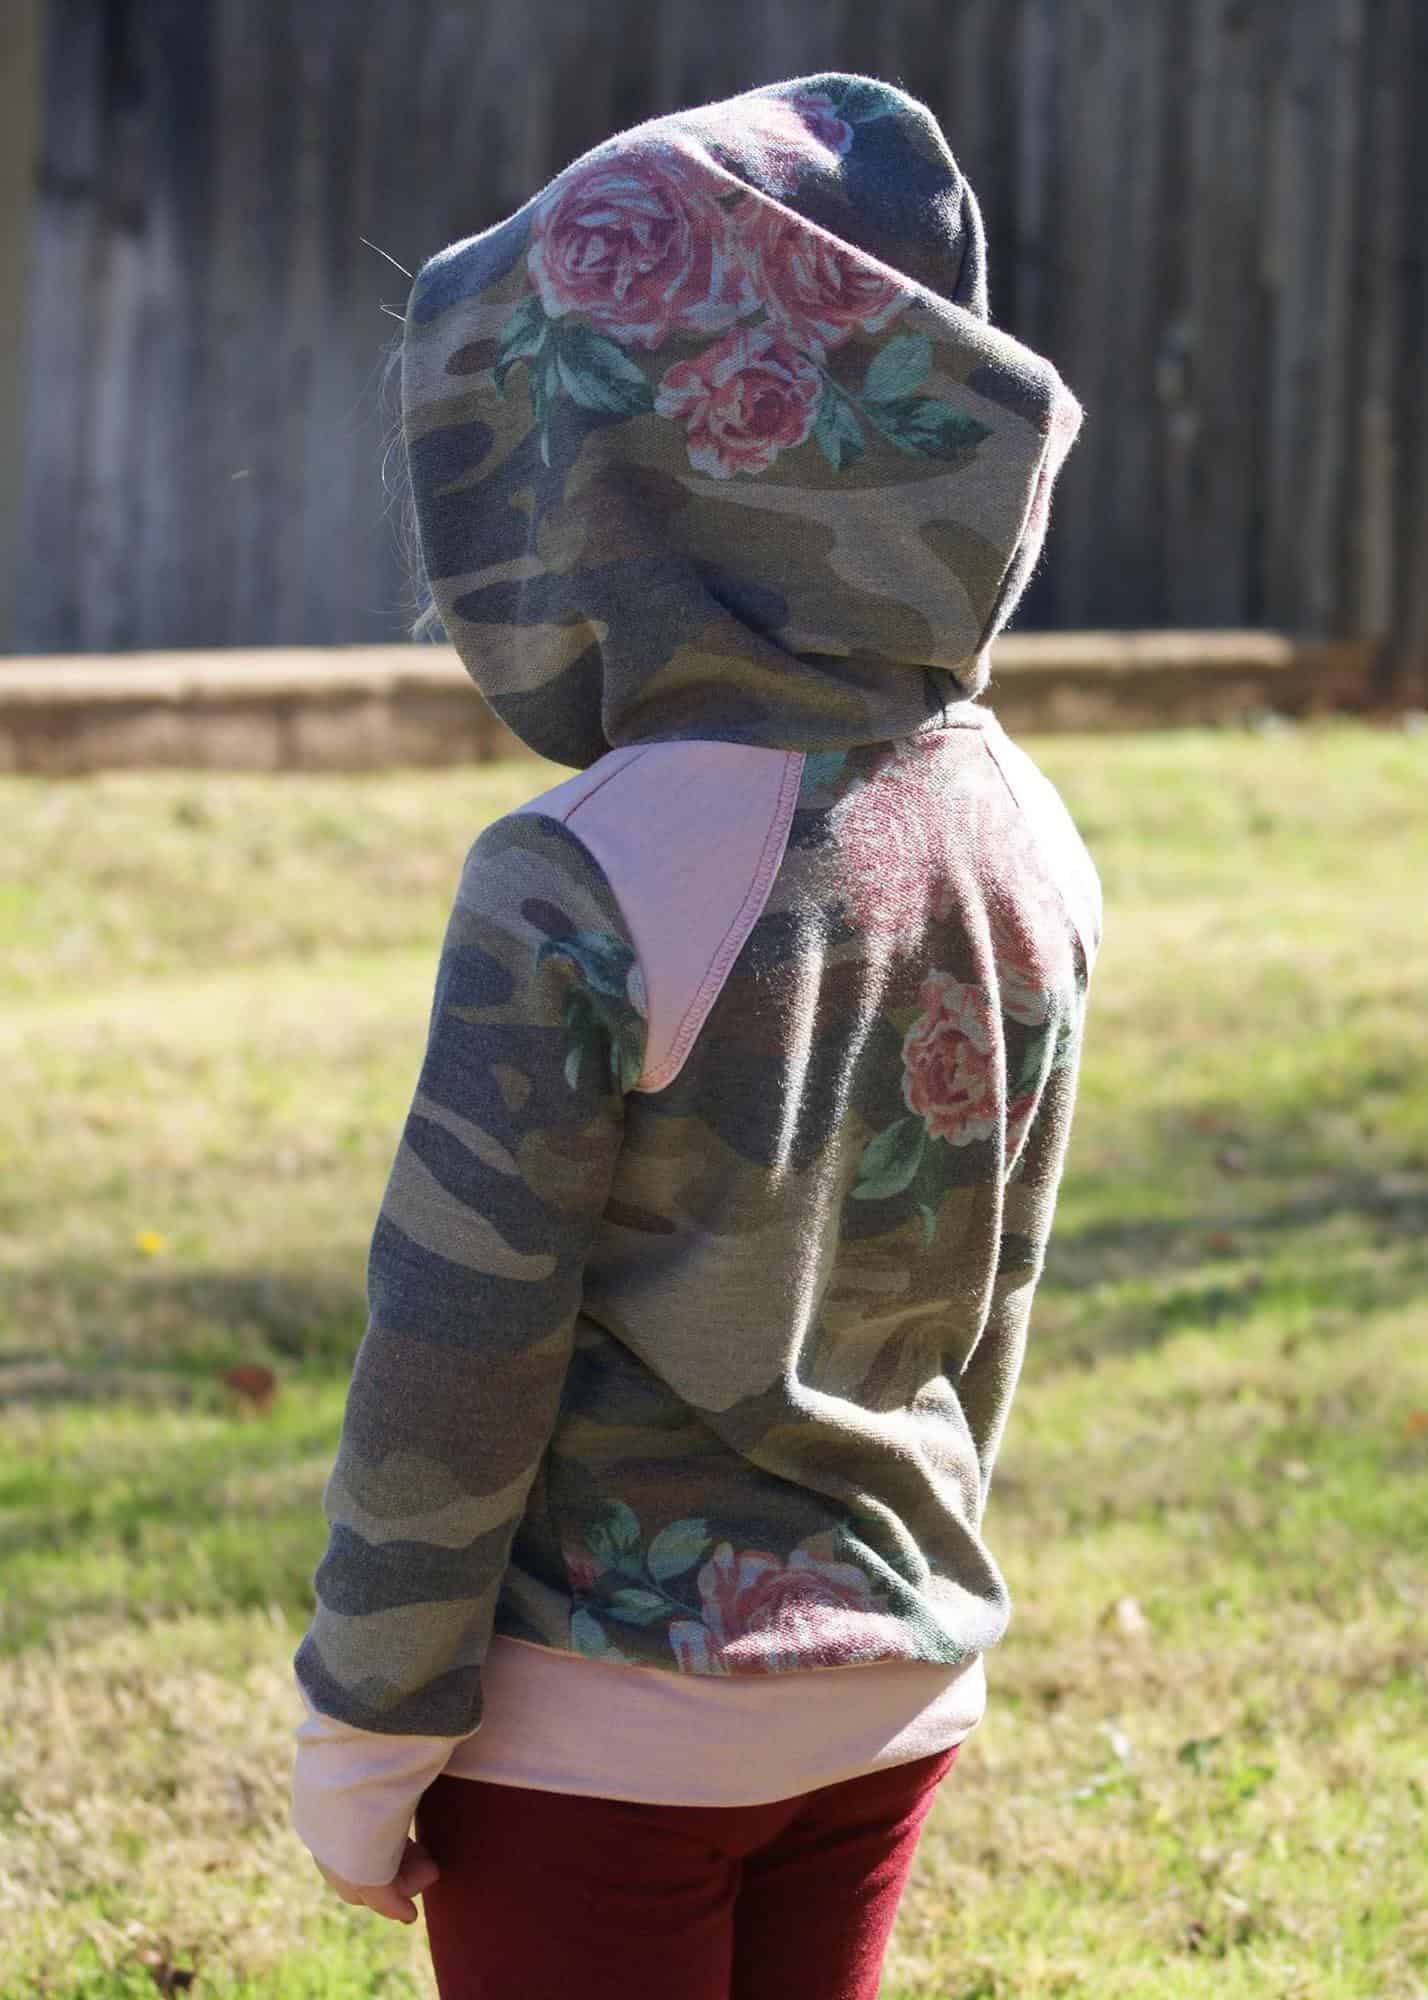
The best part of the henley patterns is that they work with a huge array of fabrics. French Terry, sweater knit, thermal, interlock, rayon spandex, and single/double brushed poly-spandex are just to name a few. Check out our Knit 101 Blog post if you need more help with the fabric types.
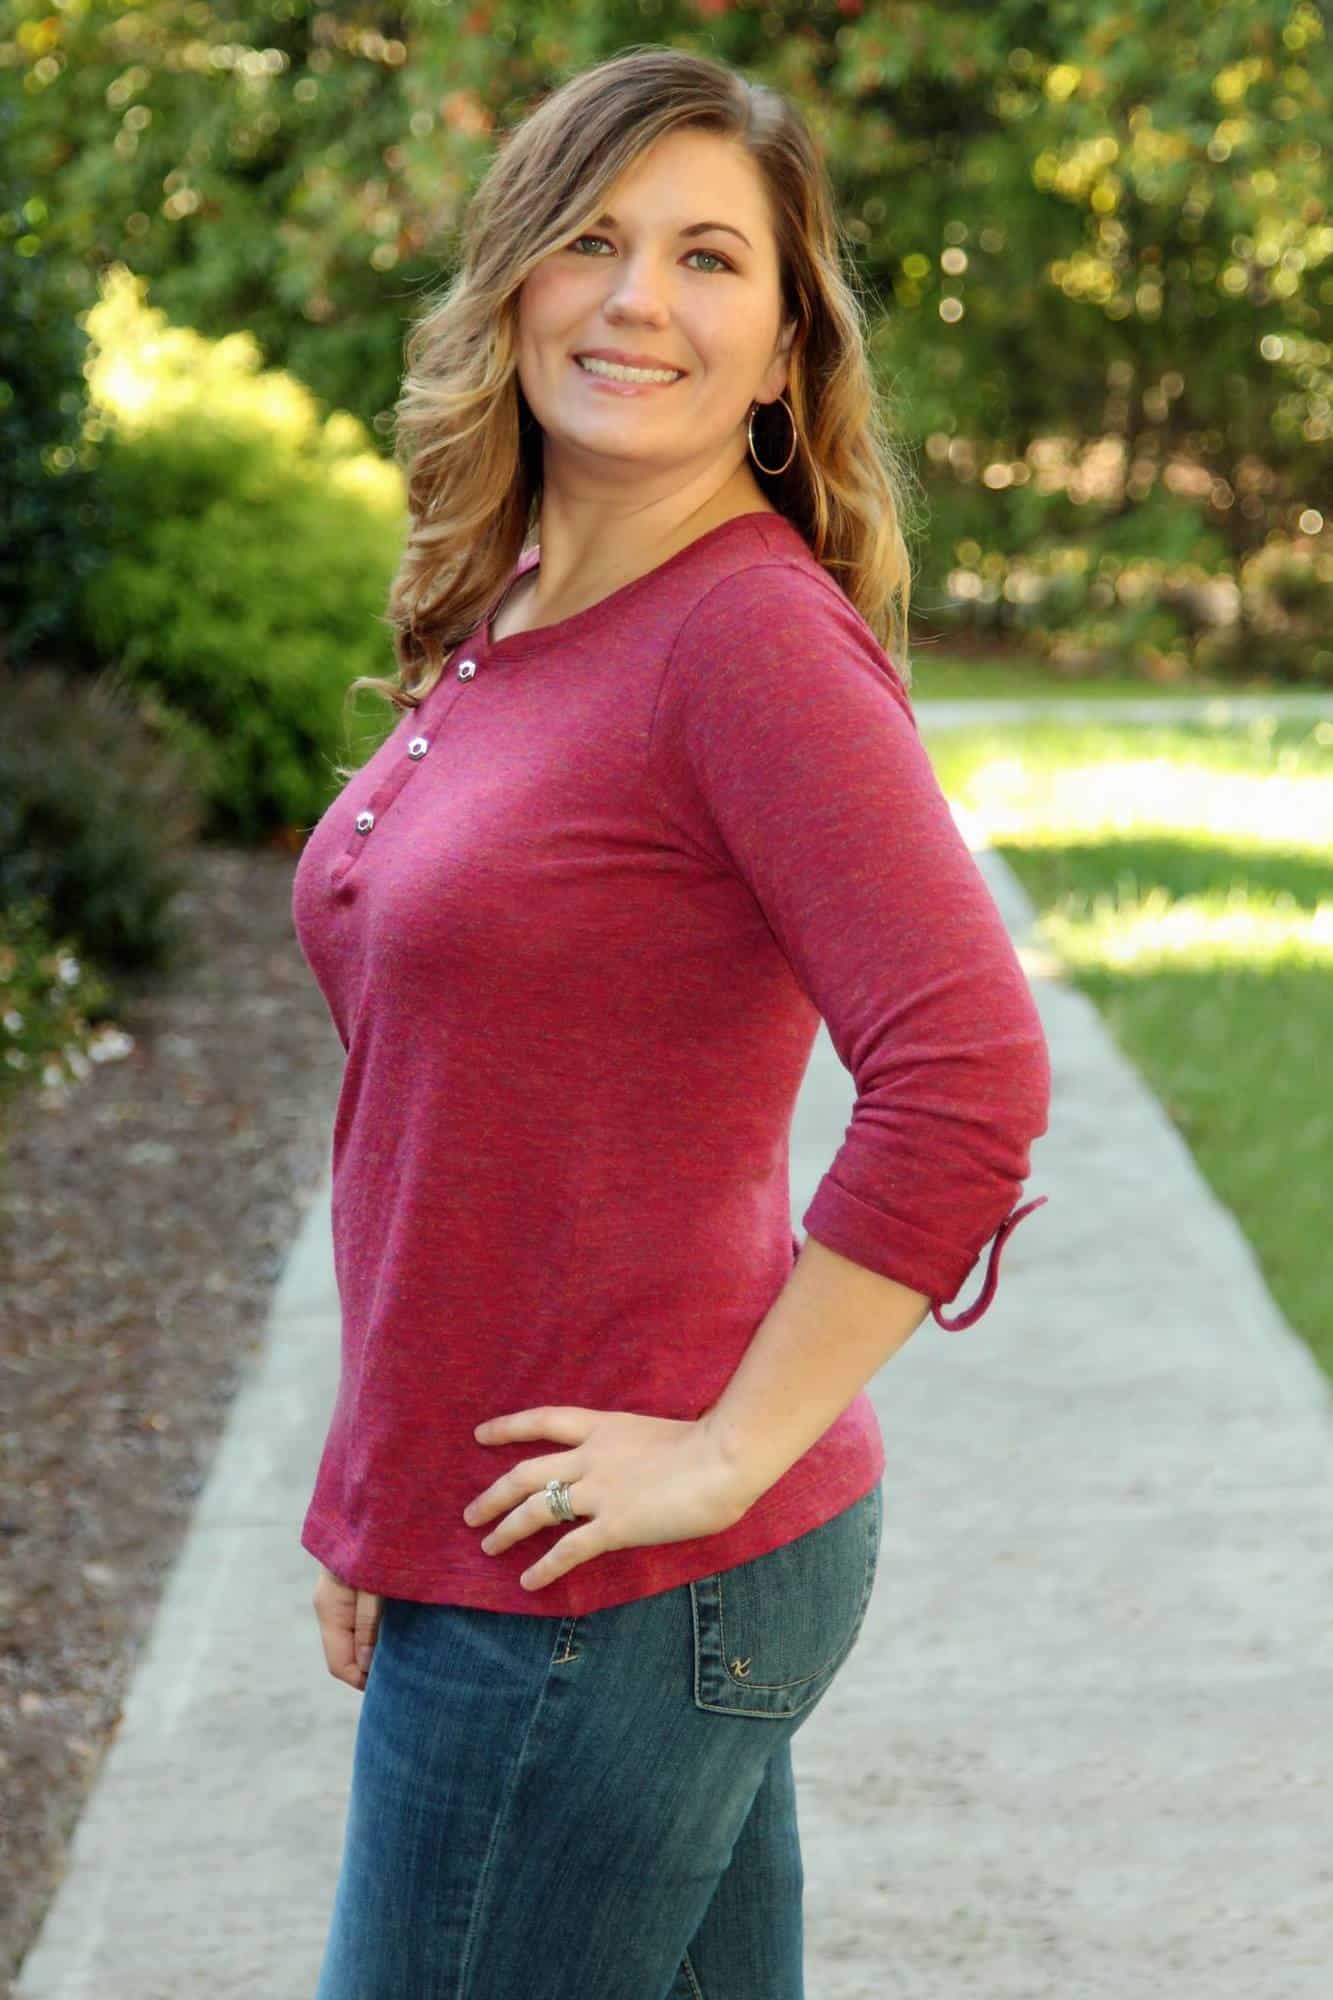
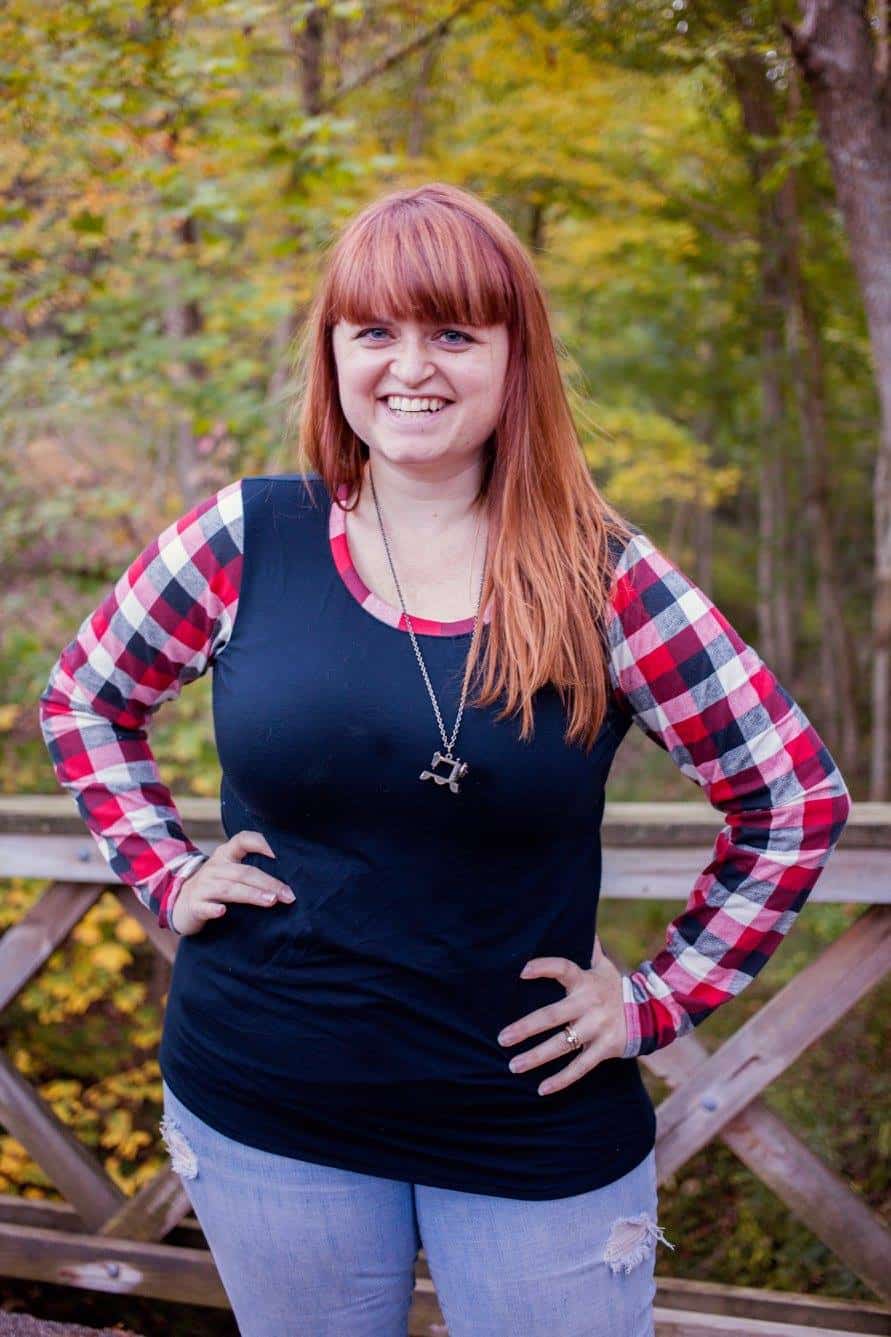
Here are a few examples from our testers! And be on the lookout for the raglan shoulder color block hack later this week. 😉
-
- Sweater Knit
-

- Rayon Spandex/Jersey
-
- French Terry
-

- Crushed Velvet
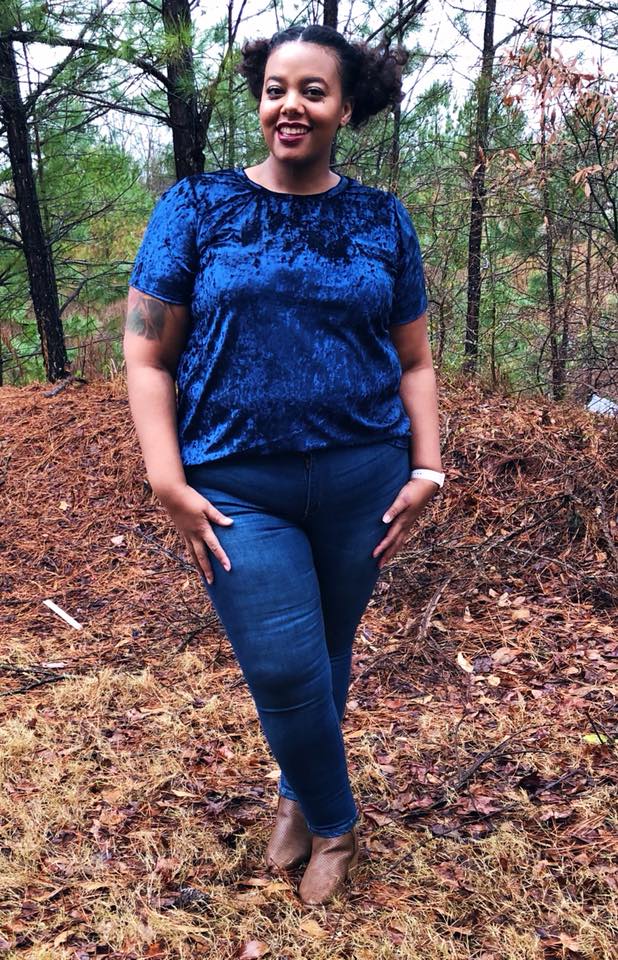
-
- Sweater Knit and Suede accents
-

- Burnout Jersey/Rayon Spandex Placket
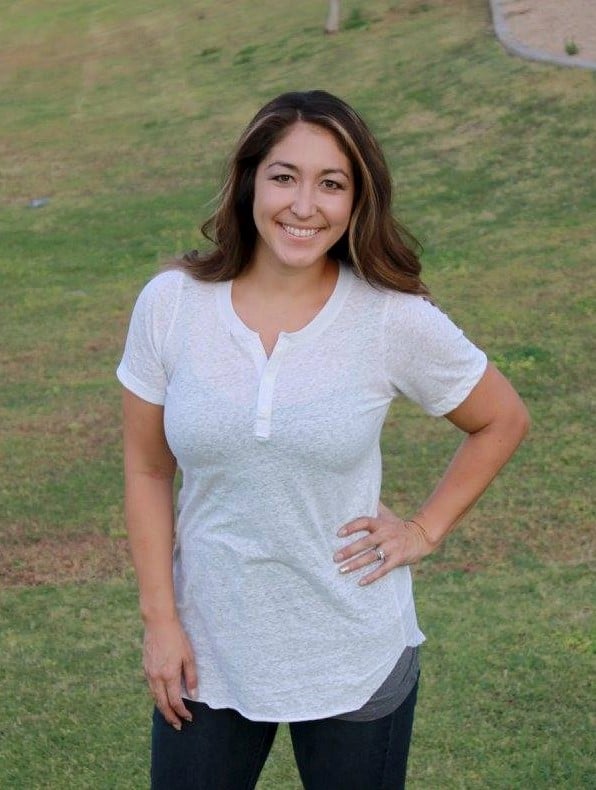
-

- Thermal
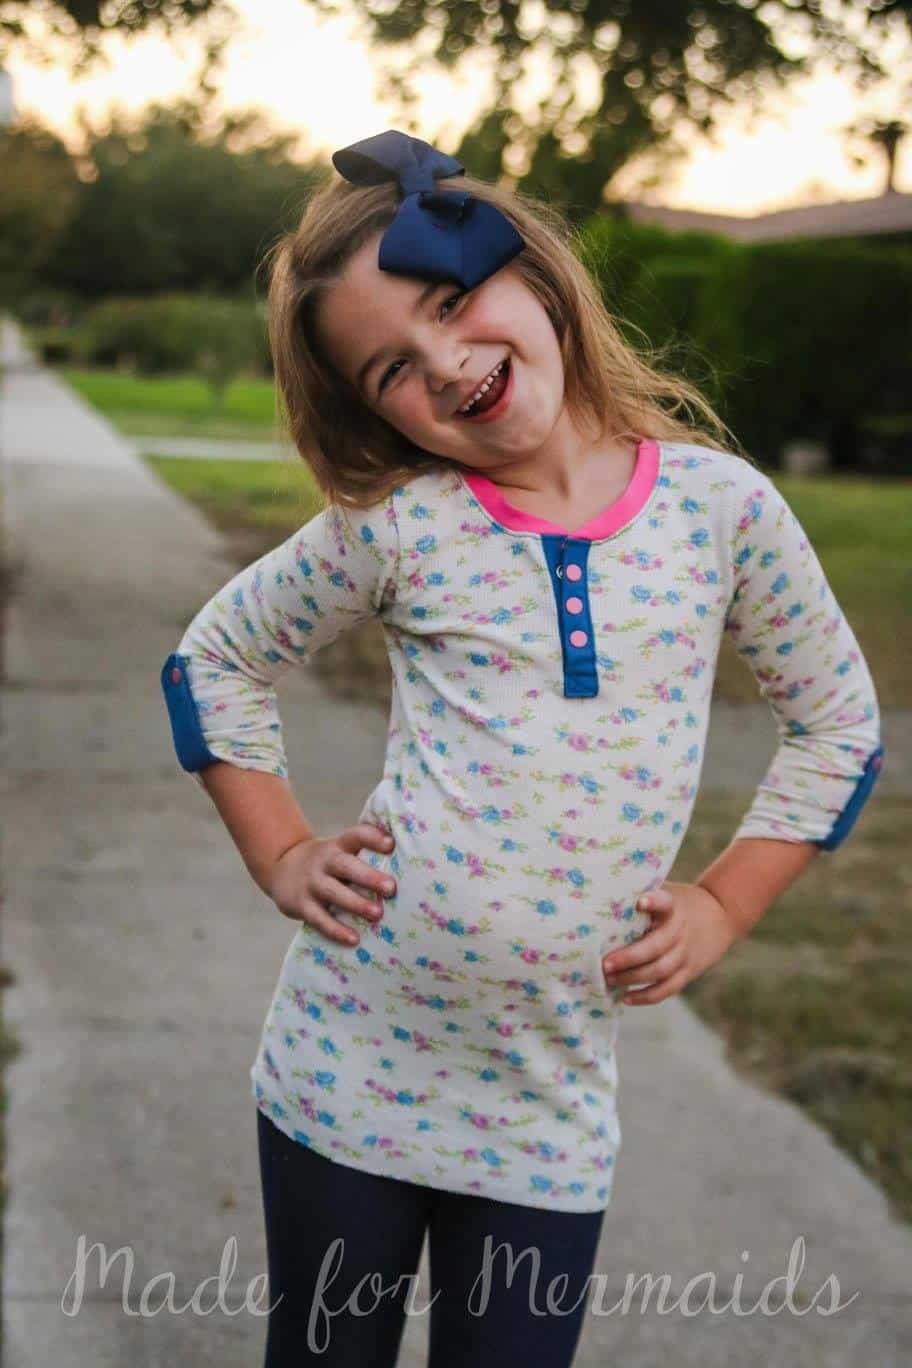
-

- Cotton Lycra
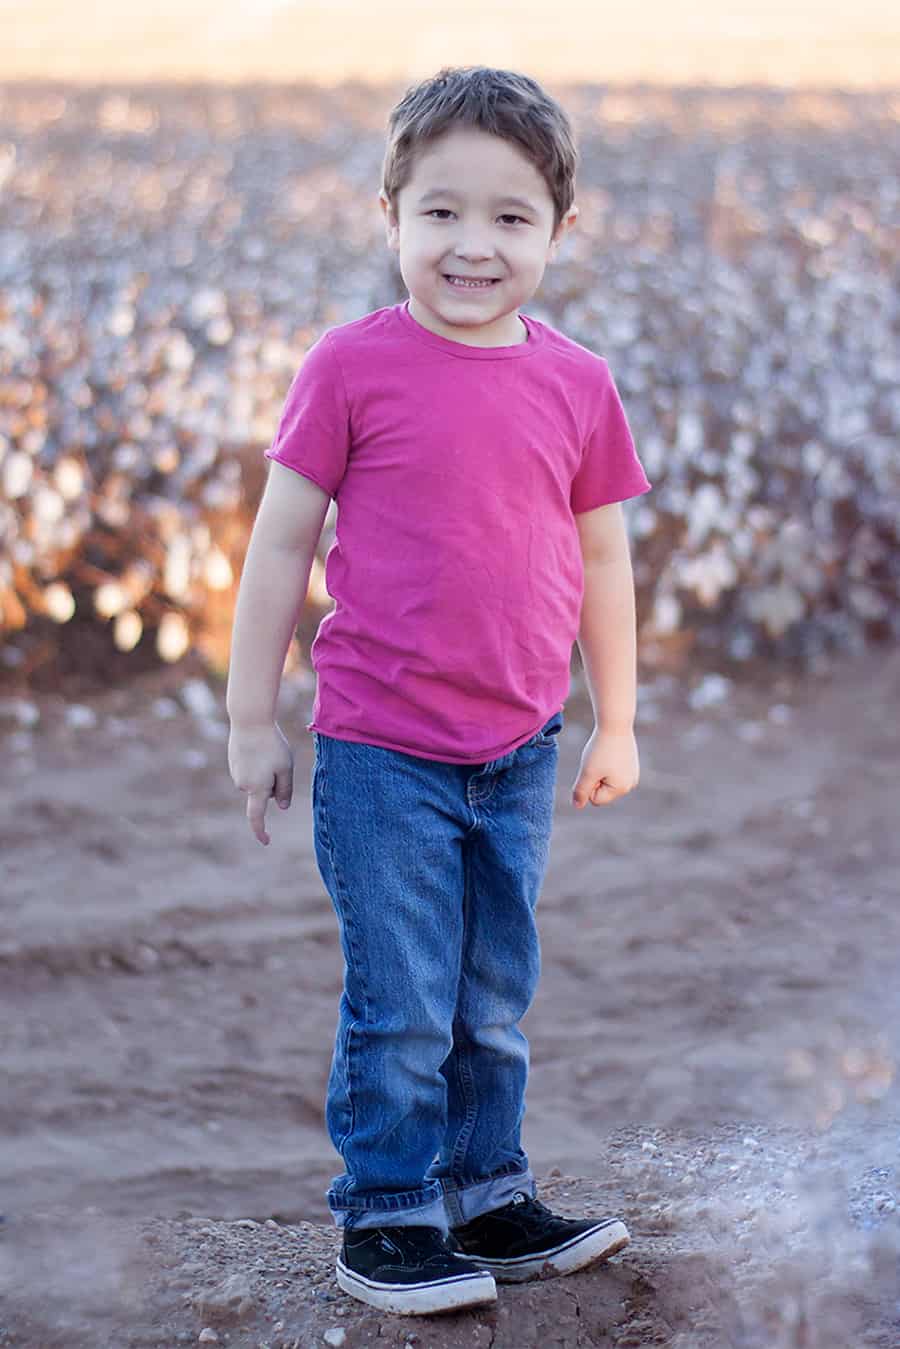
-

- Cotton Lycra
-

- French Terry
MEASURE YOURSELF
The Henley Patterns are all focusing on three measurement points: Chest, Waist and Hips. Judy created an entire post dedicated to measurements and how to properly measure yourself. You can see the full post HERE.
Chest/Full Bust — Full bust is around the fullest/biggest part of your bust. You want the tape as even horizontally as possible. For men/children, the fullest part of their chest is where the measurement needs to be taken.

Hip – This is a deceiving name. It is measured around your fullest/biggest part, which is usually your booty. Try to keep your tape as even horizontally as possible (a mirror really helps on this one!)

Waist– This is your natural waistline. Contrary to most belief, it is NOT your belly button or where you wear your pants (even though you might like high waisted pants). It is taken at the smallest part of your mid section. if you don’t have a very defined natural waist there is a very easy way to find it.
Take any kind of stretch trim, fold over elastic, thin elastic, even a strip of knit will work, and tie it snuggly around your mid section. Now MOVE around, bend walk around, sit down, it will naturally settle on your smallest part. This is your natural waist.


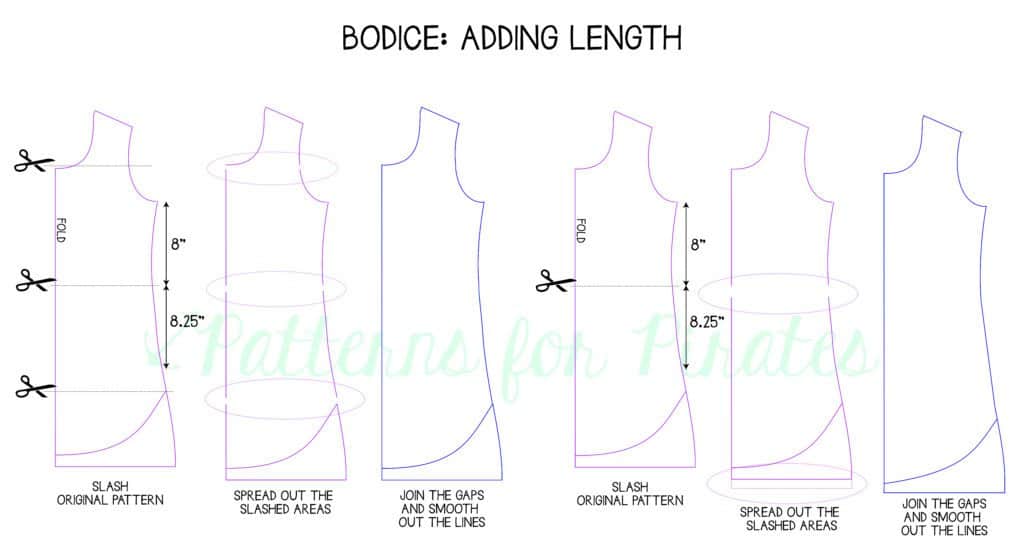
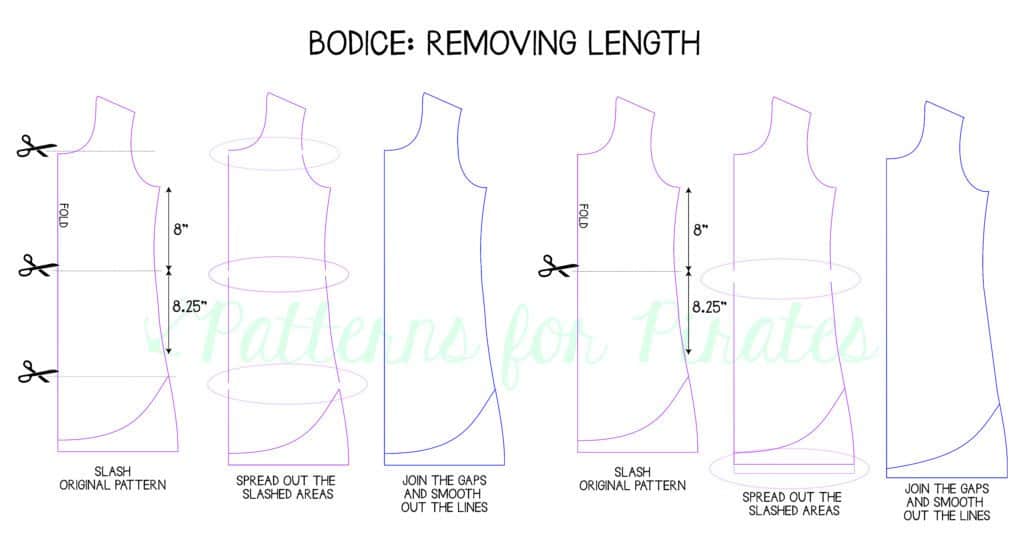
What if you’re taller or shorter than the pattern is drafted for?
Wouldn’t you know that we have an entire blog post dedicated to helping you with that as well? The “rule of thumb” is to add/subtract 1/2″ for every inch that you are different than the pattern is drafted for. For example, at 5’10” there is a 5″ difference so I would need to add 2.5″ throughout the pattern. If I were 5’1″ then I would remove 2″ of length since there is a 4″ difference.
Head HERE to read more about it!
What if your measurements don’t fall within one size?
That is why you’re sewing for yourself, isn’t it? To get the perfect fit? Well then let’s get that perfect fit!
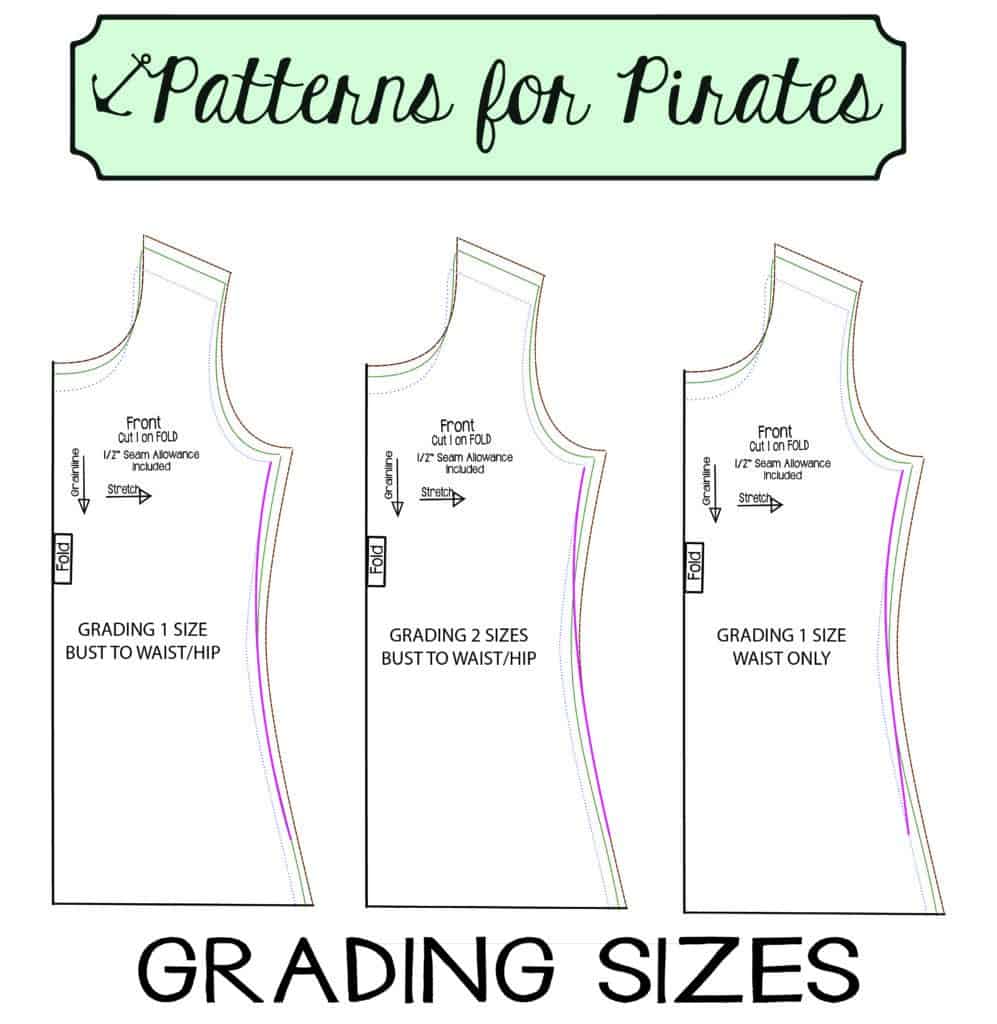
Now that you have determined your size and if you’d like to grade, how do you do it? Below are a few examples of grading for a larger waist and hip size. Any adjustments should be made to both the FRONT and BACK pieces. Do not be discouraged if your measurements put you within different or larger sizes than ready-to-wear store-bought clothes as pattern sizing does not translate the same. Our bodies come in all shapes and sizes, and we are all uniquely beautiful.
PRINT YOUR PATTERN(S)
All three henley patterns are “no-trim” pages. That is exactly what it sounds like! The pages are set up to print and be taped/glued together without needing to get scissors out and trim the edges before assembly. It makes this step of the process even quicker. Need help assembling the no-trim pages? No problem! Judy created this fabulous video for us. Go check it out HERE. (You have to be a member of the P4P Facebook group to be able to see the video.)
Before you hit print, BE SURE that your pages are set to print at 100%, no scaling. We still recommend printing only the first page and measuring your 1″ x 1″ (or 4cm x 4cm) square to verify the print size is correct before printing the entire pattern. Even if your square is off by the teeniest amount, the entire pattern will be affected and your dress will not fit. Save yourself some ink and paper (and fabric!) and verify the settings first.

Whew! That was a lot of information to take in, wasn’t it?
Hopefully now, your pattern is printed, taped/glued together, you have properly measured for your size, cut the pattern pieces out and are ready to start cutting into your pretty fabrics tomorrow. If you’re sewing along with us, be sure to tag @PatternsforPirates and #P4PHENLEYSAL on Instagram. Don’t forget to join us on the P4P event page either: Henley SAL on Facebook.
**The links won’t be active until the scheduled date.
January 14: Announcement.
January 15: Choosing Your Fabrics, Printing + Measuring.
January 16: Cutting Fabric.
January 17: Placket.
January 18: Sleeves.
January 19: Attaching Neckband + Hood.
January 20-21: Catch-Up Days.
January 22: Recap + Winners Announced!
P4P University – knit cuffs

Ahoy Pirates! In our first P4P University blog of the year I wanted to give you a few tips and tricks to make adding knit cuffs to your projects easy peasy. Whether you’re sewing for yourself, your significant other or your little ones, adding cuffs to your sleeves or leg openings can be a tedious job. We can change that!
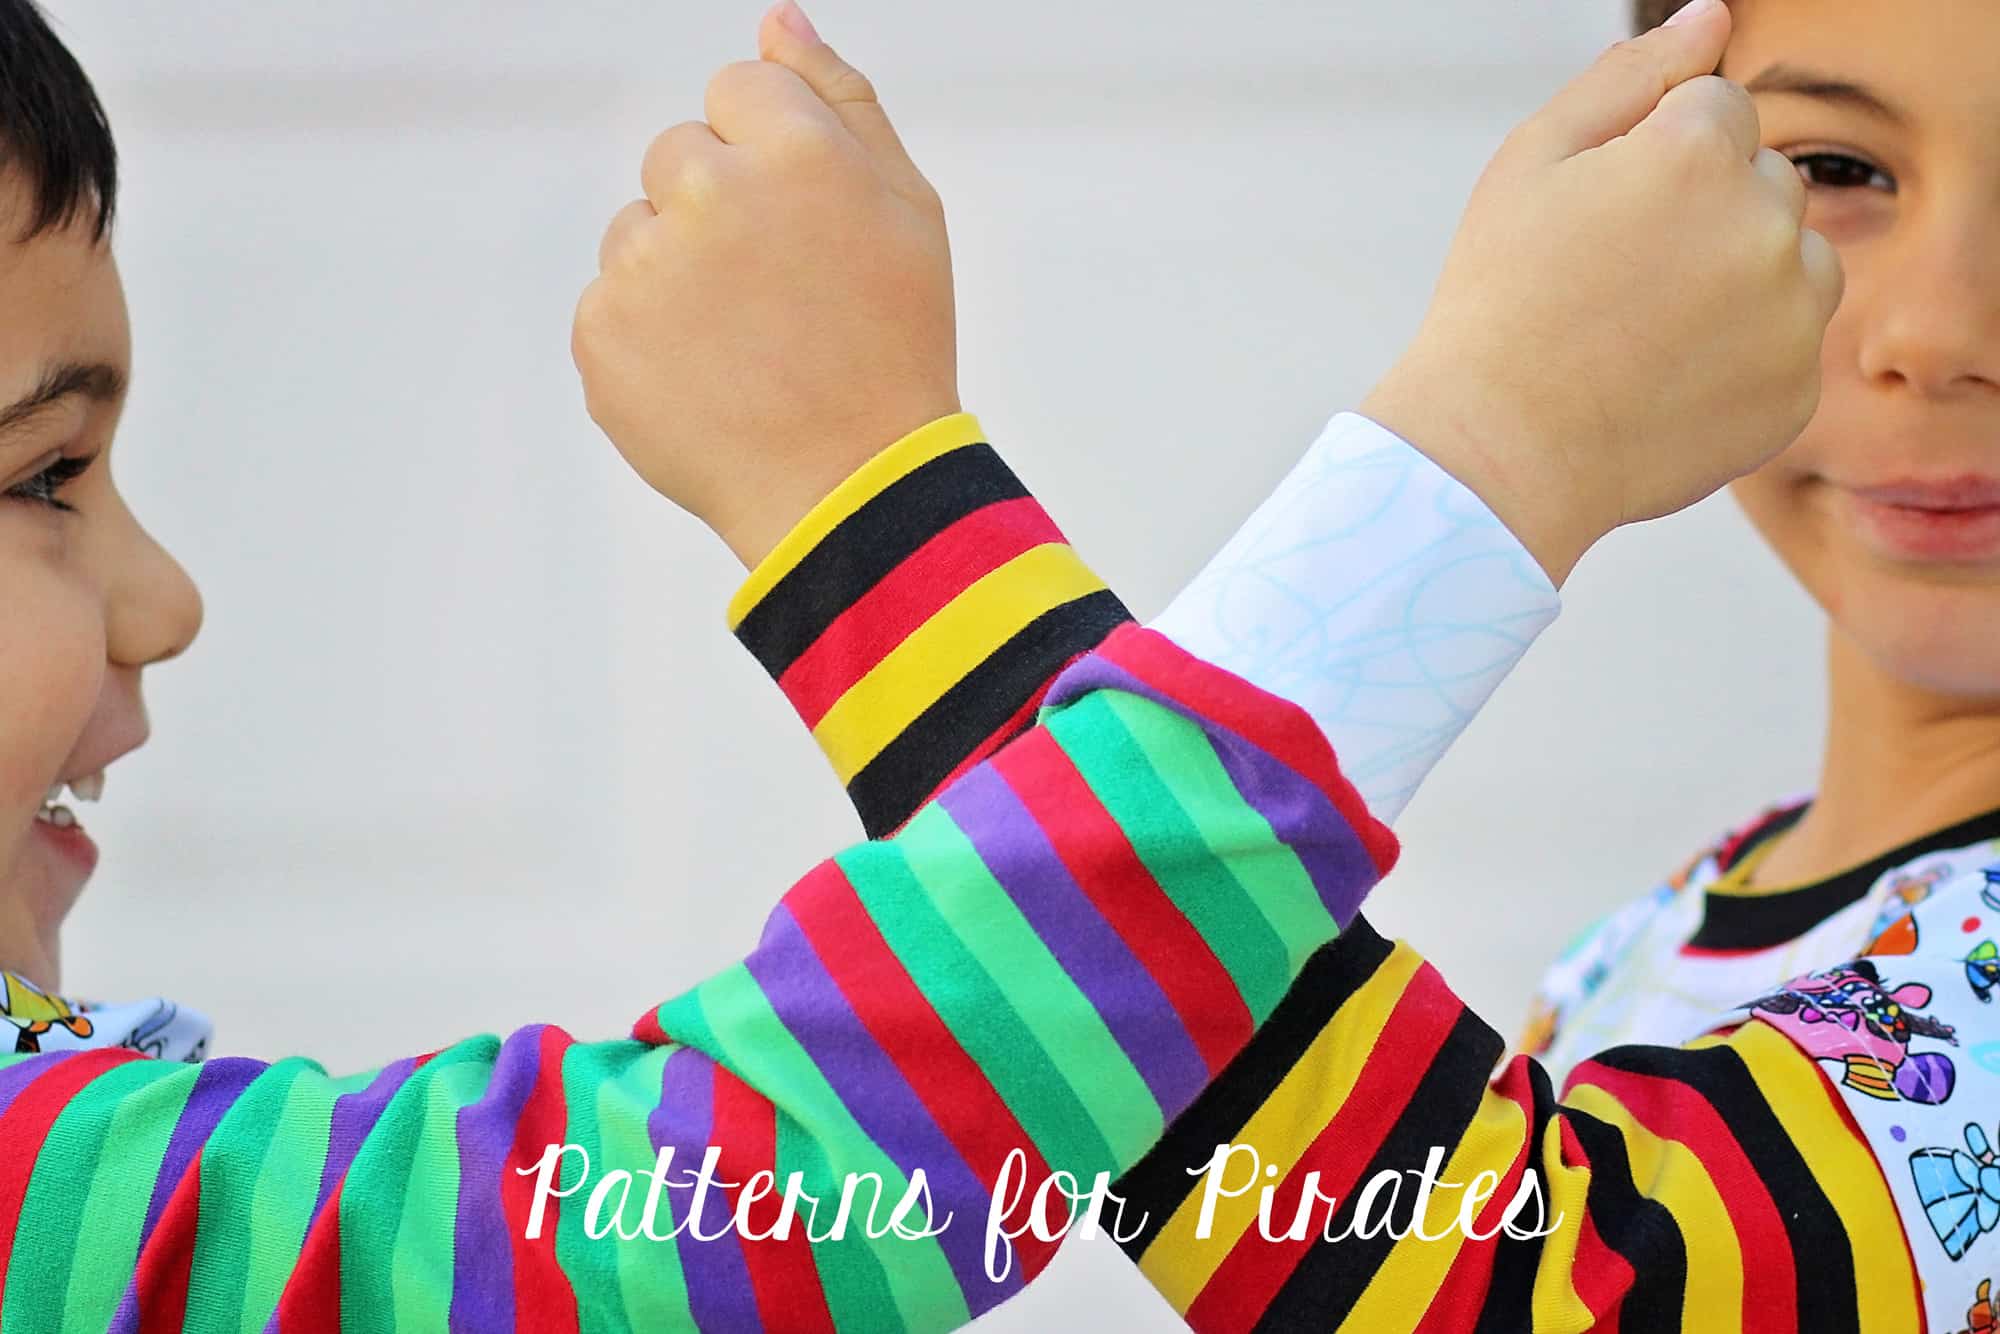
*Choose the right fabric for the cuff!
As I mentioned in the Neckbands 101 blog post, choosing the correct fabric for your cuffs will make a huge difference. The best one is rib knit or ribbing. If you do not have any ribbing handy or the colors you have do not work for your project the next best thing would be cotton spandex. I mainly use cotton spandex in for my kids’ shirts and joggers cuffs as I like to coordinate it with the main fabric. Whatever fabric you pick, make sure it has at least 50% stretch and excellent recovery.
*Always cut the cuff with the greatest stretch horizontally.
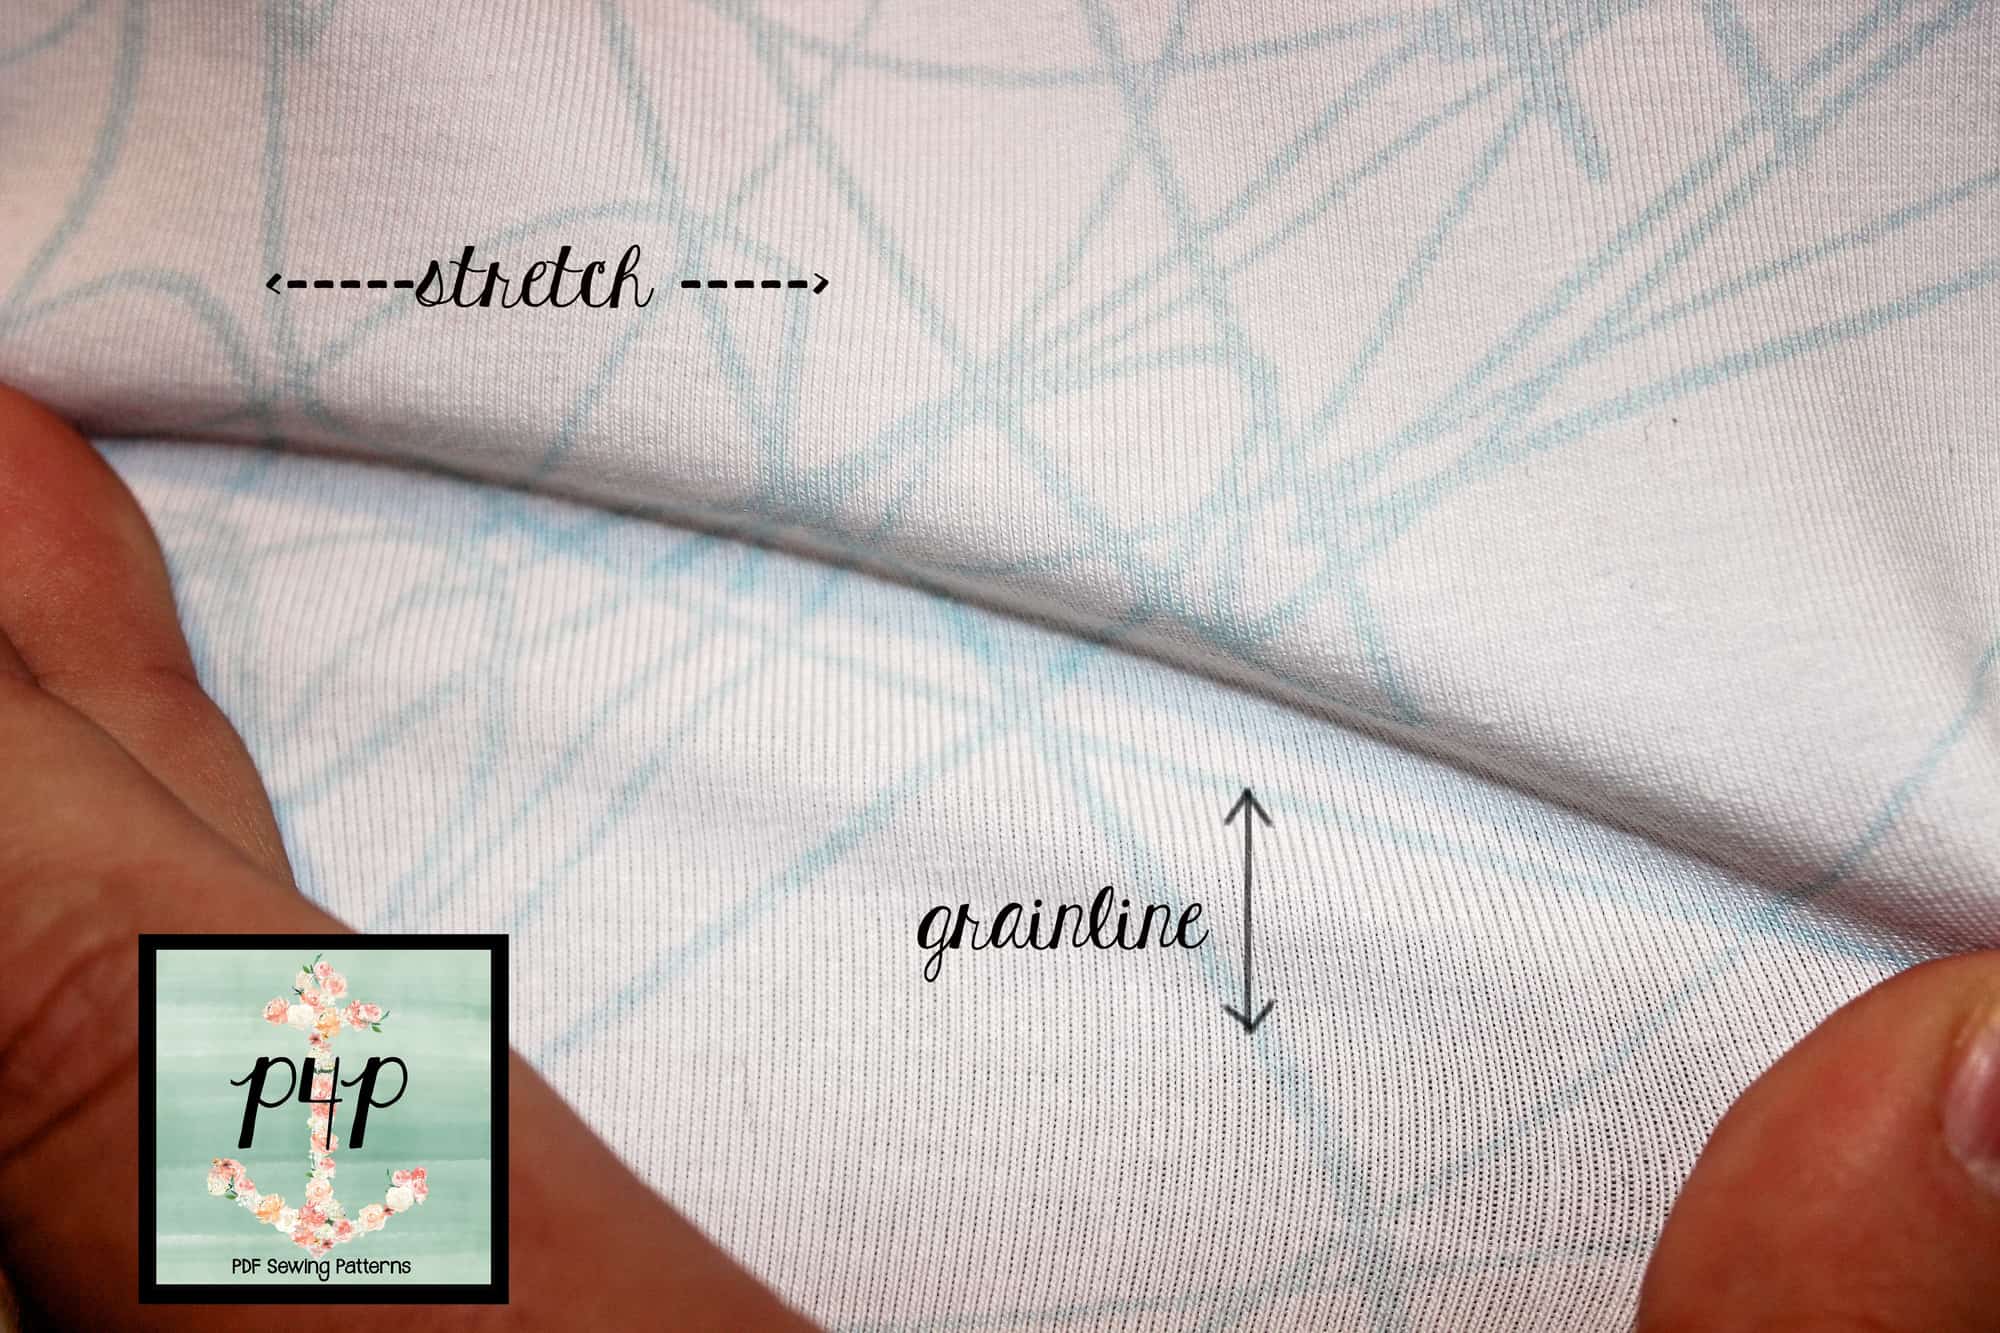
Always cut your cuffs cross grain! Even if the fabric you use stretches over 50% in both directions, you should never cut against the grain. Read all about the importance of “the grain” in Roberta’s blog post, When It Goes Against the Grain.
*Press your cuffs!
I know I talk about pressing a lot in my blogs, but you have to believe me, it makes your sewing life so much easier. I recommend grabbing those cuffs and giving them a good steam press as soon as you cut your fabric. This will create a memory hem that will make it so much easier to fold them once you sew the “loop” closed.
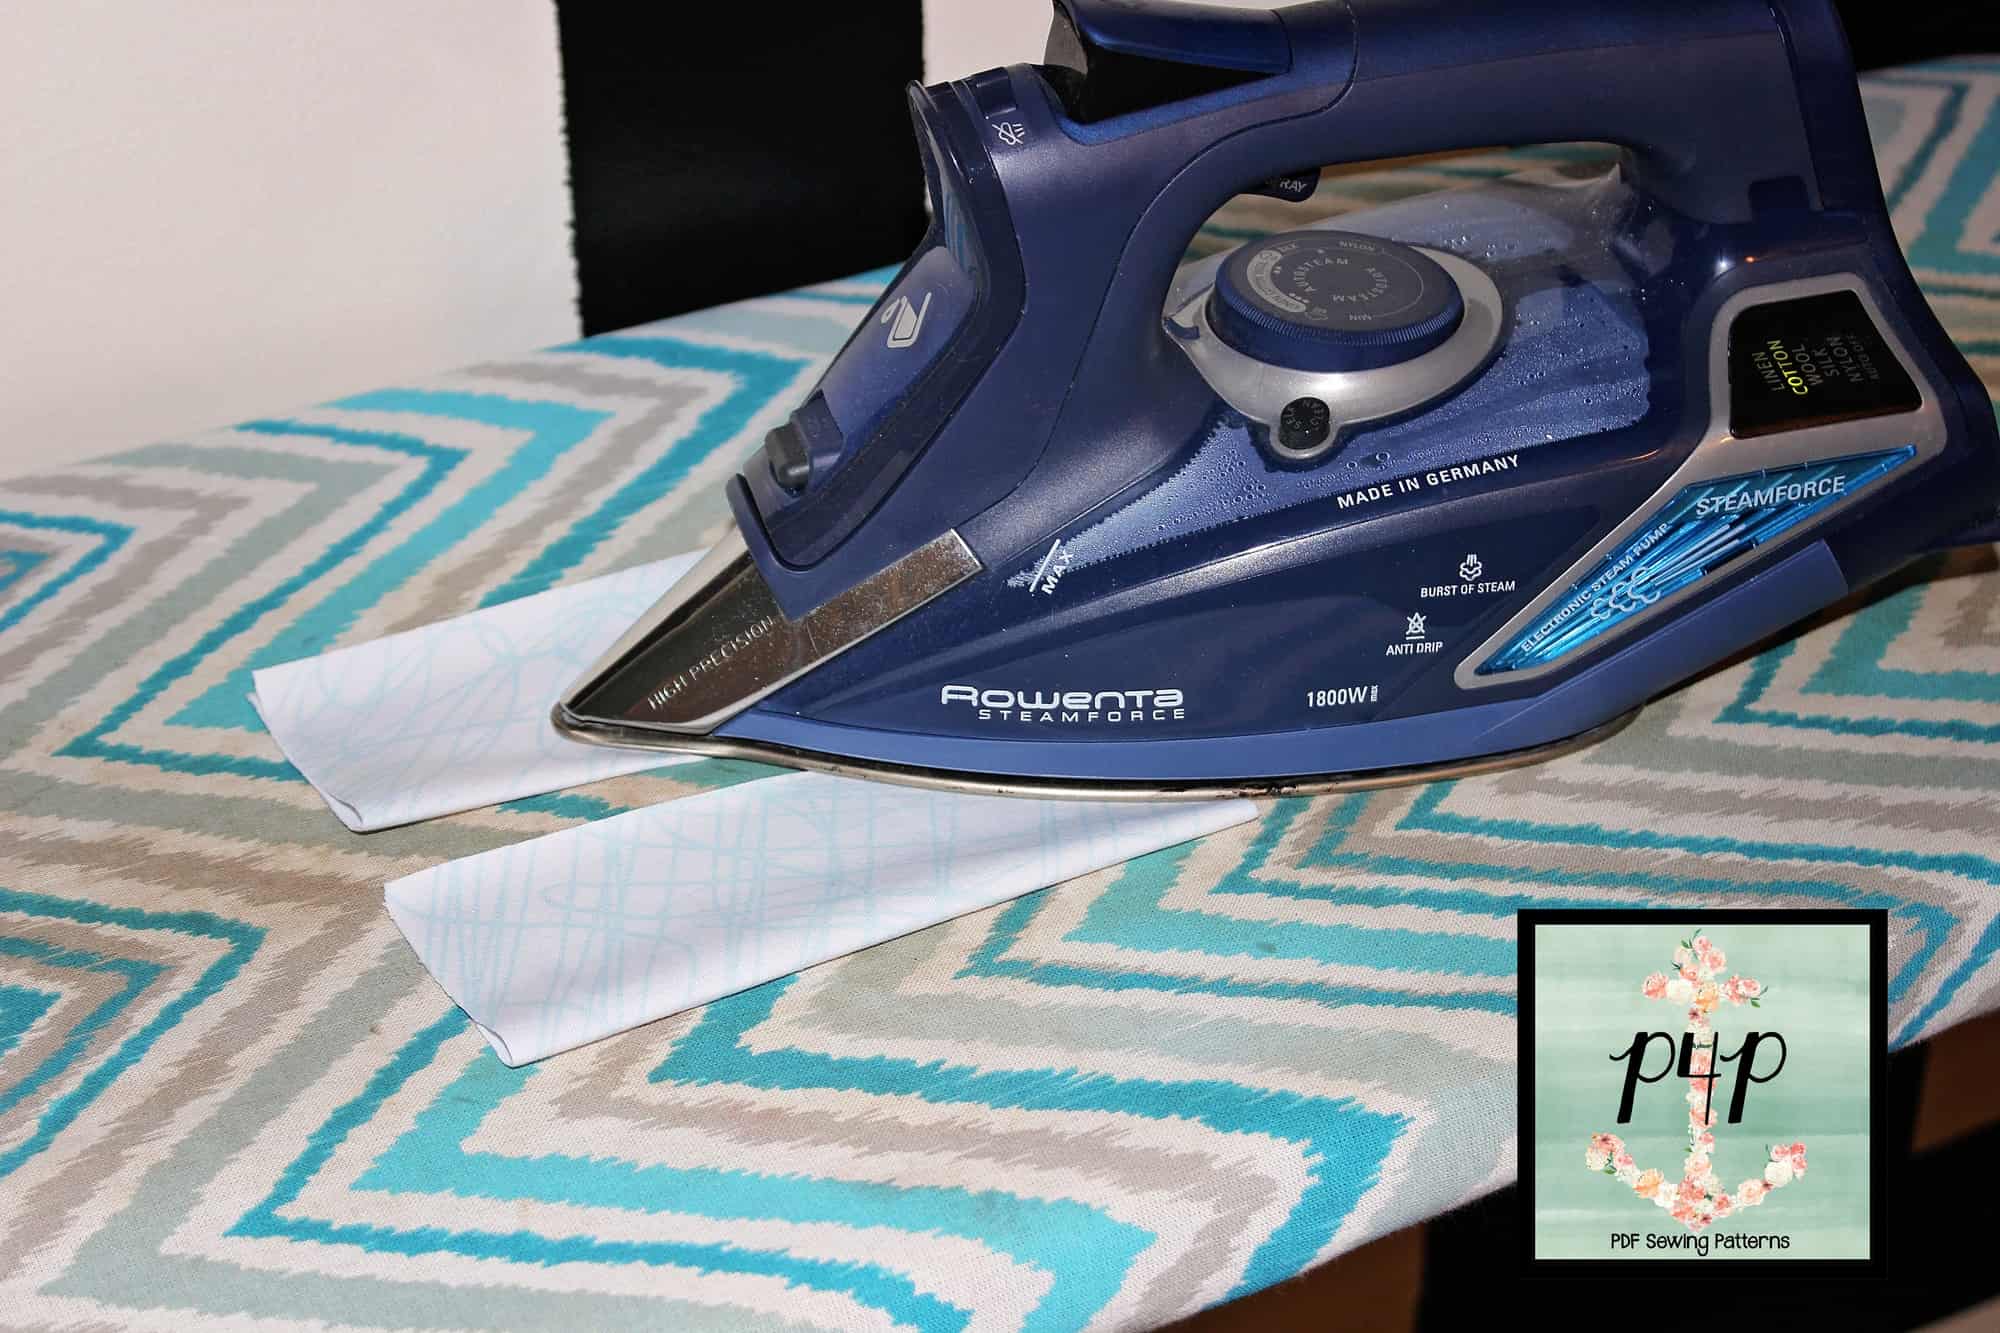
Press your cuffs after you sew them on too! 🙂
*Snip the seam allowance to create less bulk
This is one of tricks for creating less bulk at he seam. Once you sew the cuff to create a loop, grab your sharpest scissors and make a cut as close to the stitch as possible without, of course, snipping the stitch.
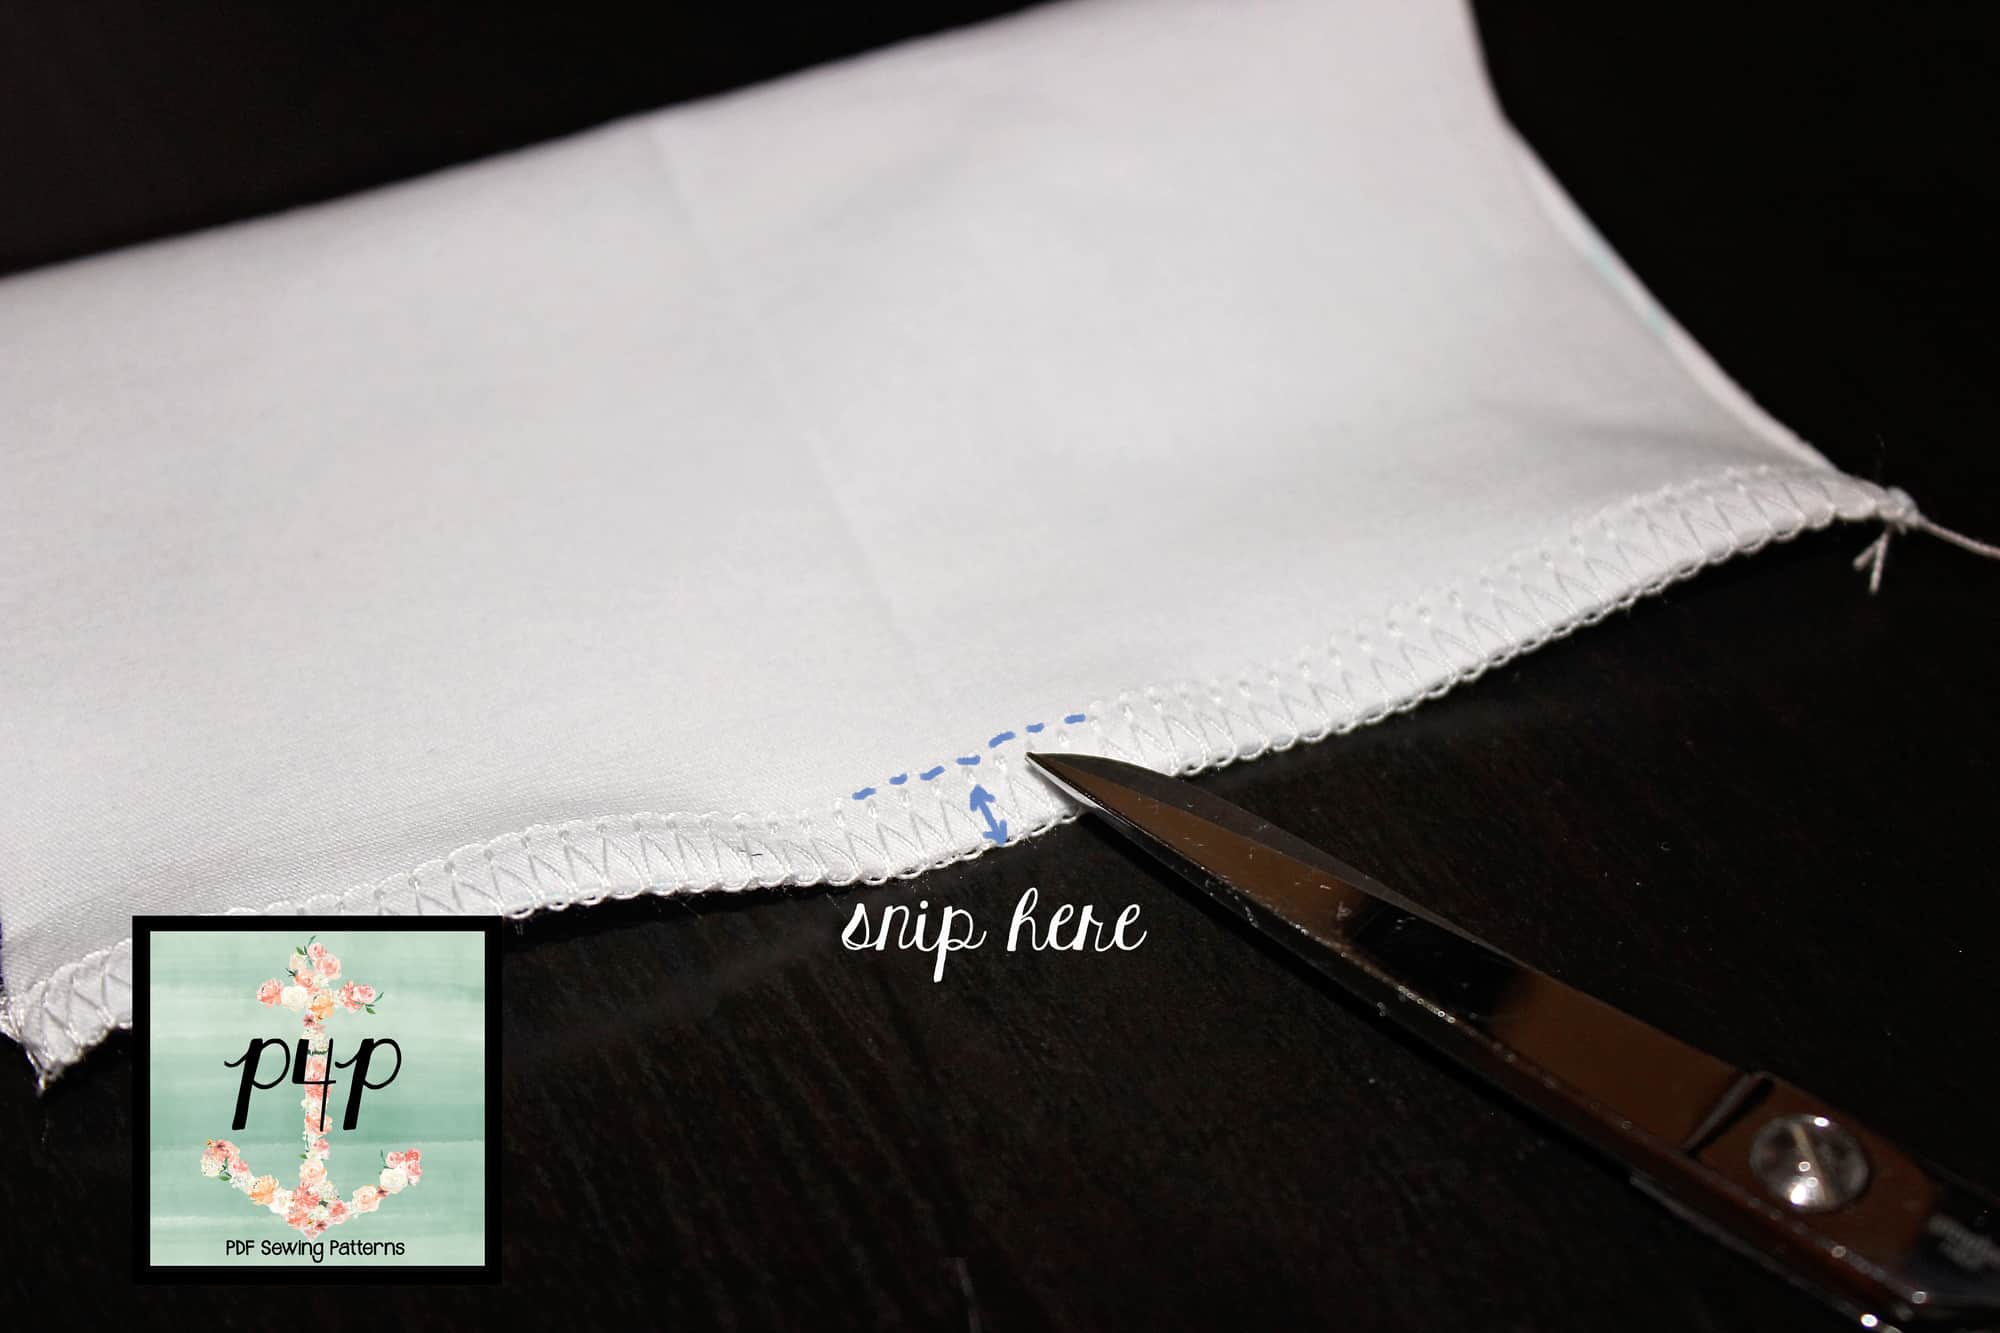
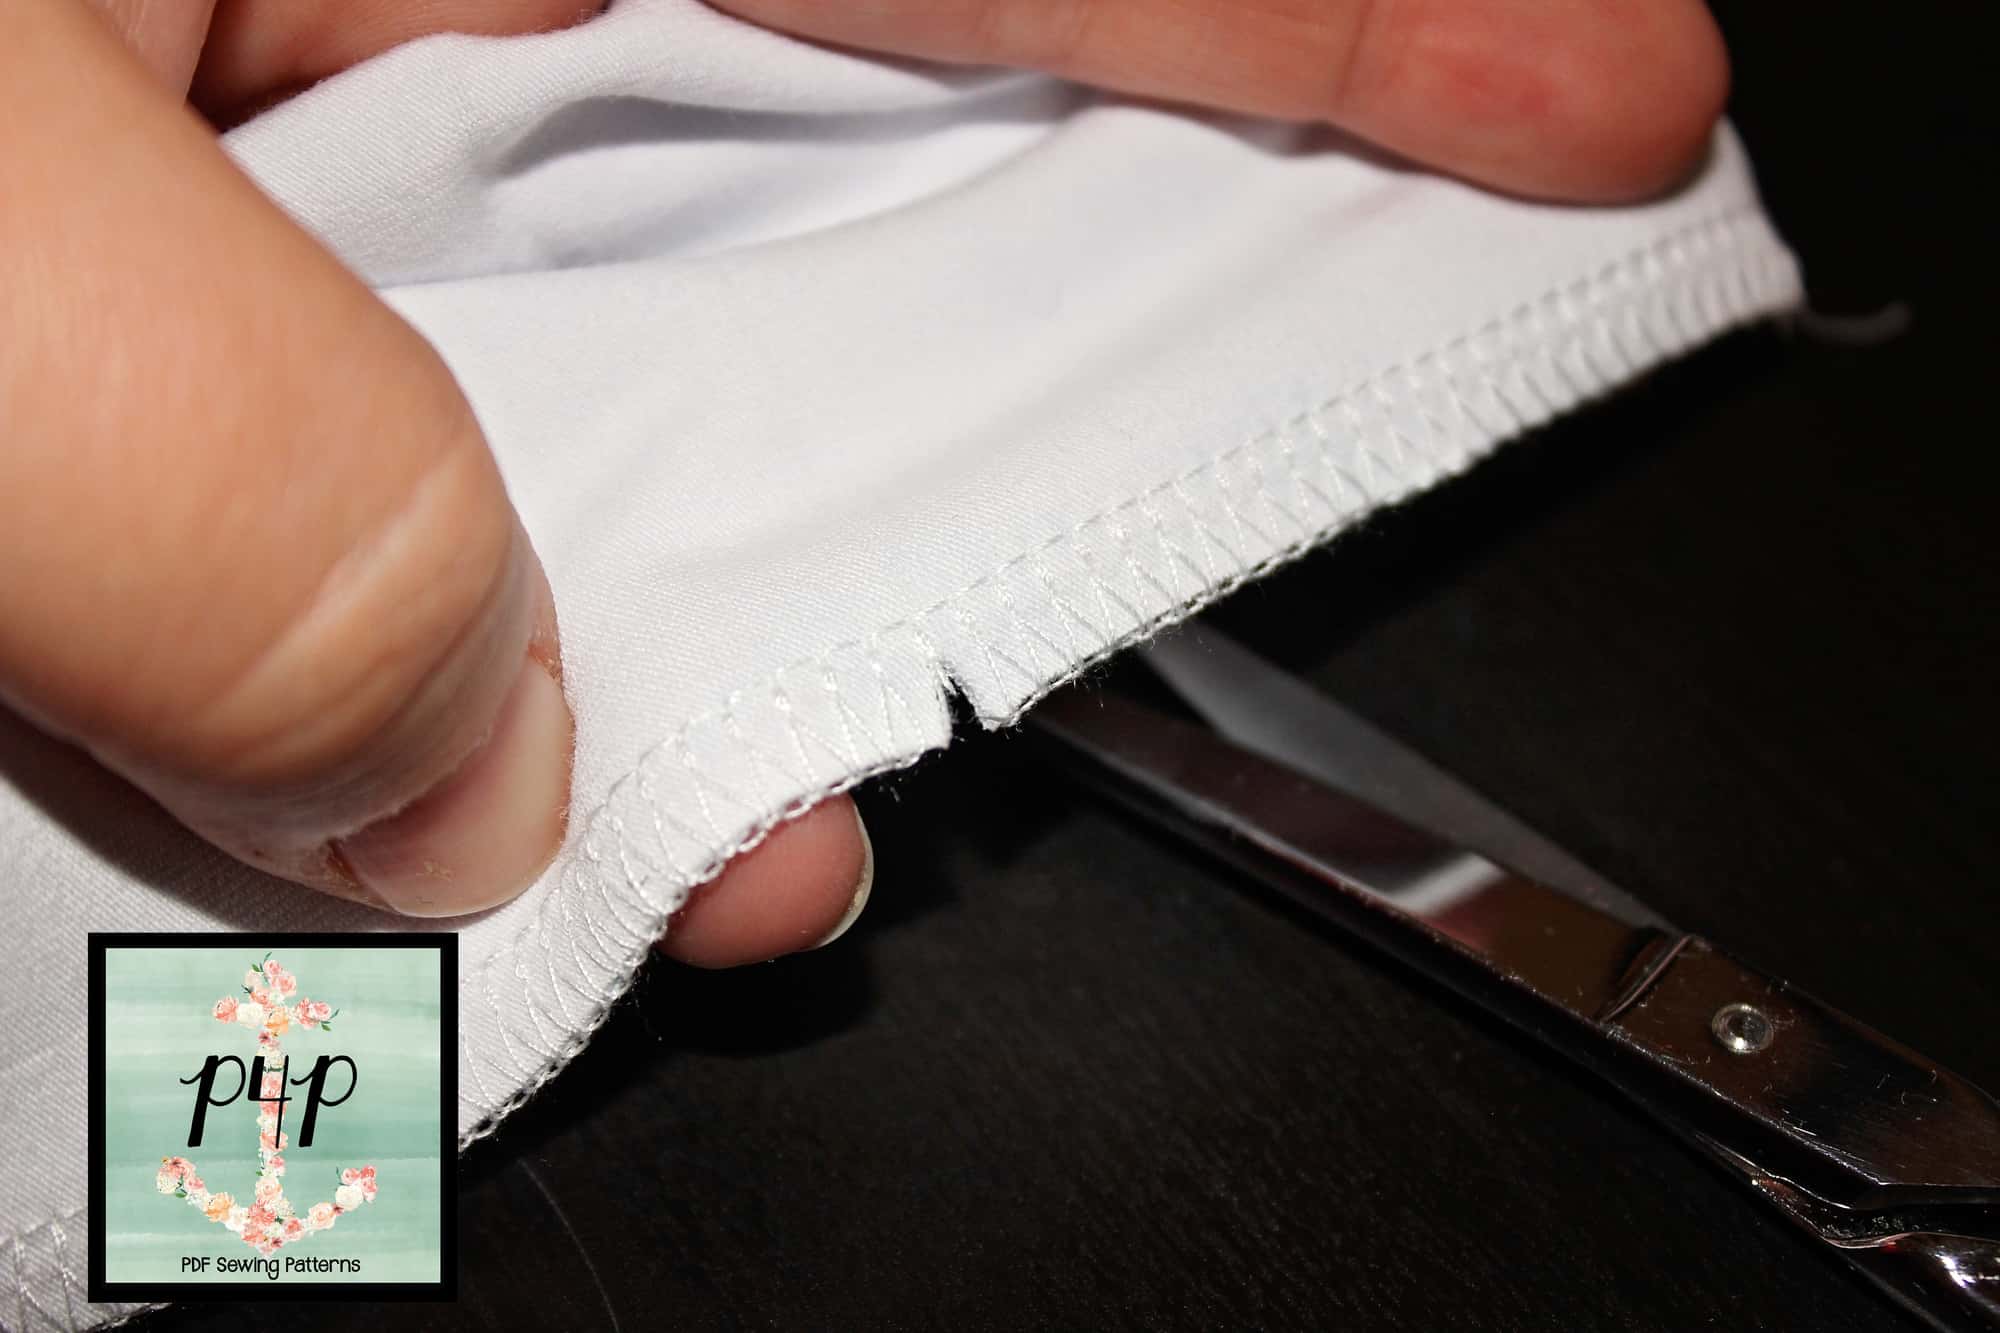
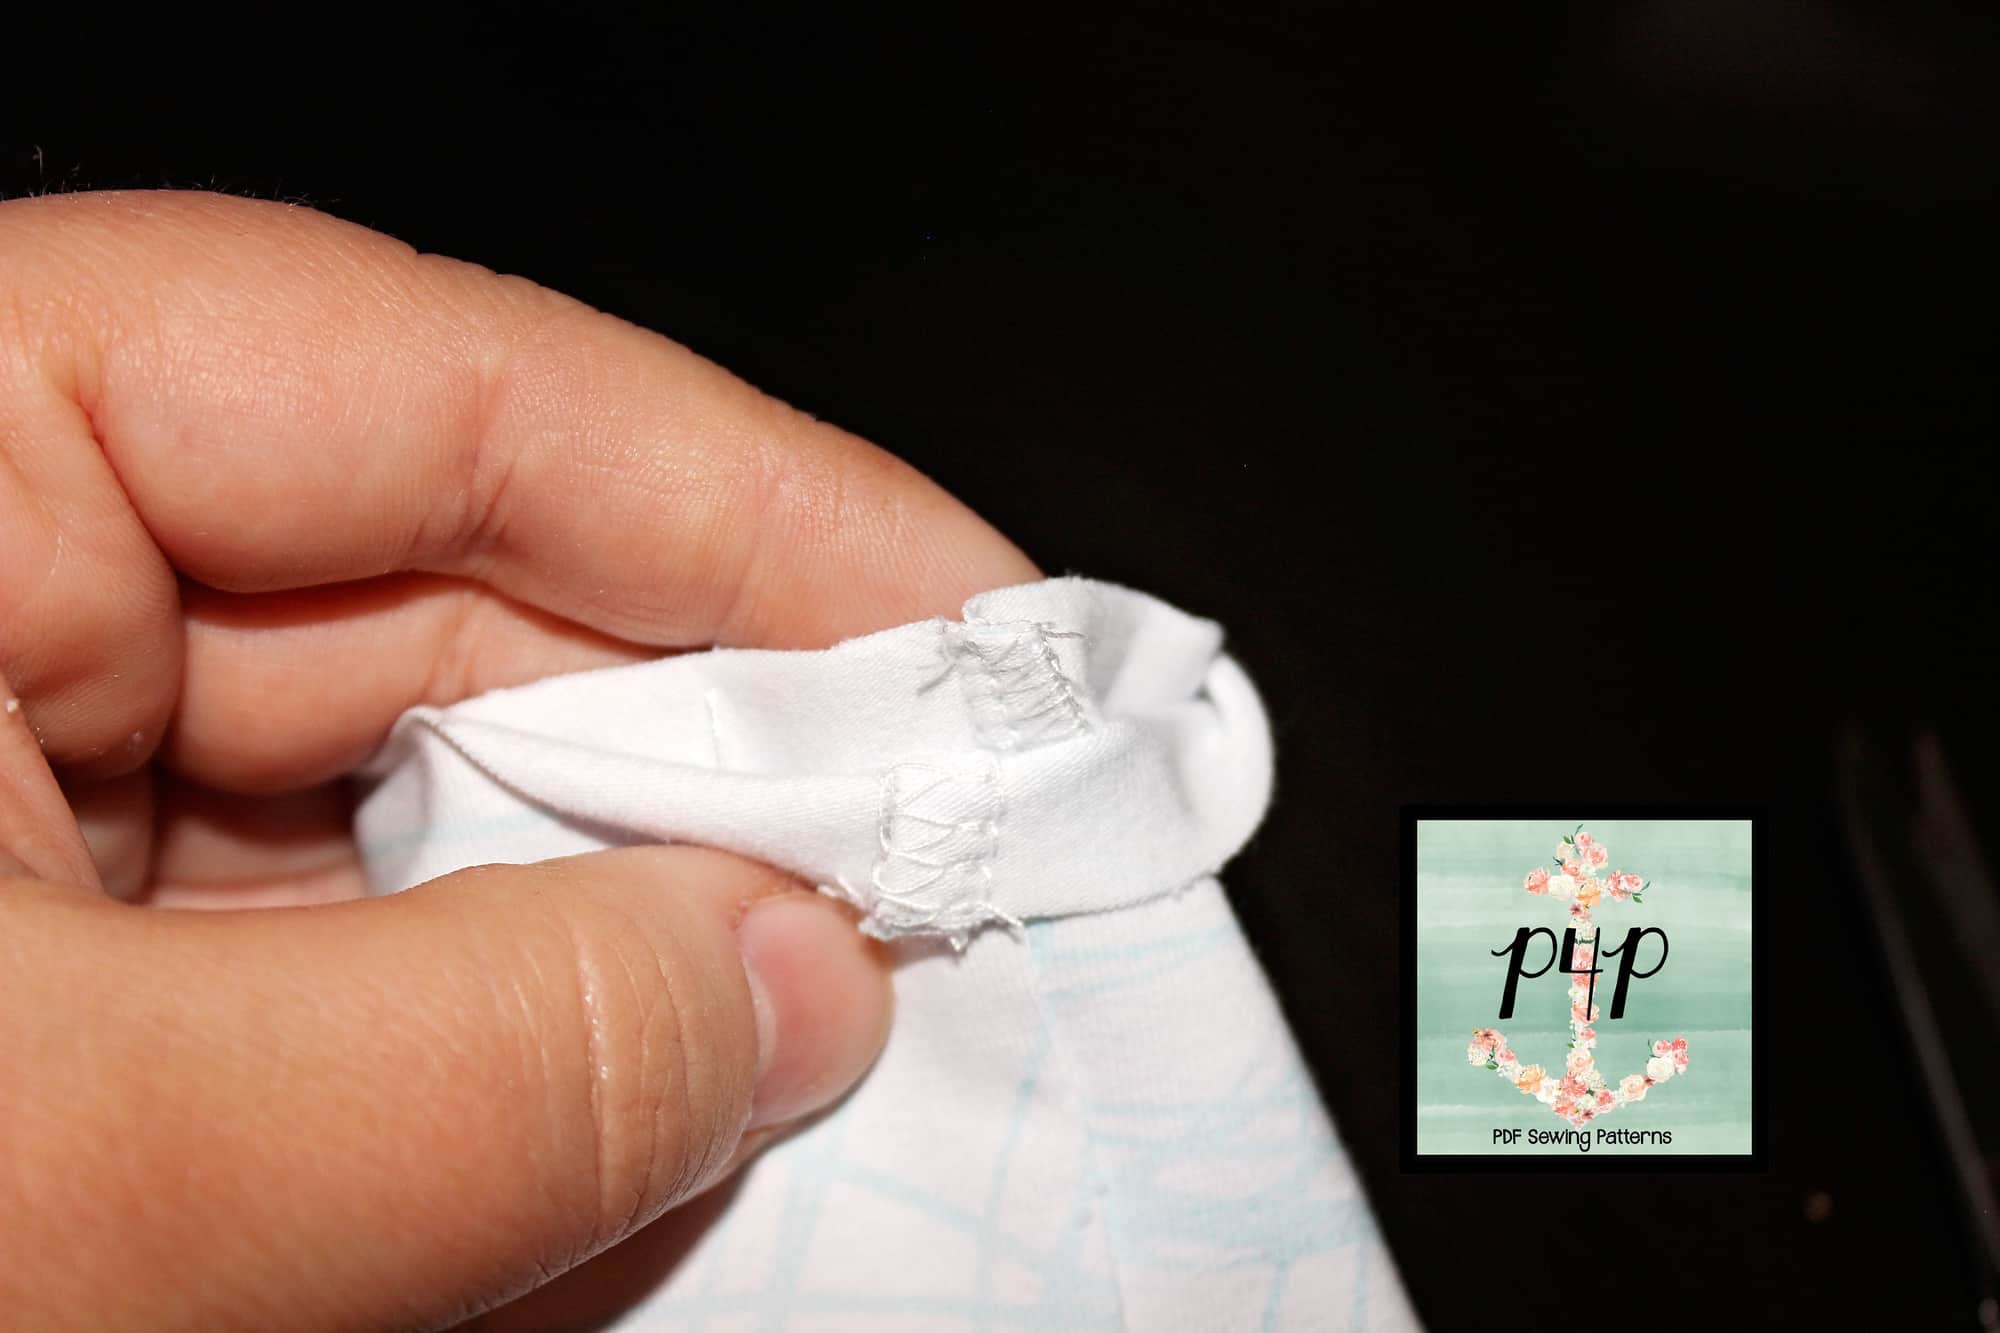
That little snip will make it so easy to please the seam allowances on opposite sides when you sew fold the cuff. In doing so, you will have so much less bulk at the seam, your serger will thank you! 🙂
*Place your sleeve inside the cuffs
Mark the quarter points on the sleeve (or leg) opening as well as the cuffs. I find that for the smallest of sizes, marking just the half point is sufficient.
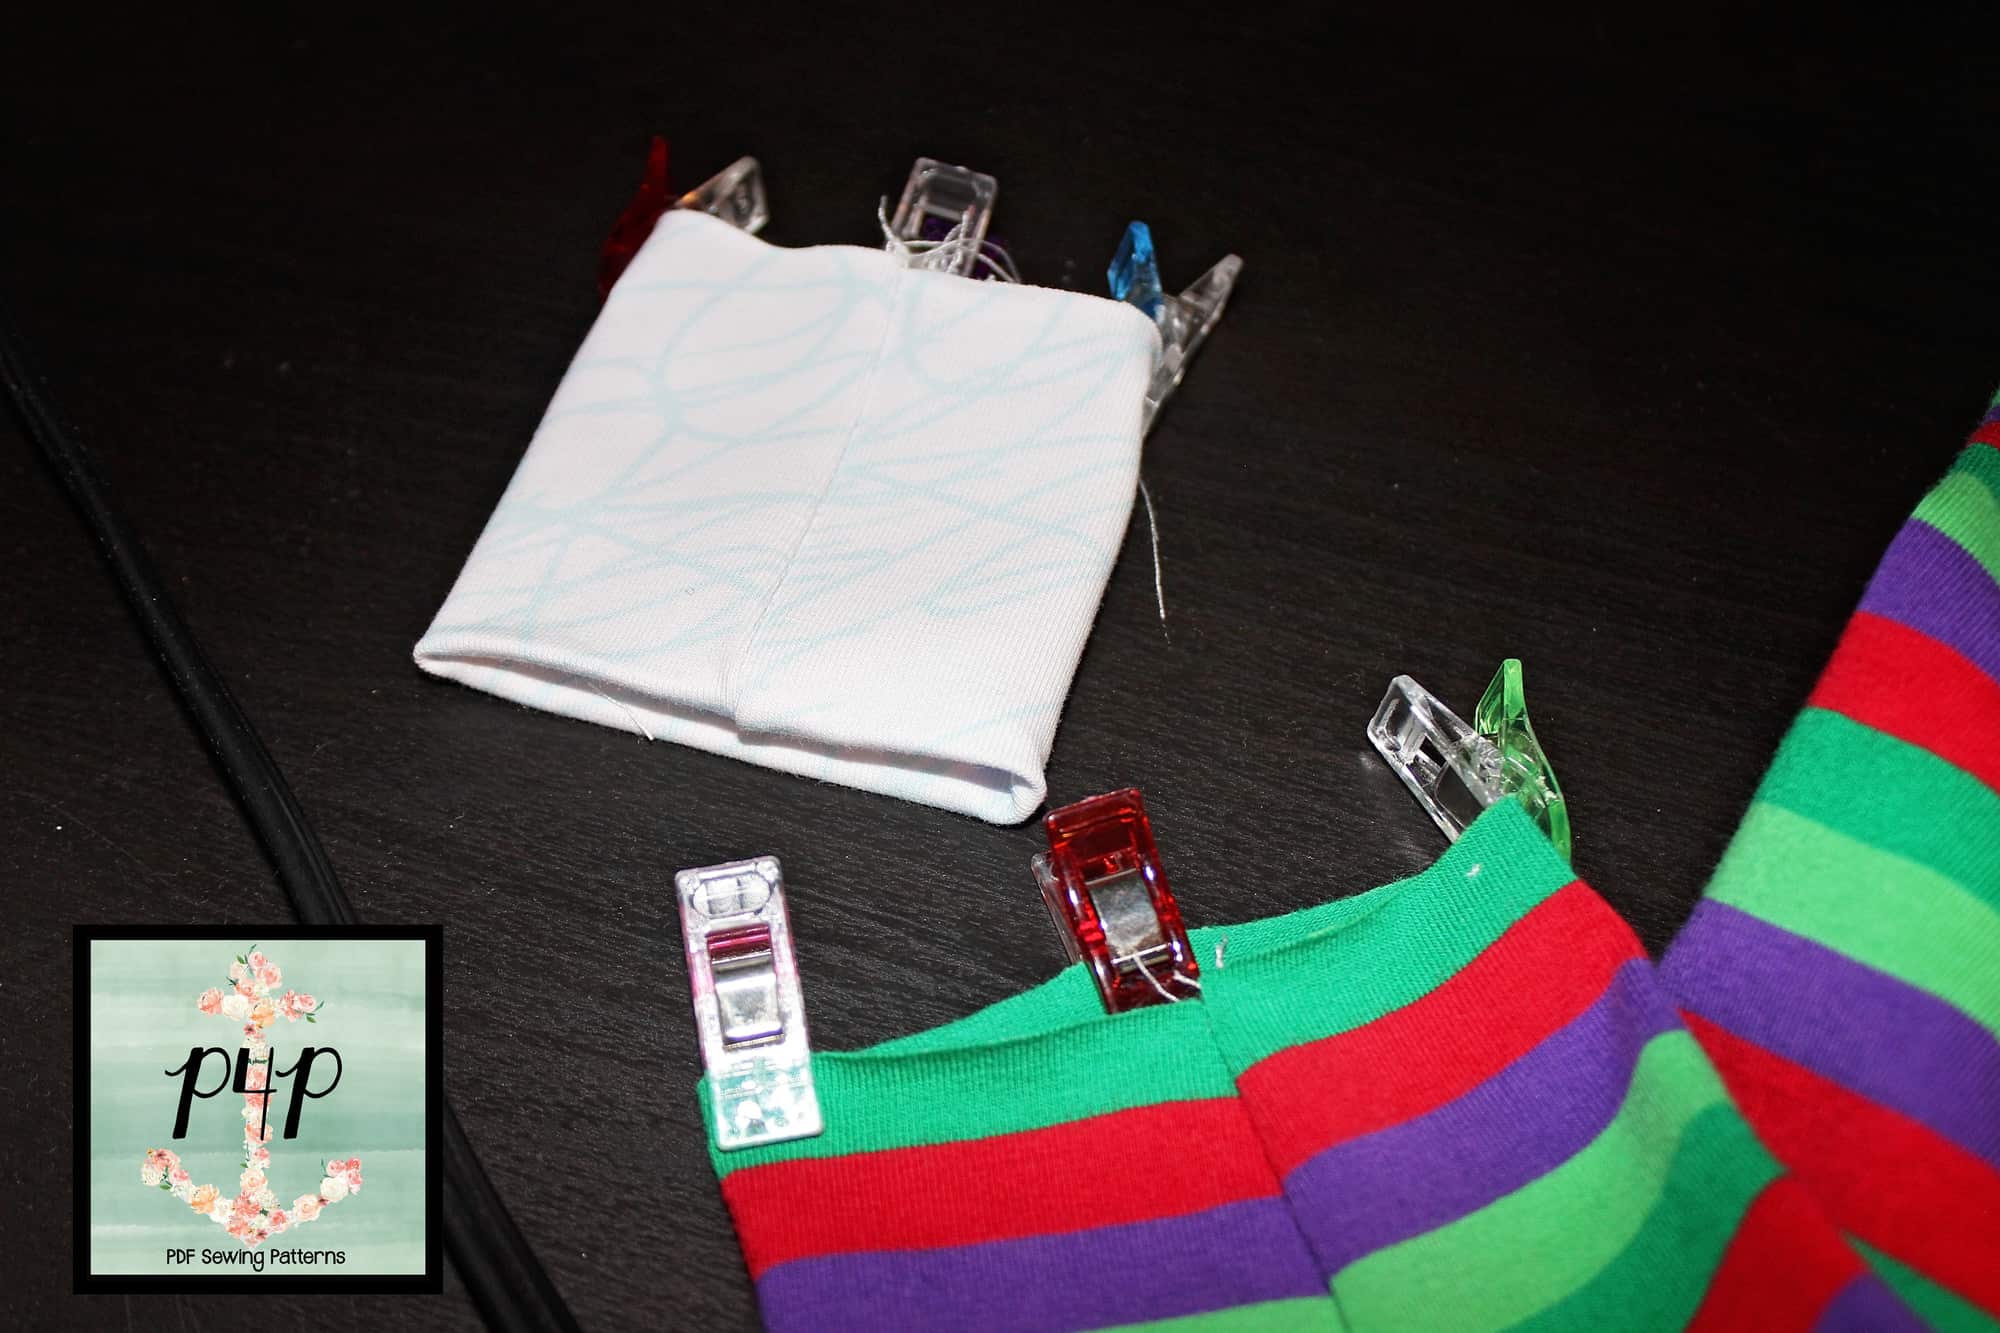
To make sure you will not have your seam allowance on the outside of your sleeve (or ankle) 😉 place the right side of your sleeve inside the cuff and match the quarter (or half way) points.
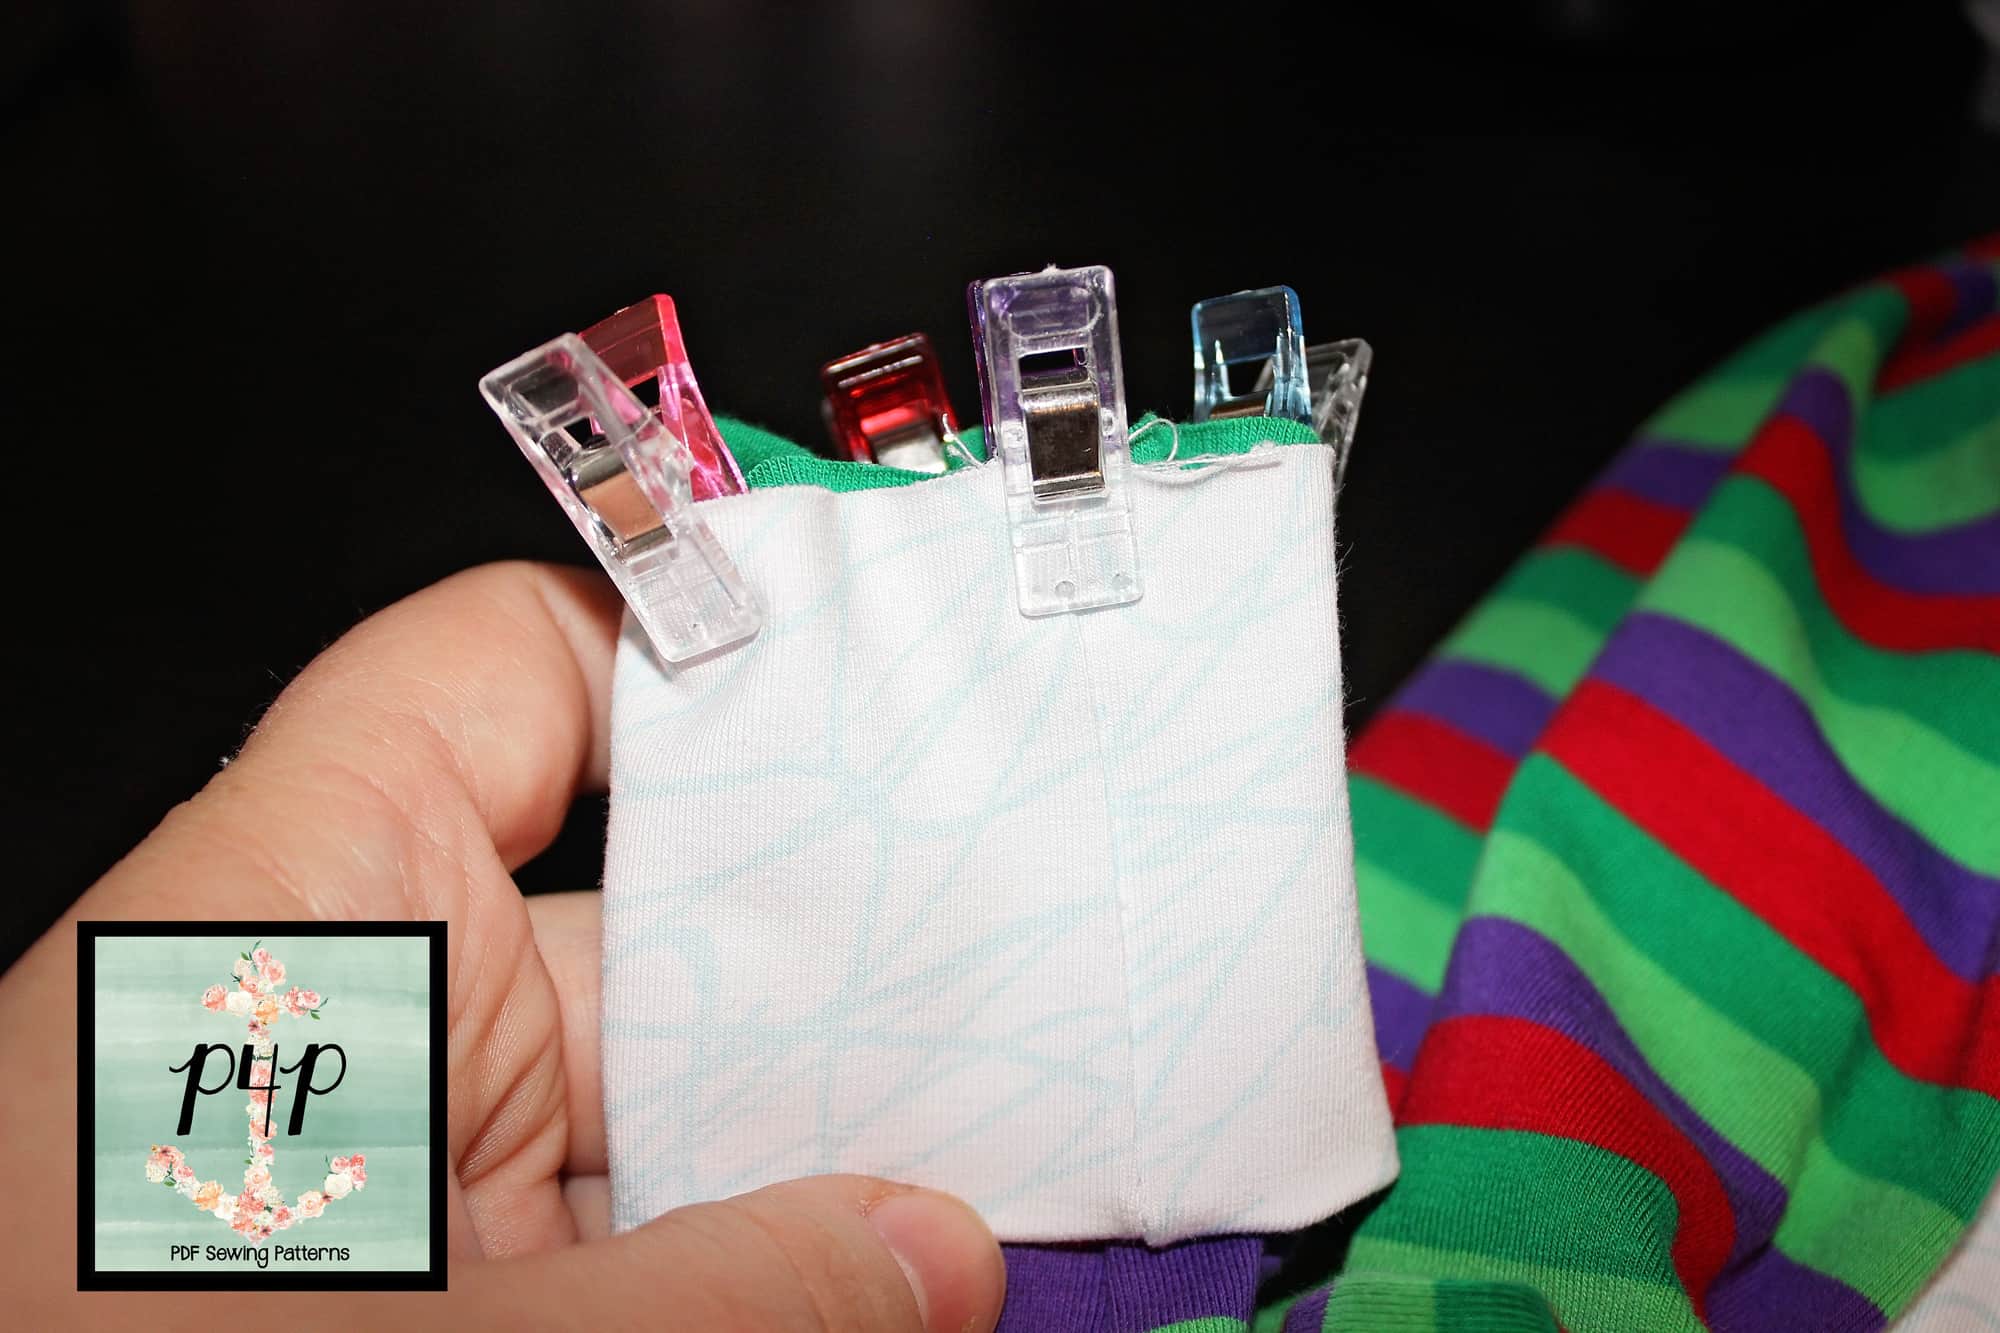
*Sew or serge with the presser foot inside the sleeve
Most of the time the sleeve opening is pretty small so I find that it is easier the place the presser foot of my serger (or sewing machine) inside the sleeve as opposed to stitching on the outside. This is especially important when you make Baby Bear Joggers or and kids shirts with cuffs, like the Jolly Roger Raglan or the Yo Ho Henley.
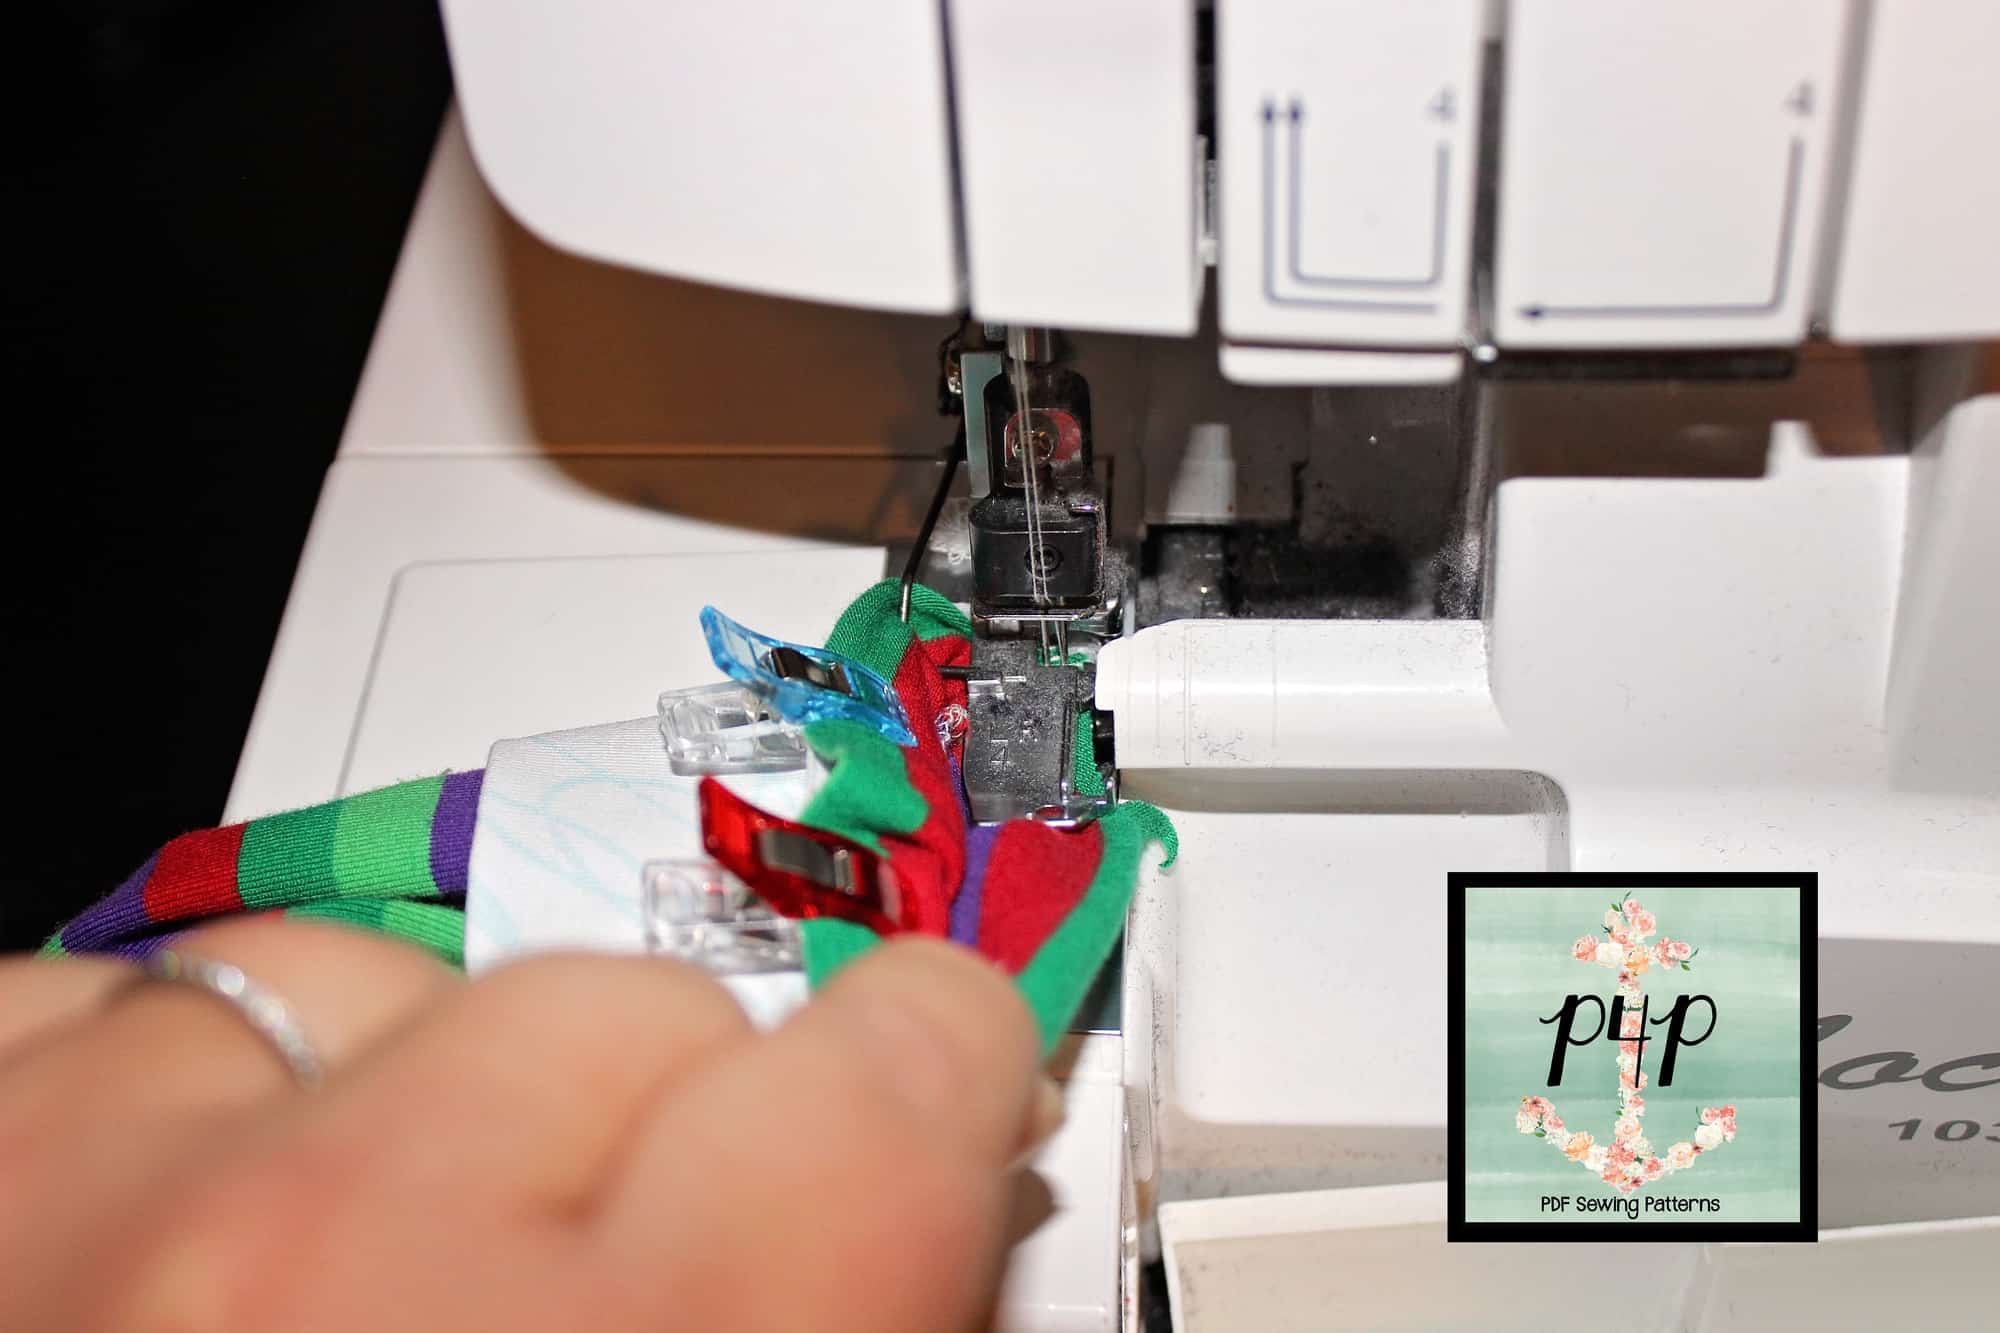
*Do not topstitch.
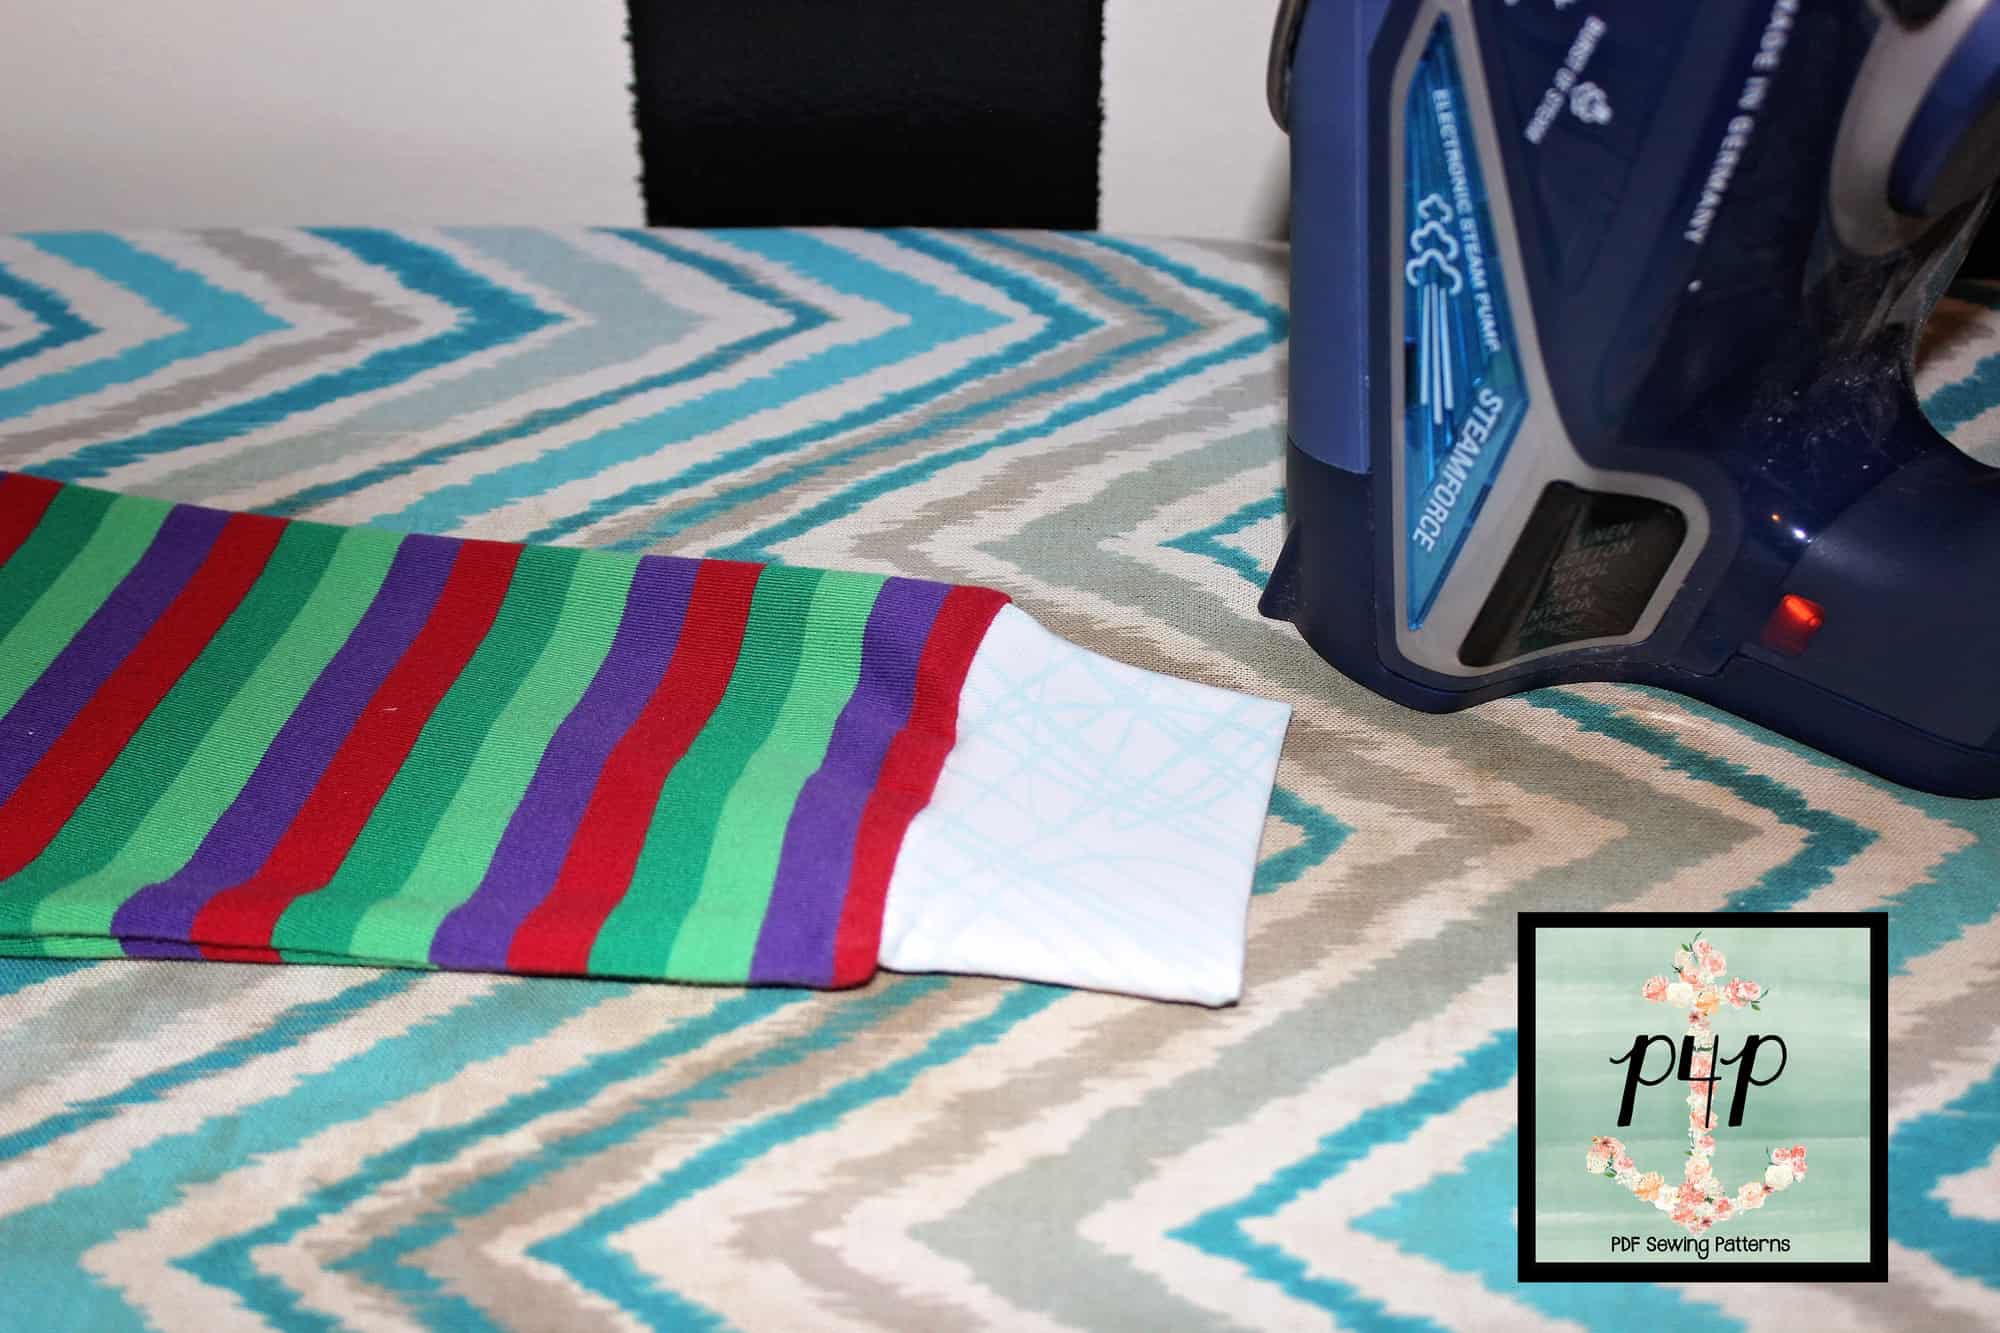
As opposed to necklines, I find that cuffs and waistbands look a lot better if you do not topstitch them down. I do encourage you to press your garments when you finish sewing it, including the cuffs.
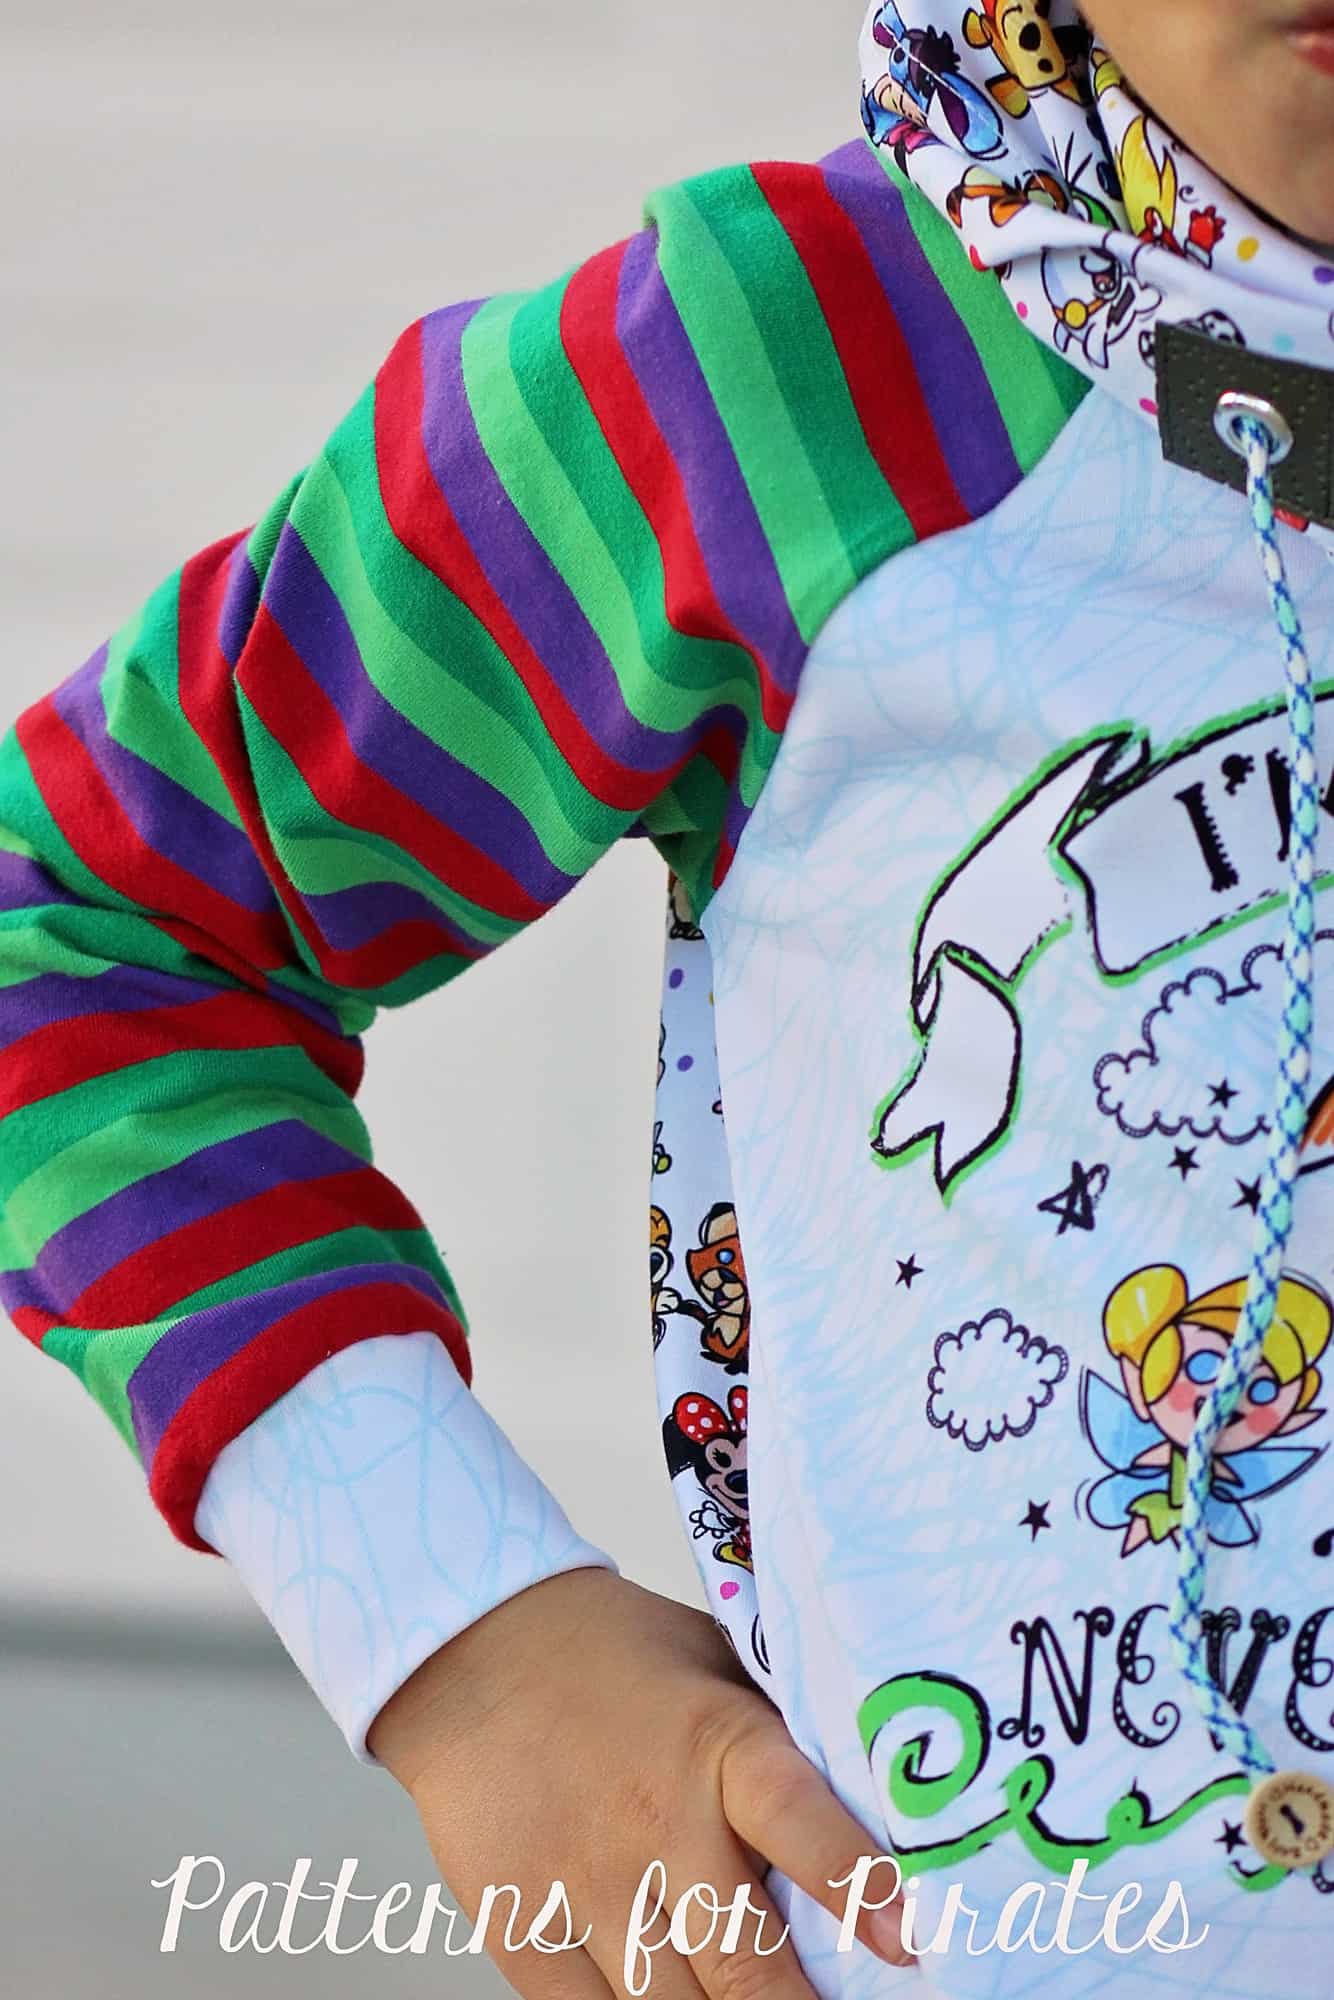
There you have it! 7 easy tips to follow when adding cuffs to your favorite P4P knit patterns. My boys are both rocking the JRR with add on cowl neck from the pack and faux layered sleeves from the blog.
Which one will you be making first? Make sure you post your creations in the P4P group and let me know if adding cuffs is now an easier “task”. 🙂

Pattern Markings 101
Many moons ago, I can remember calling my mom in a panic. I had printed out my first pattern for a garment, assembled it, and then just stared at all of the markings! Even though I’d sewn quilts for years before, this was my first attempt at making clothes and the pattern looked like a map in which I had no clue how to follow. After my “what did I get myself into” talk with her, she slowly walked me through each question I had and now after all these years we’ve come full circle and I’m making clothes for her!
Like many people, you will probably experience (or already have!) the “What have I done?” moment in sewing and question why you started a project to begin with. Have no fear! We’re here to help. We decided it was time to break that map down for you and help you learn how to navigate through the amazing world of garment sewing. In this post, you’ll find a description of all the key terms and symbols you might expect to see when starting your sewing adventures! So let’s get those patterns printed, assembled and let the fun begin! (If you’re staring at all of those pages you’ve just printed- don’t worry there either! Click here for our First Time User Tips, which includes how to assemble patterns).
Grainline
The grainline tells you which direction the grain of your fabric should run. The grainline will run parallel between the selvages, or finished edges of your fabric. There are usually printer markings, contrasting trims, solid colors, etc found on the selvage. Typically, your grainline will have the less amount of stretch in knit fabric. A few weeks ago, Roberta shared some details and information about grainlines, why they’re important, and much more. You can check that out here.
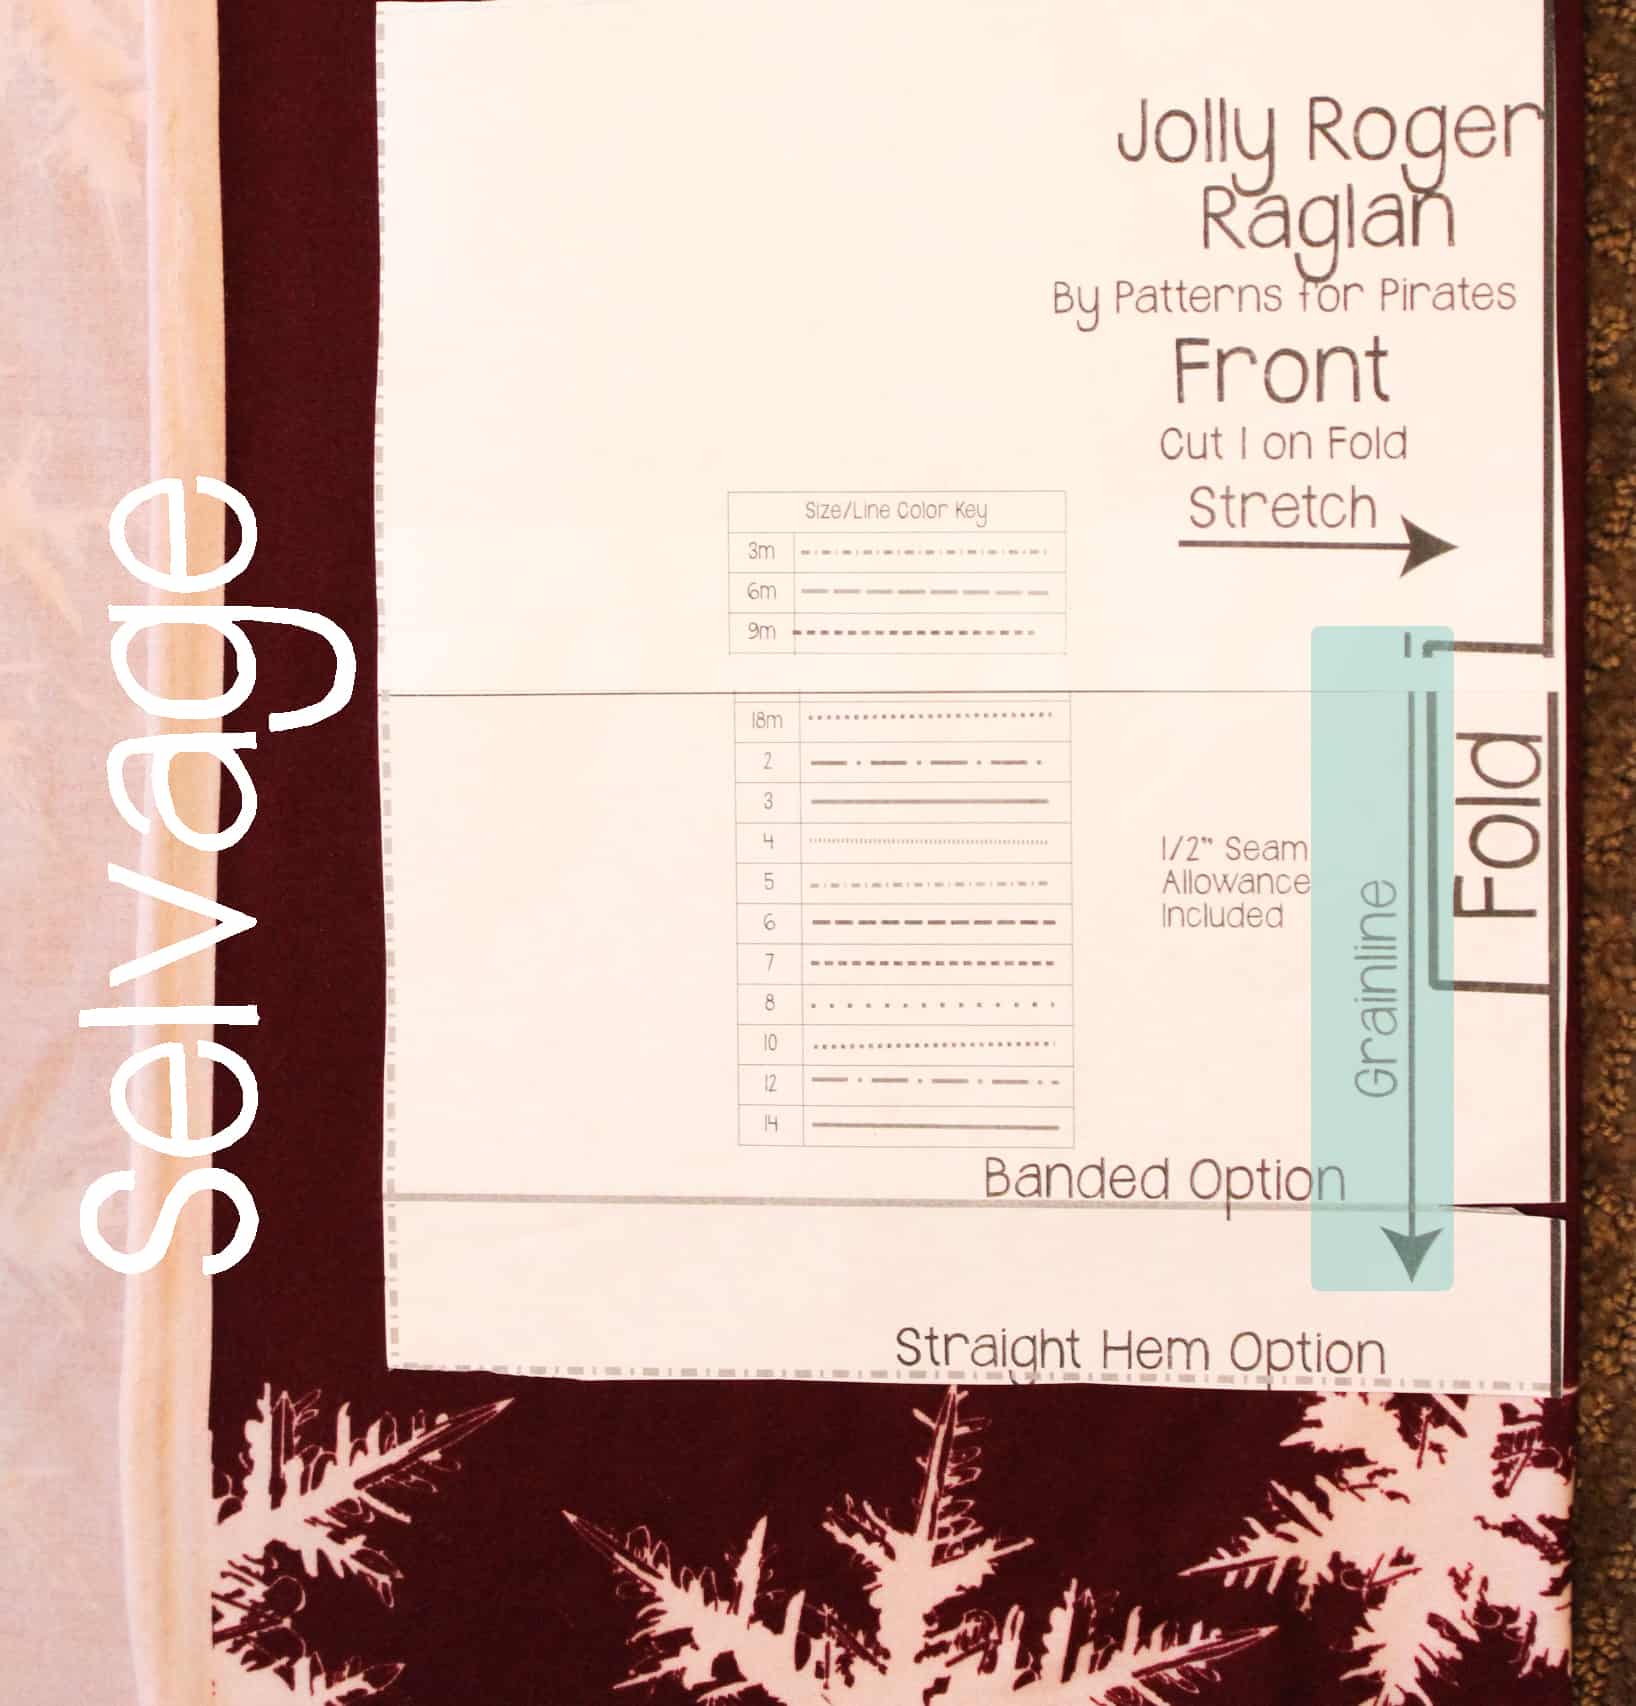
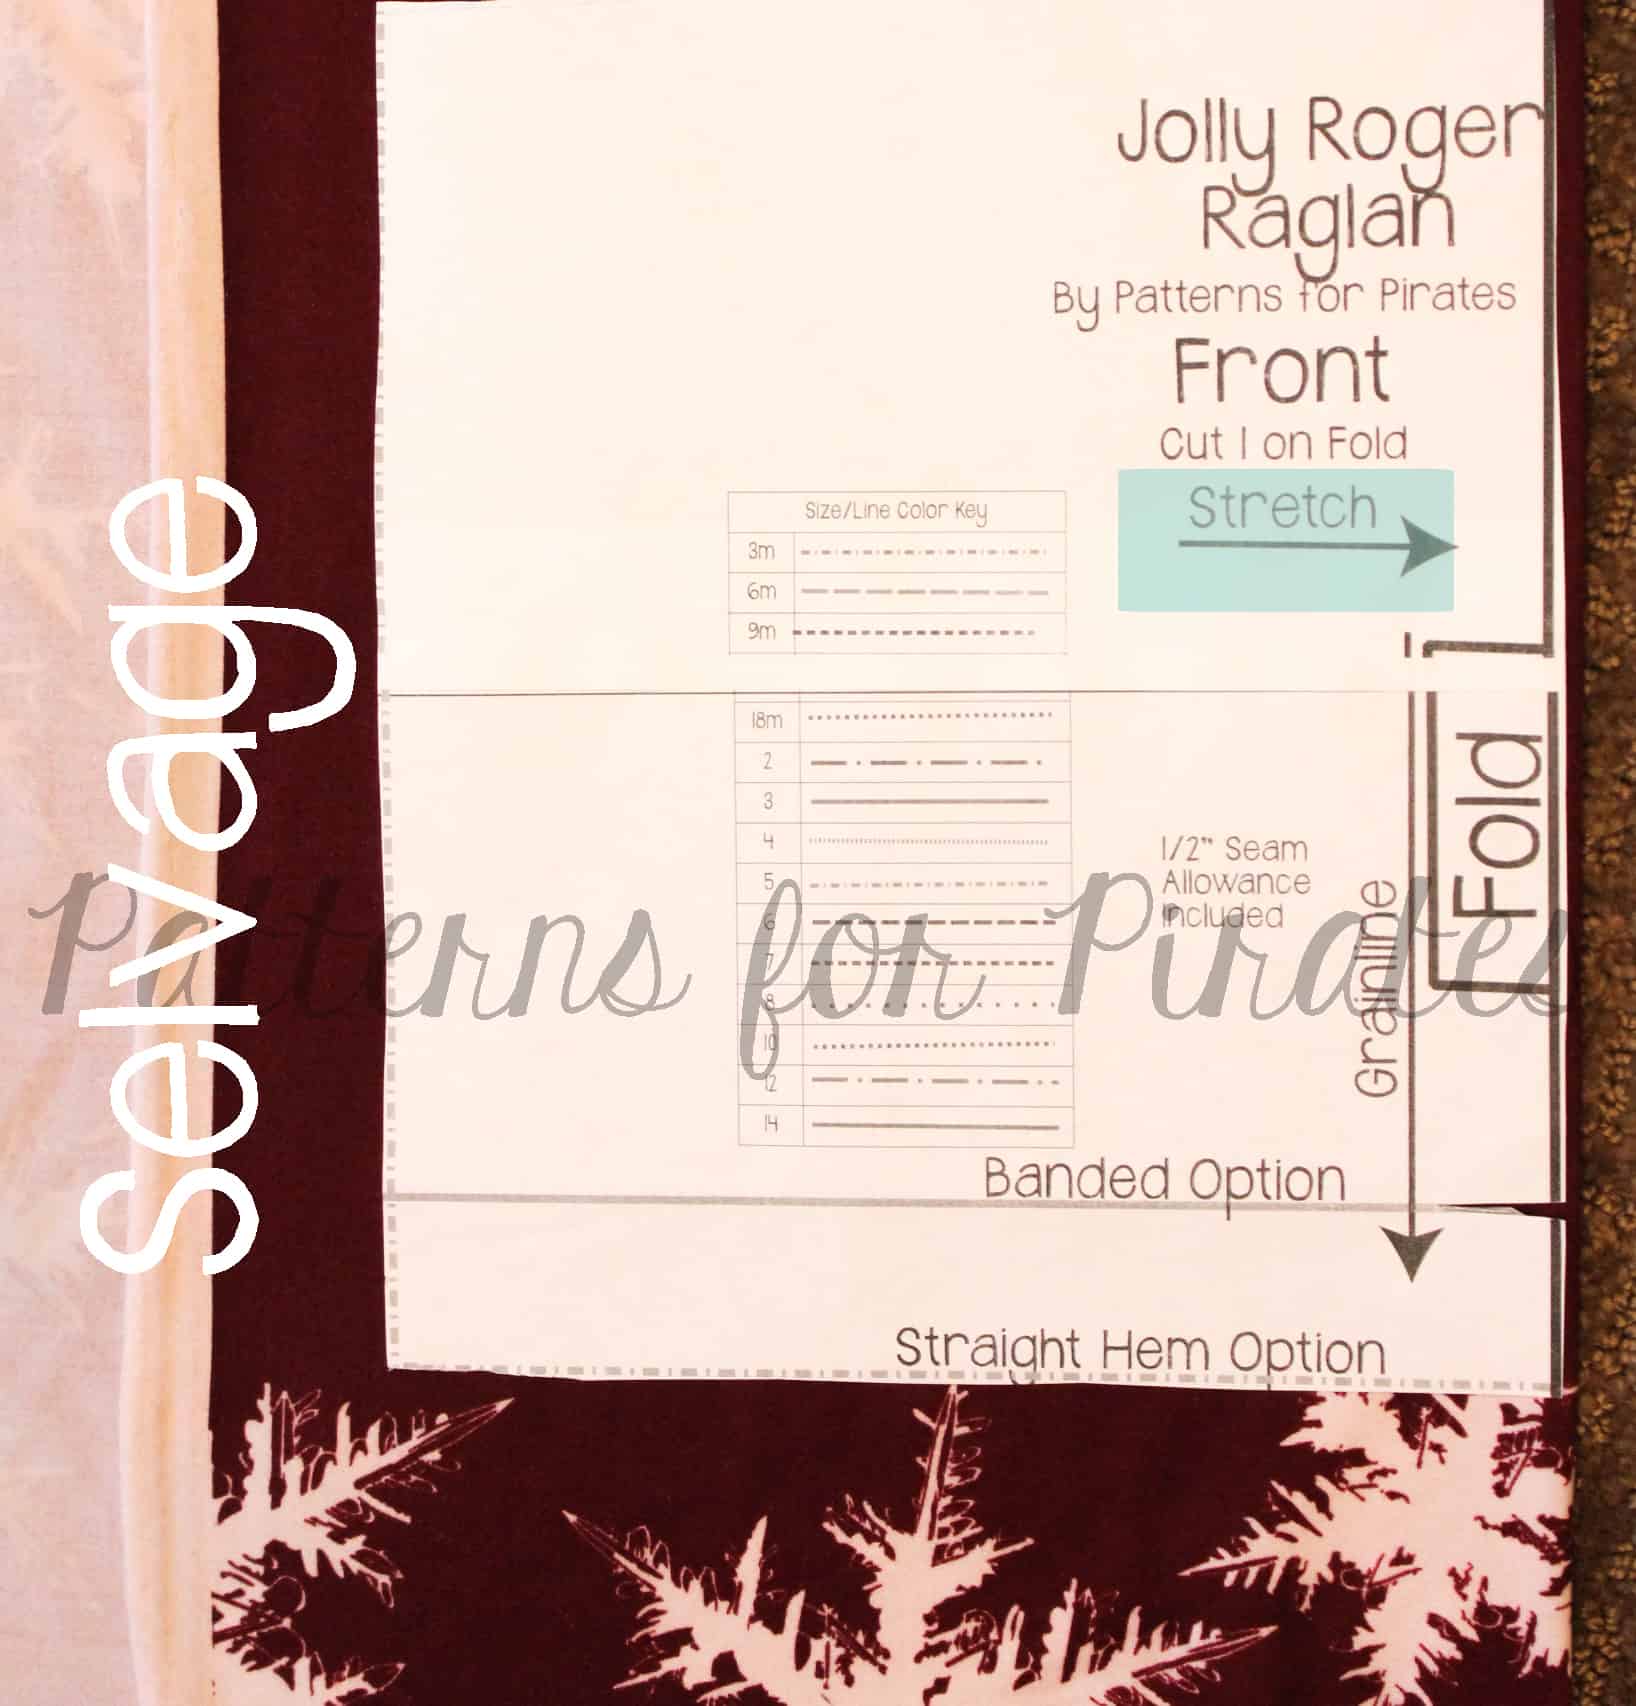
Stretch
The stretch of your fabric will run perpendicular to the grainline/selvage and will be the direction with the most stretch. As you can see in the picture below, the stretch is running the opposite way as the grainline. It is extremely important to have the right direction of stretch when it comes to the fit of your garment. The stretch will go around your body for most pattern pieces and is accounted for when the ease of a pattern is drafted (read more about ease here). For example, if a pattern is drafted with negative ease (finished measurements are smaller than your body) and you have the stretch going in the wrong direction, chances are, it won’t fit.
Fold
If a pattern piece is symmetrical on both sides, you will notice the center with a “FOLD” marking. This is commonly found on pieces such as the bodice, back, or sleeve in which both the left and right sides have the same appearance. You will want to fold your fabric wide enough for your pattern piece and align this marking to the fold of the fabric. To help conserve fabric, I like to fold it just wide enough for the pattern piece (shown above). A common error can be to fold the fabric exactly down the middle, leaving wasted material.
Notches
You might have noticed small triangles on some pattern pieces. These notches serve several different purposes. One of the purposes is to help distinguish the back from the front. For example, something like a raglan style top can easily get mixed up when assembling. These notches will help keep the front with the front and back with the back. The second purpose is to help with alignment. By matching these notches up, your pieces will be in the correct position.
TIP: I always cut my notches out rather than in as to avoid accidentally cutting too far into the seam allowance.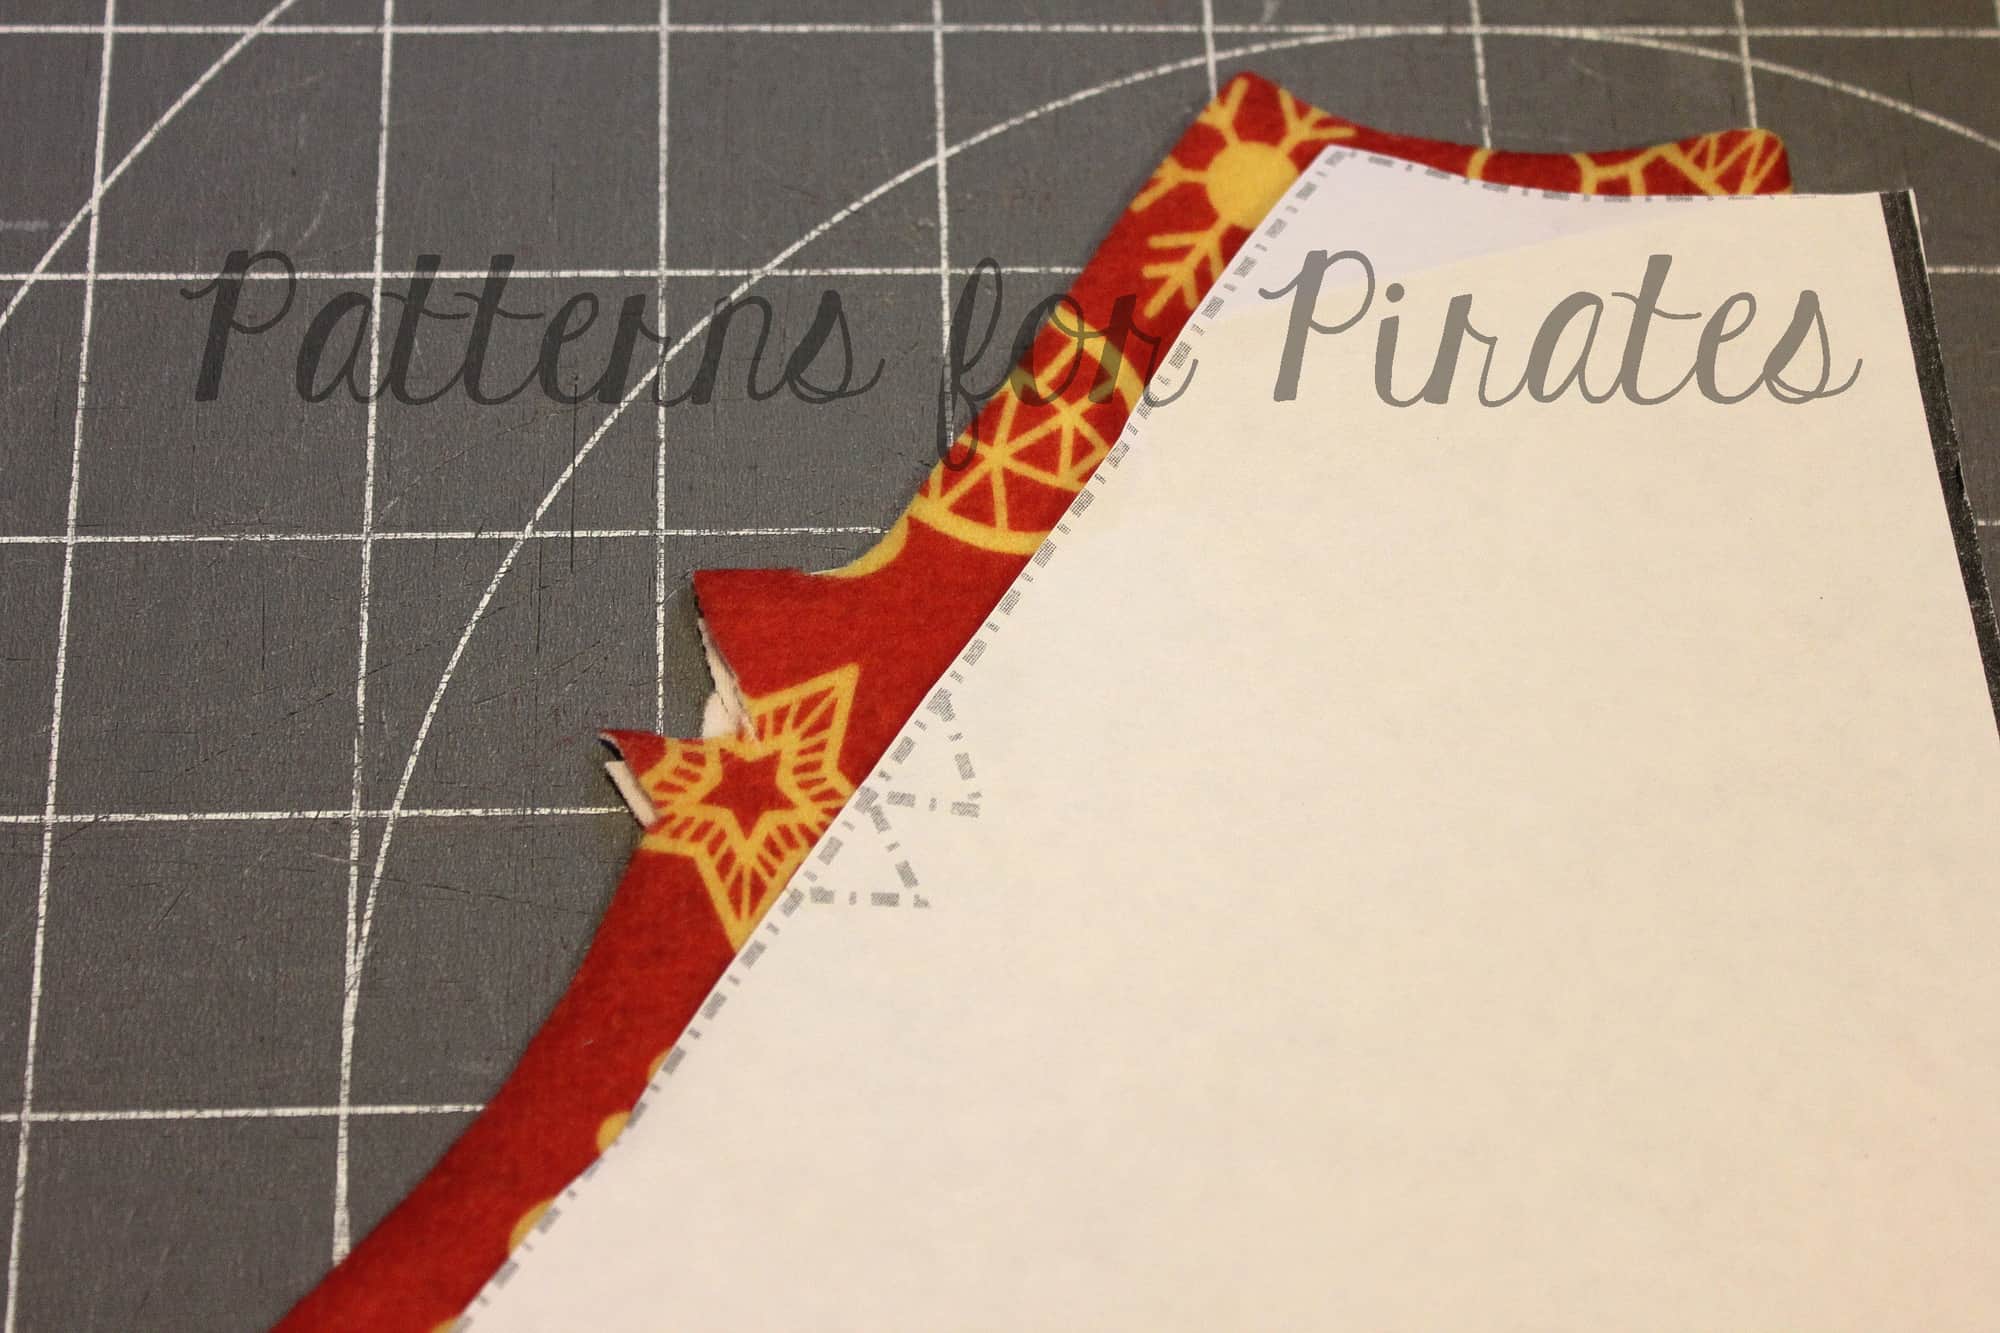
Hem Gauge
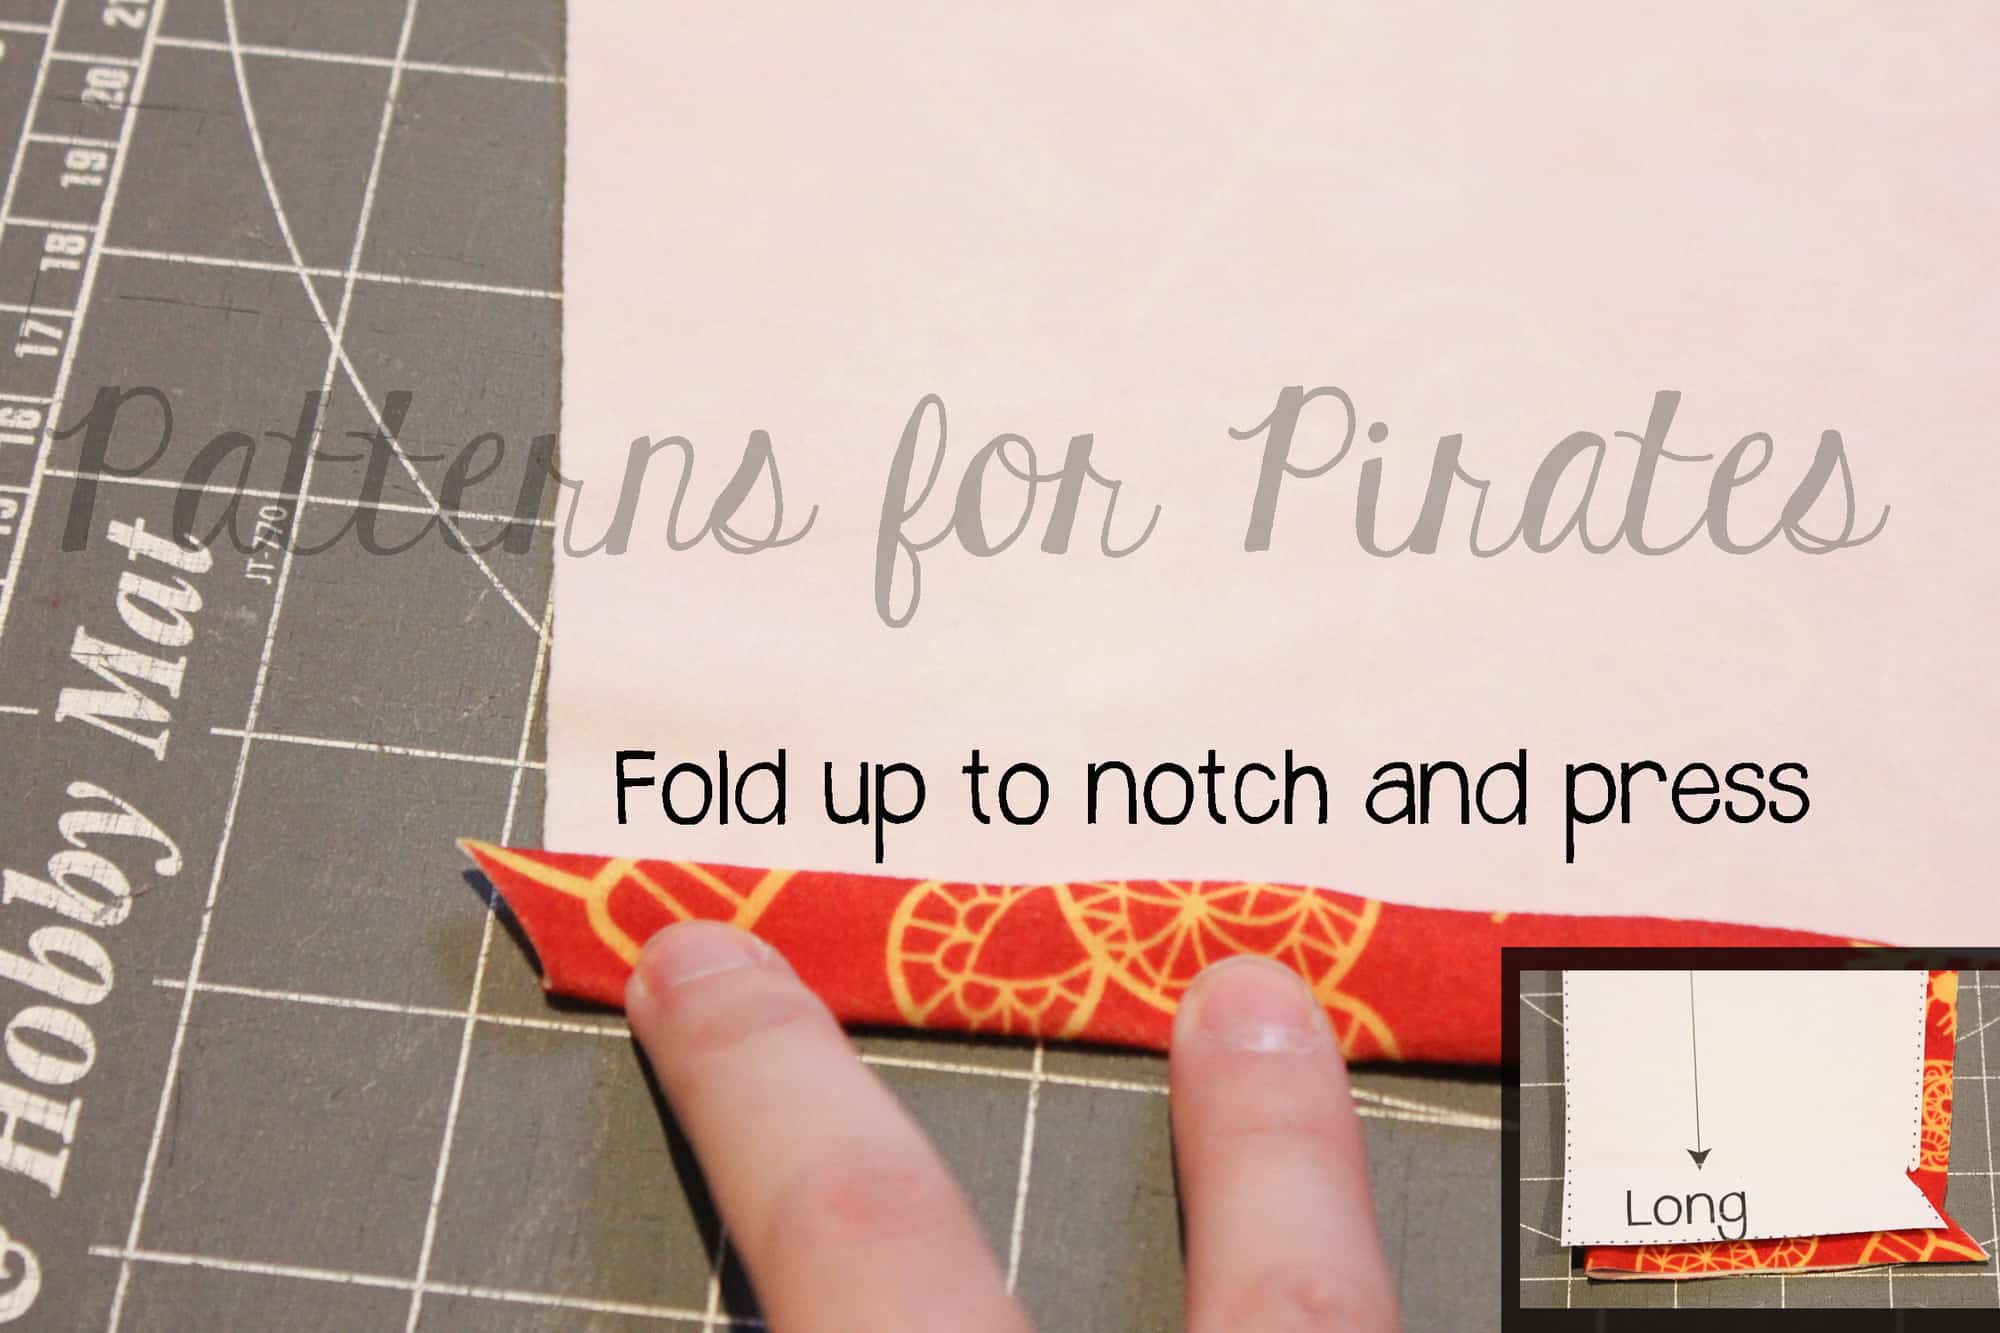
You will typically find a hem gauge on both the sleeves and bottom edges. This is usually a triangular shape that notches out. It will mark the correct allowance for your hem. This is particularly useful when creating a memory hem. All you will need to do is fold your fabric up to this notch, press and unfold. Once you’ve sewn the seams, you will still have your pressed fold in place with the correct seam allowance.
Cut Chart
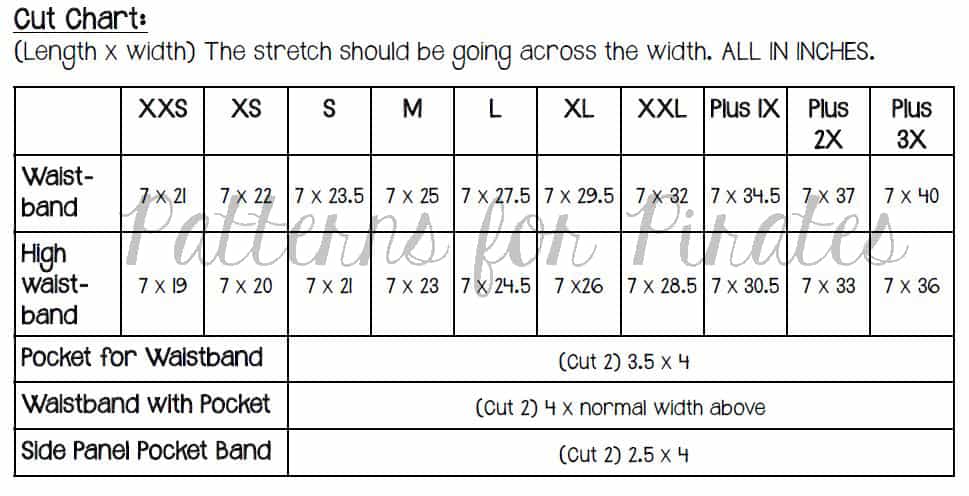
Most Patterns for Pirates patterns will include a cut chart. The cut chart is typically found within the first few pages of the tutorial and will give measurements for any rectangular pieces. For example, items like neckbands, cuffs, waistbands and elastic would all be found here. Some designers will included these as actual pattern pieces, however by providing a cut chart, you are able to save on both paper and ink. When cutting these pieces, I find it easiest to do so using a quilters ruler and rotary cutter.
Hopefully these tips help! Remember that we are always here to help, especially in our Facebook group. If you’re not a already a member, be sure to join so that you can ask questions and share all of your amazing Patterns for Pirates creations!
~ Erinn
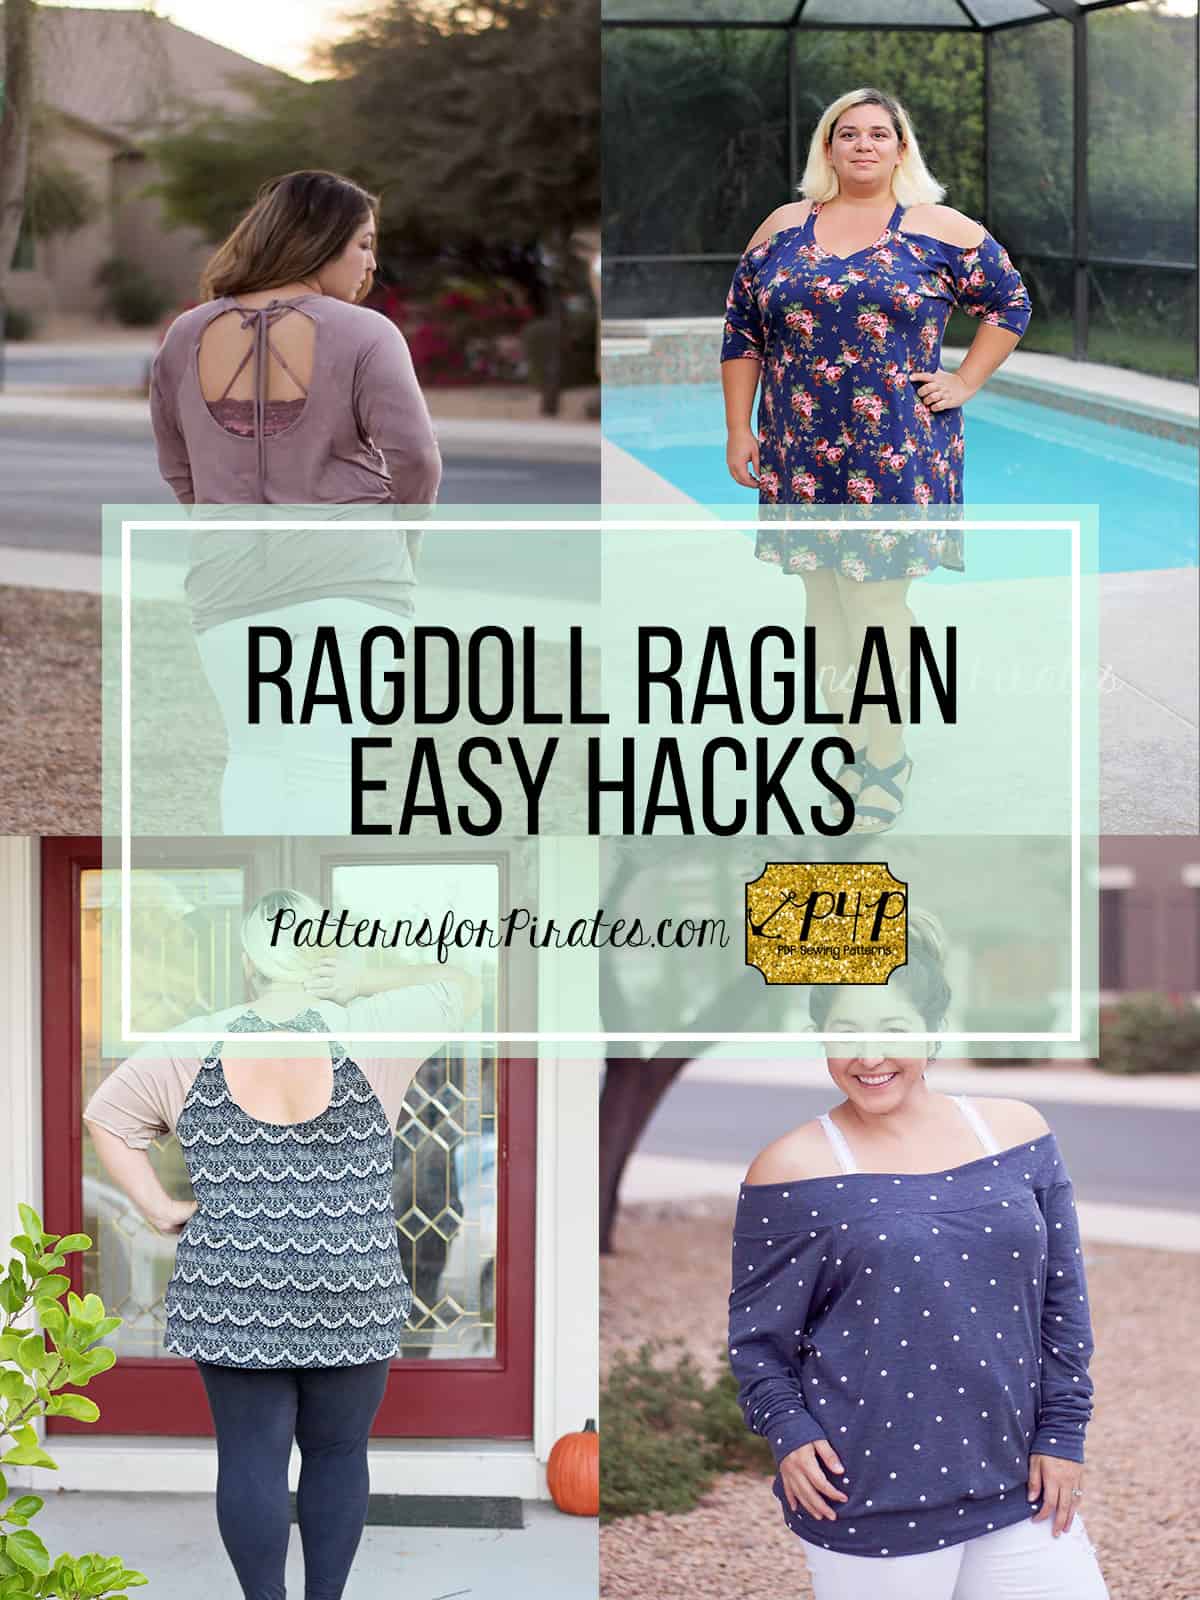
RagDoll easy hacks
. . . . .
Cold Shoulder
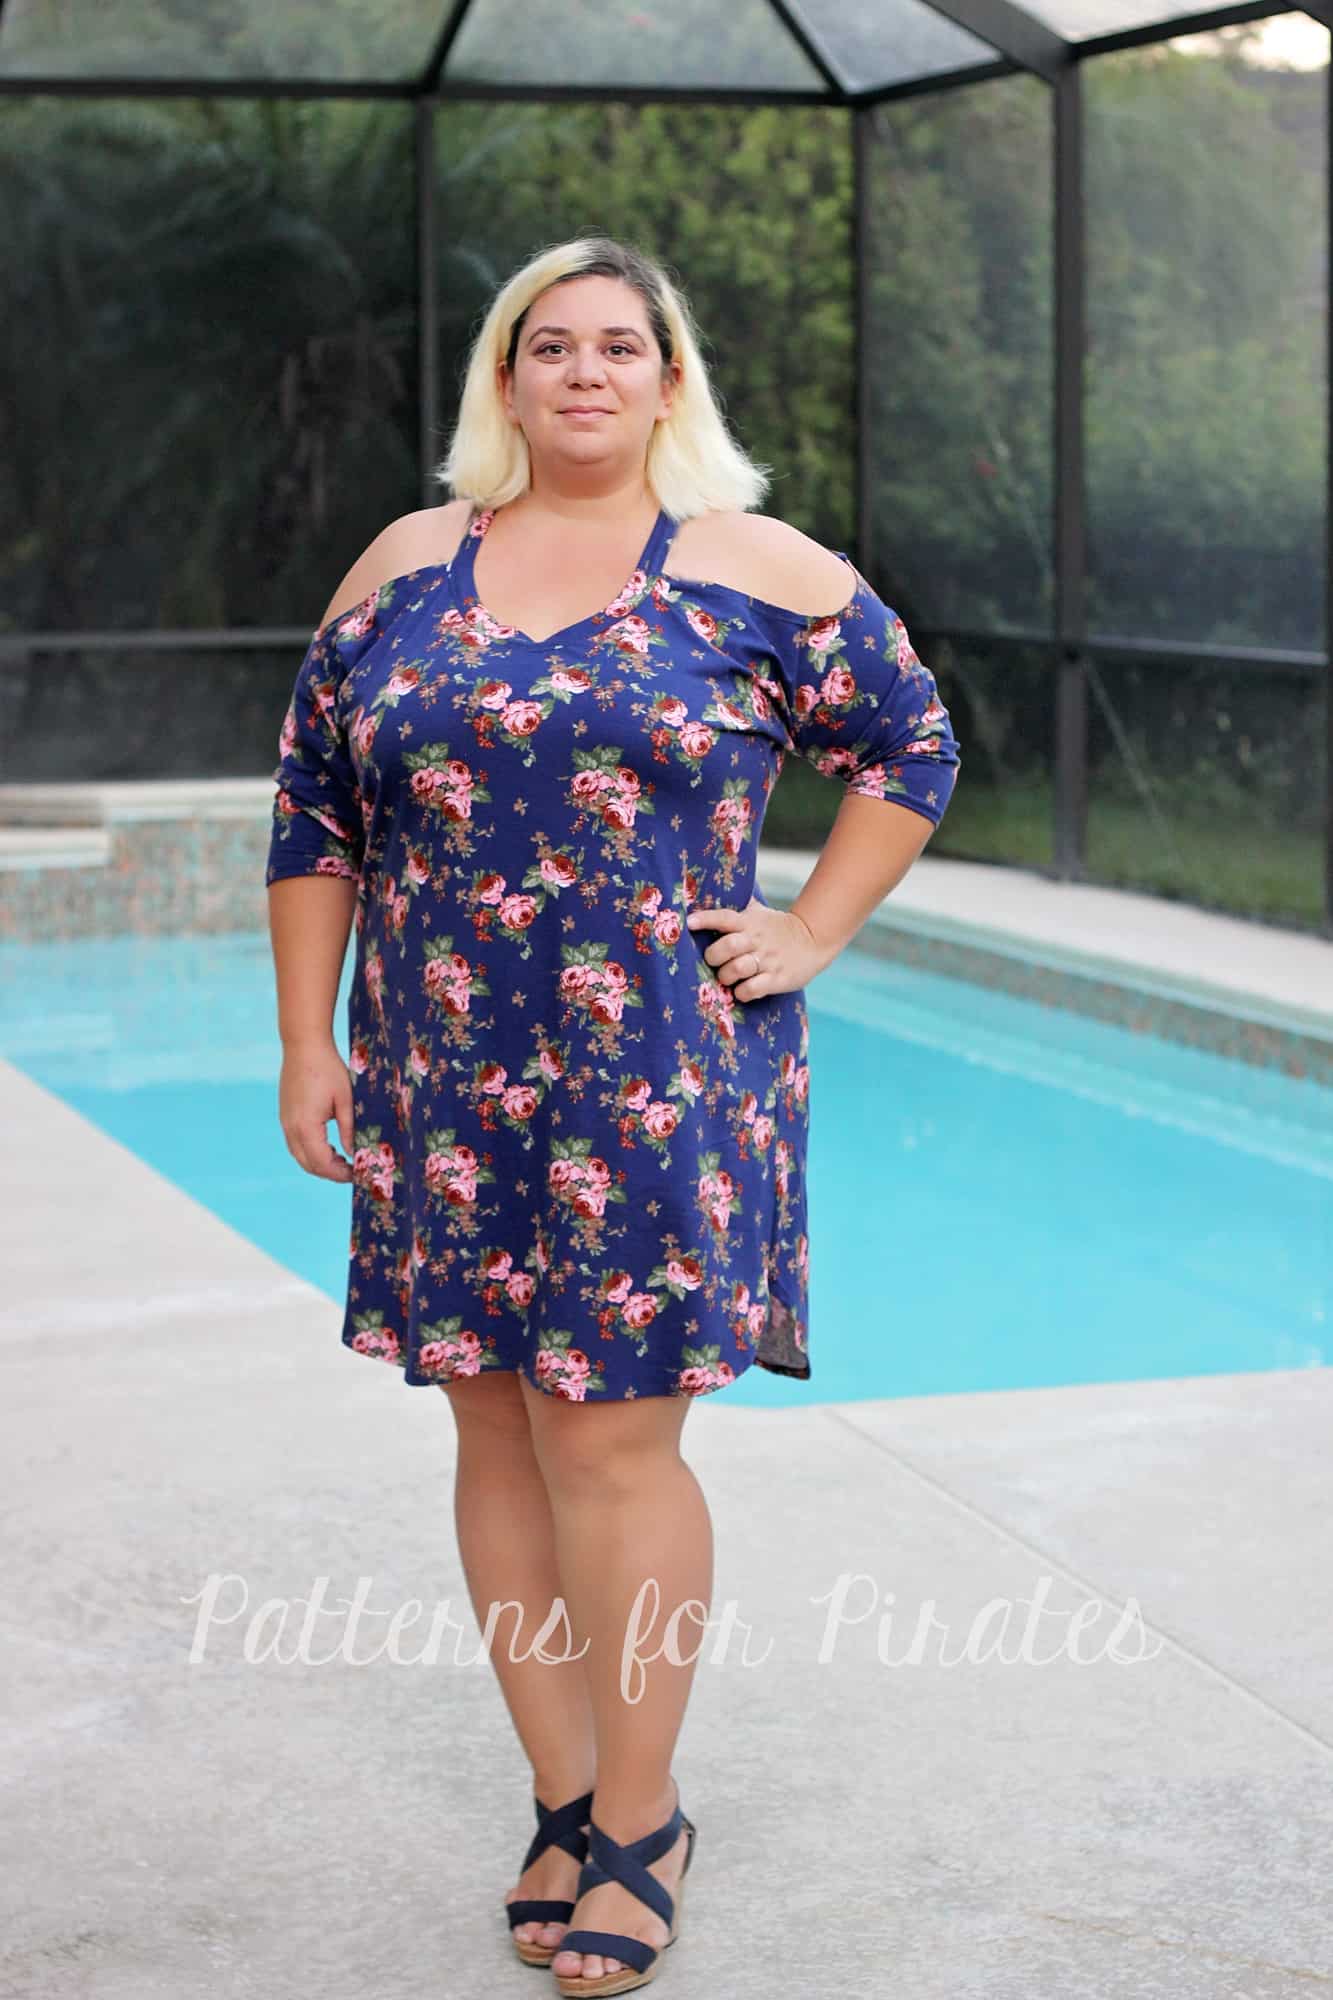
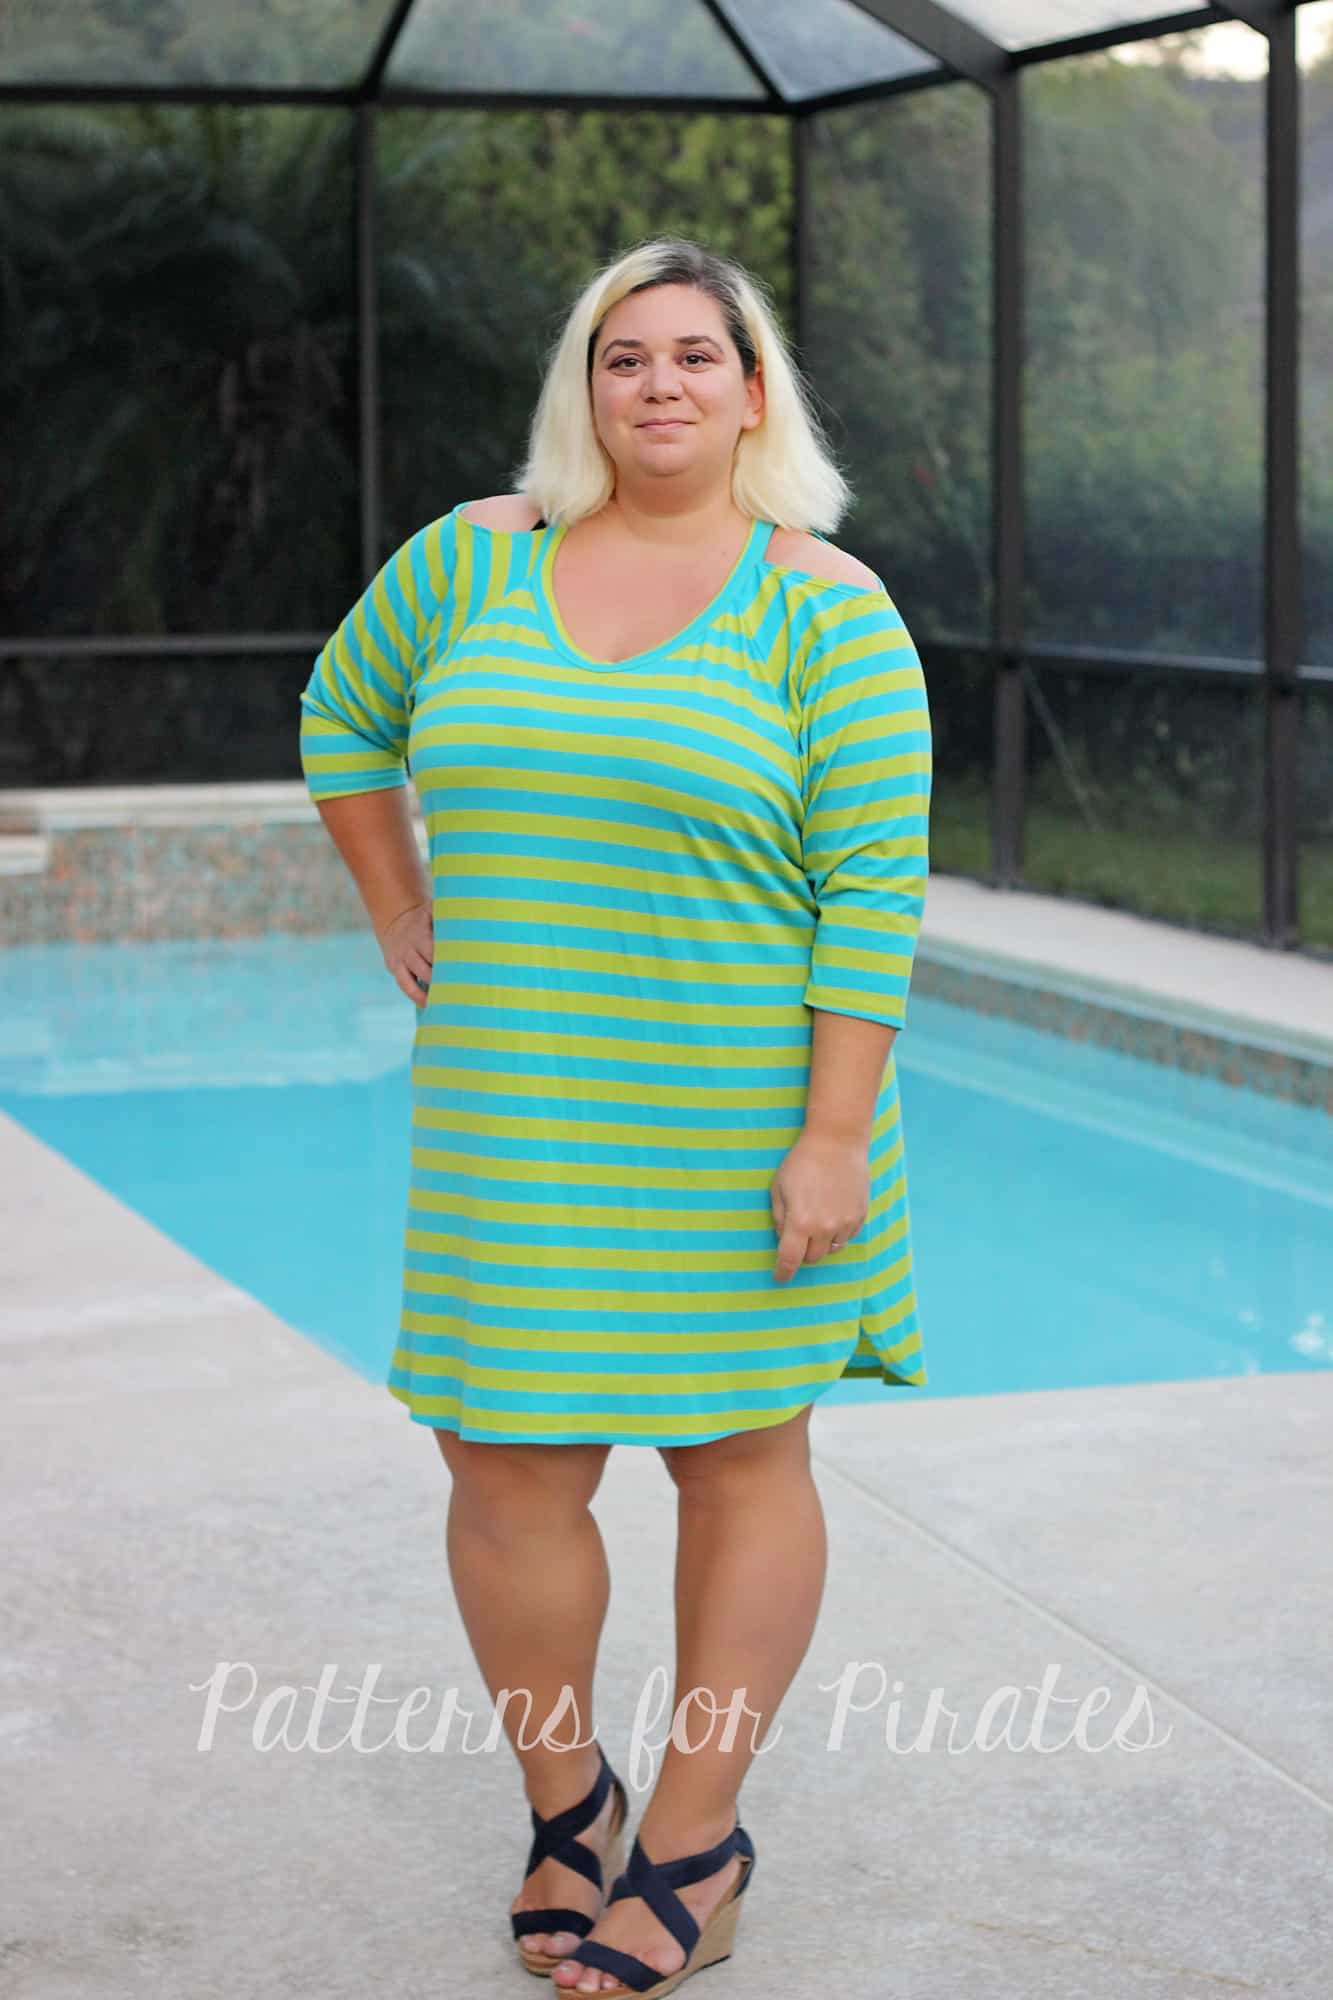
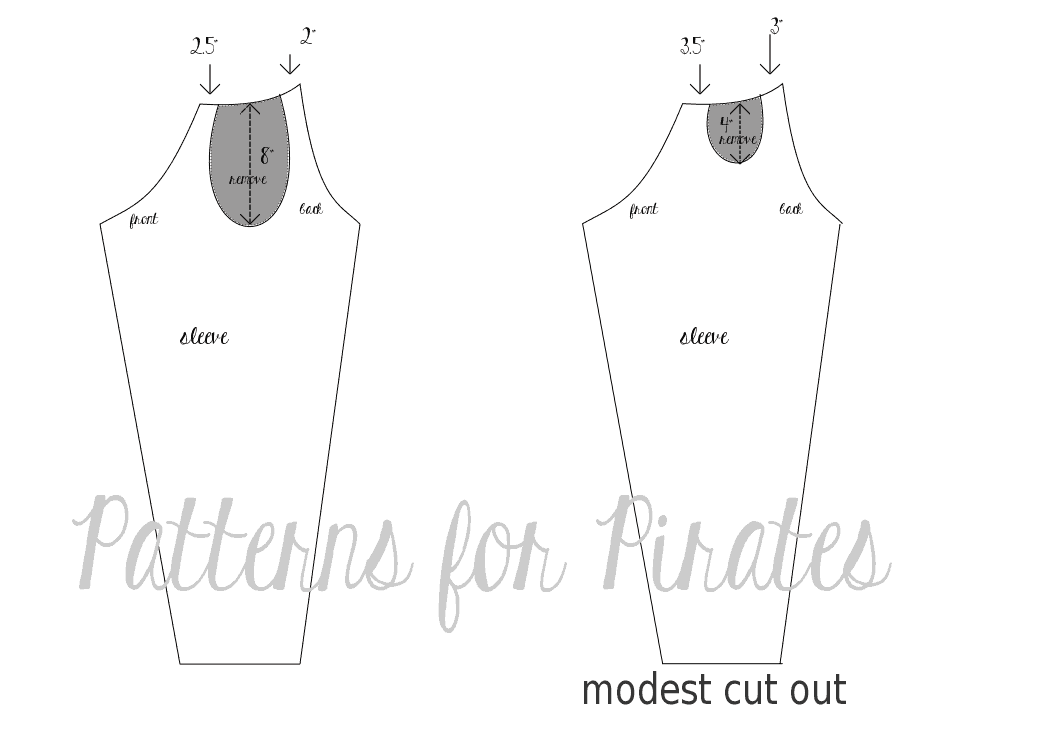
With the off the shoulder look being all the rave right now, I just had to show you how easy it is to get the look with our newest Ragdoll pattern. I will show you two different looks, one more modest and one sexier if you will. The technique will be the same for both you will just make the sleeve cut out different sizes. Feel free to play with it to get your desired cold shoulder size.
Start by printing the pattern in your size. You will be cutting out a portion of the sleeves as in the graphic below.
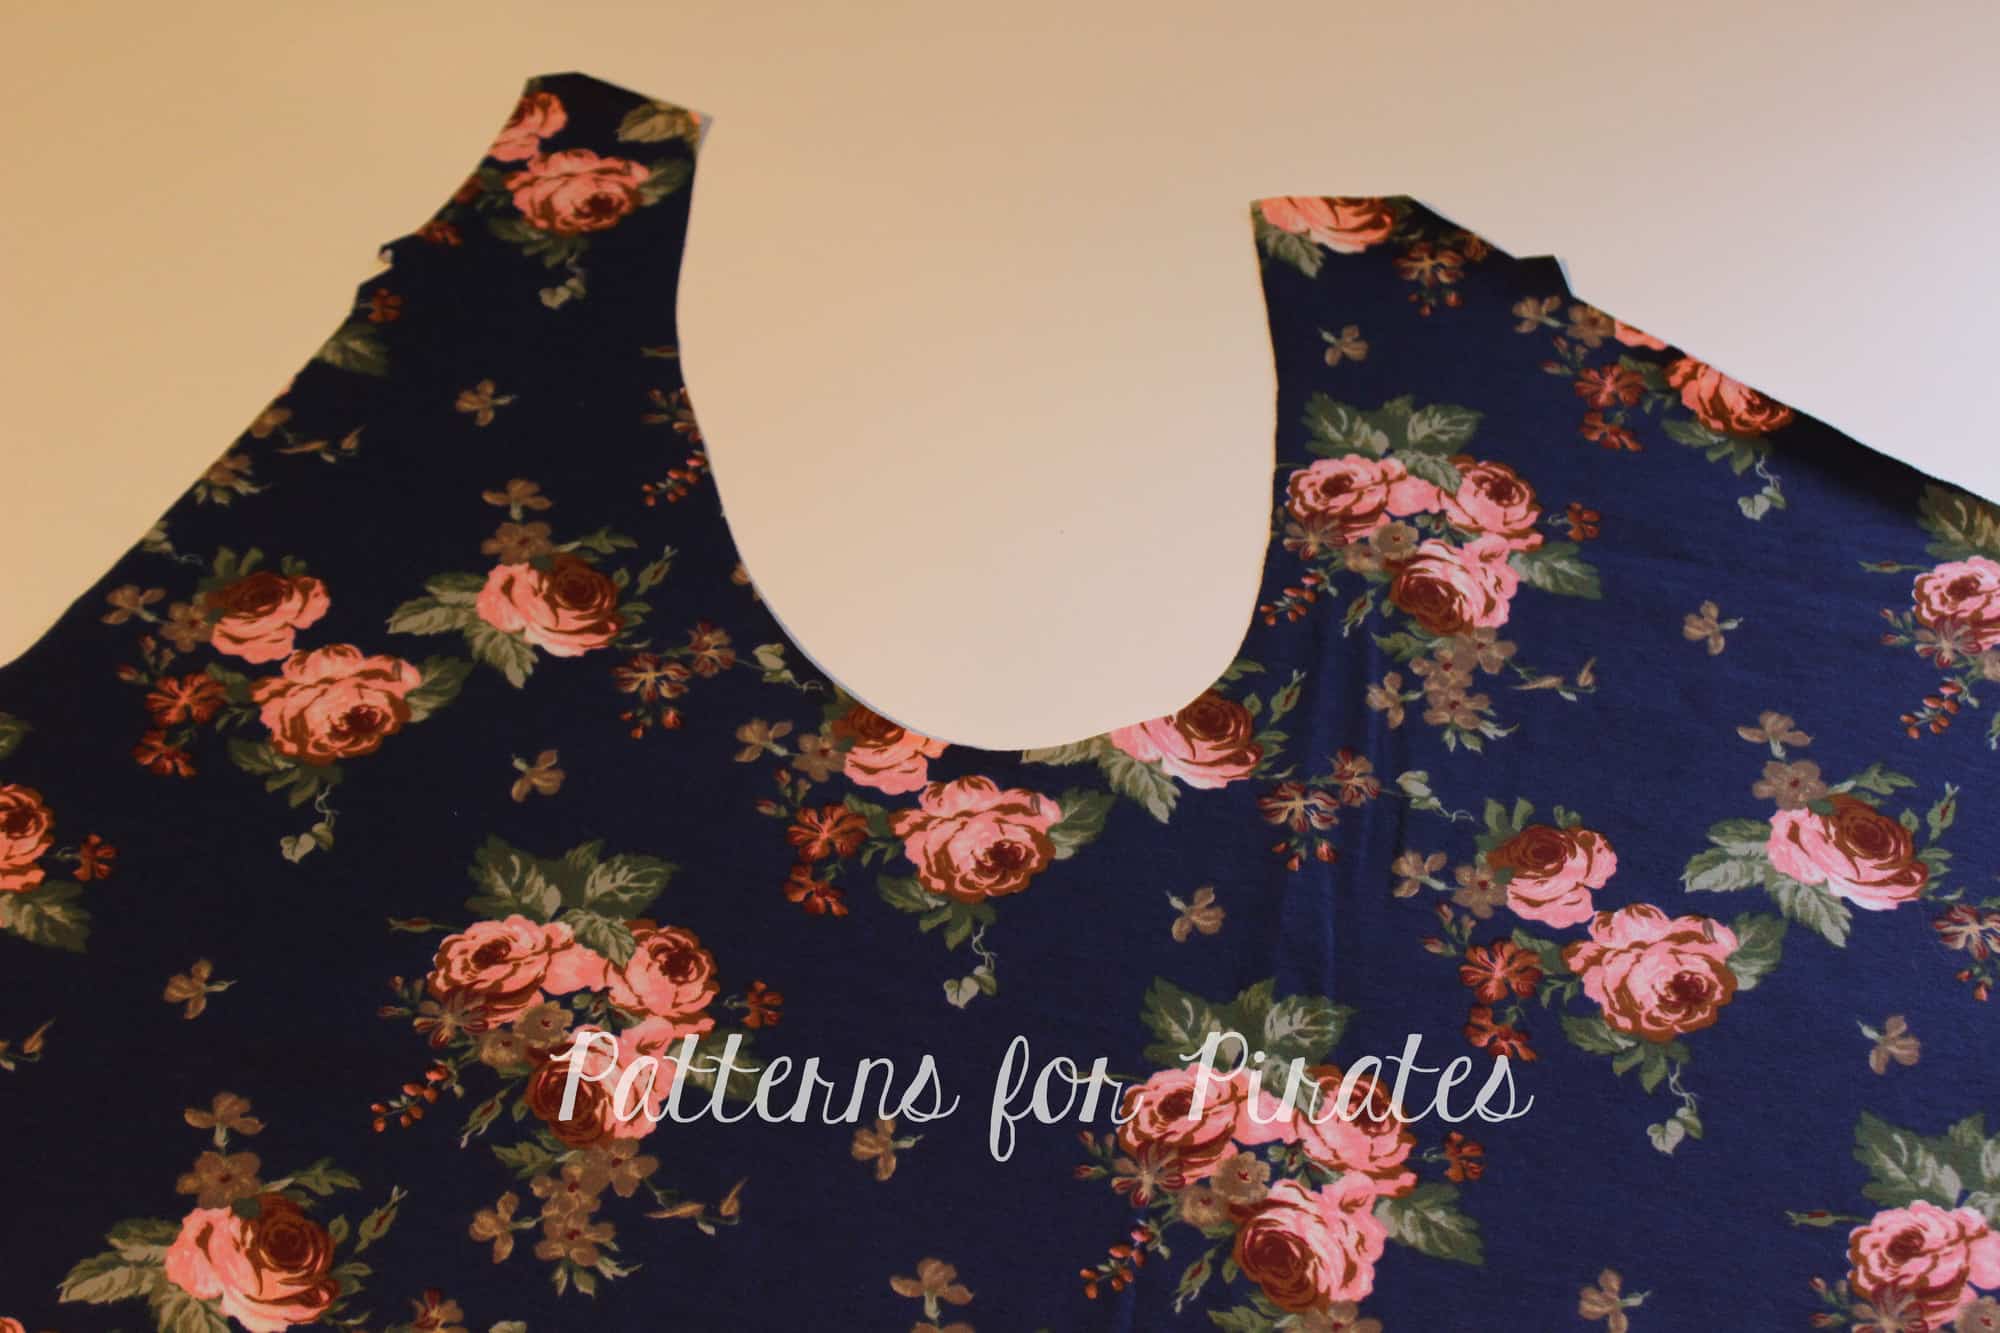
Hem the cutout using a 1/2″ hem allowance. The easiest way to do that is to steam press and pin it in place with a lot of pins (or clips). Stitch with your coverstitch, a twin needle or a zig zag stitch. Don’t forget to give it a good press after you hem it.
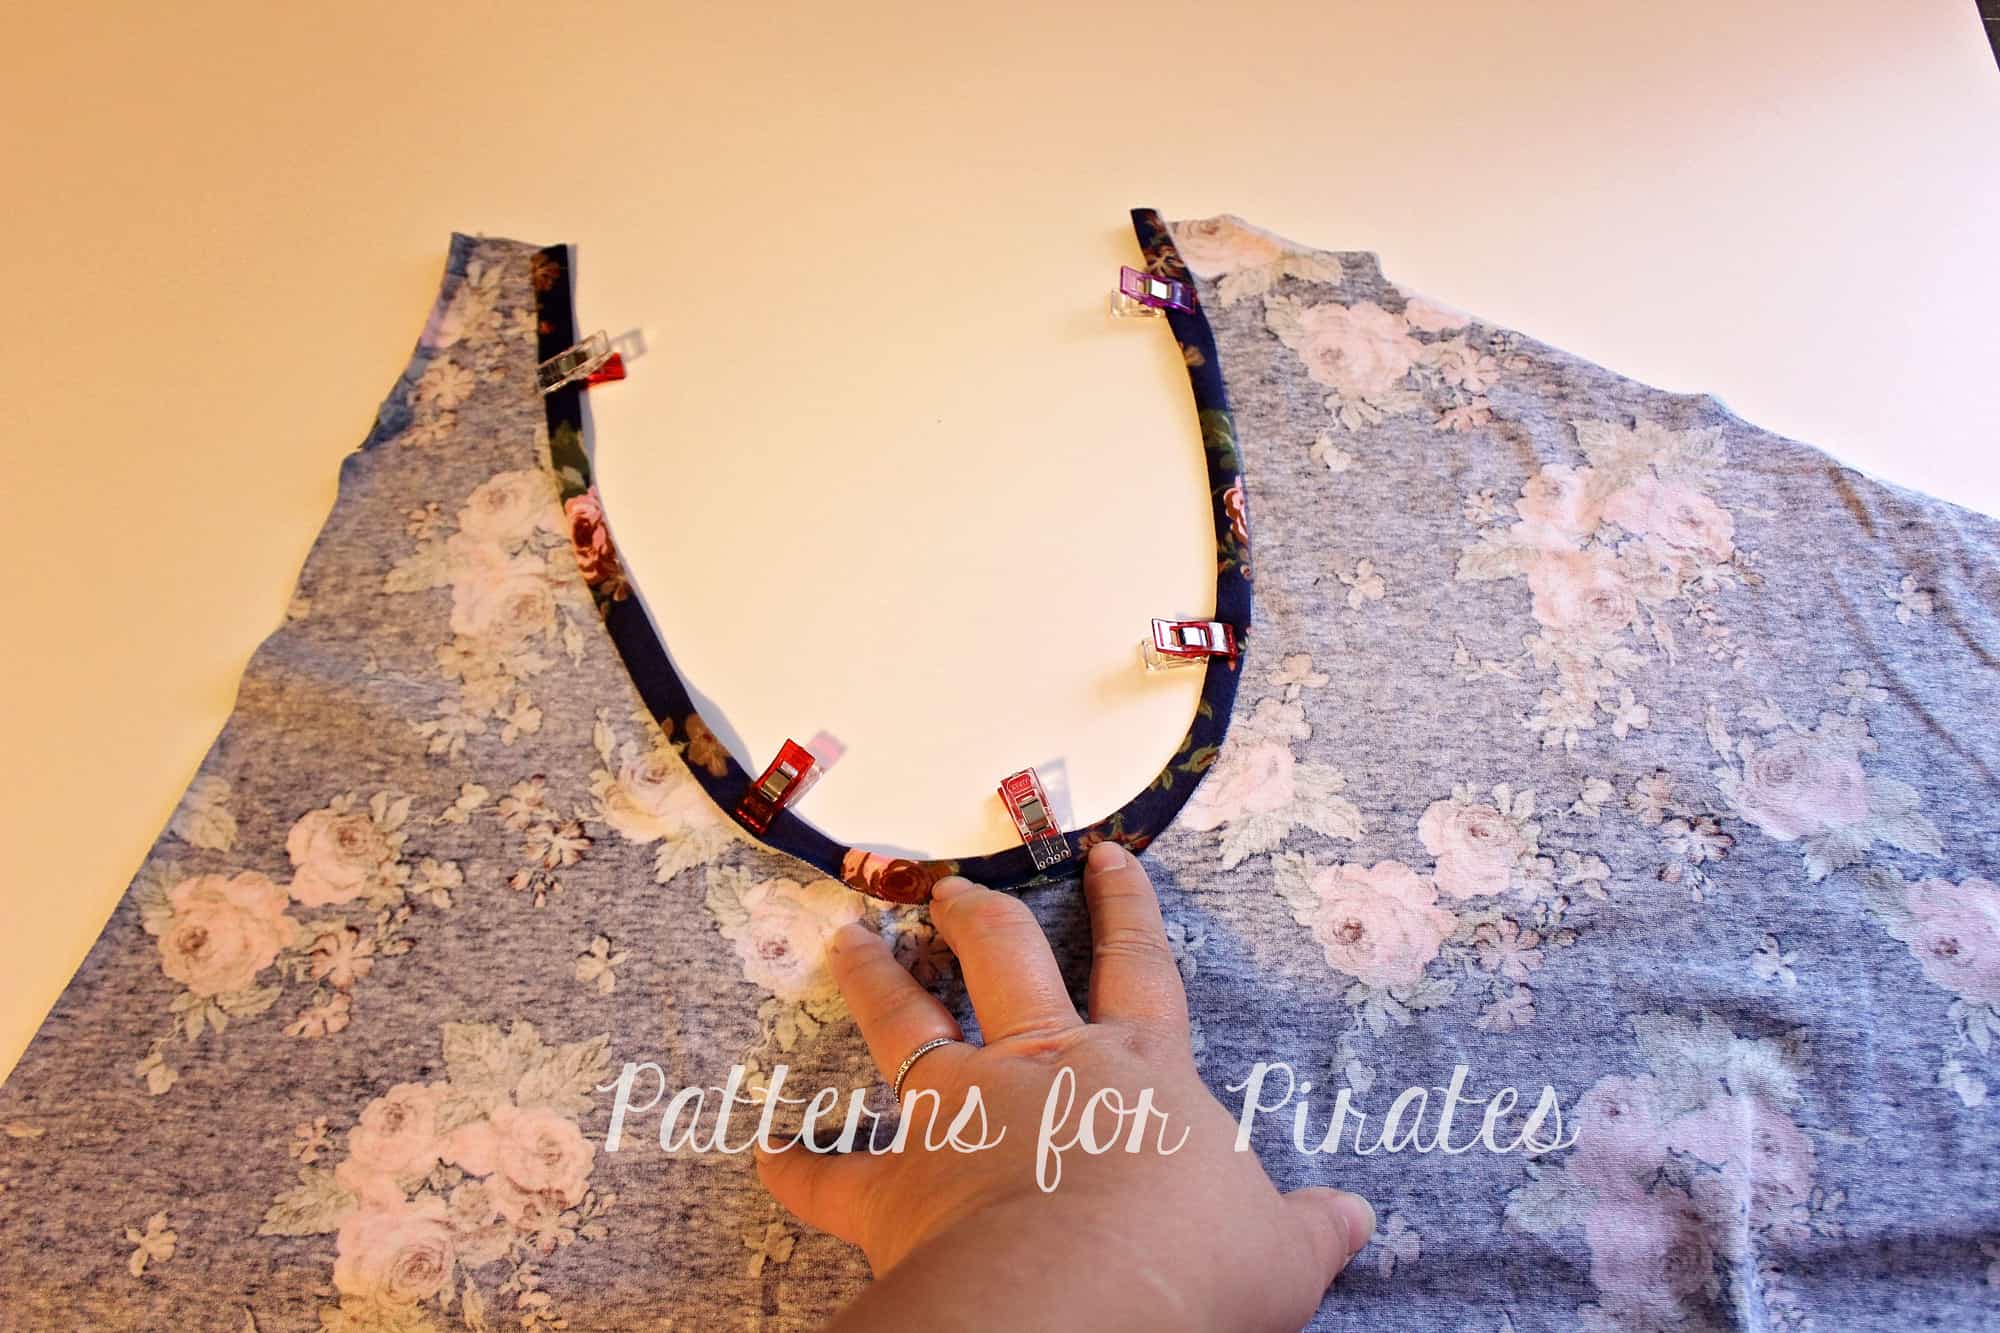
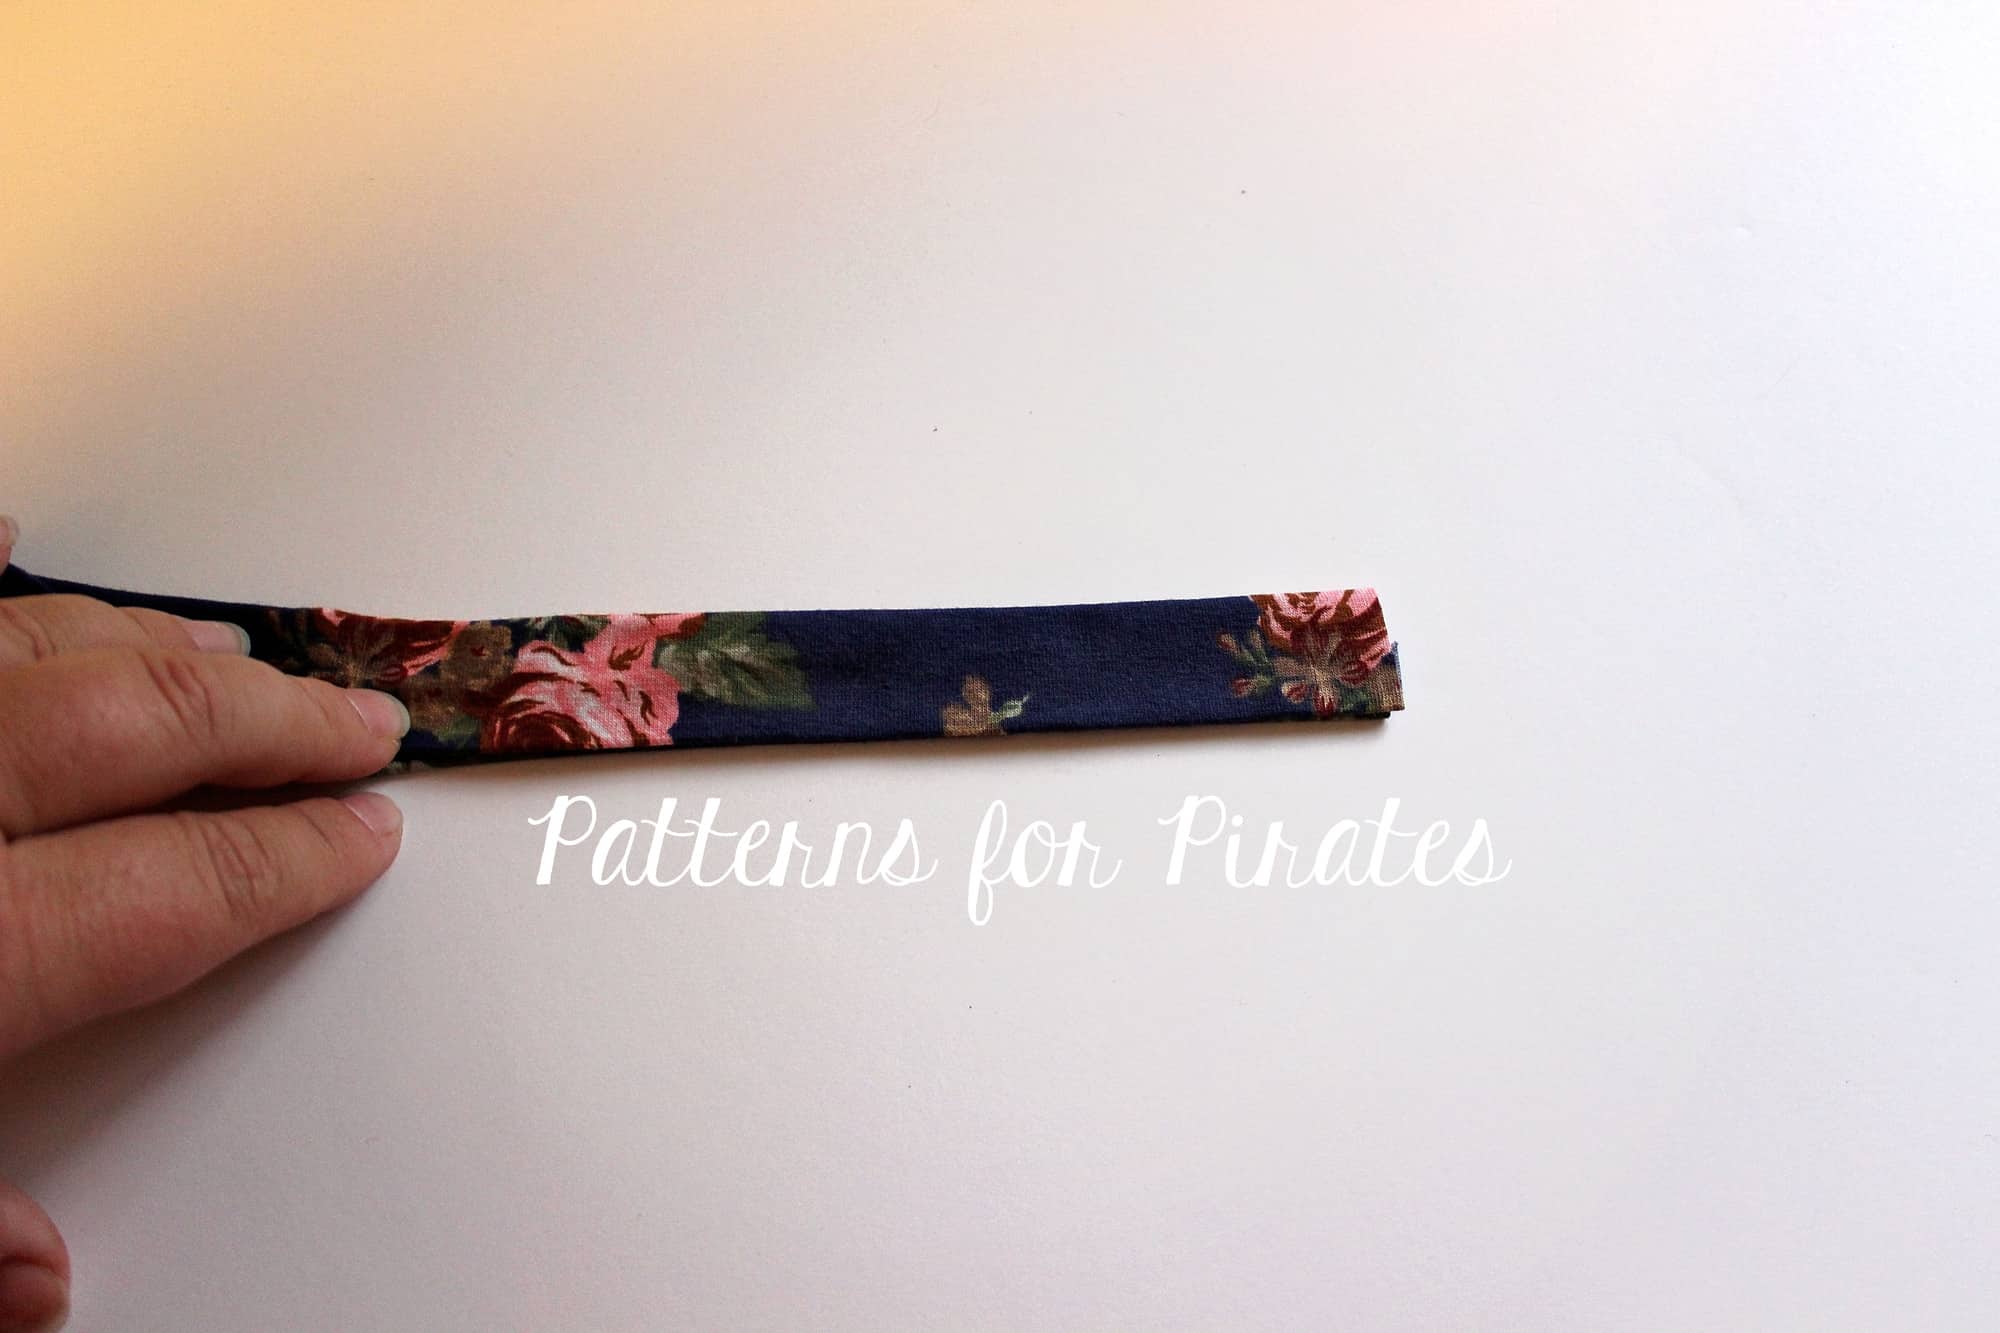
Sew the shirt or dress as shown in the pattern tutorial. All we have left to do now is attach the neckband. Press 1/2″ memory hem as shown below.

Fold the neckband lengthwise and press it really well. Sew the short sides together to create a loop. Mark the center back (where the seam is) and the center front.
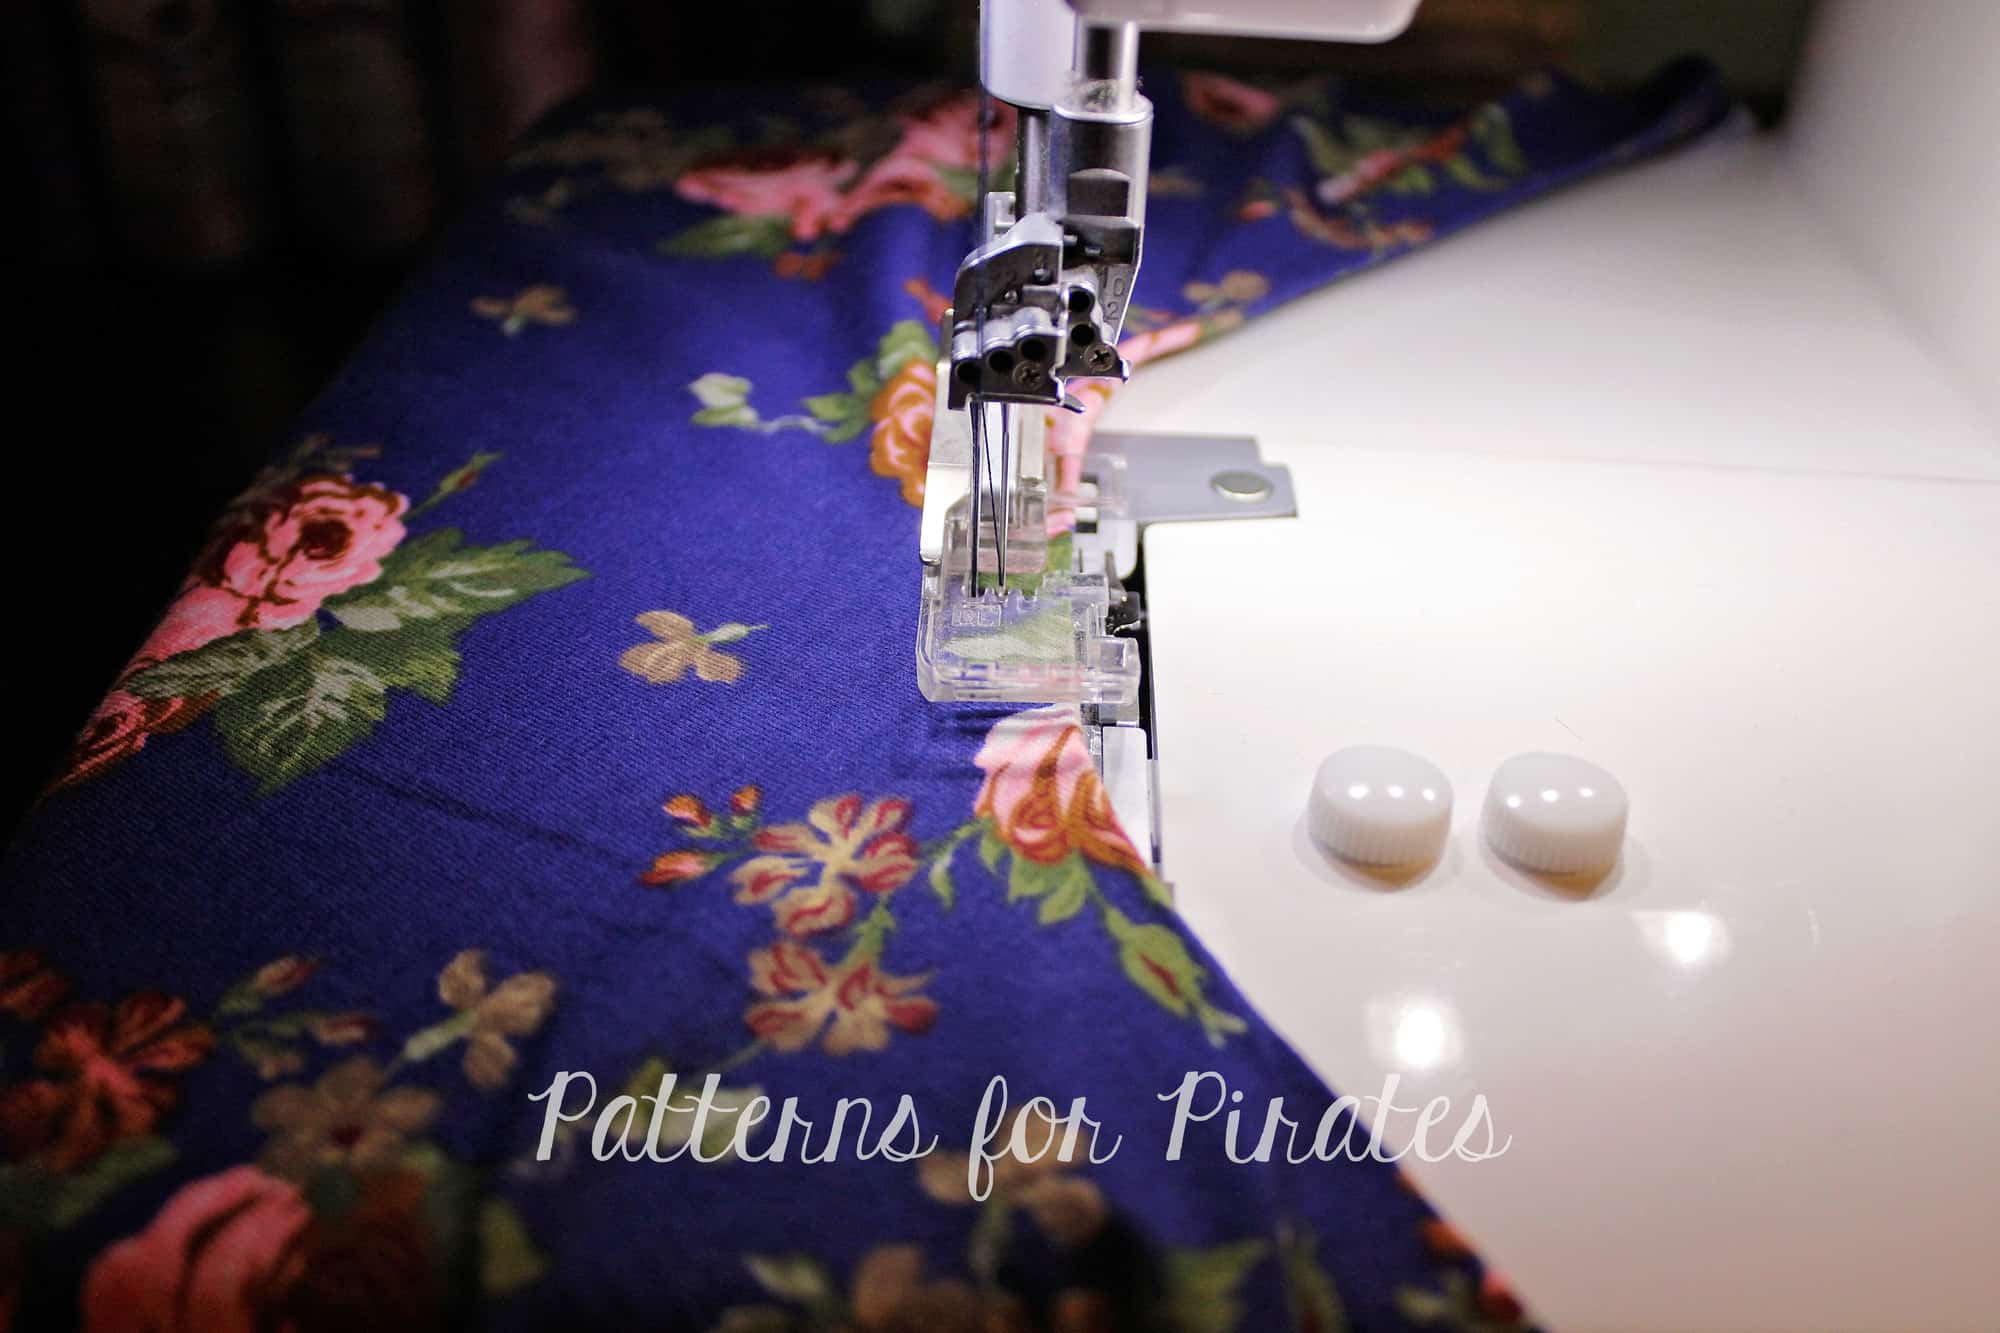
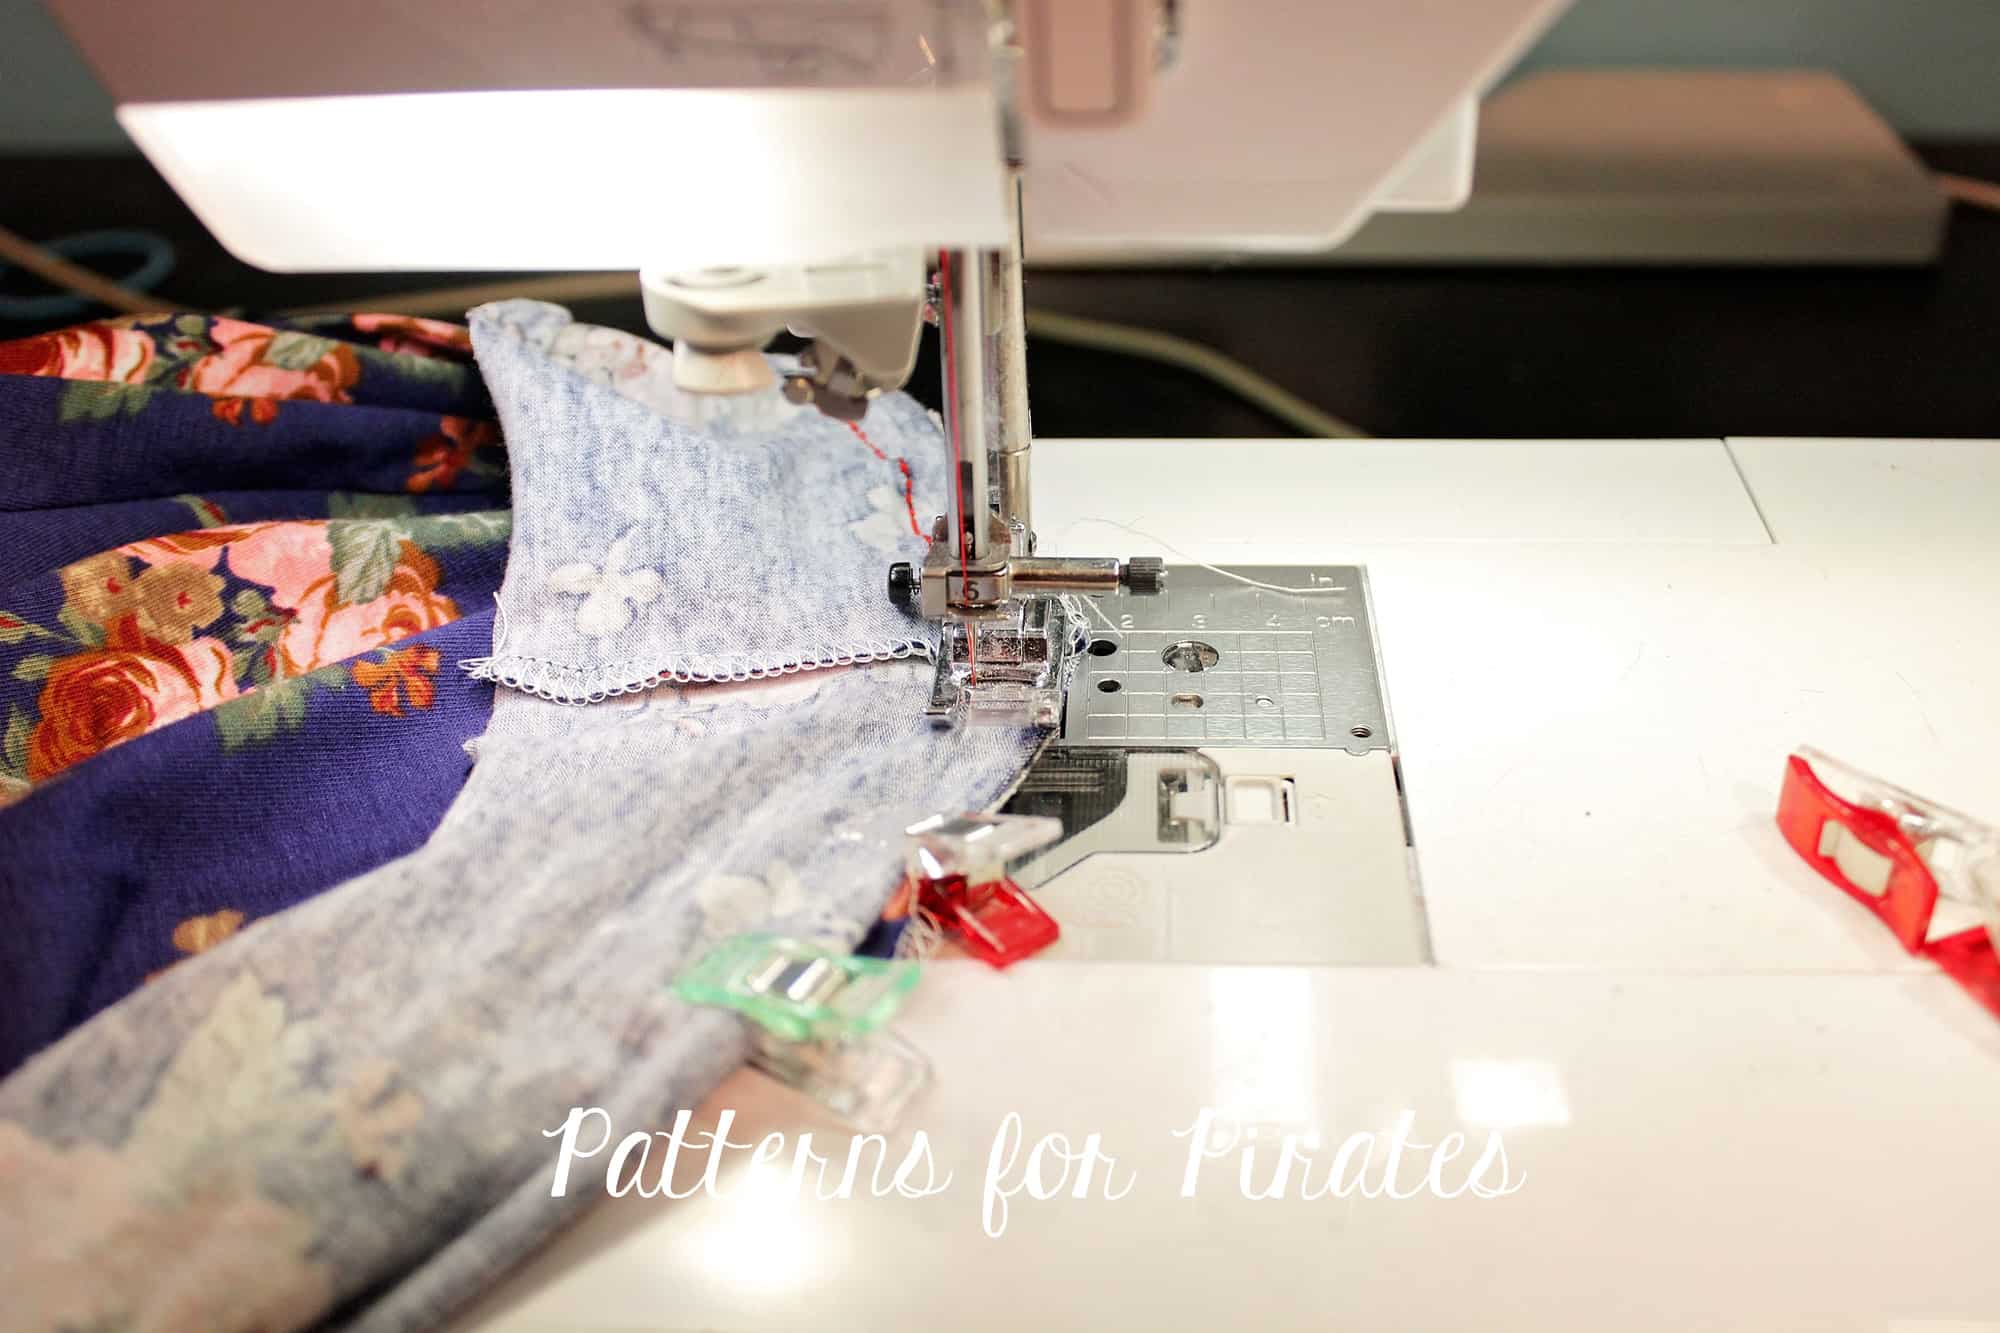
Match the center back of the neckband with the center back of the shirt. Slightly stretch the unfolded neckband and pin it to the back. Repeat for the front of the shirt. Using a stretch stitch, sew the neckband to the shirt right sides together.
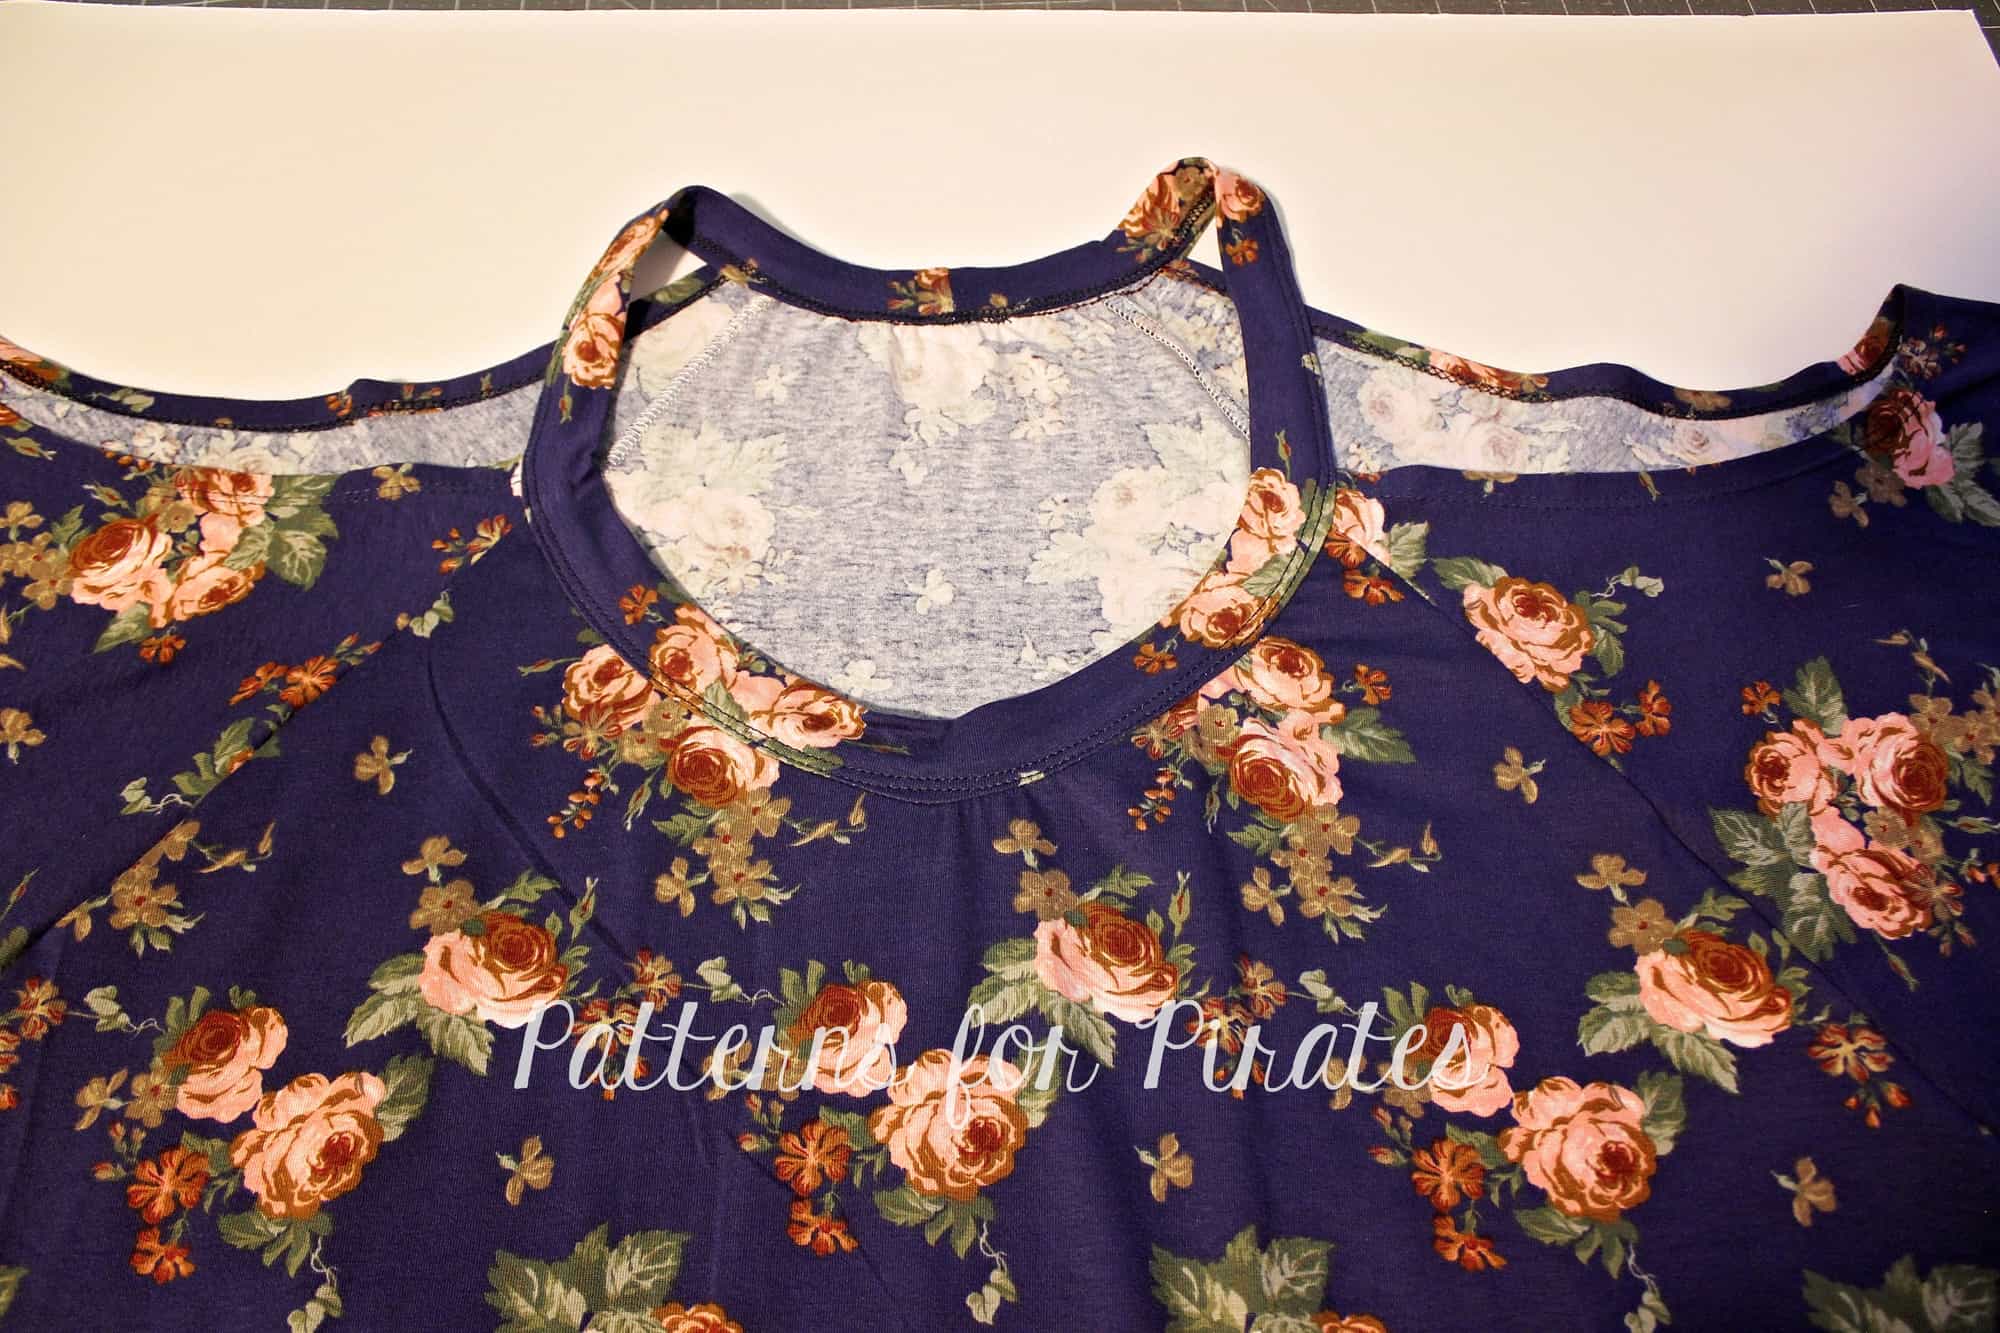
Using the memory hem you created earlier enclose the front and back of the shirt and stitch the neckband with either your coverstitch machine, twin needles or a zig zag stitch.

All you have to do now is give the neckband a good steam press and show off your new cold shoulder shirt.
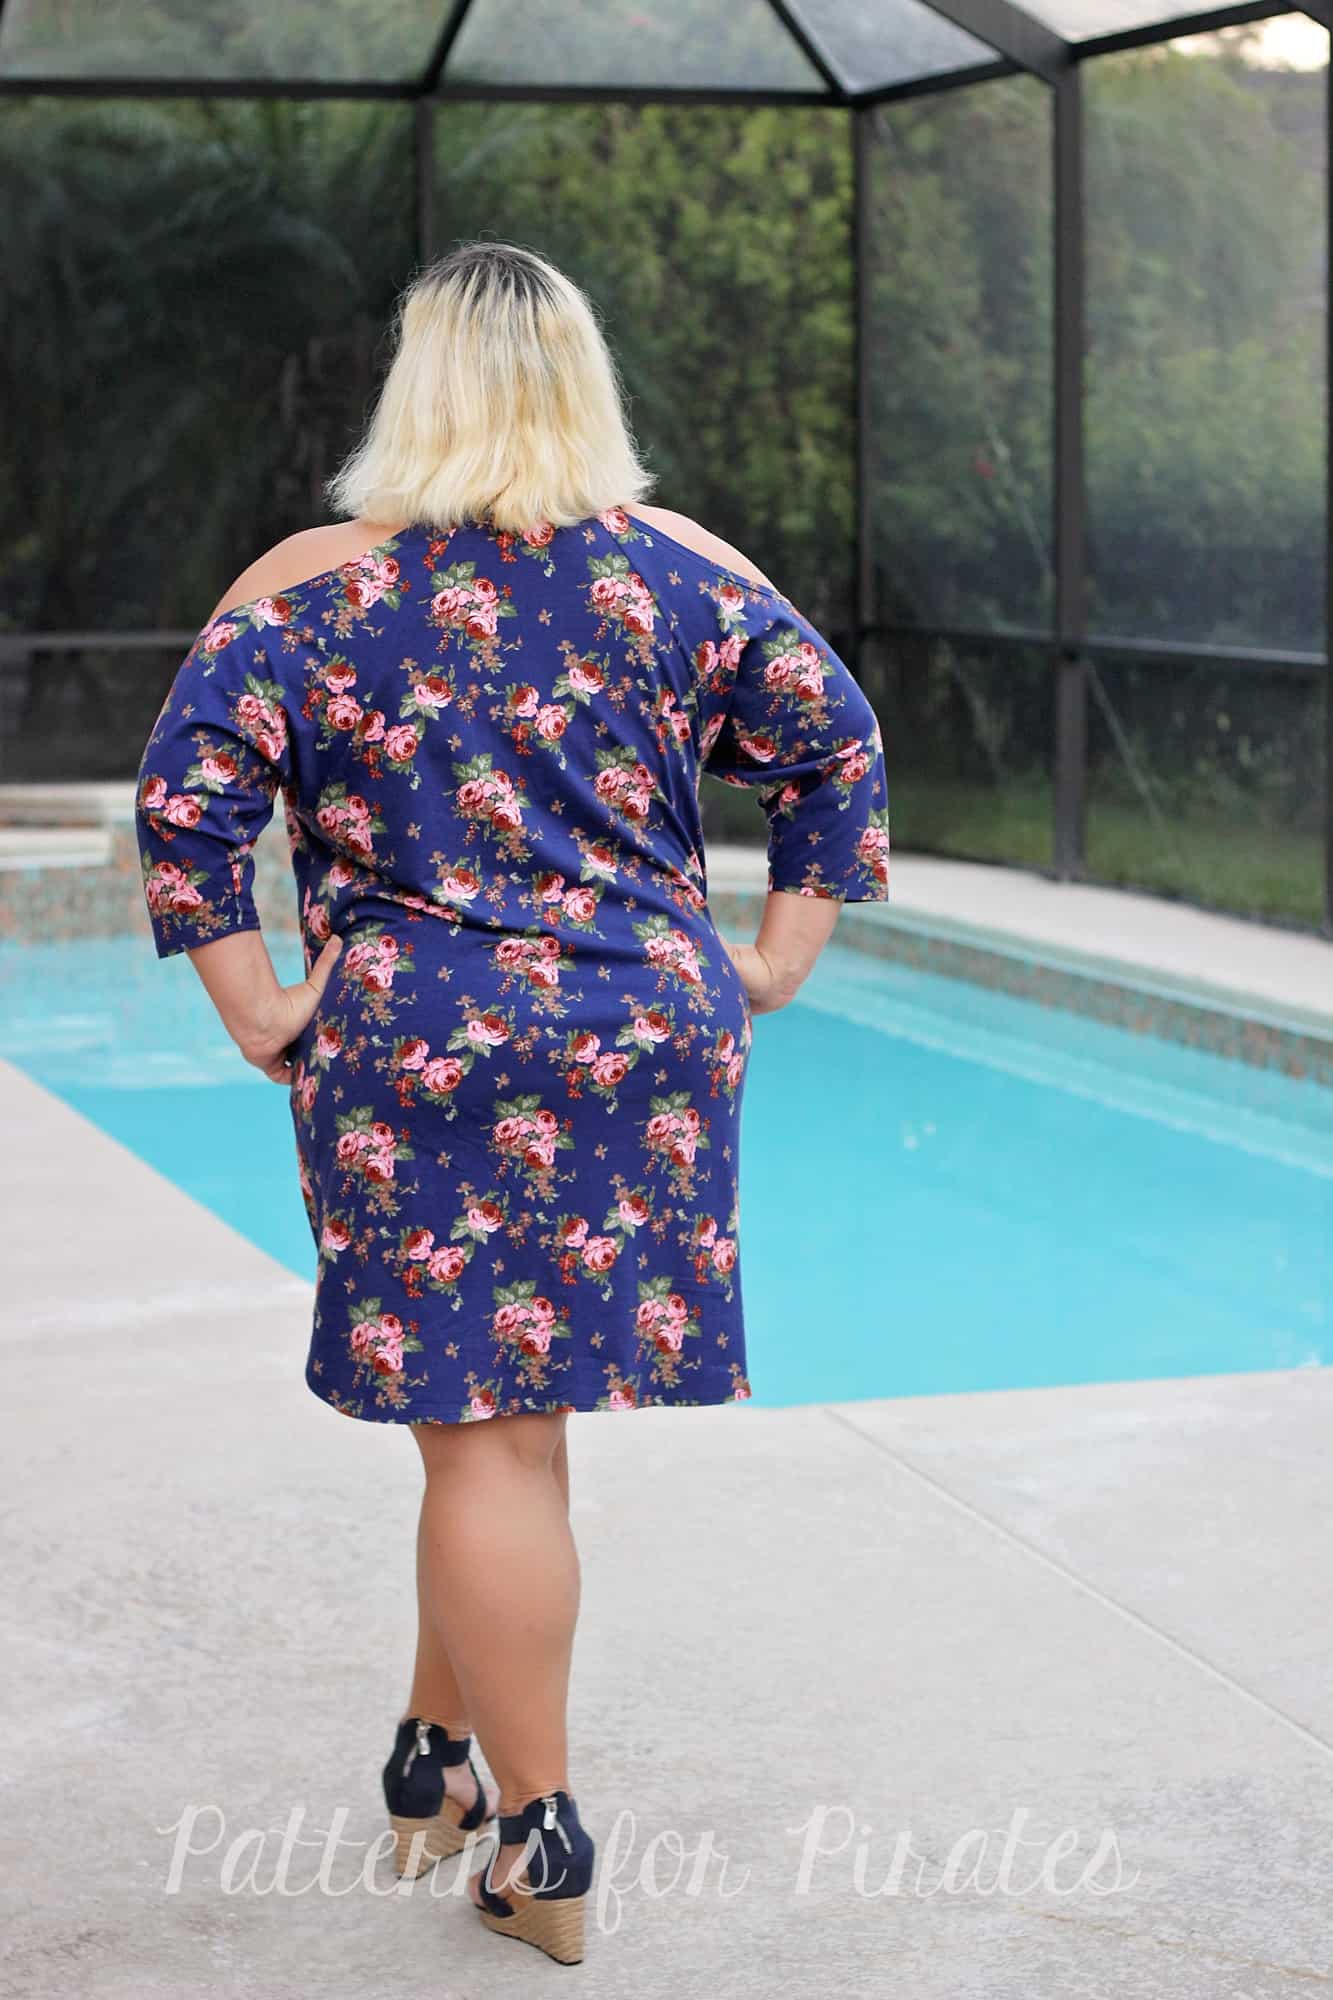
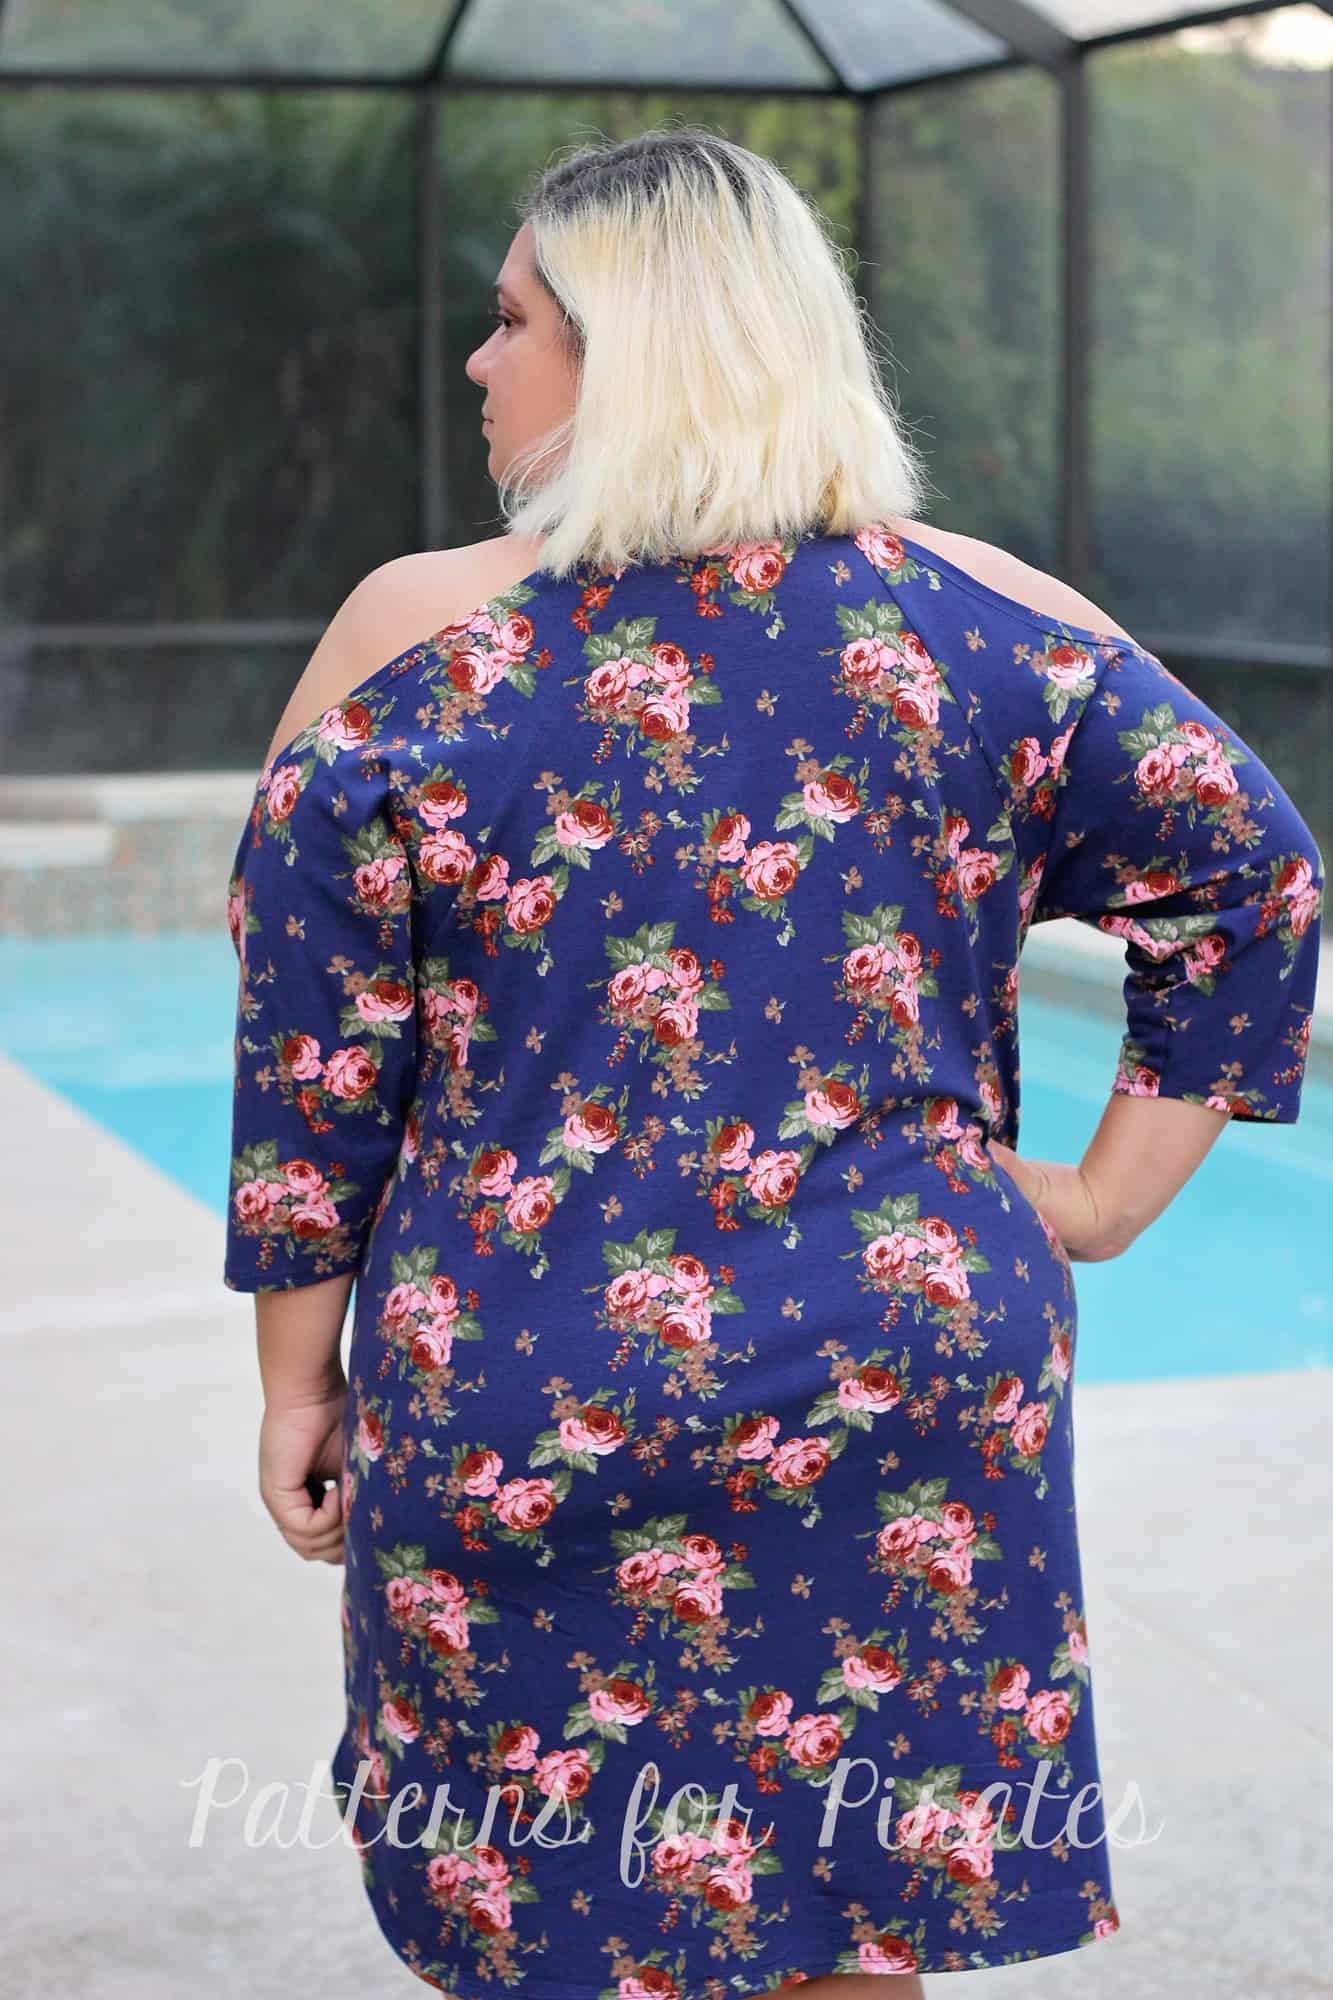
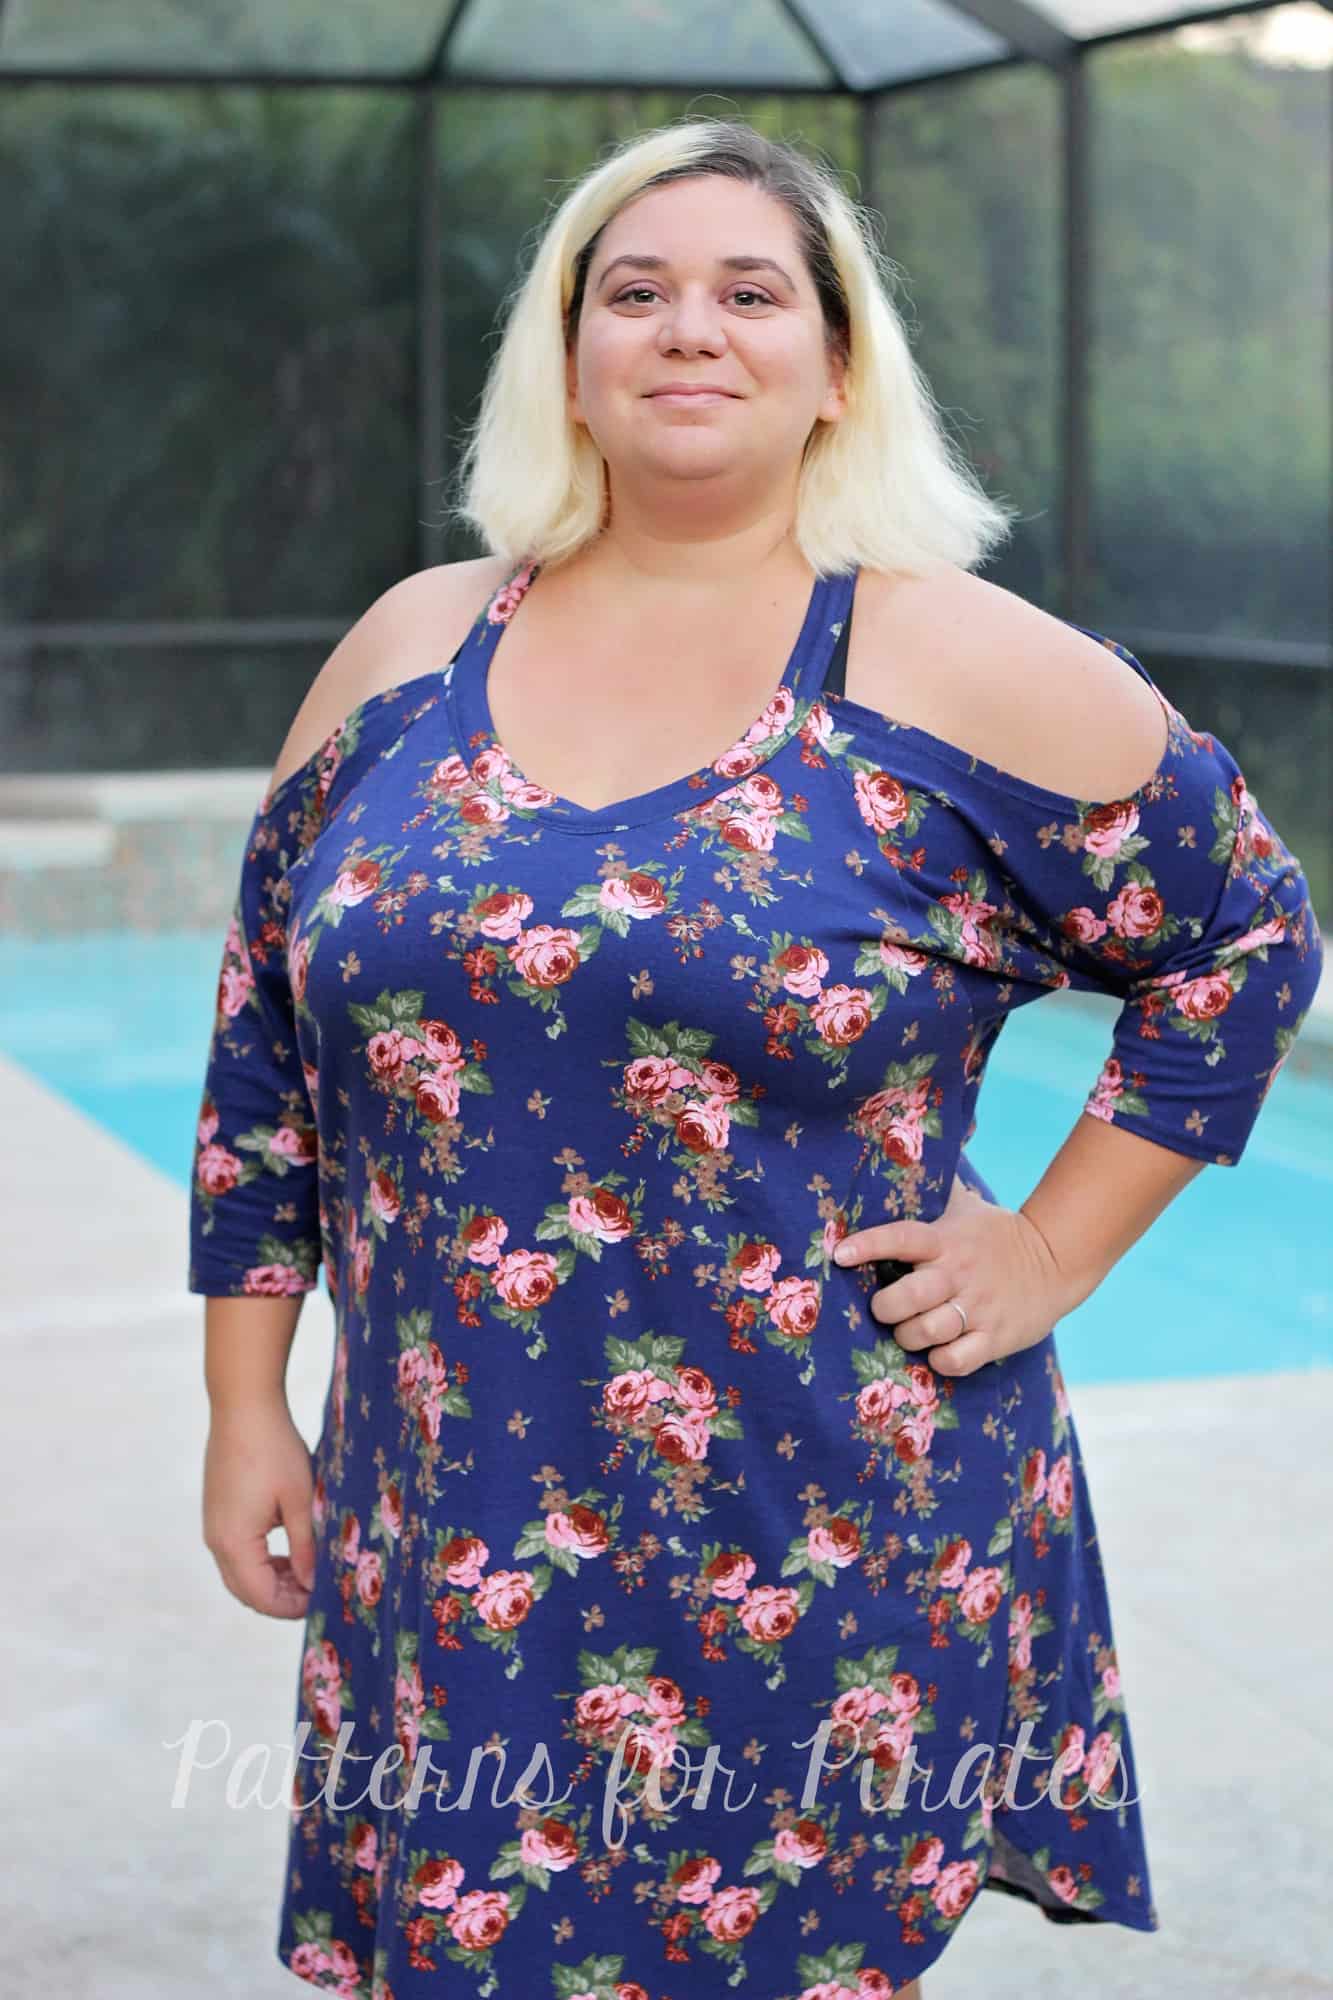
Play around with the cut-out size and get more looks!
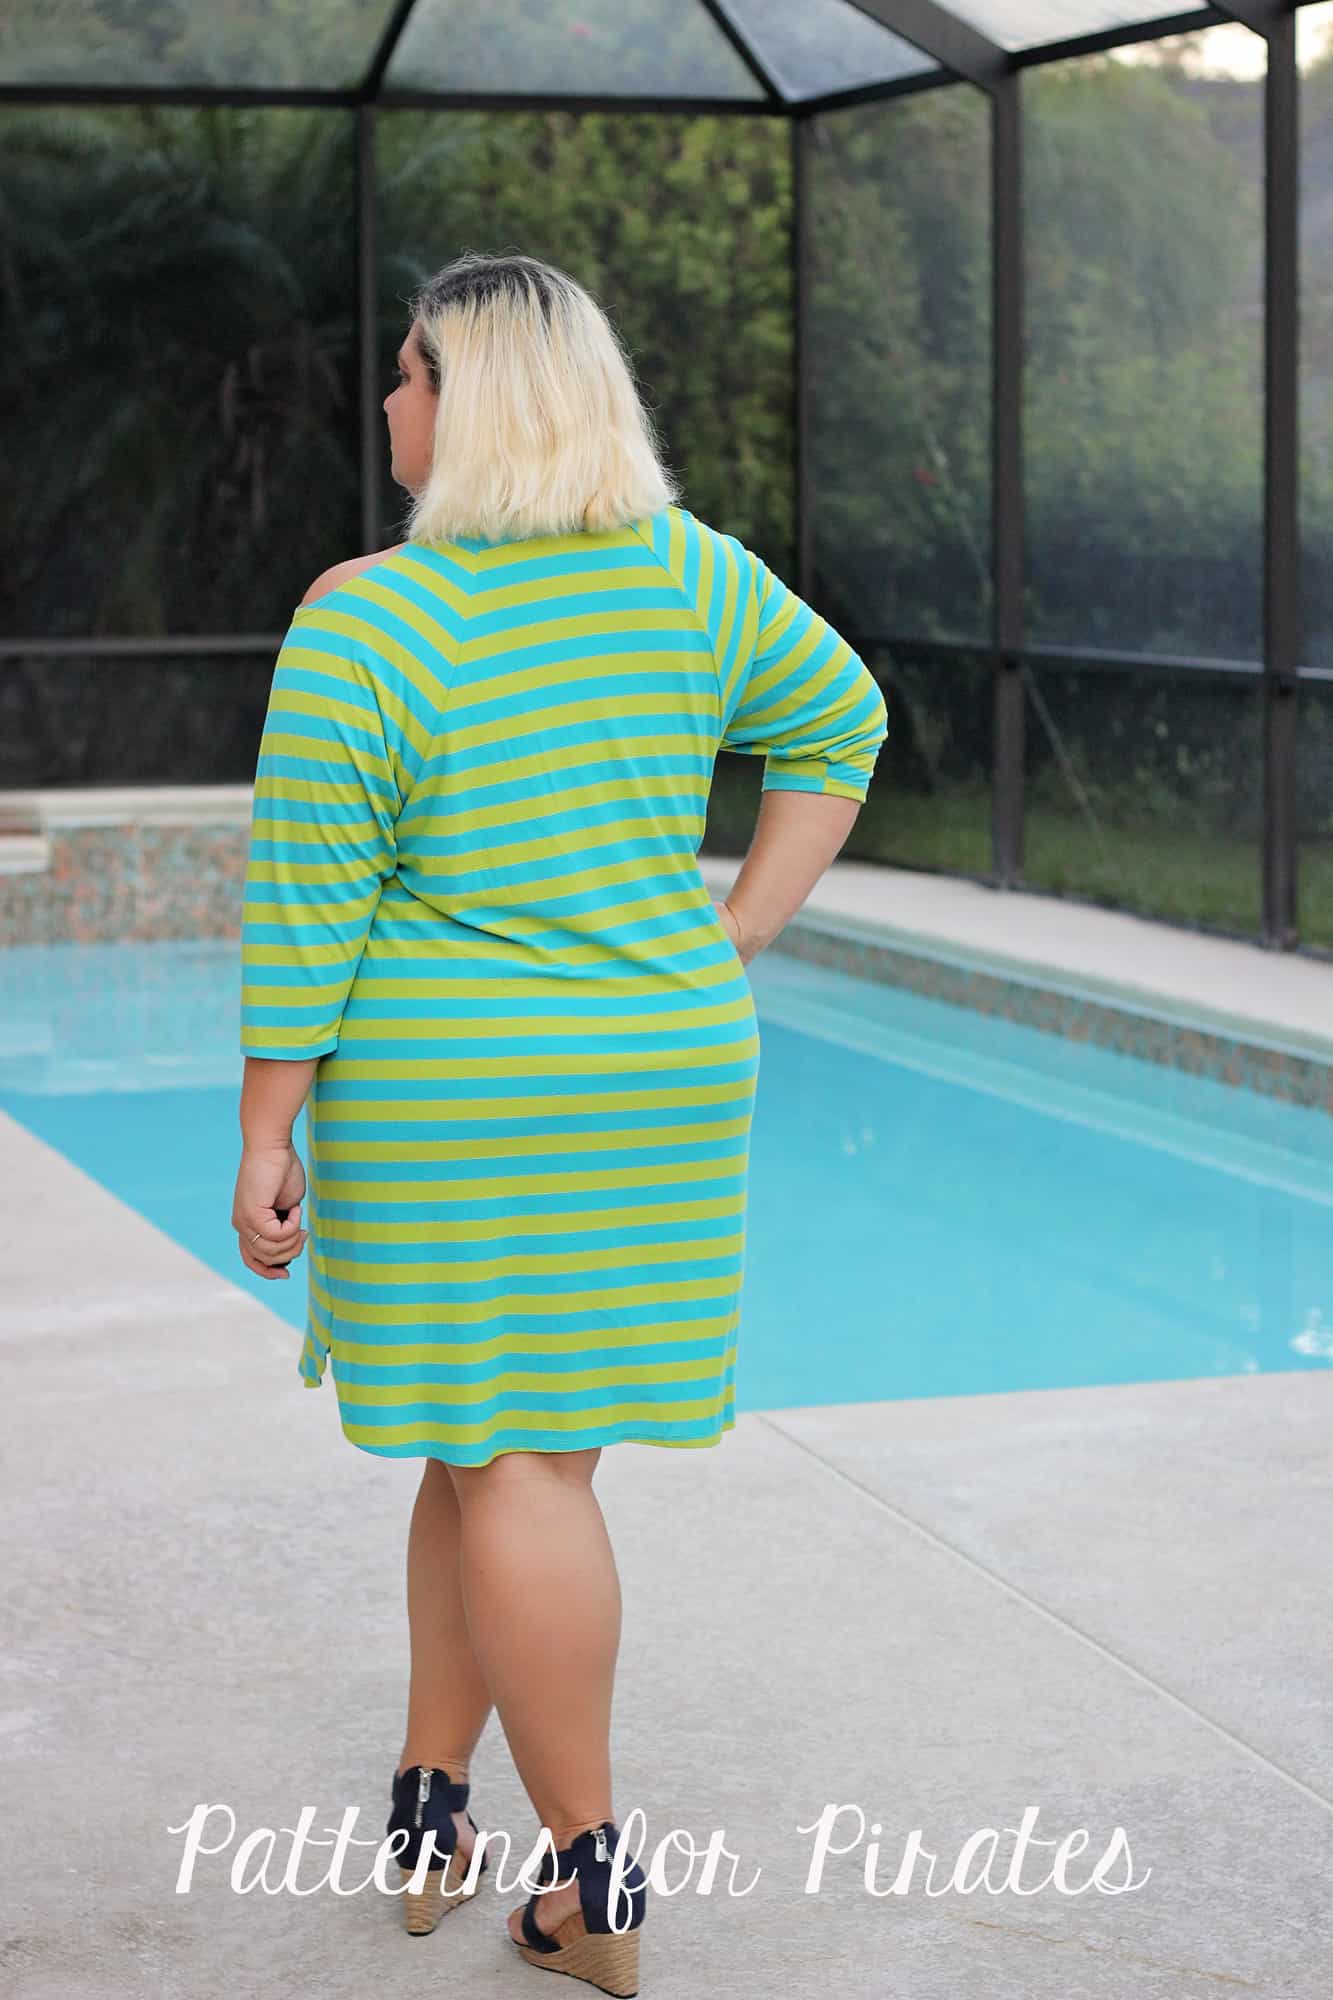
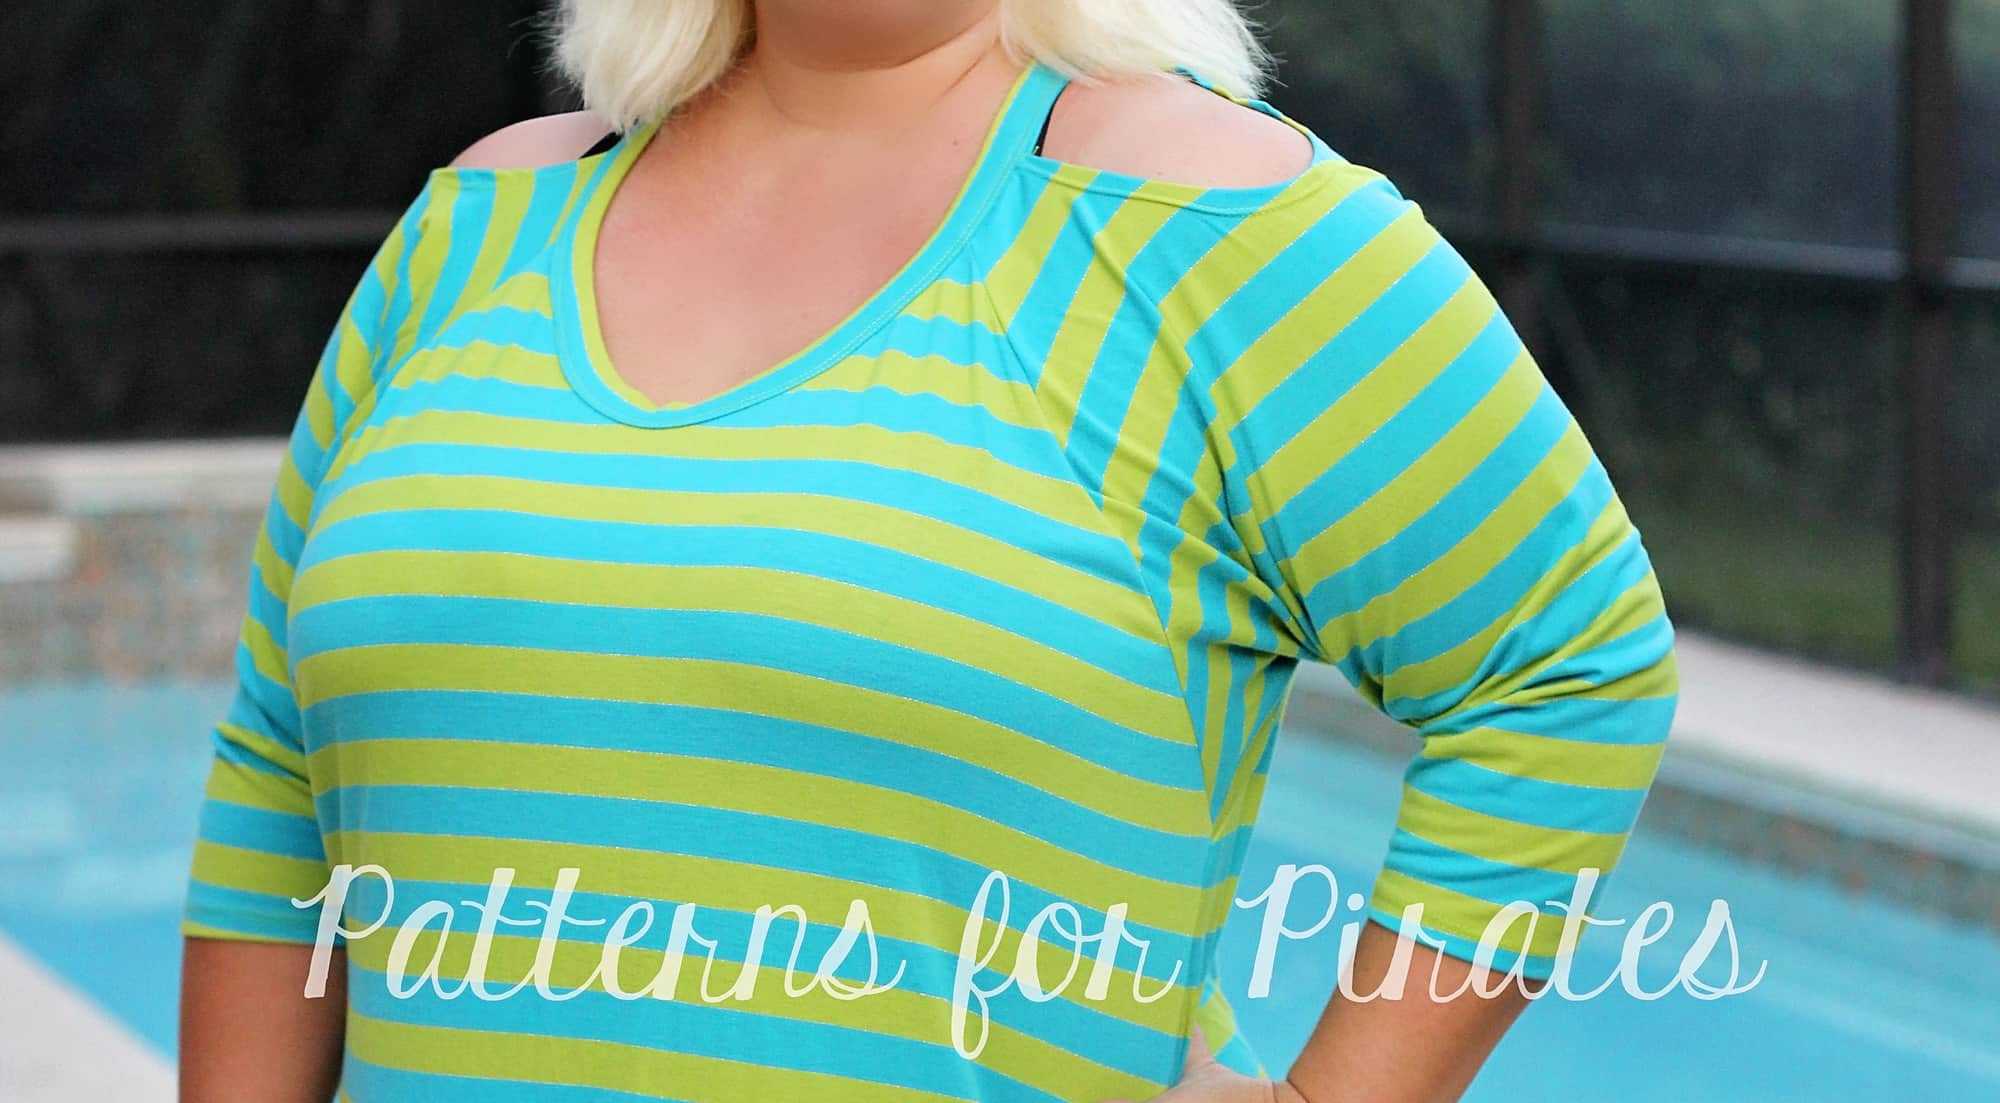
. . . . .
Tie Back
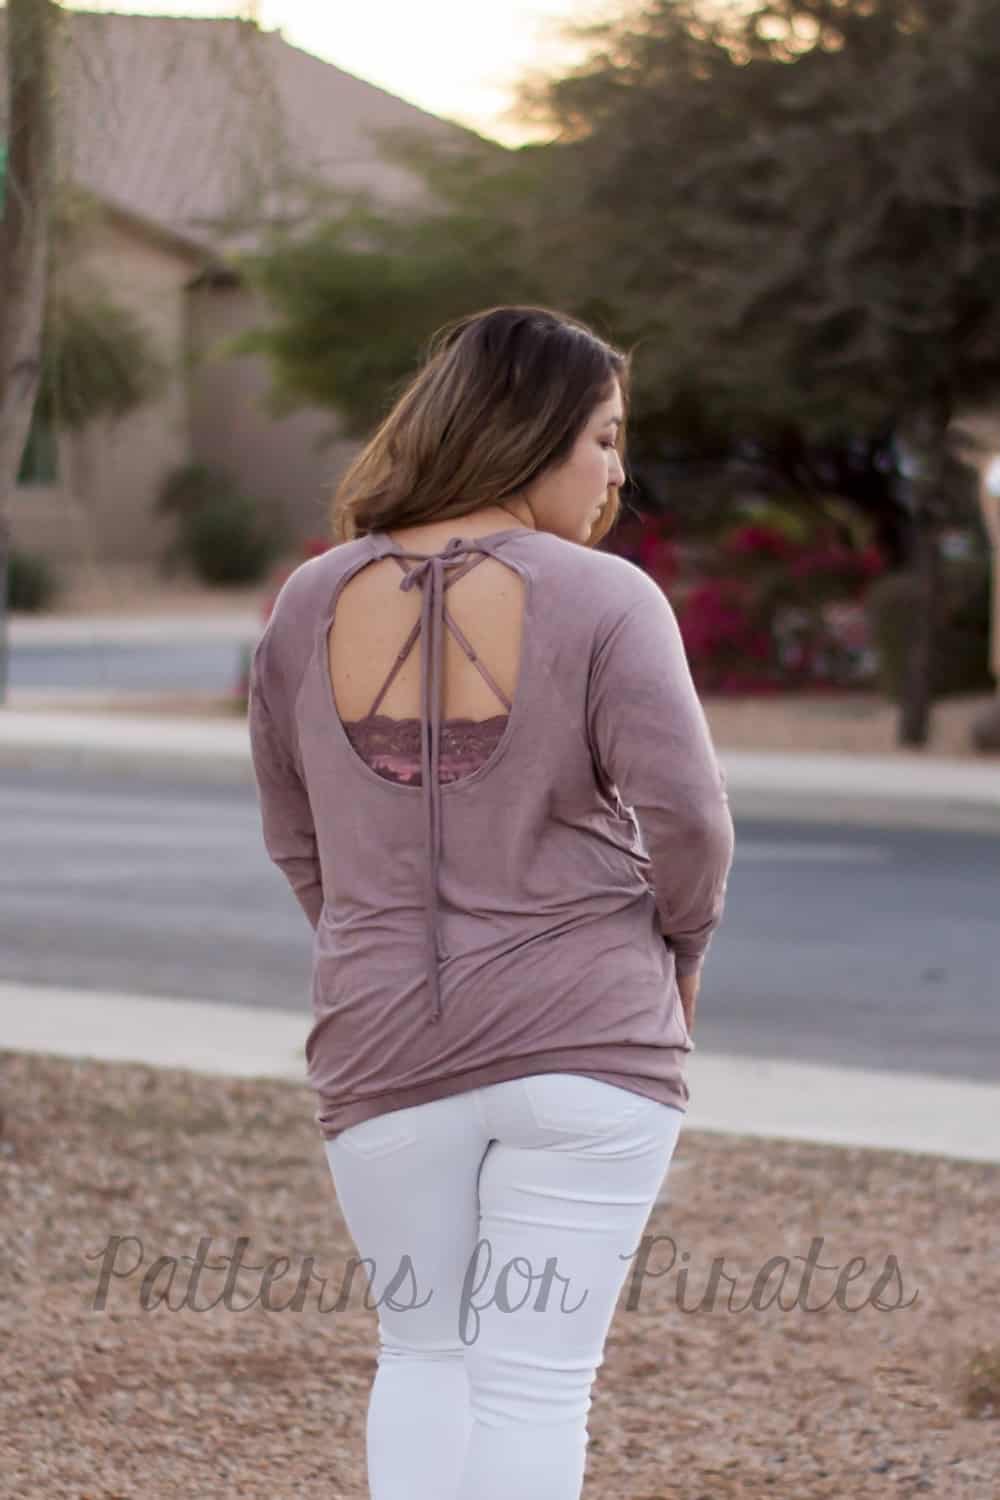
During Raglan Week last year, we showed how to create a keyhole back for the Slim Fit Raglan (here), so I knew a tie back option for the RagDoll Raglan had to be done. Instead of binding the neckline, I decided to do a spaghetti strap style tie. You can really use anything for your ties; lace, ribbon, etc. but will show you how to make the spaghetti straps.
Cut your patterns pieces as usual:
- front, back with low scoop option, 2 sleeves (mirror image).
- For the ties, I did 1.5″ x 22″. You can adjust to your preference but found this to be a good length for me.
- Neckband: as per pattern but less 3″ from the width measurement on the cut chart. Example: Size large is 2.75″ x 26.75″ so my adjusted neckband is 2.75′ x 23.75″.
Construct your pattern as provided in the tutorial but skip hemming the low back curve. We will do that after the back has been attached to the sleeves.
-
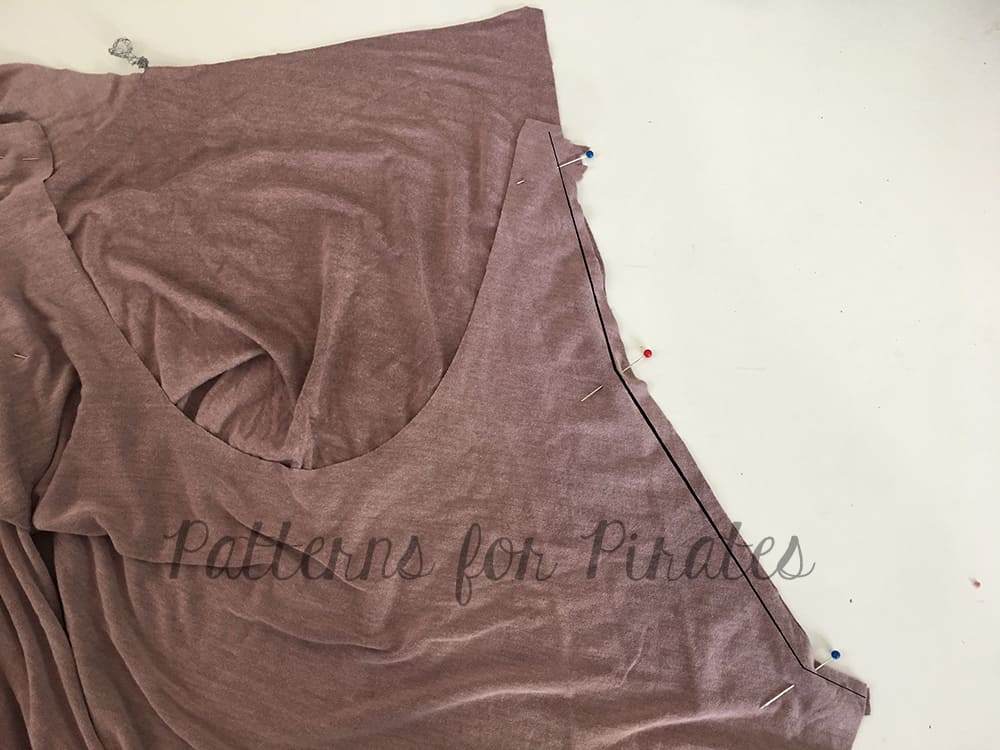
- With right sides together stitch sleeves to front and back as instructed in the tutorial. You will have excess at the top back, do not cut off your seam allowance.
-
- Back view.
-
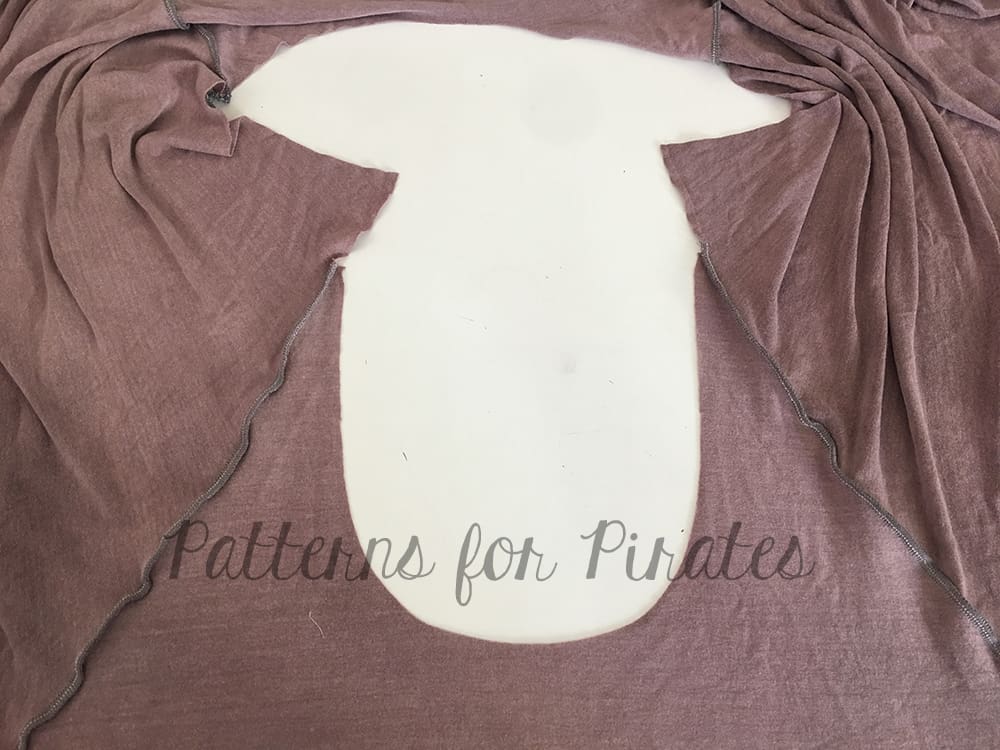
- Turn the low back curve and top portion of the sleeve under 1/2″ to the wrong side and edgestitch.
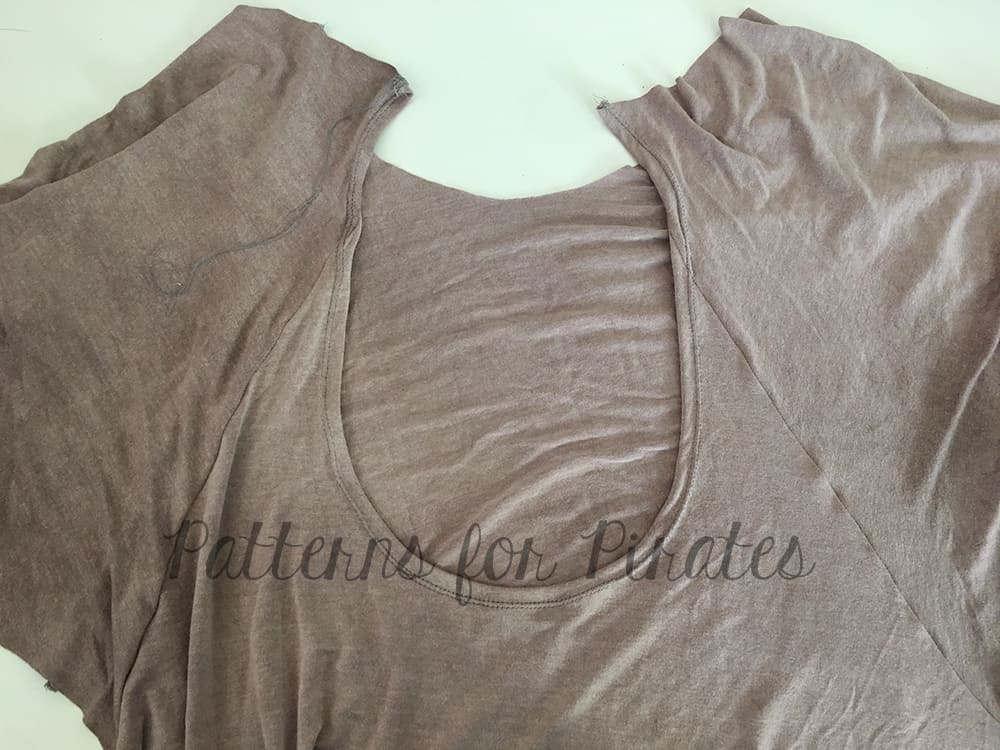
Now to create the ties.
-
- On your serger or sewing machine create a long tail at least 3/4 the length of your tie.
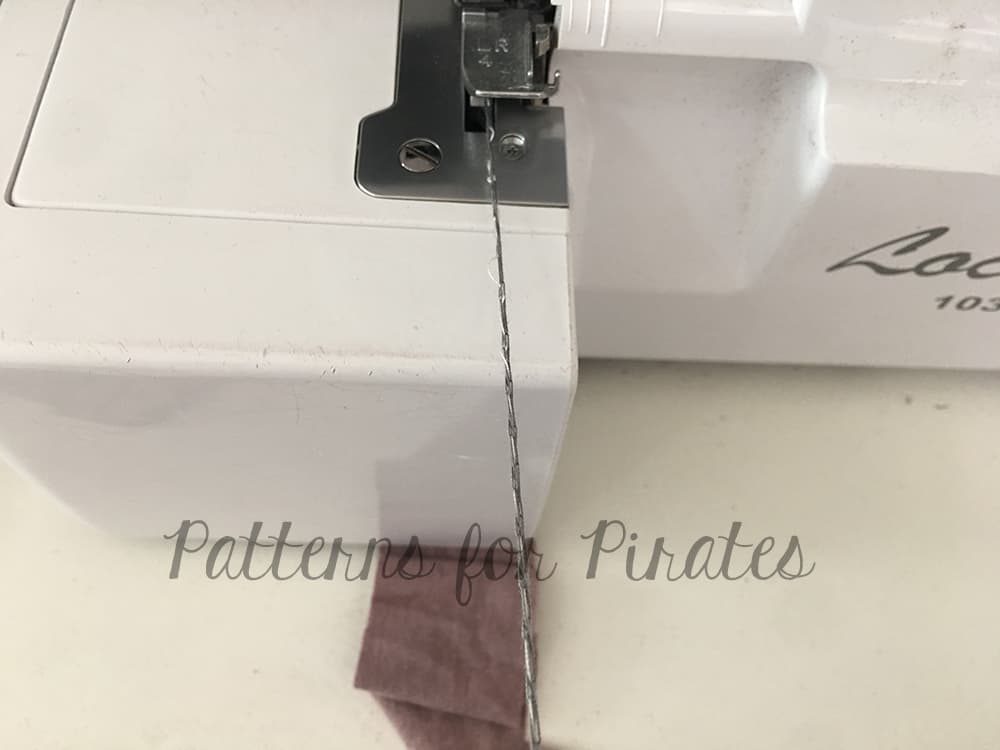
-
- Place your tail on the right side of the tie.
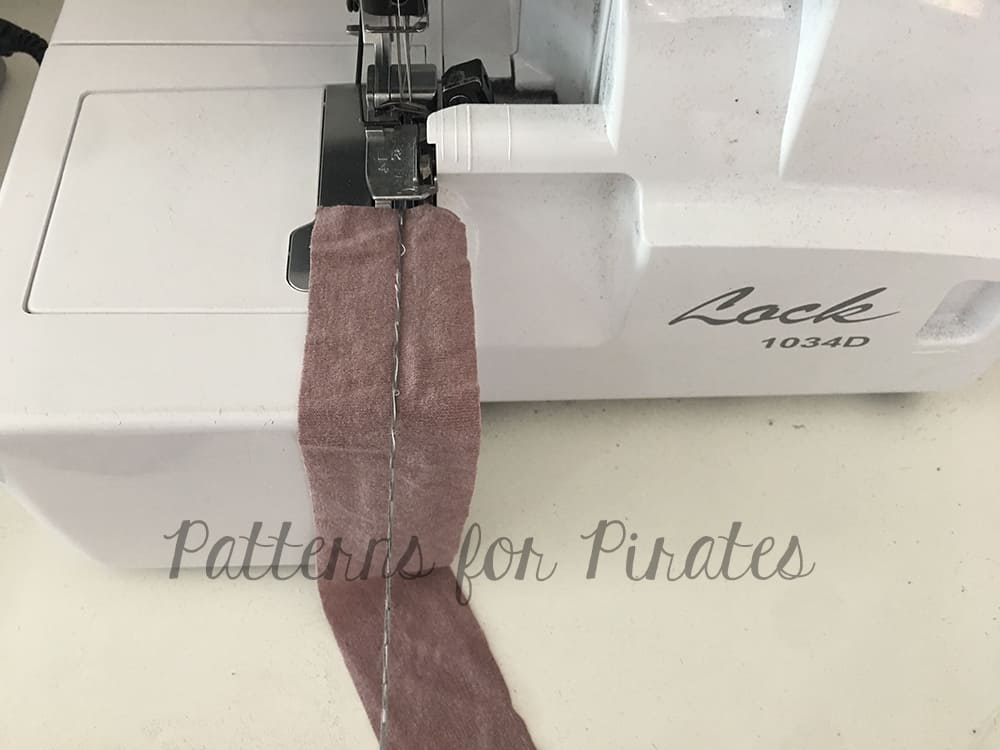
-

- Fold tie with right sides together over the tail.
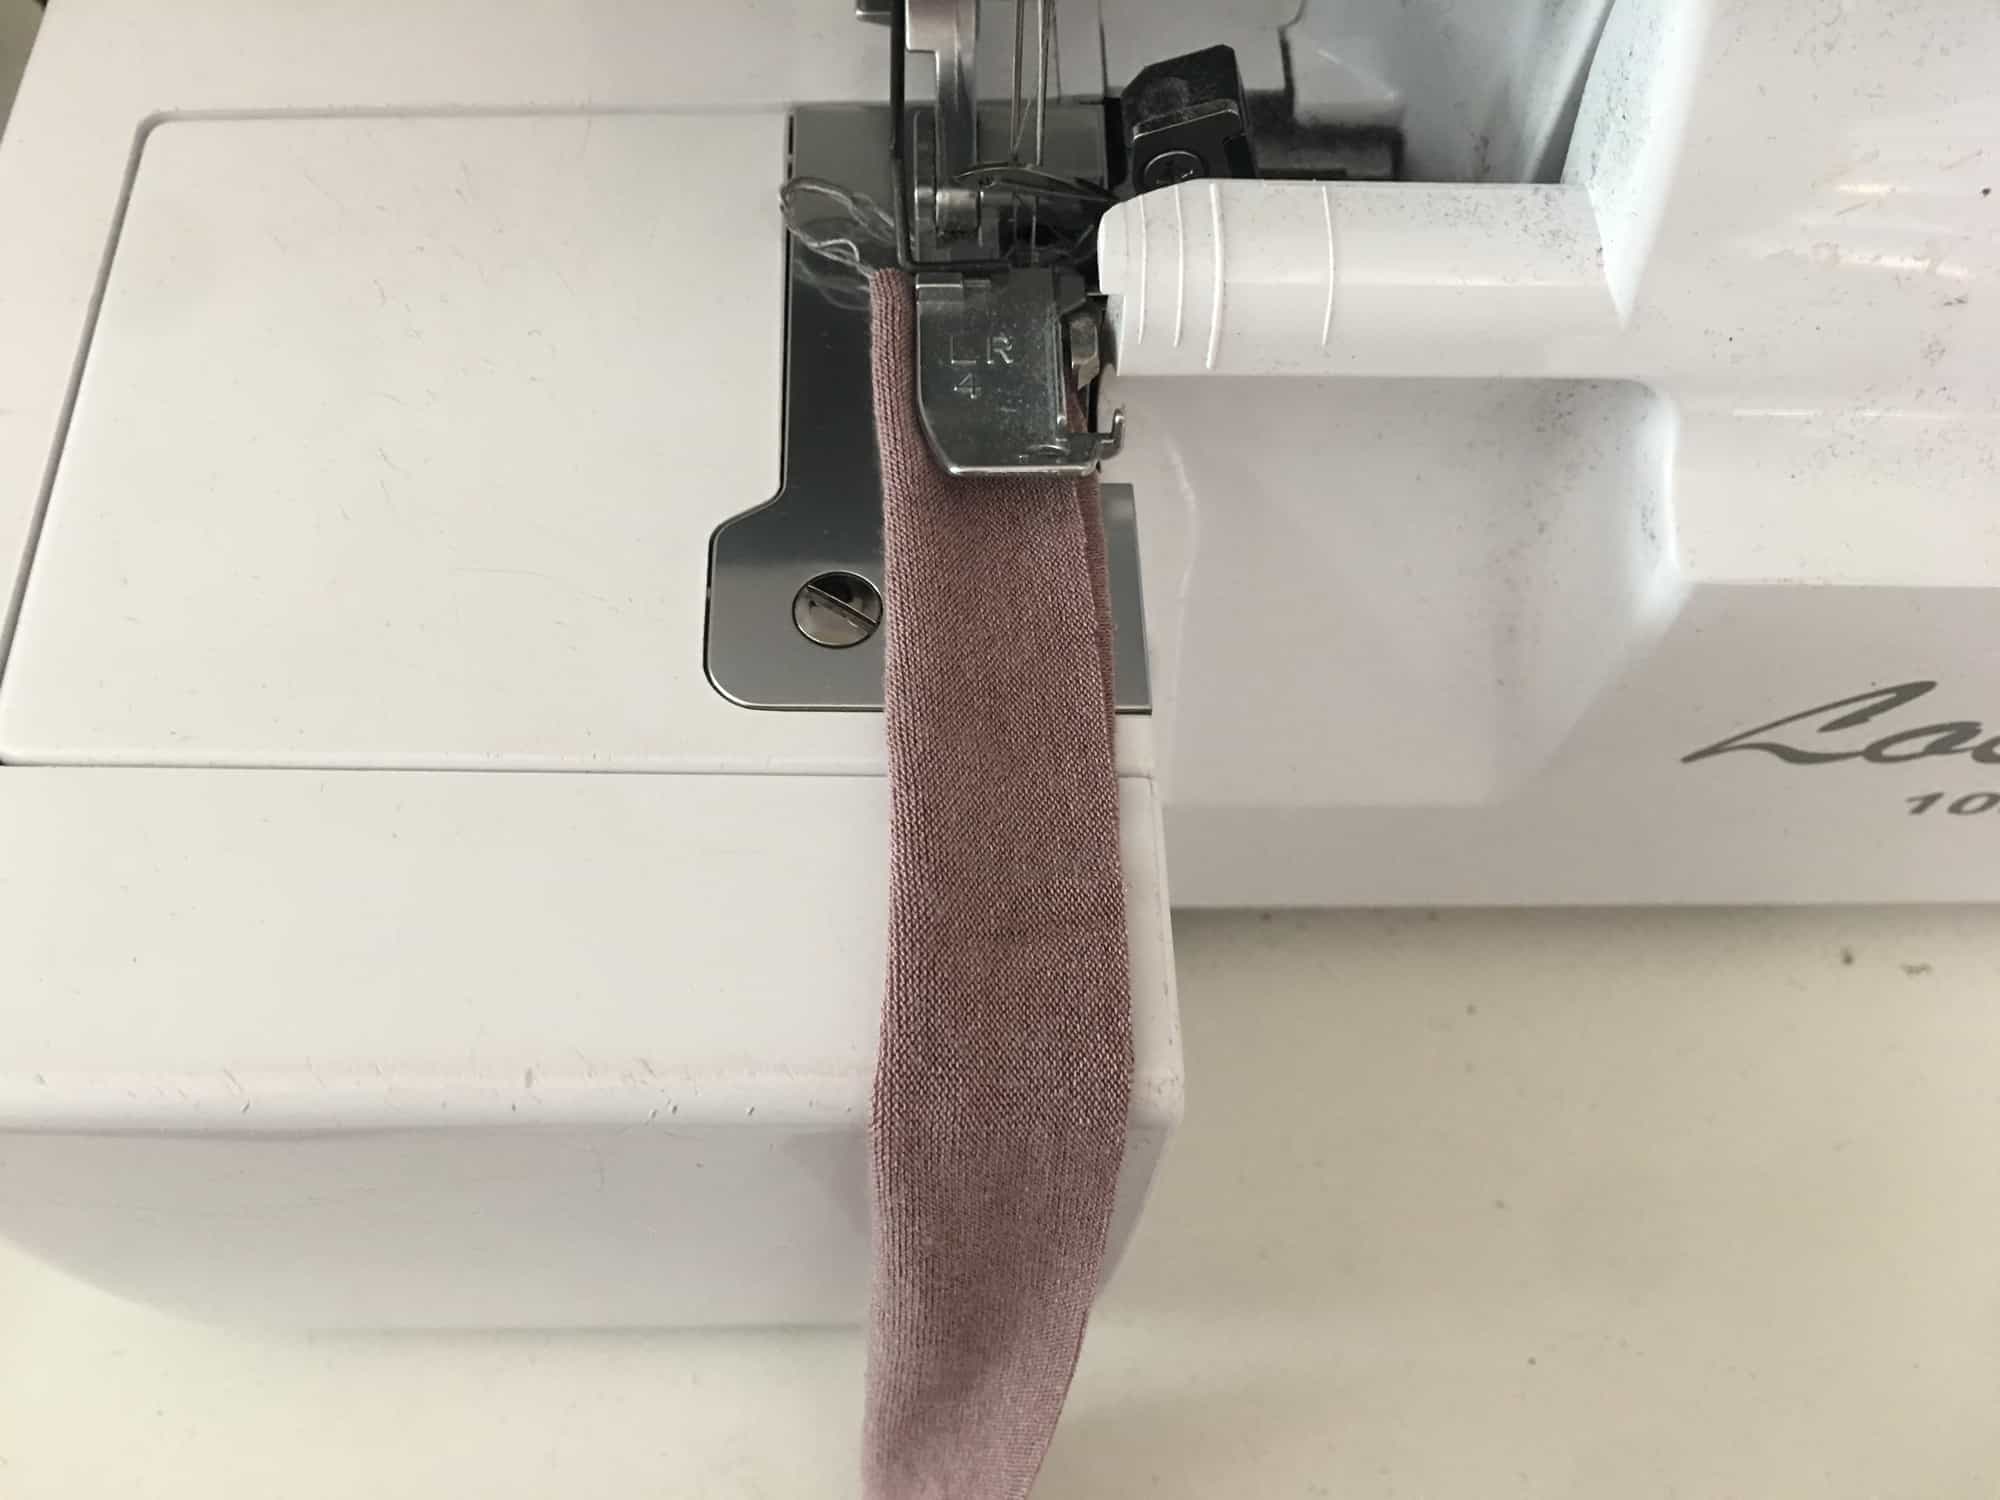
-
- Stitch using a 1/4″ seam allowance. Be sure not to catch your tail. As you stitch, pull the tail toward you so that you have excess and does not end up enclosed in your tie.
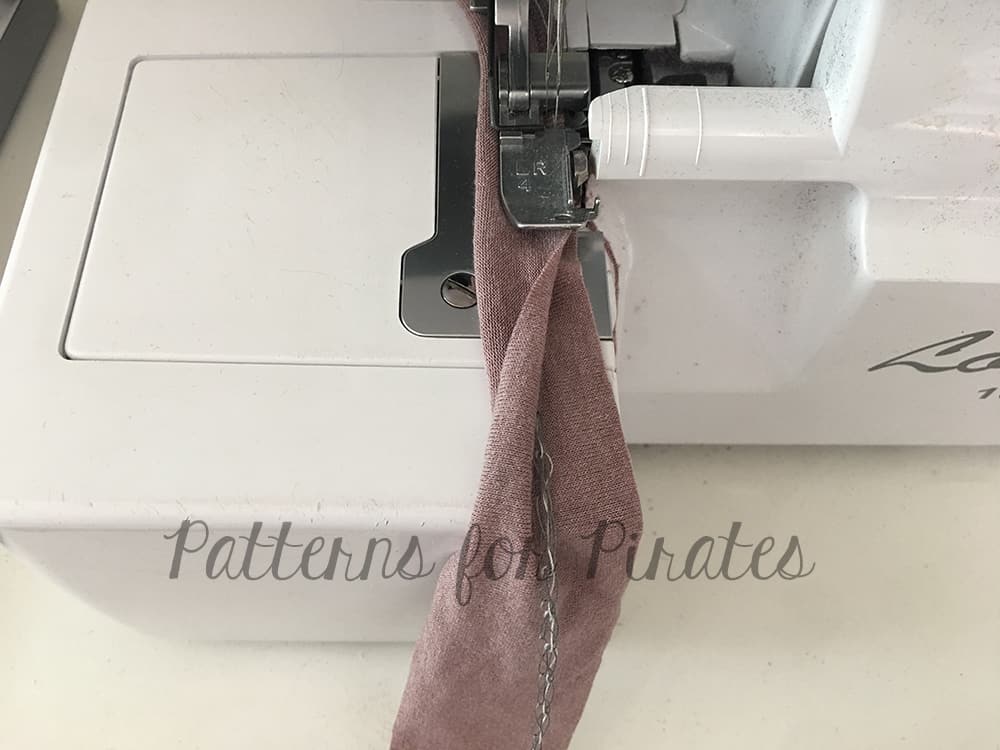
-
- Gently pull the tail and turn your tie right side out.
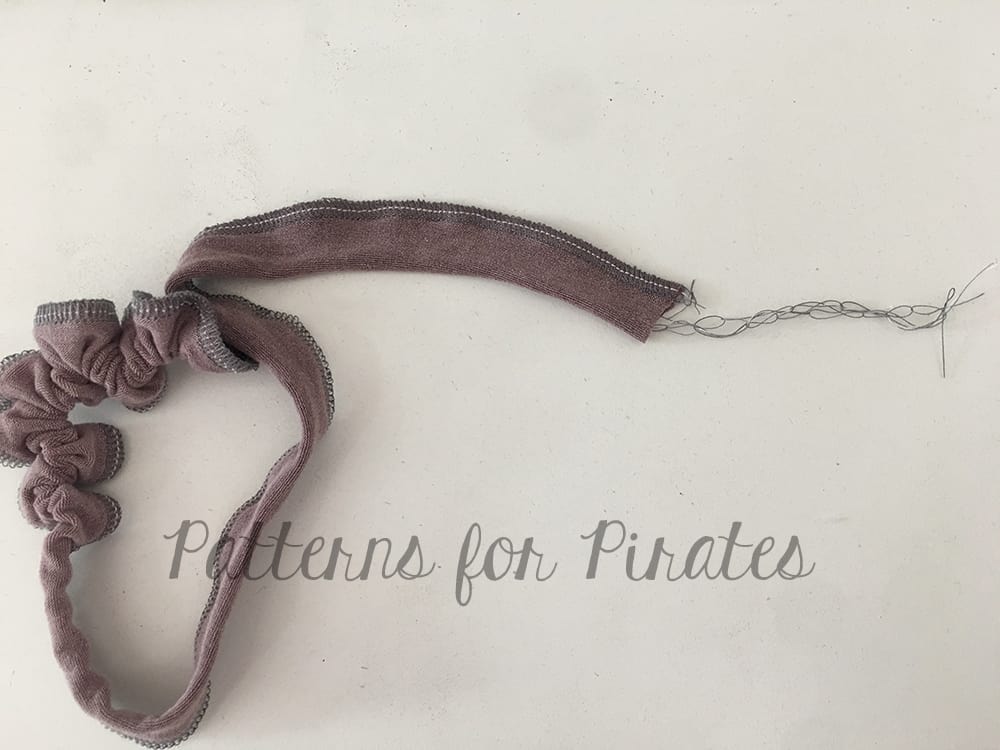
-
- Finish or knot your ends.
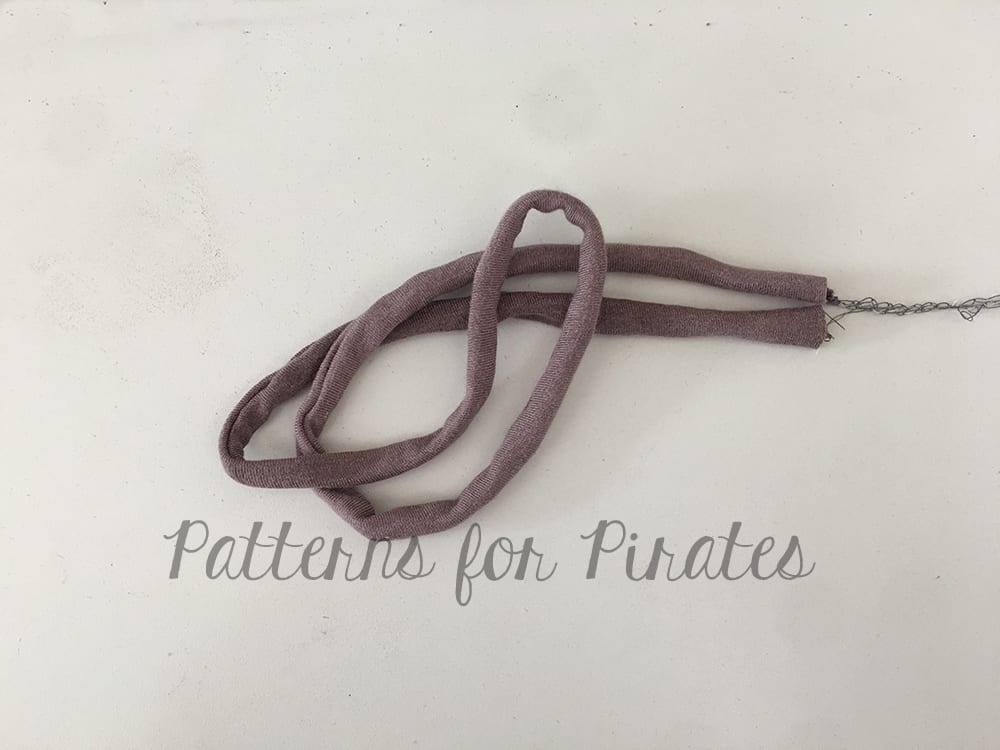
Now, we can finish the neckband.
-
- Grab your ties and neckband.
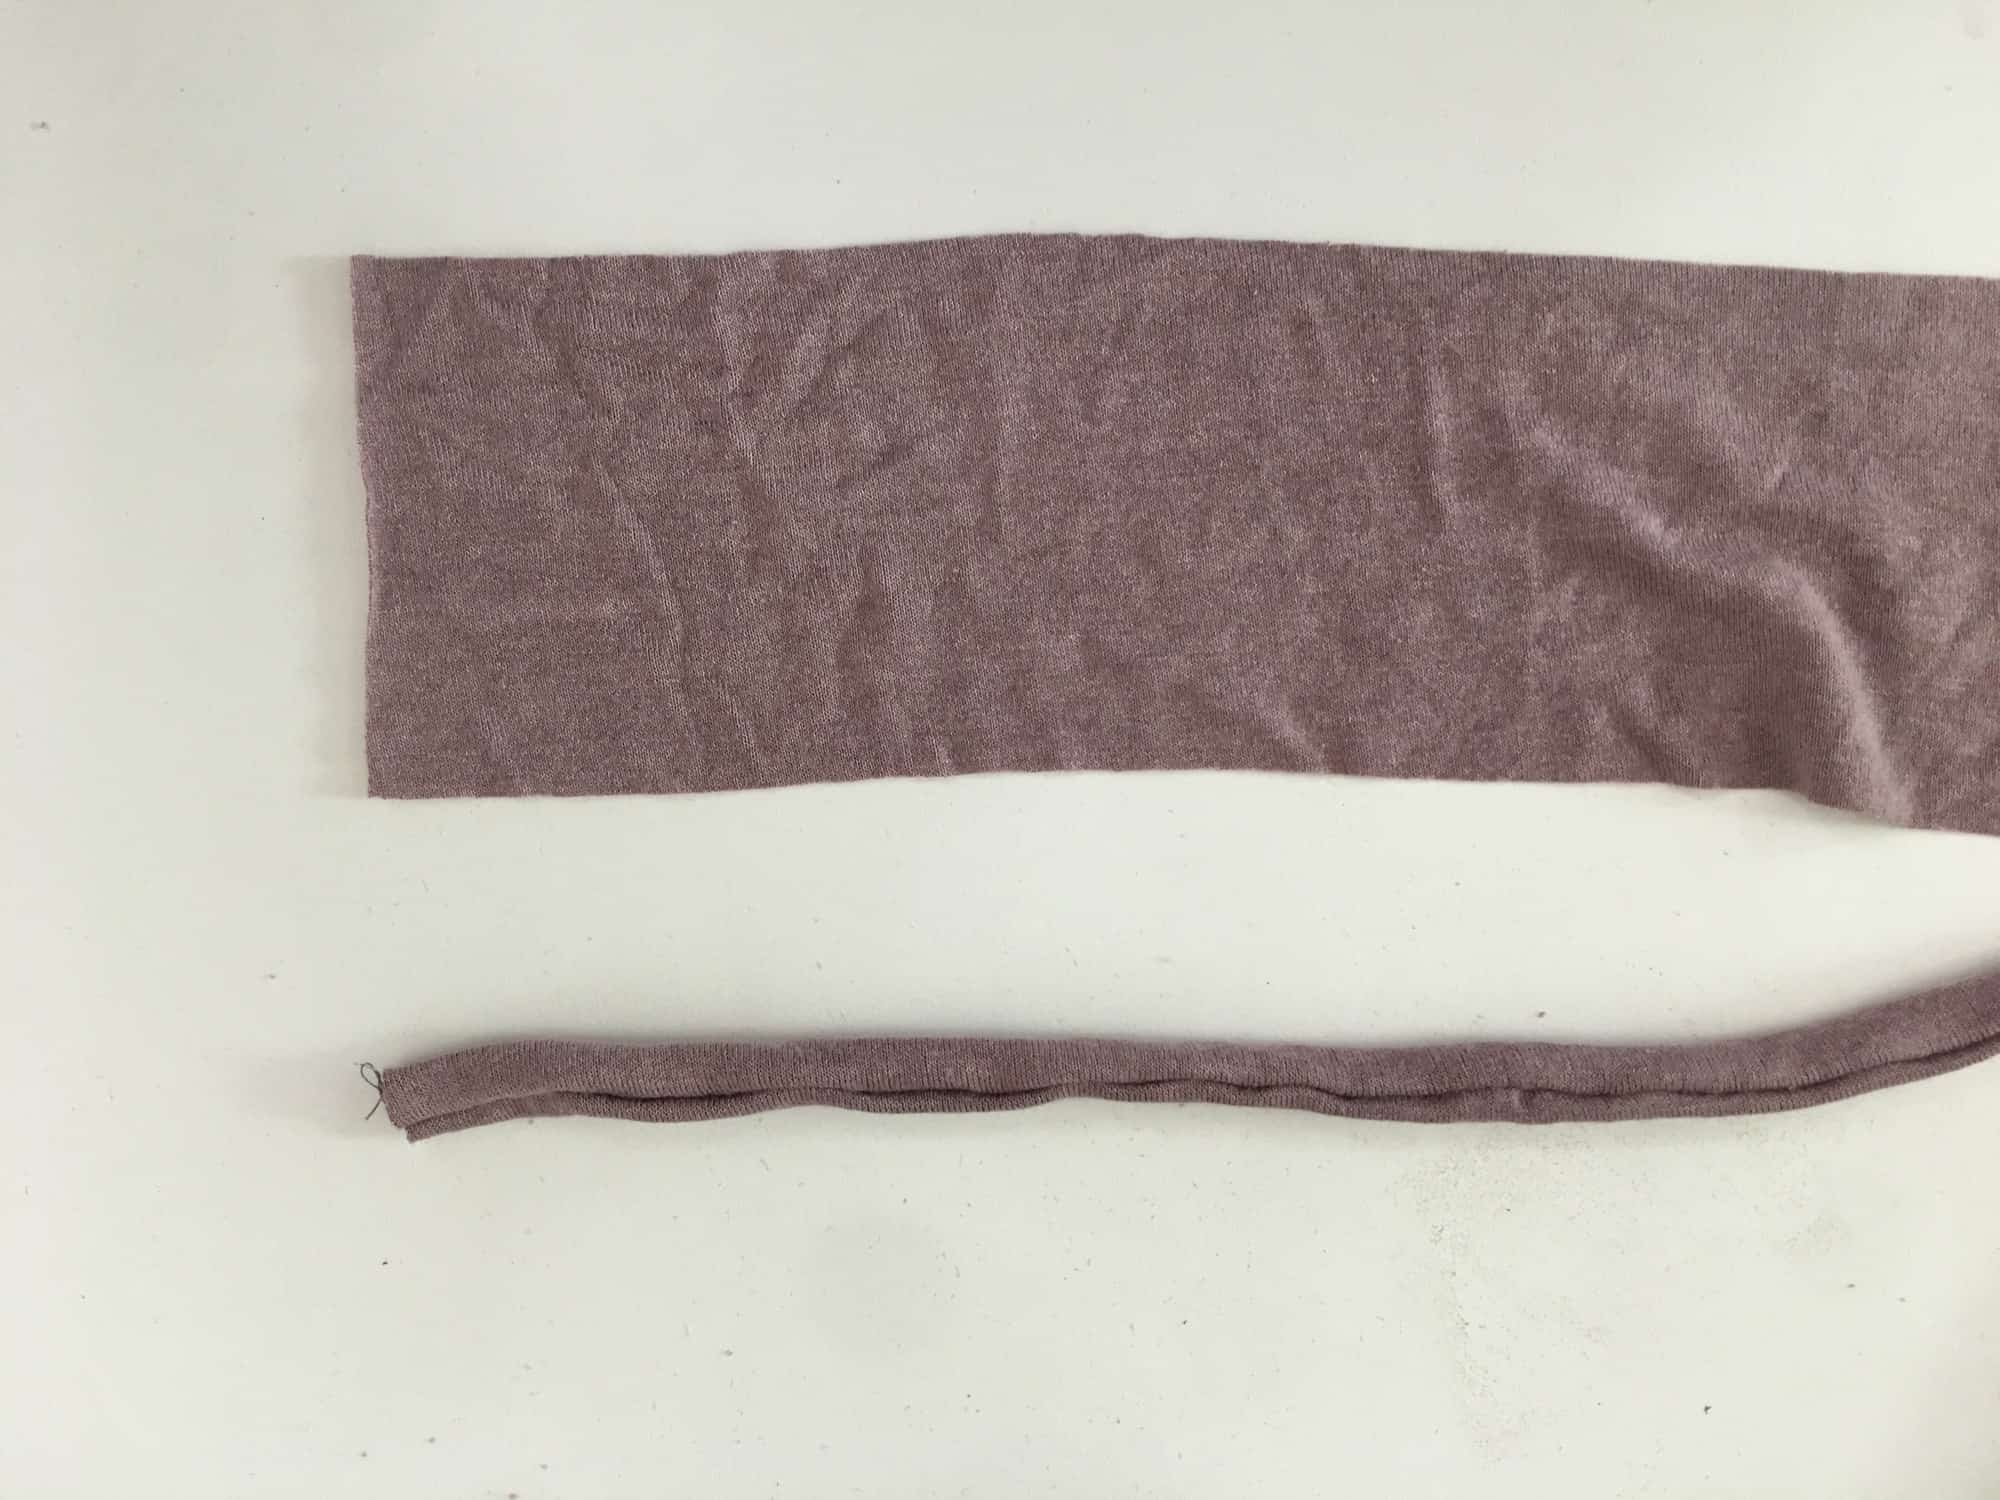
-
- With right sides together, place one tie at one end of the neckband just below center.
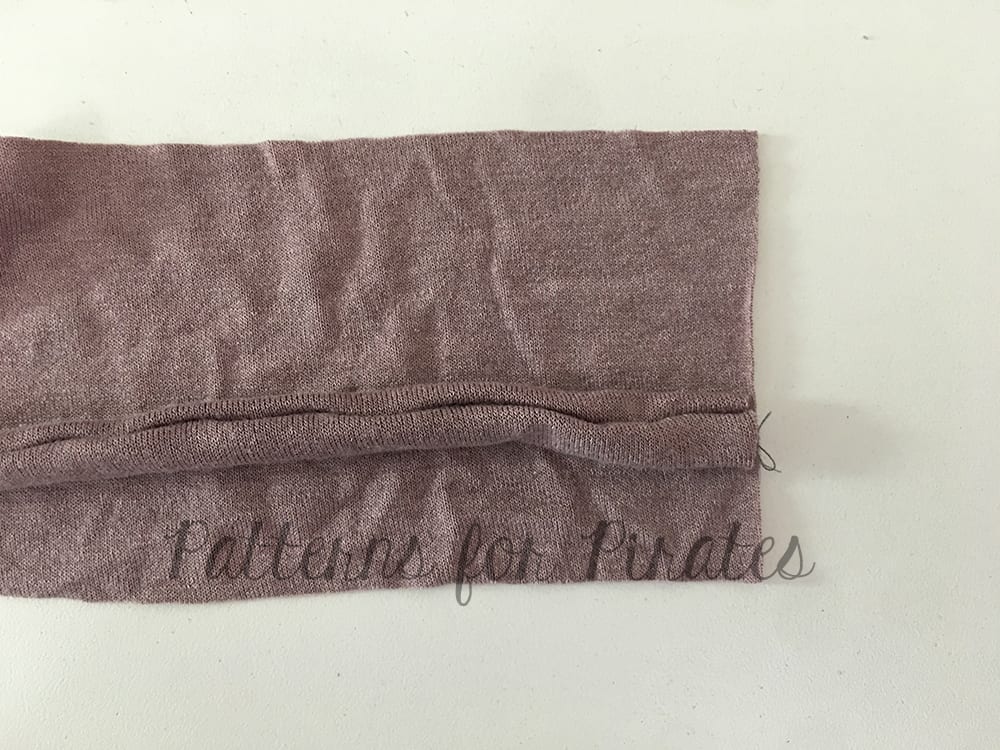
-
- Fold neckband over tie with right sides together and stitch using a 1/4″ seam allowance.
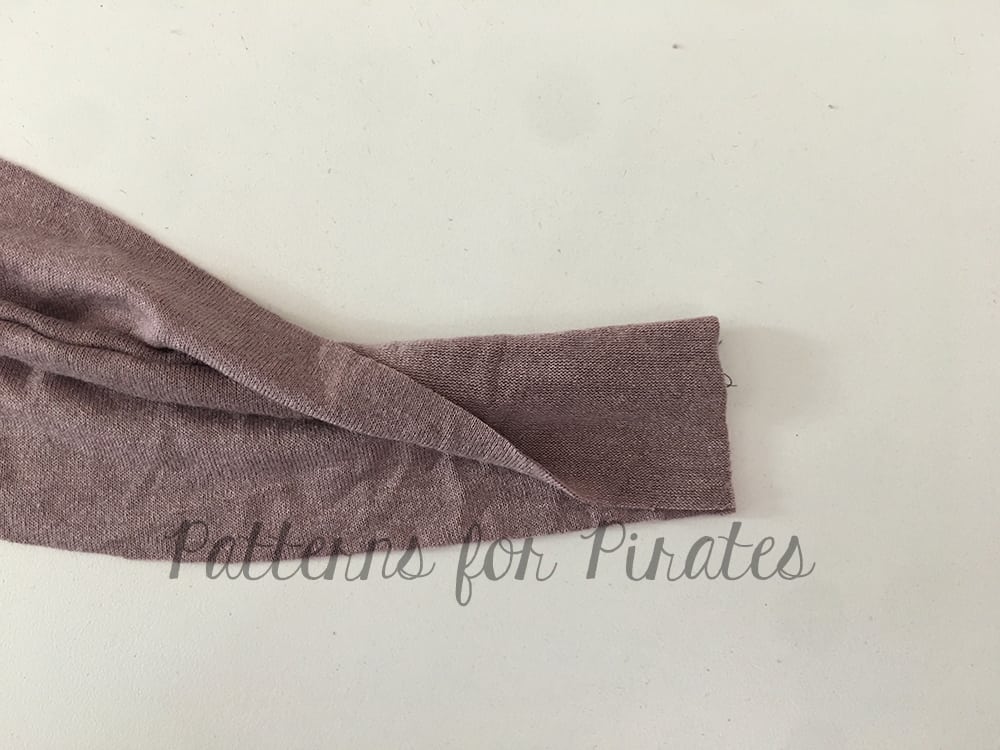
-
- Repeat on other side.
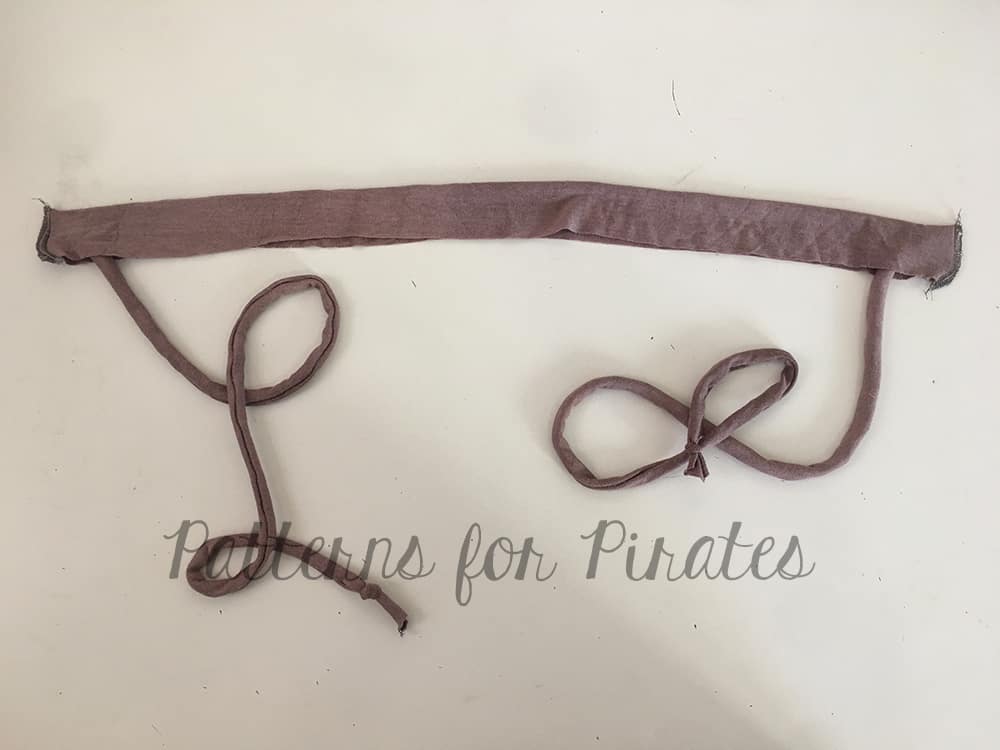
-
- Flip neckband right side out.
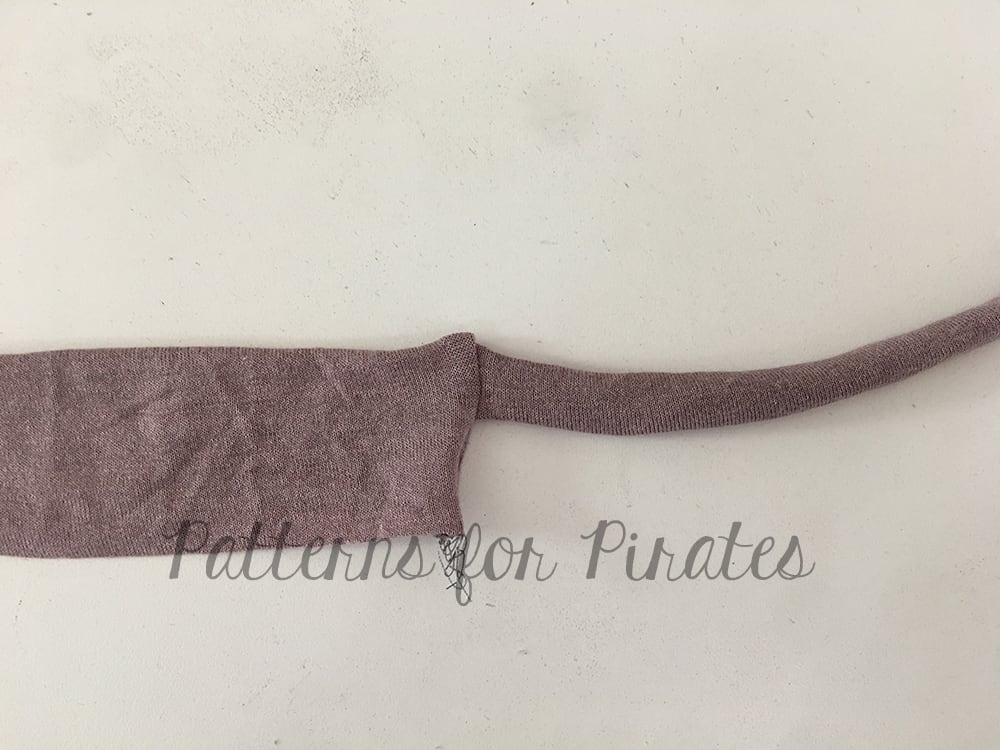
-
- Mark center of neckband and neckline of shirt.
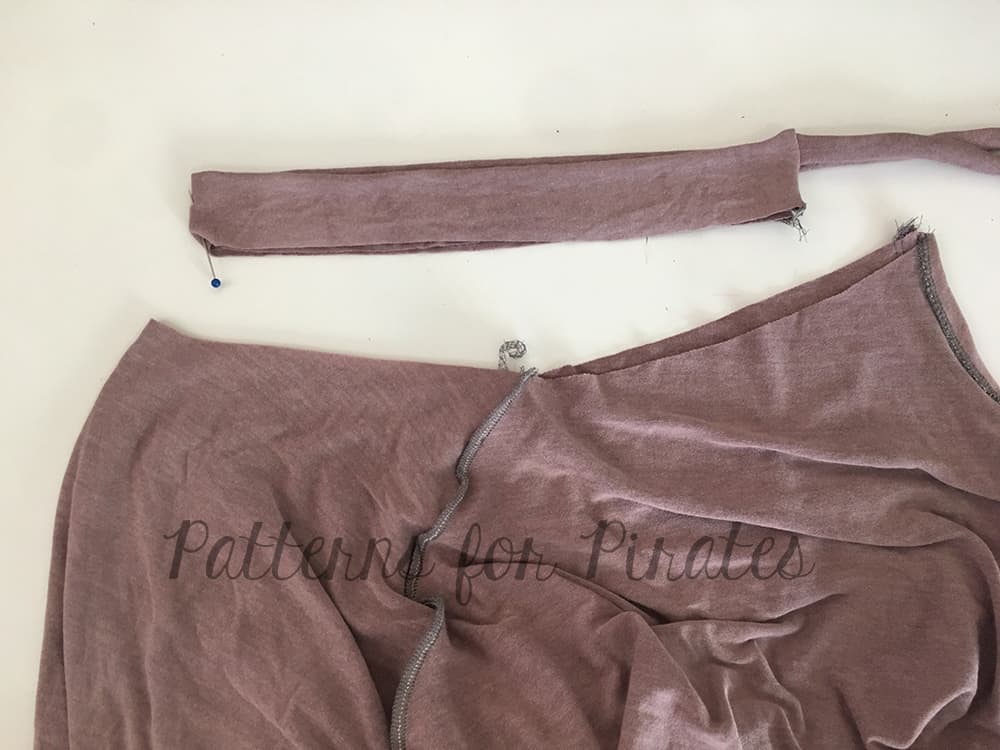
-
- With right sides together, match center and each end of the neckband to the back neckline. Stitch.
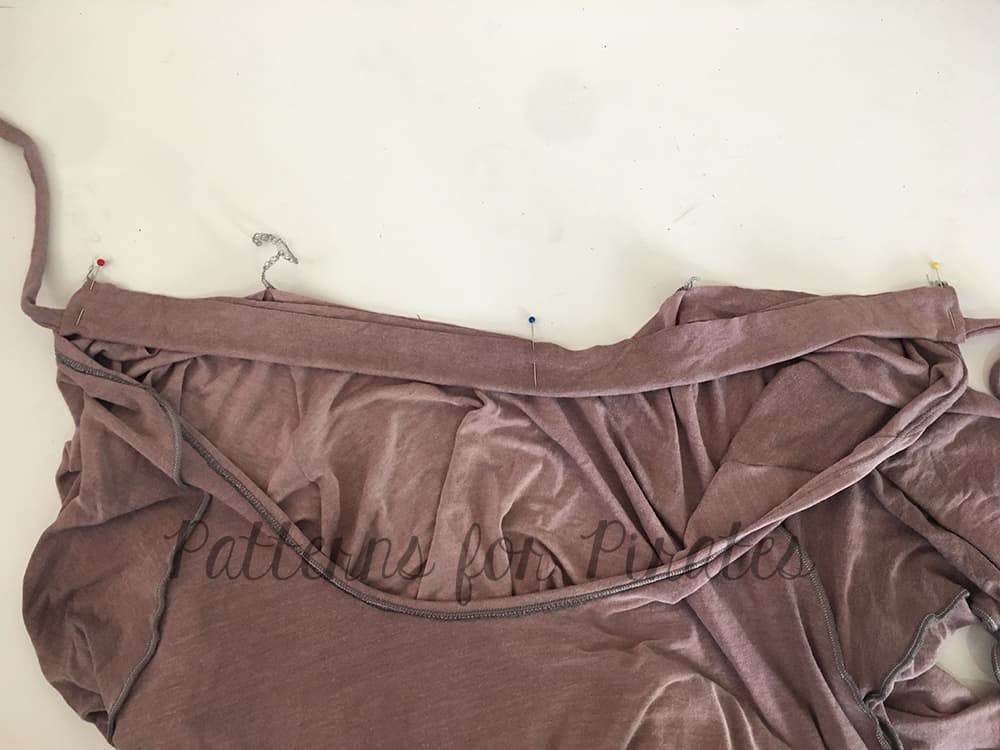
-
- Press seam allowance down and stitch a small bar tack to keep in place or topstitch entire neckline.
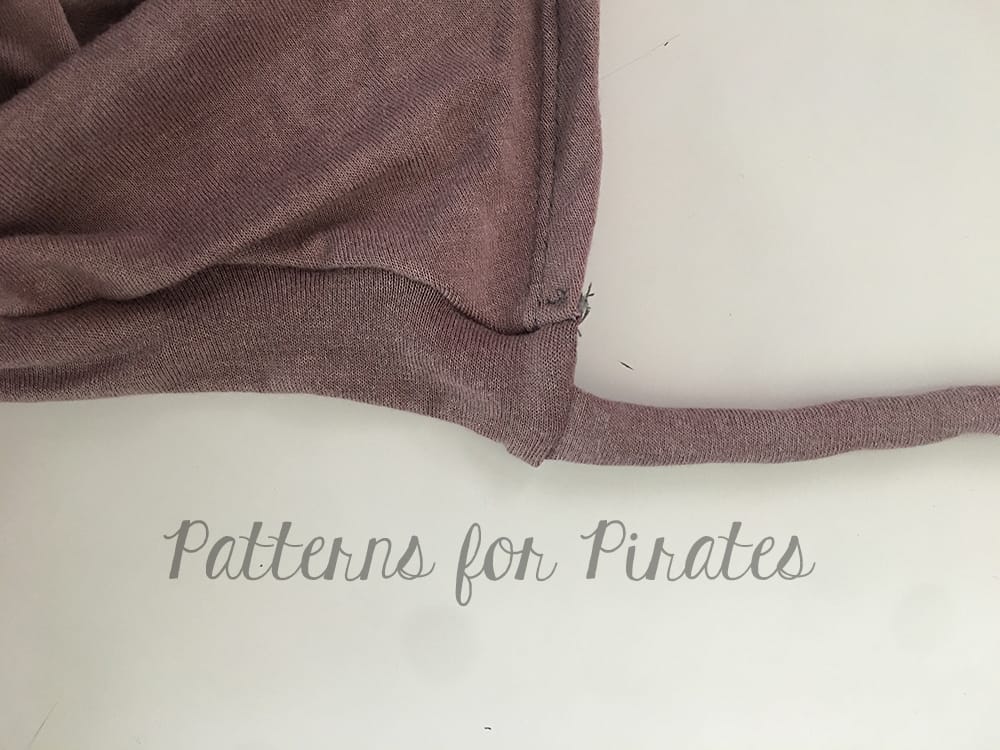
The tie back gives a much more open back but is perfect to show off all those strappy bralettes :).
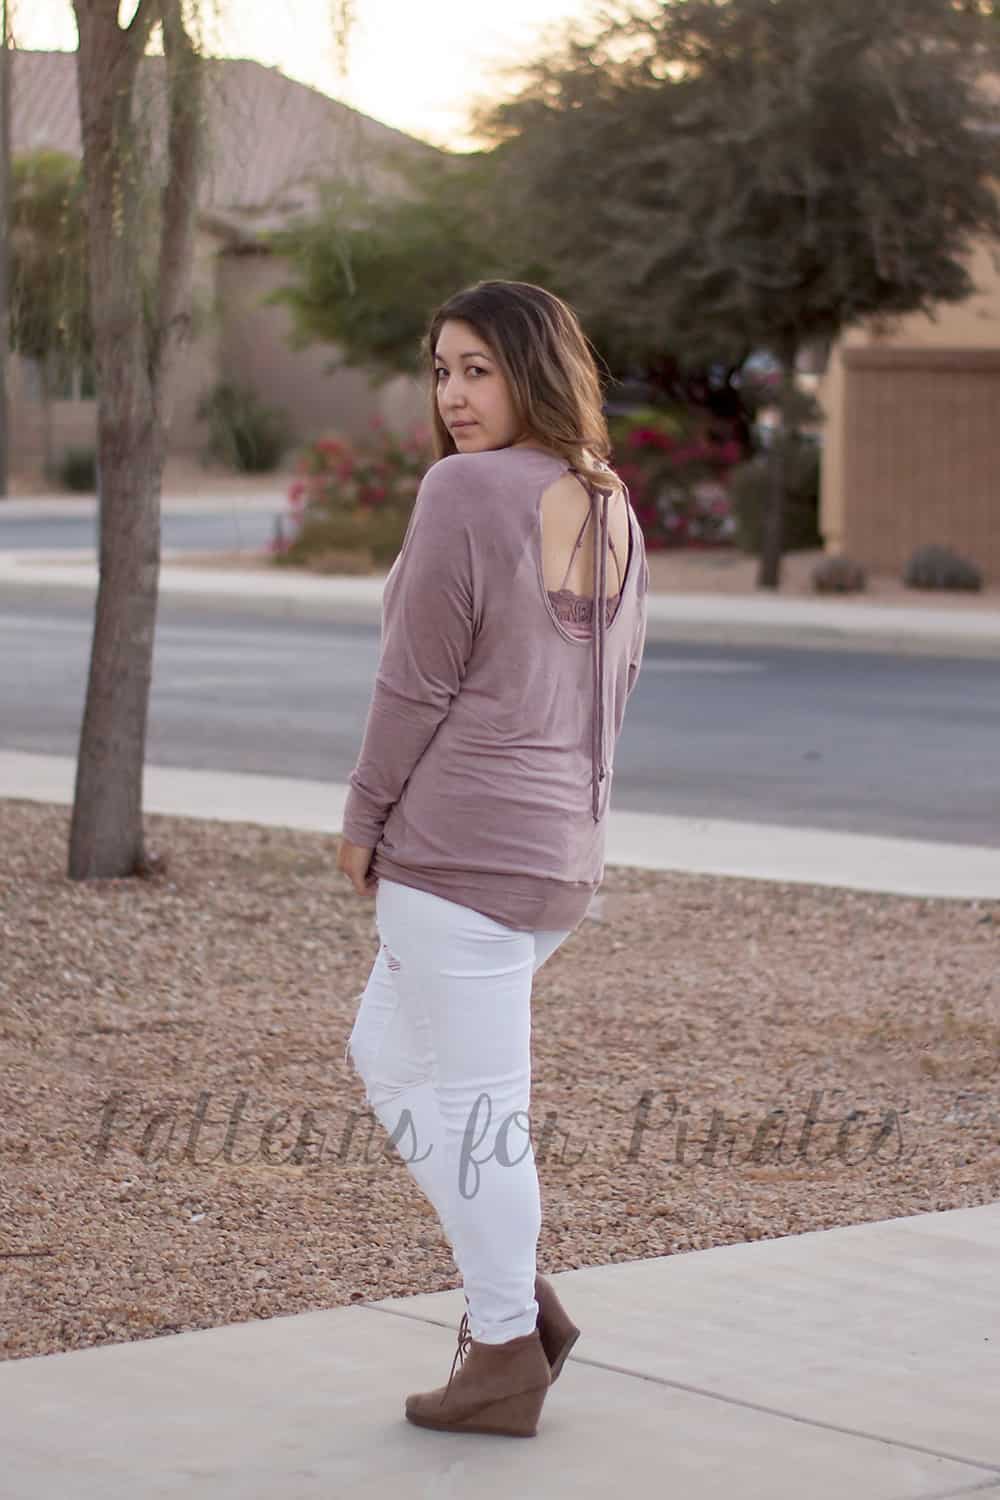
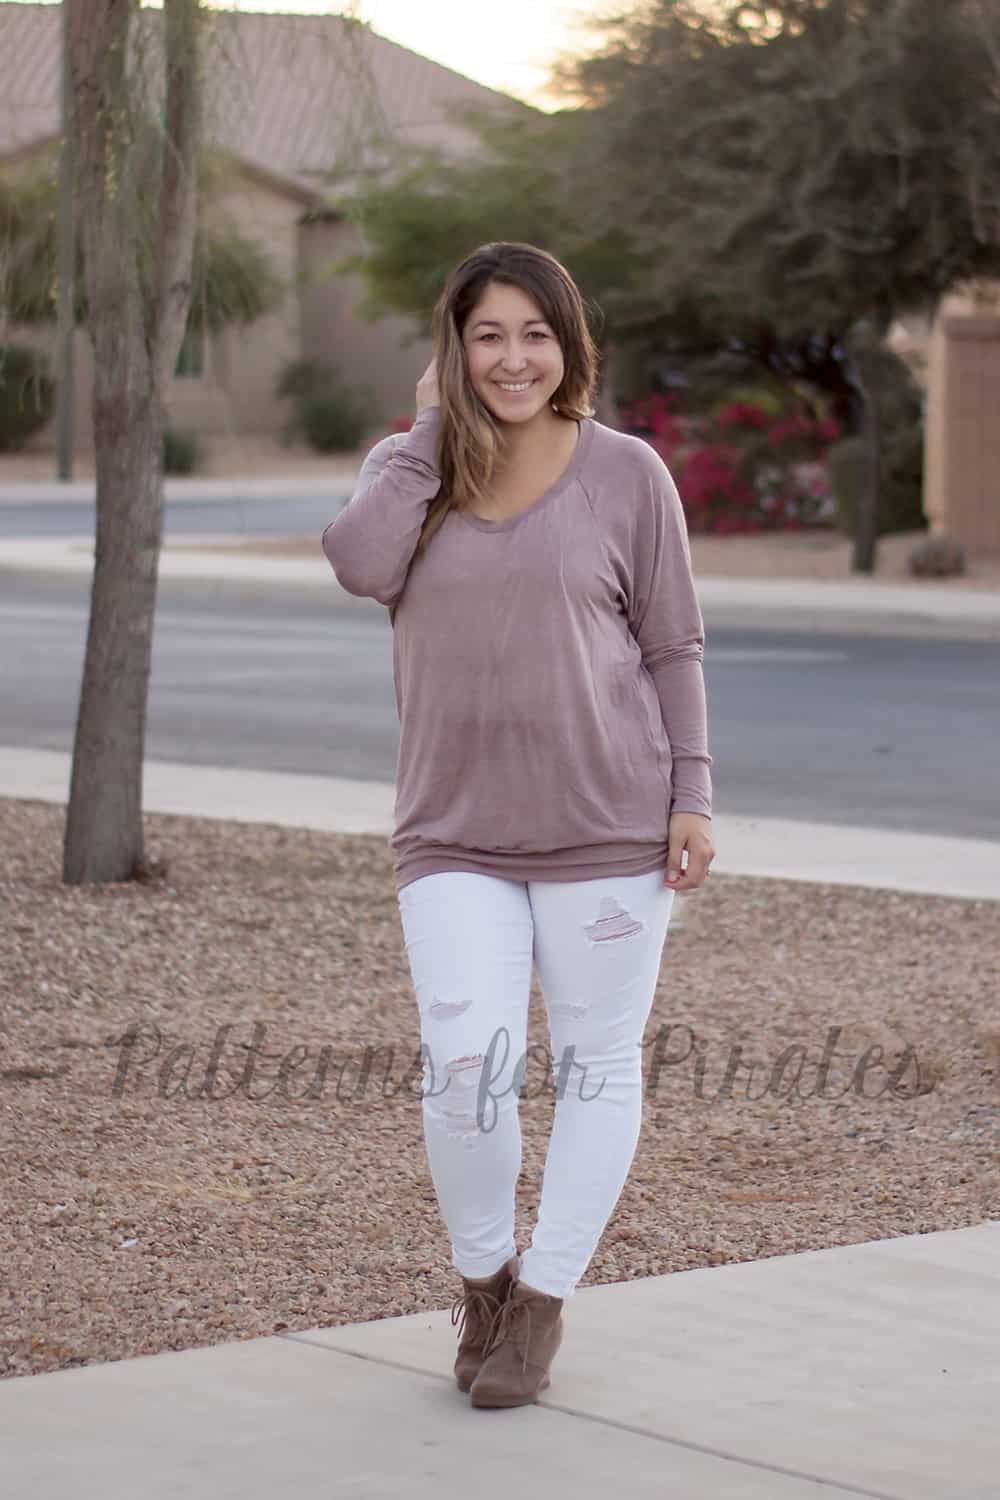
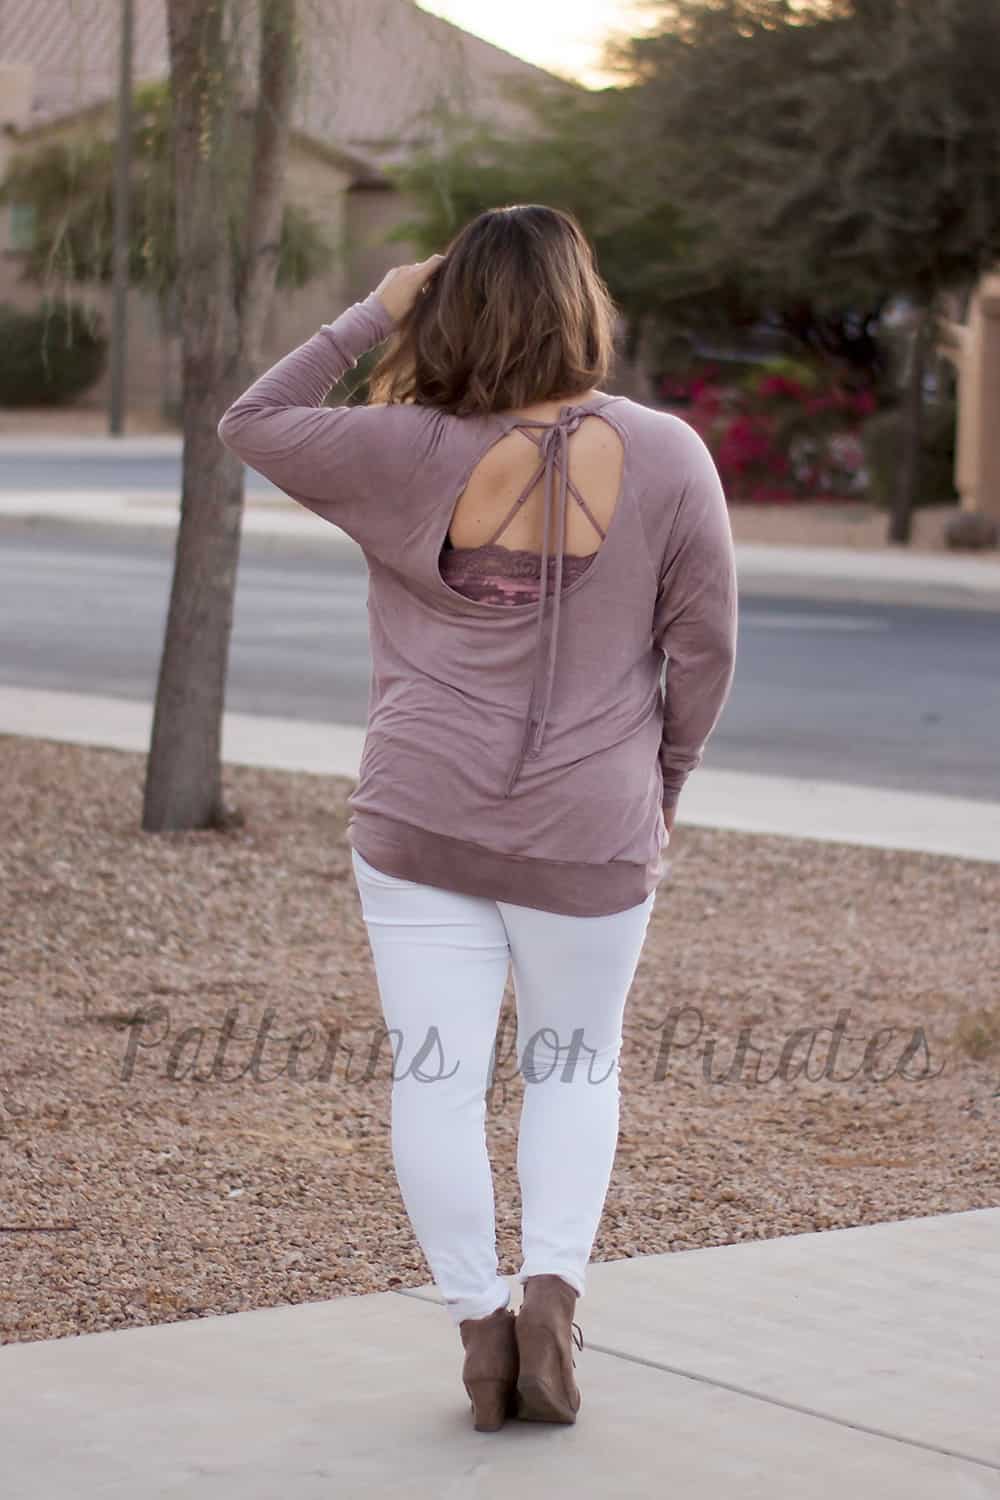
. . . . .
Twist Back
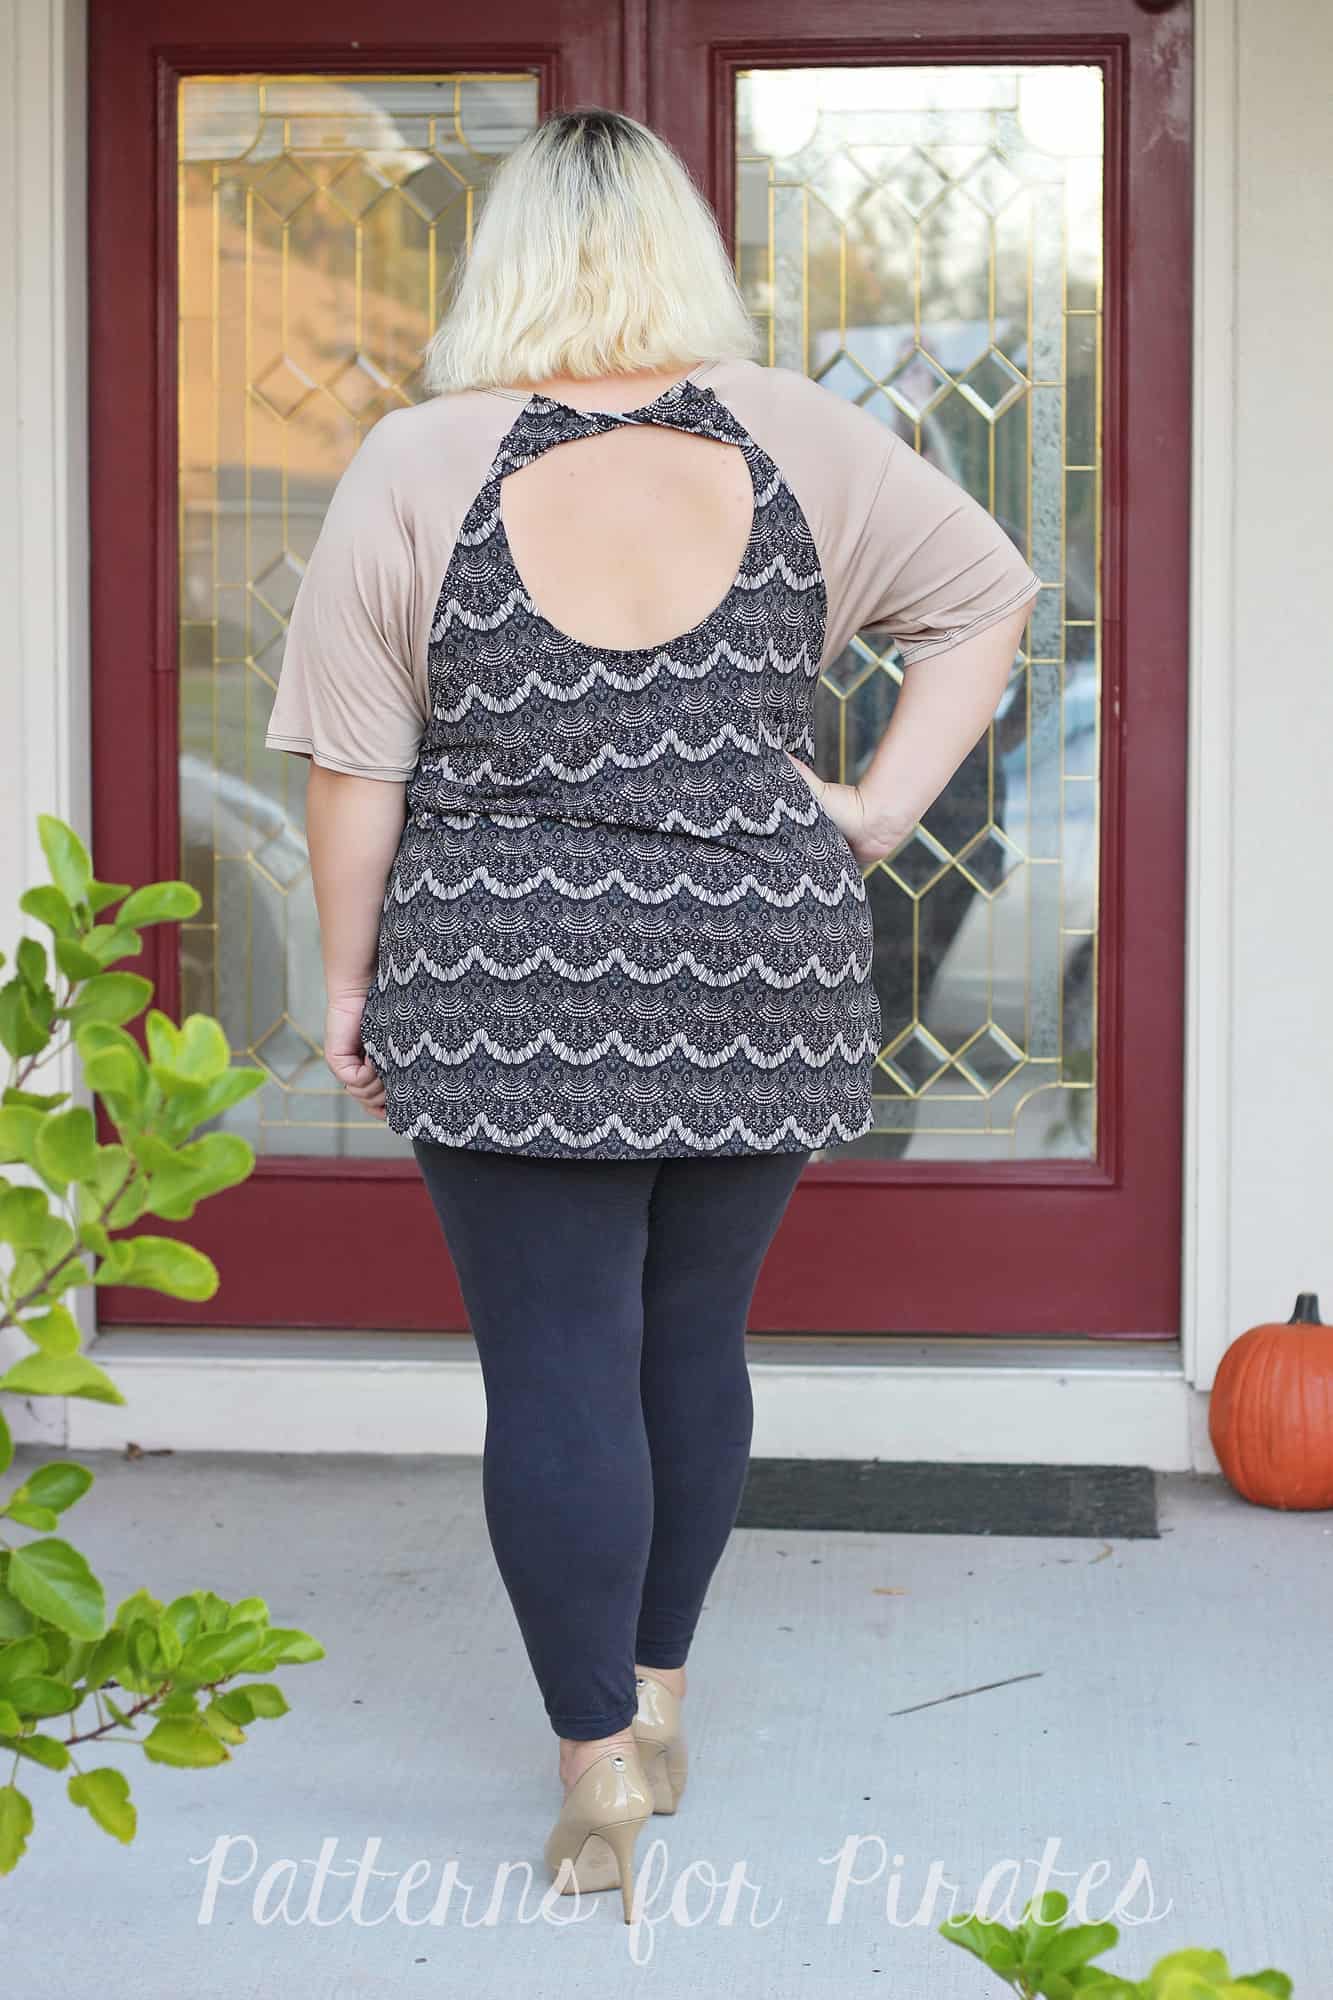
We couldn’t have ended this hack series without a twist back. For this option, you will need to print and cut the low back option. You will not be adding the neckband to this hack so the shirt neckline will be 1.5″ lower than the intended look of the pattern. You may need to wear a cami underneath (like the Cross My Heart Cami) or you can raise the neckline prior to cutting the fabric. Check out this “how to” blog!
Place the back top piece 1/2″ away from the fold line.
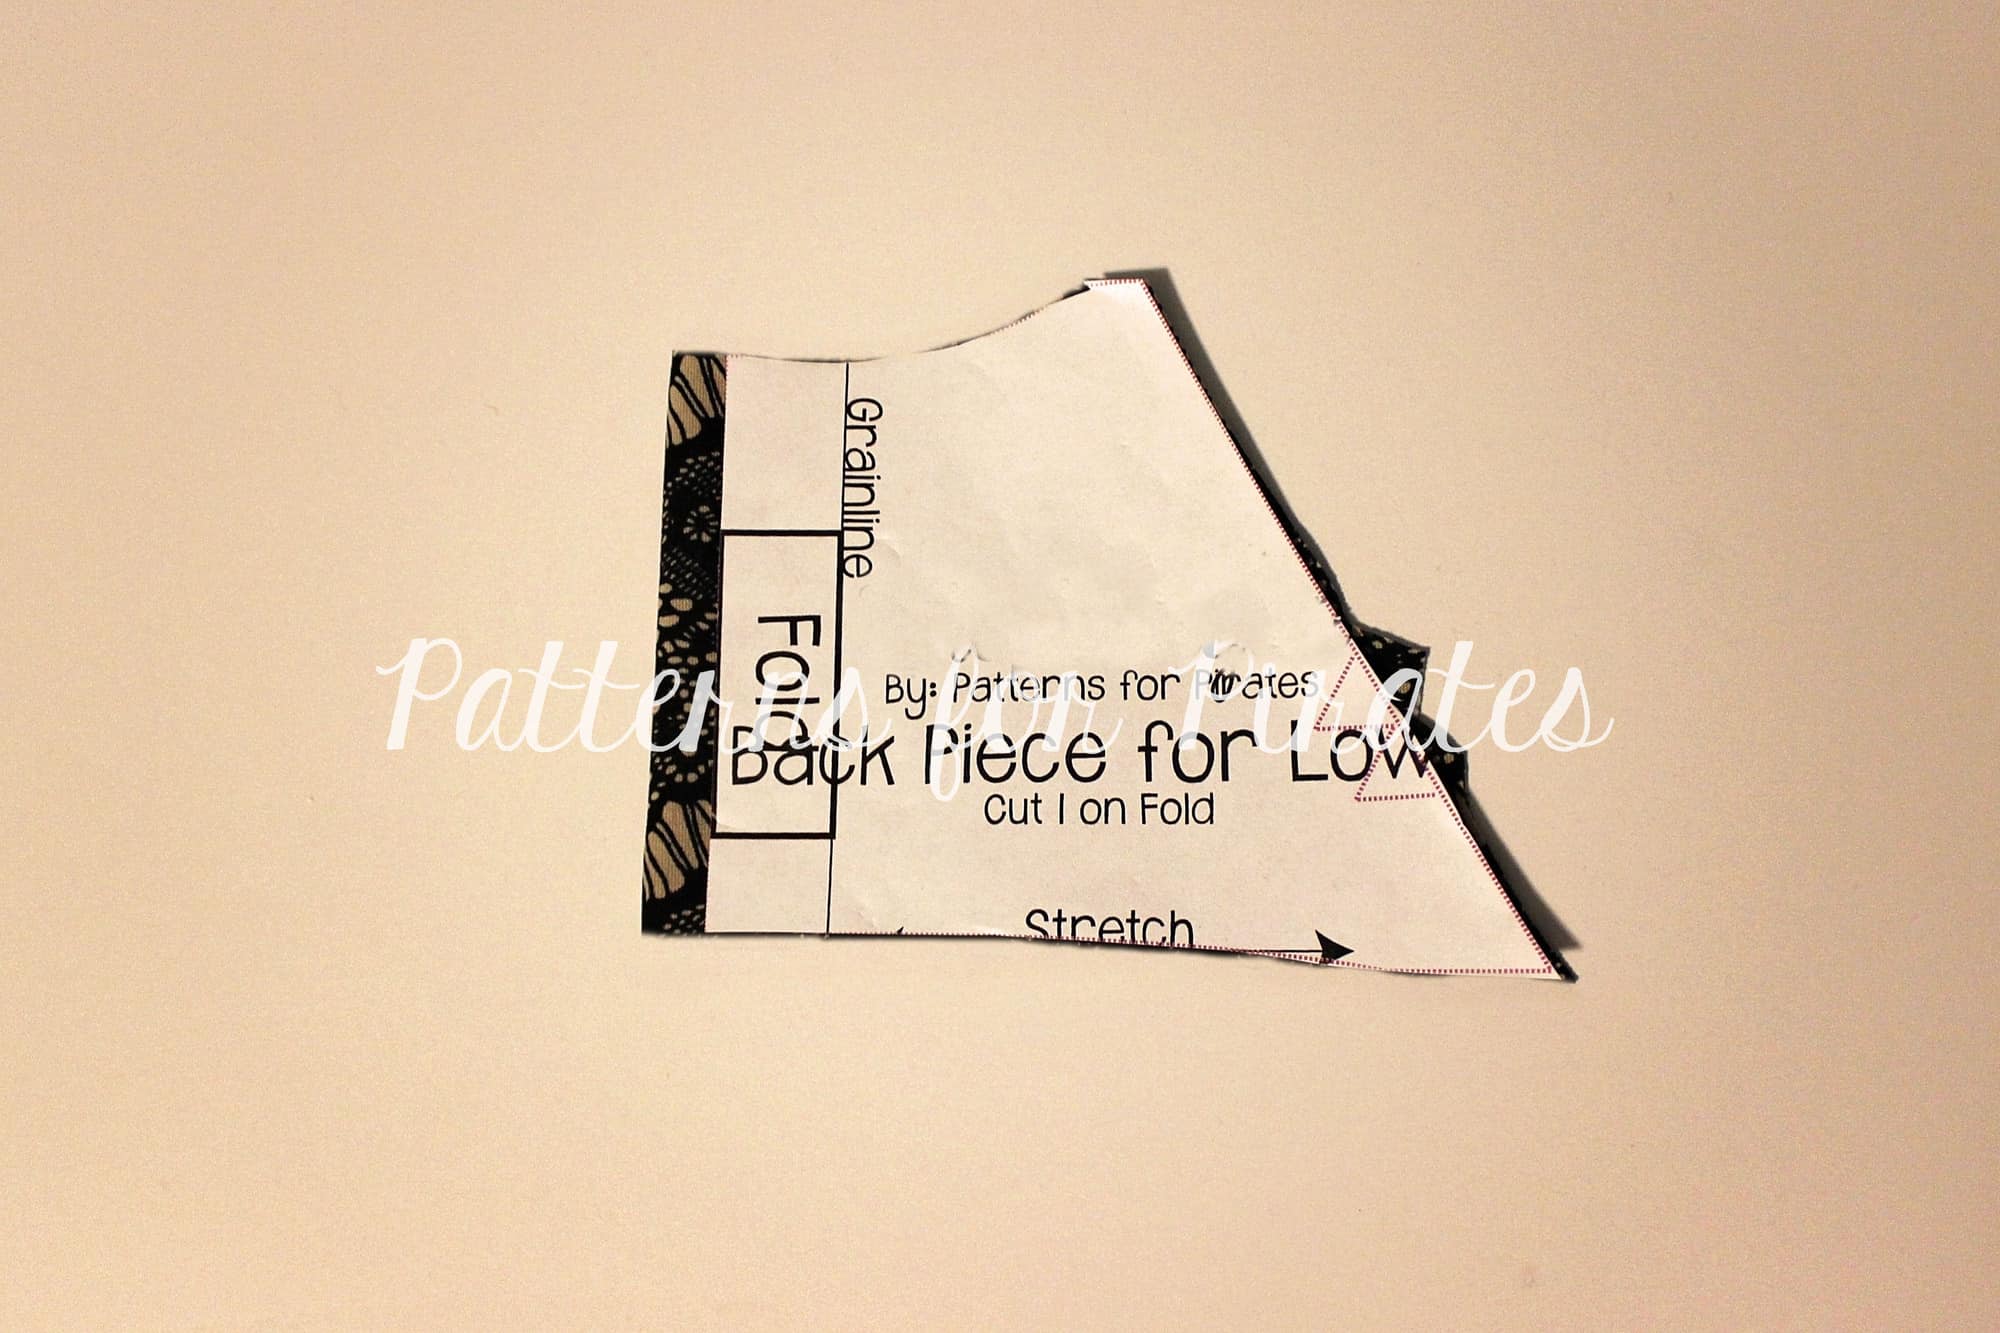
Using a 1/2″ hem allowance, hem the top and bottom. You can use a coverstitch, a zig zag stitch or twin needles.
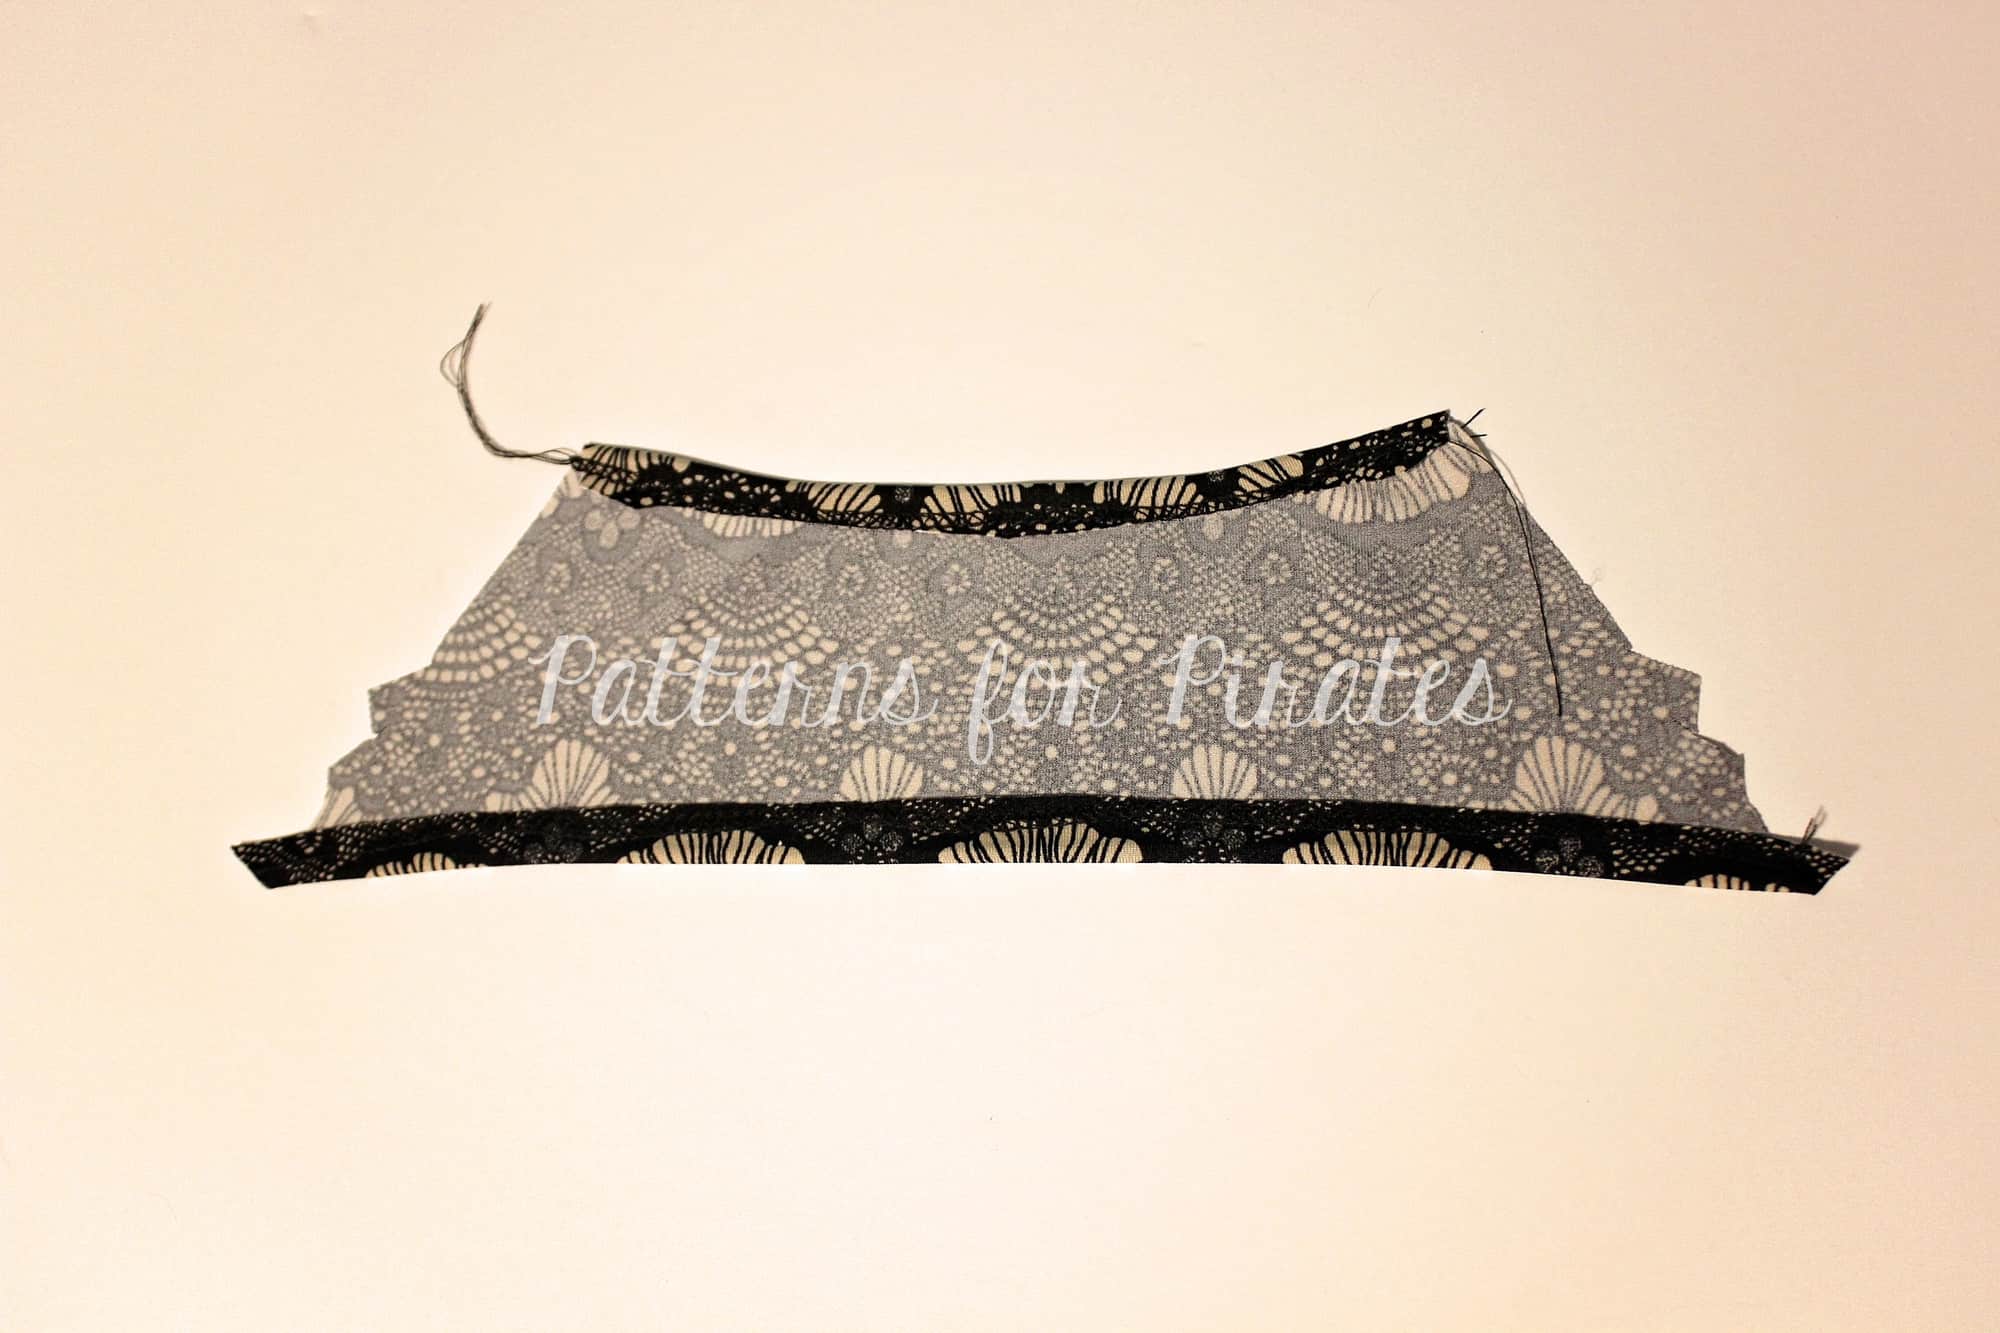
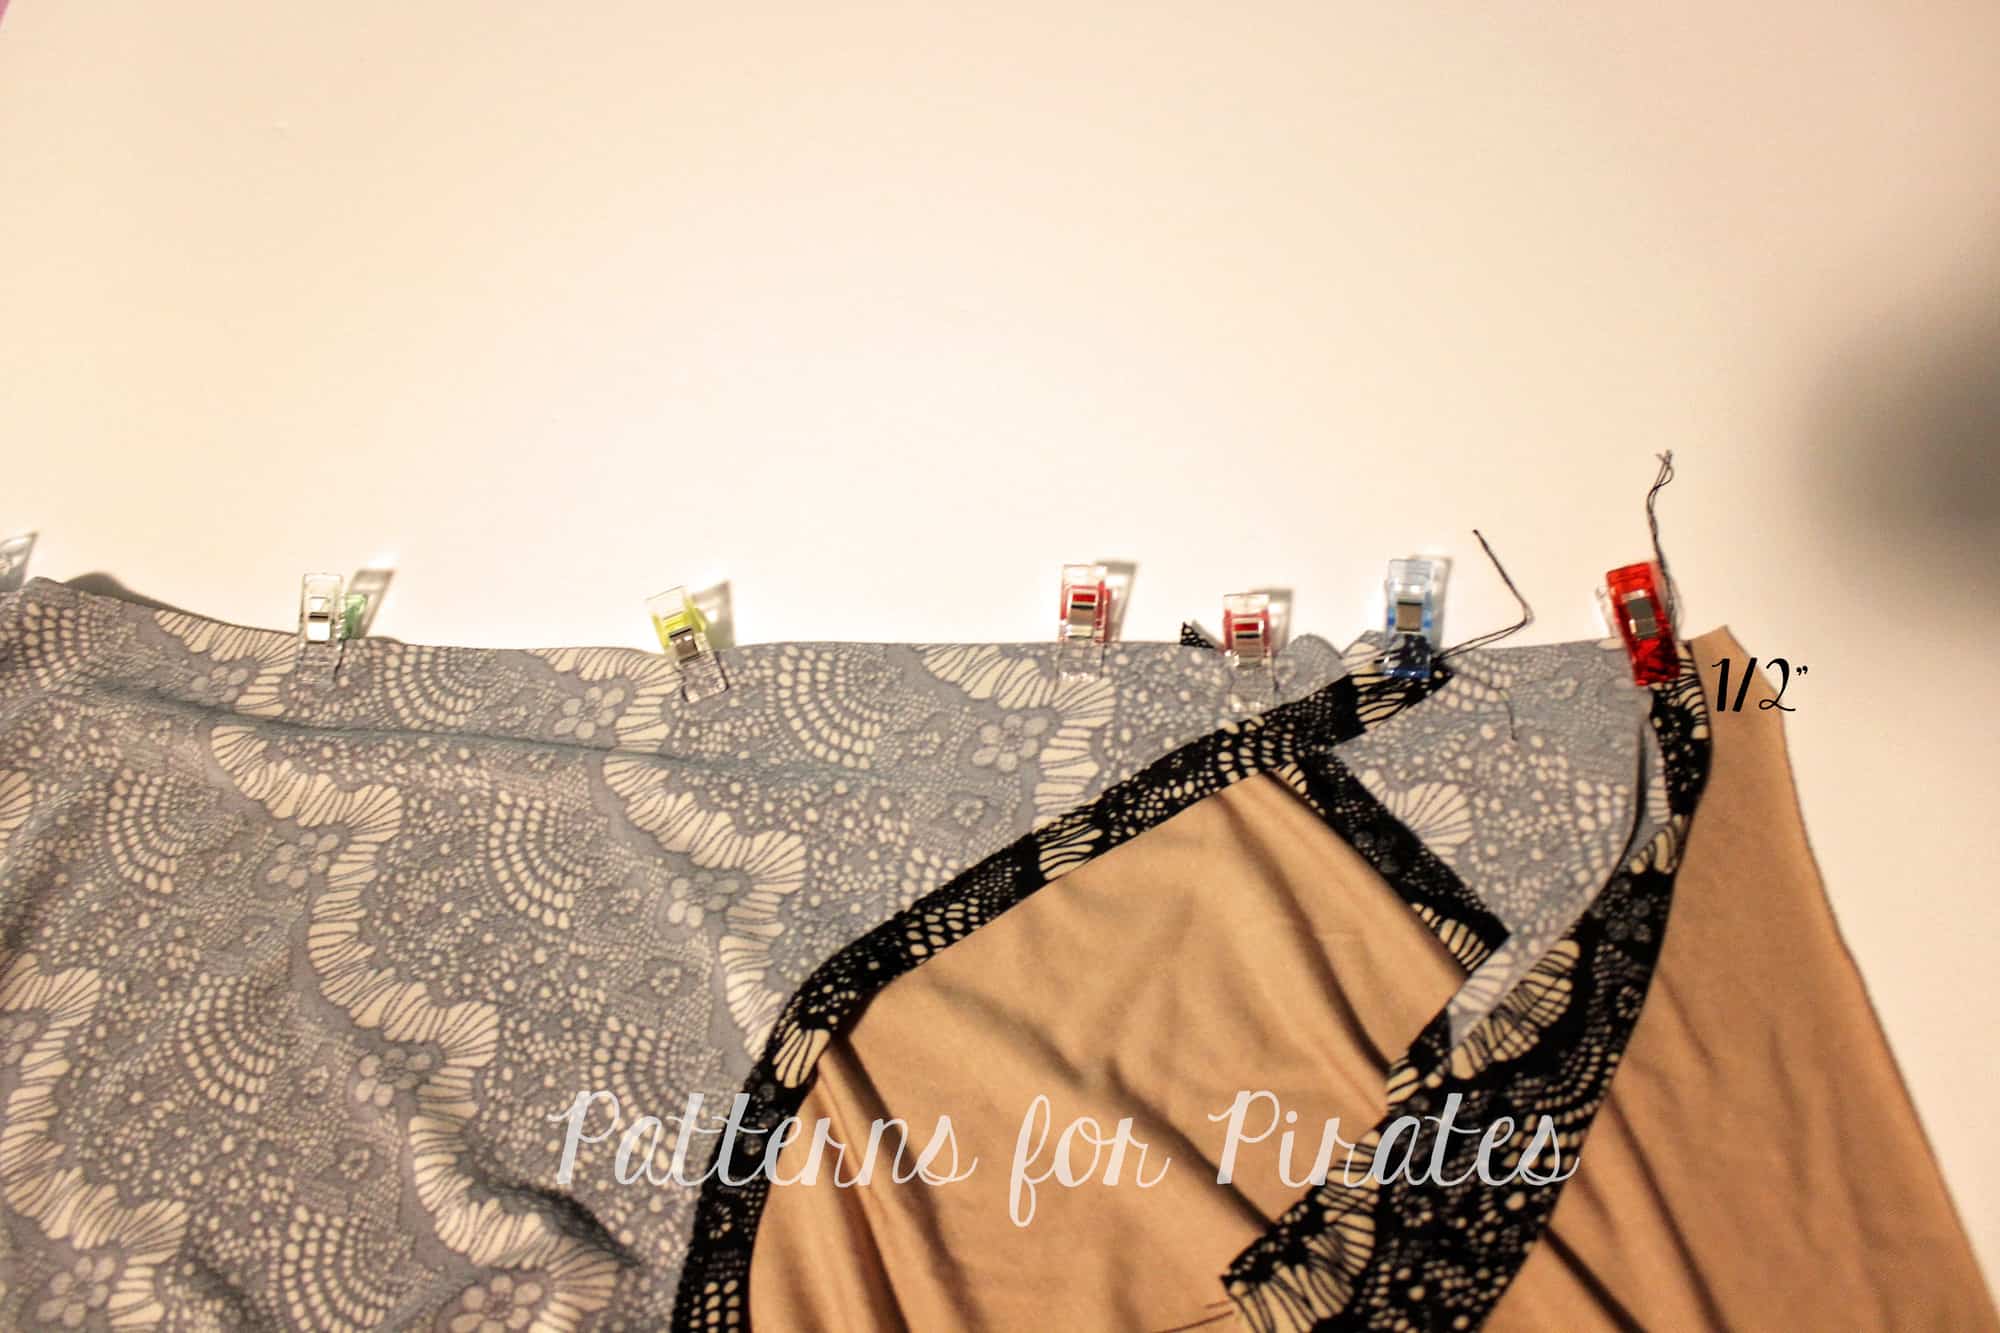
Twist the top piece twice so the right side of both the left and right sides are up. Baste the top and bottom pieces together as in the tutorial.
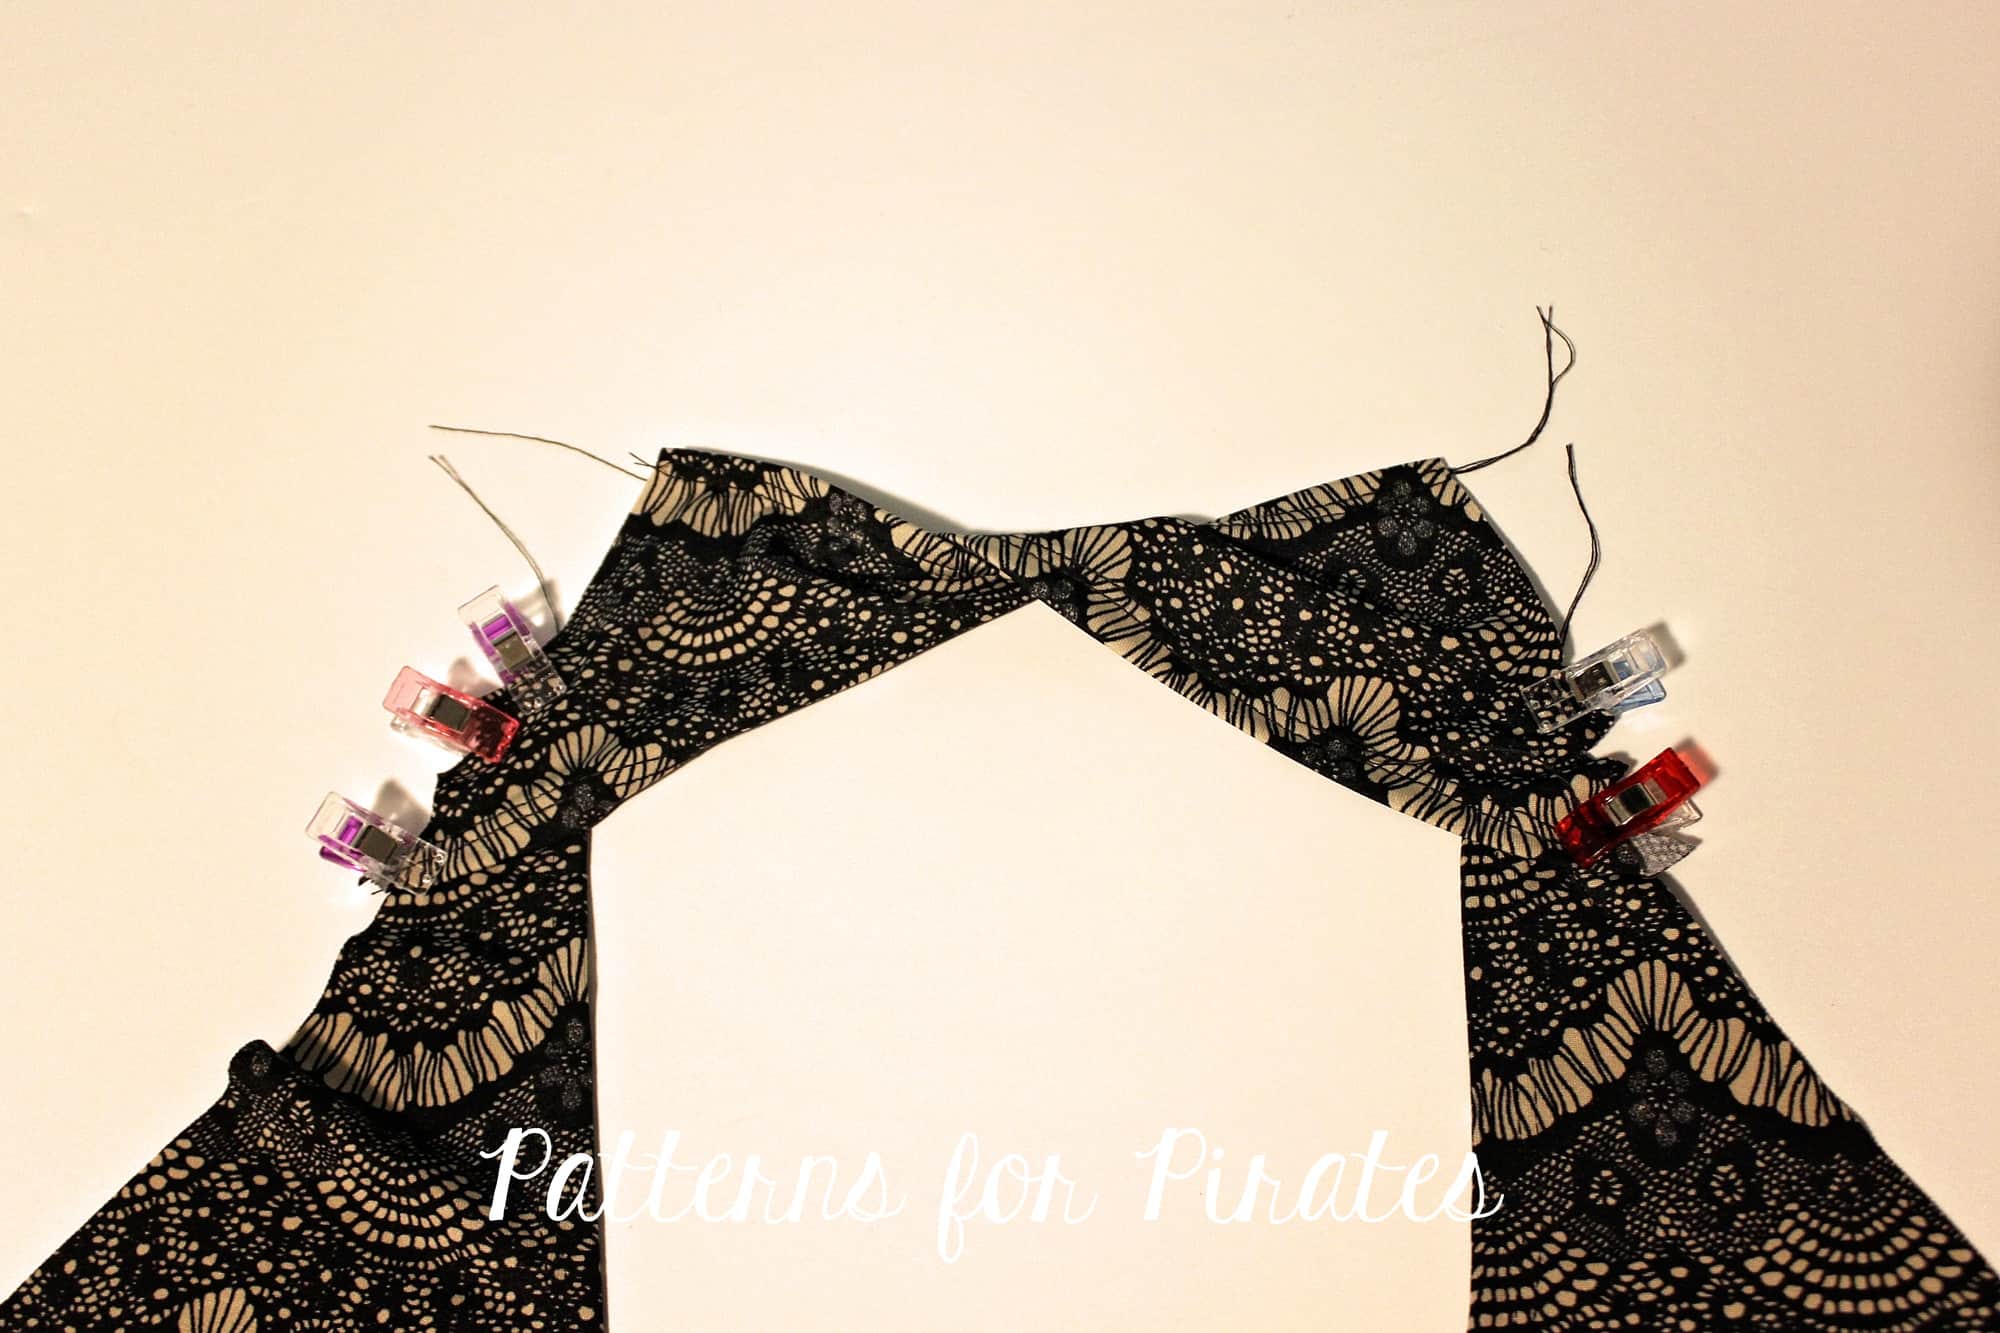
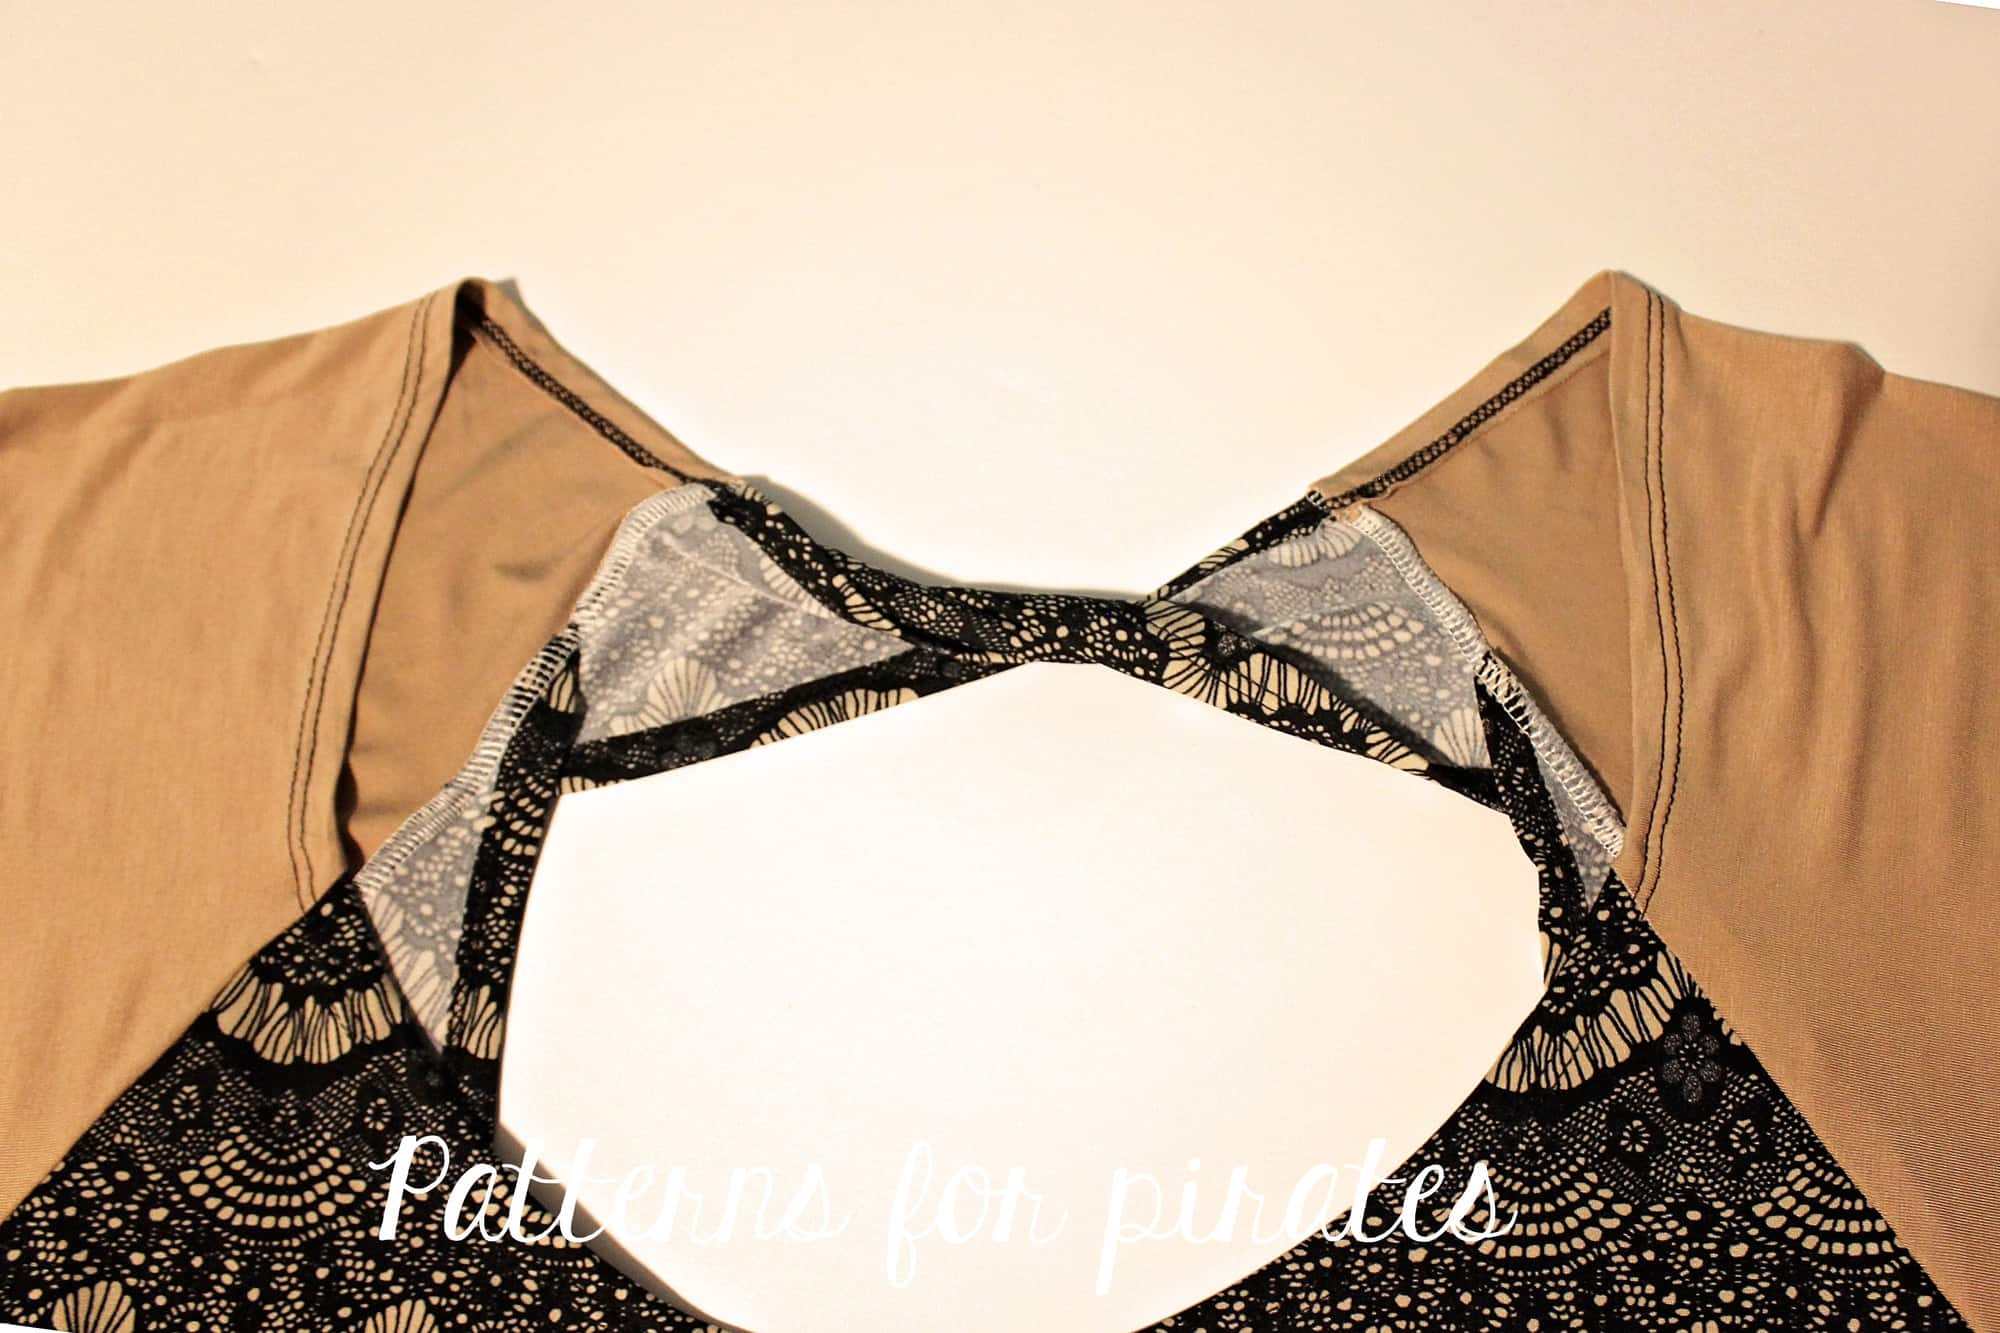
Attach the sleeves matching the notches. There will be 1/2″ excess fabric at the top which will be hemmed next.
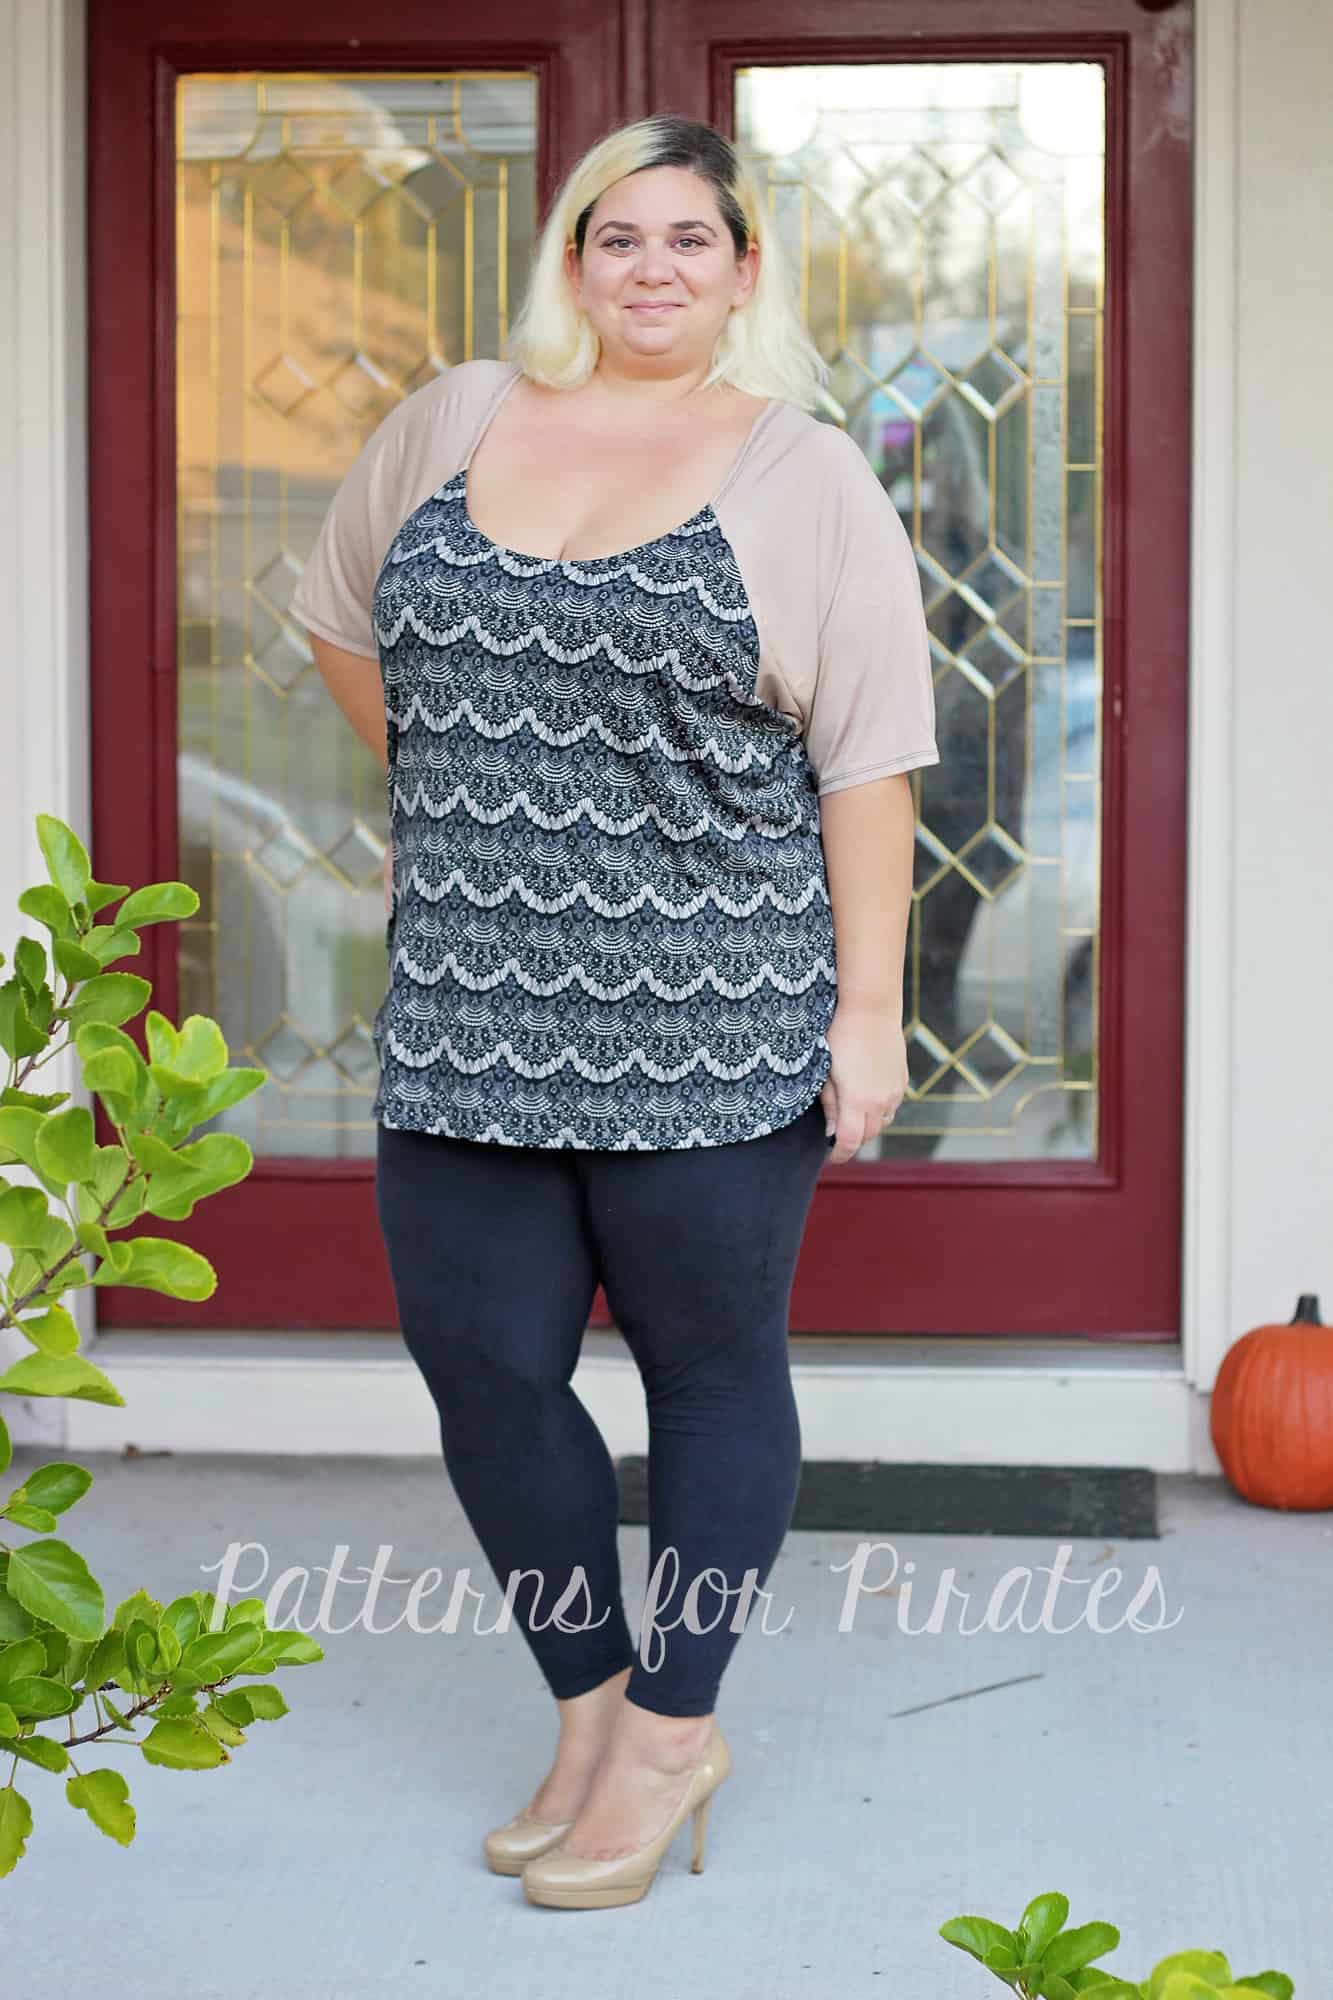
Hem the neckline with a 1/2″ hem allowance. All you have left to do is give the shirt a good press and show it off!
. . . . .
Off the Shoulder

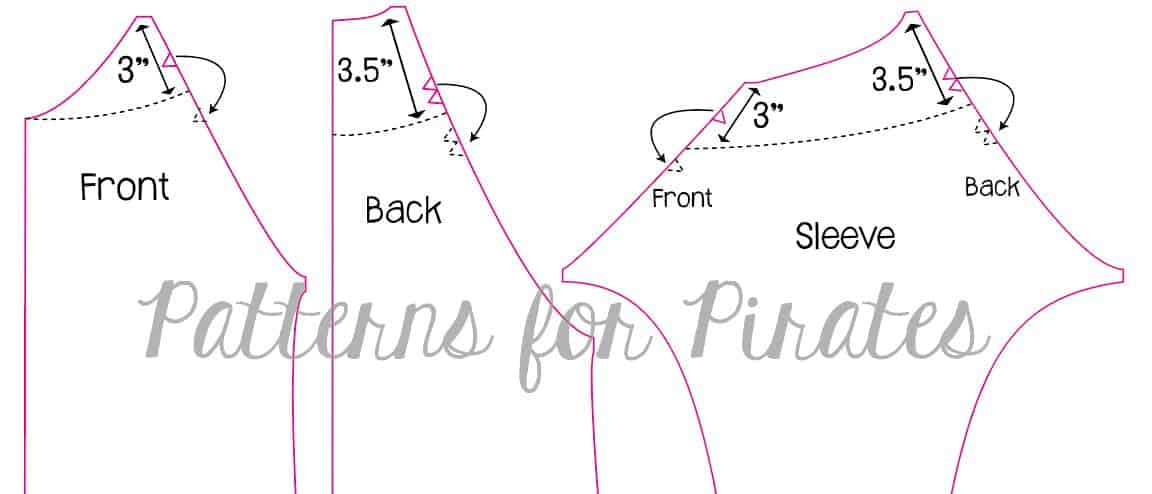
Last but not least, we couldn’t leave you without a full off the shoulder option. Using the same idea that we did for the Relaxed Raglan (here), we’re going to remove some height to all the pattern pieces (front, back, and sleeve). Also, be sure to move your notches to help you keep the pieces in order and you know which side lines up with one another.
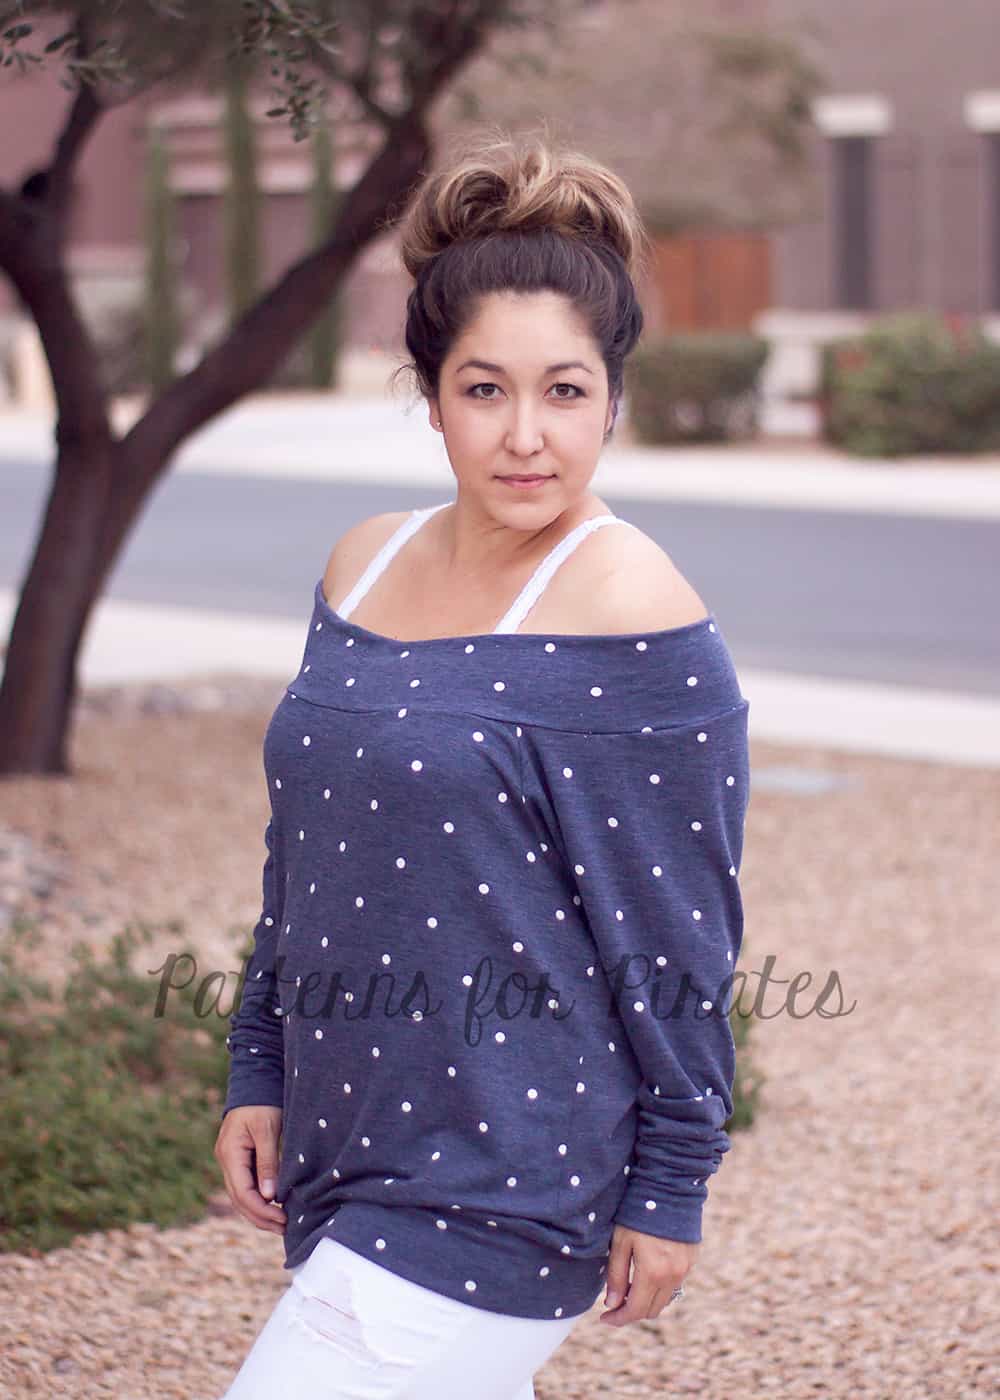
For the band, I used the same measurement as the waistband in the pattern. In hindsight, I could have made it a smidge tighter around the shoulders but as is doesn’t move around too much. Now, I didn’t measure each size, but just to be safe…..measure your neckline once you’ve completed the main pieces. Make your band between 80-85% (plus seam allowance) of the opening. (Unsure how to measure the neckline? Check out this blog post for more details.) Mark in quarter and stitch just like you would a waistband. As with any neckband though, be sure your band has good recovery! This will help keep it up on your shoulders. 🙂
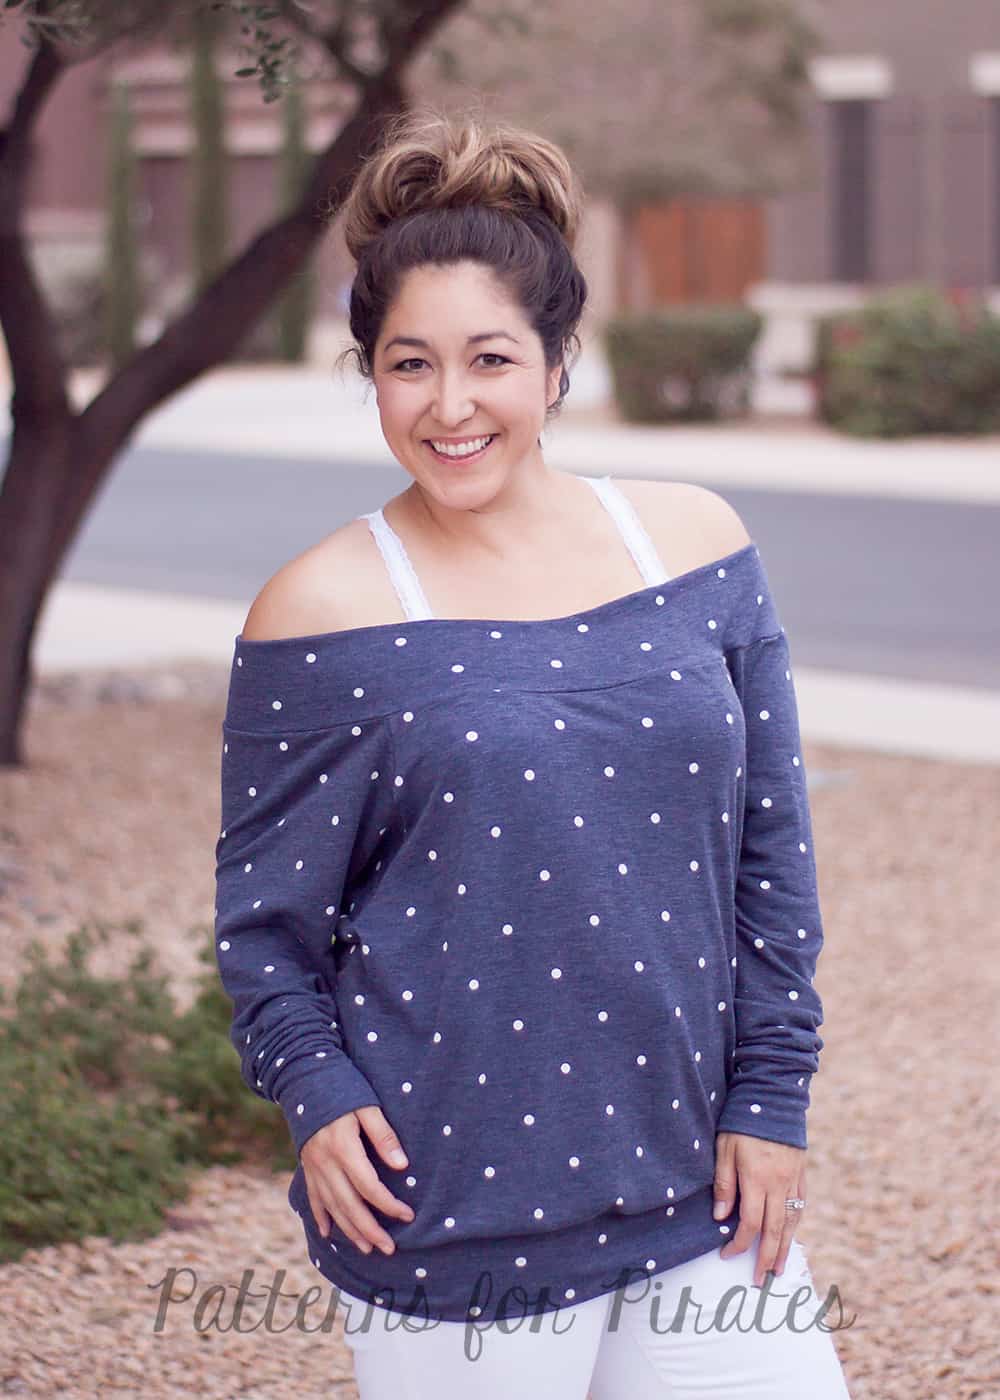
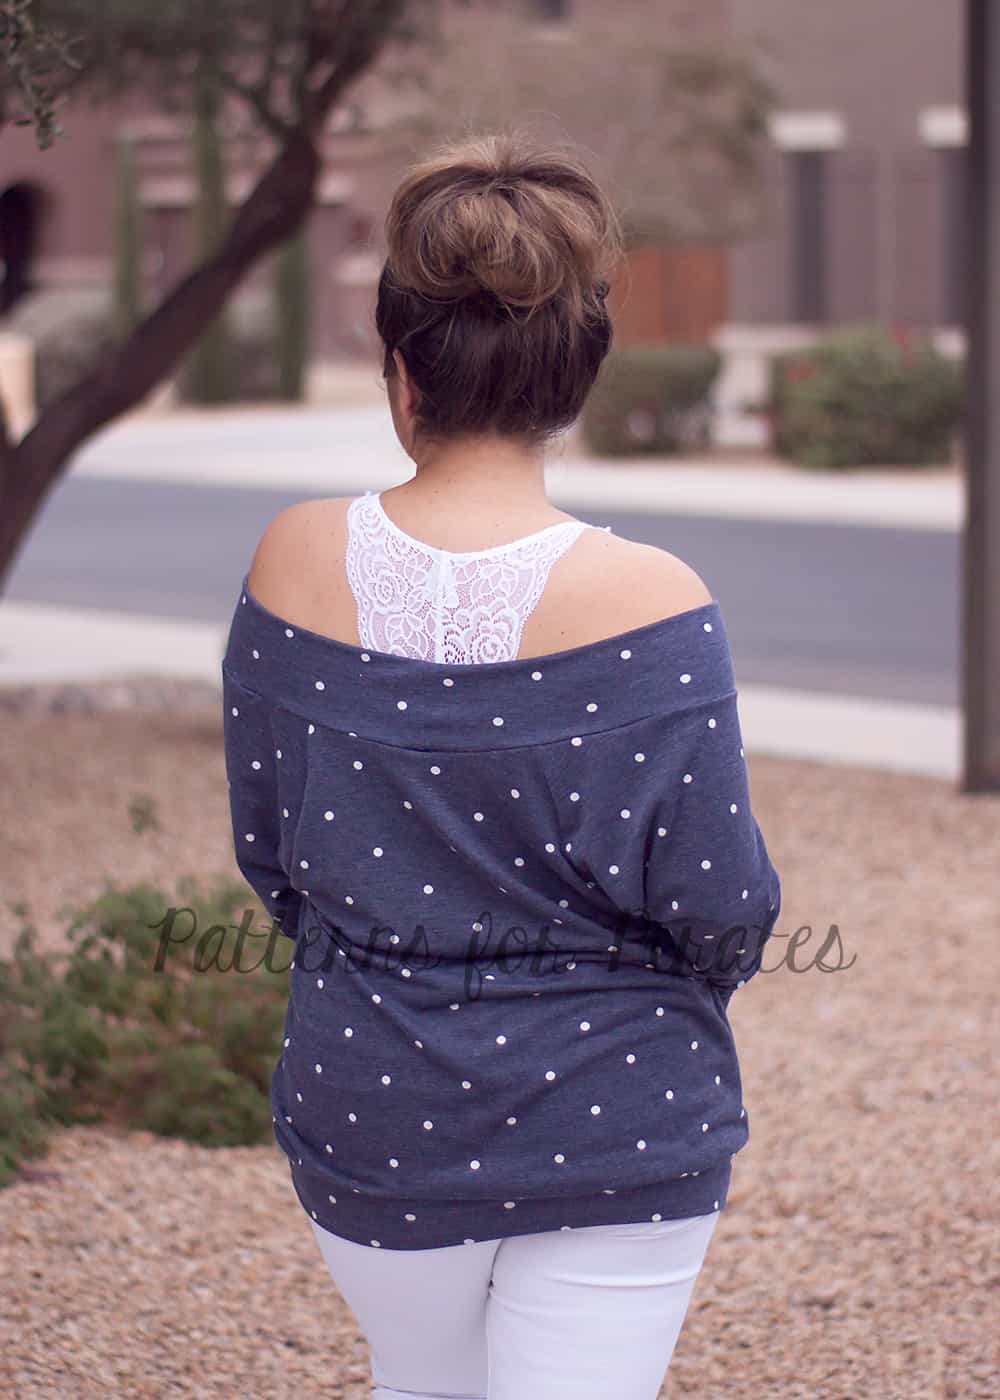
Make a RagDoll Raglan? Be sure so share you makes in the Facebook Group or tag us on Instragram!
When It Goes Against the Grain
Woven Fabrics
We make woven fabrics on a loom. The weaver strings the lengthwise threads first, and we call them the “warp”. Then threads are woven through them creating the fabric. We call these horizontal threads the “weft” or the “woof”. We’ve named the edges of the fabric the “selvages” or “selvedges”, and we weave them more tightly to prevent fraying.
The warp creates the “straight grain” of the fabric, and the weft creates the “cross grain”.
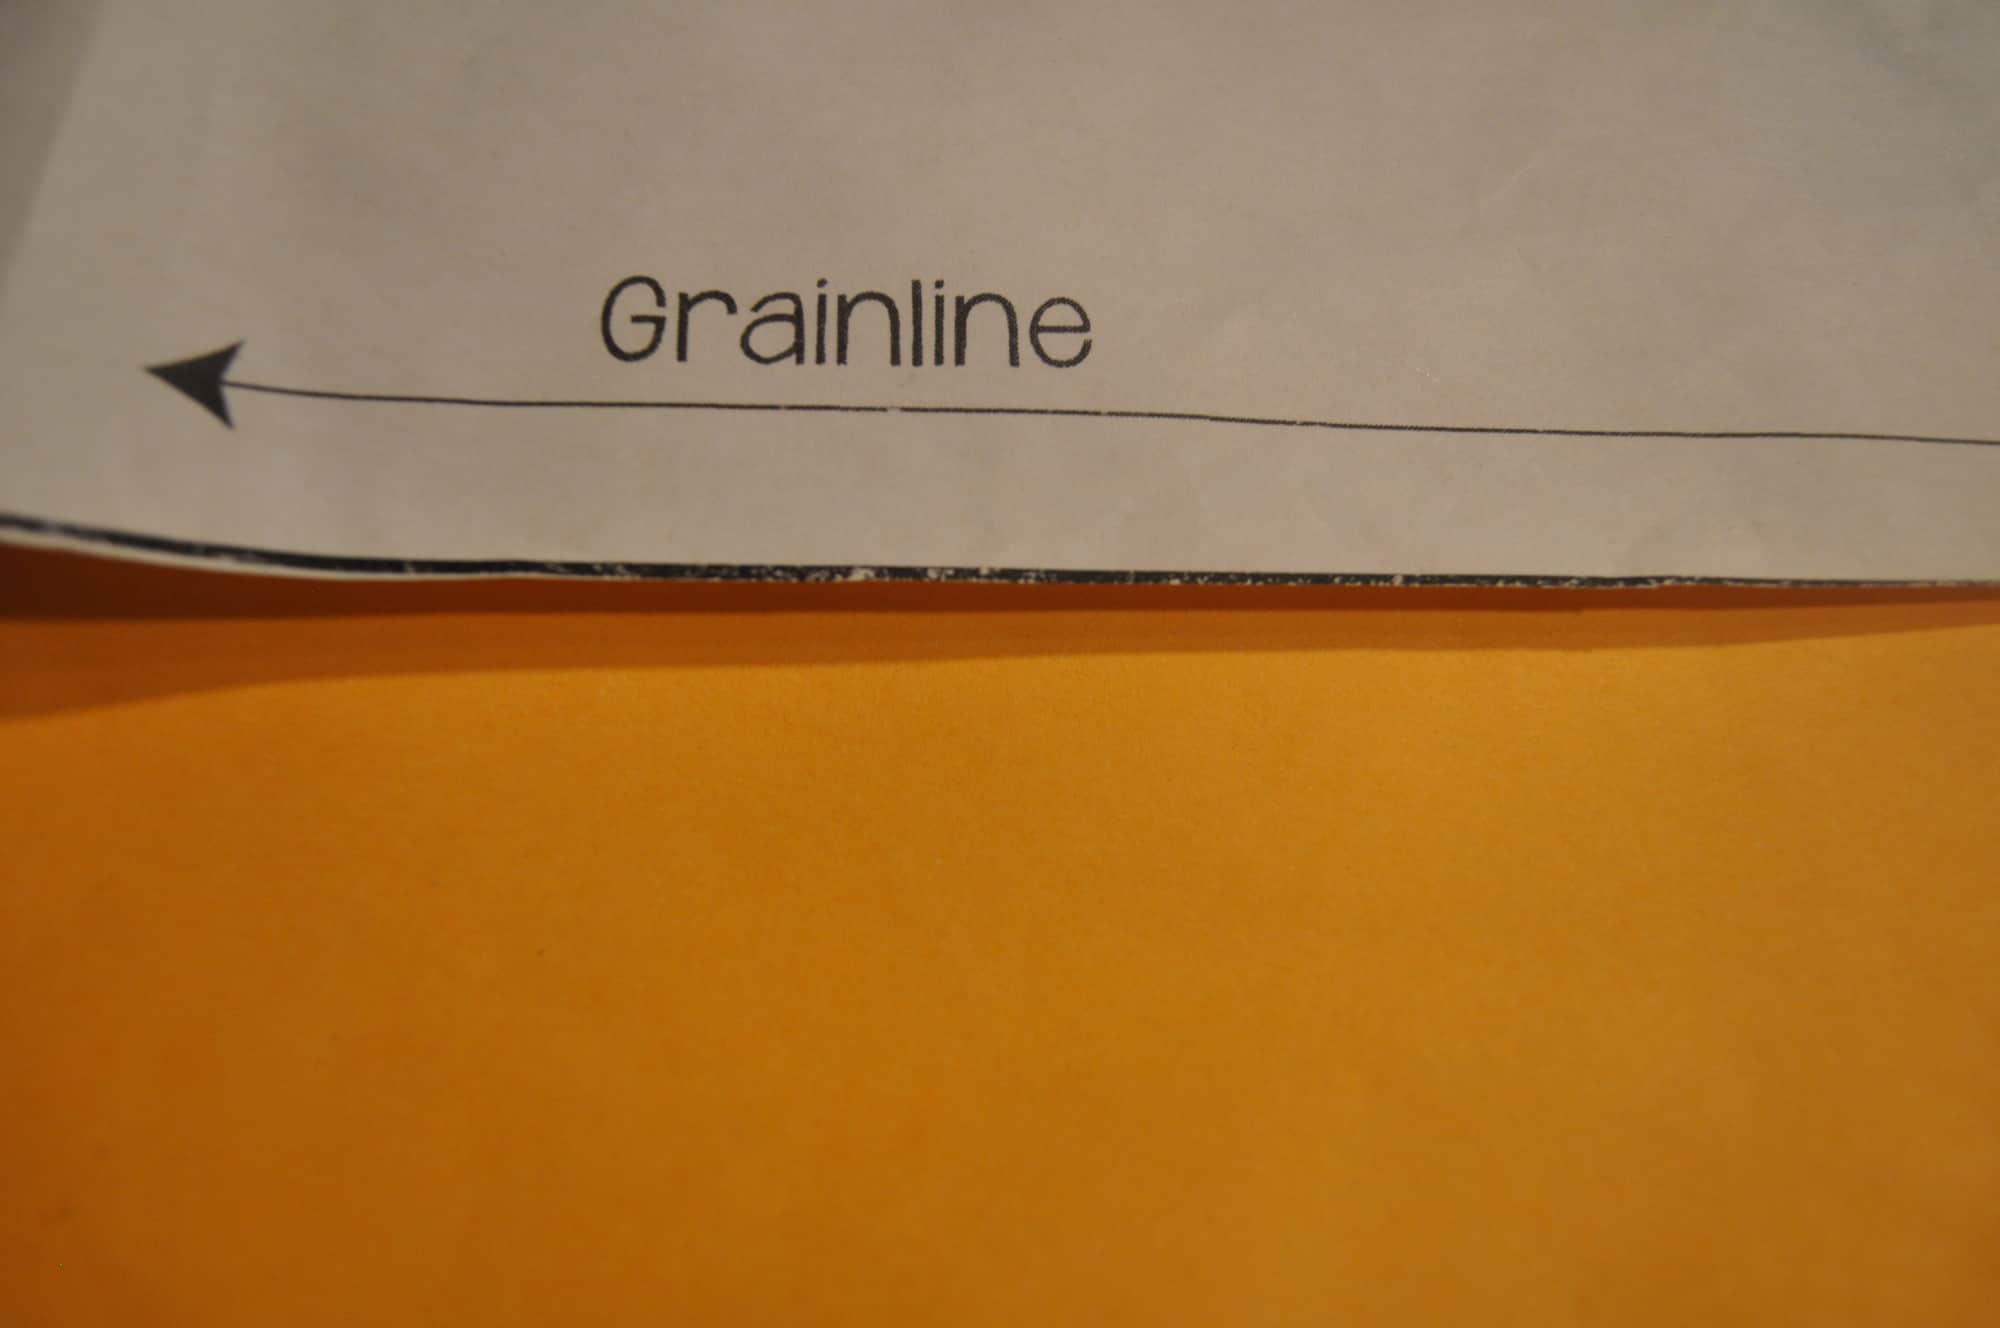
Pattern pieces have grainlines printed on them. They are either arrows or fold lines.
Grainline
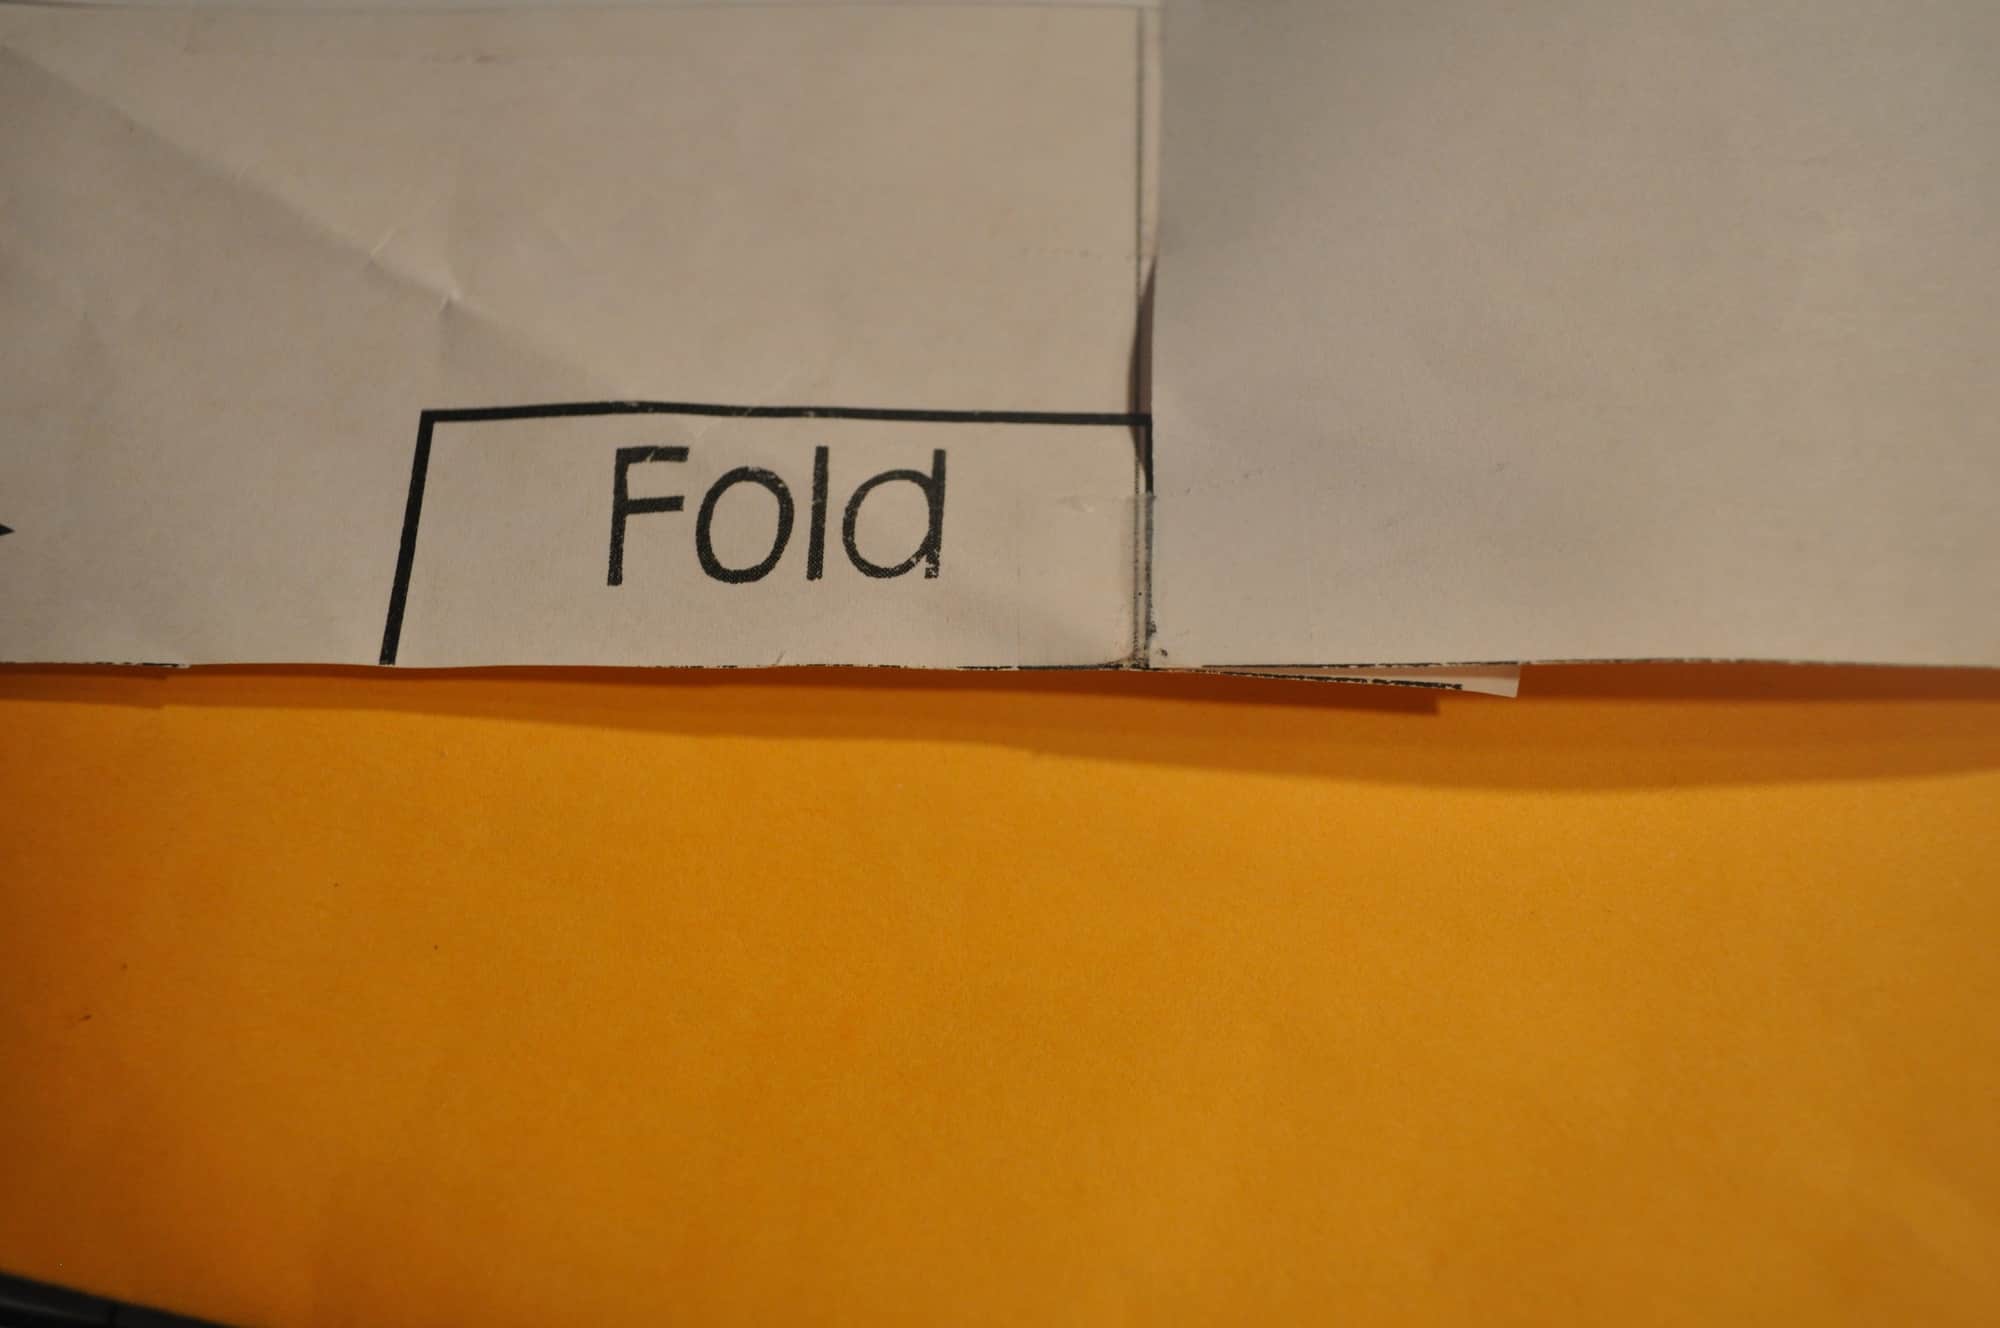
When we cut a pattern out, the best way is to fold the fabric carefully on the straight grain of the fabric, lining up the selvages . If you need to straighten the ends of your fabric, take a snip through the selvage near one end. Then pull a horizontal thread. The missing thread will create a straight line for you to cut along.
Fold Placement
Then place the pattern pieces down carefully with the grain lines on the pattern piece lined up with the straight grain of the fabric.
Finding the Straight Grain
An easy way to check if your pattern piece is “on-grain” is to measure from the line on the pattern piece to the selvages in a couple of places. The distance should be the same.
It’s important for long pattern pieces, especially something like a pant leg, to be grain perfect. If it’s not, the garment will twist, and once you cut it, there’s nothing you can do to fix it. You’ll also never be able to match stripes or plaids if you cut off-grain.
Smaller pieces like pockets, collars, cuffs, and yokes can be cut on the straight grain, the cross grain, or the bias no matter what the lines on the pattern say. The “bias” is the direction that’s 45 degrees from the straight grain. It has more drape than either the straight grain or the cross, and edges cut on the bias don’t fray.
When you cut major pieces on the bias, it’s important to cut them in opposite directions or your whole garment will twist. But it’s not important for small pieces like pockets.
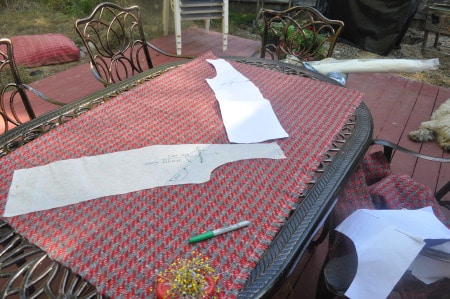
How to Position Bias Cut Pieces
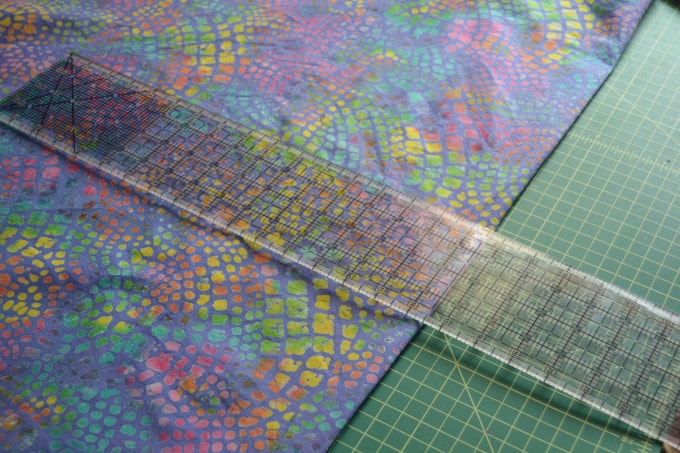
You can mark the bias on your pattern piece with a protractor or a quilting ruler.
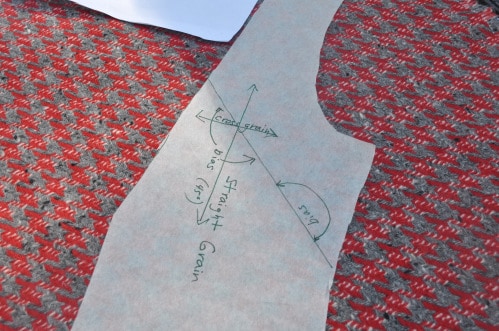
Marking the Grainlines
Over time fabrics cut on the cross grain will droop more than then fabric cut on the straight. It’s not a problem for something like a skirt or pants made from a border print. The droop won’t be noticeable in the normal lifetime of the garment. You might see it in heavy curtains, though.
Knit Fabrics
Technically, knit fabrics don’t have a grain, but the direction you cut your pieces out matters just as much. Big machines make knit fabric, but they work the same way we knit with yarn and needles. Some machines knit back and forth and some knit in the round. One results in a fabric with selvage-like edges and other in a tube of fabric.
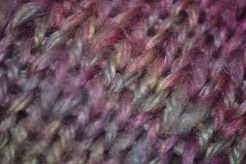
Close up of a Knit Fabric
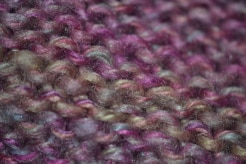
No matter what yarn is used to create the knit fabric, the single knit process will result in a horizontal stretch in the fabric we call the “mechanical stretch”. Fabrics that only have horizontal stretch are usually called “two-way stretch”. The addition of elastane (Spandex, Lycra, etc.) to the yarns can create a fabric with both horizontal and vertical stretch, and it is usually described as “four-way stretch”. Whether the fabric is two-way or four-way, the horizontal stretch should be the circumference of your garment.
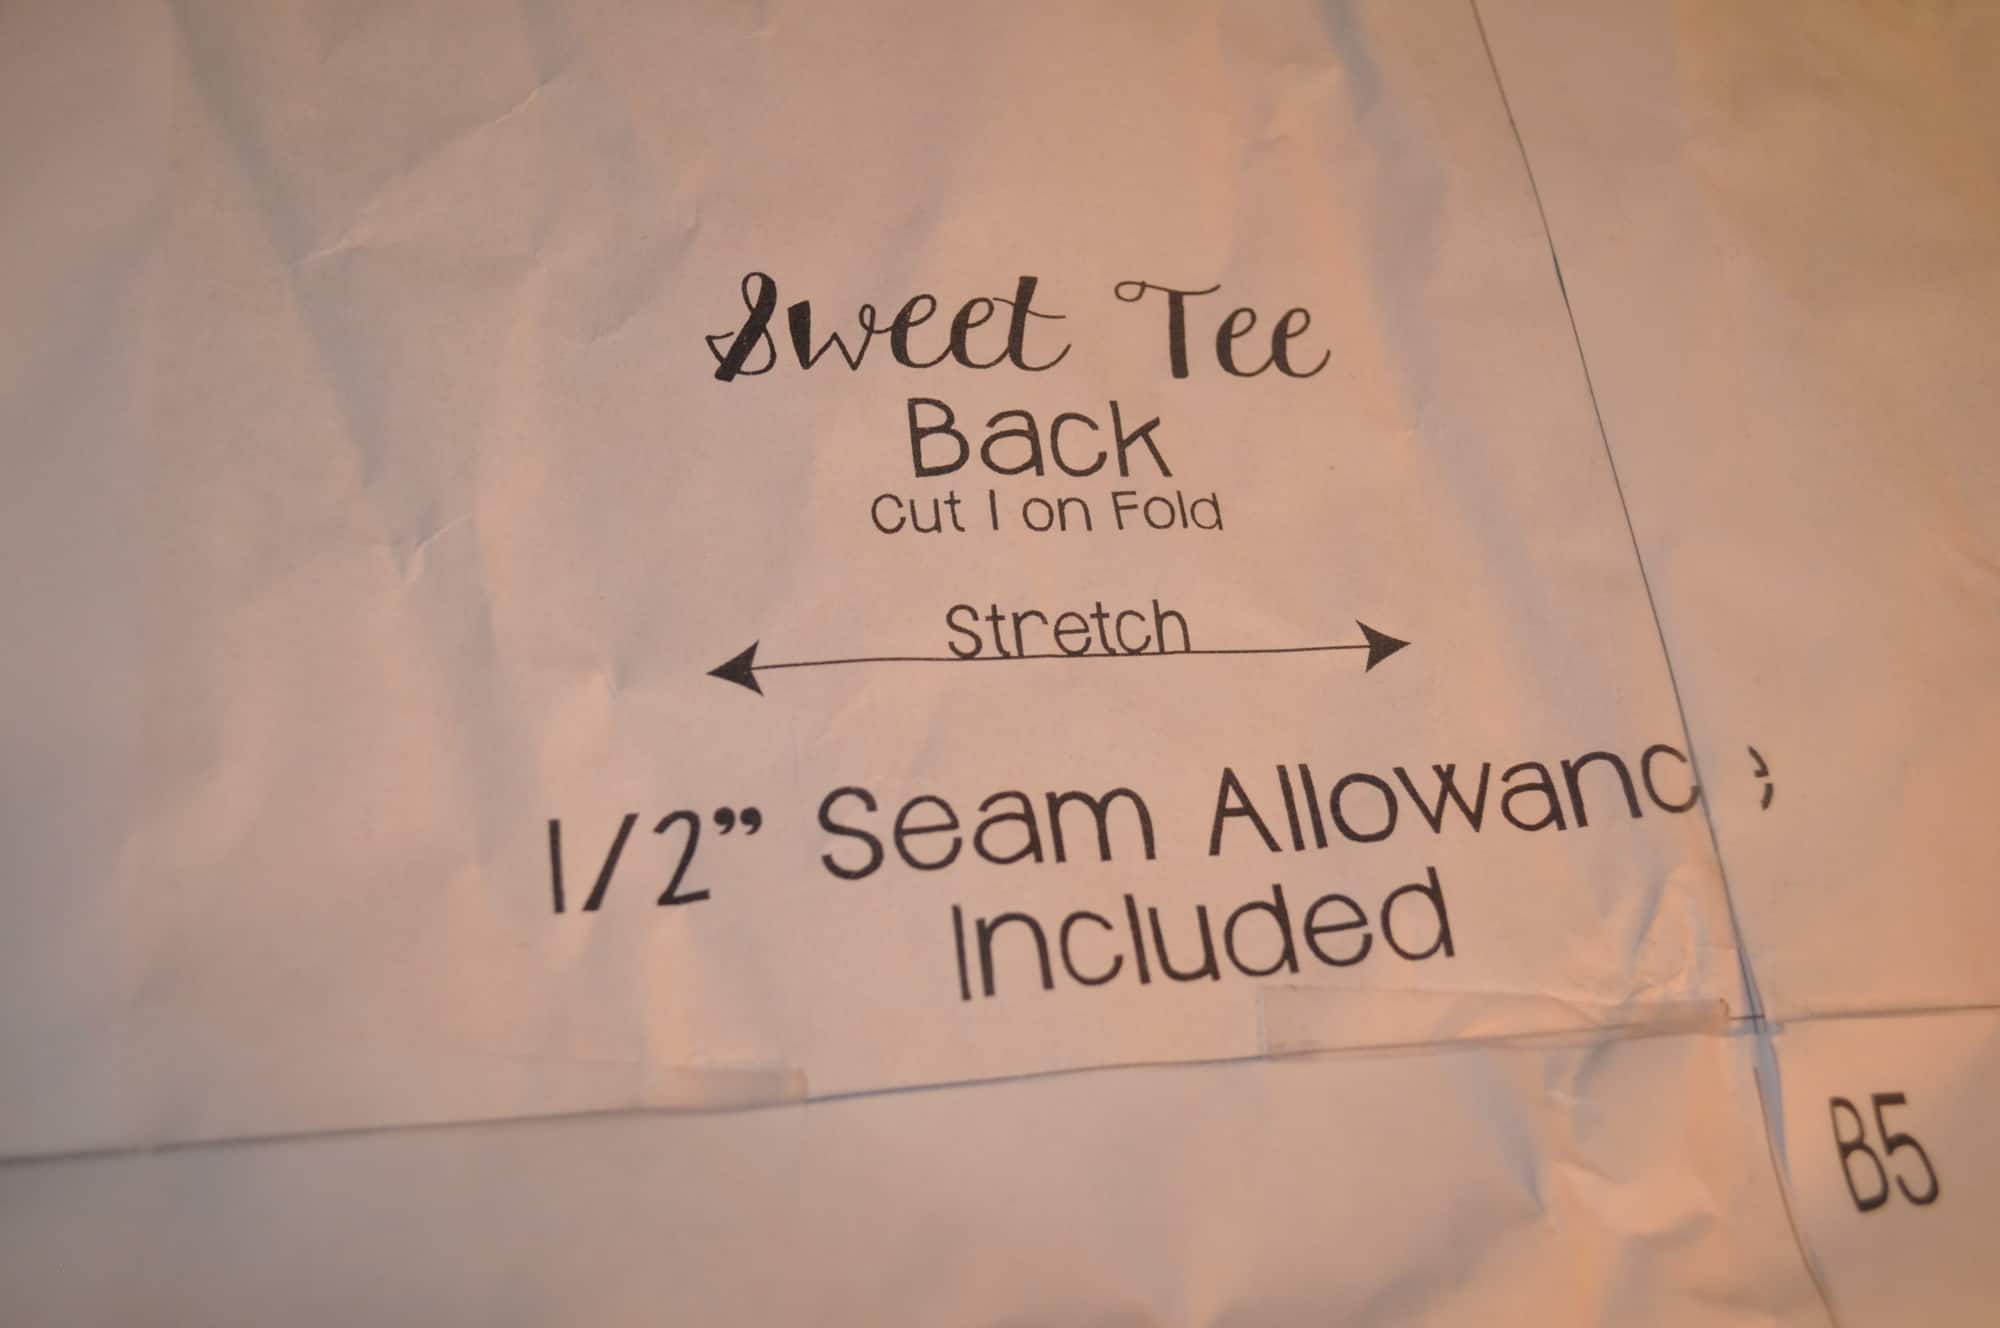
Horizontal Stretch Line
While the amount of elastane in the yarns might make the fabric stretchy enough for the garment to fit you cut with the vertical stretch used as the circumference, you shouldn’t cut it that way. If the mechanical stretch in the fabric hangs vertically, you’ll get elephant knees, saggy elbows, and baggy crotches. You can use the same method for making sure your pattern is lined up so the grainlines on your pattern are parallel to the edges of your fabric that we use for wovens. Knit patterns often have the horizontal stretch line marked, too.
There’s a saying in sewing- The fabric always wins. There is probably nowhere in sewing where fighting the fabric is more futile than not paying attention to the grain.
Roberta
- « Previous Page
- 1
- …
- 19
- 20
- 21
- 22
- 23
- …
- 29
- Next Page »