Patterns for Pirates

P4P stylish, modern, wearable patterns

  • Home
  • Blog
    • Frequently Asked Questions
    • Pattern Releases
      • Free Patterns
    • P4P University
      • Fitting
      • Sewing with Stretch, Knit Fabrics
      • Sewing with Woven Fabrics
      • Sewing Machines
    • Sew-A-Longs
    • Fabric for Pirates
    • Pattern Hacks
    • Announcement
      • Blog Tours
      • Contest/Giveaway
  • Shop
  • Bundle Discounts
  • Flash Friday
  • Gift Cards
  • My Account
  • Cart

Fall Capsule

August 1, 2017

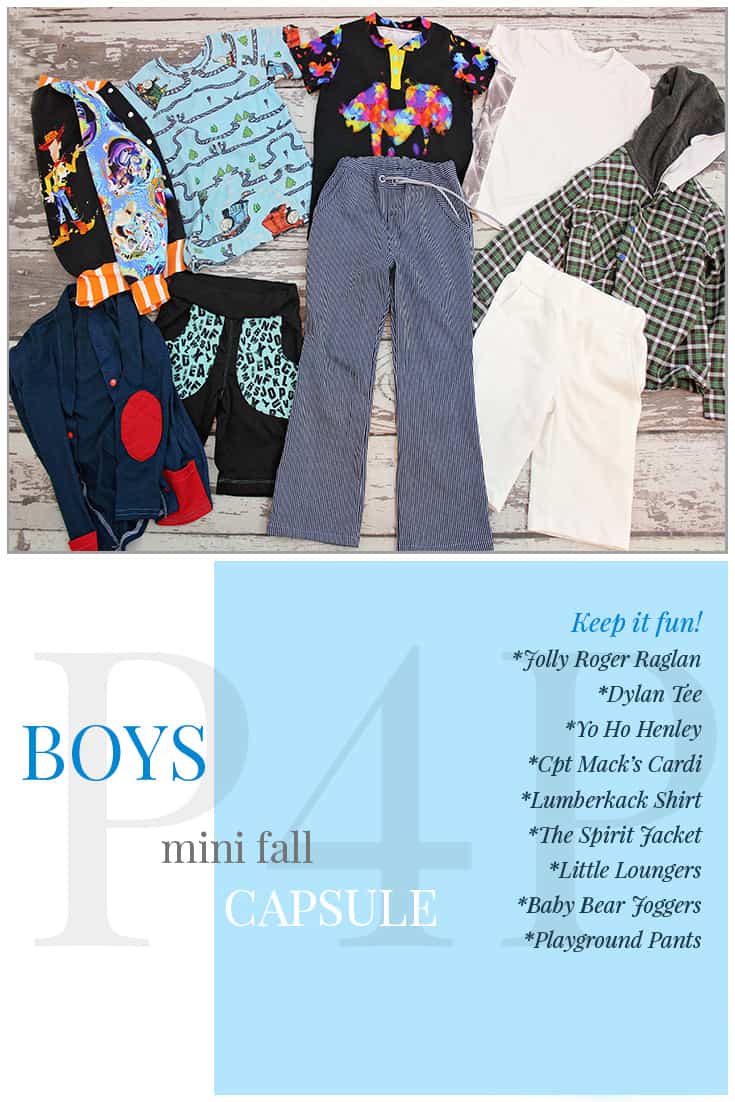
Once again Patterns for Pirates teamed up with Made for Mermaids and Cole’s Corner and Creations to bring you some Fall Capsule inspiration. As before we will be giving you some ideas how to create Women, Boys and Girls mini capsules.

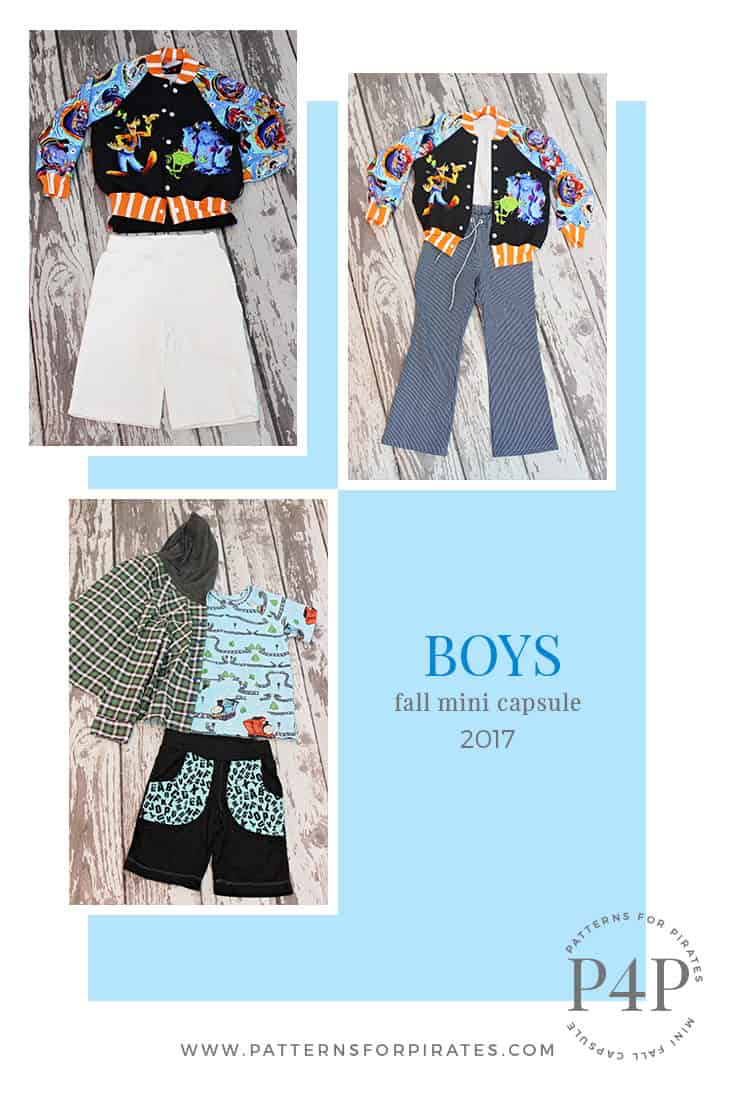
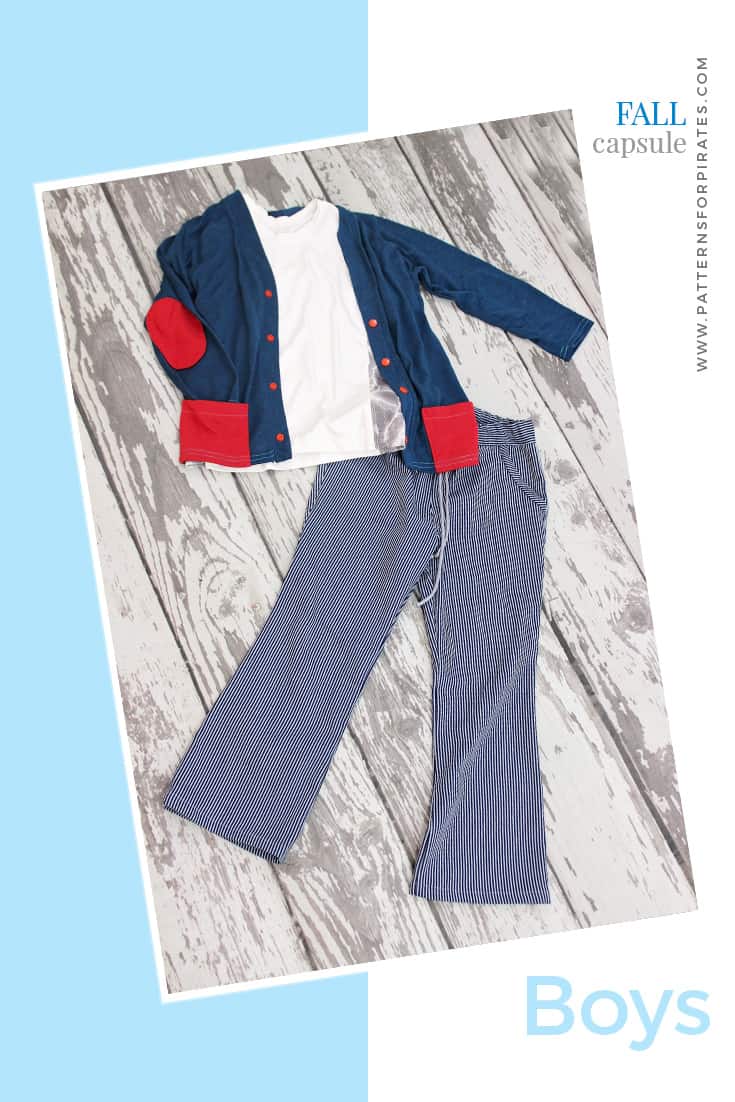
Today I will show you how to create a perfect mini fall/back to school capsule for your little men. As some of you know, I live in Florida so my kids’ capsules will reflect the warm climate. For the rare days when it’s chilly (and by chilly I mean 70s 🙂 ) I love to have some layering pieces ready. I find Cpt Mack’s Cardigan to be the perfect layering piece for short or long sleeves tshirts. Those elbow patches are so fun!
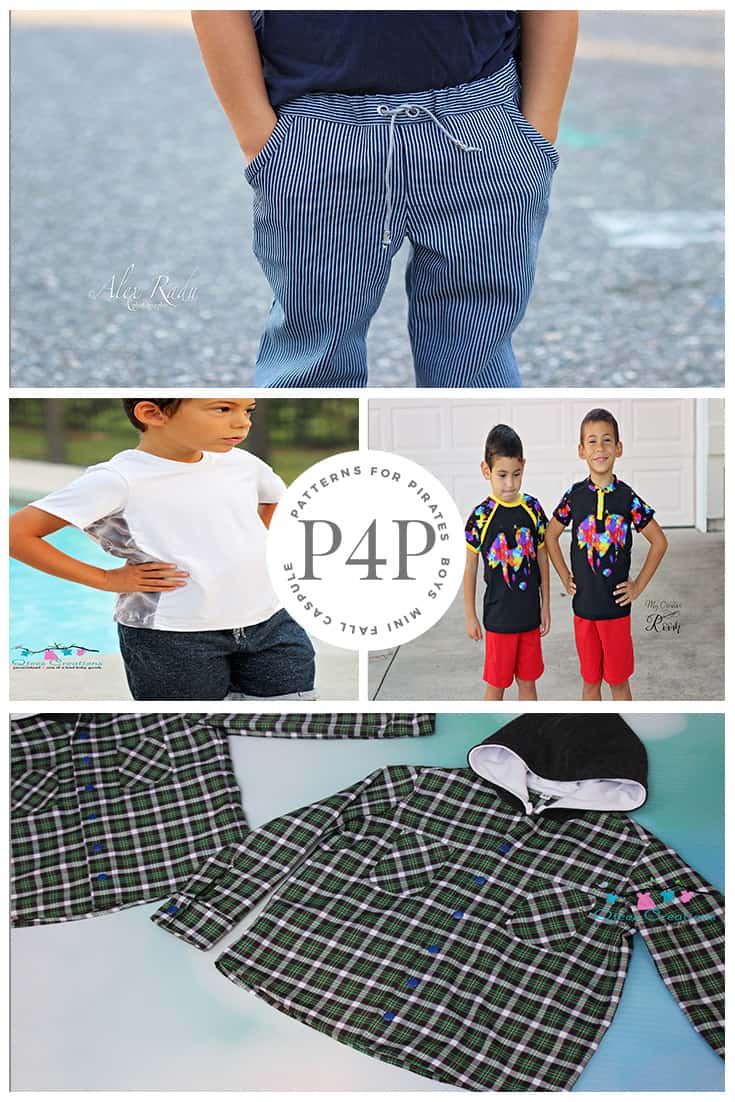
When you built your boy’s fall capsule be sure to add a button up shirt like the Lumberjack Shirt. They can be worn as stand alone tops but also make great layering tops. You can make the collar option or go for a fun, cool look and add a hood.

Every boy needs a cool jacket! Am I right? Well…look no further than the Spirit jacket from Cole’s Corner and Creations. The raglan style sleeves make it such an easy sew that you’ll be whipping those in no time.
Between the 3 sisters pattern companies you have so many tops options. For Noah’s fall capsule I went with my 3 favorite choices…the P4P Jolly Roger Raglan, the M4M Dylan Tee and the P4P Yo Ho Henley. All patterns feature a long sleeve and short sleeve option so you can pick whatever style works best for your area.
 

When choosing the bottoms for the mini fall capsule I kept in mind one thing: COMFORT! My little man lives in shorts all year long so I went with the Pirate Playground shorts and a modified knee length Baby Bear Joggers. I like the loose fit of the Playground Pants for PE days and the slimmer fit of the Baby Bear Joggers for everyday wear.
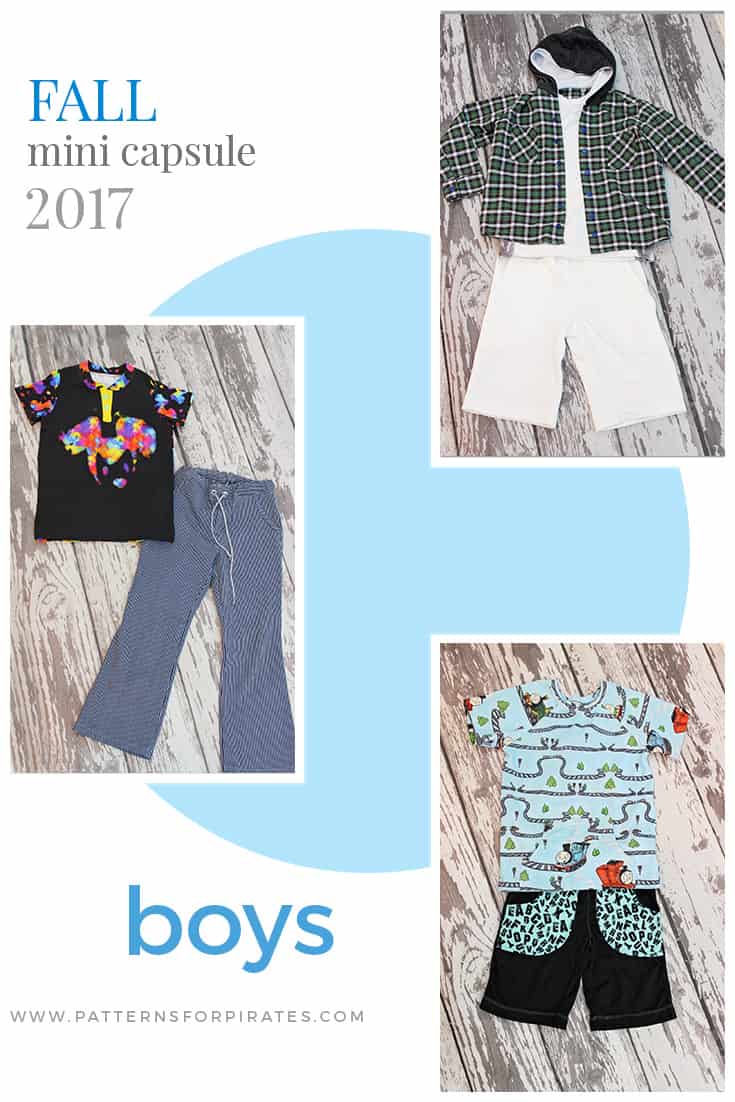
For the occasional colder day I had to add a pair of the new Little Loungers pants. This pair is made with a striped linen blend and it’s such a classic look. It pairs beautifully with the Yo Ho Henley, the JRR and the Dylan Tee.
 

We can’t wait to see your little one’s capsules this fall! You can read the contest details on the M4M blog here. Regardless of which top, layering piece or bottoms you choose remember to: Keep it fun! Keep it simple! Keep it comfortable!

Filed Under: Blog Tours, Uncategorized Leave a Comment

P4P University :: Bias Binding

July 22, 2017


We recently covered the tips and tricks to using a knit binding (HERE) but what about woven fabrics?  One of the many finishing options for necklines, sleeve hems and armcyes for woven fabrics is bias binding.  Unlike knit, woven binding should be cut on the bias (45 degrees from the grain-line) so that it bends and curves and allows it to lay flat.  Some patterns will include a pattern piece, which makes it easy to line up and cut the strip on the bias, however, it can eat up quite a bit of fabric and we all know how much we hate to waste pretty fabric, right?  You can also use pre-made bias binding, but many of times it’s nice to use the same fabric as the your garment, so we’re going to show you how make a continuous bias strip from a small square of your fabric.  This is also perfect to use up your scraps.

For this example, I used a 15″ x 15″ square which makes about 100″ of 2″ bias binding.  A 12″ square makes about 60″ which is plenty for the bias binding neckline option of the Everyday Elegance.

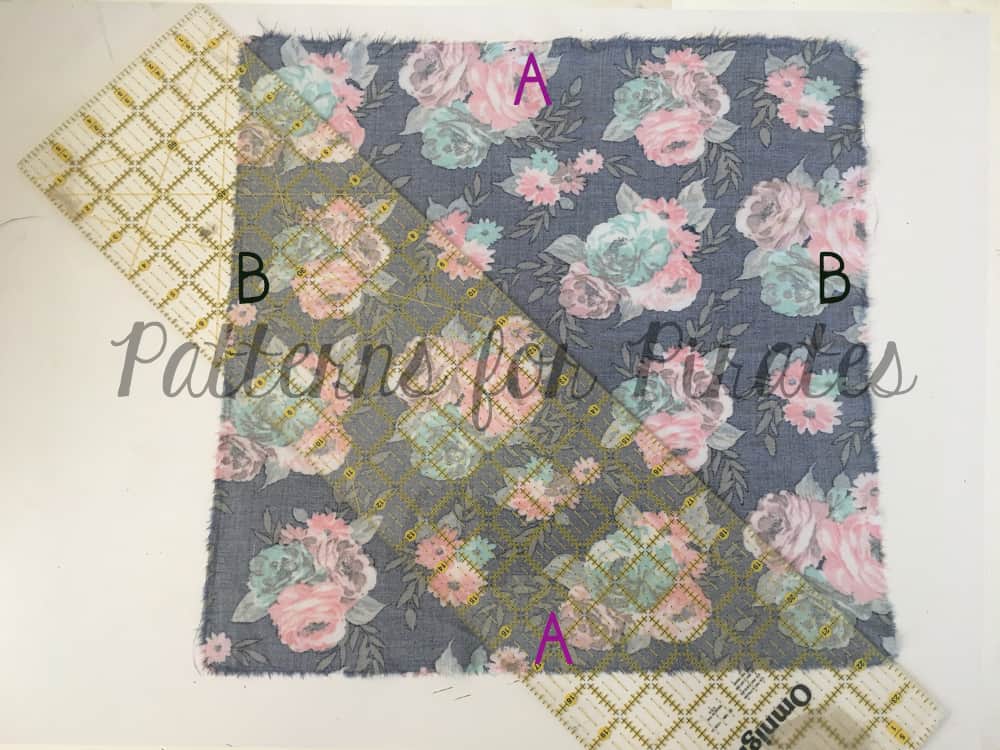
Cut and prep the square. Mark opposite sides with A/B and draw a diagonal line from one corner to the other.
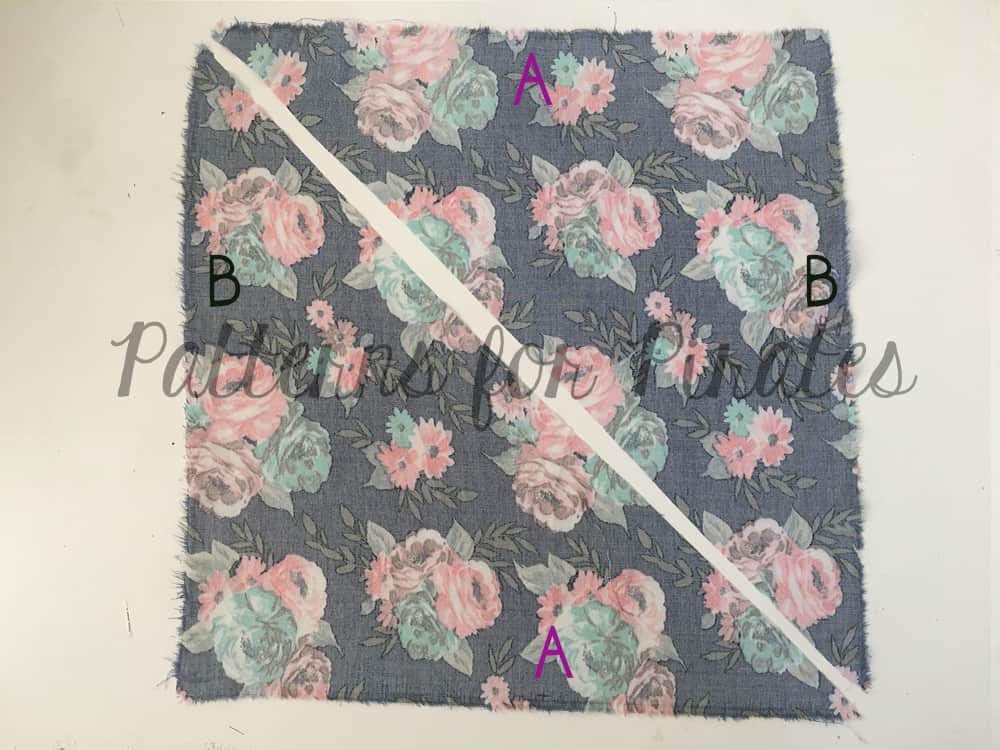
Cut the square across diagonally.

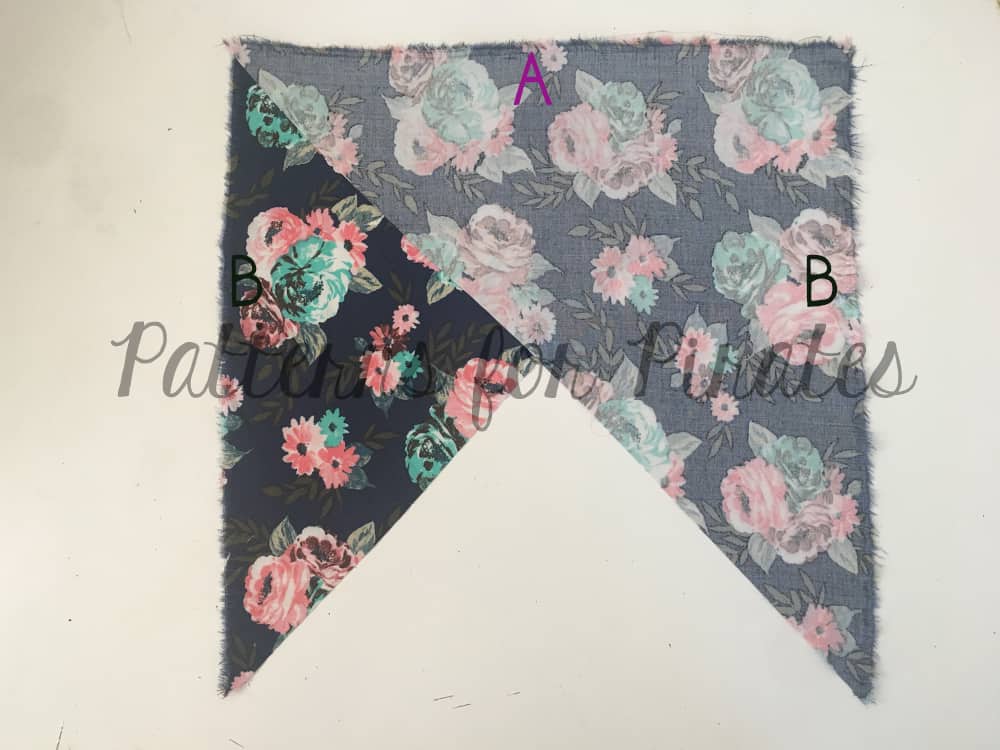
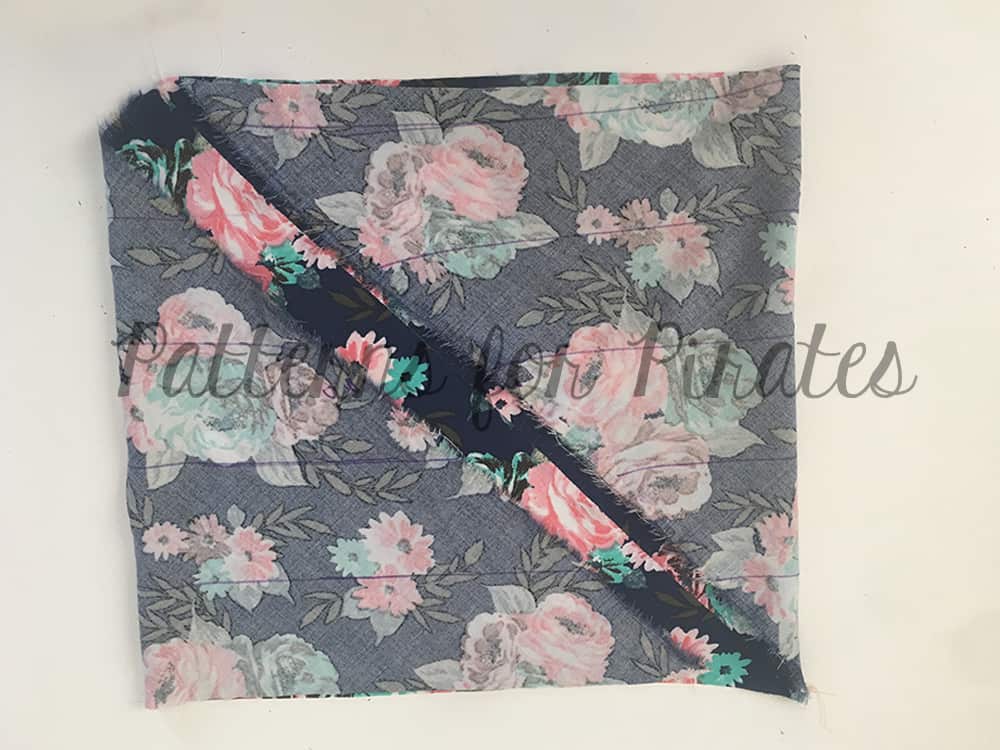
With right sides together, match the ‘A’ side and stitch together using a 1/4″ seam seam allowance.
Press seam allowance open.

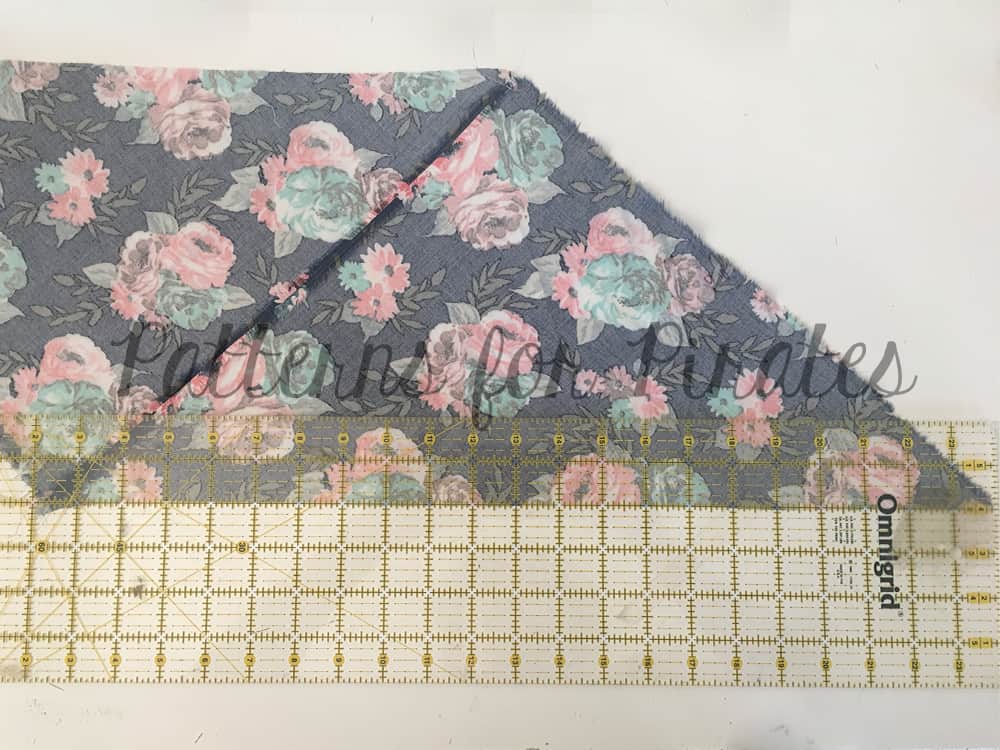
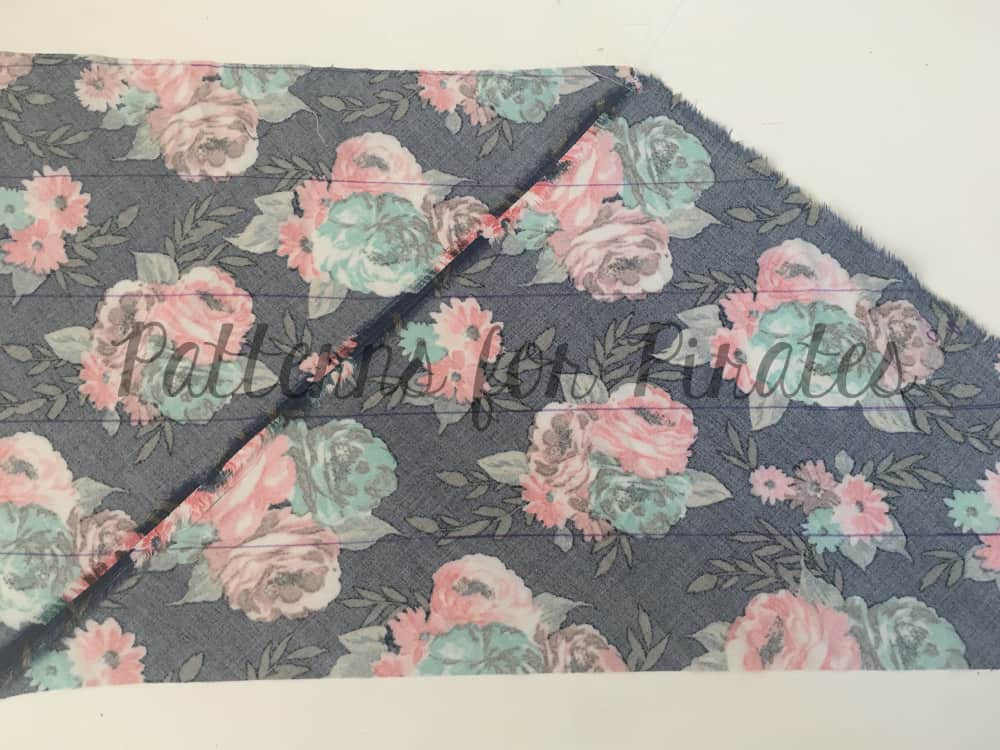
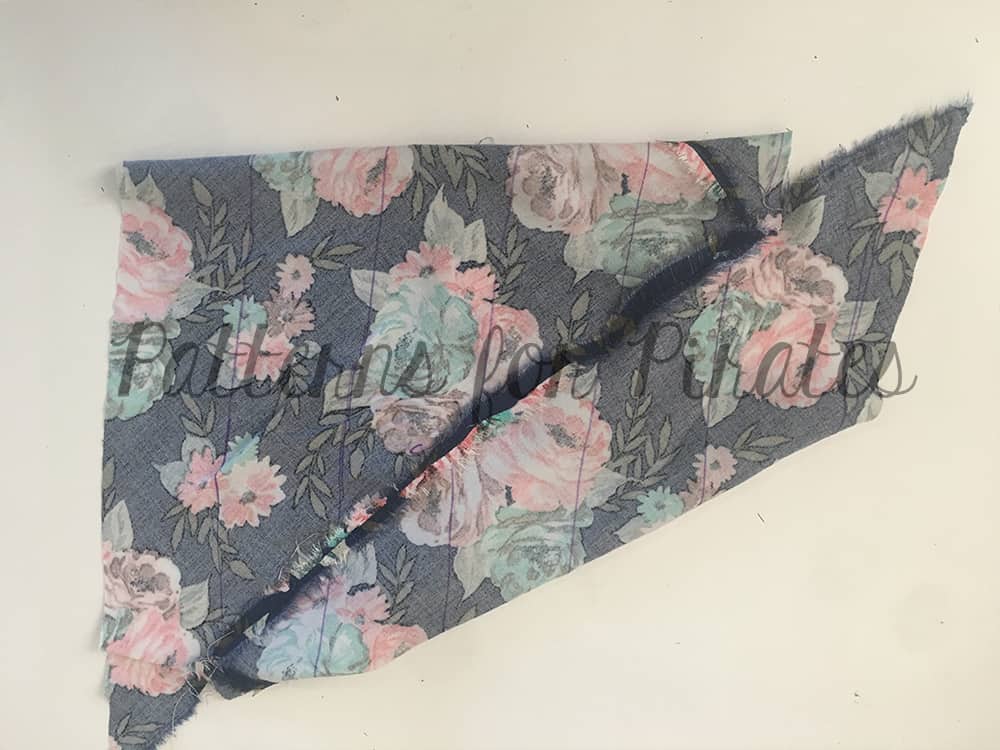
Starting at the bottom, draw 2″ lines parallel to the bottom edge. If there is any excess that does not complete a full 2″ row, just trim it off.
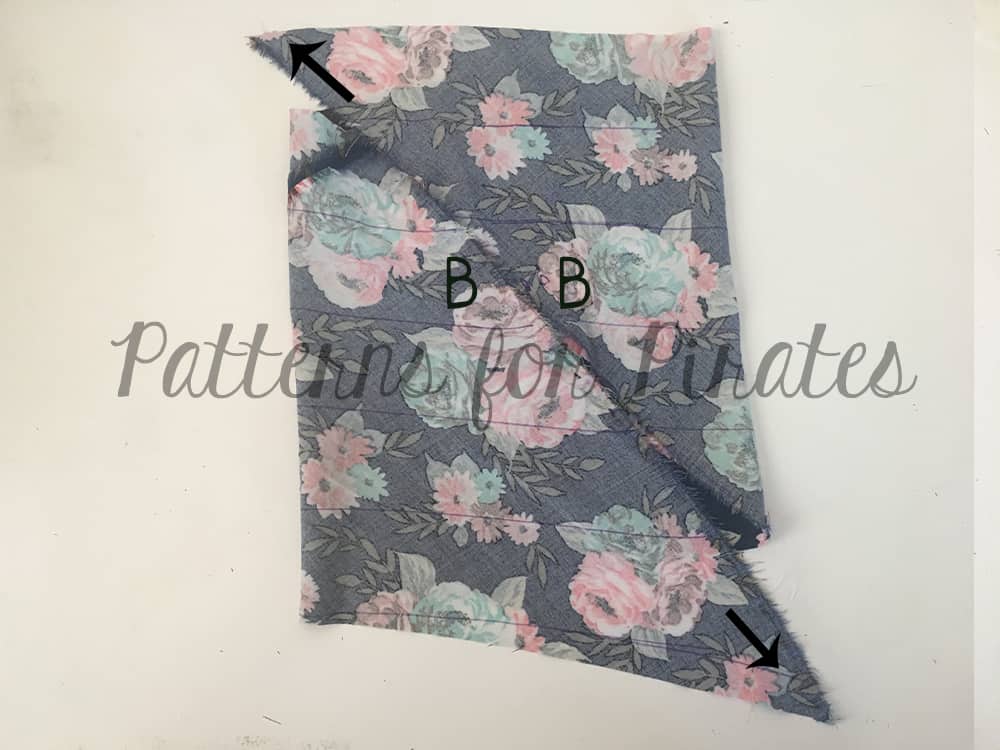
With right sides together, fold the ‘B’ side toward one another. Your fabric should be a square, with your drawn lines still parallel with one another.

Pull the pointed corners in opposite directions and match up the next row of lines.
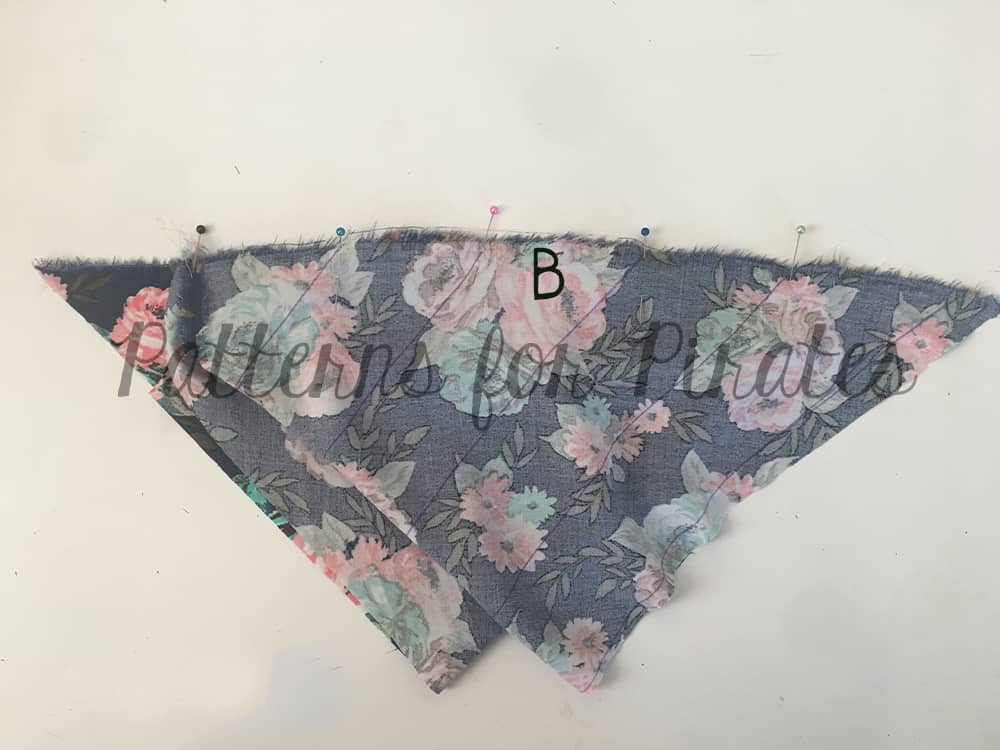
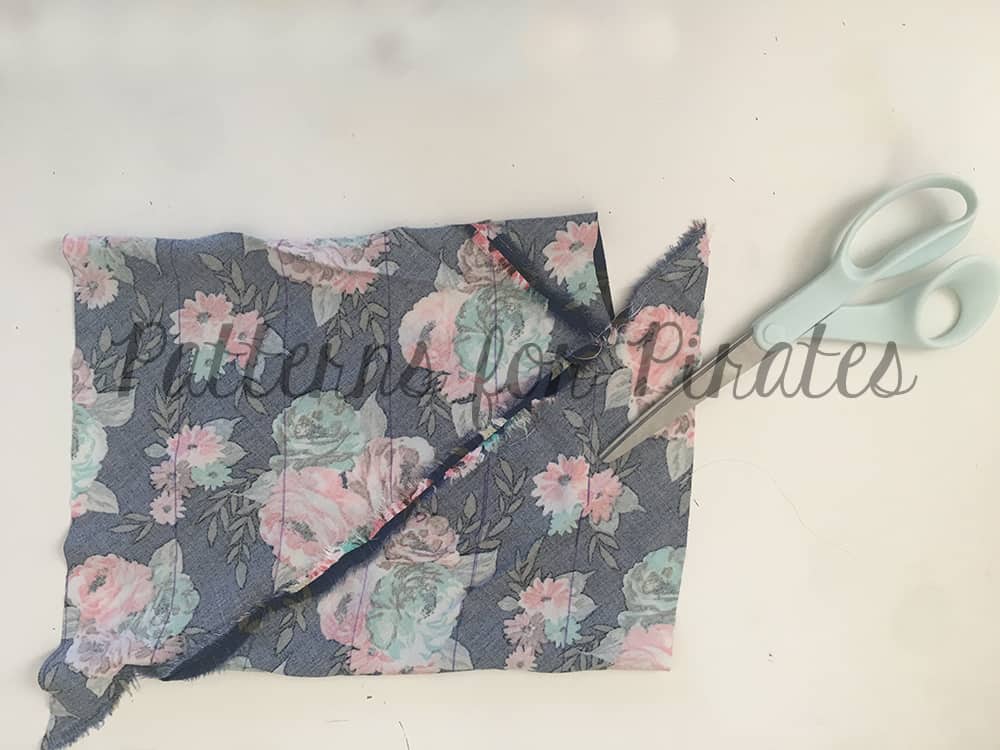
With right sides together, pin and stitch using a 1/4″ seam allowance.

Press seam allowance open.
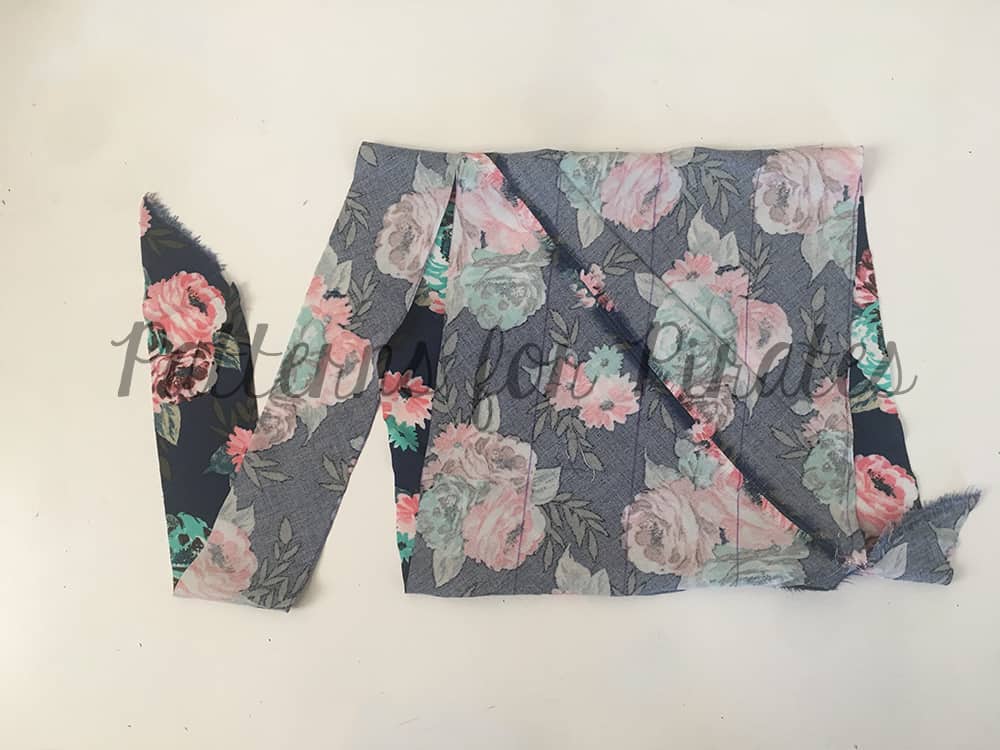
Starting at one end, cut along your previously drawn lines.

Continue cutting around the circle and voila! You now have a continuous bias strip.

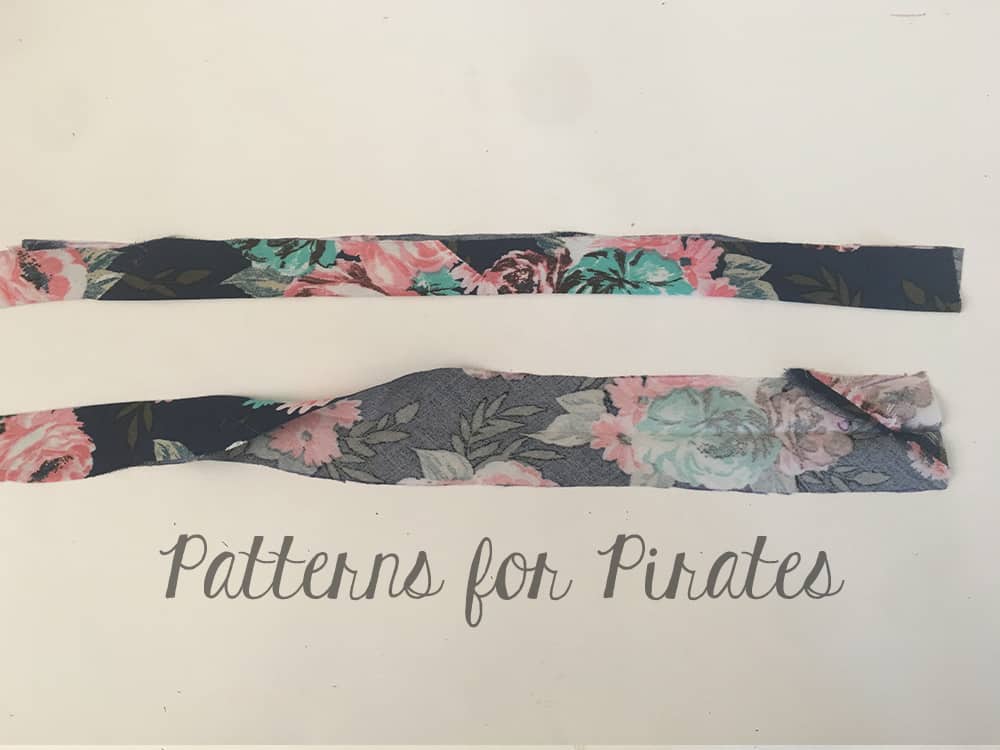
At this point, you can set your binding aside or you can continue to pre-press to finish preparing it to be sewn to your garment.  A 2″ binding strip will create 1″ single fold or 1/2″ double fold bias tape.  The above method also works for various widths and single or double fold bias tape.

Fold bias strip in half toward the wrong side. Press.
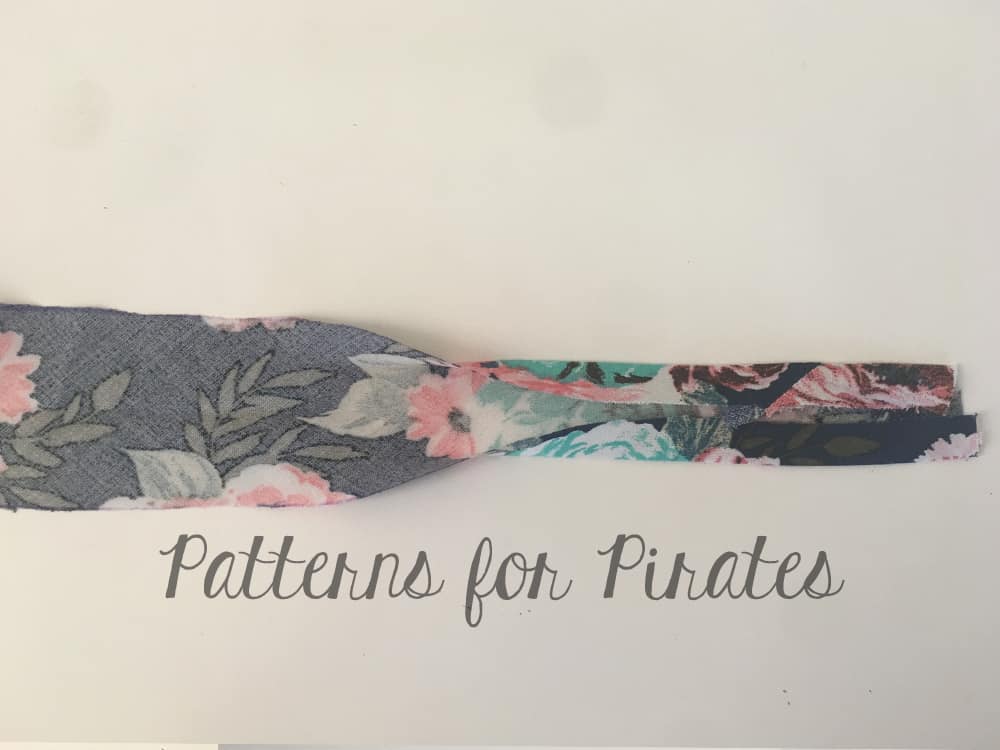
Unfold and re-fold the raw edges toward center.
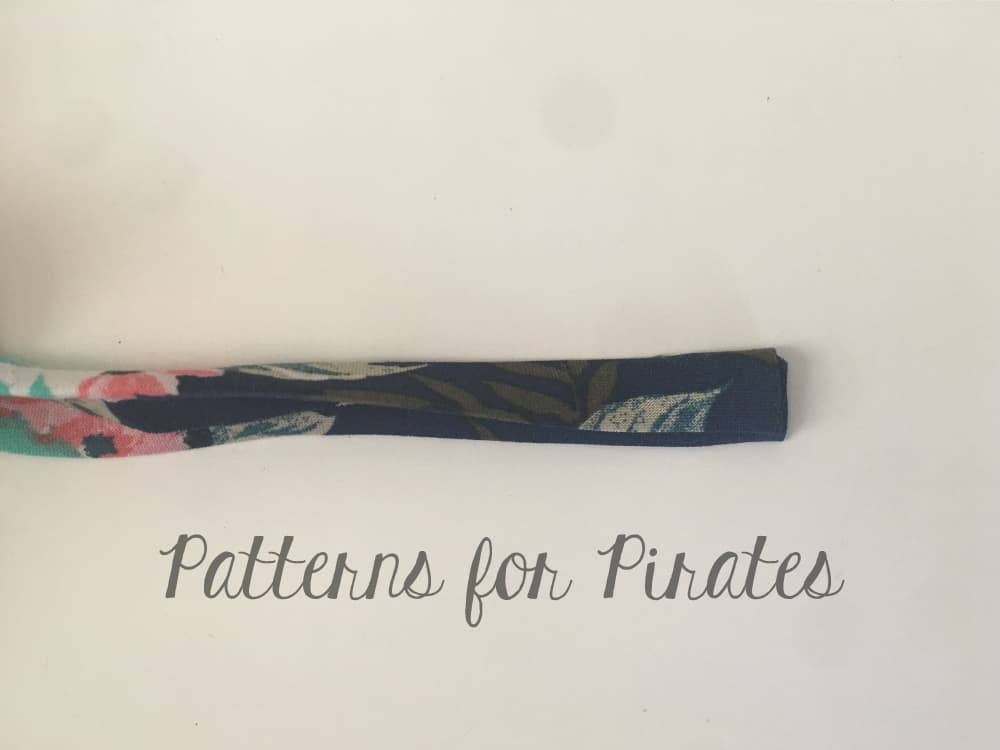
Fold again and press.

There you have it!  Creating your own bias tape from woven fabric is as simple as a couple of seams and cuts.

Check out the video below as Judy walks you through a quick demonstration on sewing with bias binding.

We’ve added another quick video with SINGLE FOLD BIAS BINDING 🙂 Enjoy!

As promised in the video here are a couple pictures to entice you to PRESS and stay stitch to help get a great finish.

Finished single fold bias:


Happy Sewing!!

Filed Under: P4P University, Sewing Techniques, Sewing with Stretch, Knit Fabrics, Uncategorized 4 Comments

LL – easy hacks

July 20, 2017

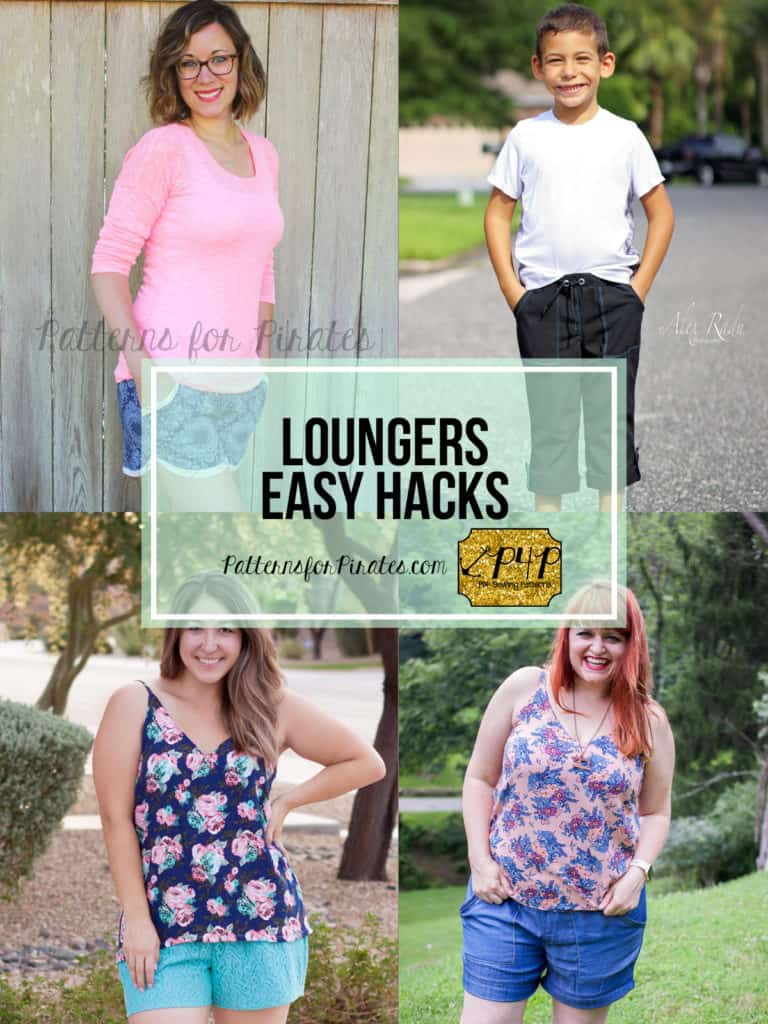
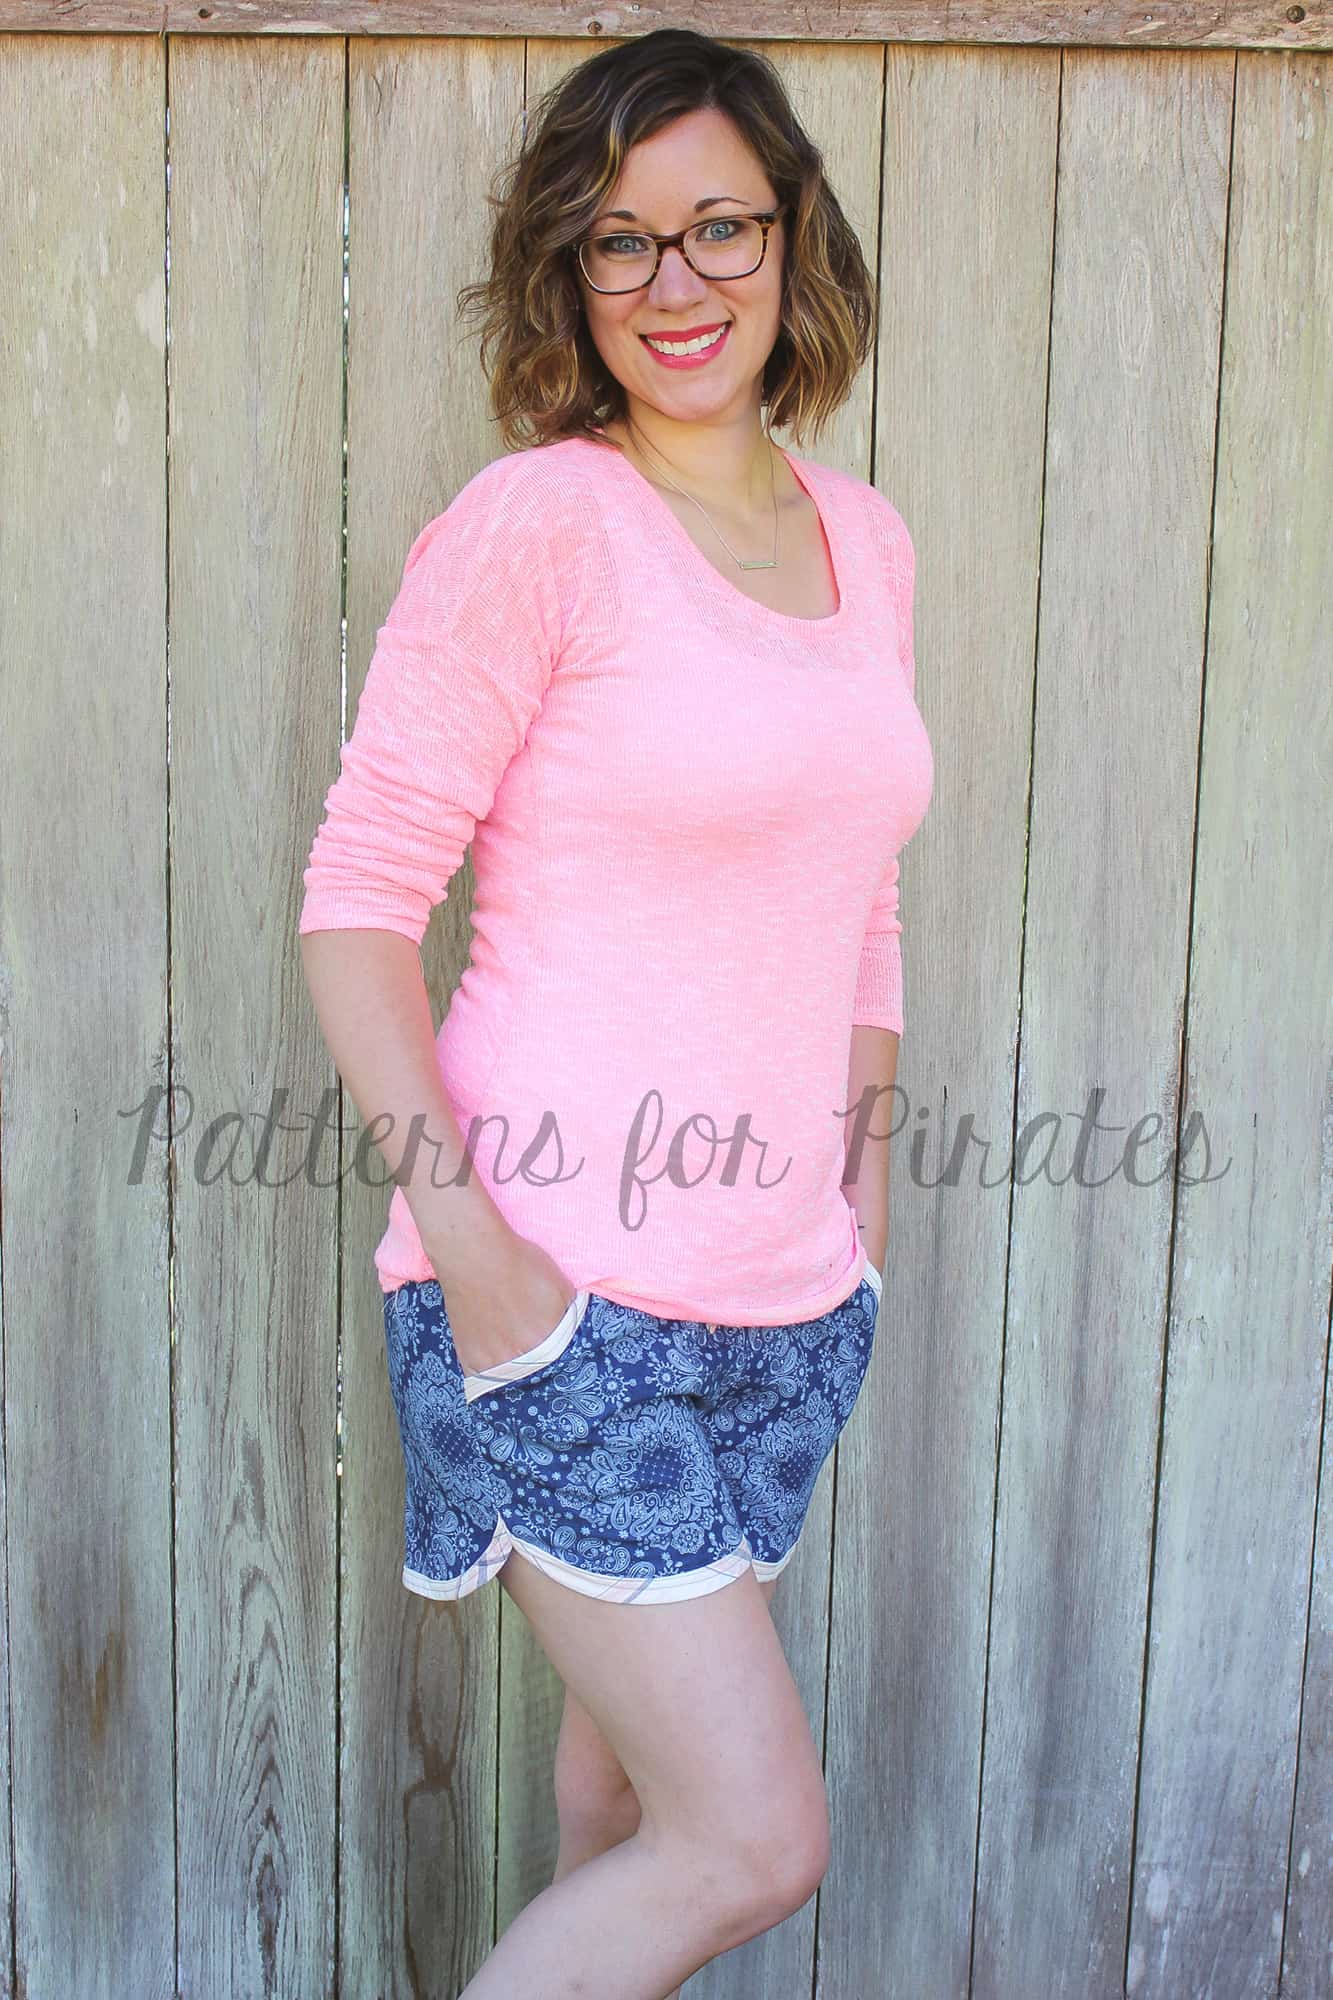
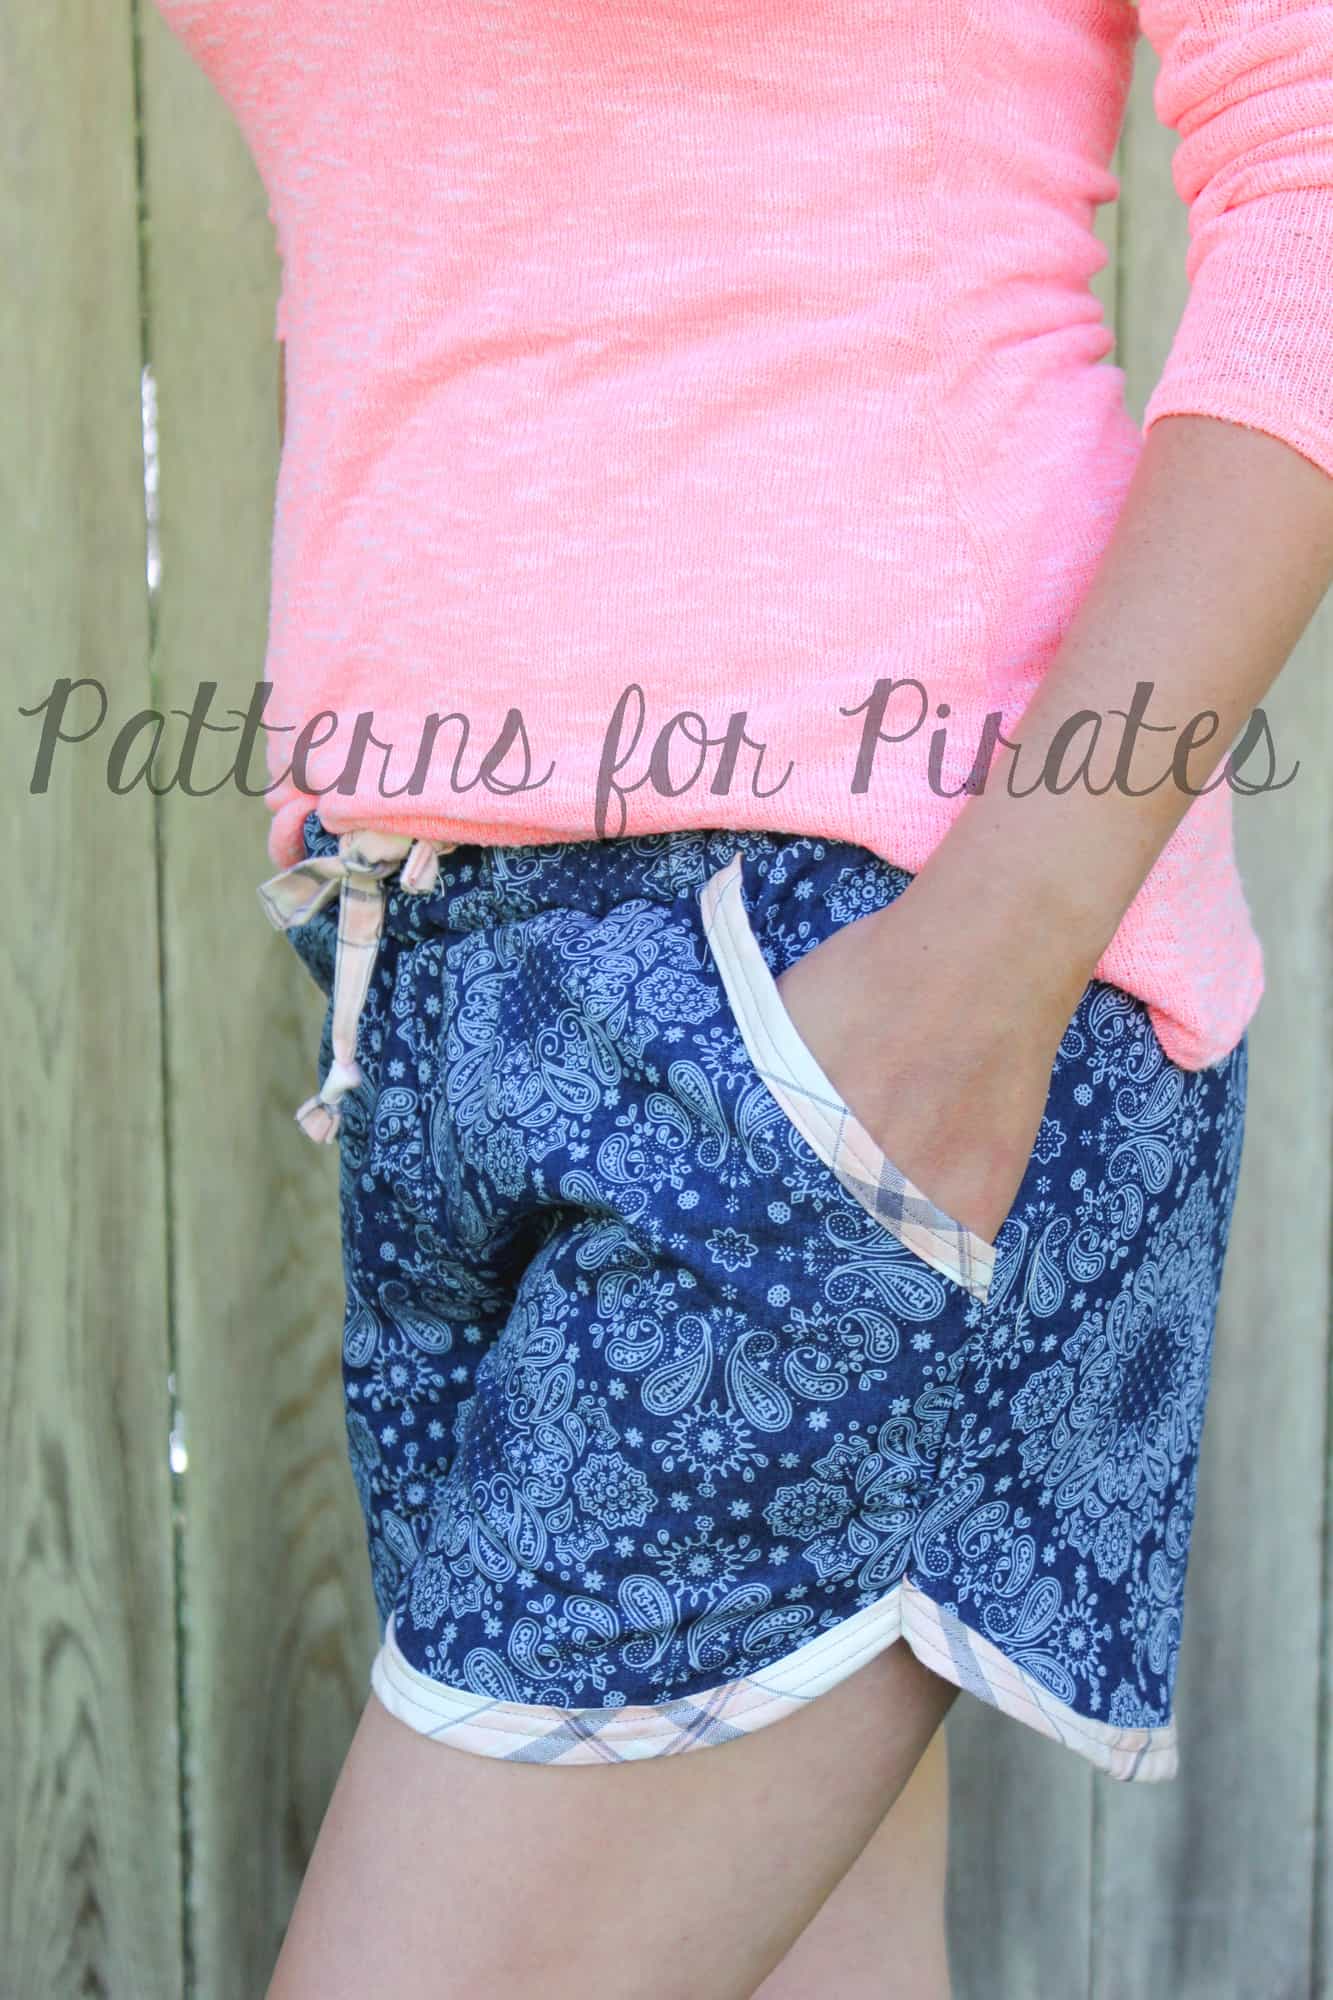
In true Pirate fashion we could not have let this double release go by without showing you some easy but fun hacks for the Little Loungers and Linen Loungers. Erinn will start you off with an adorable bias binding hack for the curved hem shorts.

…..

Bias Binding curved hem

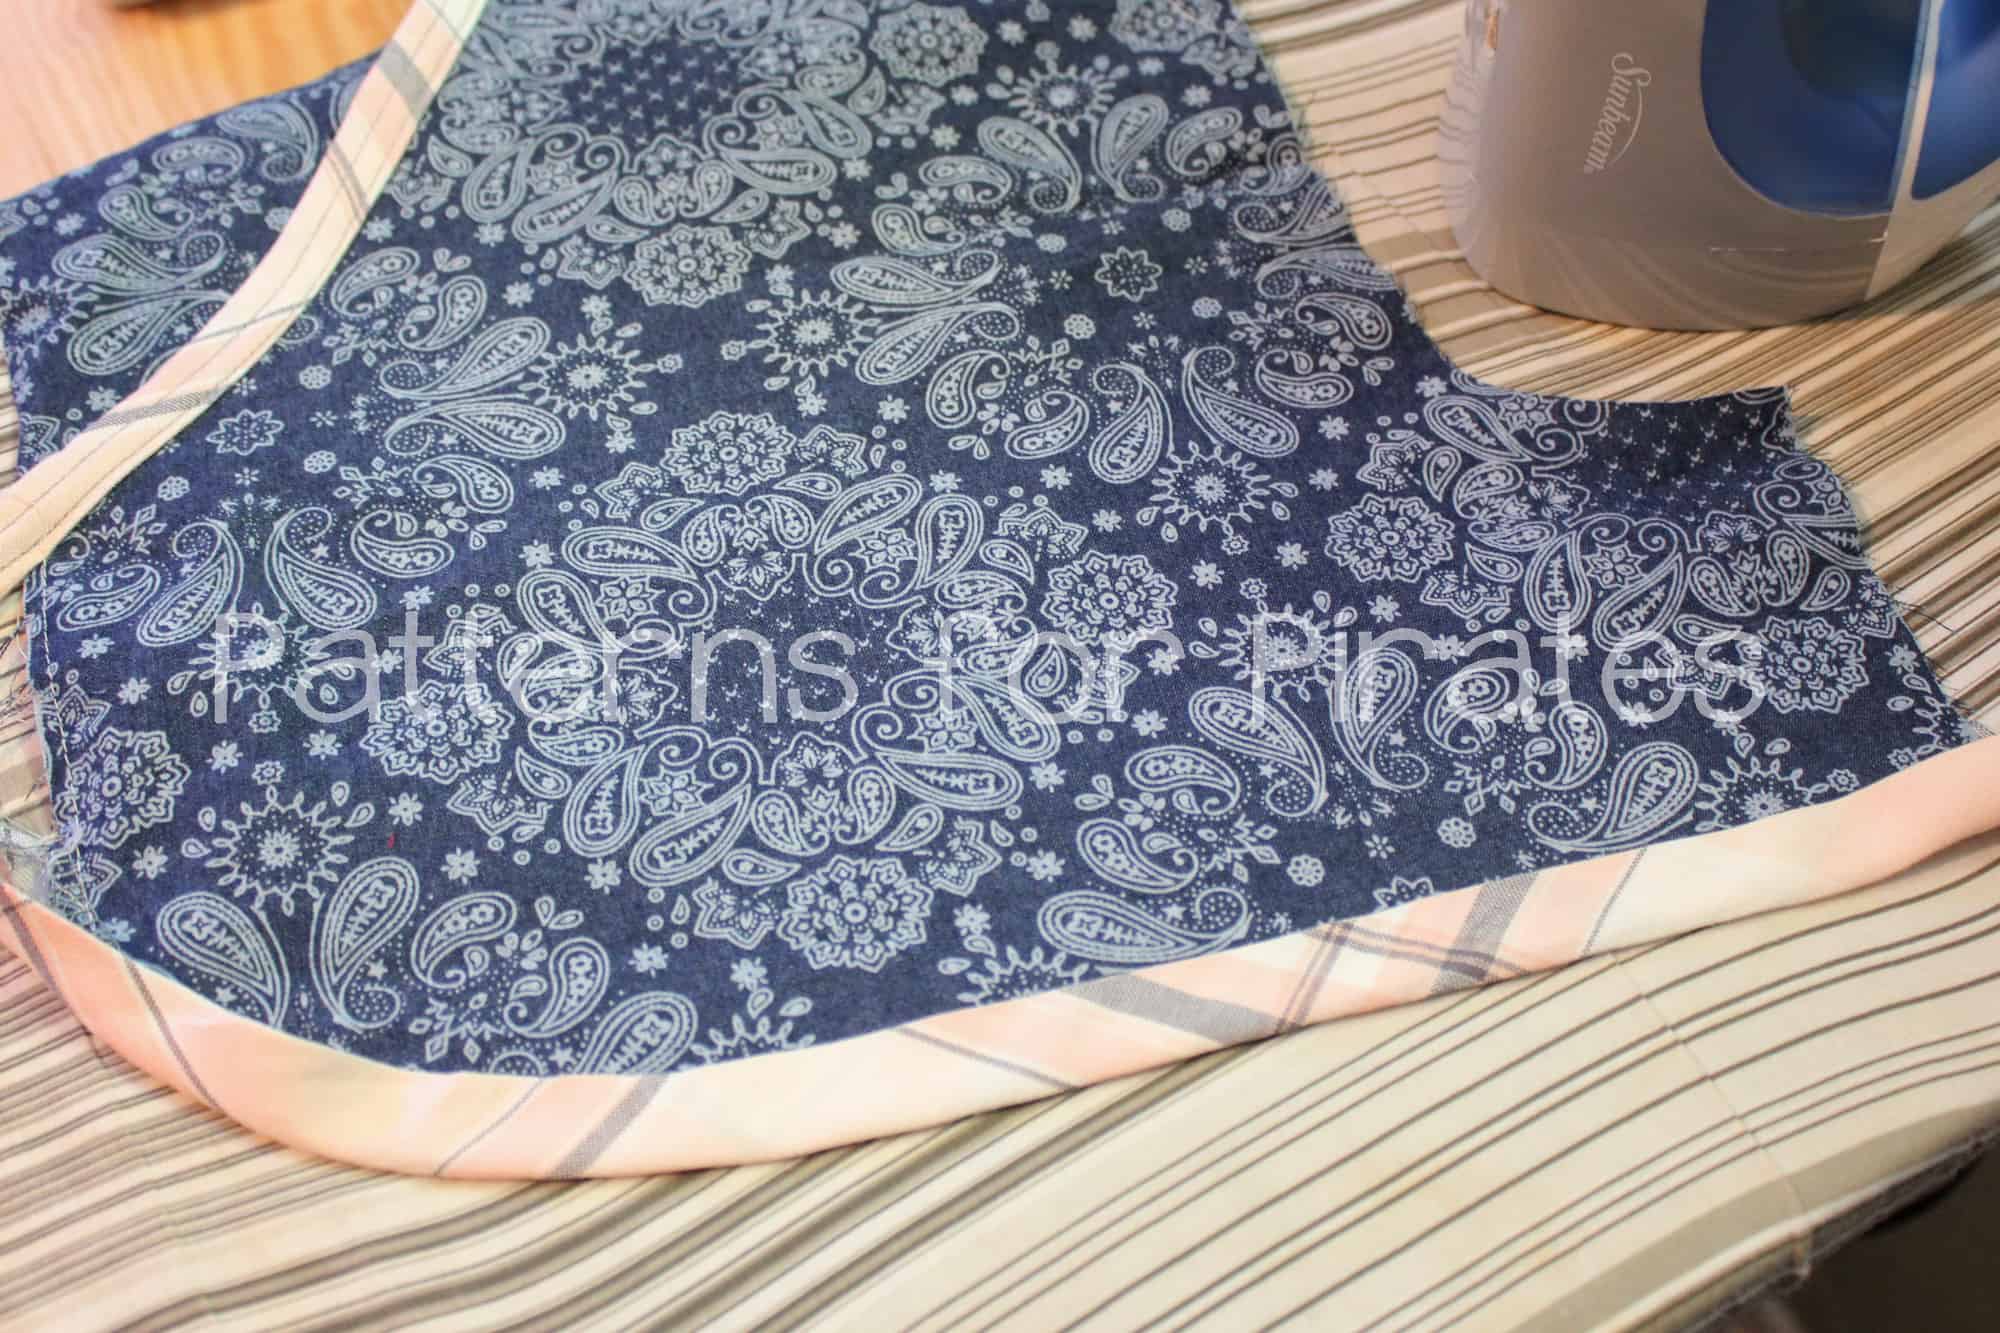
Adding bias bindings to the hemline of the curved shorts is a quick and easy way to create an entirely different look. One of the things that I love most about this look is that it’s a great way to add a pop of contrasting or coordinating fabrics.

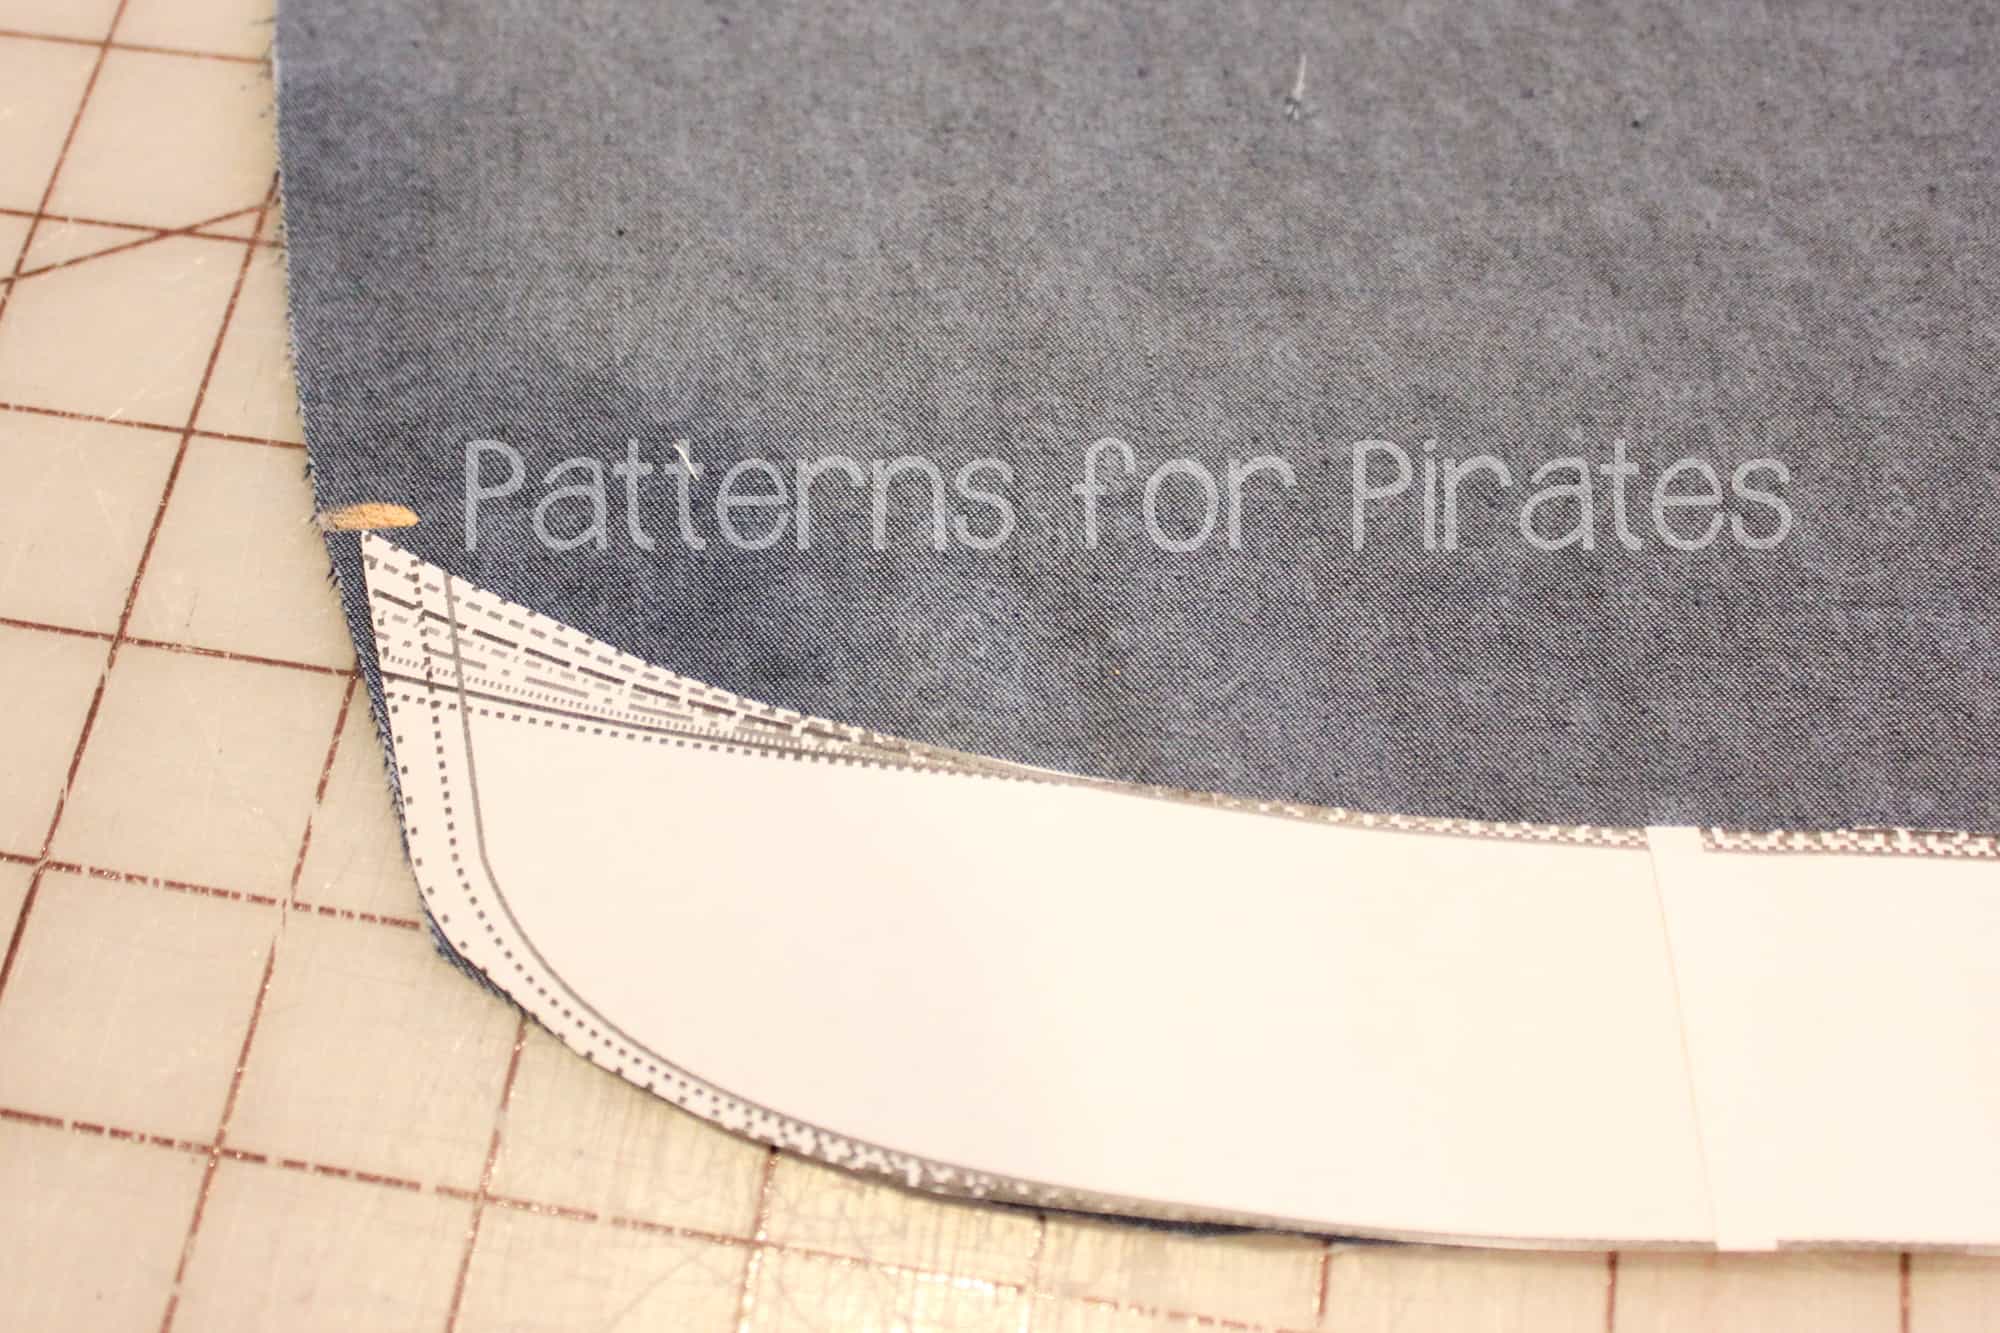
To create this look, cut out your pattern pieces as you would per the pattern. The only additional thing you will need are your bindings. For mine, I cut them 2″ wide by a length that was longer than the hemline. As you can see below, I used the curved pattern pieces and marked the top edge. I will connect my bias binding pieces up to this marking.

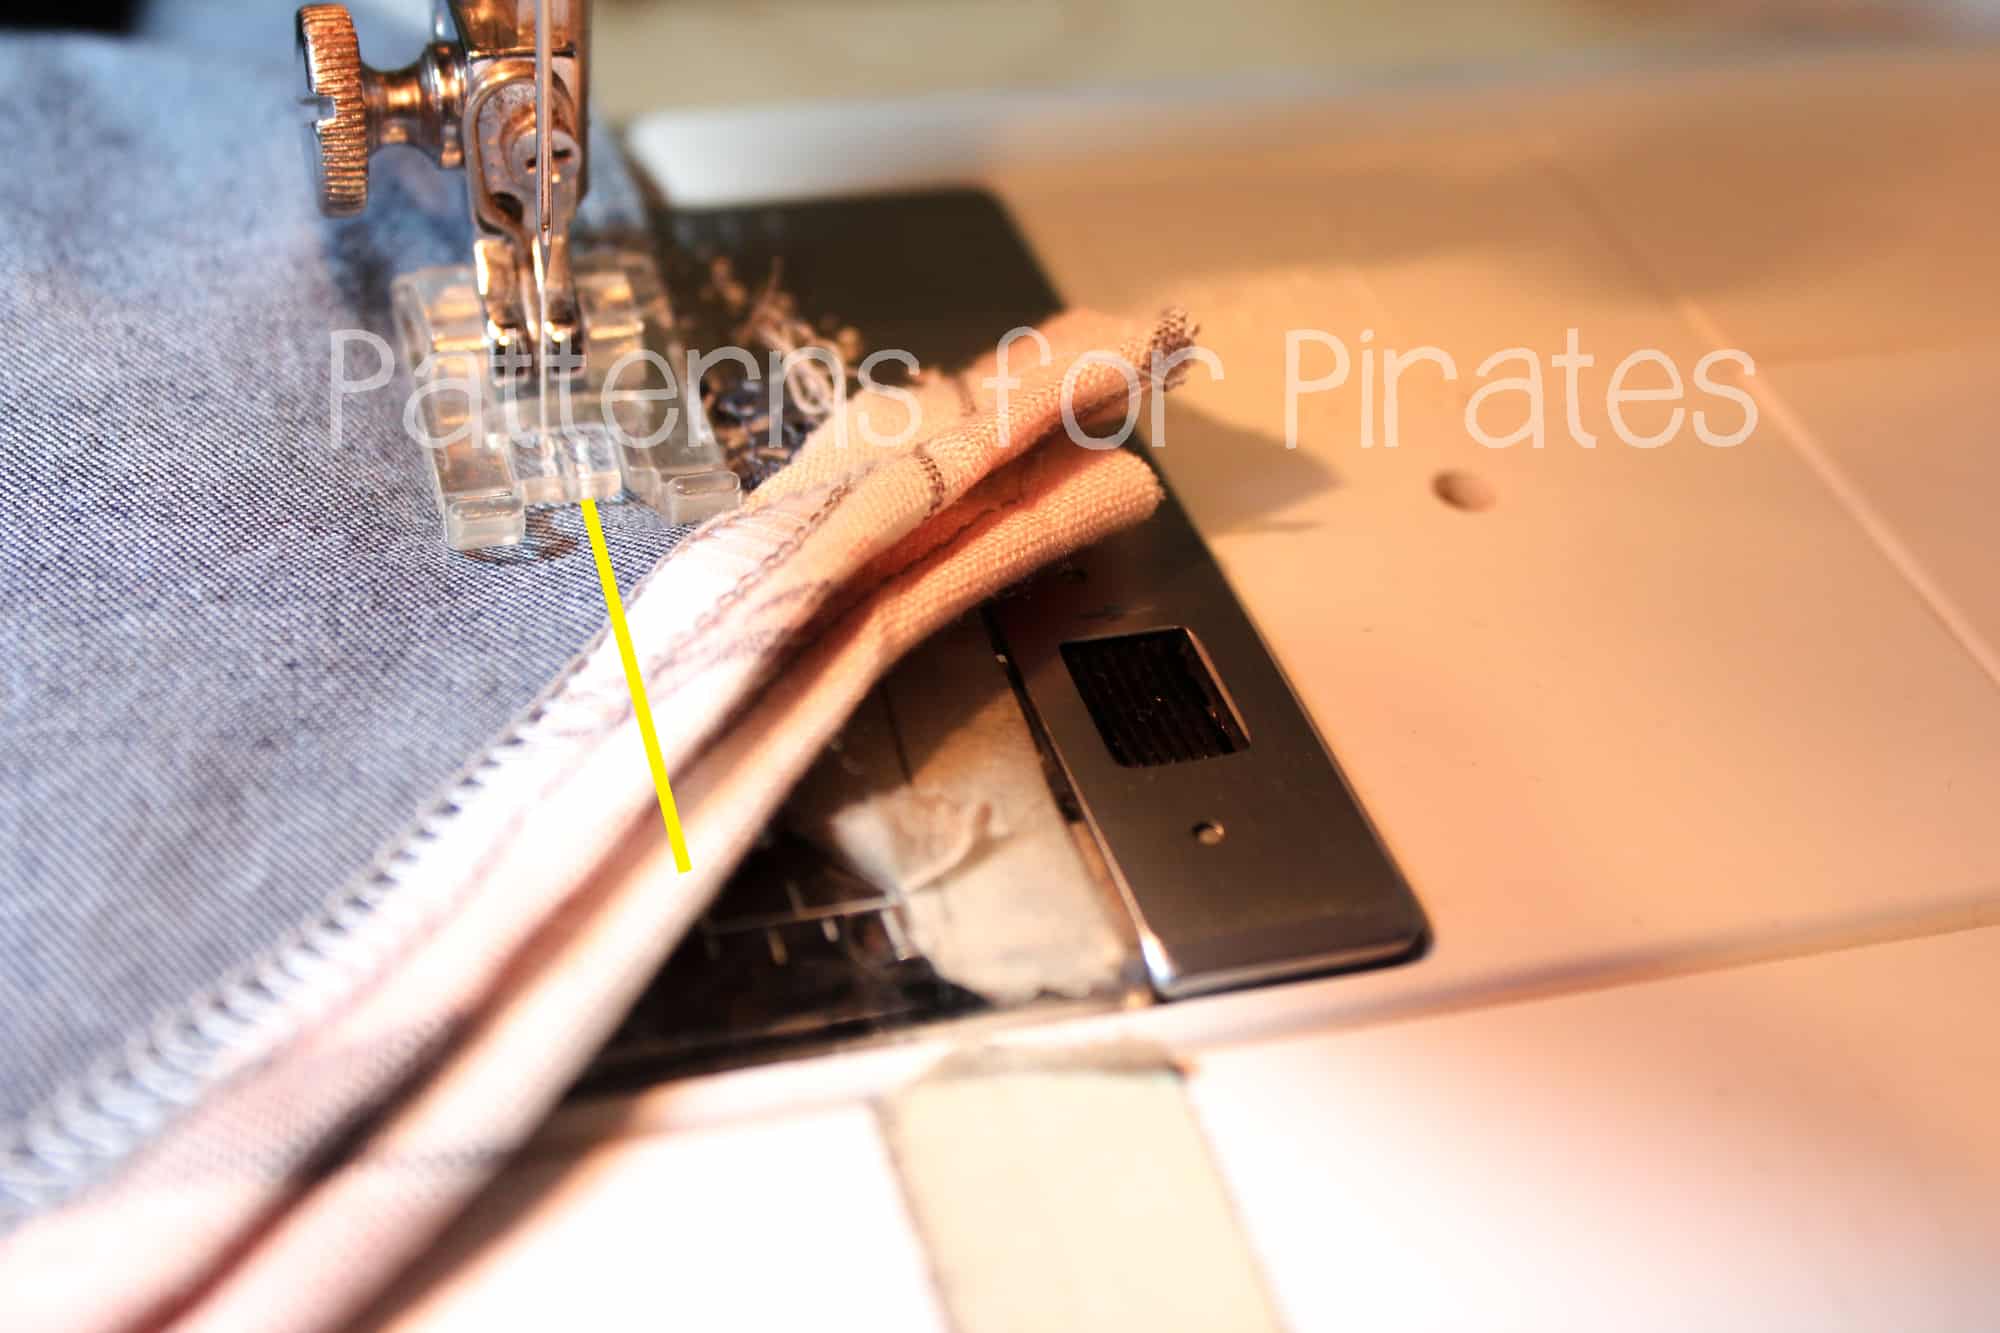
If you are attaching pockets, you can complete everything through these steps. Before sewing up the inseam and sides, you will want to complete your bindings along the curves. Place your shorts facing down and bias binding pieces face down and then gently ease them along the curves. You will want to pin/clip this in place. As you can see, my pieces are longer than the edges, but these will be trimmed later. Attach with a 1/2″ seam allowance, then clip into seam allowance along curve.

Once you’ve attached your binding, press binding piece and seam up. Press bias binding piece to align with top edge, then press again as you fold binding over (these are the same steps as were completed on pockets).  Edge stitch along folded edge and repeat on the other three hemlines.

Once you’ve attached all bias bindings, you will assembly your pattern as directed. When reaching the curved seam and inseam, you will want to make sure to use a straight stitch for the last few inches to create a cleaner finish (With wovens, it is advised to use a straight stitch first and then go back over with a serger if desired. If doing so, end your serged section a few inches before your straight stitch to help create that cleaner look). Trim any bias binding pieces that might be longer than your seam allowance.


…..

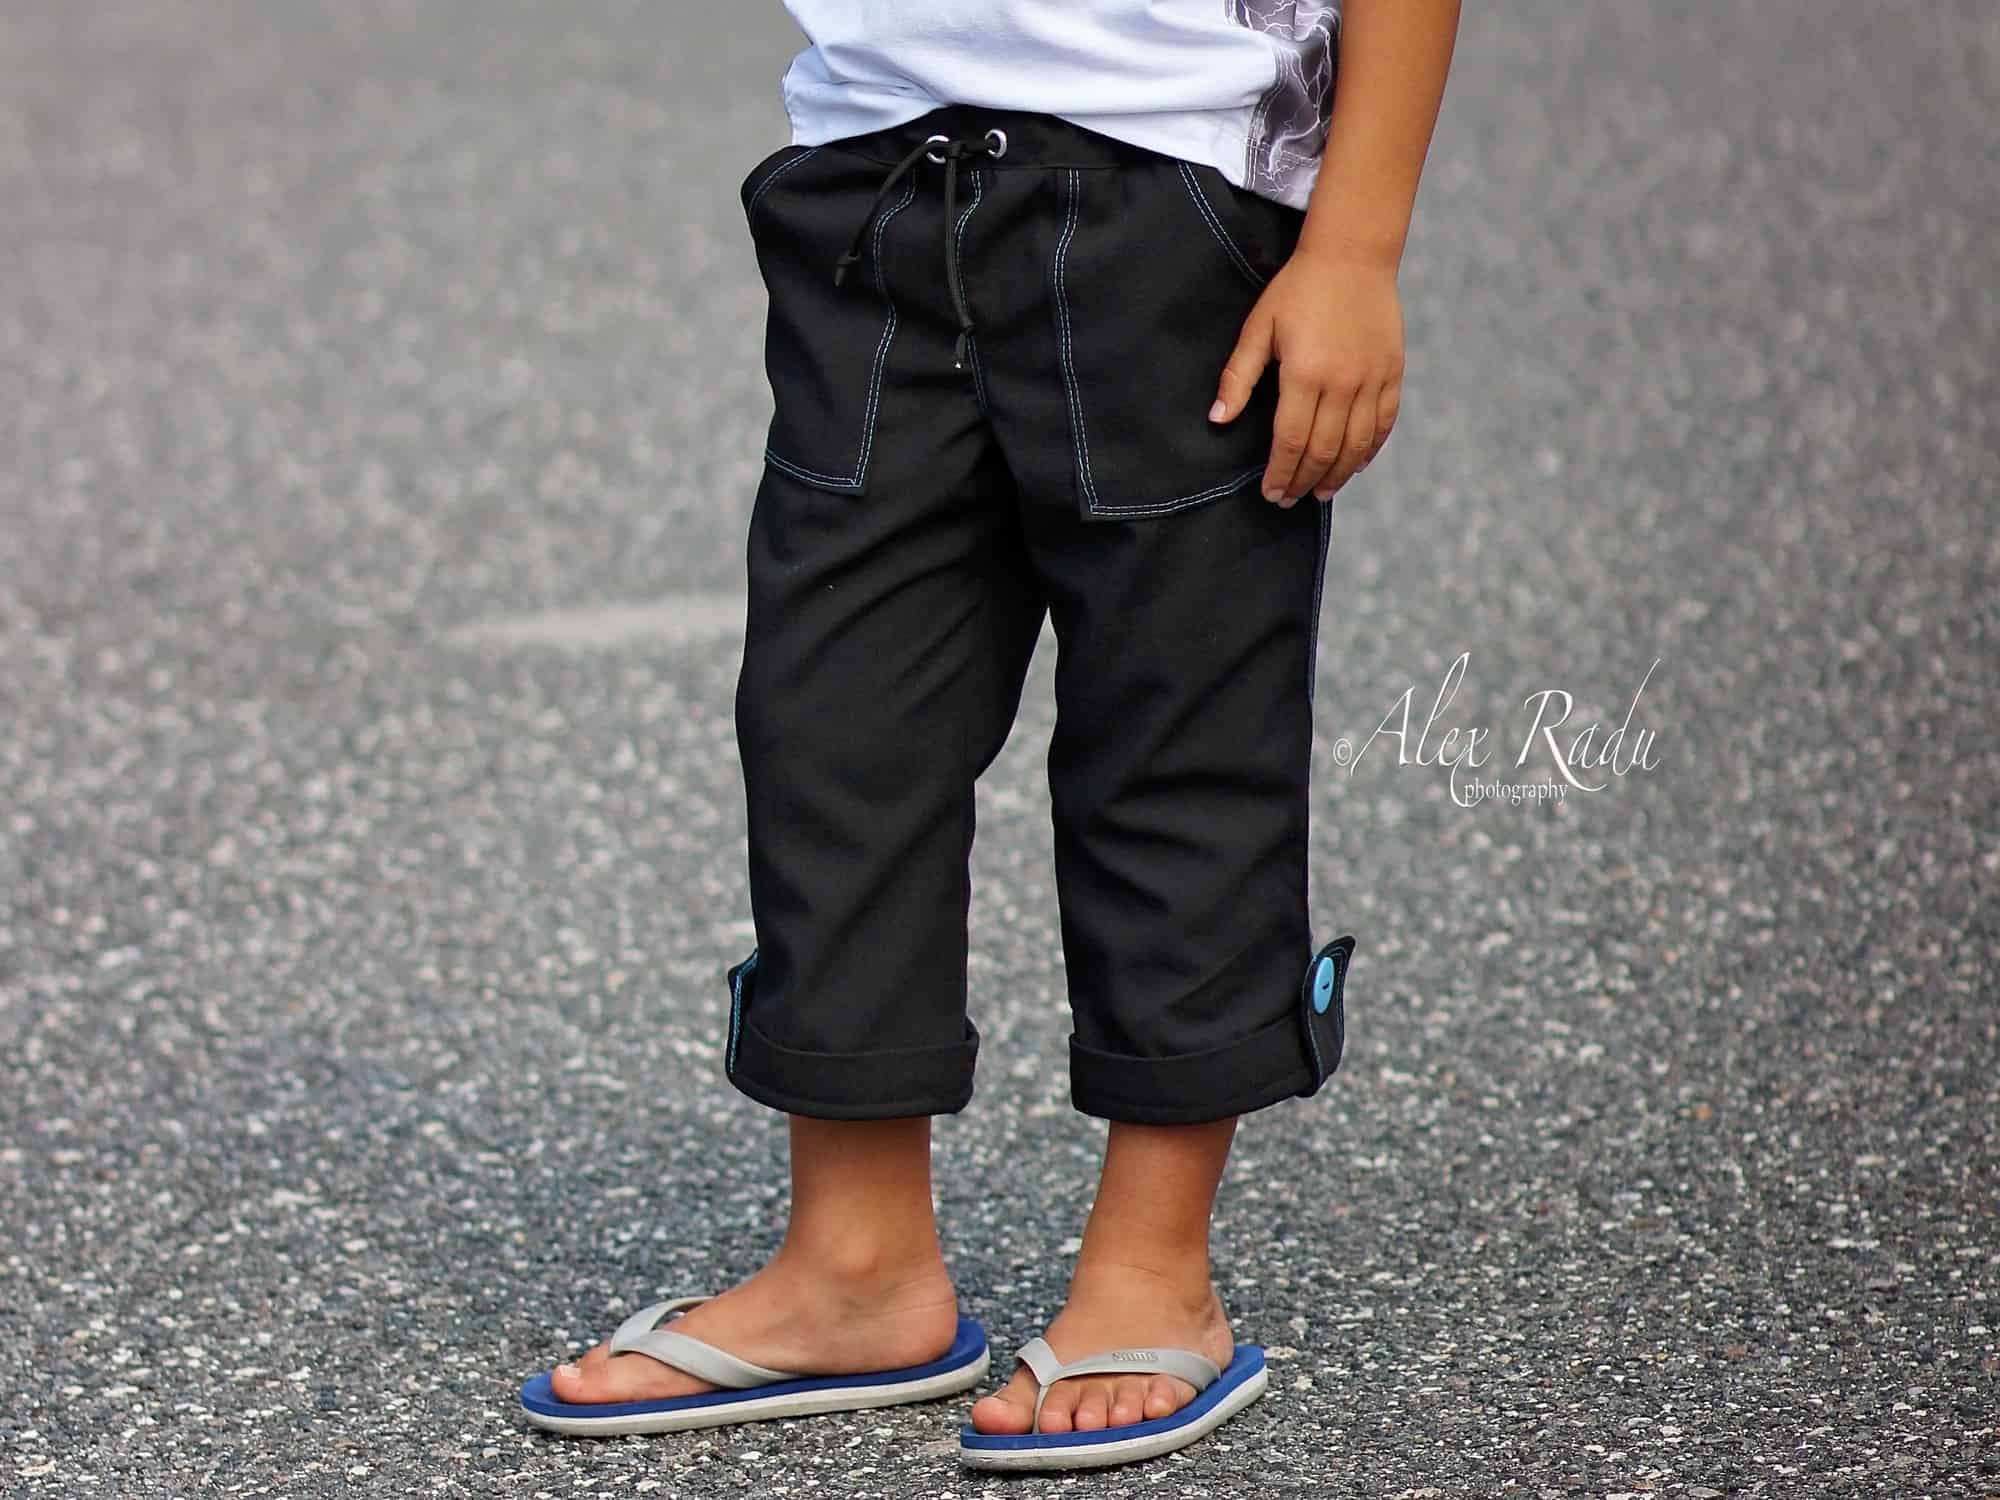
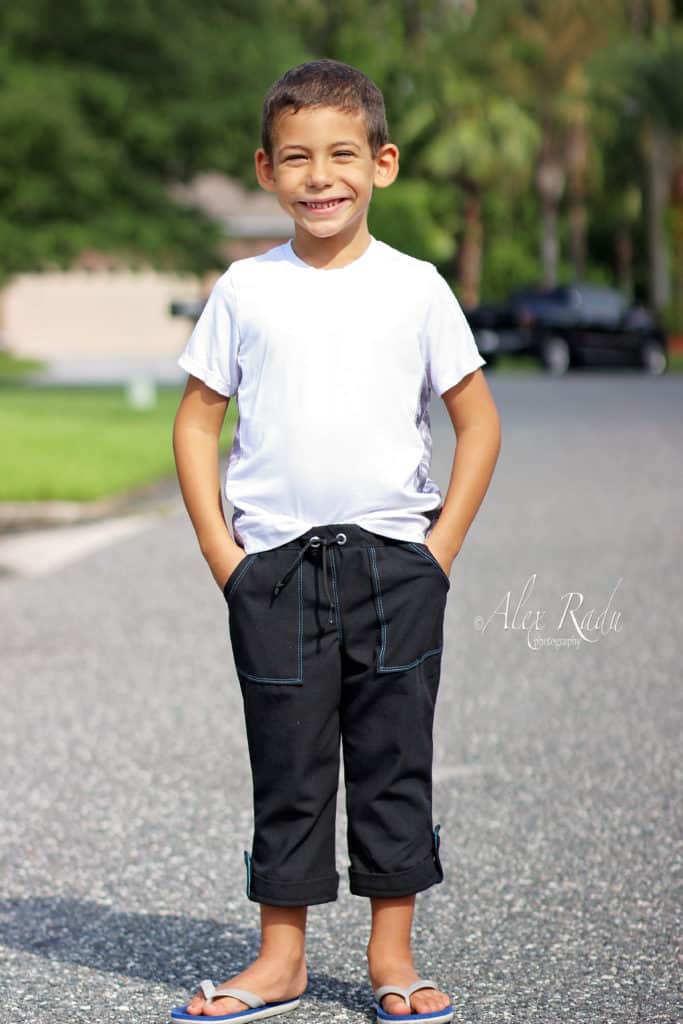
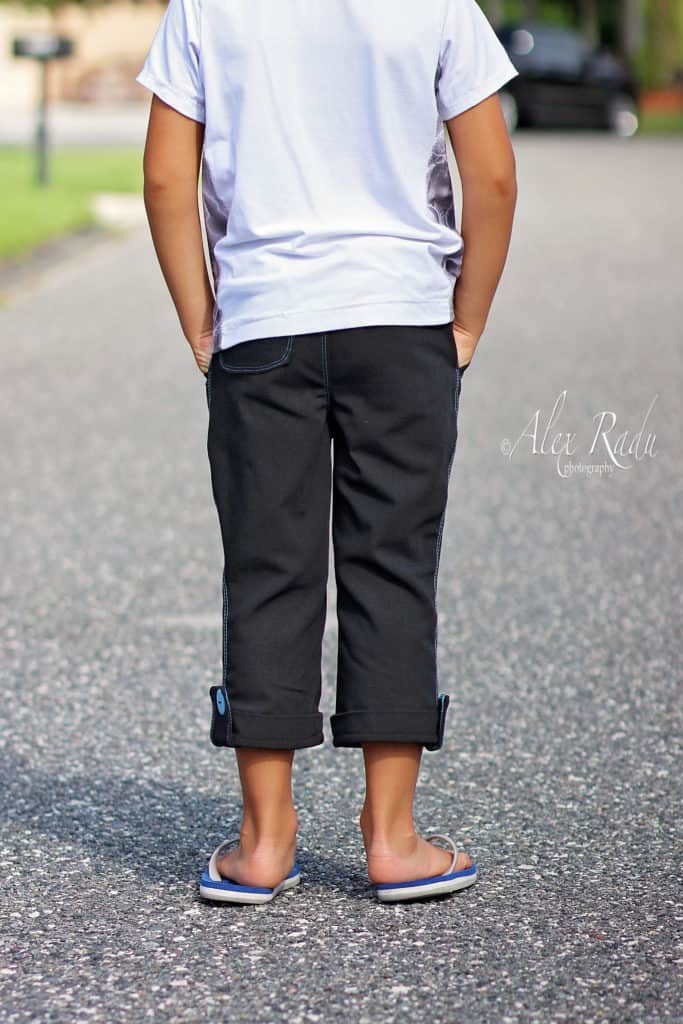
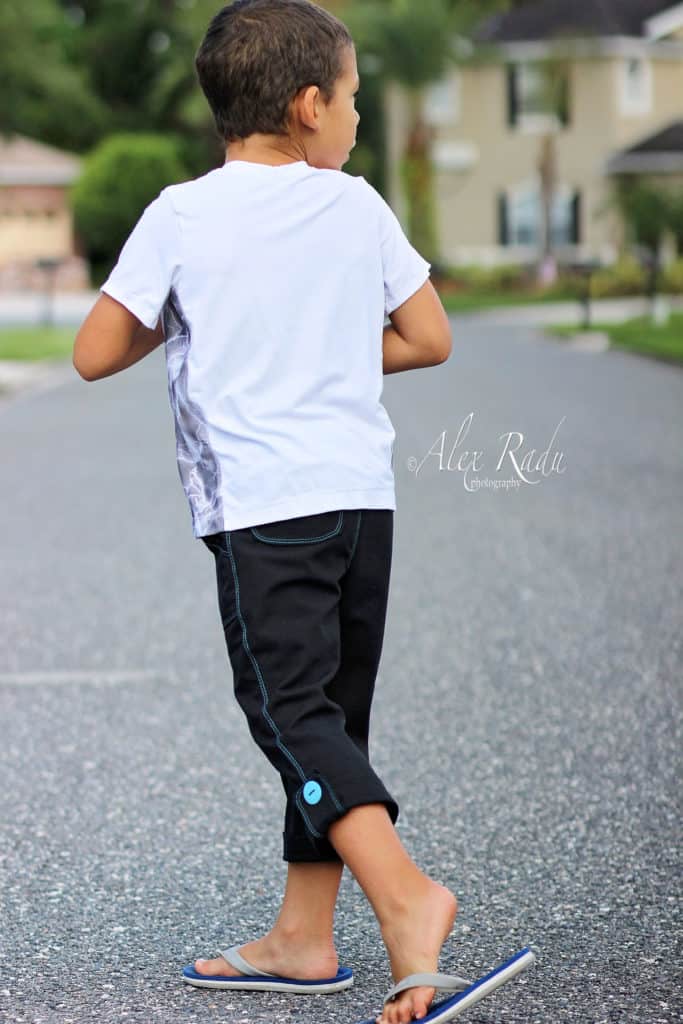
Cuffed capri pants

Next I will show you how easy it is to add  cuffs to the capri pants. The patterns include a cuff option for the short so we will use the same tutorial techniques. Start by printing the pattern in your desired size. I made a size 6 Little Loungers with patch pocket and elastic waistband.

There are two changes you will need to do to the original pattern. You must cut the capri length 1 inch shorter than the cut line for both the front and back pieces. We do that because we won’t be hemming anymore, we will be adding the cuffs. That brings me to the second change you’ll need to make. The cuffs in the pattern are drafted to fit 1:1 ratio to the shorts leg opening. The capri leg opening is smaller so we will need to shorten the width of the cuff. How much you shorten the width will vary for each size. The length of the cuff will remain the same.

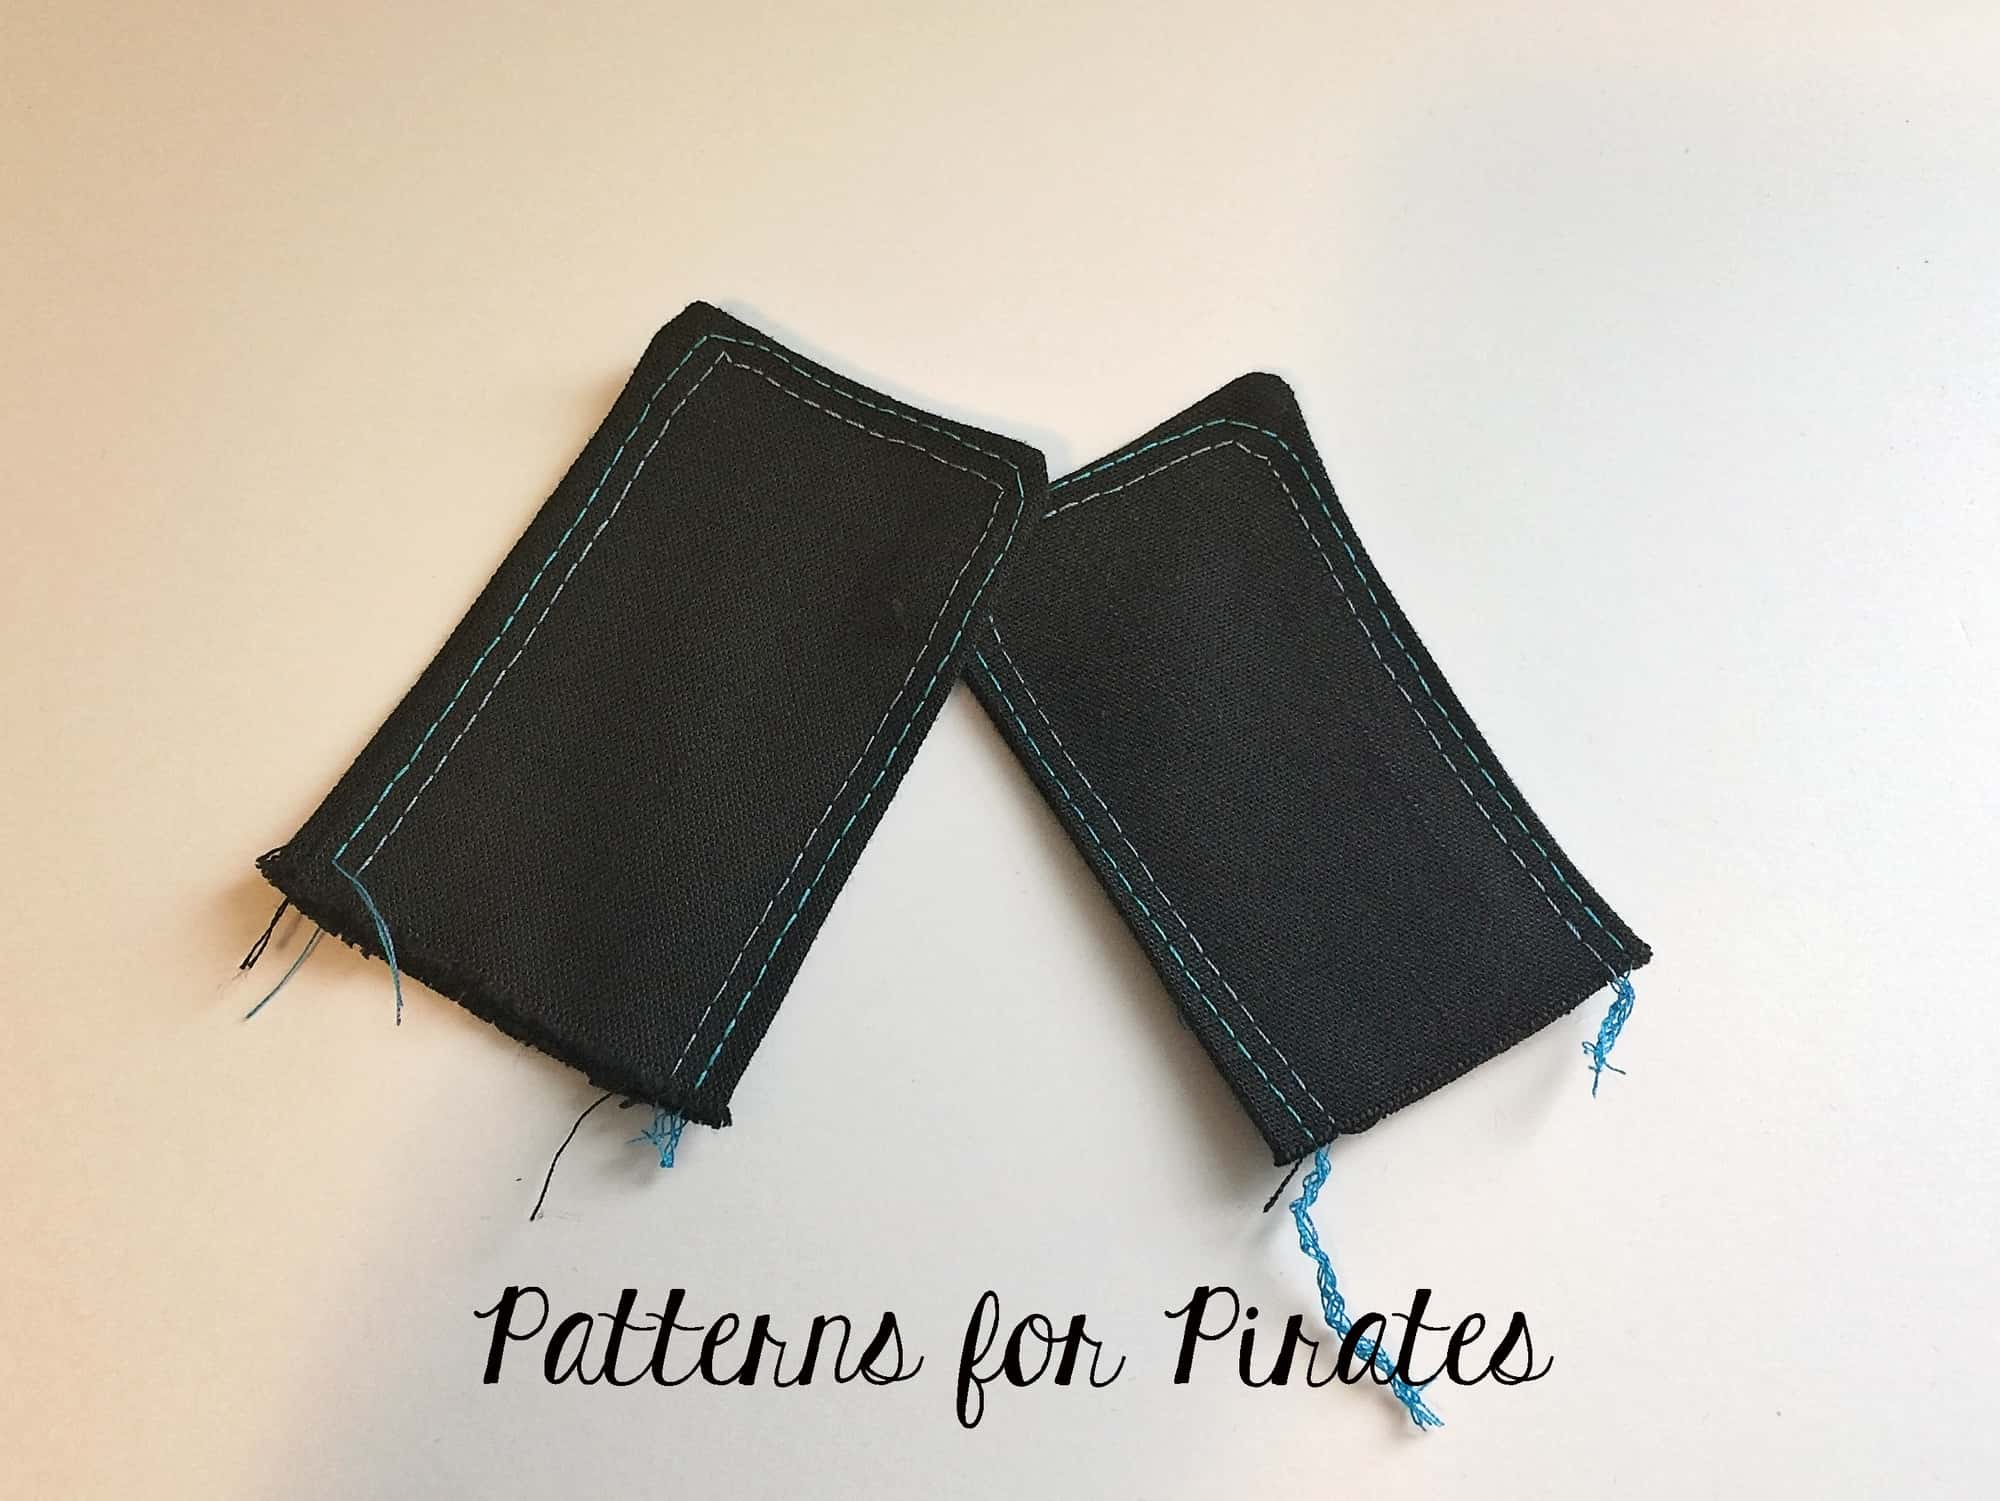
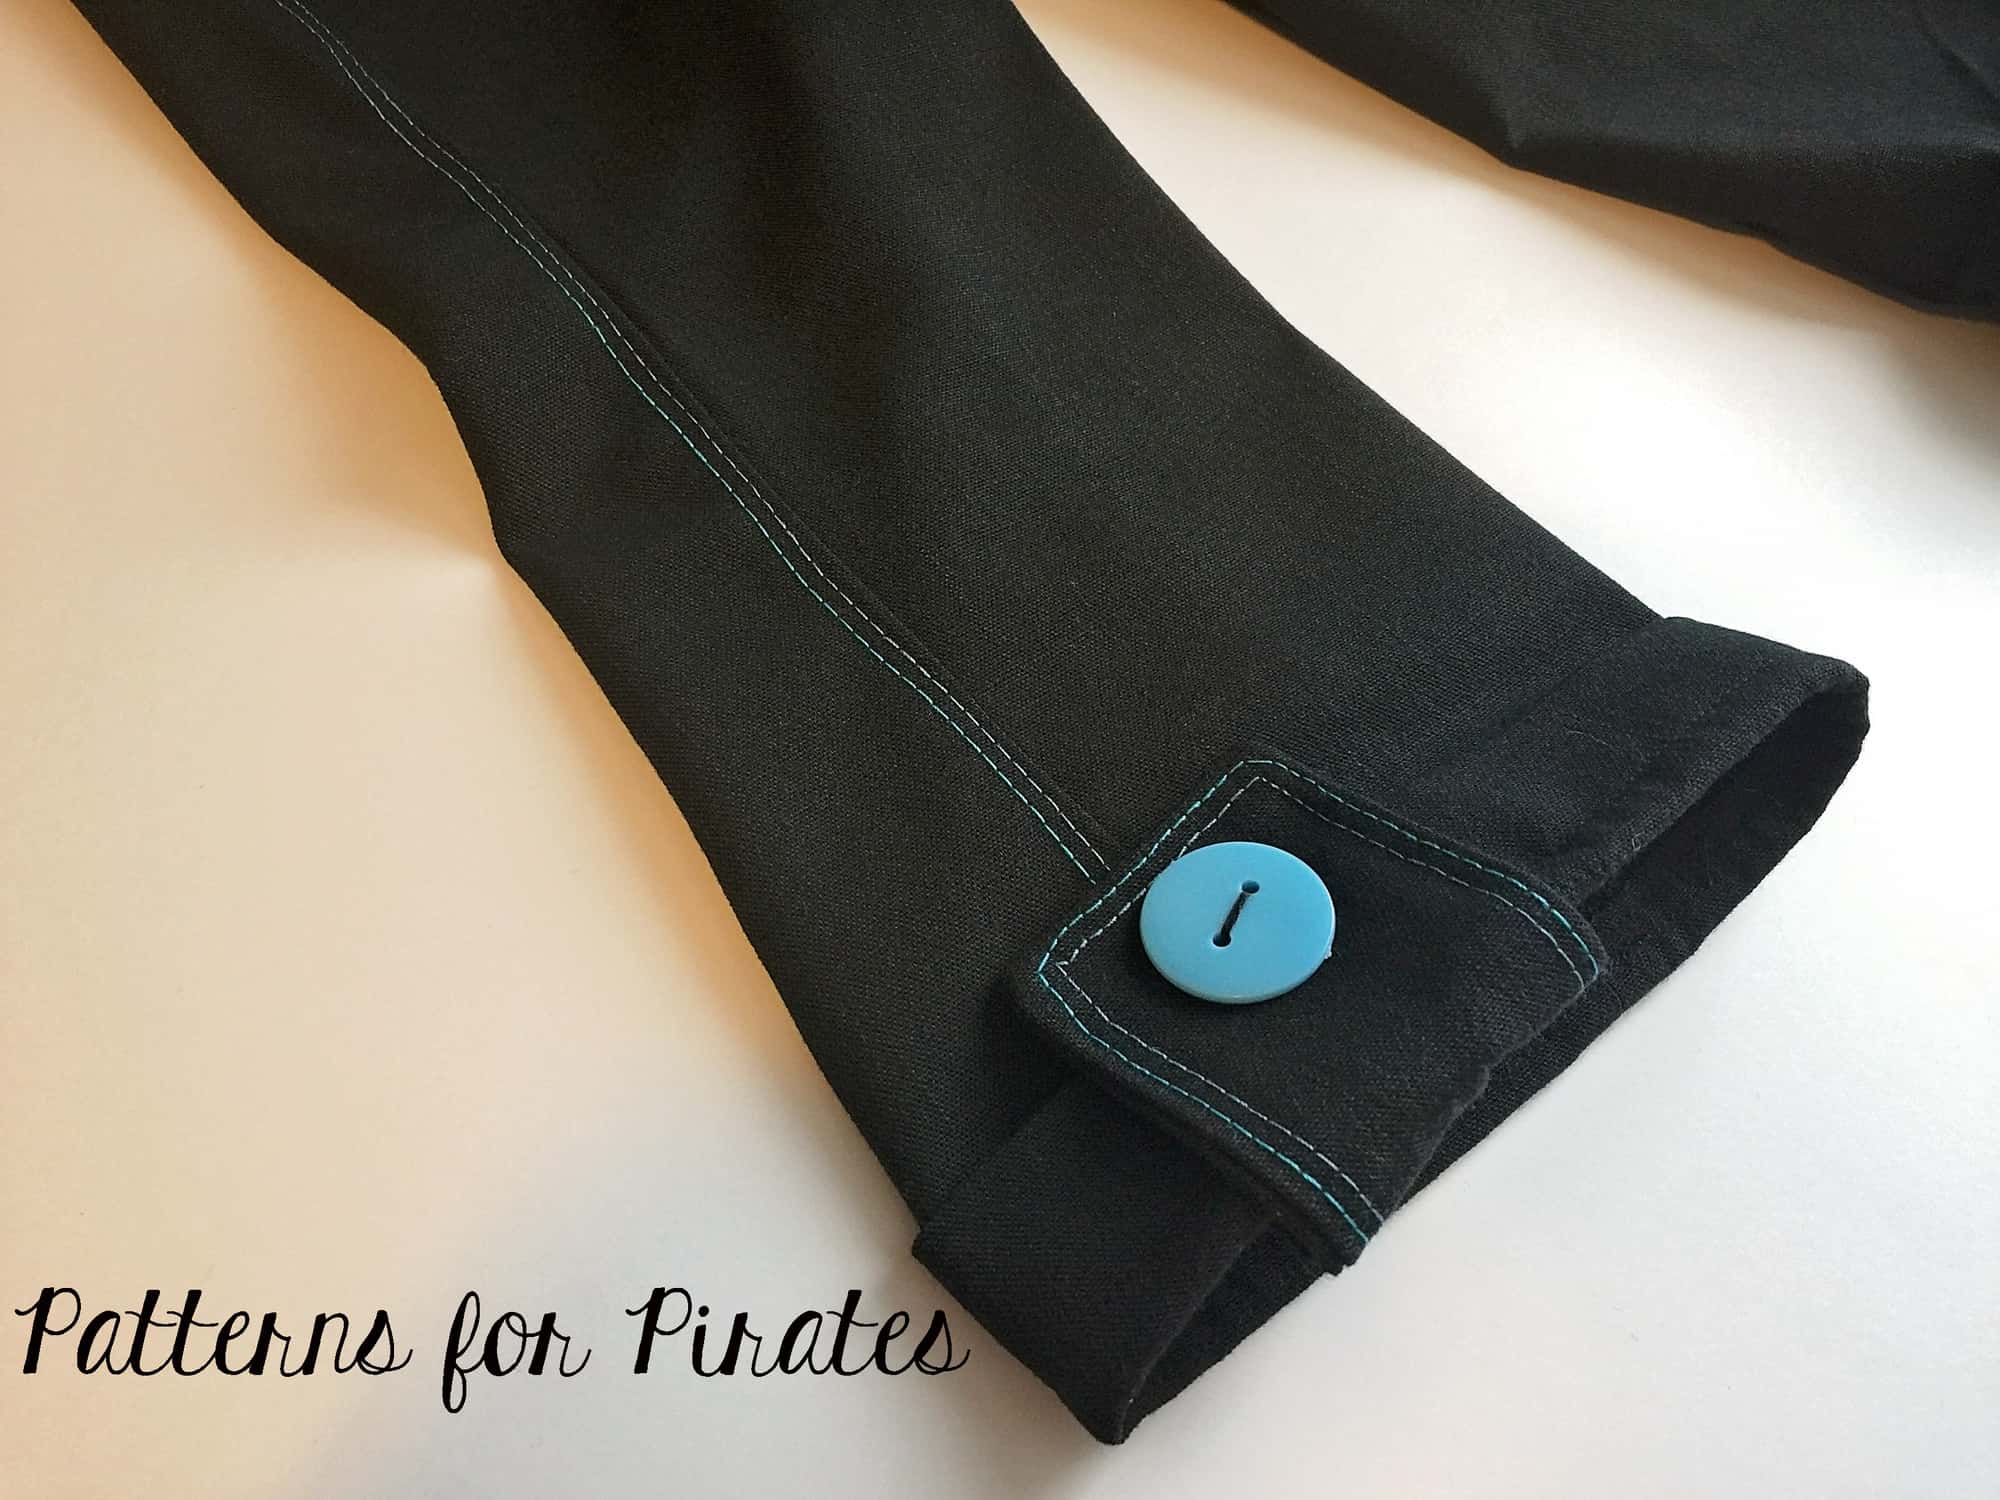
Don’t forget to cut and attach the button tabs too! They add such a cute touch to the capris!

Sew the pants as per the tutorial. Easy peasy! Don’t be afraid to add some detail stitching to the button tabs or the pockets! I used my coverstitch to add a touch of blue but you can certainly use a twin needle or your preferred decorative stitches.

If you love the look of the cuff but prefer the bermuda length you can certainly apply the same principals and created a cuffed bermuda linen lounger or little lounger…the sky’s the limit! 🙂


…..

 Hemmed and lined shorts

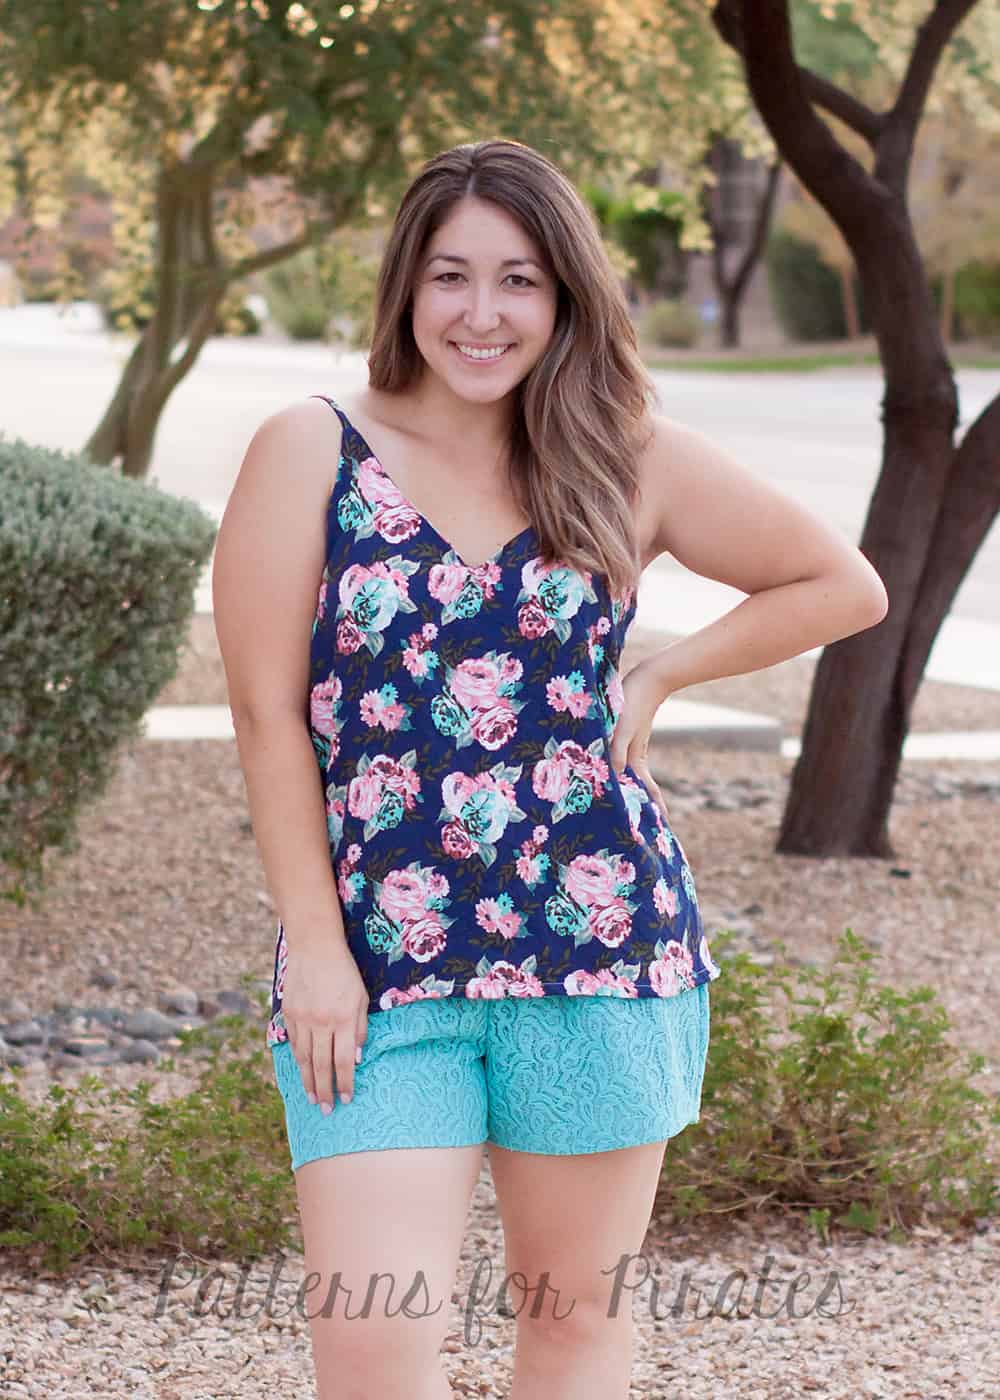
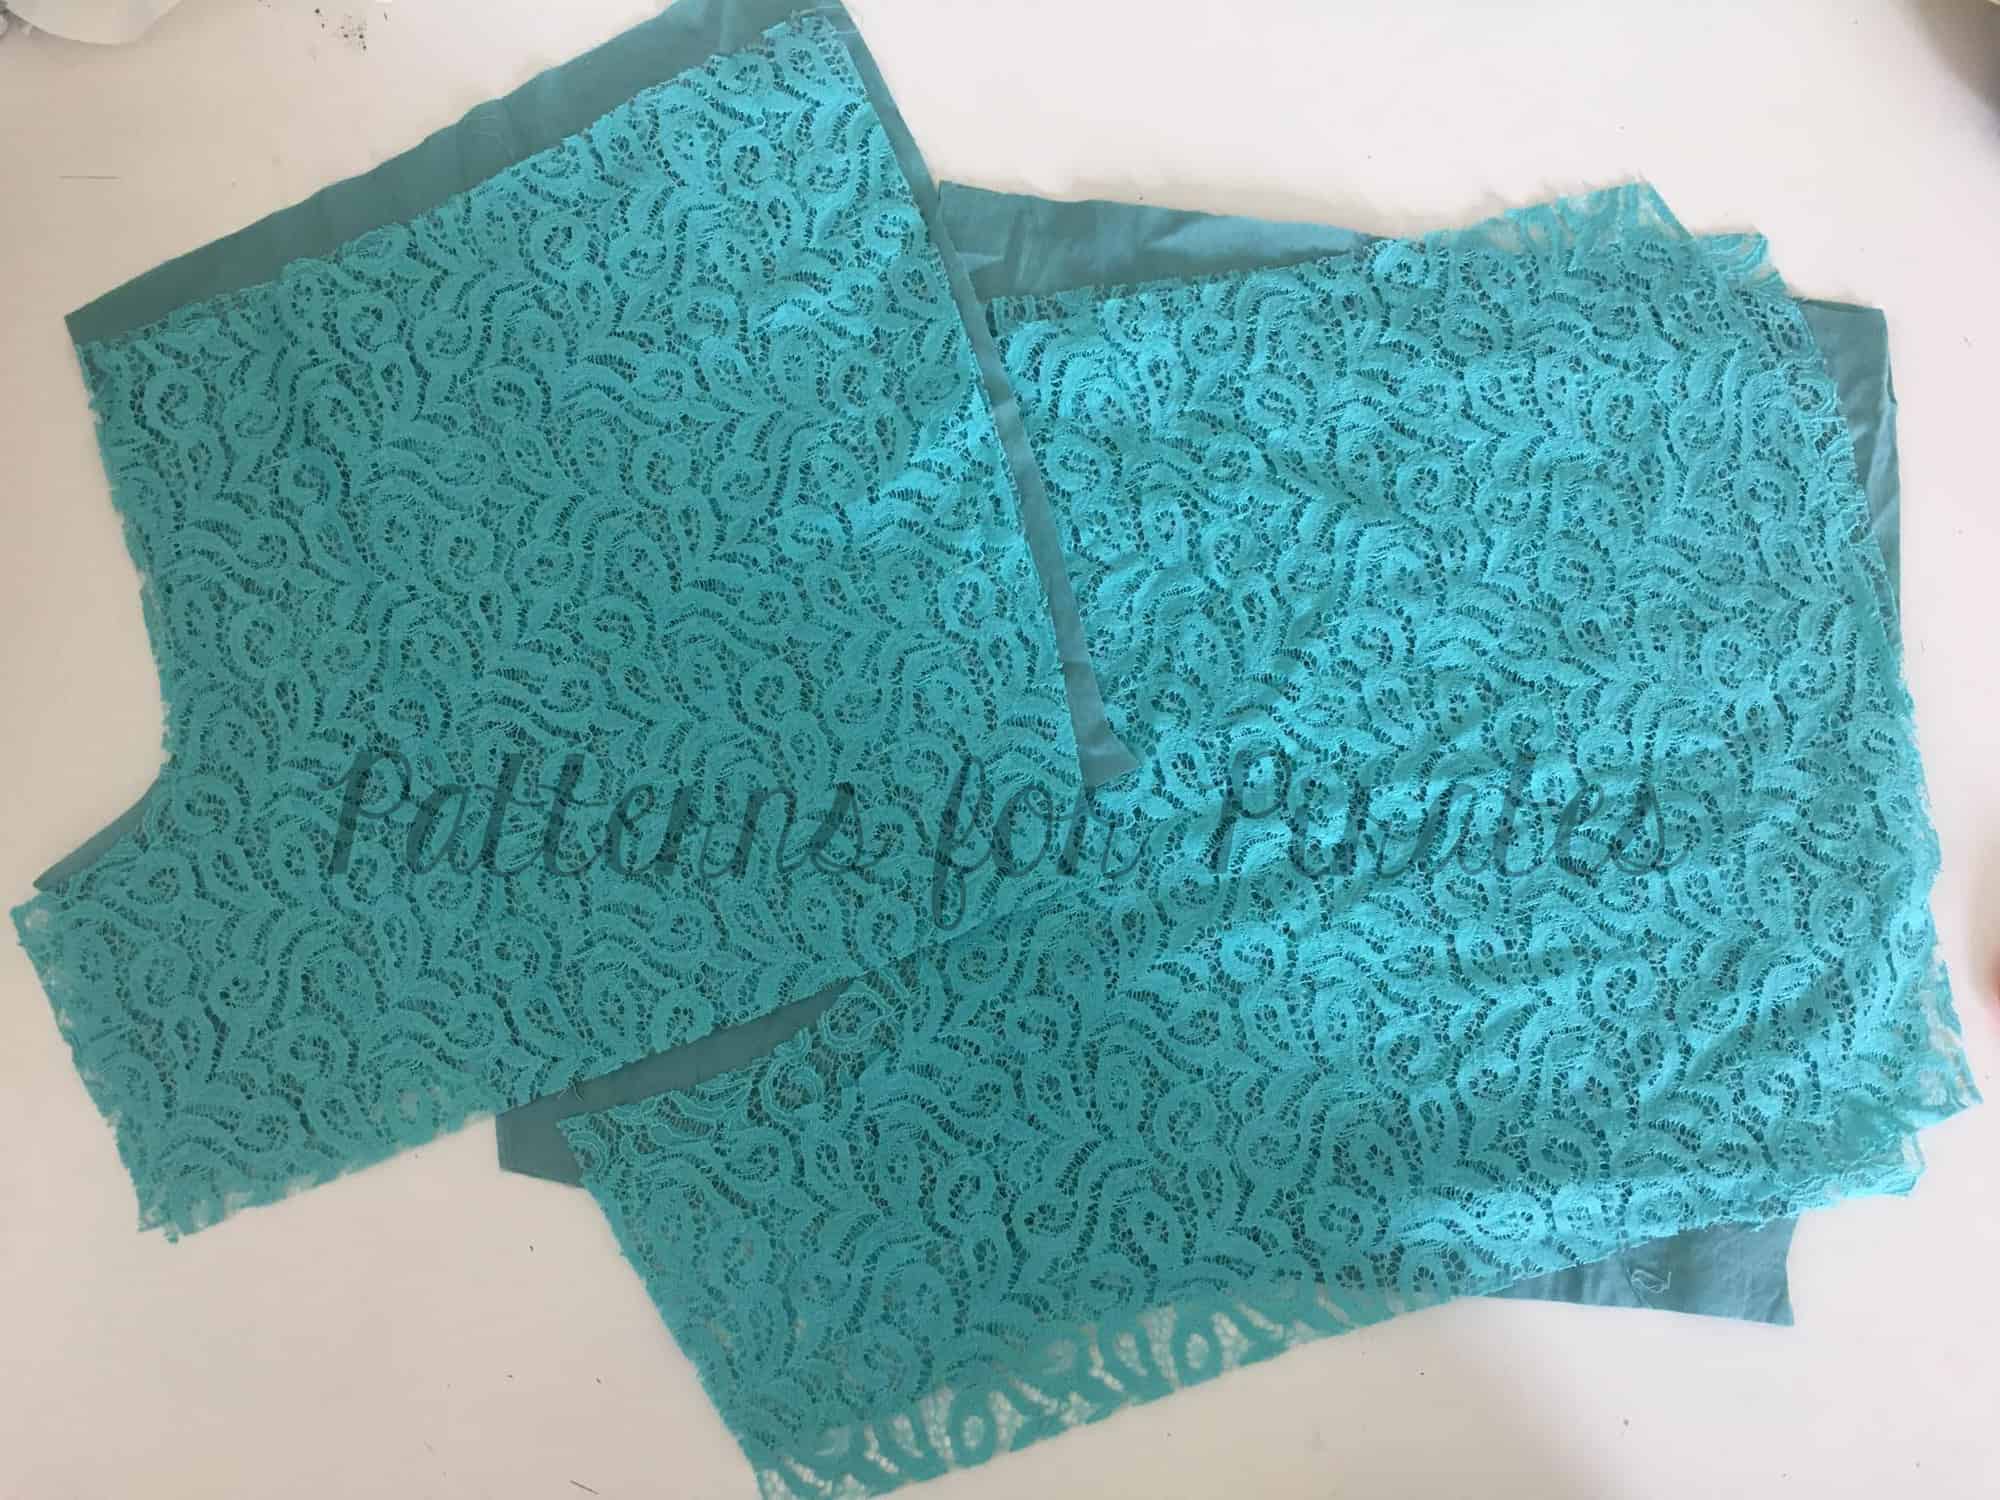
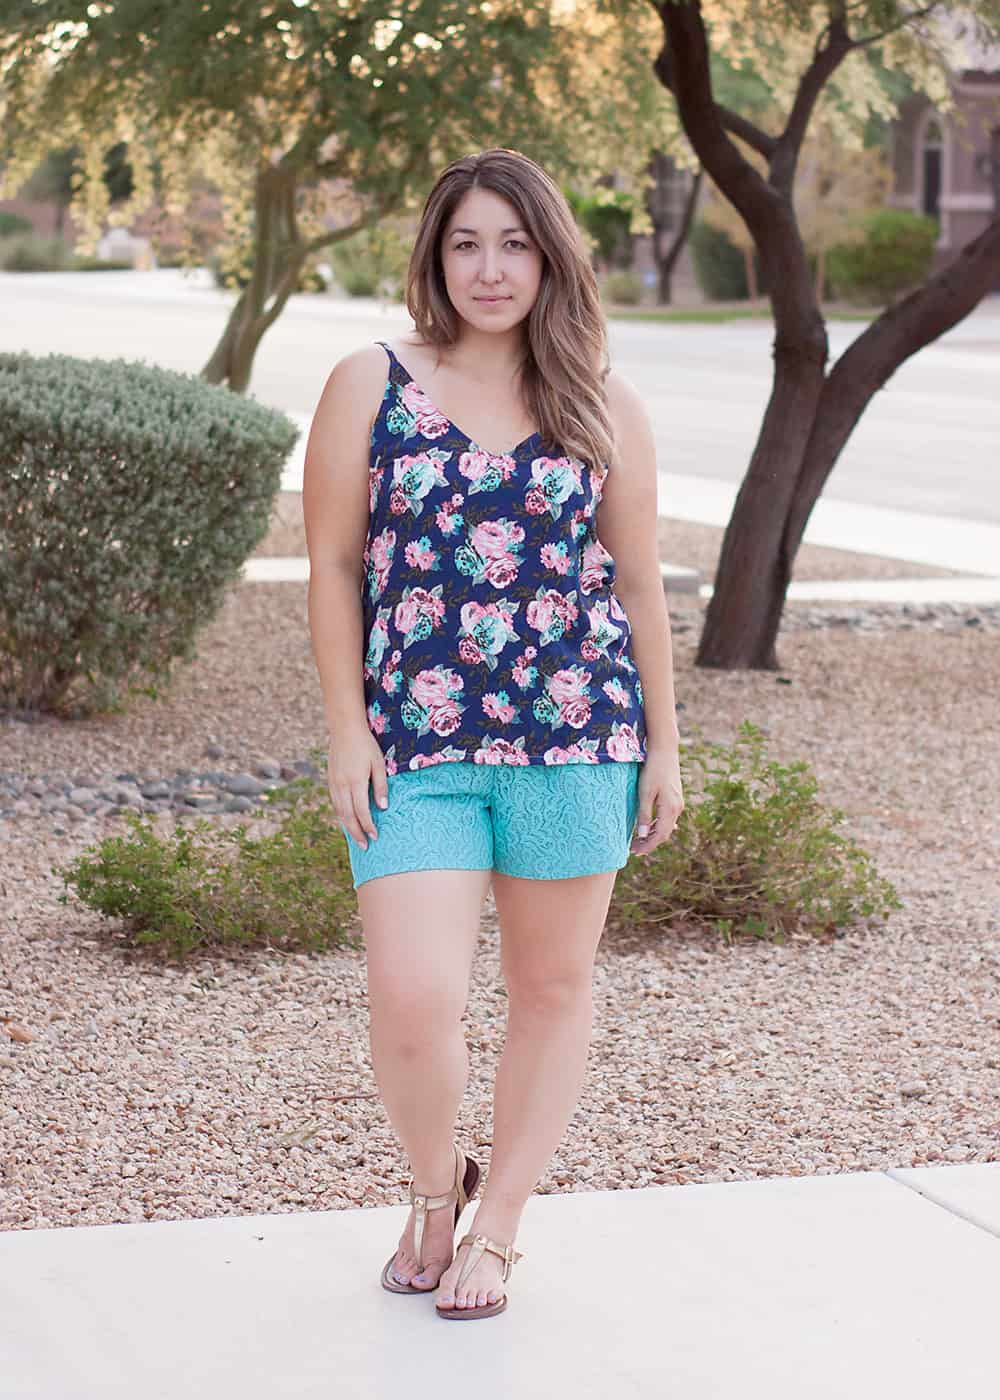
We always like to mix up our finishing options to give you a wide variety that you can apply to any pattern so we went with a cuffed or curved hem facing for the shorts this time.  If you’ve been following P4P for awhile, you’ll notice Judy loves some short shorts 😉 but that may not be your  preference.  I’m going to show you how to lengthen your inseam and do a simple hemmed edge.  I also wanted to use this gorgeous embroidered lace so will give some insight on how to line them.

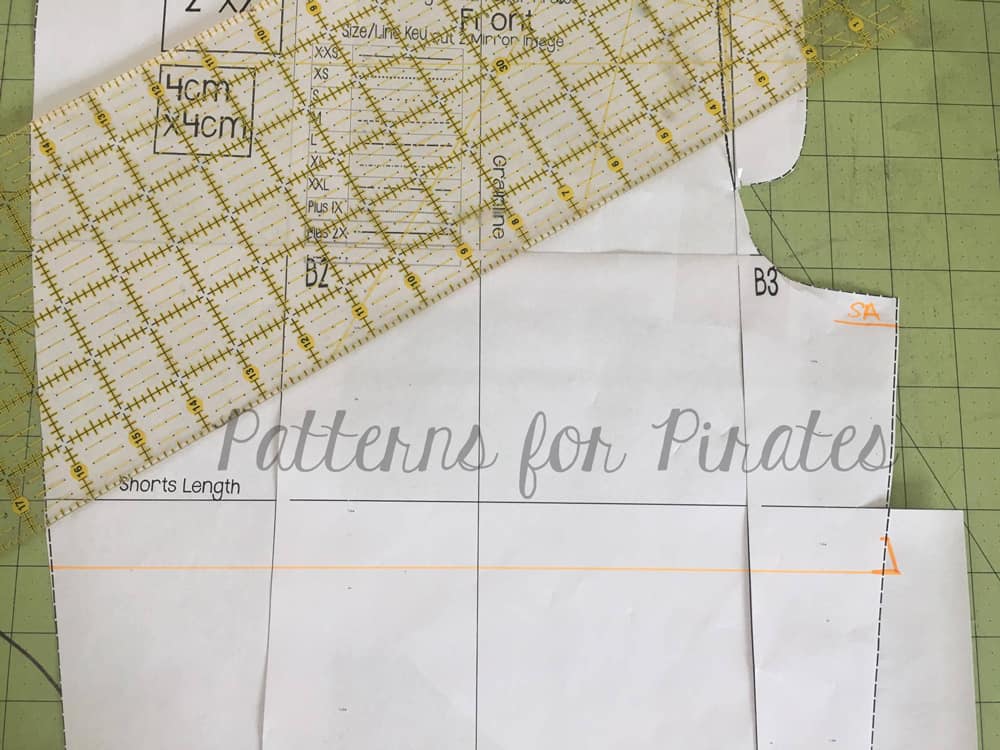
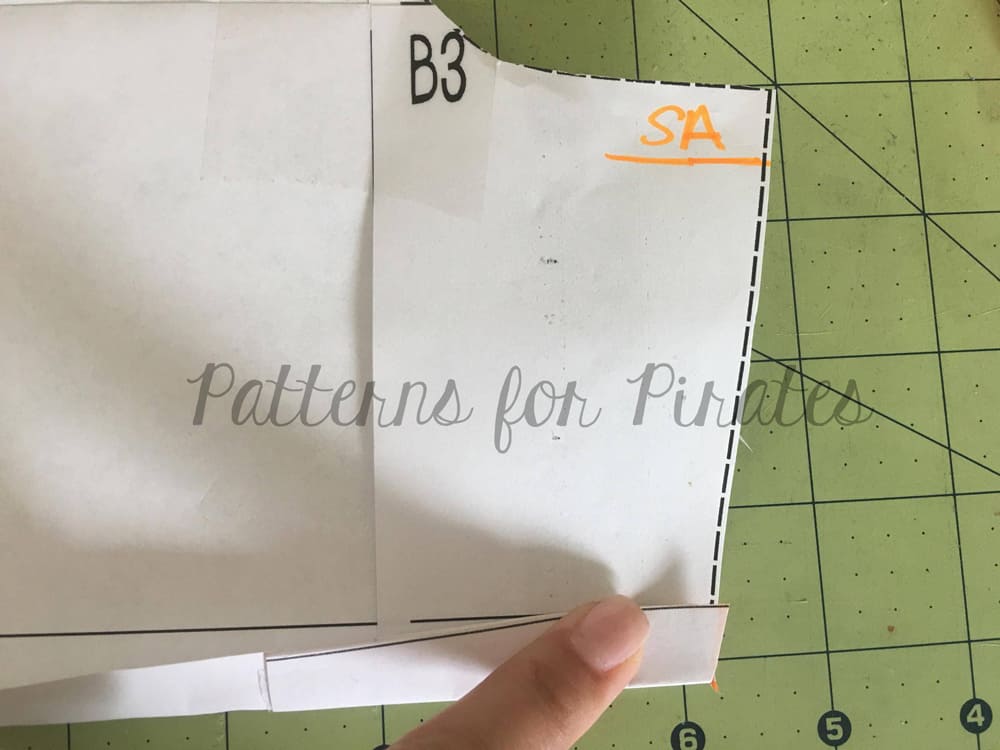
First, decide what you would like  your finished inseam length to be.  The current inseam finishes at 2.5″.  For my finished length I went with 3.5″.  Decide the length of your preferred hem (I did 1/2″) and add this to your desired inseam length.  Measure and transfer to your pattern.  Don’t forget all seam allowances are 1/2″ so your total inseam on the pattern should be 1/2″ longer.  Example for my 3.5″ finished inseam: 1/2″ seam allowance at the crotch curve + 3.5″ inseam length + .5″ hem allowance = 4.5″ total inseam.

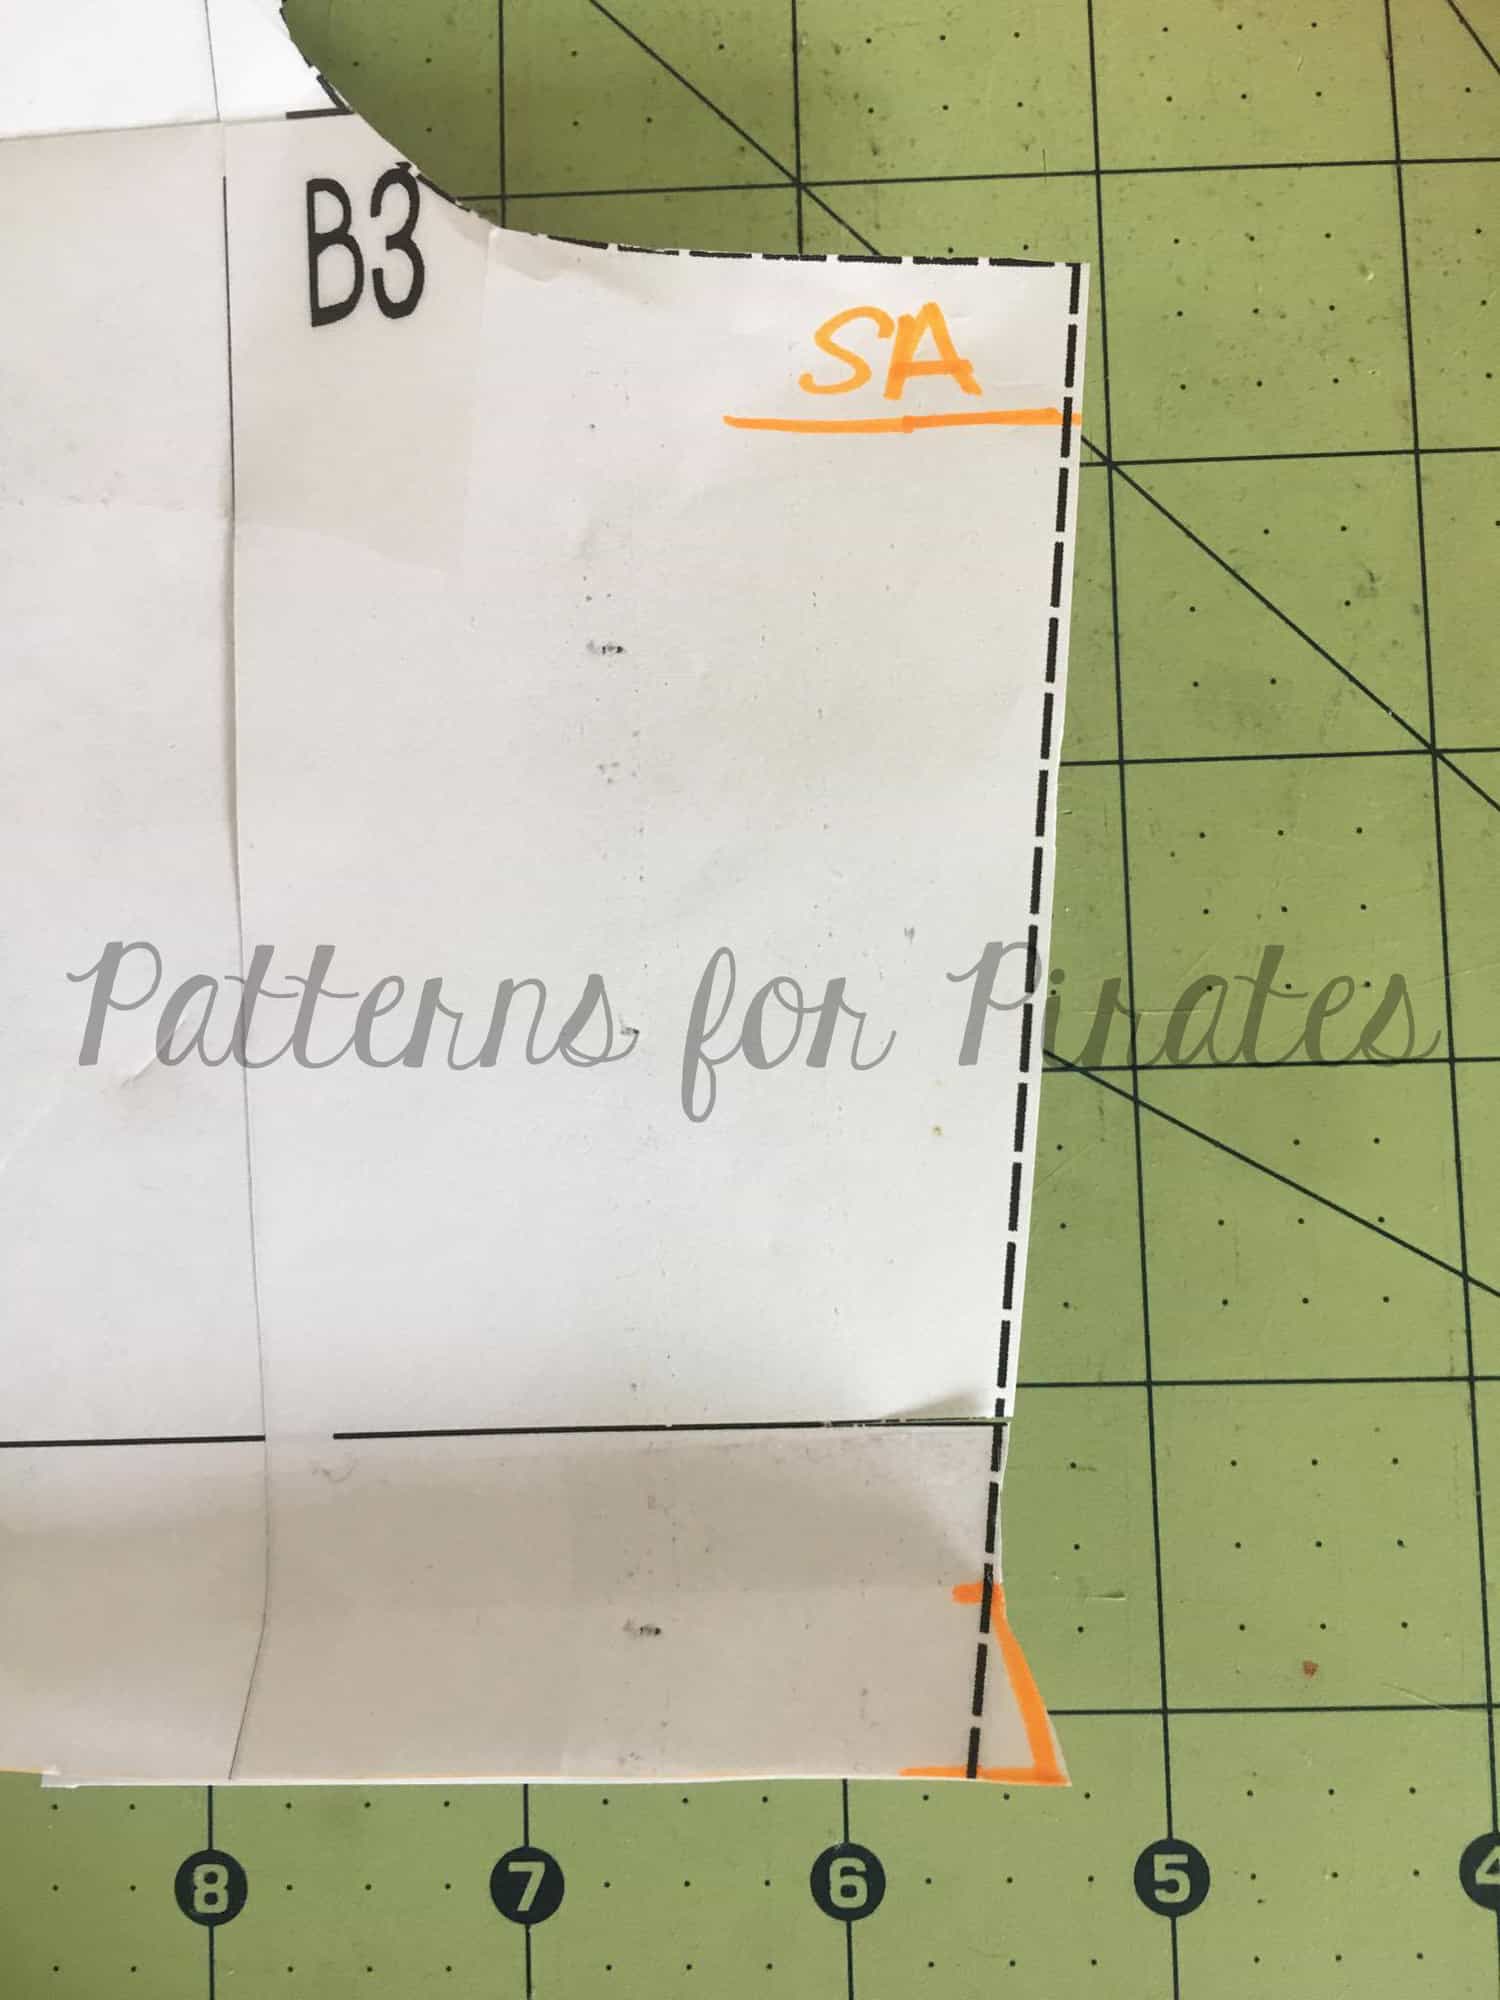
Now that you have adjusted your inseam length we will make our hem gauge for the hem.  You’ll notice these outward notches on other cutlines (bermuda) as well as on sleeves hems.  It may look a little funny, but it actually serves a purpose.  Cutting the outward notch will allow the hem to lay flat once folded.  The angle of the gauge should be a mirror image of the seam just above it so that when its turned under it will lay flush.  Again, my hem allowance is 1/2″, if you choose to do a wider hem, you will want to extend your hem gauge to match the same length of your hem allowance.


Proceed to cut your pattern and construct as instructed in the tutorial.  To make a lined pair, cut every piece from both your main and lining fabric.  Lay your main fabric on top of your lining piece (right sides up) and construct as usual, treating them as one piece.

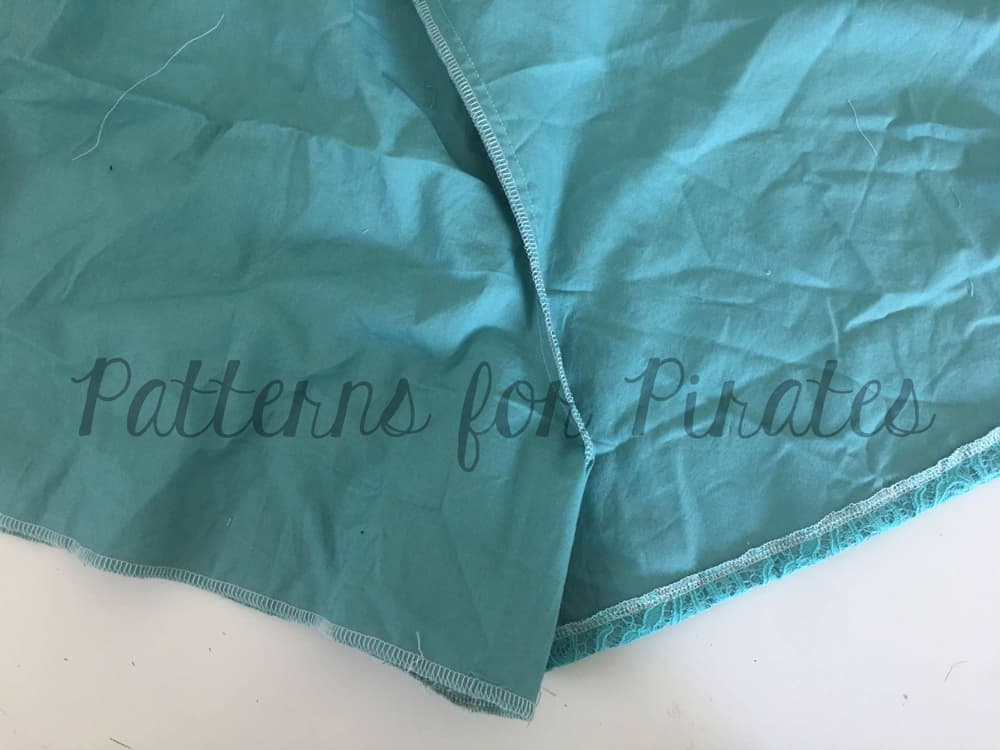
To hem, I serged both the main and lining fabric together to finish the edge . Then turned and top-stitched.  Easy right?


You can also line the shorts by treating your lining and main fabric as separate items.  So construct a main short and lining short then slip them inside one another and attach your waistband to both the lining and the main.  I chose to it the other way since I would be hemming them together anyway.


…..

Fully Enclosed Seams on Cuffed Shorts

When it comes to seams on my pants, I tend to gravitate toward wanting to enclose all of them.  It gives a nicer, neater look to your pant, and just feels more “handmade” than “homemade” to me.  The Loungers tutorial already tells you how to enclose the waistband on your pants, but what if you wanted to enclose the cuff hems too?

Here’s a quick rundown of how to make that happen:

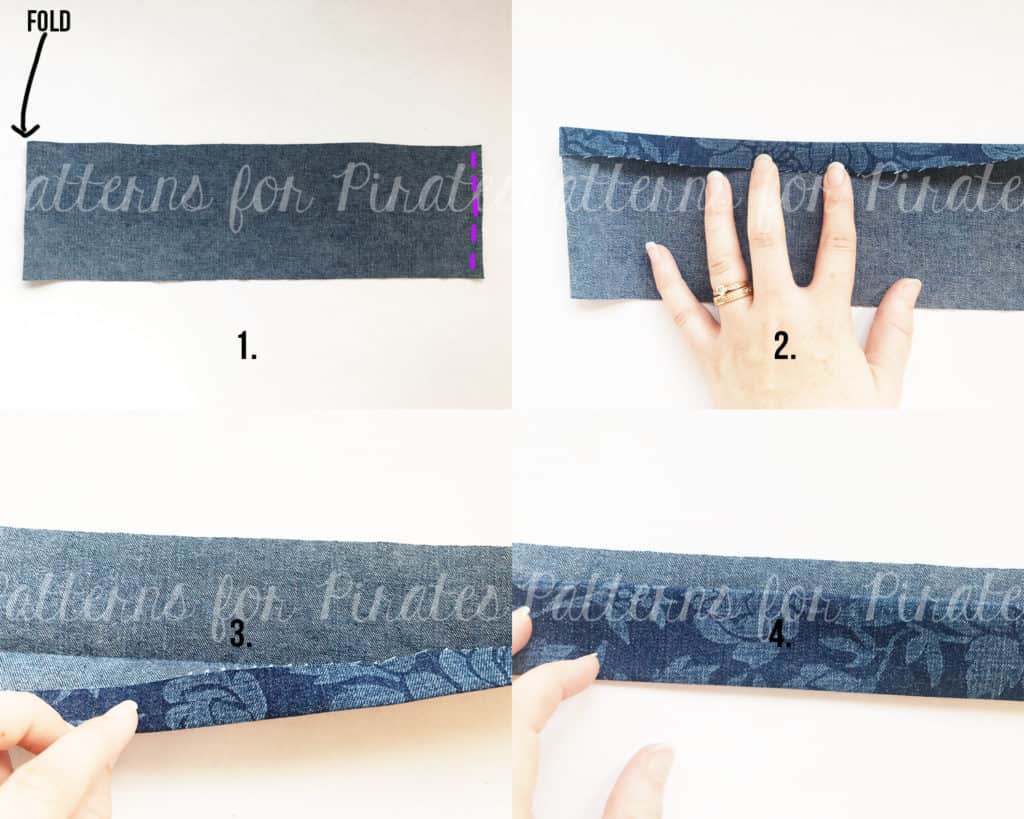
  1. Prepare your cuff as the pattern states.  Right sides together, fold piece in half and stitch along unfolded edge.
  2. Working from the wrong side of the fabric, fold and press 1/2″ on one of the long edges of entire cuff piece.
  3. With right sides together, fold and press your cuff piece, leaving 1/2″ seam allowance at the top edge.
  4. Press, press, press.

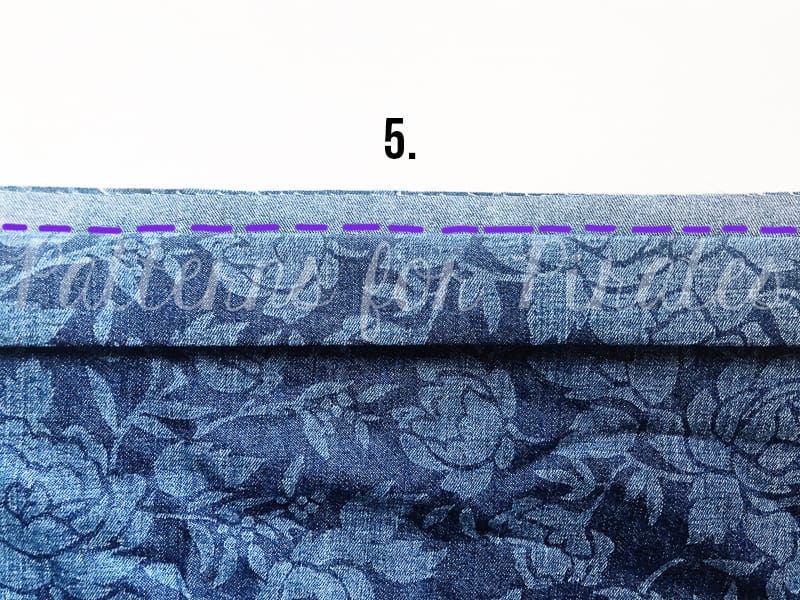
5. With your pant leg piece right side up, place your cuff piece on top (pinning carefully and aligning all of your seams.  Stitch at a 1/2″ seam allowance.

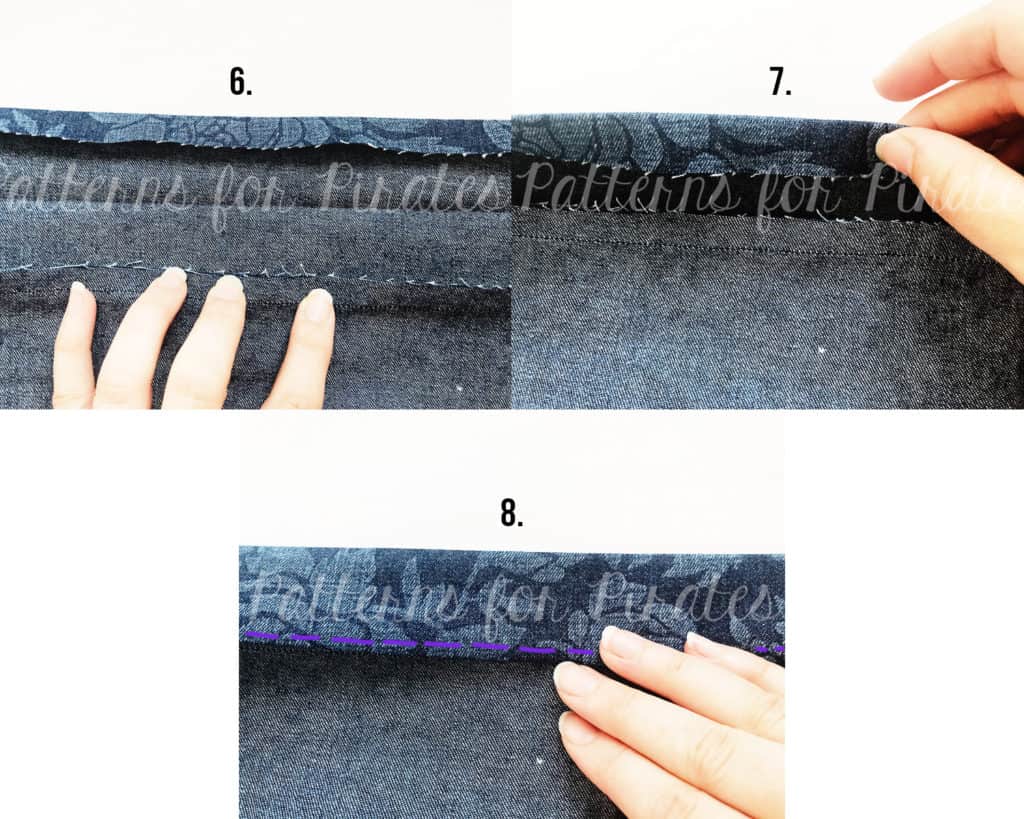
6. Flip your fabric over so you’re looking at the wrong side of your pant leg.  Open up your cuff piece and press the raw edges away from the pant leg, toward your cuff.
7. Using those beautifully pressed lines that you created for yourself back in steps 2-4, fold your cuff piece so it encloses all of your raw edges.
8. Press and edge stitch.

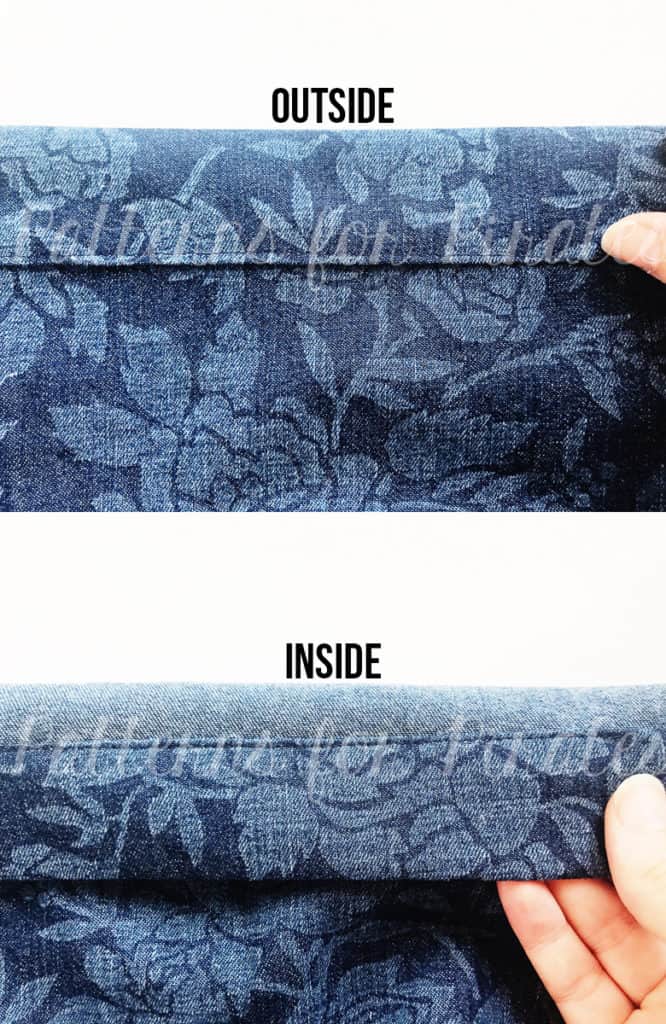
You now have a beautifully enclosed hem on your pant leg!  Do a small happy dance, pat yourself on the back, and then repeat the steps for your other cuff.

(I didn’t have a chance to grab photos in my new shorts made from the tutorial yet, but I used that same method on the short pictured below and I LOVE them!  You will too!)


Use one of these hacks?  Be sure to hop on over to the Facebook Group and share your Linen and Little Loungers love. 🙂

Filed Under: Pattern Hacks, Uncategorized 1 Comment

Everyday Elegance – easy hacks

July 13, 2017

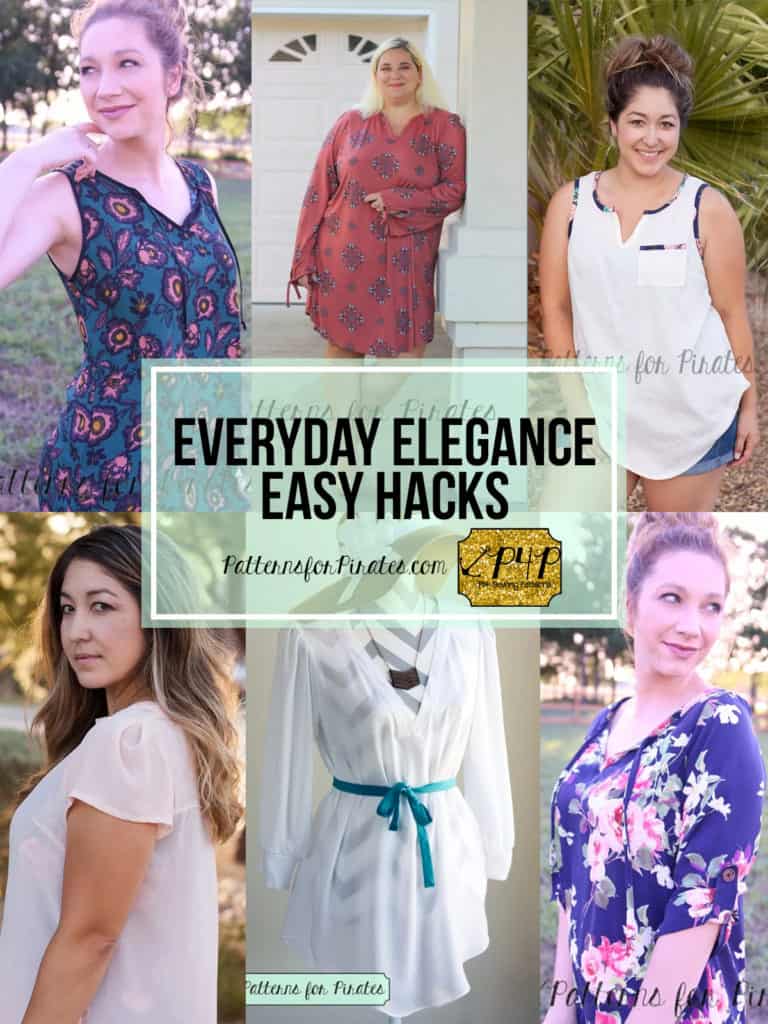
The Everyday Elegance recently received an update and and we added more options. (Read more about it the re-release here). We could not let this event pass by without showing you some easy hacks that can take your beloved EE to the next level.

[Read more…]

Filed Under: Pattern Hacks, Uncategorized 1 Comment

P4P University:: Knit Binding 101

May 18, 2017

With our recent release of the Cross my Heart and Heart Breaker Cami patterns, we’ve had some questions and hesitation about the straps… because, well, they look scary!  They may look intimidating but they truly are not as bad as they appear.  We’re going to show you a few different ways to do knit binding and hopefully help ease those fears.

What is Knit Binding?

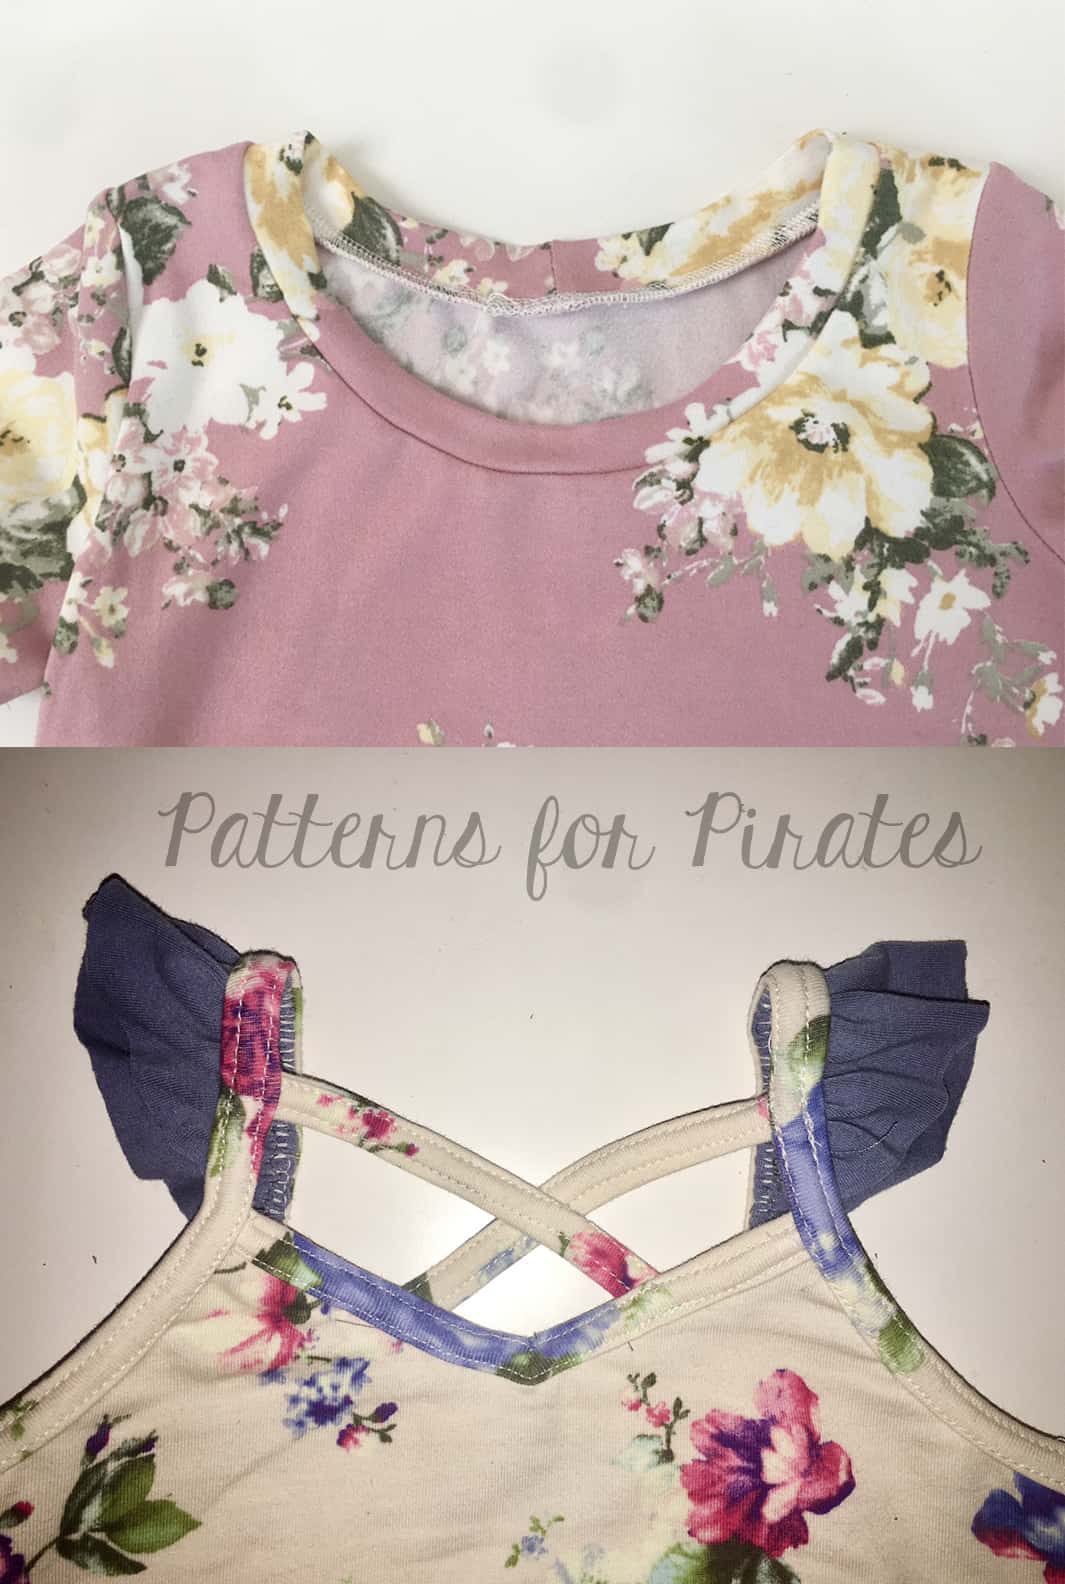
  • There are two main methods to finish a neckline or armhole.  Knit bands are an extension of the neckline and probably the most recognizable finishing method for a traditional T-Shirt (rose floral shown below). We’ll dive in to bands on another post ;).  Knit binding is done similar to bias tape binding, which is typically used on woven fabrics and encloses the raw edge of the neckline but does not extend above and away from it (ivory floral shown below).

Tools to create successful knit binding:

  • Use fabric with spandex.  You will yield better results with fabric that has great stretch and recovery.  Not sure what fabrics to use? Check out our Knit Fabric Cheat Sheet.
  • Steam iron:  One of the best tips to create even and professional looking binding is to press, press and press again.  Throughout the entire process of binding your garment, hitting your binding with some steam will help it bounce back to shape and keep a clean, crisp fold which is easier to turn and top-stitch.
  • Ball Point or Stretch Needles:  Whenever using knit fabric, stretch or ball point needles are always recommended.  The needle tip slips between the knit fibers and does not break or damage them while sewing.  Stretch needles are mostly used with fabrics that have a higher percentage of stretch (think swimwear or athletic fabrics) but most prefer to use them for all types of knits.
  • Pins or clips: Pinning or clipping your binding, especially when you get to the later steps to turn and top-stitch is a life-saver.  Once you become more comfortable with binding, you may not need as many but it’s always best to clip more now than regret it later.
  • Optional: Blind Hem Foot – this helps keep an even straight line along the edge of your binding when top-stitching.

Both the cami patterns, the Sweetheart and Me Hearties Dress, and Essential Tank use knit binding to finish the necklines, armholes or sleeves but you can apply this method to other tops and skirts in lieu of bands or hemming.  Just be sure to take in to account your seam allowances and band heights as they will finish lower or higher if no adjustments are made.

Methods to do knit binding:

  • Serger: (this method is used in the Cross my Heart and Heart Breaker Cami).  Using a 1/4″ seam allowance, the binding is serged to the neckline or armhole with the right side of the binding to the wrong side of the main fabric.  The seam allowance is pressed up with binding folded up and over the serged edge and then top-stitched.

  • Sewing Machine: (this method is used as an option in the Sweetheart and Me Hearties Dress and Essential Tank).  The binding is pre-pressed in quarters (double folds).  Using a stretch stitch (narrow zigzag, lightening bolt, or triple stretch stitch), with right side of the binding to the wrong side of the main fabric, the binding is stitched along the crease. The seam allowance is pressed up with binding folded up and over the raw edge and then top-stitched.

  • Serger or Sewing Machine: Using a 1/4″ to 3/8″ seam allowance the binding is stitched with right sides of the binding to the right side of the main fabric.  The seam allowance is pressed up and binding folded over the edge to the wrong side of the fabric and then top-stitched.  The excess binding is trimmed at the seam-line.


There are multiple options for Top-stitching binding.  Here are few of our favorites:

  • Twin Needle: Double straight stitch on front and zig-zag on back.  (Elisabeth walked us through using a twin needle a few posts back and is a great resource for top-stitching the knit binding using a regular sewing machine.  In case you missed it, be sure to check it out HERE!)
  • Coverstitch: single or double needle: straight stitch on the front with a stretch zig-zag stitch on the back.
  • Narrow Zig-Zag: Gives the appearance of a straight stitch but still has some stretch.
  • Triple Step Zig-Zag:  This is great for swimwear or high stretch areas.


Need more help?  Here’s a video of the binding options described above 🙂


Hopefully this answered your questions about knit binding and eased some of your fears.  Just remember, press and go slow!  As with any new skill, it takes time to master, so keep practicing and you’ll have added another finishing method to your sewing arsenal.

Finished a project using knit binding? Be sure to share in our Facebook Group! We’d love to see it.


Filed Under: Frequently Asked Questions, P4P University, Sewing Techniques, Sewing with Stretch, Knit Fabrics, Uncategorized 2 Comments

Mama Bear Joggers :: Stretch Woven

May 9, 2017


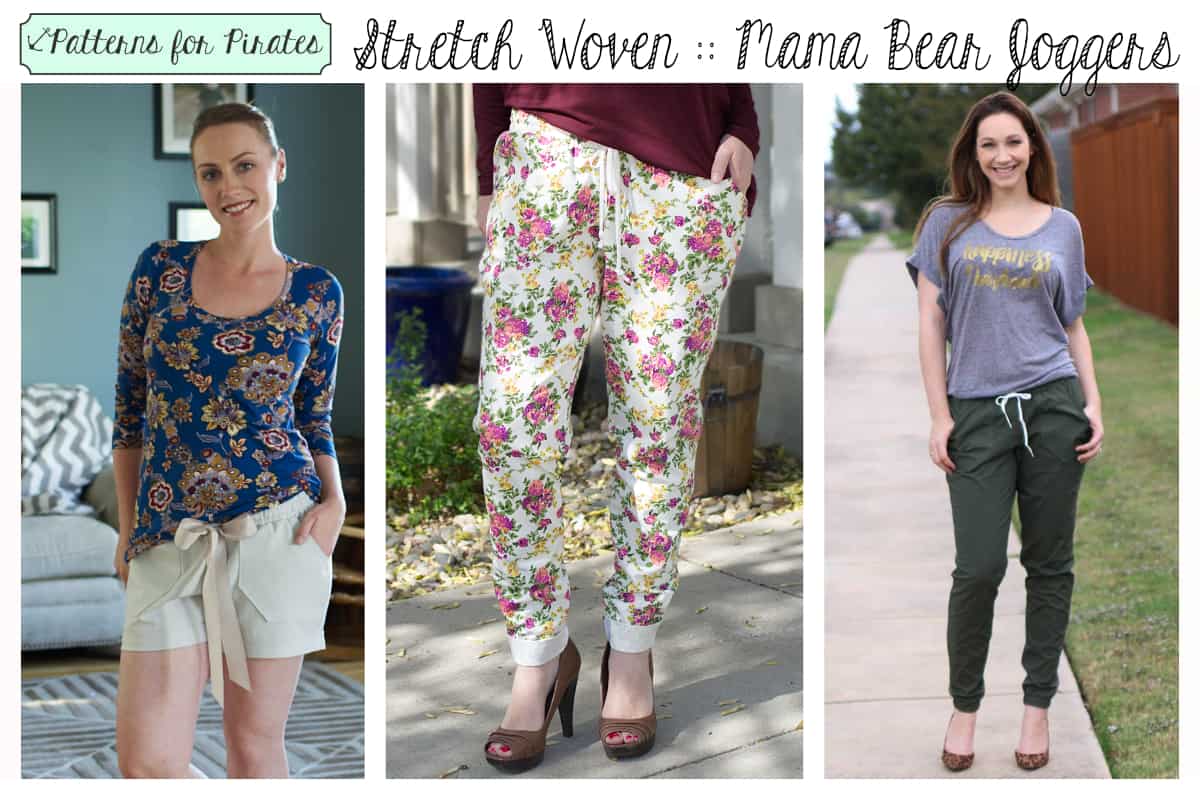
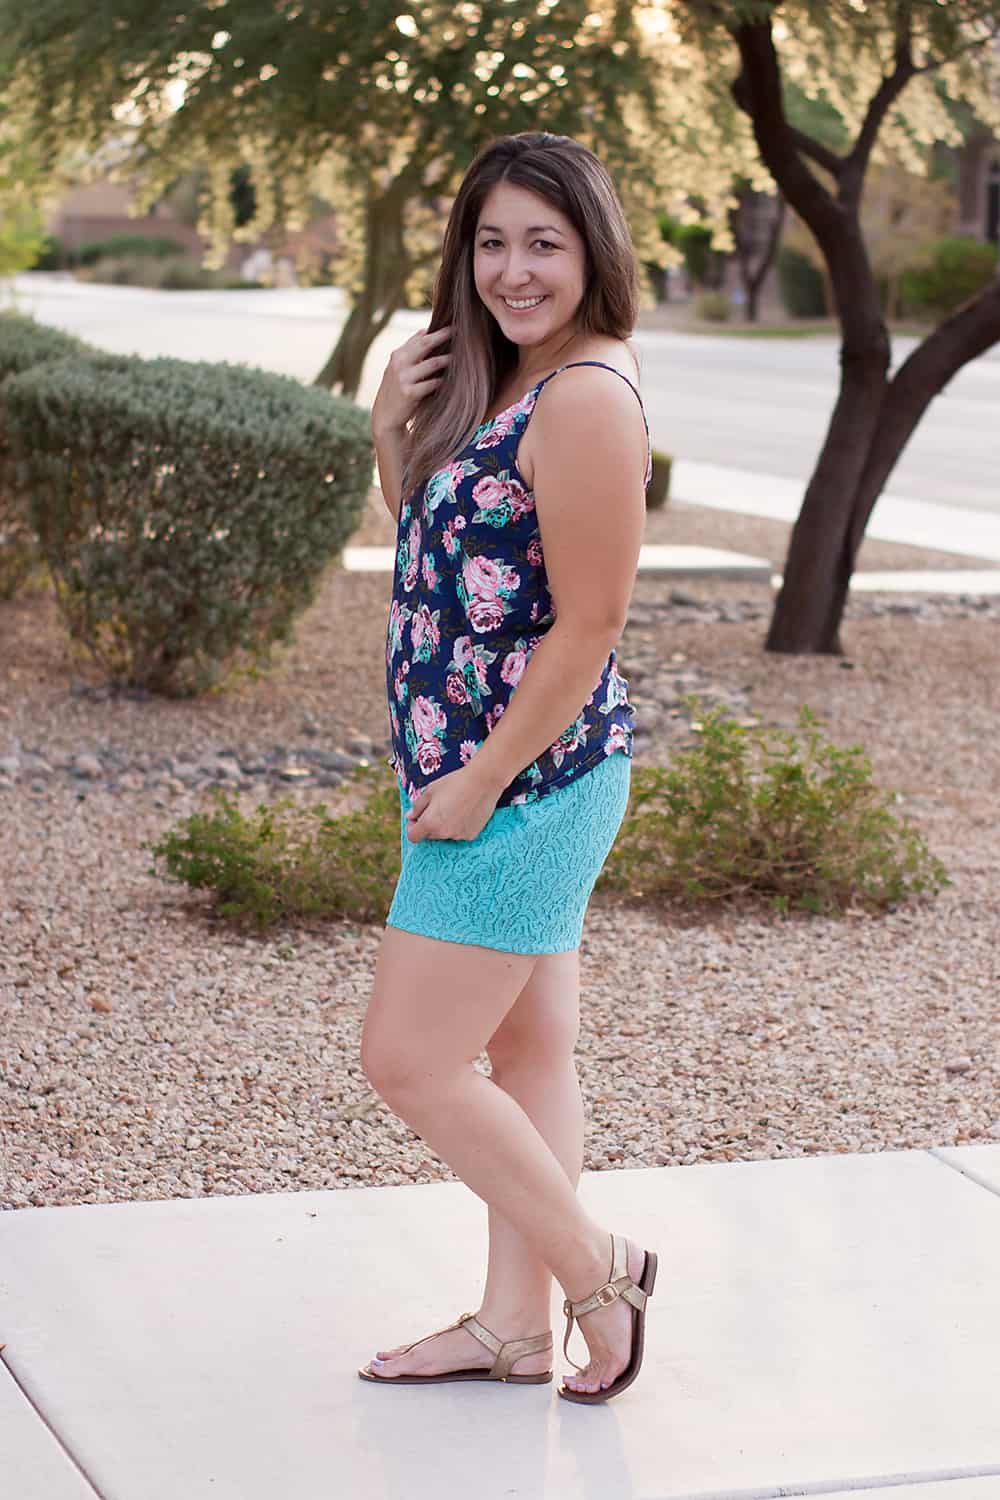
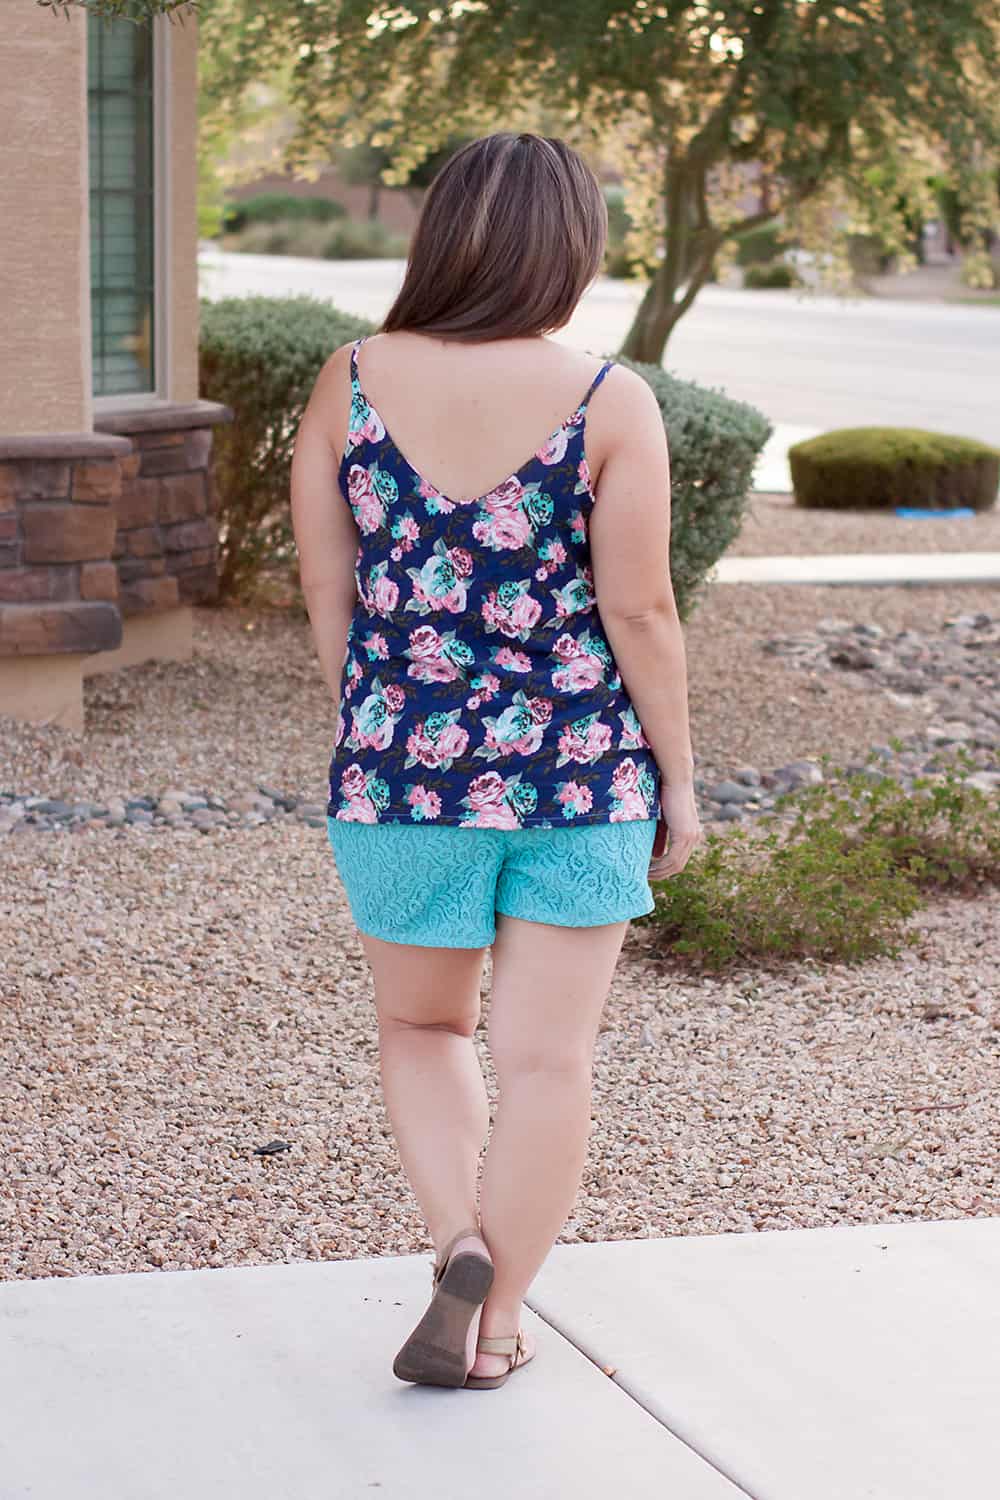
Joggers have been a really popular trend lately. A big reason, aside from the pure comfort, is because they can be dressed down with a pair of sandals or they can be dressed up with some heels for a day out in the city. But did you know? The Patterns for Pirates Mama Bear Joggers (as well as Papa and baby of course) only require 20% stretch! This leaves SO many options to choose from when deciding on fabric to sew your own. Inspired by Judy’s olive poplin version (below), I sewed up a couple joggers for myself in some other fabric options.

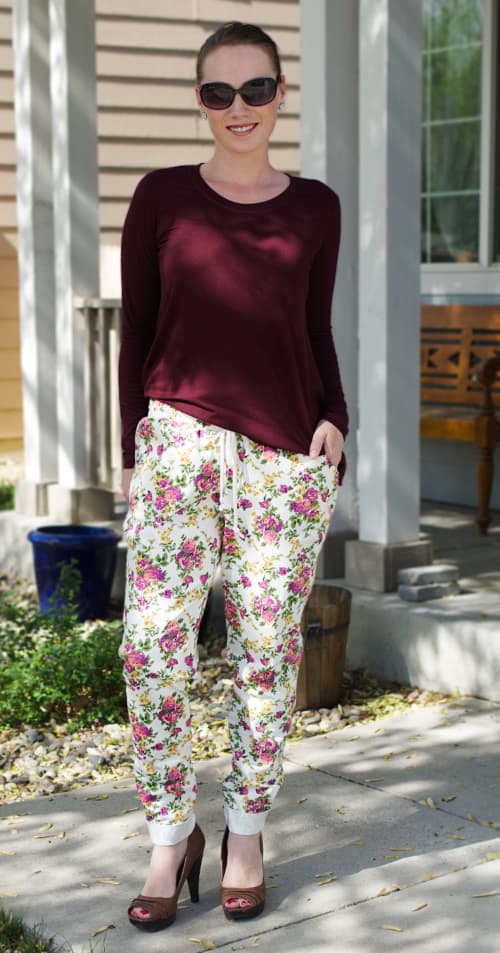
While rummaging around for something to use, I discovered some stretch denim that was hiding away in my fabric stash. I just knew it would be perfect! This denim is about 25% stretch and wears incredibly comfortably. I wear these joggers around the house or I like to style them with a pair of heels and a blousey, loose or fitted tank top for a day out. The denim definitely adds some structure to the pants but certainly does not take away from the comfort.

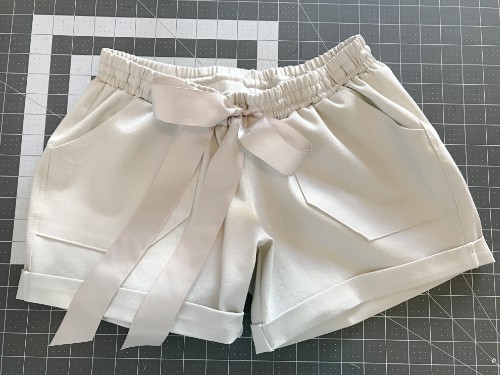
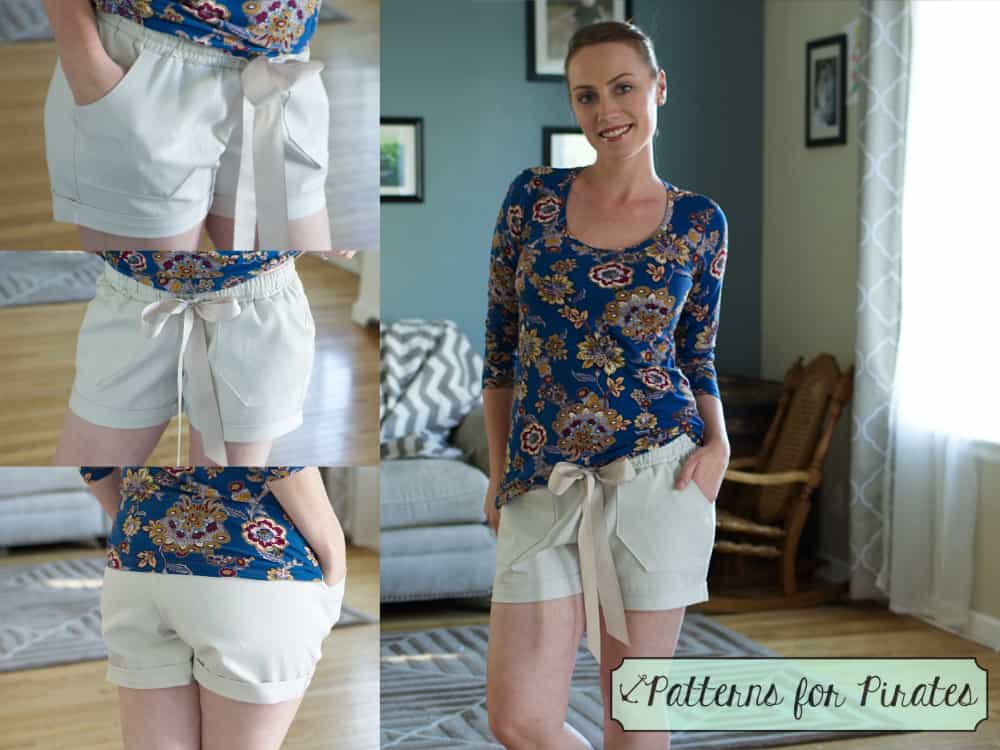
I also found some stretch twill in my stash and knew I HAD to whip up a pair of summer shorts with it! I used the Mama Bear pattern in shorts length, but added about 2.5″ to the bottom hem line in order to do the roll-up hem instead. I love the look of it over the traditional version for this purpose. Some ribbon in my stash was used for the drawstring and really finished off the look. These are just seriously cute and comfortable!
So next time you’re at the fabric store or digging around in your stash at home, break out your stretch ruler (you can find one in Judy’s cheat sheet) and then use those stretch wovens!

::: Written by Kelly Bailey – P4P Blog Contributor :::

Read more about sewing joggers for the entire family here!
Read some easy Bear Jogger hacks here!
[Read more…]

Filed Under: Frequently Asked Questions, Uncategorized 2 Comments

Peg Legs SAL: Day 7 – Recap and winners announcement

May 3, 2017

We made it to the last day of the Peg Legs sew along. You all did an amazing job this past week! I’ve seen so many beautiful pairs of Peg Legs being sewn.

Let’s recap what we did so far:

Day 1: Fabric selection

Day 2: Printing and measuring

Day 3: Cutting the fabric

Day 4: Attach add ons

Day 5: Sew inseam and attach legs

Day 6: Attach waistband

Without further ado…here are our 5 Peg Leg SAL winners


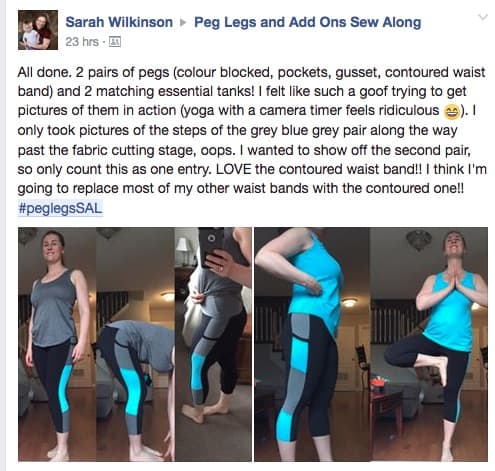
First winner: Sarah Wilkinson

$15 P4P store credit

$50 So Sew English store credit

$50 Stika Fabrics store credit

$50 Midnight Mountain Fabrics store credit

$25 Beanpop store credit

$50 RP Custom Fabrics store credit


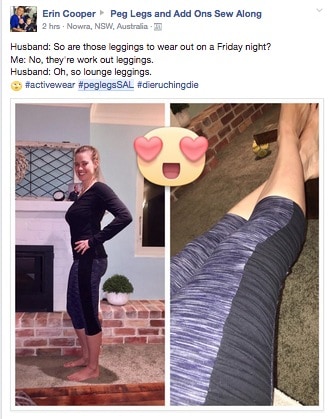
Second winner:  Erin Cooper

$15 P4P store credit

$50 Aurora Designs store credit

$50 Little Bear Fabric + Trim store credit

$50 Smoogie Custom Fabric store credit

$25 Little Lady Bug Fabrics Gift Card

$30 Store Credit($50 NZD) Levana Fabrics


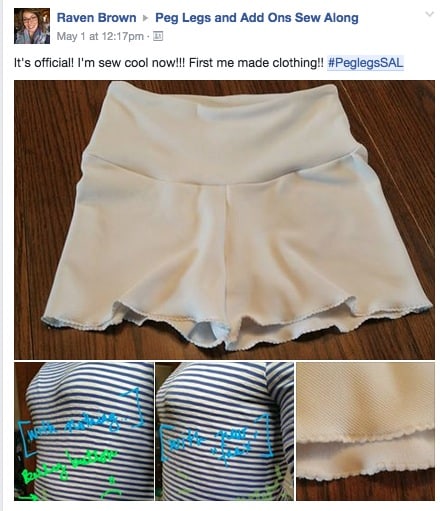
Third winner: Raven Brown

$15 P4P store credit

$60 Boss Lady Fabric store credit

$50 The Fabric Snob store credit

$50 RockerBye Destash Fabric store credit

$50 Water Tower Textiles Canada store credit

€25 Droomstoffen store credit


Fourth winner: Lorie Peugh Judd

$15 P4P store credit

$50 Made Whimsy/ You Made Something store credit

$25  Star Dust & Moon Beam Textile Company gift card to each store

$50 Pretty Posh Prints store credit

$50 Sash Fabrics store credit

$30 Phat Quarters store credit

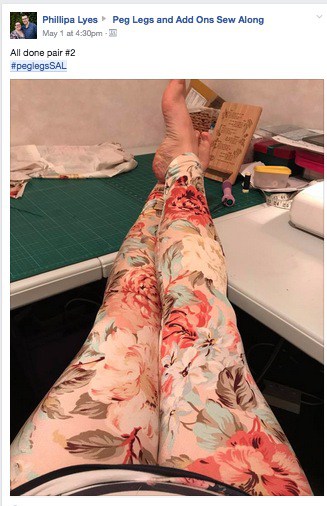
Big prize winner: Phillipa Lyes

$50 P4P store credit

$100 Sincerely Rylee store credit

$75 Sew Vagabond store credit

LFRB full of fabric from Sly Fox Fabrics

$50 True North Fabrics store credit

$50 Sweet N Charmed Fabric store credit


Congratulations to all of the winner and all participants! Please contact the shop owners to claim your prizes.


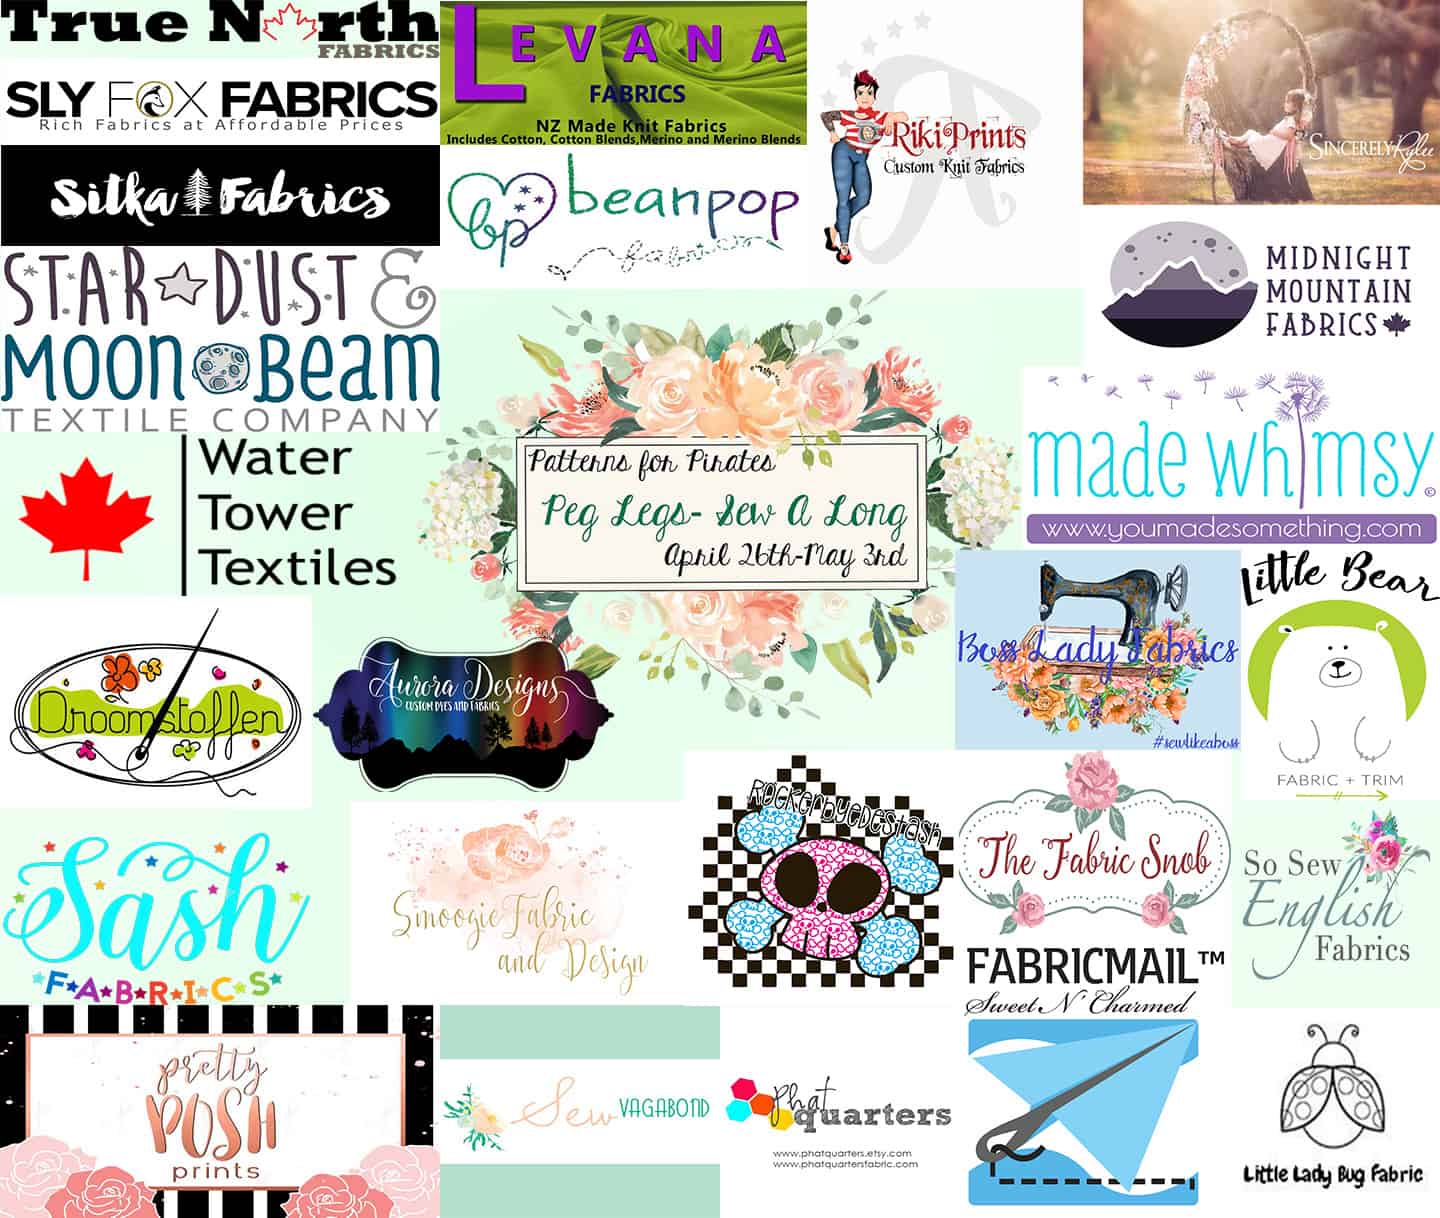
Thank you to the sponsors who made all these amazing prizes possible. Be sure to check out their awesome fabric selections!

Made Whimsy Fabric

Sew Vagabond

Sly Fox Fabrics

True North Fabrics

Sincerely Rylee

RP Custom Fabrics

Smoogie Fabric and Design

Sitka Fabrics

Star Dust and Moon Beam Textile Company

Levana Fabrics

Midnight Mountain Fabrics

Water Tower Textiles

Droomstoffen

Aurora Designs

Boss Lady Fabrics

Little Bear Fabric and Trim

Sash Fabrics

Rockerbye  Destash

The Fabric Snob

So Sew English

Fabricmail Sweet N Charmed

Phat Quarters, Pretty Posh Prints

Little Ladybug Fabrics.

Filed Under: Contest/Giveaway, Free Pattern, Sew-A-Long, Uncategorized 4 Comments

Peg Legs SAL: Day 6 – Attach waistband (with optional pocket)

May 1, 2017

Can’t believe we’re almost at the end of the sew along. Today we’ll be attaching the waistband. Whether you’re doing the high or low rise or the contoured waistband like I did, now is the time to add it to the leggings. This step can also be done with the sewing machine or the serger. If you use a sewing machine, remember to set it for a stretch stitch. A triple stretch stitch will work great!

If you are attaching your waistband with your serger you can either do a regular overlock stitch or you can even do a flat lock stitch. Using a flatlock stitch will eliminate the bulk at the seam that you get with an overlock stitch.

For this sew along I used the new contoured  waistband which, let me tell you, is the best thing ever! Best tummy control while still comfortable.

It is very important to cut your fabric along the grain. We have seen some FB comments suggesting to cut the waistbands against the grain for more support. I highly discourage that because your peg legs will loose shape in the wash and will not fit as intended.

TIP: If you are more of a rectangular shape than hourglass, you can add elastic to the top seam of your contoured waistband.

You can see the waistband construction video here.

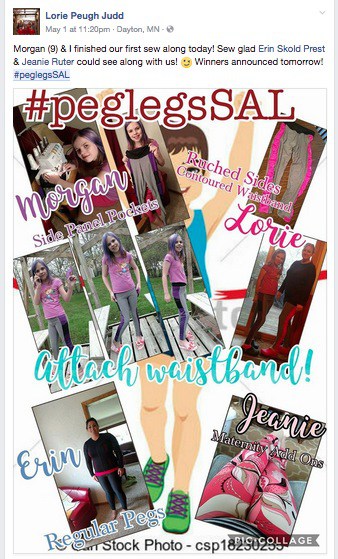
Don’t forget to post your final picture in the Peg Legs SAL event and hastag it #peglegsSAL before May 3rd 10 pm EST. Be sure to come back on Wednesday for the Sew Along recap and the winners announcement.

Filed Under: Contest/Giveaway, Free Pattern, Sew-A-Long, Uncategorized 11 Comments

Peg Legs SAL: Day 5 – Sew Inseam and attach legs

April 30, 2017

Welcome to day 5 of the Peg Legs Sew Along! Today we will be sewing the inseam, hemming each leg and attaching them. Start by pinning (or clipping) the inseams on each leg, right sides together. You can either serger it or stitch it with your sewing machine. If you use your sewing machine for this step, make sure to use a stretch stitch!

If you’re using your serger, test the stitches on a scrap piece of fabric, preferably the same as the one you used for your pegs.  Testing first will give you a chance to see if you need to make any adjustments to the tension or stitch length or width.

Once you’ve sewn the inseams you can either hem or sew the crotch curves. I prefer to hem first because I find it easier to maneuver if the legs are not attached together. When hemming your Peg Legs make sure you steam press before and after you stitch. You can use your coverstitch machine or your sewing machine for this step, just remember to use a stretch stitch.

Last step of the day is sewing the crotch curve. Pin or clip the curve right sides together, matching the inseam and the back and front rise. The easiest way to do this is to turn one of the legs inside out and place the other leg (right side out) inside.

You can see the day 5 video here !

When you’ve finished these steps, don’t forget to post a picture in the Peg Legs SAL Event and hashtag it #pegsalday5.

Filed Under: Contest/Giveaway, Free Pattern, Sew-A-Long, Uncategorized 1 Comment

Peg Legs SAL: Day 4 – Sew add ons (pocket, color block, side strip etc)

April 29, 2017

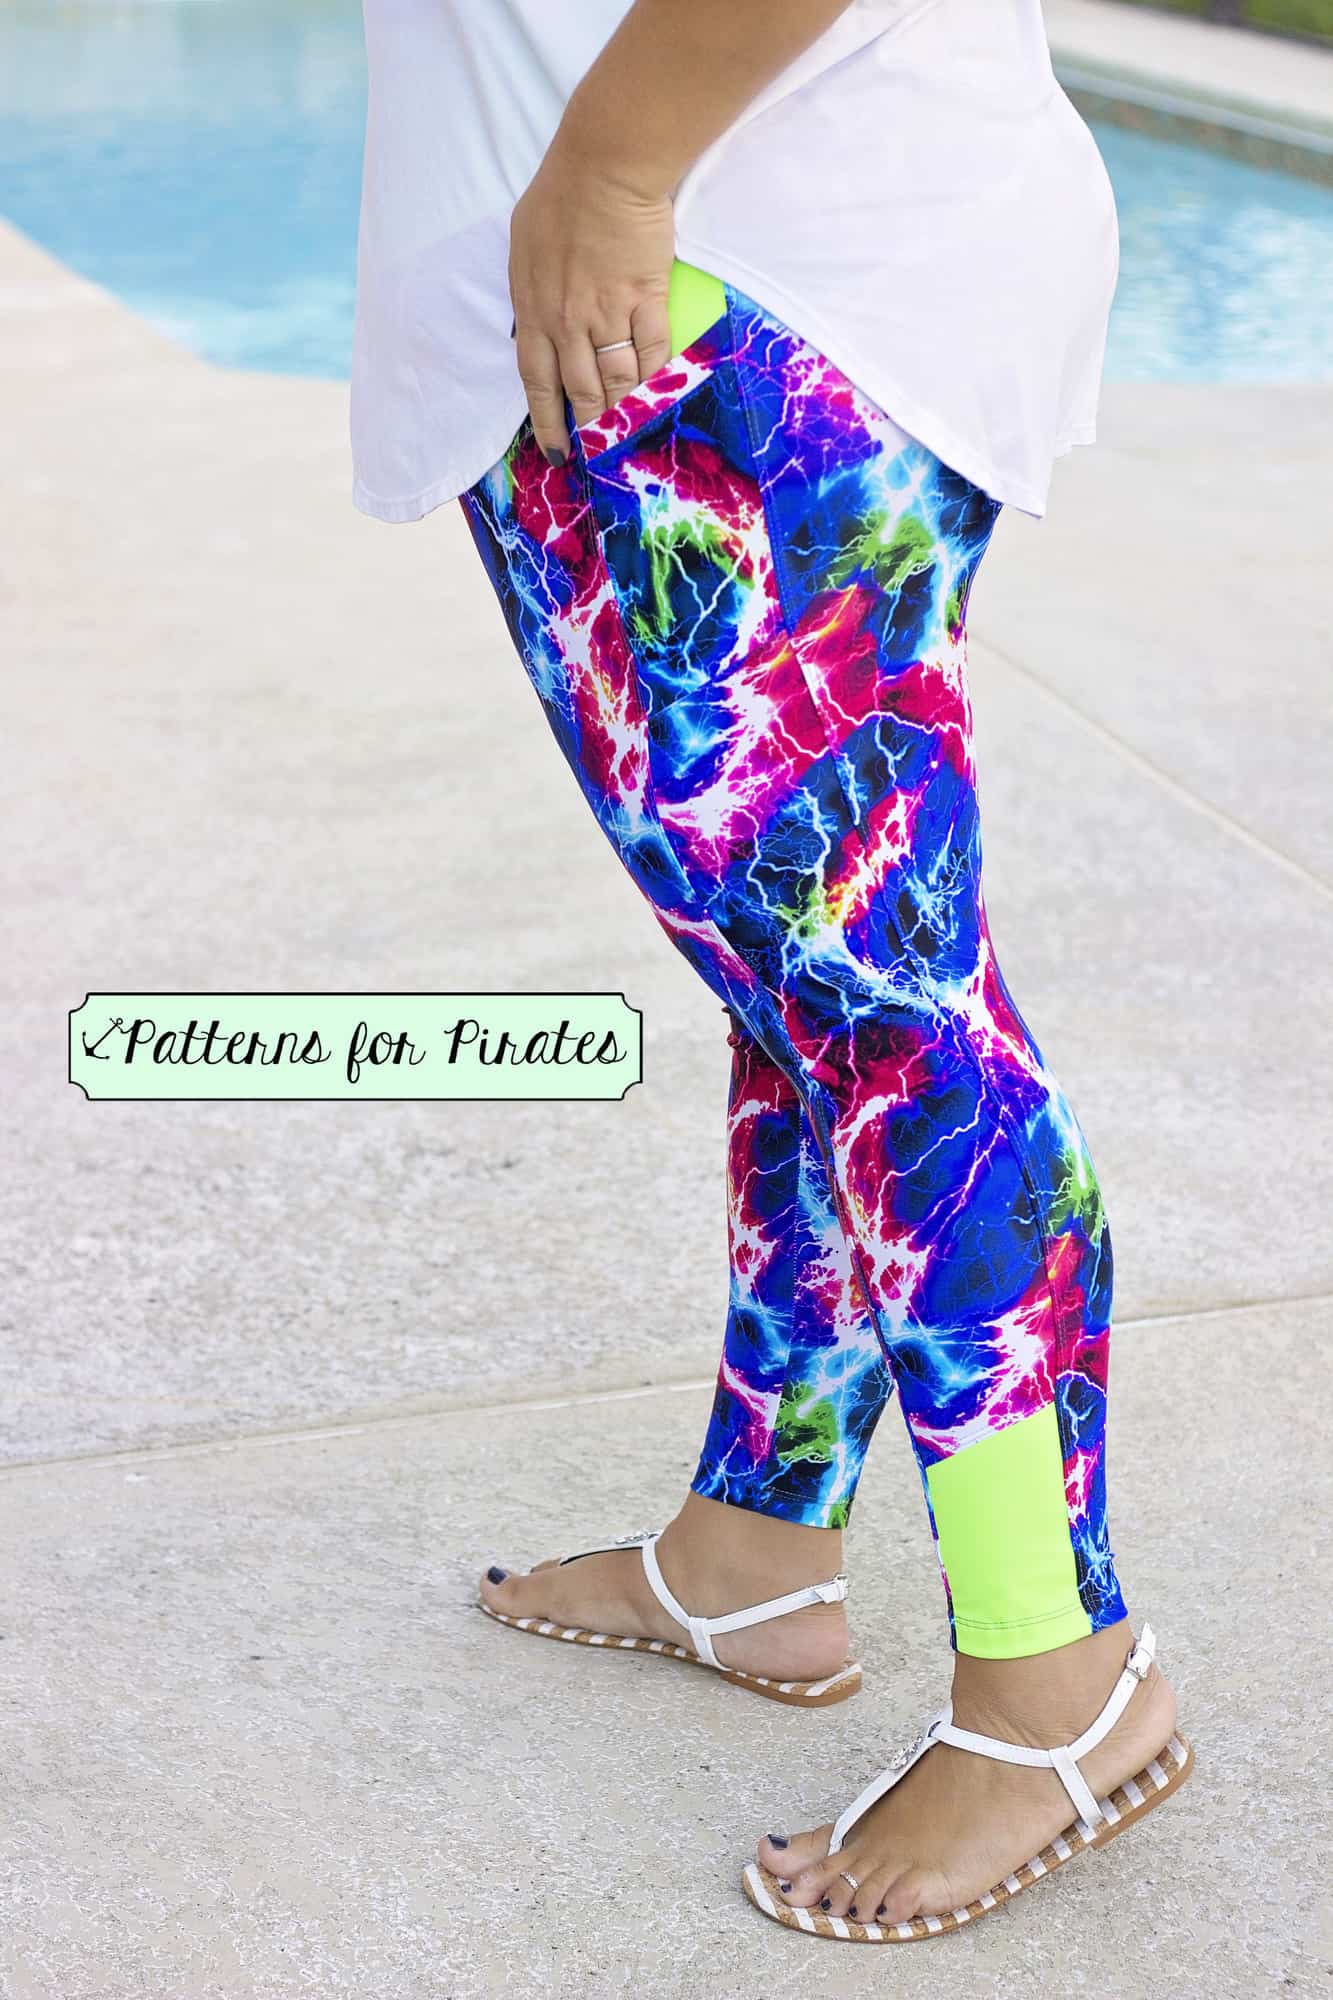
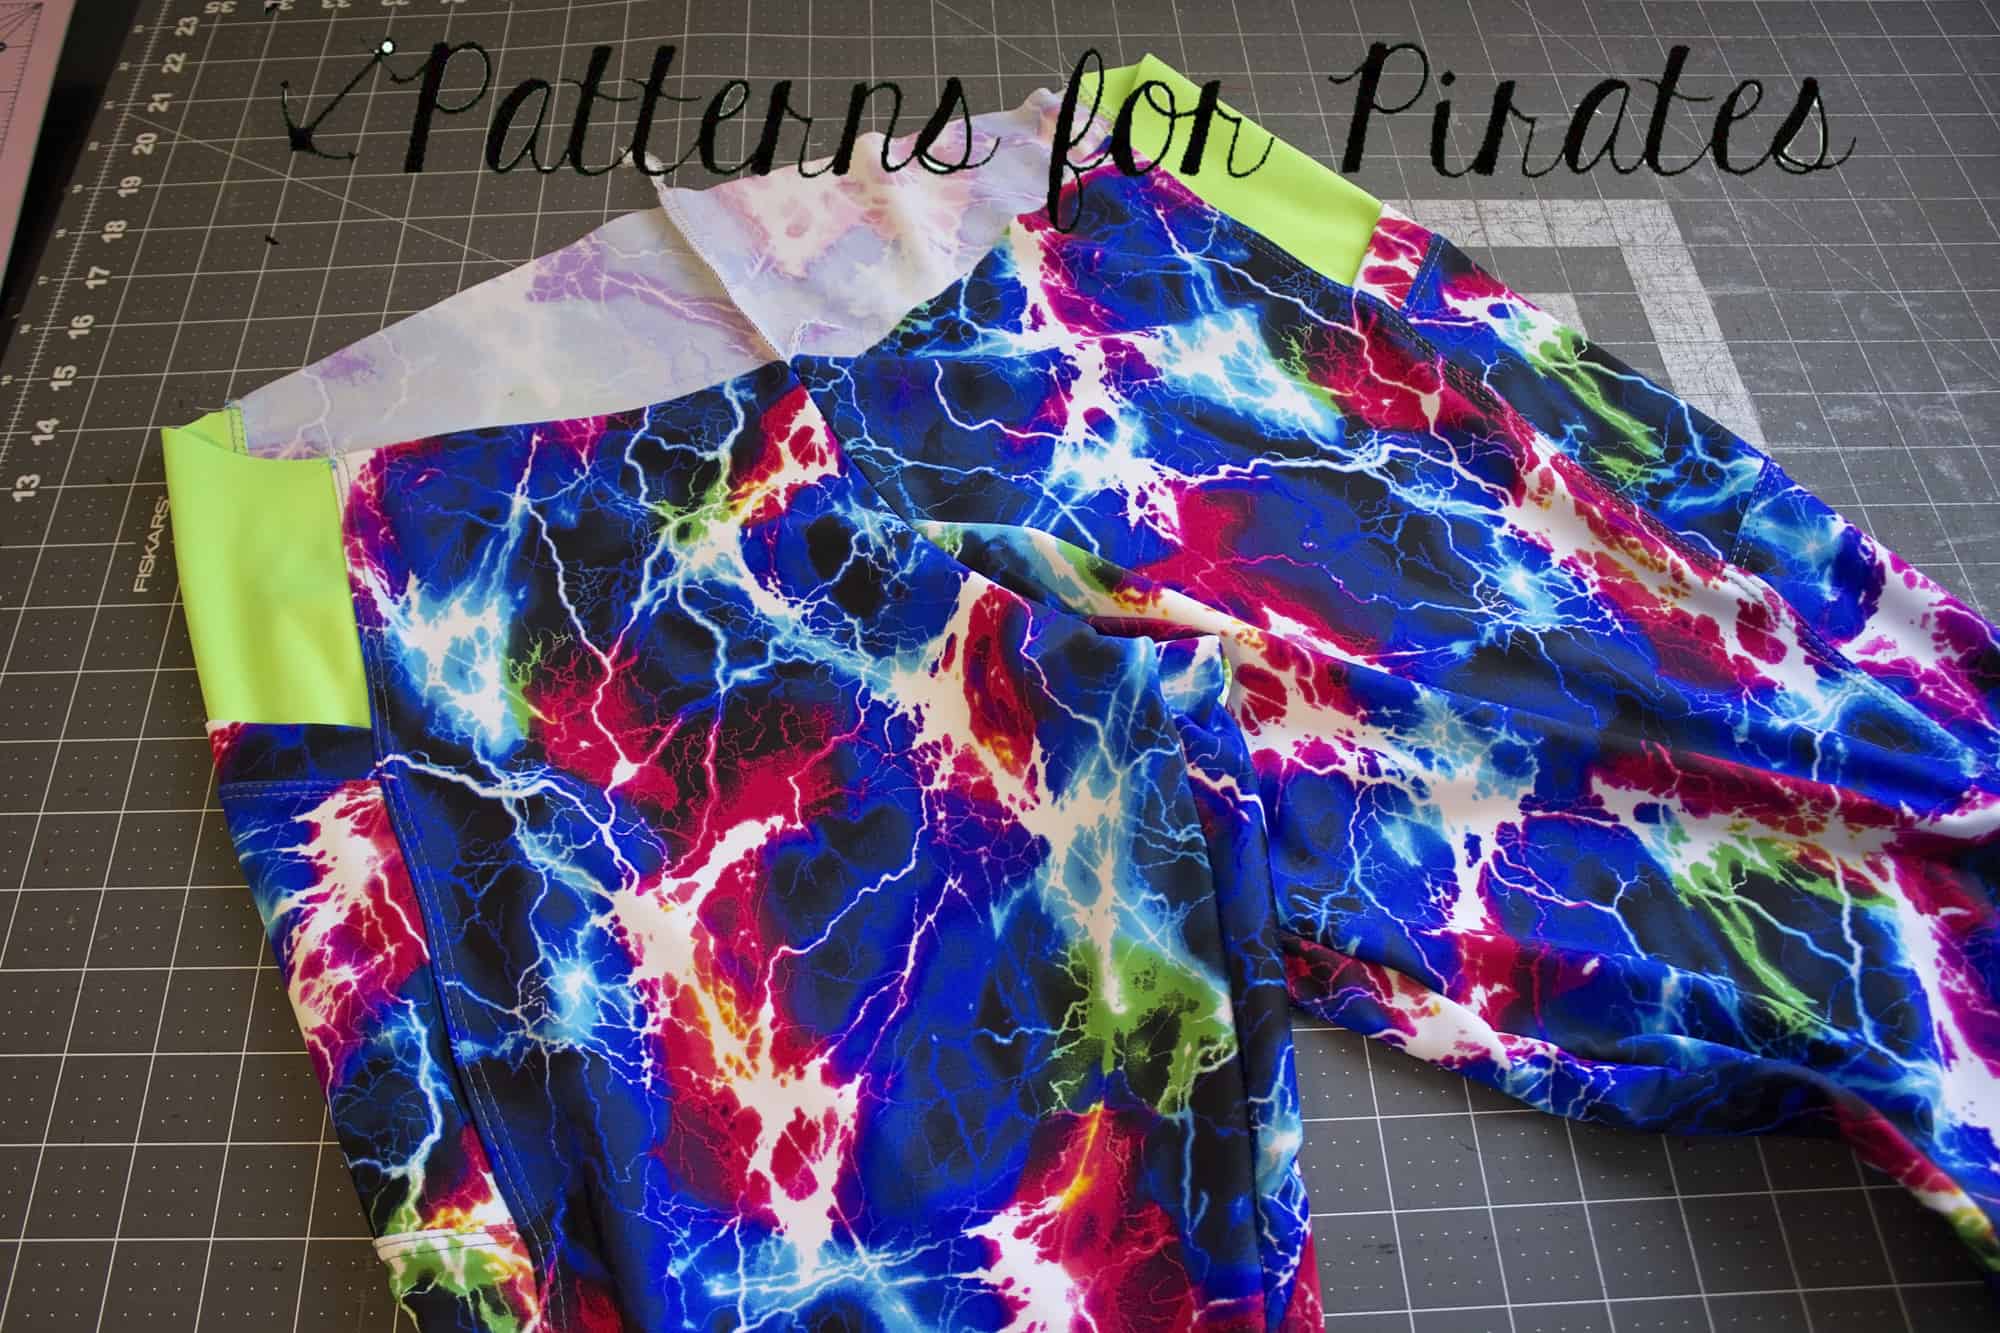
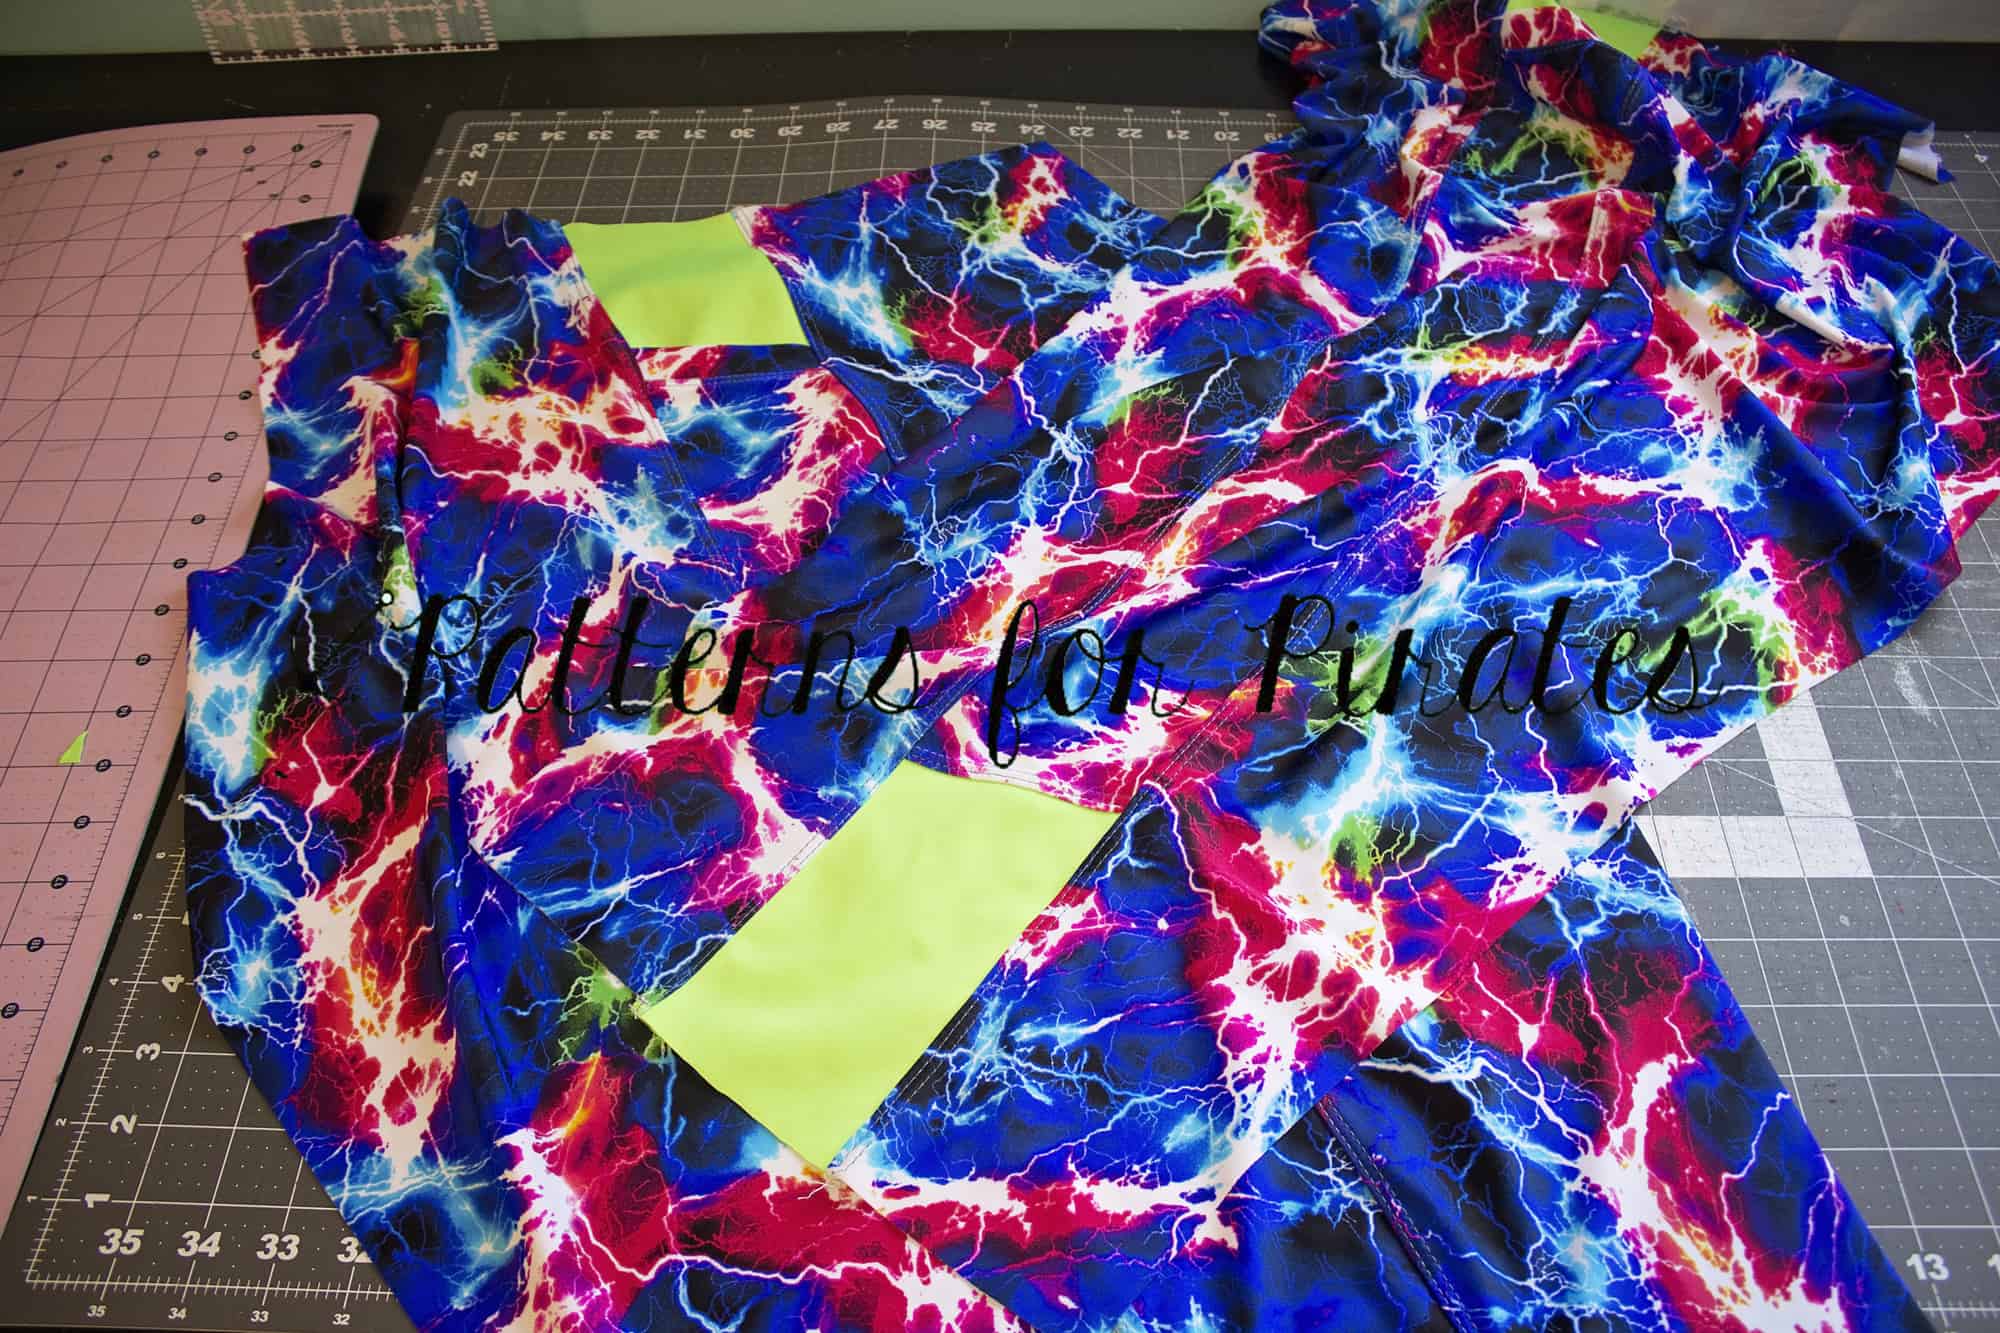
Hello there! Day 4 is here and we’re starting to sew! Woohoo! Today we’ll be putting the leg pieces together. If you added a pocket, or a side strip, or color blocked the side strip, now is the time to put them together.

I love to work “assembly line style” so I pin…well clip…all pieces together first. Then sew/serge and then topstitch. If you are using a sewing machine make sure you use a stretch stitch like the “thunderbolt” , a triple stretch stitch or a very narrow zig zag. When top stitching with a sewing machine I highly recommend using twin needles. Check out the Twin Needles Blog for some tips and tricks!

For my SAL Peg Legs pair I stitched with my serger and topstitch with the coverstitch machine. You can see how I put together the add ons in the day 4 video here!

If you want to take it up a notch you can use decorative top stitching too. The Decorative stitching blog is an excellent source for all of you who would like to take the Peg Legs up a notch!


Once you’ve assembled your leg pieces post a picture in the Peg Legs SAL Event and hash tag it #pegsalday4. See you back here tomorrow!

Filed Under: Contest/Giveaway, Free Pattern, Sew-A-Long, Uncategorized Leave a Comment

  • « Previous Page
  • 1
  • …
  • 21
  • 22
  • 23
  • 24
  • 25
  • …
  • 29
  • Next Page »

connect with me

  • Email
  • Facebook
  • Instagram
  • Pinterest
  • YouTube
Privacy & Cookies: This site uses cookies. By continuing to use this website, you agree to their use.

To find out more, including how to control cookies, see here: Cookie Policy
  • Privacy Policy
  • Refund Policy
  • Contact Us
  • About

Copyright © 2026 Patterns for Pirates

Copyright © 2026 · Genesis Framework · WordPress · Log in