Patterns for Pirates

P4P stylish, modern, wearable patterns

  • Home
  • Blog
    • Frequently Asked Questions
    • Pattern Releases
      • Free Patterns
    • P4P University
      • Fitting
      • Sewing with Stretch, Knit Fabrics
      • Sewing with Woven Fabrics
      • Sewing Machines
    • Sew-A-Longs
    • Fabric for Pirates
    • Pattern Hacks
    • Announcement
      • Blog Tours
      • Contest/Giveaway
  • Shop
  • Bundle Discounts
  • Flash Friday
  • Gift Cards
  • My Account
  • Cart

It’s a Cinch…Bag FREE Sewing Pattern + Tutorial!

April 4, 2019

I have been having the hardest time containing myself over these bags!  I just love them so much and I hope you have the same feelings about them….because this is our newest FREE pattern and it’s launching RIGHT NOW!

Let’s make some It’s A Cinch….Bags!

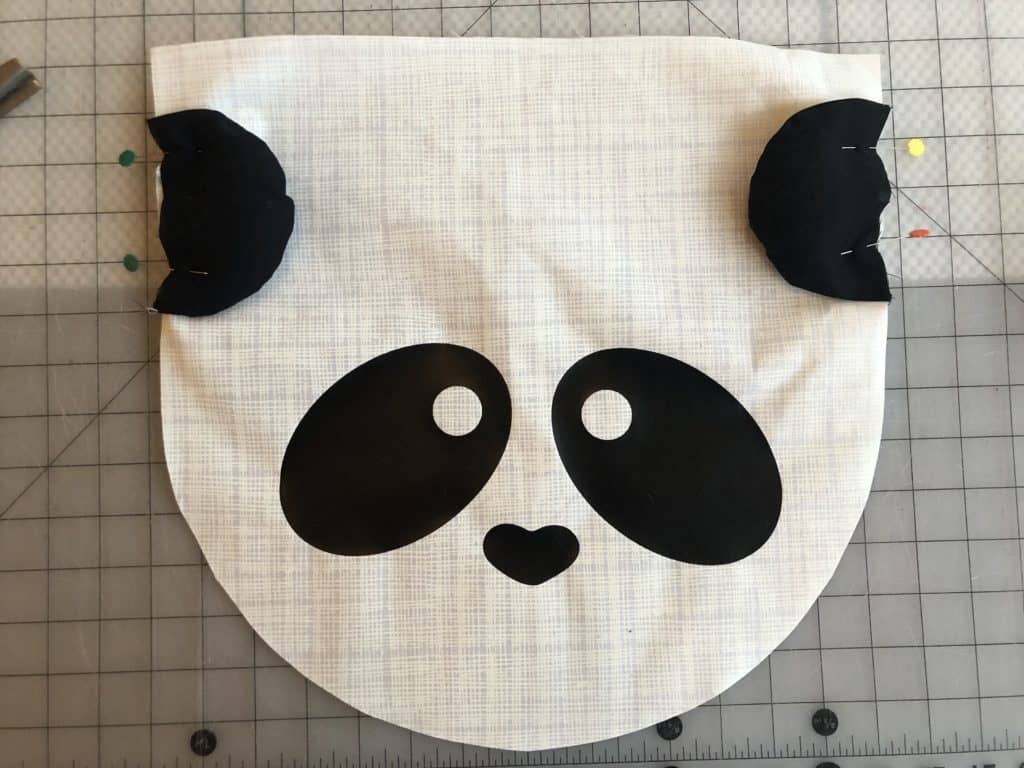
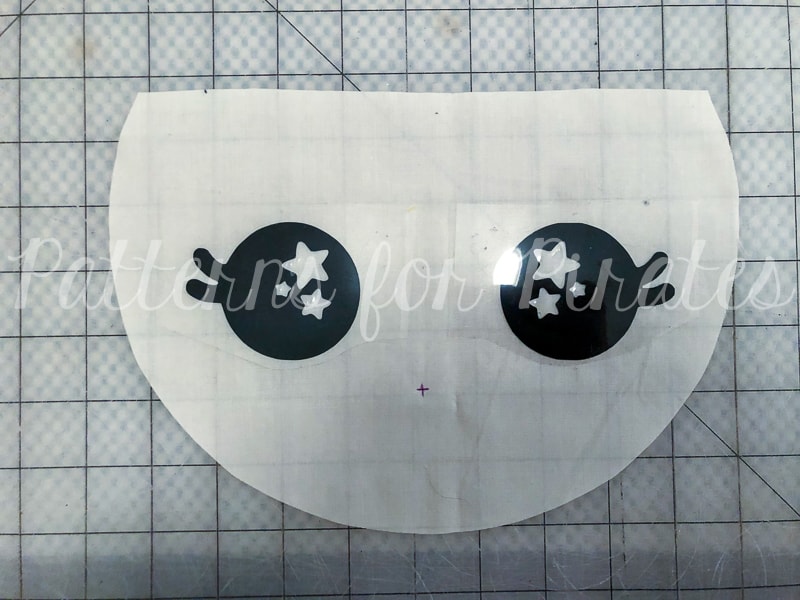
Included in the pattern below are instructions on how to make a basic bag, or one of the animals like the fox, kitty cat, panda, or bunny!  There are also downloadable files for all of the animal faces (and the emoji face pictured), which you can use for htv, fabric paint or embroidery.  But wait, there’s more!  Included along with all of that are downloadable files for a soccer ball, volleyball, basketball and baseball!  I’ve got you covered all over the place!

Plus I totally spared you from having to install zippers this time.  (I know you were worried.)

**Stick around all the way to the bottom of this post for a full video tutorial of the assembly of these sweet cinch bags as well!
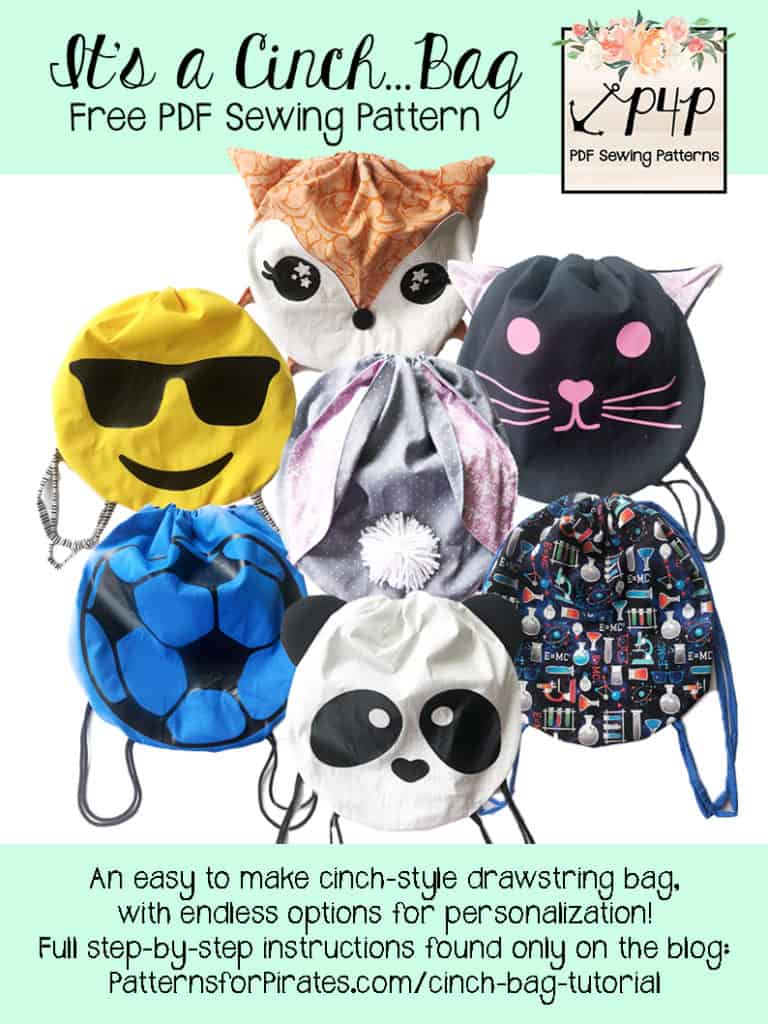
— It’s a Cinch…Bag PDF free pattern pieces, animal face files, and sports ball designs (found HERE)
— 1/2 yard main fabric
— 1/2 yard lining fabric
— 3 yards cording for straps, cut into 2 – 1.5 yard lengths.
— Optional: Small amounts of accent fabrics for ears, etc.
— Optional: Small amounts of fiberfill for the animal ears.
— Optional: Heat Transfer Vinyl / Embroidery Floss / Fabric Paint / Buttons / etc for Details

Recommended fabrics: quilting cotton, kona cotton, etc.

BASIC BAG CONSTRUCTION

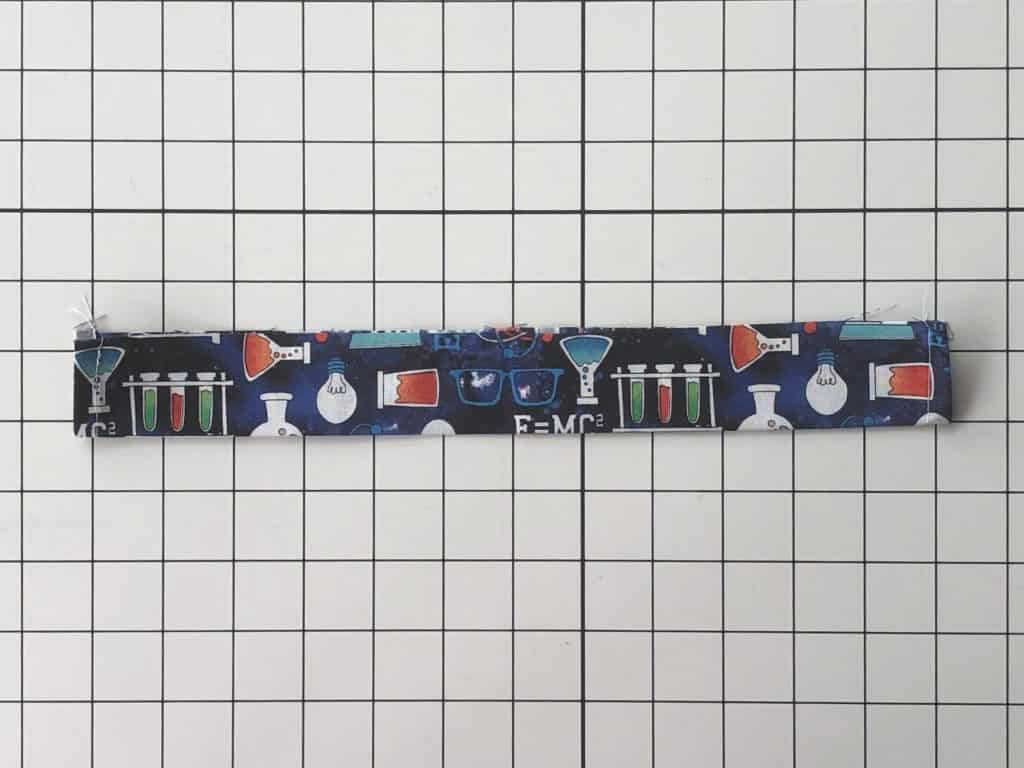
Step 1: Using a strap channel piece, fold one of the short ends (wrong sides together) at 1/4″ and press.
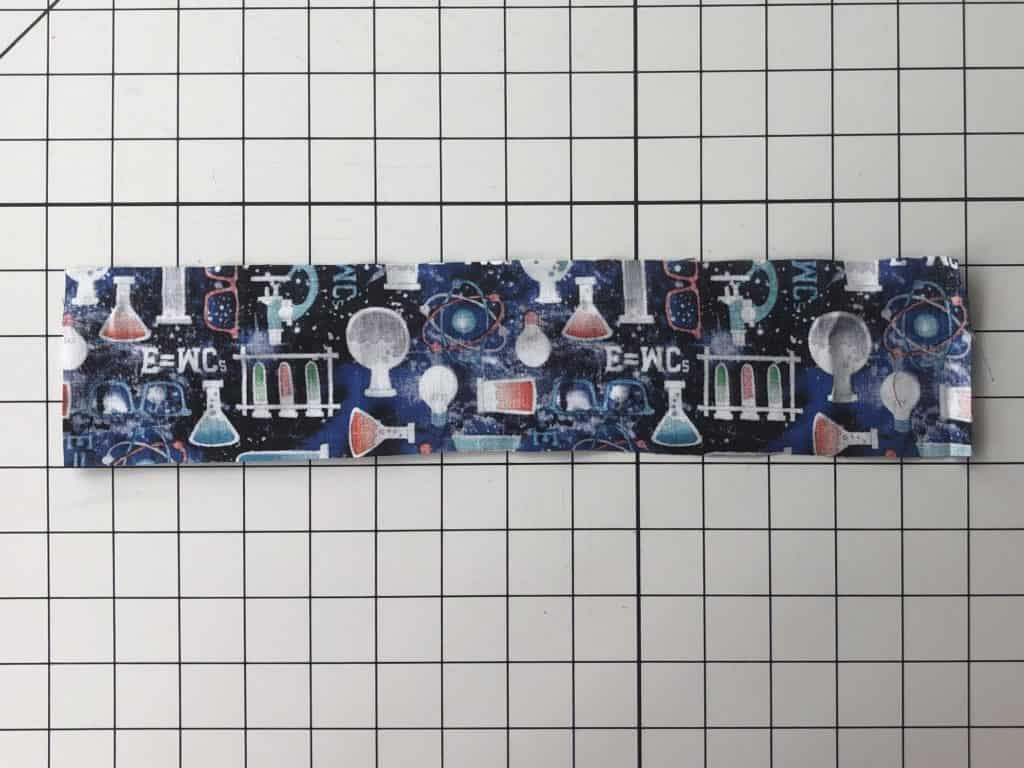
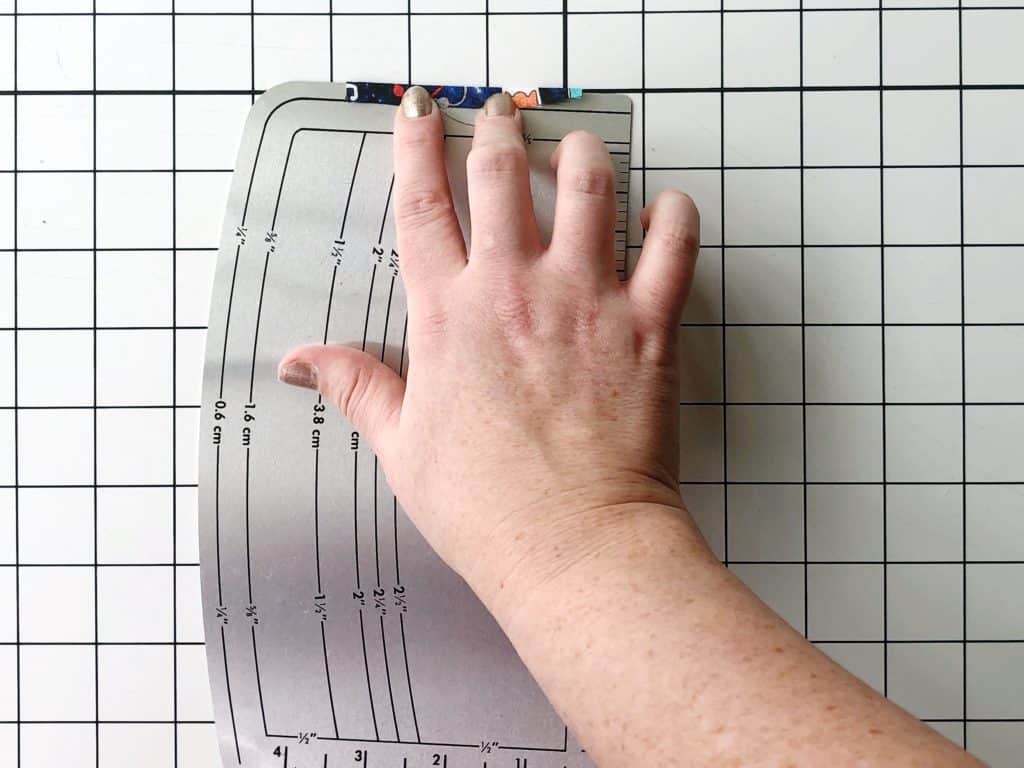
Fold another 1/4″ to enclose raw edges and press again.
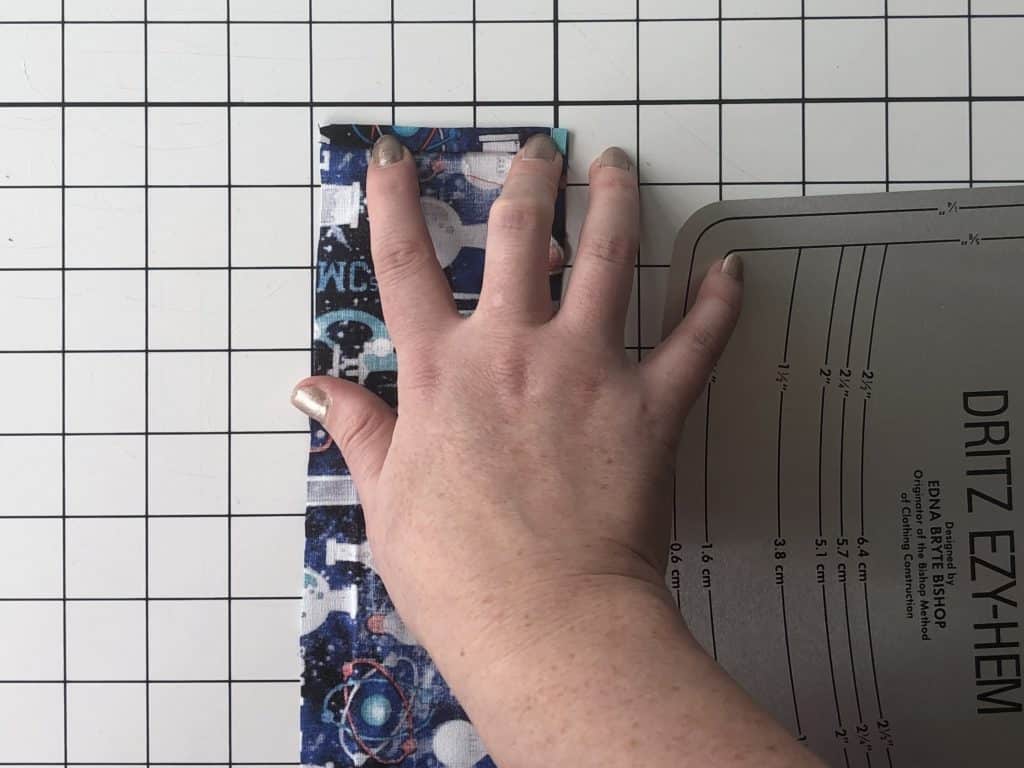
Repeat on the other short side of strap channel.  Repeat with other strap channel piece.

Step 2: Top stitch along both edges of strap channel pieces.
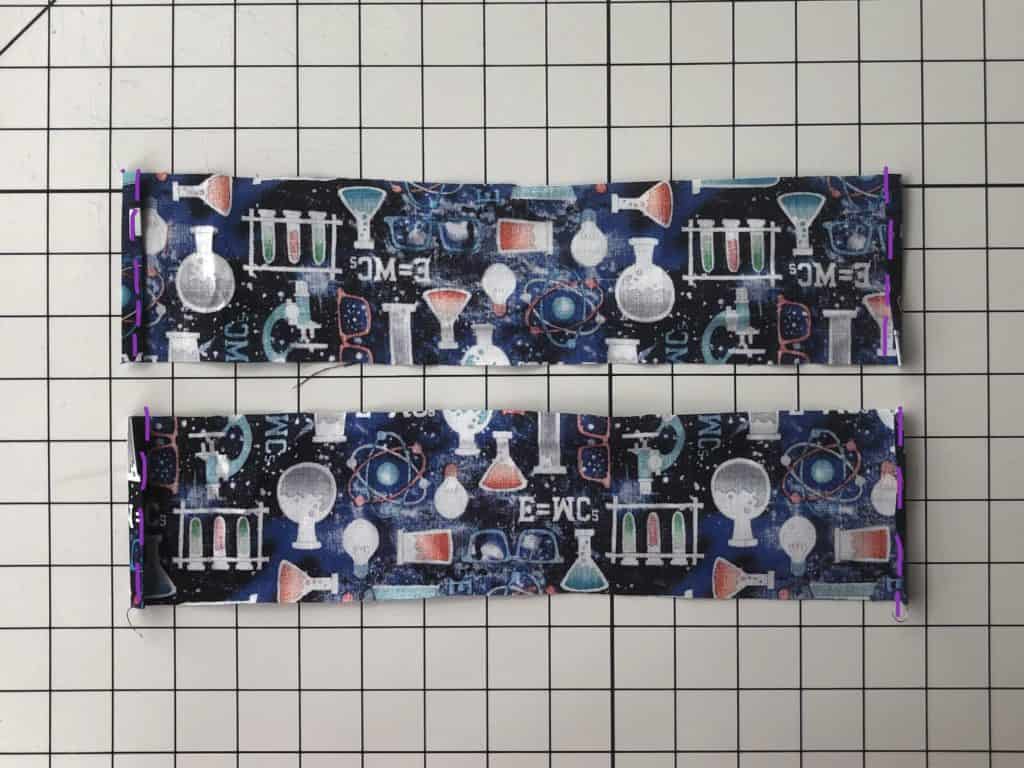
Step 3: With wrong sides together, fold the strap channel in half, meeting the long raw edges together.  Press.  Repeat with other strap channel piece.
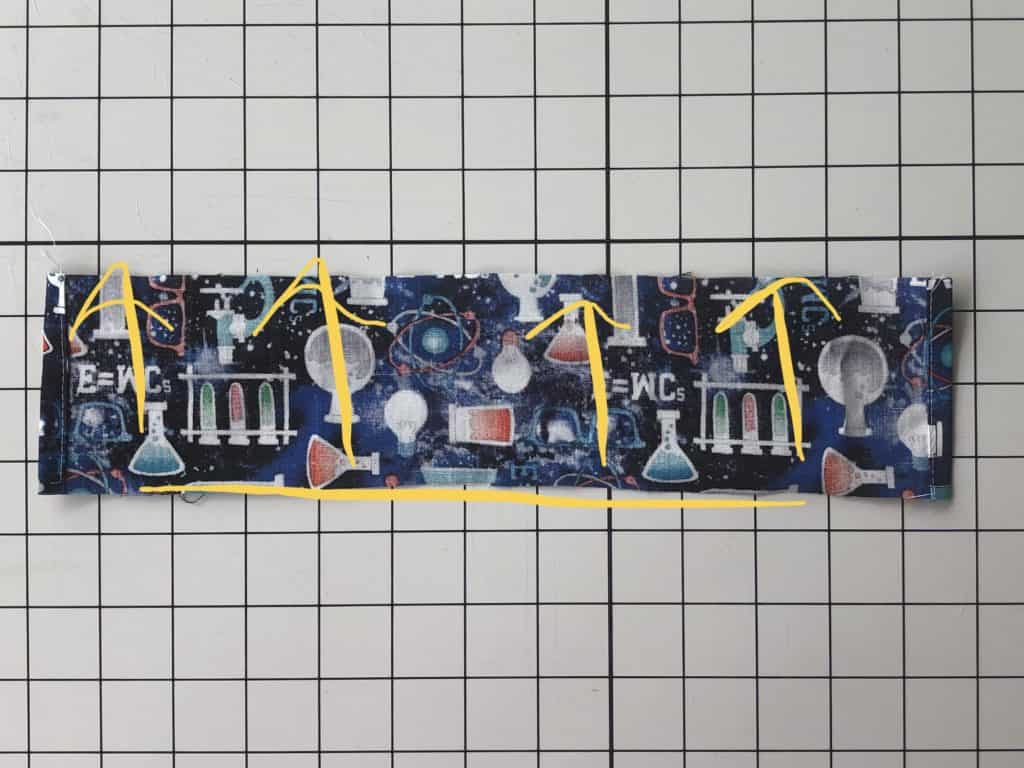
Step 4: Fold channel pieces in half and place a pin to mark the center along the raw, unfolded edges.
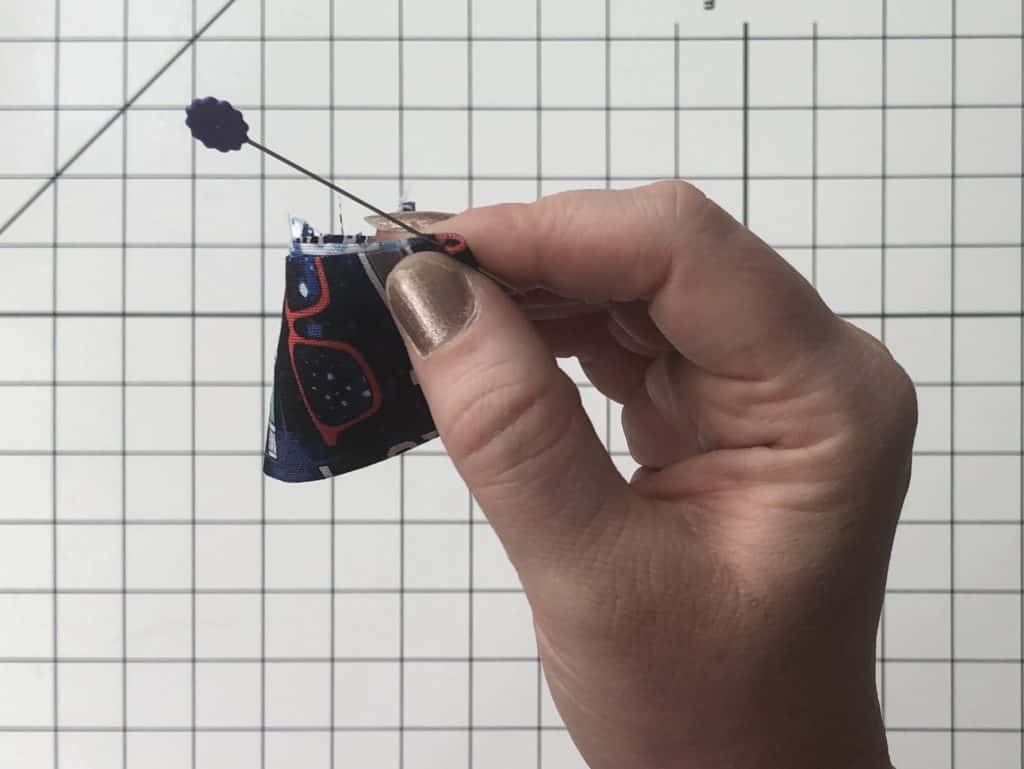
Step 5: Grab one of the Main Bag pieces, in your main fabric and place it right side up.  Using your pattern pieces for alignment, place a pin or clip at the strap placement guides at the bottom, as well as the center top of the piece.
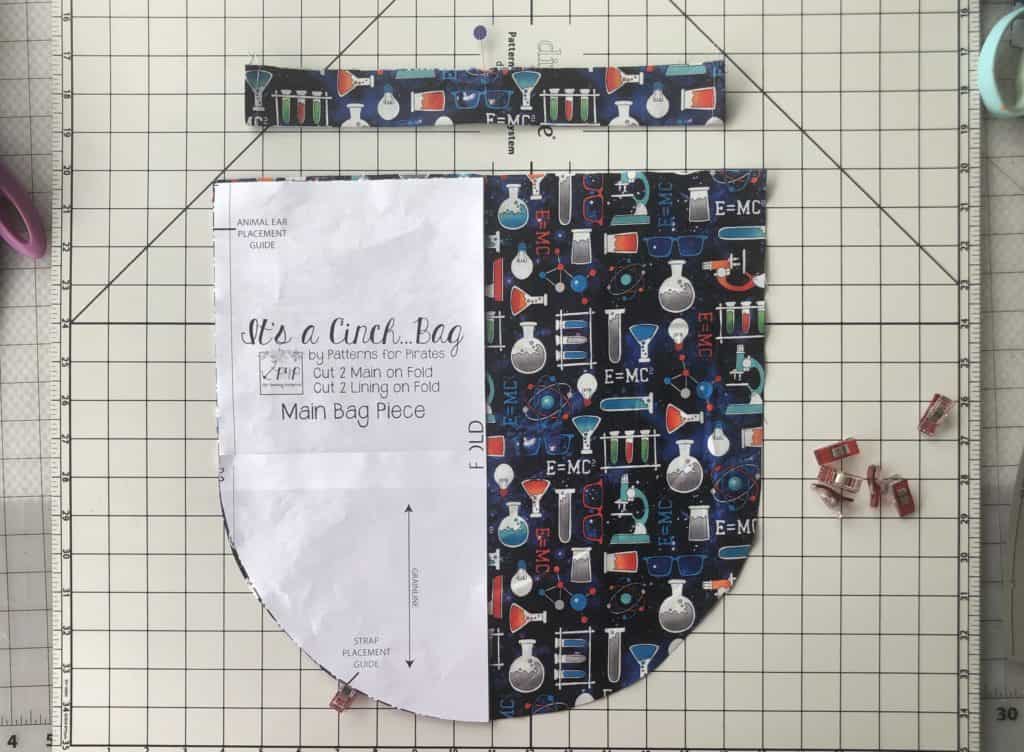
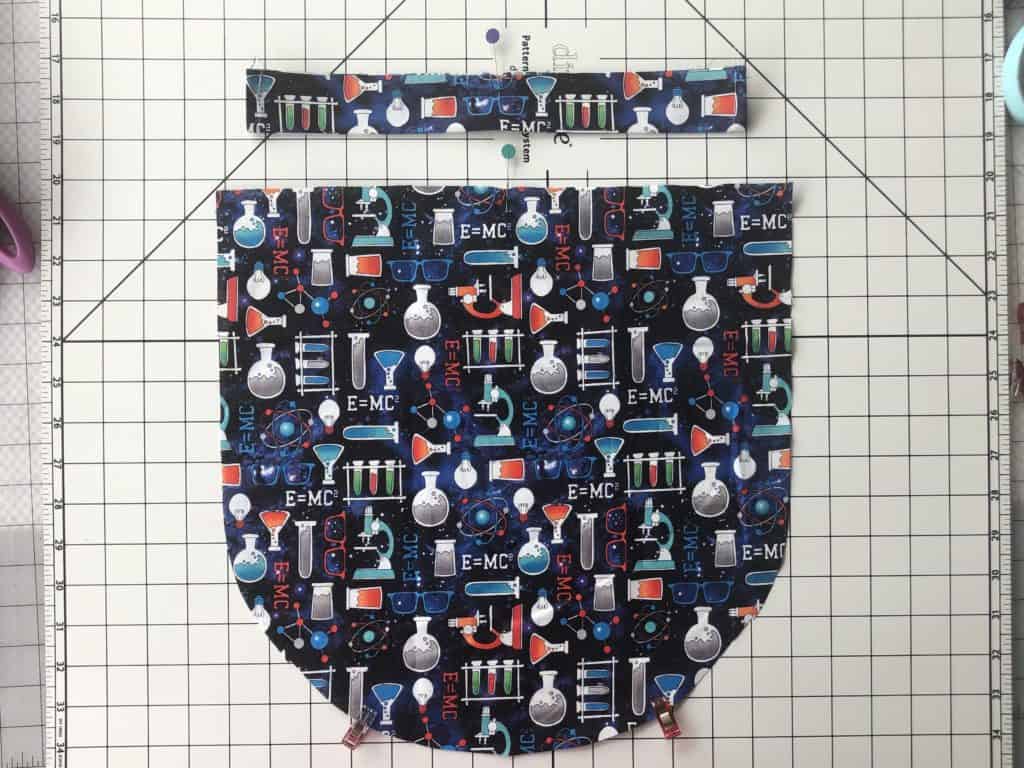
Step 6: Align one of the strap channel pieces along the top of the main bag piece, with the raw edges all matching, centered against each other.
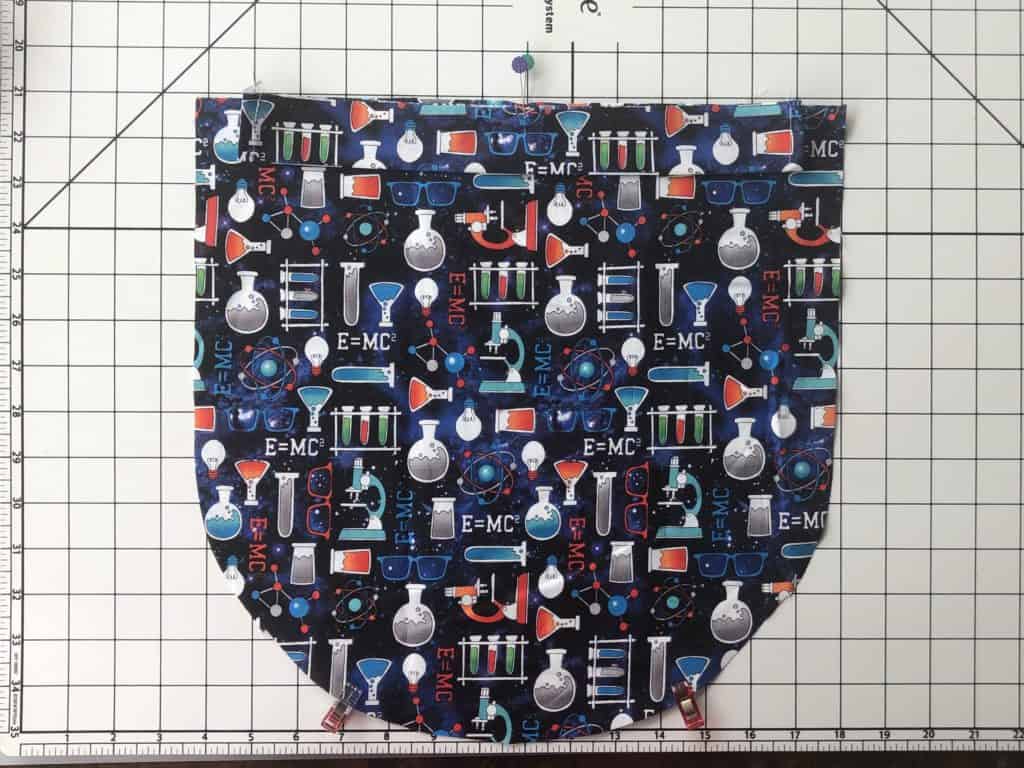
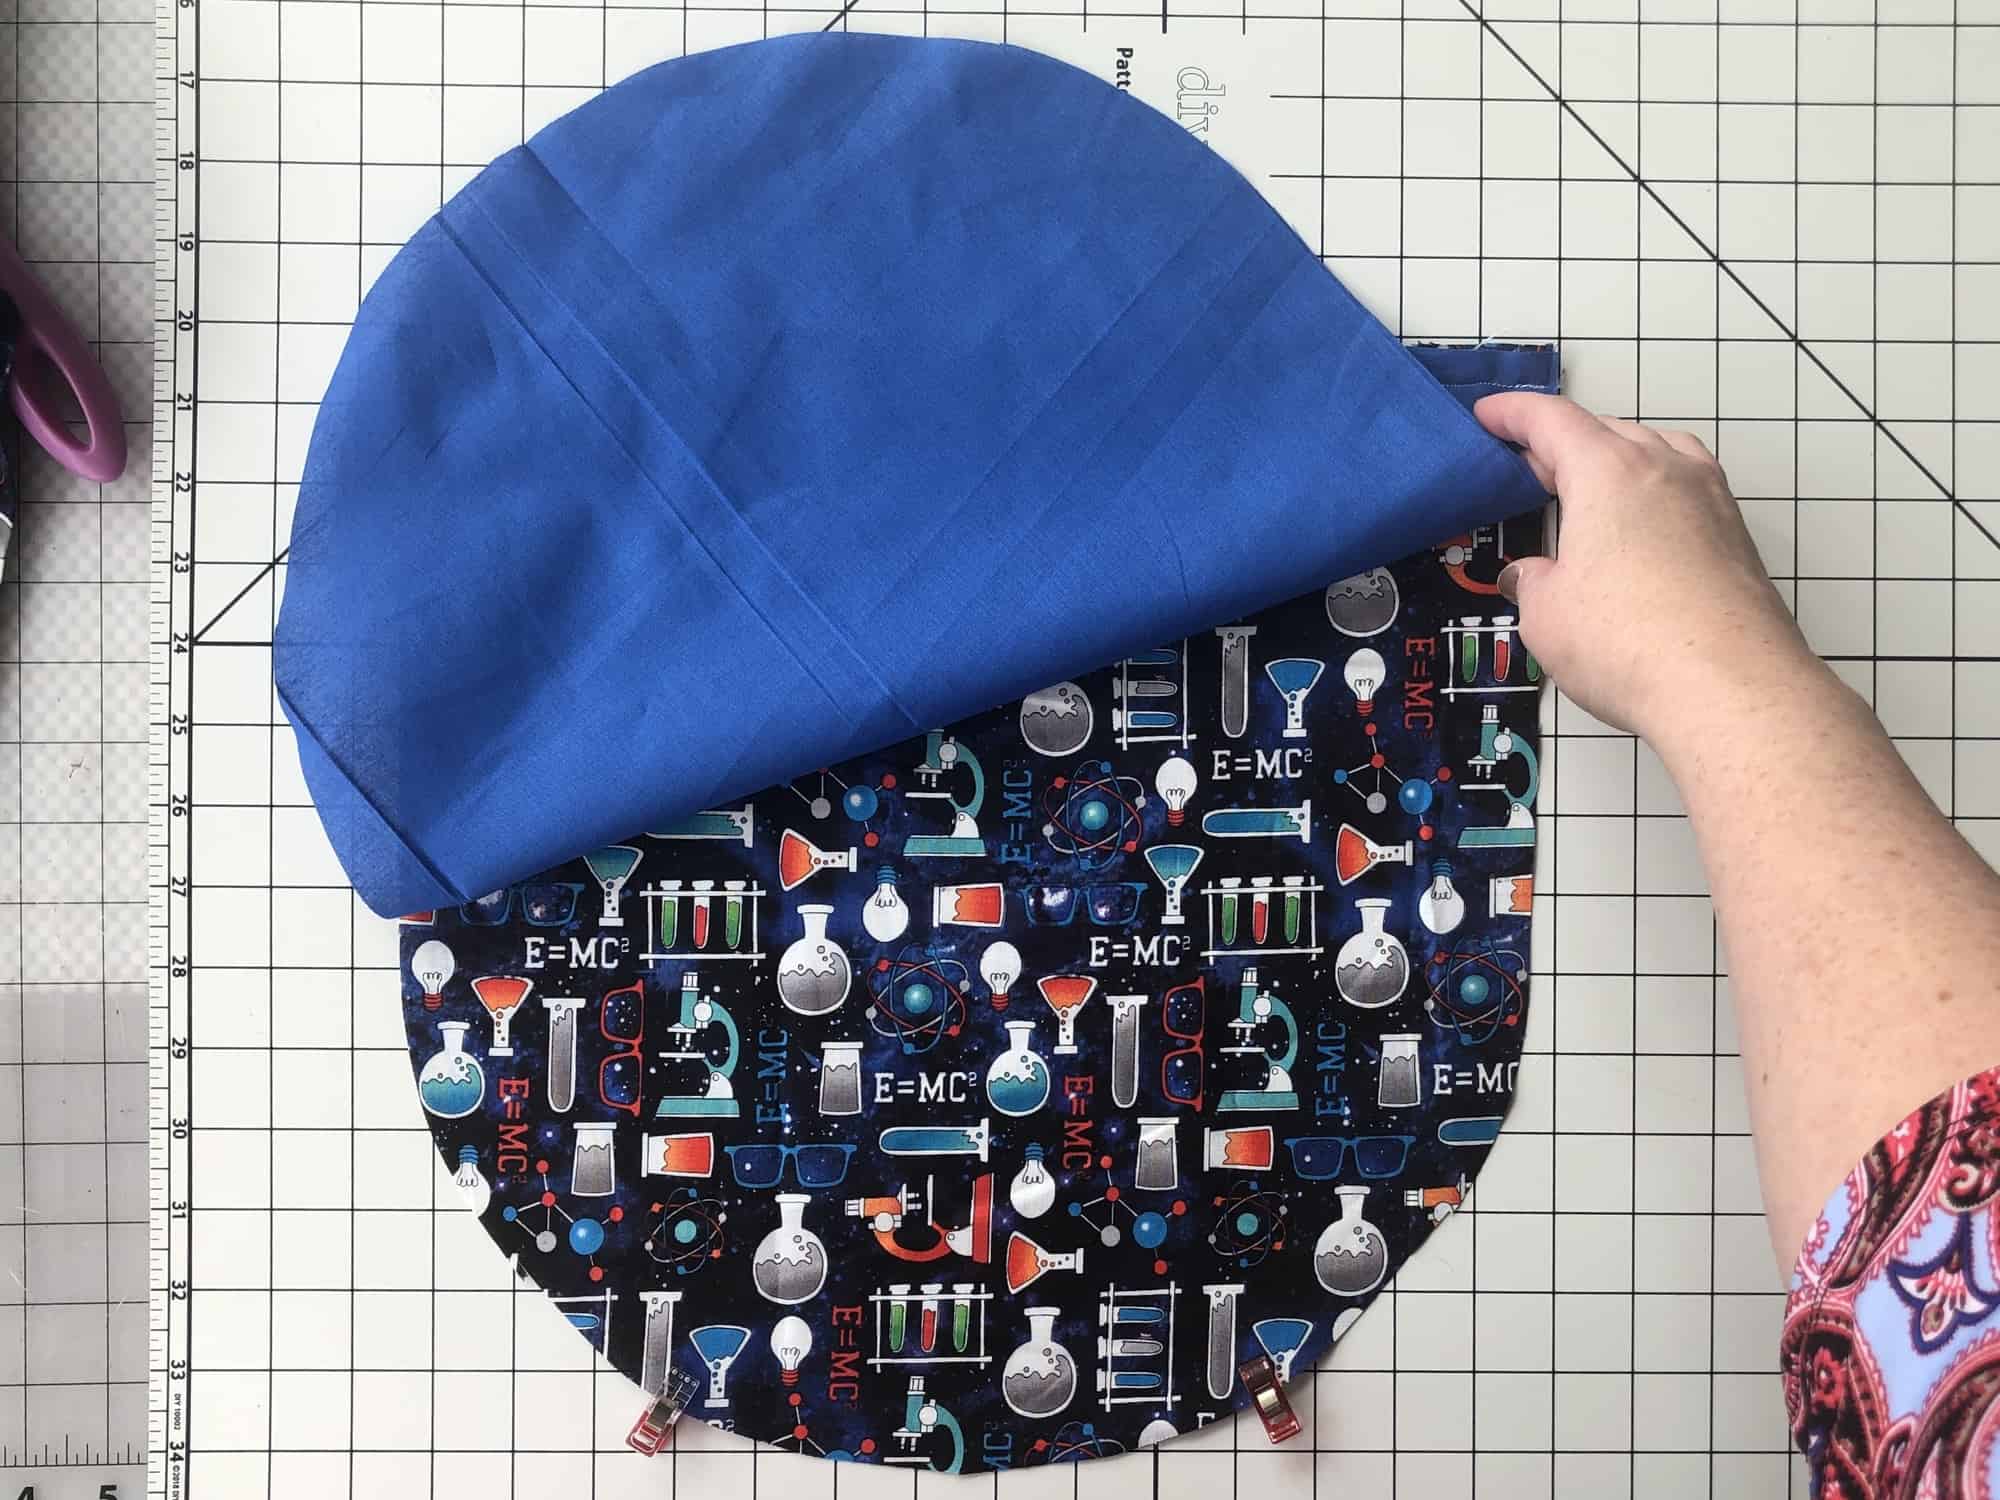
Step 7: With one of the lining pieces face down, lay it on top, sandwiching the strap channel piece between the two body pieces.
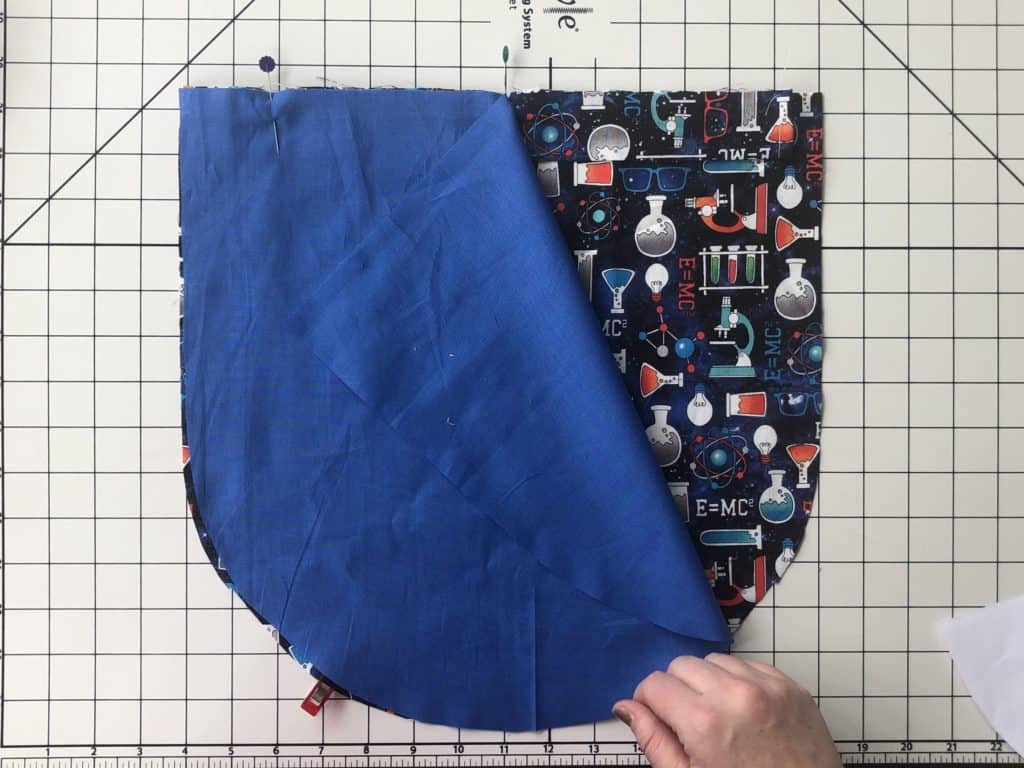
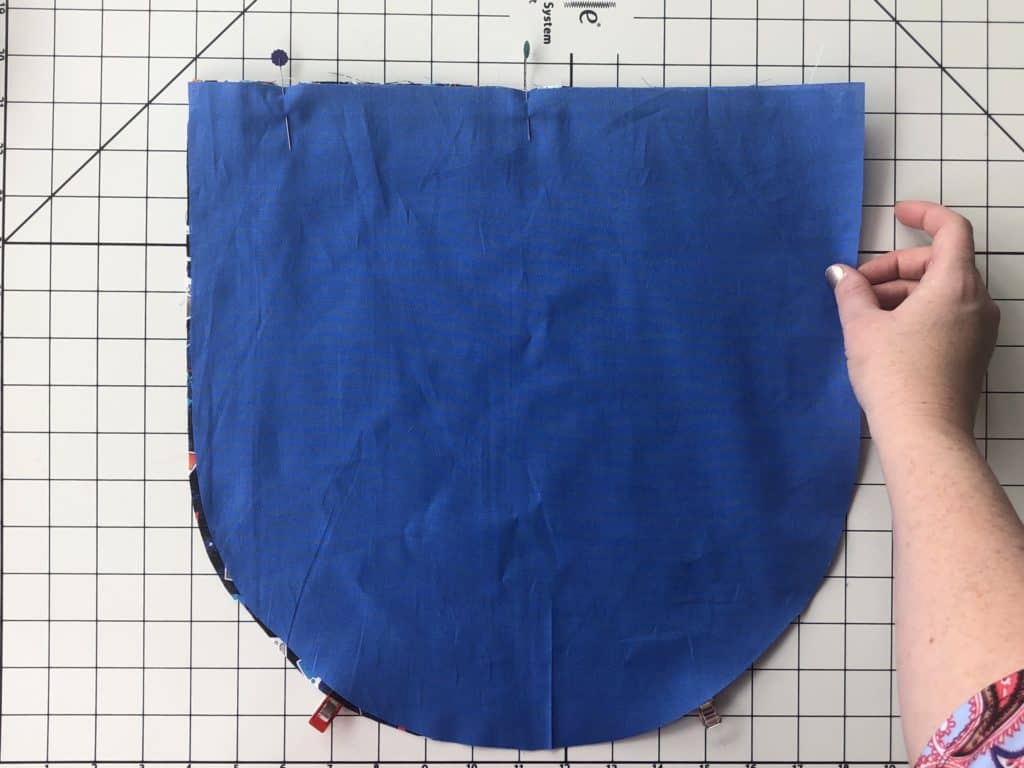
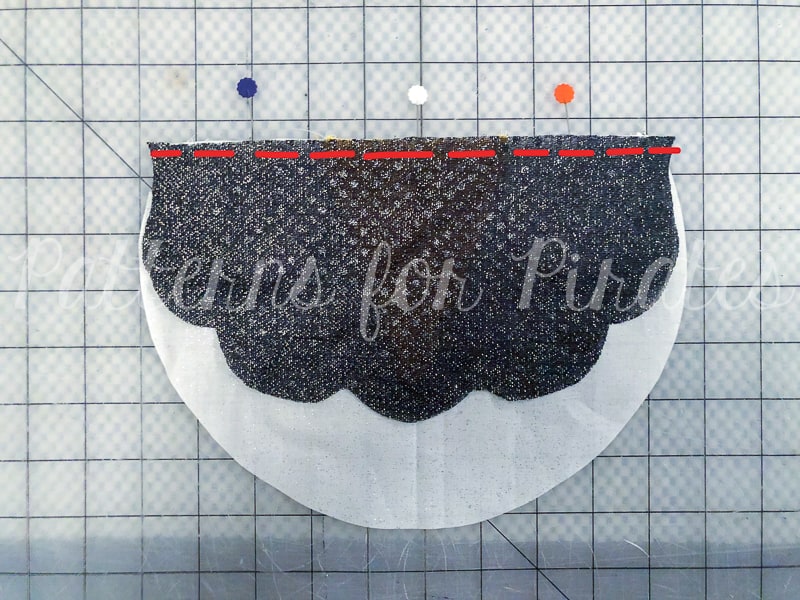
Step 8: Using 1/2″ seam allowance, stitch along the entire top, straight edge.
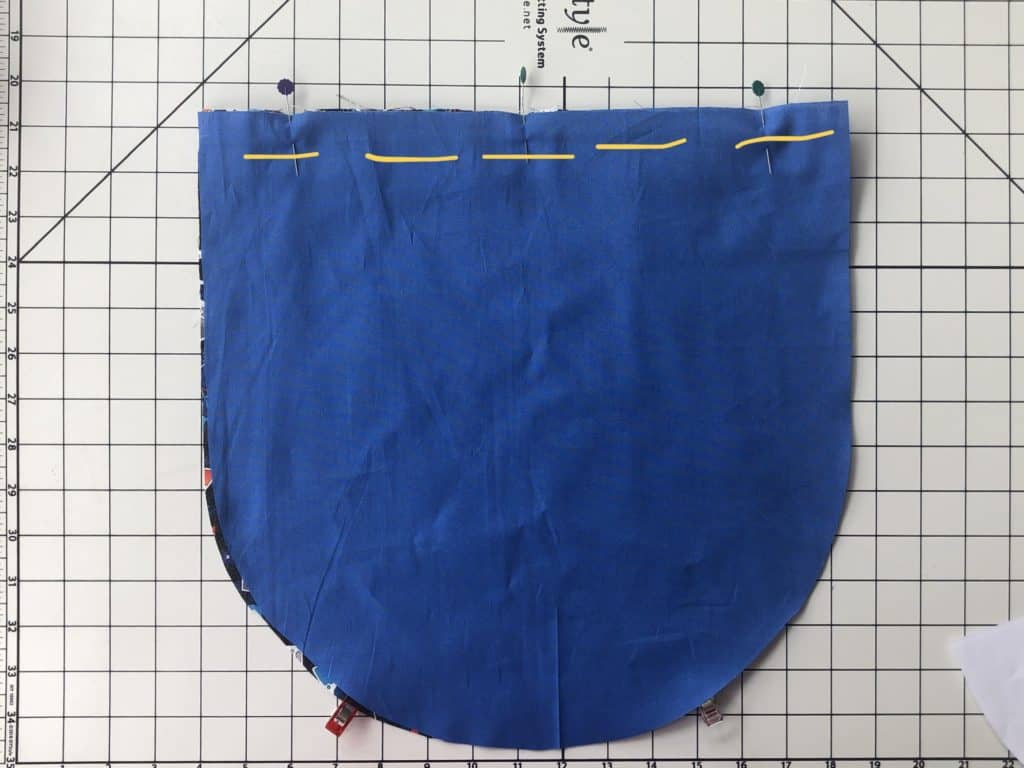
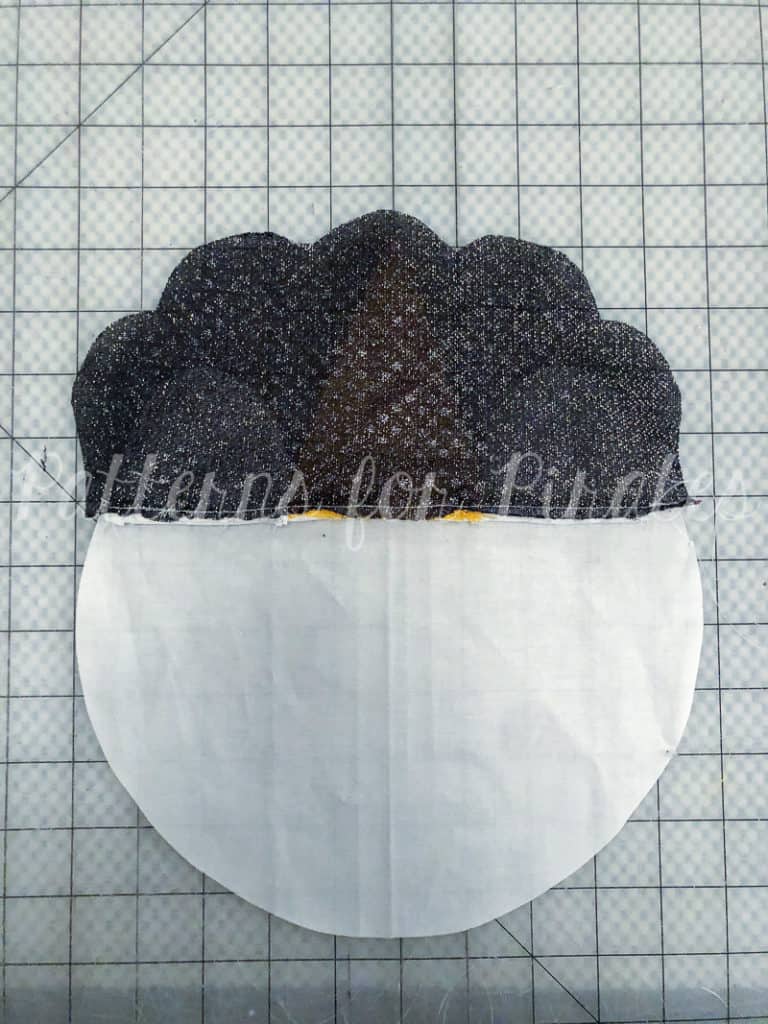
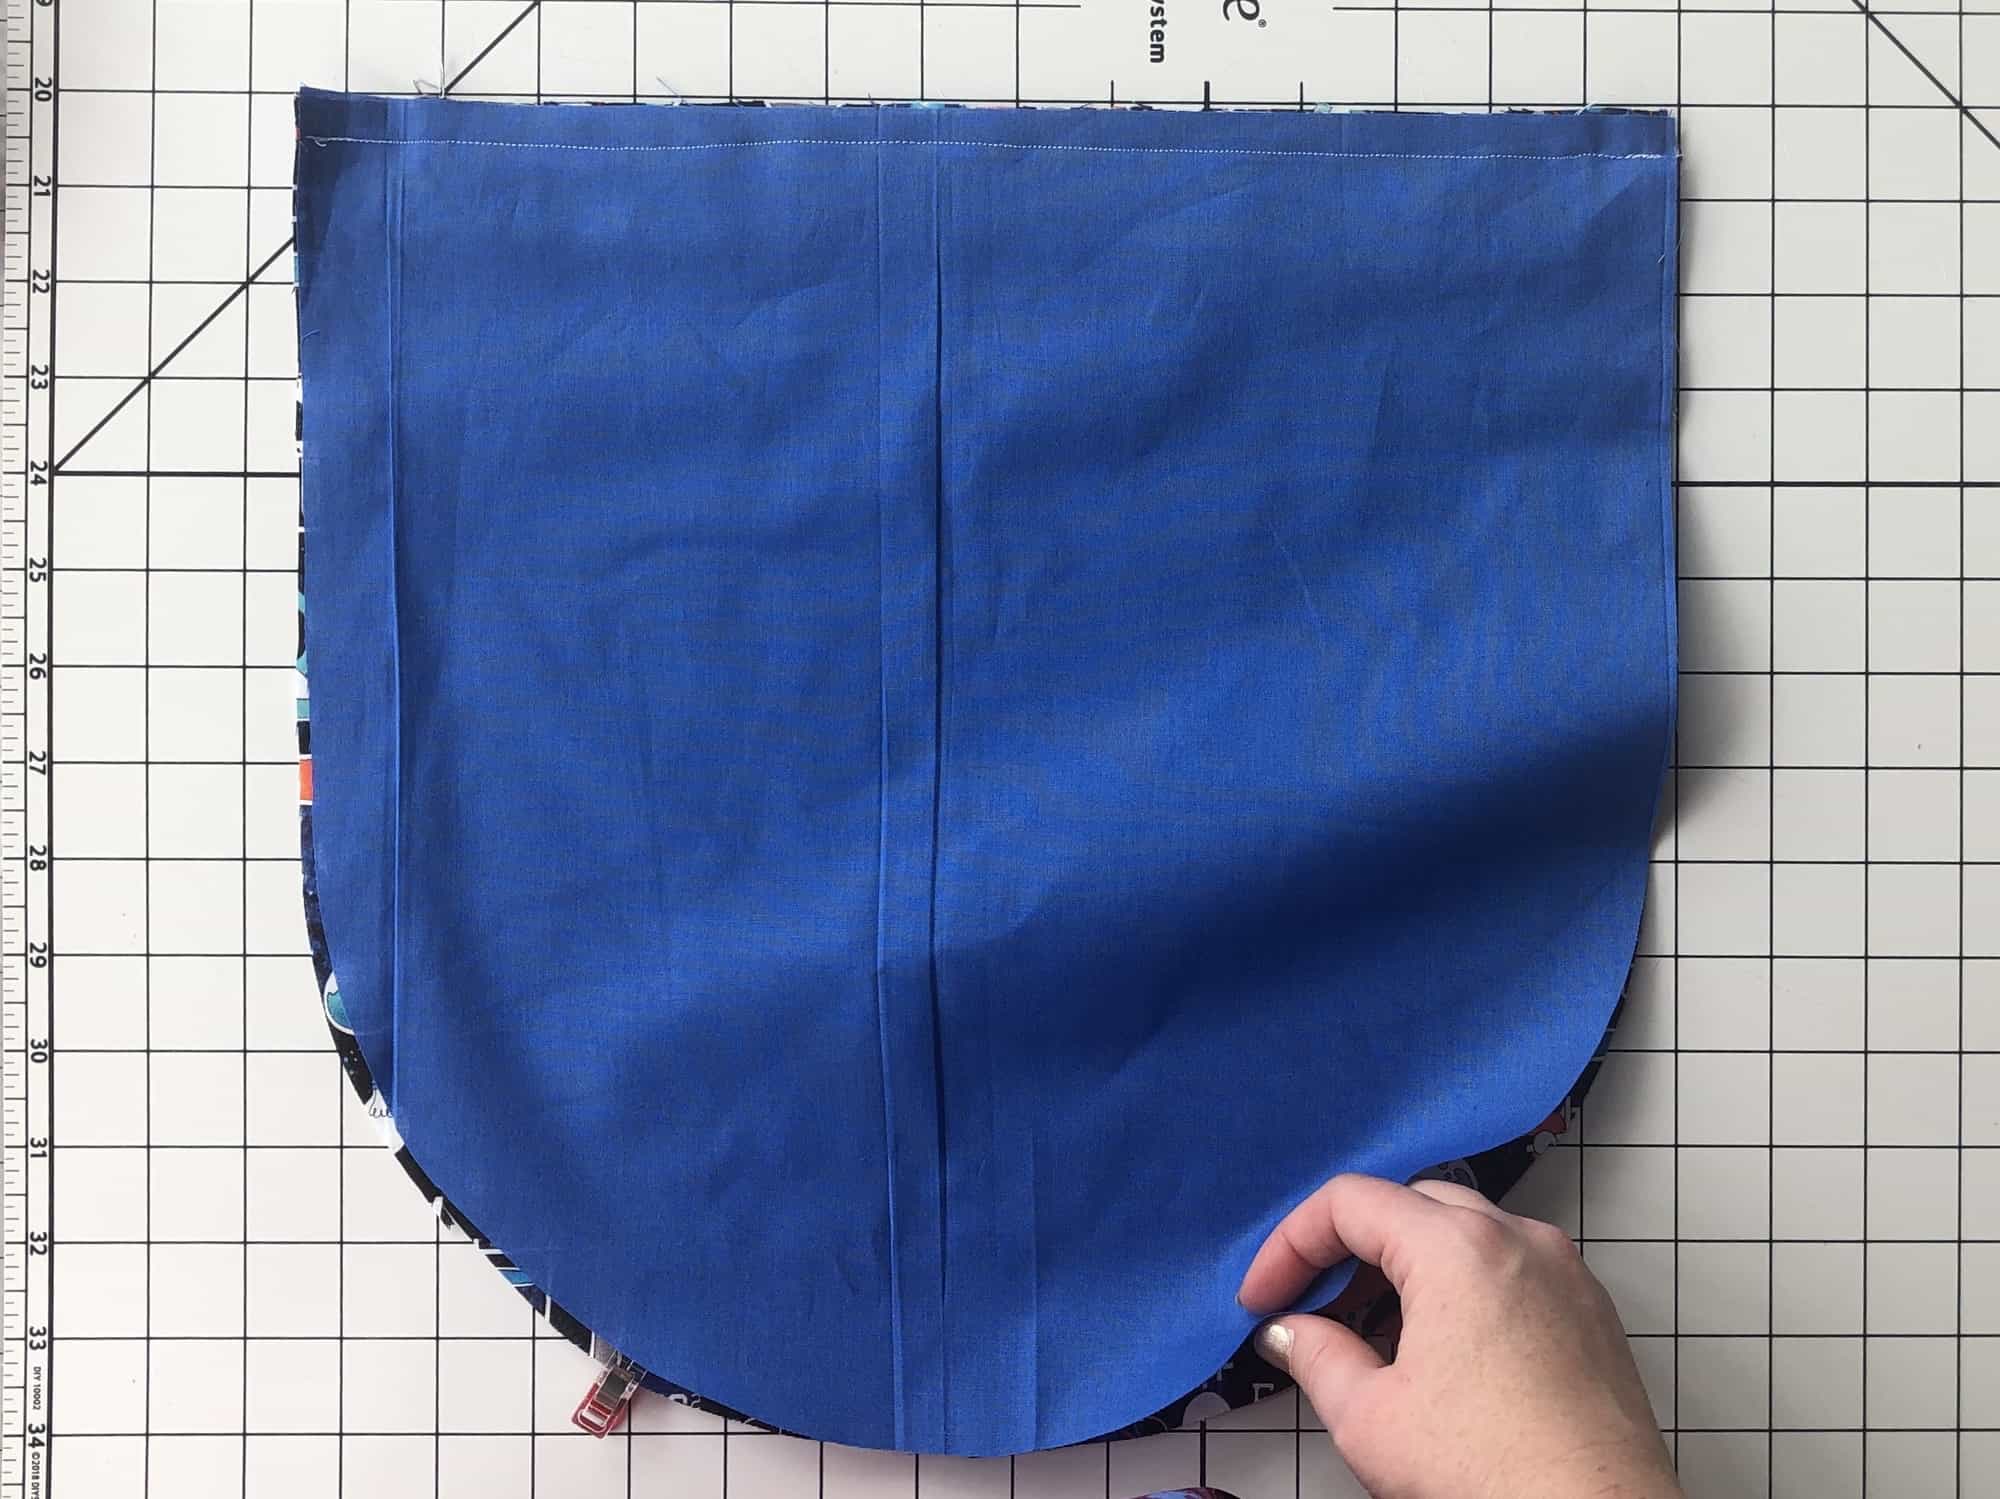
Step 9: Flip your fabrics so they are now right sides facing out, and the strap channel is sticking above the body pieces.  Press.  Repeat with other main, lining and strap channel pieces.

Step 10: With the main fabrics facing up, lay your bag pieces so that they are mirrored and the strap channels are closest to each other.

Take one of your straps and using a bodkin, safety pin, or other threading tool, feed your strap through the channels.
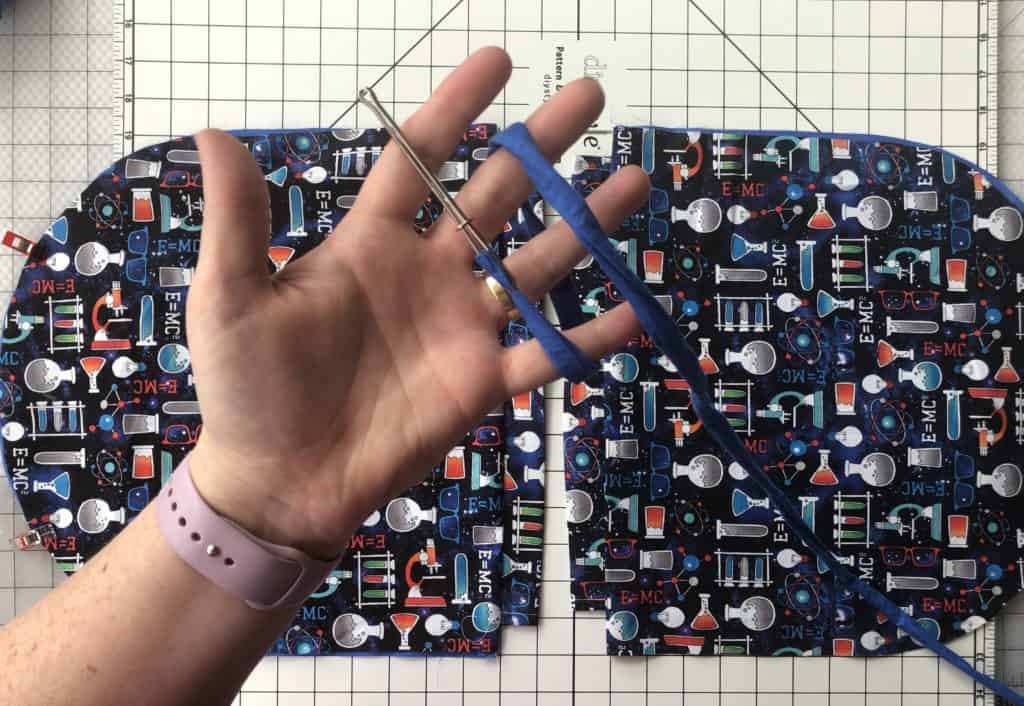
Feed into the bottom left channel, out the top, and back down through the top right channel.
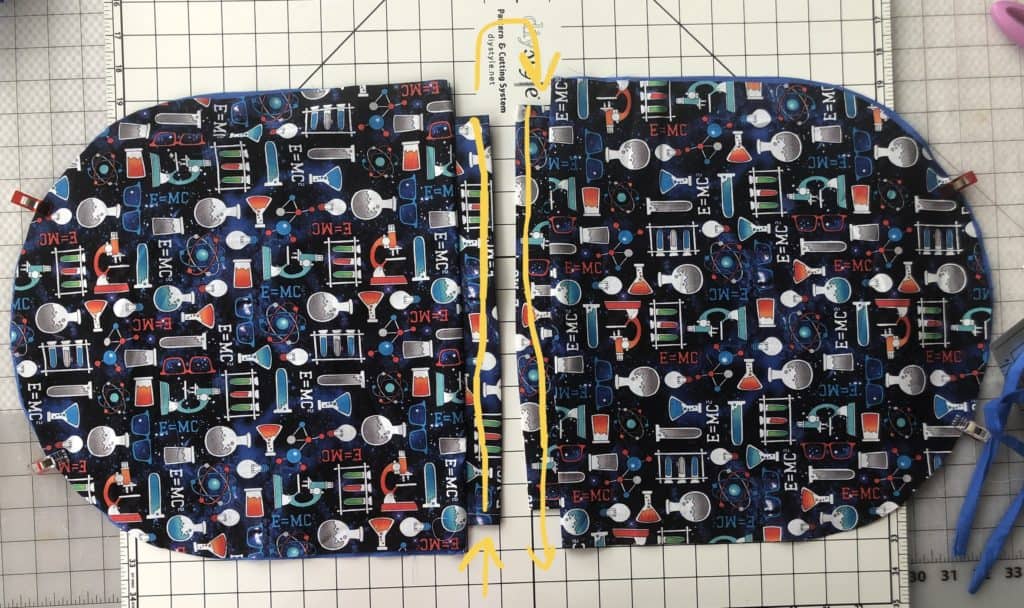
Repeat with the opposite by feeding a strap through the top left channel, out the bottom, and back up the bottom right channel.
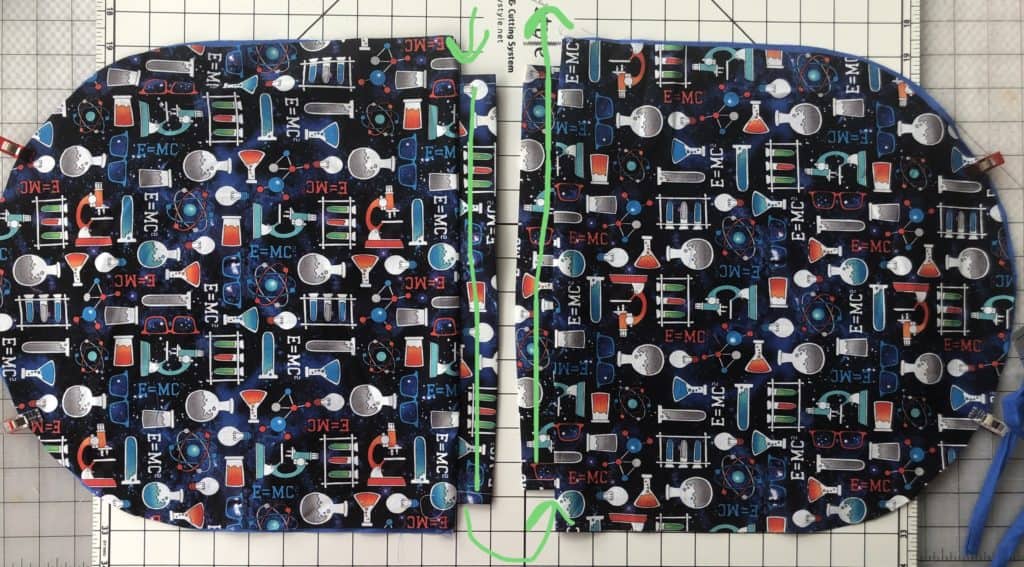
You will now have two raw ends of your straps on either side of your bag pieces.
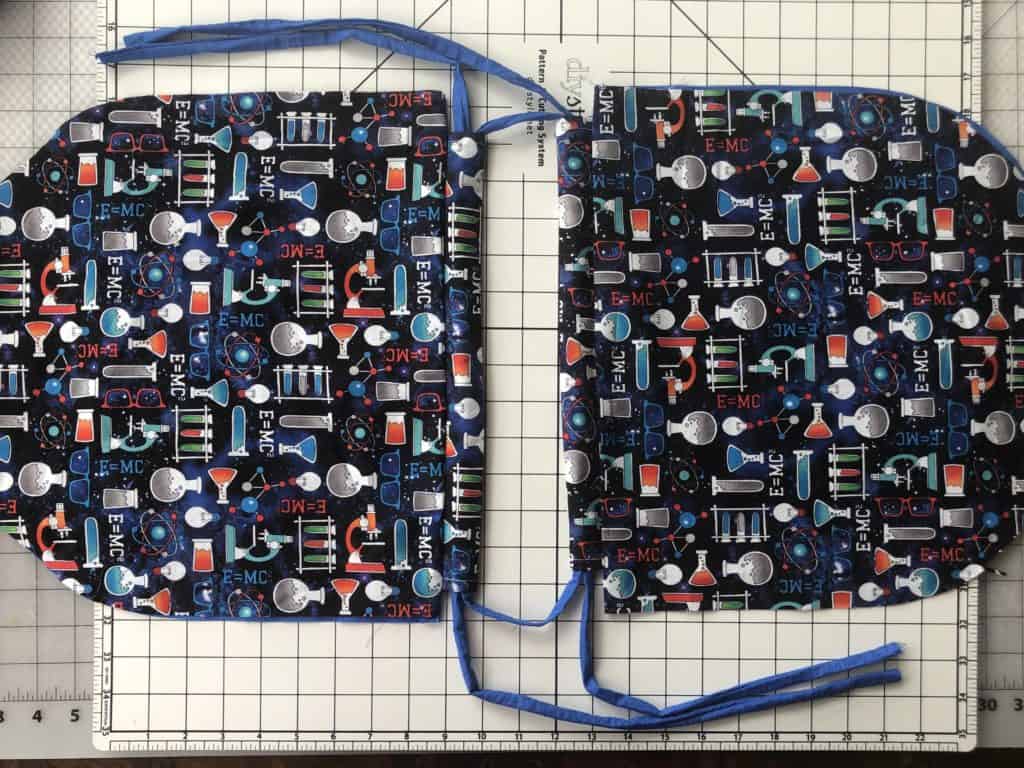
Step 11: Adjust your bag to have the outer, front of the bag facing you.  And clip or pin your straps with the raw edges facing away from the bag, to where you previously marked with the strap placement guides.
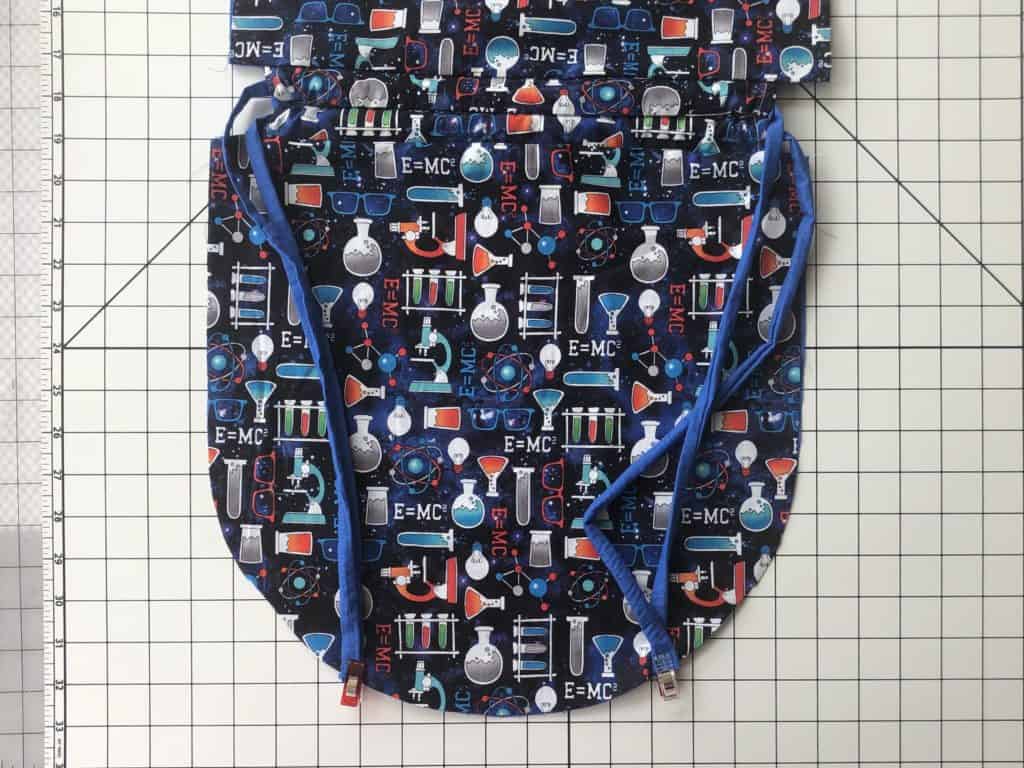
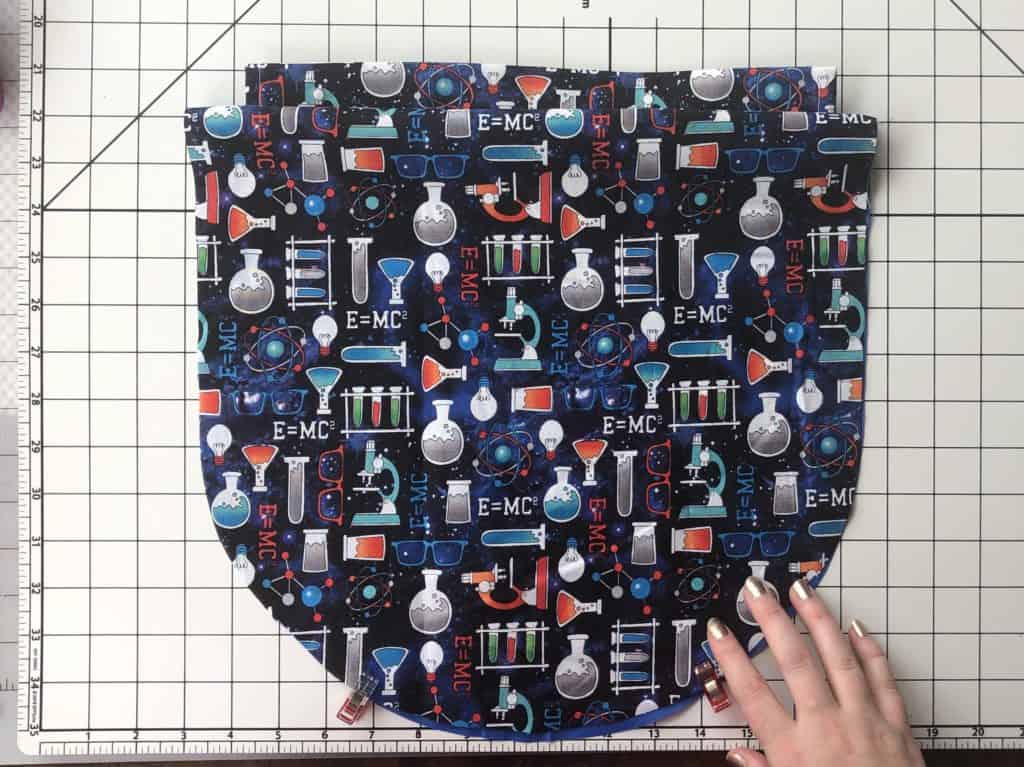
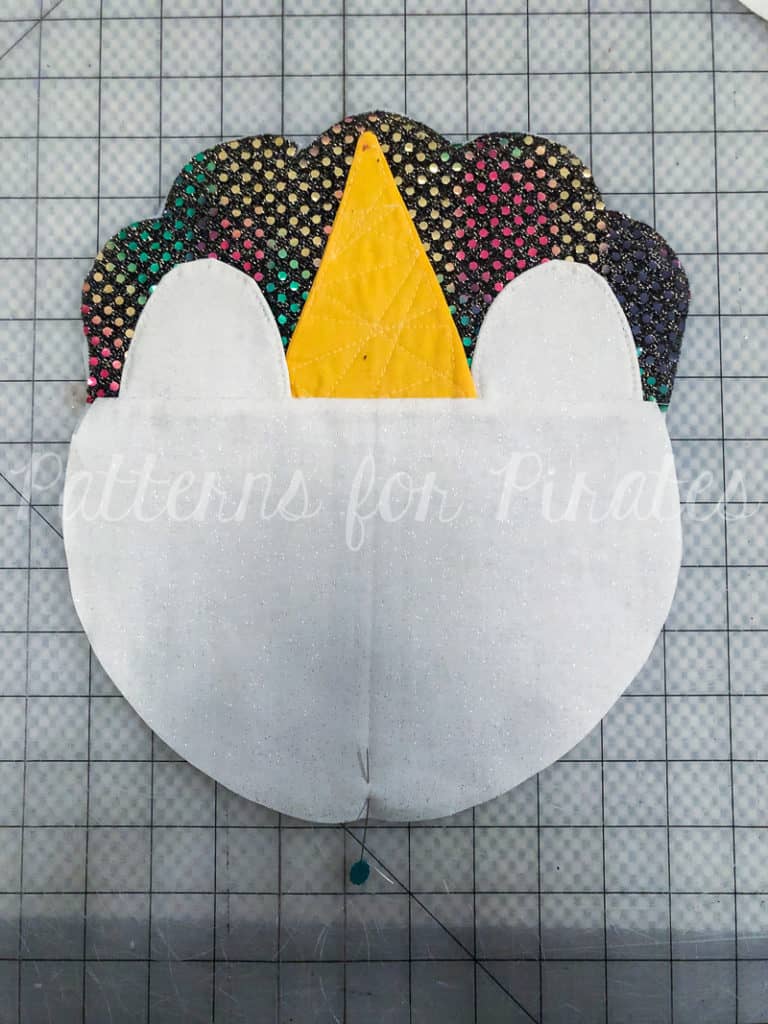
Step 12: Flip open your bag, so that the lining pieces are right sides together, and the main fabric pieces are right sides together, and the straps are nestled neatly inside.

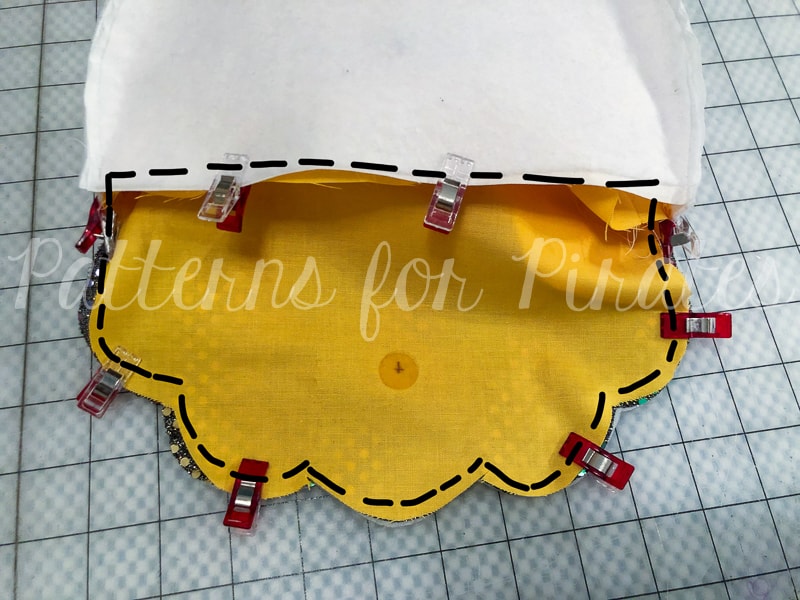
Align all edges and sew with a 1/2″ seam allowance around the entire edge, leaving open only a 4-5″ space for turning.  Be careful not to sew your strap pieces into the seam on accident.
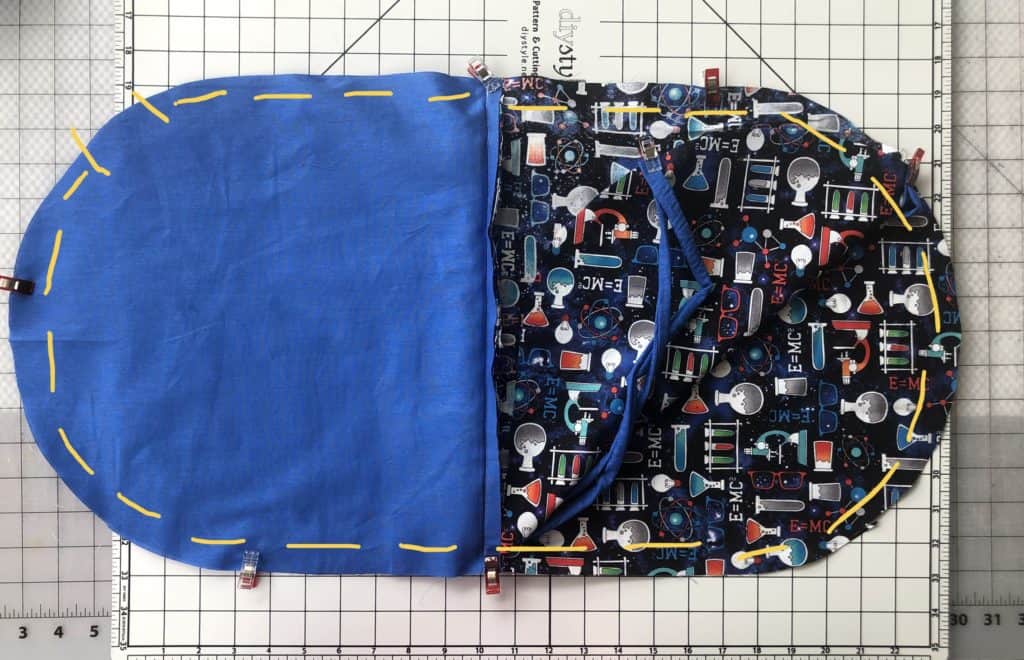
Step 13: Careful not to clip through your seams, trim your seam allowances down to help with a more precise curve.
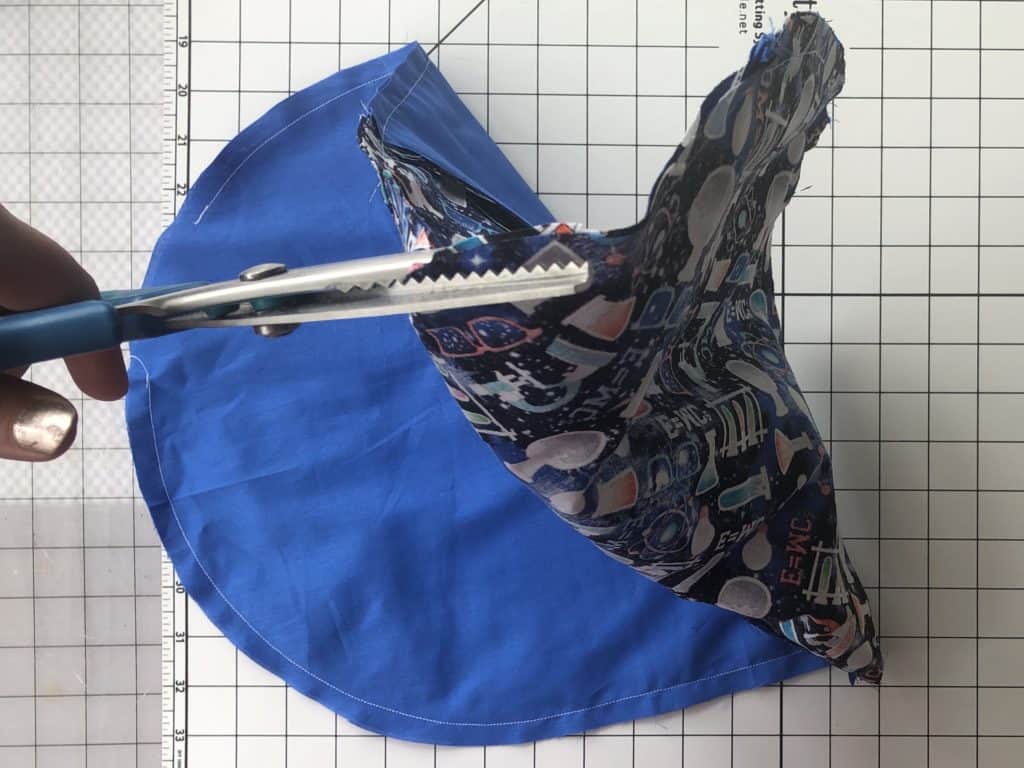
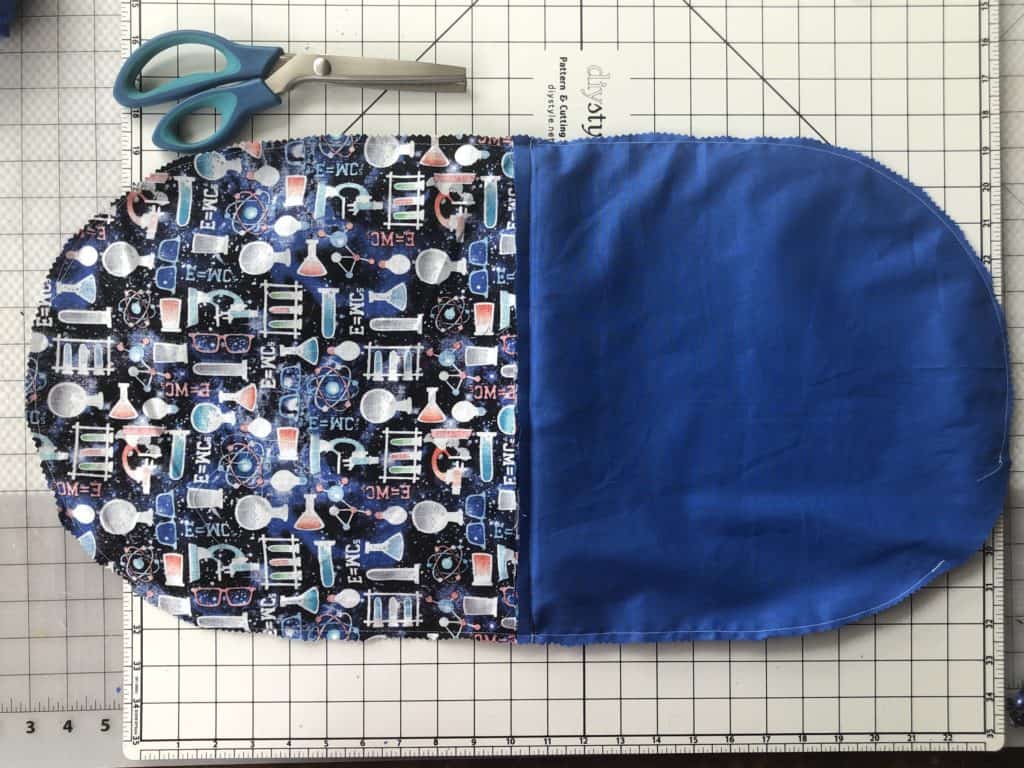
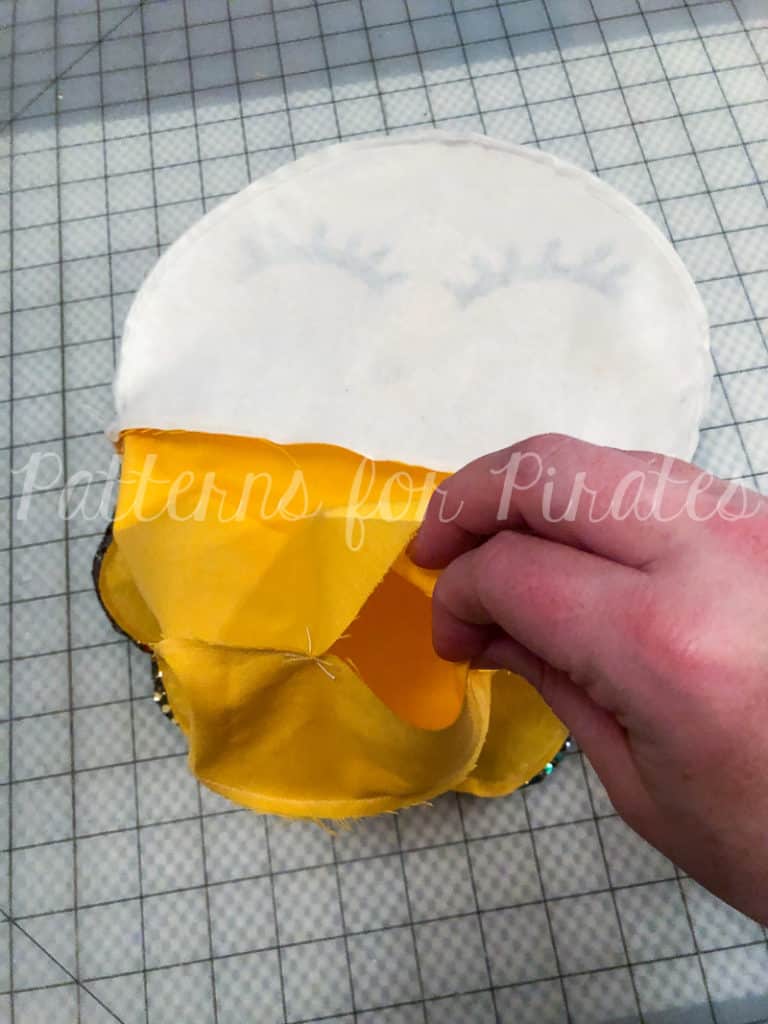
Step 14: Turn your bag right sides out, through the opening you created in Step 12.
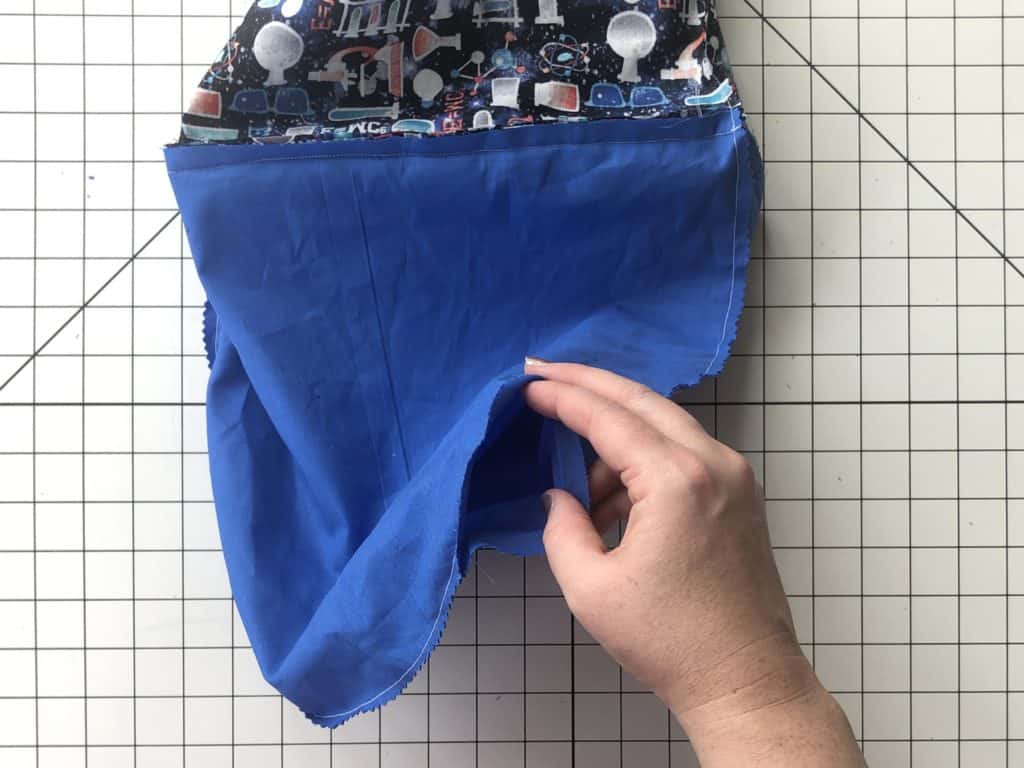
Step 15: Tuck your seam allowance back into the opening.  Pin or clip.  And using your favorite method, stitch it shut.
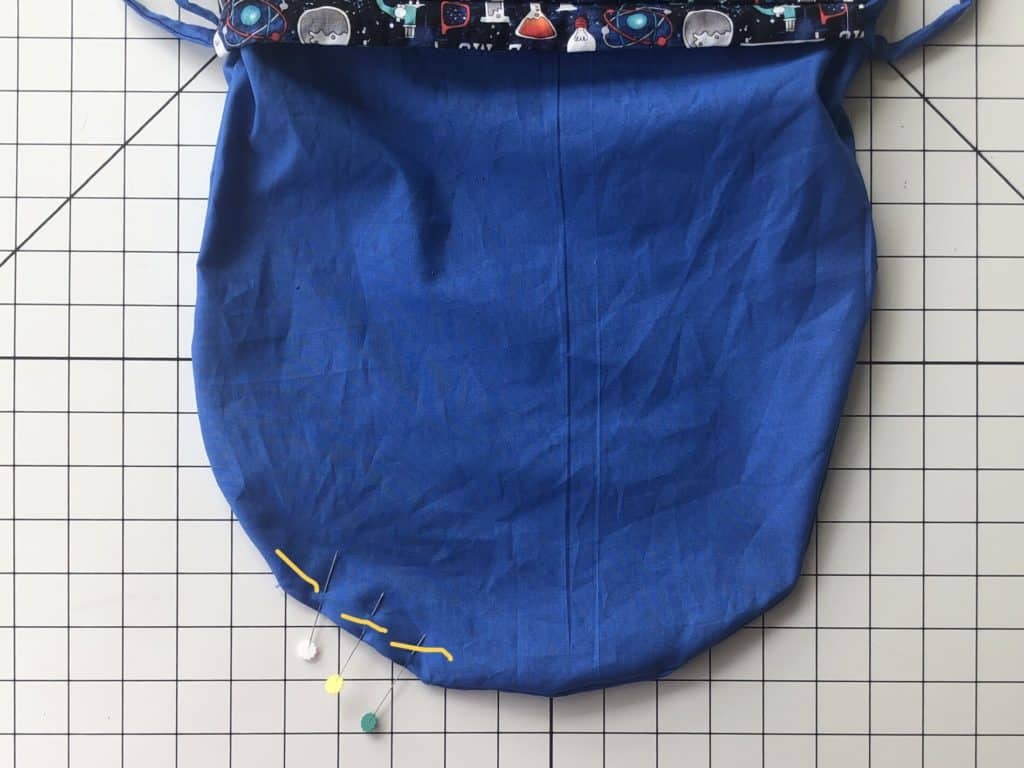
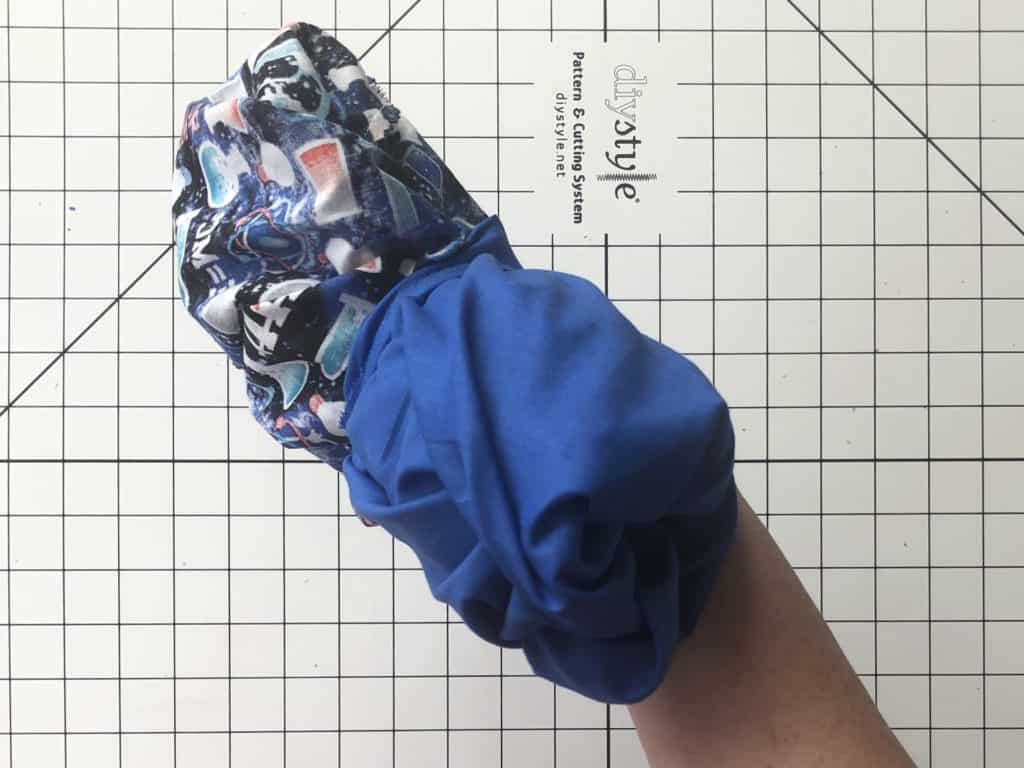
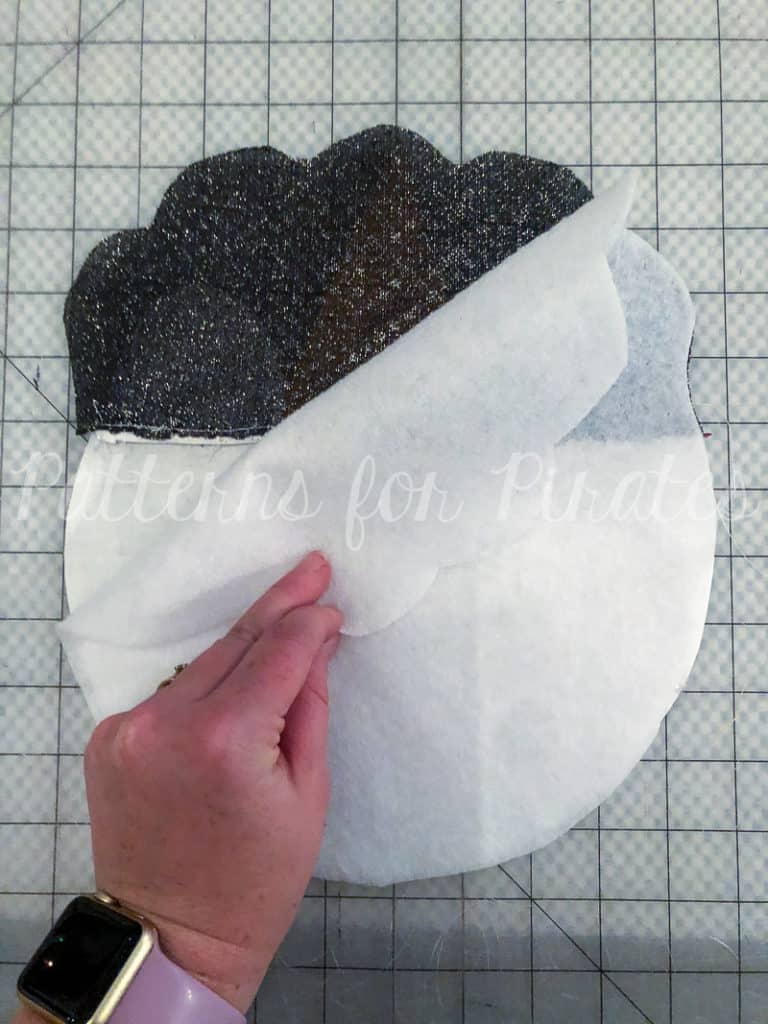
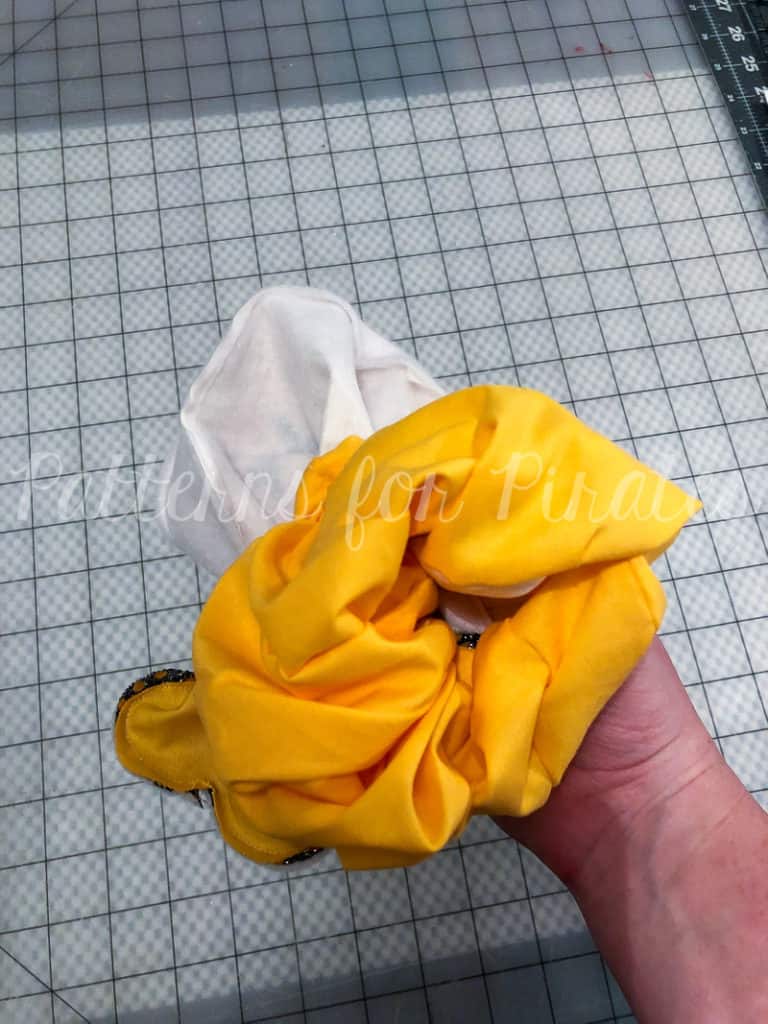
Step 16: Push your lining fabric into the main fabric side.
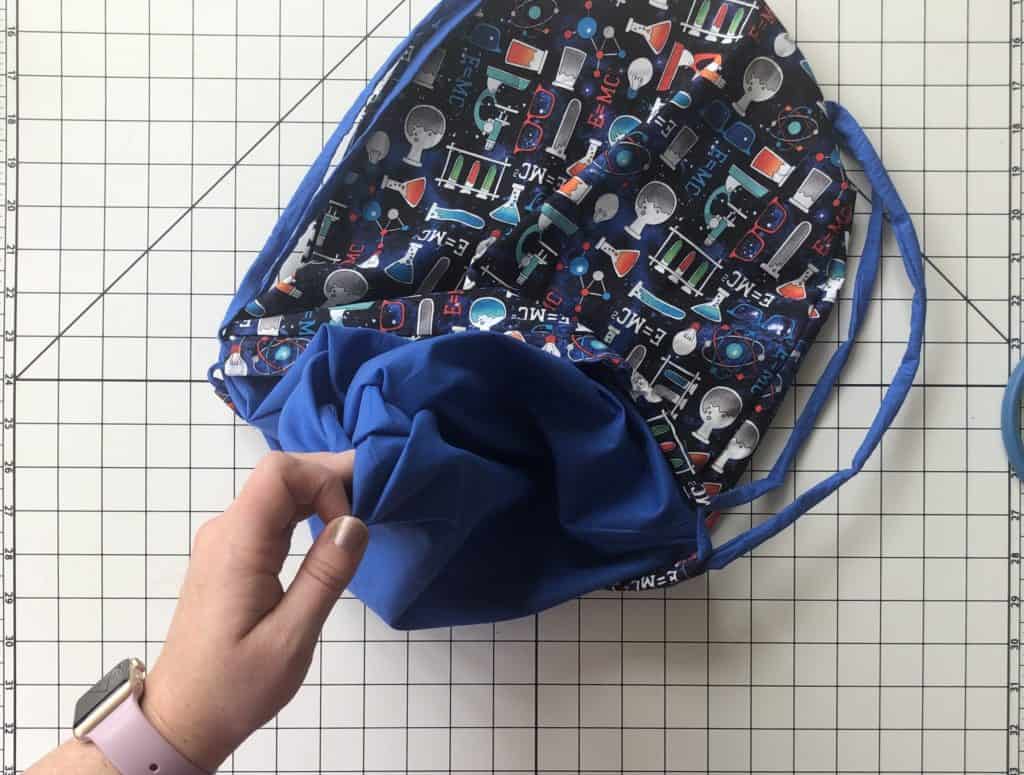
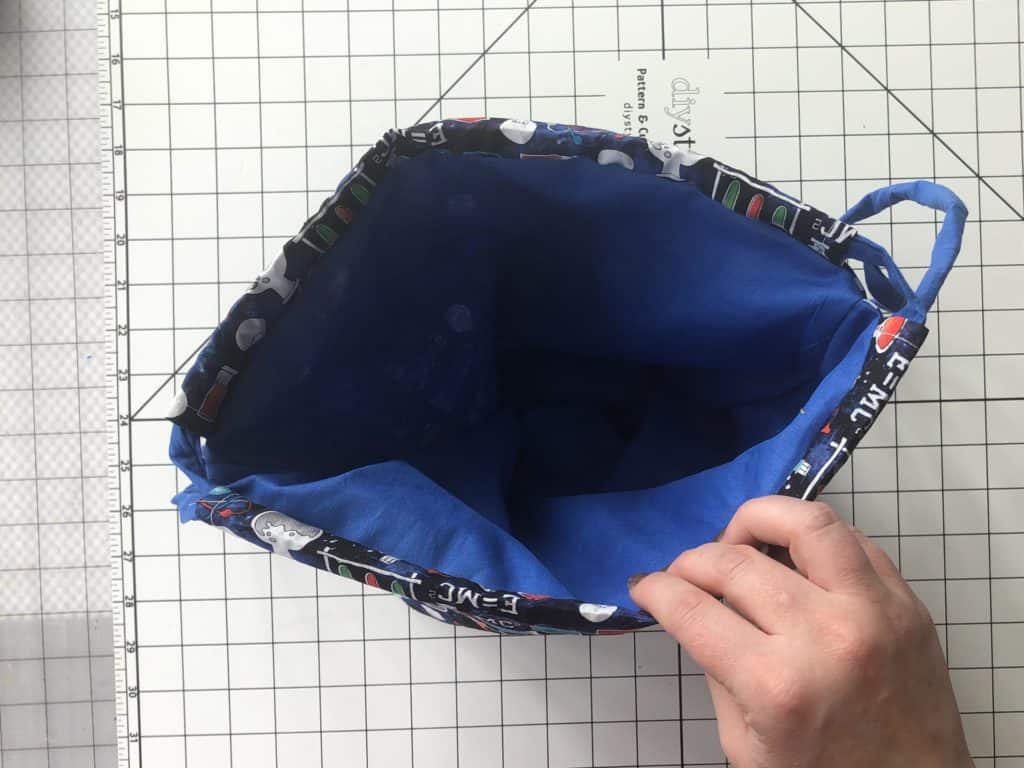
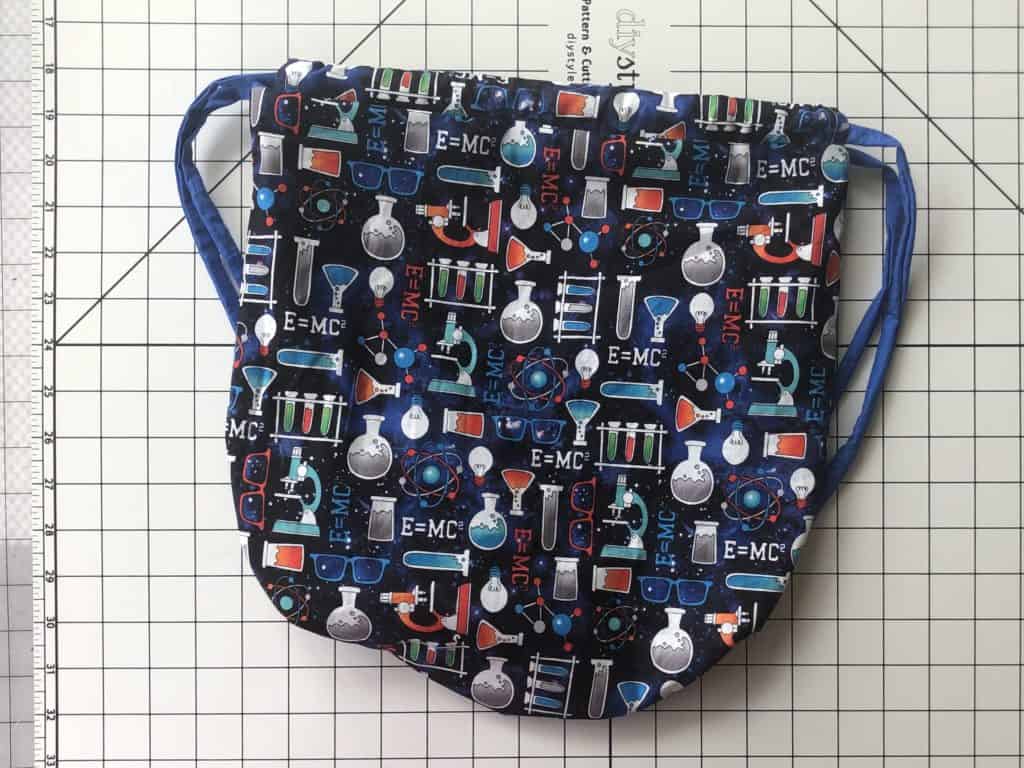
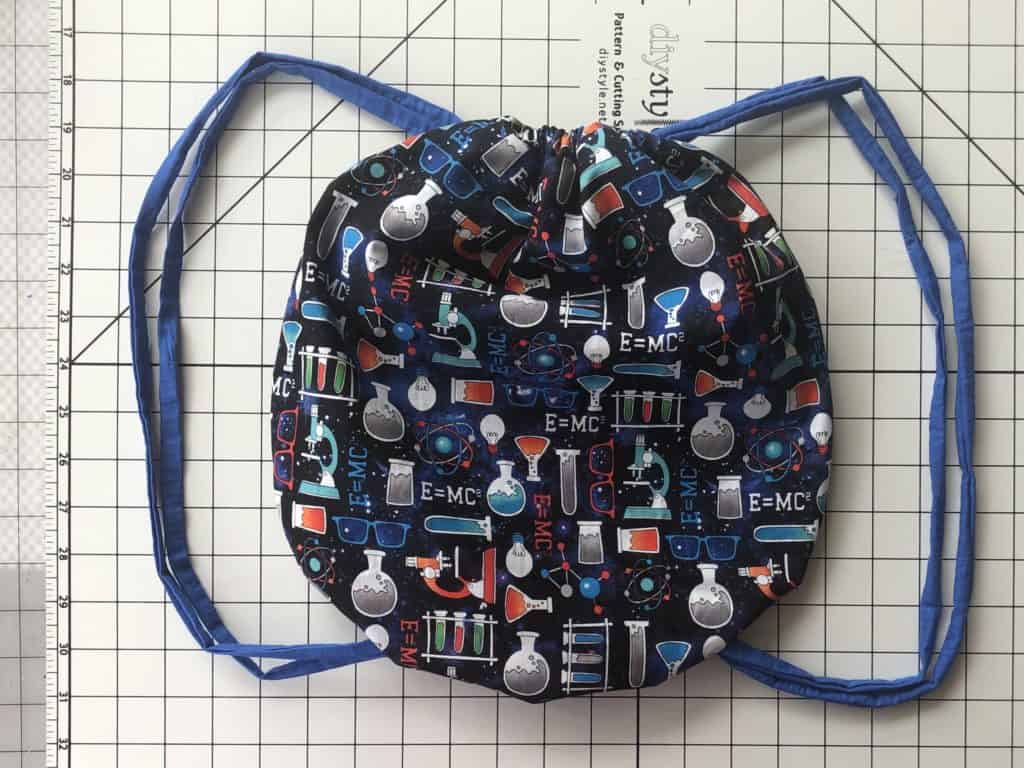
Step 17: Give your brand new bag a good press, pull the straps tight, gift it to your favorite person and make another!
BUNNY BAG CONSTRUCTION

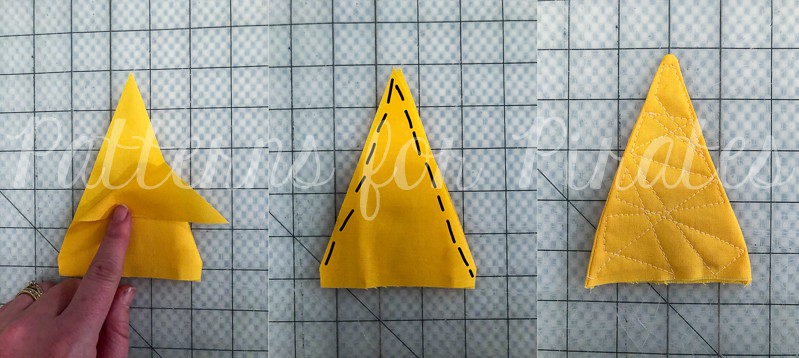
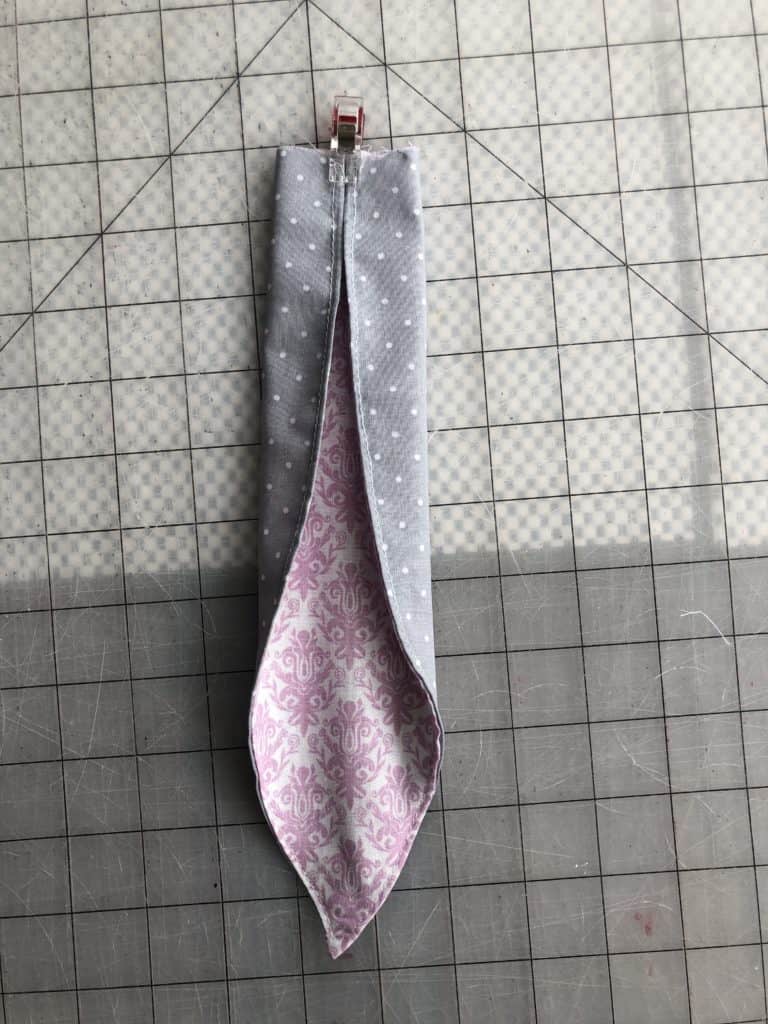
Step 1: Place the ear fabrics right sides together.
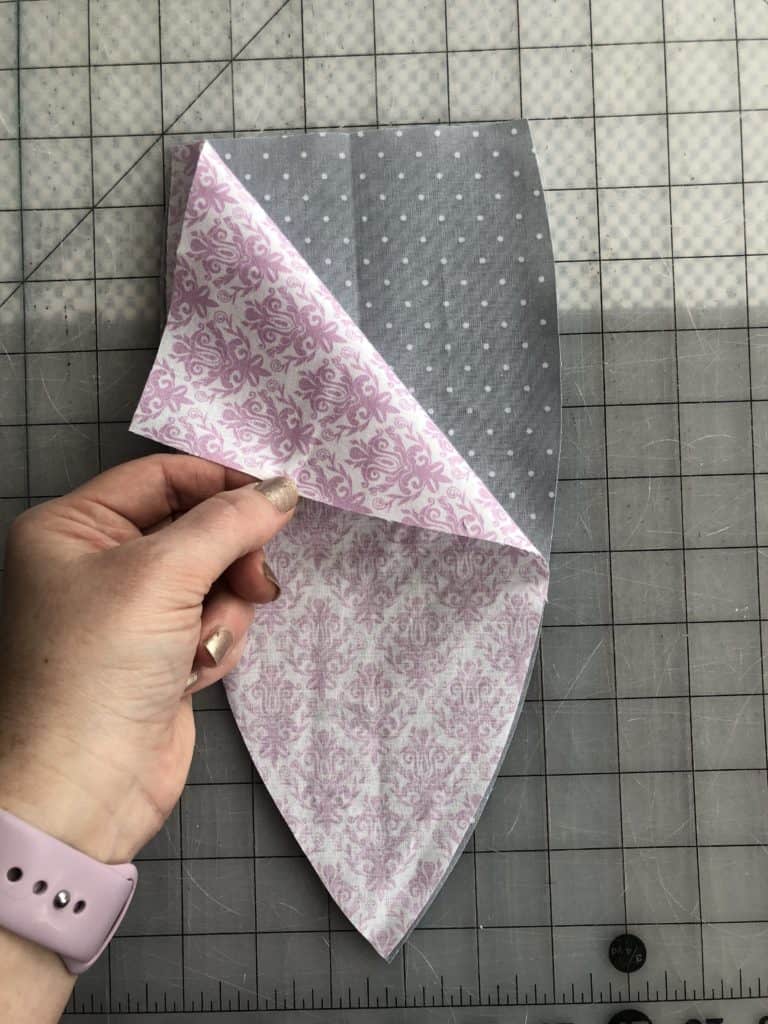
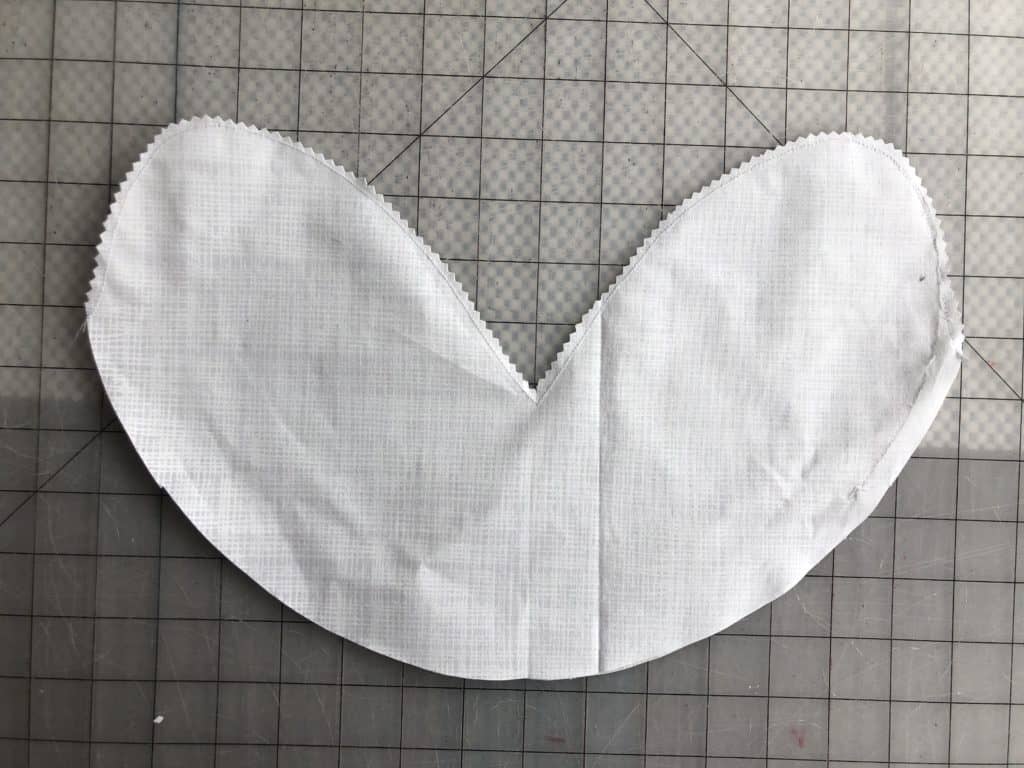
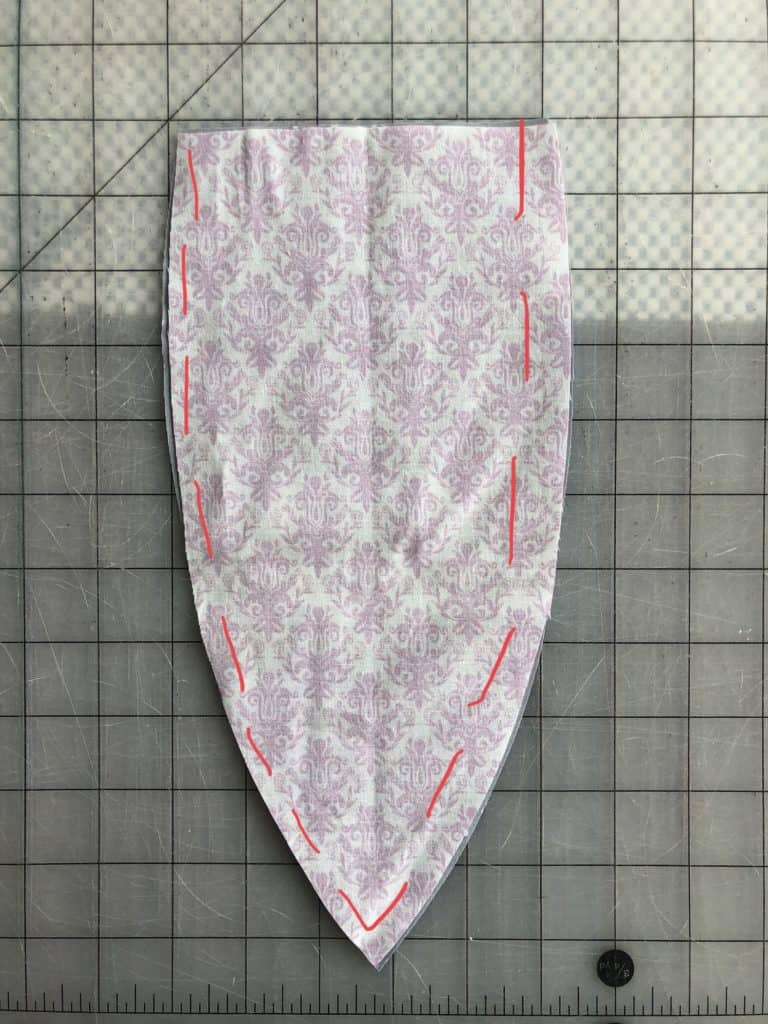
Step 2: Using 1/2″ seam allowance, stitch long outer edges together.
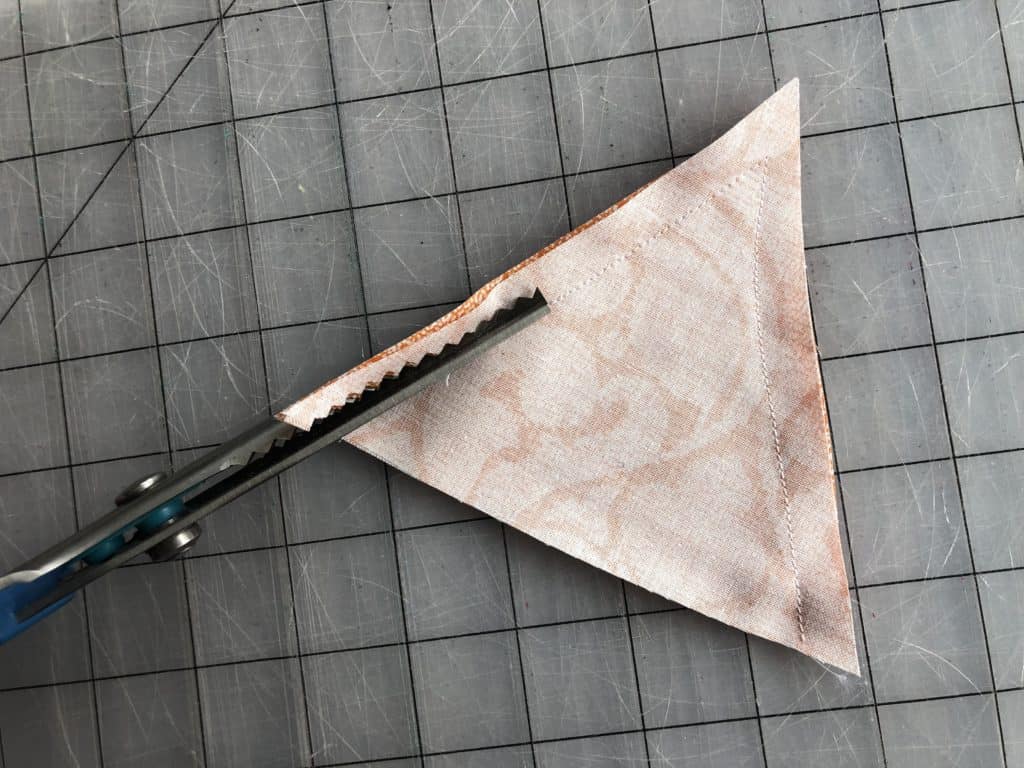
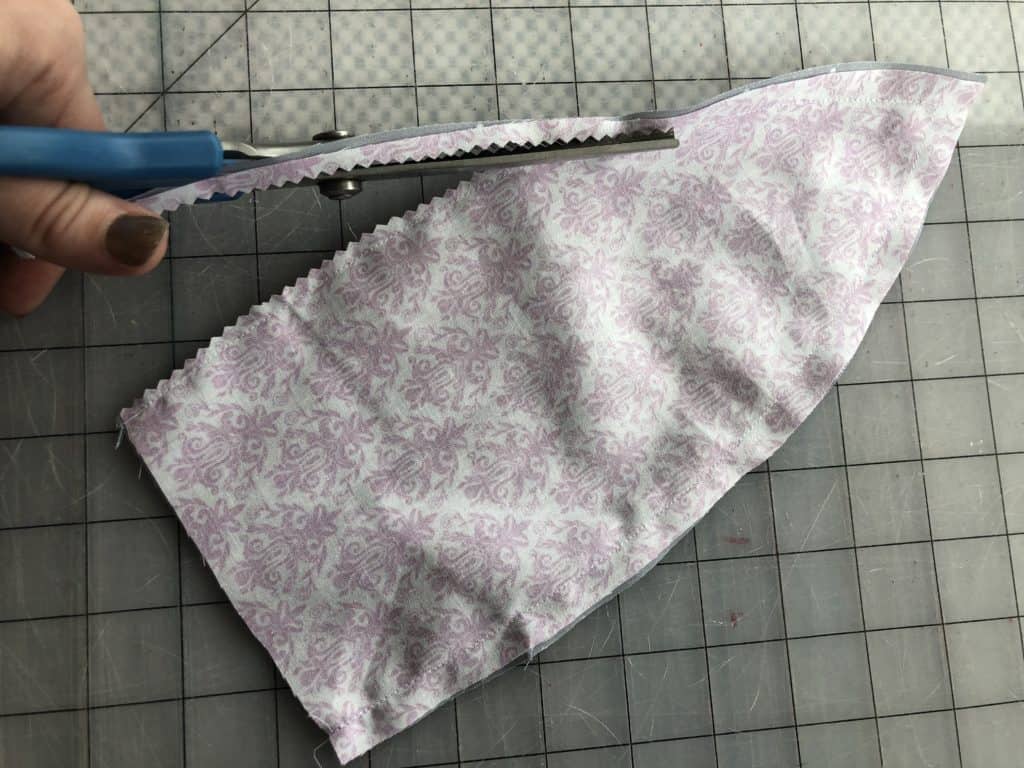
Step 3: Trim seam allowance, being careful not to clip through your stitches.
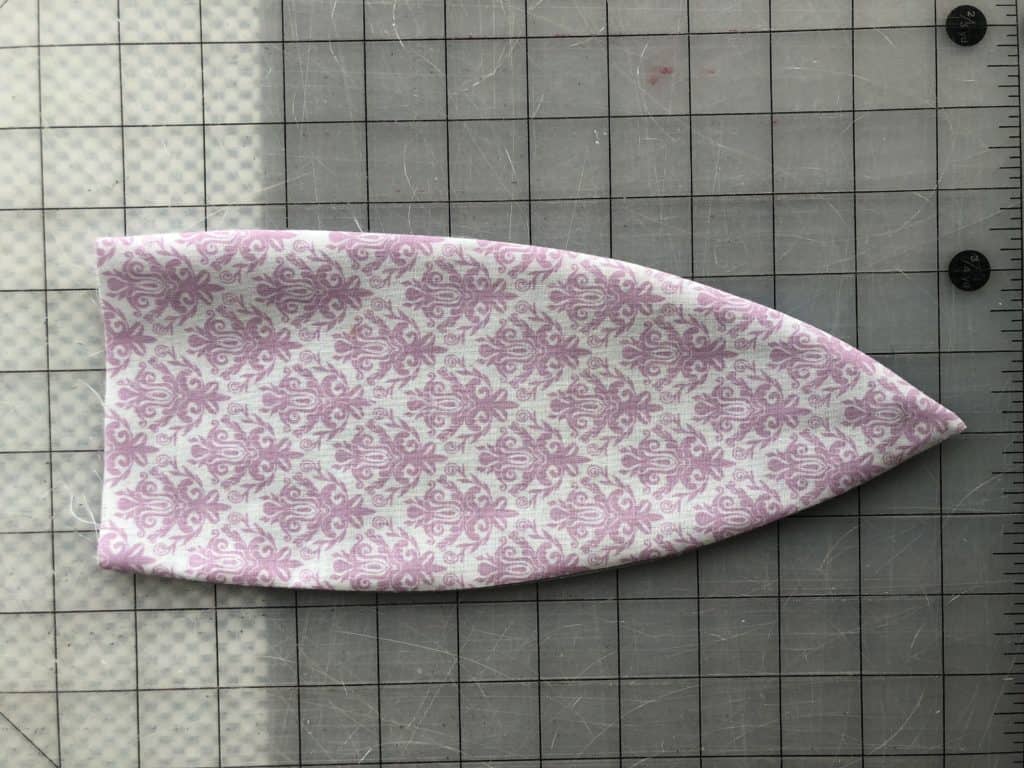
Step 4:  Turn and press, topstitch if desired.
Step 5: Fold along the top, raw edge, meeting the corners together.  Clip or baste top edge in place.  Repeat with other ear.
Step 6: If using yarn for the bunny tail:

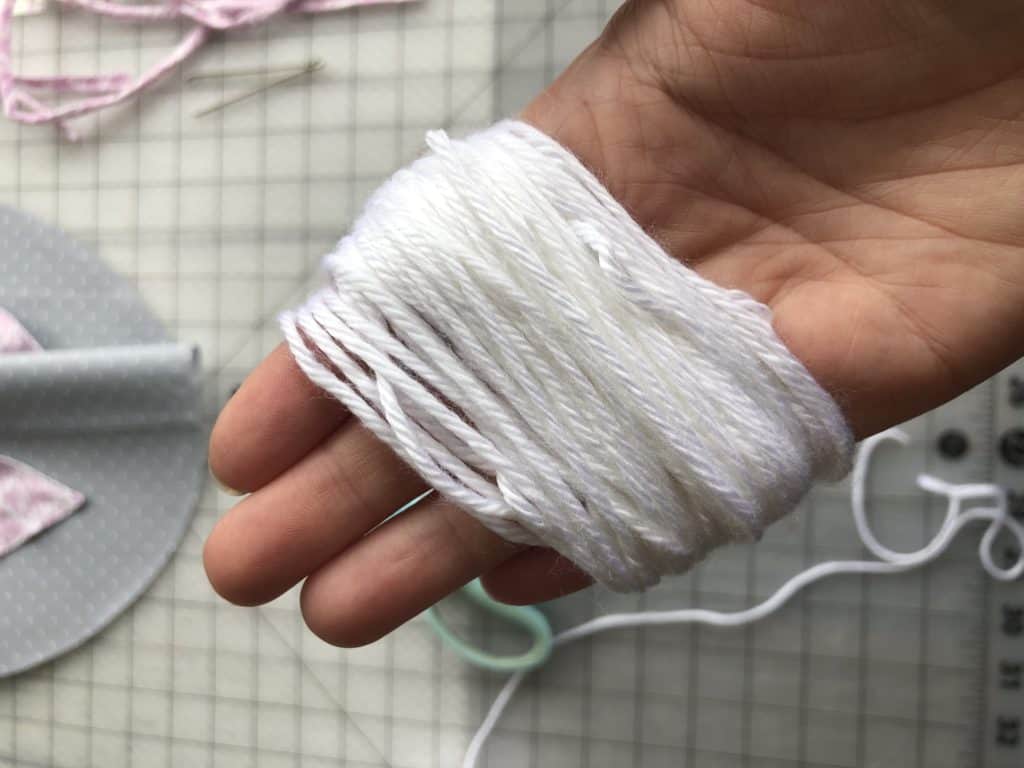
Wind the yarn around and around (and around!) your fingers.  The more you wrap, the fuller the pompom’s poof will be.
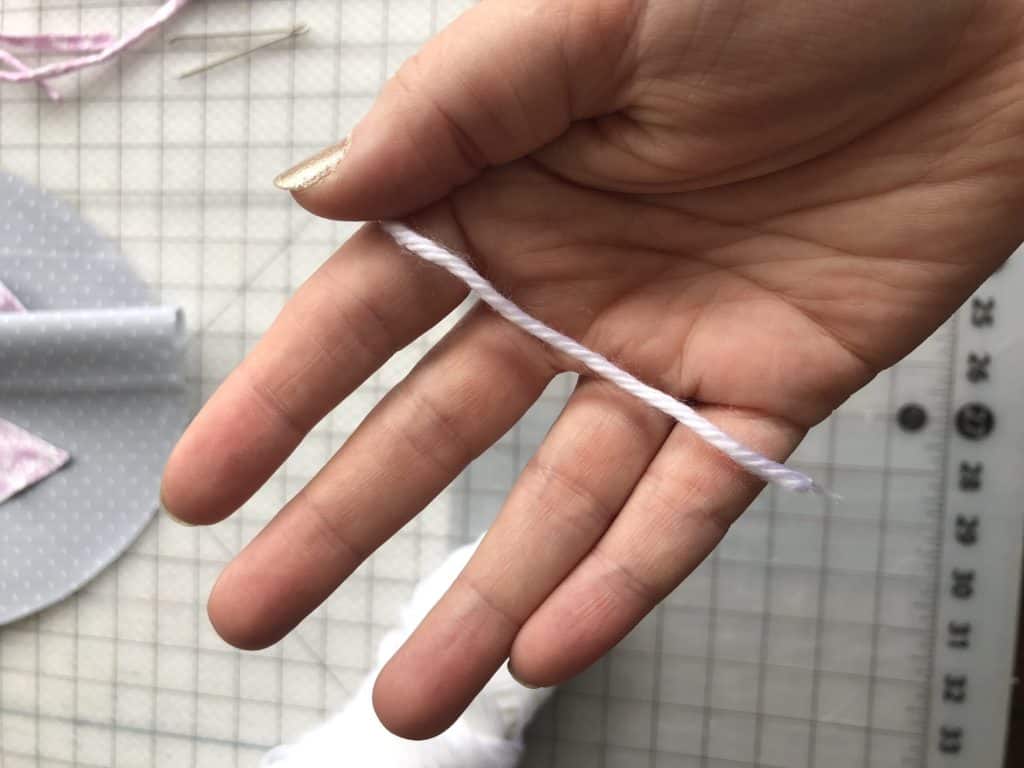
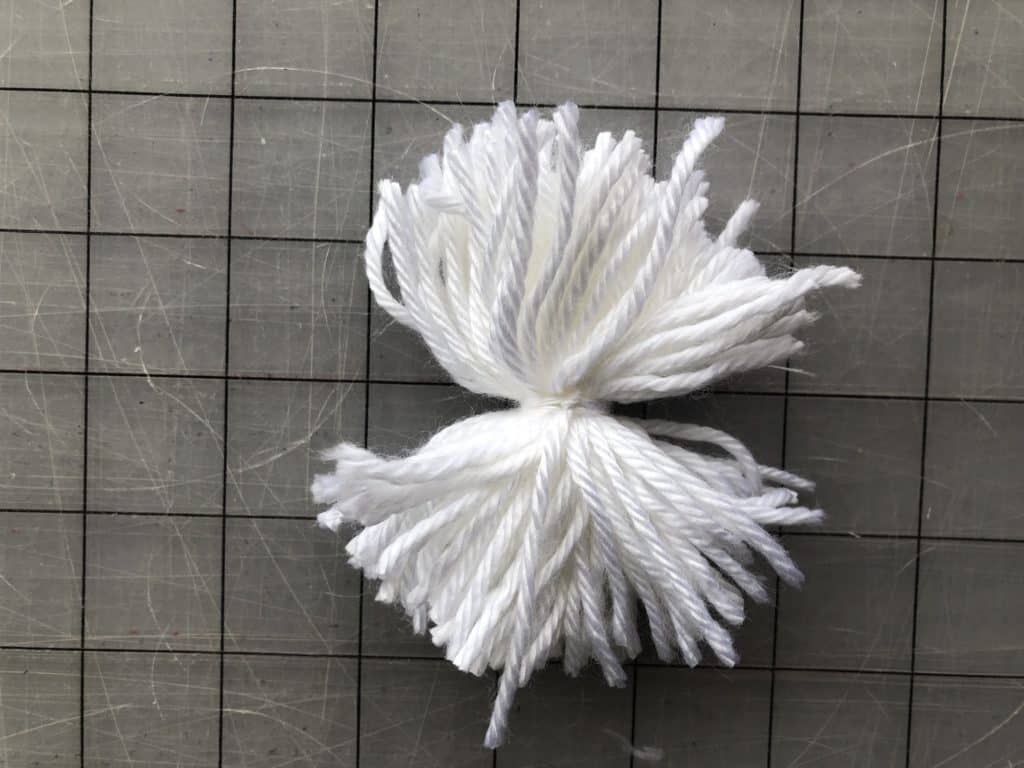
Once you’ve reached that desired poof, carefully slide the yarn off your hand.  Take a piece of yarn and tie it directly in the center.  Make the knot is as tight as you can get it.  I often secure the knot, and then switch my strands to the other side, and create a second tight not…just for safe measure.  Take your scissors and cut through the loops on each side of the knot.
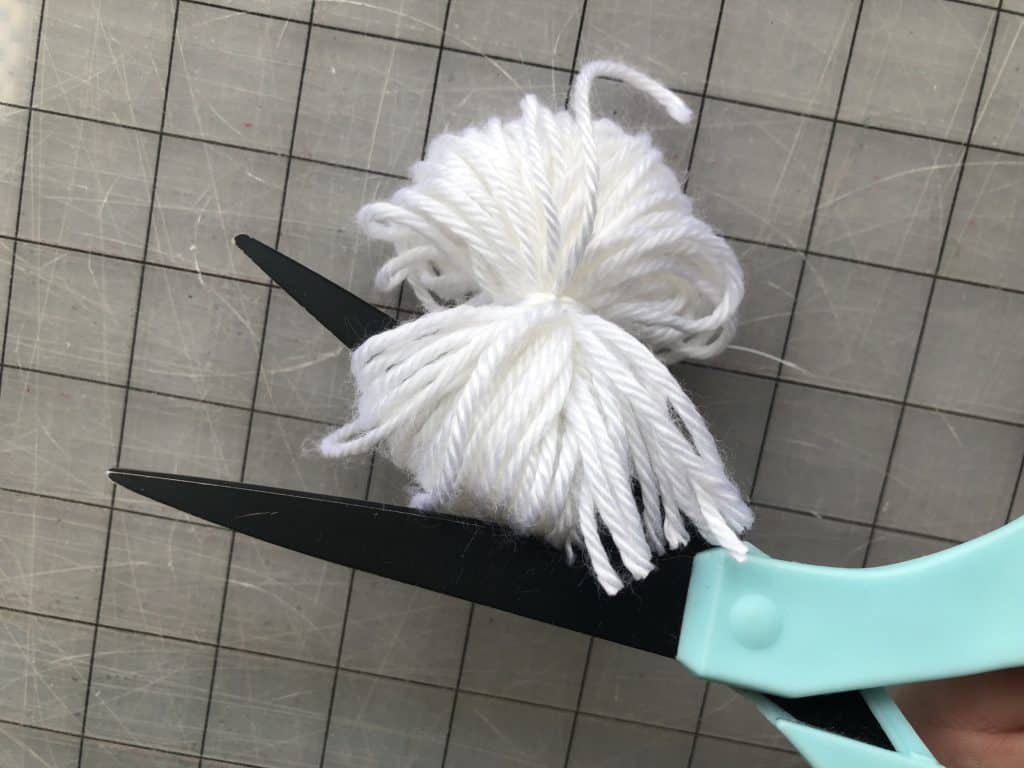
4.) Fluff your new yarn ball…cutting the ends to make them more even if necessary.
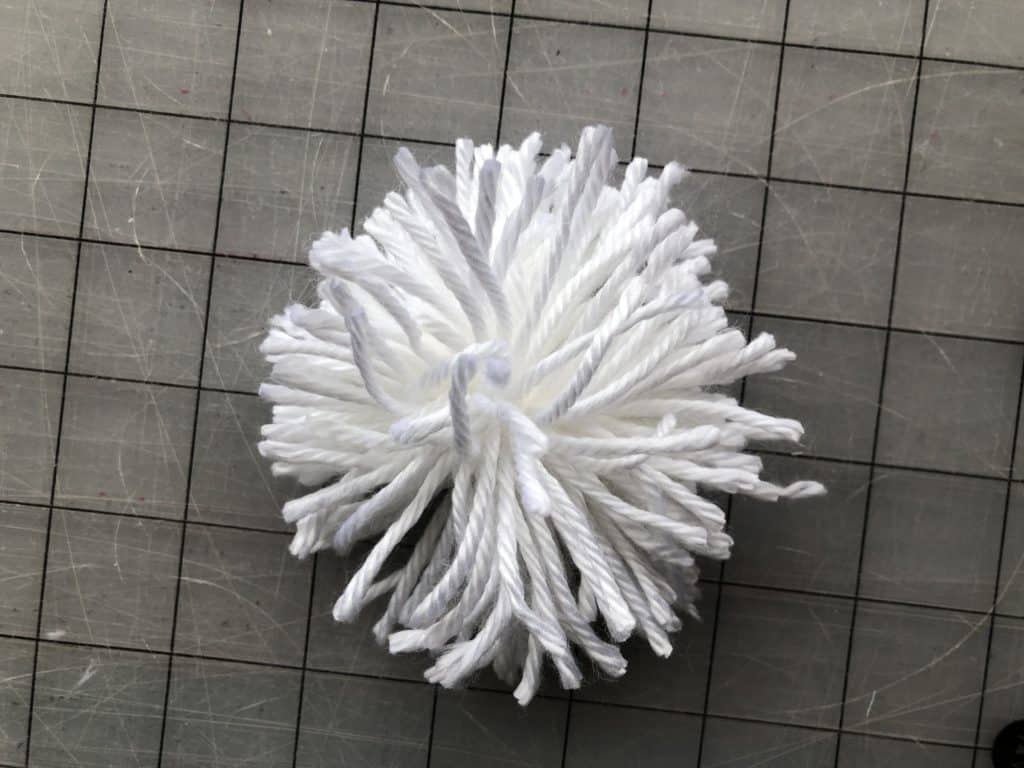
Step 7:  Align your ears with the outer ear measuring 3″ from the edges.  And your bunny tail centered between the bottom of the ears.
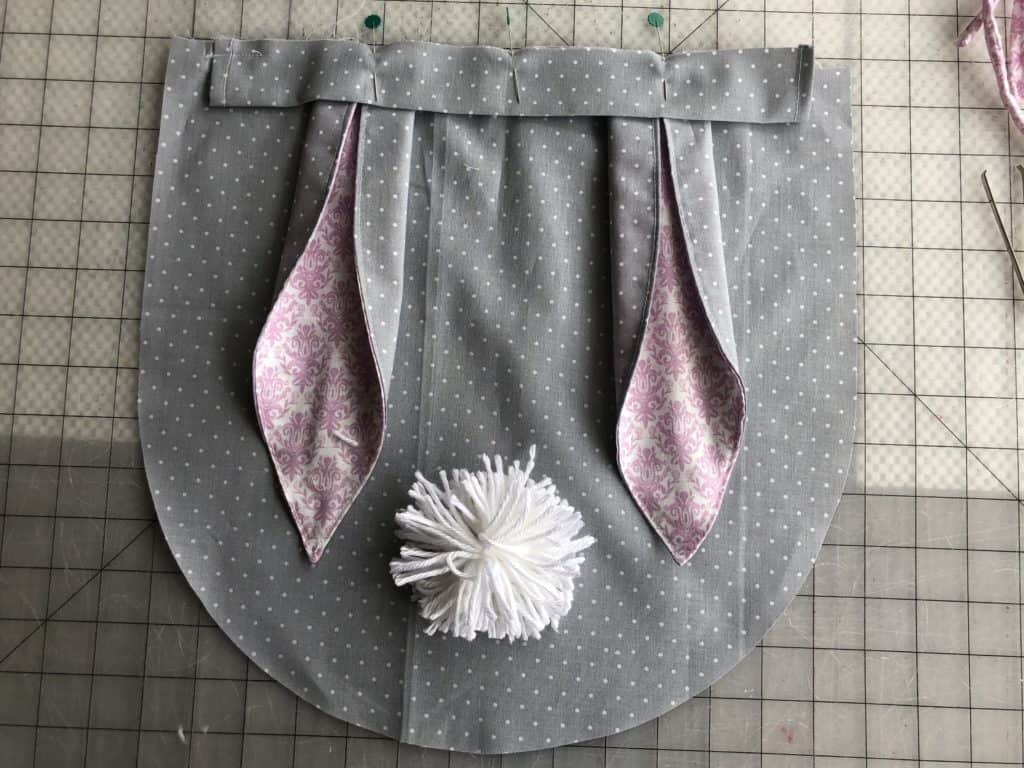
Step 8:  Finish the basic bag construction per the instructions.

FOX BAG CONSTRUCTION

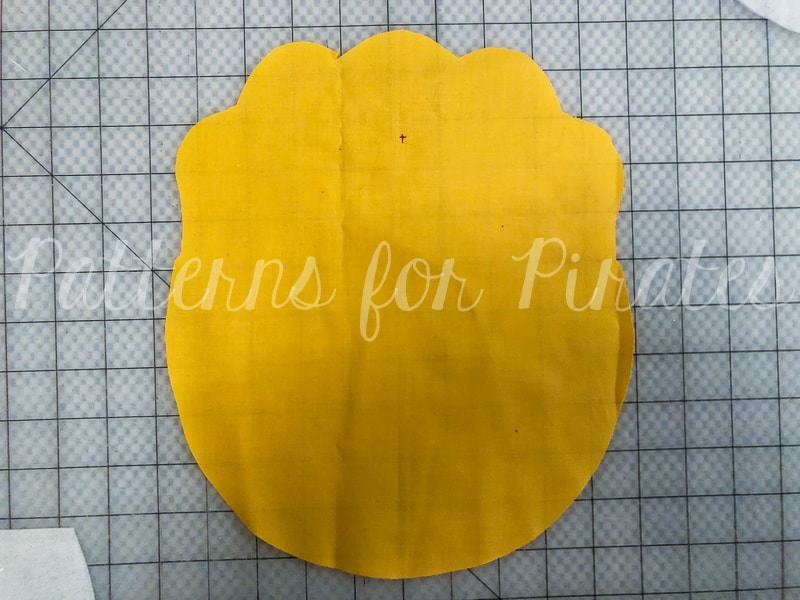
Step 1: Lay the face pieces with right sides together.
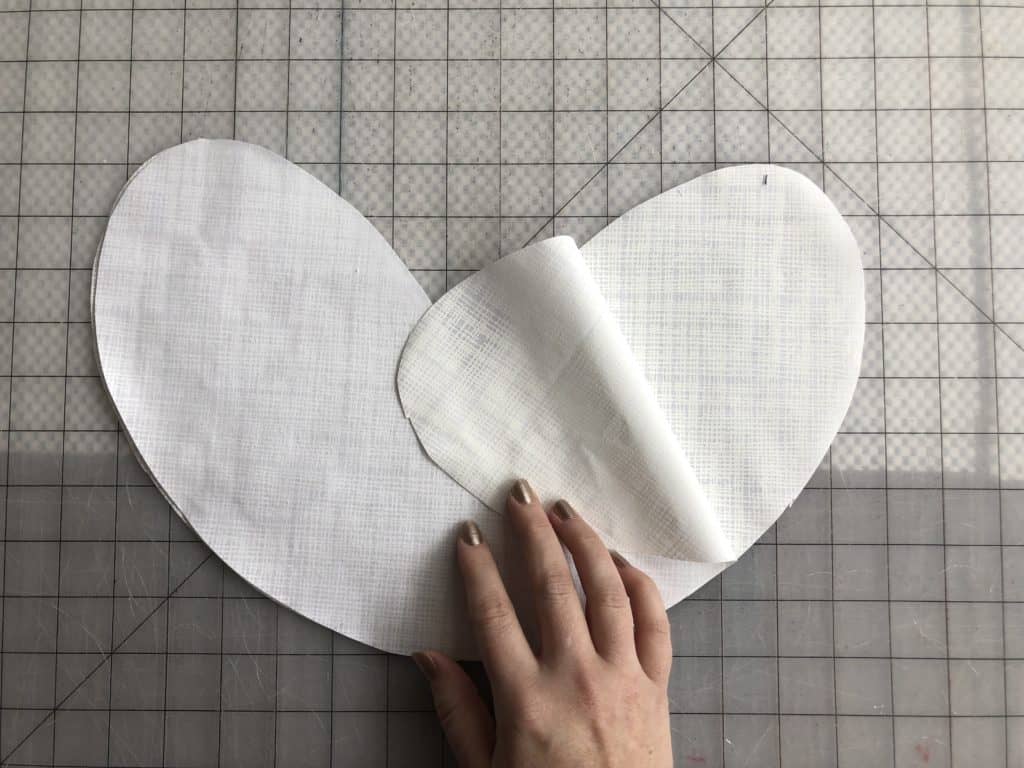
Step 2: Stitch with 1/2″ seam allowance, stopping at the marking guides on the pattern piece.
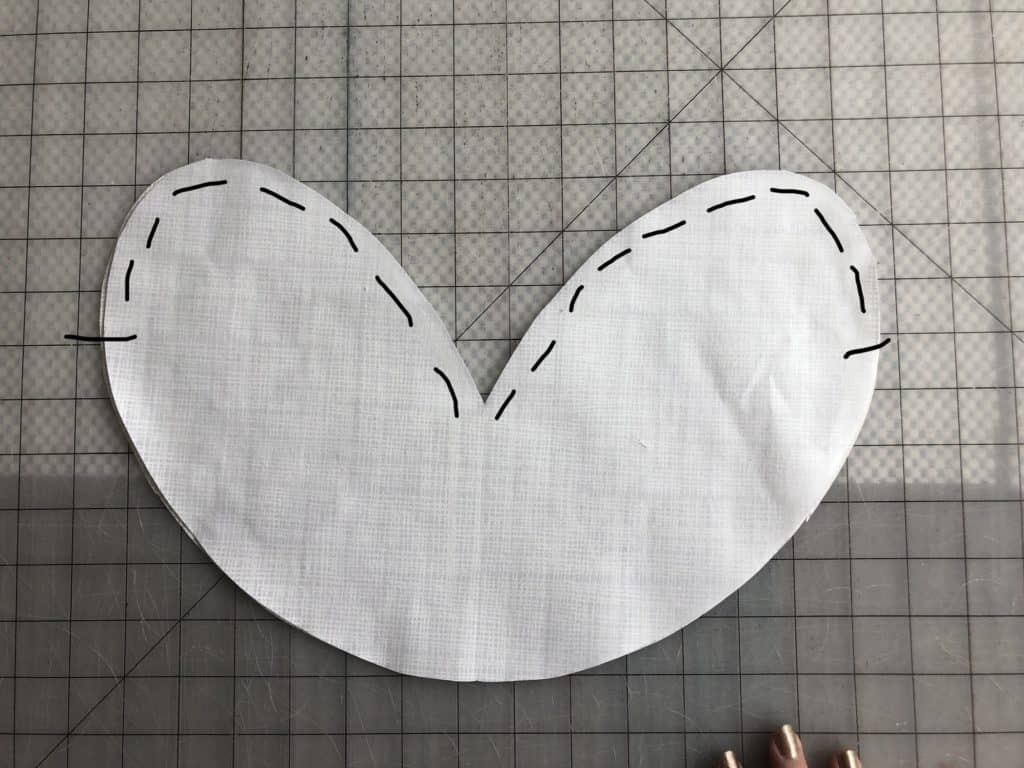
Step 3: Clip the center point and trim around top curves for a cleaner turning.
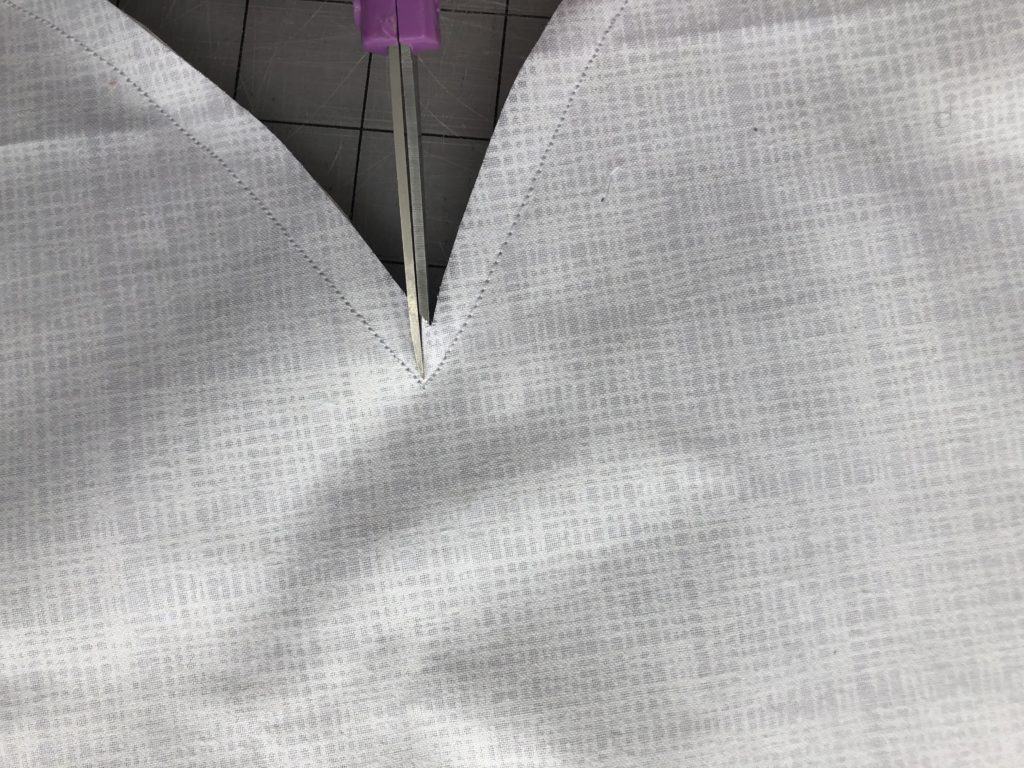
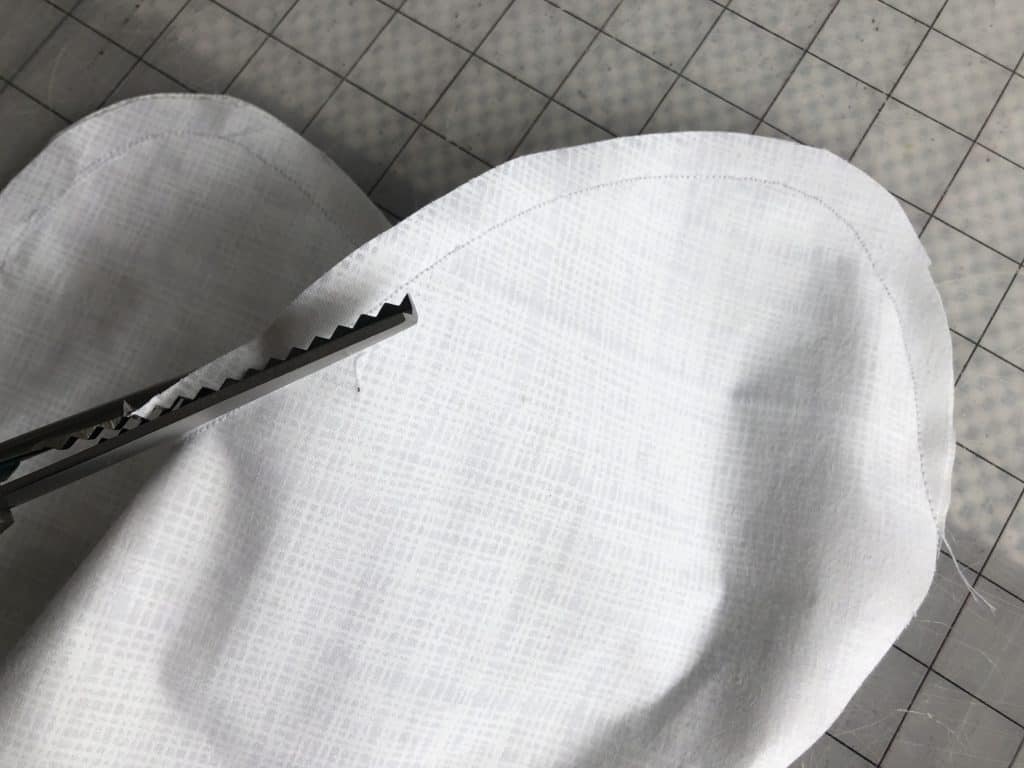
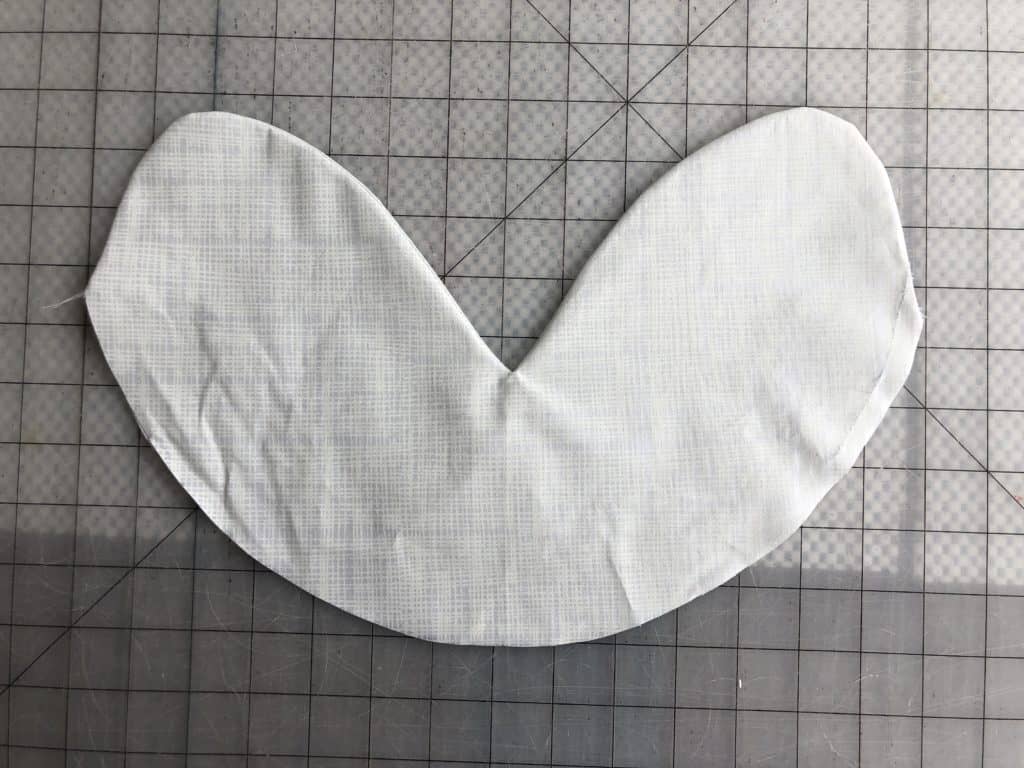
Step 4: Turn right sides out and press.
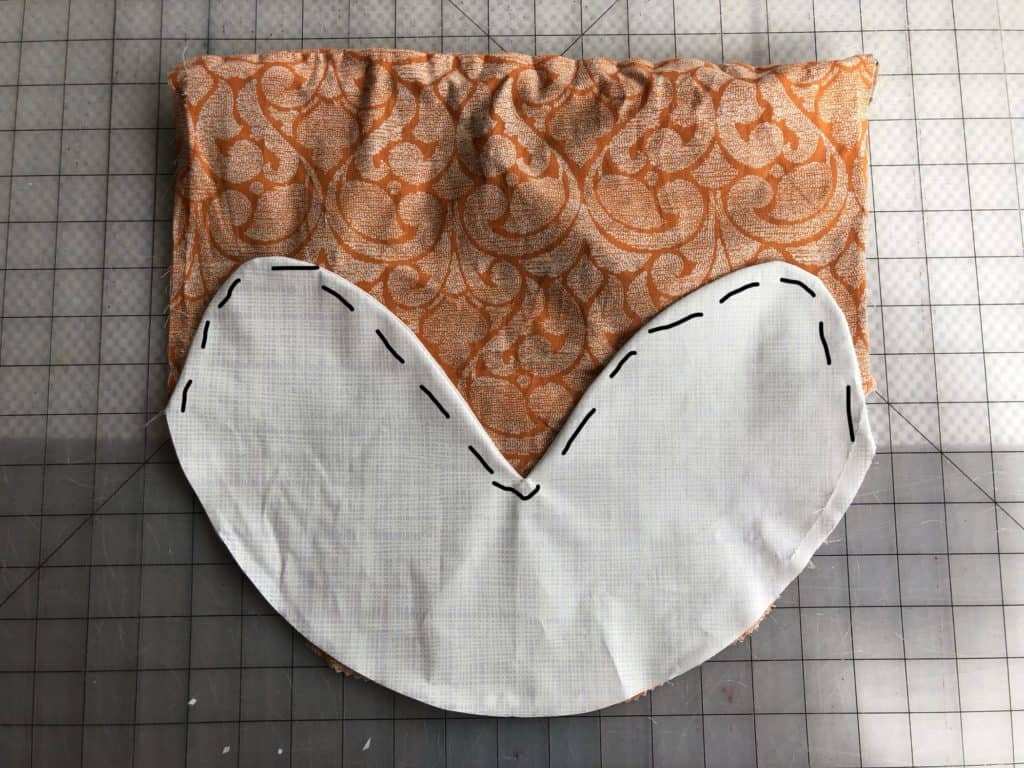
Step 5: Align with main fabric piece and topstitch the upper curves.
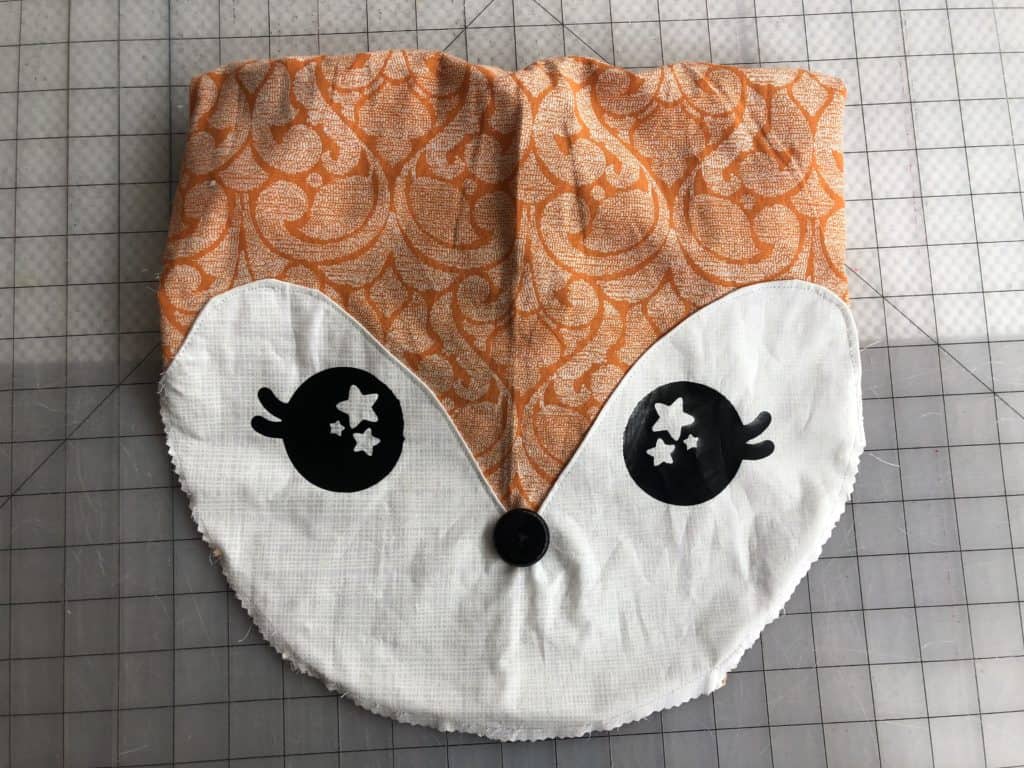
**Add your face details now.  Either the htv designs, paint, or embroidery.  It’s easiest to add everything at this step while all of the pieces are flat and unattached to other items of the bag!
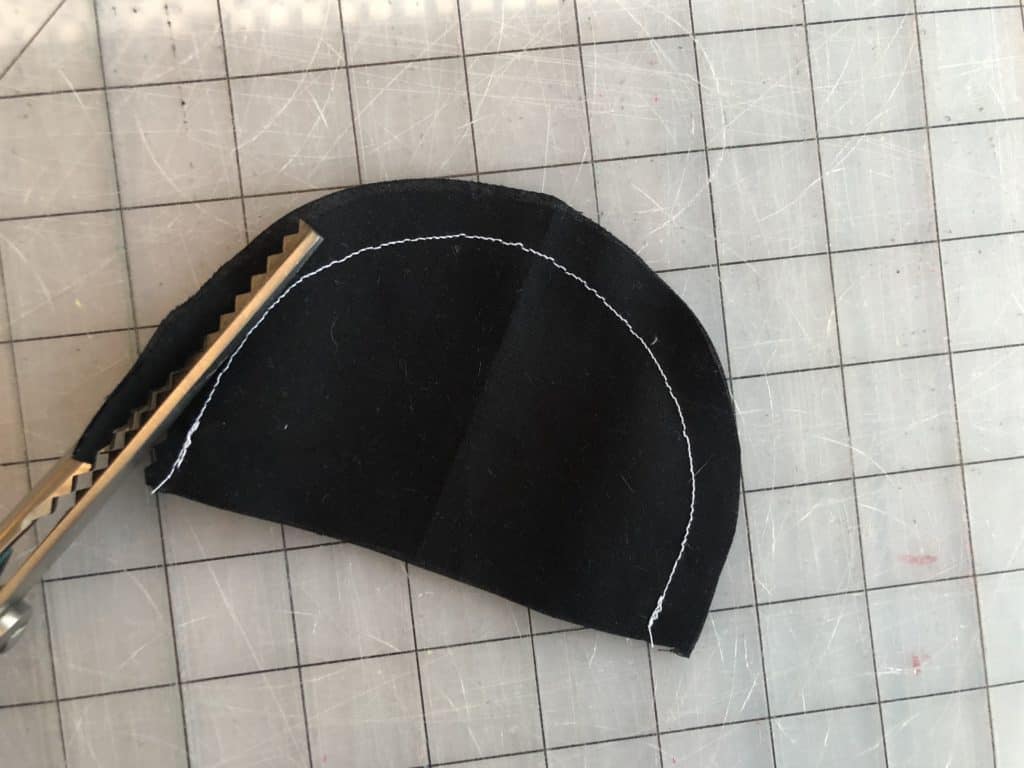
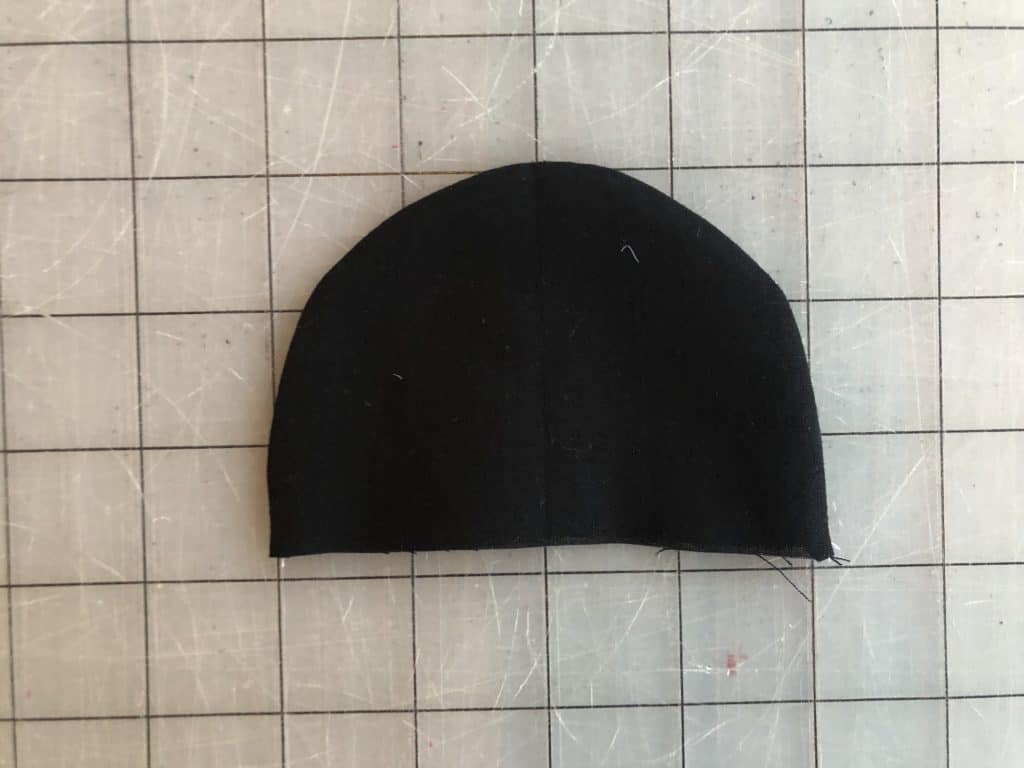
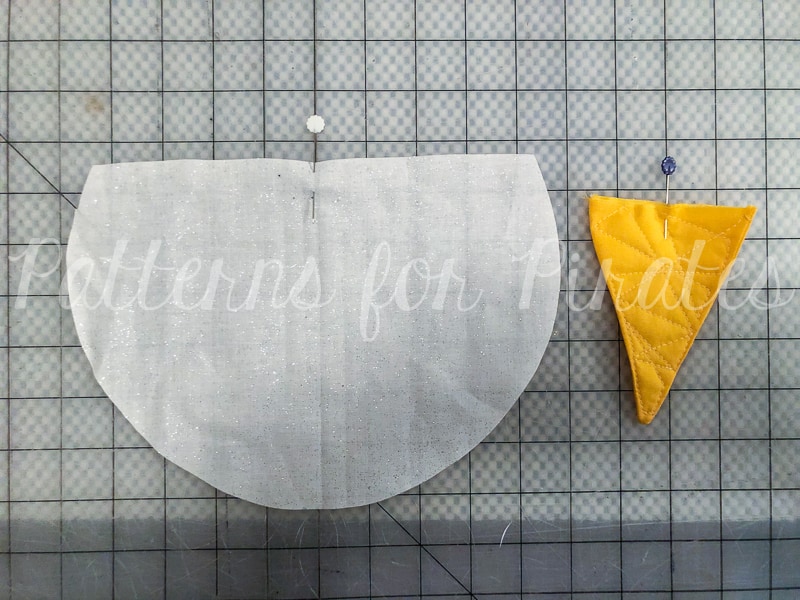
Step 6: With right sides together, stitch ear pieces using 1/2″ seam allowance.  Trim seam.
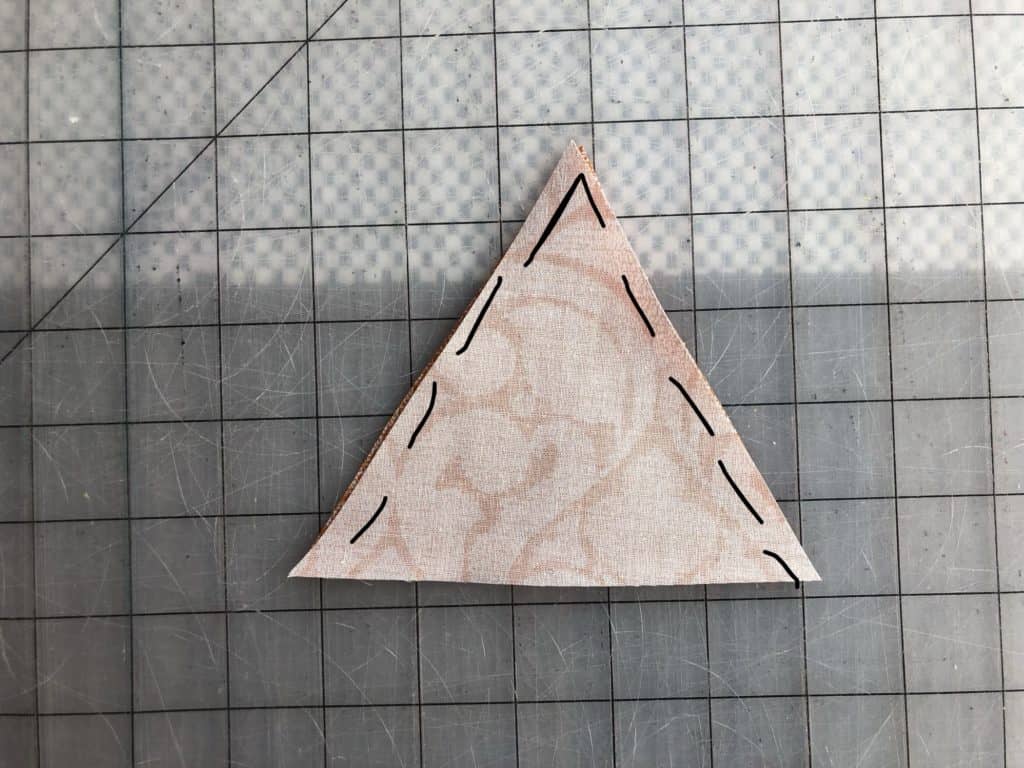
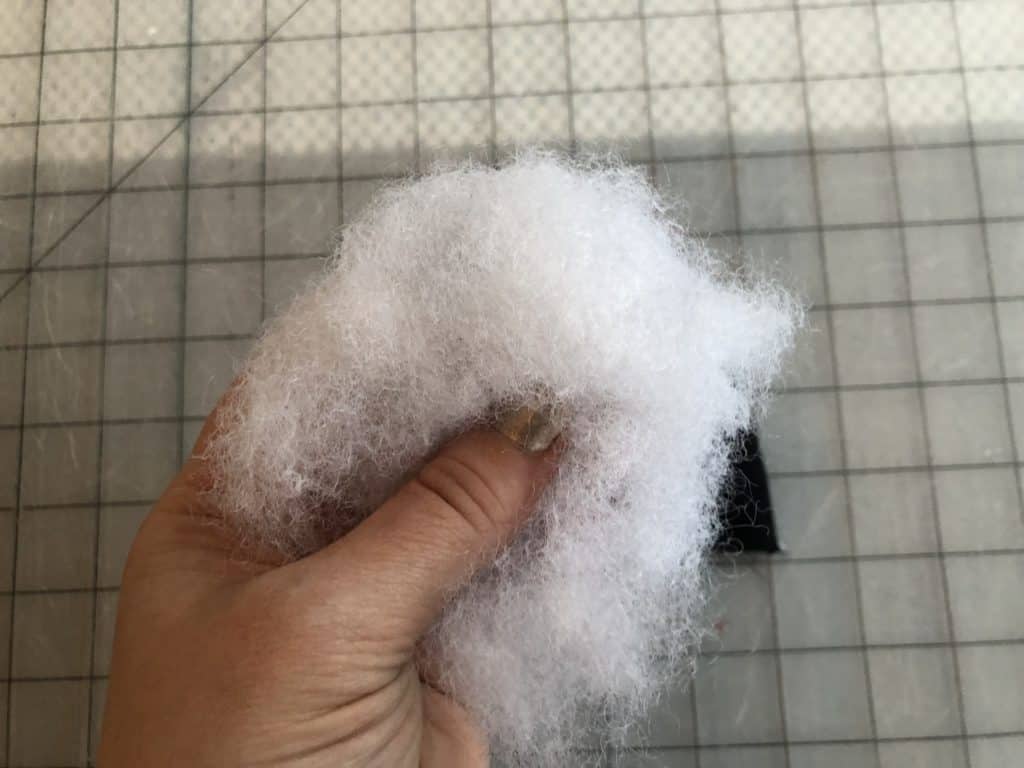
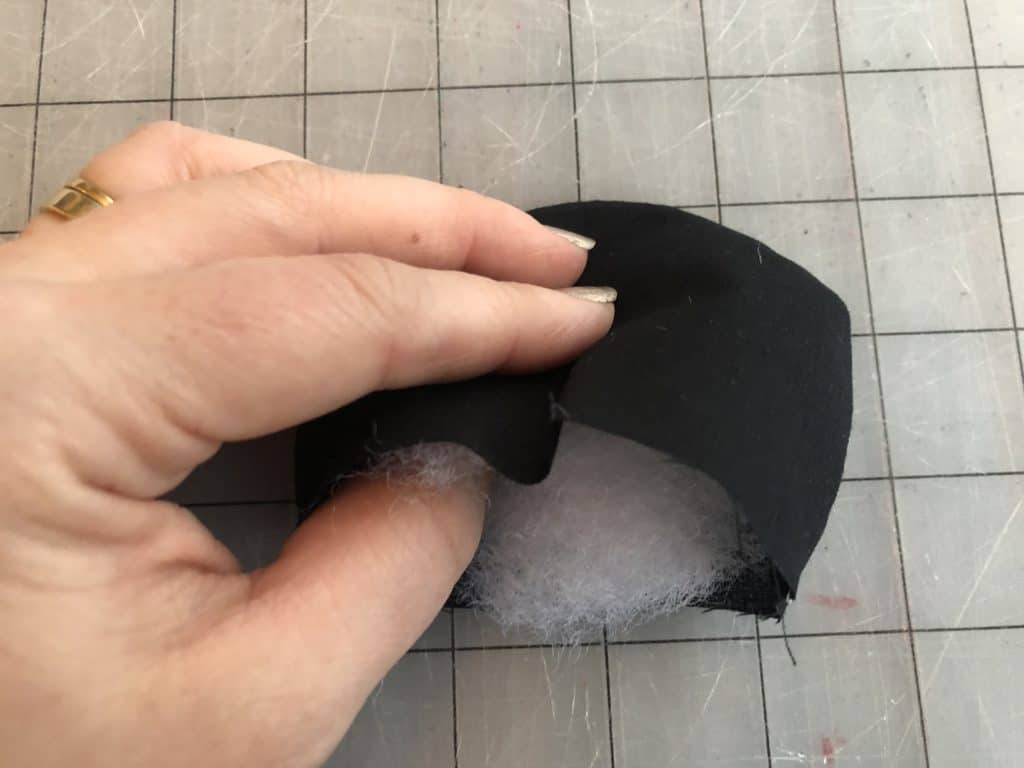
Step 7: Using a small amount of polyfil (if desired), stuff the ear.  Repeat with other ear.
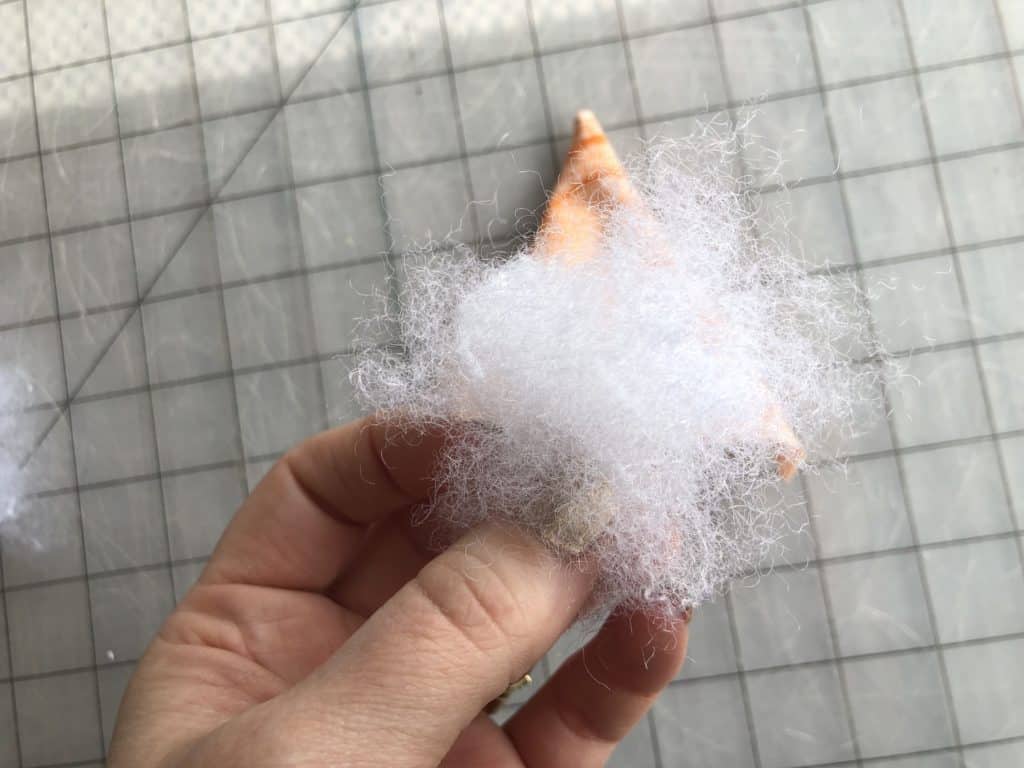

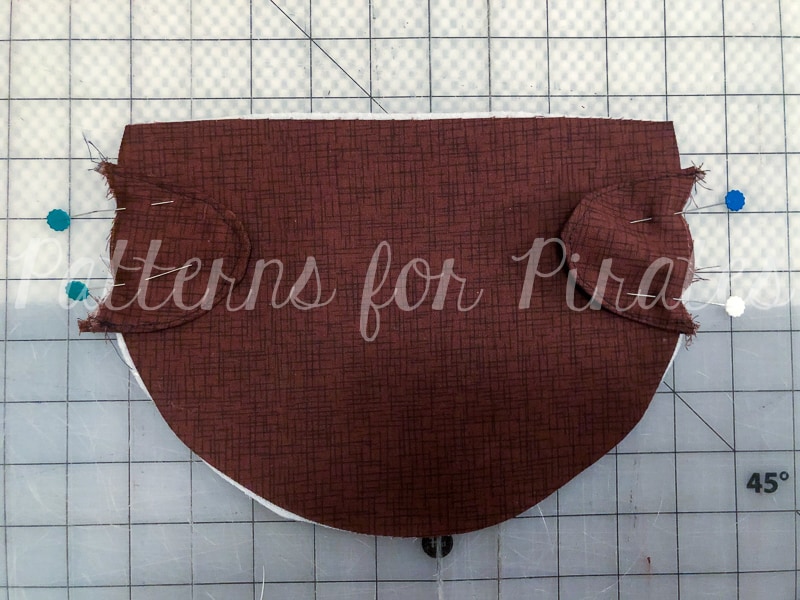
Step 8: Using the placement guide on the pattern piece, align and baste ears.

Step 9: Finish the basic bag construction per the instructions.

KITTY CAT BAG CONSTRUCTION

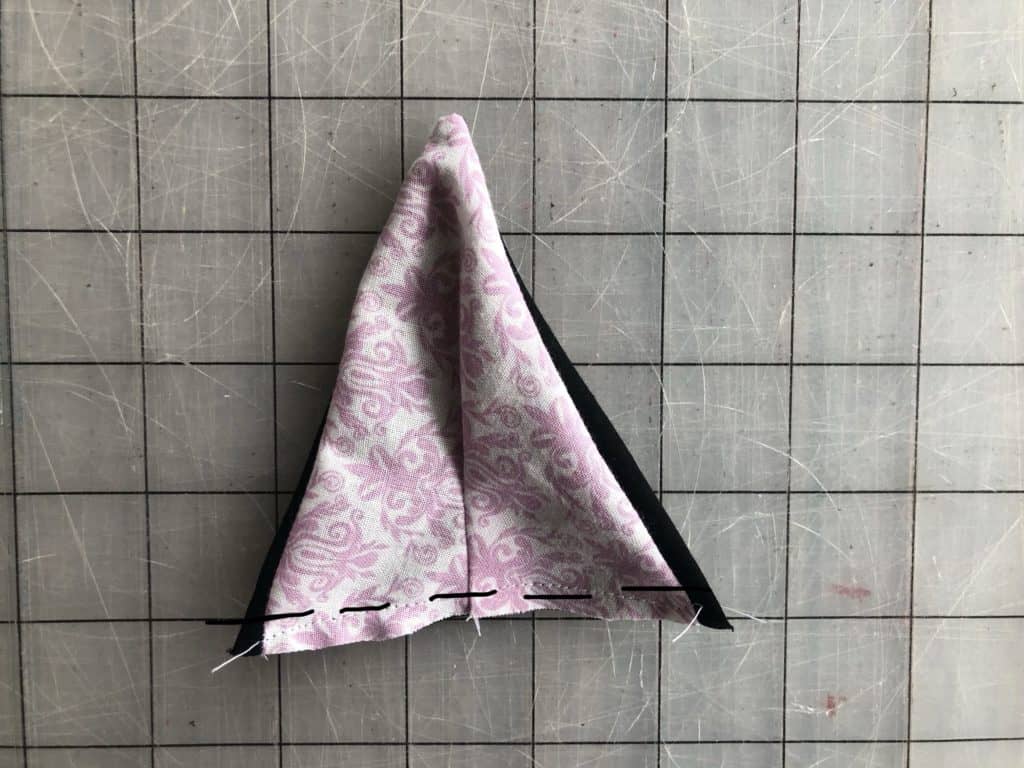
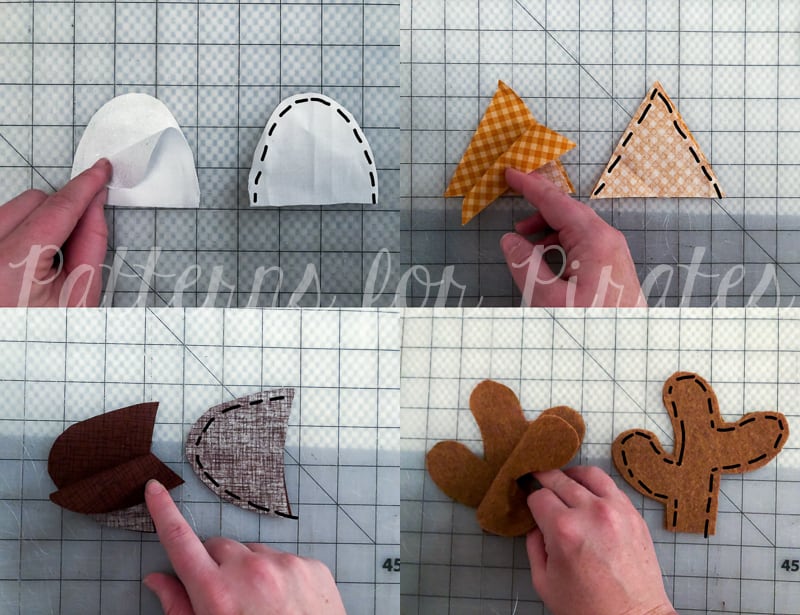
Step 1: Fold the inner ear fabric in half, with right sides together.

Step 2: About 1/2″ from the fold, sew a 1-2″ vertical line.

Step 3: With right sides together, align the two side edges to the outer ear fabric.  Sew using 1/2″ seam allowance.

Step 4: Trim your seam allowance down, for cleaner turning.

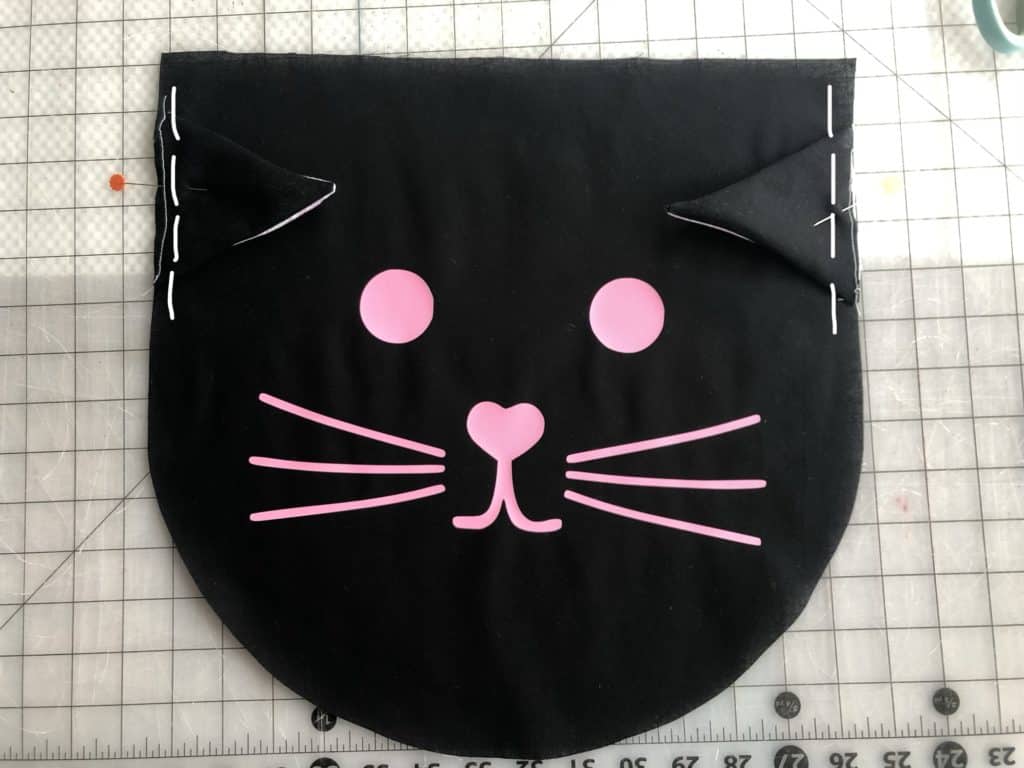
Step 5: Turn ear right-side-out and press.  Baste along bottom edge of ear, to help for easier assembly.  The “pinch” we created should fold the outer ear fabric a little bit in the front, creating a little more of a cat ear effect. 🙂  Repeat other ear.

Step 6: Add any face details.  And then using the placement guide on the pattern piece, align and baste ears.

Step 7: Finish the basic bag construction per the instructions.

PANDA BAG CONSTRUCTION

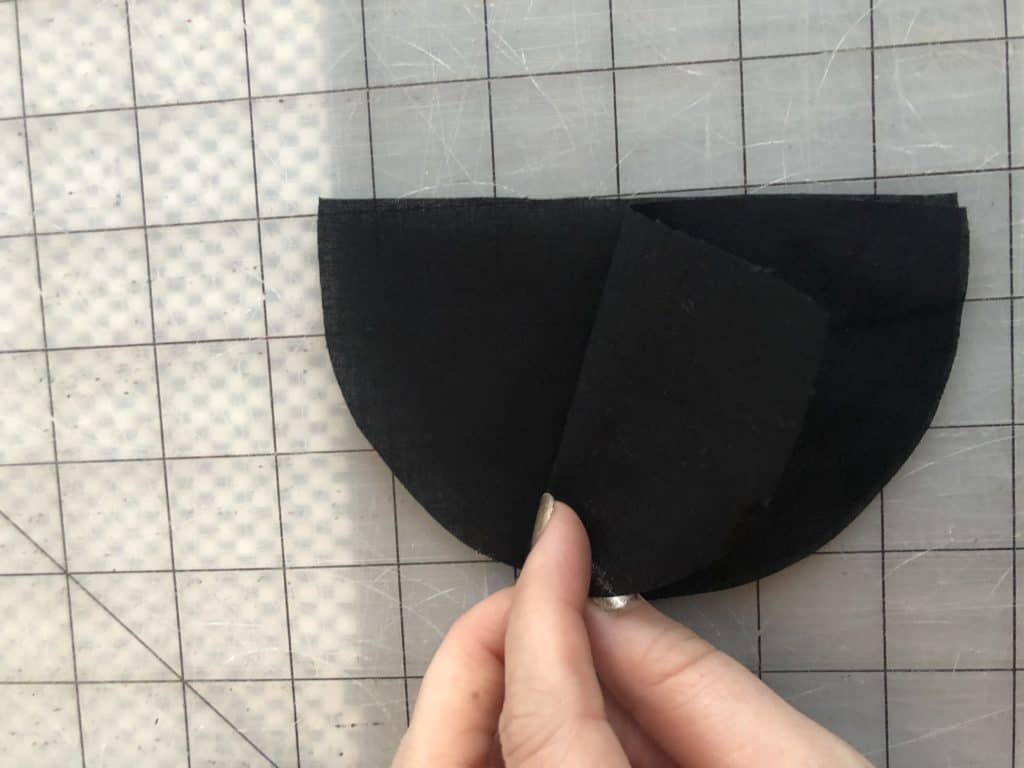
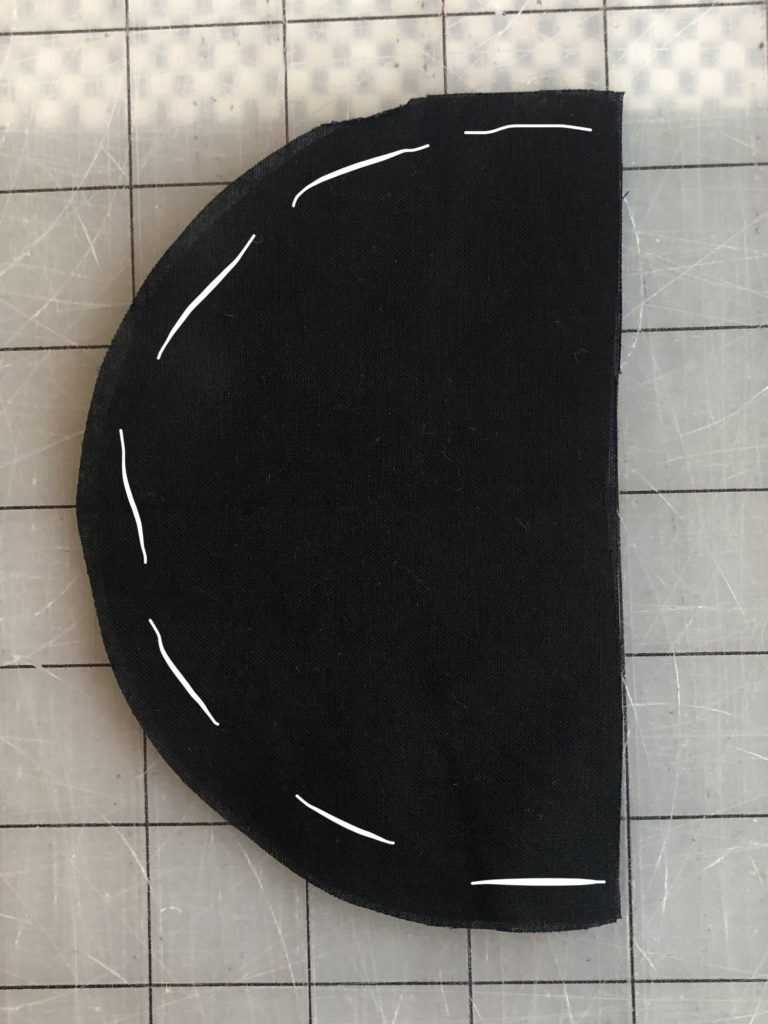
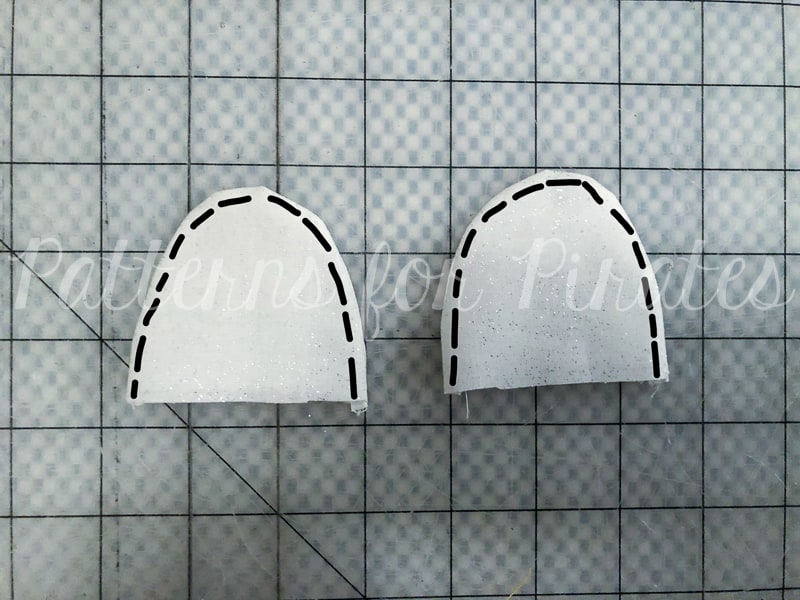
Step 1: Align two ear pieces, right sides together.  Using 1/2″ seam allowance, stitch around entire curved edge.

Step 2: Careful not to clip through your stitches, trim down the seam allowance.

Step 3: Turn right side out and press.

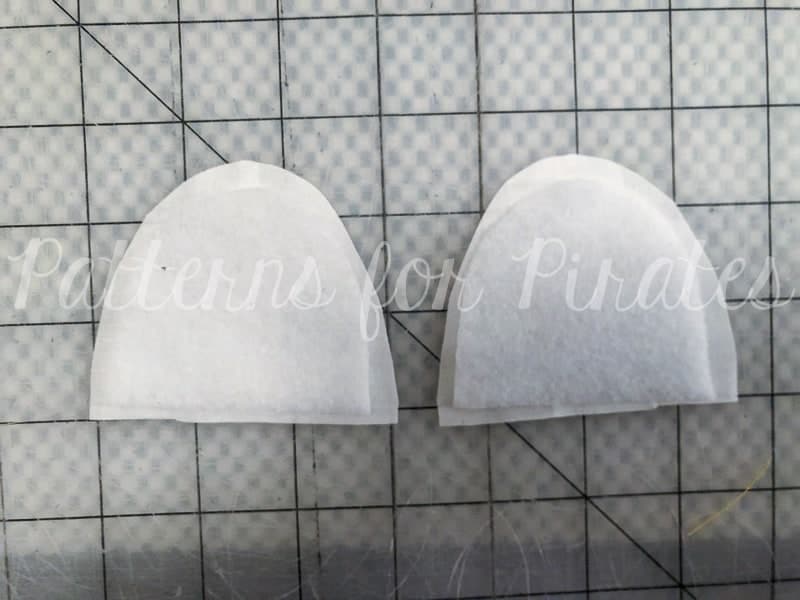
Step 4: Using a small amount of polyfil (if desired), stuff the ear.  Repeat with other ear.
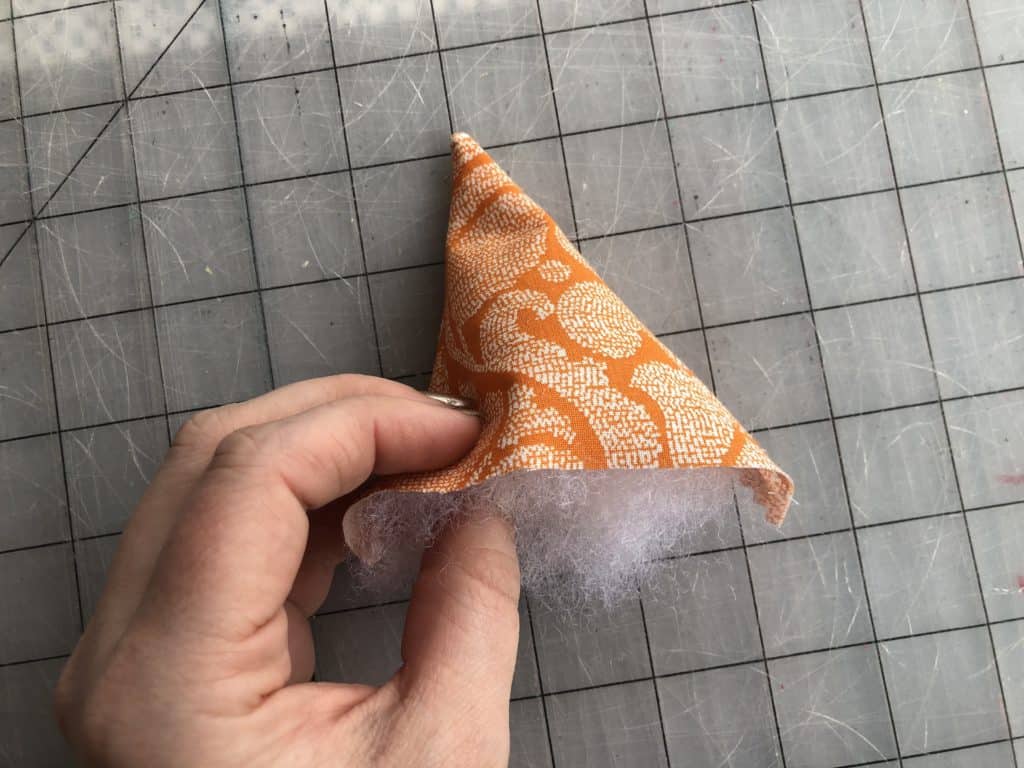

Step 5: Add any face details.  And then using the placement guide on the pattern piece, align and baste ears.
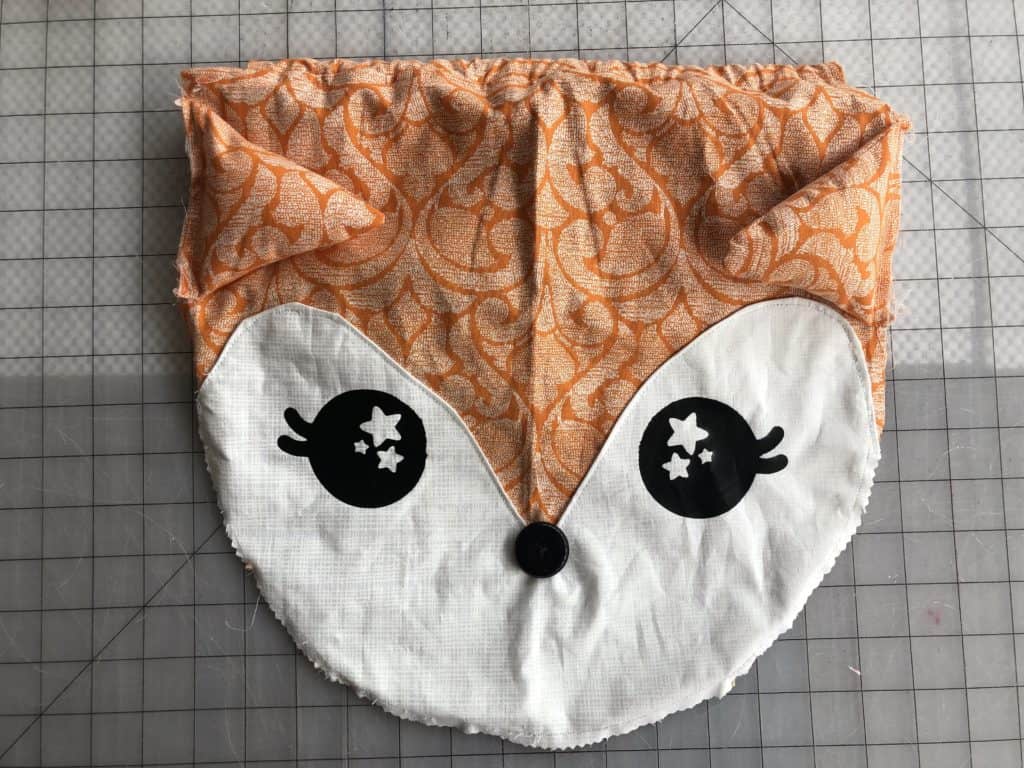
Step 6: Finish the basic bag construction per the instructions.

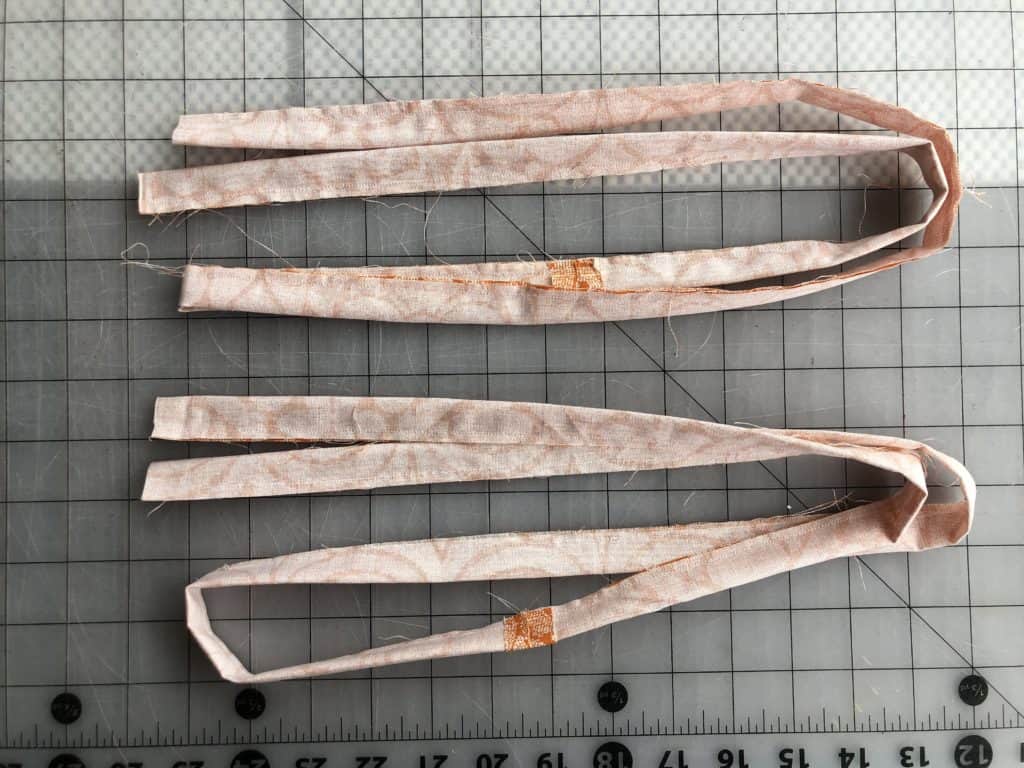
HOW TO MAKE YOUR OWN CORDING

Step 1: Cut several strips of fabric at 1.5″ wide.  You’ll need 3 yards total of length (or 108″).
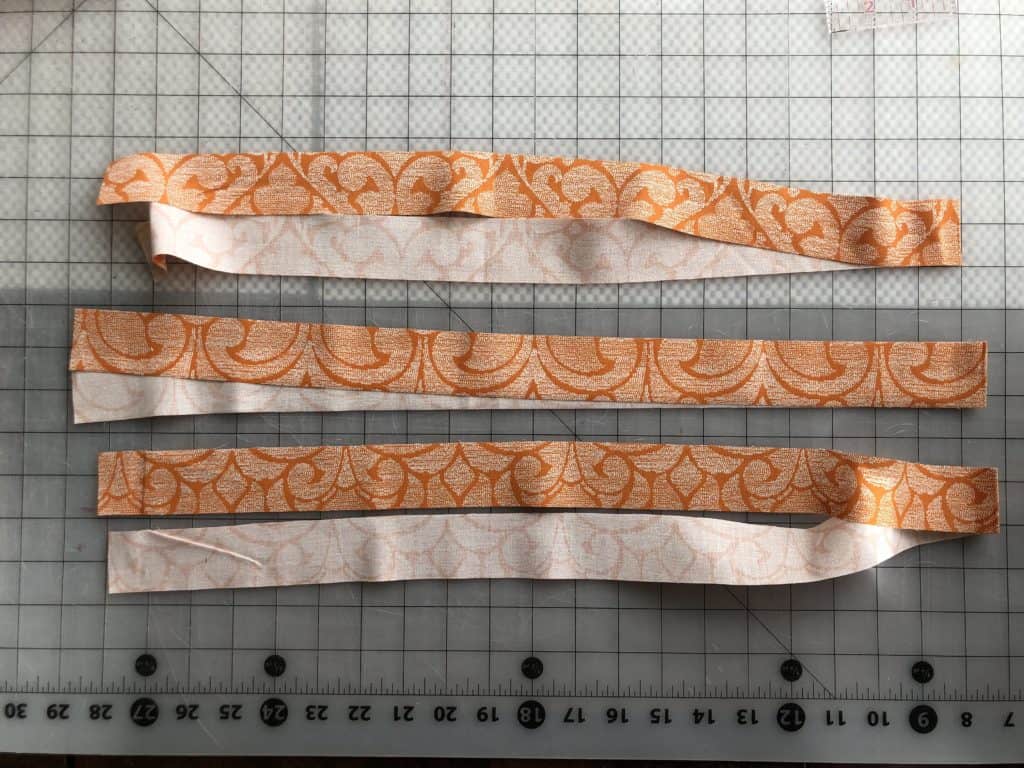
Step 2: Sew strips together across the short edge, right sides together.
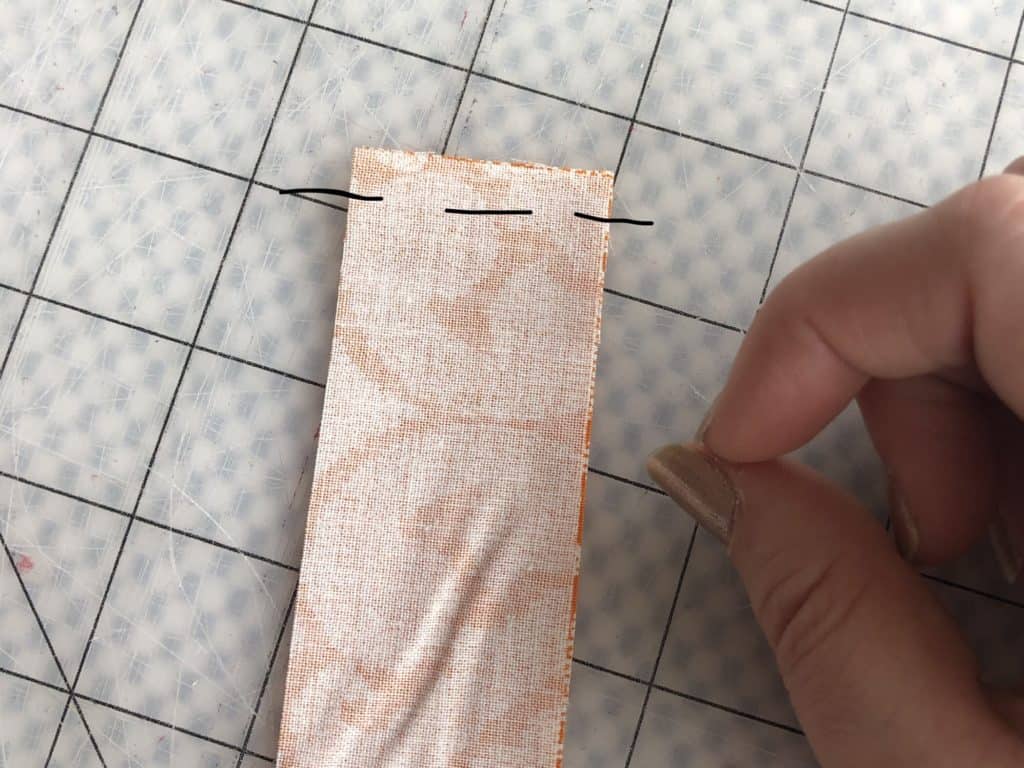
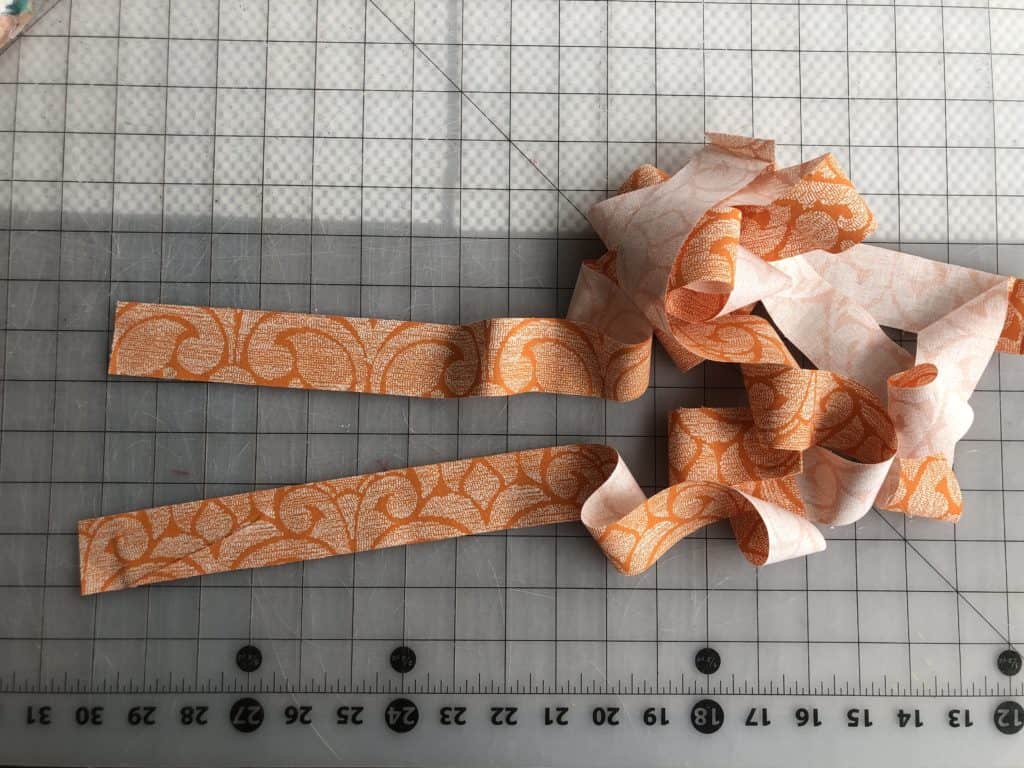
Step 3: Press open seam allowance.
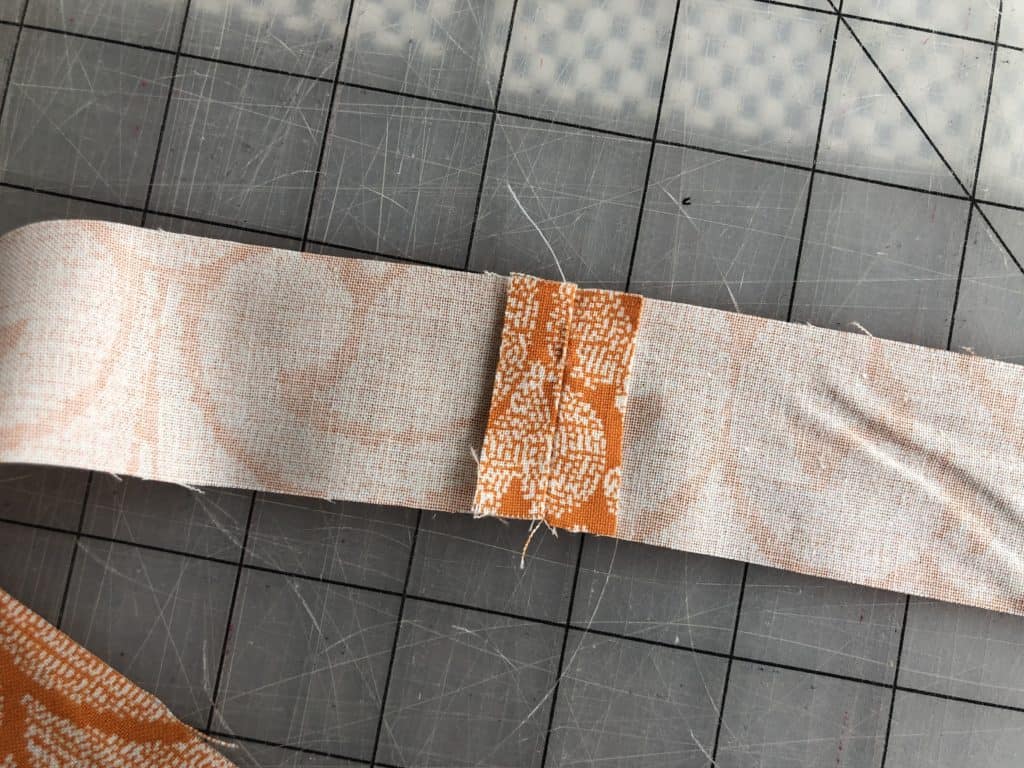
Step 4: Fold your fabric right sides together, with the long edges now touching.  And sew with 1/2″ seam allowance down the entire length.
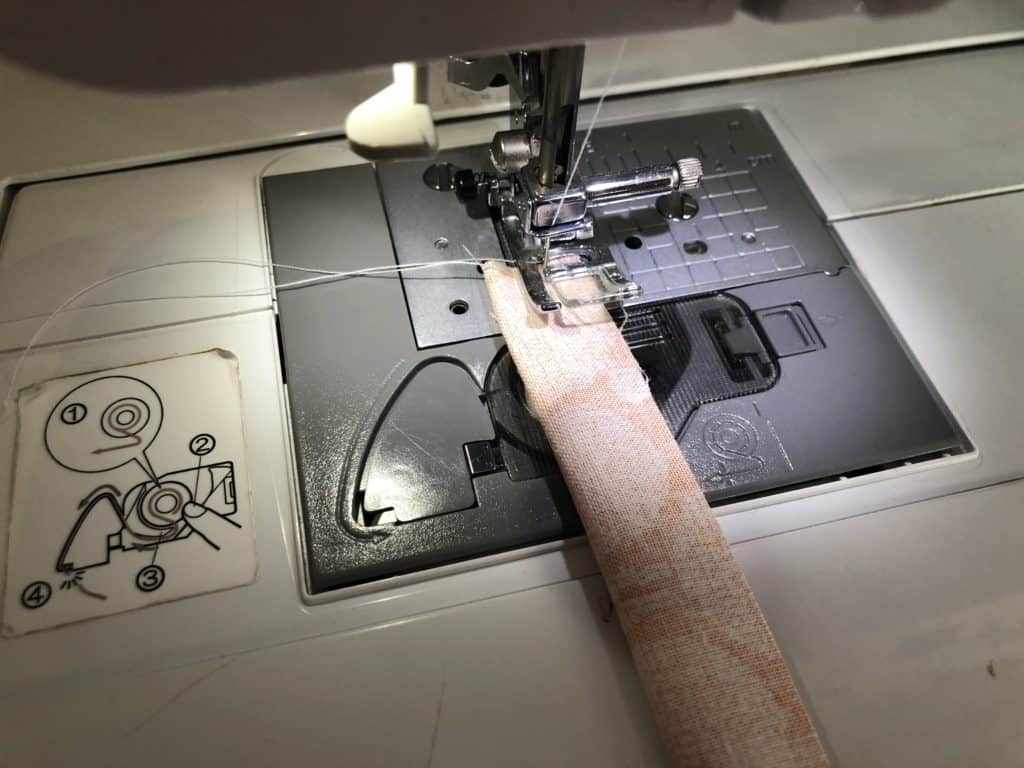
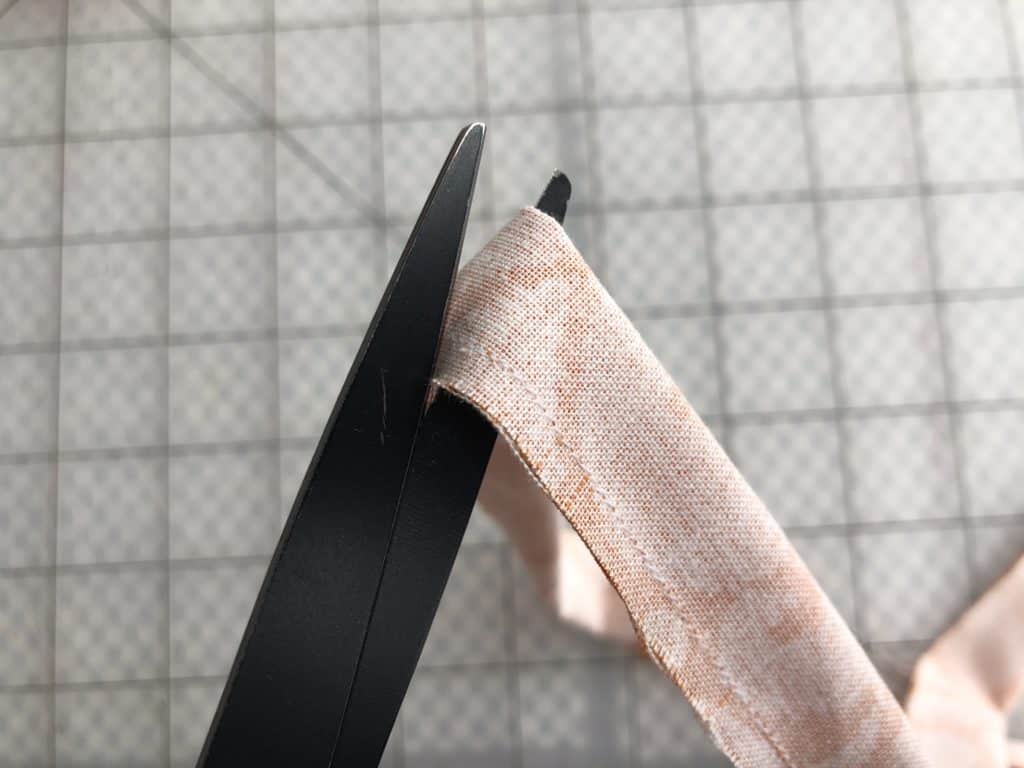
Step 5: Carefully trim down your seam allowances and cut the straps to the desired length.  In this instance, you need 54″ per strap.
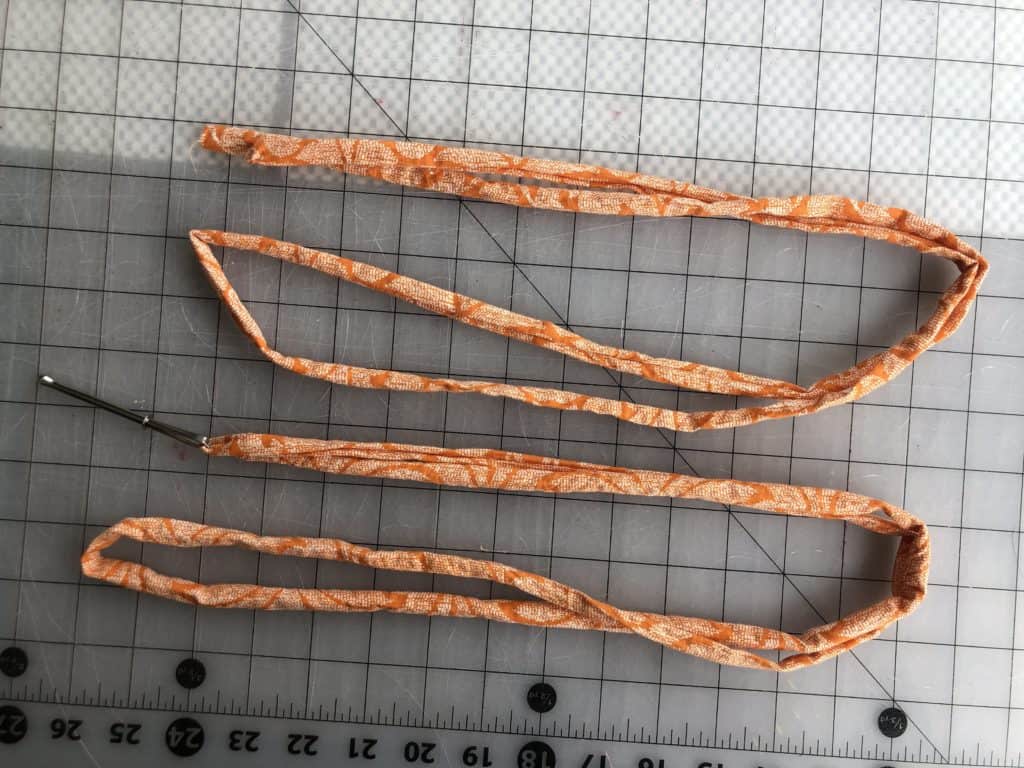
Step 6: Using your favorite turning method, turn the tubes right side out.  Press your new straps, and top stitch along edges if desired.
Are you someone who considers themselves to be more of a visual learner?  Here’s a video that walks you through all of the same steps above.  Hopefully it helps!

As always, we love when you share what you’ve made with us.  Head over to the Patterns for Pirates Facebook group and show off the adorable It’s a Cinch…Bag that you’ve managed to make from our freebie pattern!  Have a great week, Pirates!

Filed Under: Free Pattern, Pattern Release 1 Comment

Sporty Piko – easy hacks

March 29, 2019

Ahoy, matey! As with most of our new releases, the P4P blog team has some easy hacks ready for you to help achieve even more looks. First stop by the shop and grab the Sporty Piko and Youth Sporty Piko, then let’s get started.

….

Solid Back

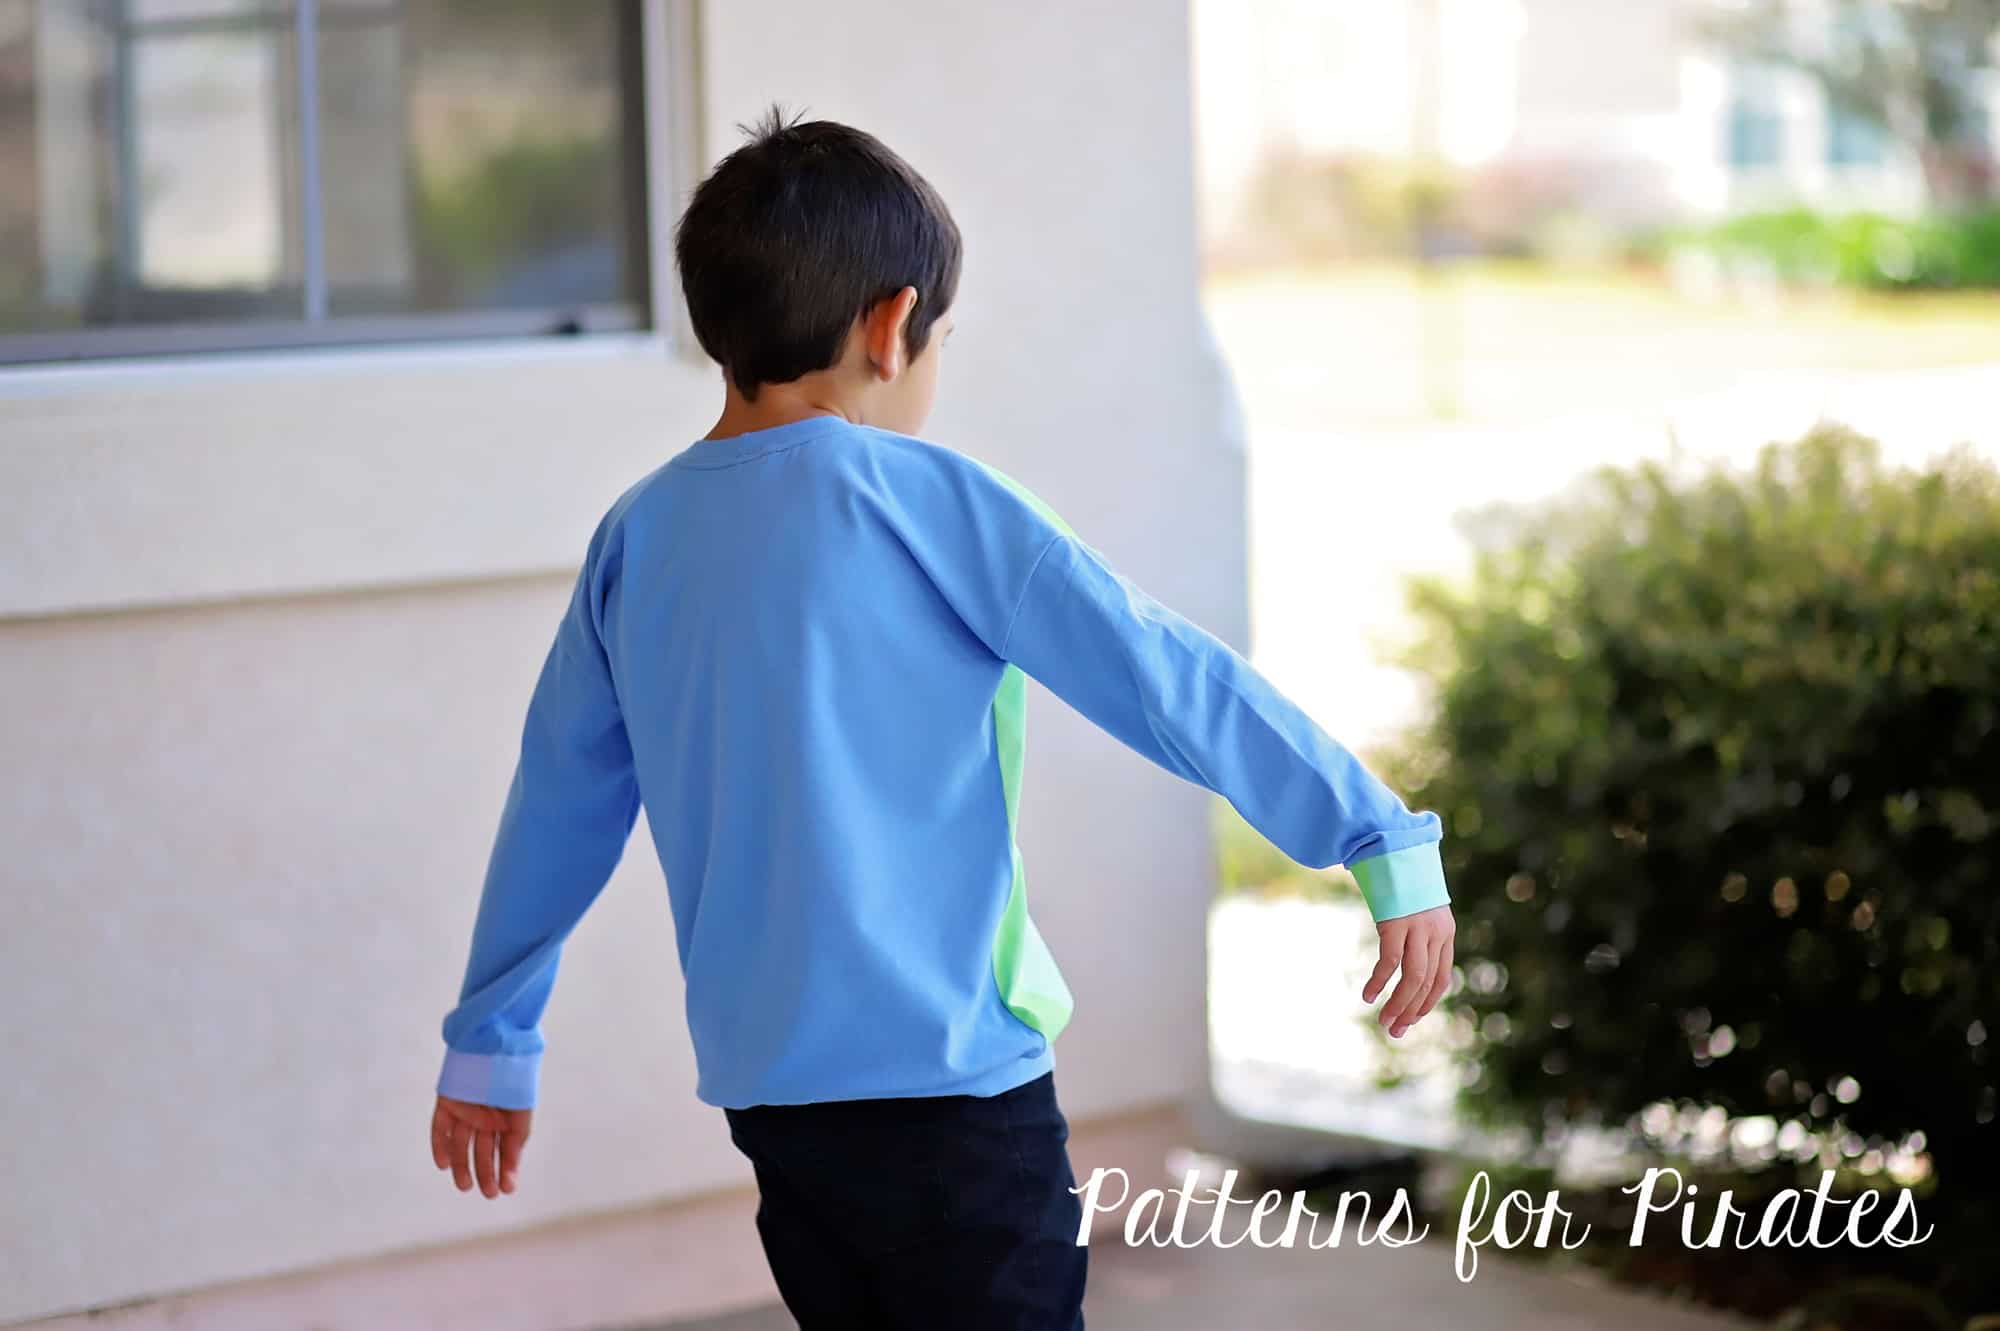
You might have noticed that both the Sporty Piko and the Youth SP feature a color blocked back to allow for multiple prints or color fabric to be showcased. Well, what if you want a solid back without the horizontal seam? Super easy hack!

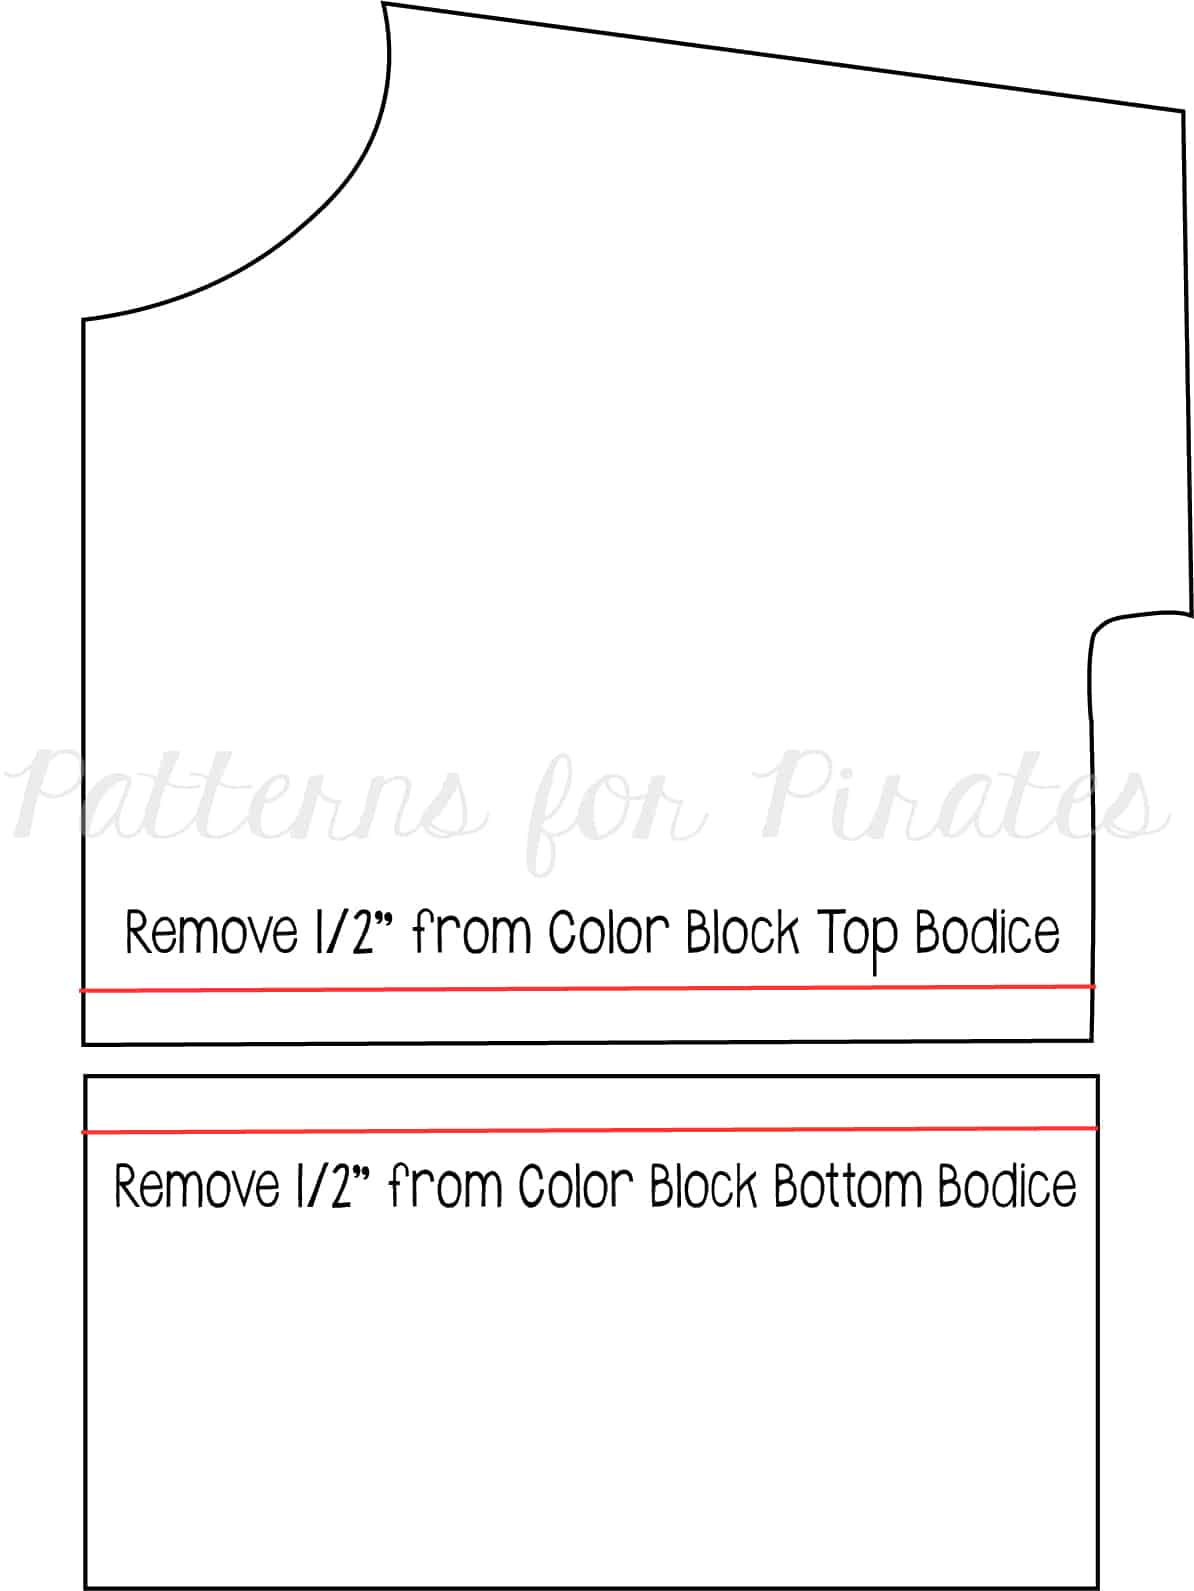
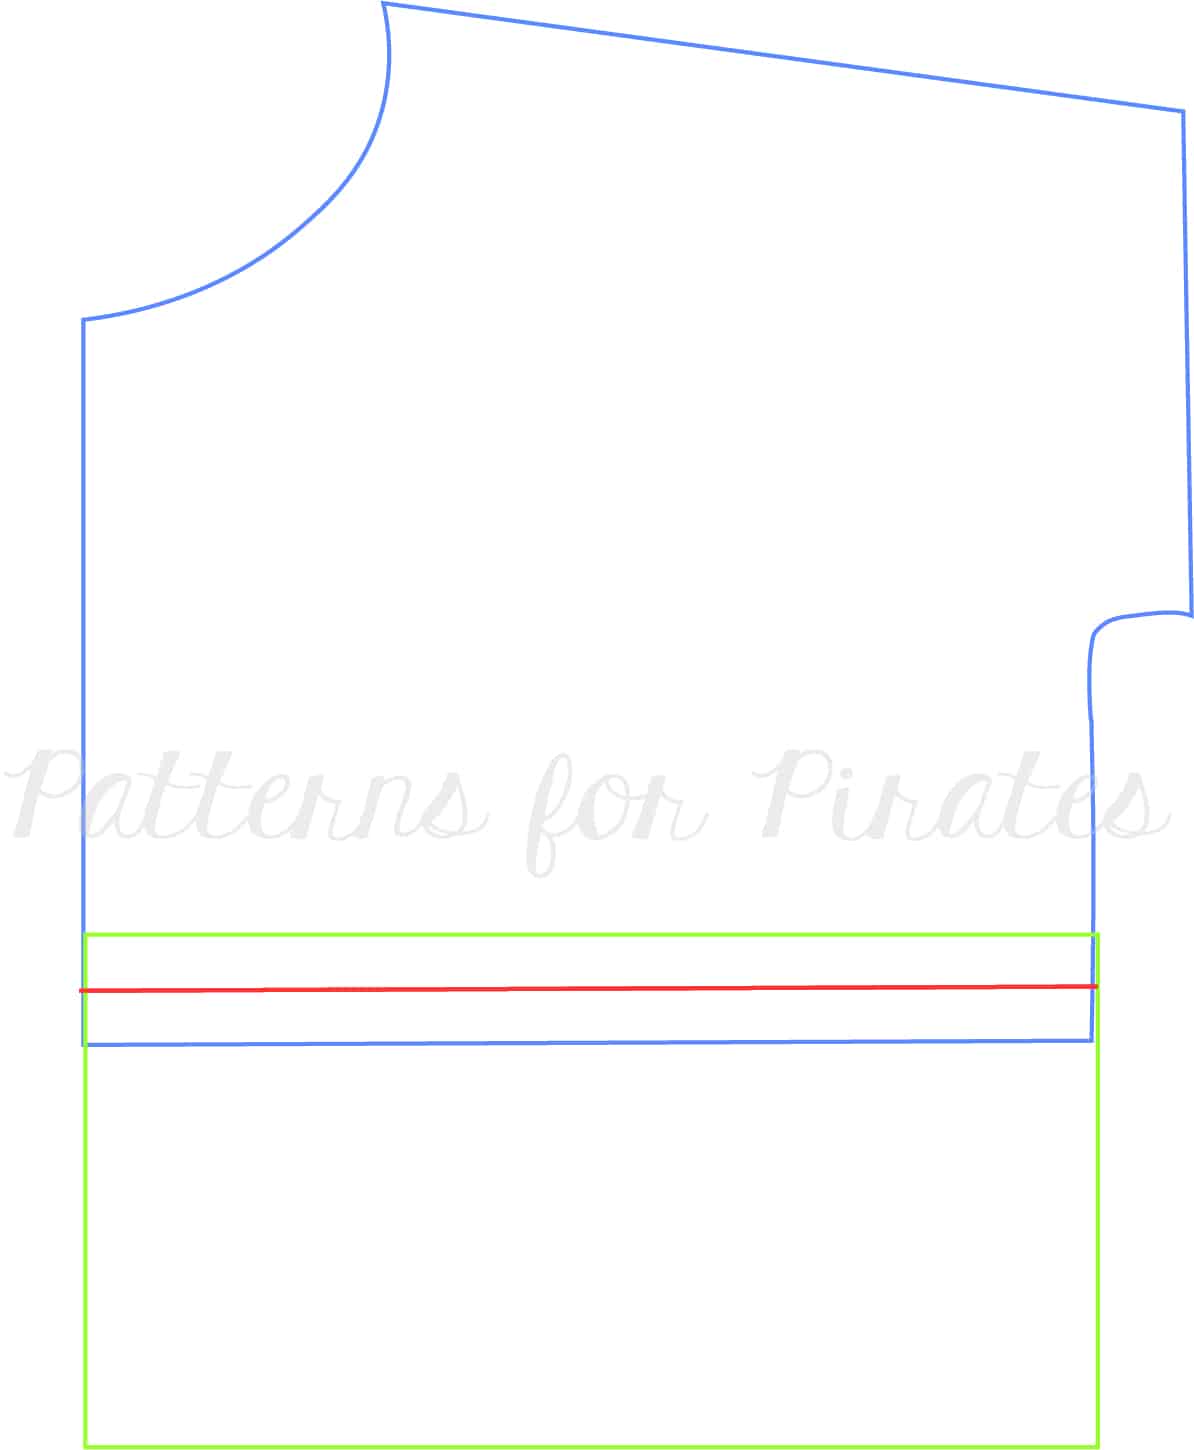
Start by printing your preferred style. Now grab the two back pieces. At this point you can do one of two things- remove the 1/2″ seam allowance from each piece and tape together (shown in first picture). Shown in the second picture, you could also fold each piece up 1/2″ and butt the two pieces together, matching the FOLD line and the side seam and …boom! There you have your new back pattern piece.


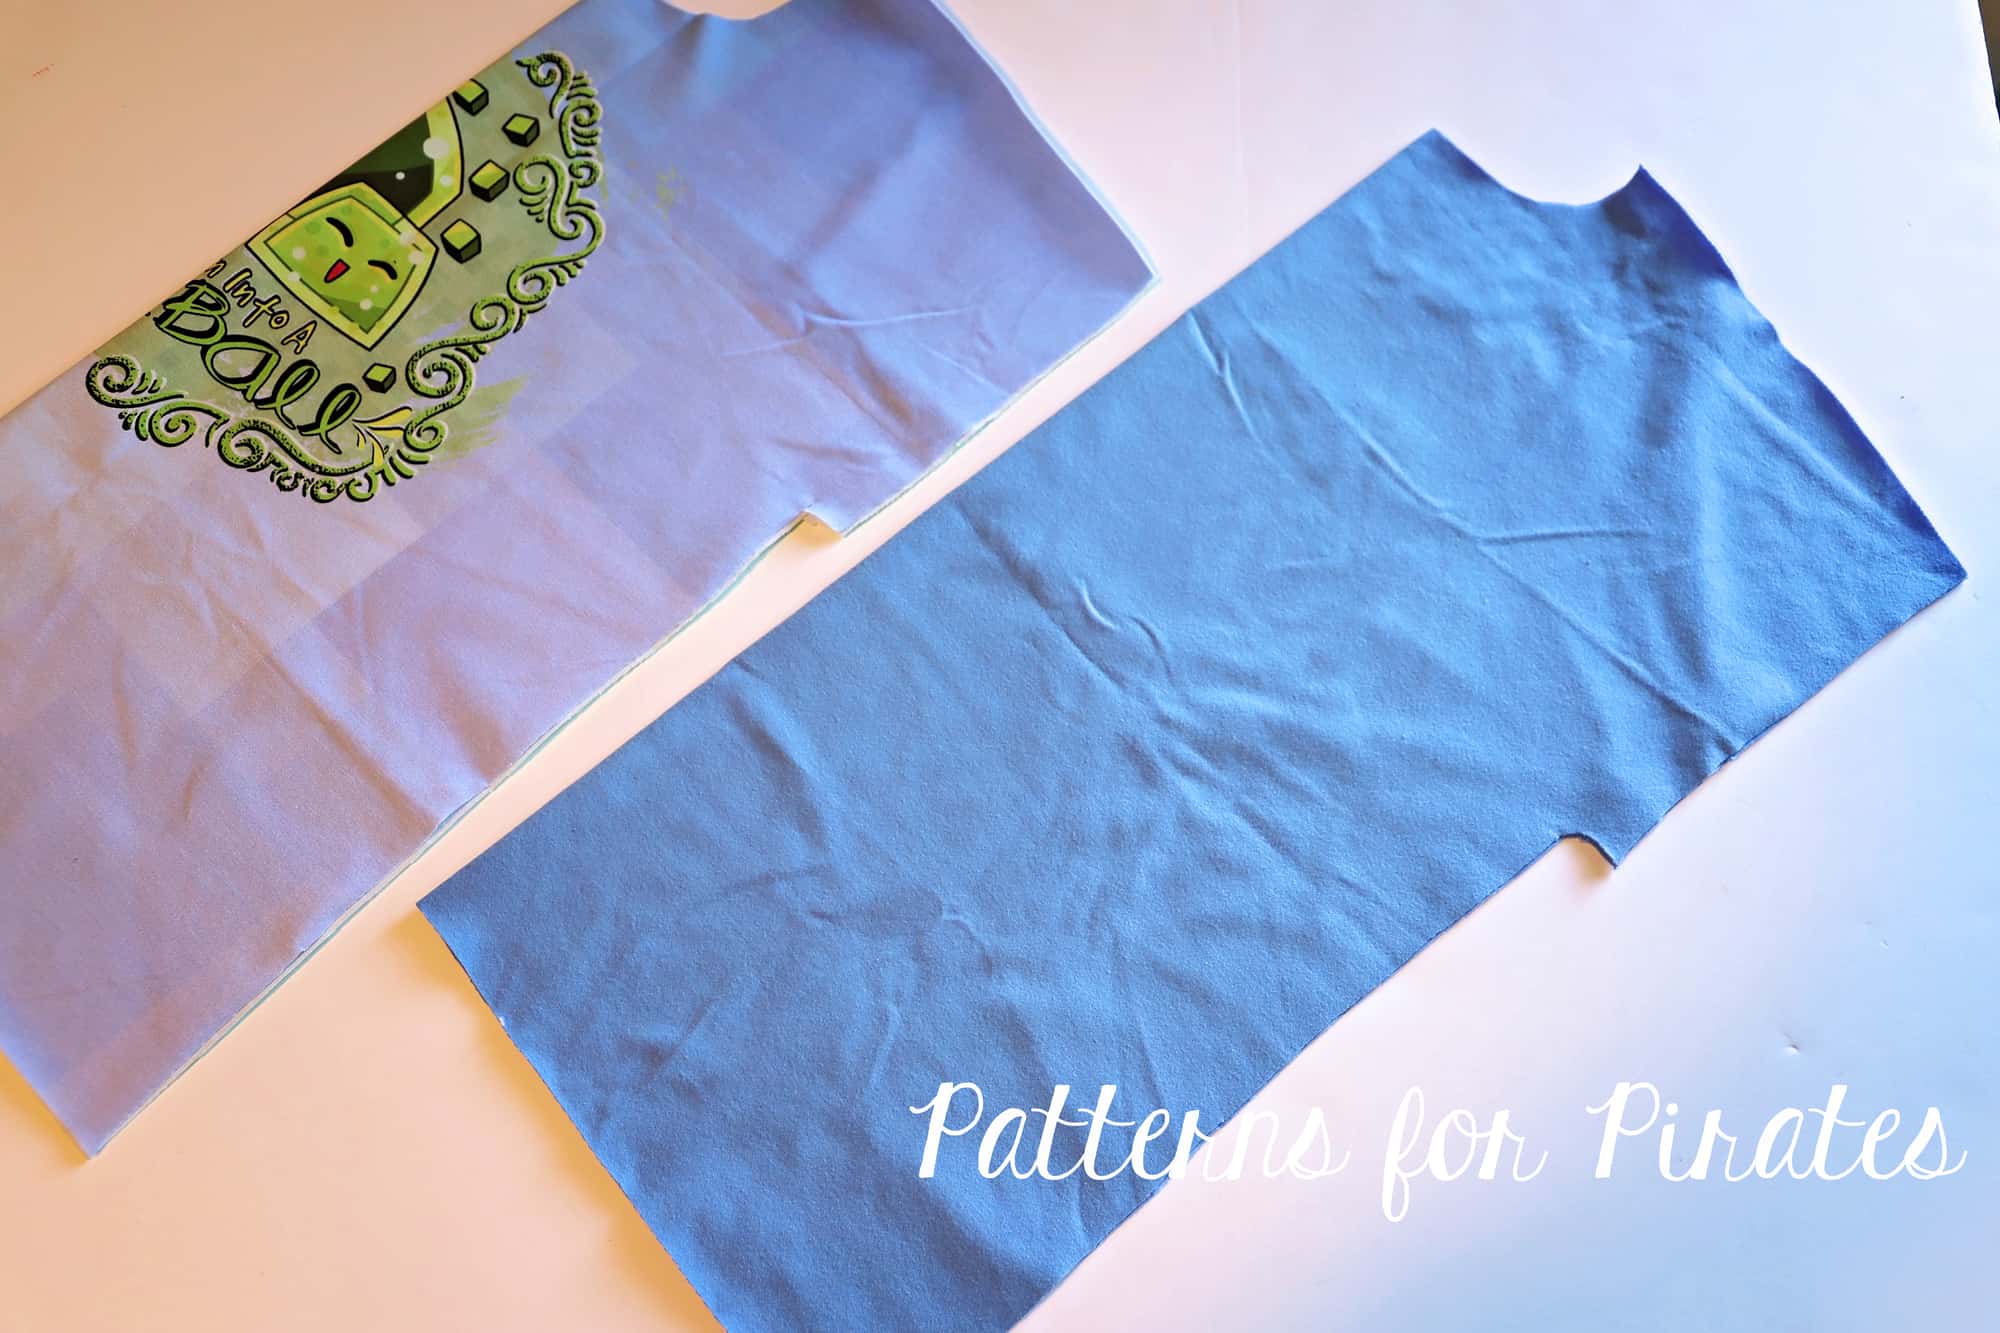
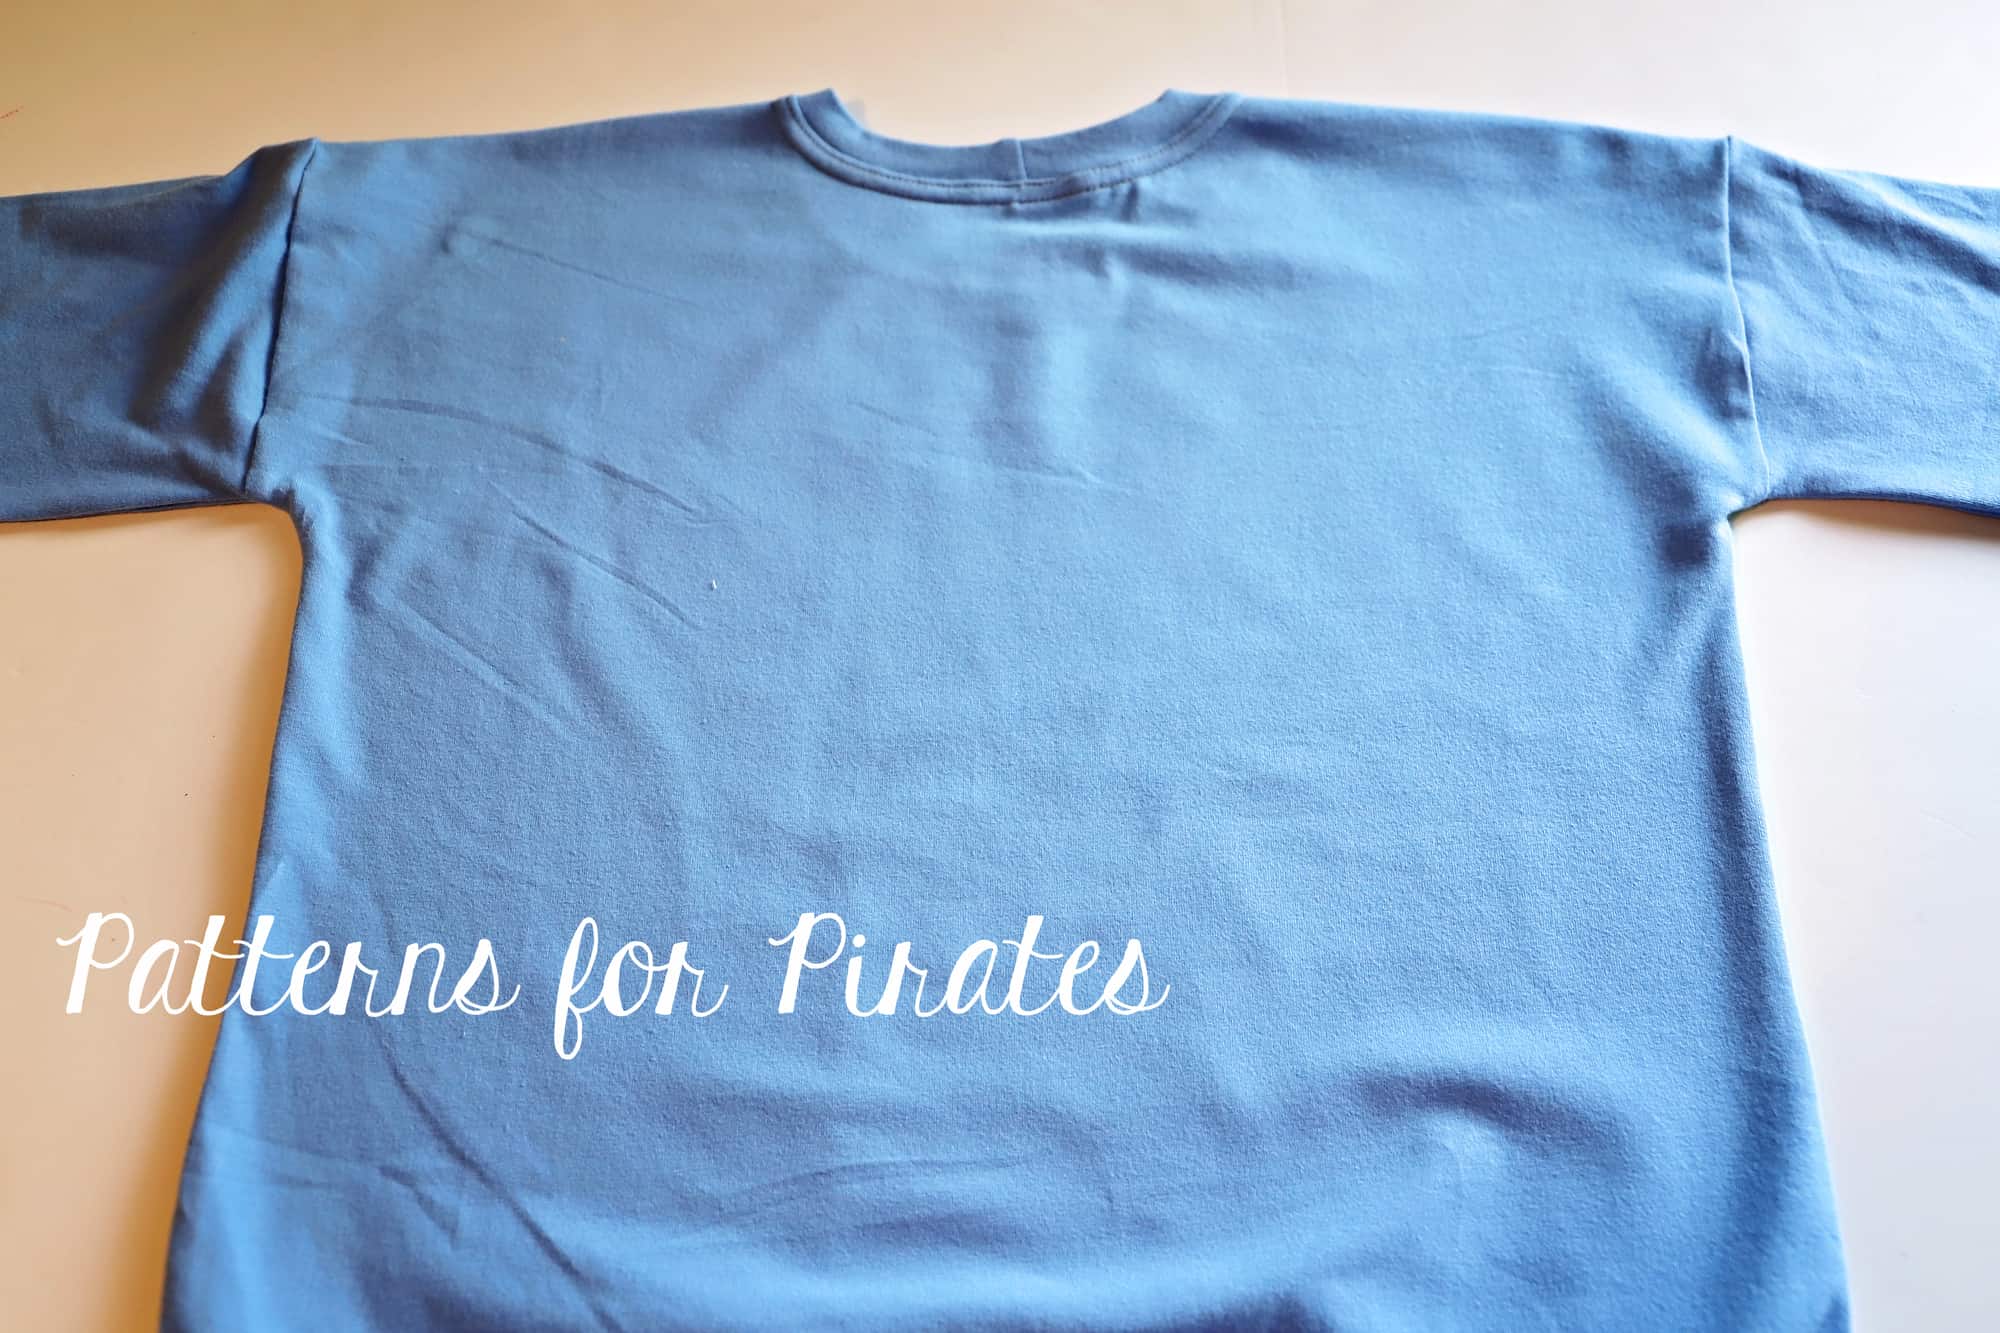
Cut your pattern pieces and sew the shirt as per the tutorial. Simply skip the steps that show you how to sew the two back pieces.

Tadah! All done! One more option to add to the Sporty Piko styles.

My little man absolutely loves his new shirt but if you want to treat yourself to an adult Sporty Piko with a solid back, simply follow the same steps and enjoy!


P4P Sporty Piko- solid back hack

…..

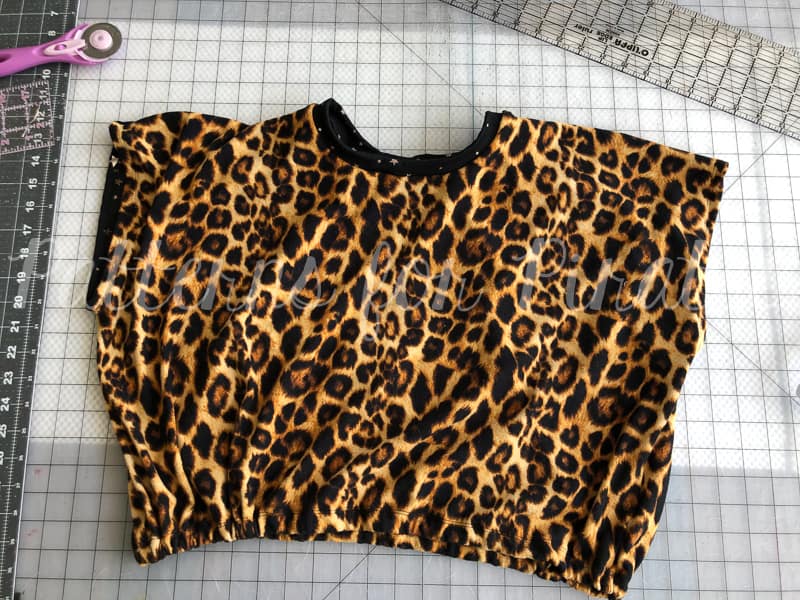
Elastic crop top

Maybe you want a cute crop but aren’t interested in fussing with the drawstring option?  I’ve got you covered!

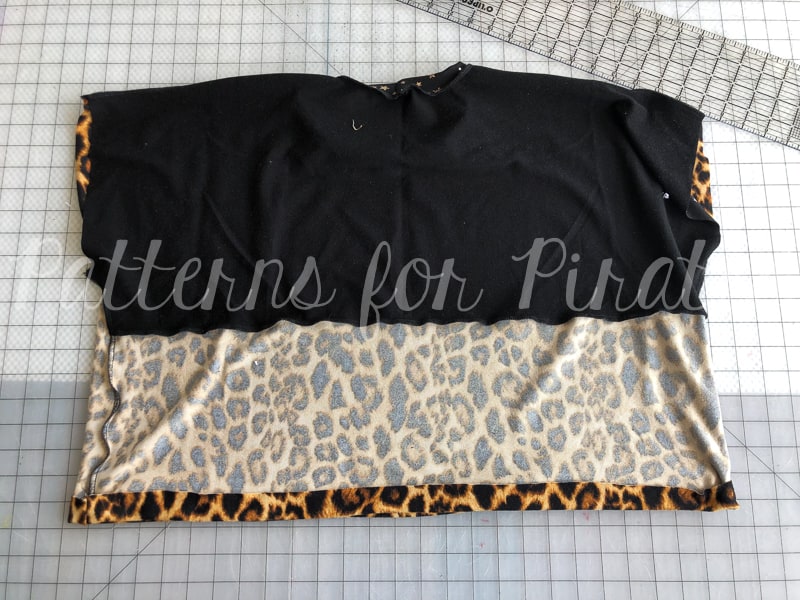
Follow all of the instructions for the crop option, including the 1″ hem.

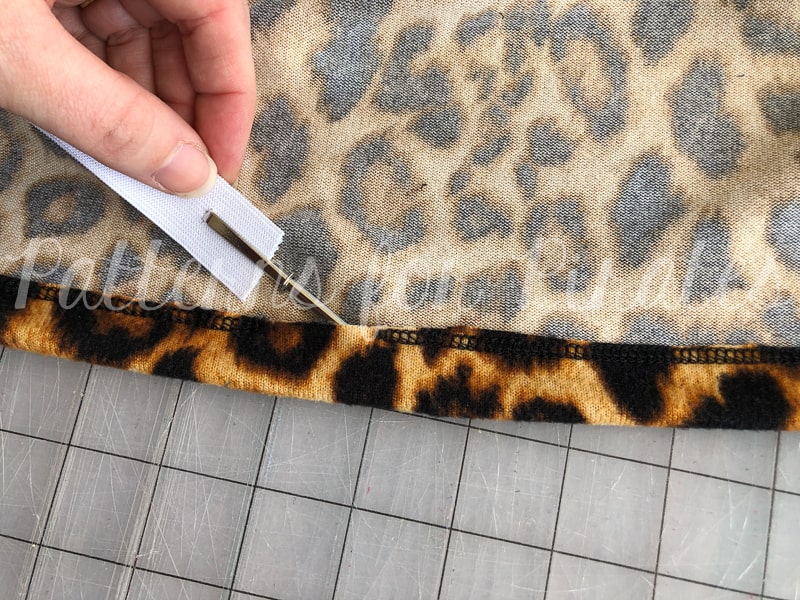
Top stitch around the entire folded edge, leaving around a 3″ opening to thread the elastic through.  (I like to position my opening on the back portion of my items, but it’s really a personal preference.

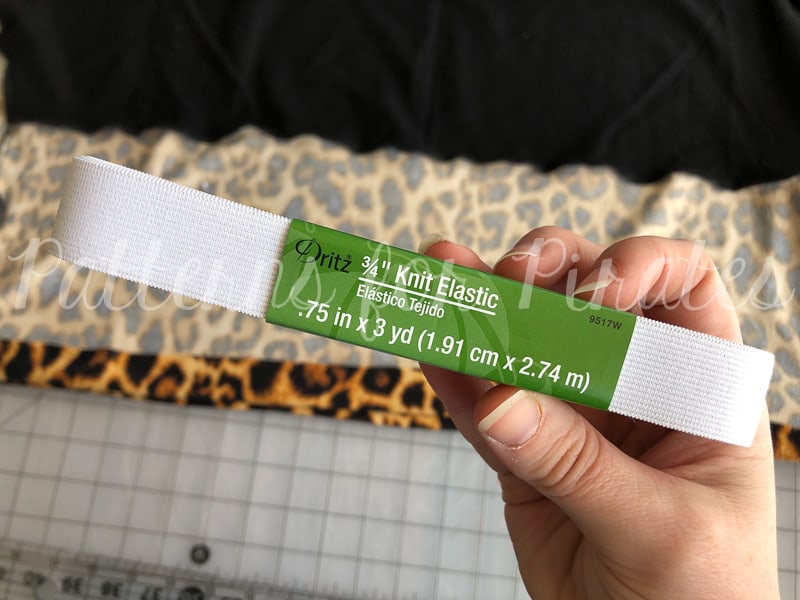
Using 3/4″ knit elastic, cut a length that is your waist measurement, minus 2″.

Feed the elastic through the opening.

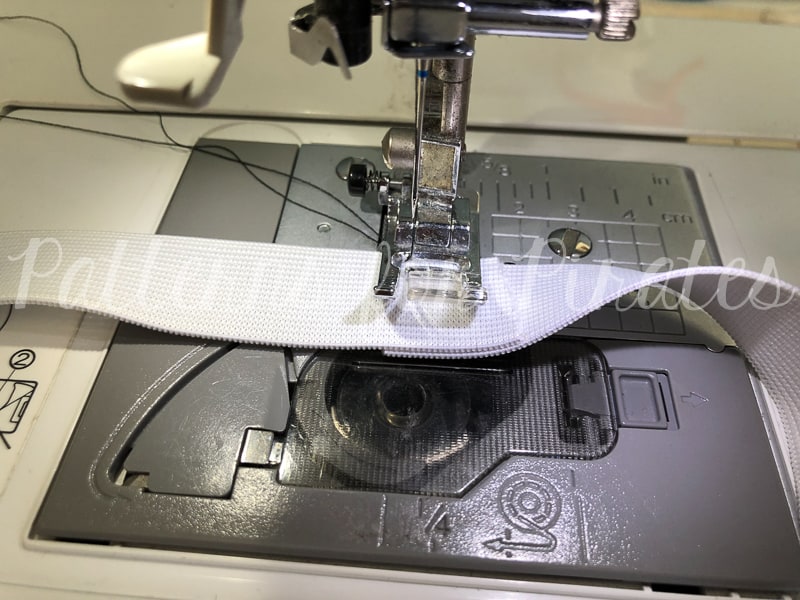
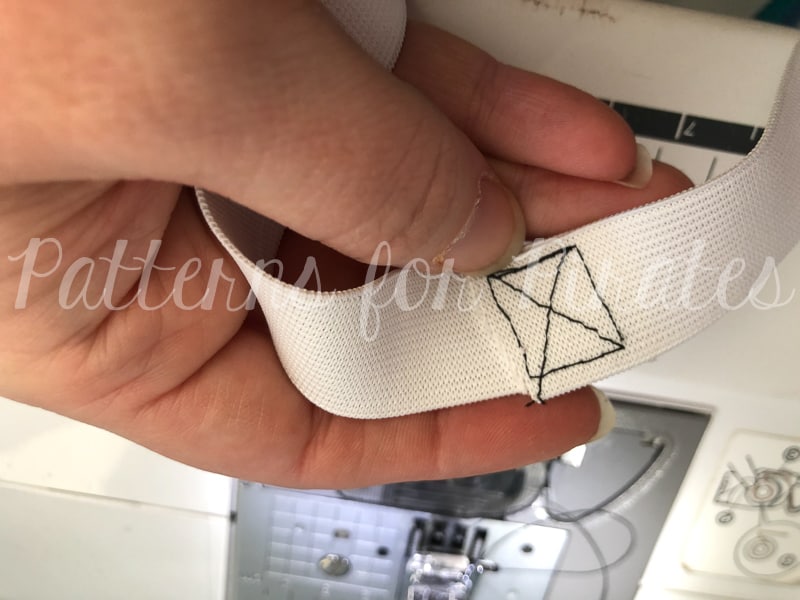
Overlap the raw edges of the elastic, being careful not to twist it, by 1″.  Sew the overlapped pieces together, using a stretch stitch.

Close up the opening of the bottom hem, and enjoy your new crop!


…..

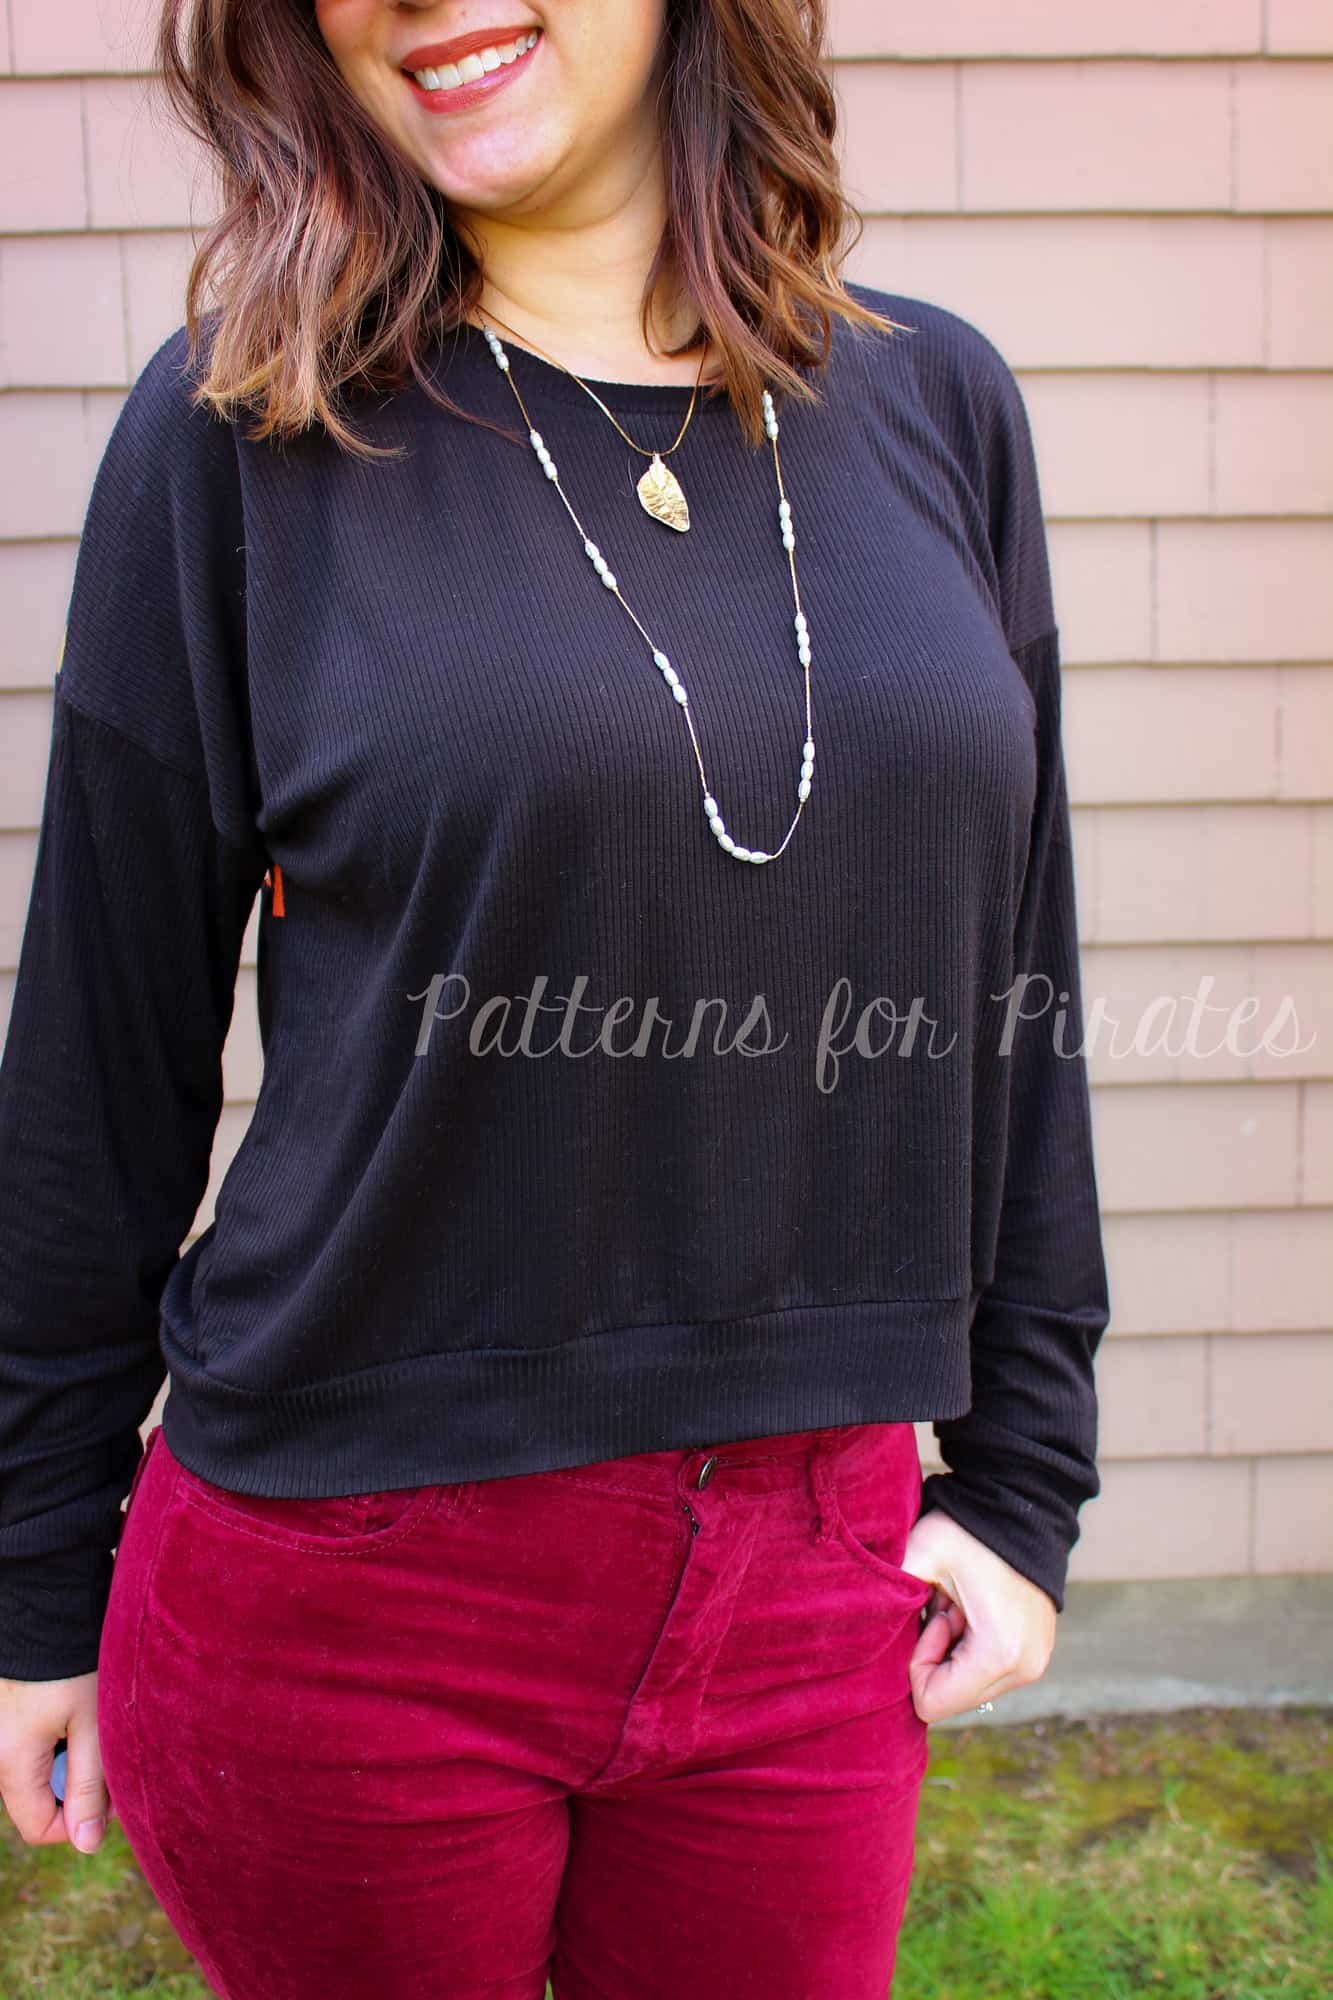
Banded crop top

Elastic… draw string… and now we’re bringing to you a third option to finish off your crop top versions- a banded option. This is a quick and easy way to finish off your top, especially for those of us who are opposed to the dreaded finishing hem! 🙂

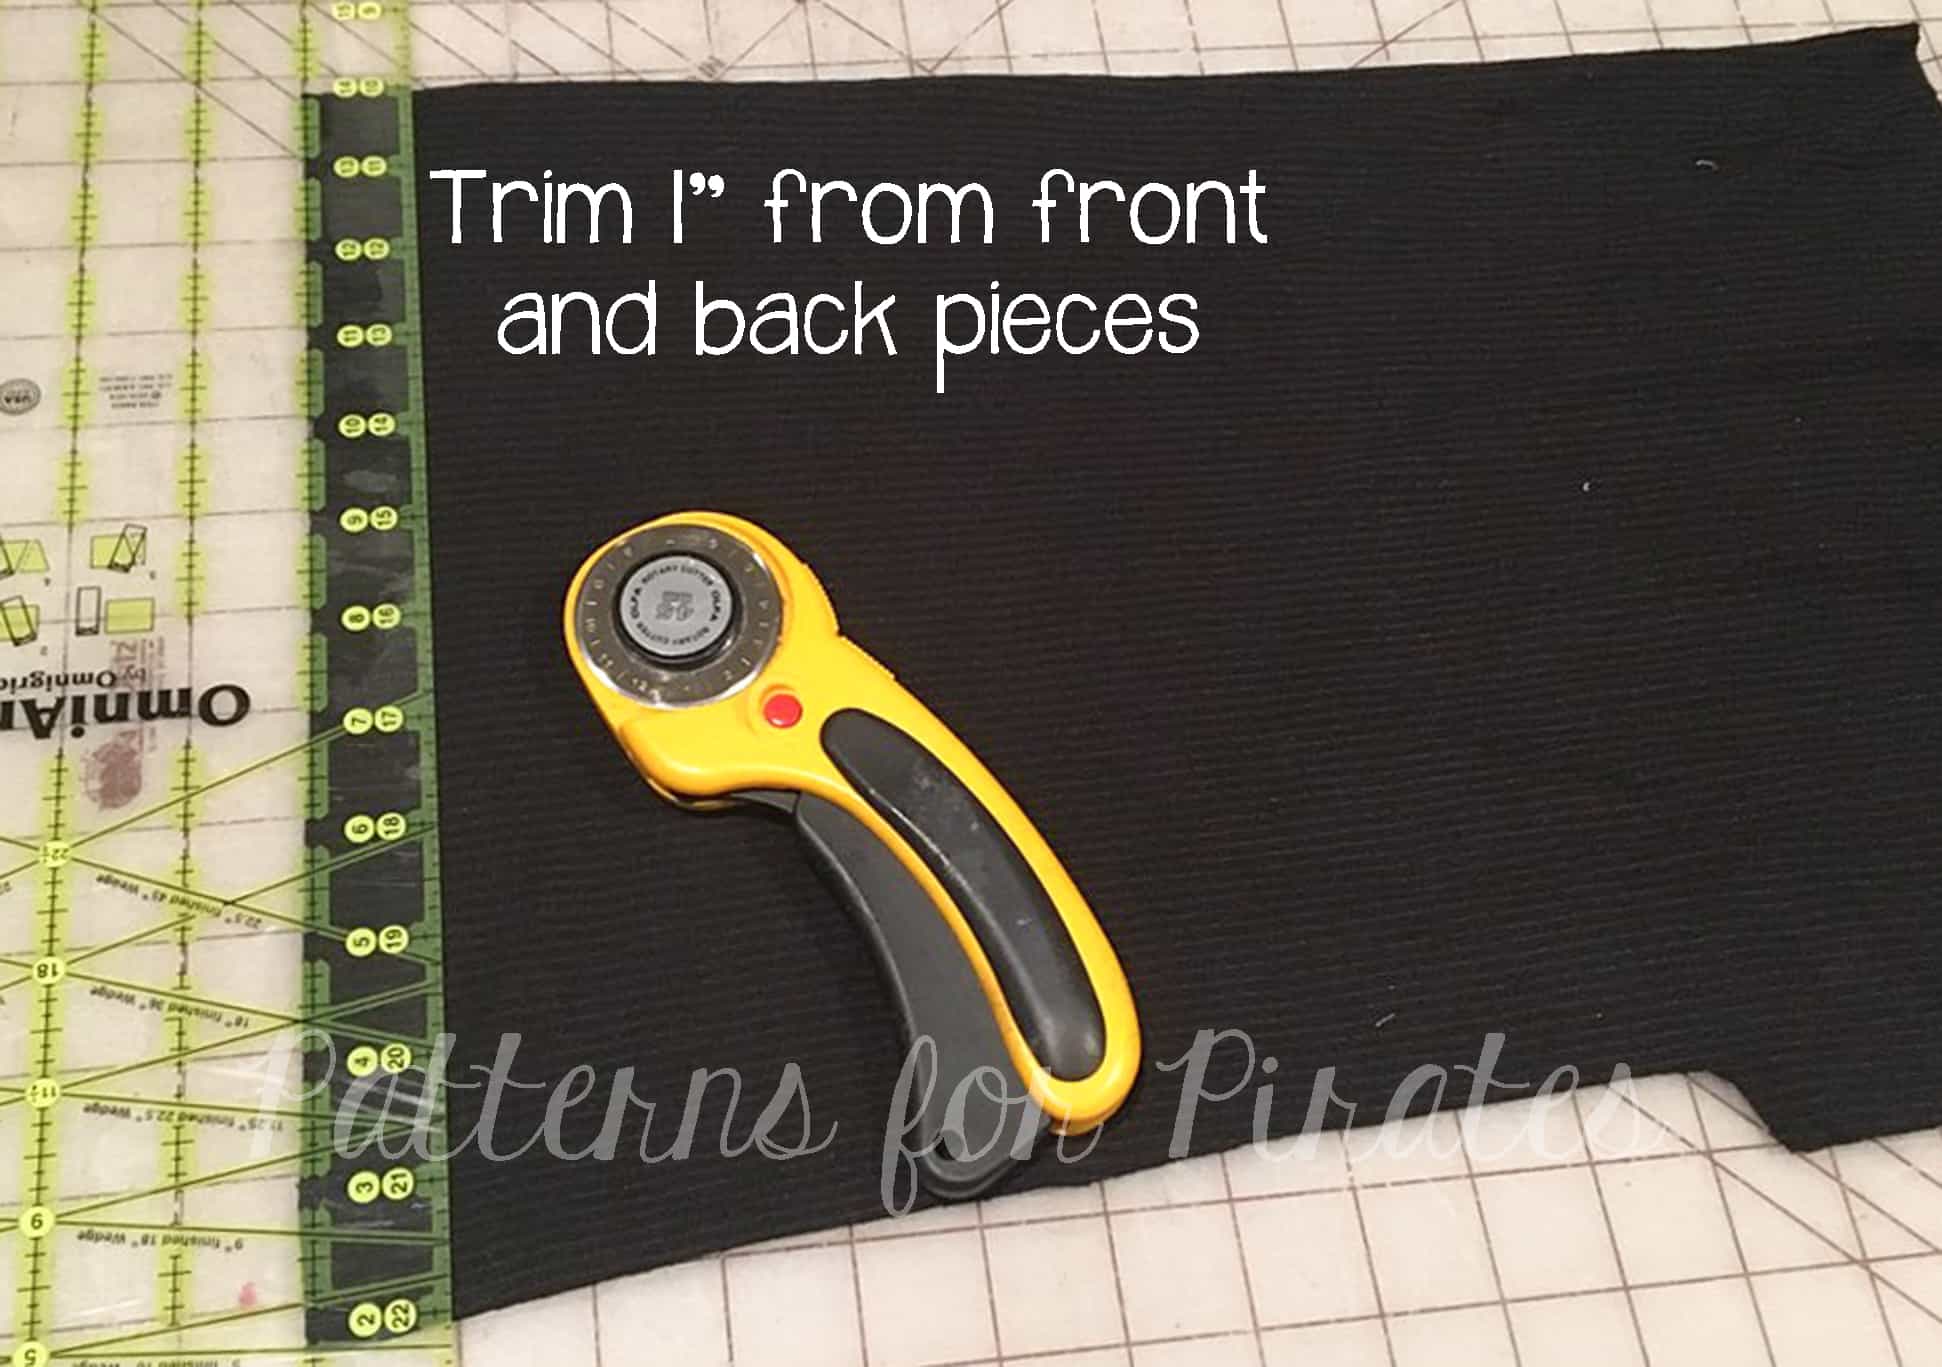
To create this look, you will need to cut out all of your pieces needed for the cropped version, as well as a band (discussed later). Once you’ve cut out your pieces, you will want to trim 1″ off of both the front and back pieces (everything else will remain the same).

Assemble your shirt as per the pattern directions. Once you’ve completed your shirt, it is now time to attach the band. You will want to measure the total bottom hem of your shirt. To calculate the final width of your band, you will take your total measurement x 90%. Then add 1″ for the seam allowance. For the women’s version, I recommend a length of 4″ and for the youth, a length of 3-4″, depending on where you would like the finished length to be.

Using the instructions for the banded version in the tutorial, attach your bad. That’s it! Go off and enjoy that new shirt you’ve just finished up using one of our three finishing options.

~Erinn and Nicole


Now that you got your patterns and looked over our easy hacks, time to sew! Remember to share your creations in the P4P Facebook group so we can all admire them.

Filed Under: Frequently Asked Questions, Pattern Hacks, Pattern Release, Uncategorized 4 Comments

Loggers :: New Pattern Release!

March 12, 2019

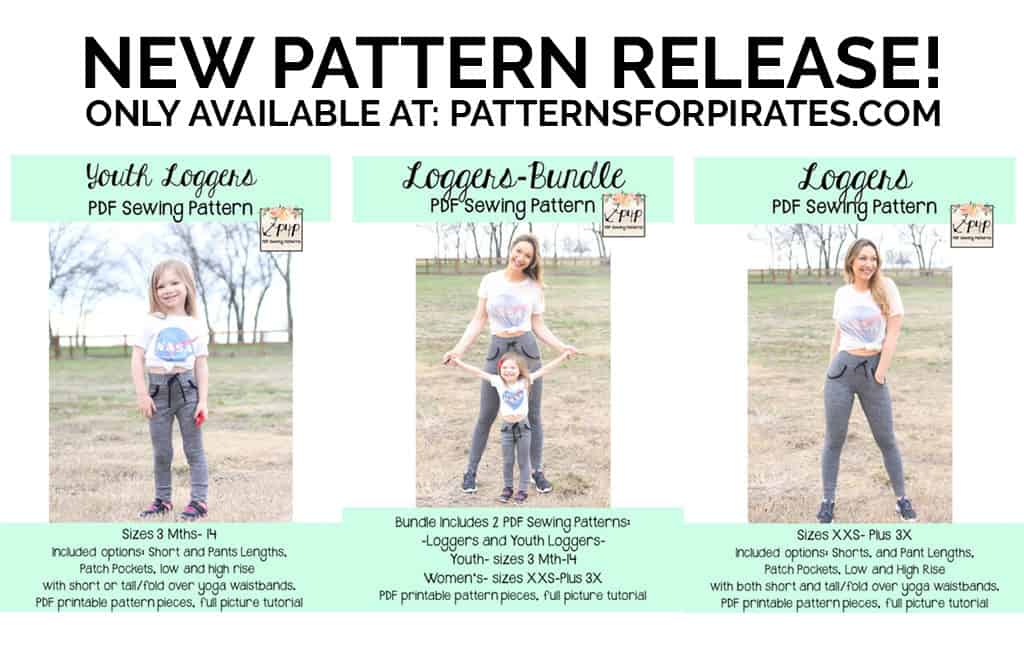
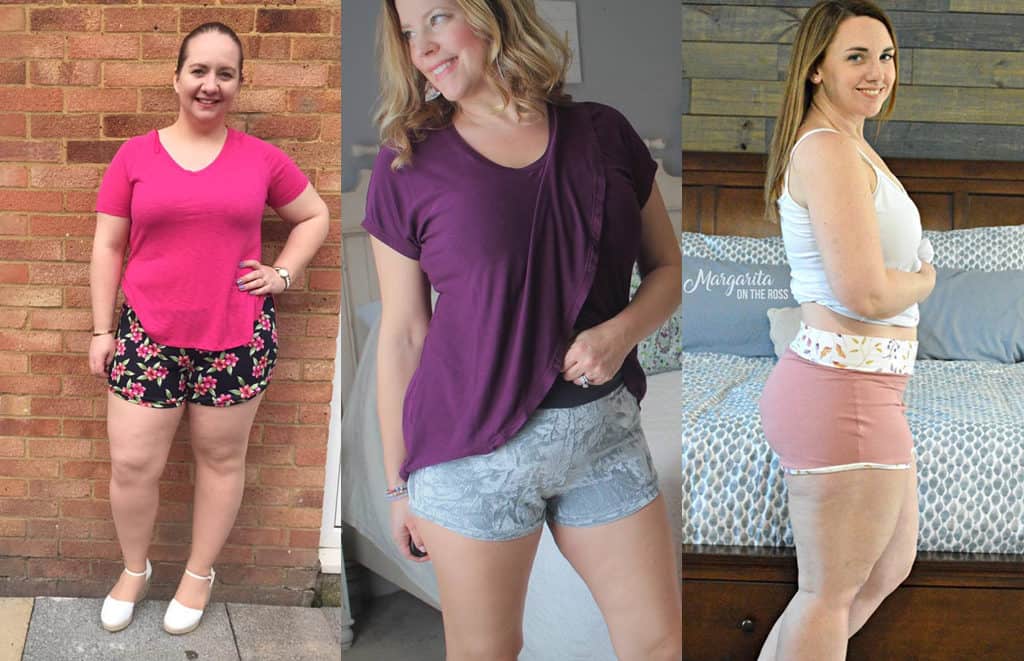
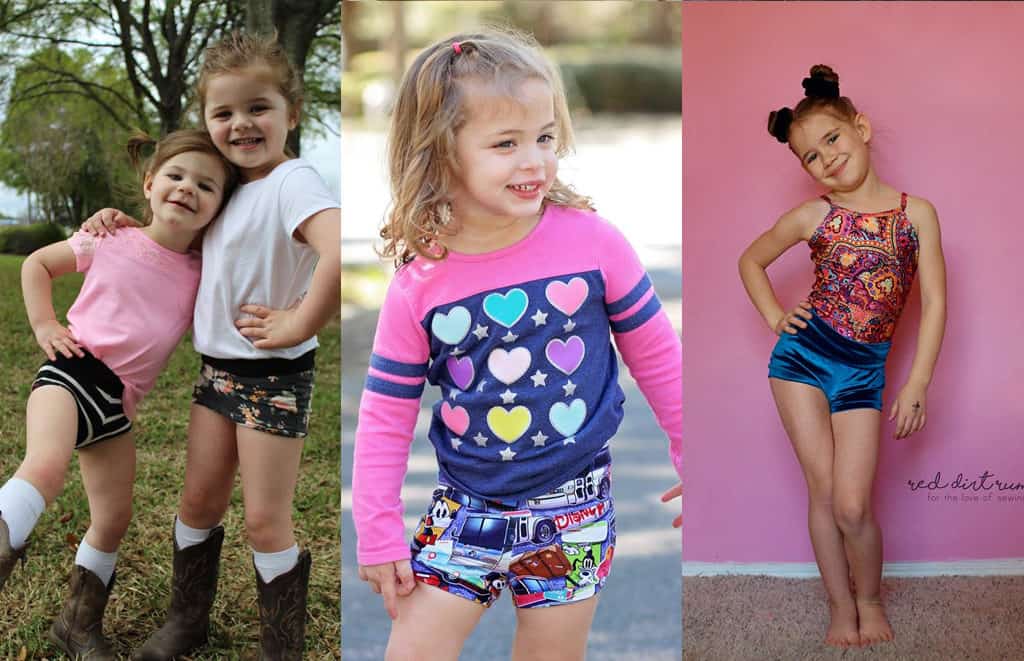
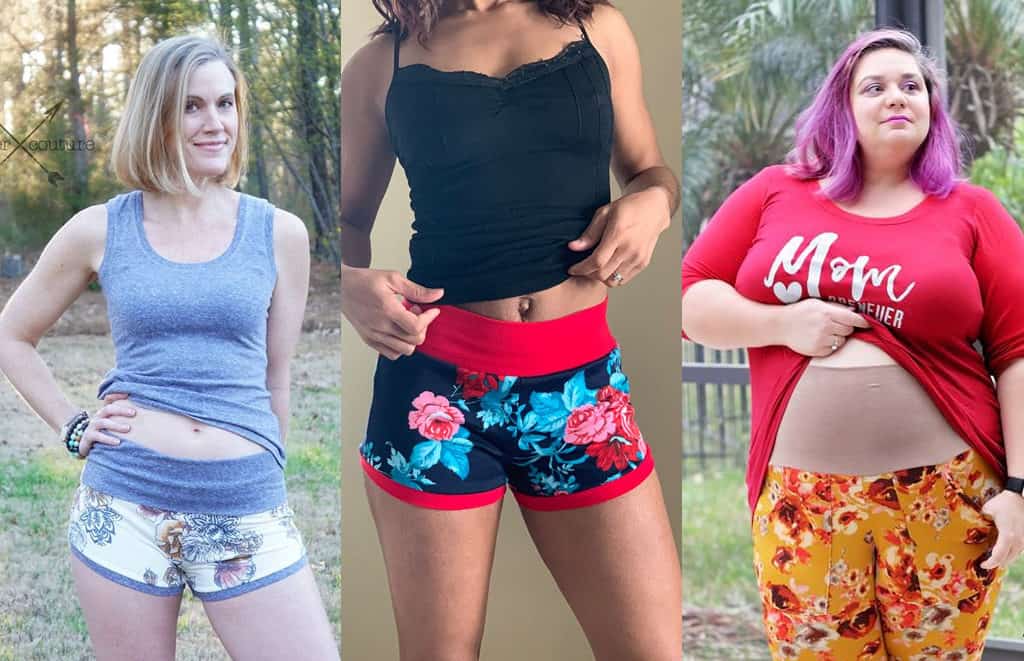
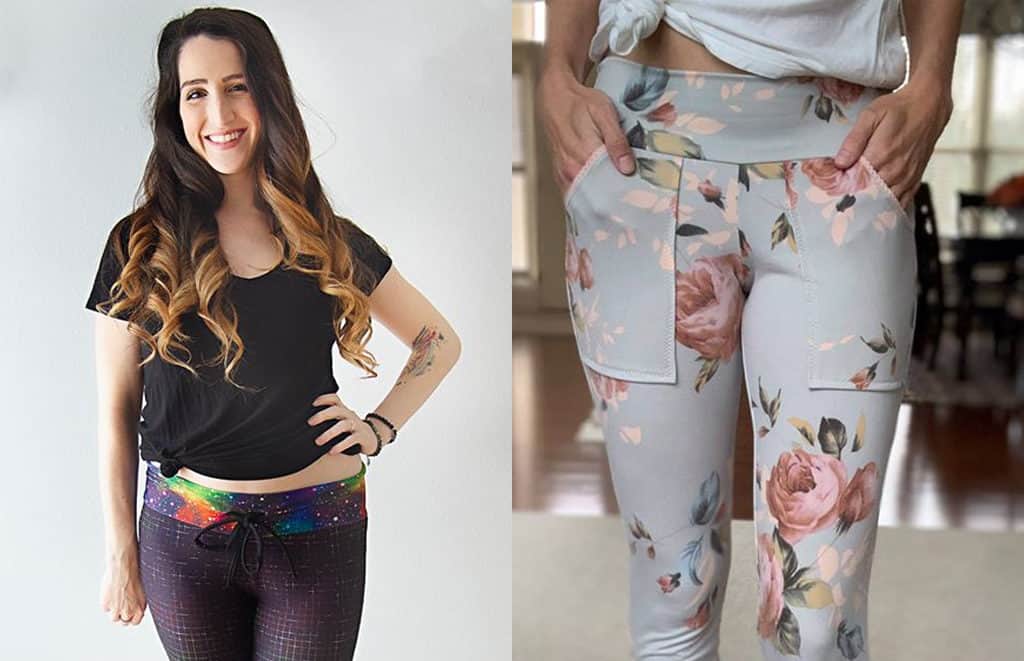
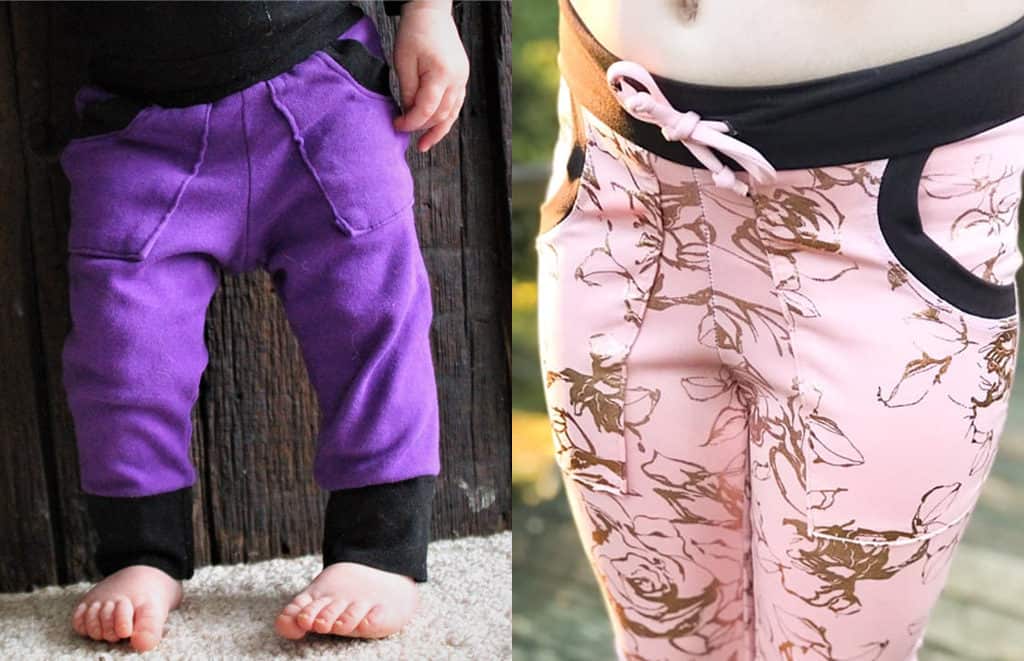
What do you get when leggings and joggers get together and make a baby?  LOGGERS!!

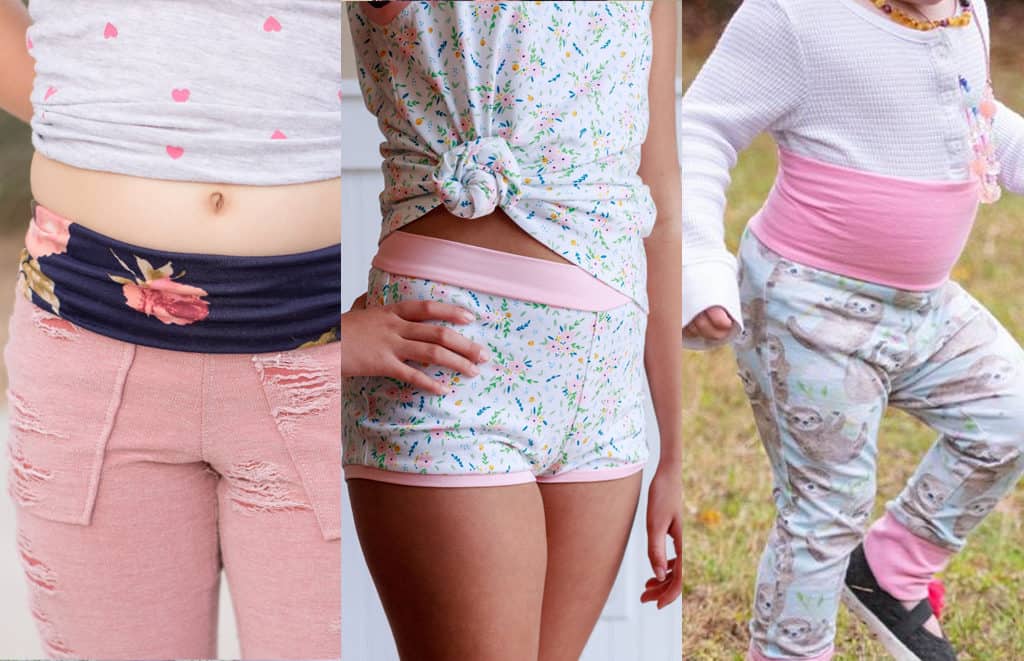
Today is like Christmas and my birthday all wrapped up into one because we are bringing you two brand new patterns that I think you’re really going to love: Loggers and Youth Loggers!These patterns are drafted for a stretch knit fabric with a 40-50% horizontal stretch, and you will want some vertical stretch for wearing comfort.  Both the adult and youth versions feature a tighter pant with cuffs and optional pockets on the pant length.  They are drafted in two lengths (shorts and pants), a large size range (XXS – Plus 3X in women’s and 3M – 14 in youth), have two rises (high and low), two waistbands (short or tall/fold over yoga) as well as an optional drawstring.
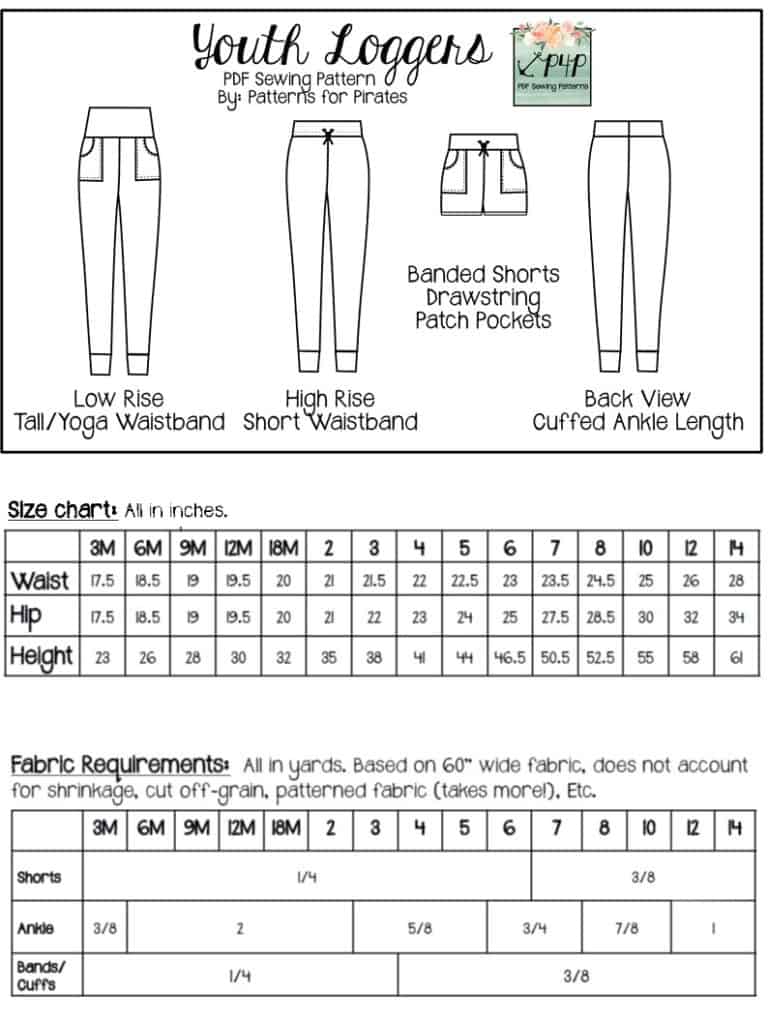
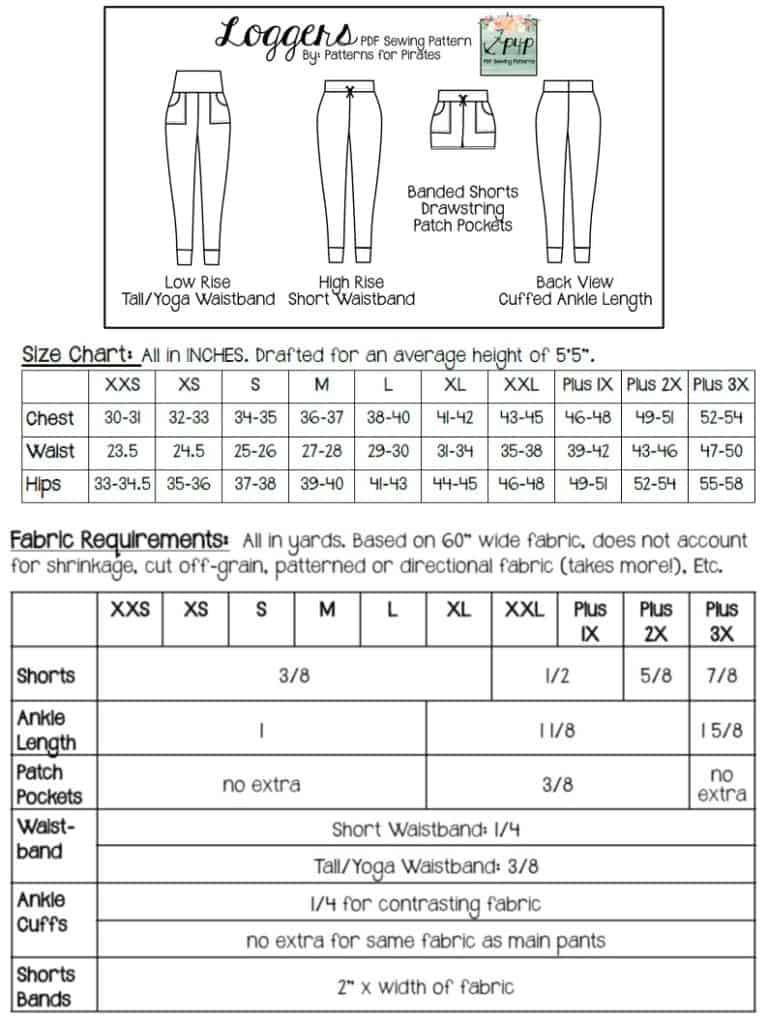
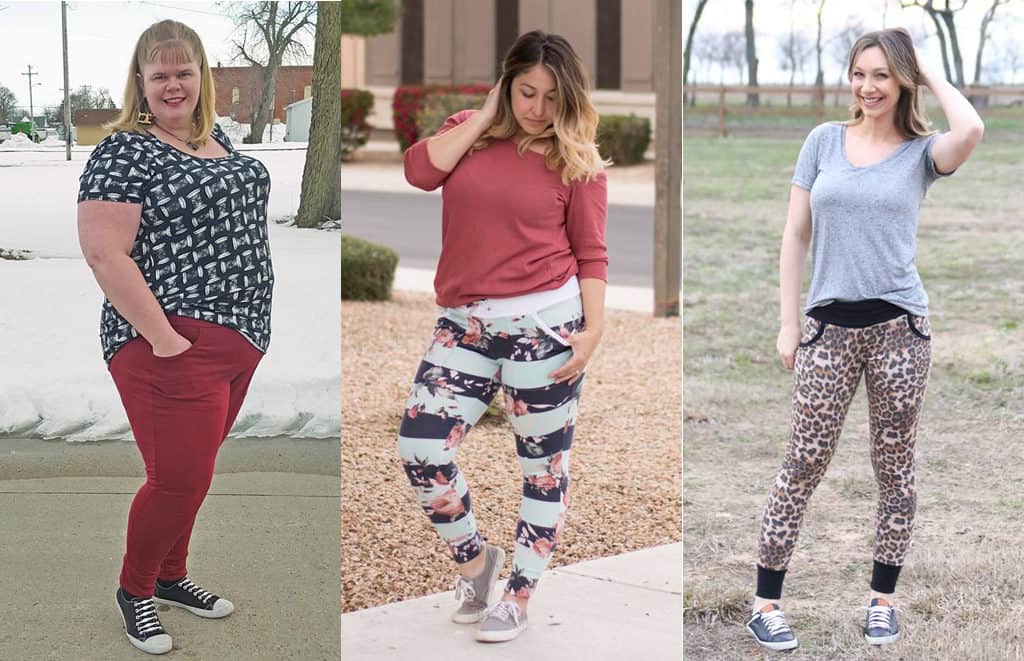
Loggers wear like a jogger but look like a legging.  Everything is finished with a band, meaning there is no hemming required.  And they are perfect for lounge wear, workout gear, swim cover-ups, layers under dresses/skirts, and everything in between.

**Want to learn more about how to measure yourself for this pattern?  We’ve got you covered with an in-depth blog HERE.  And in case you’re new to Patterns for Pirates and PDF patterns in general, we have a great blog full of new user tips HERE to help you get started!  As with all of our current releases and updates, the pdfs now include our layers feature and can be found in Letter, A4 and A0 sizes.  And for even more helpful fun, we have a *free* printable that you can use to help record your measurements as you take them.

Let’s take a quick look at the different options!

PANT LENGTH W/CUFFS

SHORTS LENGTH W/BANDS

SHORT + TALL/FOLD-OVER YOGA WAISTBANDS

OPTIONAL PATCH POCKETS + DRAWSTRING

Are you ready to get in on the logger fun?  Go grab your pattern(s) now!

LOGGERS | YOUTH LOGGERS | LOGGER BUNDLE

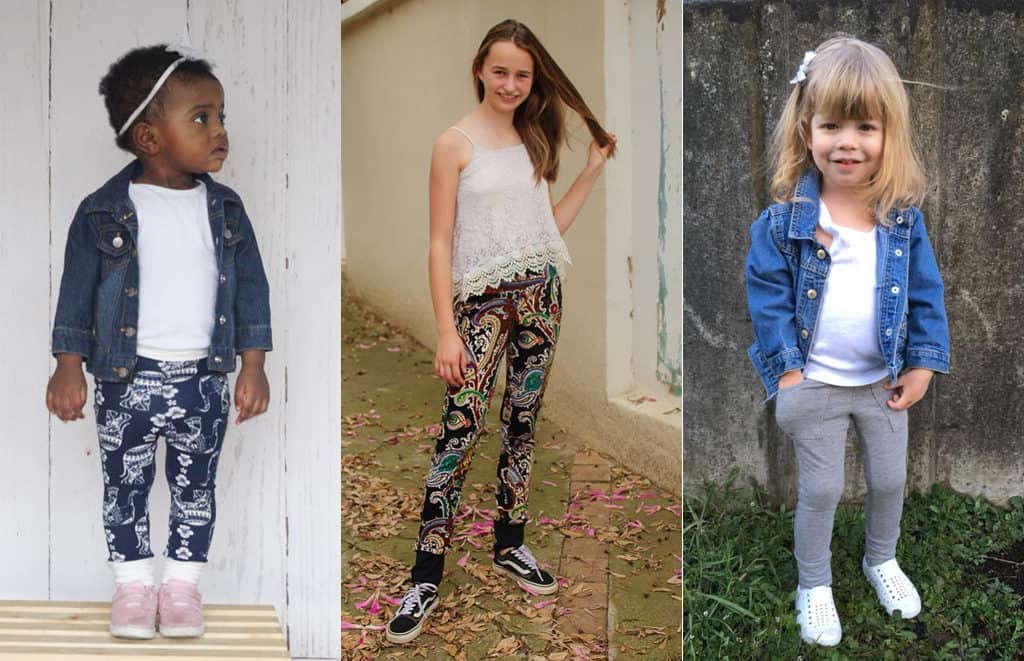
Need more convincing?  Just take a look at this pattern on all of the amazing shapes and sizes of our testers, and get a look at more examples of all the options in our albums in the P4P Facebook group! Logger Album | Youth Logger Album

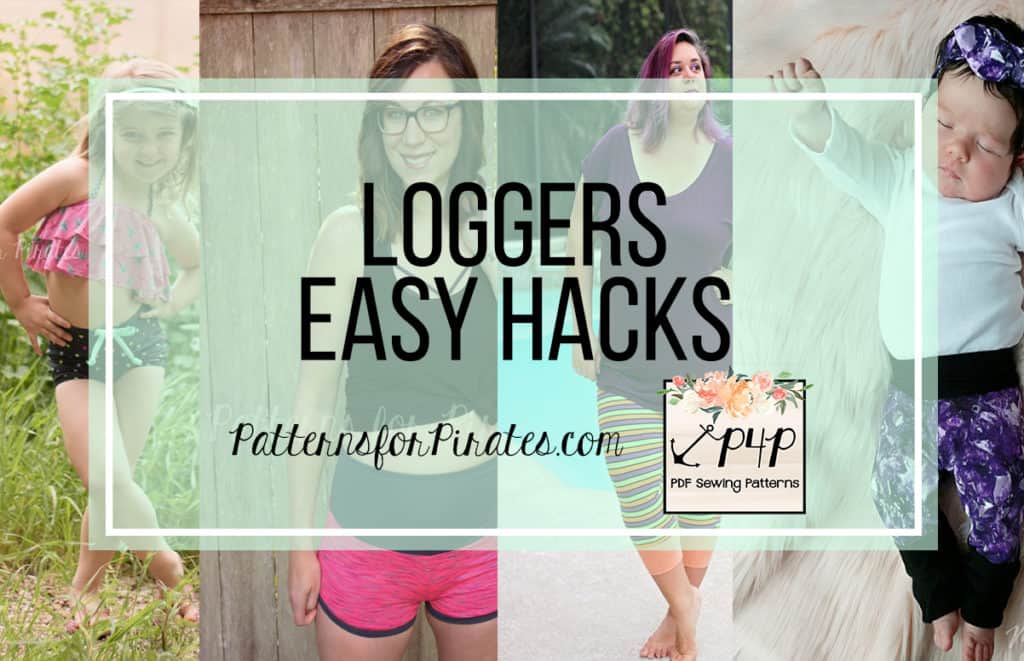
And if that didn’t give you enough options, make sure to check out the hacks post to help take your patterns even further.

The release sale (no code needed) will be through Sunday, March 17, 2019 (11:59PM US Central Time Zone).

Happy Sewing, pirates!

Filed Under: Pattern Release Leave a Comment

Heart Pouch :: Free Valentine Sewing Pattern!

February 10, 2019

Have we told you (our Pirate family) lately that we love you?  We love you so much, that we are giving our hearts to you this Valentine’s Day.

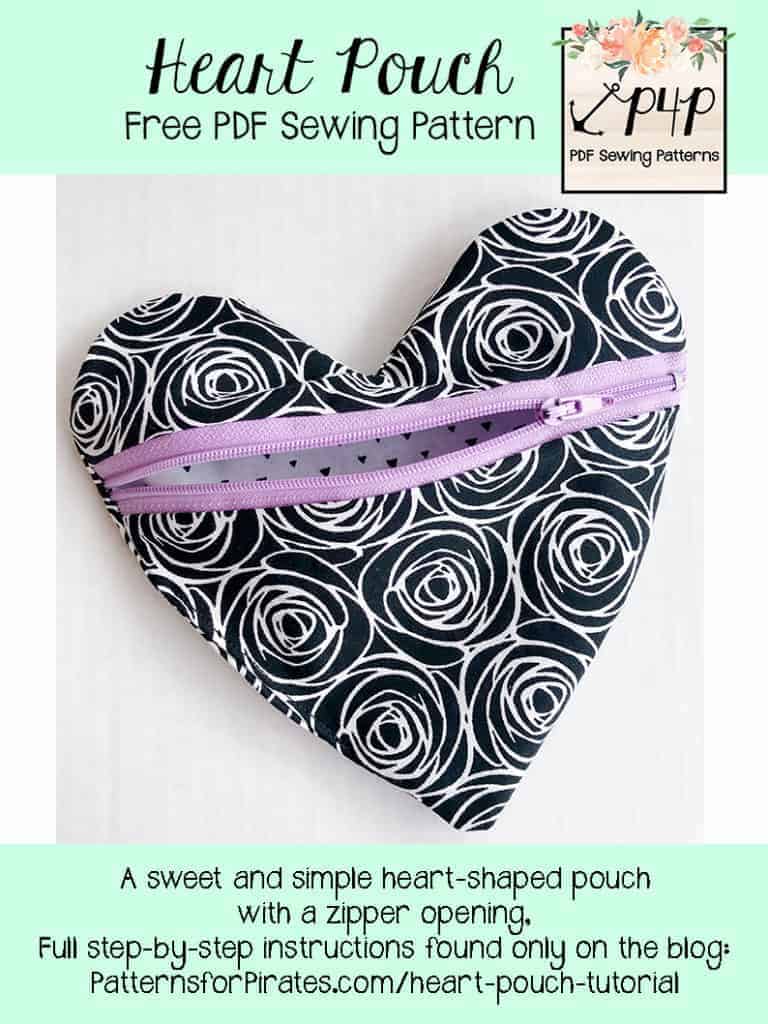
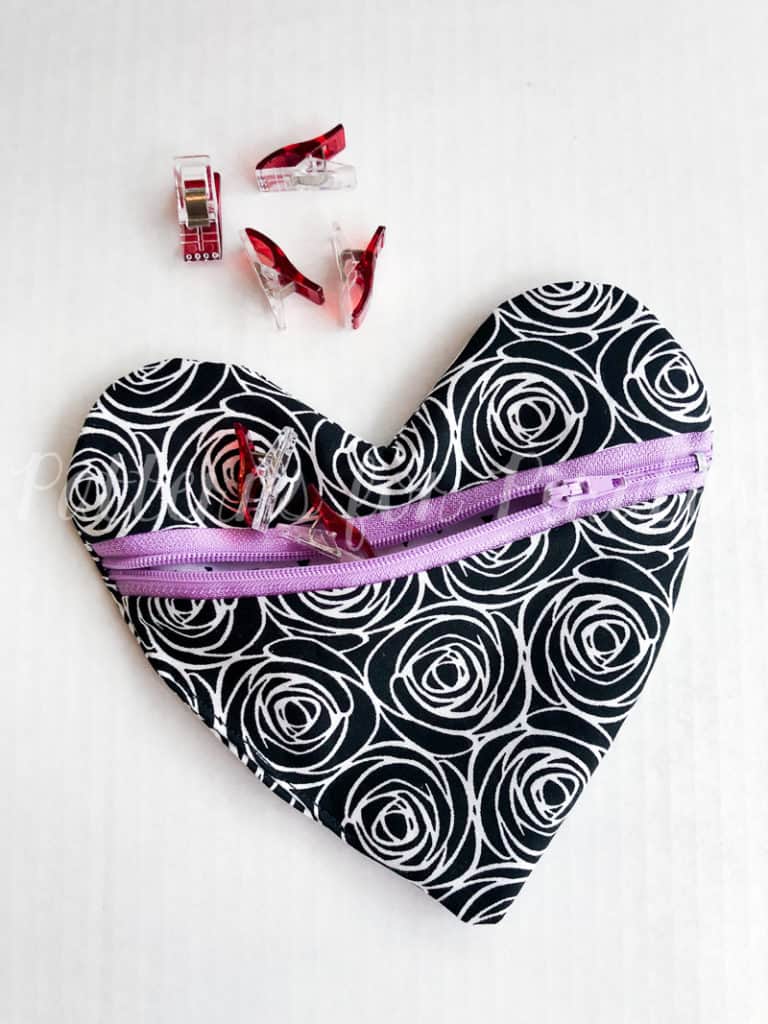
Well, maybe not our actual hearts…but a Heart Pouch sewing pattern.  And it’s free!!  This zipper style pouch is super easy, quick, and fun to make, and takes very little fabric.  (Plus maybe you have some 9″ zippers laying around from the scarfs that you never got around to making this past holiday season??  It’s a perfect way to use up that stash!)

**Stick around all the way to the bottom of this post for a video tutorial of the assembly of these sweet little pouches as well!

— Heart Pouch PDF free pattern pieces (found HERE)
— 2 – 8″x8″ pieces cotton woven for main + lining fabrics
— Lightweight Fusible Interfacing: I like Pellon SF101, or Heat & Bond 3336 (aff links)
— 1 – 9″ zipper

Recommended fabrics: quilting cotton, kona cotton, etc.

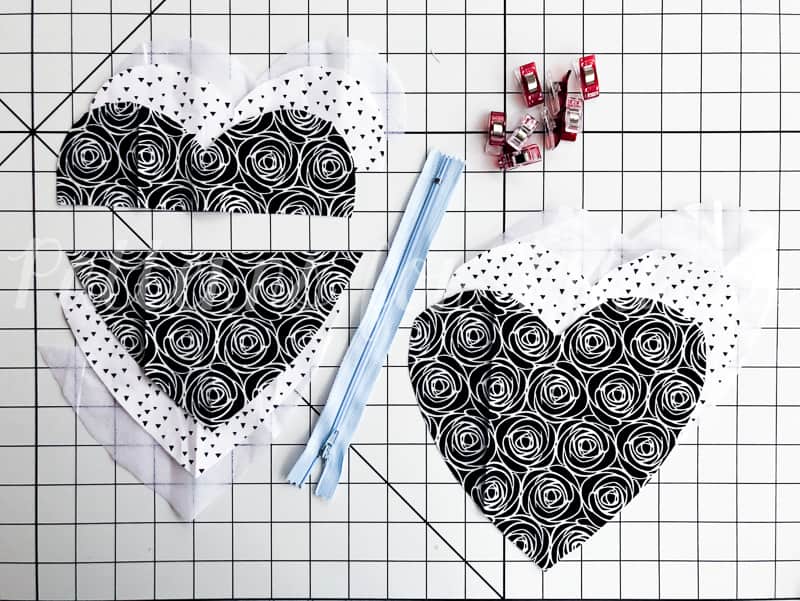
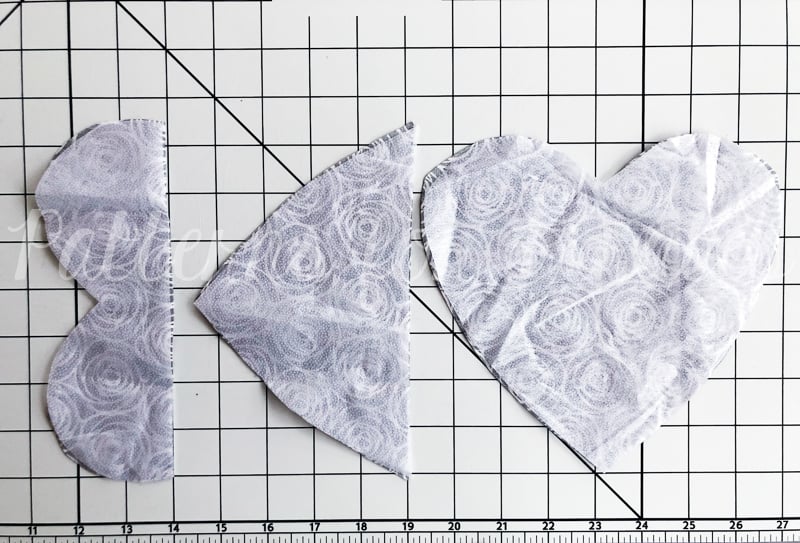
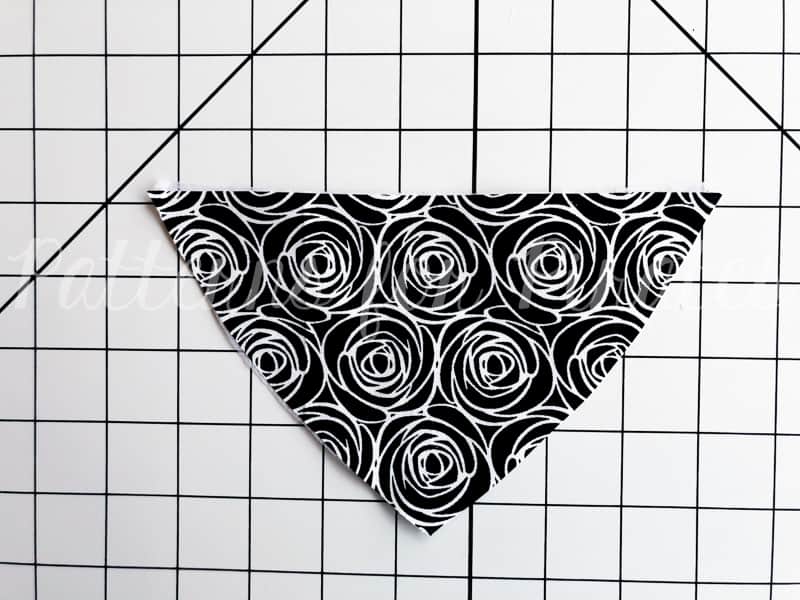
Step 1: Prepare your pieces.  You will need one each of the pouch back, pouch upper front, and pouch lower front; in your main, lining and interfacing fabrics.

Step 2: Following the instructions from the manufacturer, iron the interfacing to your main fabric pieces.

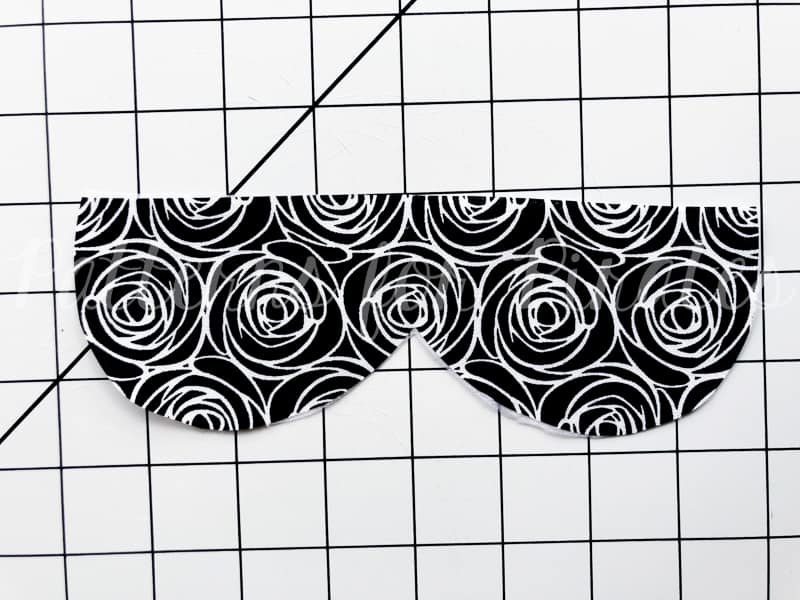
Step 3: Locate the upper front piece in your main fabric, and lay it with the fabric face up.

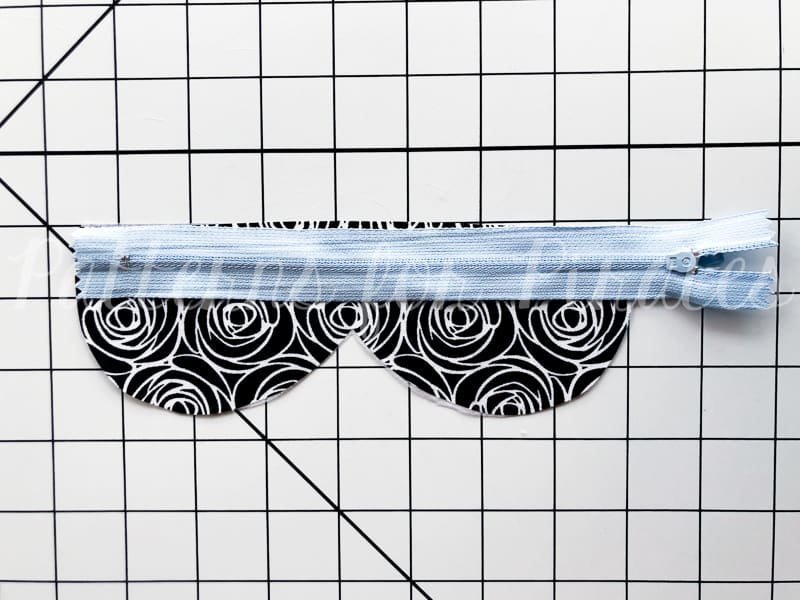
Step 4: With the zipper face down, align it against the straight, raw edge of your pattern piece.

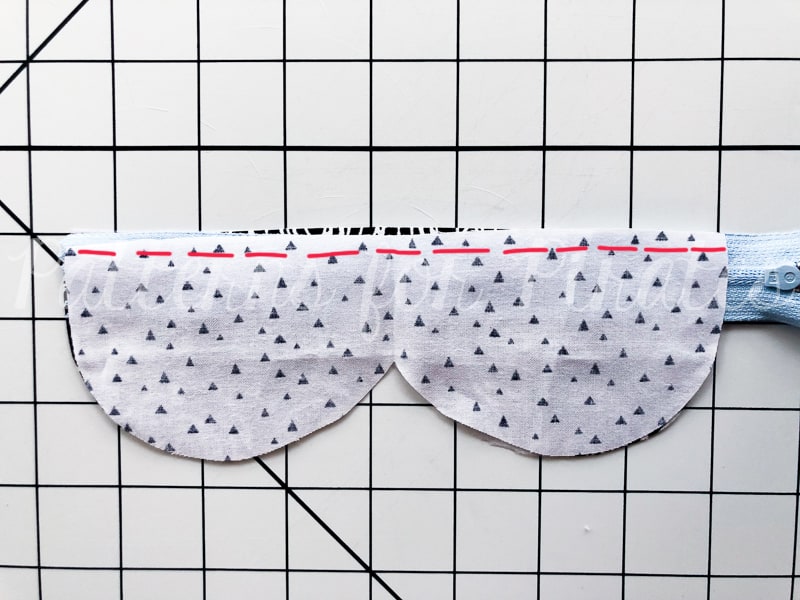
Step 5: With your upper front lining piece face down, align it along the straight edge, sandwiching the zipper between the two pieces of fabric.  Sew with 1/4″ seam allowance.

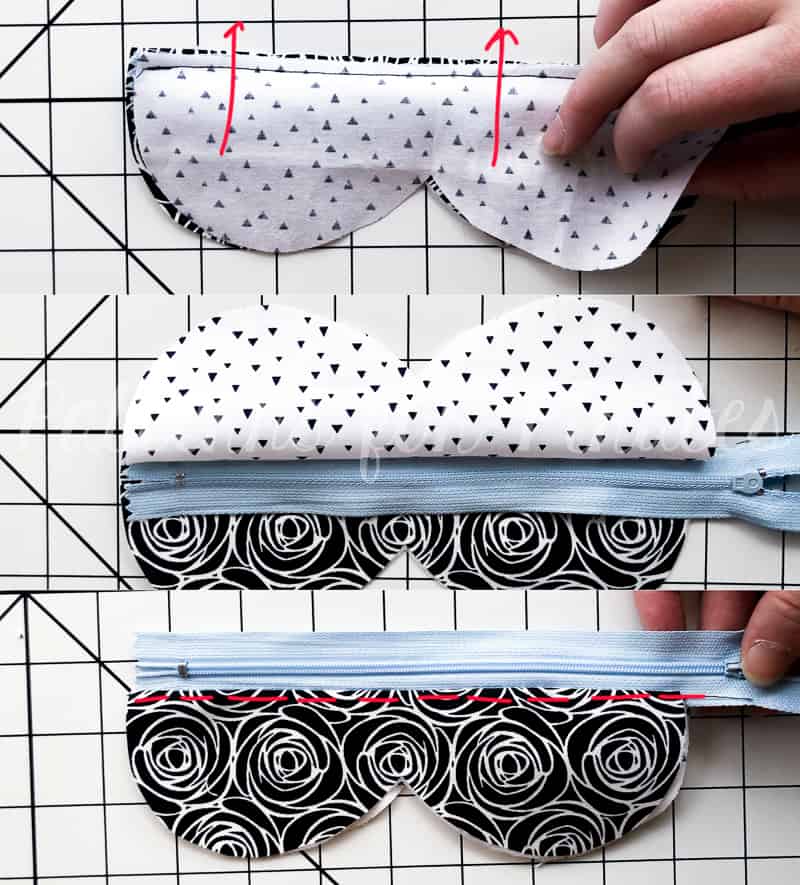
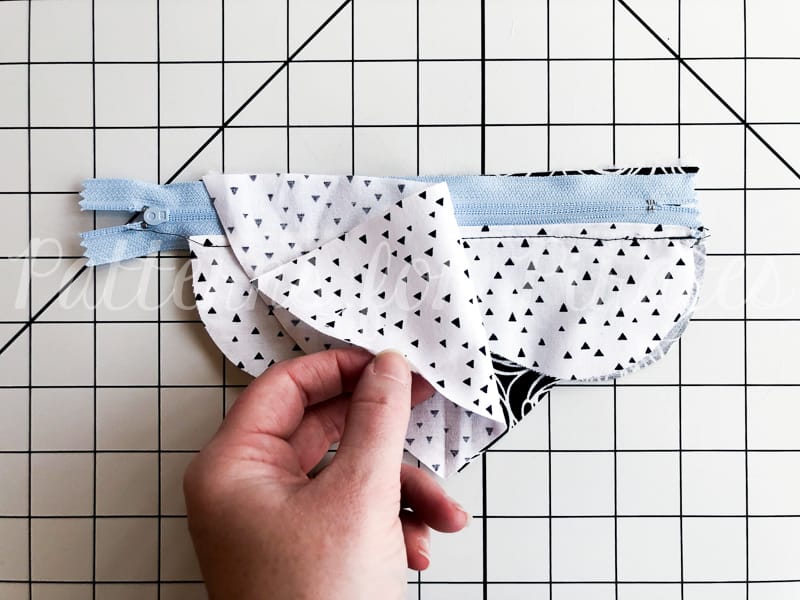
Step 6: Flip open the upper front pieces, so they are now touching with wrong sides together, and your zipper is exposed.  Press and topstitch, if desired.

Step 7: Locate your lower front piece in your main fabric, and lay it with the fabric face up.

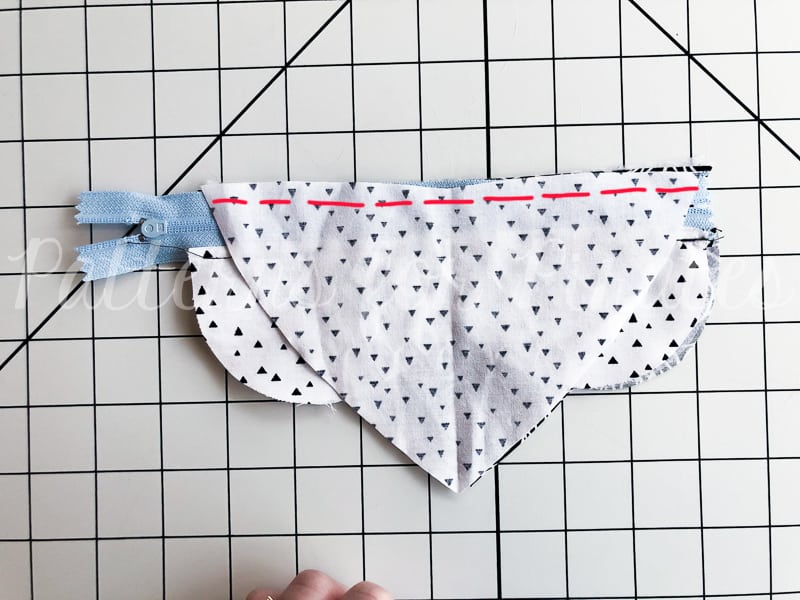
Step 8: Lay your upper front pieces with the main fabric face down, aligning the zipper to the long straight edge of the lower piece.

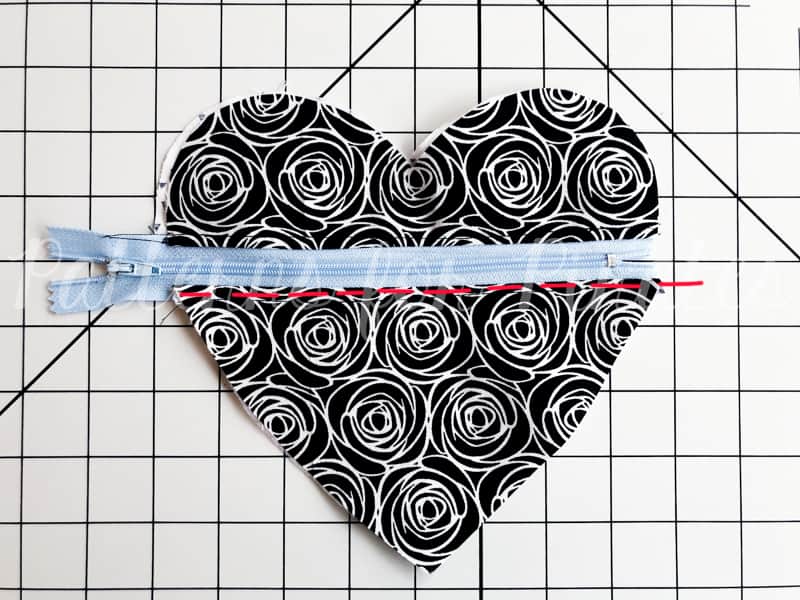
Step 9: Similar to step 5, align the lower front lining pieces along the straight edge, sandwiching the zipper between the two pieces of fabric.  Sew with 1/4″ seam allowance.

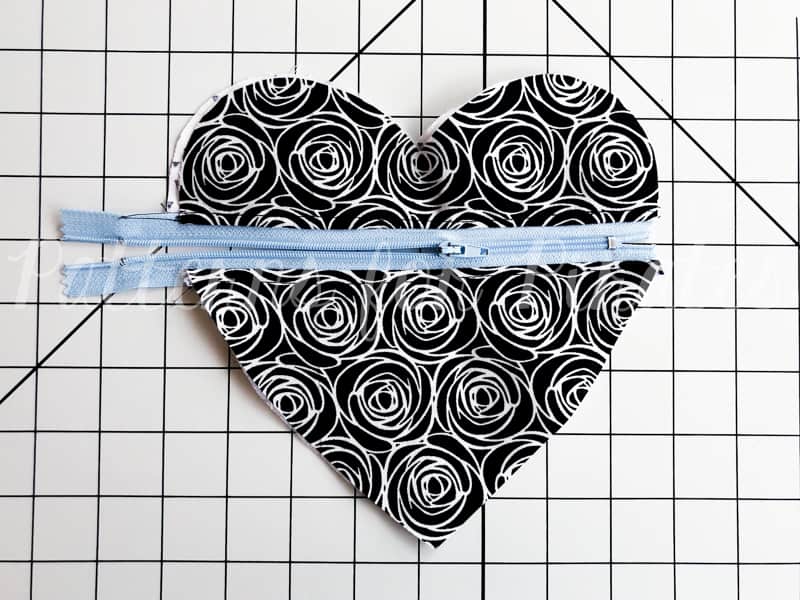
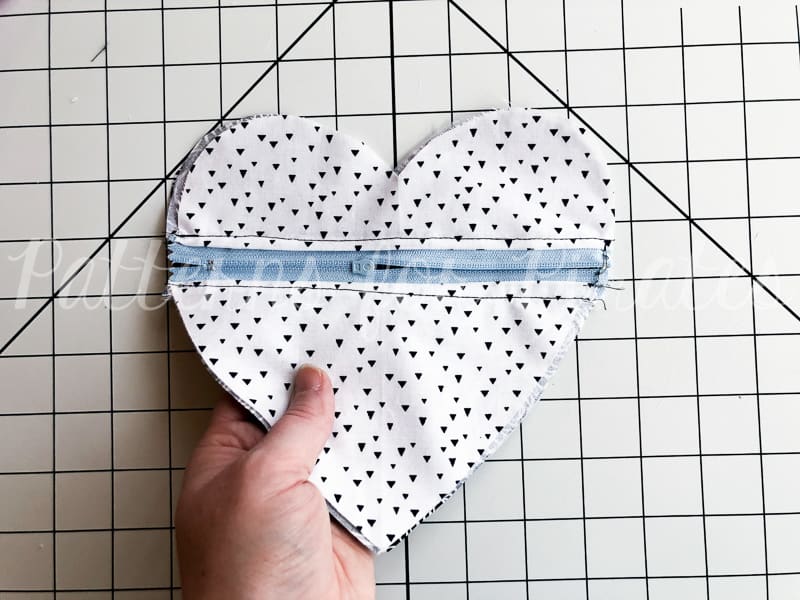
Step 10: Flip open the lower front pieces, so they are now touching with wrong sides together, and your zipper is exposed.  Press and topstitch, if desired.

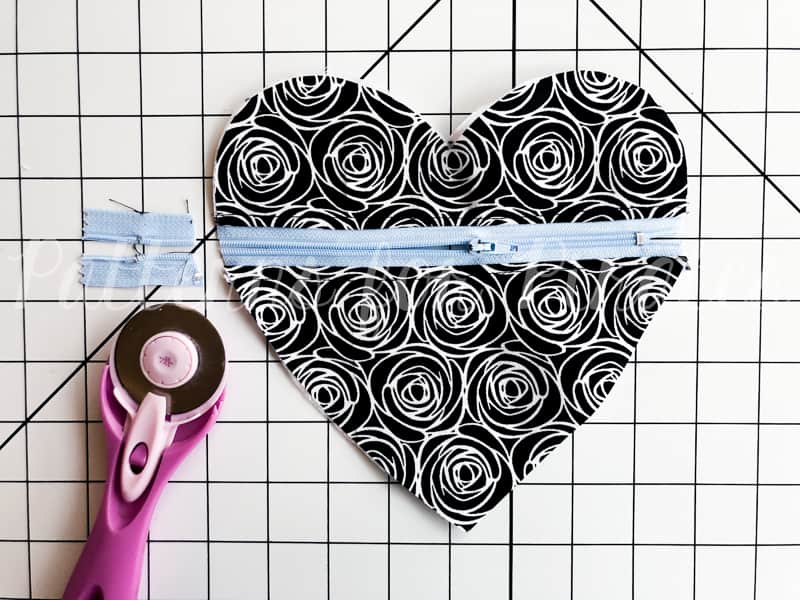
Step 11: Open up your zipper, and trim any excess length if needed.

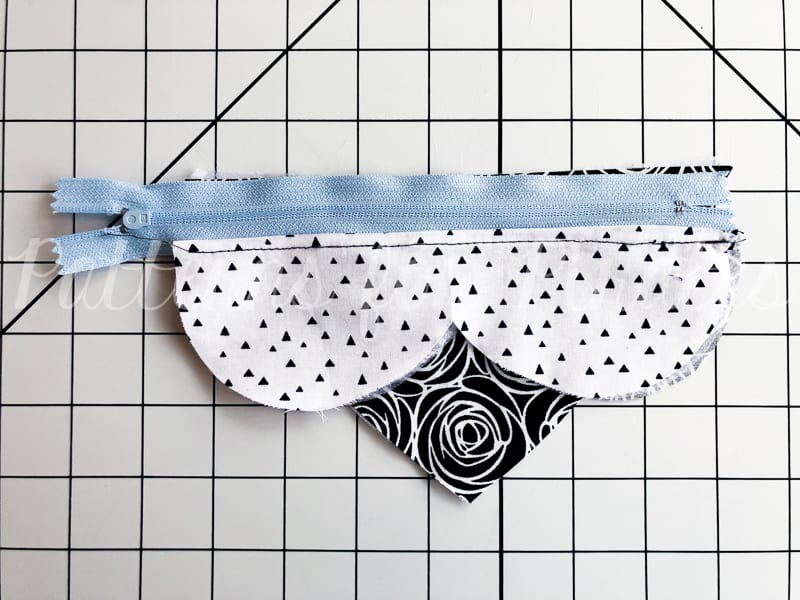
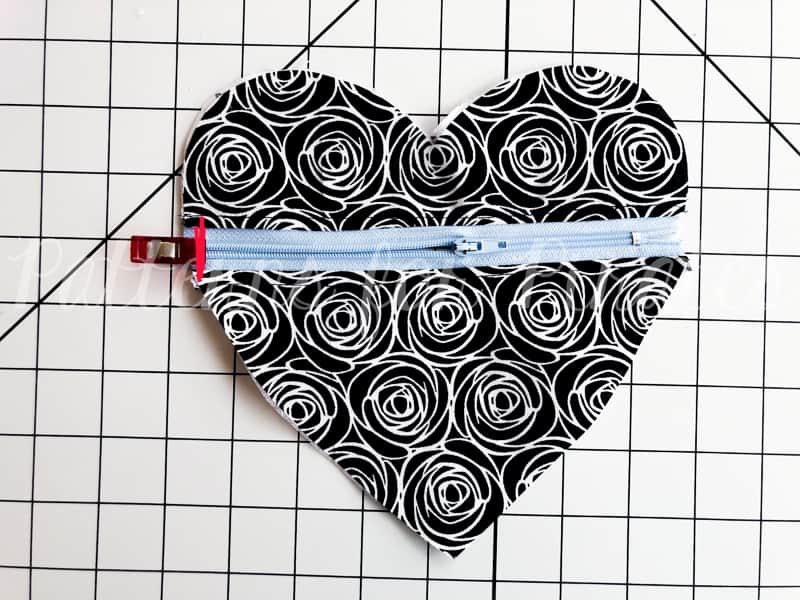
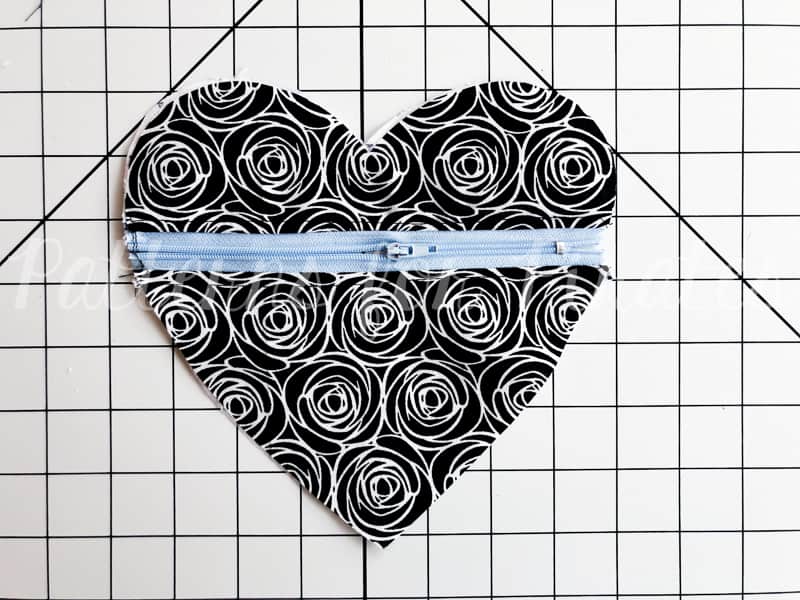
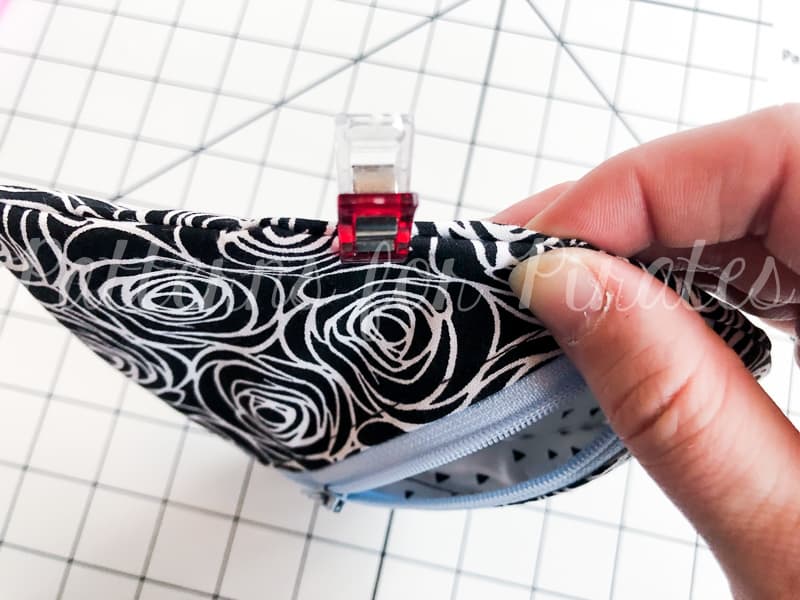
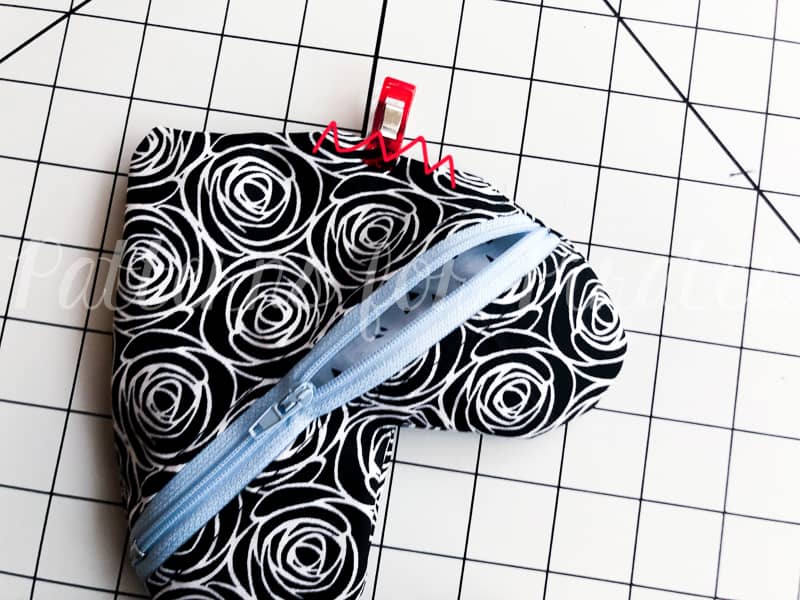
Step 12: Clip your zipper opening together and zigzag stitch to baste the edge shut.

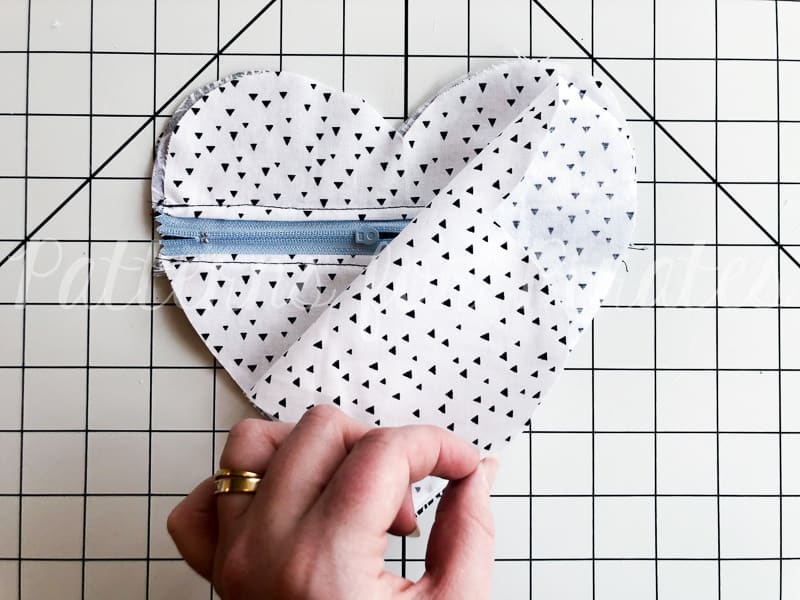
Step 13: Lay your completed front piece with the main fabric face up.

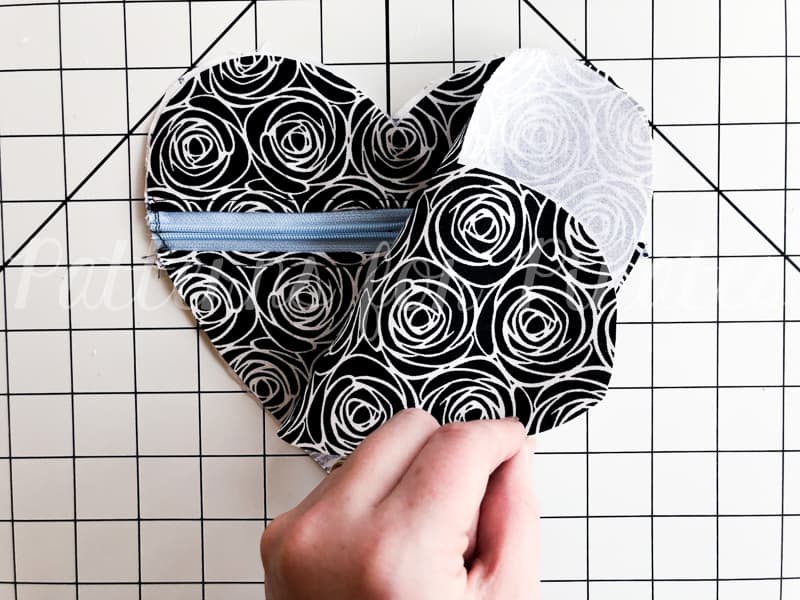
Step 14: Place your main back piece on top, with right sides together.

Step 15: Flip the entire group over, so that now the lining side is face up.

Step 16: Place your lining back piece on top, with right sides together.

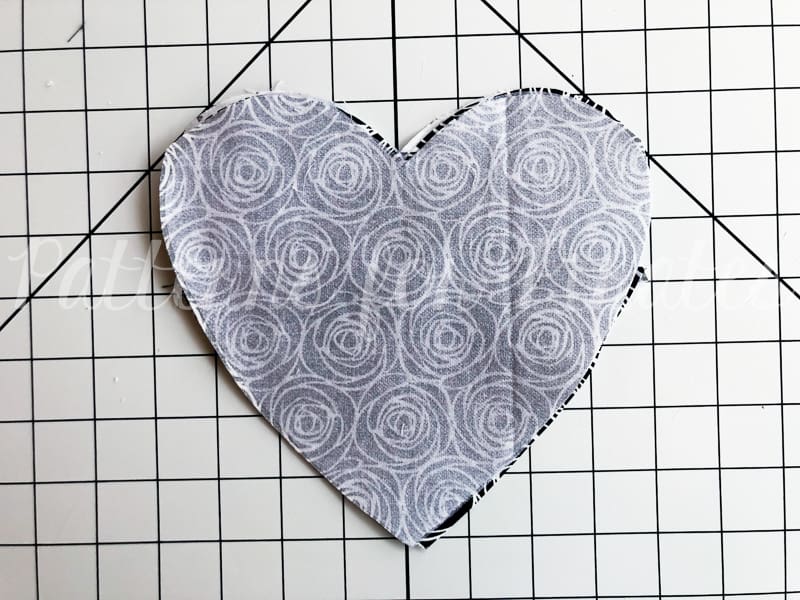
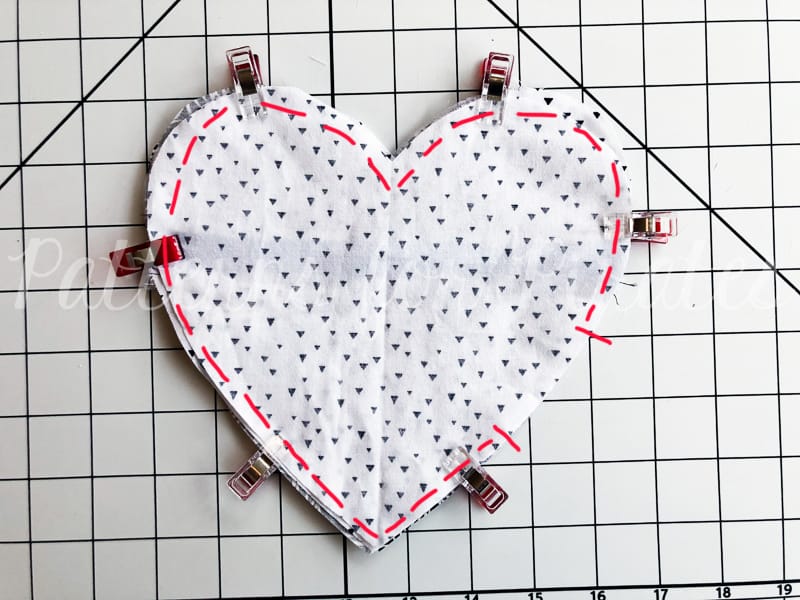
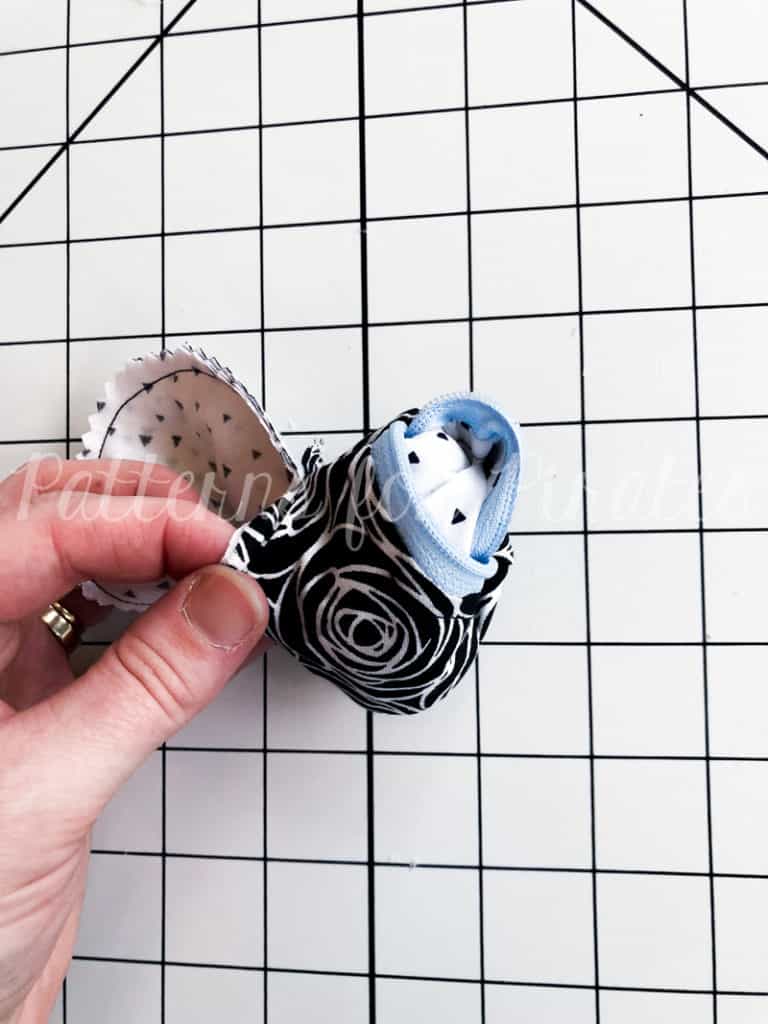
Step 17: Pin/clip and sew entire outer edge with 1/2″ seam allowance, leaving a 2″ – 3″ opening along one of the straighter sides.

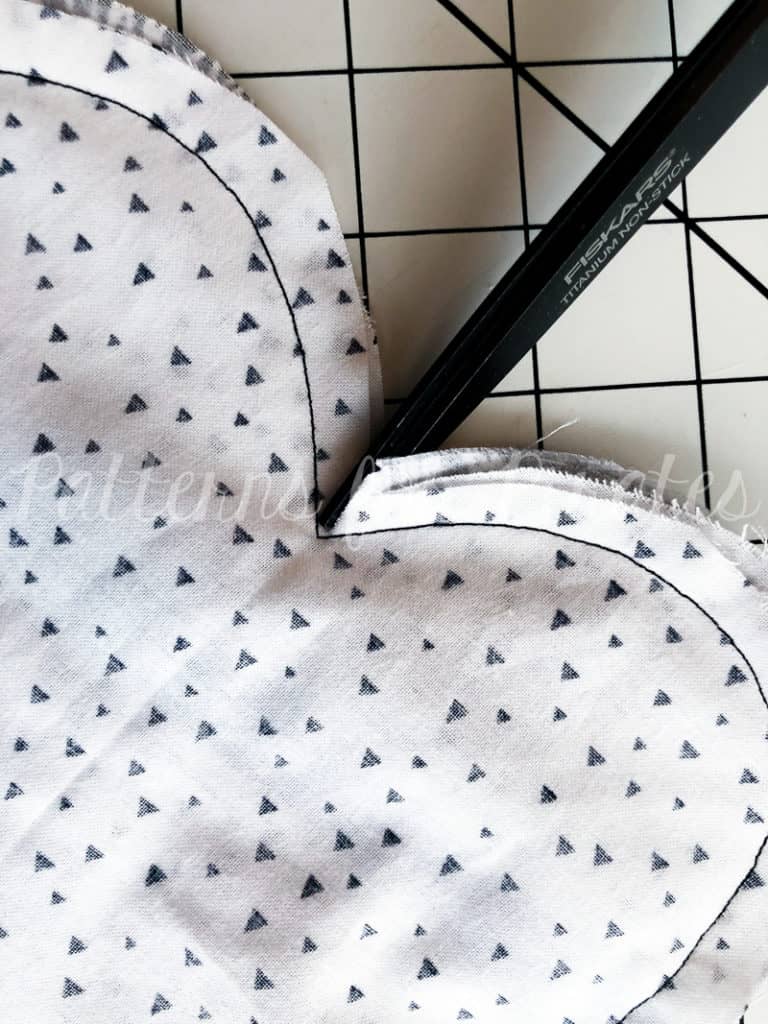
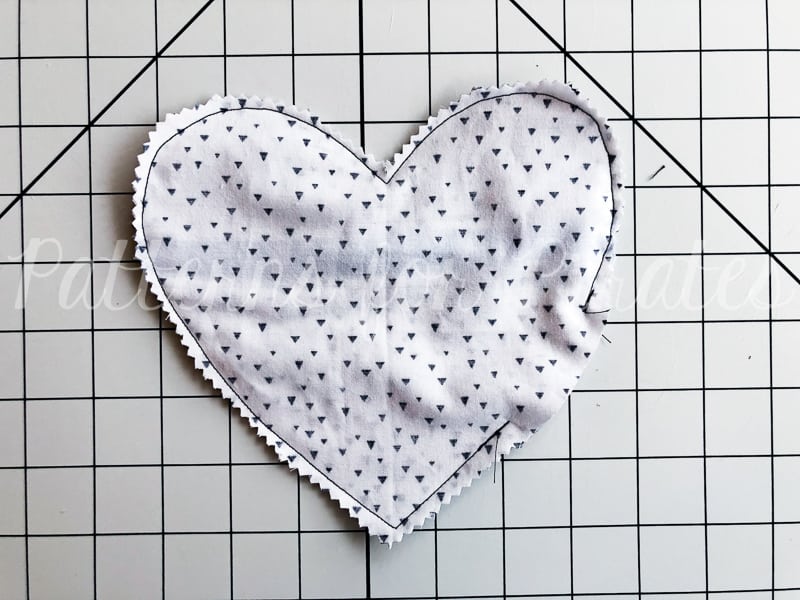
Step 18: Clip into the top point seam allowance as closely as you can, without clipping through your stitches.  Trim around entire outer edge, for easy and cleaner turning.
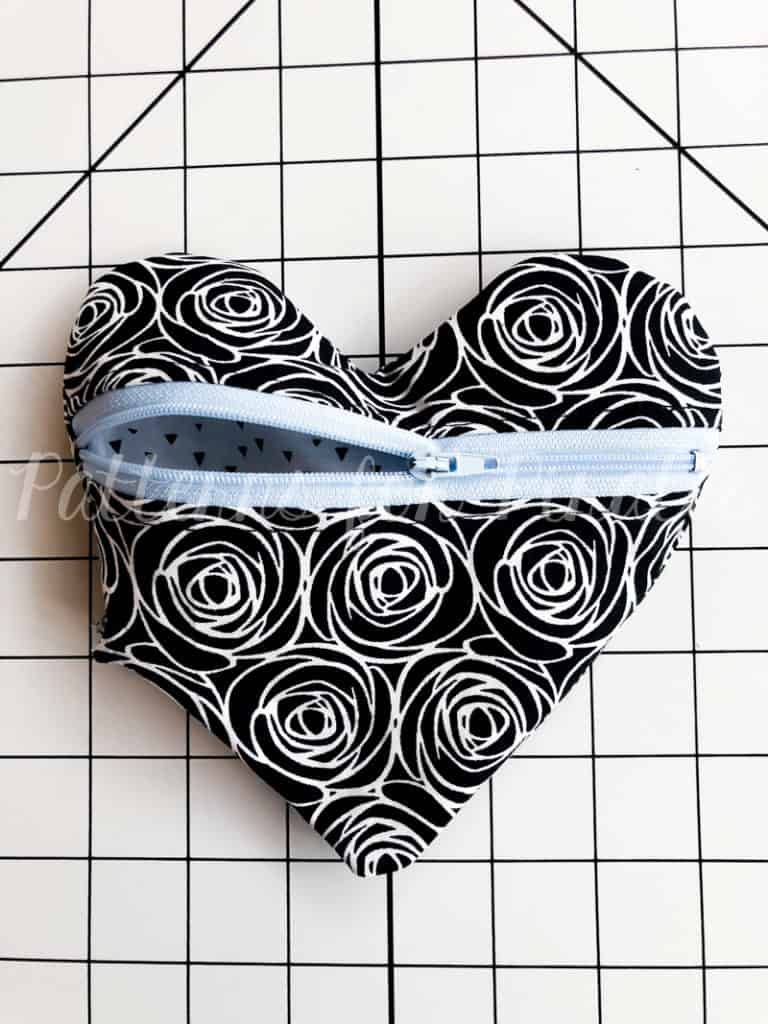
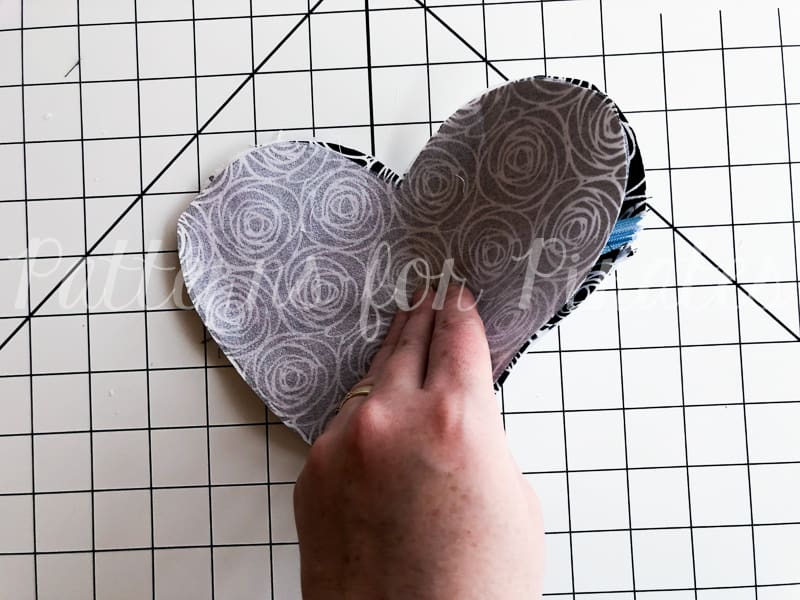
Step 19: Turn your pouch right sides out, through the opening of the main fabric pieces.

Step 20: Press and smooth out all corners, round edges and bottom point.

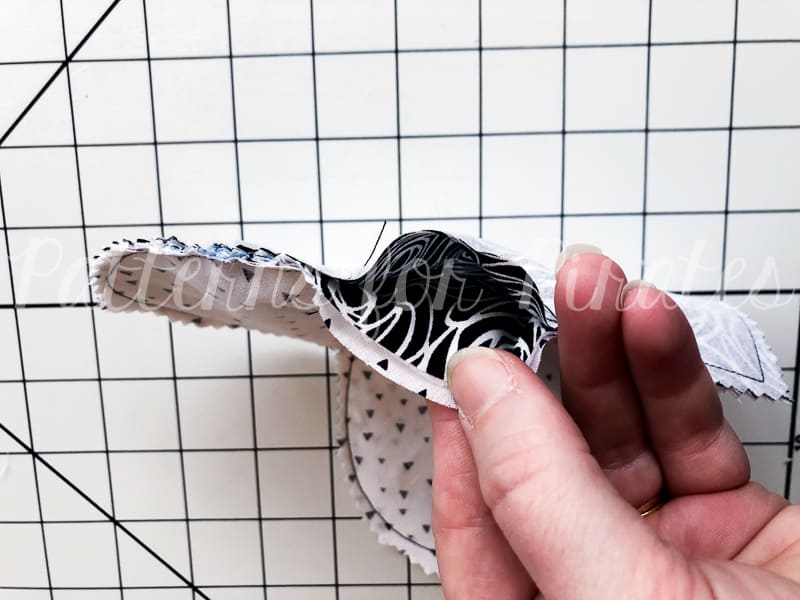
Step 21: To close up your opening with no raw edges showing, pinch three of the raw edges together…treating them as one.  And the fourth raw edge as it’s own.

Step 22: Tuck raw edges in and pin/clip.

Step 23: Using your favorite blind stitch, close up the opening.
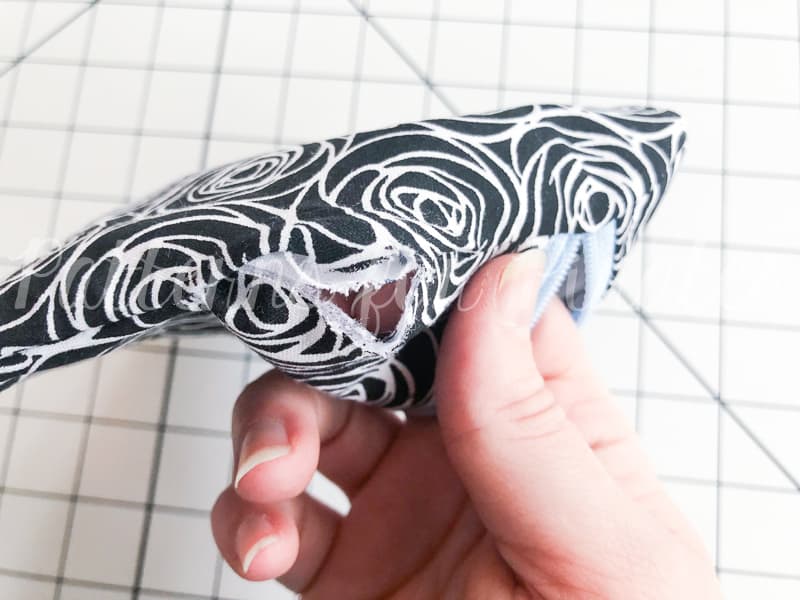
Step 24: You’re finished!  Go fill your new heart pouch with whatever goodies will fit in it, or gift it to someone who will do the same.
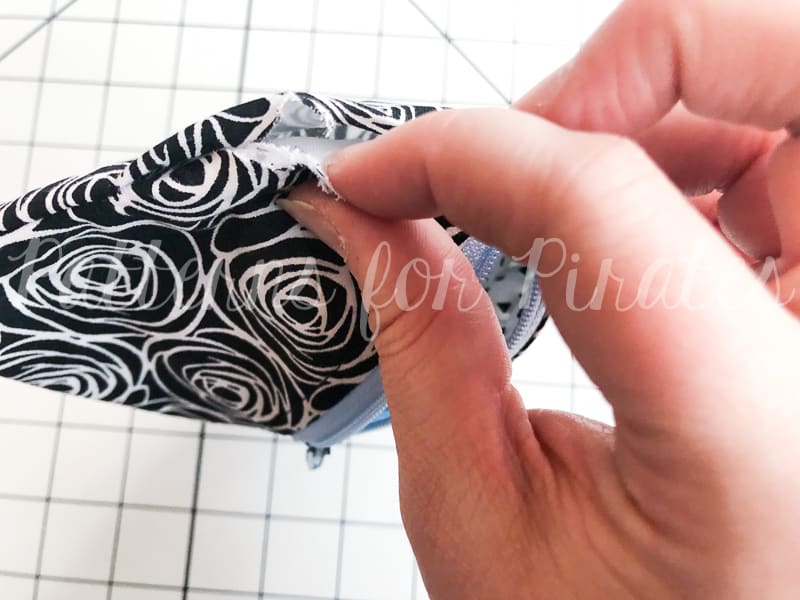
Are you someone who considers themselves to be more of a visual learner?  Here’s a video that walks you through all of the same steps above.  Hopefully it helps!

As always, we love when you share what you’ve made with us.  Head over to the Patterns for Pirates Facebook group and show off the fabulous Heart Pouch that you’ve managed to make from our freebie pattern!  Happy Valentine’s Day, friends!

Filed Under: Free Pattern, Pattern Release 20 Comments

The Basic Tees :: New Pattern Release!

February 8, 2019

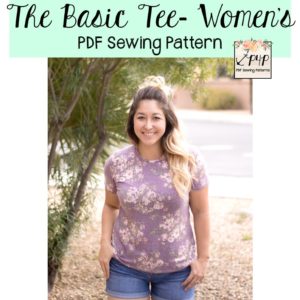
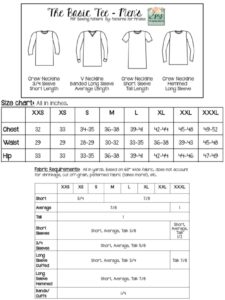
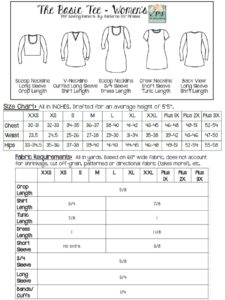
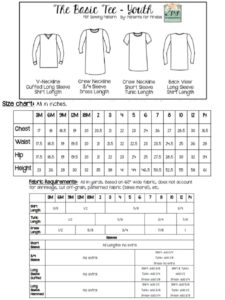
Is there anything more fun than a pattern release day?  Maybe when it’s not one pattern, but it’s THREE!  We’ve got tees for the whole family, y’all!


The patterns are drafted for knit fabrics and are each packed full of options.


**Want to learn more about how to measure yourself for these pattern?  We’ve got you covered with an in-depth blog HERE.  And in case you’re new to Patterns for Pirates and PDF patterns in general, we have a great blog full of new user tips HERE to help you get started!  And, as with all of our current releases and updates, the pdfs now include our layers feature and can be found in Letter, A4 and A0 sizes.

Let’s give a quick rundown of the options!


Short Sleeve
3/4 Sleeve
Long Sleeve

Short Sleeve
3/4 Sleeve
Long Sleeve Cuffed


NECKLINE OPTIONS

Crew
V Neck

Crew
Scoop
V Neck

Crew
V Neck


HEM LENGTHS

Shirt
Tunic
Dress

Crop
Shirt
Tunic

Dress

Are you ready to make your new favorite shirts for yourself and/or the family?  What are you waiting for?

THE BASIC TEE – Women’s | THE BASIC TEE – Men’s | THE BASIC TEE – Youth | THE BASIC TEE – Bundle

Need more convincing?  Just take a look at this pattern on all of the amazing shapes and sizes of our testers, and get a look at more examples of all the options in our albums in the P4P Facebook group!  The Basic Tee: Men’s / Women’s / Youth

The release sale (no code needed) will be through Monday, February 11, 2019 (11:59PM US Central Time Zone).

Happy sewing, Pirates!

Filed Under: Pattern Release, Uncategorized 3 Comments

Naughty Nice + Sugar Spice PJs :: New Pattern Release!

December 7, 2018

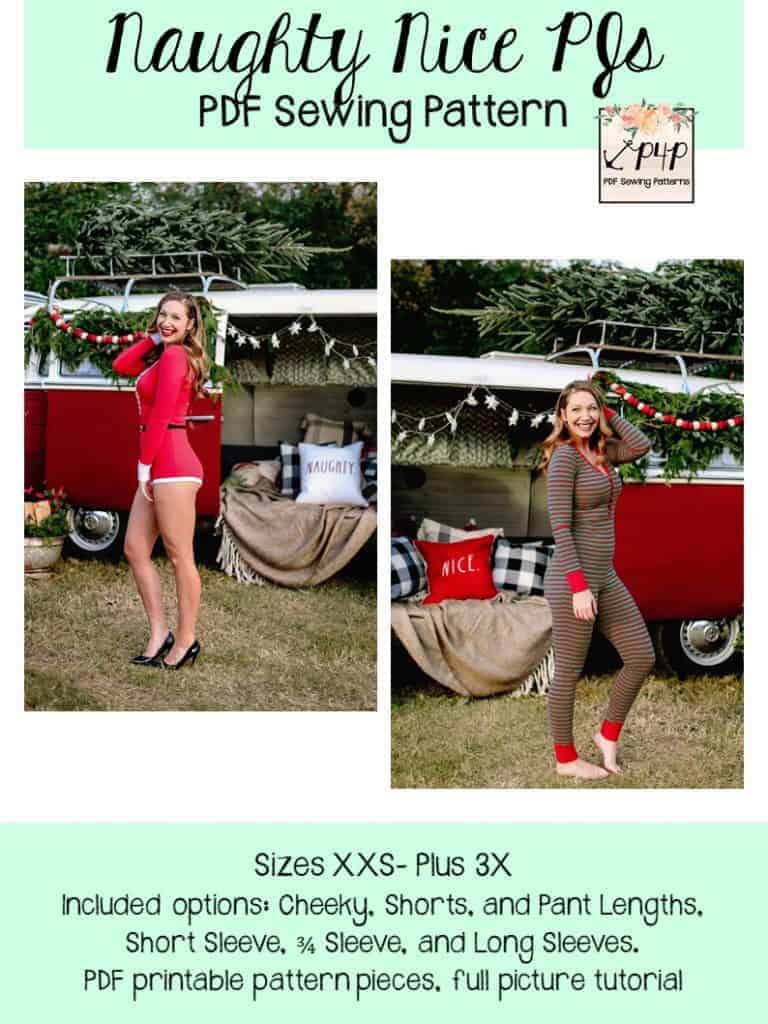
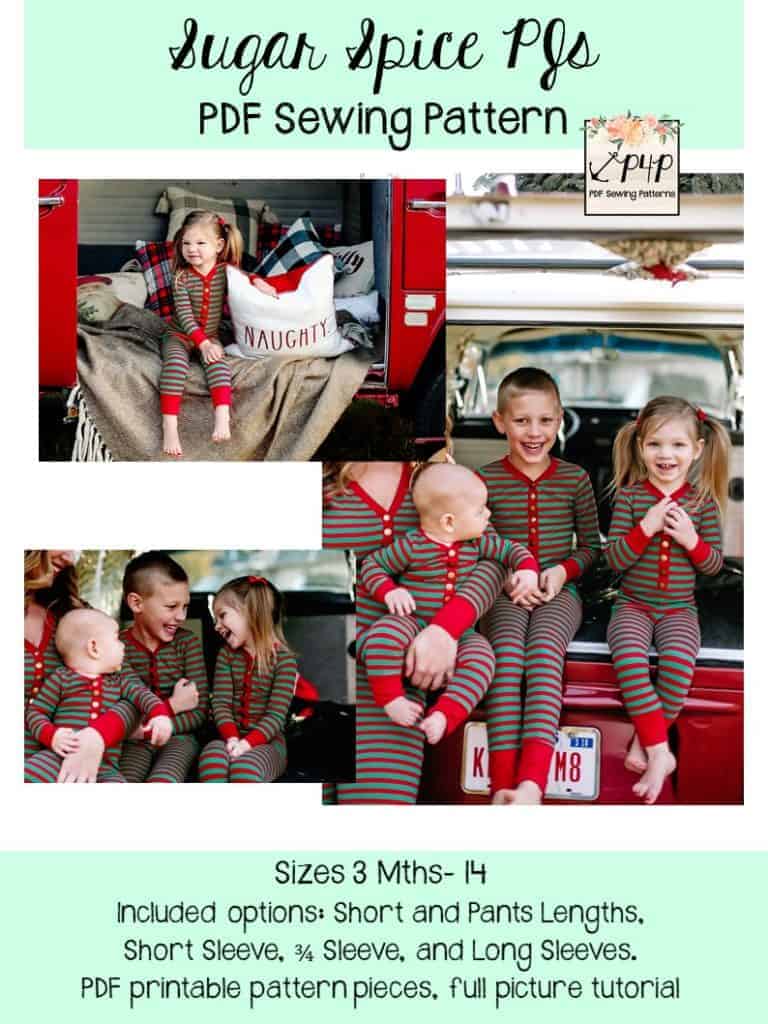
If you follow Patterns for Pirates on Instagram in the slightest, you’d know that we’ve been teasing these patterns for a while now.  And guess what?  Today, we are officially launching two brand new patterns for the P4P lineup.  Welcome aboard, Naughty Nice and Sugar Spice PJs!


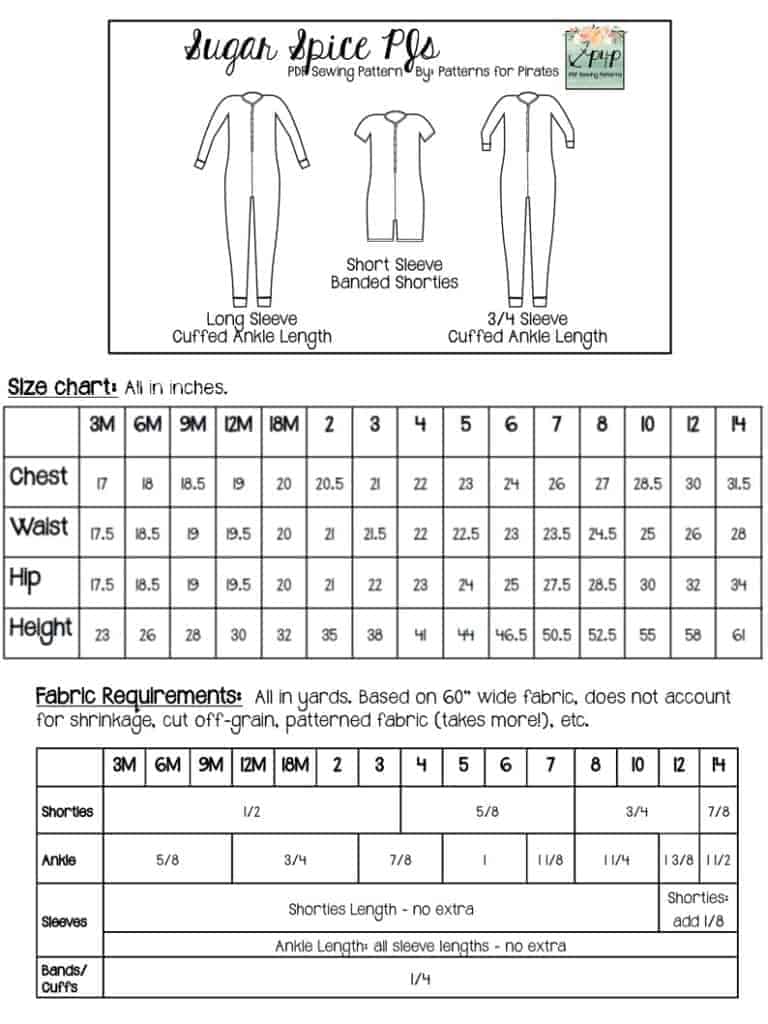
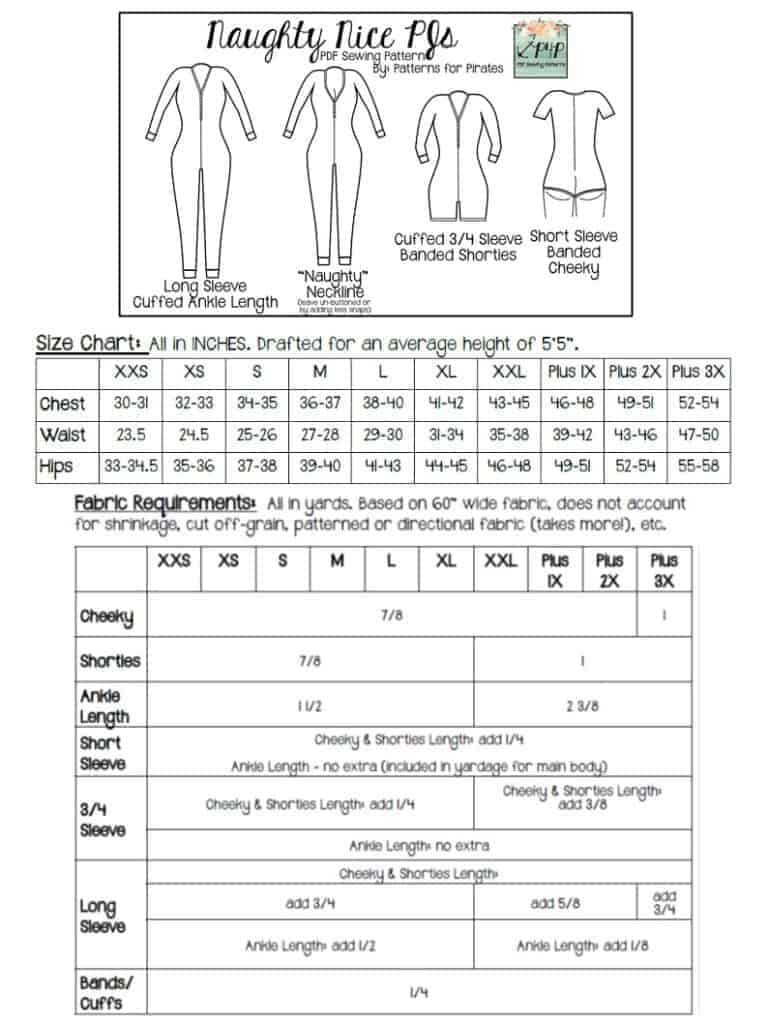
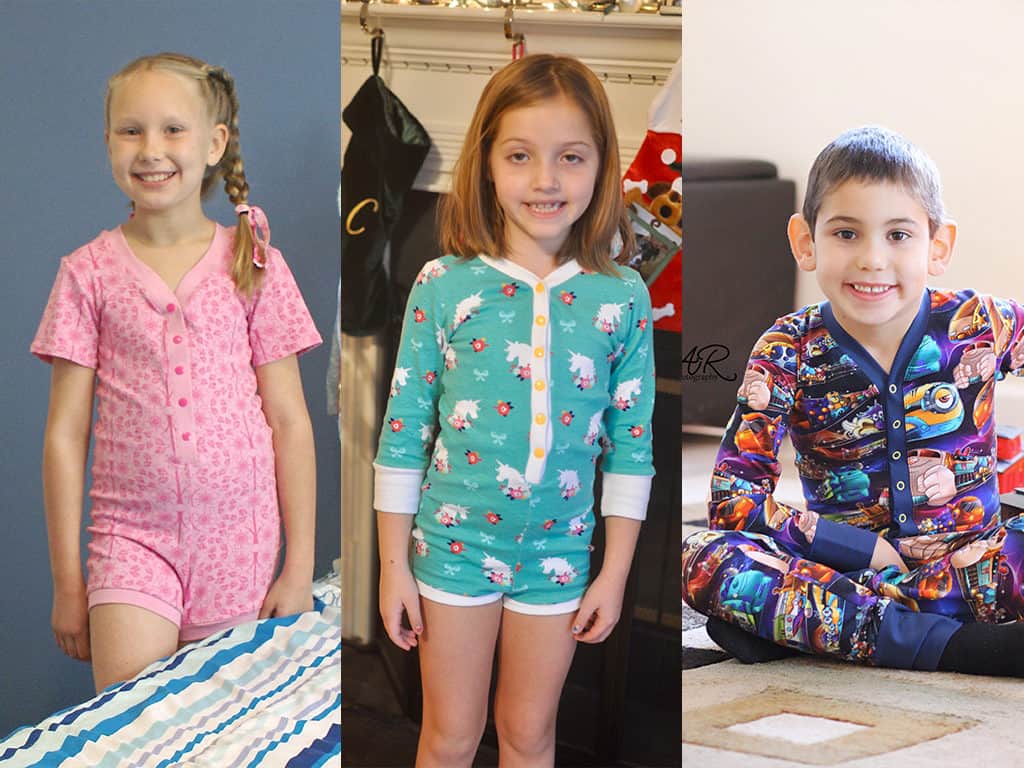
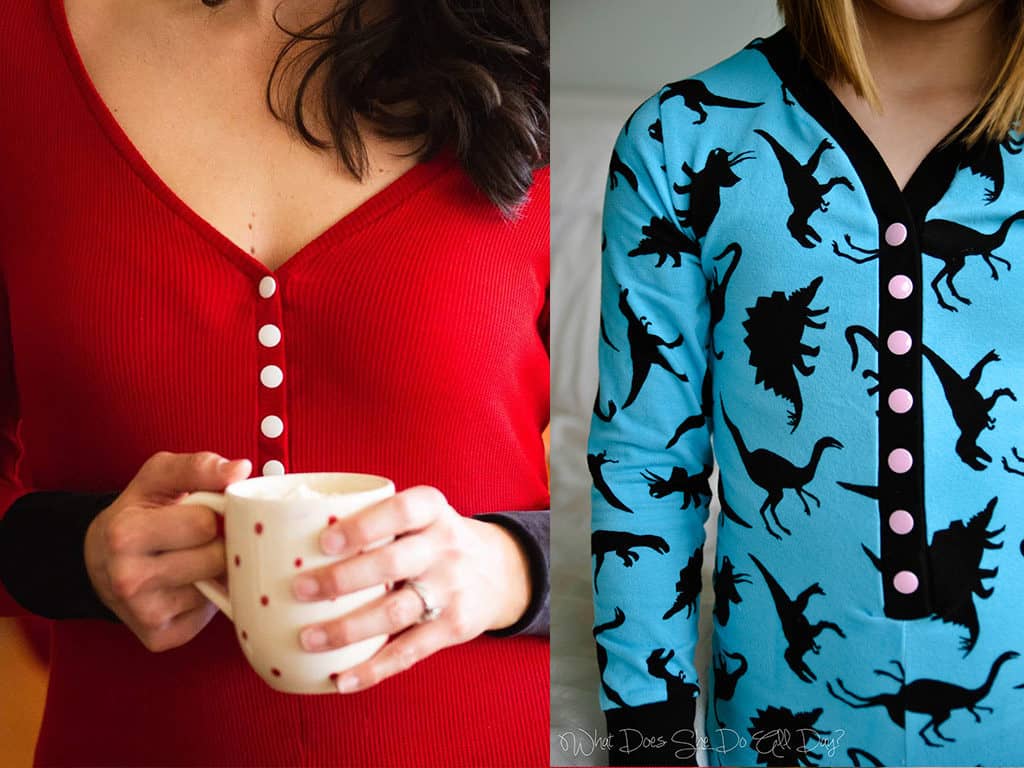
These patterns are drafted for knit fabrics and comes with a multitude of options.  For the women’s pattern there are three lengths (cheeky, shorts and pants) and three sleeve lengths (short, 3/4 and long).  For the youth pattern, there are two lengths (short and pants) and three sleeve lengths (short, 3/4 and long).  These are a tight pajama with center front and back seams, and a neckline placket that can be closed using buttons or snaps.

Our favorite fabric types for these amazing new jammies?  We recommend a light to medium weight knit with at least 40-50% stretch such as cotton spandex, brushed poly, thermal spandex, French Terry spandex, and bamboo/modal spandex blends.


**Want to learn more about how to measure yourself for this pattern?  We’ve got you covered with an in-depth blog HERE.  And in case you’re new to Patterns for Pirates and PDF patterns in general, we have a great blog full of new user tips HERE to help you get started!  And, as with all of our current releases and updates, the pdfs now include our layers feature and can be found in Letter, A4 and A0 sizes.

Here’s a quick look at the different options!

Bottom Length:

Sleeve Lengths:

Placket front:

Are you ready to make the cutest (or sexiest) pair of pjs ever?!  Go grab the pattern and get to it!

NAUGHTY NICE PJs | SUGAR SPICE PJs | PJ BUNDLE

Need more convincing?  Just take a look at this pattern on all of the amazing shapes and sizes of our testers, and get a look at more examples of all the options in our albums in the P4P Facebook group! Naughty Nice Album | Sugar Spice Album

And if that didn’t give you enough options, make sure to check out the hacks post to help take your patterns even further.

The release sale (no code needed) will be through Friday, December 14, 2018 (11:59PM US Central Time Zone).

Happy Sewing, pirates!

Filed Under: Pattern Release 4 Comments

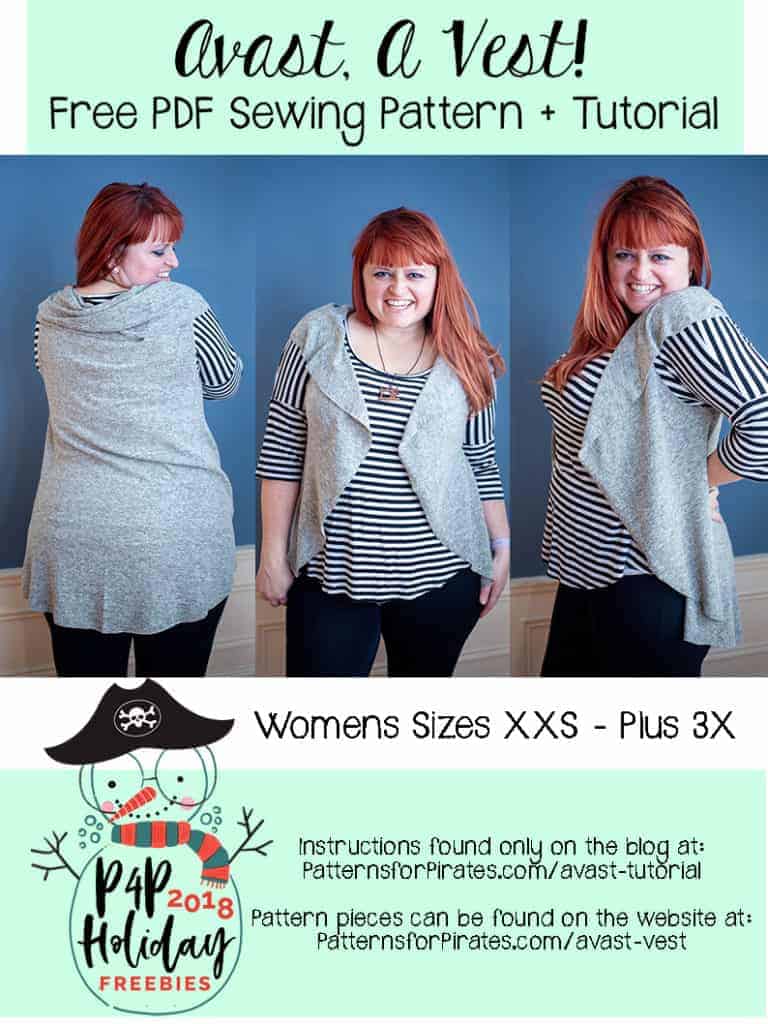
2018 Holiday Freebies :: Avast, A Vest!

December 6, 2018

Can you believe that we are on our fifth and final day of freebies?  I hope you’ve enjoyed this past week as much as I have!

Today’s freebie is fun, quick and easy!  Think of it as a your vest friend.  (See what I did there?!)  Allow me officially shout out: Avast, A Vest!

Fabric Requirements: 1-1/2 yards of a medium weight, double sided fabrics.  Favorites: brushed hacci, jersey knit, french terry, dbp.

GRAB YOUR COPY OF THE AVAST! A VEST PATTERN HERE!

Why double sided?  Because of the way this vest is worn, the top is folded back and reveals the backside of the fabric.  We wanted this pattern to be as simple of a layering piece as possible.  But if you’re not loving the raw edges and backside of your fabric, cut two pieces, sew them together around the entire outer edge (right sides together, turn through one of the arm openings, and complete the rest of the tutorial that way!

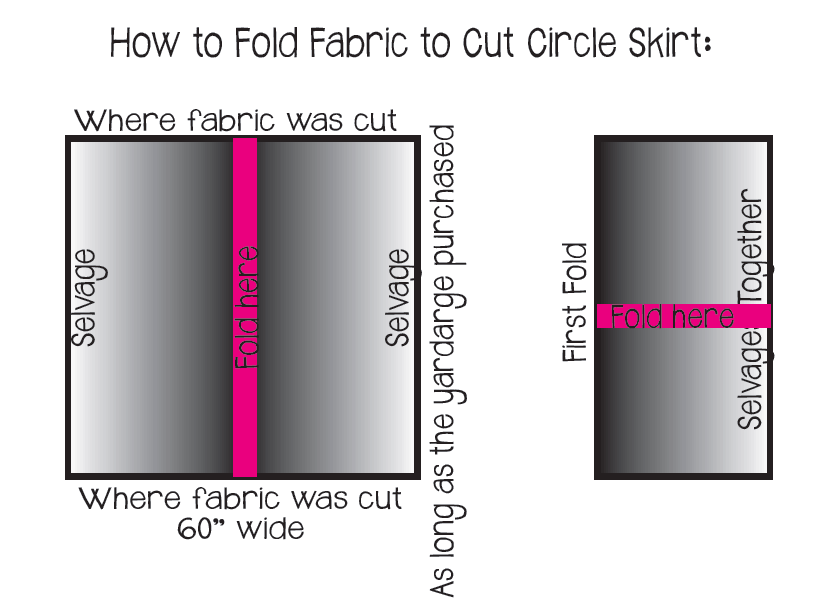
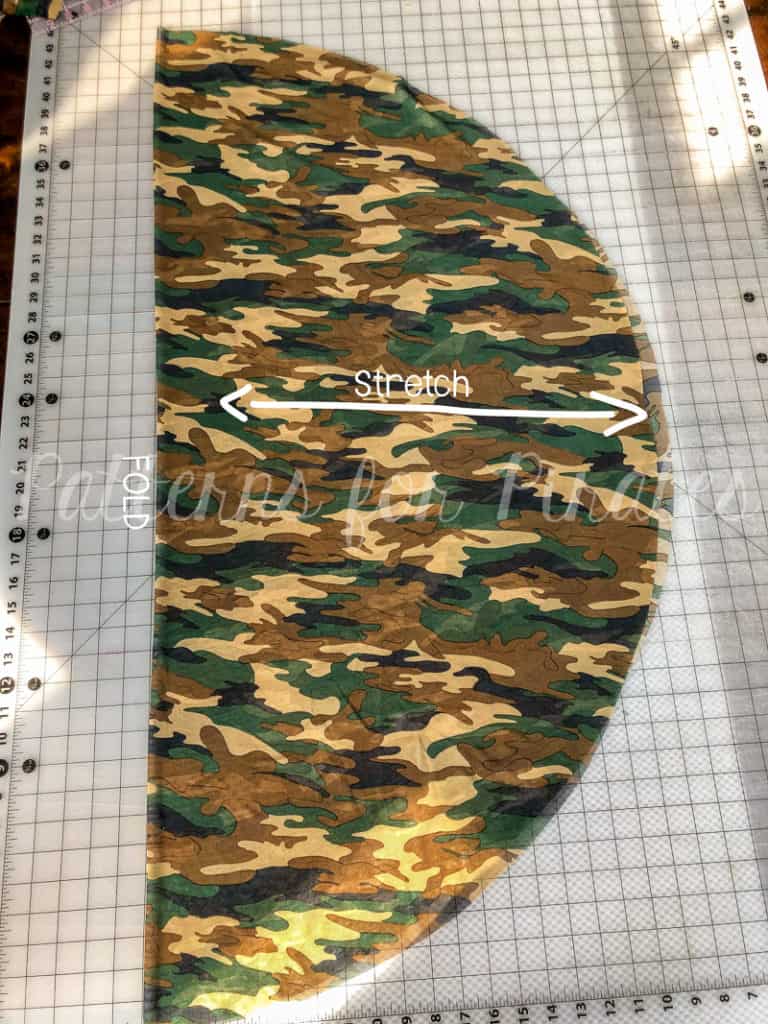
If you need help folding your fabric to prepare for cutting, it’s just like a circle skirt!

———

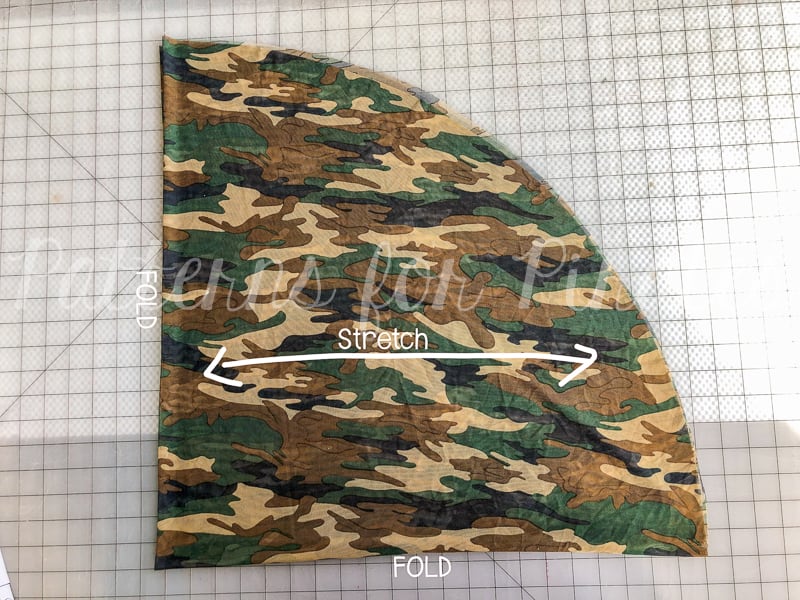
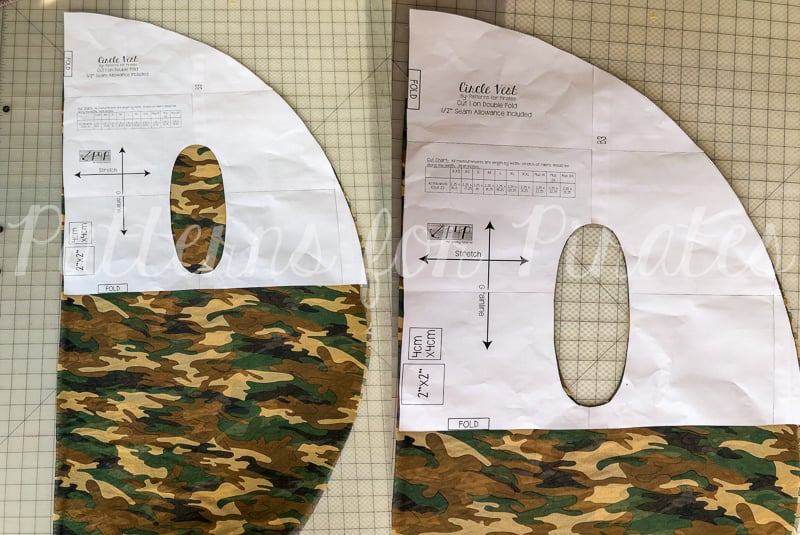
Cut your pattern piece, making sure to fold selvedge to selvege and then top to bottom before cutting. **DO NOT cut your arm openings yet, or you will end up with four armholes. 😉

Open up your fabric piece, leaving it still folded in half along with the stretch going horizontally.

Grab your pattern piece, realign it along the top, and cut our your arm openings.
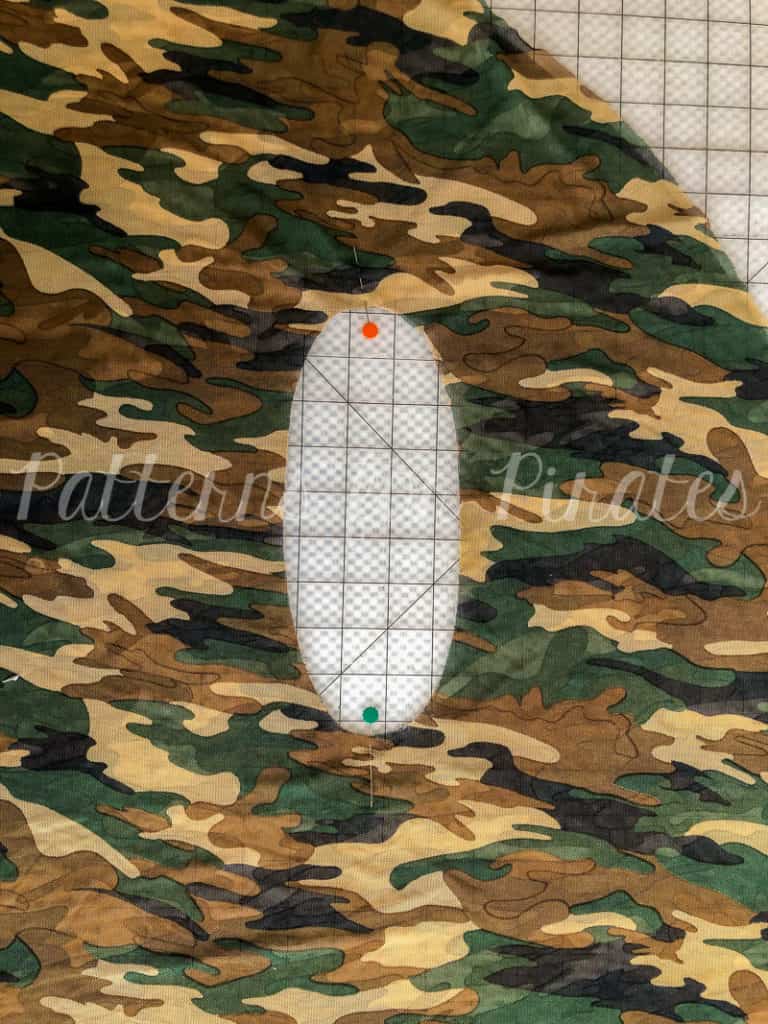
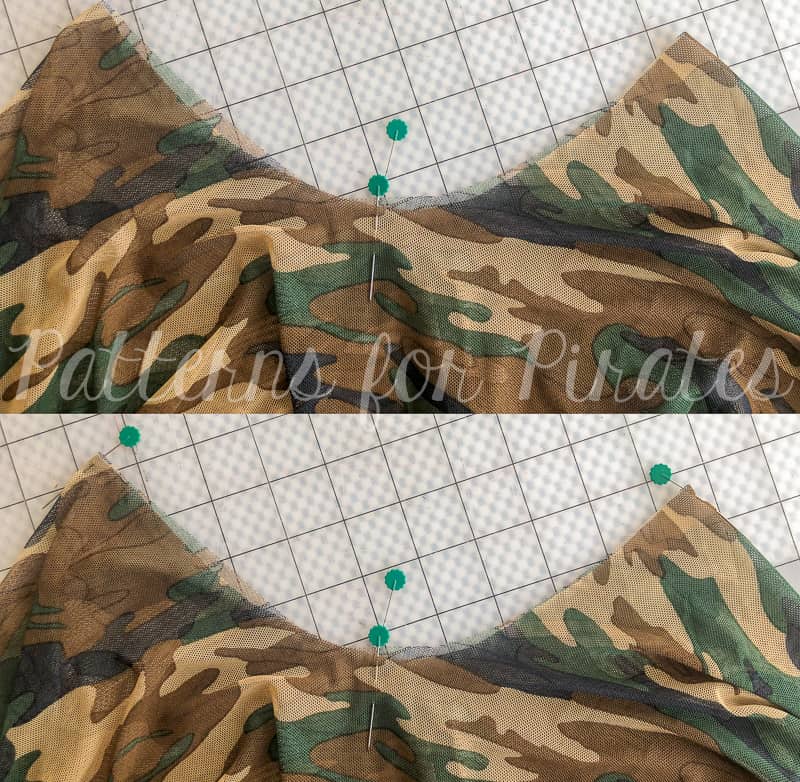
Use the pattern guides to mark the middle points of the top and bottom of both arm openings.

Fold the arm opening, to meet the pins you just placed together and mark the other quarter points of the opening.

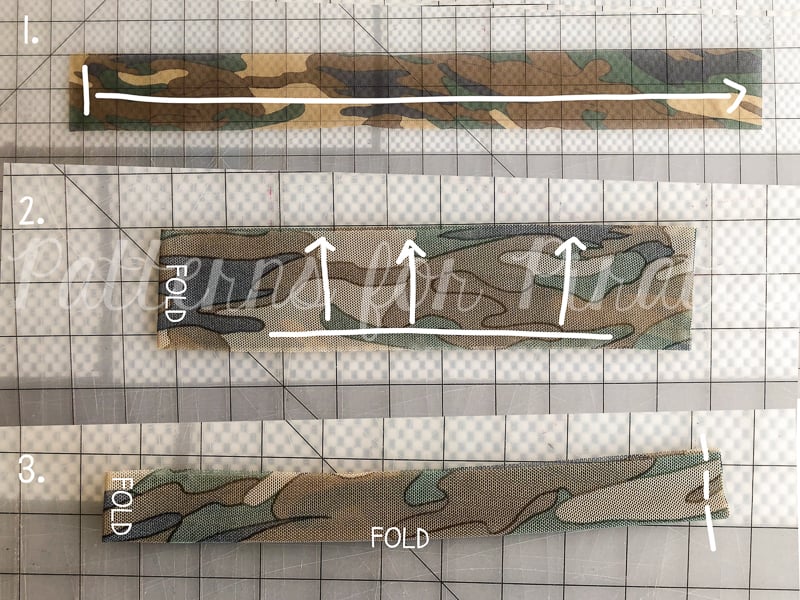
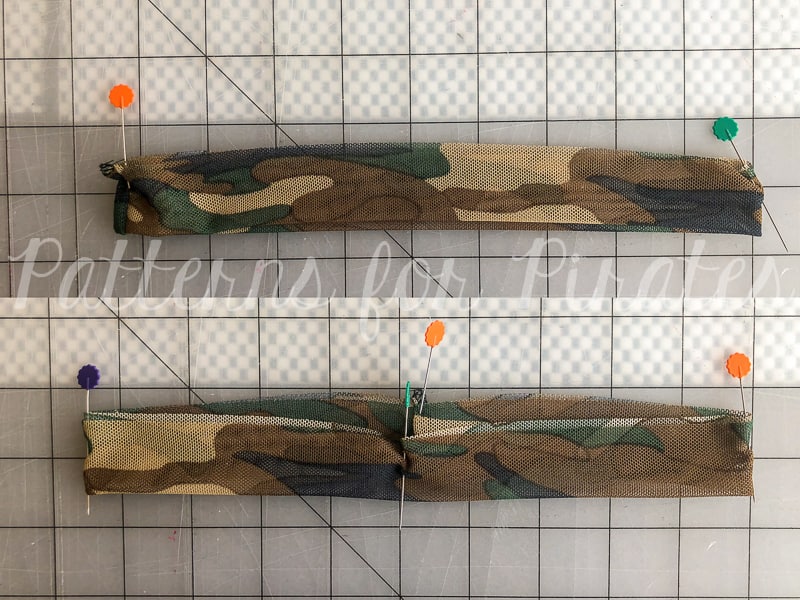
1. Fold your armband piece, right sides together, meeting the short ends together.
2. Now meeting the long ends together, fold in half again.
3. Using 1/2″ seam allowance, sew short raw edges (you will be sewing through four layers).

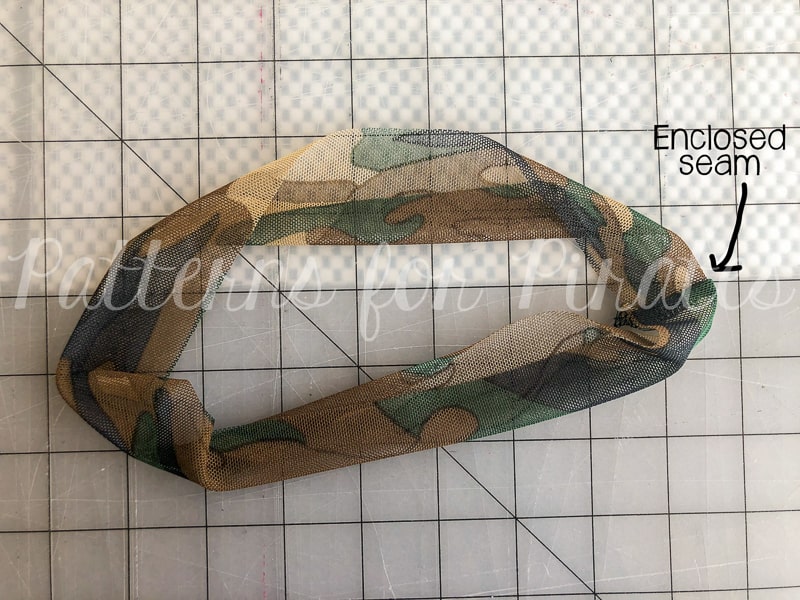
Flip open your armband, enclosing the seam cleanly in the middle. Repeat for other armband.

Mark quarter points of raw edges of armbands.

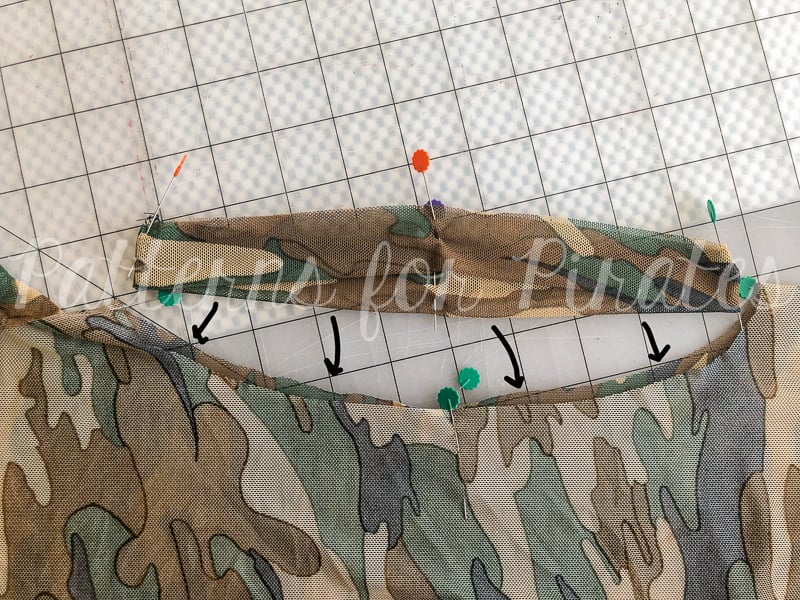
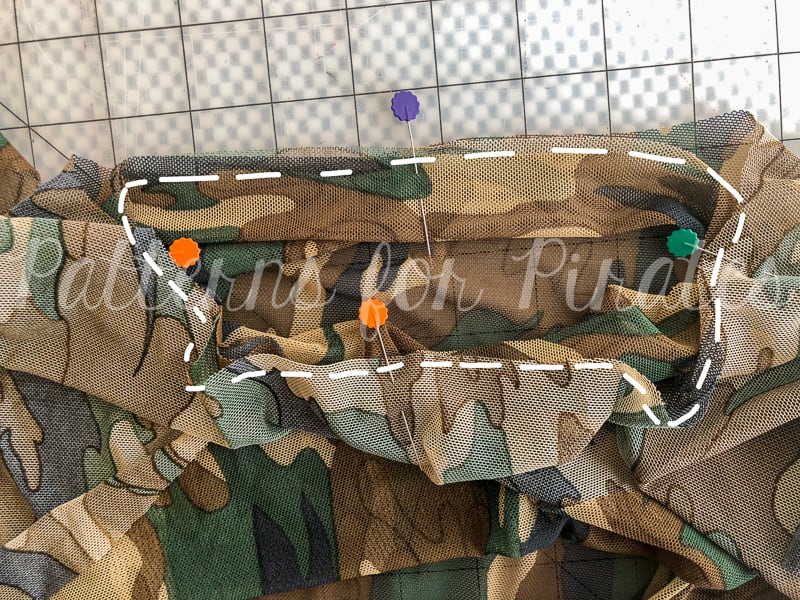
Slide the armband inside the bodice, aligning the raw edges and matching the quarter-marked points. Note: The armbands are slightly smaller than the bodice opening.

Stitch, using 1/2″ seam allowance. Repeat with second armband.

Open it up and throw it on as your new favorite layering piece!  You’re welcome to finish the edges if you’d like, but this was meant to be a more flowy, open vest.

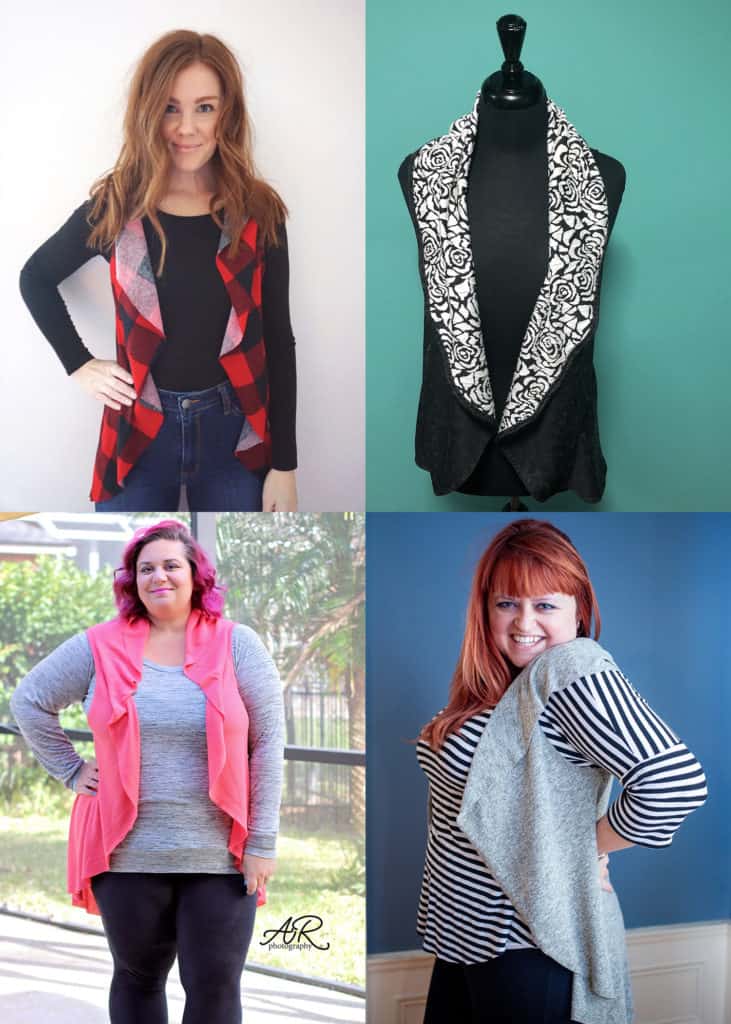
Here are a couple of photos from our holiday tester group:

Also be sure to head over the Patterns for Pirates Facebook Group and share what you’ve made with your new designs!

Happy Holidays, Pirates!

Filed Under: Free Pattern, Pattern Release 9 Comments

2018 Holiday Freebies :: Sleepy Cut Files

December 5, 2018

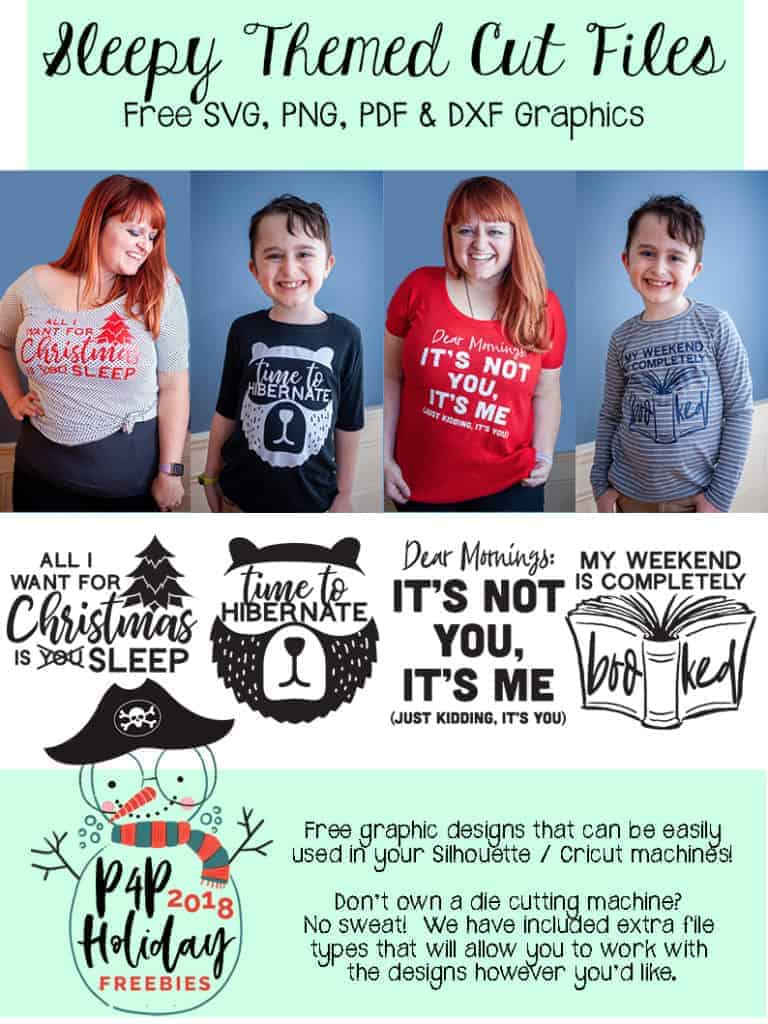
It’s day FOUR of our P4P 2018 Holiday Freebies and I am coming at you hot with some super fun “sleepy” themed digital designs!

The weather outside screams for extra naps, cuddling under big puffy blankets, curling up with a good book, and never leaving your bed.  We thought maybe it would be a good time to give you some new graphics for your cozy clothes.  (But really, you can put these on anything!!)

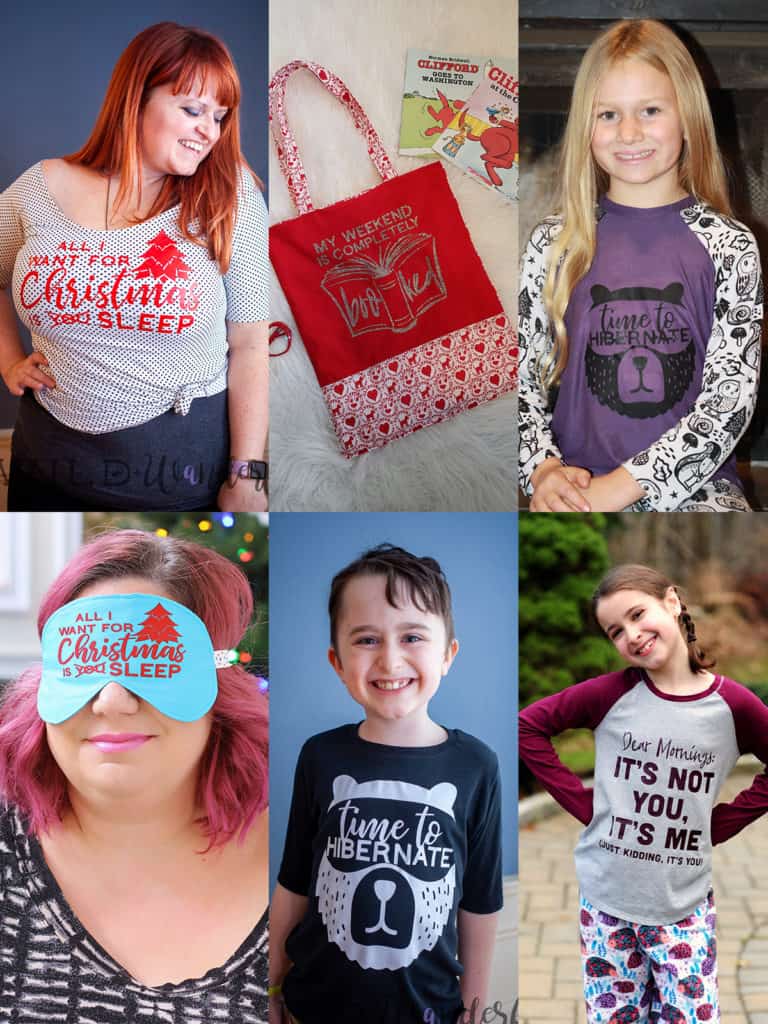
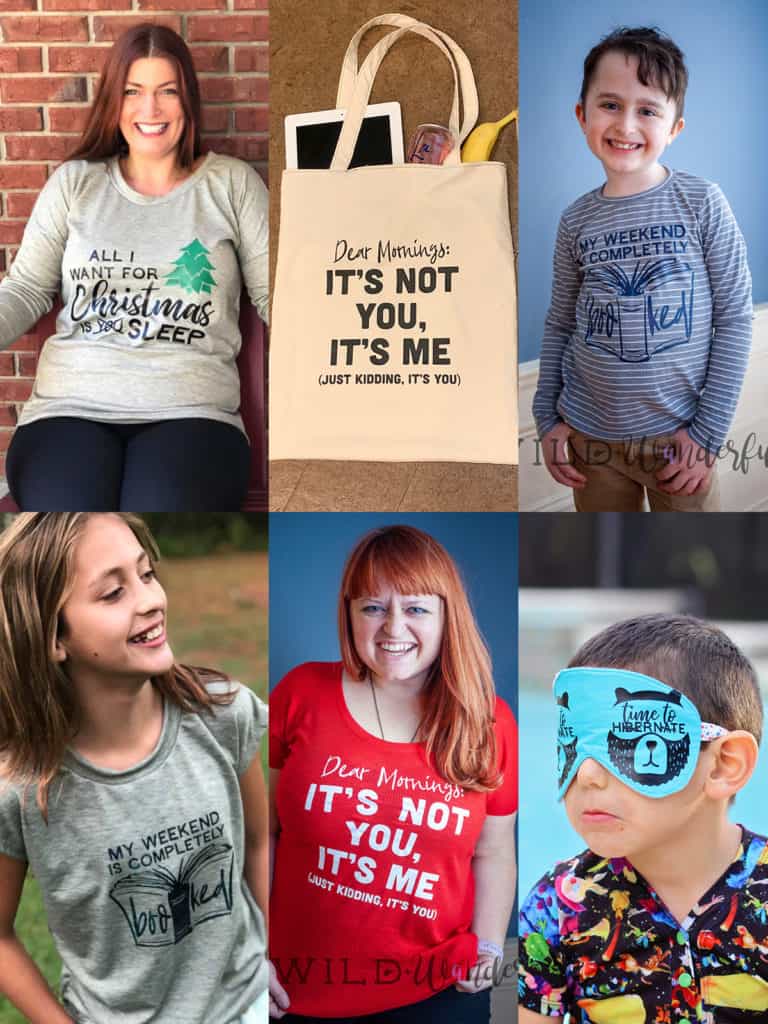
The designs are all packaged together with four different file types: SVG, PNG, DXF, and PDF.  They should work with most digital die cutting machines.  Here are a couple of examples from our amazing group of holiday testers!

Don’t own a machine like a Silhouette or Cricut?  No sweat!  We have included extra file types that will allow you to work with the designs however you’d like.

— Go old school and use an iron on transfer paper and your at-home printer.
— Use Heat Transfer Vinyl and your die cutter.
— Try your hand at Freezer Paper Stenciling.

What are you waiting for!

Go grab your copy of the FREE Sleepy Themed Cut Files now!

Also be sure to head over the Patterns for Pirates Facebook Group and share what you’ve made with your new designs!

Happy Holidays, Pirates!

Filed Under: Free Pattern 1 Comment

2018 Holiday Freebies :: Pirate Stocking Cap

December 4, 2018

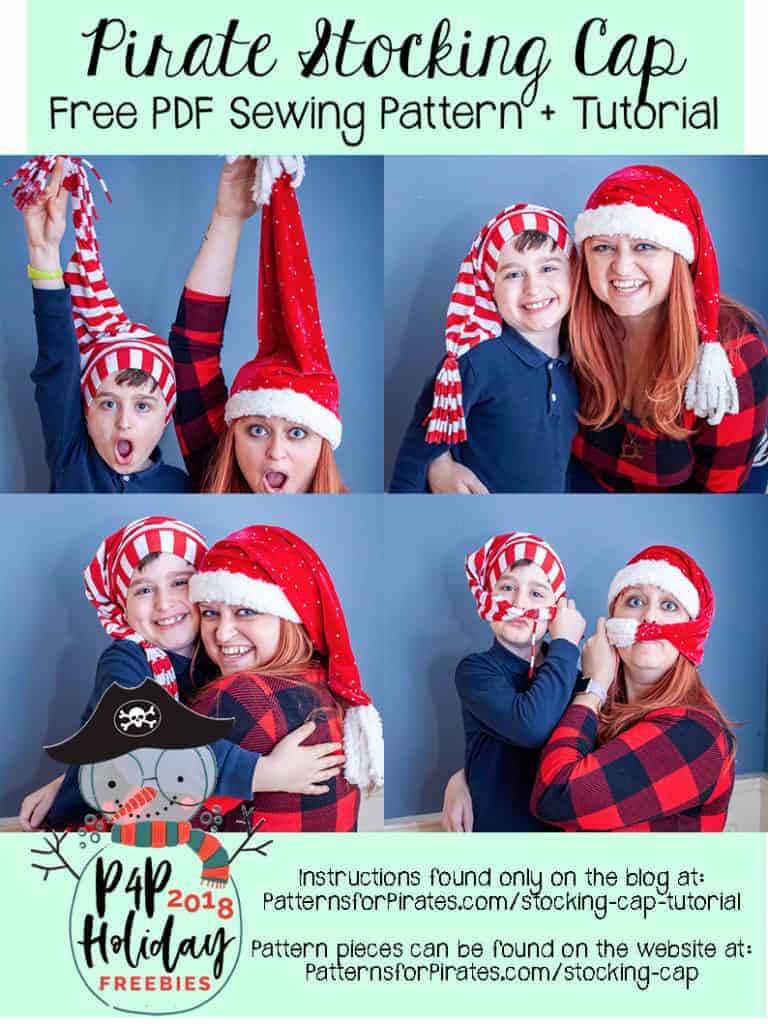
On our THIRD day of freebies this holiday season, I thought it was time to bring to you a new hat pattern.  Did you know that I (Katy) started in the handmade selling world with crocheted hats?  Putting things on people’s heads apparently is my “thing” and it can be your thing too!

Today’s pattern is a super quick and easy one.  Perfect for scrap busting.  And even more perfect for people who like fun hats.

This stocking cap pattern comes in four sizes, which should cover the heads of the majority of your family!

XSmall (fits 17″ – 18″ head circumference) – Toddler
Small (fits 19″ – 20″ head circumference) – Child
Medium (fits 21″ – 22″ head circumference) – Teen/Adult
Large (fits 23″ – 24″ head circumference) – Adult

Grab your free pattern pieces here. If you need help putting the pattern together, pop over to the First Time Users Tips page or ask in our facebook group .

Recommended fabrics: Ponte, sweater knits, liverpool, brushed poly, rayon blends, tshirt knits, upcycled sweaters, etc.   Anything with a decent amount of drape to it works best, otherwise the “slouch” won’t happen as well.  I suggest washing your fabric before you begin to pre-shrink & help prevent color bleeding in the future.
Cuff piece: Any knits with at least a 20% stretch.

Instructions:

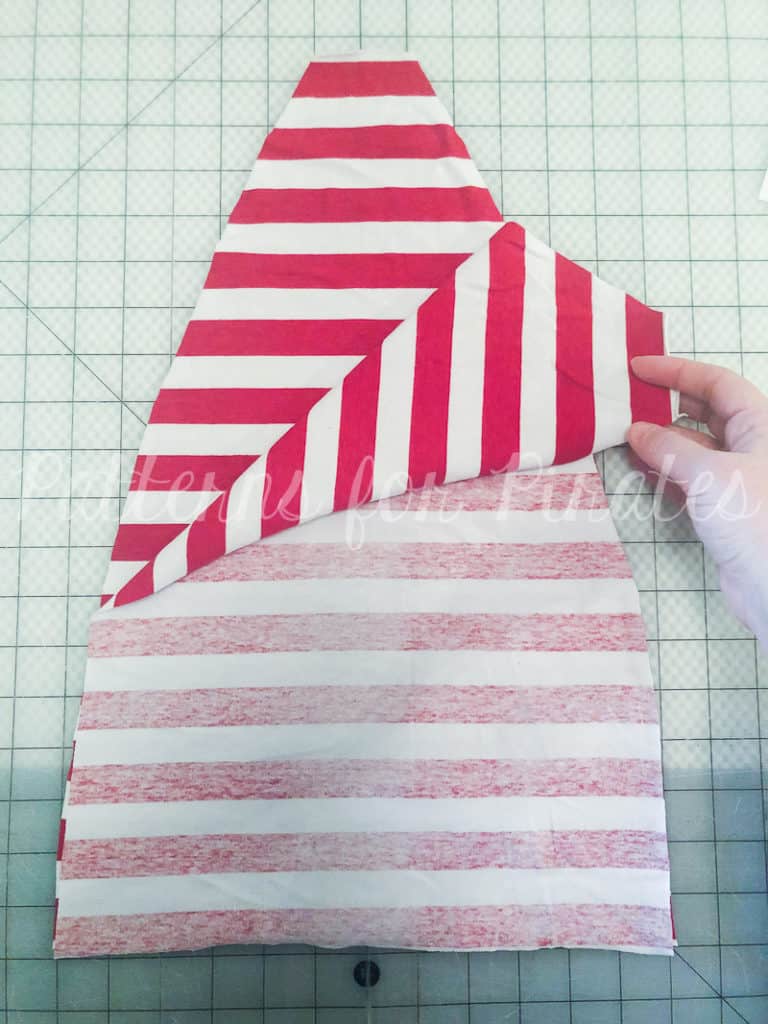
Lay one main hat piece, right side up.

Lay the second main piece on top, right sides together.

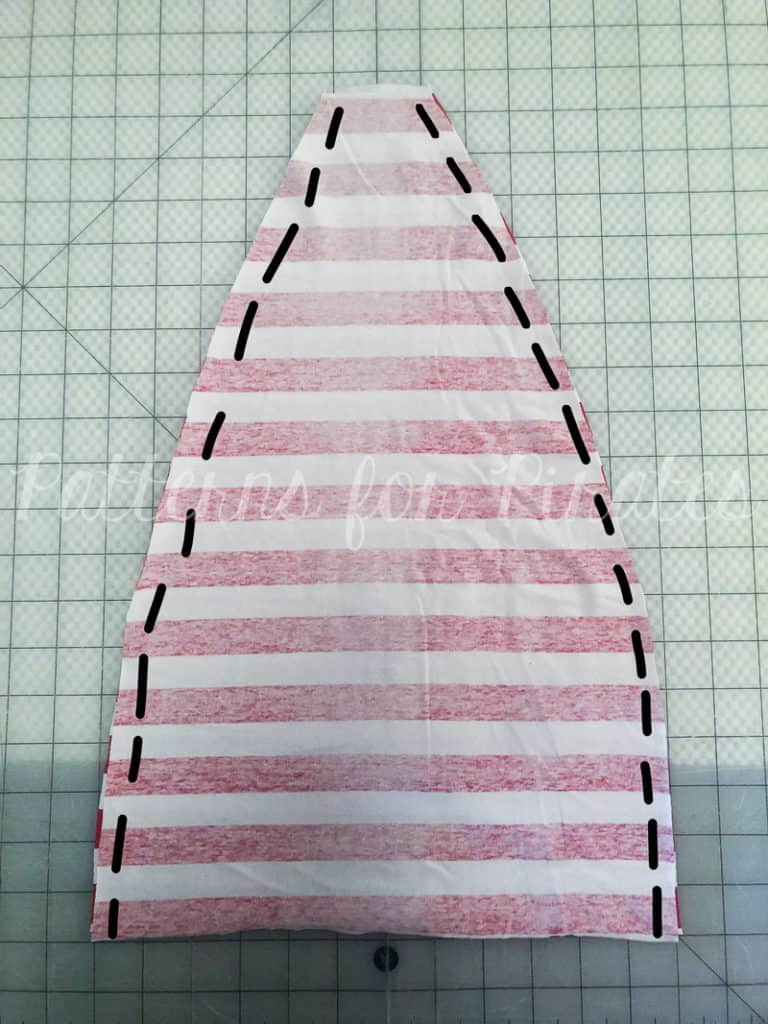
Using 1/2″ seam allowance, sew around the two outer edges.

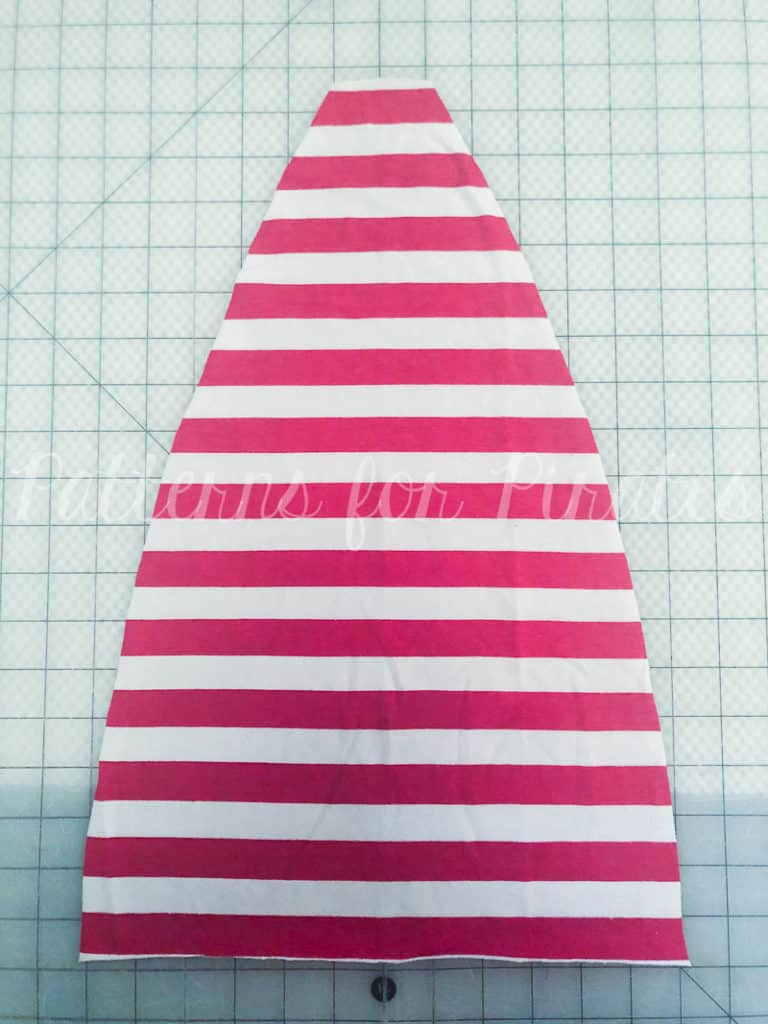
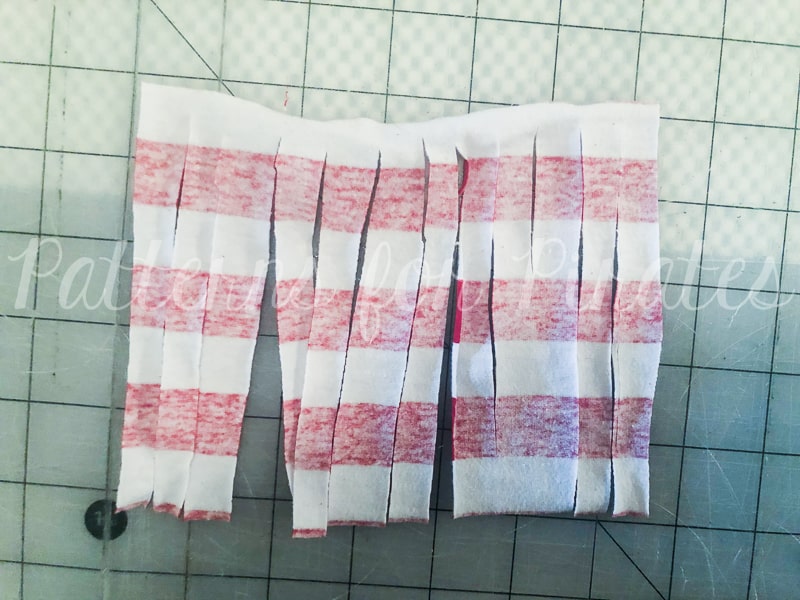
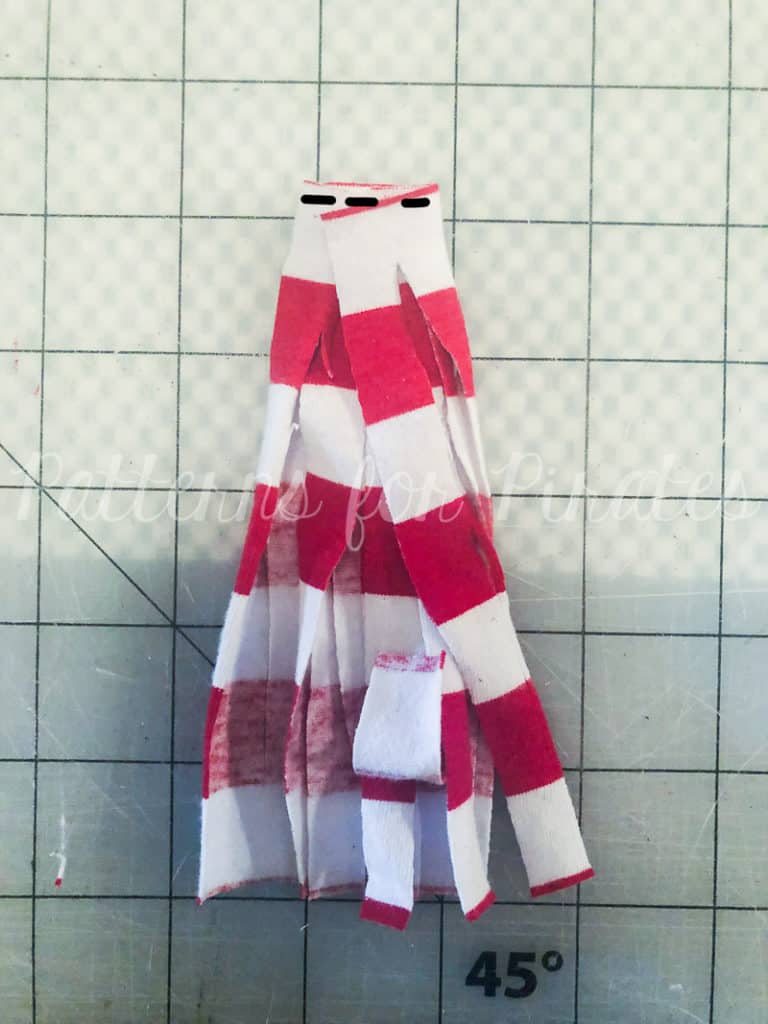
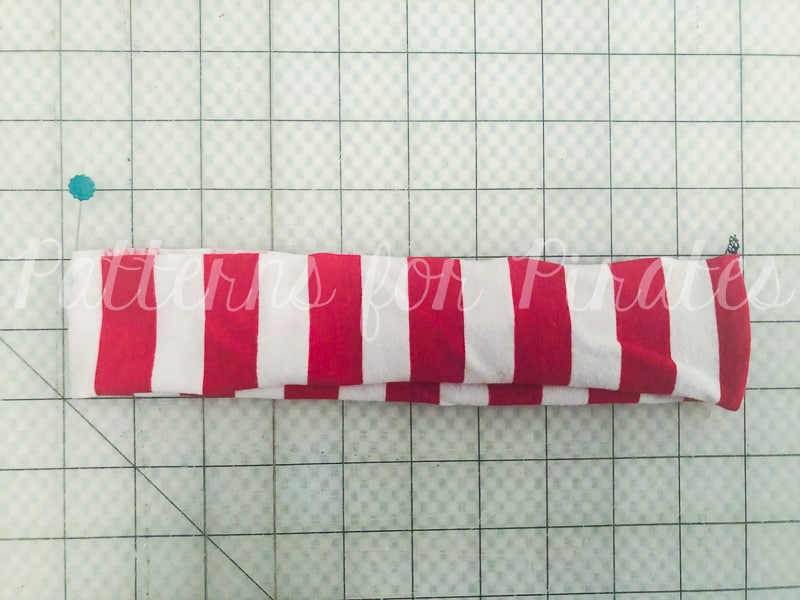
With your fringe piece face down, start rolling it — wrong sides together.

You want this piece to be as close to 1/2″ wide as possible. Baste the top together.

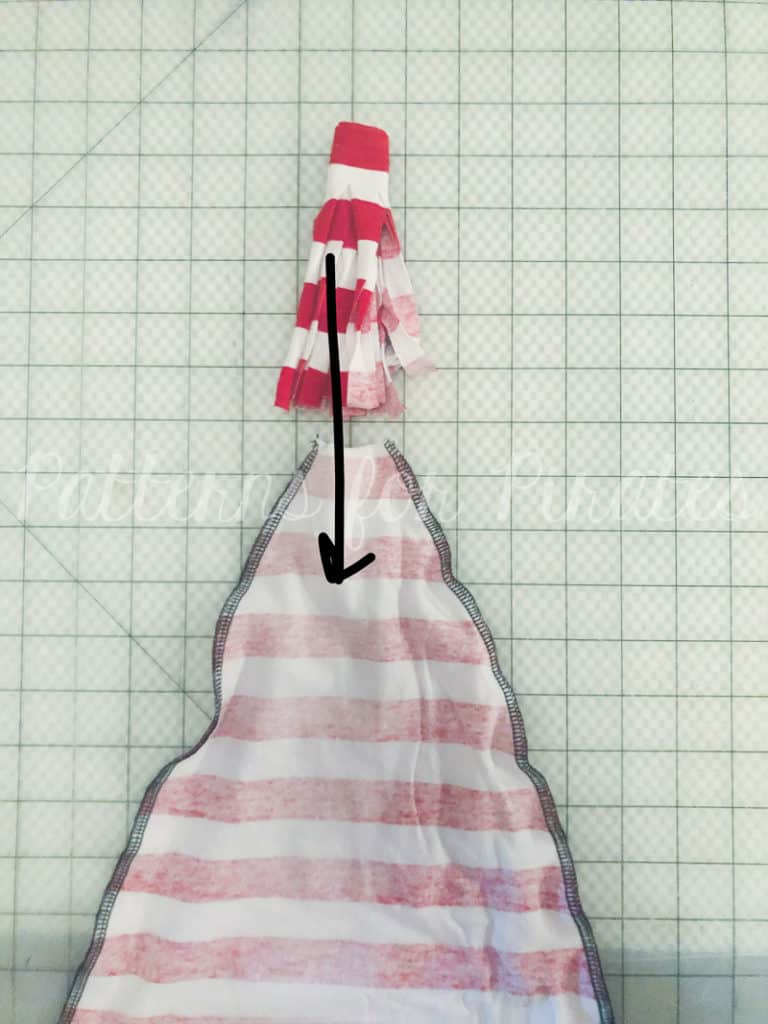
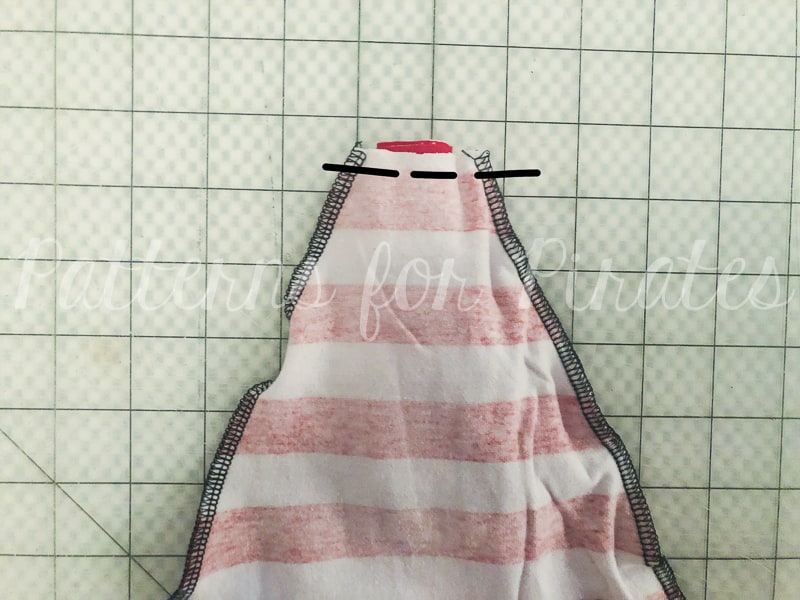
Slide the fringe piece inside the main hat. Make sure to tuck all of the fringe edges inside, so you don’t catch them.

Stitch along the raw edges, using 1/2″ allowance. (You might find this step easier to do with your sewing machine, as it can generally handle a thicker amount of fabric than your serger.)

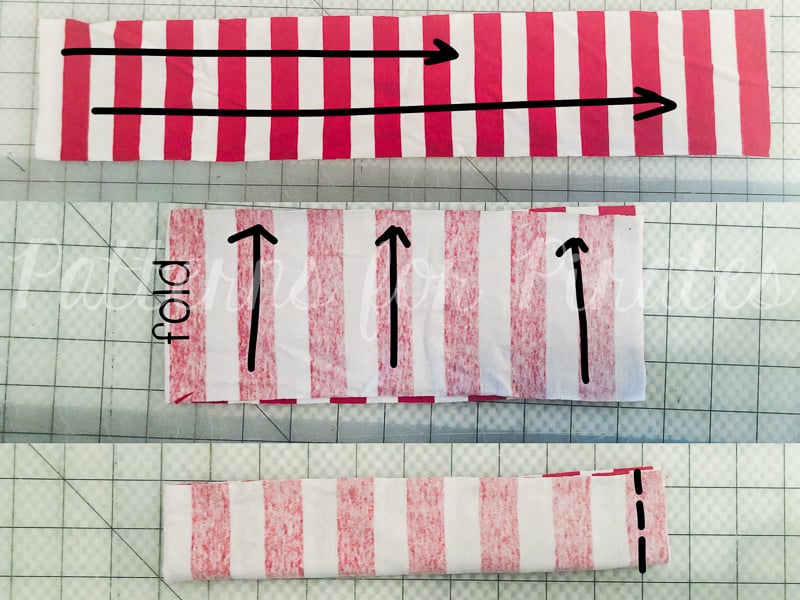
1. Fold your band piece, right sides together, meeting the short ends together.
2. Now meeting the long ends together, folding in half again.
3. Using 1/2″ seam allowance, sew short raw edges (you will be sewing through four layers).

Flip open your band, enclosing the seam cleanly in the middle. Mark the half points of the band.

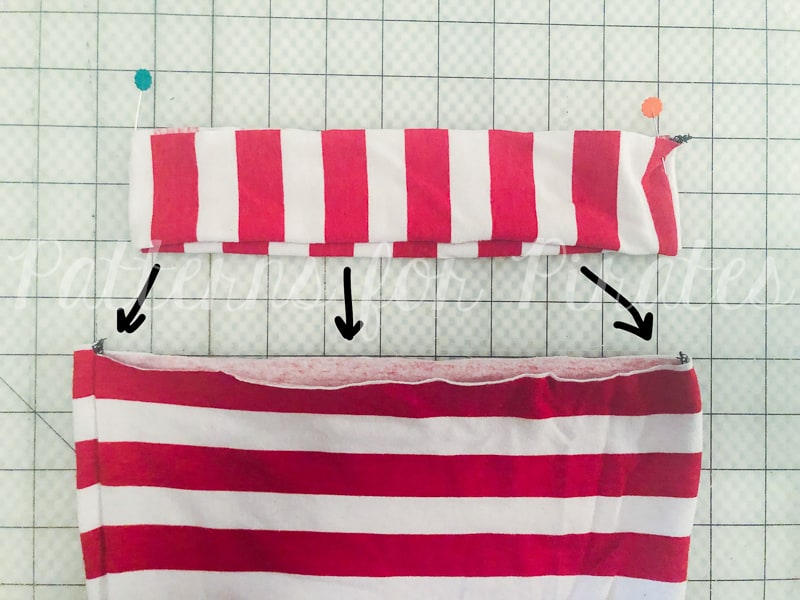
Slide the band over the hat body, aligning the raw edges and matching the half-marked points. Note: The band is slightly smaller than the hat body.

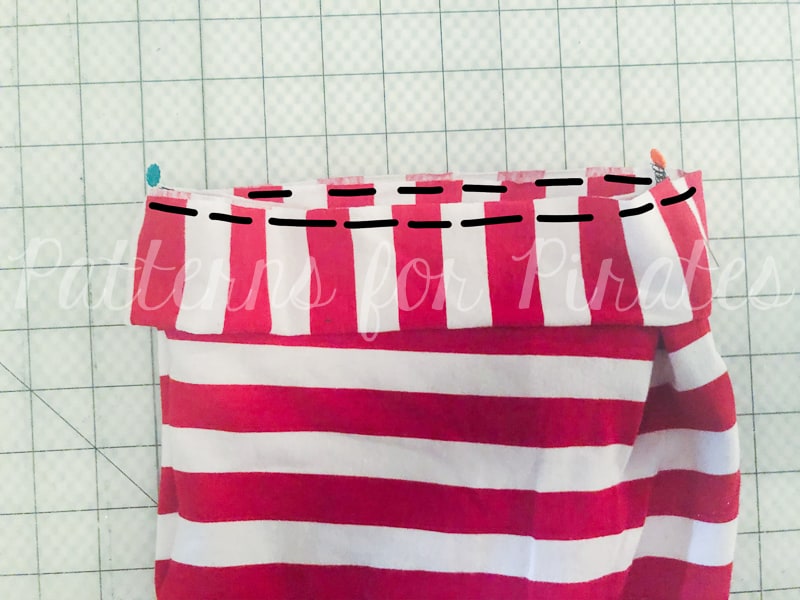
Stretching the band only, stitch through all three layers of raw edges.

You’re finished!!  So easy, right??

In case you needed it, here is some inspiration from our fabulous group of testers:

As always, we love when you share what you’ve made with us.  Head over to the Patterns for Pirates Facebook group and show off the fabulous Pirate Stocking Caps you’ve managed to make from our freebie pattern!

Filed Under: Free Pattern, Pattern Release 2 Comments

2018 Holiday Freebies :: Critter Clutch

December 3, 2018

Welcome back to the second day of our P4P Holiday Freebies 2018!  I’m not sure I can even handle the excitement I have over today’s free pattern.  I am so happy to have this idea out of my head and finally in pattern form, to share with all of you.  AND FOR FREE!

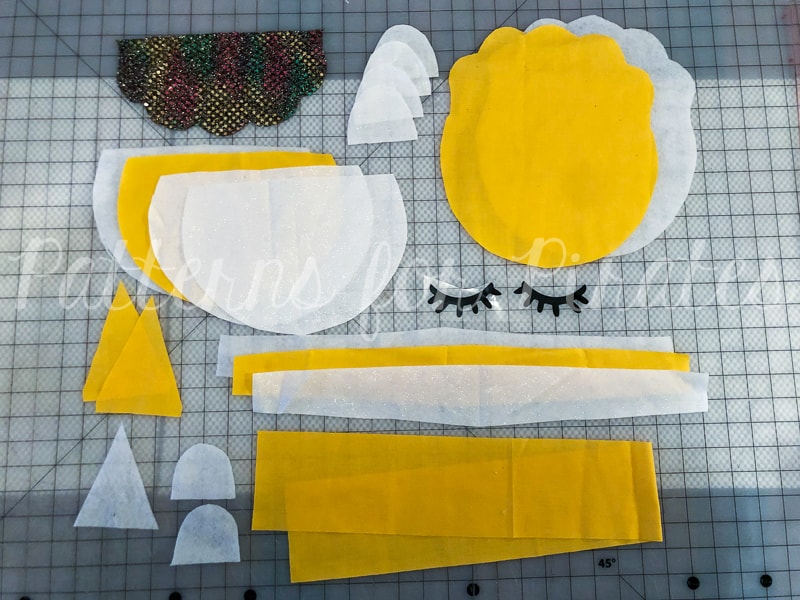
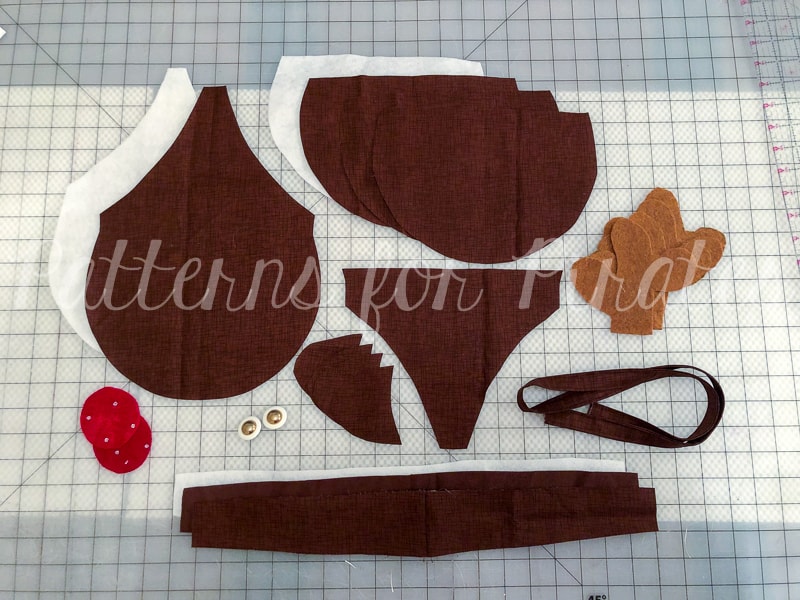
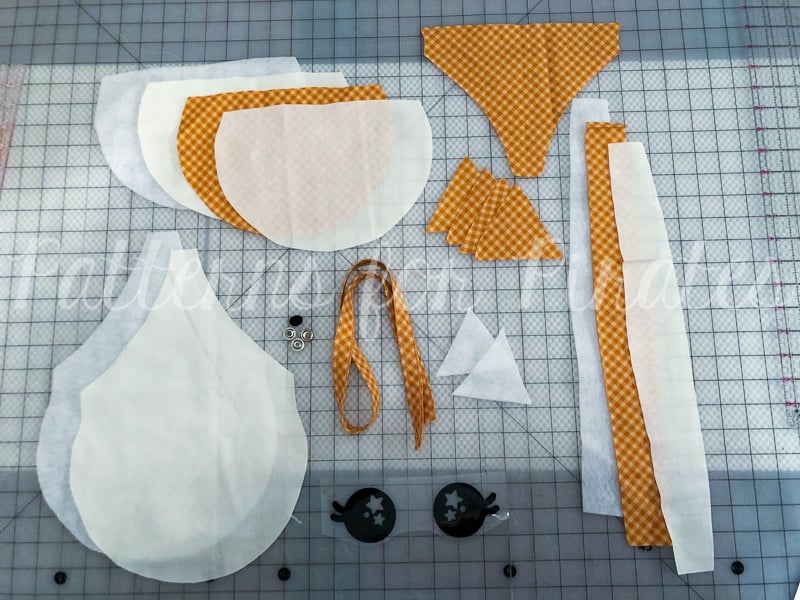
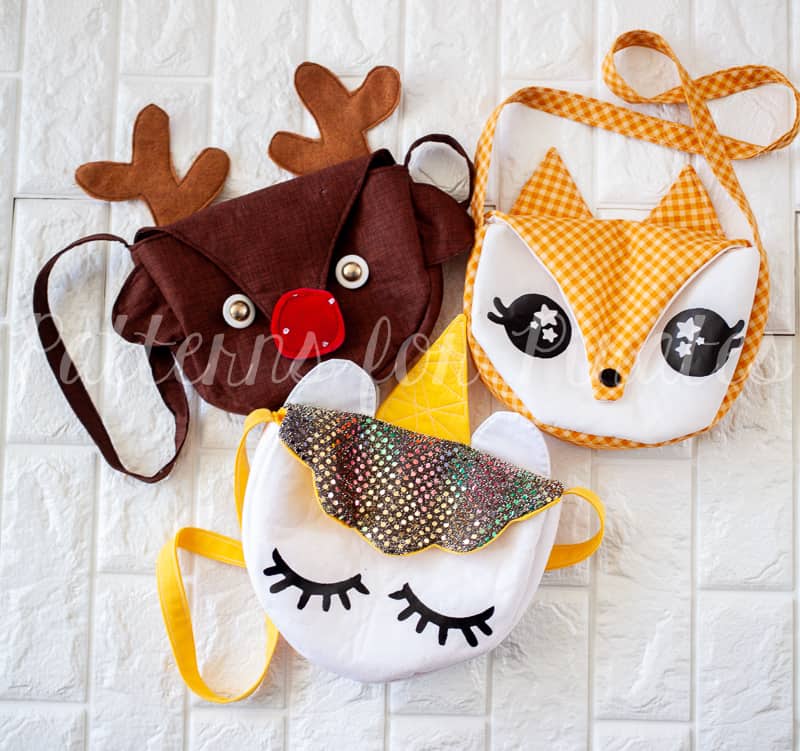
These Critter Clutches are simply adorable!  They take minimal amounts of fabric, with not too much time involved in it.  The hardest part is deciding which version to do first: Unicorn, Reindeer or Fox??!!

You will need:
— Critter Clutch pattern pieces + Eye Digital Designs for HTV (found HERE)
— 1/2 yard main fabric, 1/2 yard lining fabric
— Fusible Fleece: I like Pellon 987F (aff link)
— Buttons / Snaps / Velcro for eyes and closures

Recommended fabrics: quilting cotton, kona cotton, flannel, etc.

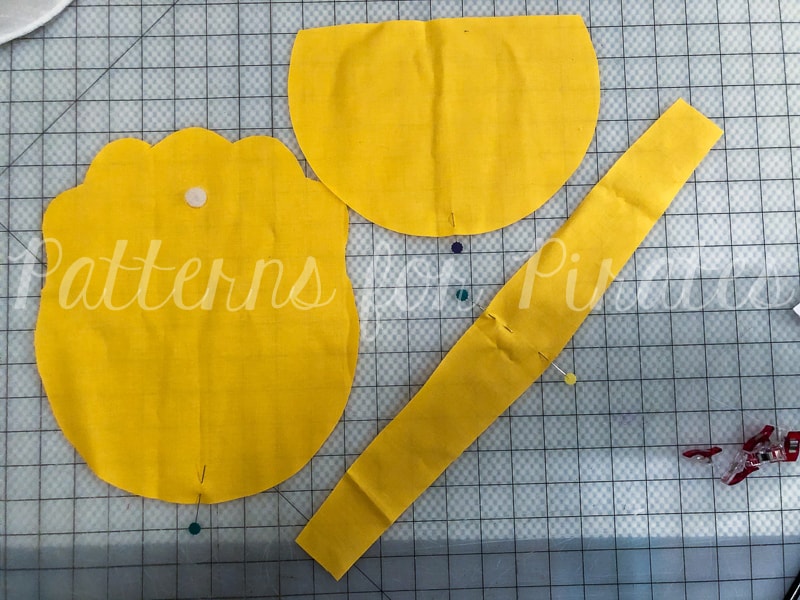
Cut out all pieces needed for your corresponding bag.

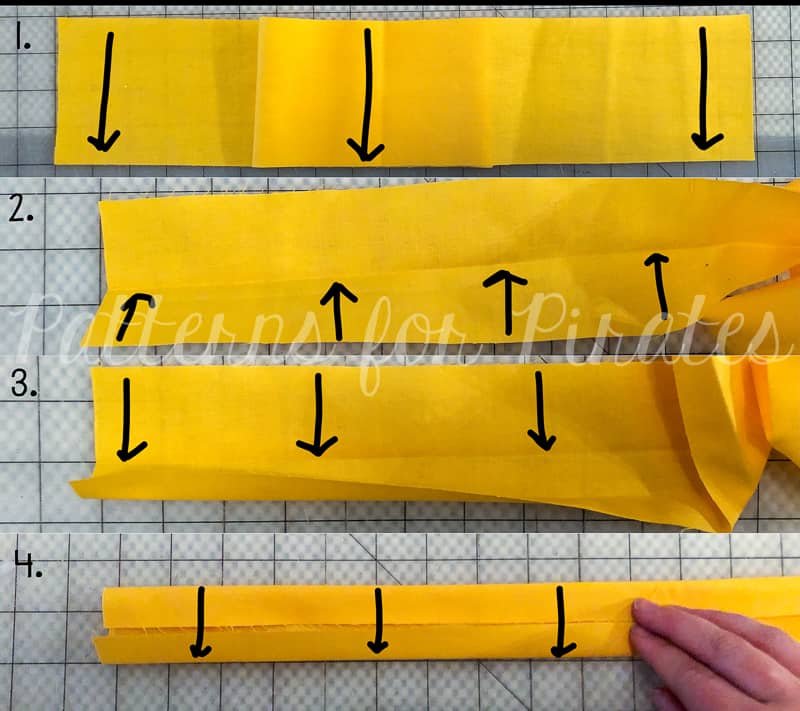
Prepping the Strap:

Cut 3″ long x 34″ wide strip of fabric.
**Note: Depending if you or the recipient will be wearing it cross body or straight down from one shoulder, you may want to adjust the width of this piece to your liking.

1. Fold in half, with long edges touching, wrong sides together. Press.
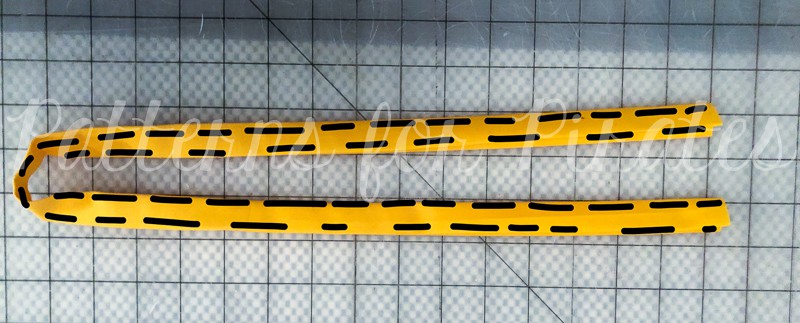
2. + 3. Open up, and fold each long edge into the crease you just created.
4. Fold, completely enclosing the raw edges.

Edge stitch along both long edges. Set aside.  Finished width: 3/4″.

Horn / Ear / Antler / Nose Pieces: 

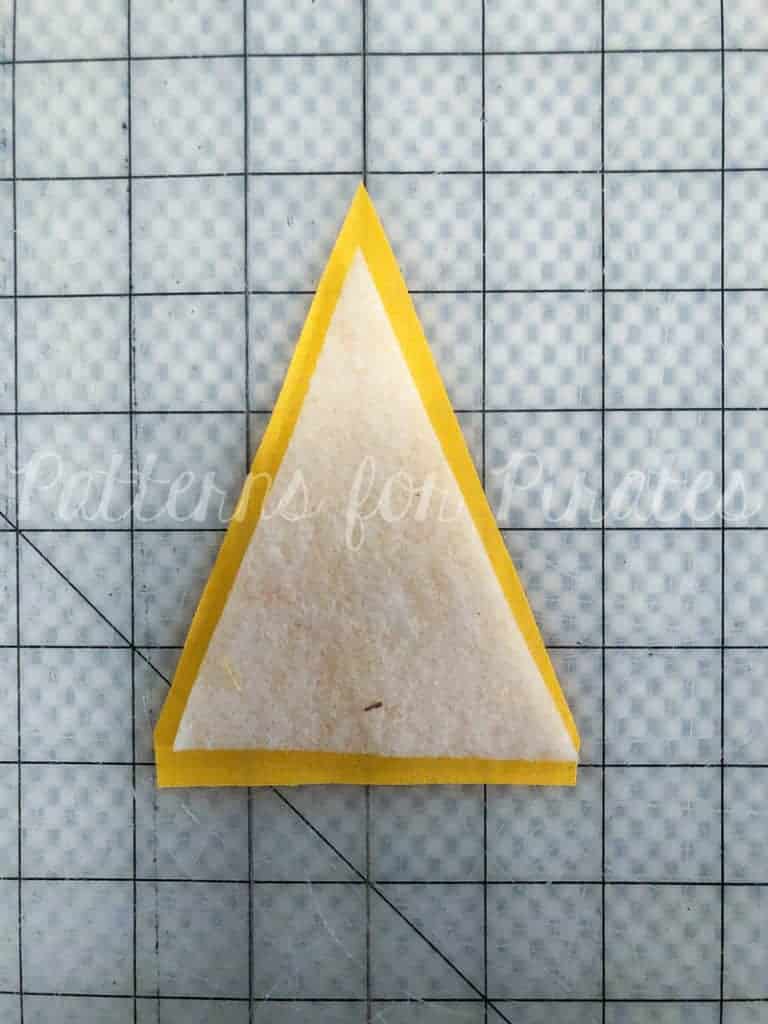
*Tip: I added fusible fleece to these pieces to help them stand up better.  Some of our testers opted to fill them with a small amount of fiberfil.  Either way works!


Right sides together, sew along the outer edges using 1/4″ seam allowance. Leave the bottom open for turning.

Clip corners and allowance before turning to get a crisper edge.  Topstitch if desired.

I like to get a little funky with the unicorn horn and add some decorative stitches to it.  This also helps the horn’s stiffness.
Apply Interfacing:

Carefully trim away 1/4″ from each interfacing piece, to allow for easier turning.

Following the instructions from the manufacturer, apply interfacing to these pieces:

  • Front Main Piece
  • Main Gussett

Eyes + Closures:

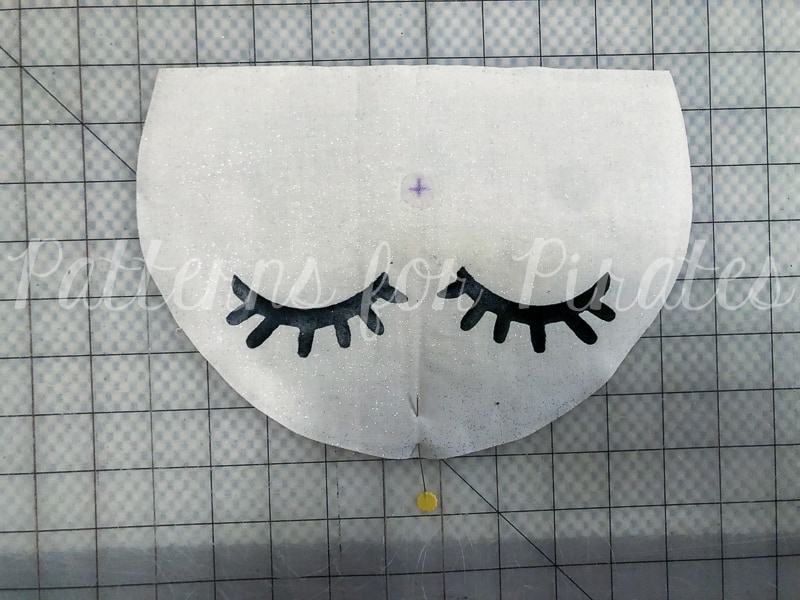
I personally like to add the eyes and velcro / snaps to the front main piece before we assemble the bag.  It allows for all of the stitching or snaps to be enclosed inside of the bags, and it’s a lot easier to apply HTV to a flat surface.  You can wait until the end if you’d like!

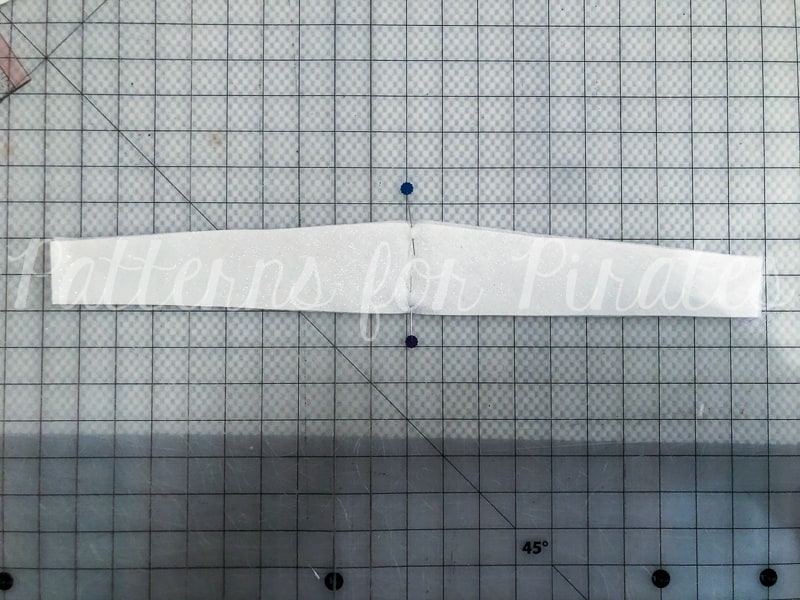
The Fox and Reindeer’s eyes need to be a little more wide set.  And the Unicorn’s eyes work best if you apply them closer to the bottom of the bag front.

Velcro / button placement on front main piece:

  • Unicorn / Plain Bag: 2″ from the top, centered (4.5″ from either side)
  • Fox / Reindeer: 2″ from the bottom, centered

Velcro / button placement on Back Lining piece:

  • Unicorn / Plain Bag: 2″ from the top, centered (4.5″ from either side)
  • Fox / Reindeer: 1.5″ from the bottom, centered

REINDEER ONLY:

1″ from the top edge, pin and baste ears in place using 1/8″ seam allowance.

Back Main Assembly:

UNICORN ONLY: Take back main piece and mark the center along the top, straight edge.  Mark center of horn piece.

Right sides together, align and pin/clip horn in place.

Place ears on either side of horn.  **Be sure not to go outside of your seam allowance on the outer edges, or you’ll have trouble turning your bag because the ears will be stuck in the outer edges.

FOX and REINDEER ONLY:

Right sides together, place ears and antlers (not pictured) 1″ from the outer edge.
ALL ANIMAL BAGS:

Place top piece, right sides together. Stitch with 1/4″ seam allowance.

Press open, with horn, antlers and/or ears pressed toward top and seam allowance pressed down.

Follow the manufacturer directions and iron your fusible interfacing onto the back side of the back main piece.

Attaching the Gusset:

Mark middle bottom of back piece and middle of both long edges of outer gusset piece.

Right sides together, ease gusset around bottom edge of back piece.  Sew using 1/4″ seam allowance.

Repeat for front main piece, attaching right sides together to other edge of gusset.

Repeat for lining pieces. Only this time, leave 4-5″ gap in one of the lining curves, to allow for turning.

Using 1/4″ allowance, baste straps, centered, on side gusset pieces. 

Final Assembly:

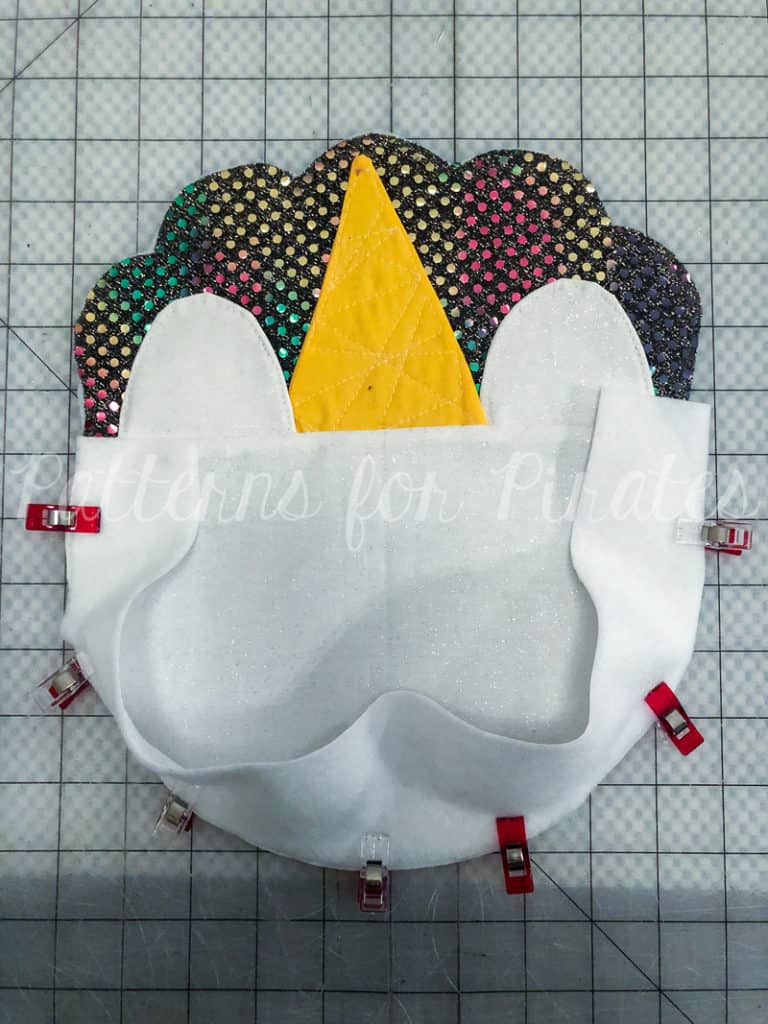
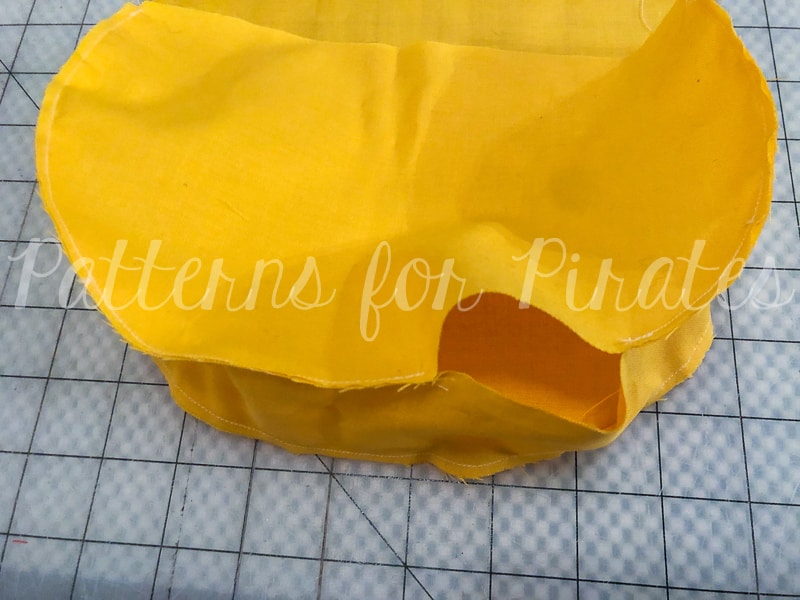
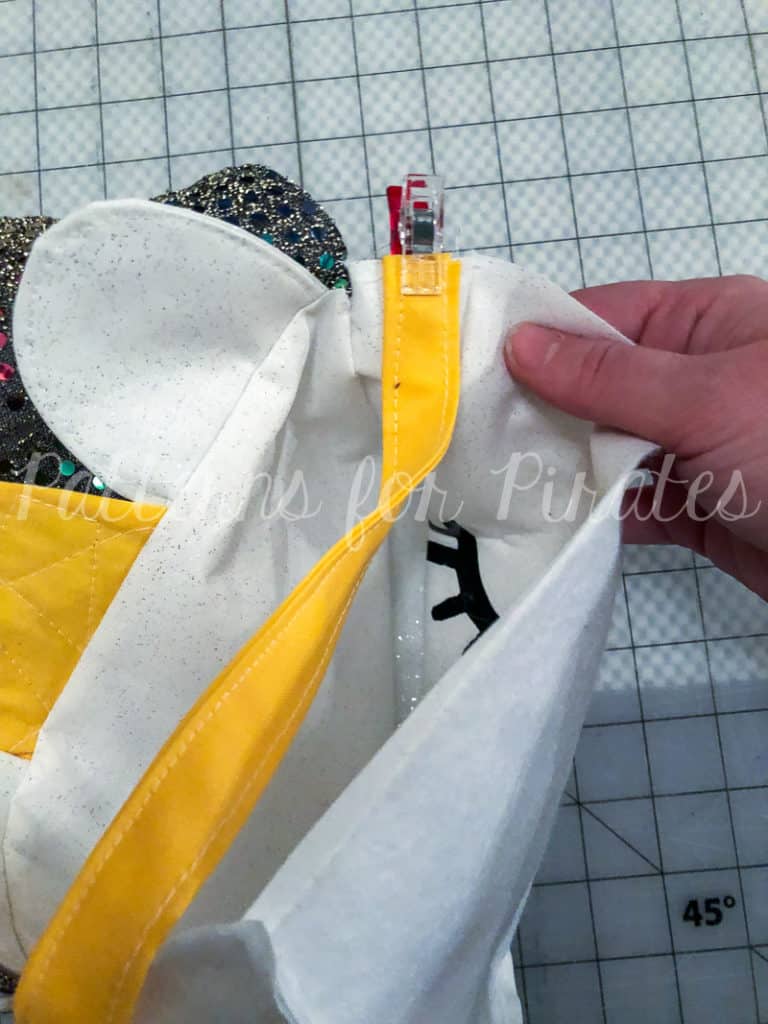
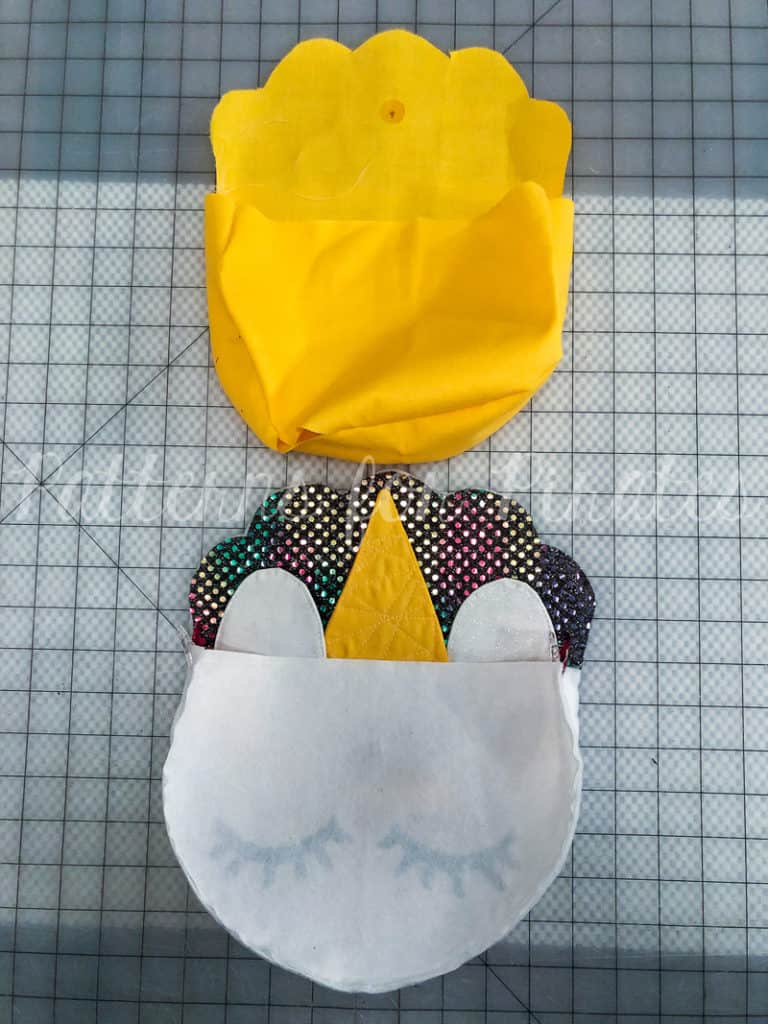
With the lining piece right sides out and the main, outer bag piece wrong sides out, slide the lining inside and align entire top edge.

Sew with 1/4″ seam allowance. Clip all edges and curves for cleaner turning.

Locate the opening you’d left in the lining.

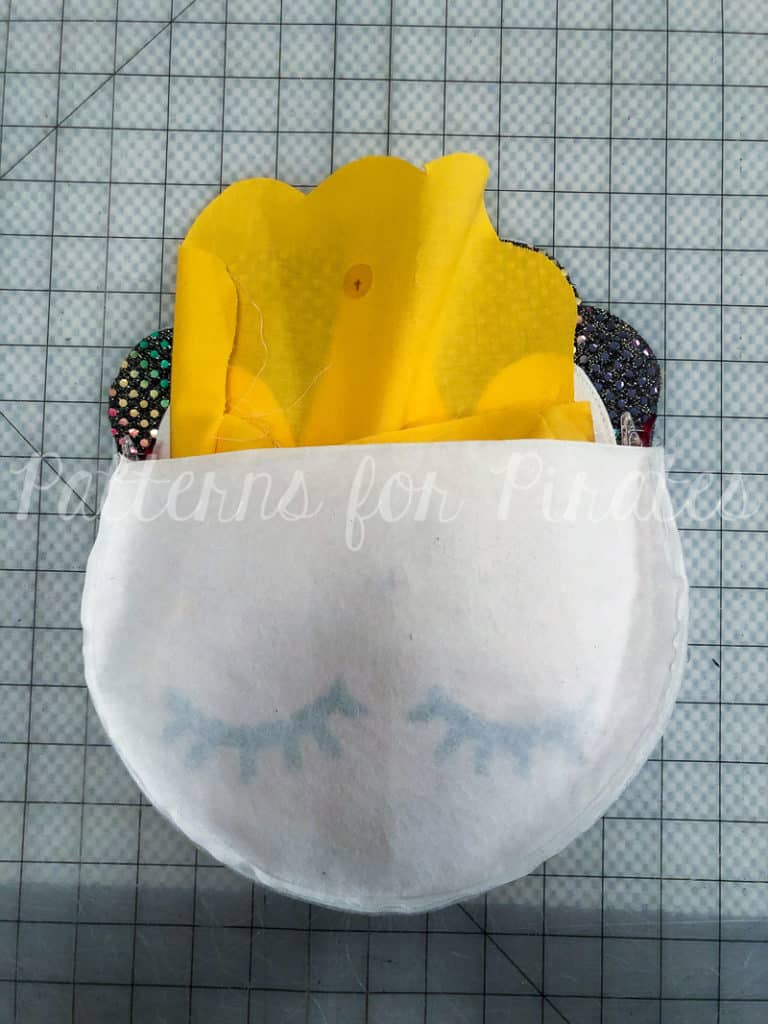
Turn bag right-side-out through opening.

Pin and sew the opening in the lining closed, using your favorite blind or ladder stitch.

Press bag.  Topstitch around top edge if desired.

Reindeer Nose:

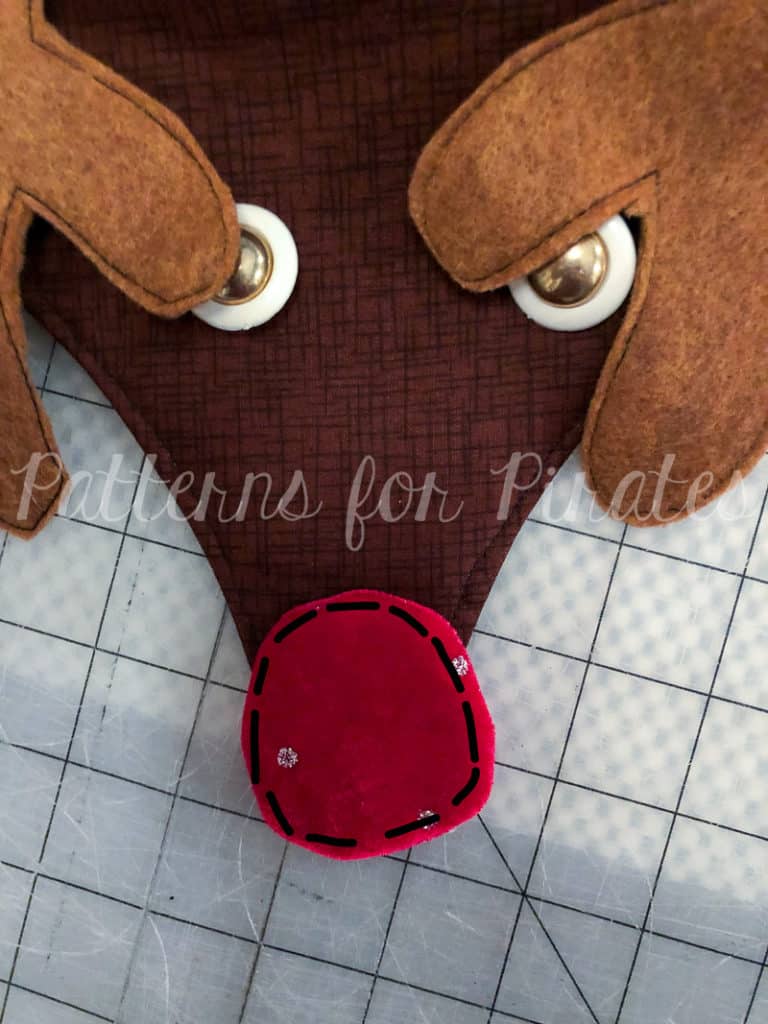
Align the nose at the very bottom of the front flap piece.  Top stitch the entire circle, catching the flap in your stitches and affixing the nose to the flap piece.

YOU’RE FINISHED!  DO A HAPPY DANCE!

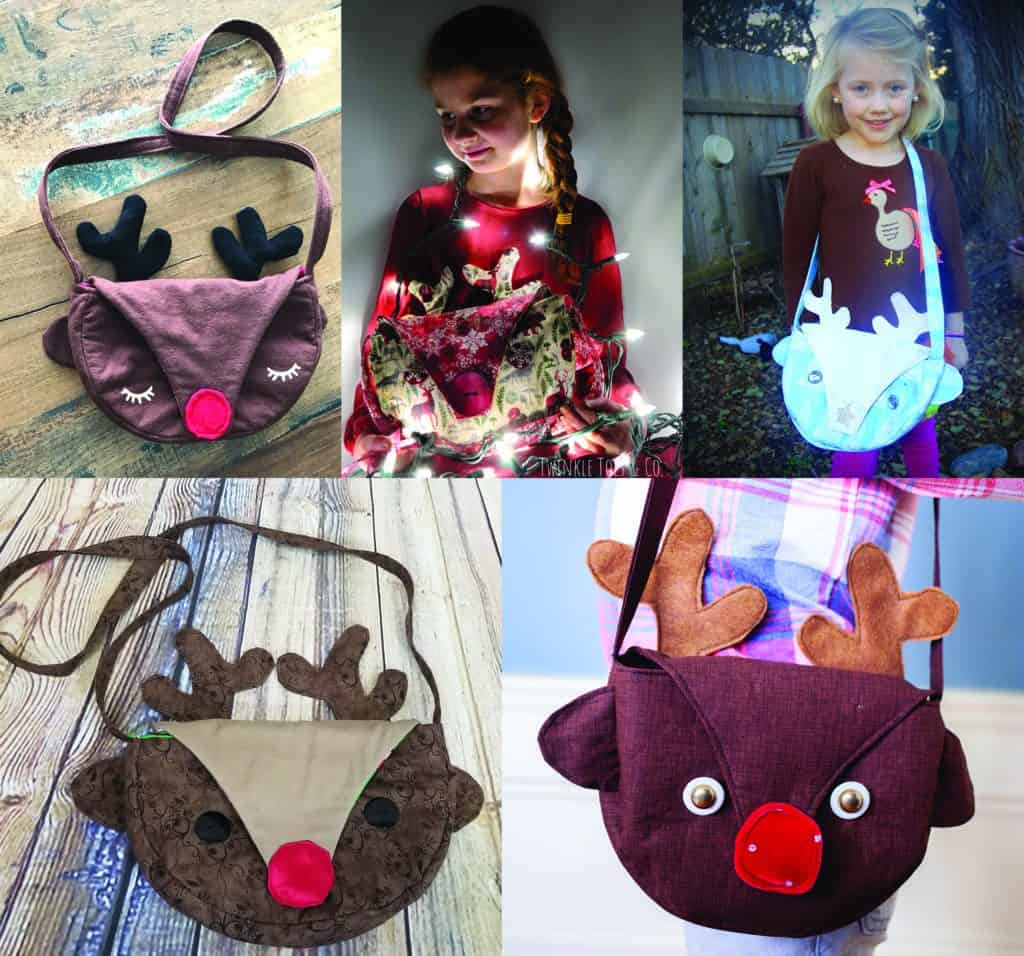
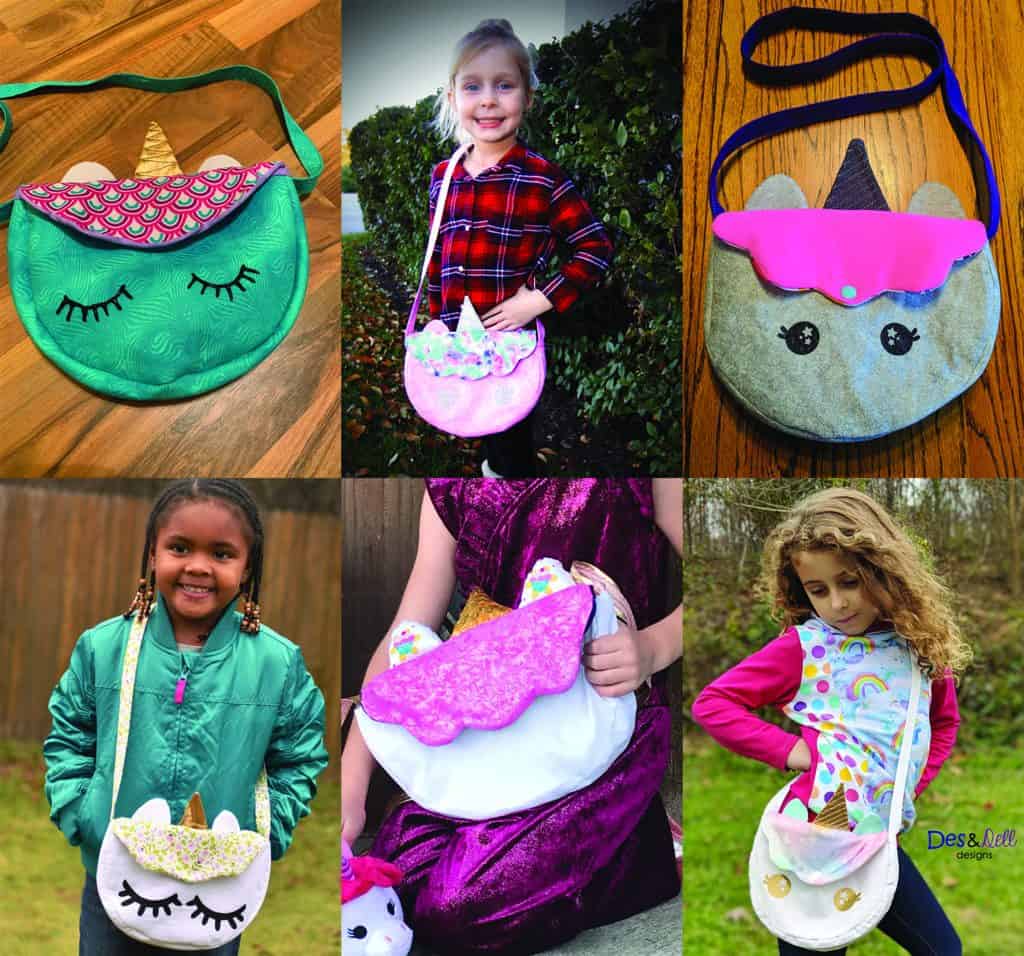
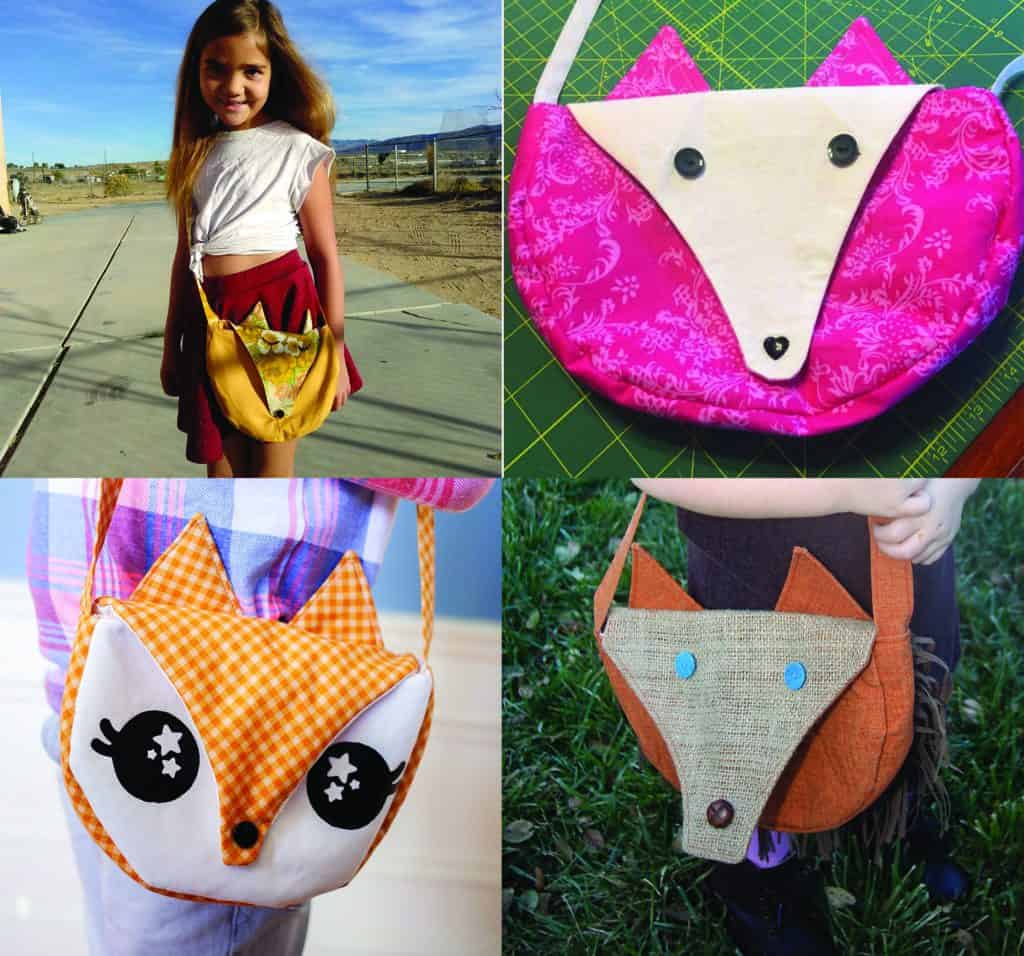
In case you needed it, here is some inspiration for the different designs sewn up by our amazing testers!

UNICORN:

REINDEER

FOX

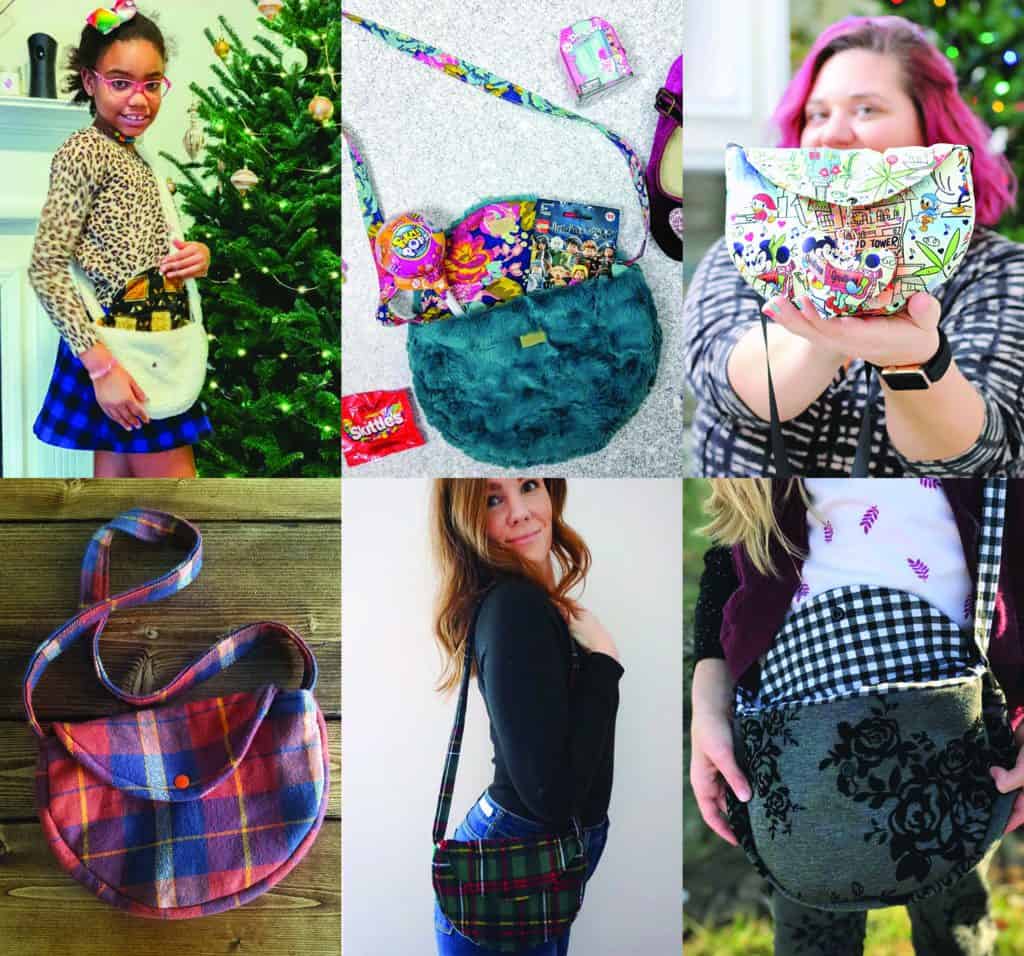
PLAIN

I hope you love these little cuties as much as I do.  Don’t forget to share your finished projects in the Patterns for Pirates Facebook Group!  Happy Holidays, friends!

Filed Under: Free Pattern, Pattern Release 5 Comments

  • « Previous Page
  • 1
  • …
  • 7
  • 8
  • 9
  • 10
  • 11
  • …
  • 19
  • Next Page »

connect with me

  • Email
  • Facebook
  • Instagram
  • Pinterest
  • YouTube
Privacy & Cookies: This site uses cookies. By continuing to use this website, you agree to their use.

To find out more, including how to control cookies, see here: Cookie Policy
  • Privacy Policy
  • Refund Policy
  • Contact Us
  • About

Copyright © 2026 Patterns for Pirates

Copyright © 2026 · Genesis Framework · WordPress · Log in