Patterns for Pirates

P4P stylish, modern, wearable patterns

  • Home
  • Blog
    • Frequently Asked Questions
    • Pattern Releases
      • Free Patterns
    • P4P University
      • Fitting
      • Sewing with Stretch, Knit Fabrics
      • Sewing with Woven Fabrics
      • Sewing Machines
    • Sew-A-Longs
    • Fabric for Pirates
    • Pattern Hacks
    • Announcement
      • Blog Tours
      • Contest/Giveaway
  • Shop
  • Bundle Discounts
  • Flash Friday
  • Gift Cards
  • My Account
  • Cart

P4P nursing hacks

June 12, 2018

Ahoy, pirates! Throughout the years the P4P team has showed you lots of ways to hack our patterns and make them nursing friendly.  So today I wanted to put them all together in a round up blog. this way you have easy access to them at all times.


RELAXED’S RAGLAN Nursing Hack
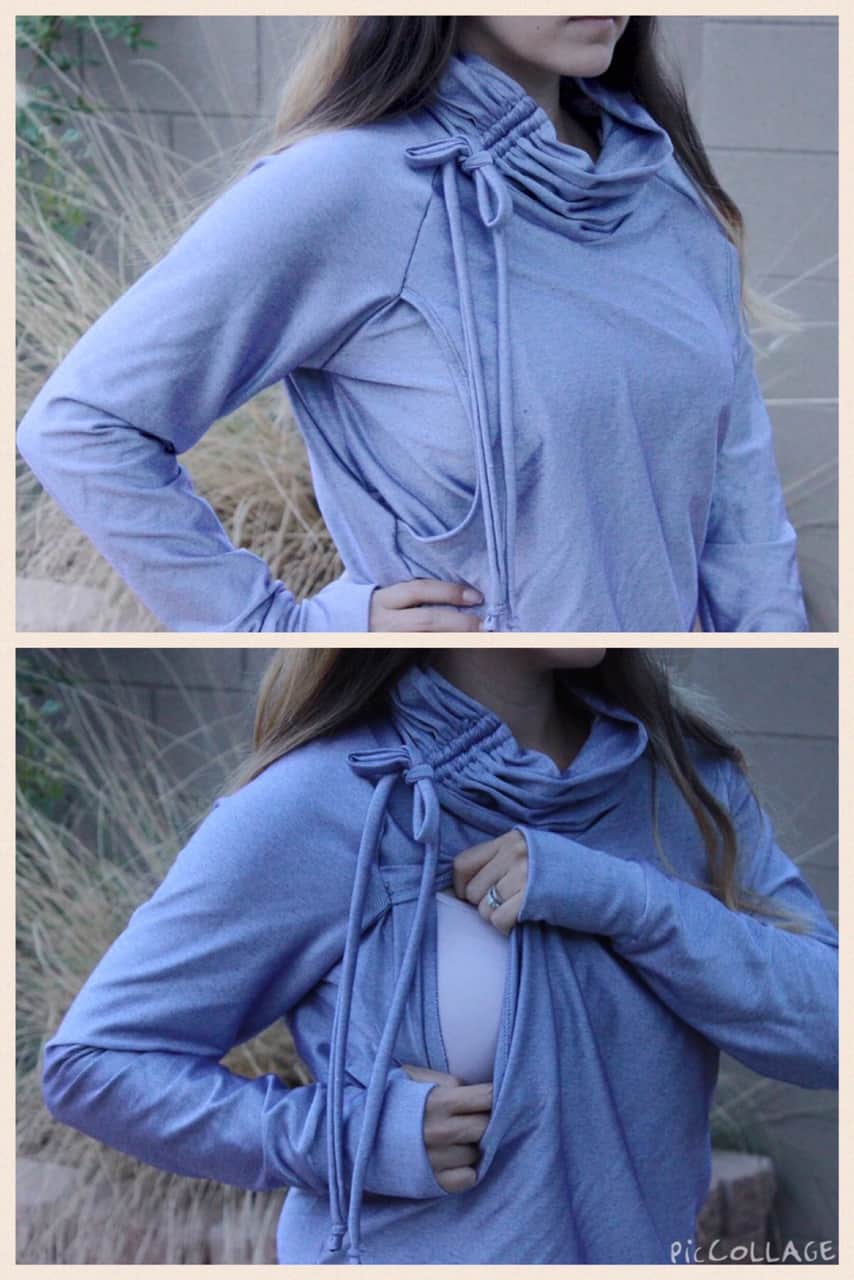
Nicole is showing us how to modify the Relaxed Raglan (or the Ragdoll, or the Slim Fit Raglan) to make it nursing friendly. You can find the blog here.


HENLEY nursing hack
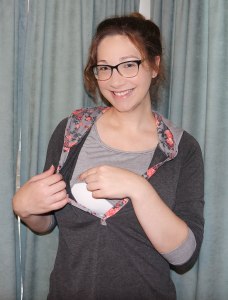
Next up we have a Henley modification that can certainly be applied to the Brunch Blouse as well. The blog can be found here.


FST/LMU MASH nursing hack
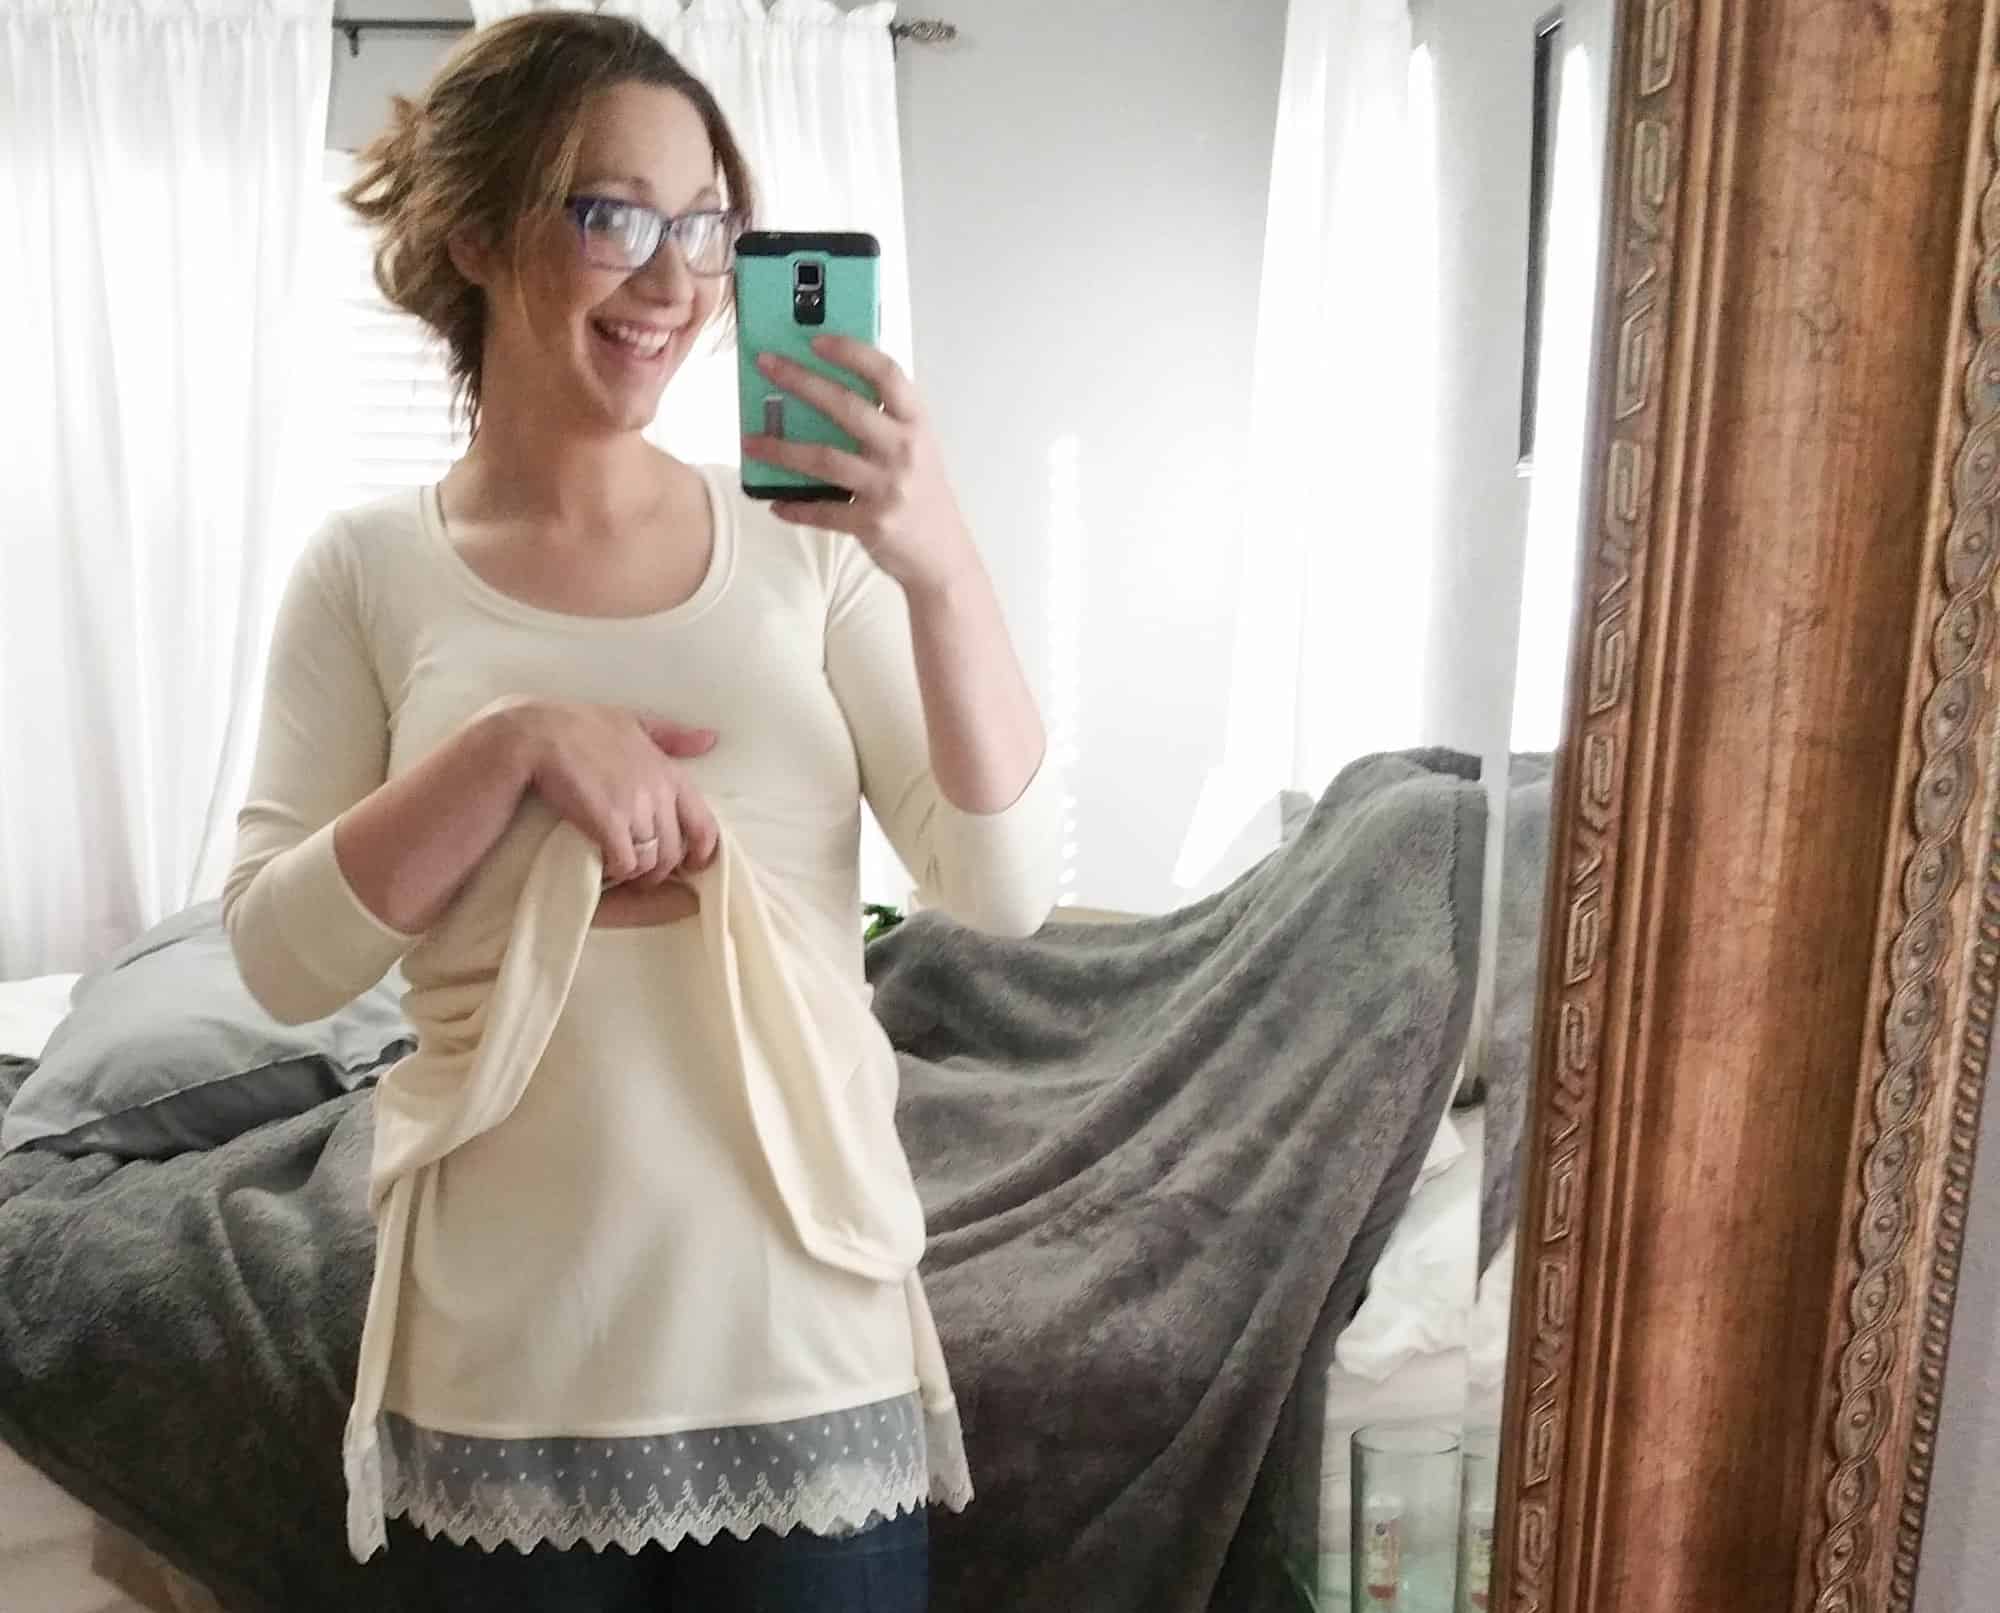
A lot of us are big fans of the FST/LMU mash so we couldn’t skip this mash in our nursing line up hack. You can find the details here.


LAYER ME UP nursing hack
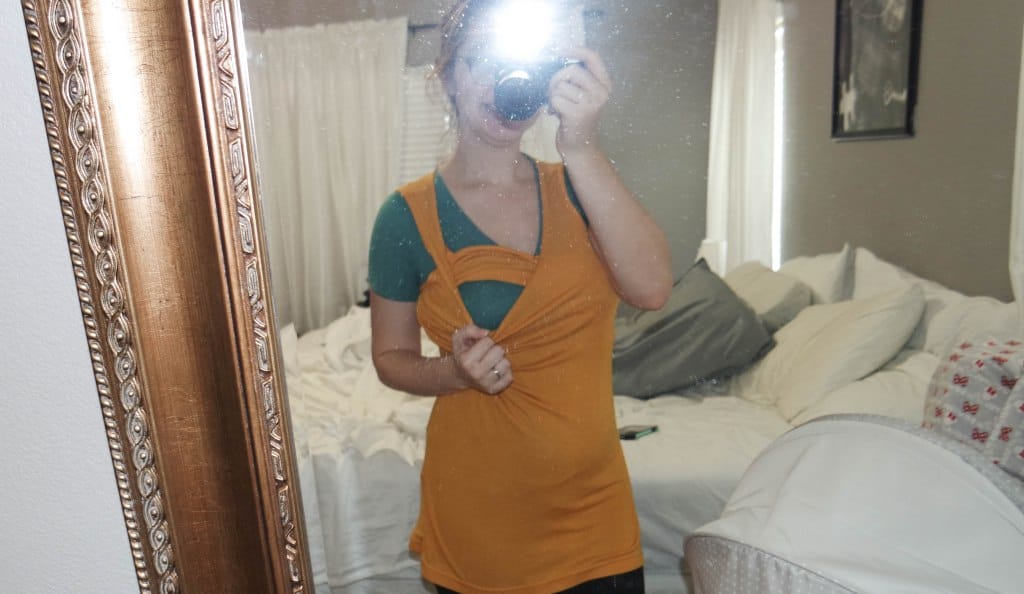
Our Layer Me Up Shirt has a nursing hack on the blog as well. Judy is showing us here how to modify the shirt to achieve a nurse friendly look.


BOUNDLESS nursing hack
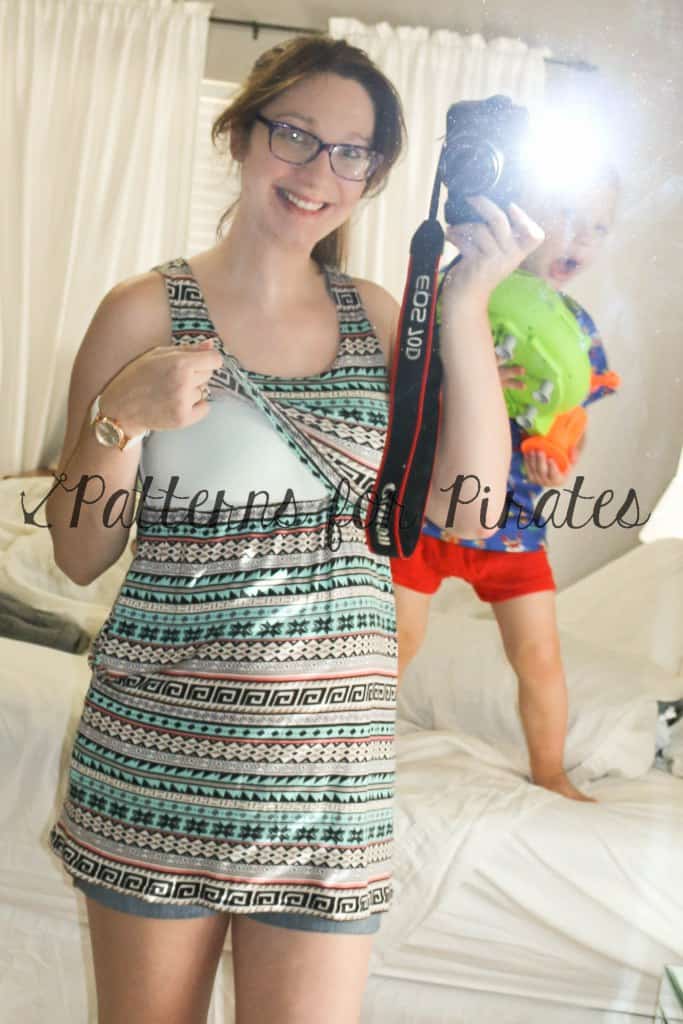
The Boundless Knit Dress nursing modification can be found here. The same technique can be applied to other dresses like the Sunshine or the Sweetheart dress.


BOHO BABYDOLL nursing hack

Our Boho Babydoll hacks includes a split side seam modification is that is great for nursing as well. You can read Erinn’s blog here.


CAREFREE CARDIGAN nursing hacks
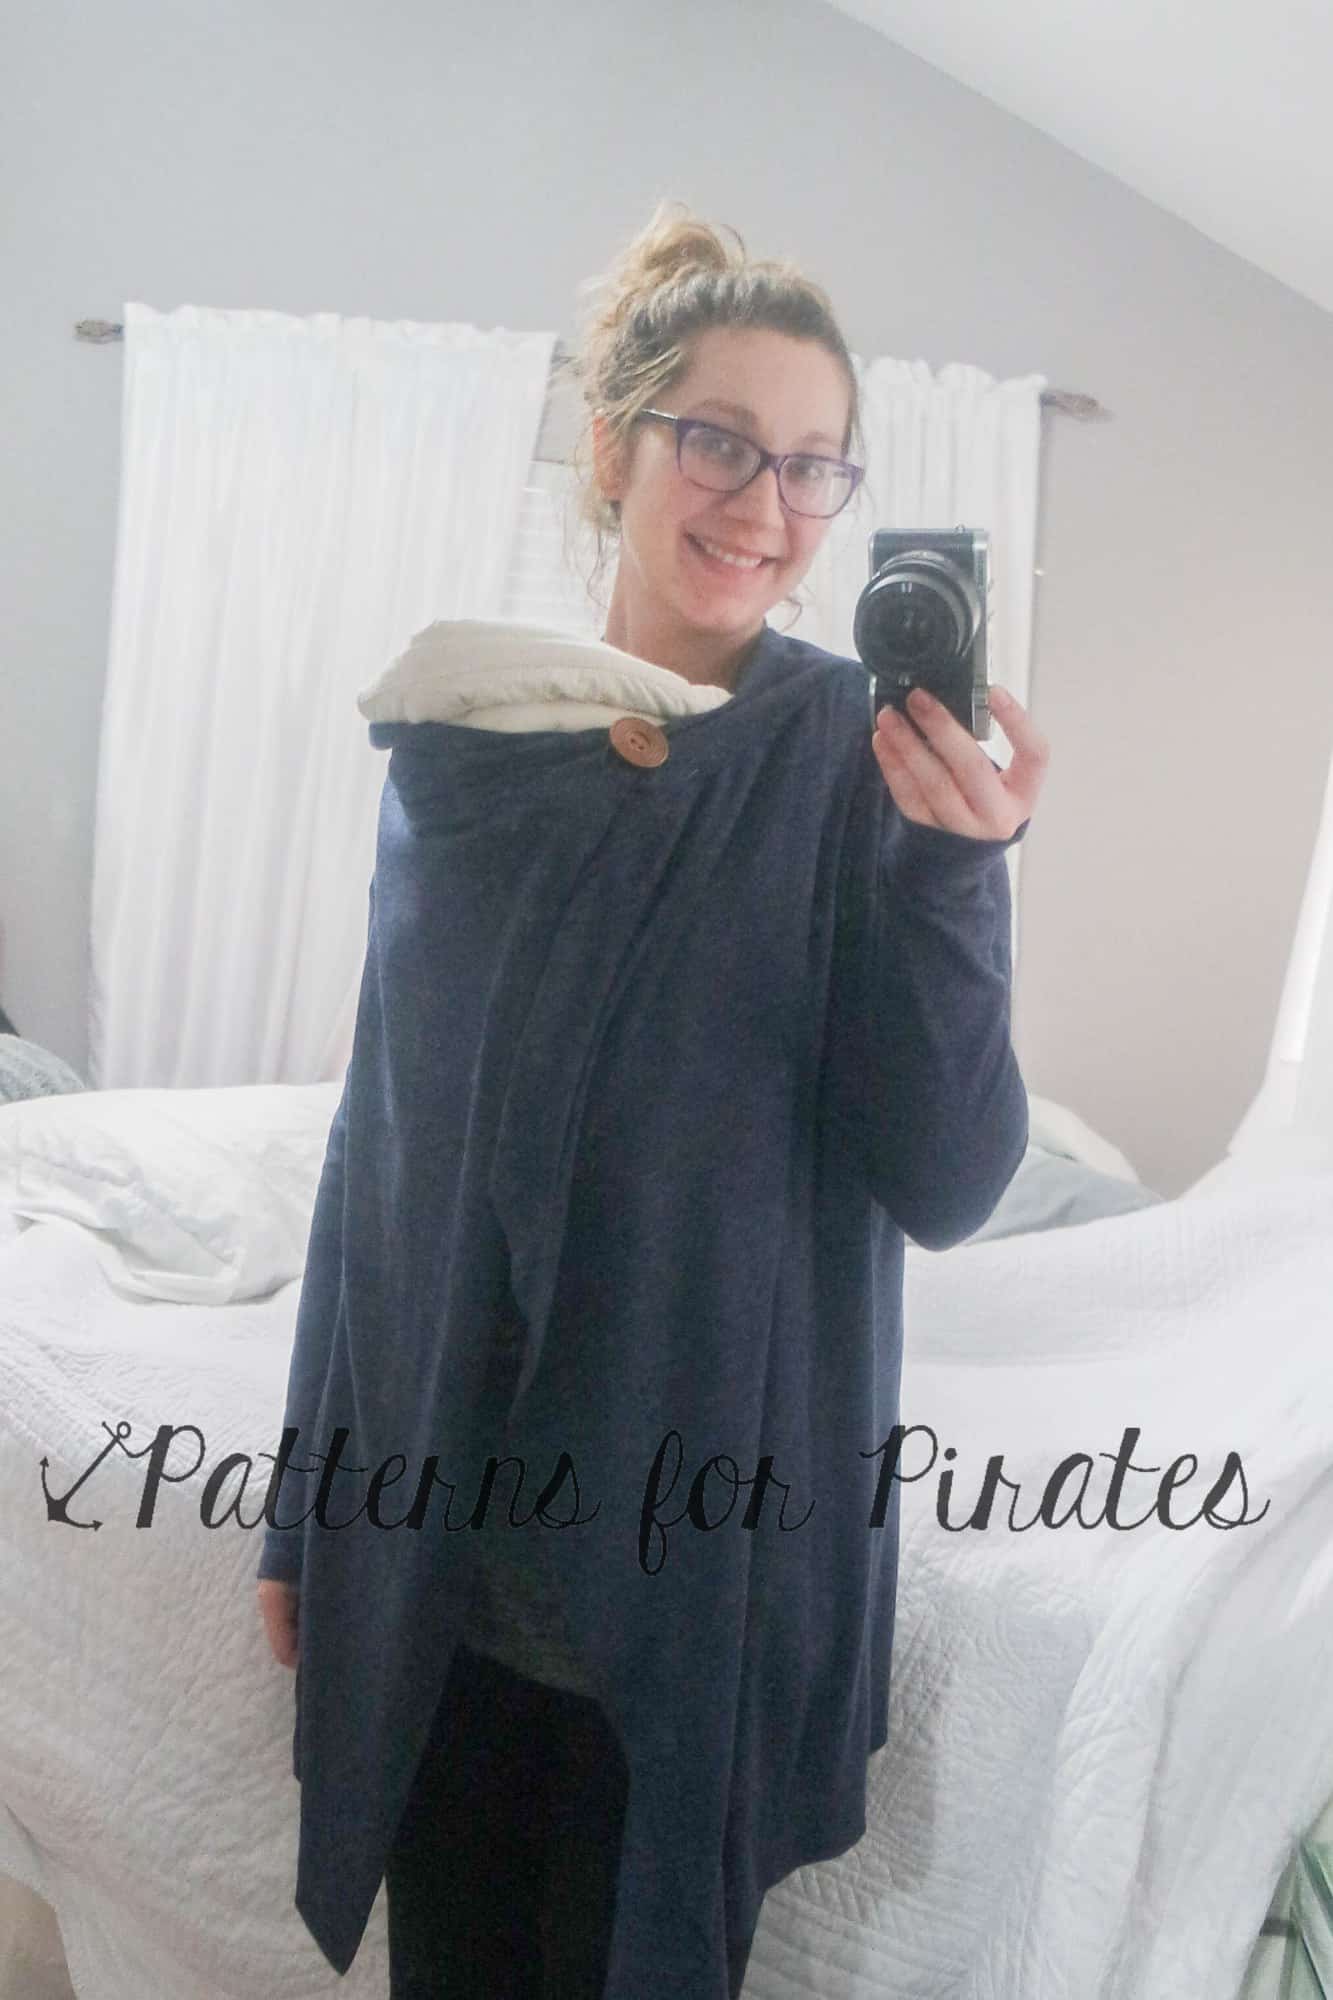
Our cardigans are already nursing friendly but Judy took it up a notch with the Carefree Cardigan Button Hack. The blog can be found here.


ESSENTIAL TANK nursing hacks
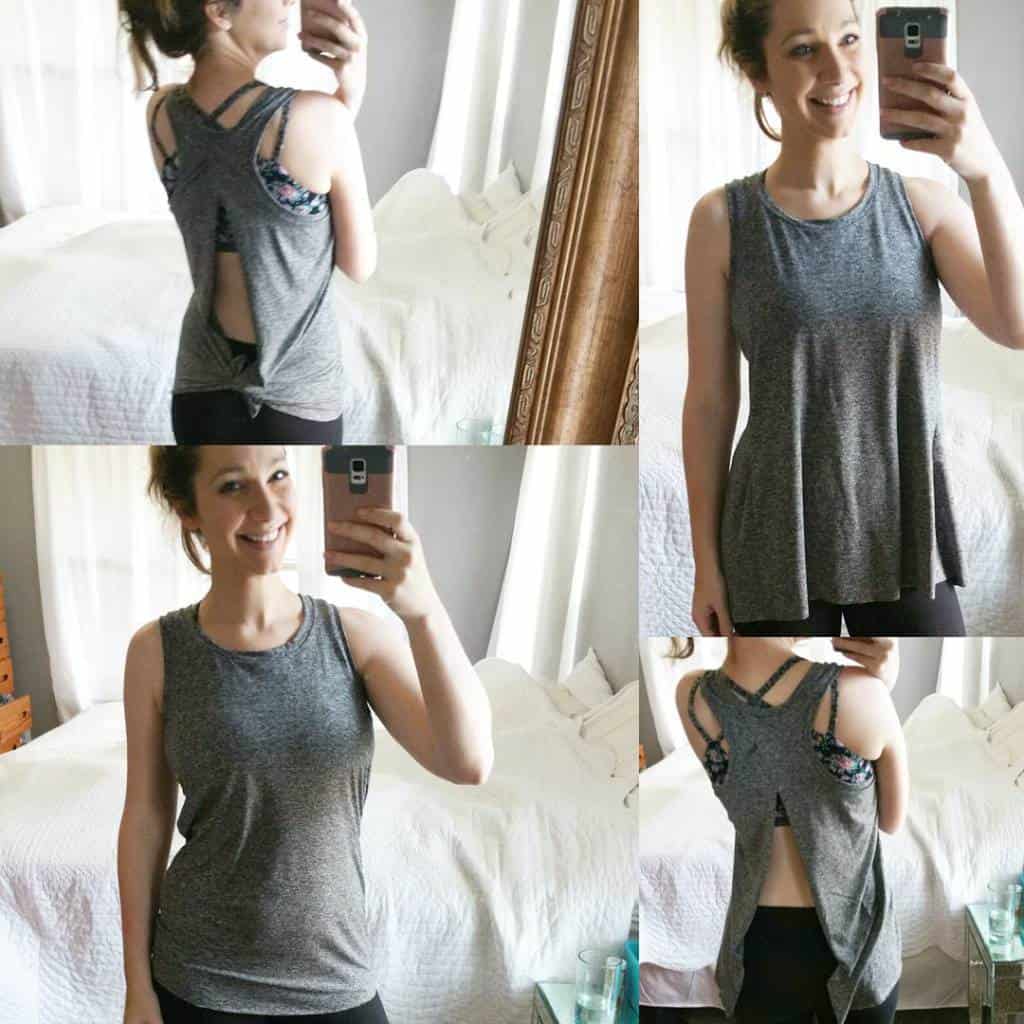
Last but not least we have an Essential Tank hack that is nursing friendly too. Judy shows us here how to achieve an open back look for the ET.


All you have to do now bookmark this blog post so you have easy access to all our nursing hack and get sewing. 🙂



Filed Under: Frequently Asked Questions, Pattern Hacks Leave a Comment

Palazzos Open Leg Hack

June 7, 2018


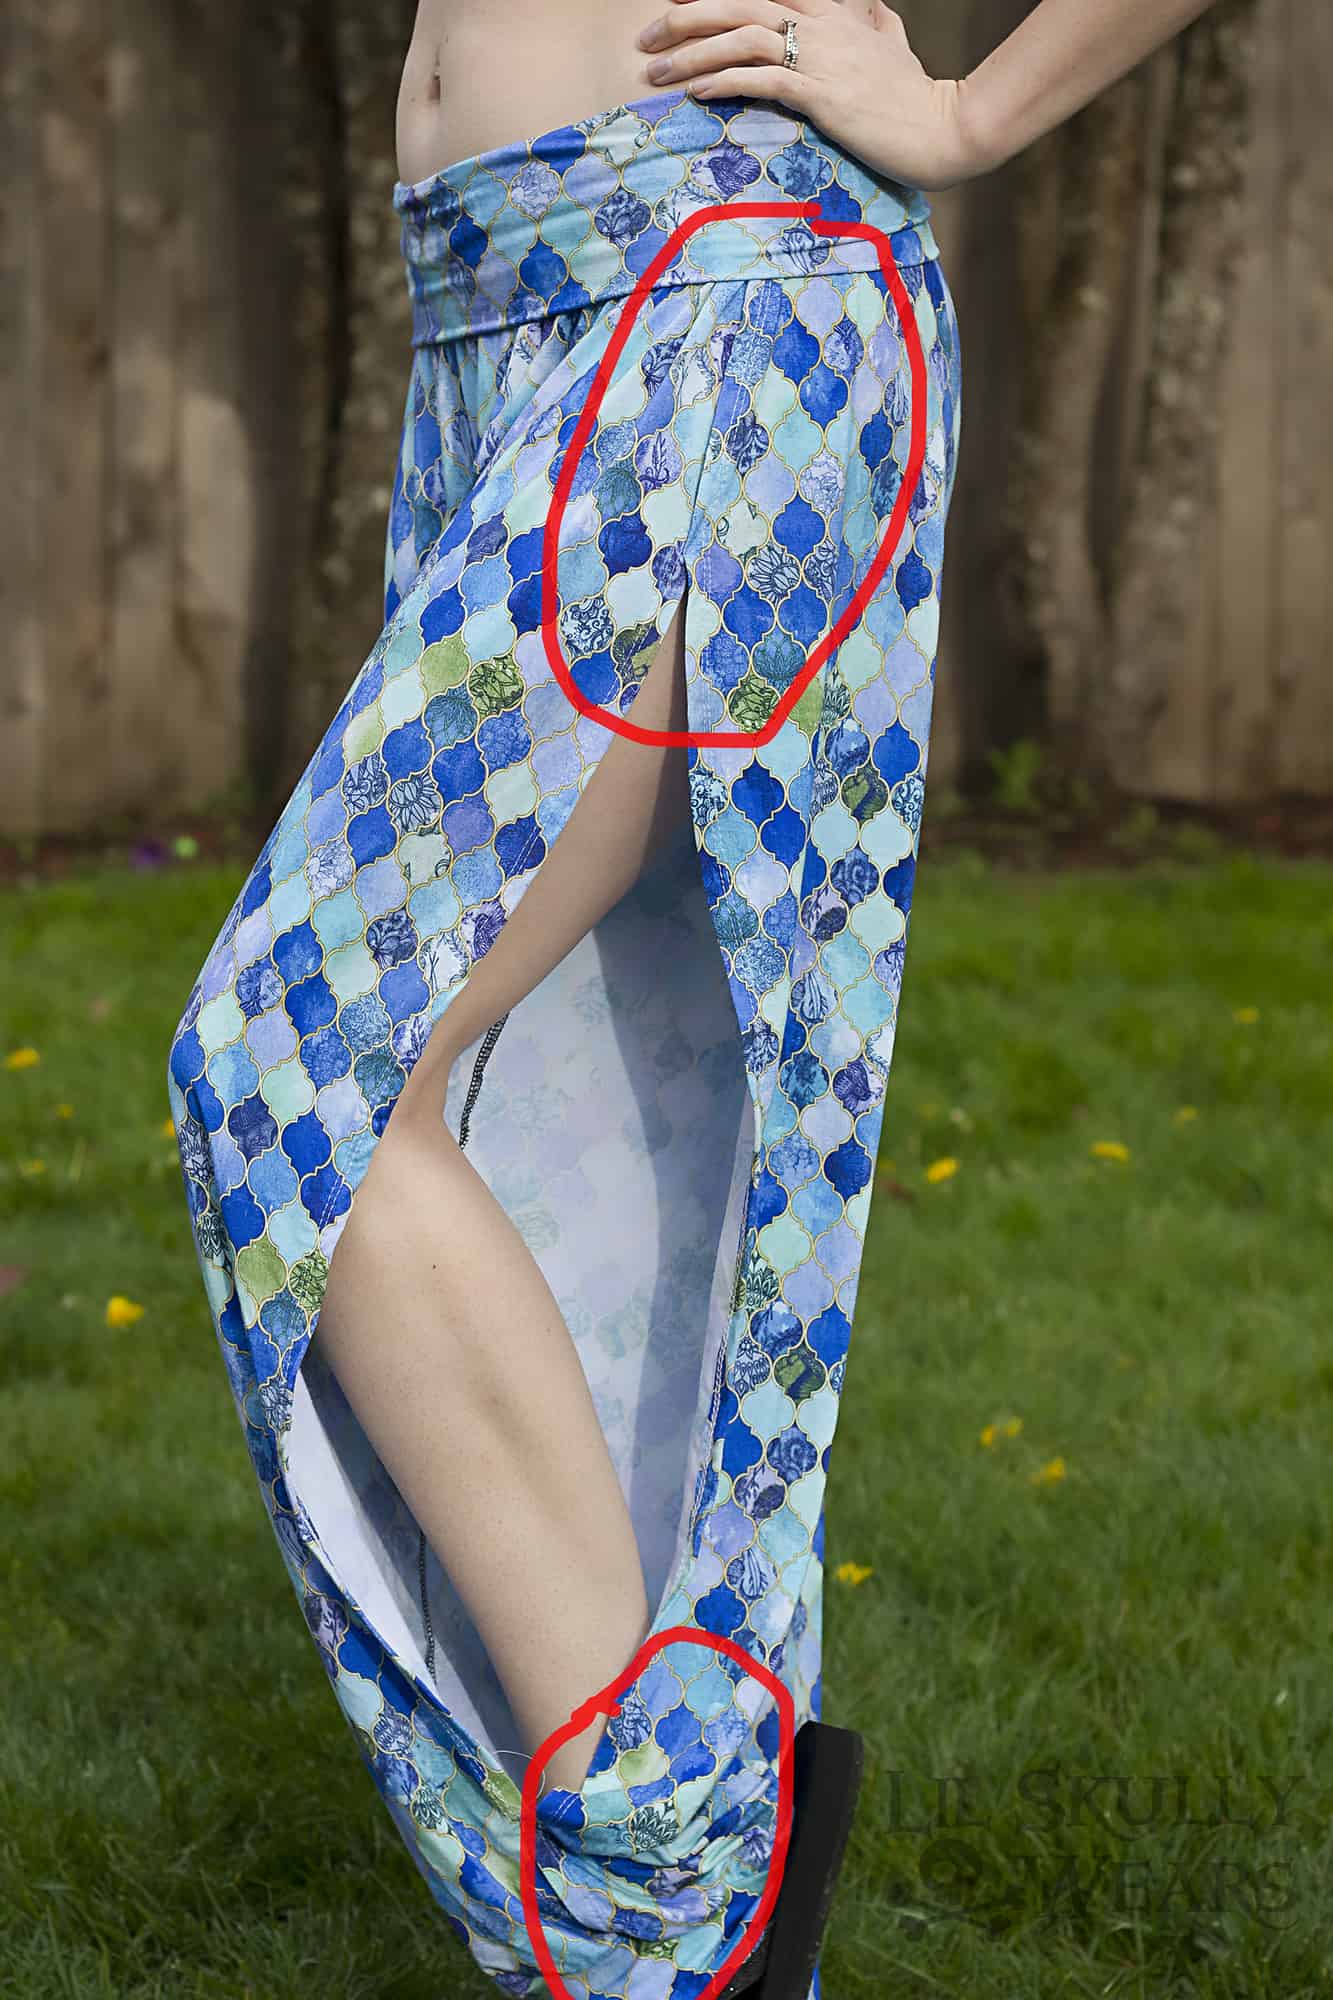
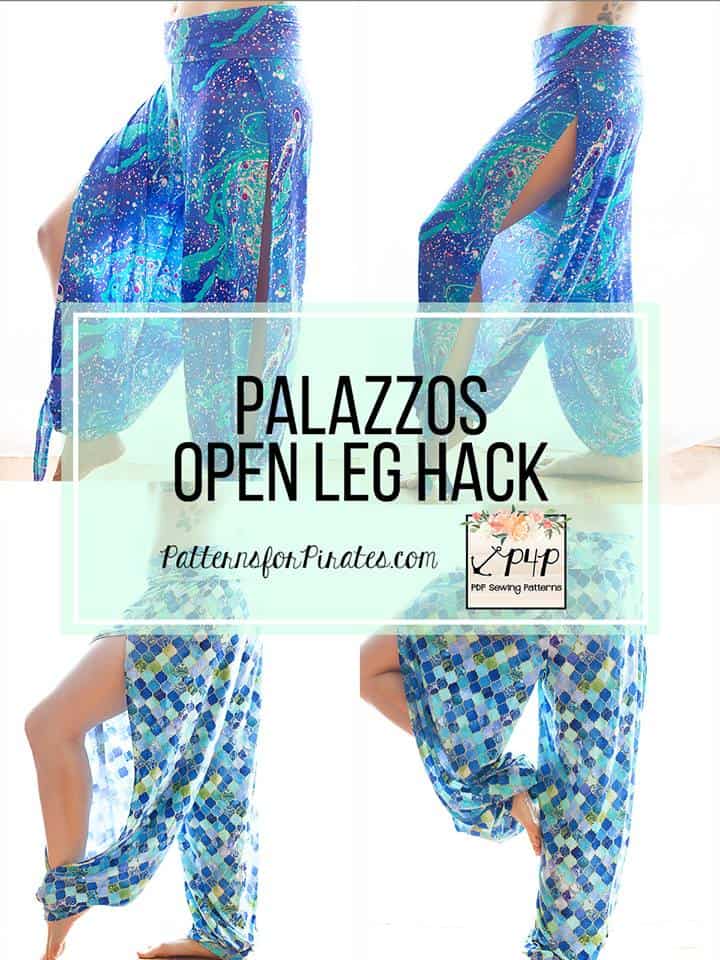
I’m so excited to bring you this fun summer hack!  These open leg pants are perfect for summertime, yoga, belly dancing, beachwear coverup, and really whatever you want them to be!   I’ll be taking you through two styles-   the overlap with a tie and the split seam with banding.  They can be mixed and match as well :).

Let’s talk about fabric,  drapey fabrics are a must for this so things like Bamboo Lycra, Rayon spandex, and Double Brushed Poly work great (although DBP is better for colder weather due to breathability).  I used Bamboo Lycra for both of my options.   I definitely recommend using a cheap muslin fabric first to make sure you get the fit you want before cutting into your nice fabric.

Now for the fun part!  Open up your Palazzo pattern and for sizing I chose to size up for a looser fit through the hips. Print your pattern and assemble as normal.

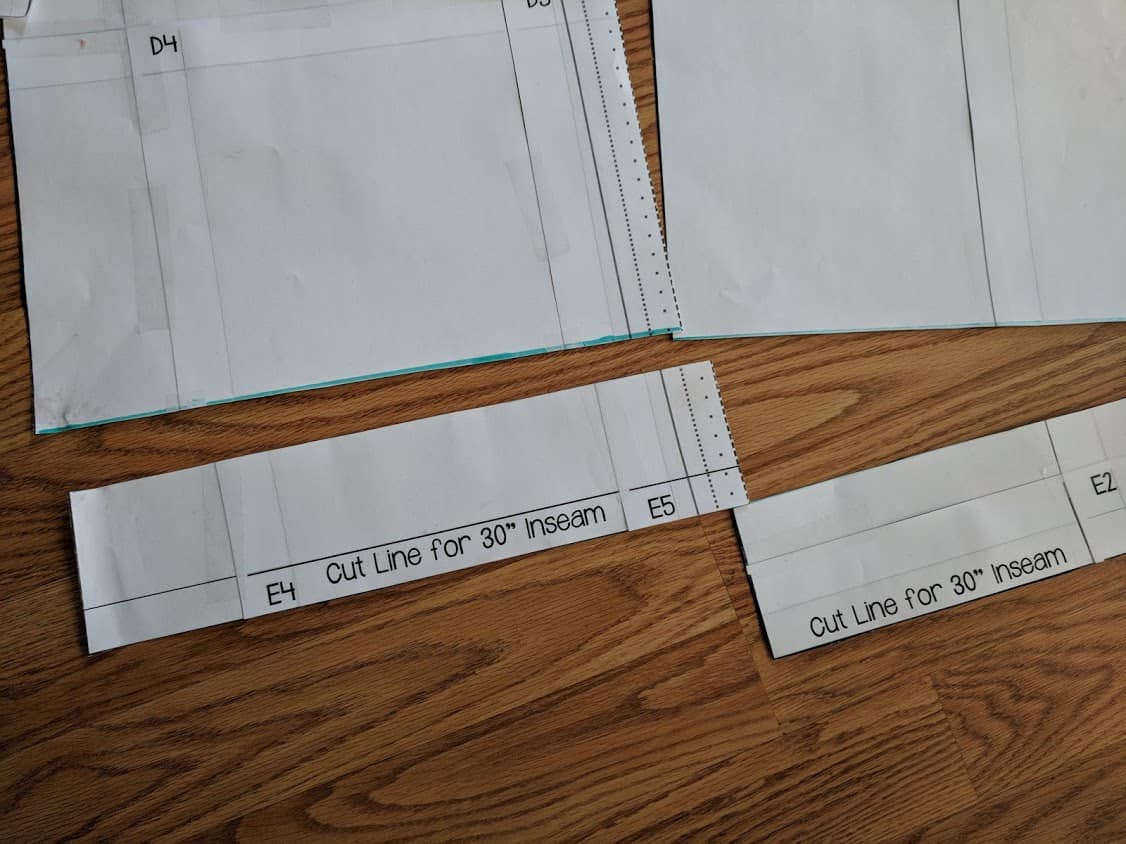
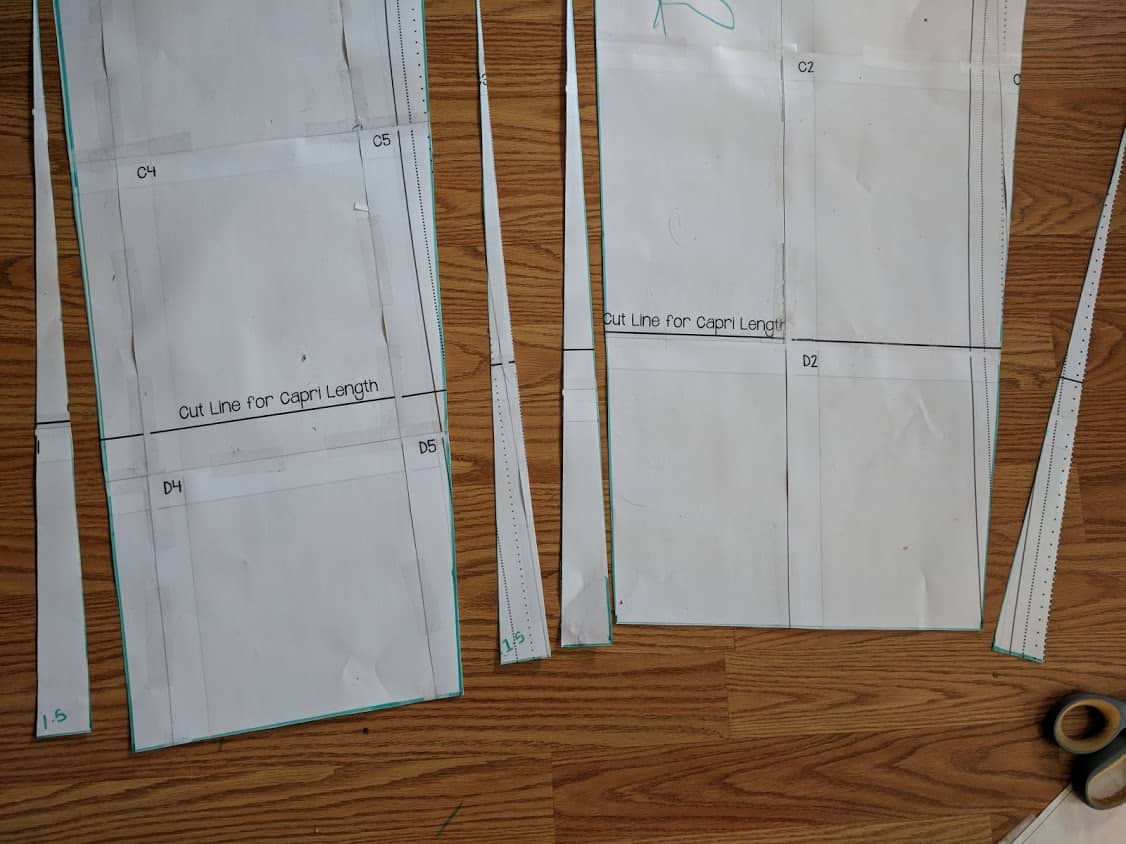
First,  you’ll need to take off some length – I took off about 3 inches.   It still left me with a lot of drape at the ankle.  It was perfect for the tie version but if you want less ankle drape you’ll need to take off more especially for the cuff version.

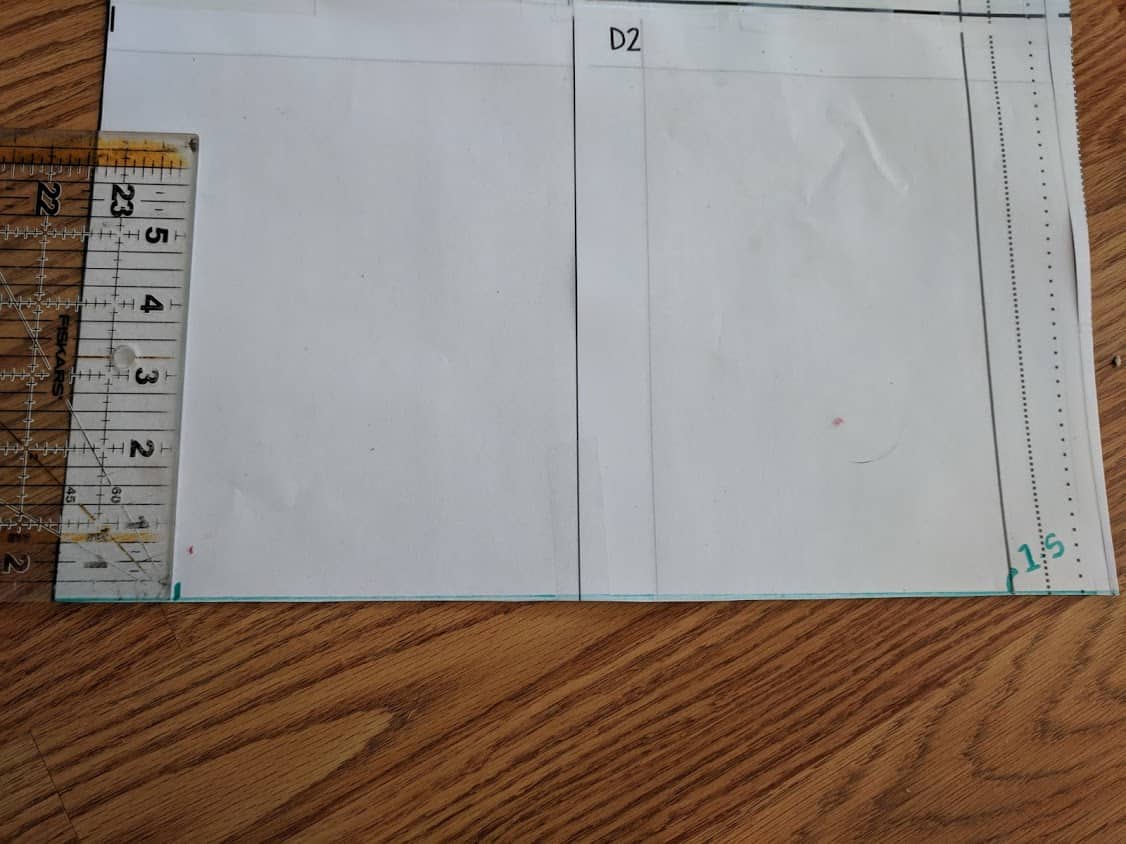
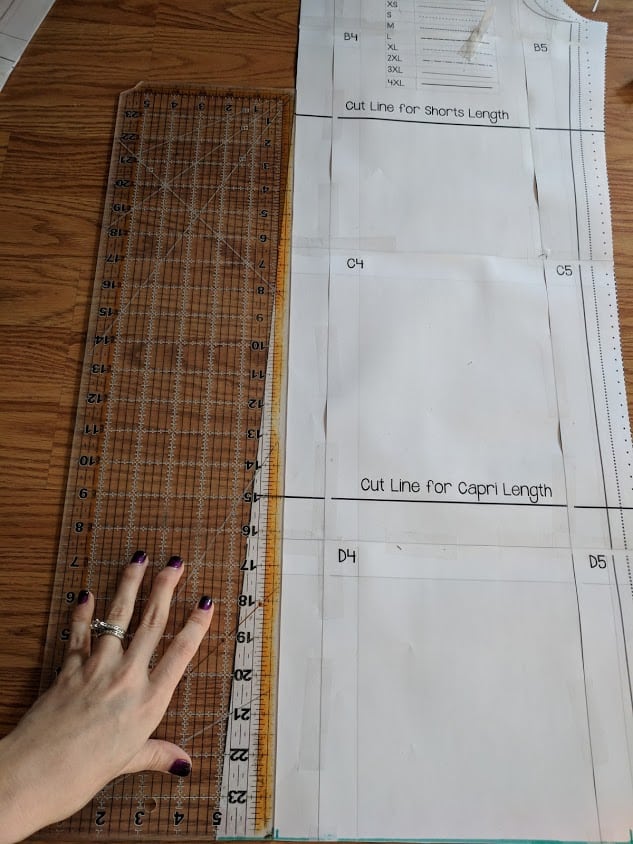
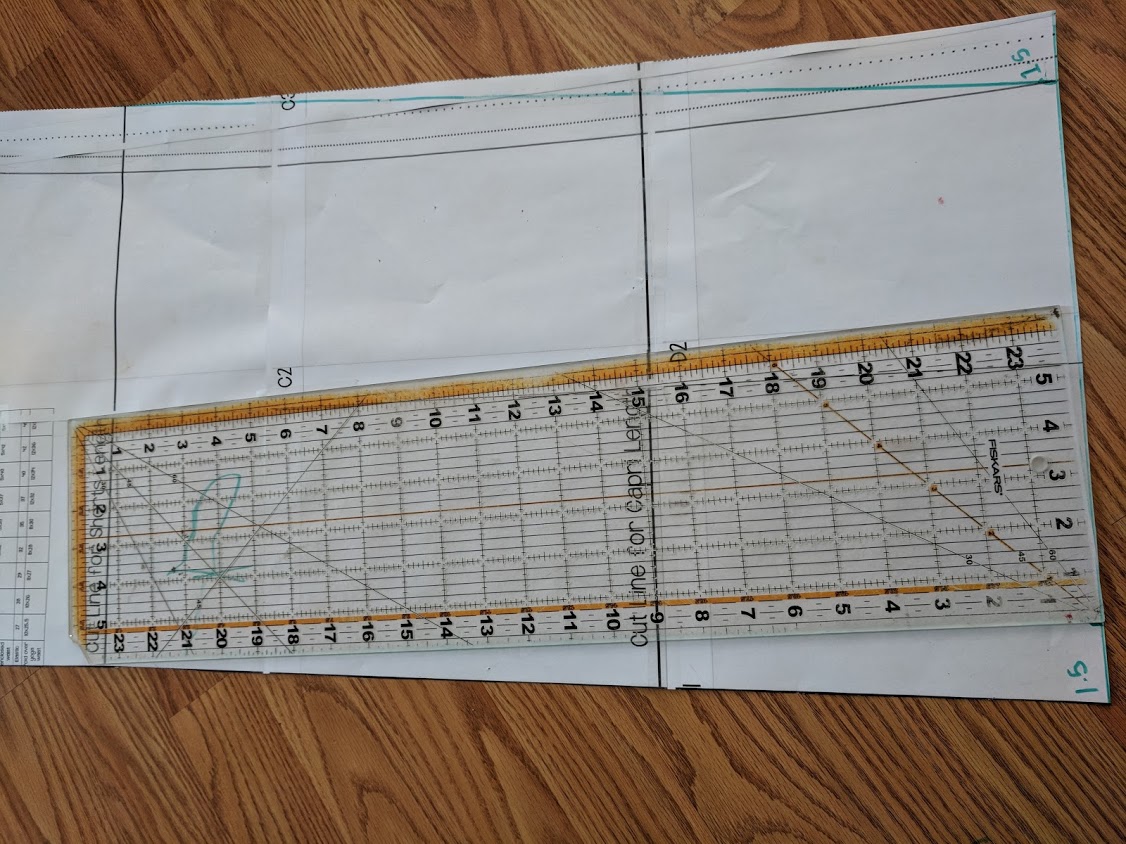
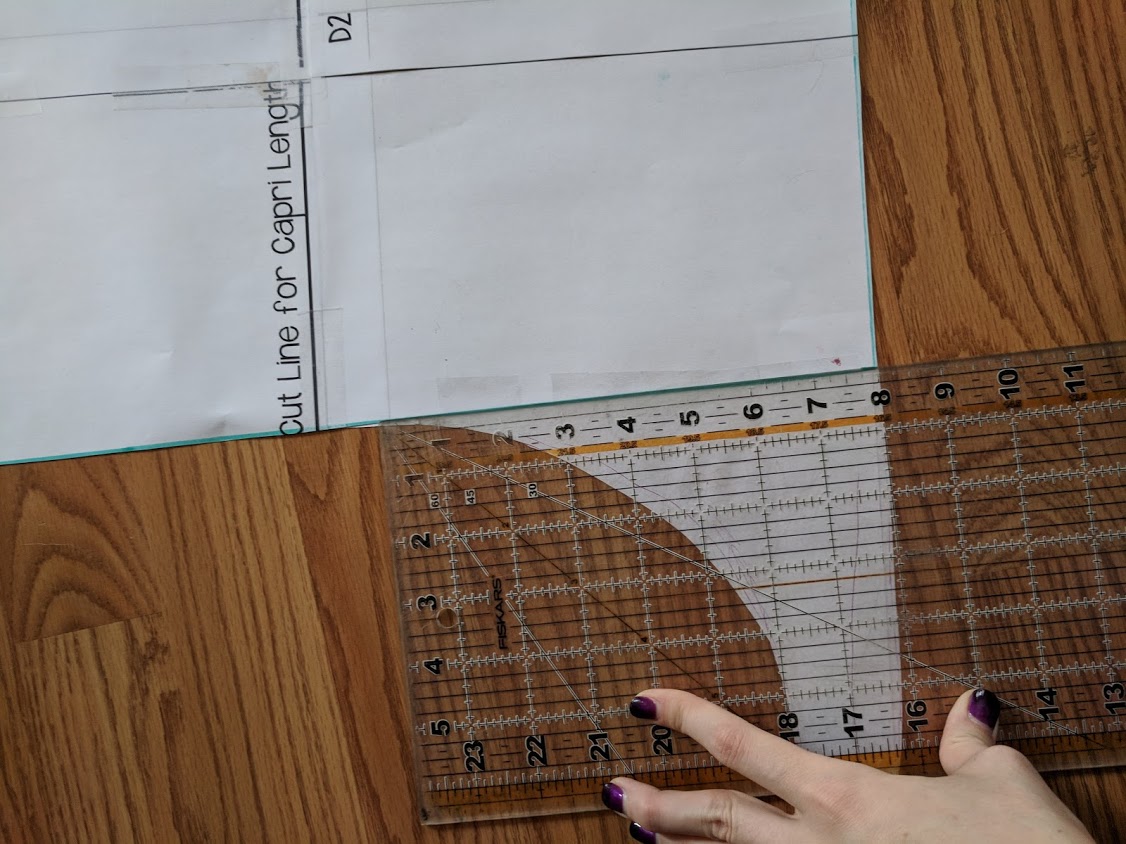
Next, you need to taper in your legs.  The amount you take in will also determine the look you want. If you want a thinner leg take them in even more. For the tie option, I marked in 1.5 inches on each side of the pattern piece for a size medium.   (If you are doing the cuff I’d recommend taking it in .5-1 inch more.)

Once you have your 1.5 inches marked on both pieces you’ll take a straight edge up to the shorts cut line to create a gradual grade ending there.  Now cut those off.


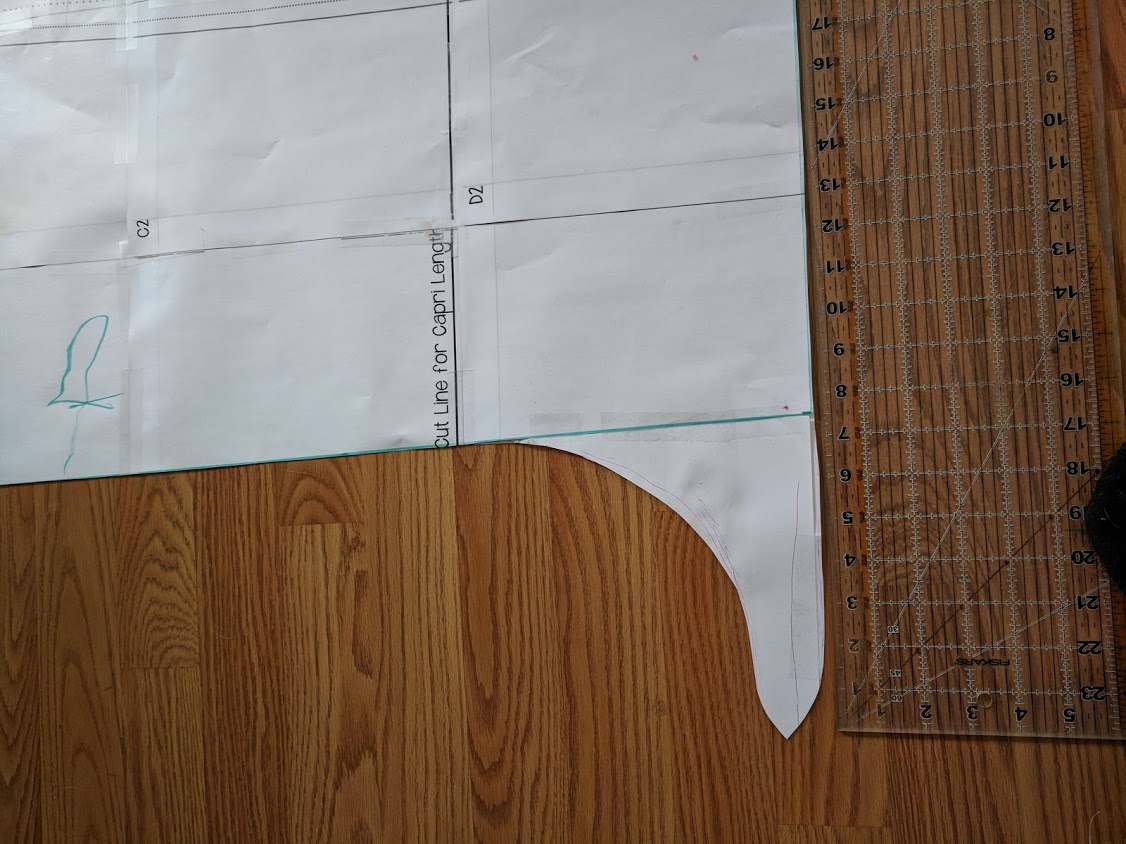
If you are doing the Cuff bottom stop here and move on to sewing.  If you are wanting the tie- you’ll need to create a tie extension on the outer leg seam.   Honestly I just kind of winged it.   The size shown here is smaller than the one in the photograph as those were a tad too long.   Here are the measurements and tie shape.  Make sure you do matching ties on both outer edge seam pieces.


Now cut out your fabric pieces!  For your waistband- I used the fold over yoga band and you’ll cut it at your normal size, not the upsized.

Sewing the Tie Overlap option-

The first thing you are going to do is hem the entire outside edge of the pants through the tie and along the bottom using a .25-.5 inch hem.   It’s a lot of hemming but worth it!   Do this on all four pieces.     Outside edge only- not the inner leg seam.

Next lay your front and back pattern pieces right sides together and sew up the inner leg seam as instructed in the original pattern.  Then sew the two pieces together along the crotch seam.

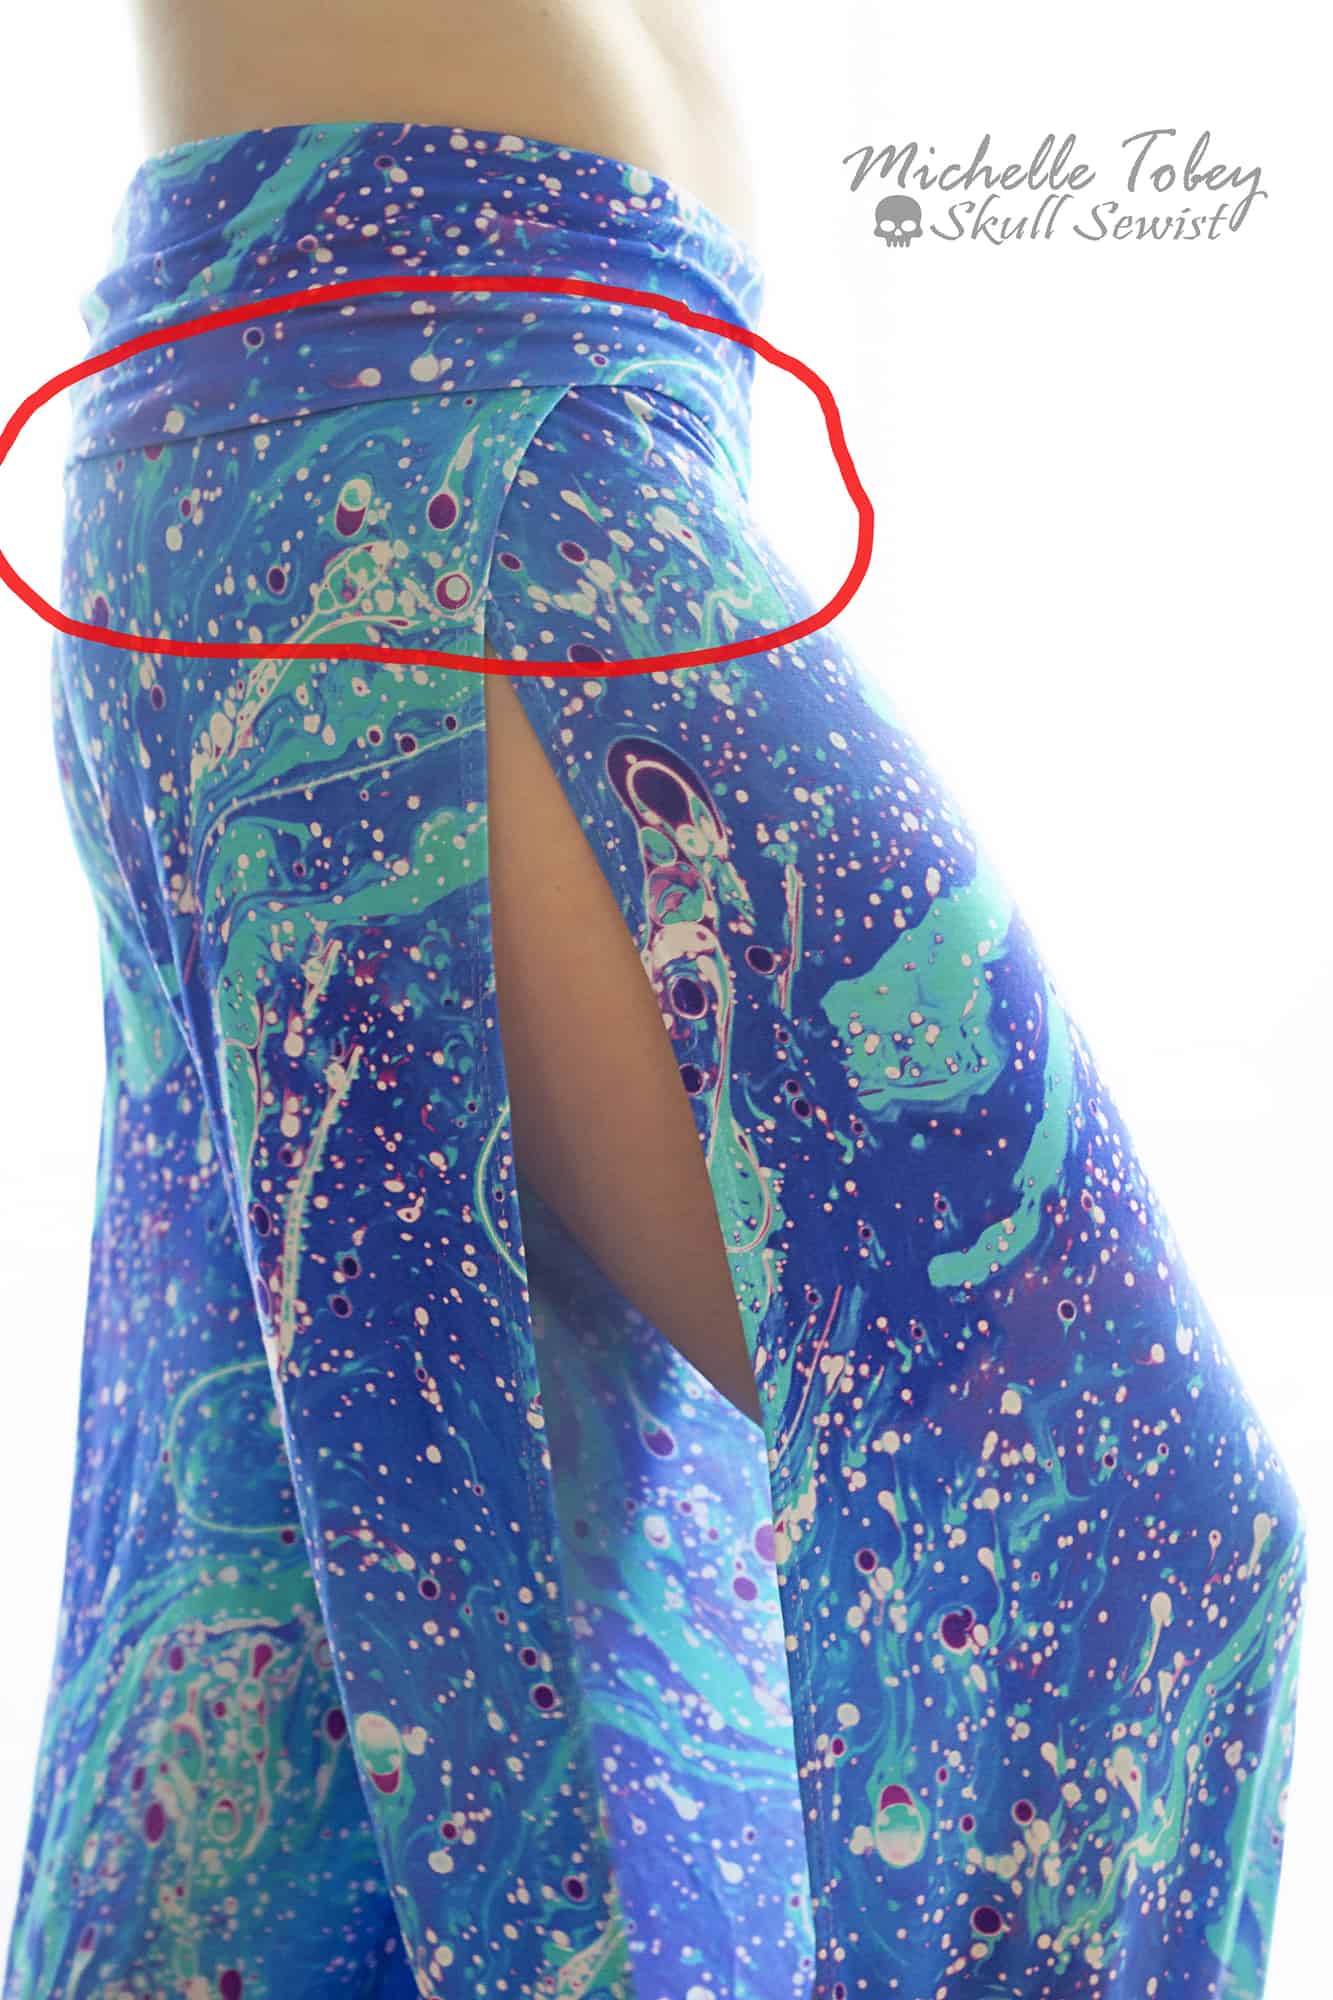
Now you are a going to put your pants on- I know it’s a little tricky as they are totally open but pull them up one side at a time.  You are going to take your front and back pieces at the top and overlap them to where you feel comfortable.  Mine overlapped about 4 inches.   Use some clips to clip it together and then baste the pieces together.  The red circled part is where you are overlapping.

Now cut the waistband from your regular size- (not your upsize) and sew it to your pants and you are done!   If you’d like a more modest leg you can tack your opening closed however low you’d like it.  Tie your bottoms up and you are ready for some summer fun!


Sewing the Cuff option-

First I’m going to have you clip your front and back inner leg seams RST together on one leg.

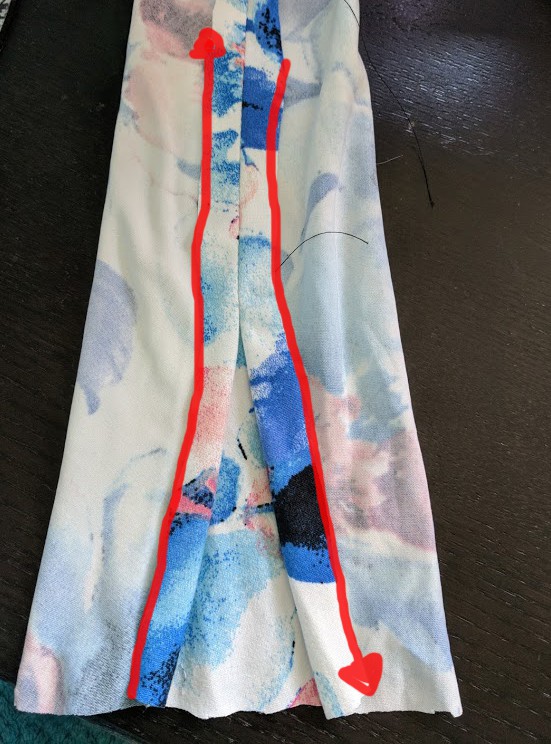
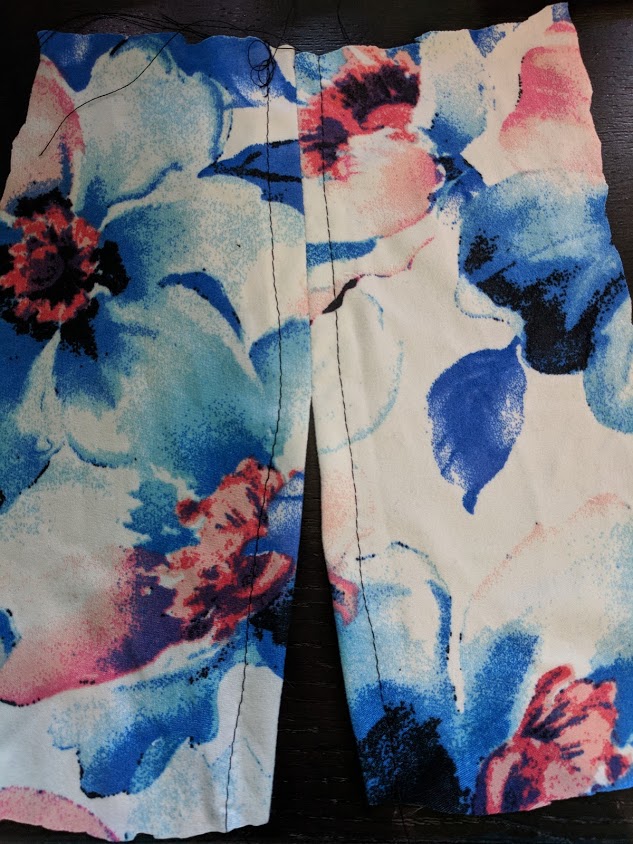
Now slip your pant leg on inside out- I know it’s a little weird as the side is totally open but at this point, you are going to figure out how big you want your slit to be.   Using clips- clip the top as far down as you’d like it and the bottom as far up as you’d like it.   Repeat on the other side.   It’s helpful if you have someone that can help you hold up the side.   You can also just guess if you want and clip on the floor.  Mine are about 8 inches from the top and 4 inches from the bottom. The photo below shows what you are clipping.

Then, using your sewing machine (you might want to baste first), sew your seam allowances together up to where you clipped on the bottom and top.    Feel free to try on again after basting to make sure this is the size you want your opening. Don’t forget to back and front stitch a few times to seal your seam.  Once you have your set opening you’ll press open your seam allowance and topstitch from the bottom all the way to the top as shown by the red lines below.    The second picture is what your finished outer leg will look like at the bottom and top.

Now go ahead and sew up your inner leg seams, crotch seams, and waistband.

Finally, for the cuff, you’ll take your bottom width of your pant and multiply it by .7.  Cut out two cuffs that are that length (going with the stretch of the fabric) by 4 inches tall.  If you’d like a different height feel free to use whatever.

Then you will serge on your cuff stretching as you go and leave a small 1.5-2inch opening.   Now using any elastic you’d like that will fit in the cuff, find a comfortable length around your ankle and cut two pieces.   Feed the elastic into your cuff opening using a safety pin and making sure to keep one end out.   Once you have both ends out and the elastic fed through,  overlap your elastic ends and stitch using a stretch stitch.  Push the elastic back into the cuff and finish your cuff seam.

Yay!! Now you have your finished pants!!

Thank you so much and I hope you enjoy these pants as much as I do! Don’t forget to show them off in the P4P Facebook group too!

May your sails and bobbin always be full,

Michelle


Filed Under: Frequently Asked Questions, Pattern Hacks, Uncategorized 1 Comment

Set Sail Hat :: New FREEBIE Pattern Release + Extras!

May 22, 2018

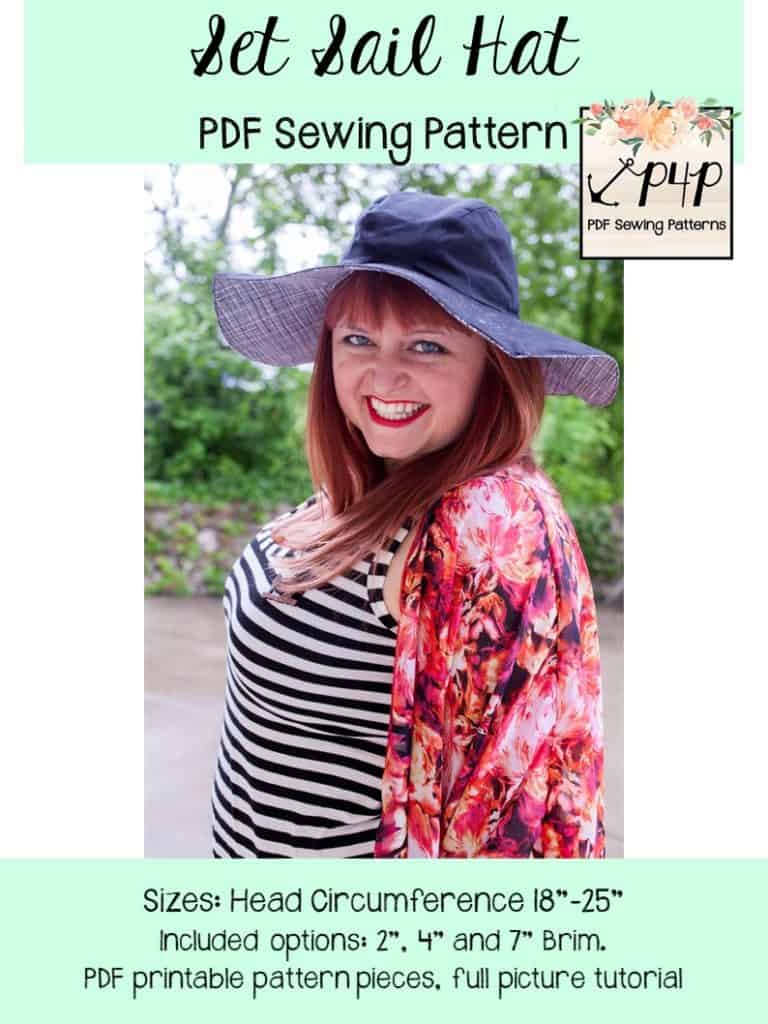
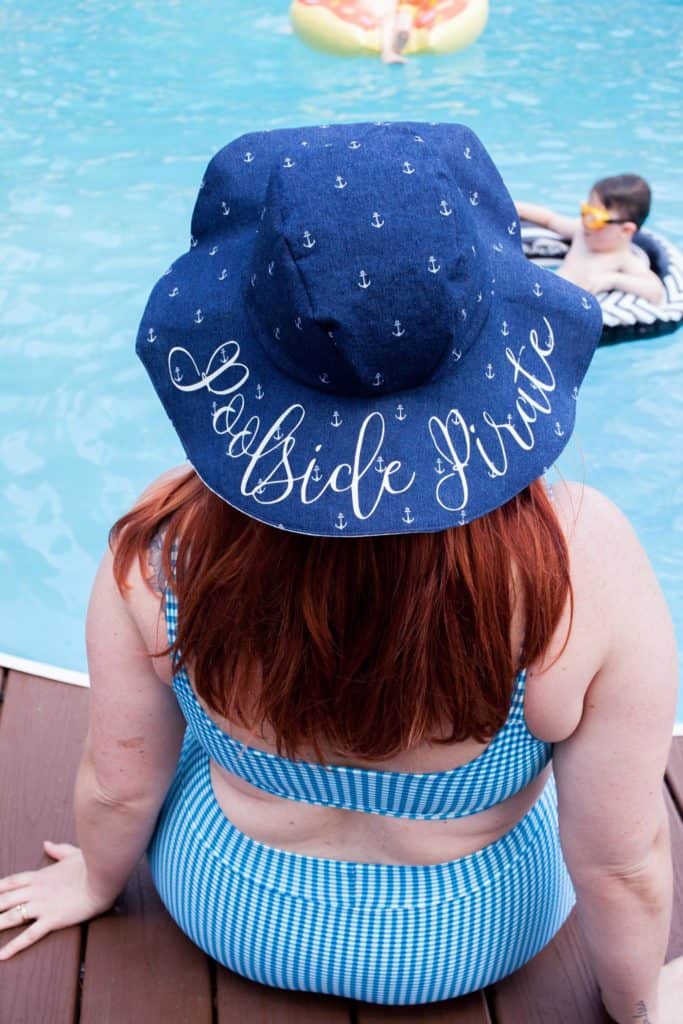
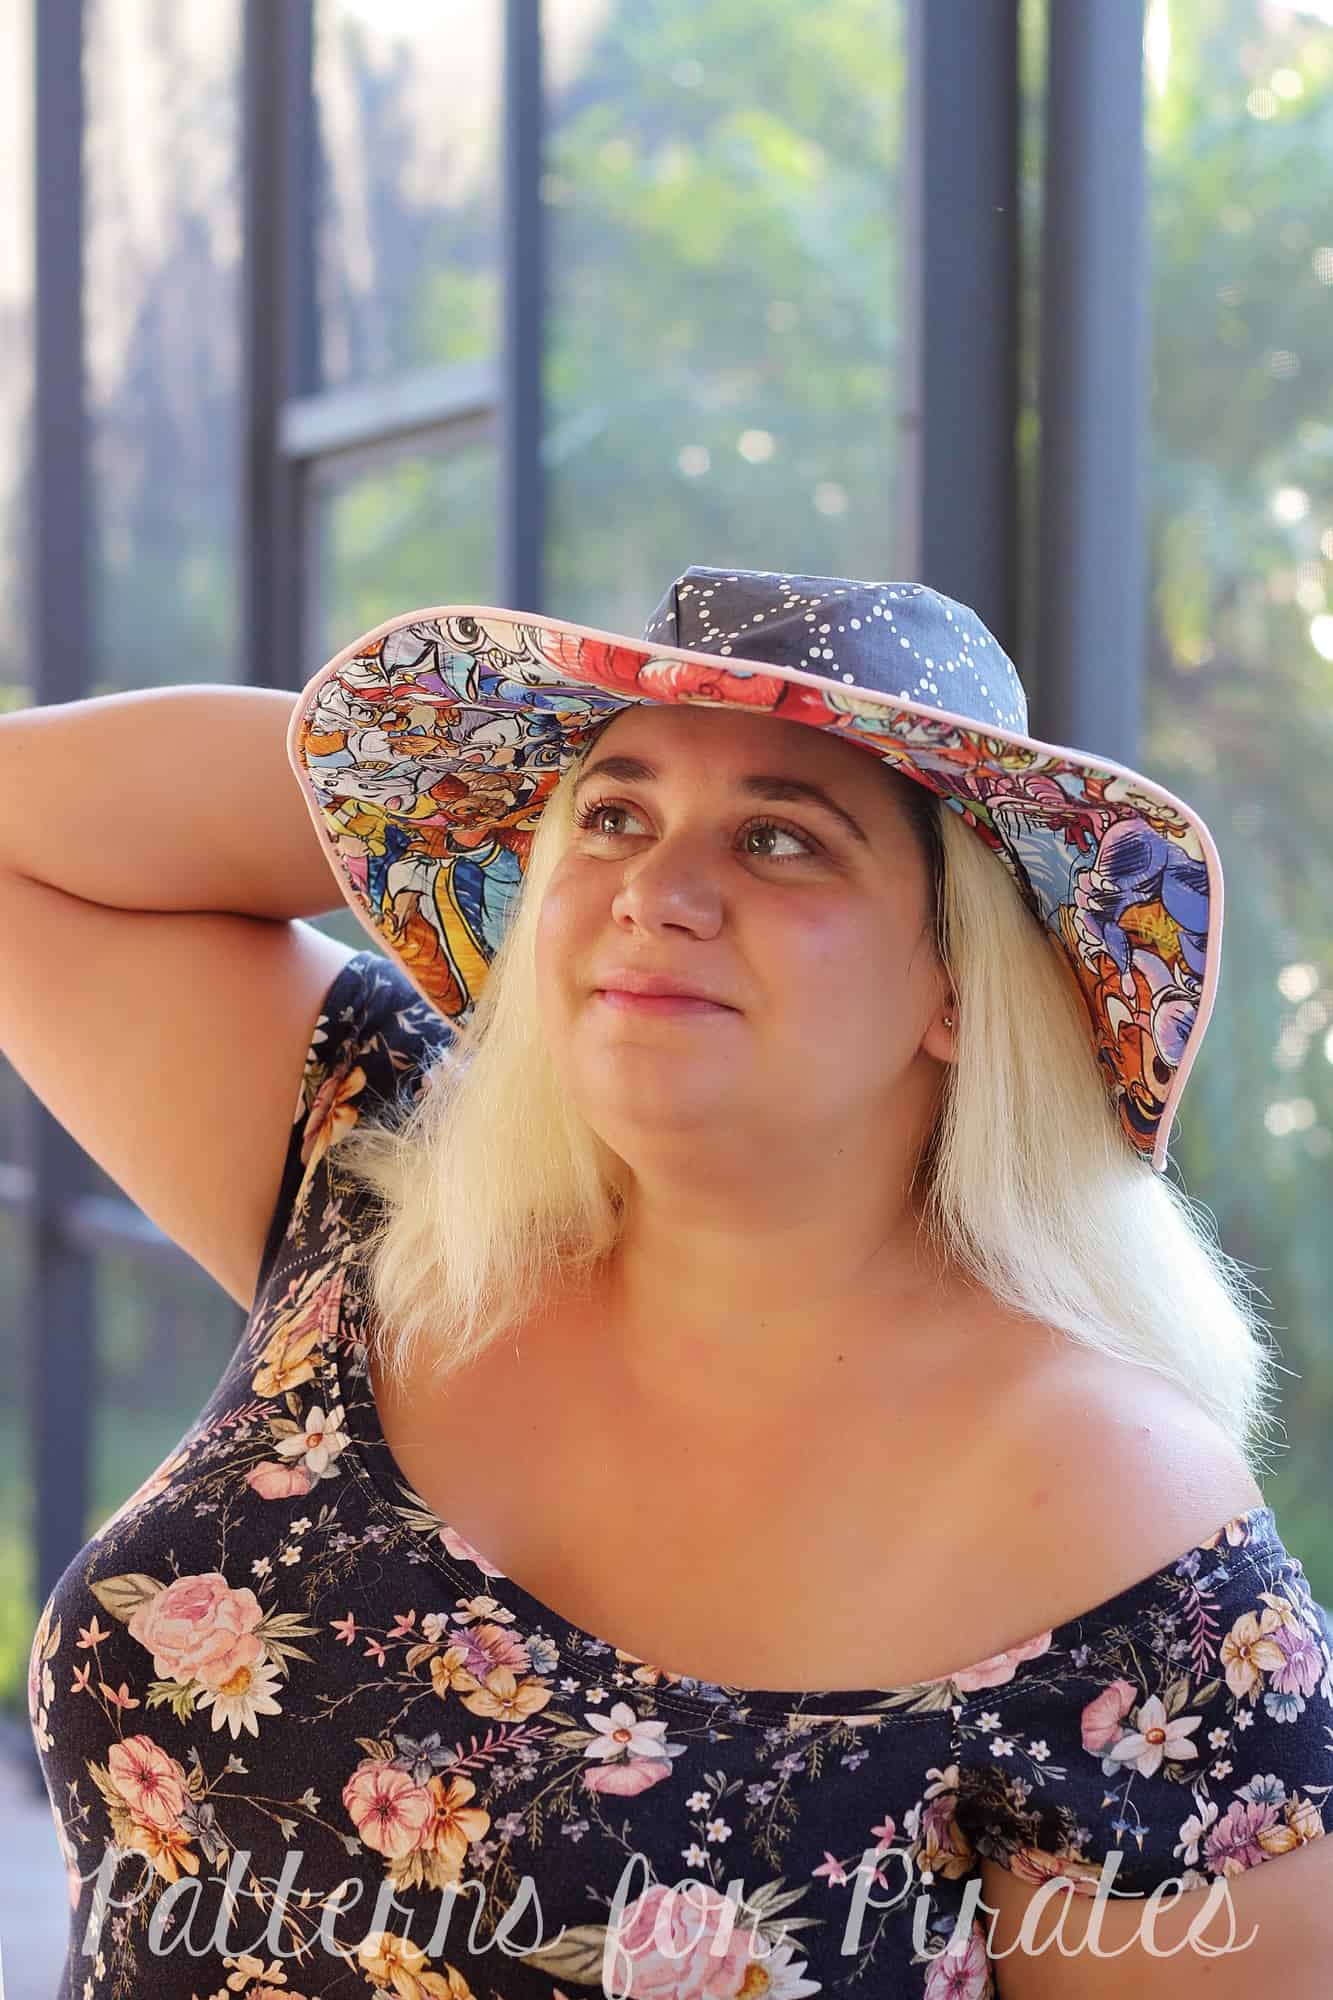
I am super-duper excited to be sharing the newest addition to the P4P pattern lineup: the Set Sail Hat.

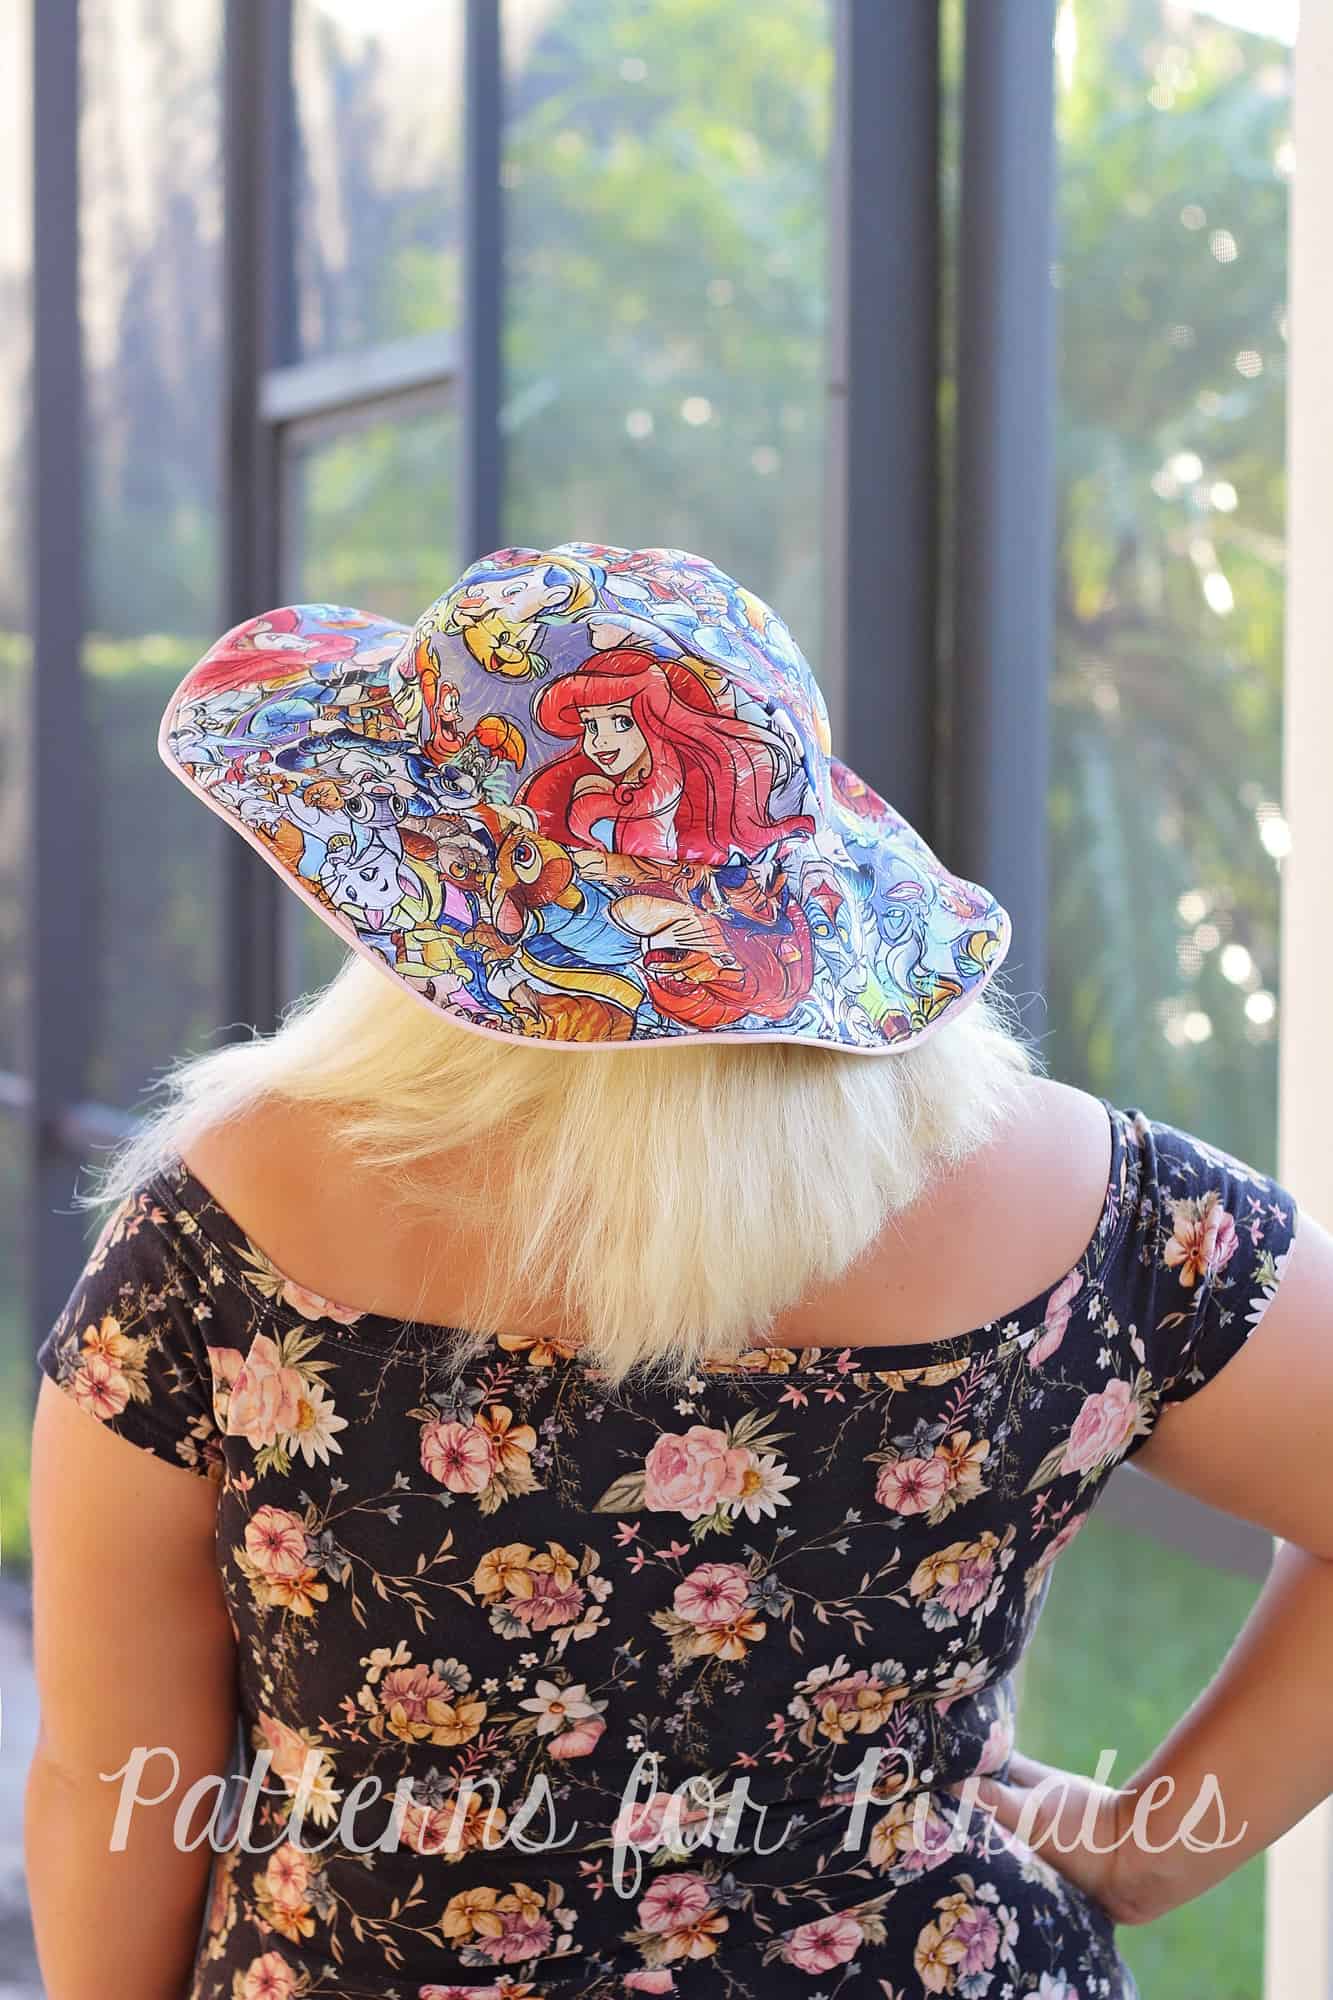
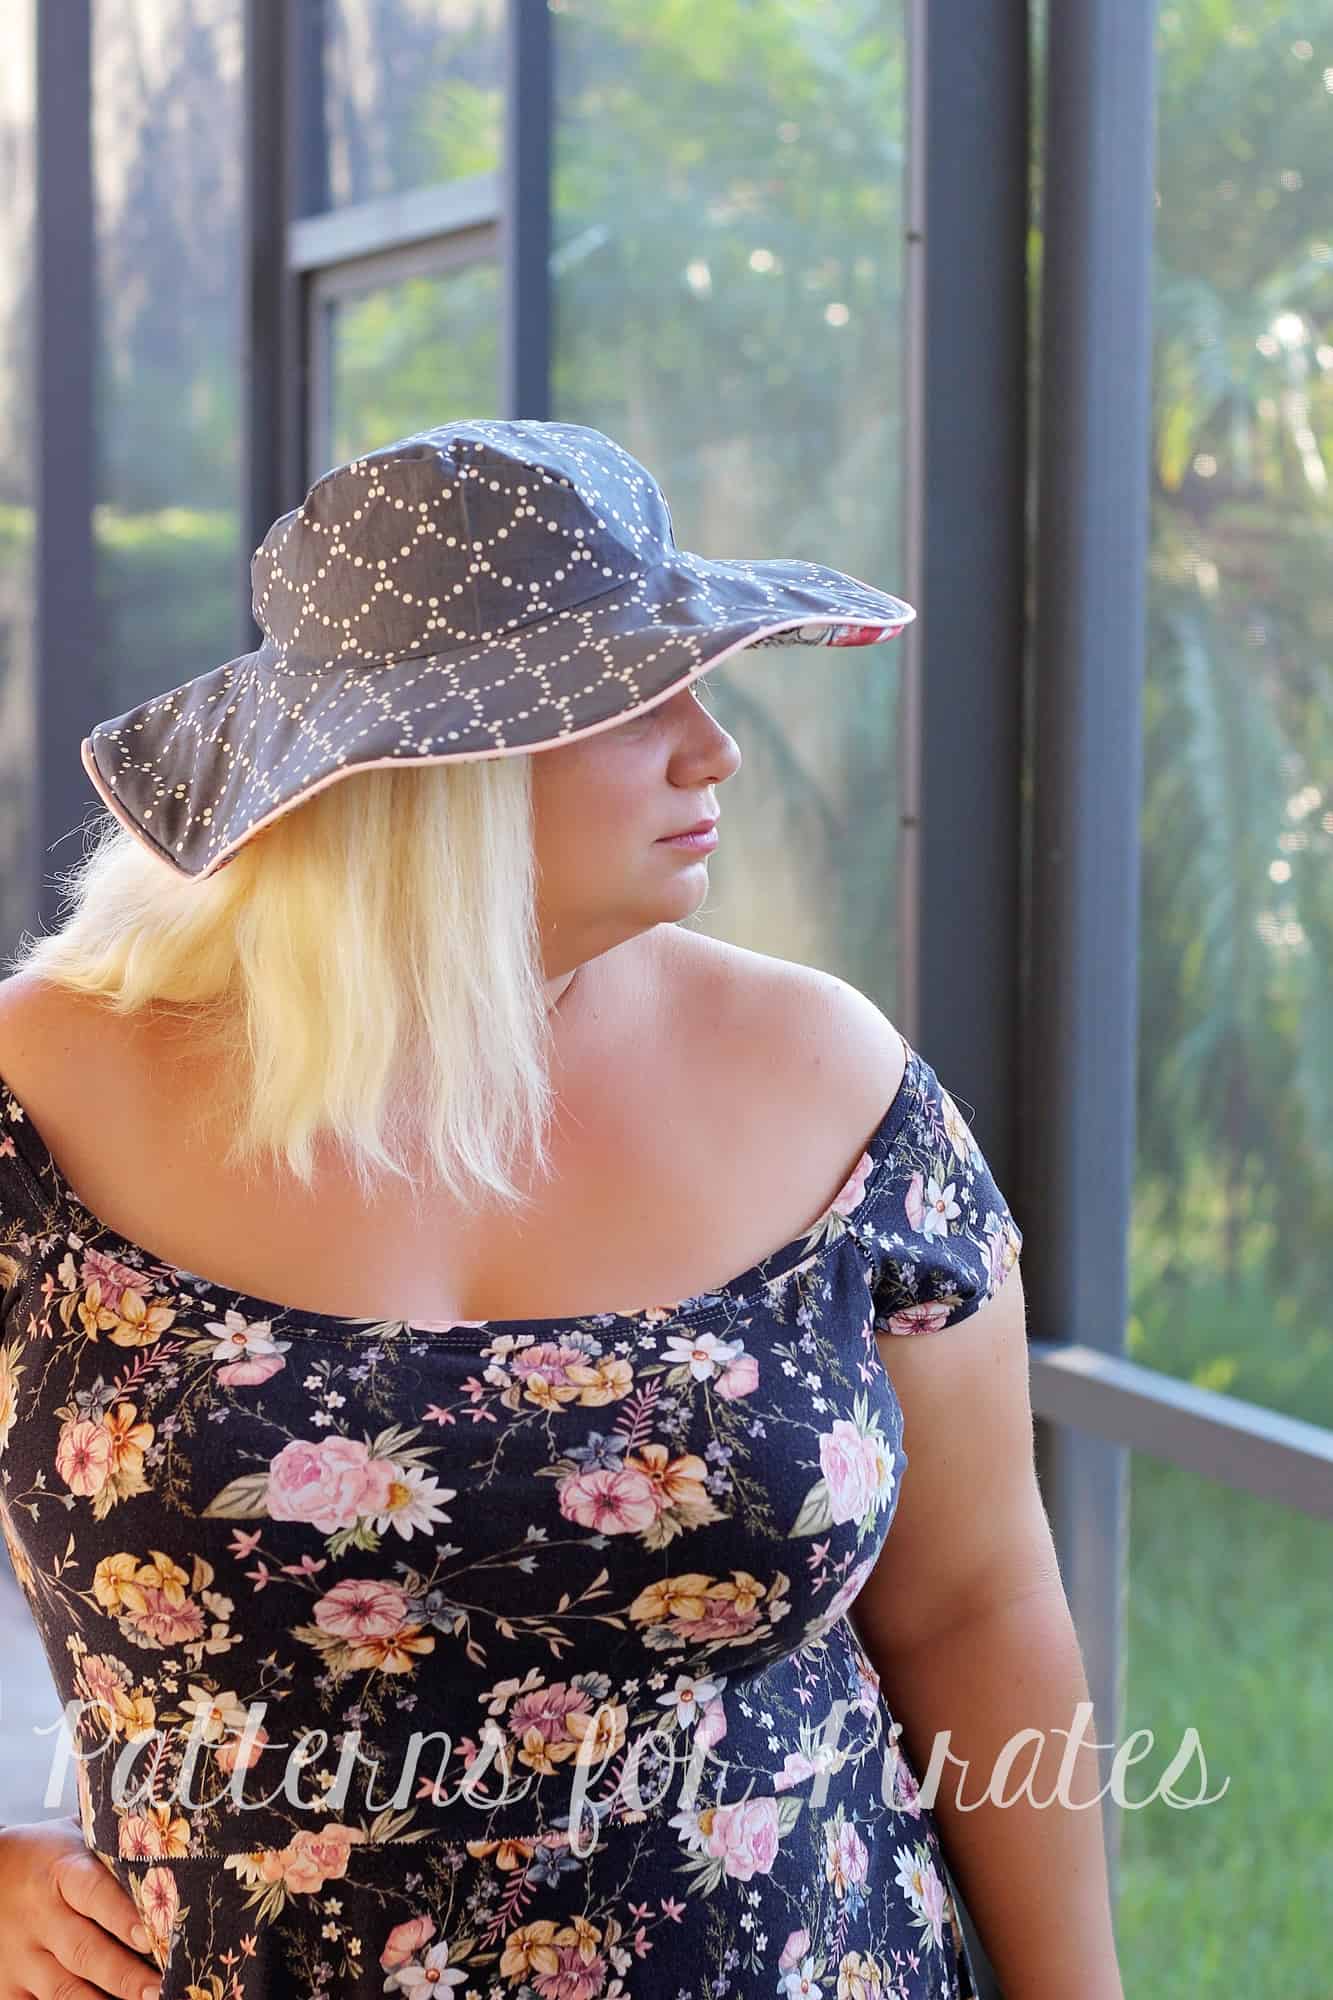
Get ready for the quickest, cutest sew ever, my friends!  Because this hat takes minimal amounts of fabric and gives you maximum results.  And it’s reversible!  So you are practically getting two hats for the sewing efforts of one.  Perfect, am I right?

Did I forget to mention the best part??!!  It’s FREE!

The Set Sail Hat is drafted for head circumferences ranging from 18″ to 25″.  It has a three-piece cap that curves beautifully to your head, and comes ready with three brim sizes: 2″, 4″, and the ever-fabulous 7″.  To keep those brims extra sturdy, we do recommend stabilizing them with a medium-to-firm weight interfacing (we love Pellon 809!) so make sure to pick some up next time you go shopping at your local fabric store.

Here’s a quick peek at the AH-MAZING hats that our testers created!

This slideshow requires JavaScript.

But wait!  There’s more!  We’ve been seeing “wordy” sun hats all over the place the last couple of seasons and we wanted to help you make your own.

Packaged as SVG and PNG files, you can download these phrases (which are already curved specifically for the brim of both the 4″ and 7″ hats):

  • Vacay Vibes
  • Sup, Beaches?
  • Seas the Day
  • Resting Beach Face
  • Pirate Maiden
  • Hello Sunshine
  • Do Not Disturb
  • Champagne Please
  • Boss Babe
  • Beer Me
  • Beach Please

You can find those freebies as a quick download here: Set Sail Hat Phrases


Easy Hack: Adding Piping

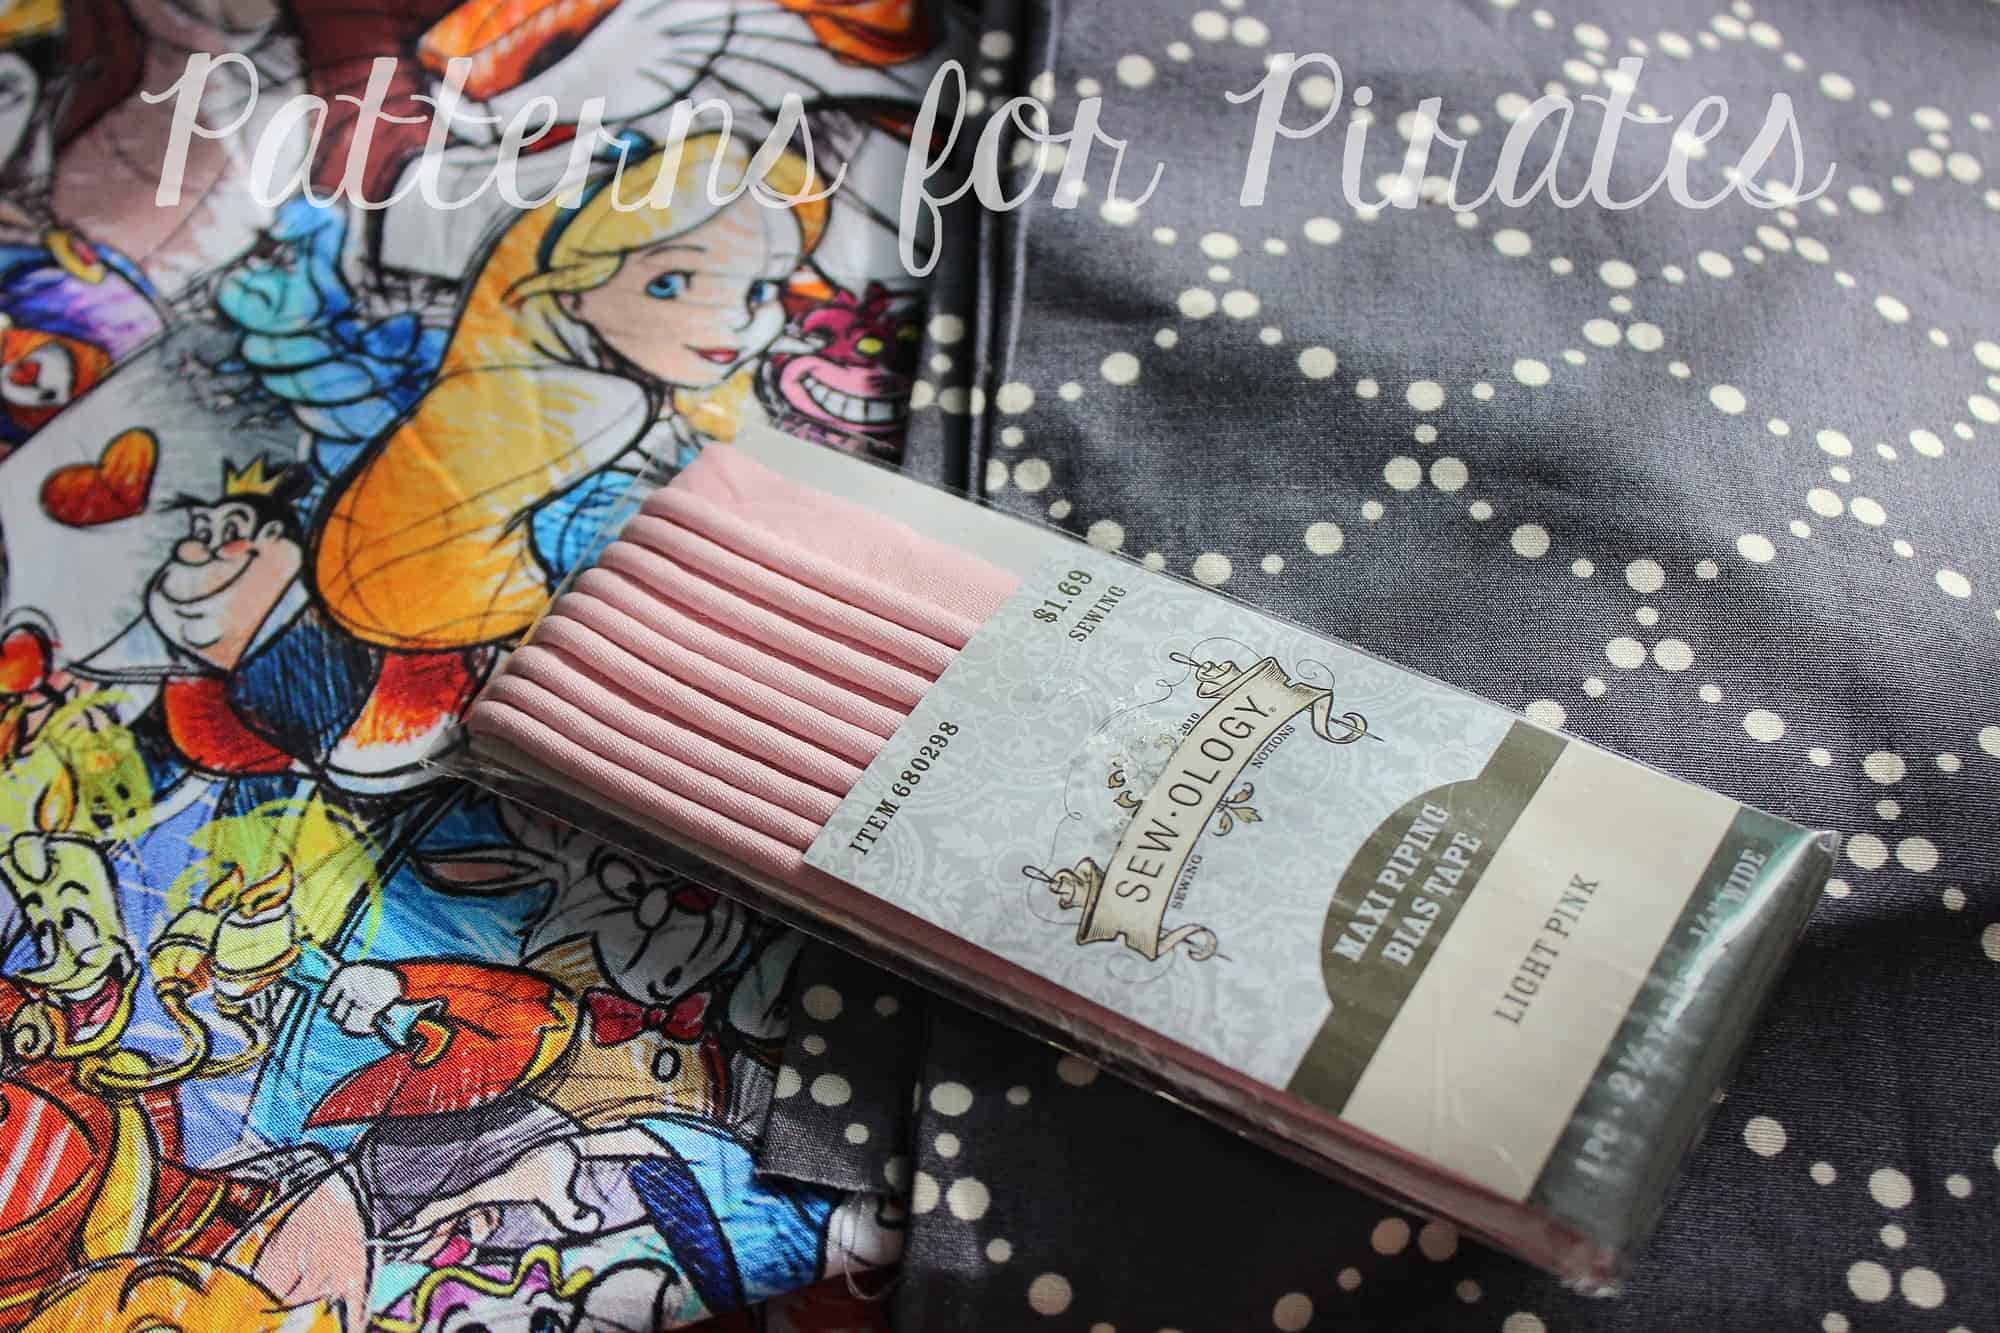
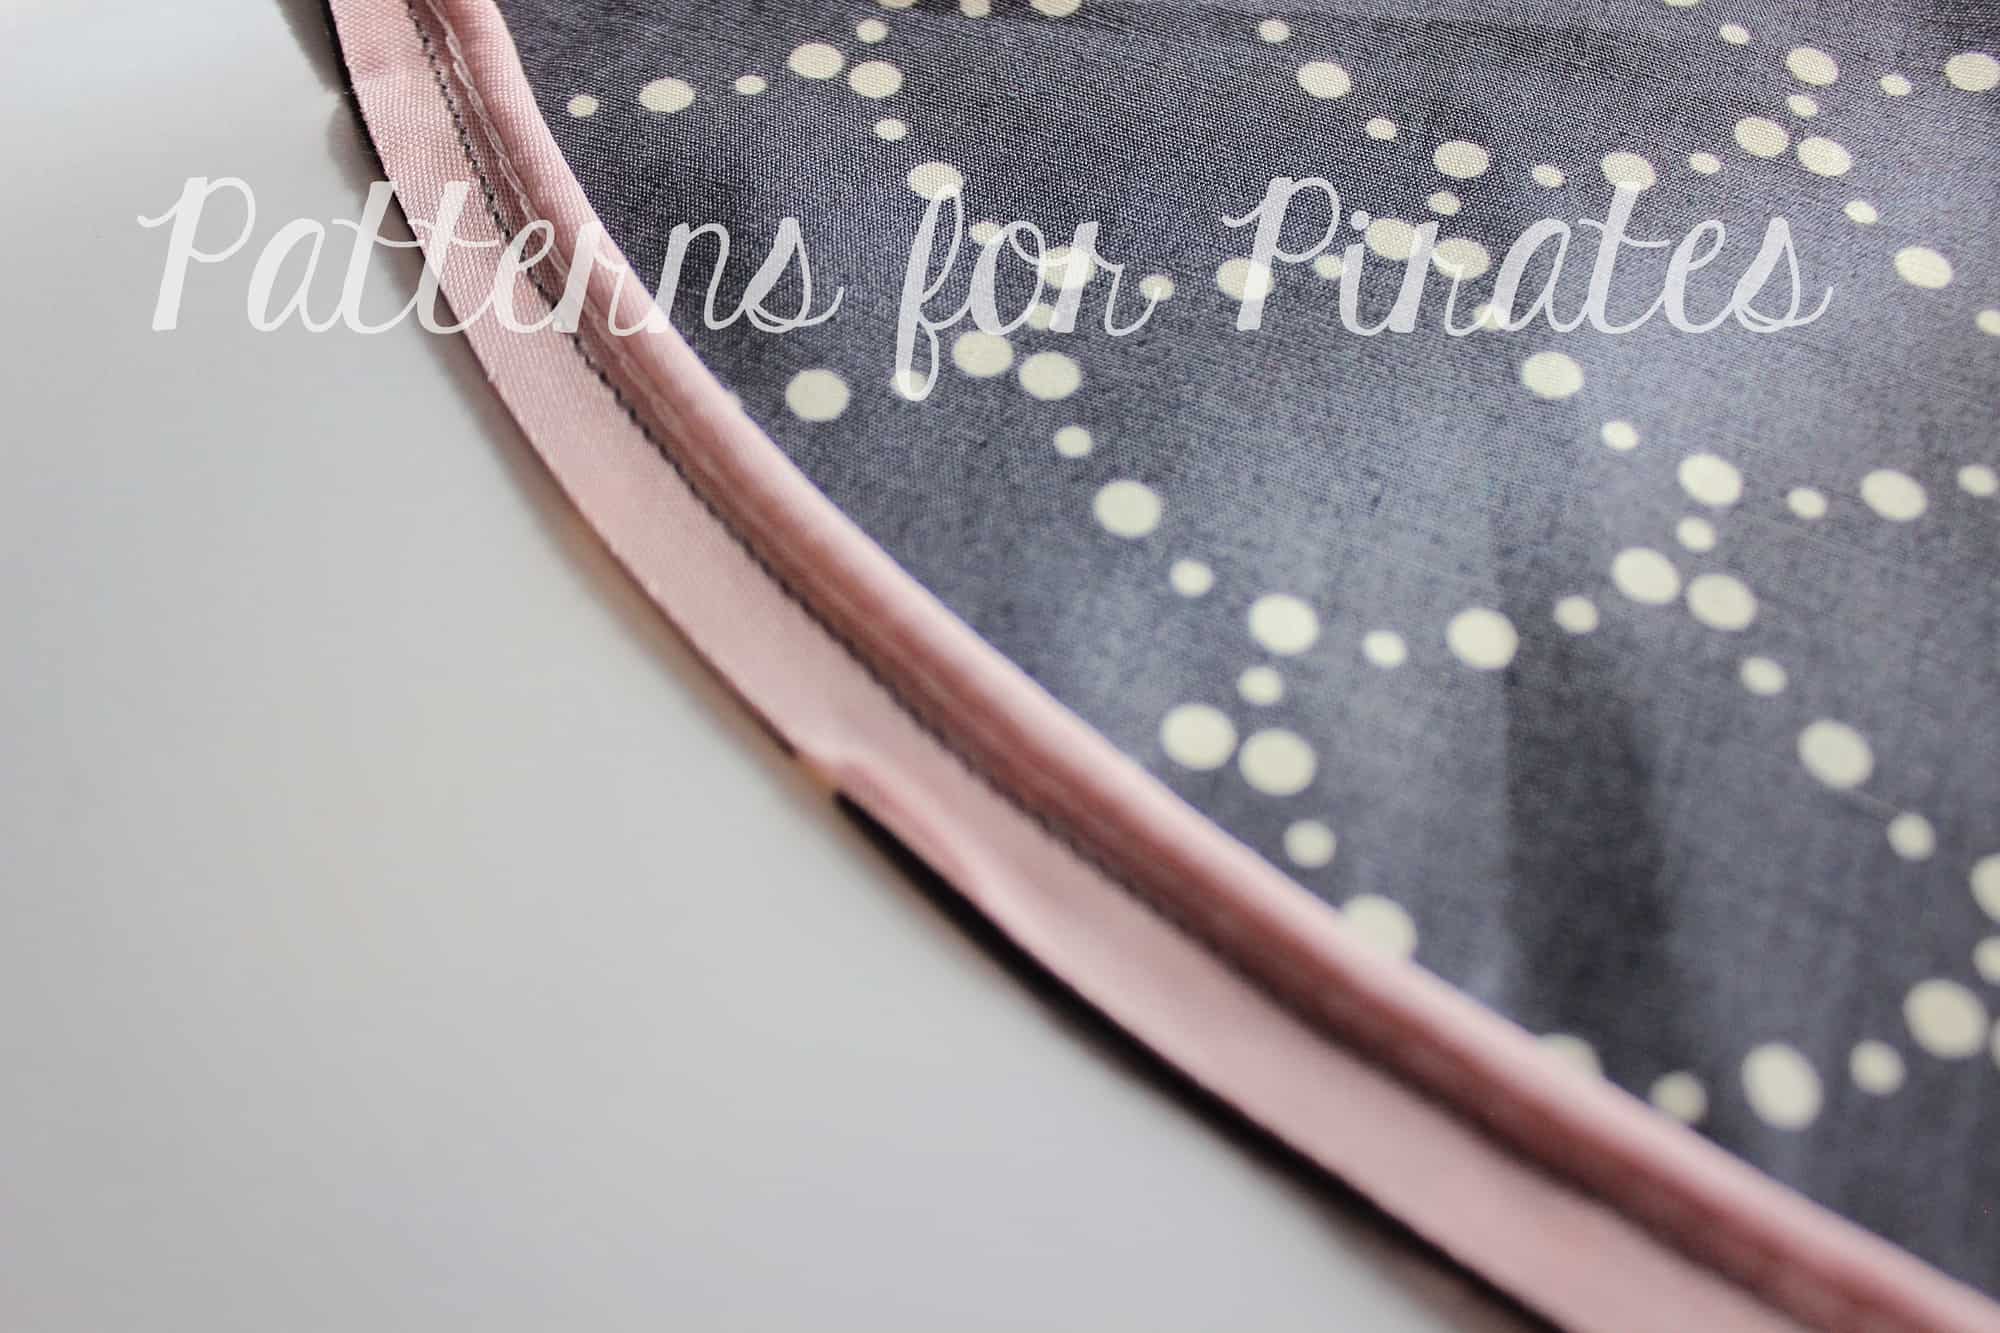
It’s not part of the original pattern instructions, but we wanted to help you with a quick tutorial on the blog.  We’ve got an easy little detail addition that makes a big impact.  We are talking about PIPING…good old fashion store bought piping. Don’t get us wrong, if you feel adventurous and want to make your own, go for it! However, our personal preference is the ease of ready made piping 🙂

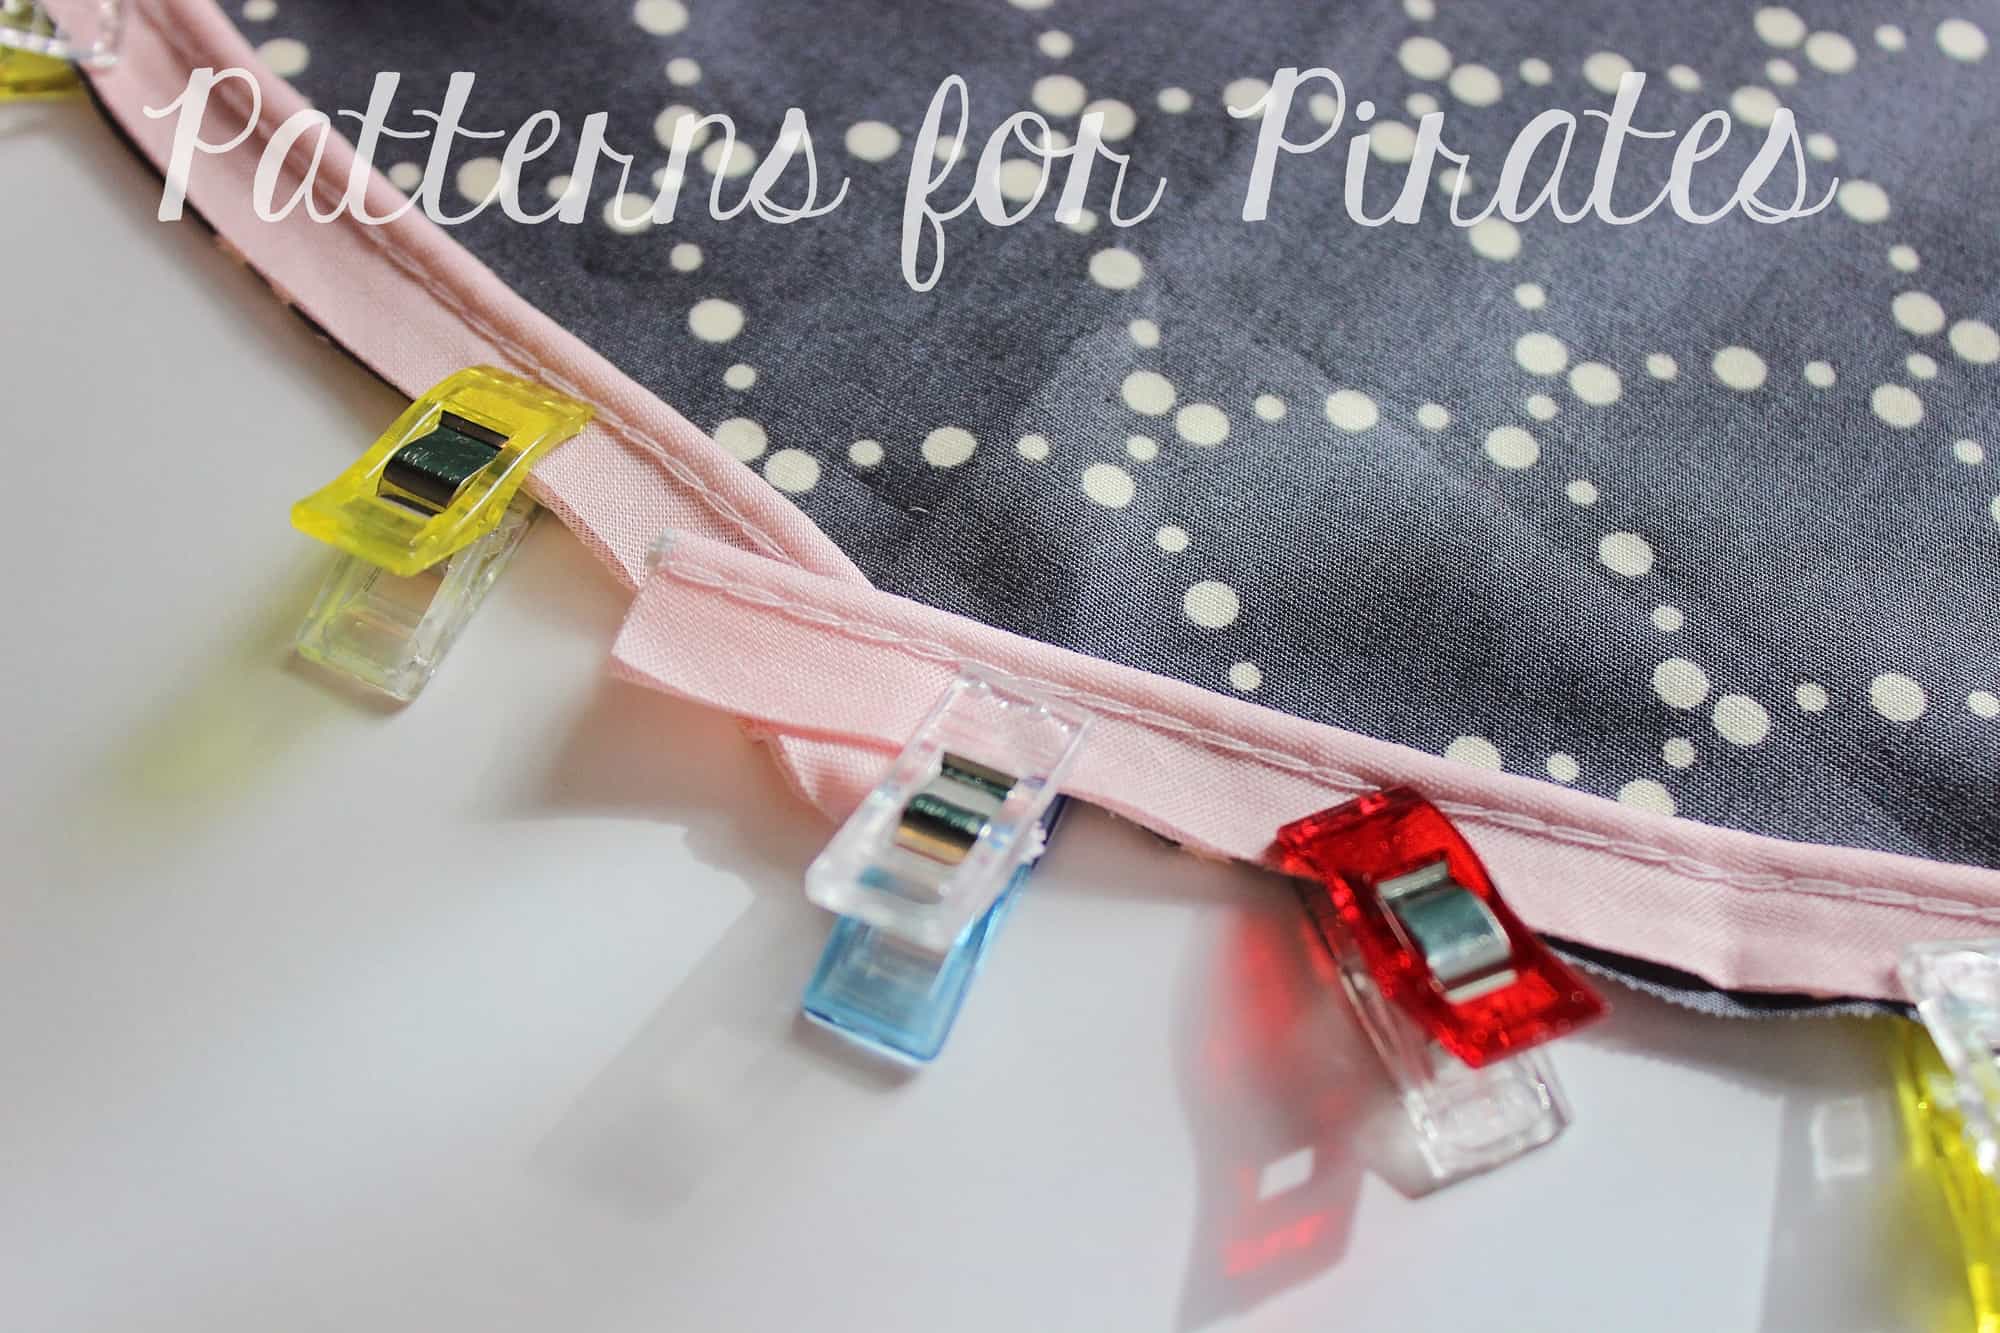
We’ll be adding piping to the brim of the hat. The 4″ brim takes a little less than a package of piping. If you chose to add this detail to the 7″ brim you will need two packs of piping. You will not have to make any changes to the pattern, simply cut your pieces as you normally would.

Pin or use clips to attach the piping to the outer circumference of one of the brims, lining or main. Chose what would be the back of the hat and overlap the piping there.

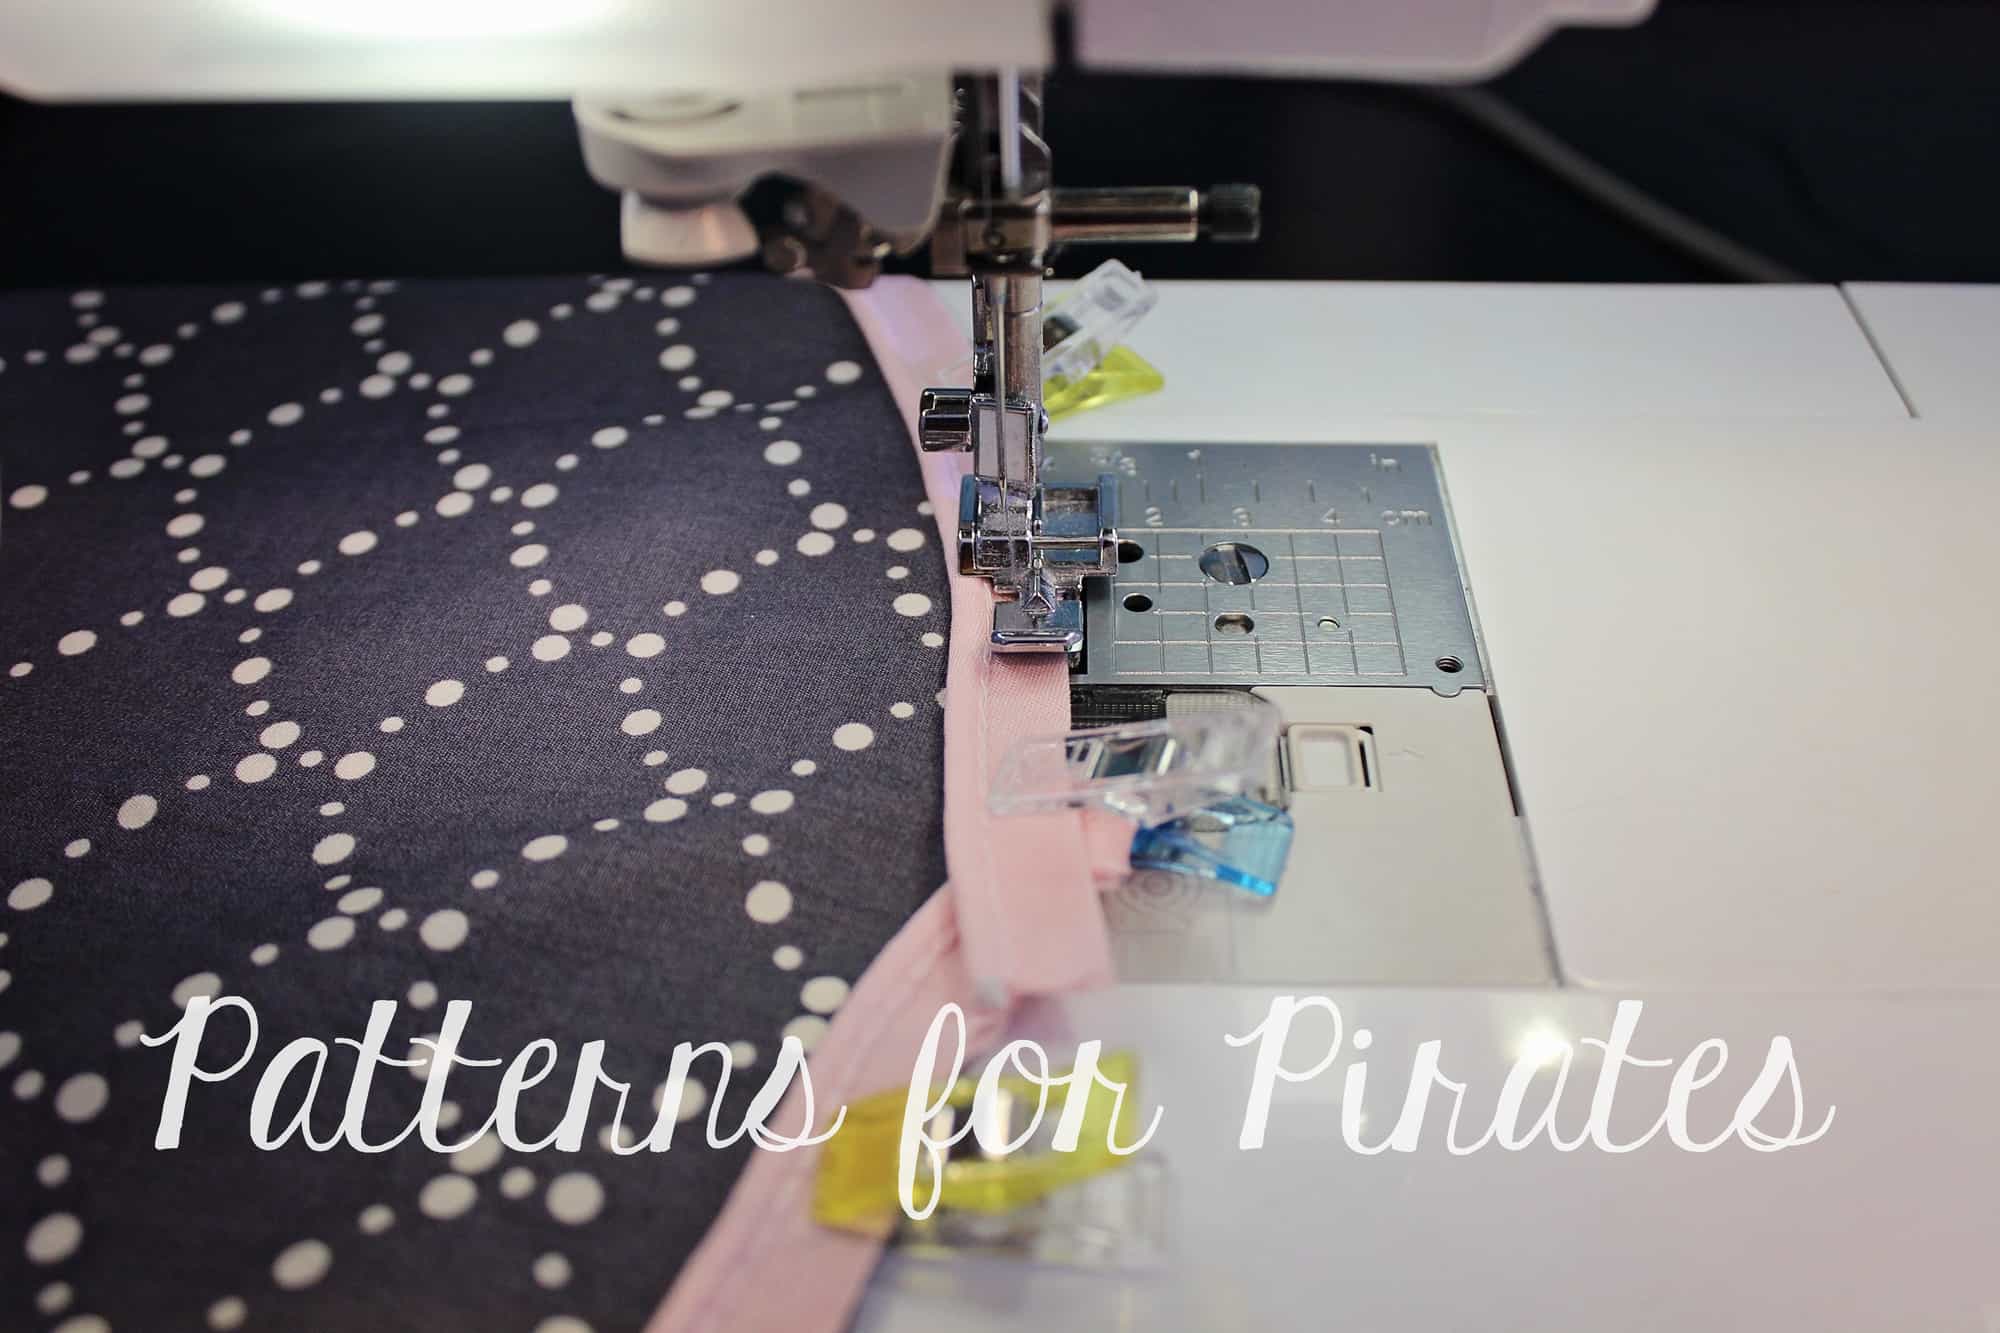
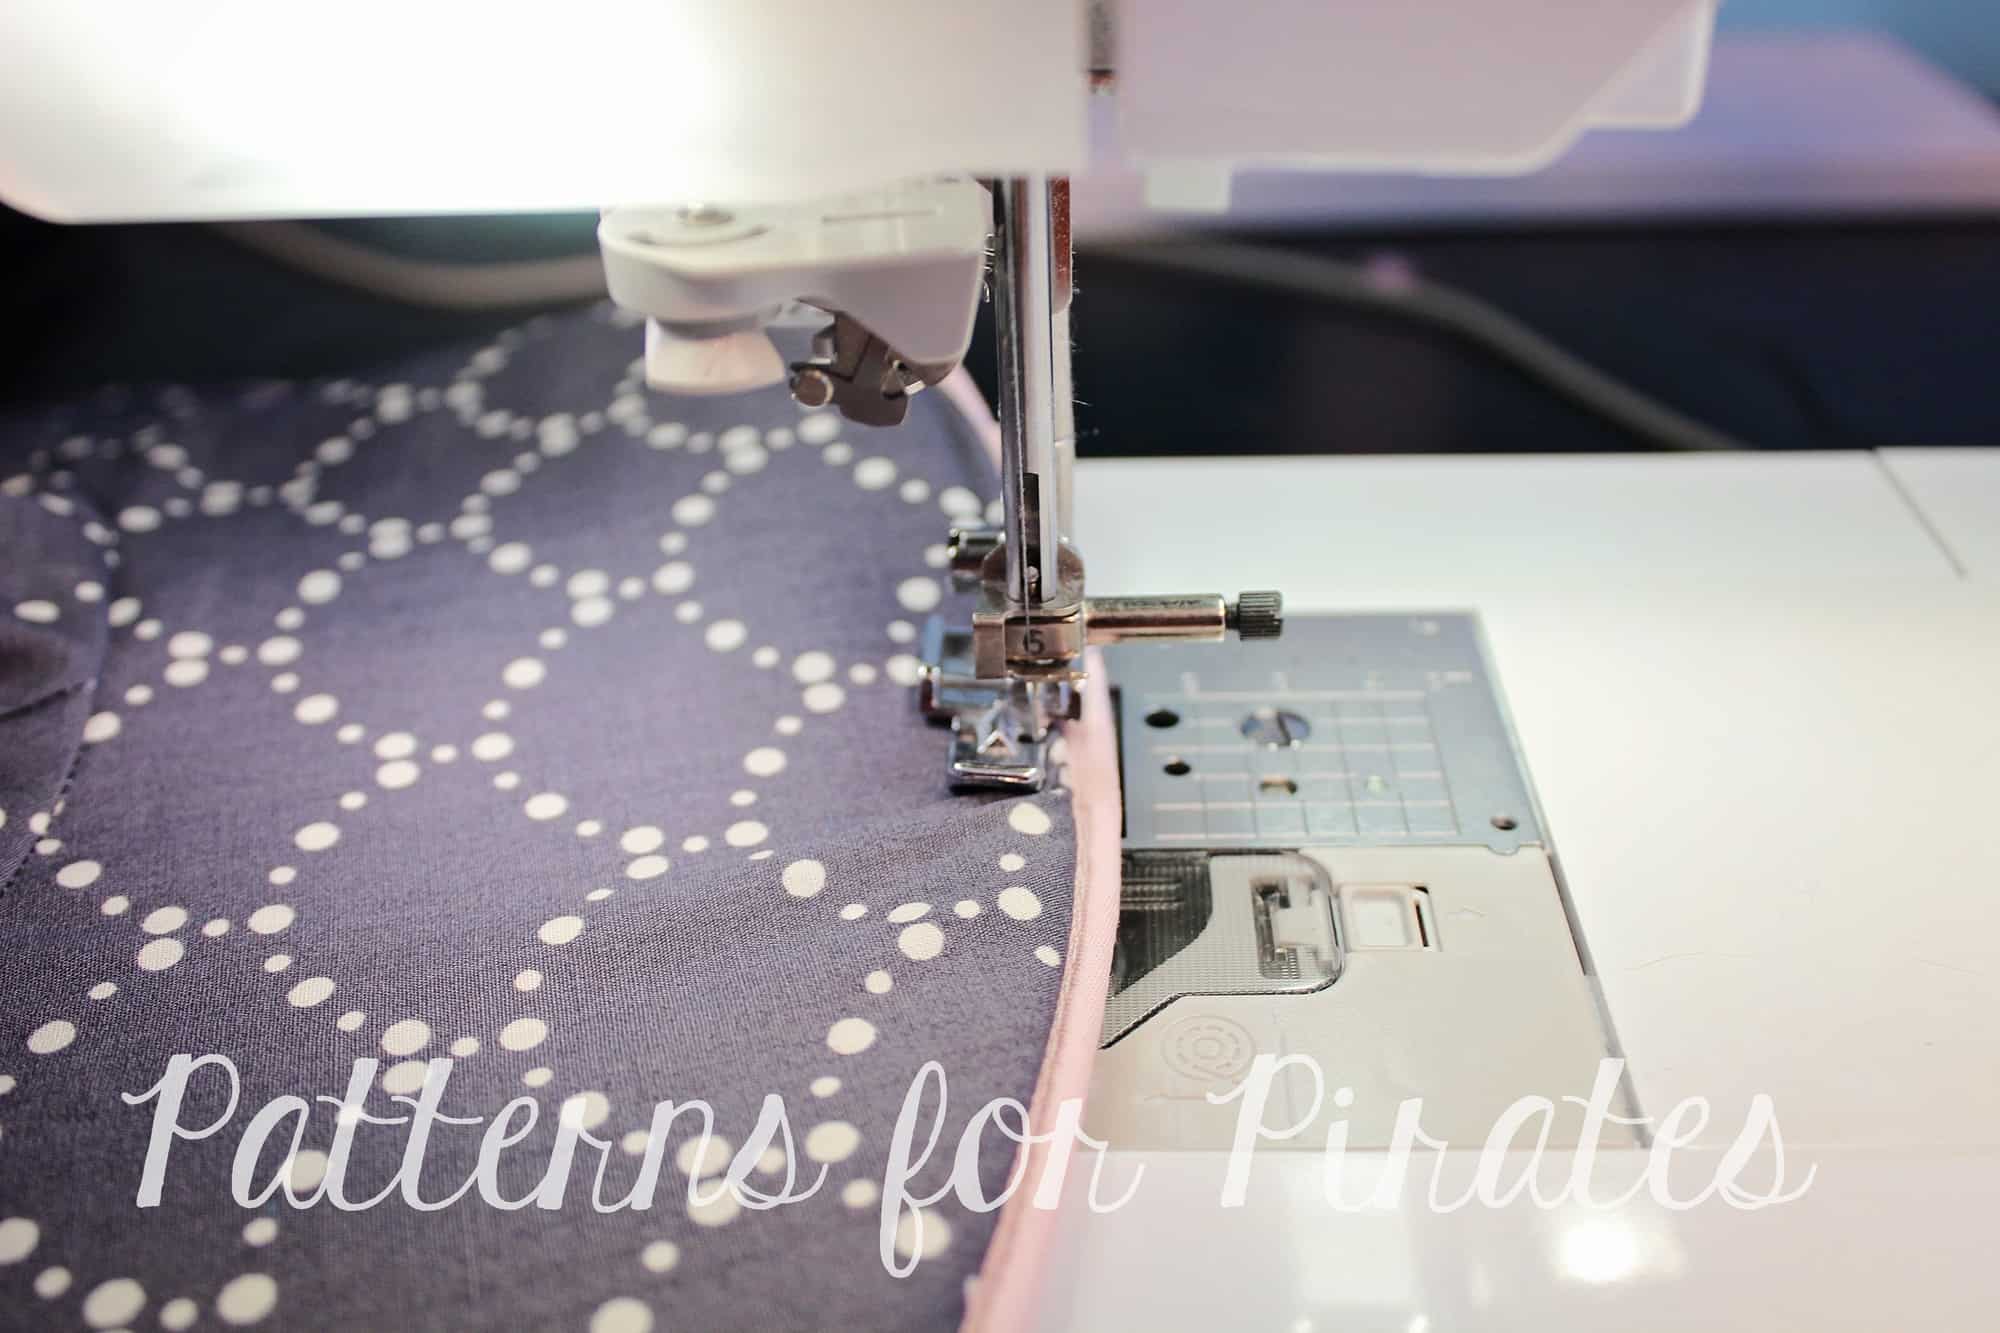
The key to successfully sewing piping is using your zipper foot. So, switch your regular foot to the zipper foot and sew the piping to the brim.

All you have left to to now is sew the hat as per the tutorial and enjoy your awesome new make!

Remember to use the zipper foot when topstitching the outer edge of the brim.

What are you waiting for?  Go grab your copy of the Set Sail Hat!  It’s always free and always fabulous!

Need some style inspiration?  Check out our Facebook Album full of amazing images from our testers.

Happy Sewing, Pirates!

Filed Under: Free Pattern, Pattern Release 7 Comments

Boundless Dress :: New Pattern + Update!

May 3, 2018

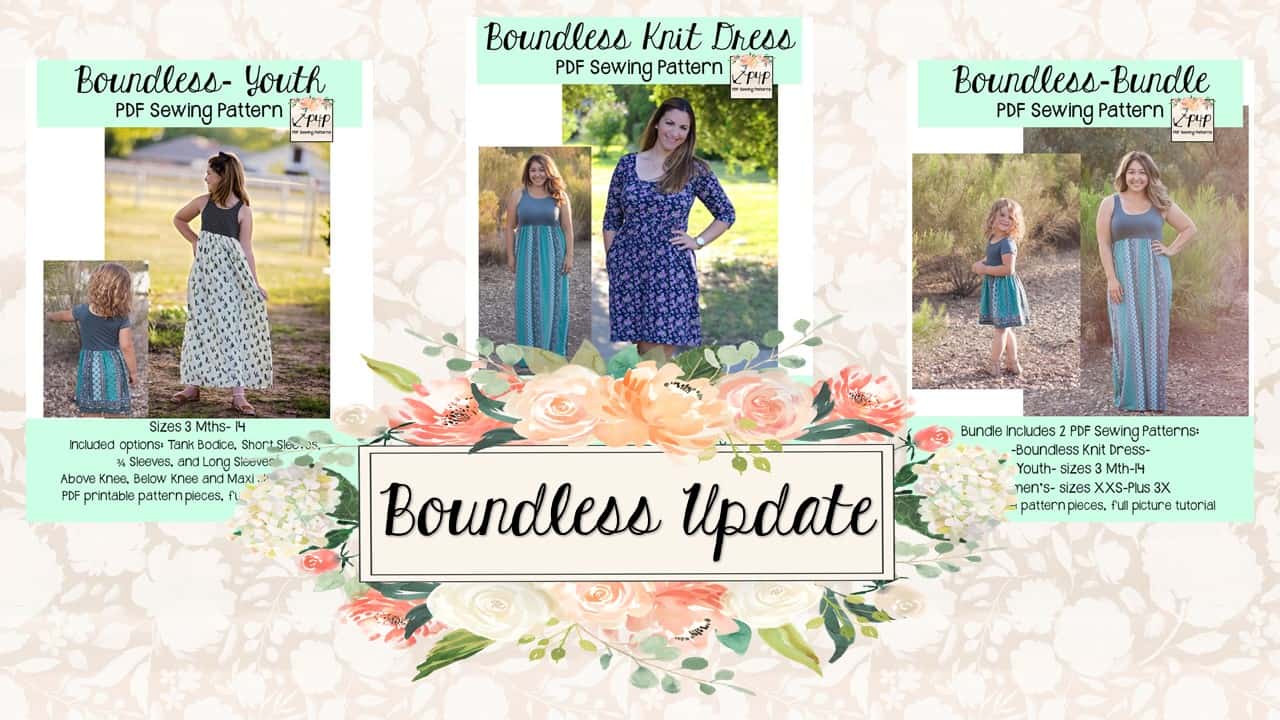
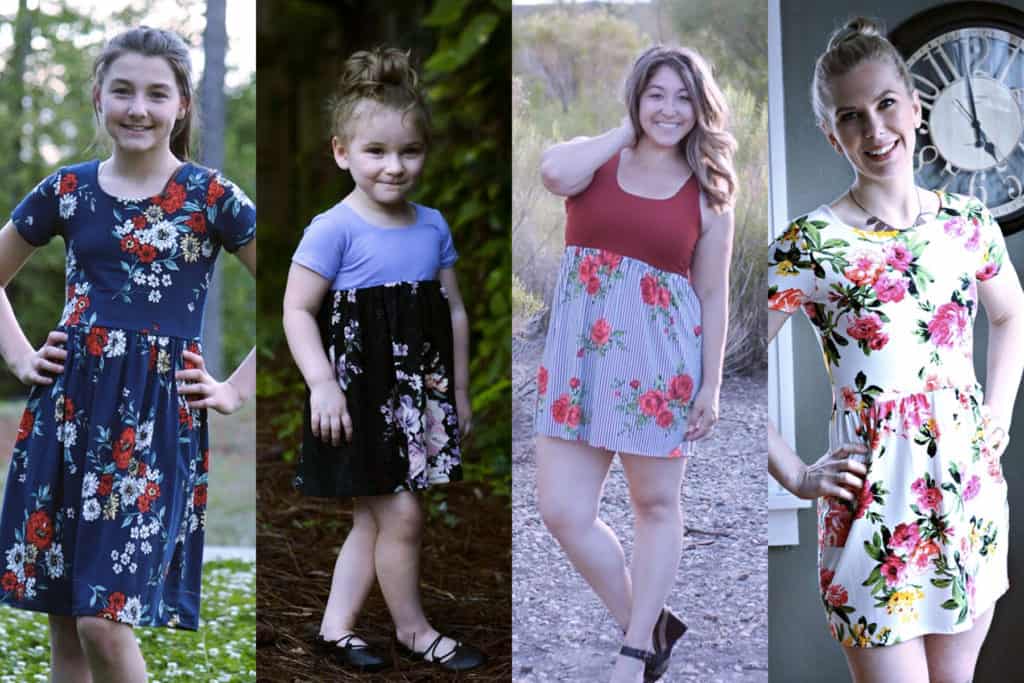
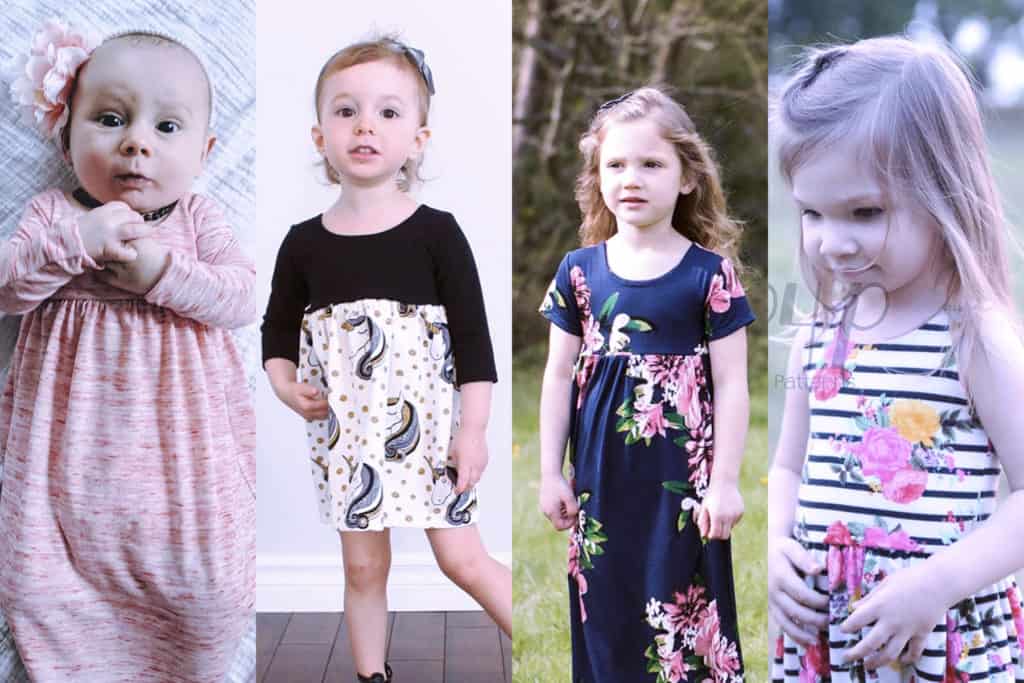
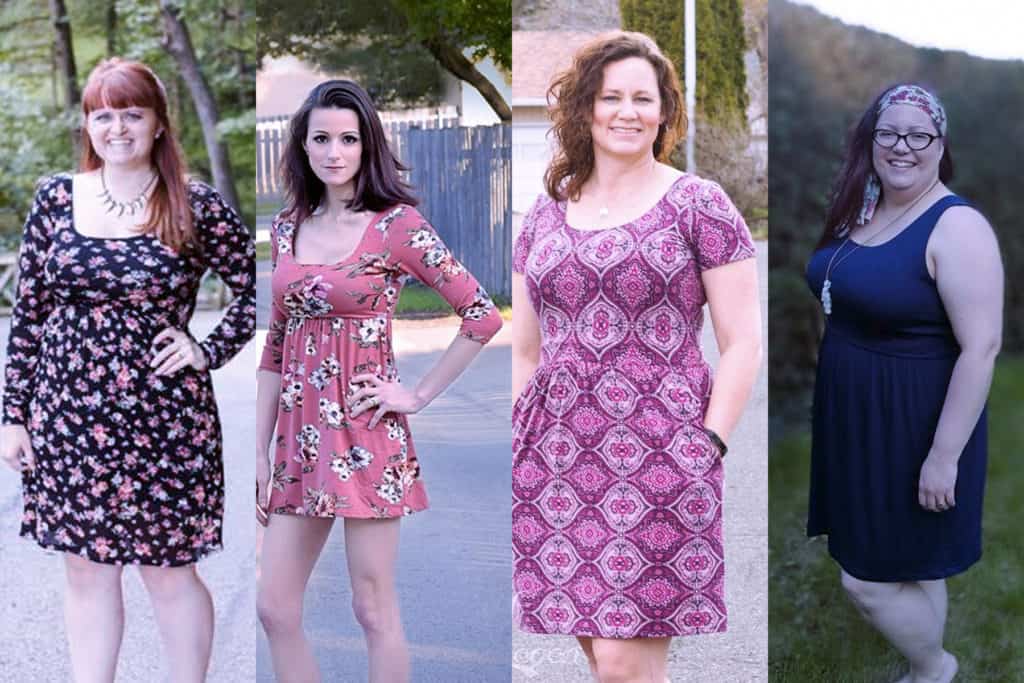
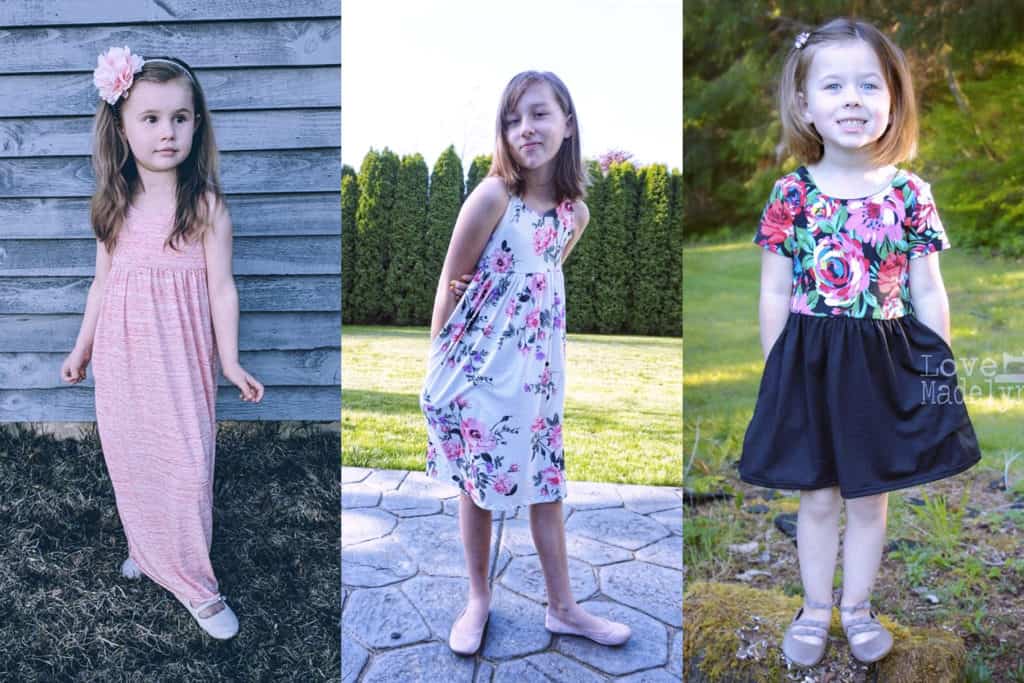
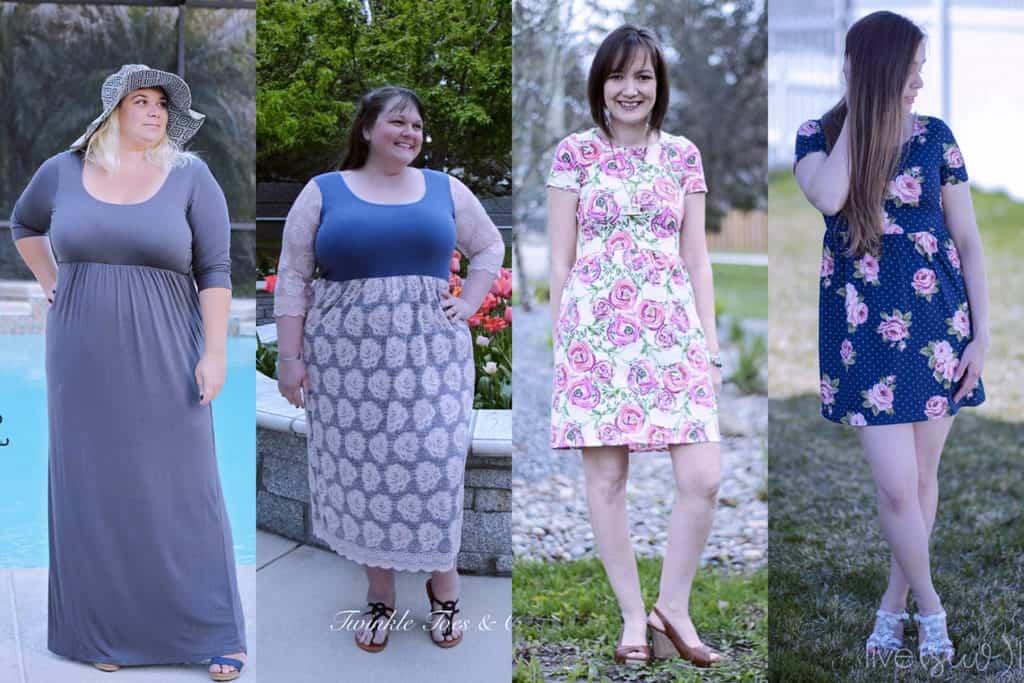
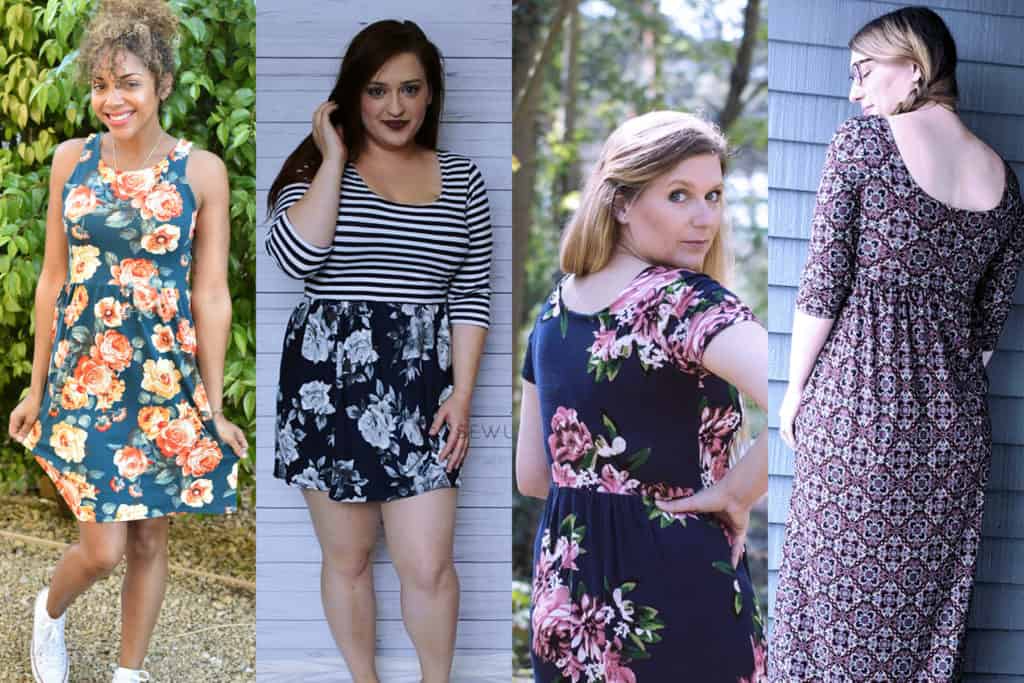
We told you that we’d be going through and updating older patterns, didn’t we?  But did we tell you that we would be taking one of our favorite patterns, updating it, AND adding a girl’s version of it as well?  Because that’s exactly what we did.  And we are so excited to share them with you!

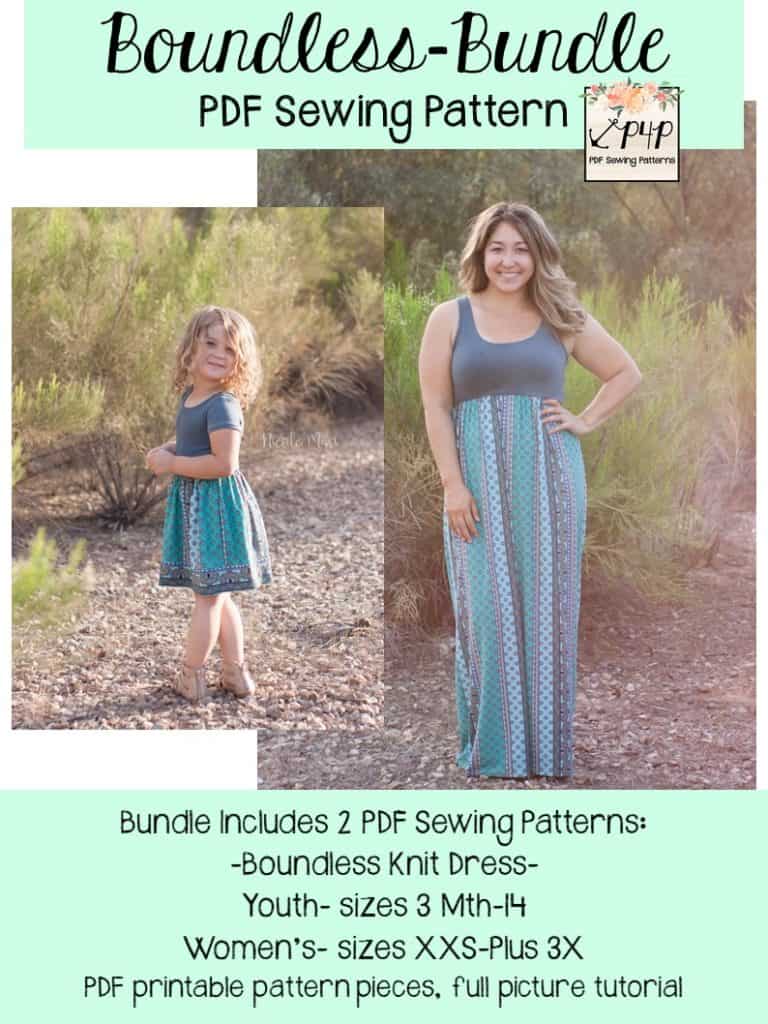
Allow me to re-introduce you to the Boundless Knit Dress and at the same time, introduce you to it’s mini: the Boundless Youth!

Before we get started: If you already own a copy of the original Boundless pattern, you will NOT need to re-purchase to get the updates.  If you bought here (PatternsforPirates.com) or on the Craftsy store, you will simply need to sign into your account and re-download the file.  If your purchase was via Etsy, email help@patternsforpirates.com (WITH PROOF OF PURCHASE) and you will get an updated file.  It’s as easy as that!

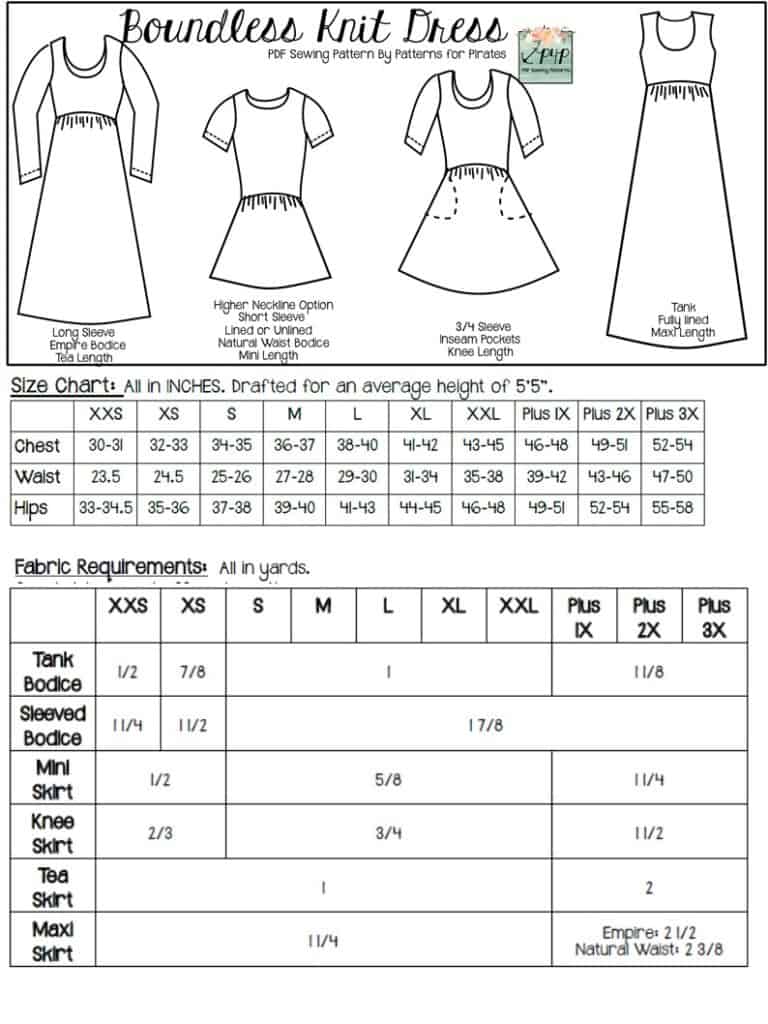
Both patterns feature as many options as we could fit into them.  We’ve got four sleeve types (sleeveless, short, 3/4 and long), multiple lengths (Mini, Knee, Tea and Maxi), two waistline options (empire and natural waist), and optional pockets.  Both the women’s and youth bodices can be made lined or unlined, and the women’s even comes with two neckline options (high and low).  It is drafted for women (sizes XXS – Plus 3X), and youth (3M – 14).


**Want to learn more about how to measure yourself for this pattern?  We’ve got you covered with an in-depth blog HERE.  And in case you’re new to Patterns for Pirates and PDF patterns in general, we have a great blog full of new user tips HERE to help you get started!  And, as with all of our current releases and updates, the pdfs now include our layers feature and can be found in Letter, A4 and A0 sizes.

Let’s take a look at the different options!!

Empire + Natural Waist Bodices

Sleeved + Sleeveless Options

Multiple Hem Lengths

Women’s Neckline Options

Are you ready for Boundless amounts of sewing fabulousness?  Grab your pattern now!

BOUNDLESS DRESS – YOUTH | BOUNDLESS DRESS – WOMEN’S | BOUNDLESS KNIT DRESS BUNDLE

Need more convincing?  Just take a look at this pattern on all of the amazing shapes and sizes of our testers, and get a look at more examples of all the options in our albums in the P4P Facebook group! Women’s Album / Youth Album

And if that didn’t give you enough options, make sure to check out the hacks post to help take your patterns even further.

The release sale (no code needed) will be through Monday May 7th 2018 (11:59PM US Central Time Zone).

Happy Sewing, pirates!

Filed Under: Pattern Release 8 Comments

Go To Jacket :: New Pattern Releases!

March 2, 2018

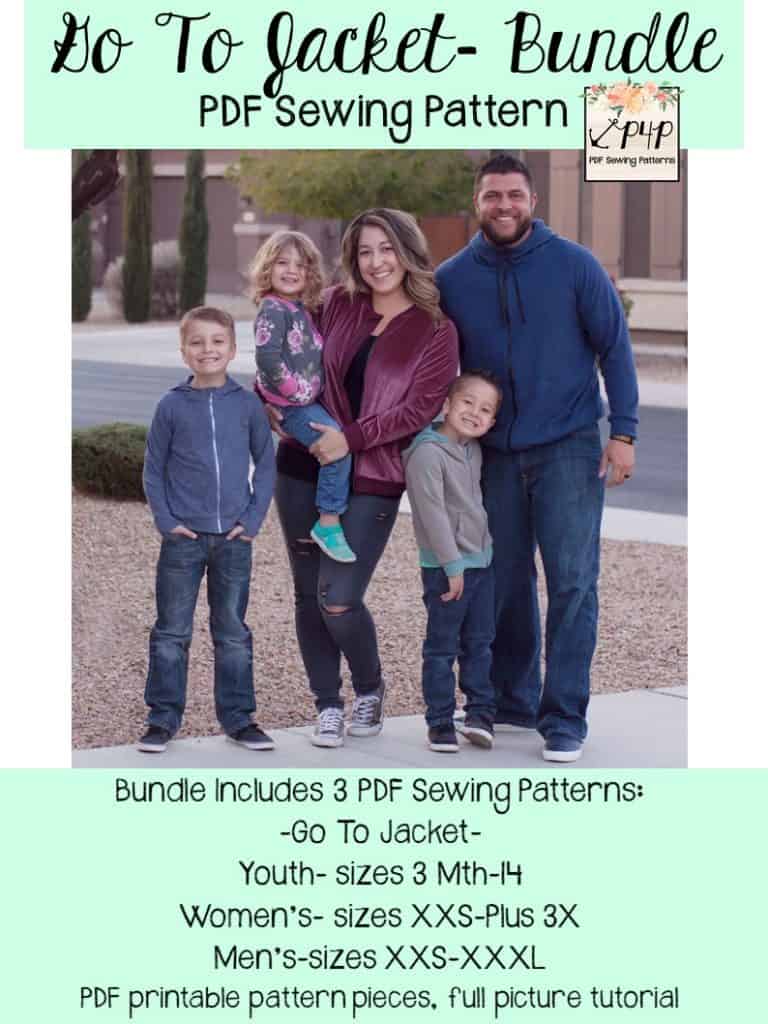
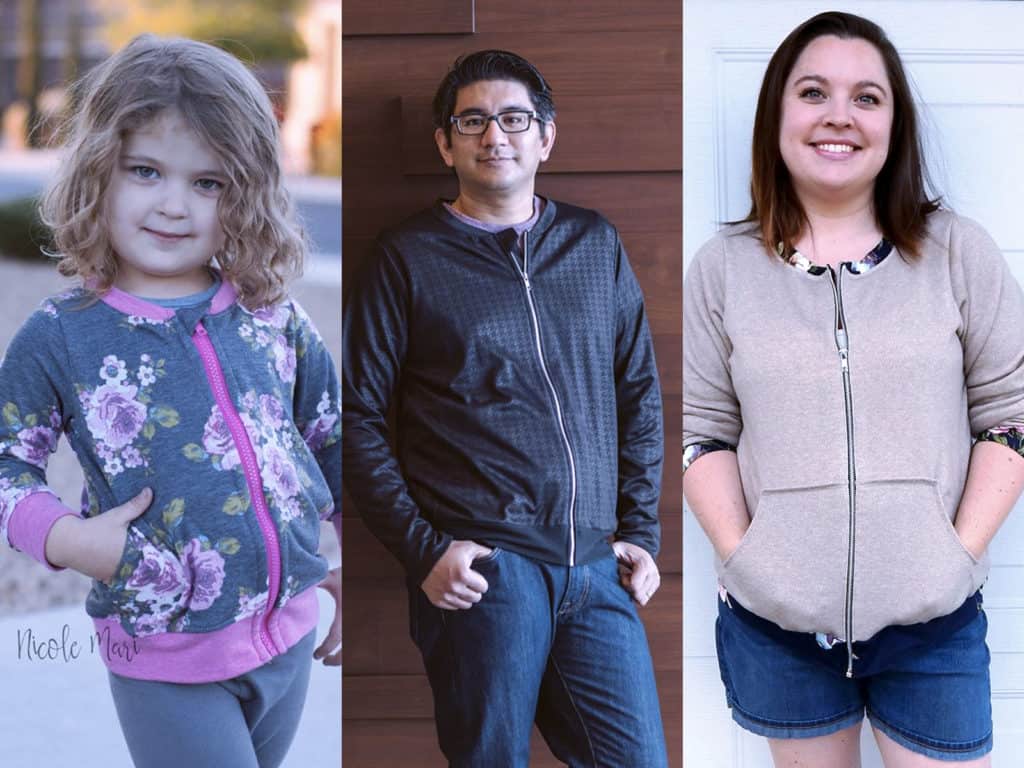
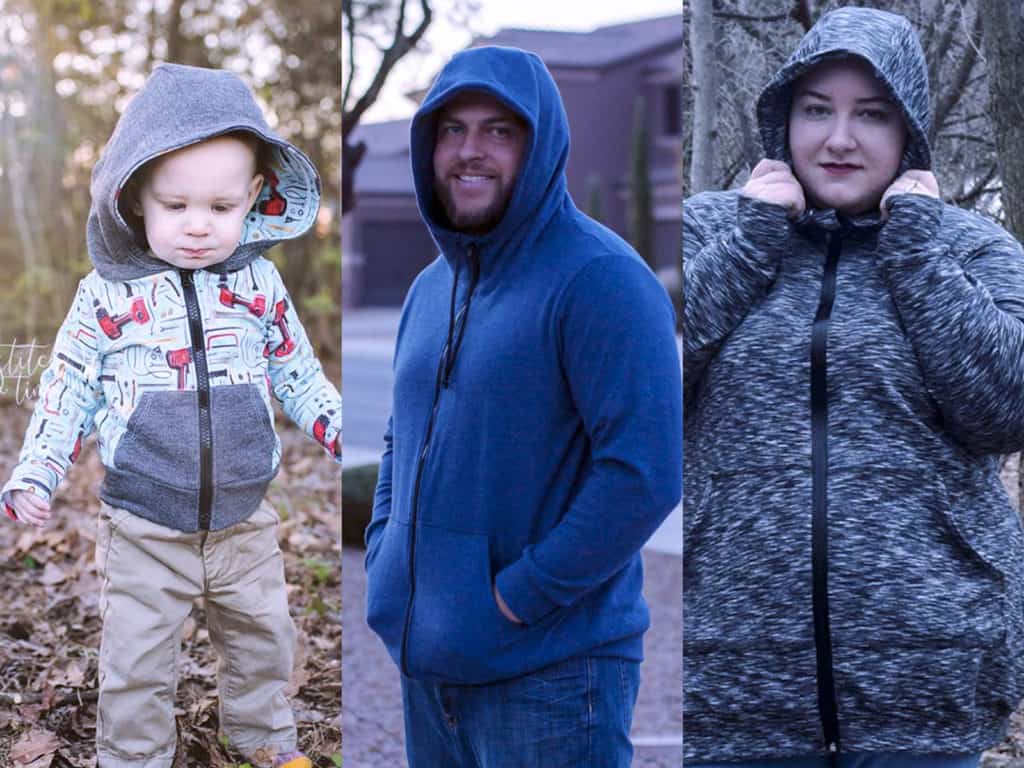
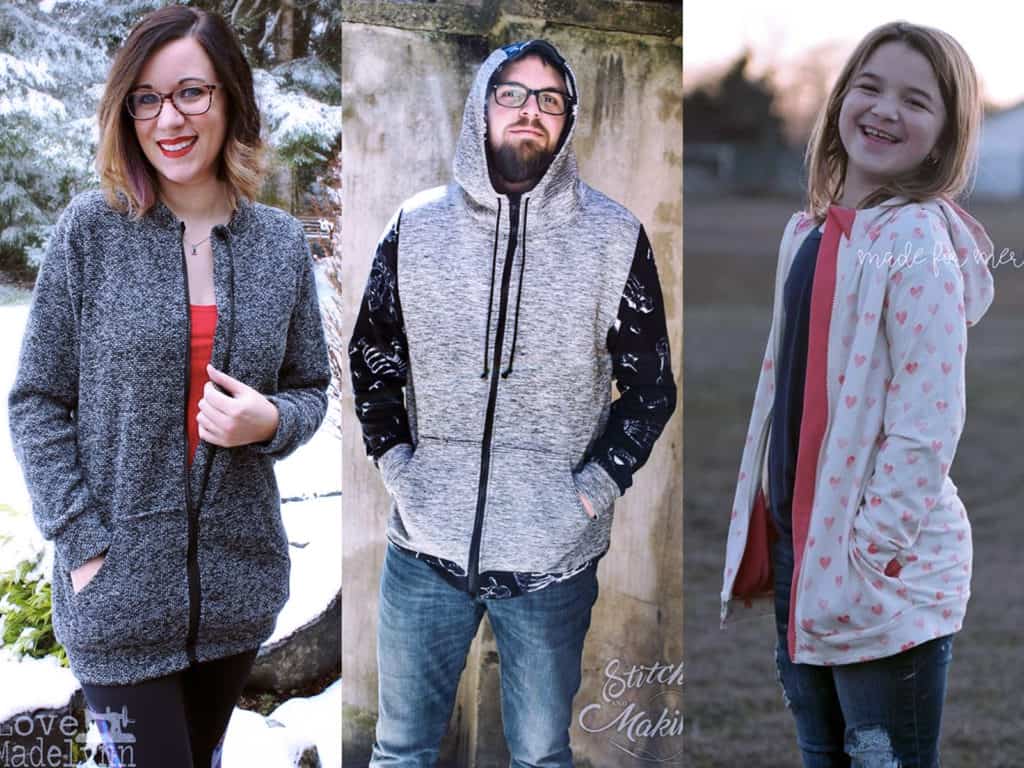
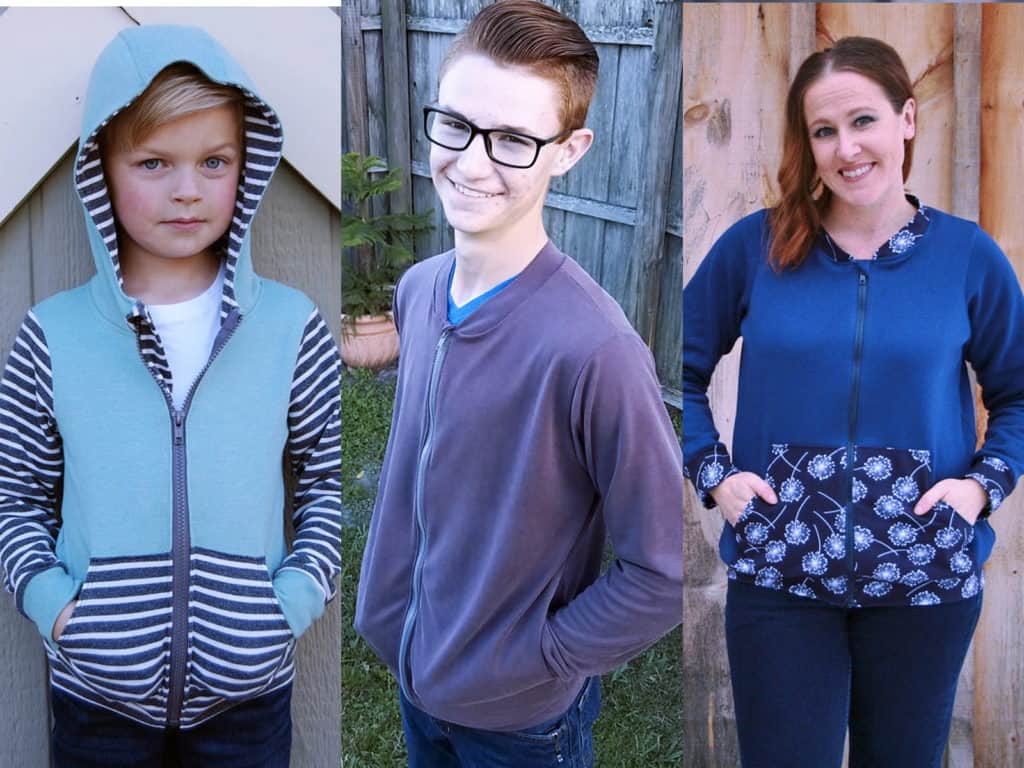
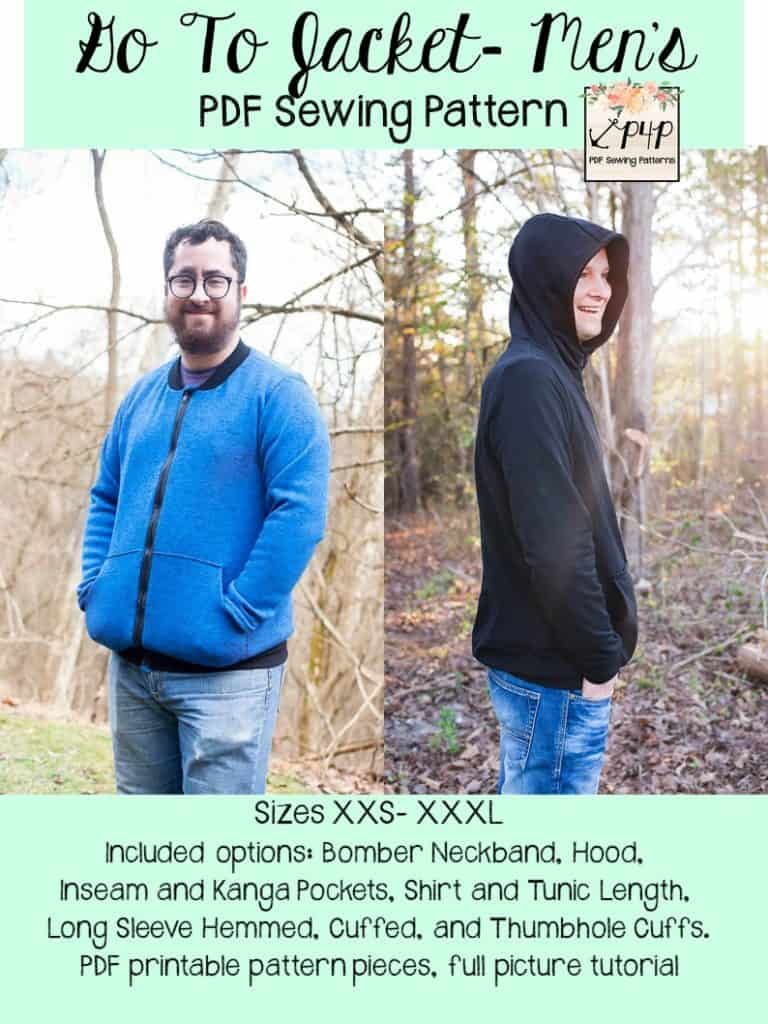
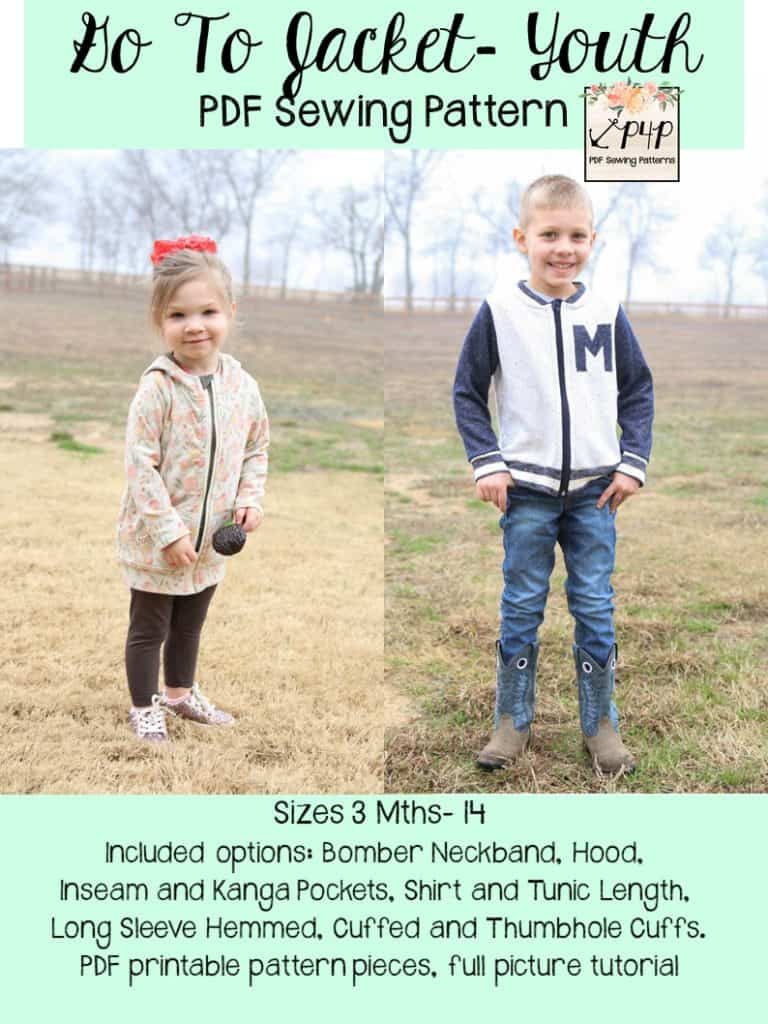
Stop the presses!  P4P is releasing THREE new patterns today and we couldn’t be more excited!  The Go To Jacket is available in enough sizes that you can make one for every member of your family.  Because we made it for Men, Women and Kids!


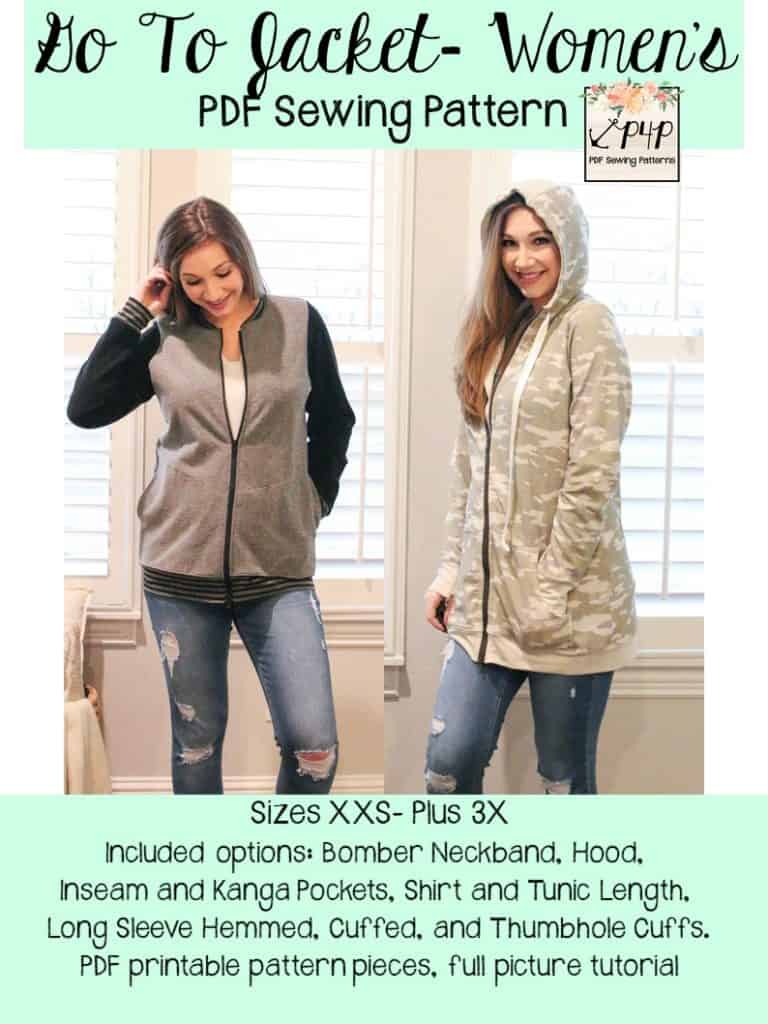
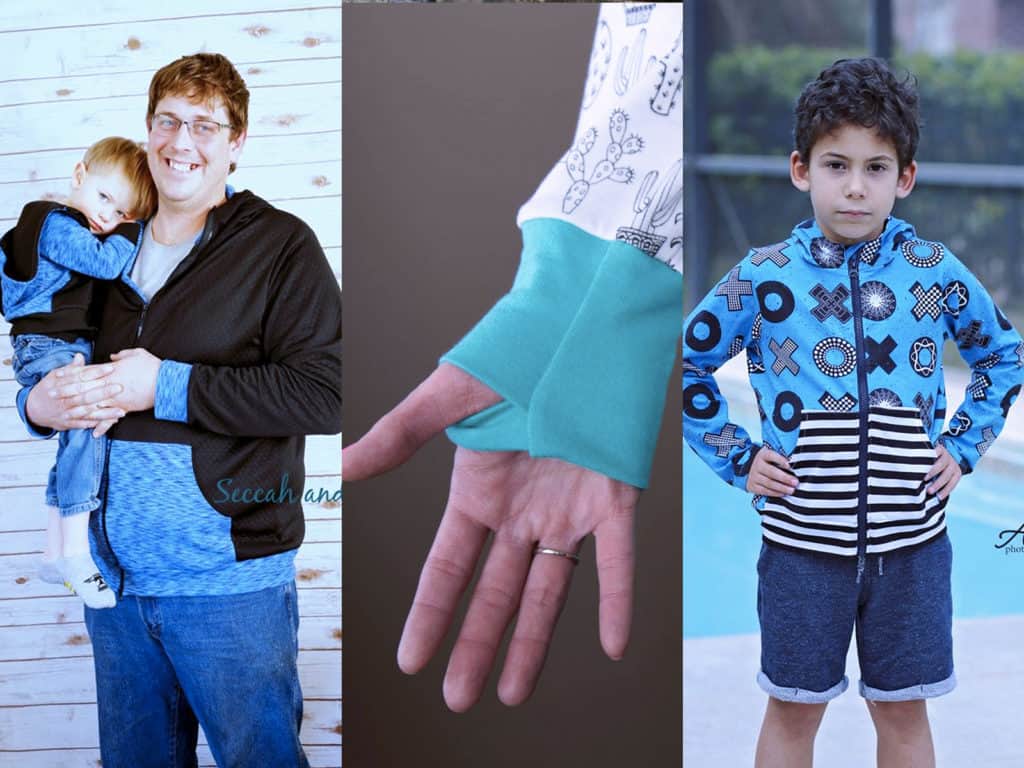
Just like the rest of our patterns, we’ve packed the Go To Jackets full of as many options as we could!  It is drafted for women (sizes XXS – Plus 3X), men (sizes XXS – XXXL) and youth (3M – 14) and can be made into a bomber style, or finished with a 3-piece hood.  There are two pocket options, two length options and three different sleeve hem types.

The Go To Jacket patterns were drafted for knit fabrics, which can range for lightweight fabrics to something on the heavier side, like fleece.

Don’t be scared of those zippers!! We have a couple very helpful links to walk you through them in the tutorial- you’ll be zipping ALL THE THINGS soon 😉

**Want to learn more about how to measure yourself for this pattern?  We’ve got you covered with an in-depth blog HERE.  And in case you’re new to Patterns for Pirates and PDF patterns in general, we have a great blog full of new user tips HERE to help you get started!  And, as with all of our current releases and updates, the pdfs now include our layers feature and can be found in Letter, A4 and A0 sizes.

Let’s see some options in action, shall we?

Bomber Style

Hooded

Tunic + Shirt Lengths

Cuffed / Hemmed / Thumbhole Sleeves

Kangaroo + Inseam Pockets

The jacket also boats a zipper/chin guard so your little one can zip up themselves and not worry about getting their little chins rubbed by the zipper all day! We also include instructions how to finish the neckline and zipper with a clean nice finish on the inside for extra gorgeous-ness!


Ready to grab your patterns?  You won’t regret it!

Go To Men’s | Go To Women’s | Go To Youth | Go To Bundle

Need more convincing?  Just take a look at this pattern on all of the amazing shapes and sizes of our testers, and get a look at more examples of all the options in our albums in the P4P Facebook group! Men’s Album / Women’s Album / Youth Album

The sale price will last through March 8 (11:59 PM US Central time zone) so grab it while you can at the introductory price!

And if that wasn’t enough options, make sure to check out the hacks post to help take your patterns even further.  Also head over to the P4P University post to learn all about shortening zippers for your Go To Jackets!

Happy Sewing, friends!

Filed Under: Pattern Release 4 Comments

All P4P today winners

January 31, 2018

Welcome to the 2018 #allP4Ptoday winner circle! I will be adding each monthly winner here so be sure to check out the blog often. You can get the contest details here.

DECEMBER

And just like that, yesterday we said good bye to 2018. Let me take a second to thank all of you who showed off your #allP4Ptoday outfits last year, you are an inspiration!

The December winner : @athomewithkaara !

We spotted Kaara on Instagram looking just gorgeous in her P4P birthday outfit. Who doesn’t need a faux leather Pencil Skirt? I know I do!

We see you on Instagram and in the P4P Facebook group, so remember to #allp4ptoday for a chance to win a P4P pattern of choice!

NOVEMBER

Time for another #allP4Ptoday winner! We’ve seen quite a few fall P4P outfits this month and loved them all.

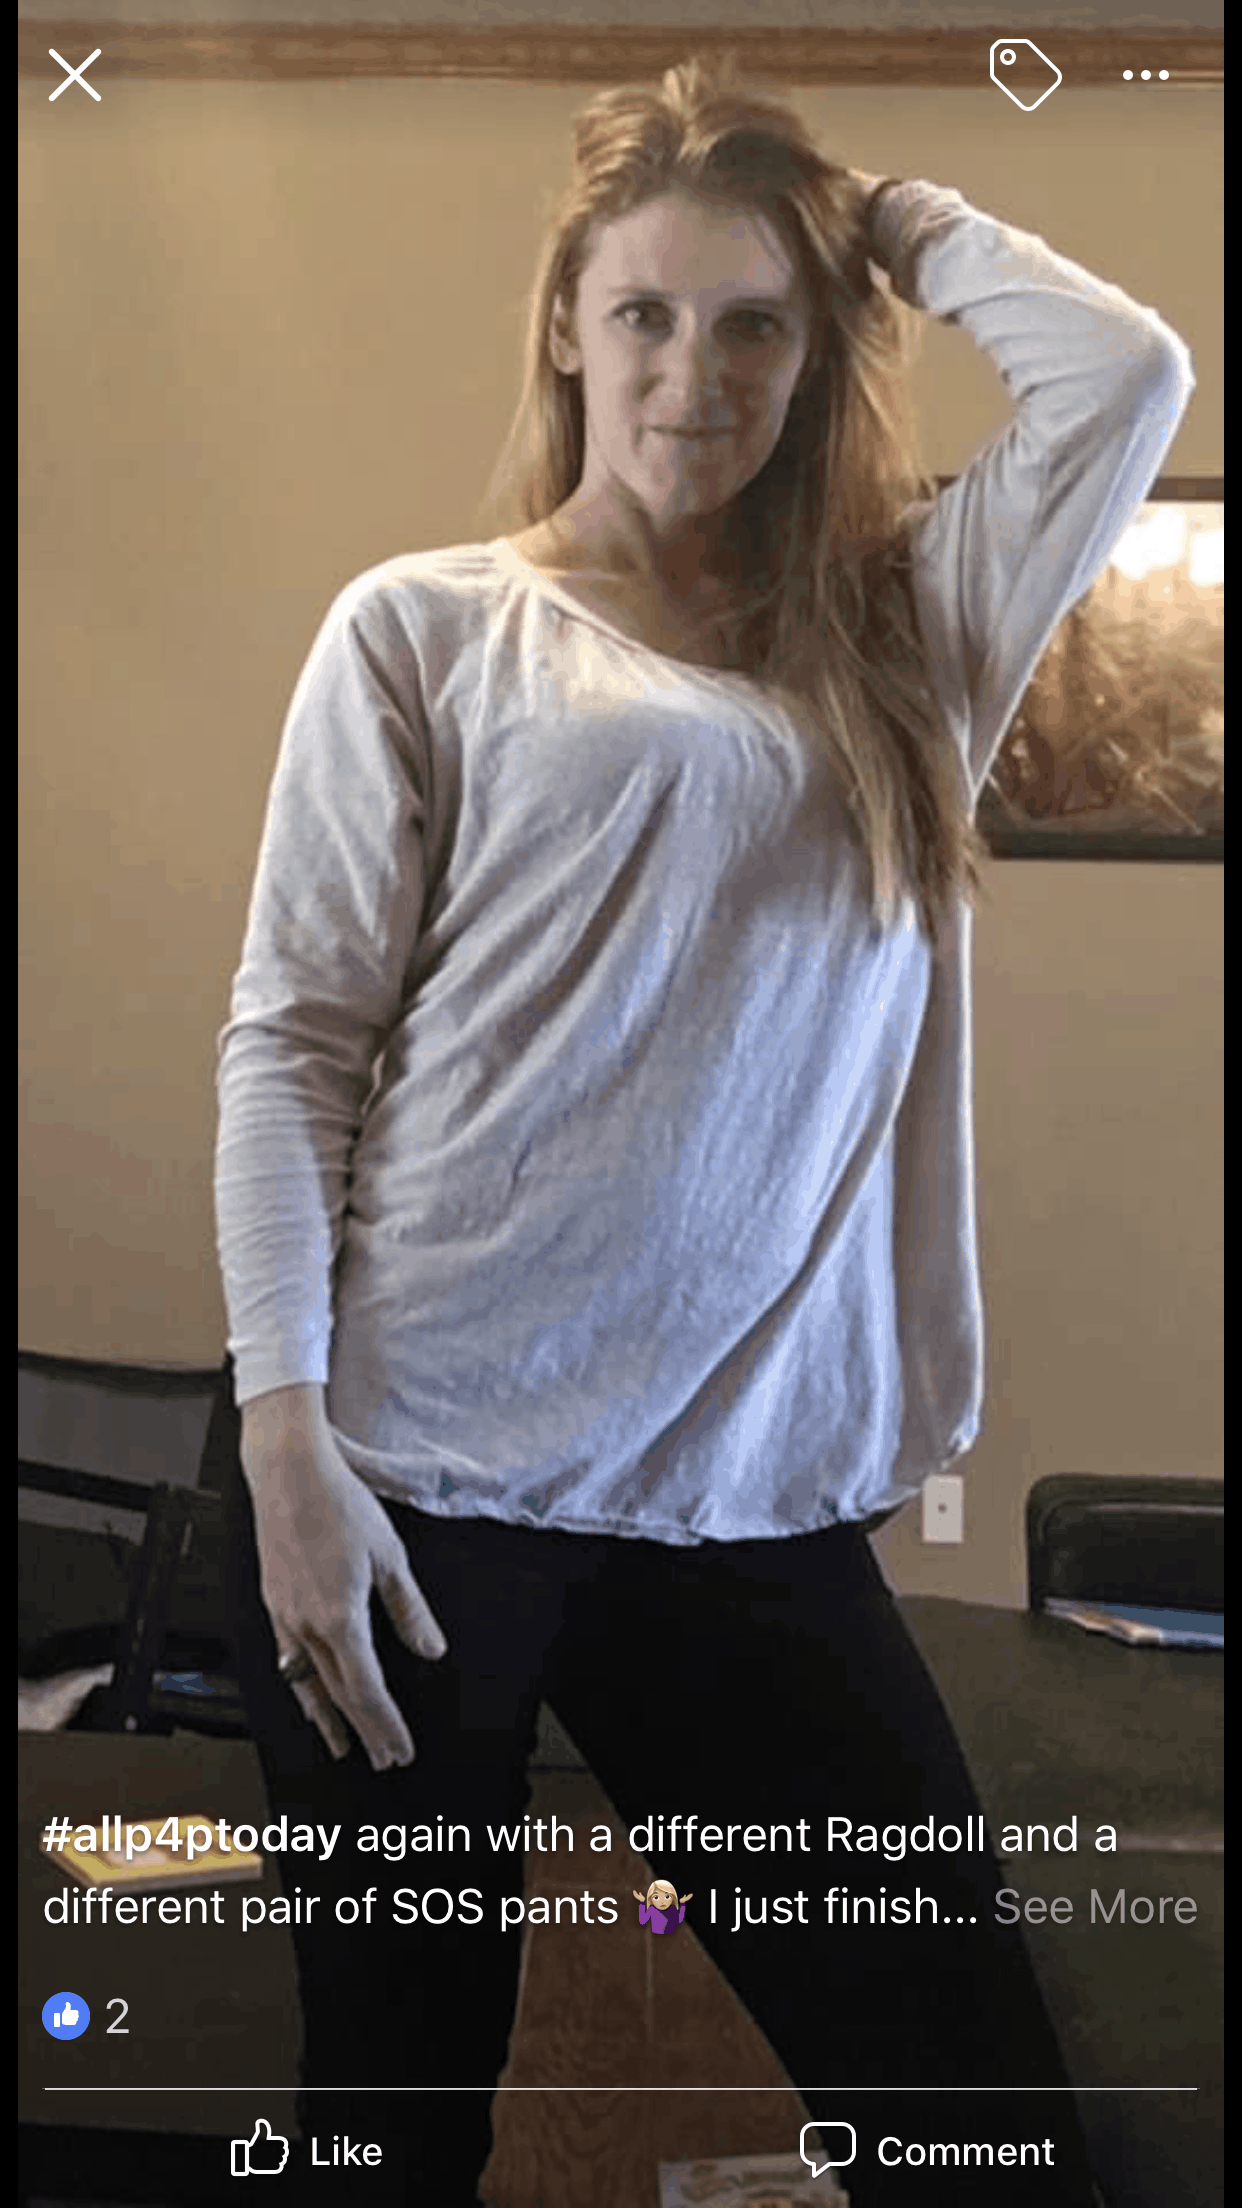
November’s free pattern winner is:  Shauna Anderson! Looks like Shauna really loves her SOS pants and Ragdoll shirt. Such a comfortable combination.

We cannot wait to see what P4P patterns you’ll be sewing for the holiday season! Don’t forget to # the posts so we can find them easily and maybe get you a free pattern.

OCTOBER

And just like that the spookiest month of the year is gone. So much awesomeness was displayed in the P4P group during October. Thank you for incorporating Patterns for Pirates in your Halloween costumes too!

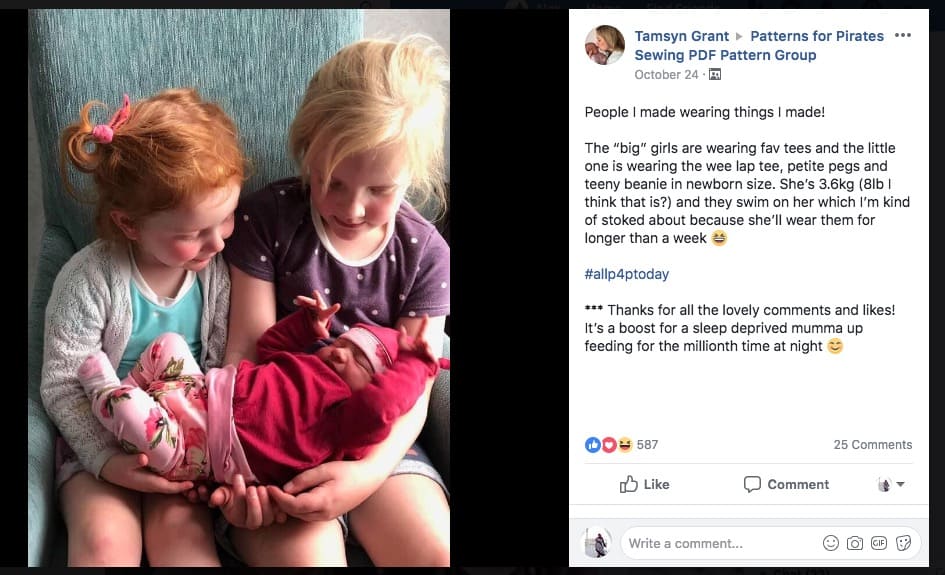
Our October #allP4Ptoday winner is ….Tamsyn Grant! How could we not? Just look at these 3 cuties. All 3 are sporting their mama made outfits and look adorable in them!

With two months left in the year, there’s still chances to win a P4P pattern of choice for 2018. Be sure to hashtag your post #allP4Ptoday so we can find it easily.

SEPTEMBER

Can you believe it’s the end of September already? The kiddos are back in school, some of you have cooler weather and the P4P group celebrated an amazing milestone…100k!  We’ve seen so many cute #allp4ptoday outfits this month too!

So without further ado…our September winner is…

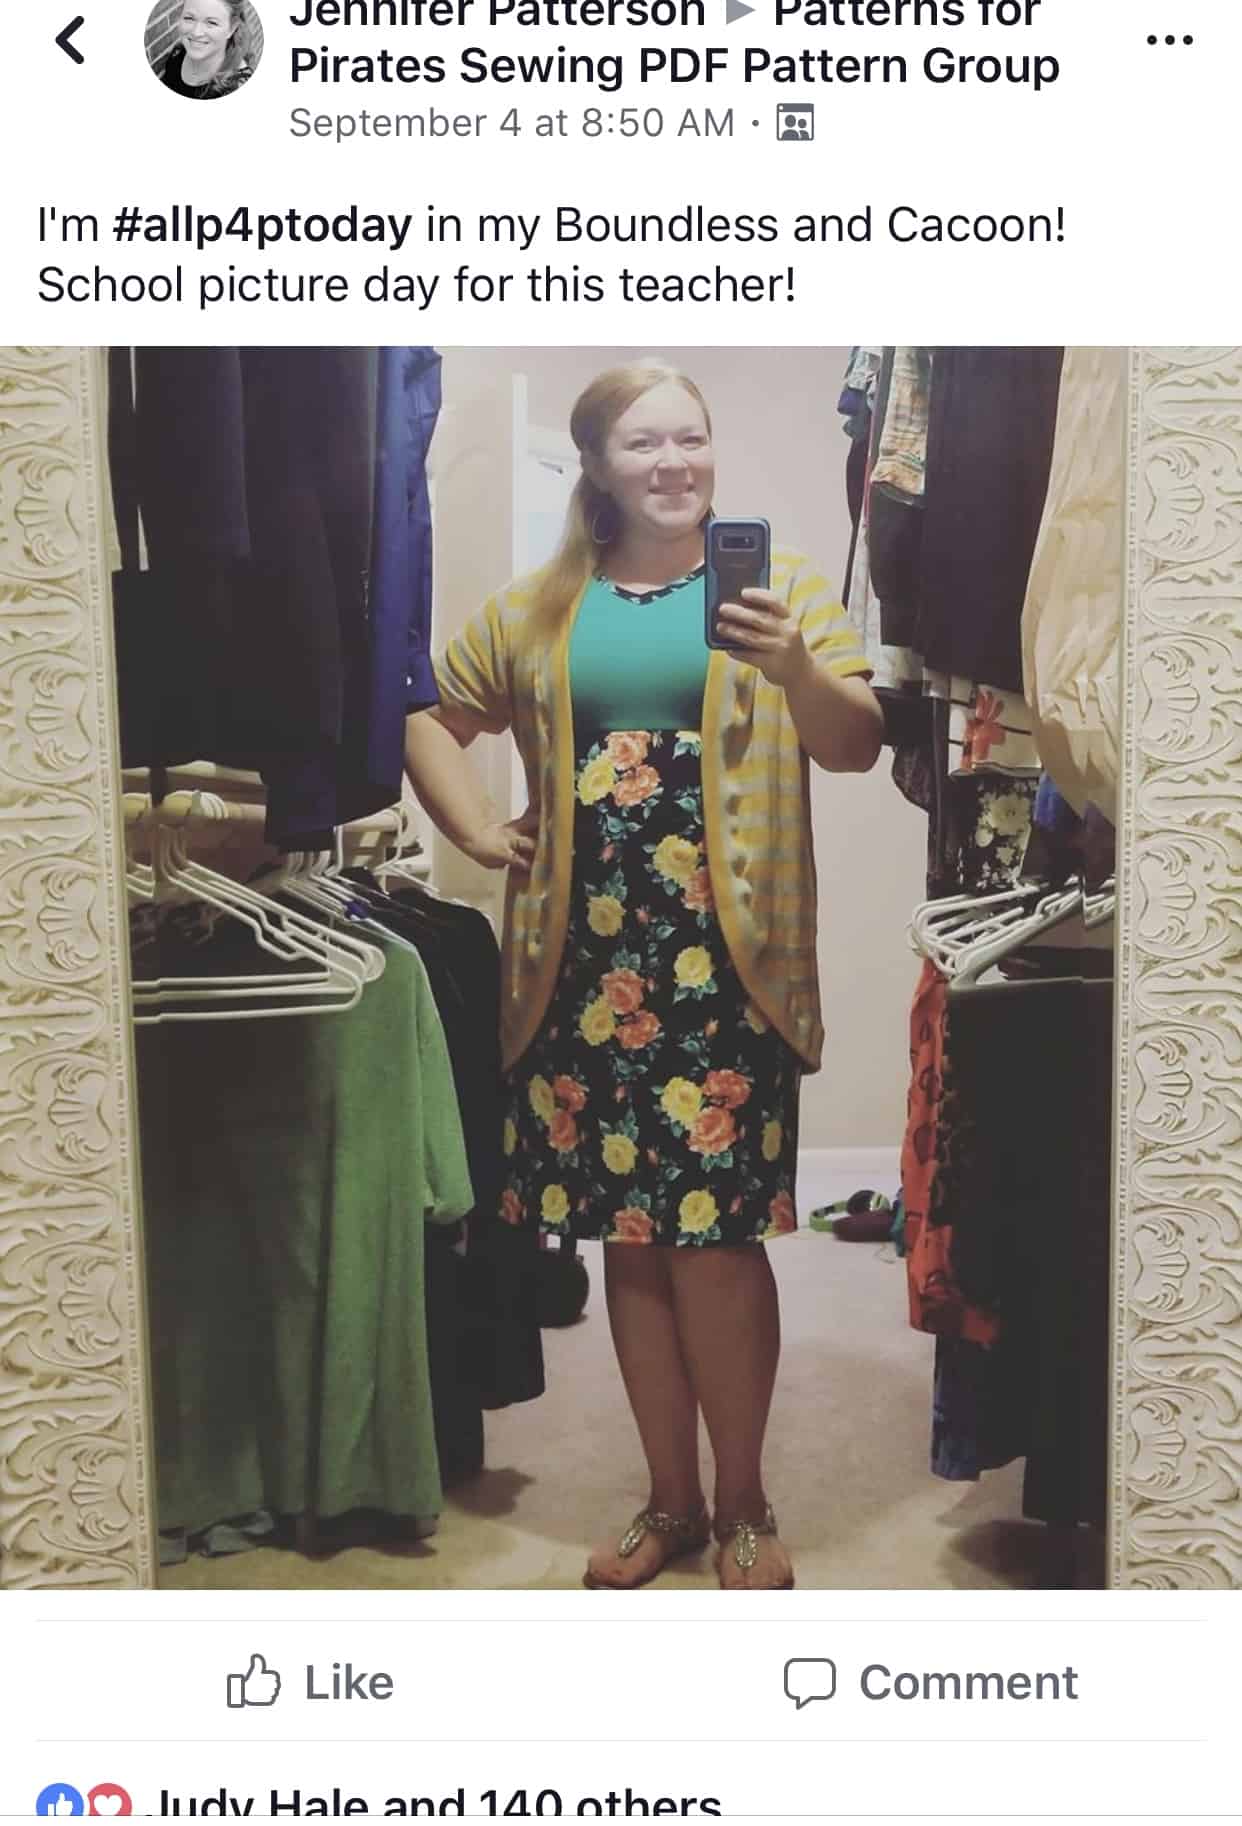
Jennifer Patterson! 

Jennifer is rocking a beautiful Boundless layered with a Cocoon Cardigan that I have a feeling we all need in our lives! Simply gorgeous!

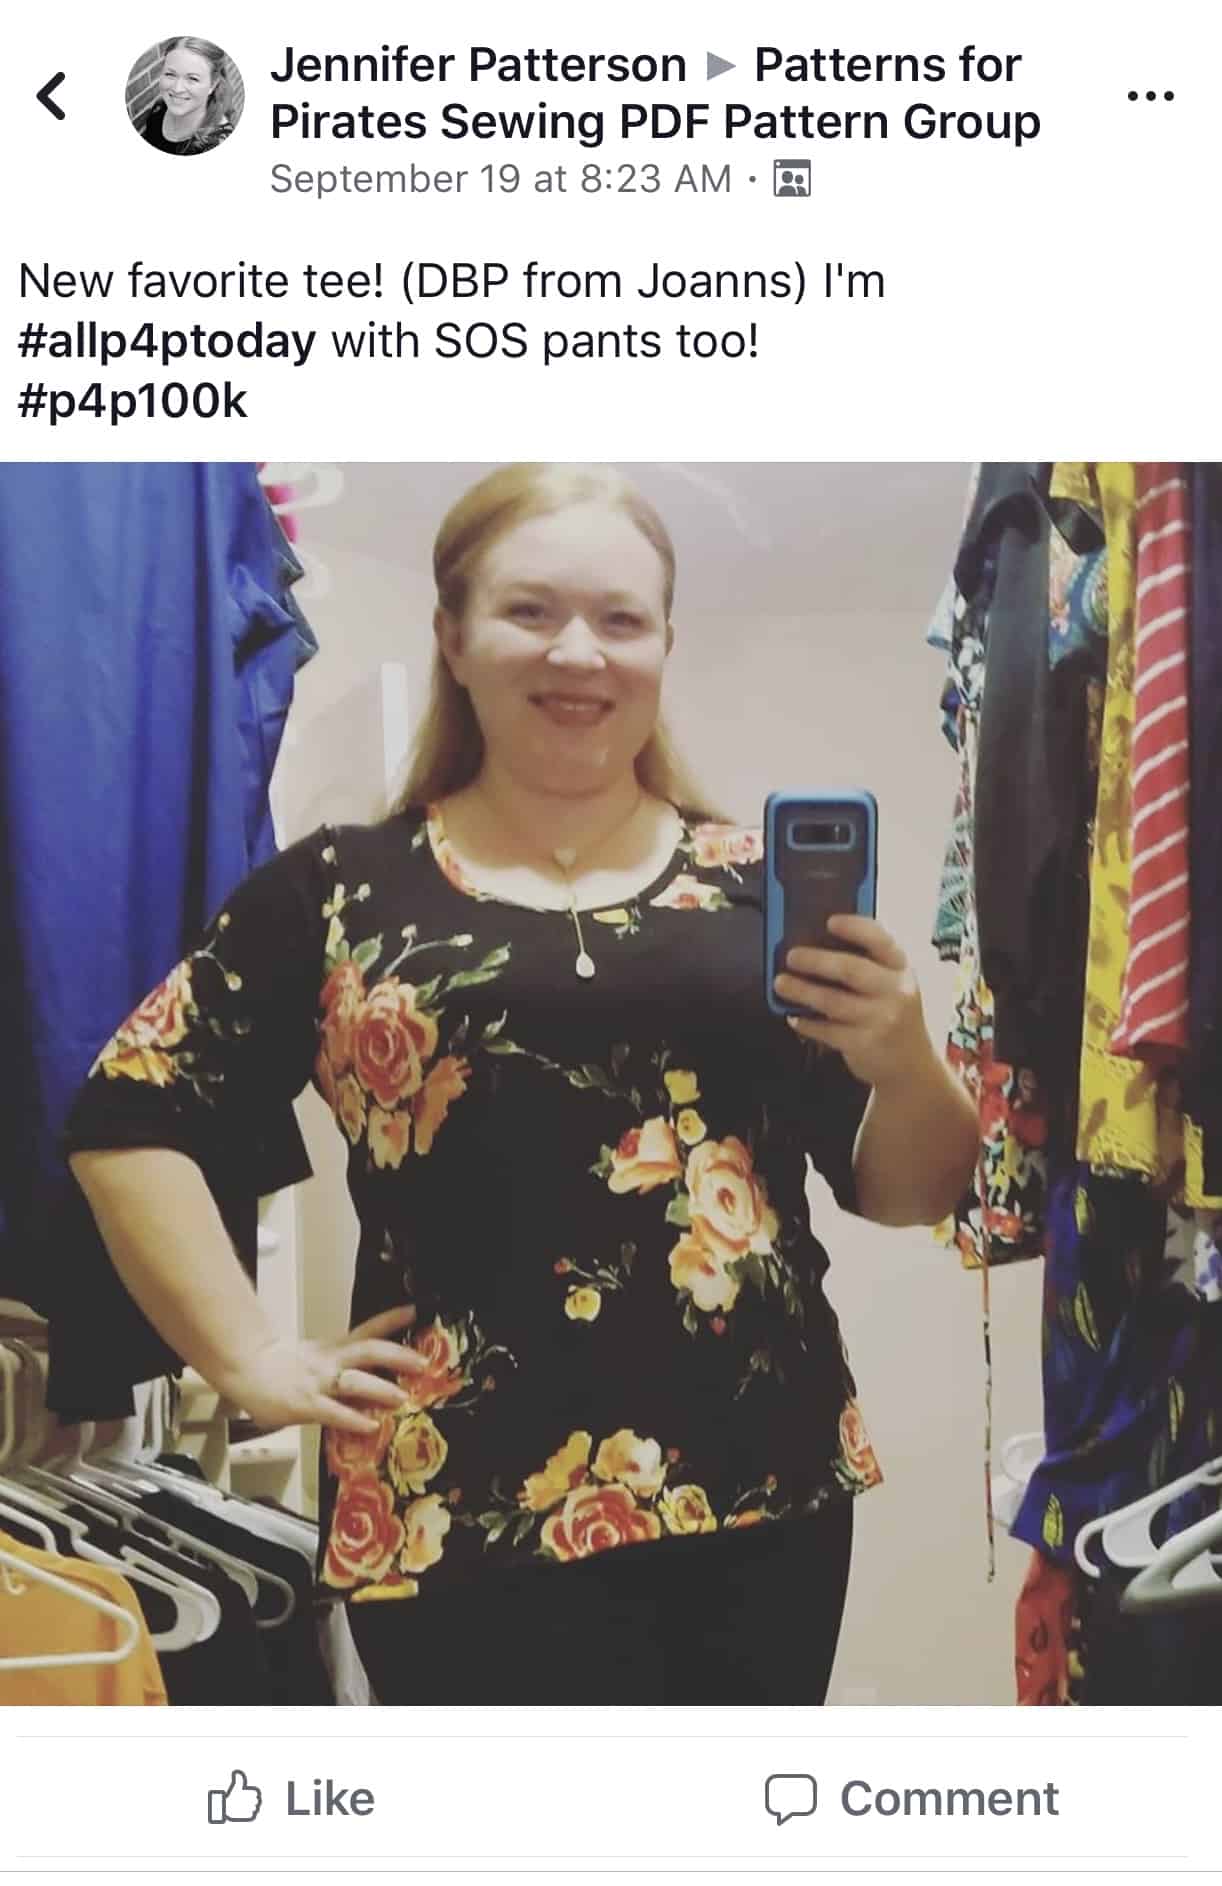
We’ve also spotted her rocking the Favorite Tee with SOS pants!

Keep the hashtags coming in October! I can’t wait to see how you incorporate P4P in your Halloween costumes!

 AUGUST

Ready for back to school? We’ve seen some really cute BTS #allp4ptoday outfits in the group this month. Can’t wait to see more!

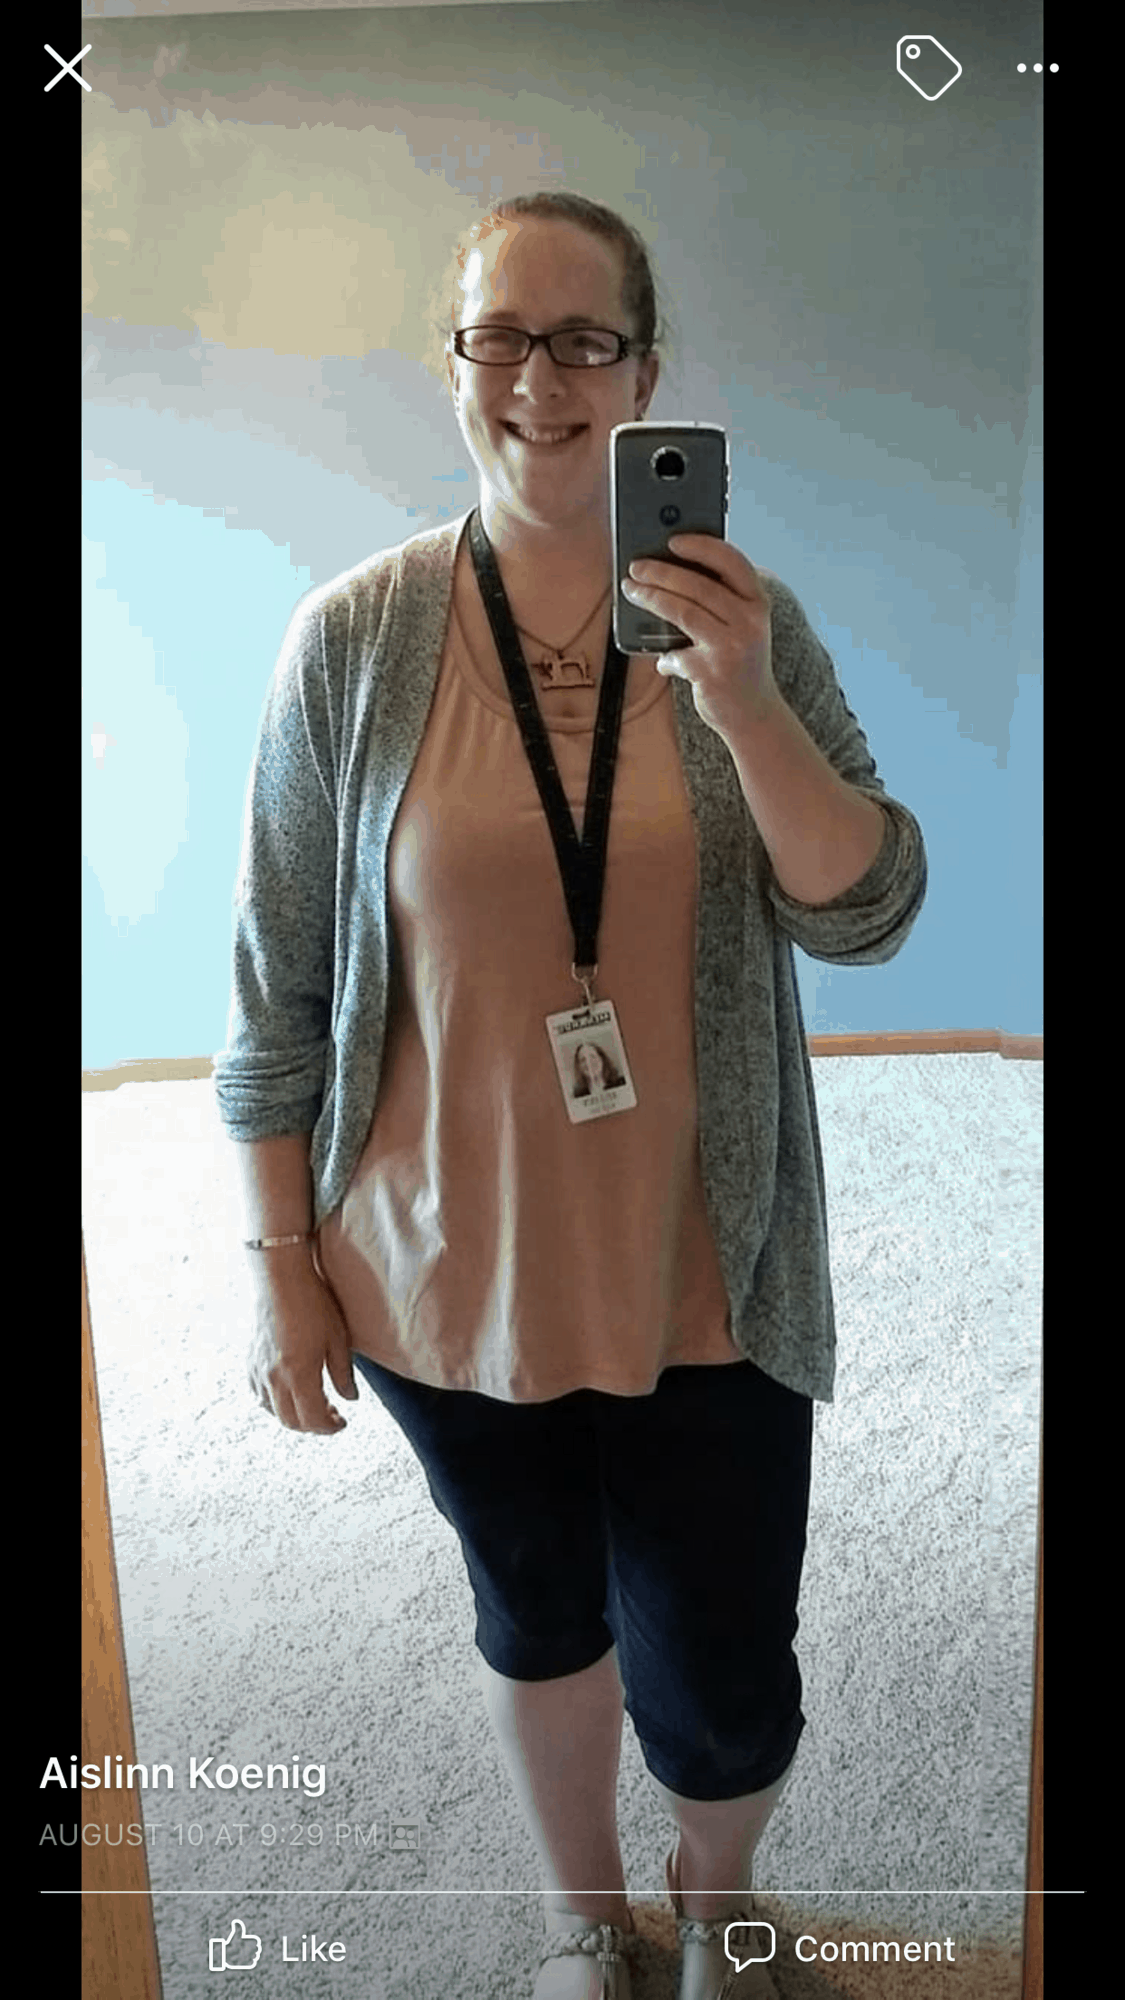
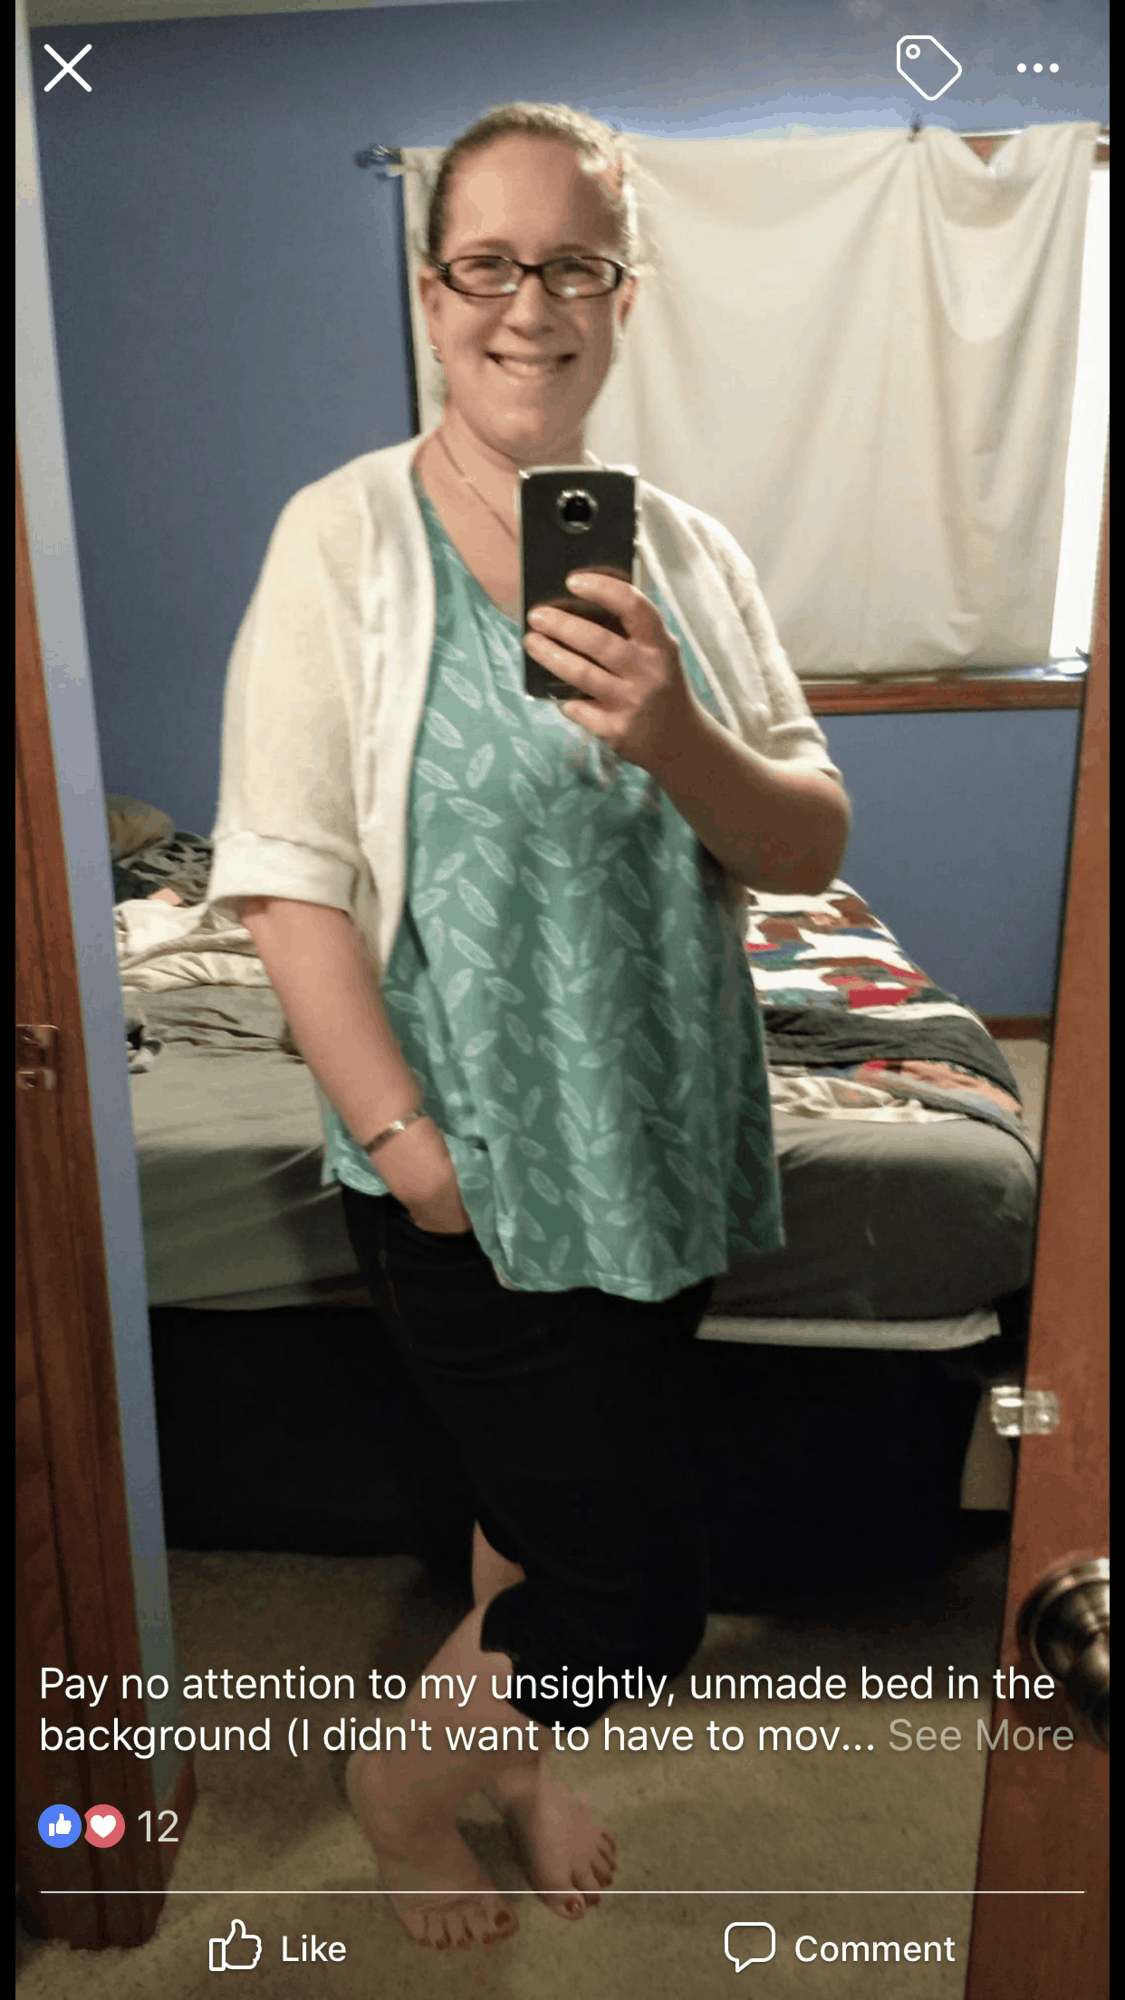
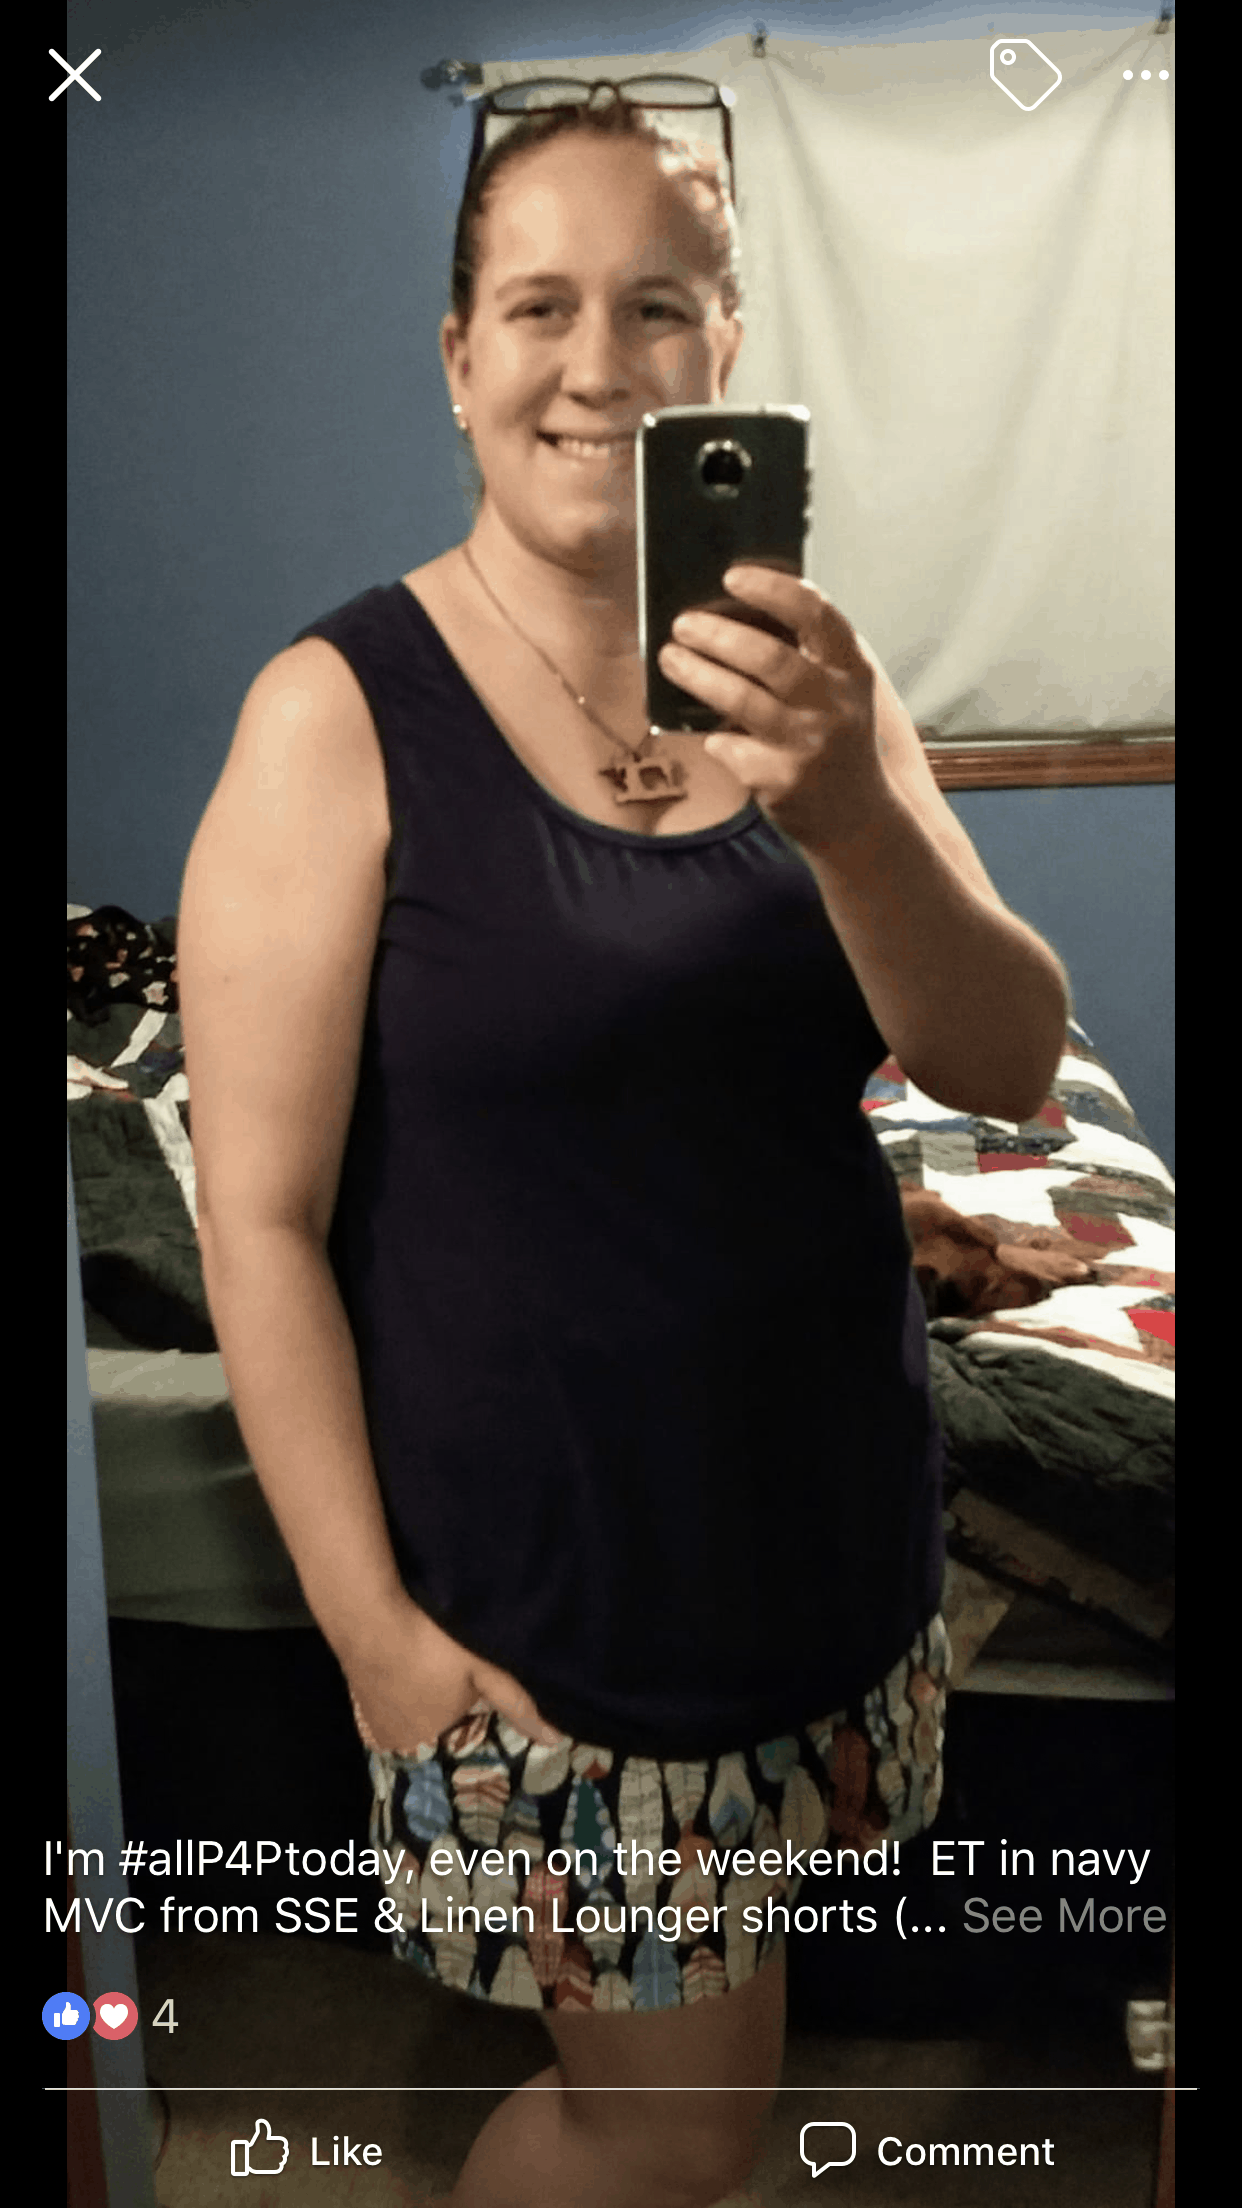
Our August winner posted so many beautiful all P4P outfits we couldn’t even get them all in the blog. A big congratulations to….Aislinn Koenig

Isn’t she amazing? Keep those #allp4ptoday posts coming, a new winner will be picked next month too.

JULY

Ahoy, Pirates! These hot summer days have me thinking of fall, am I the only one? Whether you’re sewing yourself a new swim suit, a dress or getting ready for the new school year…don’t forget to show it off in the P4P group and hash tag it #allp4ptoday so we can see you and who knows, maybe even give you a FREE pattern.

Without further ado… our July winner is:

Kristin Richardson Morrison

She looks so beautiful and comfortable in her P4P outfit. Thank you for sharing, Kristin!


JUNE

Ohh wow! That is how I started my search for the June #allP4Ptoday winner. I am absolutely mesmerized by all the beautiful pictures that I’ve seen this summer month.

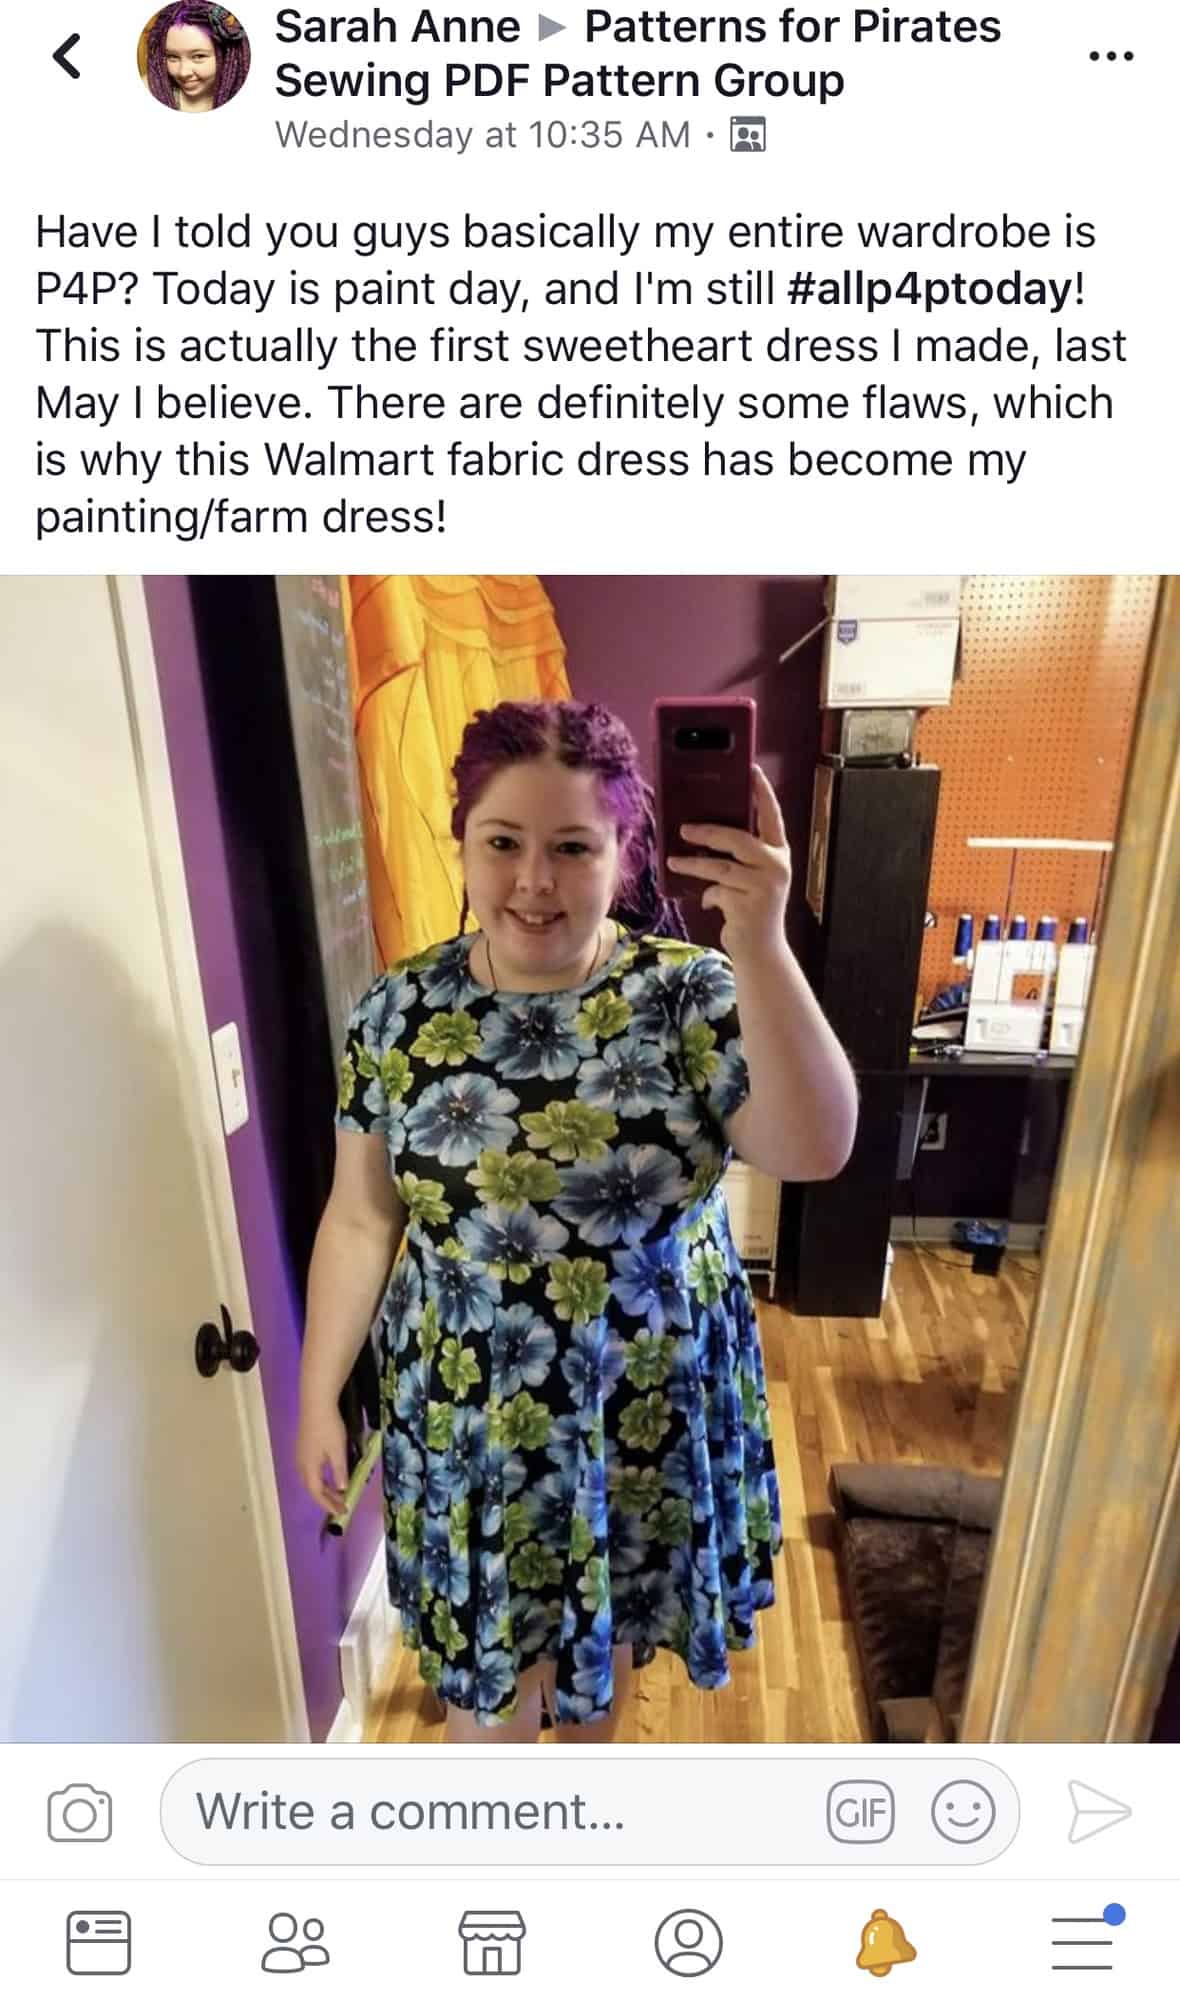
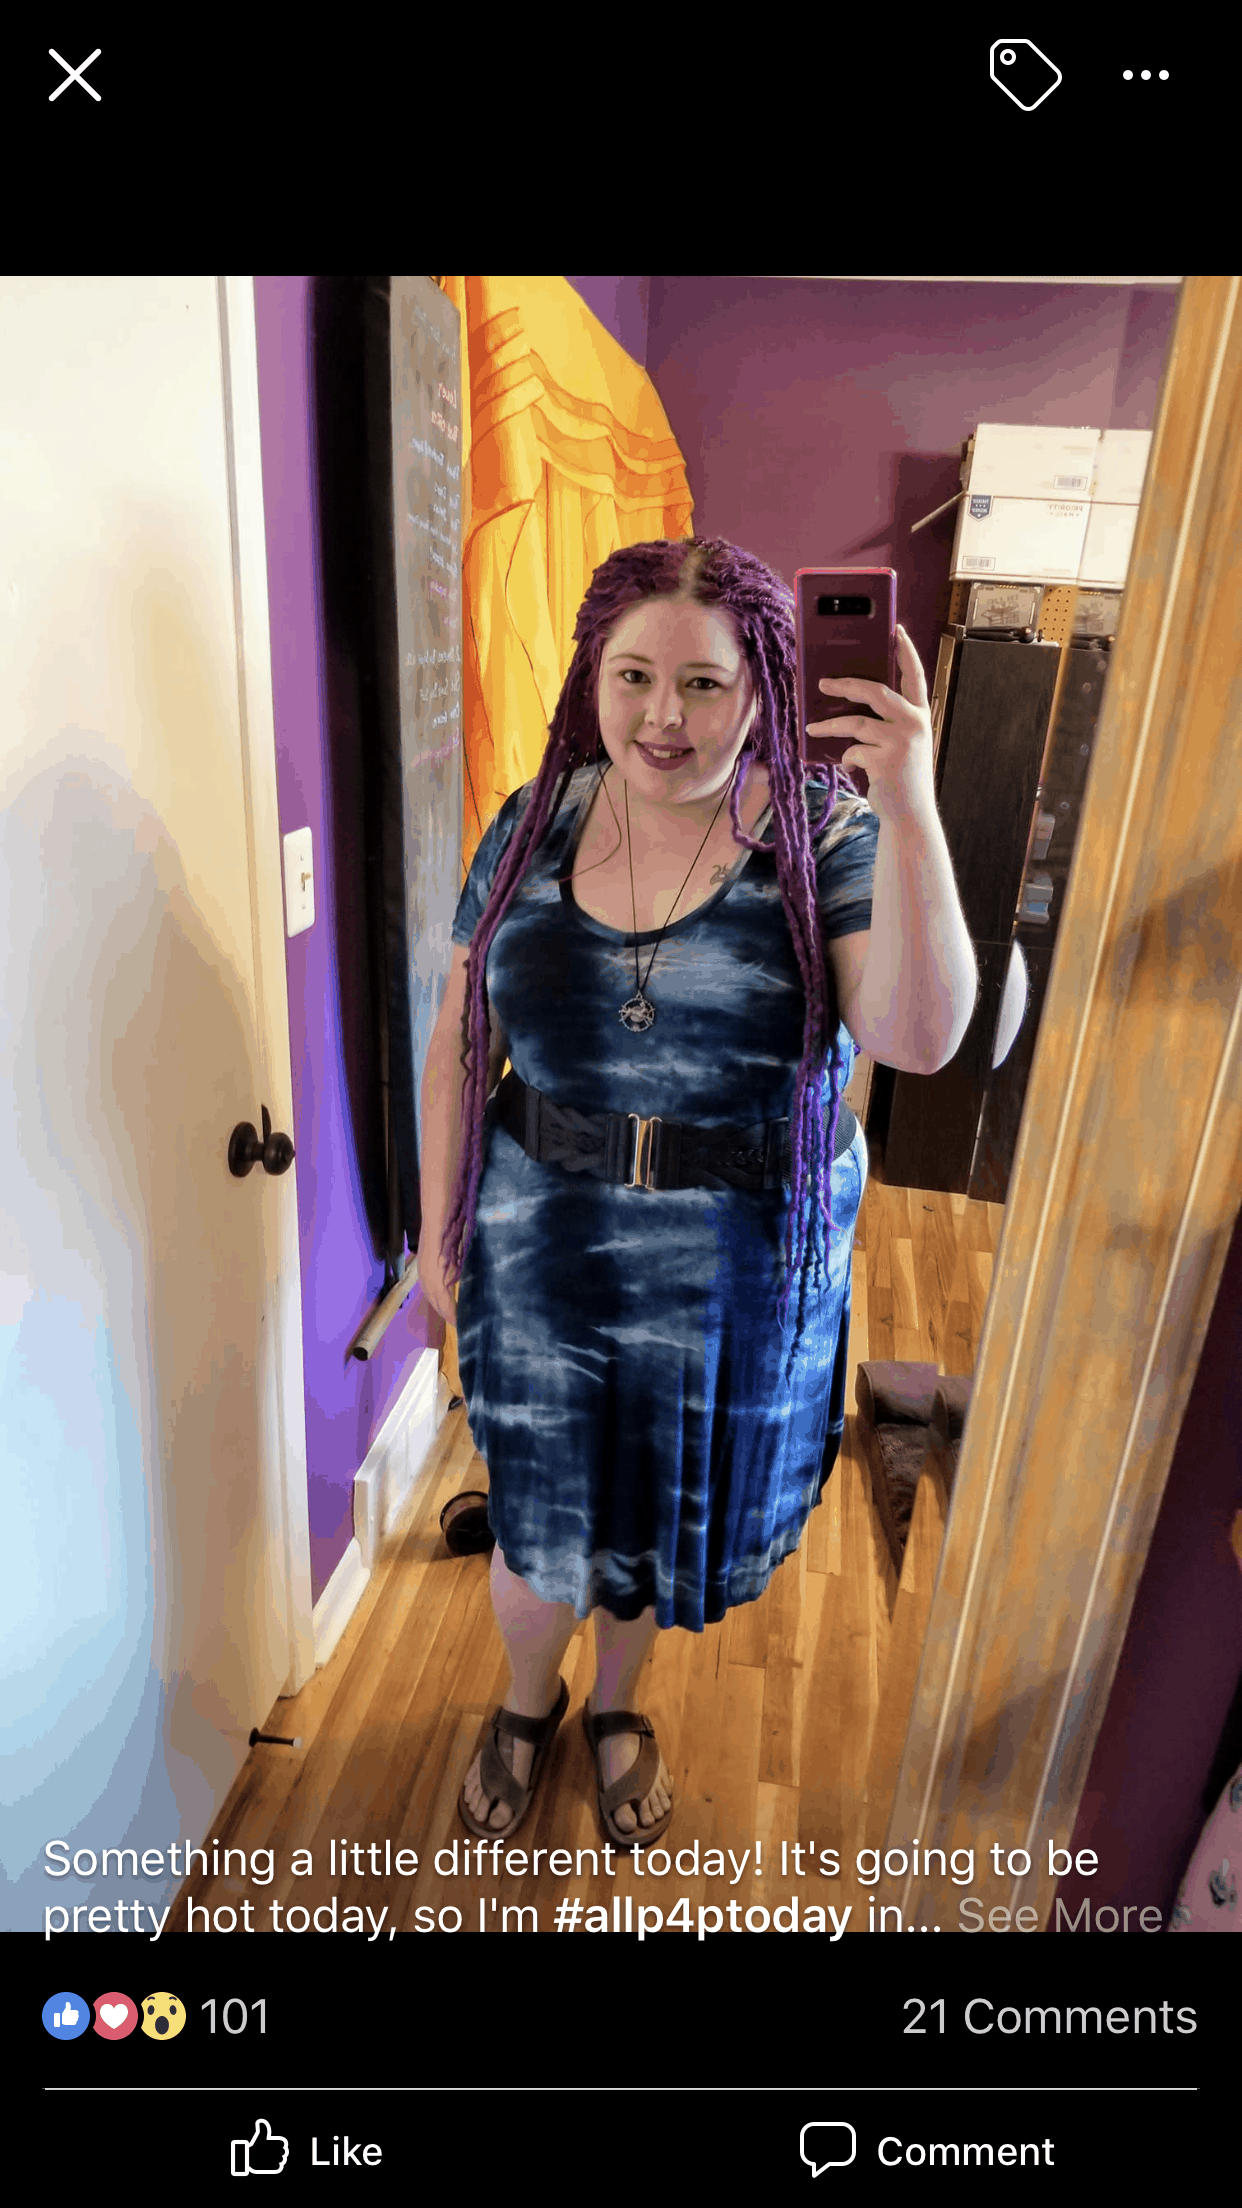
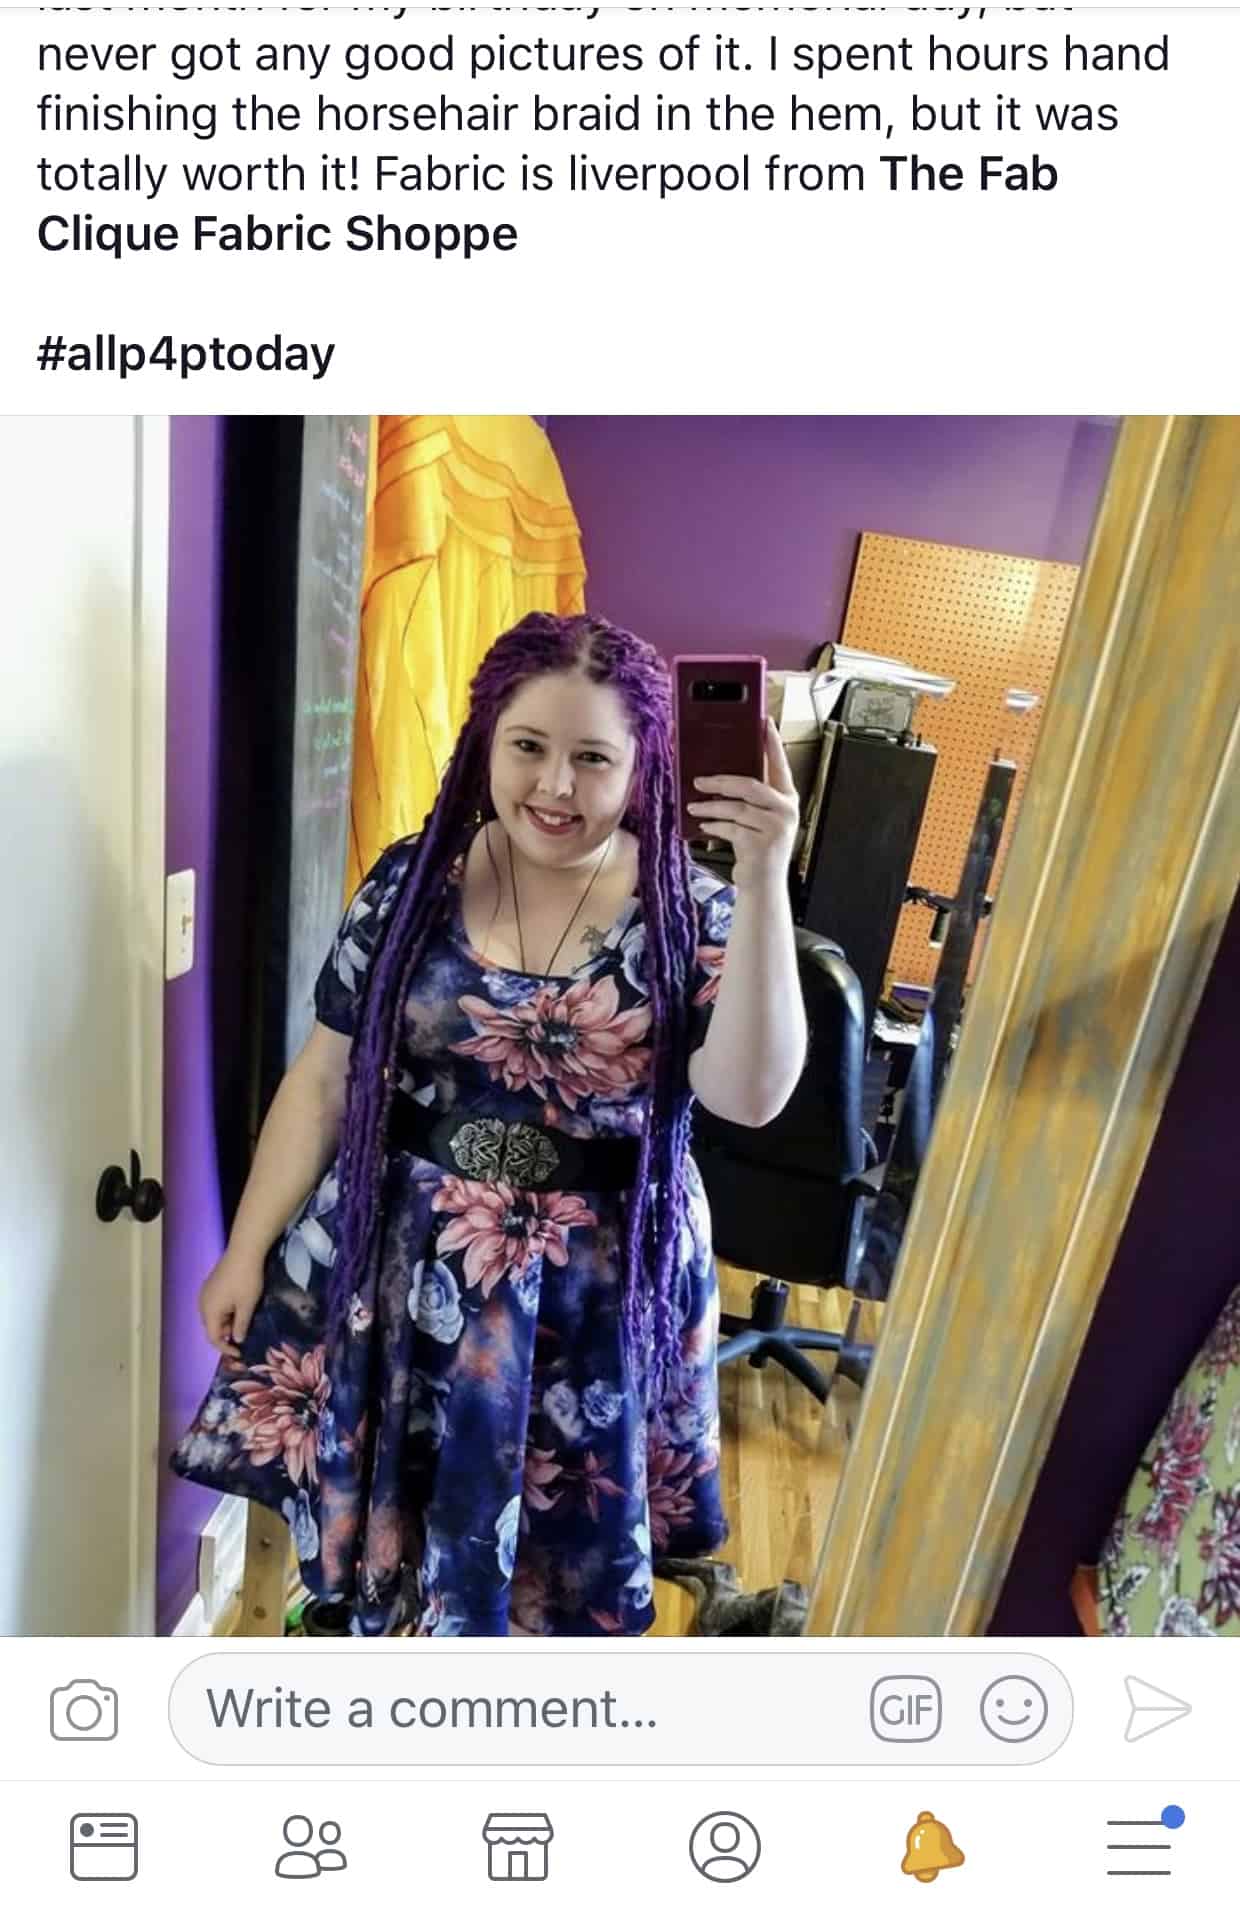
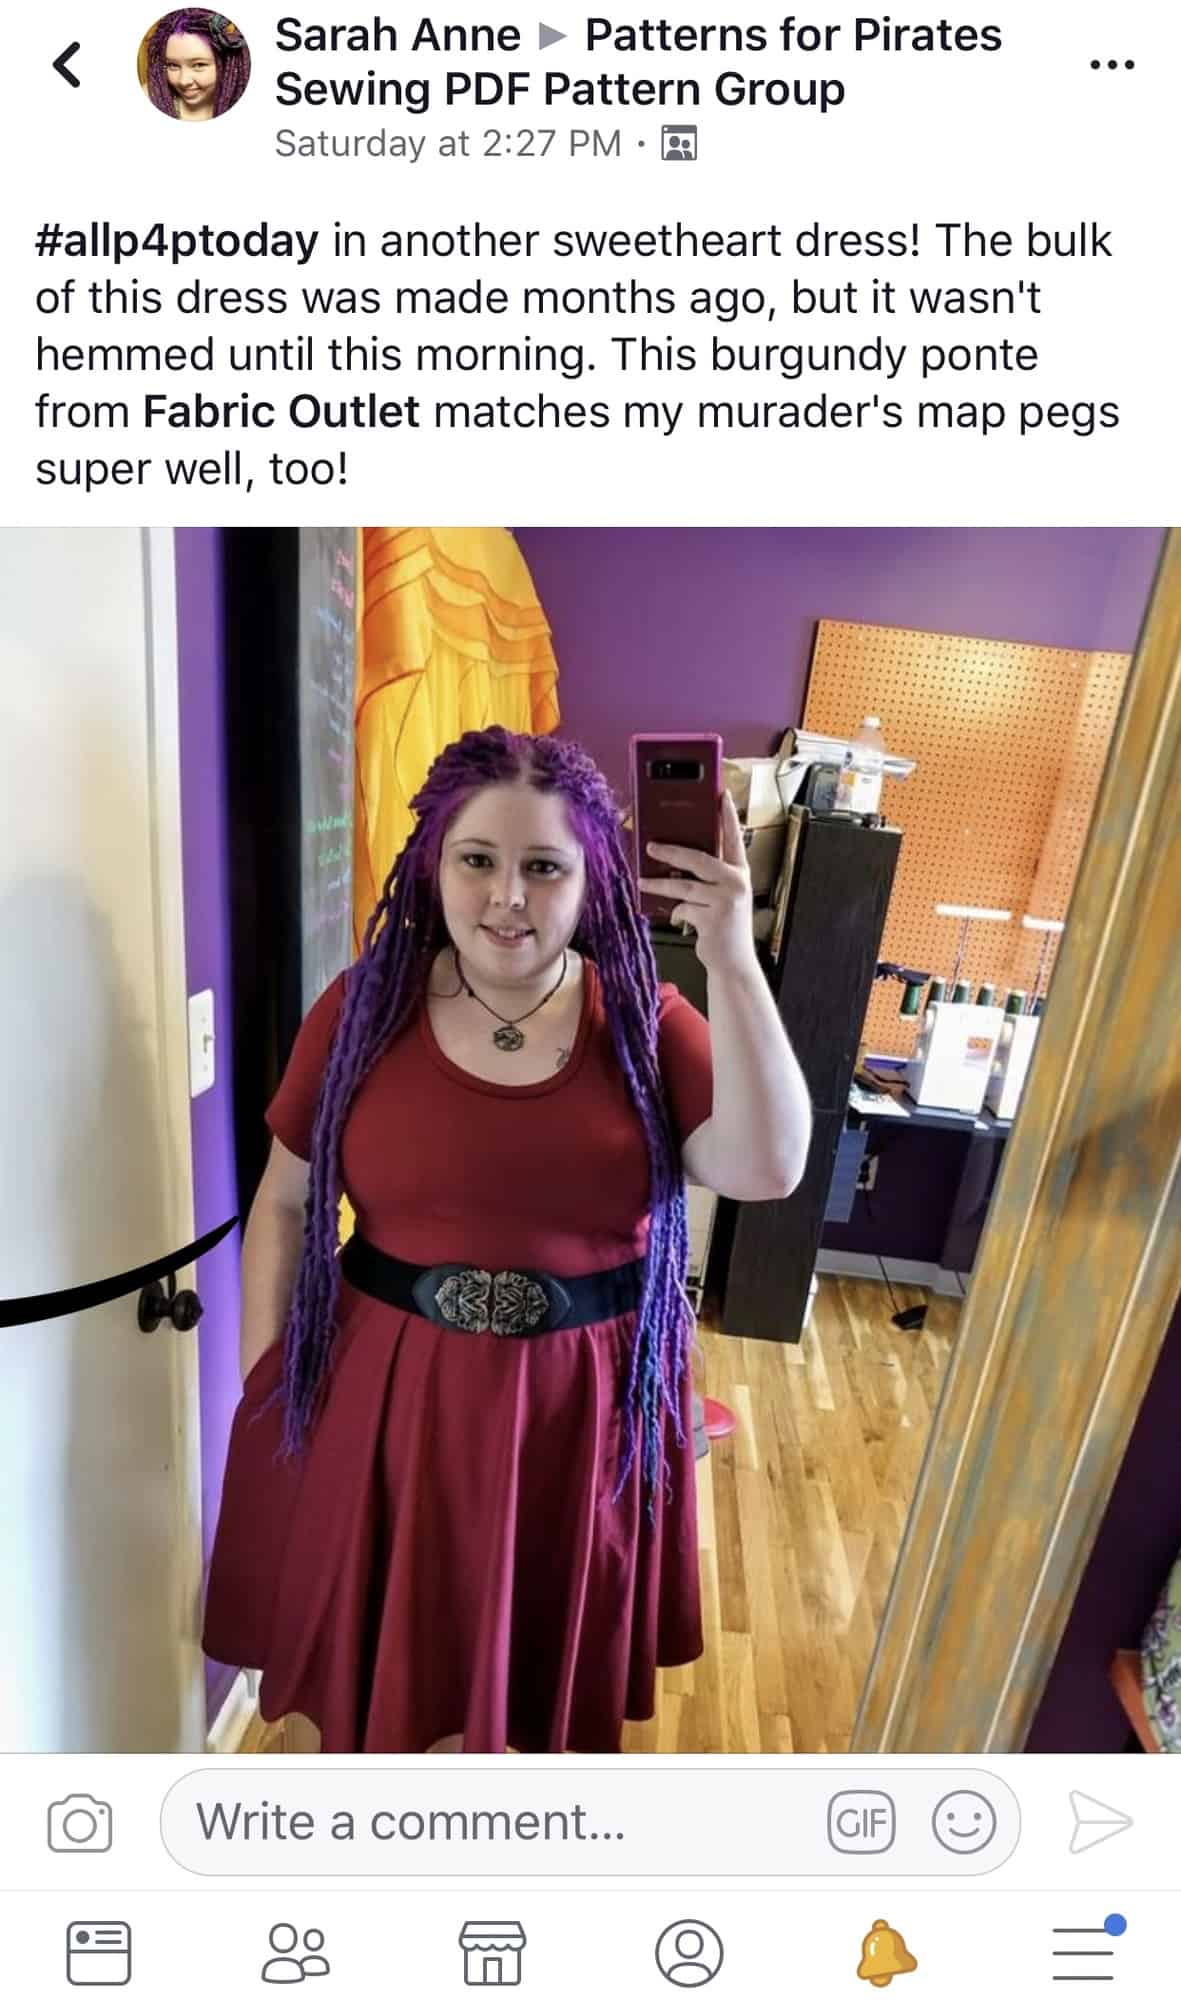
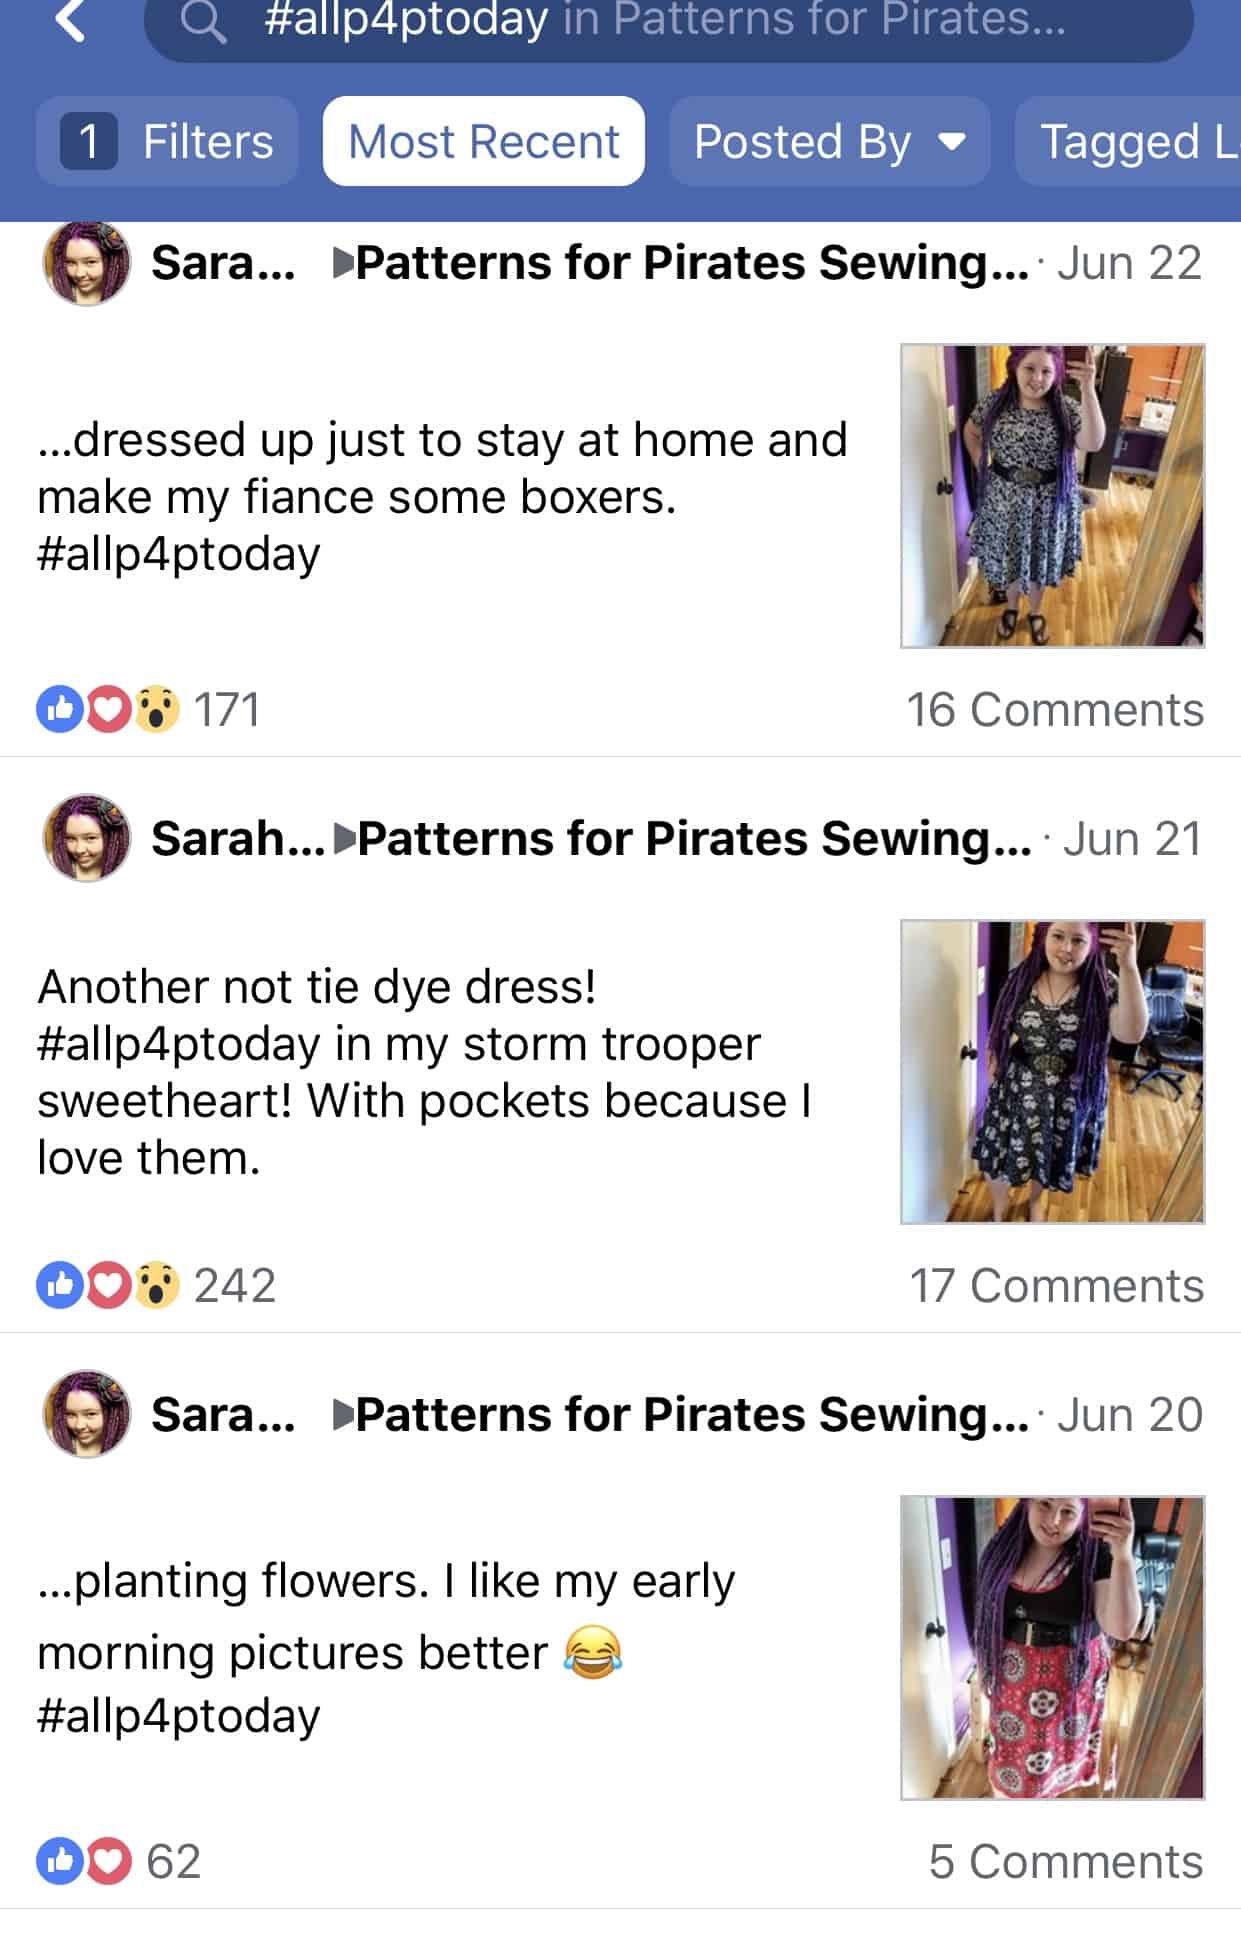
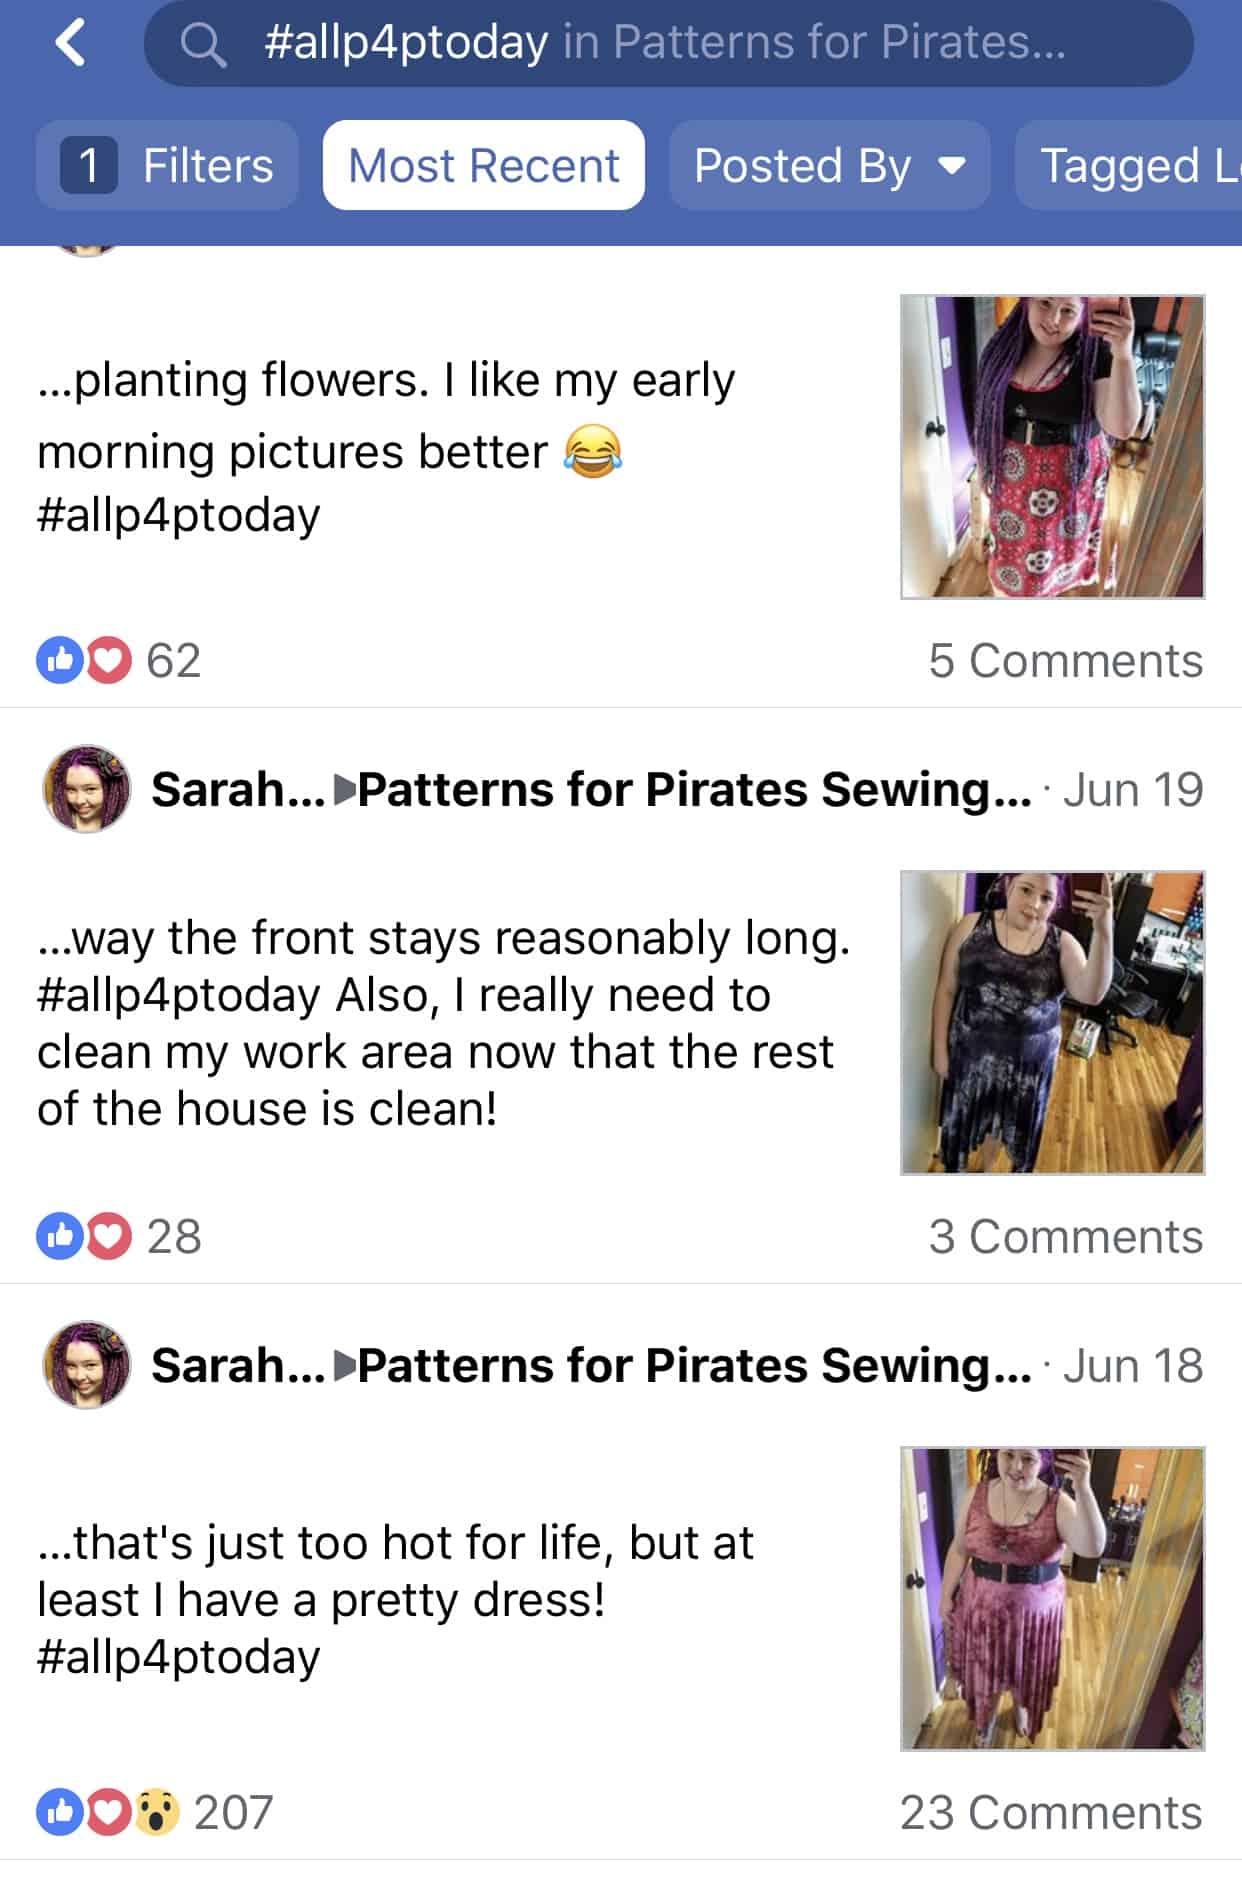
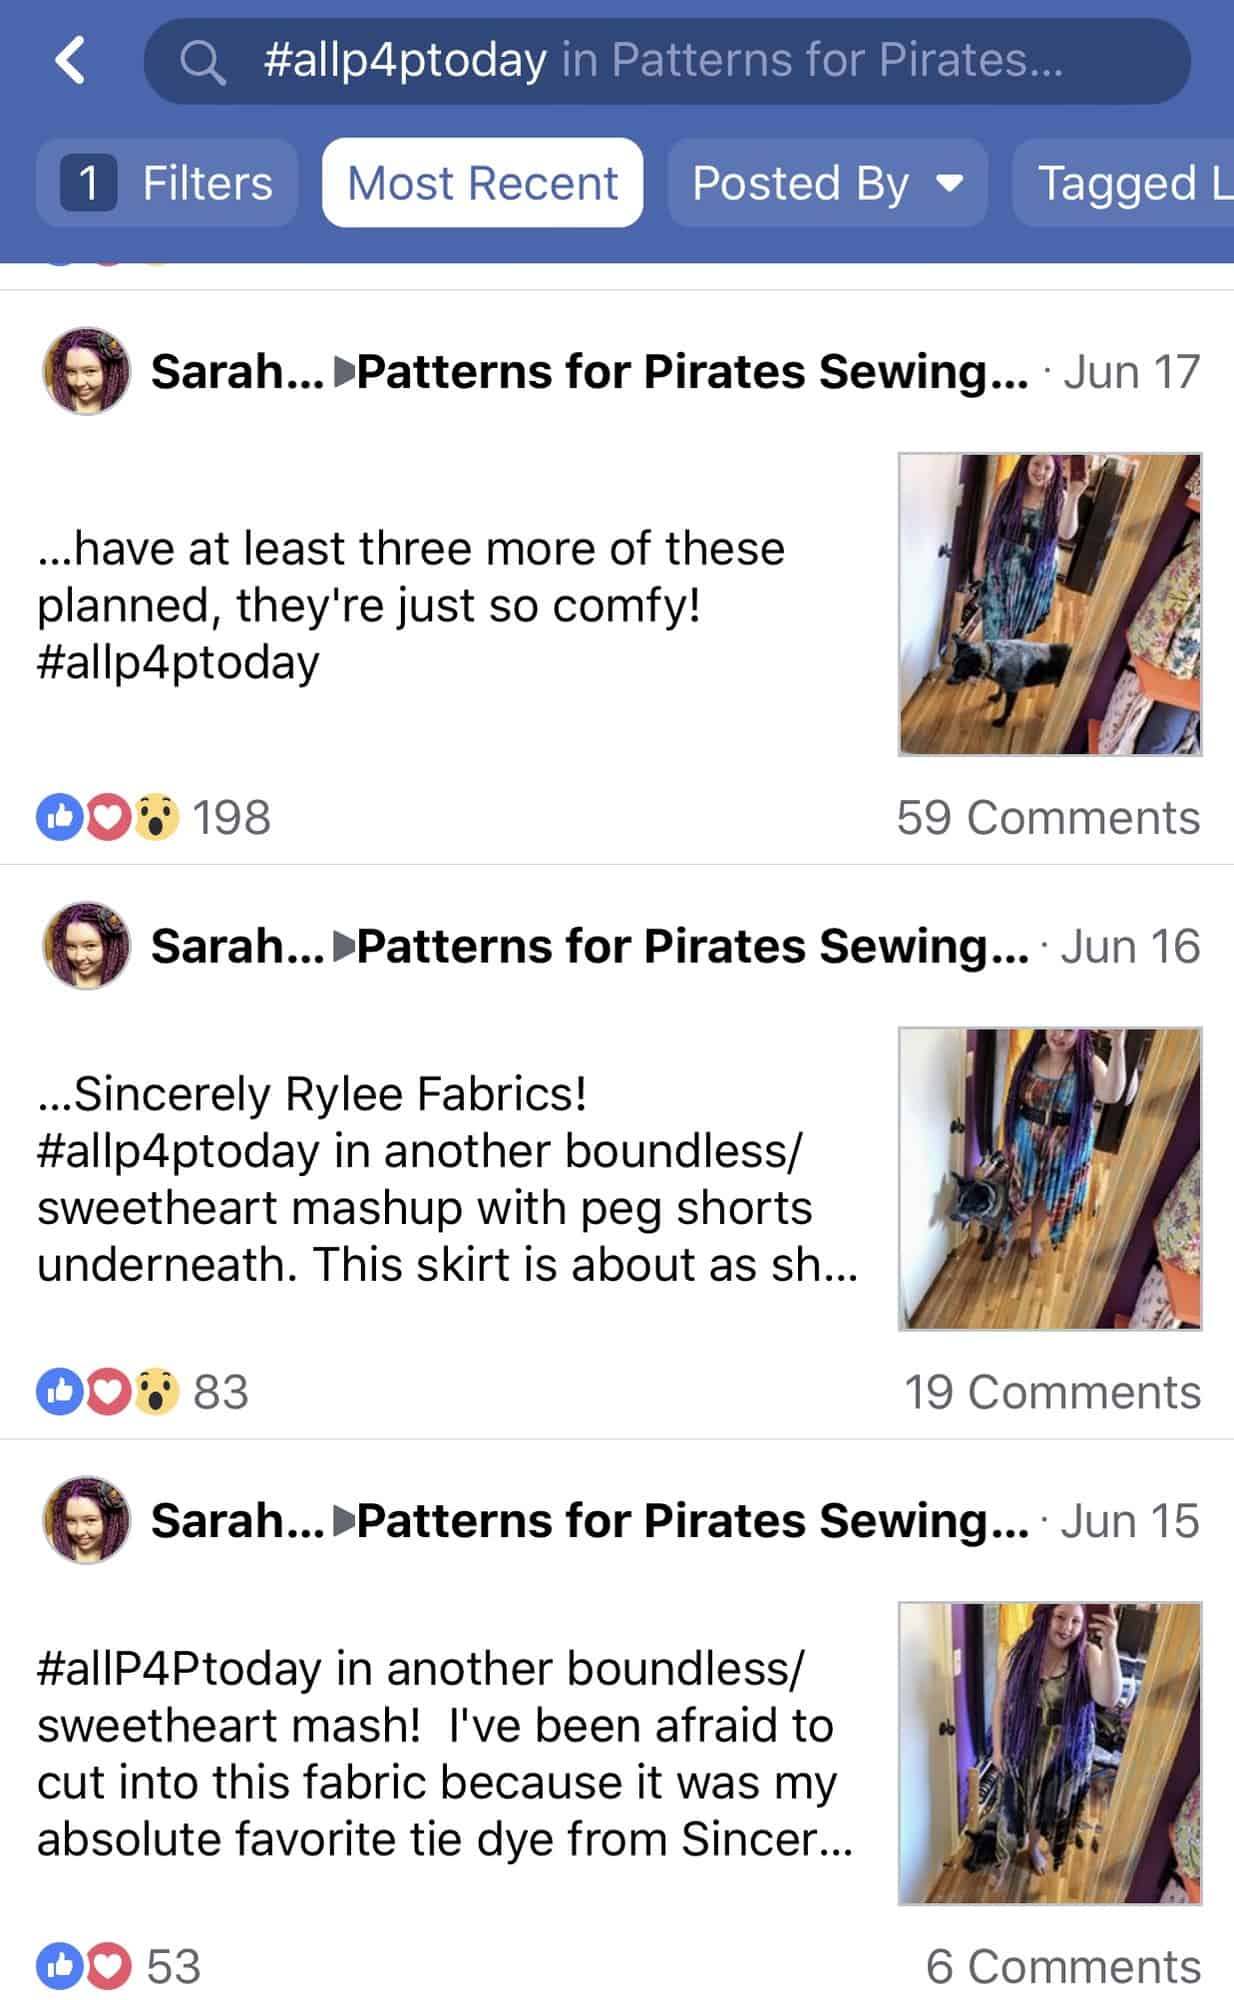
One of you stood out all month long so …. congratulations Sarah Anne!

You are our #allP4Ptoday winner for the month of June.

Sarah Anne has worn P4P almost daily! Doesn’t she look stunning in her me-made outfits? You have made us proud!

Keep on posting those #allP4P outfits!

MAY

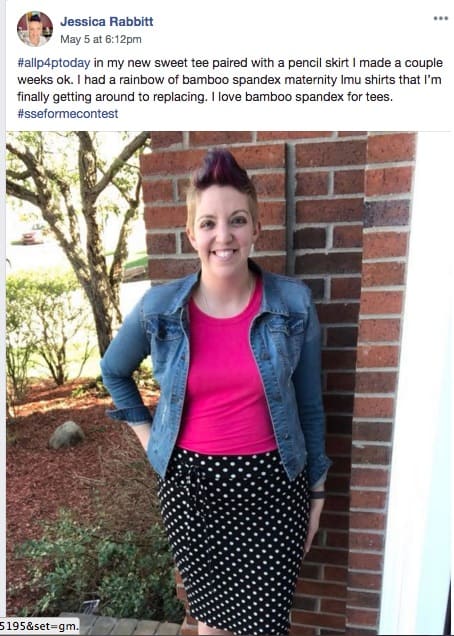
Wow! You were all amazing during the big Me Made May month. I am so glad you did not forget to hashtag your all P4P creations. Our May winner is:

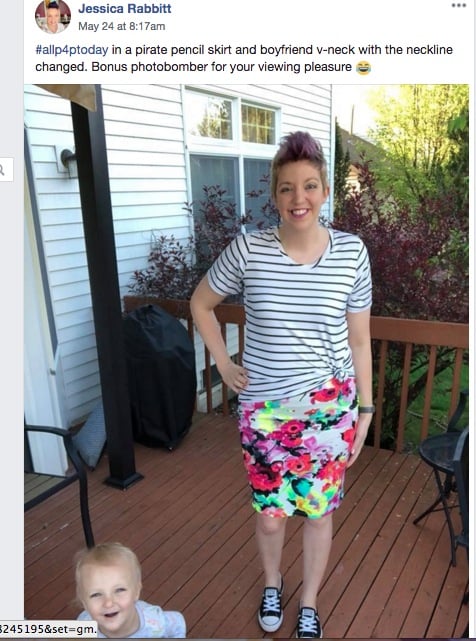
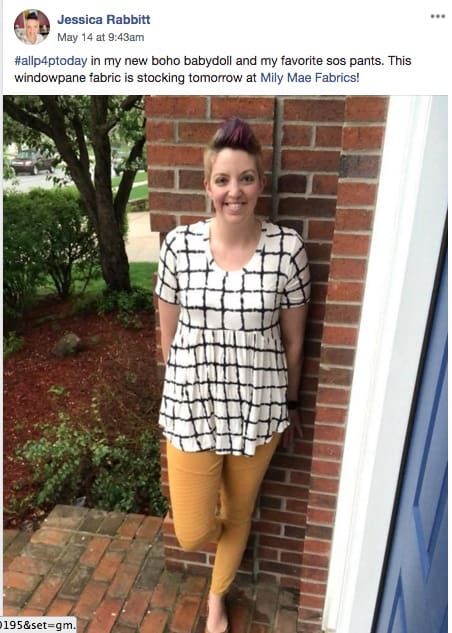
Jessica Rabbitt

Jessica is a veteran all P4P today poster, we see her every month and, between you and me, we get a tad jealous of her amazing shoe collection 😉 We love seeing all the bright patterns and colors that make her shine!

I can’t wait to see what you will be sewing in the month of June.

APRIL

April showers bring May flowers they say..well in the P4P group April brought a lot of cute, fun all P4P outfits.

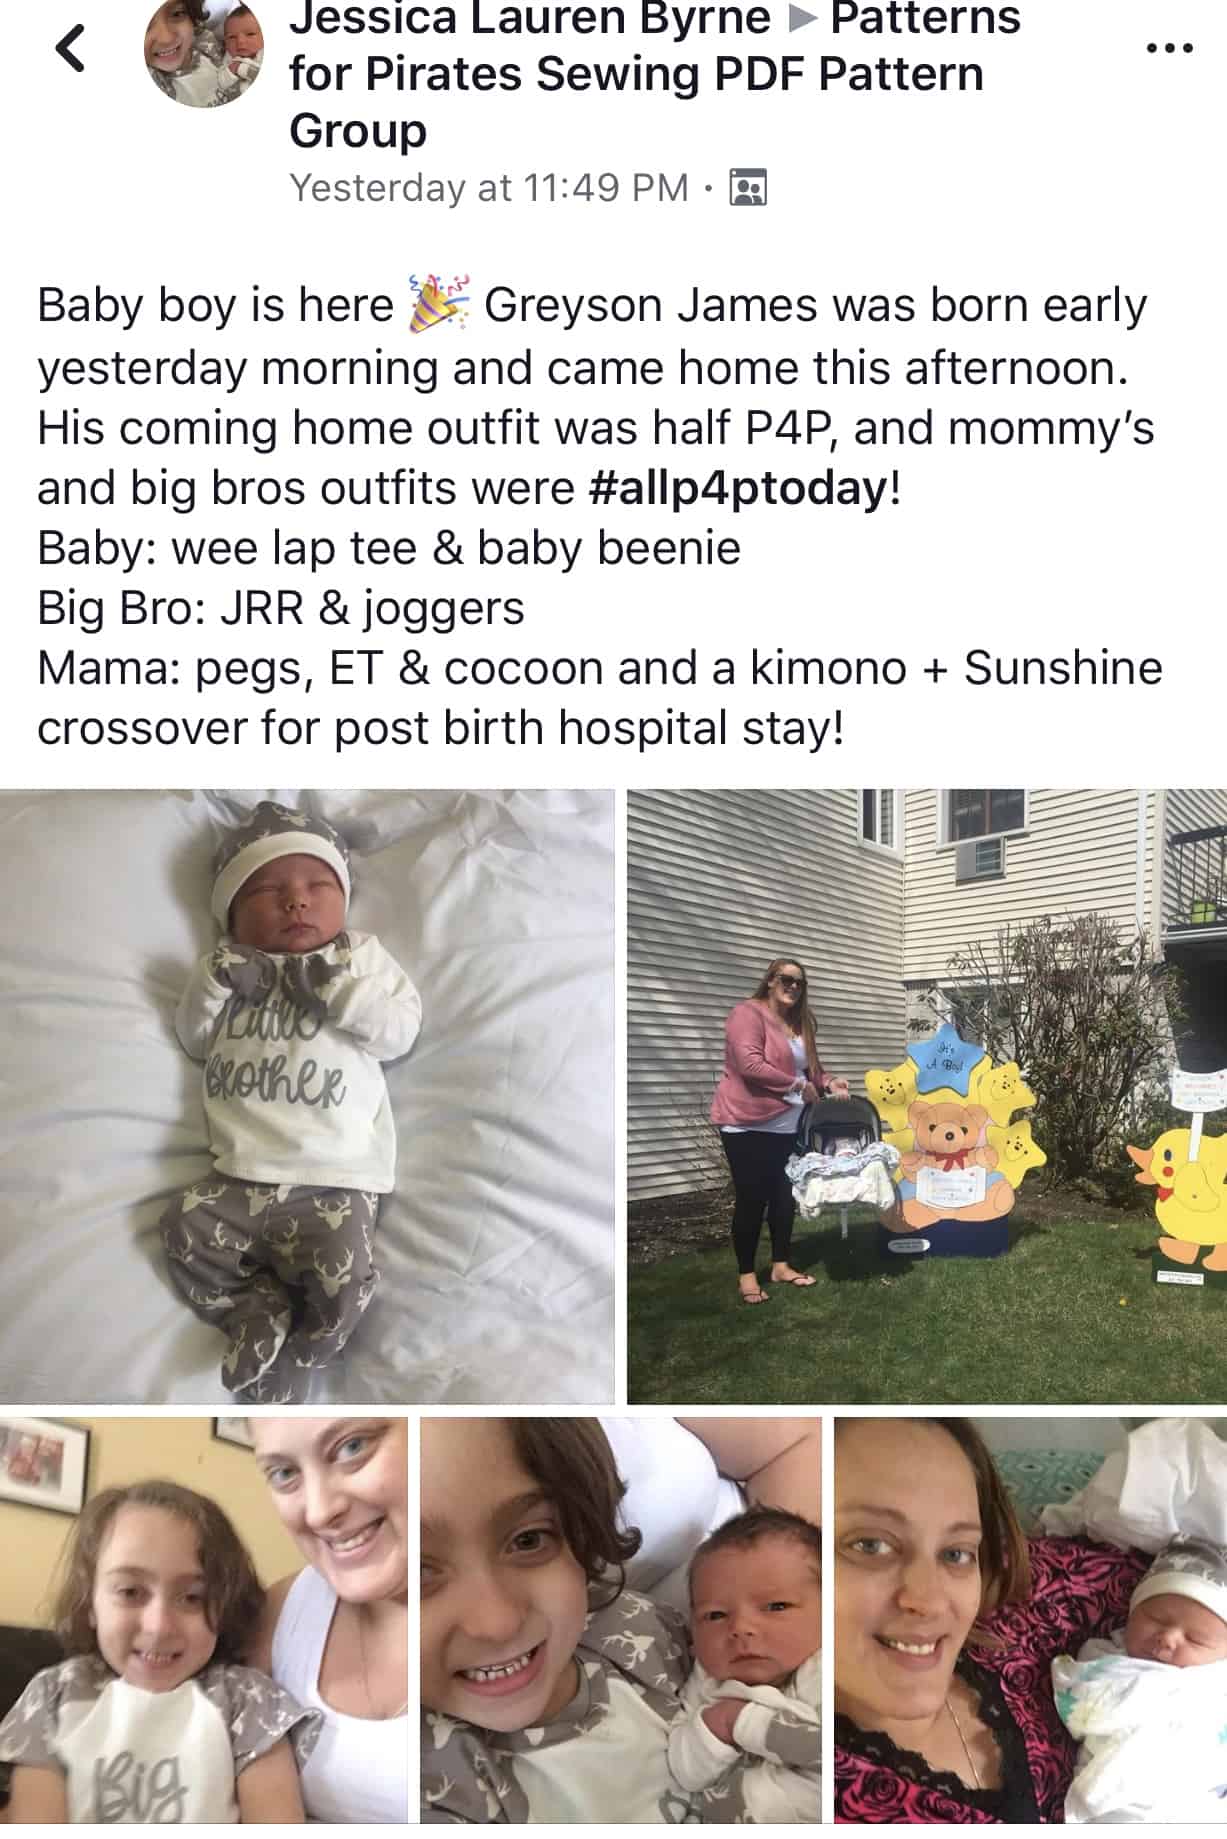
So without further ado, join me in congratulating Jessica Lauren Byrne not only for winning the April #allP4Ptoday contest but for that new bundle of joy she just welcomed!


What a stunning P4P family! Great job!

I can’t wait to see your May Me Made creations!


 MARCH

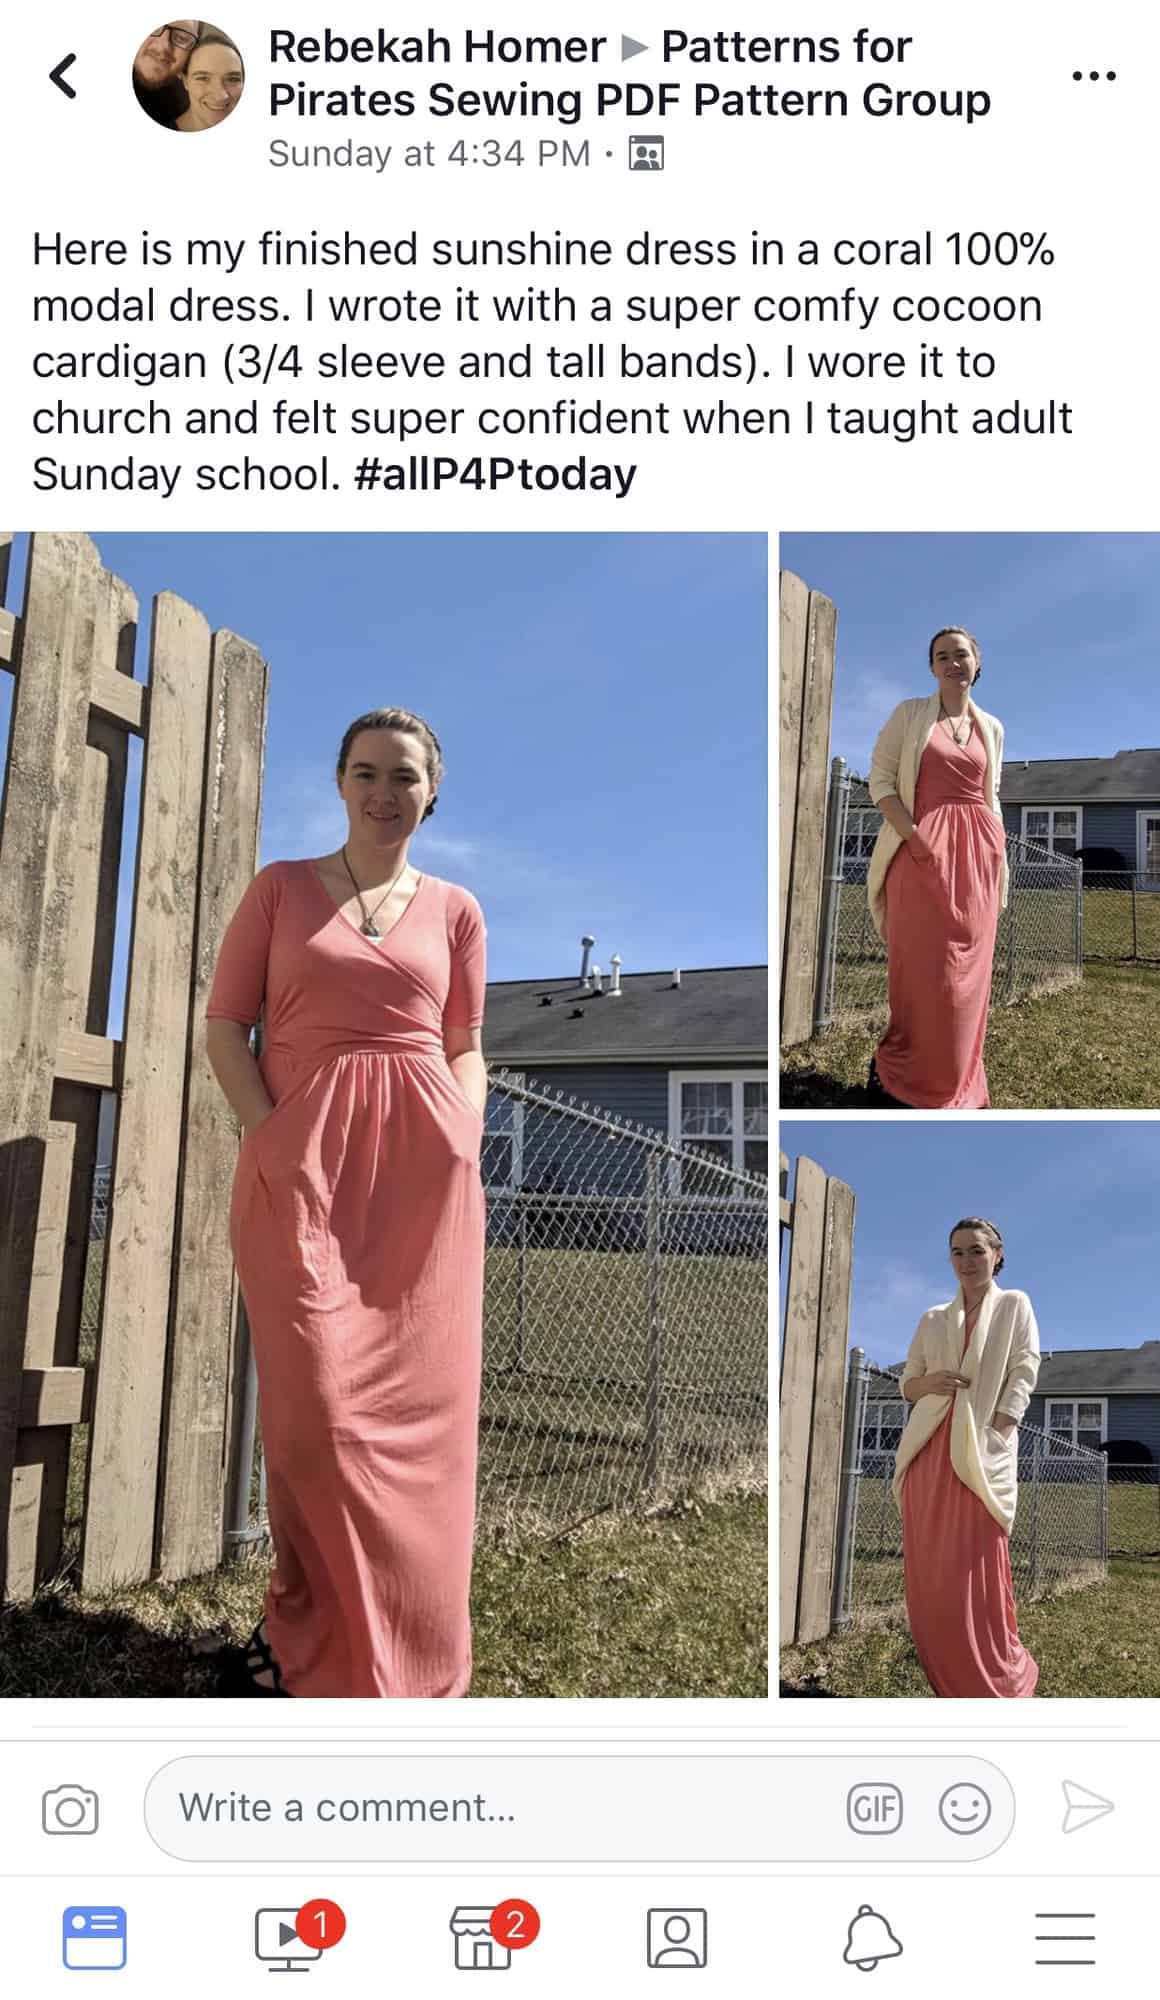
Spring is in the air! Time for dresses and cardis, am I right? And speaking of dresses and cardigans…look how gorgeous is our March #allP4Ptoday winner!

Congratulations Rebekah Homer! That Sunshine Dress and Cocoon Cardigan look amazing on you!

We can’t wait to see what #allP4Ptoday outfits you will be showing off in April!

 FEBRUARY


And just like that, the shortest month of the year is behind us. We couldn’t end the month of love without announcing our #allP4Pwinner.

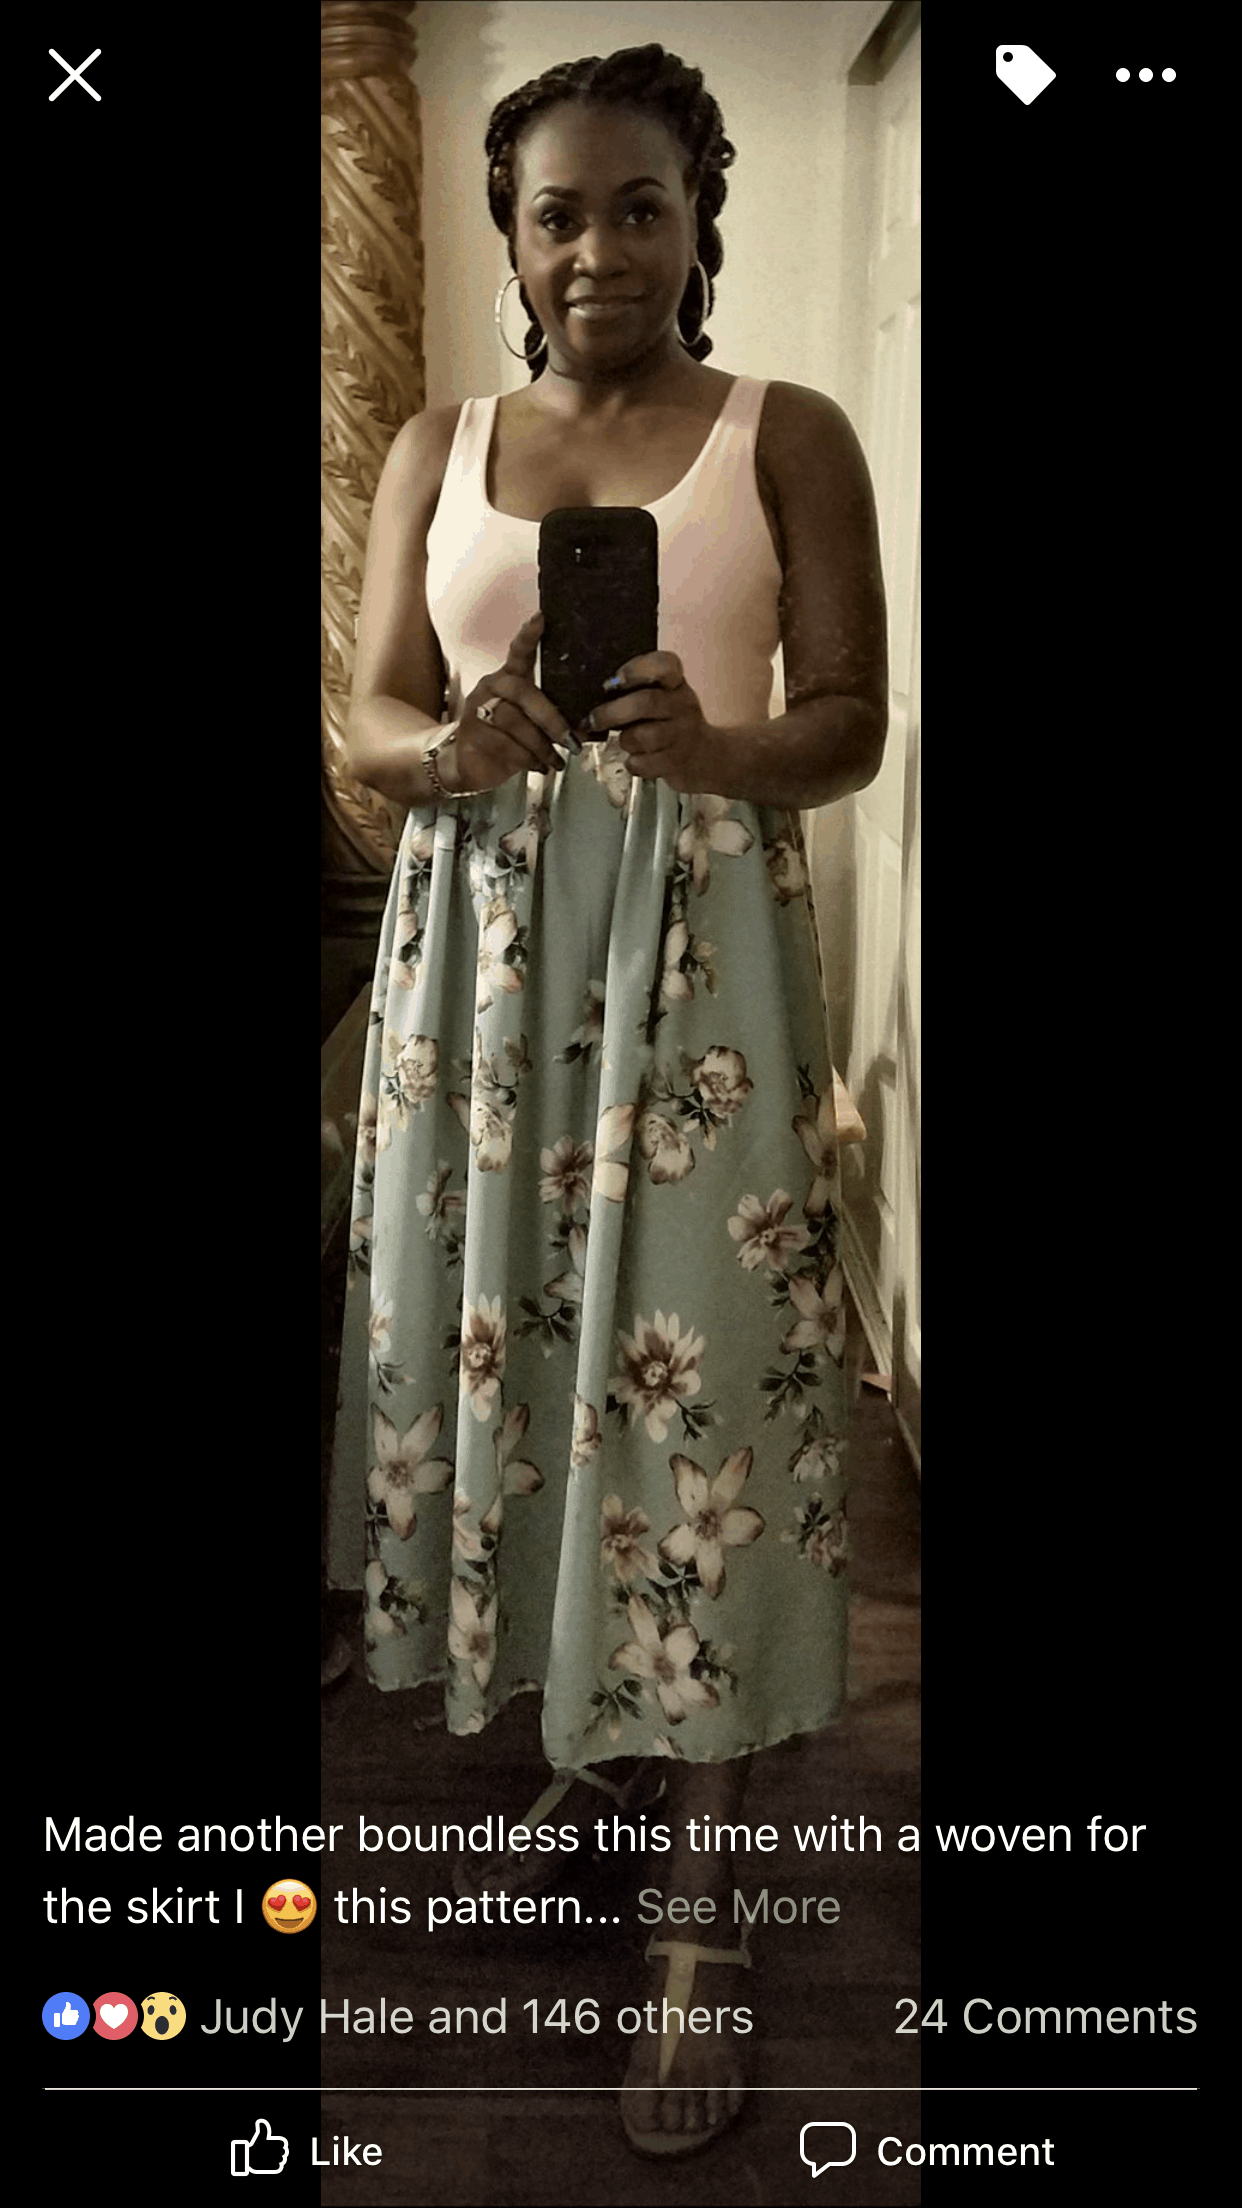
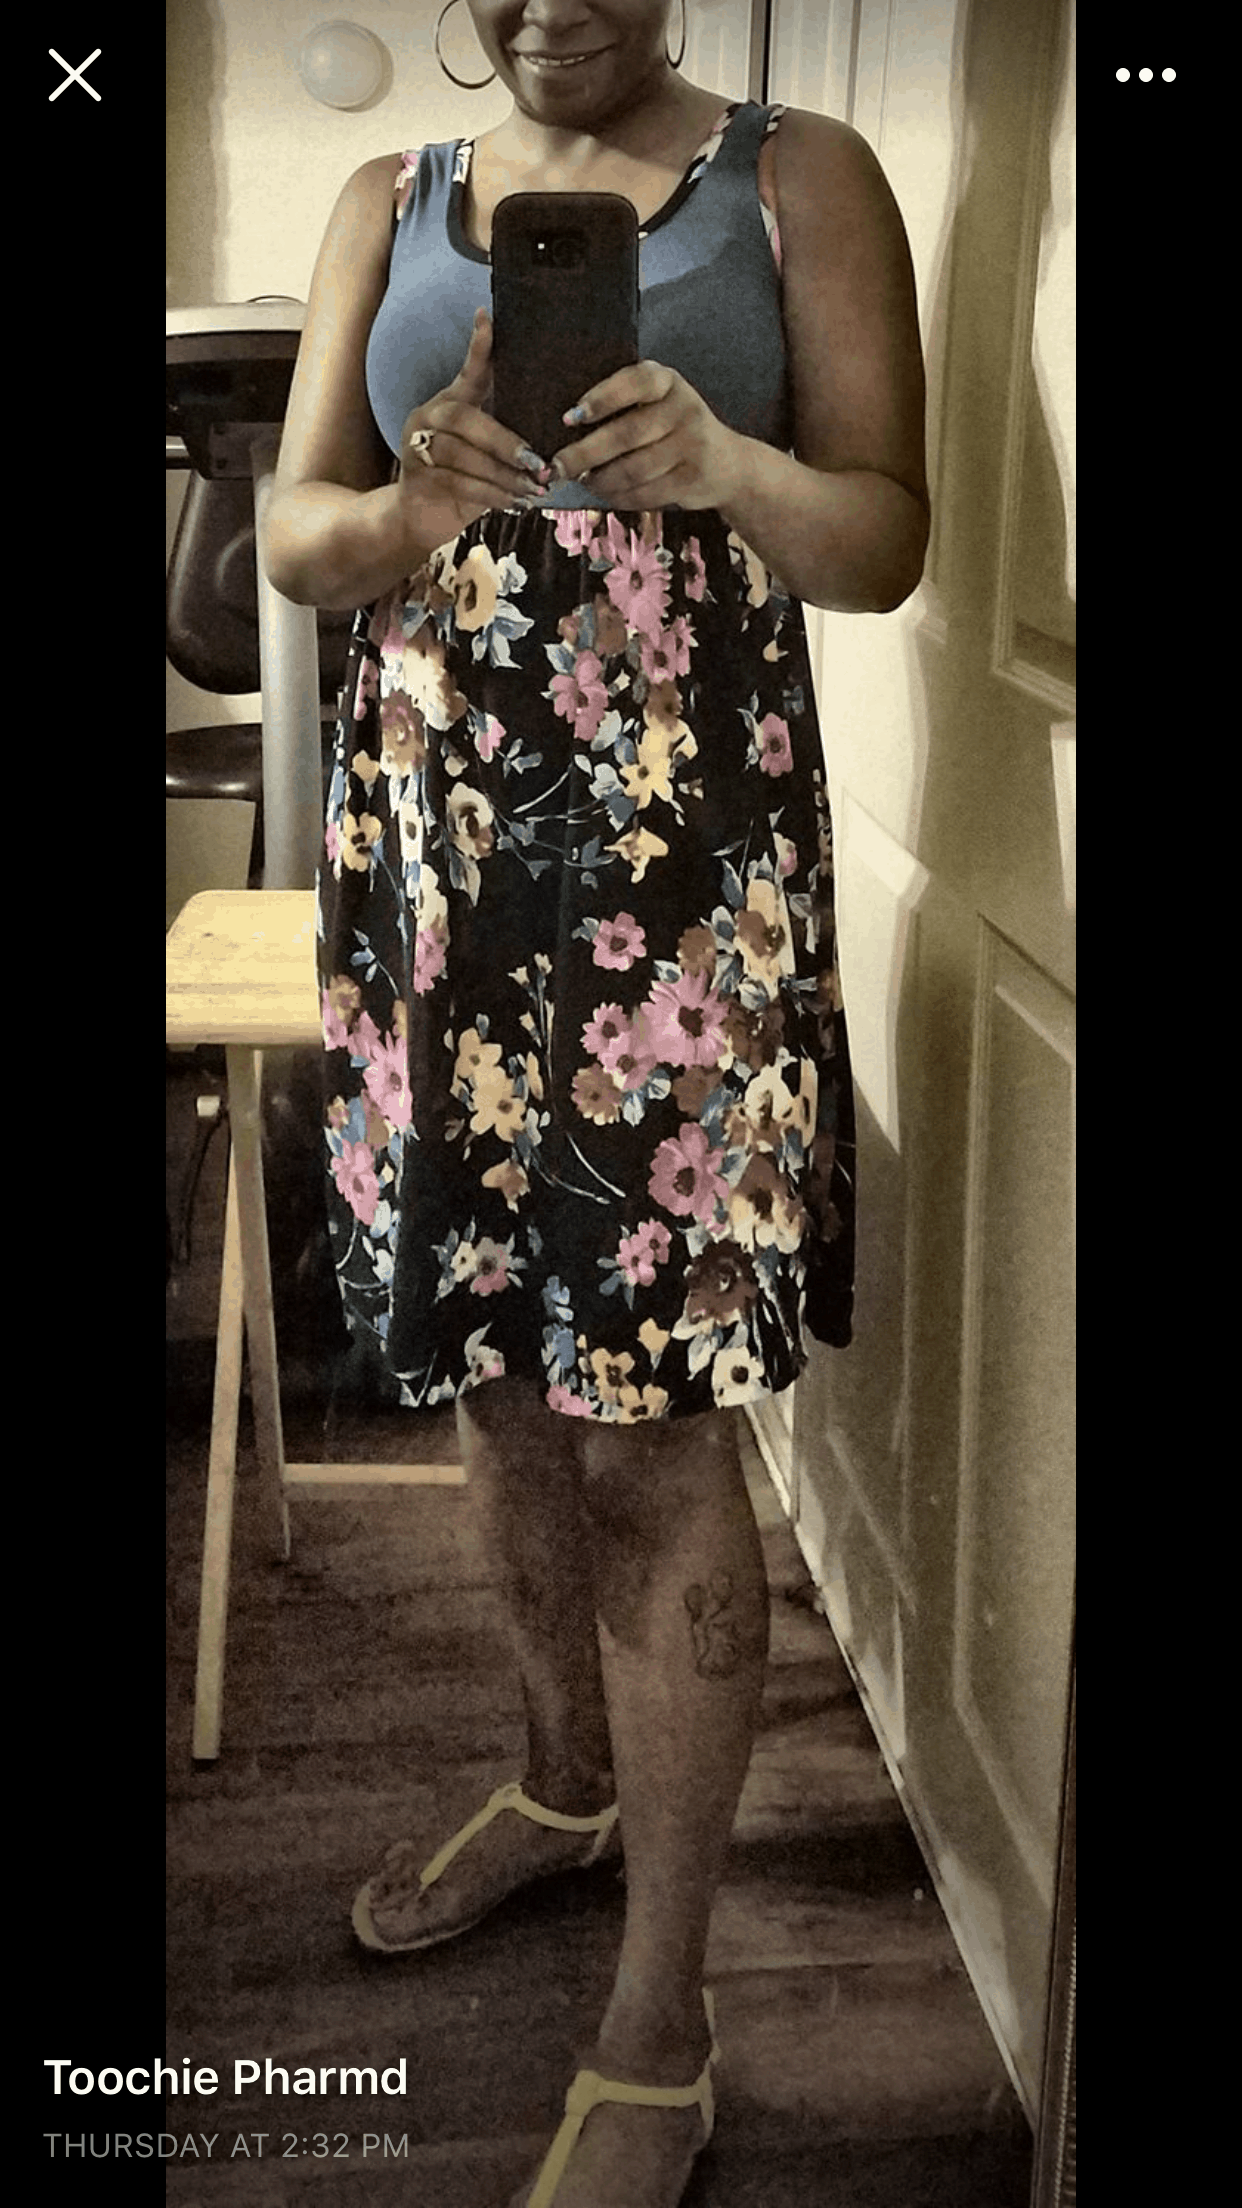
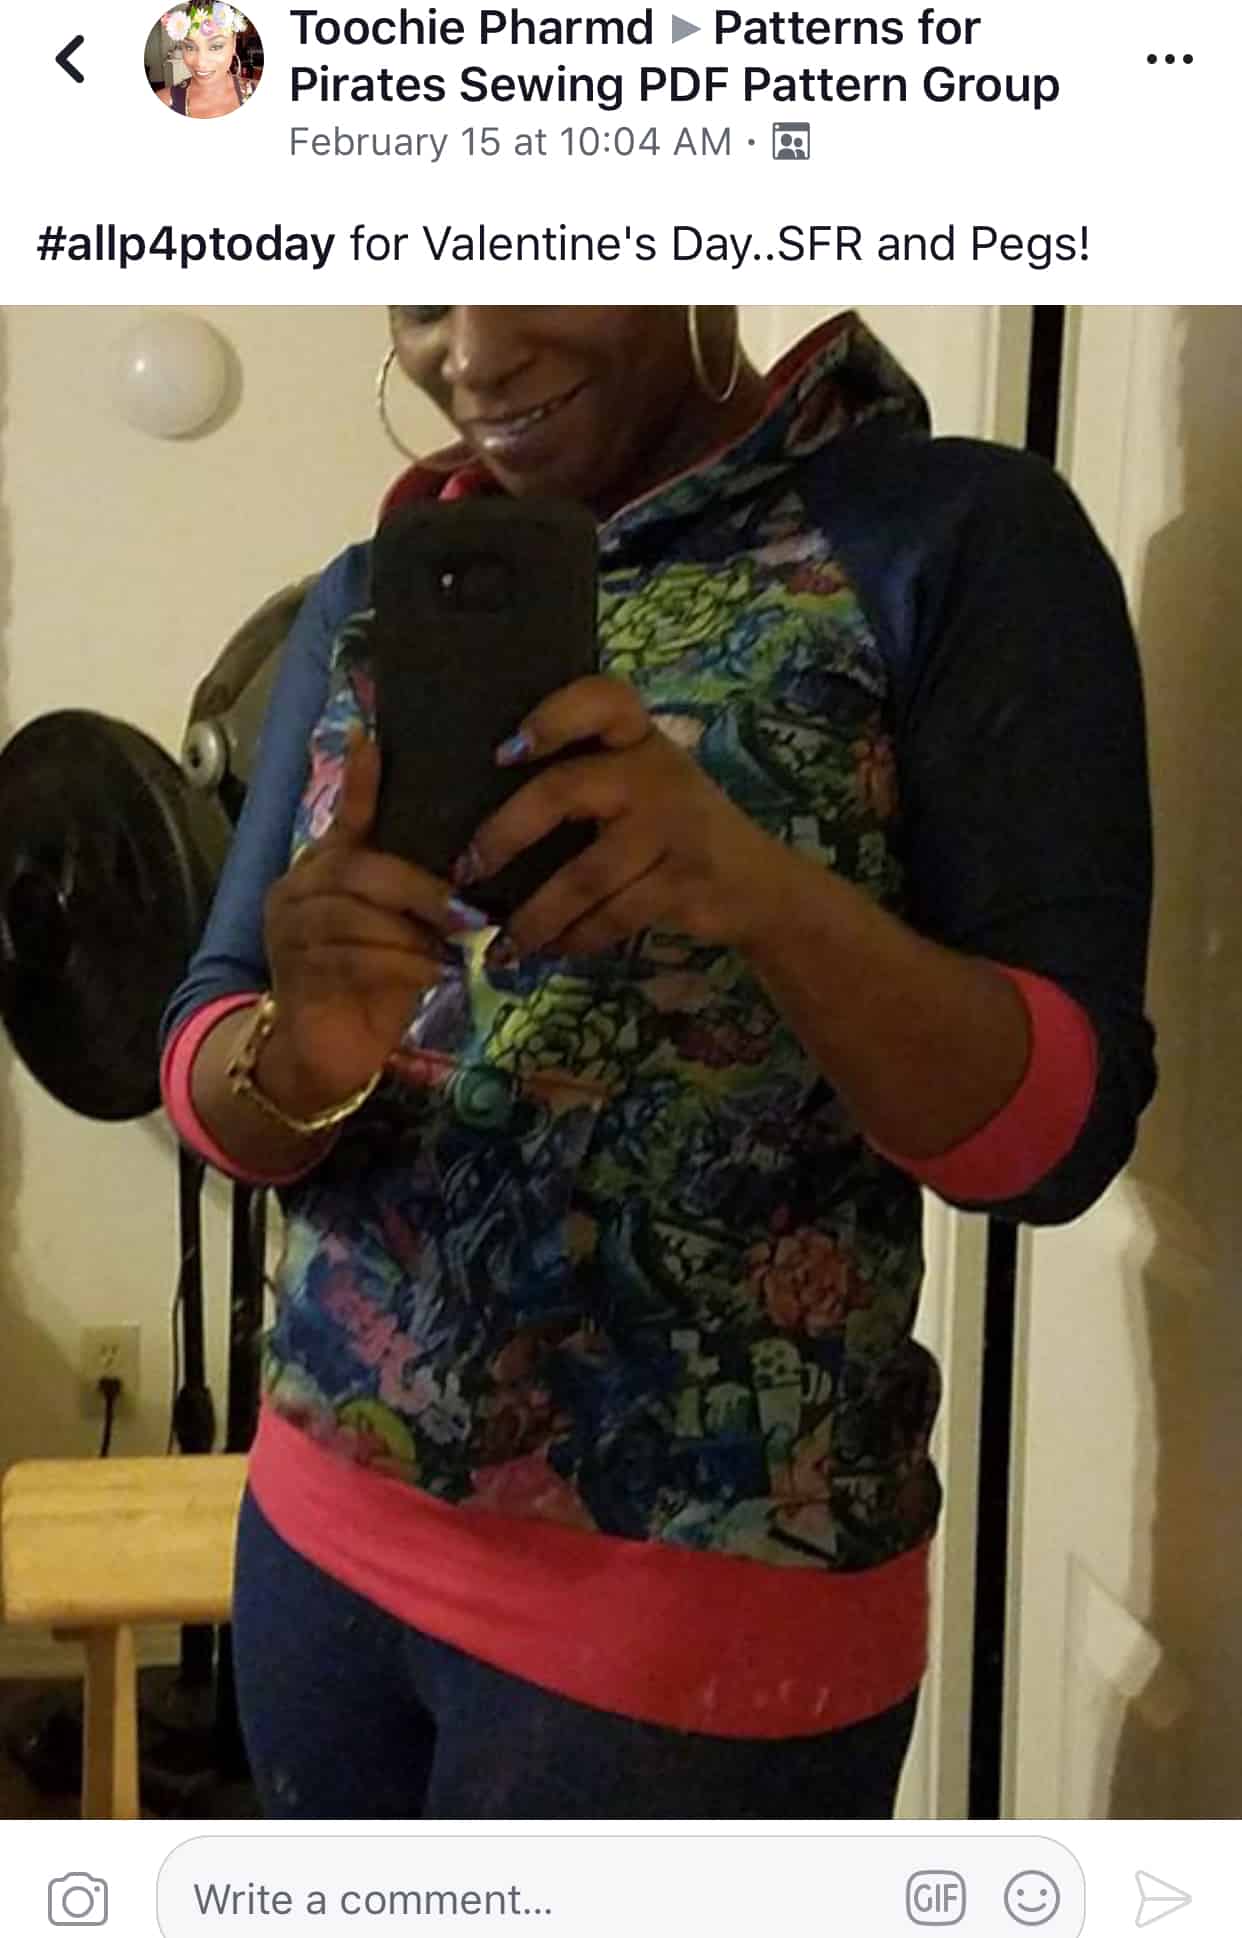
Congratulations Toochie Pharmd!!

Doesn’t she look absolutely stunning in her Boundless dresses? We just loved seeing Toochie rocking all P4P this month.


We can’t wait see your spring #allP4Ptoday in March!


JANUARY

You all rocked January in P4P outfits. As always, we loved seeing all your creations!

Without further ado…the first winner of 2018 is:

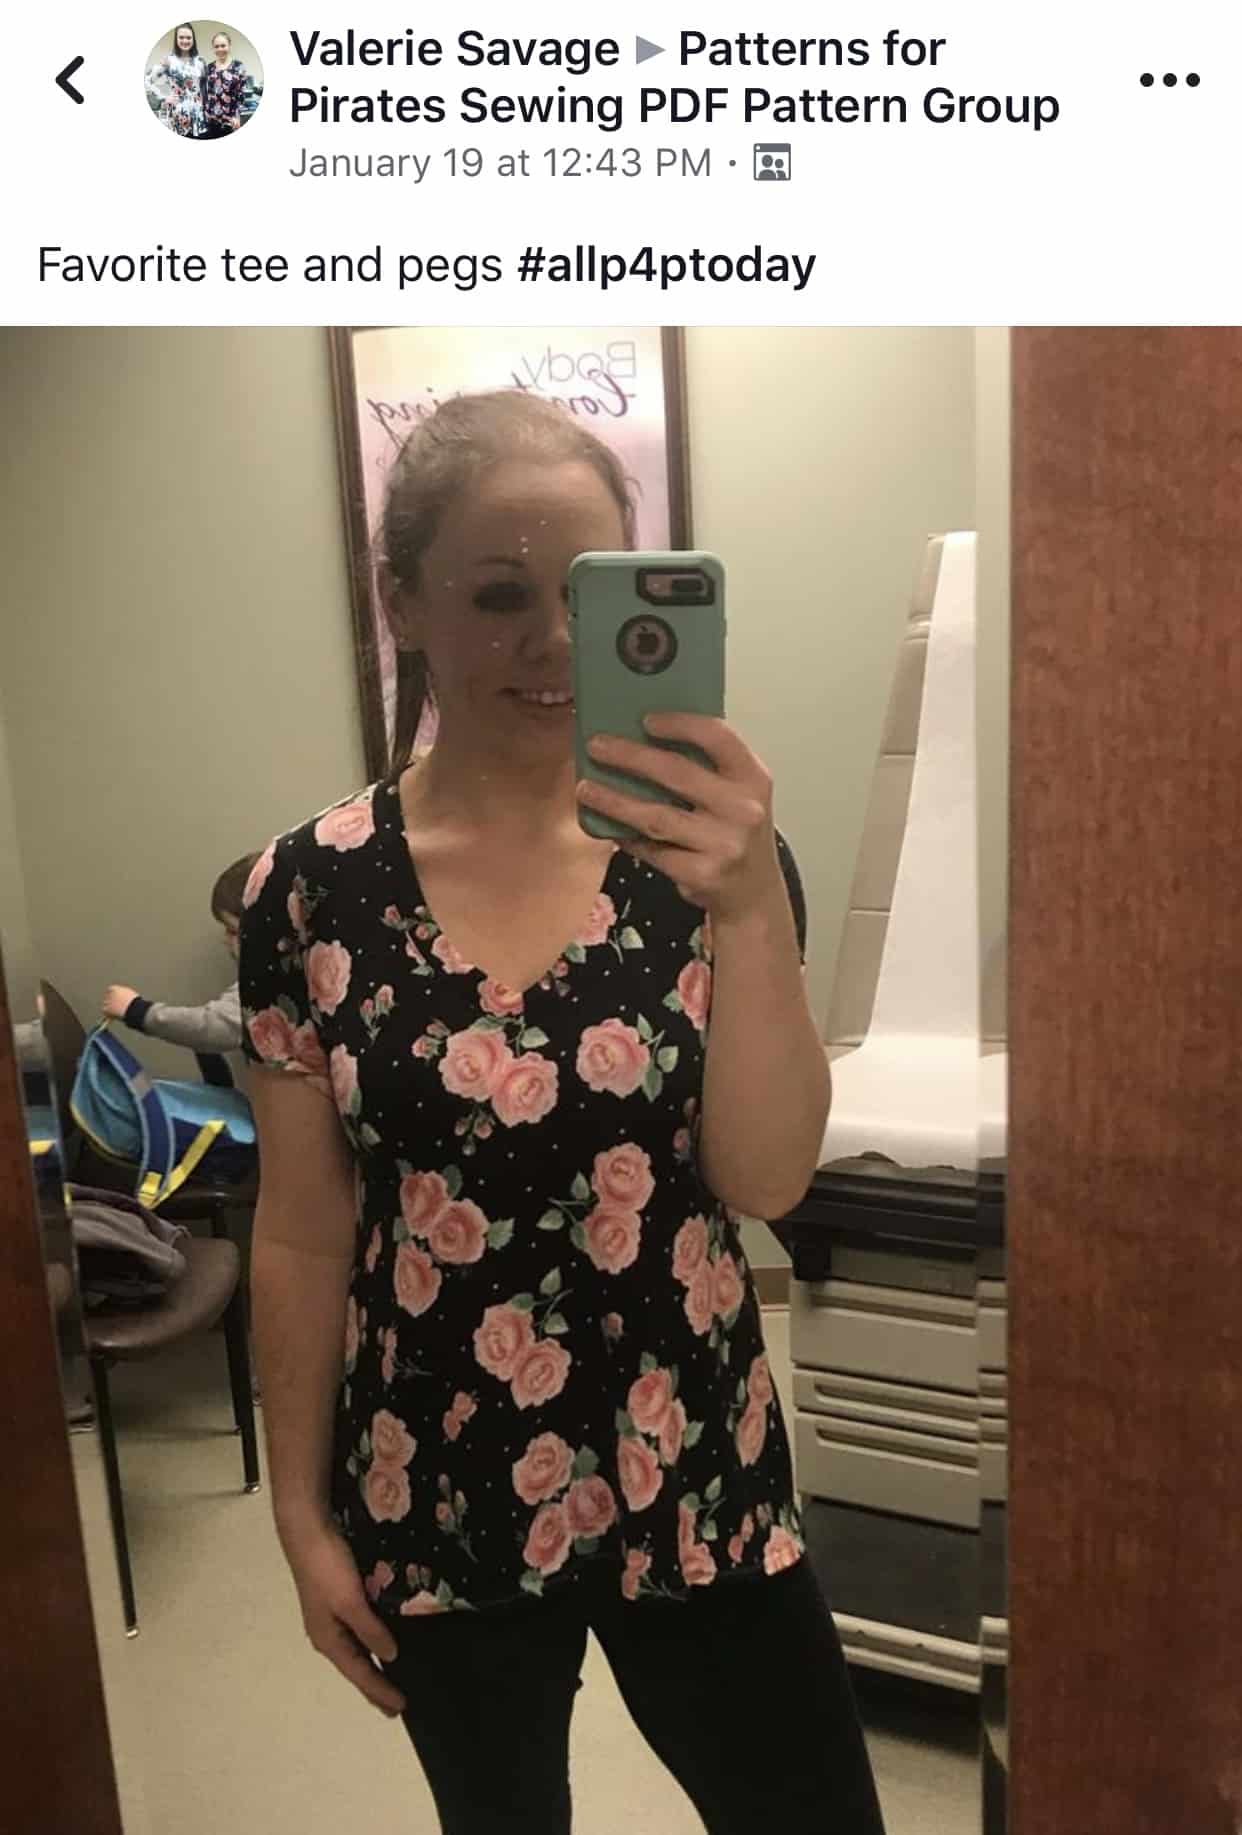
Valerie Savage

Does’s Valerie look ohh so adorable in her Peg Legs and Favorite Tee?

Thank you all for showing off the creations in the group. Keep those #allP4Ptoday pictures coming…next month’s winner may be YOU!

Filed Under: Announcement, Contest/Giveaway Leave a Comment

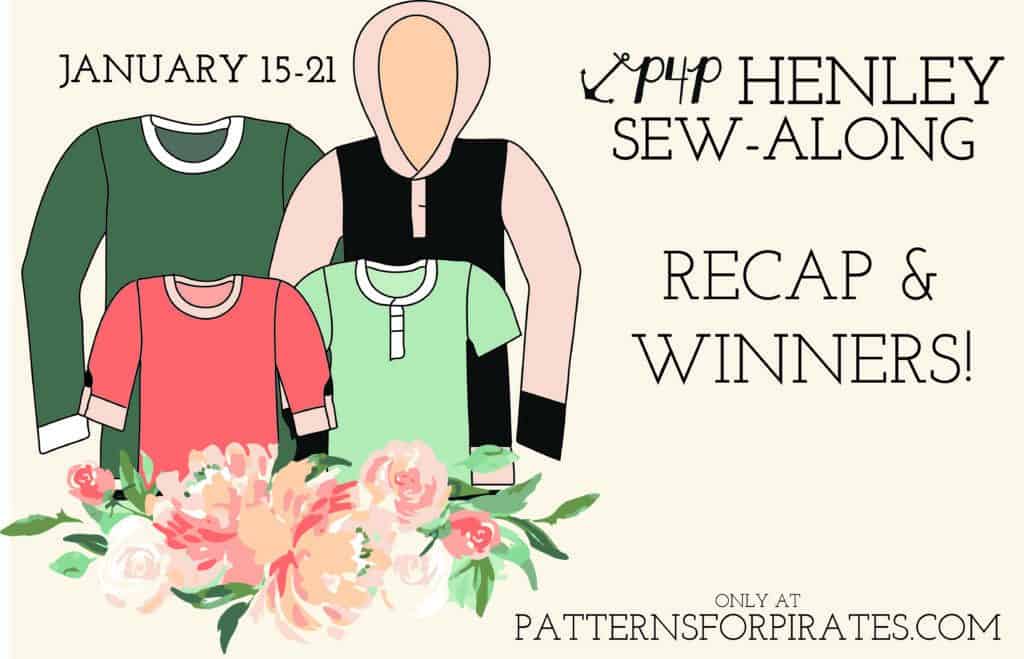
P4P Henley Sew-Along | Recap + Winners!

January 22, 2018

How much fun did you have last week, sewing all the henleys?  The Pirate team just loved seeing all of those plackets and neckbands being tackled for the first time, as well as the fun raglan sleeve hack being utilized!

We didn’t really want to have a contest with this sew-along, as much as we just wanted people to have fun without pressure.  However, we couldn’t resist picking some random people that sewed along with us, to gift them some free P4P patterns!  Here are the four P4P Henley Sew-Along Champs!

Layni Van Hyning

Cathryn Perrotti Larkin

Kit Kabboord‎

Alaura Sproles‎


Worried that you missed something?  Don’t be!  We ran this sew-along on the blog so you’d have easy access to it whenever you were ready to sew some henleys for yourself.  Here was the weekly lineup, in case you need it again!

January 14: Announcement.
January 15: Choosing Your Fabrics, Printing + Measuring.
January 16: Cutting Fabric.
January 17: Placket.
January 18: Sleeves.
January 19: Attaching Neckband + Hood.
January 20-21: Catch-Up Days.
January 22: Recap + Winners Announced!

Filed Under: Sew-A-Long 1 Comment

P4P Henley Sew-Along | Sleeves

January 18, 2018


We’re back and working on the sleeves today!  We get quite a few posts in the main Facebook Group about having issues with the sleeve so I made a quick video about easing the sleeve to the bodice.  I hope this helps!


If you’re doing a cuffed version, be sure to hop on over to our Knit Cuffs Blog Post for more tips. 🙂
We’re in the home stretch now…only one more day to go!

**The links won’t be active until the scheduled date.

January 14: Announcement.
January 15: Choosing Your Fabrics, Printing + Measuring.
January 16: Cutting Fabric.
January 17: Placket.
January 18: Sleeves.
January 19: Attaching Neckband + Hood.
January 20-21: Catch-Up Days.
January 22: Recap + Winners Announced!


Filed Under: Sew-A-Long, Uncategorized Leave a Comment

P4P Henley Sew-Along | Placket

January 17, 2018

Dun, dun, dun!  Today is placket day!  But please don’t let this step scare you away, I promise that once it clicks you’ll be a pro at sewing them.  (On the other hand, if you have decided that you want to skip the placket on this version of your henley, the patterns already include a neckband measurement for a basic tee option.  Easy as that!)

Lucky for you, Alex has already given us an incredibly in-depth hand holding on making plackets work for you.  If you head over to her blog post, you’ll find some info on what they are, if interfacing is necessary or not, and THREE wonderful videos taking you through each step of the way.

P4P University – Plackets

Have more questions or as stuck on a step?  Or maybe you just want to share your progress so far?  Feel free to post in the Sew-Along event group!  There are always helpers in there!  And, if you are sewing along with us, be sure to tag @PatternsforPirates and #P4PHENLEYSAL on Instagram.

**The links won’t be active until the scheduled date.

January 14: Announcement.
January 15: Choosing Your Fabrics, Printing + Measuring.
January 16: Cutting Fabric.
January 17: Placket.
January 18: Sleeves.
January 19: Attaching Neckband + Hood.
January 20-21: Catch-Up Days.
January 22: Recap + Winners Announced!

Filed Under: Sew-A-Long 8 Comments

P4P Henley Sew-Along | Cutting Fabric

January 16, 2018

Welcome back!  So far, we’ve learned how to pick the perfect fabrics and get the perfect fit.  Today, we are diving right in and cutting into your beautiful fabrics.  We’re also sharing two new hacks so before you cut into your pretties, check them out first!

Is this your first time using one of our patterns?  Check out our Pattern Markings 101 and Grainline blog posts for more tips about cutting out your fabric correctly.  Now, on to the hacks…..

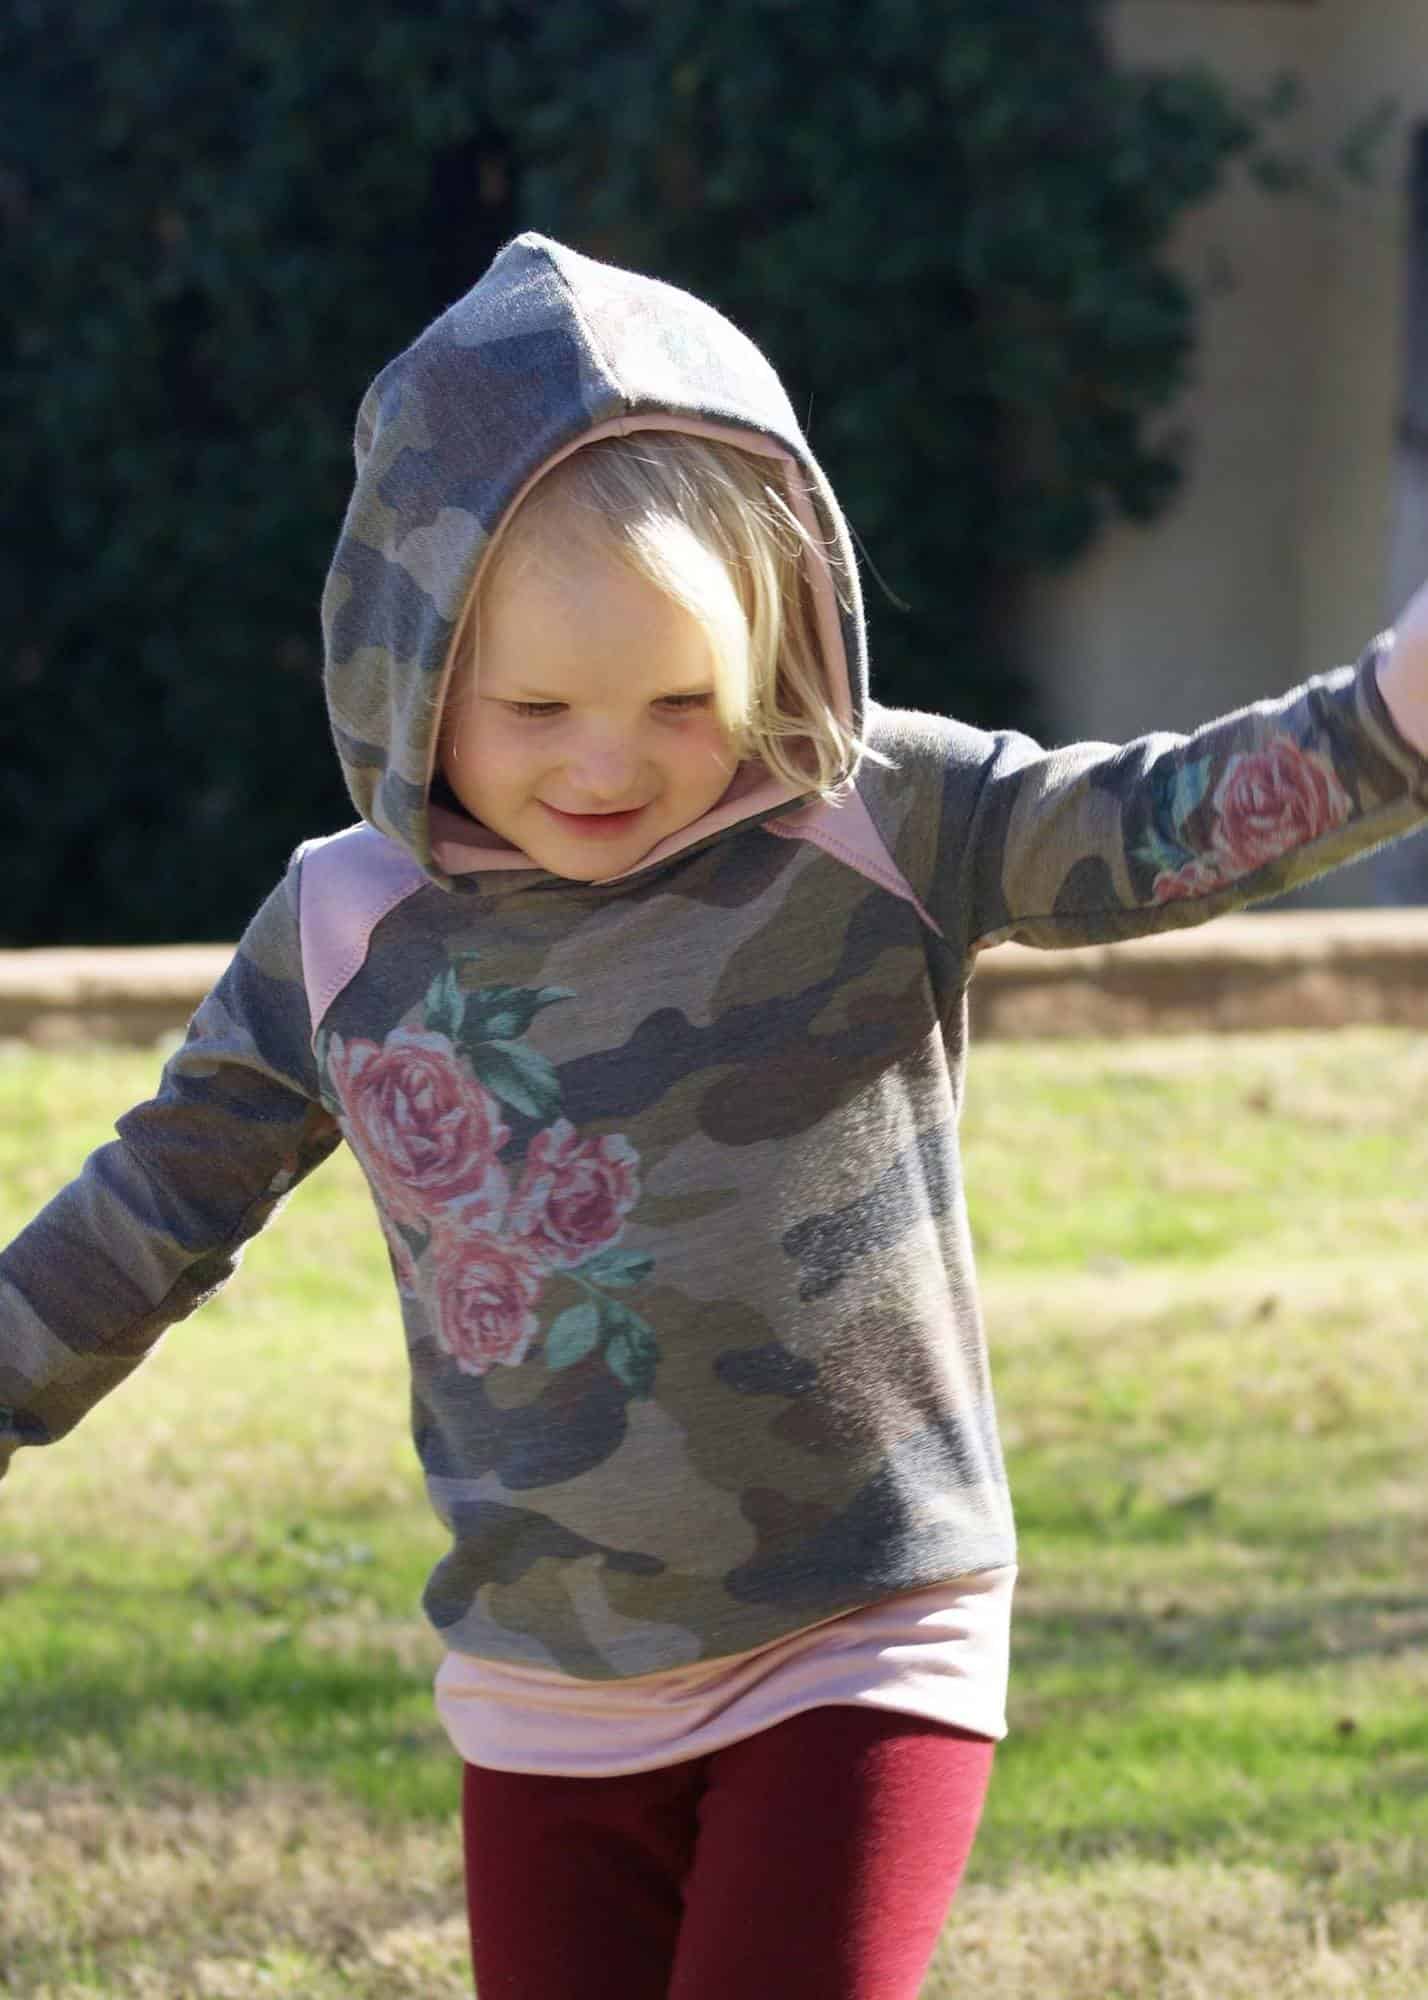
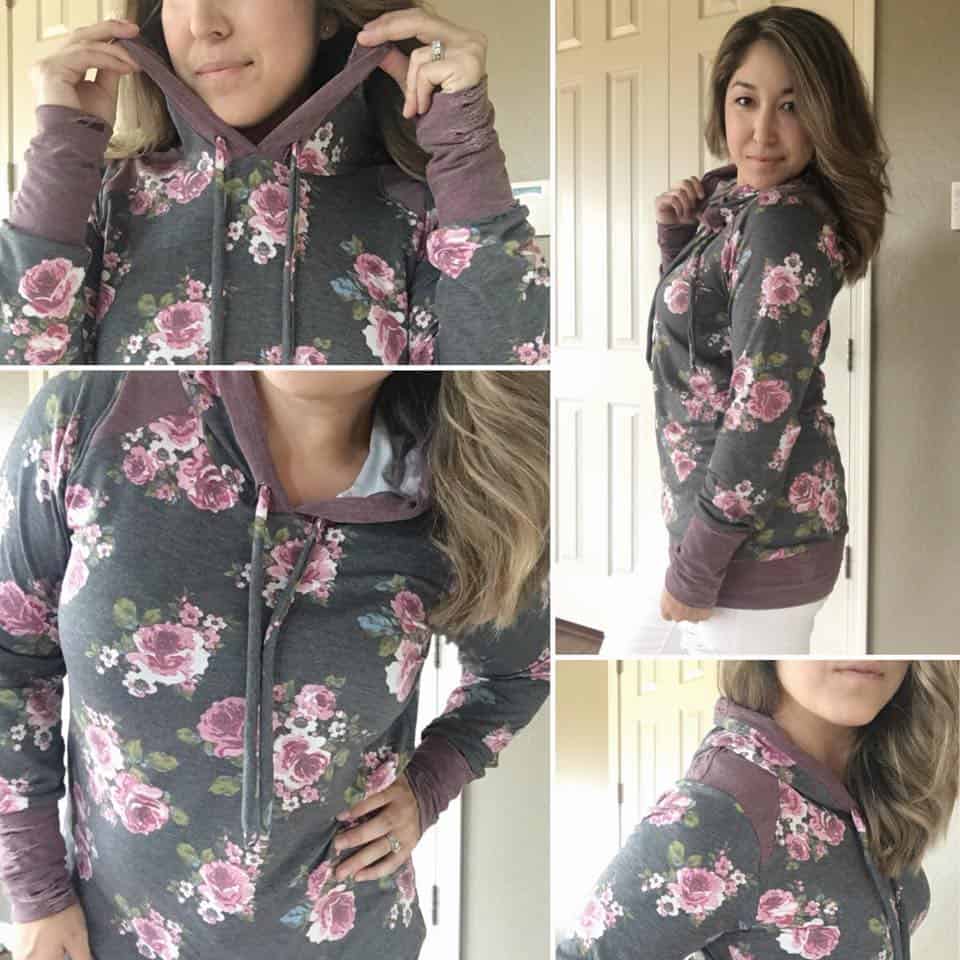
Henley Raglan Color Block Hack

Download the Color Block Pieces for the Women’s Henley and Yo Ho Henley HERE.

French Terry
Sweater Knit and Suede accents


Here we go!

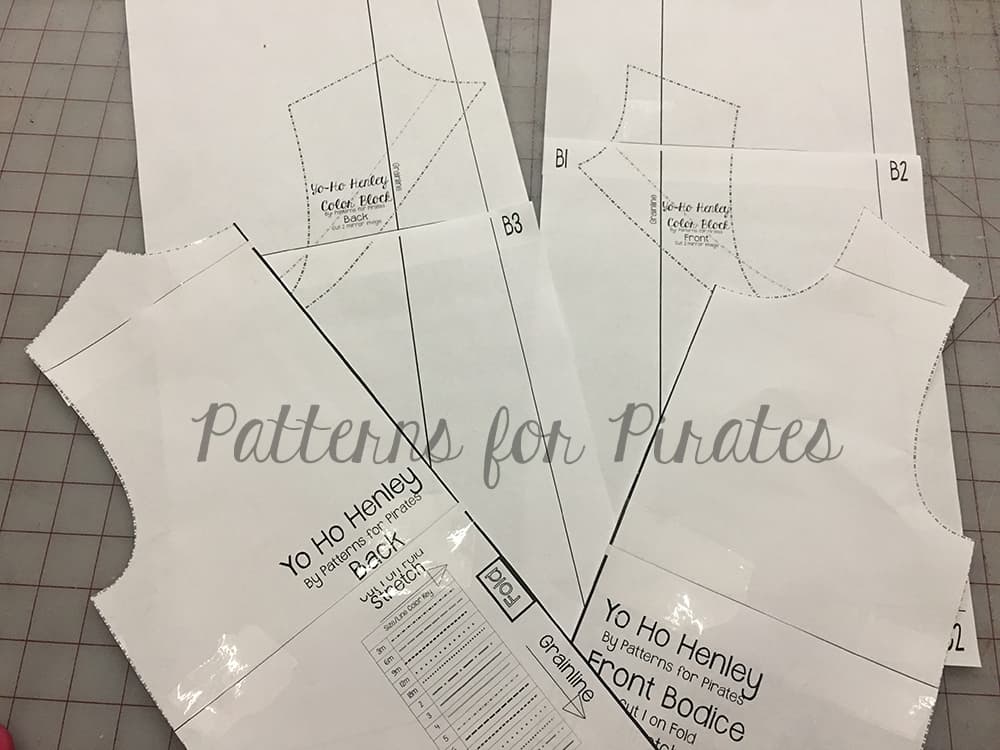
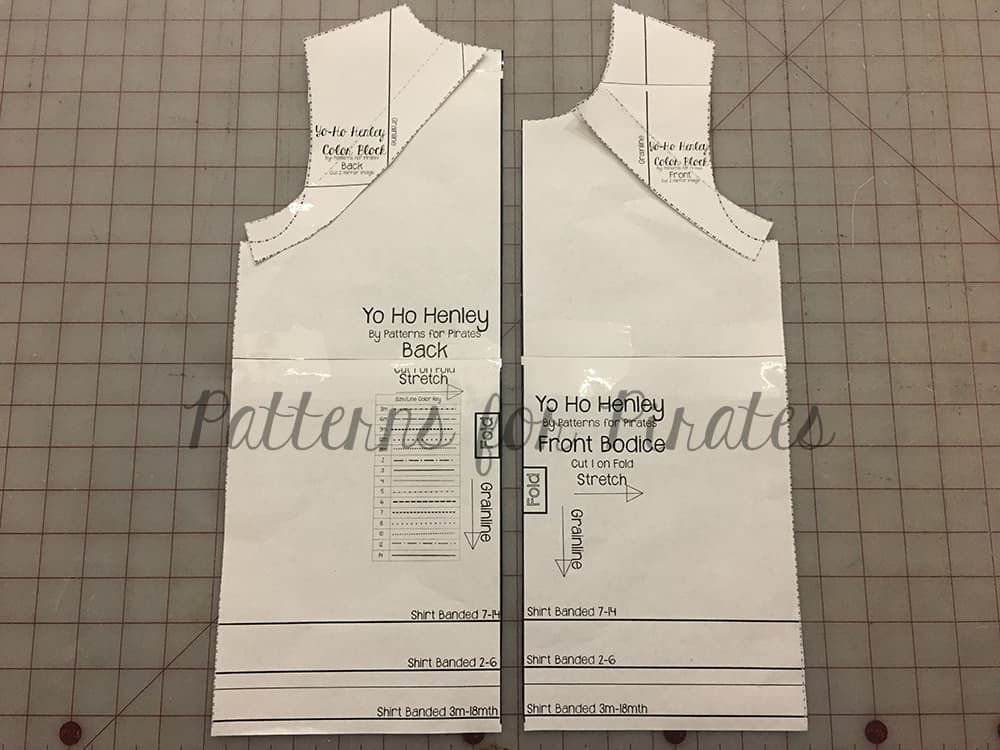
Print out the Henley Main and Color Block pieces
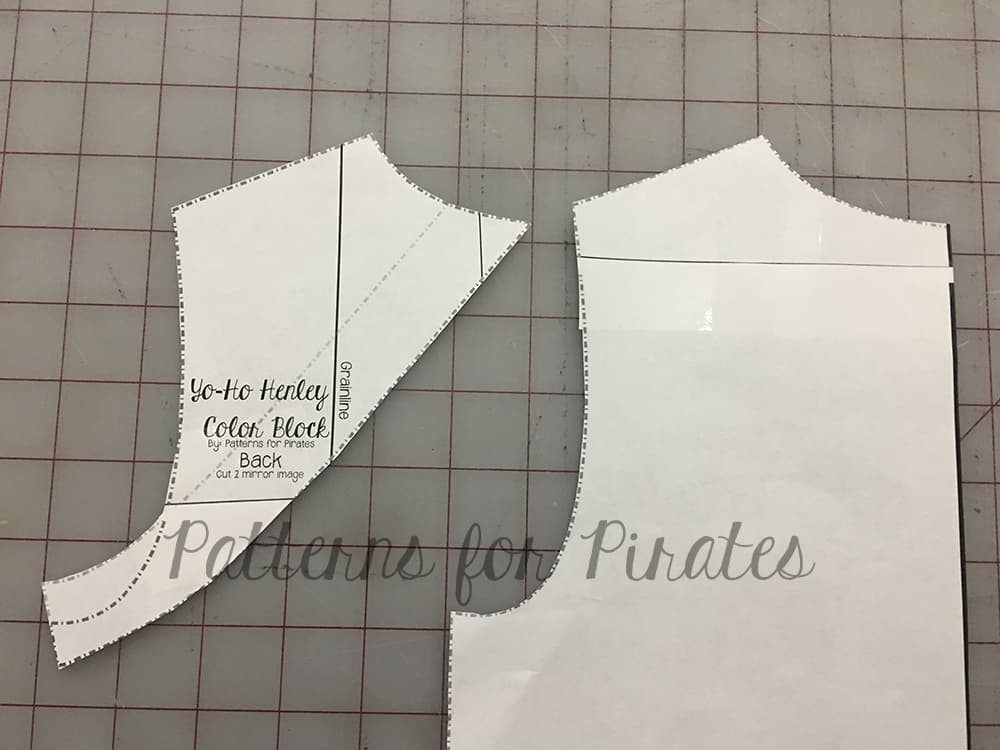
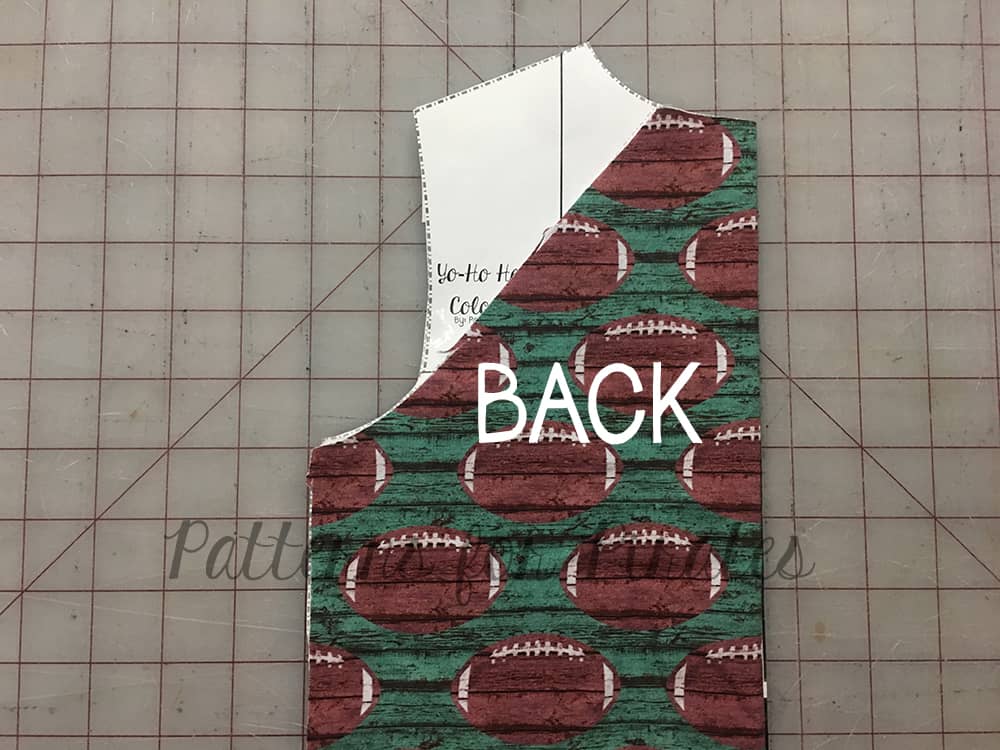
Picture of Back Main and Color Block Pieces
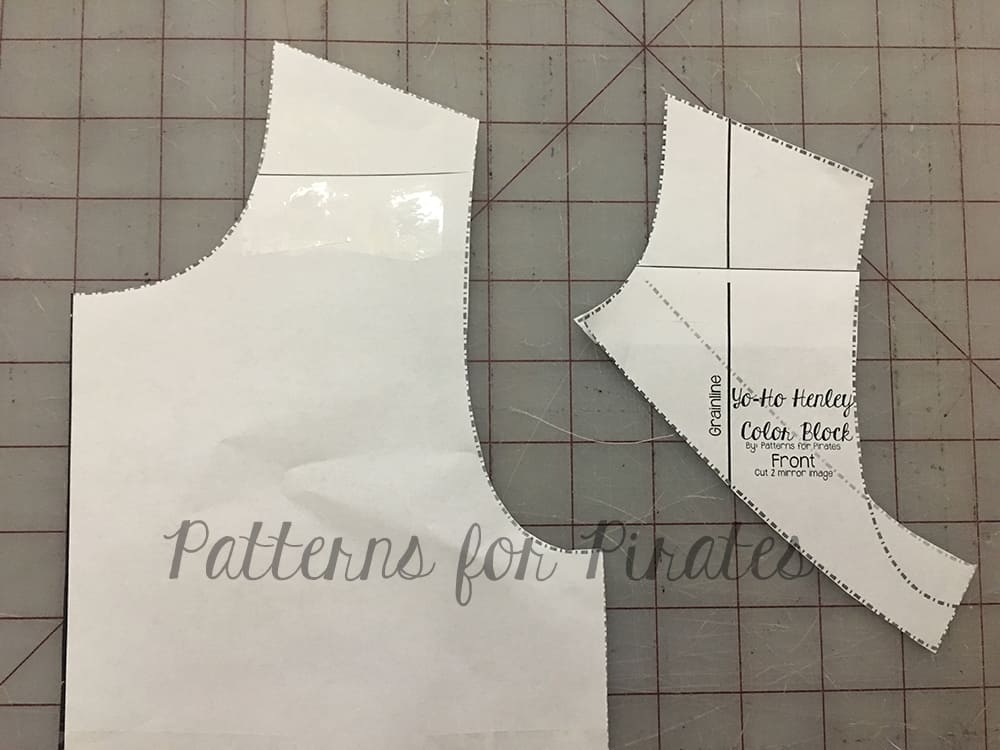
Picture of Front Main and Color Block Pieces

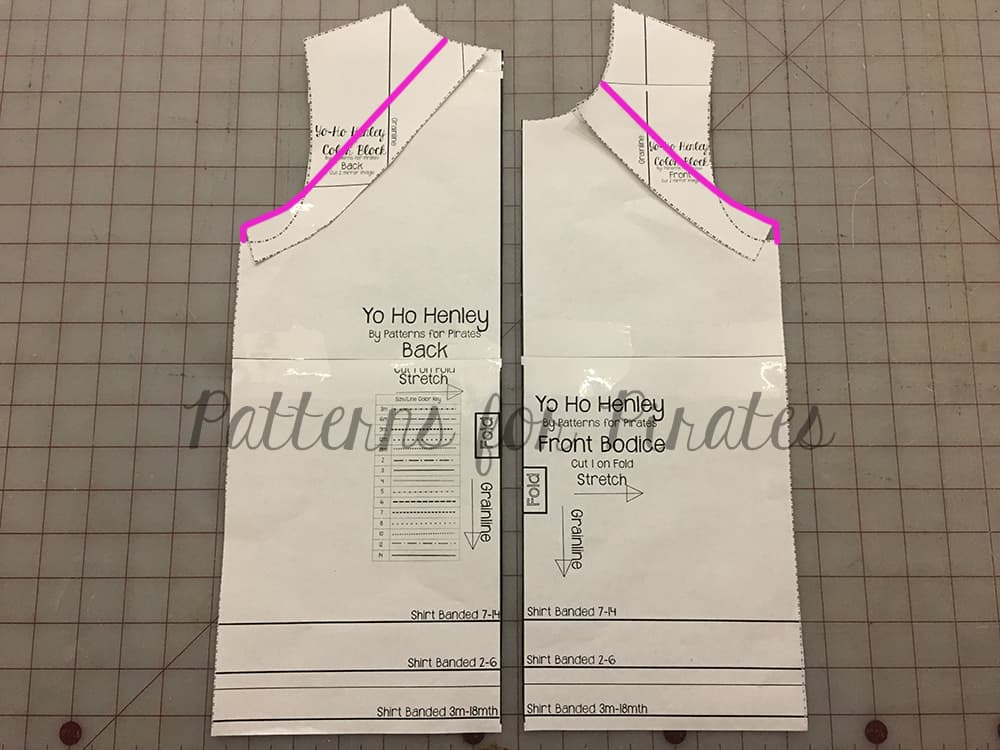
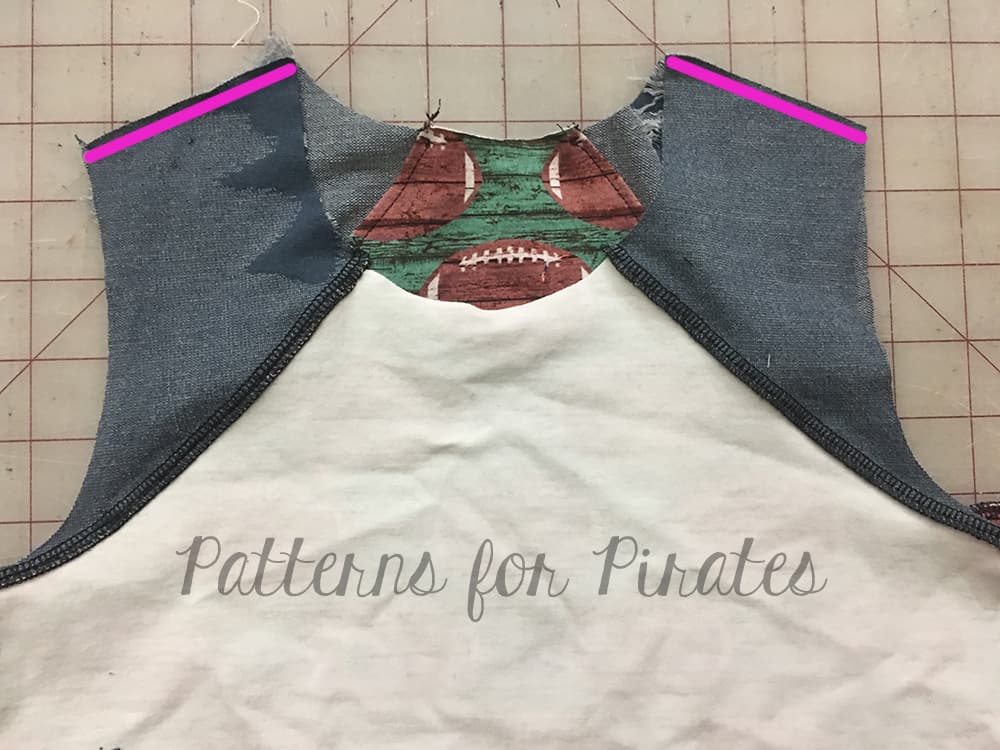
The Color Block Pieces should line up at the shoulder seam with the main body.
Transfer the faded line (shown in pink here) to your main body as this will be your new bottom color block. If you do not want to cut your main pattern piece you can also fold it along that line when you cut your fabric.
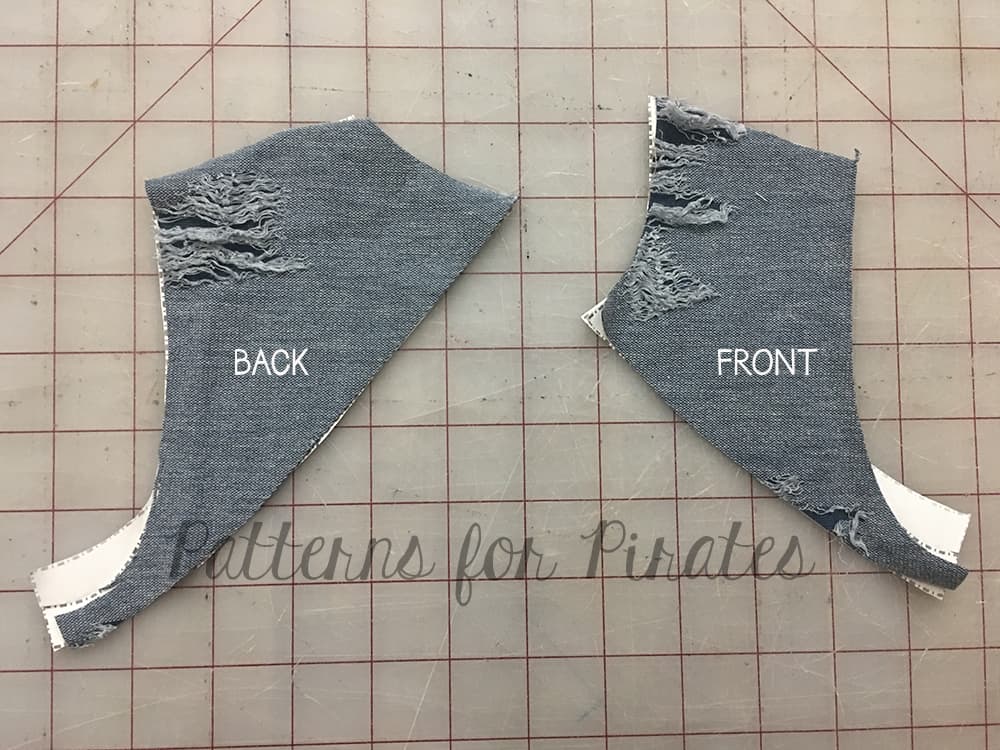
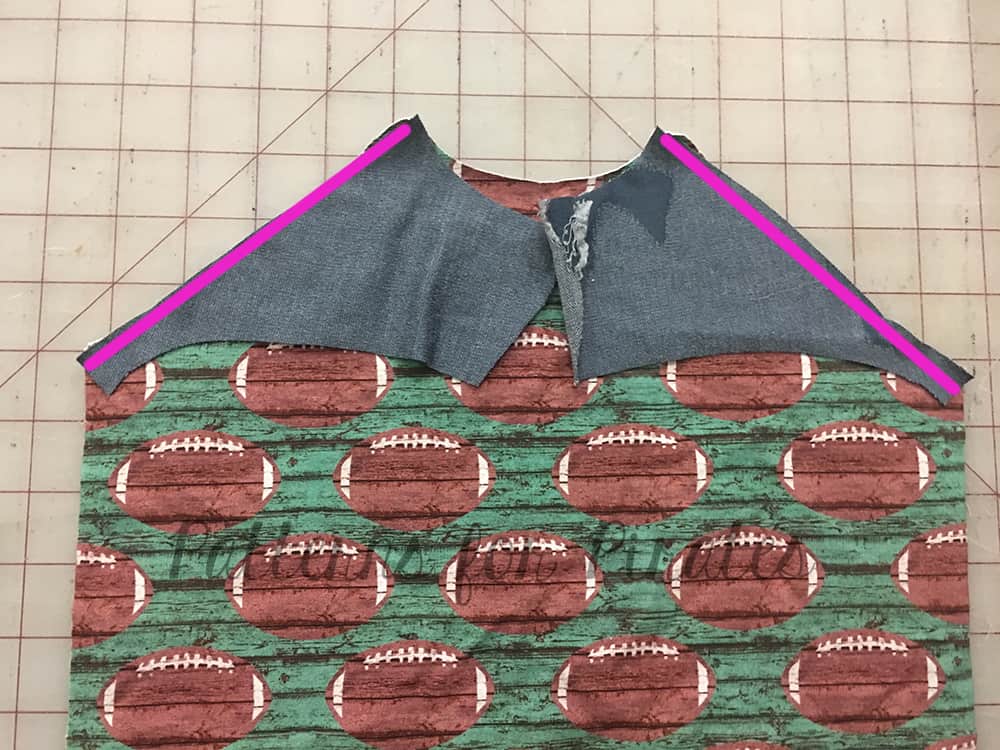
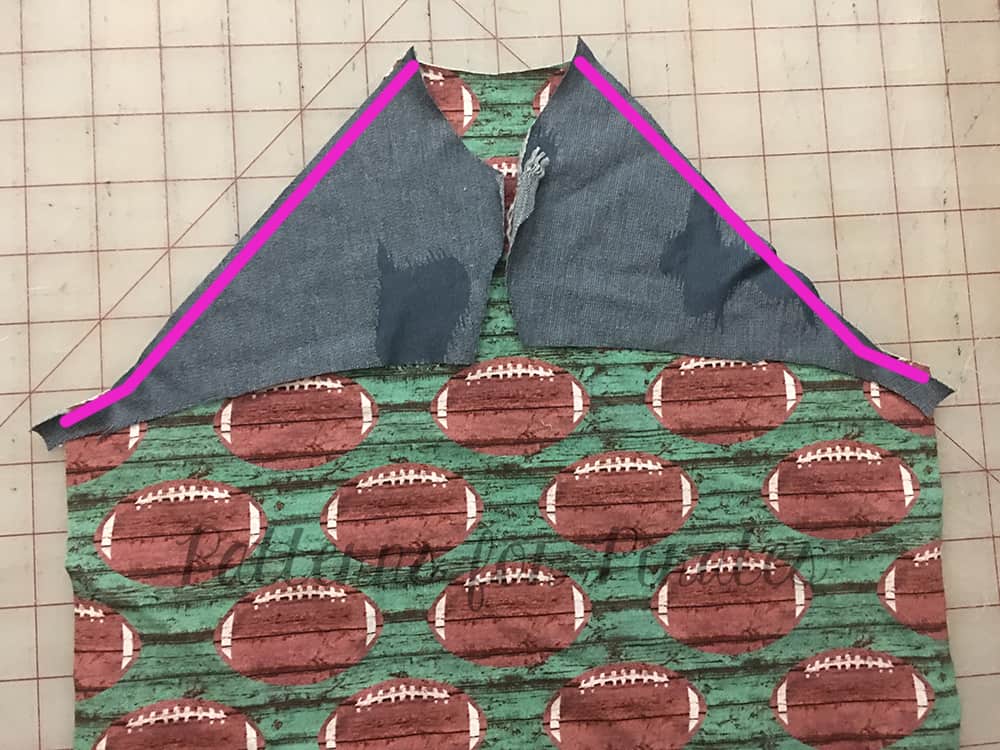
Cut 2 (mirror image) of the top color block. Follow the darker size line along the armscye.

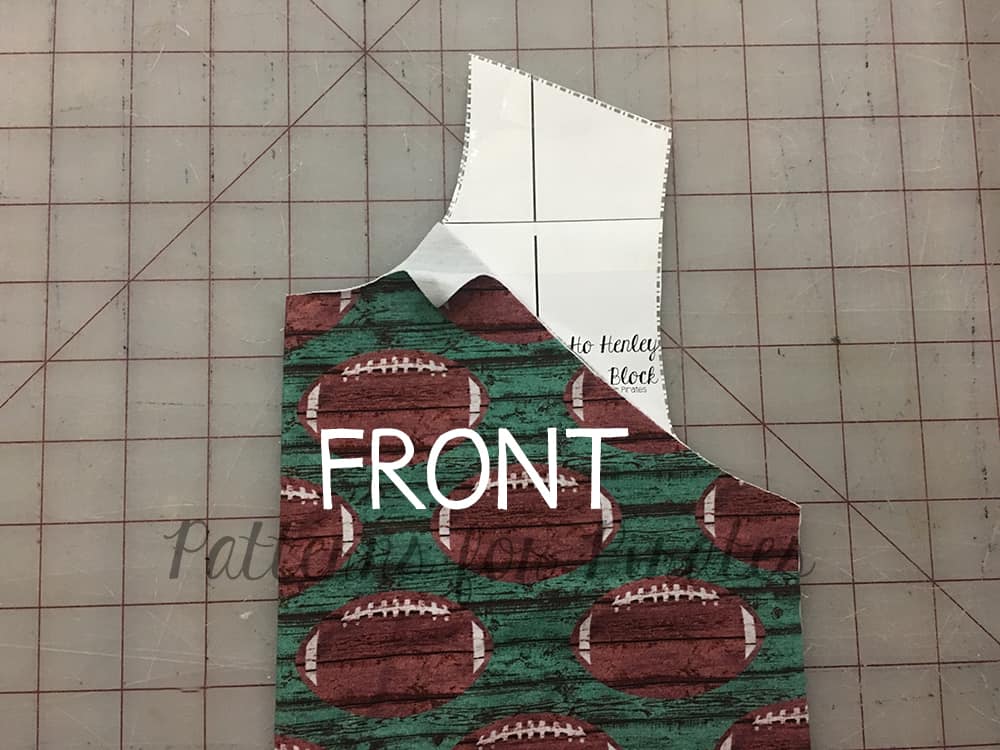
Cut 1 Front on the fold along the line you transferred in the previous step.
Cut 1 Back on the fold along the line you transferred in the previous step.
With right sides together, and using a 1/2″ seam allowance, stitch top color block to front bodice.

With right sides together, and using a 1/2″ seam allowance, stitch top color block to back bodice.
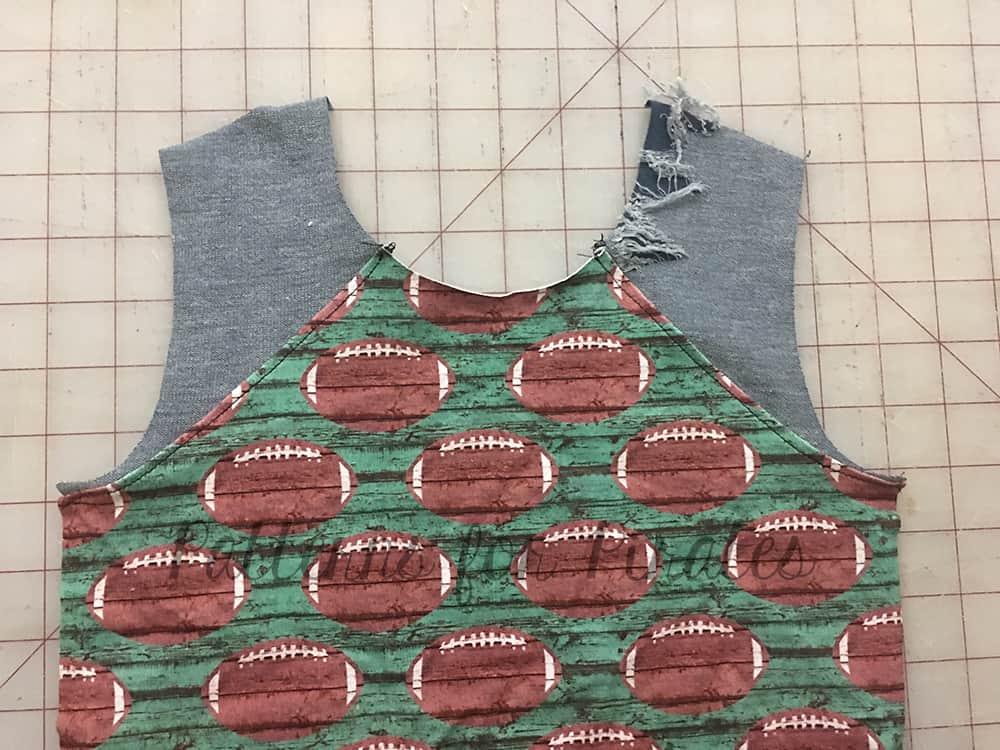
Press seam allowance down and top-stitch. Repeat for the back.
Continue as instructed in your pattern.


Women’s Long Sleeve Tall Cuffs Hack


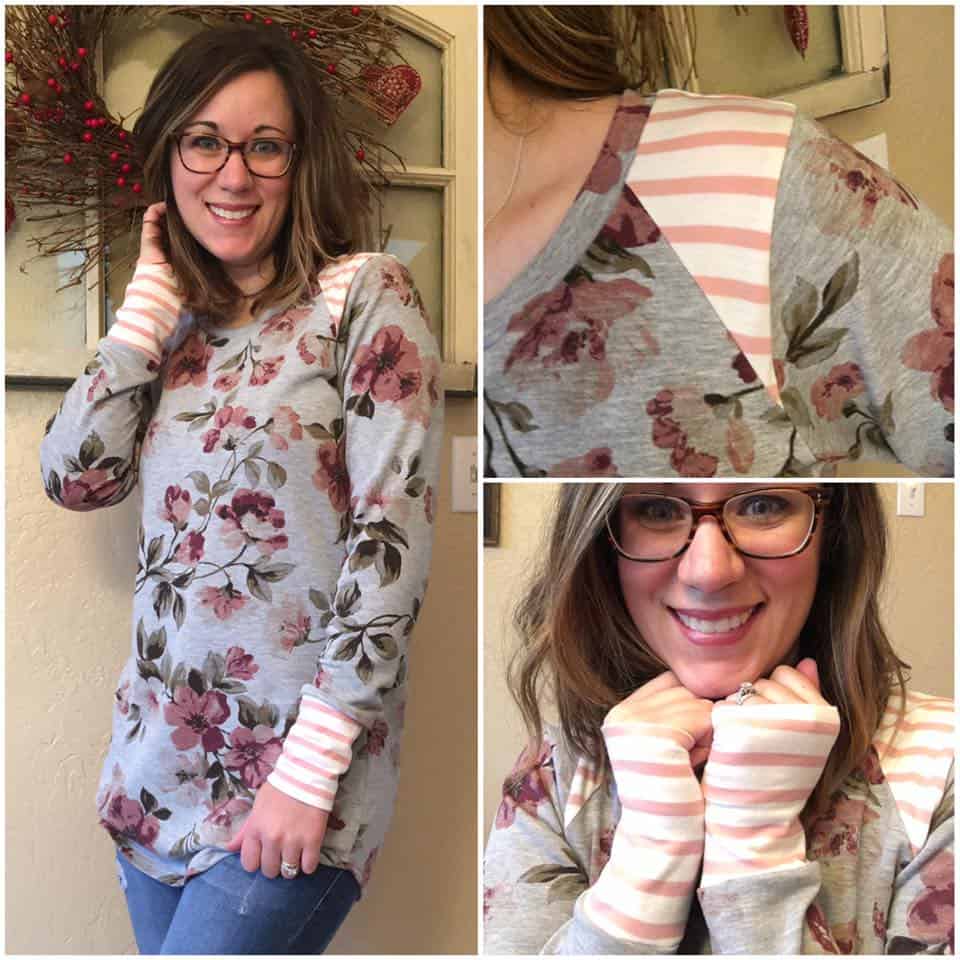
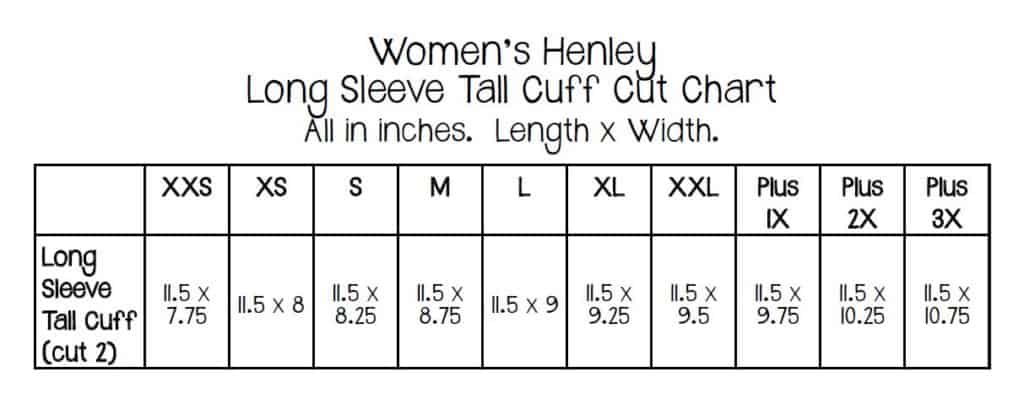
If you’ve been following in the main Facebook Group, a few weeks ago I hacked the Henley and upsized it for a more looser top! With that, I also did a longer cuff.  It received lots of love, so we thought we’d make it easy on y’all and share the new cuff measurements.  Cut your sleeve on the “Roll up” Cut line and use the measurements below for your cuffs.  Construction is the same as the other cuff/band options. 🙂
 

We hope you love these hacks as much as we do!  Check back tomorrow for more details on the Placket….. It’s really not as tricky as you think 😉


**The links won’t be active until the scheduled date.

January 14: Announcement.
January 15: Choosing Your Fabrics, Printing + Measuring.
January 16: Cutting Fabric.
January 17: Placket.
January 18: Sleeves.
January 19: Attaching Neckband + Hood.
January 20-21: Catch-Up Days.
January 22: Recap + Winners Announced!

Filed Under: Sew-A-Long, Uncategorized 1 Comment

  • « Previous Page
  • 1
  • …
  • 9
  • 10
  • 11
  • 12
  • 13
  • …
  • 19
  • Next Page »

connect with me

  • Email
  • Facebook
  • Instagram
  • Pinterest
  • YouTube
Privacy & Cookies: This site uses cookies. By continuing to use this website, you agree to their use.

To find out more, including how to control cookies, see here: Cookie Policy
  • Privacy Policy
  • Refund Policy
  • Contact Us
  • About

Copyright © 2026 Patterns for Pirates

Copyright © 2026 · Genesis Framework · WordPress · Log in