Patterns for Pirates

P4P stylish, modern, wearable patterns

  • Home
  • Blog
    • Frequently Asked Questions
    • Pattern Releases
      • Free Patterns
    • P4P University
      • Fitting
      • Sewing with Stretch, Knit Fabrics
      • Sewing with Woven Fabrics
      • Sewing Machines
    • Sew-A-Longs
    • Fabric for Pirates
    • Pattern Hacks
    • Announcement
      • Blog Tours
      • Contest/Giveaway
  • Shop
  • Bundle Discounts
  • Flash Friday
  • Gift Cards
  • My Account
  • Cart

Basics of Sewing Swim

April 25, 2016

As I’m approaching my very first swimsuit pattern release, I realize there will be a lot of questions about sewing swim!

So here are some bullet points you’ll need to know before you jump into your first suit! 🙂

swim

Common Questions:

  • What type of fabric do you need? 
    • Nylon Spandex is the traditional swim knit. There are also some polyester spandex blends that are capable of with standing the chlorine and can hold up to the activity.
    • My favorite suit I made was out of supplex, a nylon spandex.  I almost always use a nylon spandex rather than the poly blends, it’s just my personal preference.
    • Just like all fabric types you will have a wide range of quality.  Great swim knit can be a breeze to work with, while cheaper/thinner/slinkier swim knit can really test your patience ;). If you’re sewing swimwear for the first time, I’d recommend buying a good quality swim knit even if you’re nervous.  It is much easier to work with!
    • How can you tell if it will be easy or more difficult to work with online? Watch the weight- steer clear of lightweight, drapey descriptions and try to stick with medium weight knits.
    • Lining- You can use a swim lining or just self line with more swim knit.  The self lined suit will most likely fit and feel a bit tighter because usually your swim knit is a bit more stable than the swim lining.
  • Do I need special thread?
    • Nope 🙂 You can use standard poly thread like always.
    • You can use a stretch thread in your loopers or bobbin for more stretch. I’ve done both and haven’t ever had issues with threads popping, but I recommend it if you’re planning on getting tons of wear and being very athletic in it.  (I highly recommend it for youth- they wear them more often, are more active and they often get passed down to other kids throughout the years.)
  • What is the best stitch?
    • You can use your serger or your favorite stretch stitch.
    • When using my machine I usually use the lightening stitch or regular zigzag stitch. I use my coverstitch as well for finishing hems.
    • I baste with a stretch stitch as well, you can technically baste with a traditional long straight stitch, but if you don’t pull  your basting stitches you will hear those threads pop when you try on/wear…which can be scary ;).
    • stretch stitches
  • What kind of needle should I use?
    • You need to use a stretch needle. These are best when sewing fabric with high spandex content.
  • What other notions will I need?
    • You will need a SWIM elastic.  Even if you are using the top as a sports bra, I still recommend using the swim elastic.  It has more stretch then regular elastic and will withstand the wear and tear much better.
    • I highly prefer the cotton swim elastic to the clear plastic kind. It is so much easier to work with and softer.
    • IMG_0010
    • Don’t let the elastic scare  you!
    • And don’t skip it! I know a lot of ladies will use bands on swim in place of elastic, but I don’t recommend it.  Elastic keeps it shape always- wet or dry.  Swim fabric on the other hand gets heavier and stretches out when wet (and depending on quality can stretch enough that it is loose while swimming.) So, if you don’t ever want to loose your bottoms or have to constantly tug back in place don’t skip the elastic!!
    • Here is a little video of me putting in some swim elastic to help!

  • How can I make sure the top is supportive enough to hold me up?
    • Follow the tutorial and use all the suggestions to add more support.  If you skip any, you might regret it if you’re looking to be very active or have a larger bust to hold up.
    • Power mesh- this is an inner lining mesh spandex that you can use to add more support to a suit. It stretches less than swim knits, so it will hold in your body better on that section you place it. I only recommend using it in some of the suit and for adults only.  I like to use it on the front of both the top and bottoms.  If you have a smaller bust, you most likely will not want it in the top.  It is something that will “smoosh” you like a minimizer.  There are varying degrees/quality of power mesh as well. You can get looser and stronger depending on how much activity and “smoosh” you’d prefer in your suit.  There is also “power net” which is an even tighter mesh.  Use this one with caution as you might need to go up a size to accommodate the amount of stretch.
    • Swim cups- I used a sew in swim cup in almost all of my suits and sports bras too.  I like the tighter feel (the cups don’t stretch like swim knit- so it will feel and be tighter across the chest if you sew them in.) and the thicker layer of coverage for my bust.  I HIGHLY prefer the soft cups.  I find the molded cups to be really unforgiving in perfect fit (lets just say the D/DD was no where NEAR fitting my D cup bust… I was really channeling the Madonna cone look :/ ) and are much more difficult to get placed perfectly and to sew in nicely and neatly.  For larger then a D/DD cup you’re really only getting some coverage for the “important part”.  You will need to slip your lining on  (I recommend wearing a bra/sports bra) to get a good placement and make sure it’s covering that important part, pin in place, and sew in.
    • Remember you’re looking for your sewing cup size- which is the difference between your upper and full bust (NOT under and full bust).  You don’t want your cups oversized.  They will take up too much of your top and you will loose too much stretch that you need for a good fit.
    • IMG_0081
    • I also have an option for adding boning to the side seams, my other sister Megan loves this one! You’ll just need lightweight boning:
    • IMG_6694
  • Where can you get these supplies?
    • Here is a Note on my sister’s (the swim suit sewing queeen ;)) FB page with tons of suppliers:
      • https://www.facebook.com/notes/coles-creations/buying-swimsuit-fabric/10150740266823620
  • How tight should it be?
    • Traditional swimsuit fit has negative ease, meaning the finished measurement of the suit will be smaller then your body.  It will have to stretch to get on.  Suits are generally 20-25% negative ease.  Some athletic ones (think Speedo, Nike, etc) have 30% for more intense work out/swimming needs.  Don’t size up if you plan on swimming at all in it, you will need that negative ease to keep the suit in place when wet.  If you are at the lower end of your size range you might even need to take a bigger seam allowance to make it snug enough (this will depend on quality of swim knit as well, the super stretchy thinner fabric will mean you will need it tighter).
    • The elastic around the edges of the suit are there to help keep everything in place as well.  It might “squeeze” you a bit when not wet, but again you will want that very snug to make sure your suit isn’t shifting while you’re swimming.

Have FUN sewing and swimming!  

IMG_1335 IMG_092913040907_10103939304773709_3823376724495832161_o IMG_099613041099_10154119162434666_7968371201553453968_o (1)

Filed Under: P4P University, Pattern Release, Sewing with Stretch, Knit Fabrics, Uncategorized 15 Comments

Tips and Tricks of Up-cycling

December 2, 2015

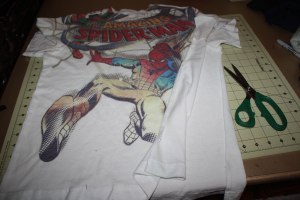
I love to up-cycle! With a little boy I can find boyish knits, stripes and even character prints so much easier and more affordable buying a men’s T-shirt then the $30/yd euro knit… Which I’m constantly drooling over!  I also love the heathered T-shirt knit, which is harder to find in a fabric store and very easily found in RTW (Ready to wear). I love to use my husband and my old shirts as well… It’s even more special handmade with an already sentimental shirt! So here are some tips and tricks I’ve learned… 1- Buy bigger… Why not? If an XS and XXXL are the same price get more fabric 🙂 2- If it has a picture on it make sure it will fit on your smaller size you are creating.  This one can be difficult if you’re buying large men’s shirts BC they are proportionally much bigger pictures/words/designs on the chest. Here is one I BARELY SQUEEZED on his little chest, but then when it is on some wraps around to the sides, so really I should’ve waited until he was a few sizes bigger!

IMG_6361 IMG_6374

3- Use the hem! I don’t have a cover stitch machine… Yet 🙂 and although I love my double needle using the existing hem saves time and looks nice and professional already!  All  you have to do is account for the hem- Most my patterns are 1″ so here I am cutting with my pattern piece 1″ below my fabric to make up for the fact that I will not be turning up and hemming.

IMG_7303

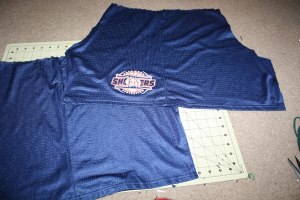
4- Cut you RTW items down the seams, this give you nice flat pieces to last your pattern pieces out on. If there isn’t a side seam, then I don’t cut… but anywhere there are seams I go ahead and cut because you will not be able to use the area.  I also cut the sleeves, again along the seam and use them if I can!  Here is a shirt and shorts cut and ready to use:

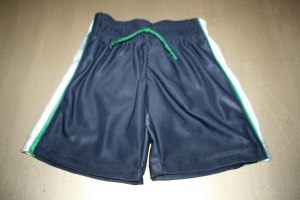
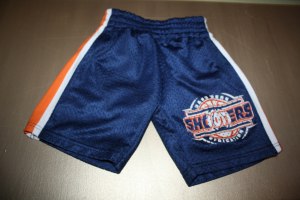
IMG_6437IMG_7300   5- If you’re using a shirt with a design, fold with the DESIGN centered… You’d think RTW is all centered nicely on that shirt… Until you fold it at the side seams and realize it’s not!! Often they’re off centered! 6- If you don’t have ribbed knit to match for the neckline you can use theirs…especially if you have a much larger size (men’s xxl down to a toddler size). Here are a couple of some up-cycles I’ve done: Patterns for Pirates Buccaneer BBall Shorts:

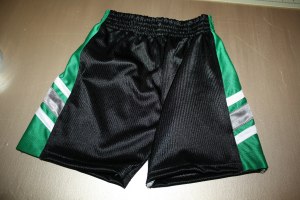
IMG_7317IMG_7294IMG_7304IMG_7333IMG_7340

Matey Muscle Tank:

IMG_0348IMG_6490-2

Wingman Shirt: The grey was from a heathered grey t-shirt… the Batman logo was appliqued on my sewing machine 🙂

IMG_9070

Deep Sea V-Neck:

Copy of IMG_6577

Cole’s Creations ‘Buttercup Dress:

20140521_141909

Women’s Raglan:

listing pictures2

Filed Under: Sewing Techniques, Uncategorized 1 Comment

First Time User Tips

October 23, 2015

Are you using a P4P pattern for the very first time? I’m so excited for you to try out one of my pdf sewing patterns! Here are a few tips if you are brand new to sewing a P4P pattern, or to sewing from a pattern in general.

*Buying from the site- you will receive an email with a download link after payment is processed (check JUNK mail) and you can also log back into the site to download any purchased patterns anytime! Our freebie patterns downloads expire in 30 days once purchased, but fear not! You can add them to cart and “buy”  them as many times as you want.

Our patterns include various formats so be sure to open the correct one.

Letter – used mainly in the USA, must be printed on letter size paper (8.5″ by 11″)

A4 – used outside of USA, must be printed on A4 size paper (8.25″ by 11.75″)

A0 – used to print on 36″ wide paper, usually at copy shops.

Projector – this new style of paperless/printless way of cutting the fabric pieces requires a special set up. I would not recommend this for beginners. Only the newest P4P patterns include projector files.

#1: Read the tutorial thoroughly before beginning.  Before you start envisioning fabric selection and thinking about what size, you need to sit and read!  There is A LOT of info in the first few pages of a P4P pattern. Here are some highlights in those first few pages:

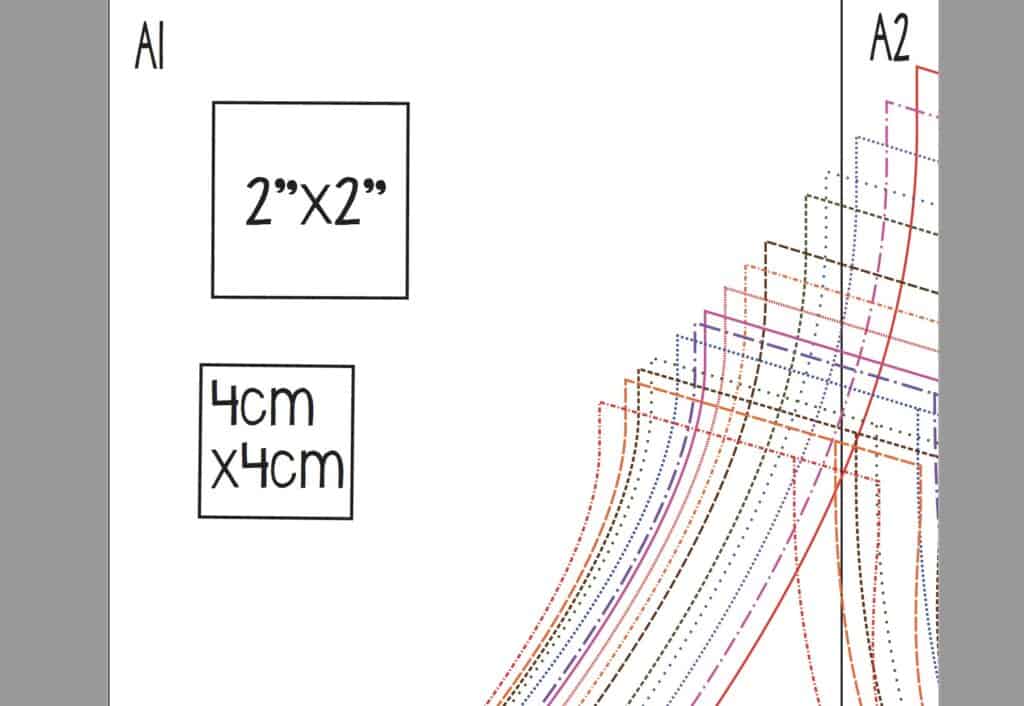
*Printing instructions-  You MUST open and print from ADOBE PDF viewer, not the app, not another PDF program! This will ensure the correct scaling!  I advise only printing the pattern pieces (these are listed on the first page in the tutorial) to save paper and ink-you can read the tutorial instructions on a computer, laptop, tablet, smart phone-whatever you have available! You will want to print with scaling set to “none” or custom “100%”. Carefully measure the 1×1 inch square to ensure that the pattern is printed in the correct scale (I always advise to only print the first page with the measuring inch first to test, then when you are sure it’s correct print the other pages). Our newer patterns include a 2″x2″ and a 4cm x 4cm square instead of the 1″ one.
Here is a shot of what your adobe printing settings should look like before you print: Custom scale: 100% and about the preview it should say 100%

Screenshot 2015-12-10 17.15.33


Here is a shot of the printed page with a correct 1×1 inch square:

SAMSUNG CAMERA PICTURES

One of the most common printing mistakes is to have the “fit to page” option clicked. Here is a shot of “fit to page” INCORRECT printing.  This will result in a pattern that is much smaller then intended!

If you look, you will see an outline around the entire page about 1/8″ that should not be there. The 1×1 inch square will also measure slightly smaller.

Screenshot 2015-12-10 17.16.02

SAMSUNG CAMERA PICTURES

SAMSUNG CAMERA PICTURES

*Piecing the pattern pieces together- I have a quick video putting the “no trim pages” together here: (you must be a member of the P4P FB group to view) Video Link

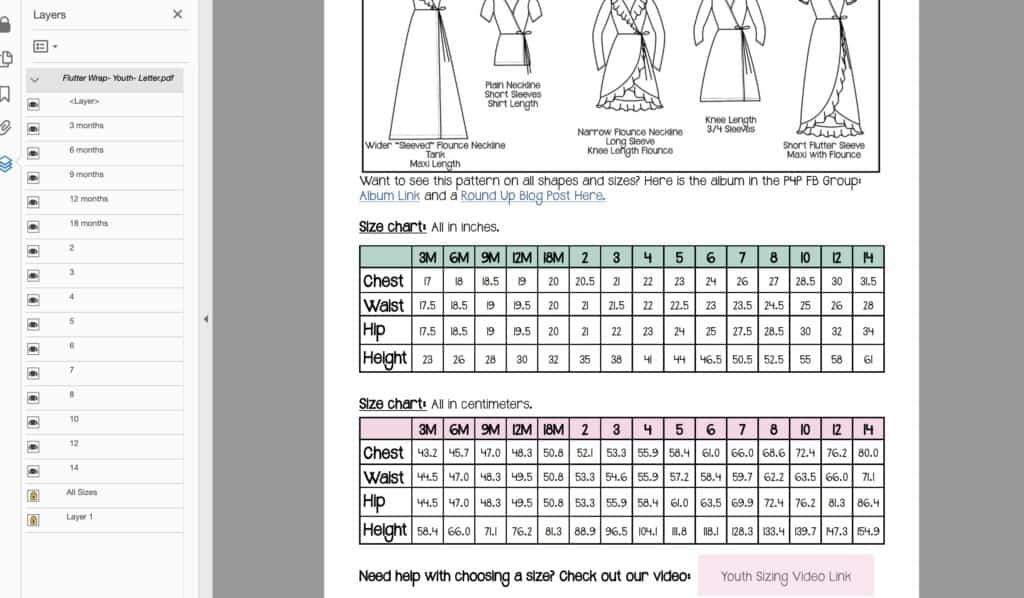
*Choosing your size- I have a size chart both in the listing pictures and in the first few pages of the tutorial.  Carefully measure yourself and find the size that your measurements correlate to.  Chest-fullest part around your bust, Waist-where you naturally bend to the side, High Hip-around your hip bones, Hip-around the fullest part of bottom/booty.  I only add the measurements that are important for that particular pattern.

Here is a blog post about measuring yourself.

  • If your measurements put you in several sizes then you can mash/blend sizes between your measurements to create the perfect fit (this is why sewing is so great! Custom fit and size for your particular body type). Our P4P University blog series includes a very helpful post about grading. You can read the Grading blog here.
  • Using the “Finished Measurements”- You can flat measure other garments that are well fitting and compare, or compare to your measurements. You should be able to know exactly how much you need to add or take off for the perfect length before sewing up!
  • LAYERS – once you chose your size(s) you can print just the needed one(s) by selecting it/them on the left side of the pdf file. Simply use the cursor to click/unclick the little “eye” located on the left of each size.
  • I also include the height my patterns are drafted for above the size chart (5’5″). If you are shorter or taller you will need to adjust for your height.  I include a link right below the size chart to this post explaining how I prefer to add/take length for petite and tall adjustments: Petite and Tall Adjustment Blog Post
  • Do not choose your size based on what you buy in ready to wear/store bought clothing.  Store sizing varies extremely from store to store.  Just choose based on your current measurements!
  • Read the description of fit carefully (located under the line drawing in the tutorial).
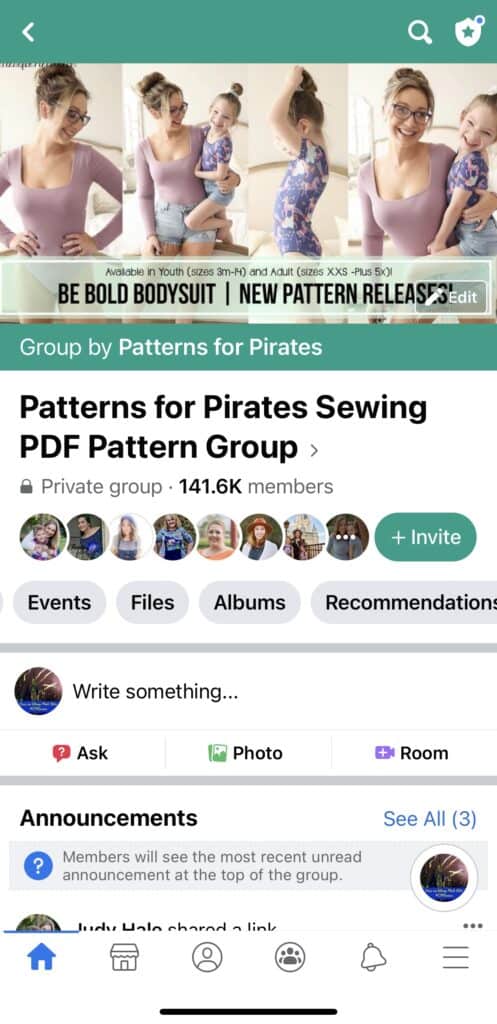
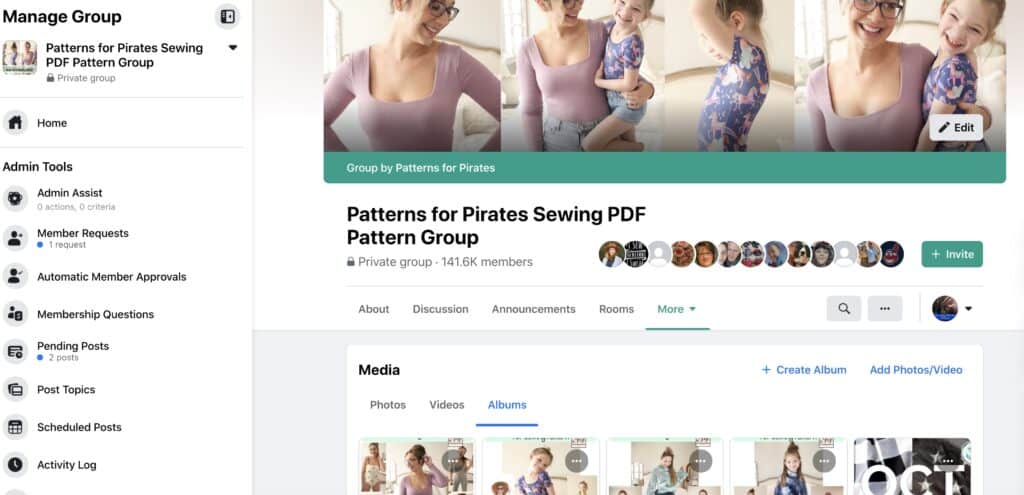
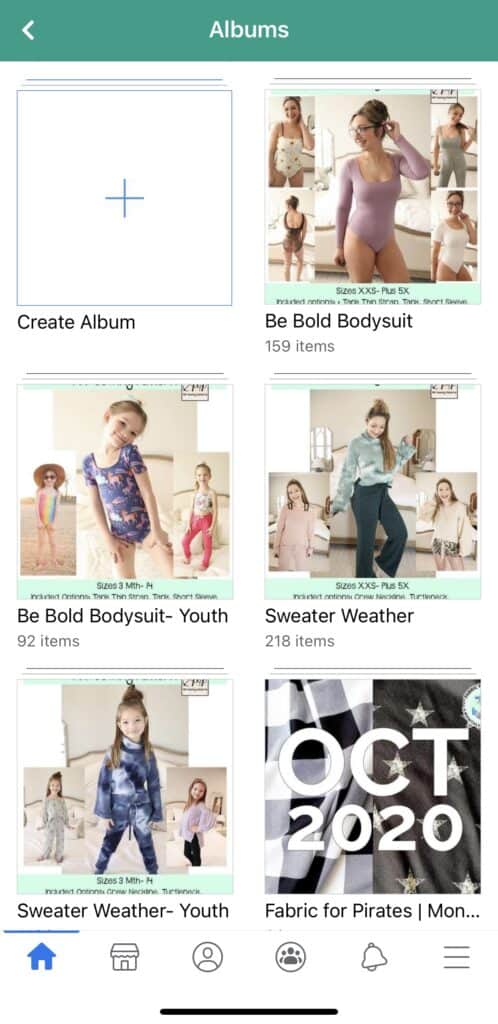
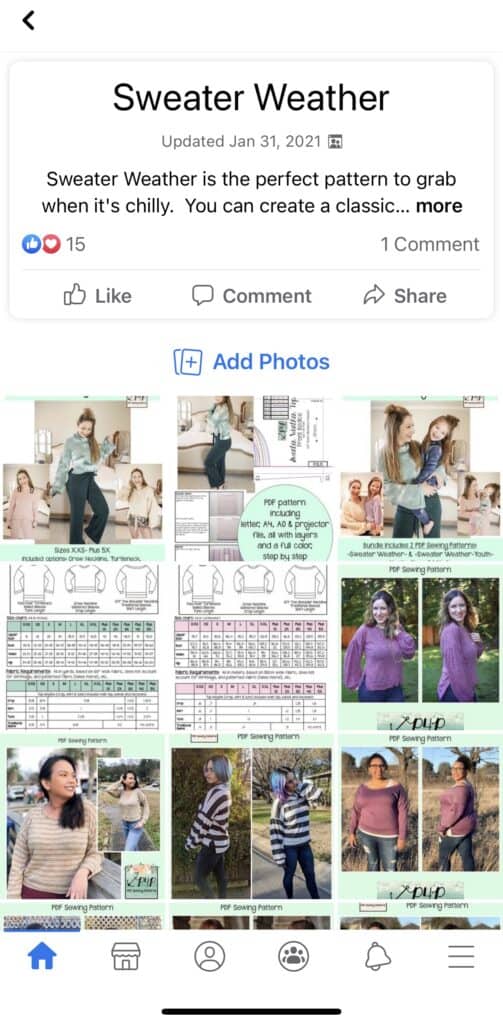
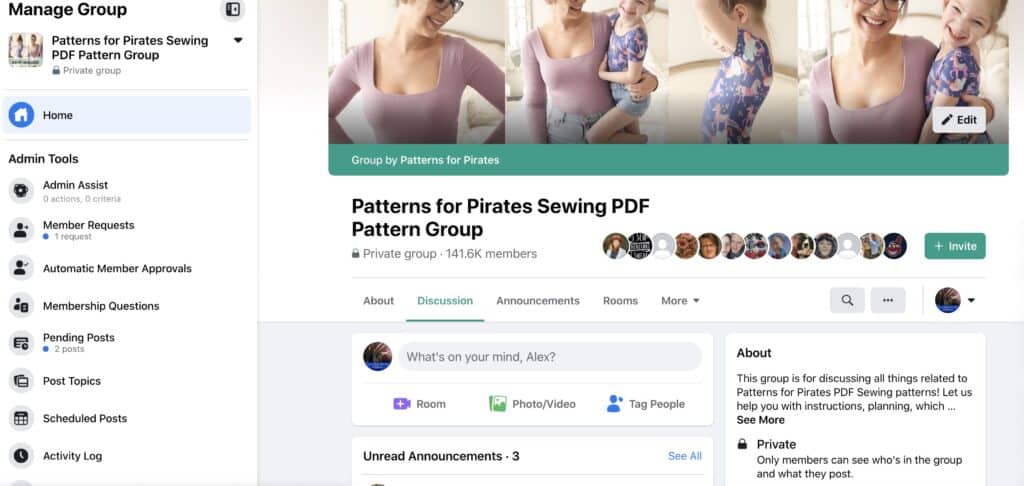
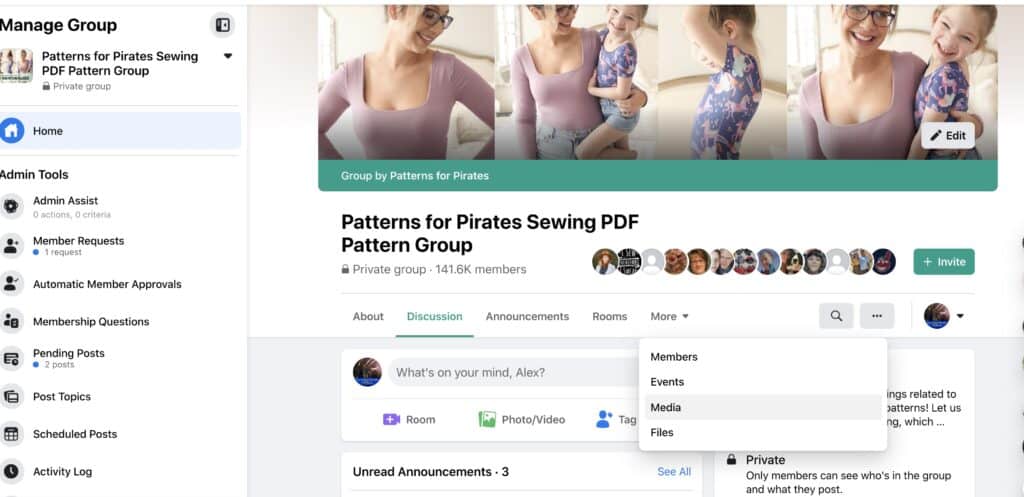
  • Look through the pattern album in the group! Yes, I have an album for almost every single pattern filled with A TON of pictures of every size and option for everyone to look through to see the intended fit of the pattern.  You can see where it is fitted, loose, and how it looks on a variety of sizes and body types.  Most pictures are also labeled with their size and their fabric choose to help even more! You can view the albums both mobile and on a desktop! Just go to the P4P FB Group and click “view group info”.  From there you can click “pictures” and go to “albums”.  Scroll through for the particular patterns you’re looking for! 🙂
  • Mobile View:


  • Desktop View:


*Choosing fabric- One of the most IMPORTANT parts of following a pattern is to use fabric that is suggested by the designer.  If you don’t you will not have the intended look that is shown on the cover and listing pictures.  The wrong fabric can mean a loose fit turns snug, a flowy fit turns tent-like, and so on.

  • Knit fabrics– I often give the percent of stretch knit fabrics should have for fitted patterns. Here is a quick link to my sister’s blog with a video on how to find the percentage of stretch: Megan’s Blog Post
  • Different fabric = Different look and fit— if you do not follow the suggested types of fabric you have to be prepared for the garment to not look and fit how it is intended and showed in the pattern listing pictures. I make sure that all my testers follow those suggestions, so all the tester pictures are going to show the intended fit and look. If you are unsure, read our Different Fabric, Different Fit before you decide.
  • Buying online- I love to buy online.  In fact, I pretty much get fabric from an online source or scramble to “borrow” some from my Mama’s large stash ;).  I hardly ever make it to a brick and mortar store! BUT, there seems to be an endless amount of fabric types to learn as a beginner seamstress and online shopping can be very difficult to navigate.  I always suggest buying from a smaller shop that you can message questions to!  Being able to ask how thick/thin, percentage of stretch and even if it would be good for a certain type of garment is such a nice bonus to supporting a smaller shop!
    • There are a lot of shops offering non custom fabric online as well as an abundance of custom knit designers/hosts FB that are smaller businesses (but be weary-sadly there are many that have been scammed by these groups, so look for well established custom groups).  I love destash fb pages where you can buy from other sewists, but often you’re buying from someone who doesn’t know the full description of the fabric, so I don’t recommend this for beginners.
    • Stick to searching the exact recommended fabrics until you are confident with all the different kinds of fabrics out there.
    • We also offer a monthly subscription where you can receive a 2 yard piece of fabric, hand selected by our team. Get all the details about Fabric for Pirates here.
  • Fabric Requirements- I list fabric requirements on the last listing picture under the size chart as well as the first few pages of the tutorial.  I often break up the fabric requirements into different options and different parts of the garment. Example: Relaxed Raglan I list main body 7/8yd and long sleeves 7/8 yd, this means you will need 7/8 for the main body and an ADDITIONAL 7/8 for the sleeves.
    • As described in the tutorial, the fabric requirements do not include extra for fabric being cut off grain, shrinkage after prewashing (I ALWAYS recommend pre-washing fabric before cutting!), or to match any kind of patterned fabric/directional fabrics.
    • I recommend buying a little more to account for these things 🙂

Screenshot 2015-10-23 13.24.34

*Looking for more inspiration- If you have looked through the listing pictures, album pictures in the FB group and still want to see more you can use the search bar in the Facebook group. with our hashtags to help! Some pictures are tagged with hashtag/pattern name… here are a few for examples: #peglegs  #carefreecardigan #cptmackcardigan… using the hashtag will help pull up pictures and not posts about the pattern 🙂


Now we’re finally ready to begin!

*Cutting fabric- It is important to cut your pieces along the grainline of the fabric.  Grainline is easily found parallel along the selvage of the fabric (the sides that are not cut by the store).  You want to match your selvage/grainline to the grainline arrow on the pattern piece.  Making sure this is straight is important! If it is cut off grain/not straight it will hang not straight! Have you ever had a pant leg/sleeve/shirt always twisting while you wear it? That is because it was cut off grain! It’s really annoying! So take your time matching the grainline on both woven and knit fabrics.
cutting layout

*Cut chart- I include a cut chart for any rectangle pieces.  The measurements for the cut chart are located in the first few pages of the tutorial and on the pattern pieces.  This way you can cut your rectangle pieces without having to look up the tutorial :). Our newer patterns include rectangle pattern piece as well. Some sewists prefer to have everything printed so now you can chose.

  • I prefer to use my cutting mat, quilters ruler and rotary cutter for cutting rectangle pieces.  If it has a longer measurement I prefer to fold in half and cut on the fold for ease as well.  Again, make sure you are keeping your grainline straight.

*Direction of Stretch- I also include a direction of stretch arrow on all pattern pieces for knit garments.  It is always perpendicular to the grainline.  Even with 4 way stretch fabric the greatest amount of stretch will run horizontally on your fabric.  If it is on the fold, fold  your fabric selvage (the part not cut by the store) towards the opposite selvage as wide as your piece and place on fold.

B1

*Using a Stretch Stitch for Knit Garments- Since most of my patterns are for knit/stretch fabric I thought I would add available stretch stitches you can use.  I use a serger in the tutorial, this is a great machine stitch for stretch fabrics if you own one.  Basic sewing machine stitches that also work are

a) triple stitch

b) lightening stitch

c)honeycomb stitch

d) overlock stitch

e) stretch overlock stitch-this is my personal favorite usually-

f) double overlock stitch

If you read your manual they will list the stretch stitches your machine have.  If you don’t have or can’t find your manual you can always google for your manual!  It is very valuable to have! 🙂

stretch stitches


I hope these tips are helpful for first time users! You can always post other questions to the P4P FB group and don’t forget to share your final garment!


Filed Under: Frequently Asked Questions, P4P University 66 Comments

Tips on sewing with silky fabrics

July 24, 2015

I have two patterns that I suggest using a lightweight woven with a very soft drape (Everyday Elegance Top and the Summer Cover Up).  I often get asked for “tips and tricks” to working with this kinds of fabrics!  So, here is a compiled list of a few tips I have for working with slippery wovens like chiffon, peach skin, rayon, satin, challis, ect.

I think the most difficult part of sewing something up in this fabric is the cutting.  I almost always use pattern weights like these:

But with any kind of slippery fabric they’re a MUST! If you don’t have any, use any kind of paper weight, heavy object that isn’t too tall.  The silver paper weights are from this Etsy Shop if you’re looking to buy.  She has several options in her shop, I prefer the shorter version to be able to get my scissors closer to them! The pink were hand-me-downs from my mama <3.

Some specialty wovens are harder then others– if you’re cutting anything that needs to be precise (collar piece) then I recommend only cutting ONE layer at a time.  With something as loose and forgiving as the kimono though, I don’t personally bother with it. 🙂

So, lets get started sewing! I recommend using a nice, new, sharp needle for these.  
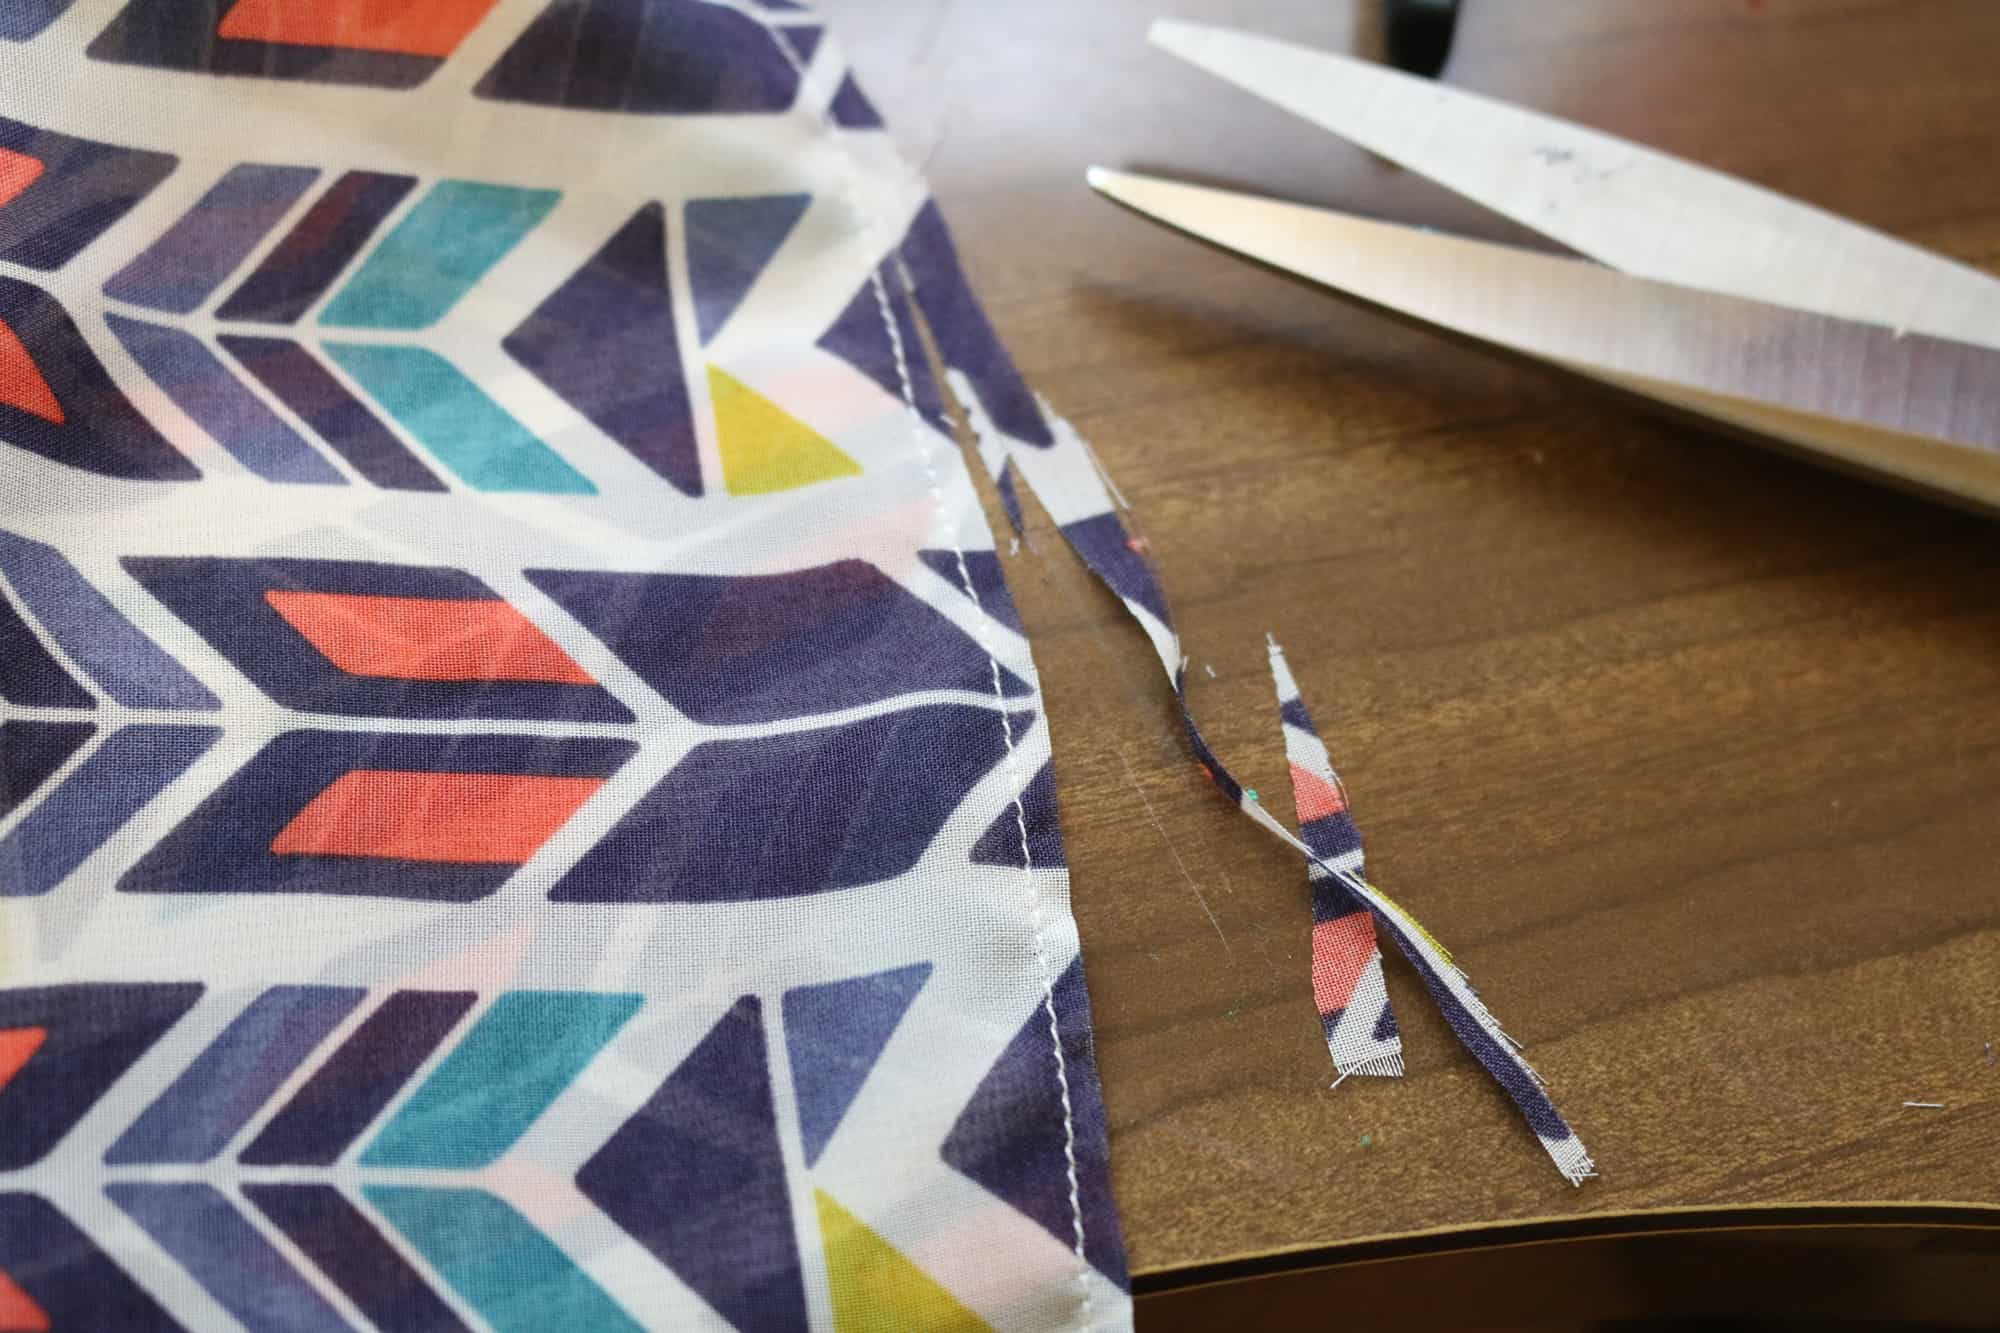
I also like to tighten my stitch length down one notch to keep away from puckers.

When sewing my BIGGEST TIP is to not OVERWORK the fabric.  Although it is a non-stretch woven they will get “wonky” and pull out of shape if you do.  Don’t pull or “man-handle” the fabric to make anything match! If your pieces aren’t lining up perfectly it is almost always a cutting mistake (remember I said that was the most difficult part!).  
The good thing is most clothing made from these drapey fabrics are loose fitting and forgiving :).  Trim and let it go 😉

After I sew, I PRESS.  It takes a little more time, but it makes your end product much more professional.

French seams:

I had a lot of questions about using french seams.  I don’t tend to care what the inside of my clothes look like a TON.  But for nicer items in specialty wovens french seams would be nice.  Here is my quick how to:

You will place your pieces WRONG side together and make the first stitch. For my patterns with 1/2″ seam allowances I do the first stitch at 1/4″.  Then trim it to 1/8″.  I press the seam on both the wrong and right sides of the garment flat, then fold at the seam and press again.

Now with RIGHT sides together and first seam pressed inside stitch again at 1/4″ from fold/seamline.  This should enclose your raw edge from the first seam allowance and put you at your 1/2″ seam allowance total for the seam.

Again press from wrong and right sides of garment.  I tend to always press to the back.  You can top-stitch here if you prefer.  I do lengthen my stitch length back out to 3 for top-stitching.  Press again 🙂 Do you see an important trend in this? lol!

Hemming:

My prefered way to hem is to serge the edge—- I loosen my tension a tad to fight the puckering.

Then I press the serged edge over twice for a nice even narrow hem. Okay, most the time I don’t press…but you SHOULD press, I can hear my mom telling me to take my time and press every time I don’t 😉 

Now I DO press after EVERY TIME! I see a lot of seamstresses complain their hems are “wonky” on specialty wovens, two things cause this- over working your fabric/pulling it as you sew and not pressing! A good press after can really change the way your hem looks!

I got asked to show how to hem without a serger; so here is how I hemmed without a serger.  I pressed WITH LOTS OF STARTCH (don’t be scared to use some or lots 😉 ) a 1/2″ to wrong side.

Then I opened the 1/2″ hem and folded the raw edge to the fold line.  This creates a 1/4″ narrow hem fold. Press again.

Tada! You can sew with specialty wovens! The biggest tips are: cut carefully, don’t pull your fabric as you sew and press, press and press again 🙂

Filed Under: P4P University, Sewing with Woven Fabrics, Uncategorized 2 Comments

  • « Previous Page
  • 1
  • …
  • 3
  • 4
  • 5

Featured Patterns

  • Loosey Goosey Loosey Goosey $12.00 Original price was: $12.00.$10.50Current price is: $10.50.
  • Loosey Goosey- Youth Loosey Goosey- Youth $10.00 Original price was: $10.00.$8.50Current price is: $8.50.
  • Loosey Goosey - Bundle Loosey Goosey - Bundle $20.00 Original price was: $20.00.$18.00Current price is: $18.00.
  • Everyday Shirt Everyday Shirt $12.00
  • Everyday Shirt- Youth Everyday Shirt- Youth $10.00
  • Privacy Policy
  • Refund Policy
  • Affliliate Program
  • Contact Us
  • About

Copyright © 2025 Patterns for Pirates

Copyright © 2025 · Genesis Framework · WordPress · Log in