Patterns for Pirates

P4P stylish, modern, wearable patterns

  • Home
  • Blog
    • Frequently Asked Questions
    • Pattern Releases
      • Free Patterns
    • P4P University
      • Fitting
      • Sewing with Stretch, Knit Fabrics
      • Sewing with Woven Fabrics
      • Sewing Machines
    • Sew-A-Longs
    • Fabric for Pirates
    • Pattern Hacks
    • Announcement
      • Blog Tours
      • Contest/Giveaway
  • Shop
  • Bundle Discounts
  • Flash Friday
  • Gift Cards
  • My Account
  • Cart

P4P University – knit cuffs

January 9, 2018

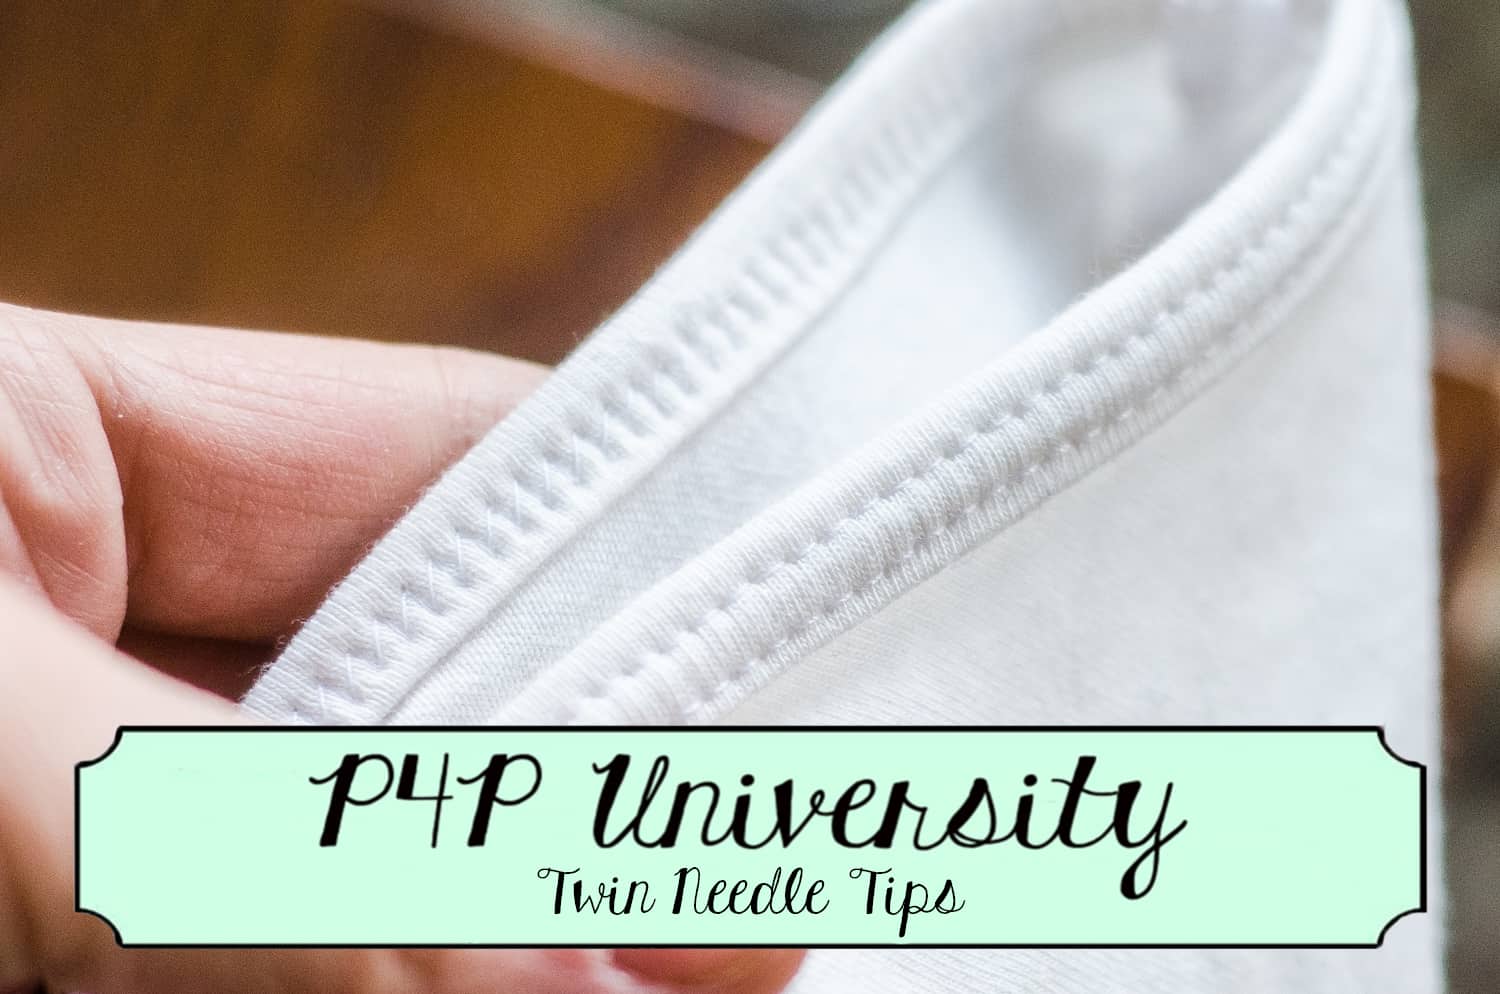
Ahoy Pirates! In our first P4P University blog of the year I wanted to give you a few tips and tricks to make adding knit cuffs to your projects easy peasy. Whether you’re sewing for yourself, your significant other or your little ones, adding cuffs to your sleeves or leg openings can be a tedious job. We can change that!

*Choose the right fabric for the cuff!

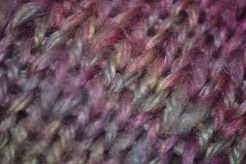
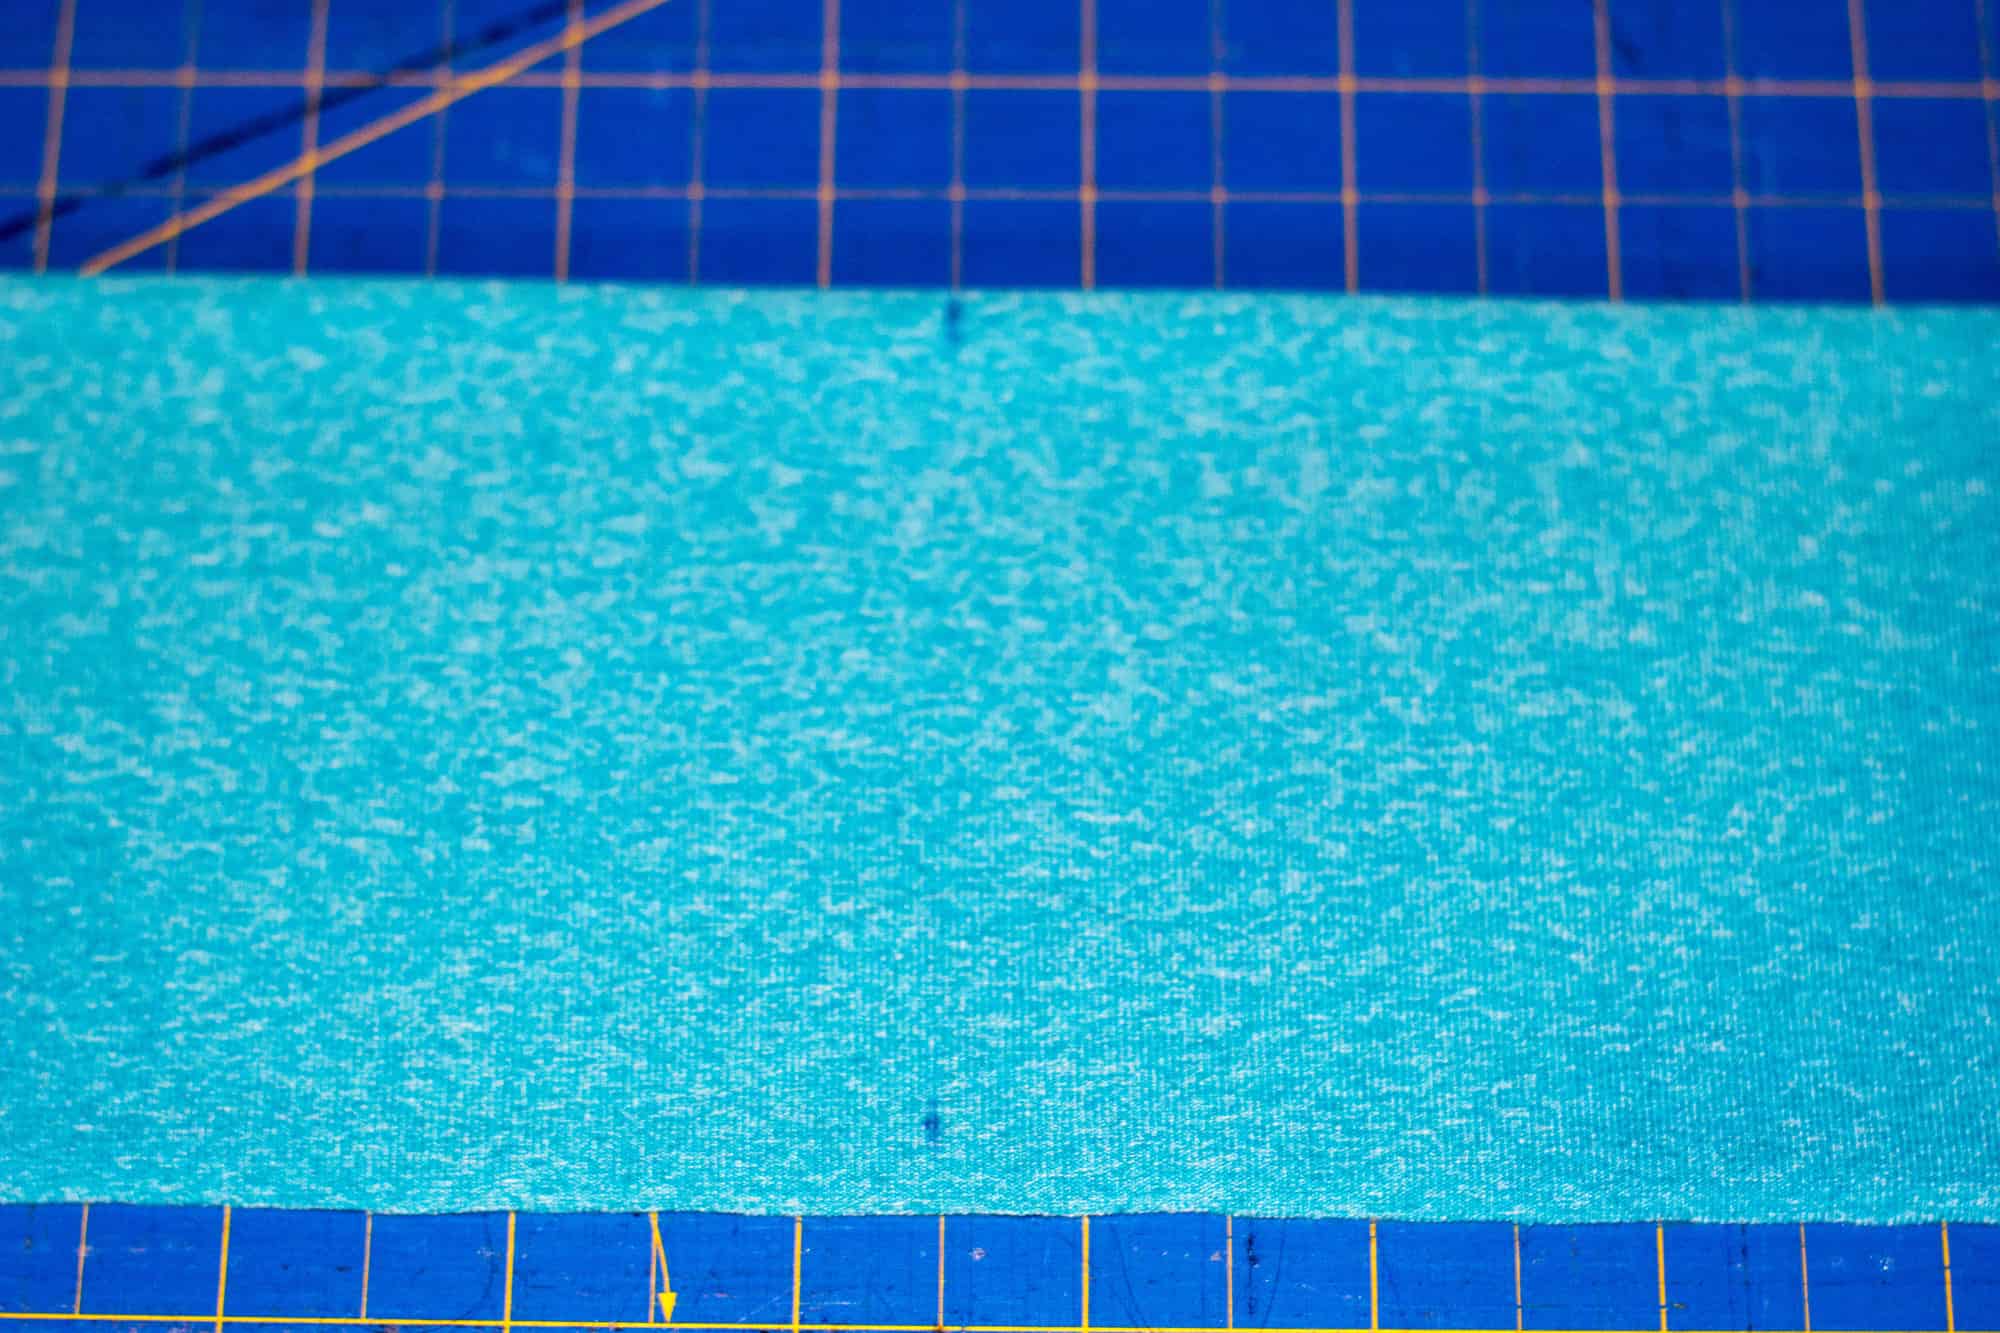
As I mentioned in the Neckbands 101 blog post, choosing the correct fabric for your cuffs will make a huge difference. The best one is rib knit or ribbing. If you do not have any ribbing handy or the colors you have do not work for your project the next best thing would be cotton spandex. I mainly use cotton spandex in for my kids’ shirts and joggers cuffs as I like to coordinate it with the main fabric. Whatever fabric you pick, make sure it has at least 50% stretch and excellent recovery.

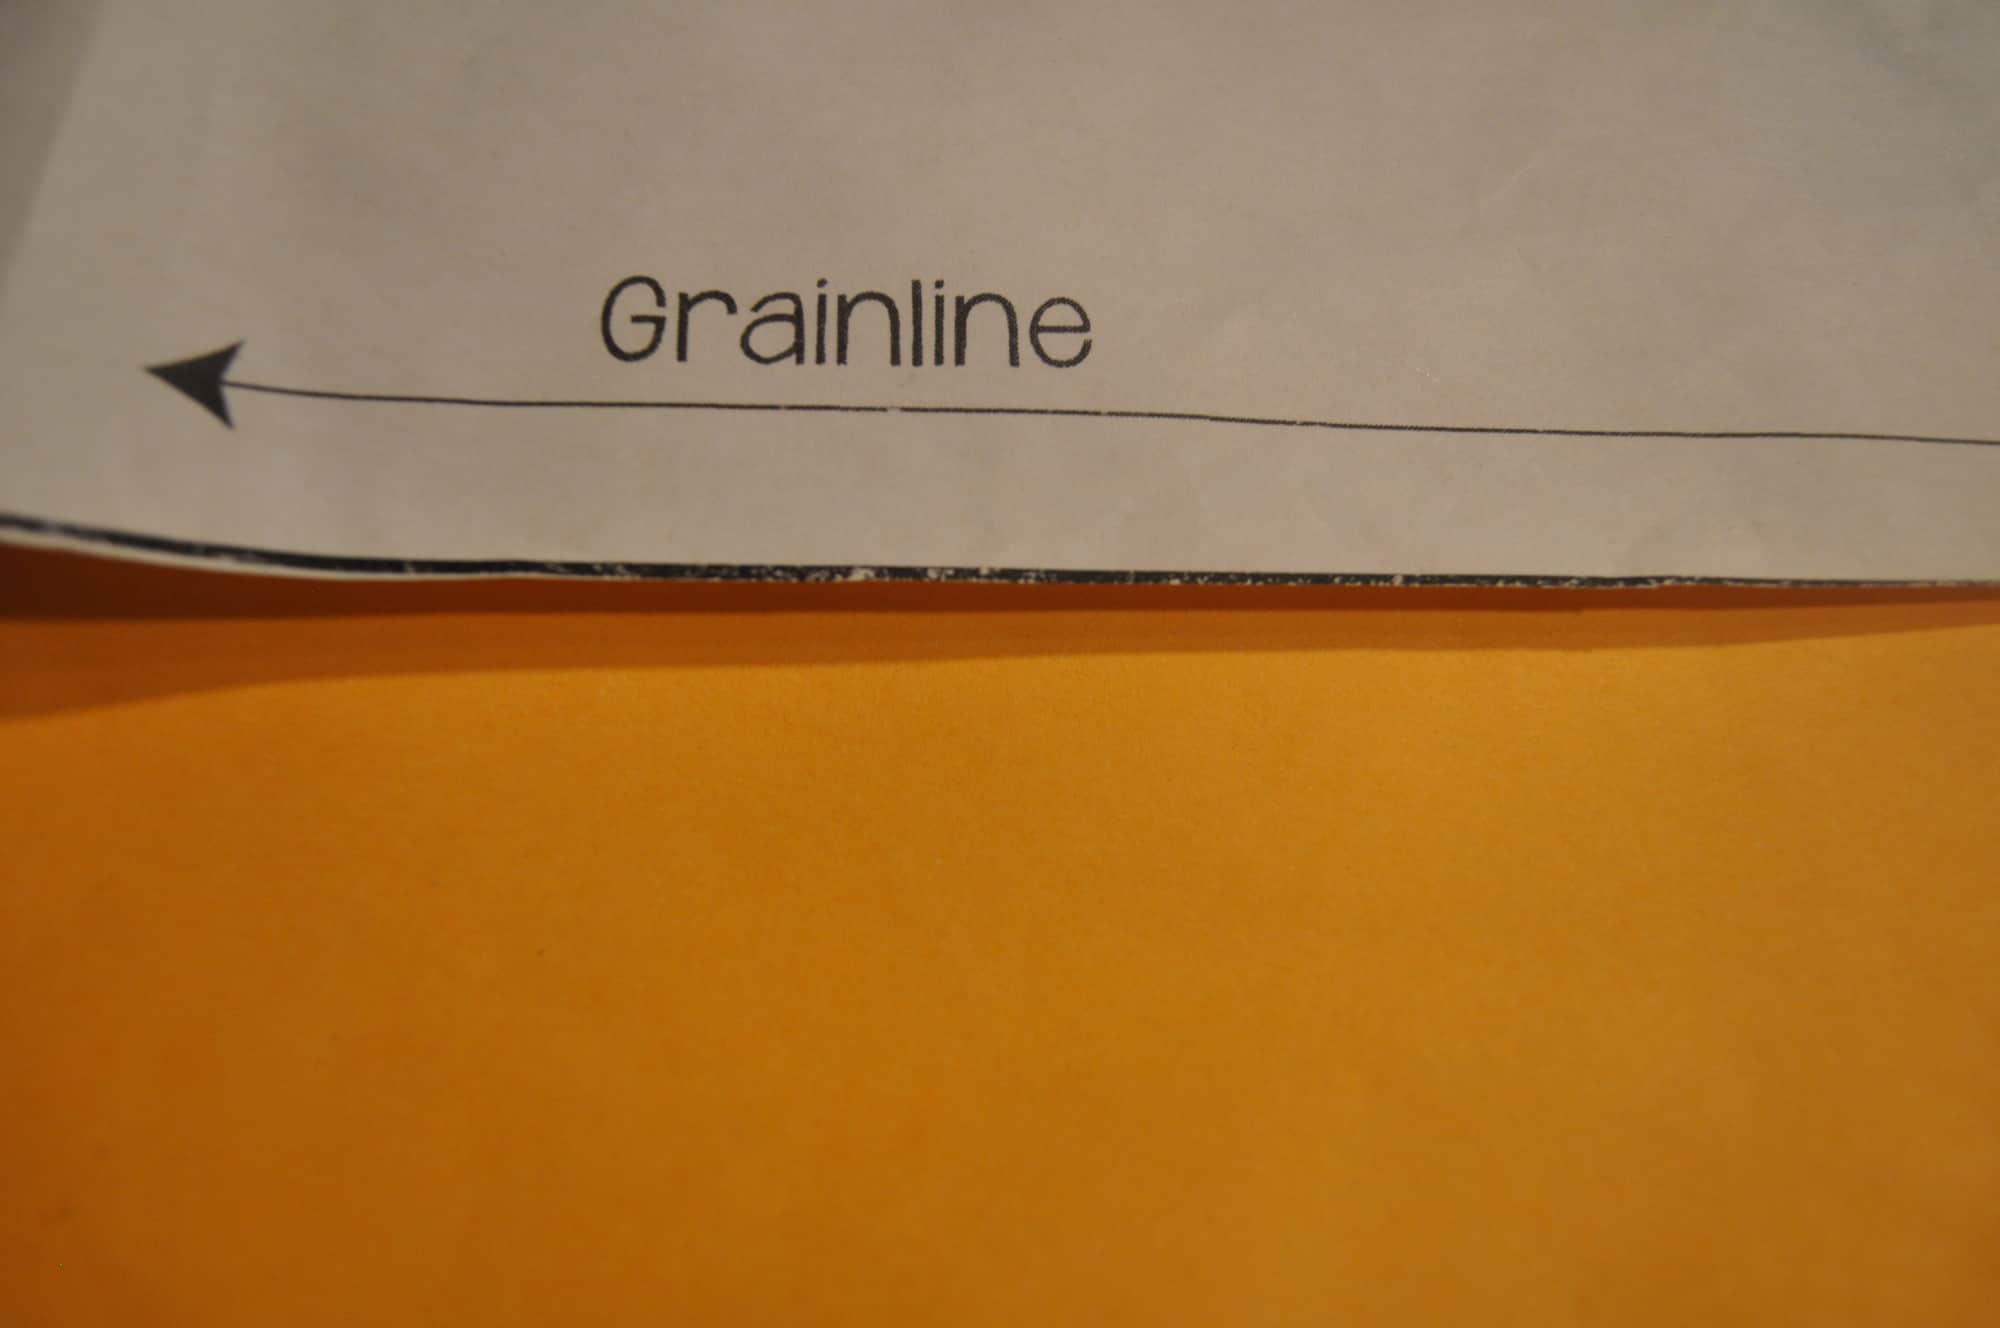
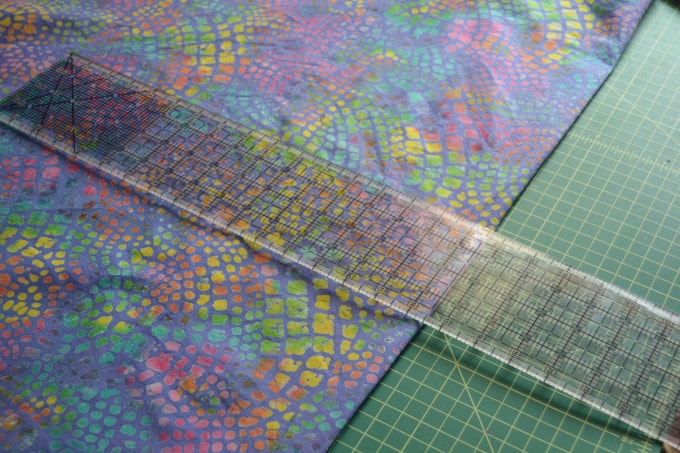
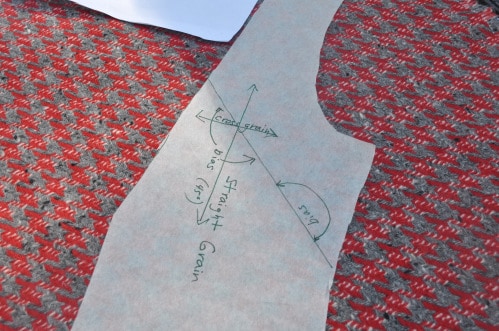
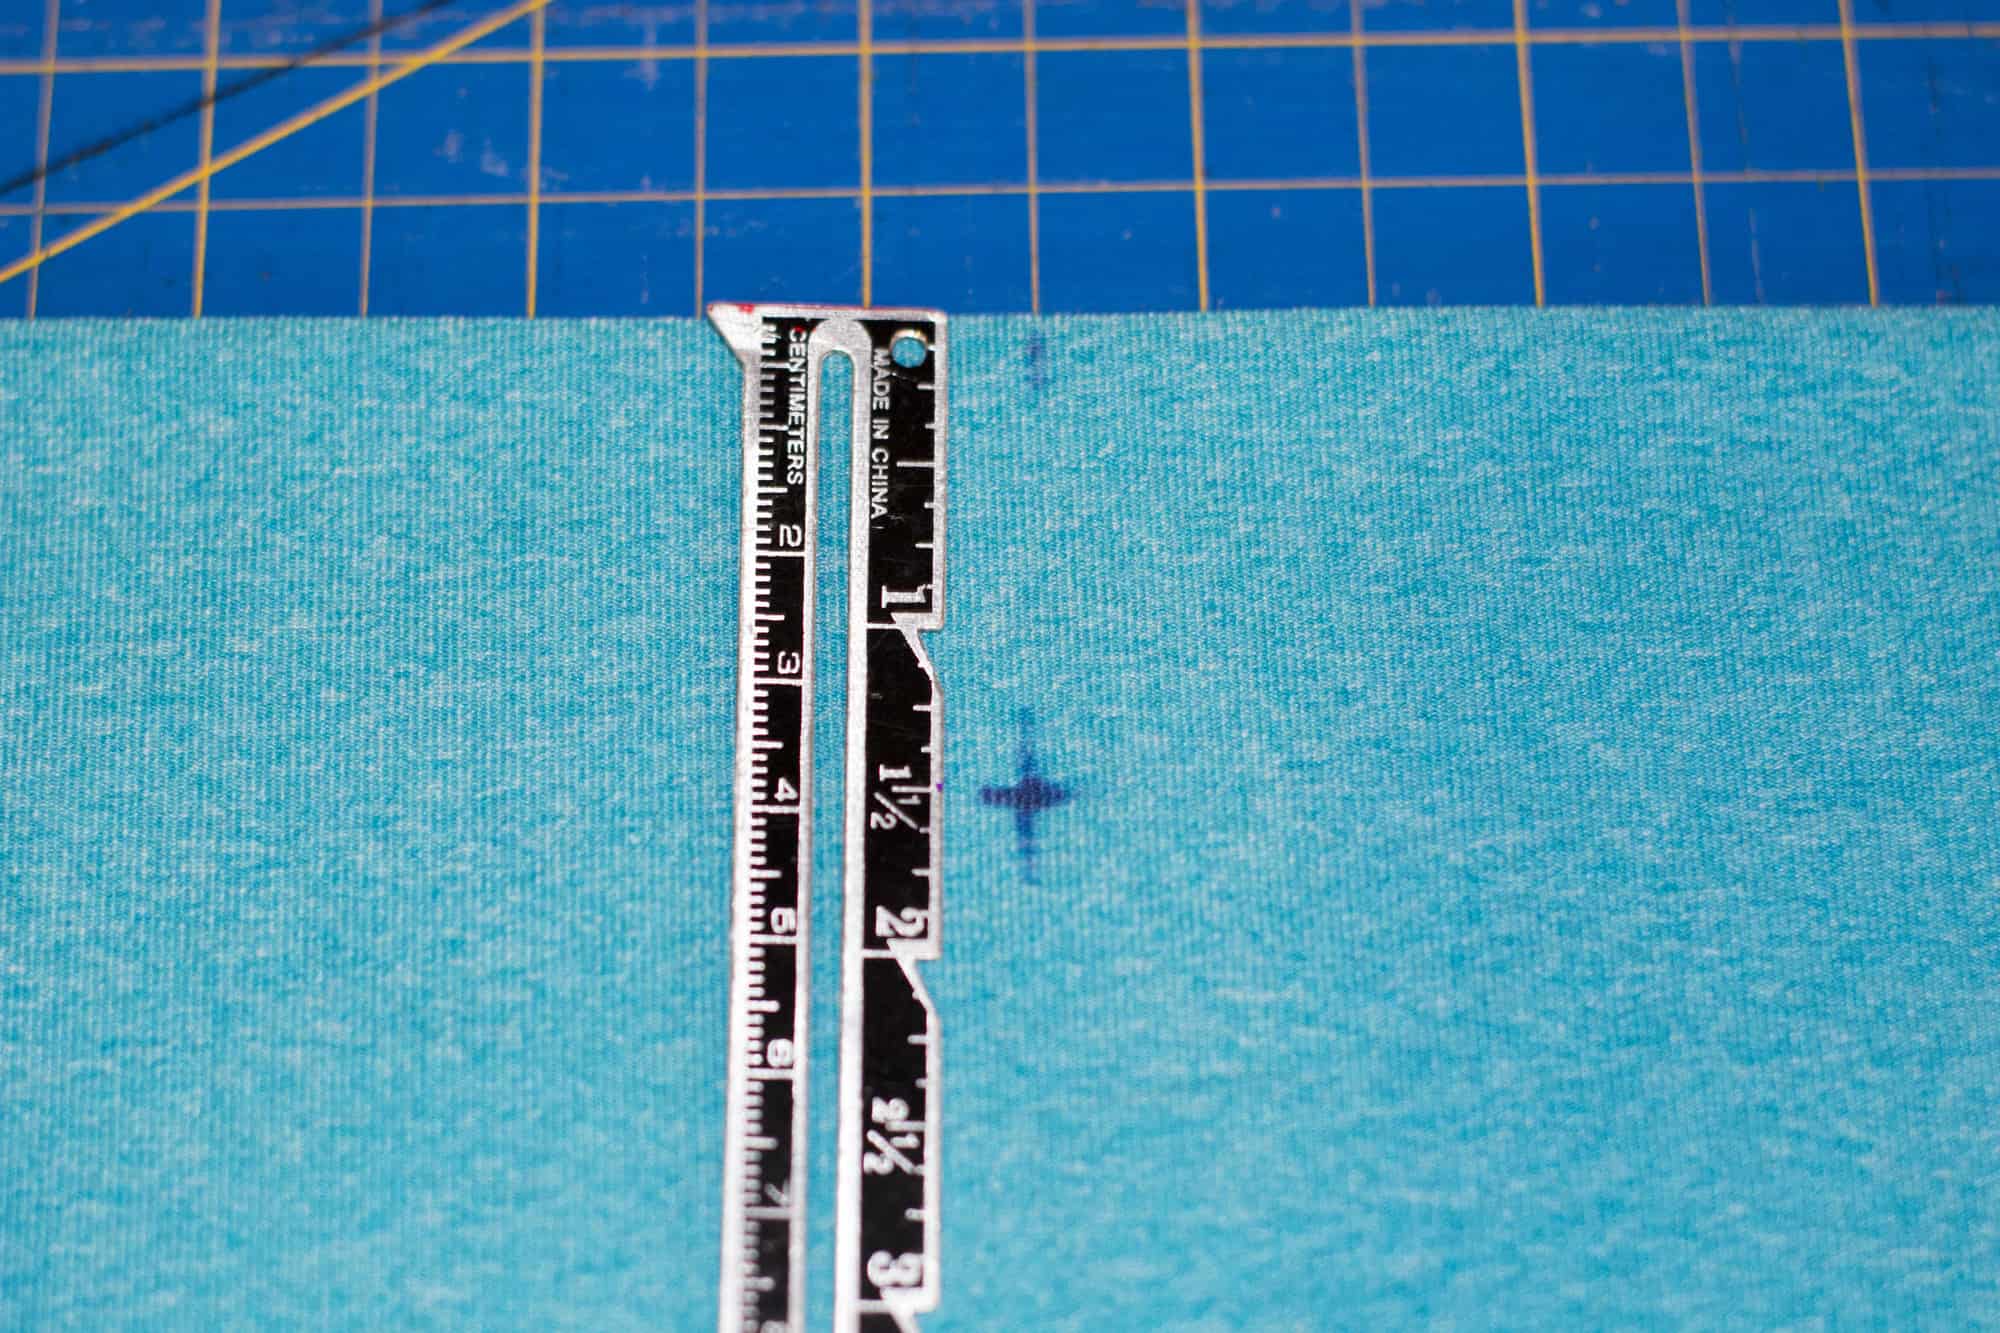
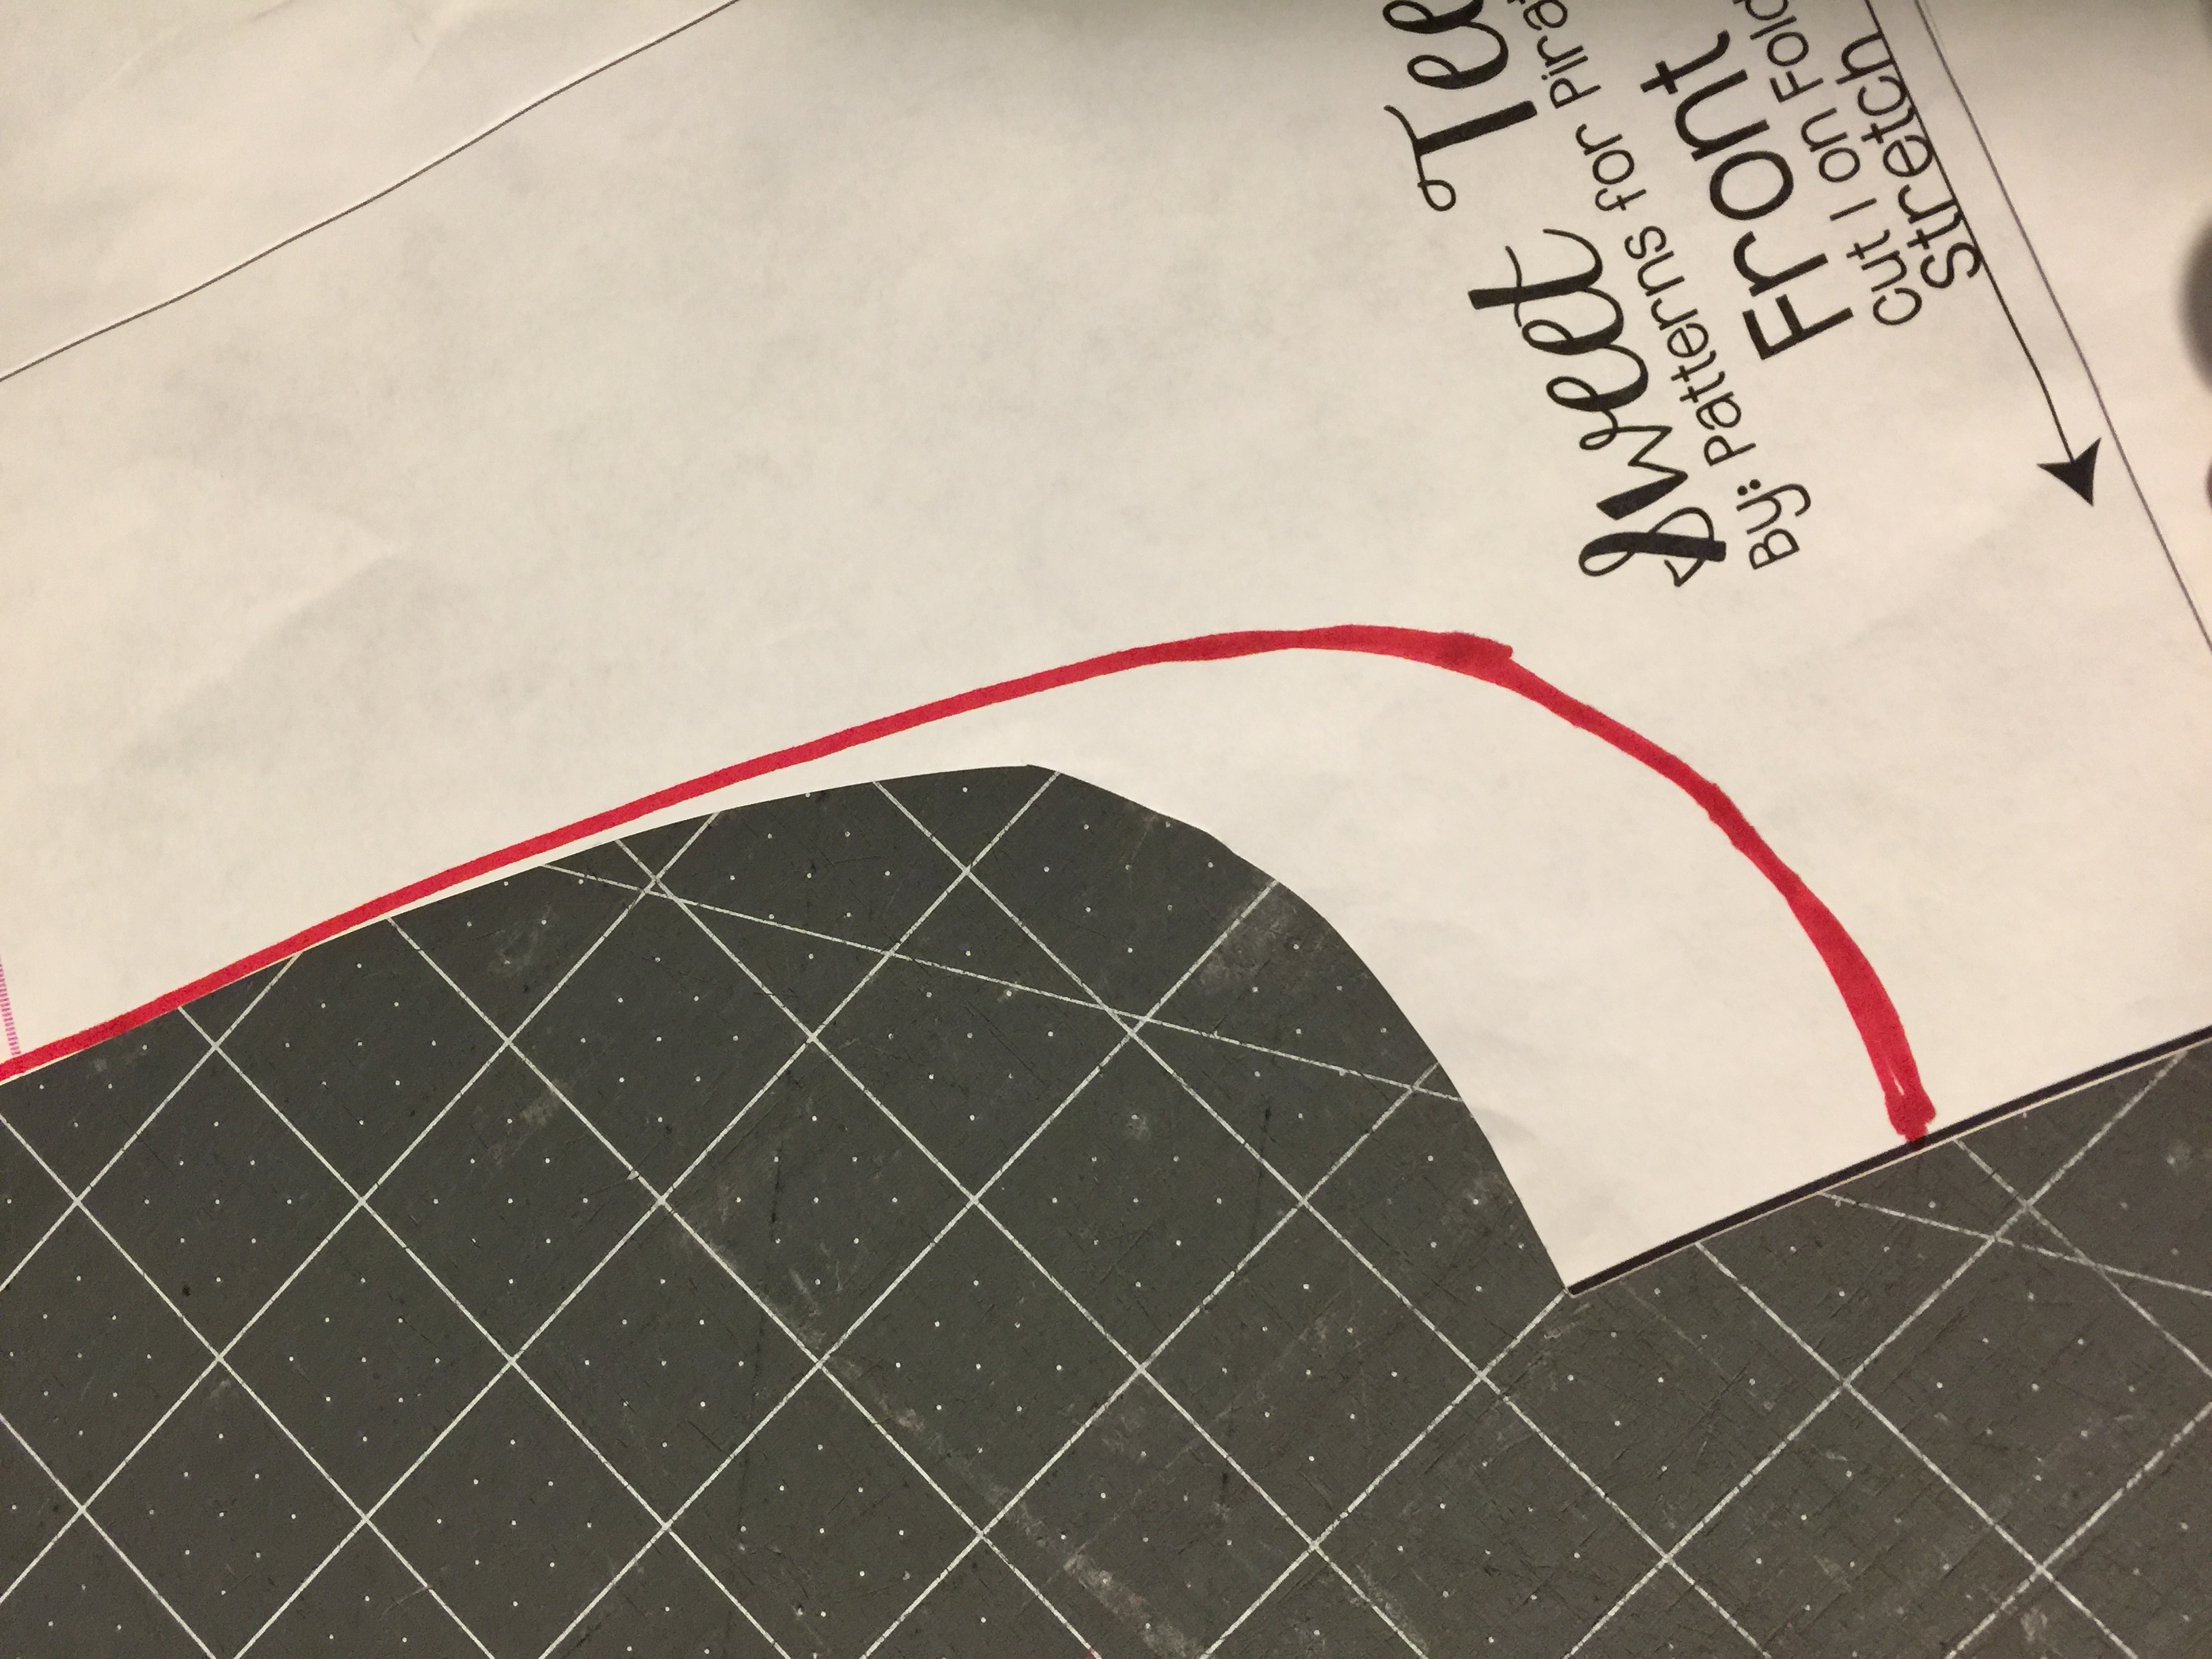
*Always cut the cuff with the greatest stretch horizontally.

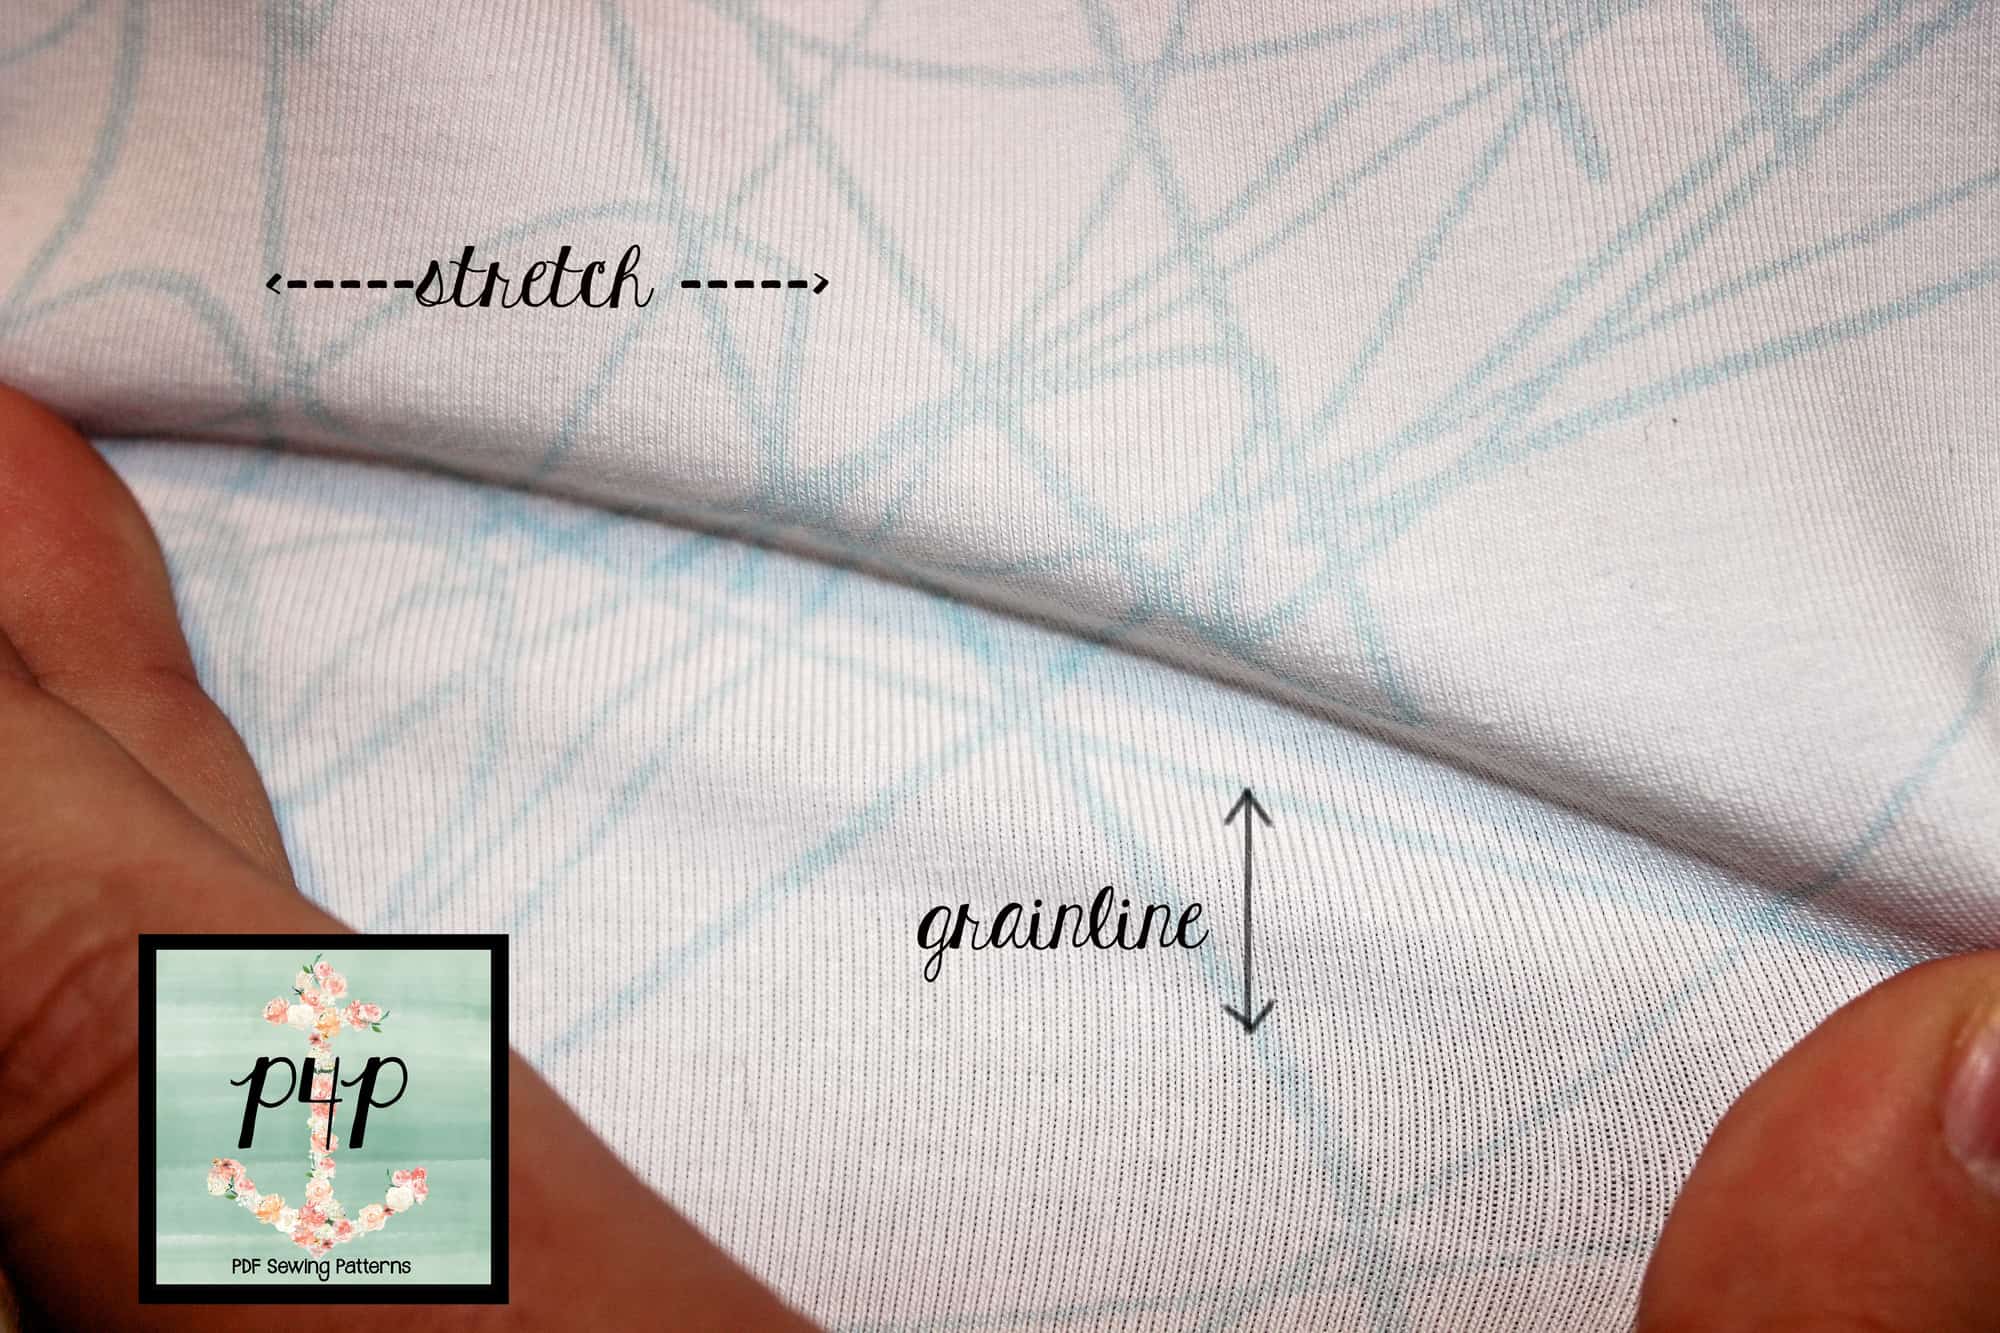
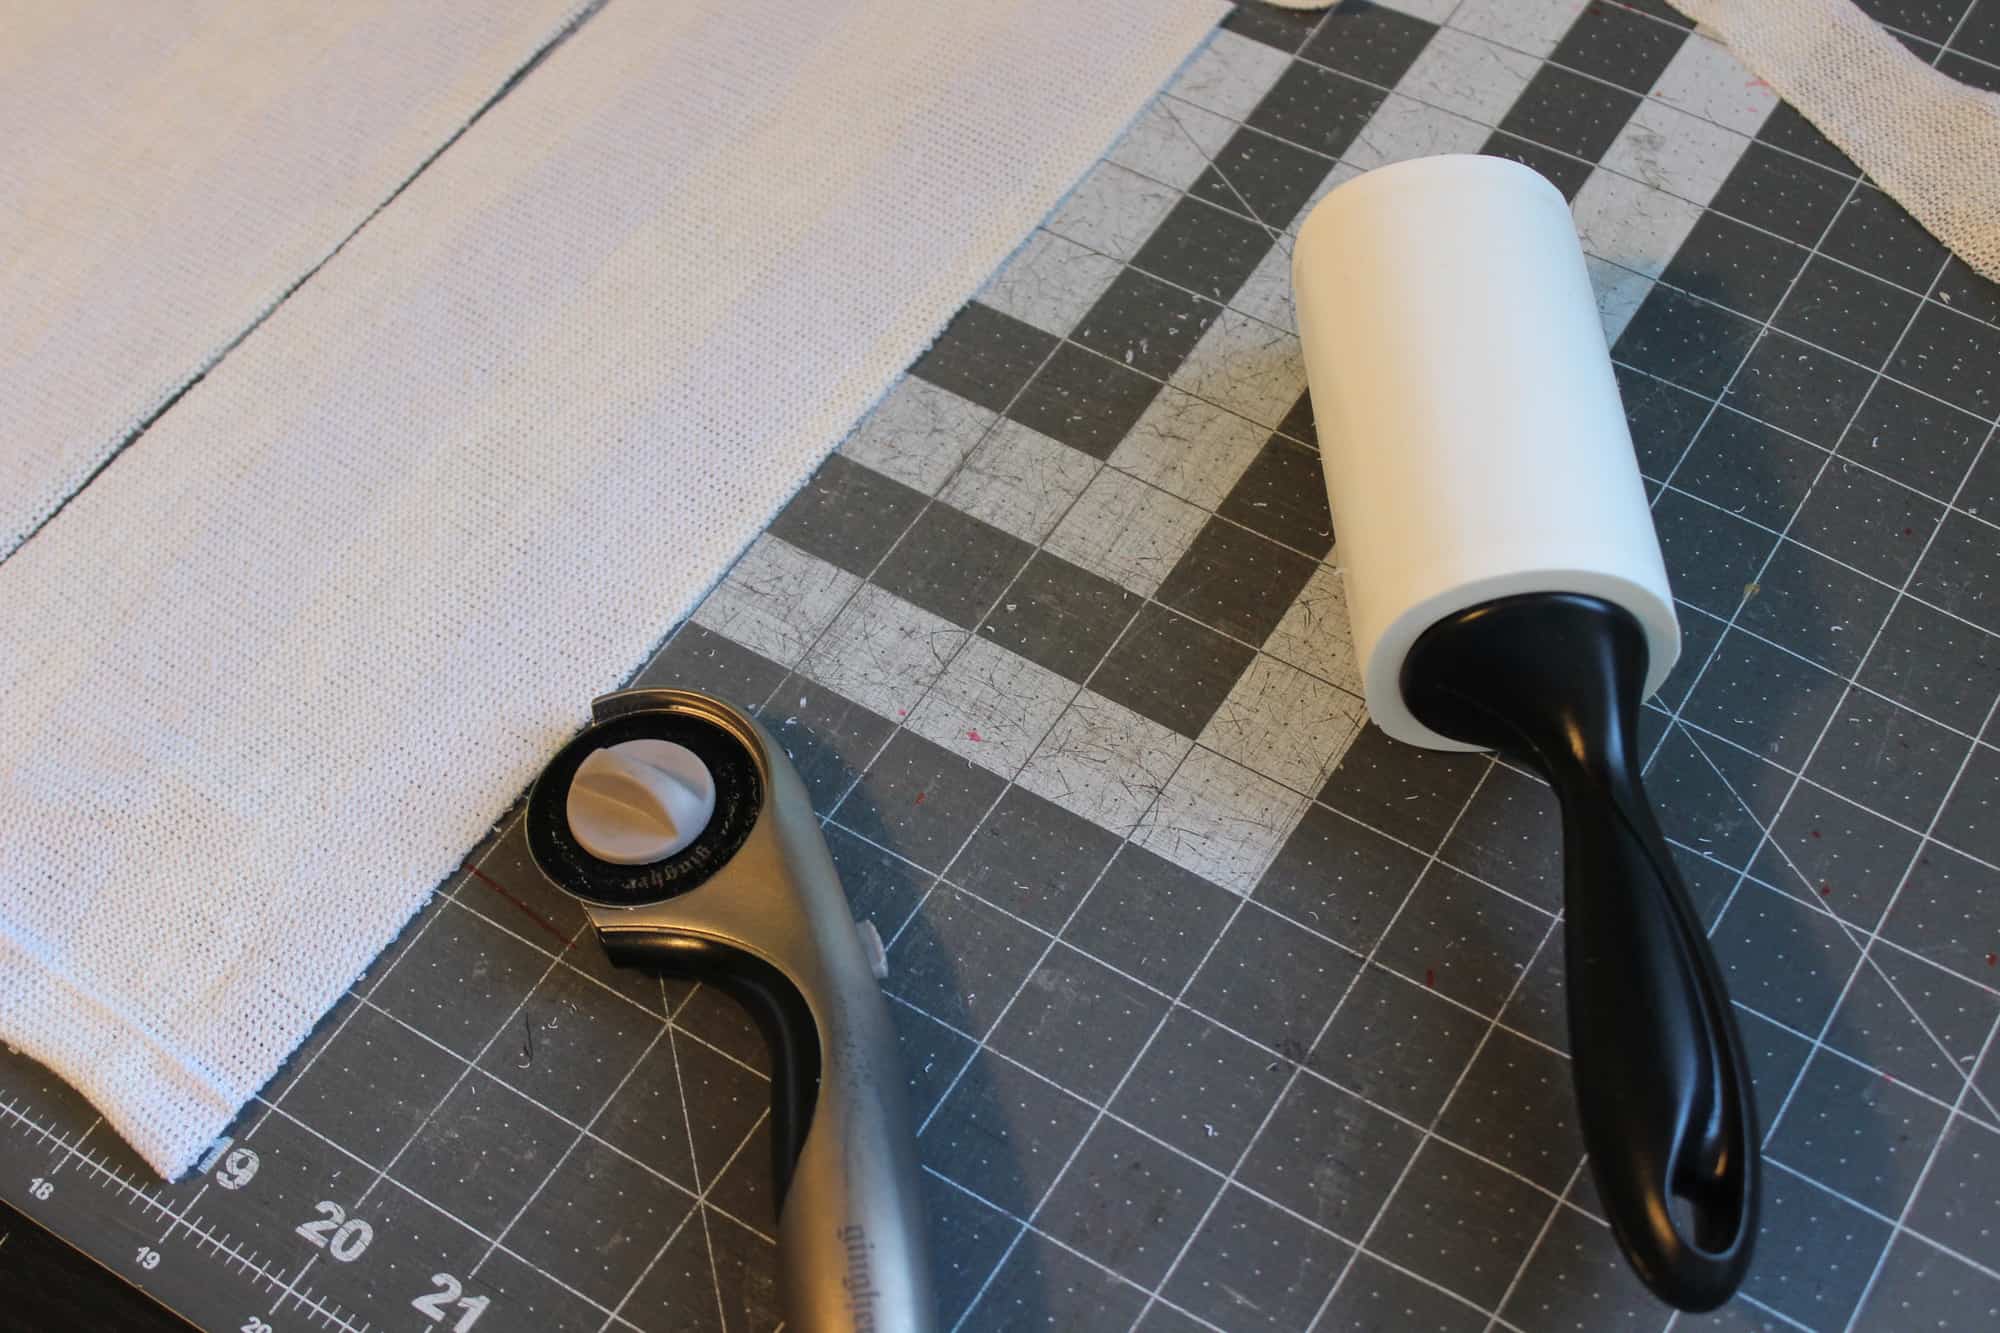
Always cut your cuffs cross grain! Even if the fabric you use stretches over 50% in both directions, you should never cut against the grain. Read all about the importance of “the grain” in Roberta’s blog post, When It Goes Against the Grain. 

*Press your cuffs!

I know I talk about pressing a lot in my blogs, but you have to believe me, it makes your sewing life so much easier. I recommend grabbing those cuffs and giving them a good steam press as soon as you cut your fabric. This will create a memory hem that will make it so much easier to fold them once you sew the “loop” closed.

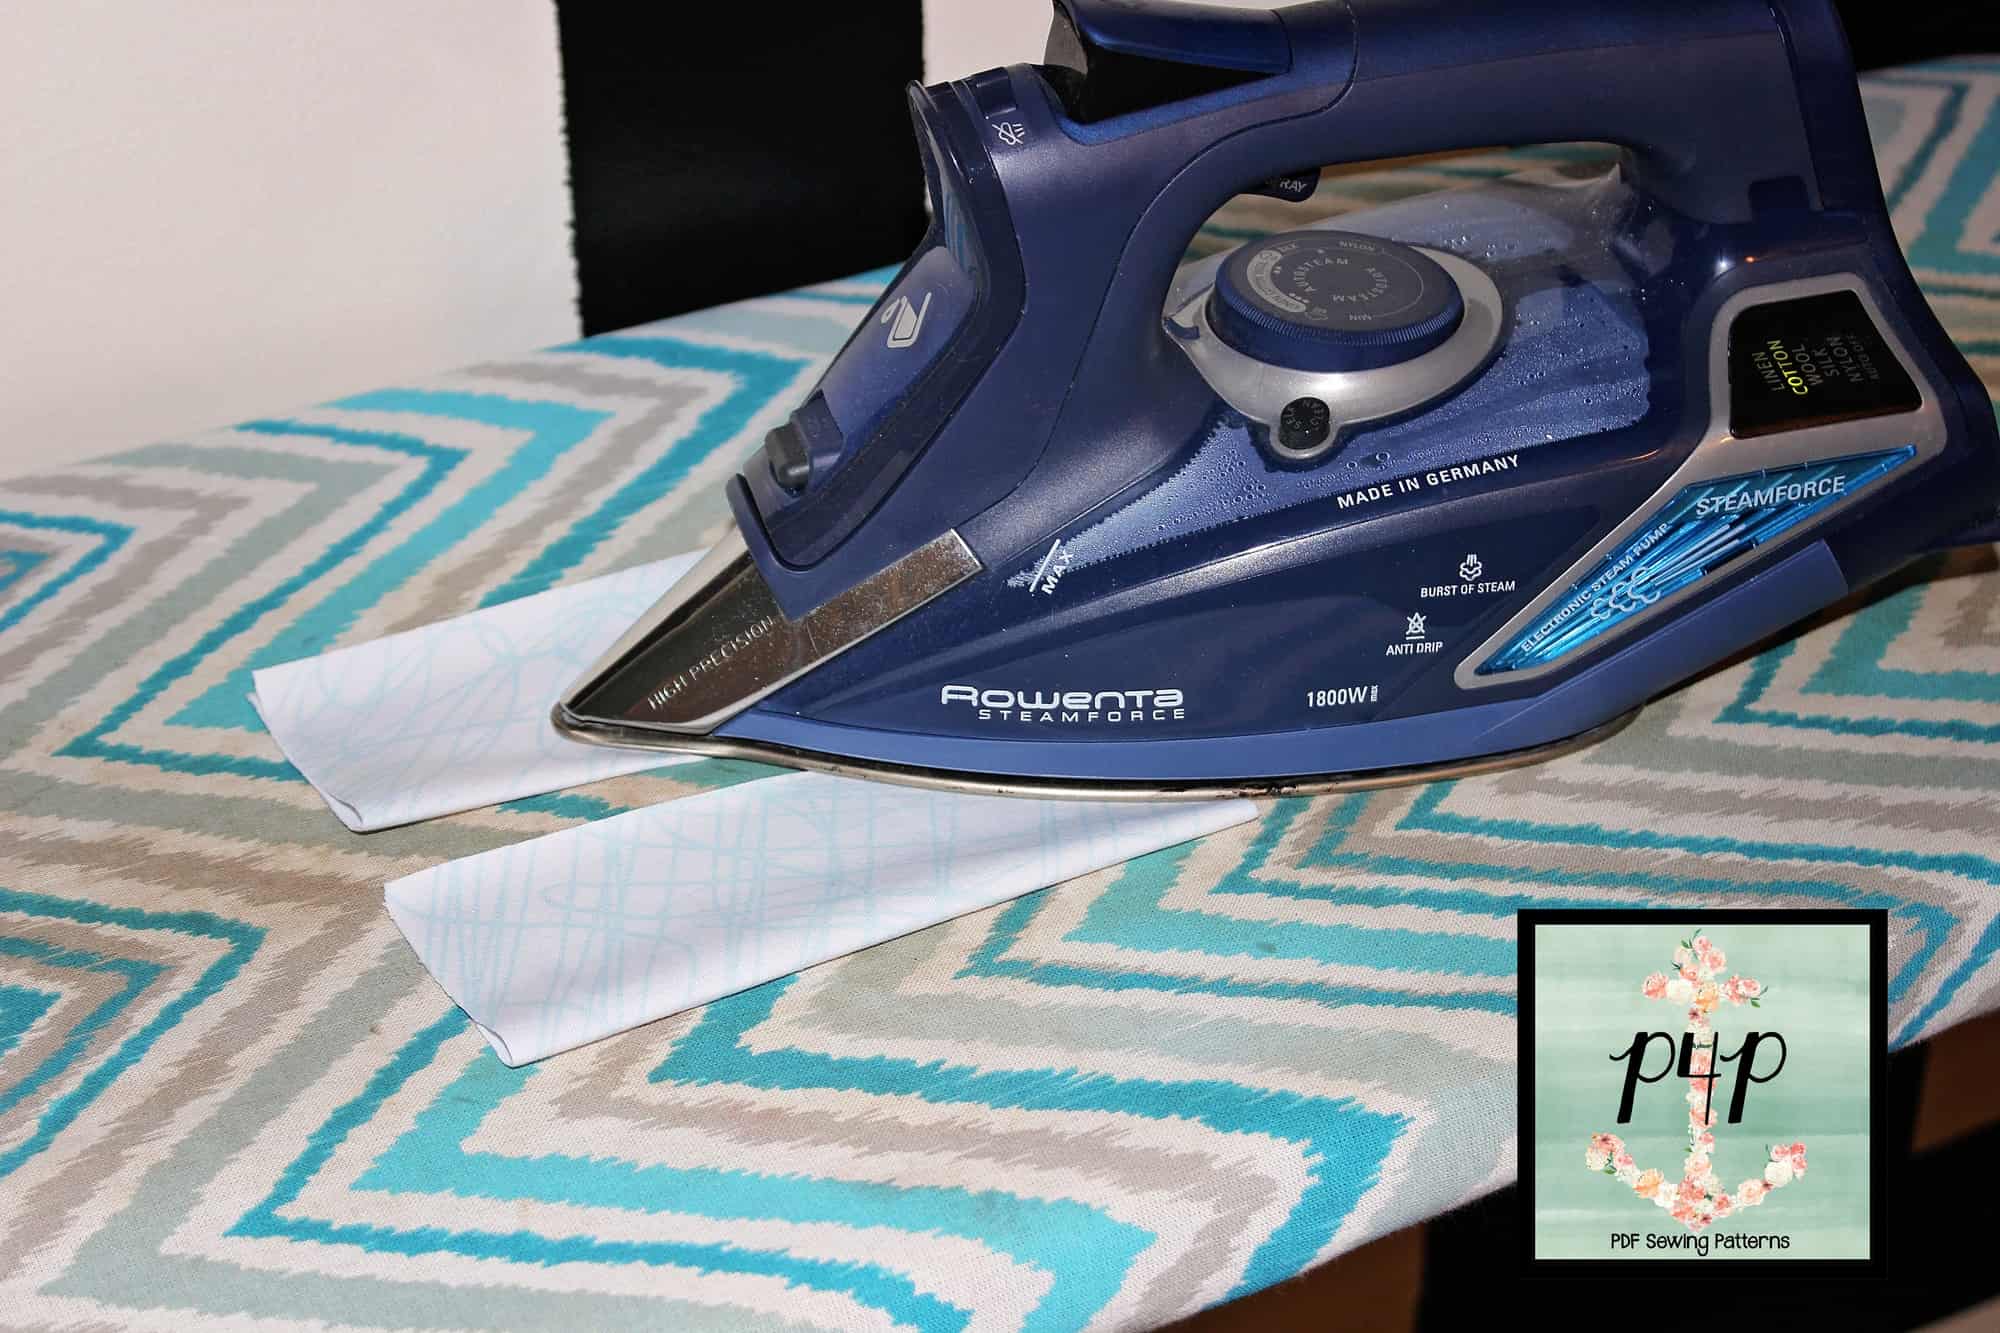
Press your cuffs after you sew them on too! 🙂

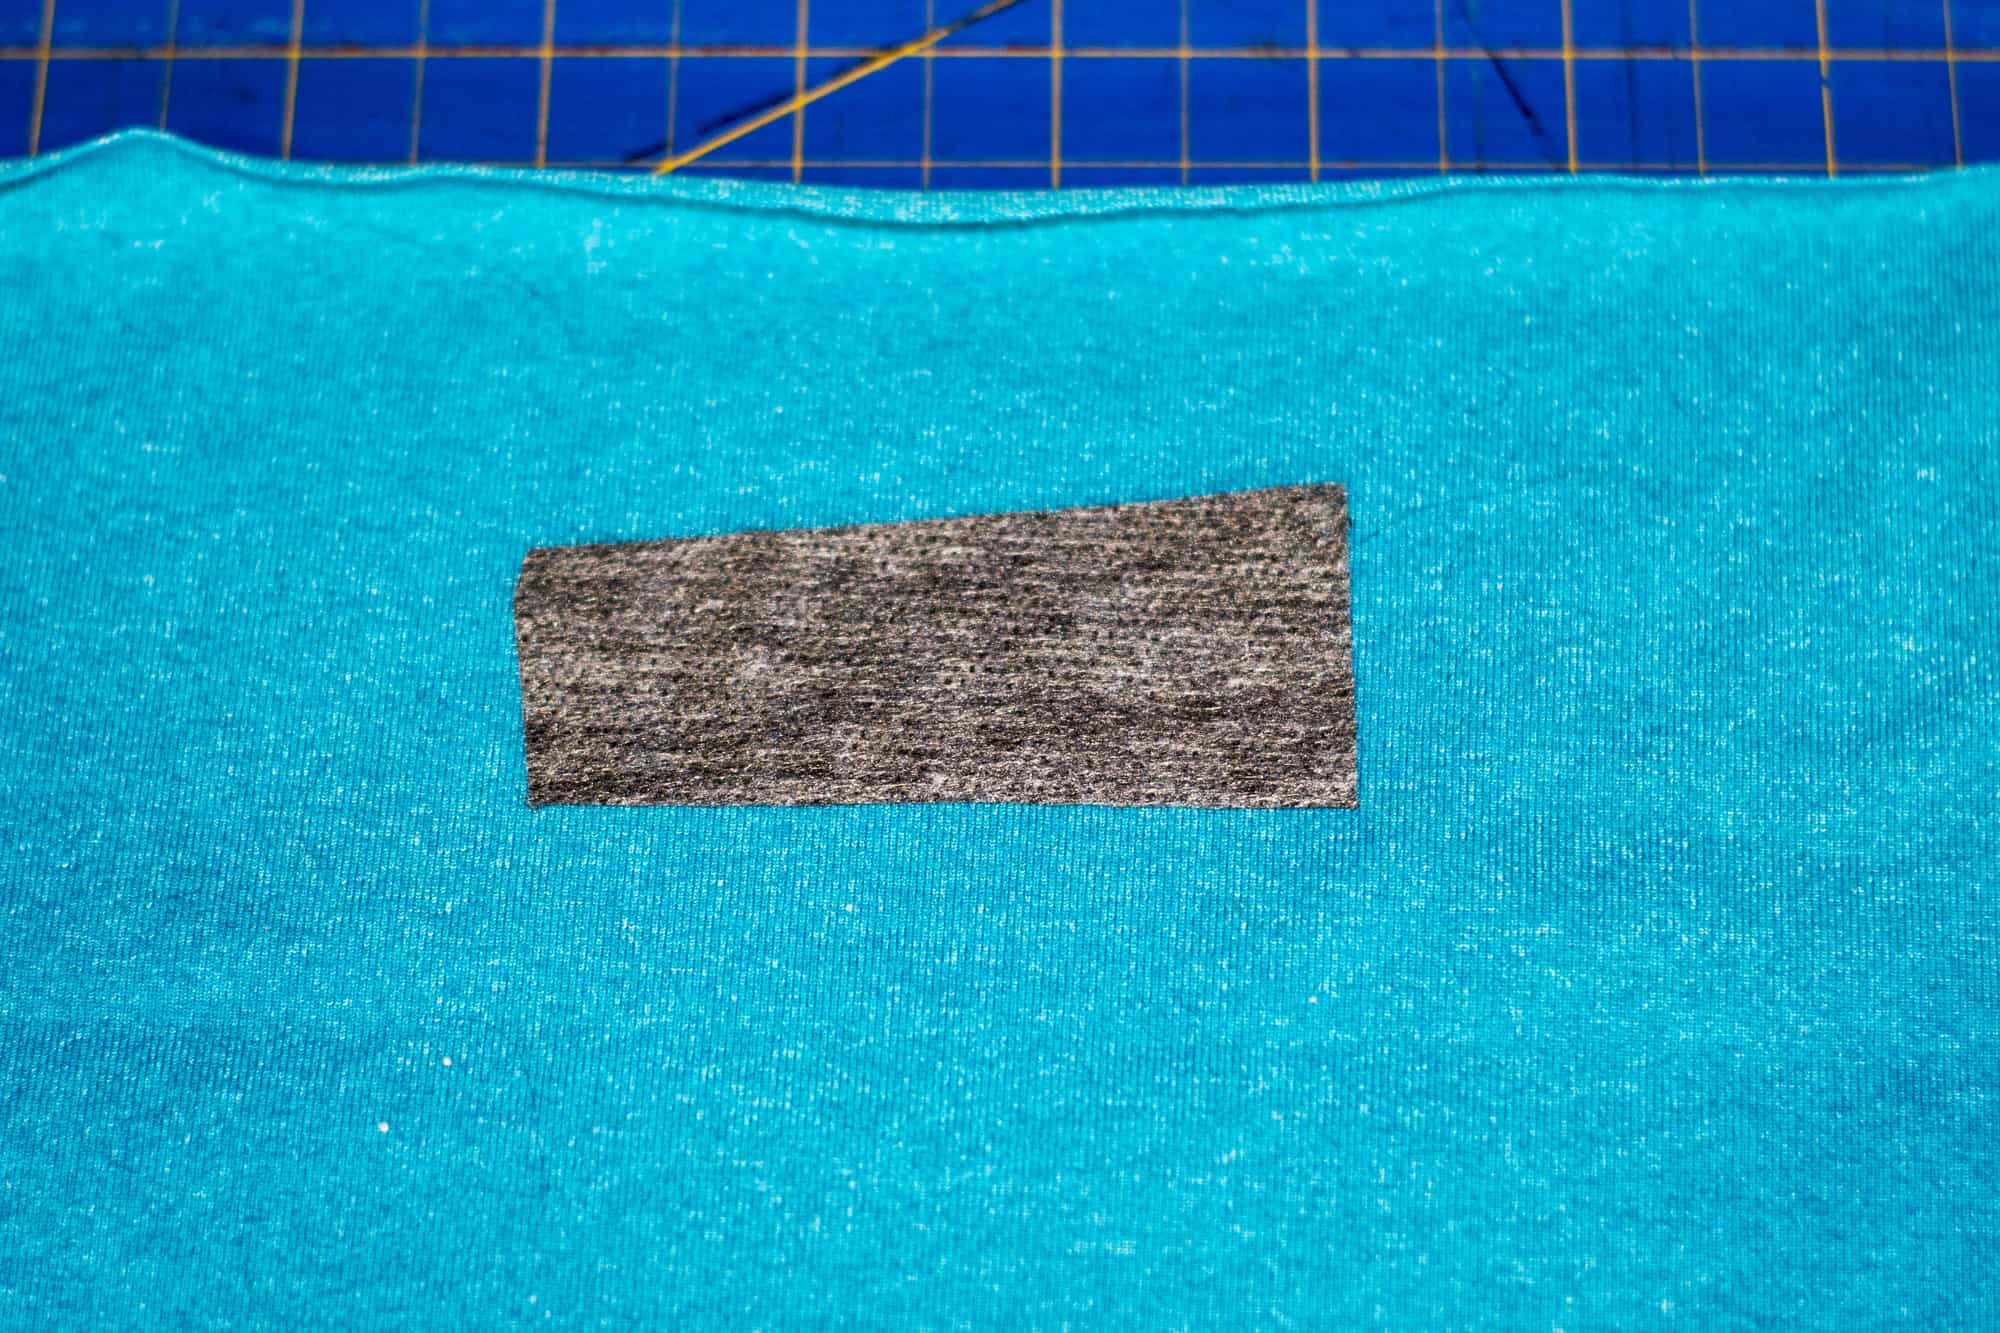
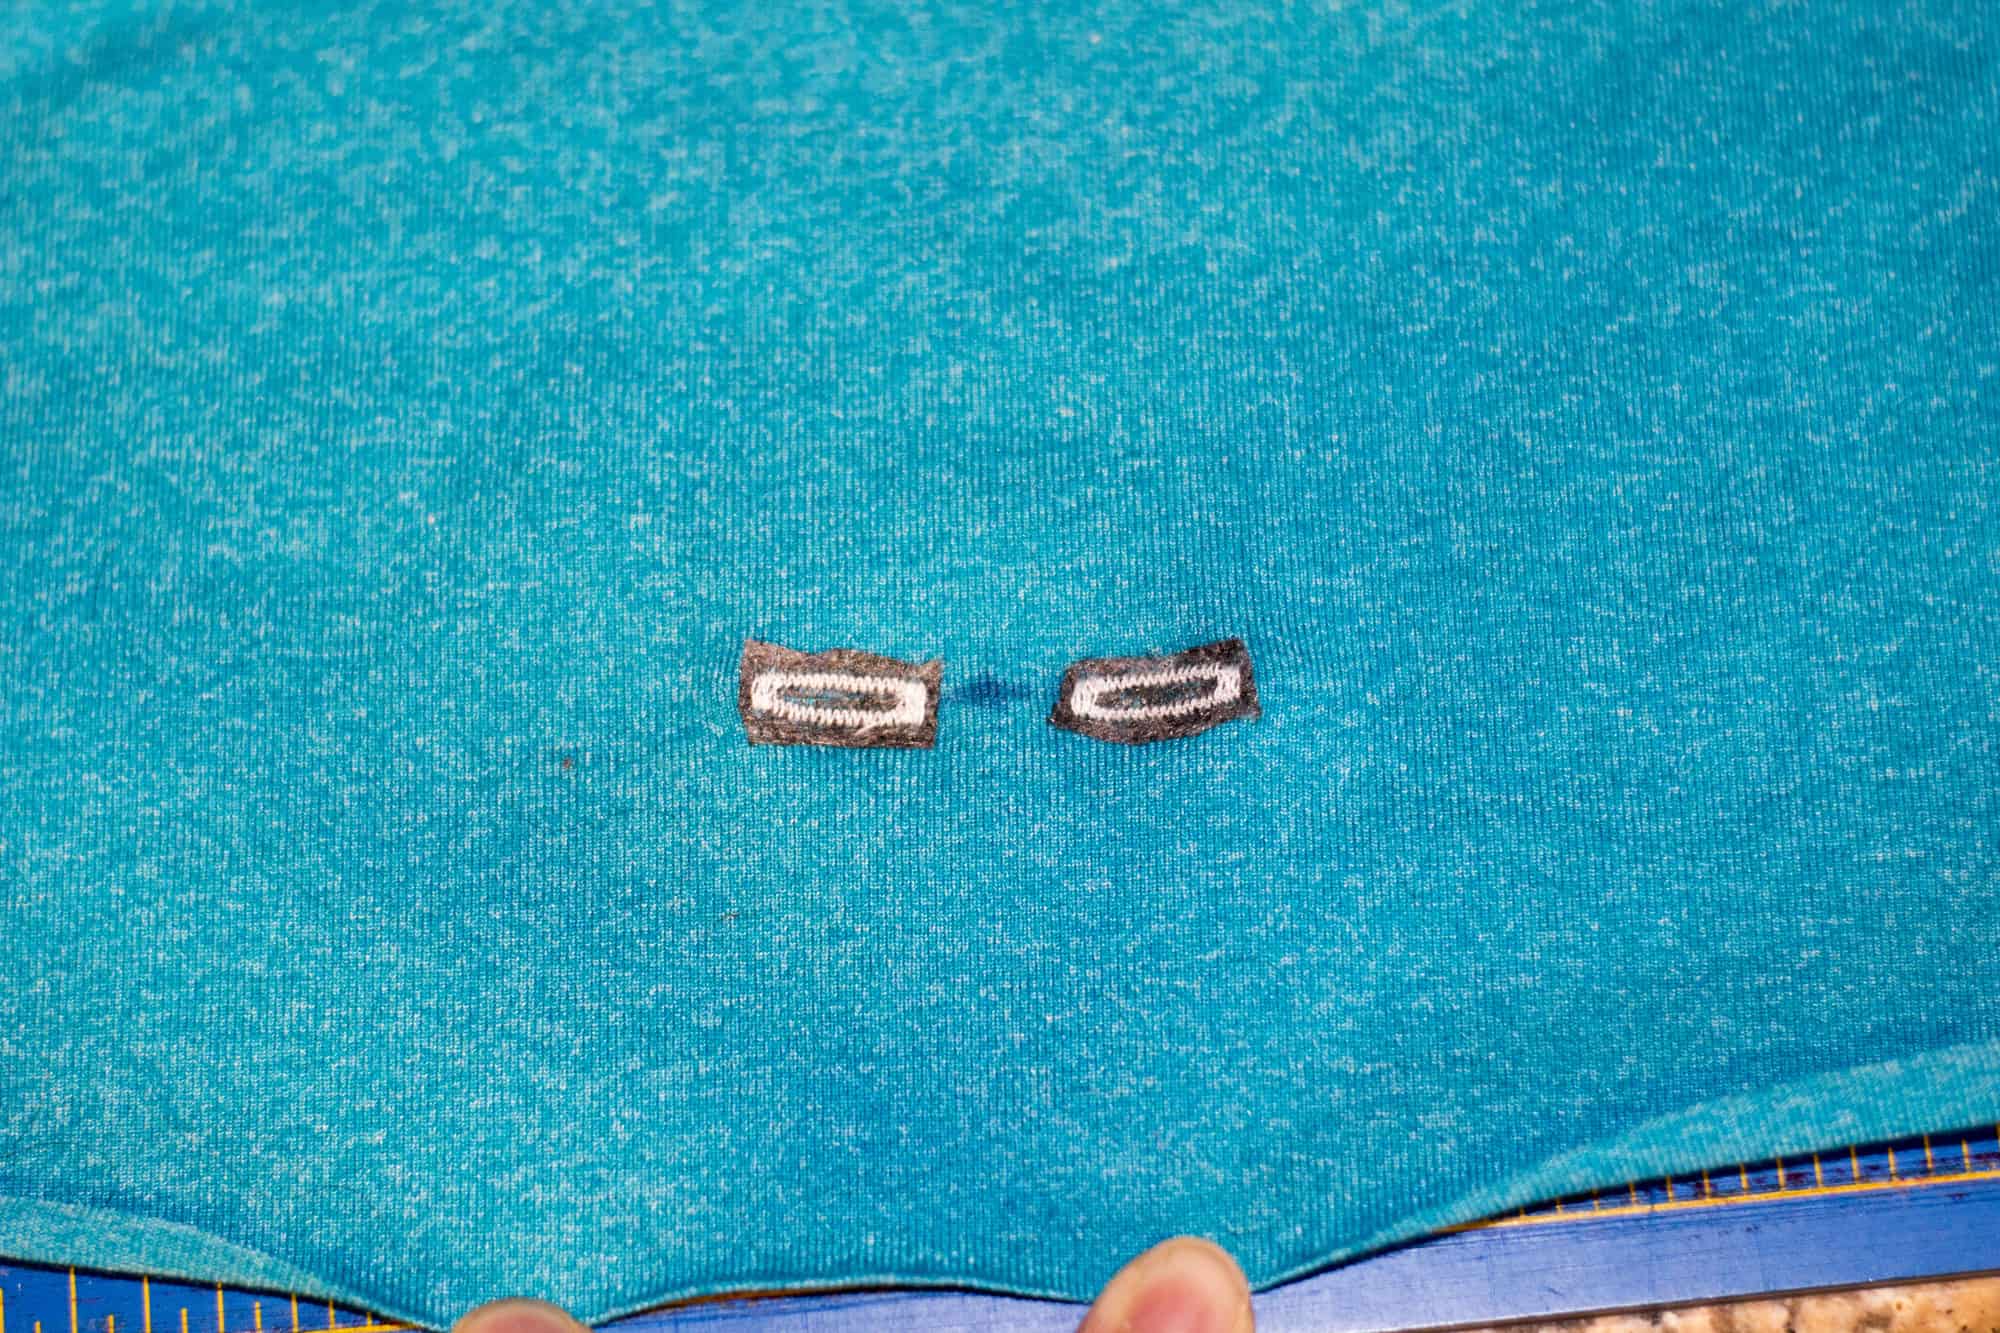
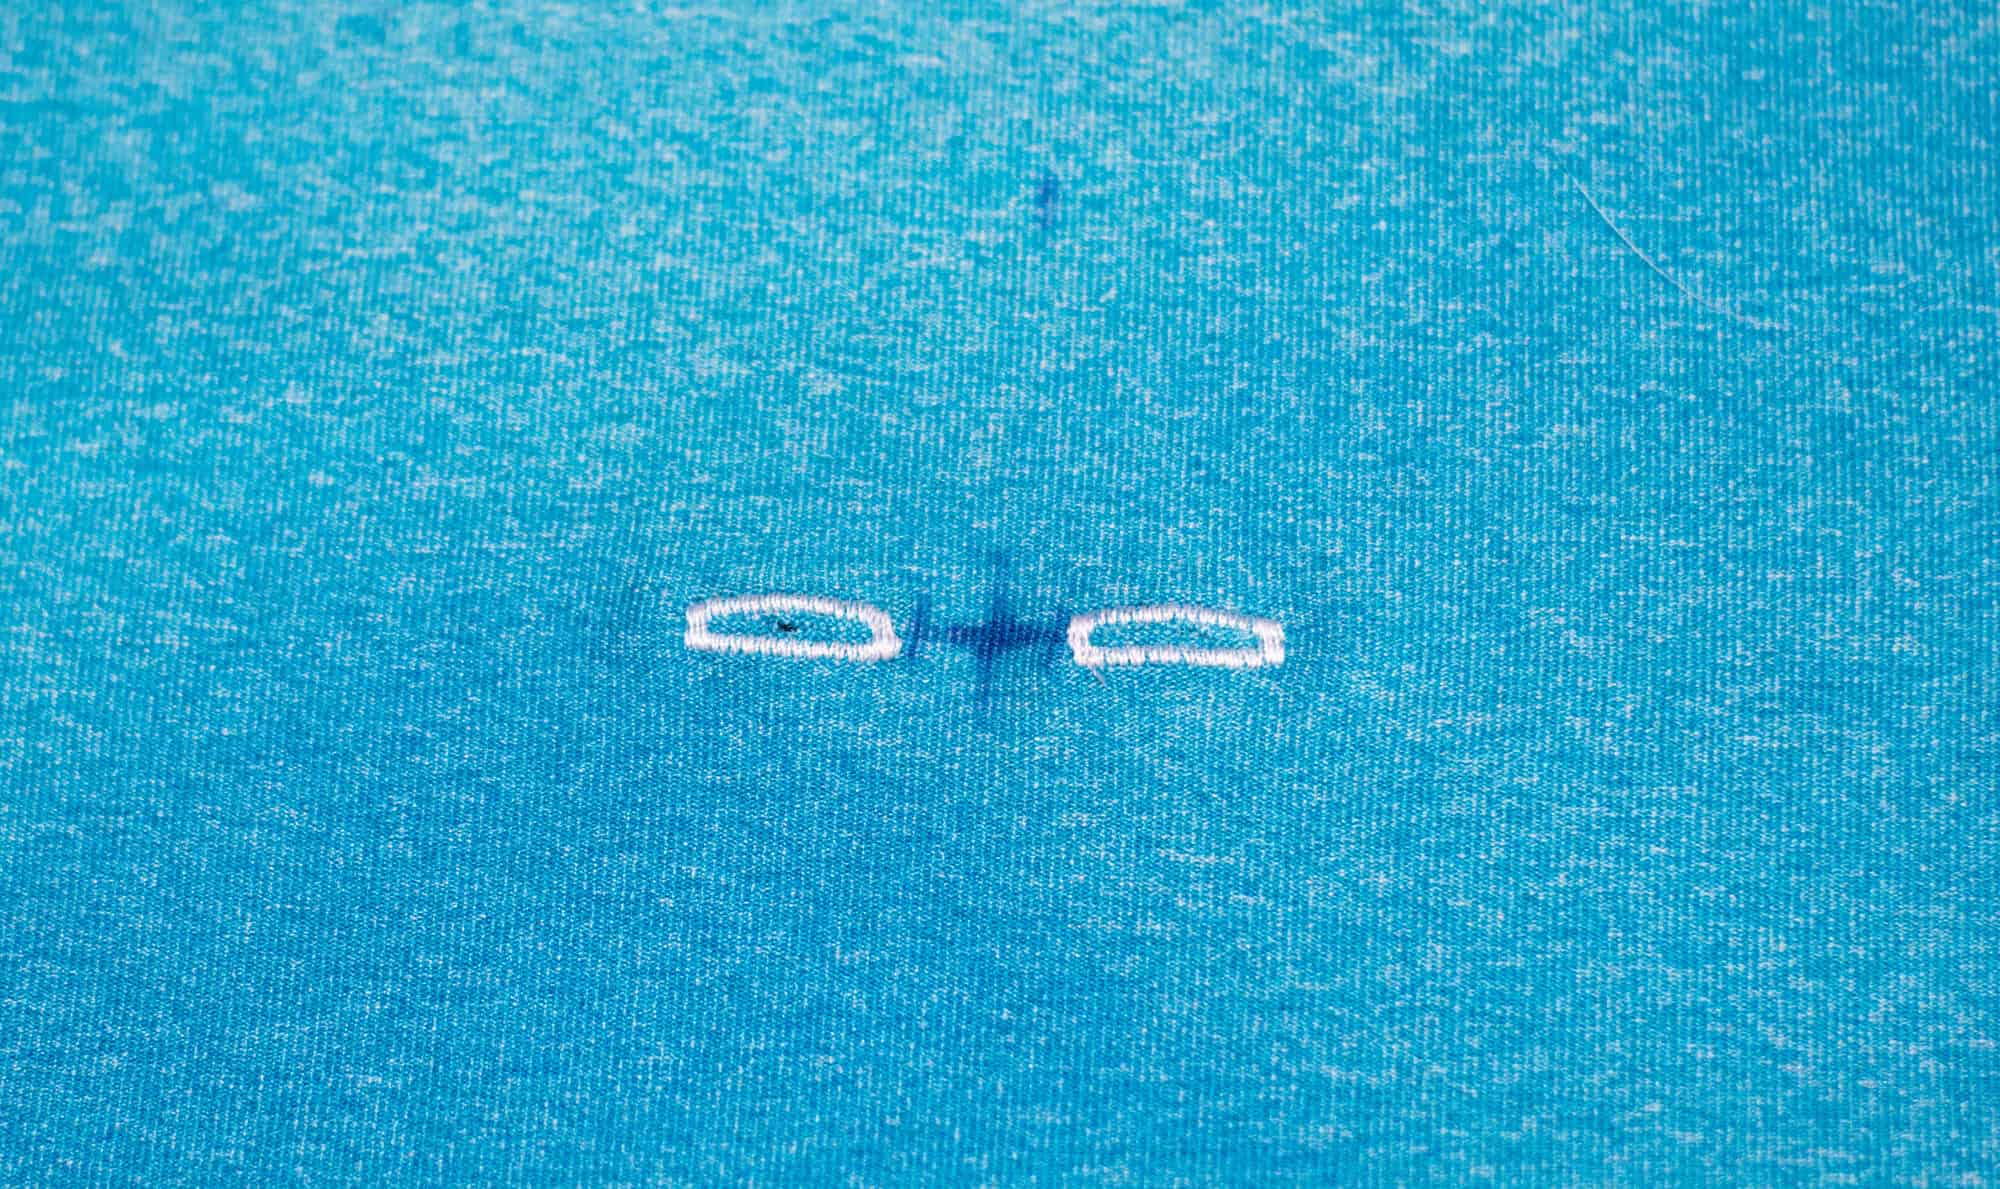
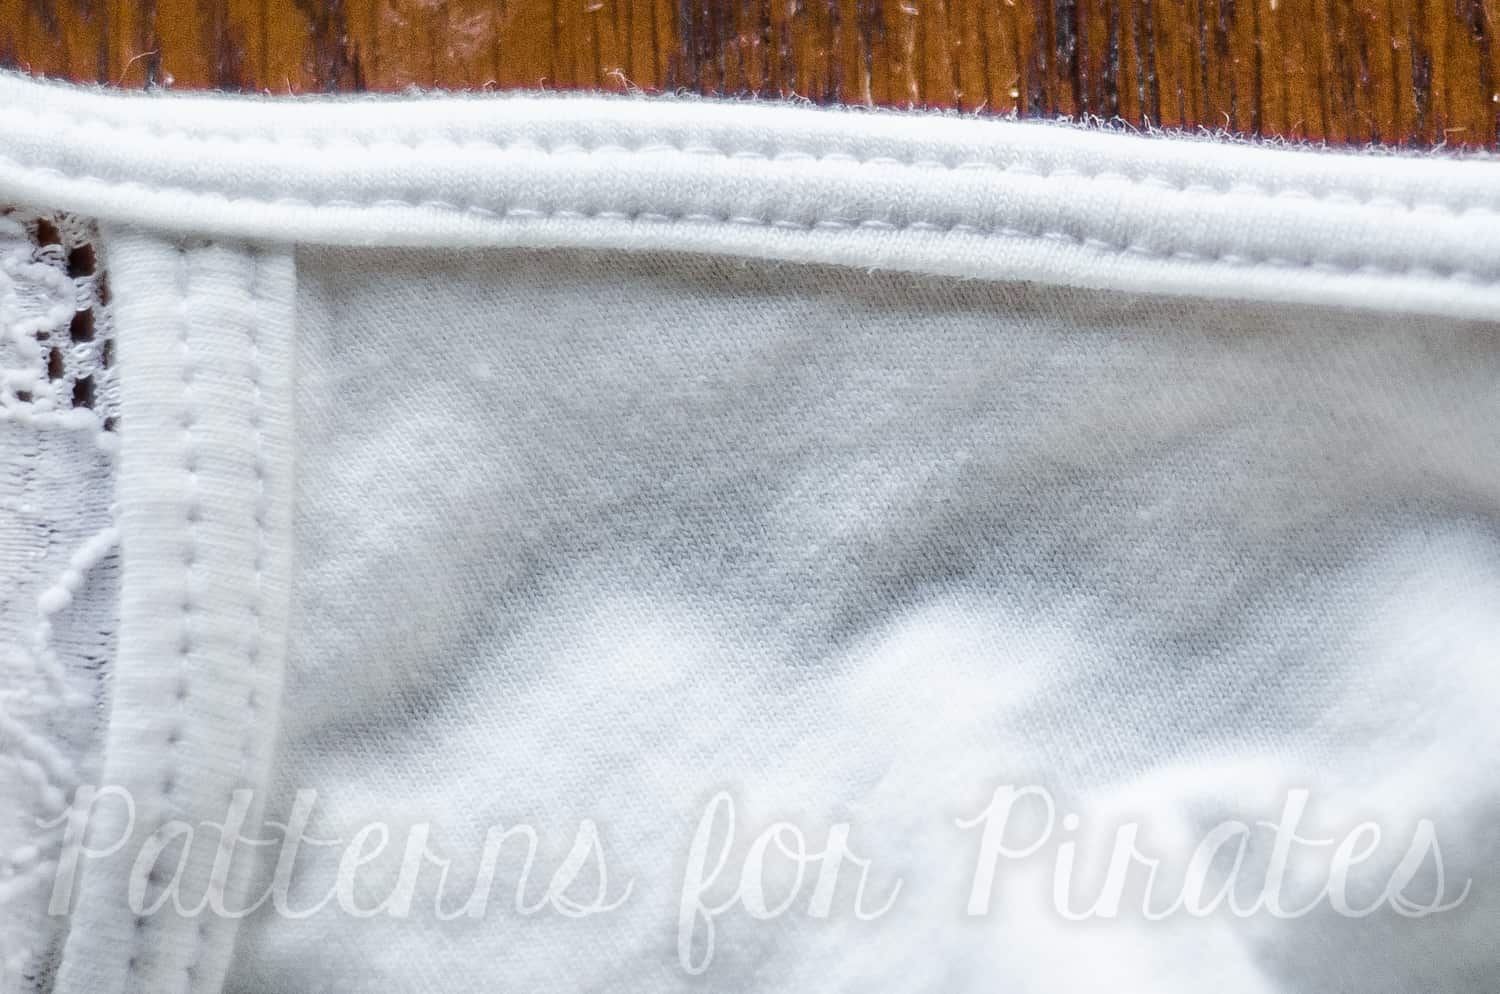
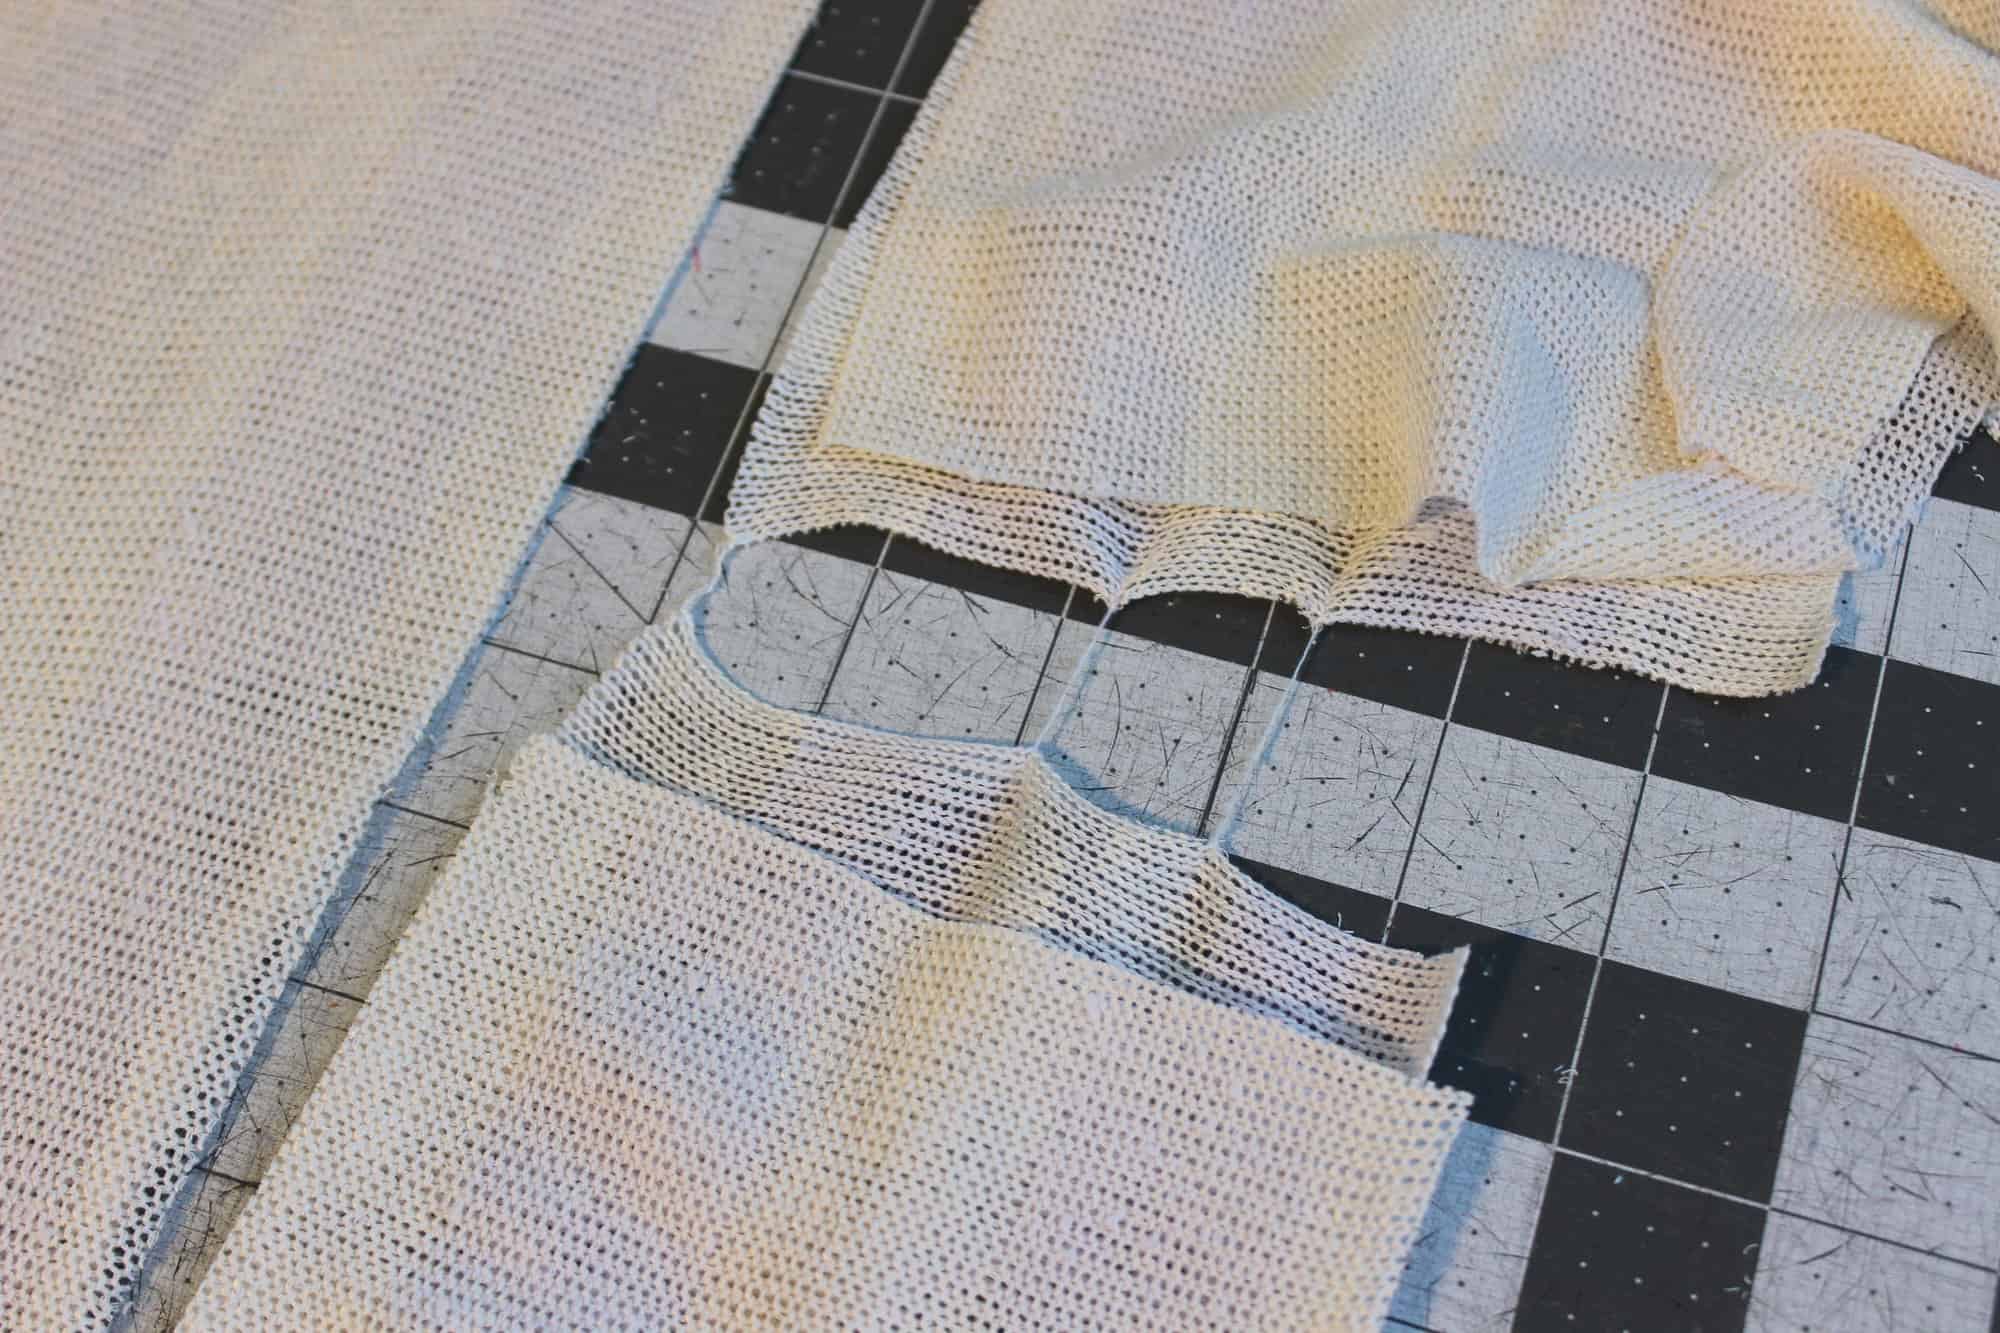
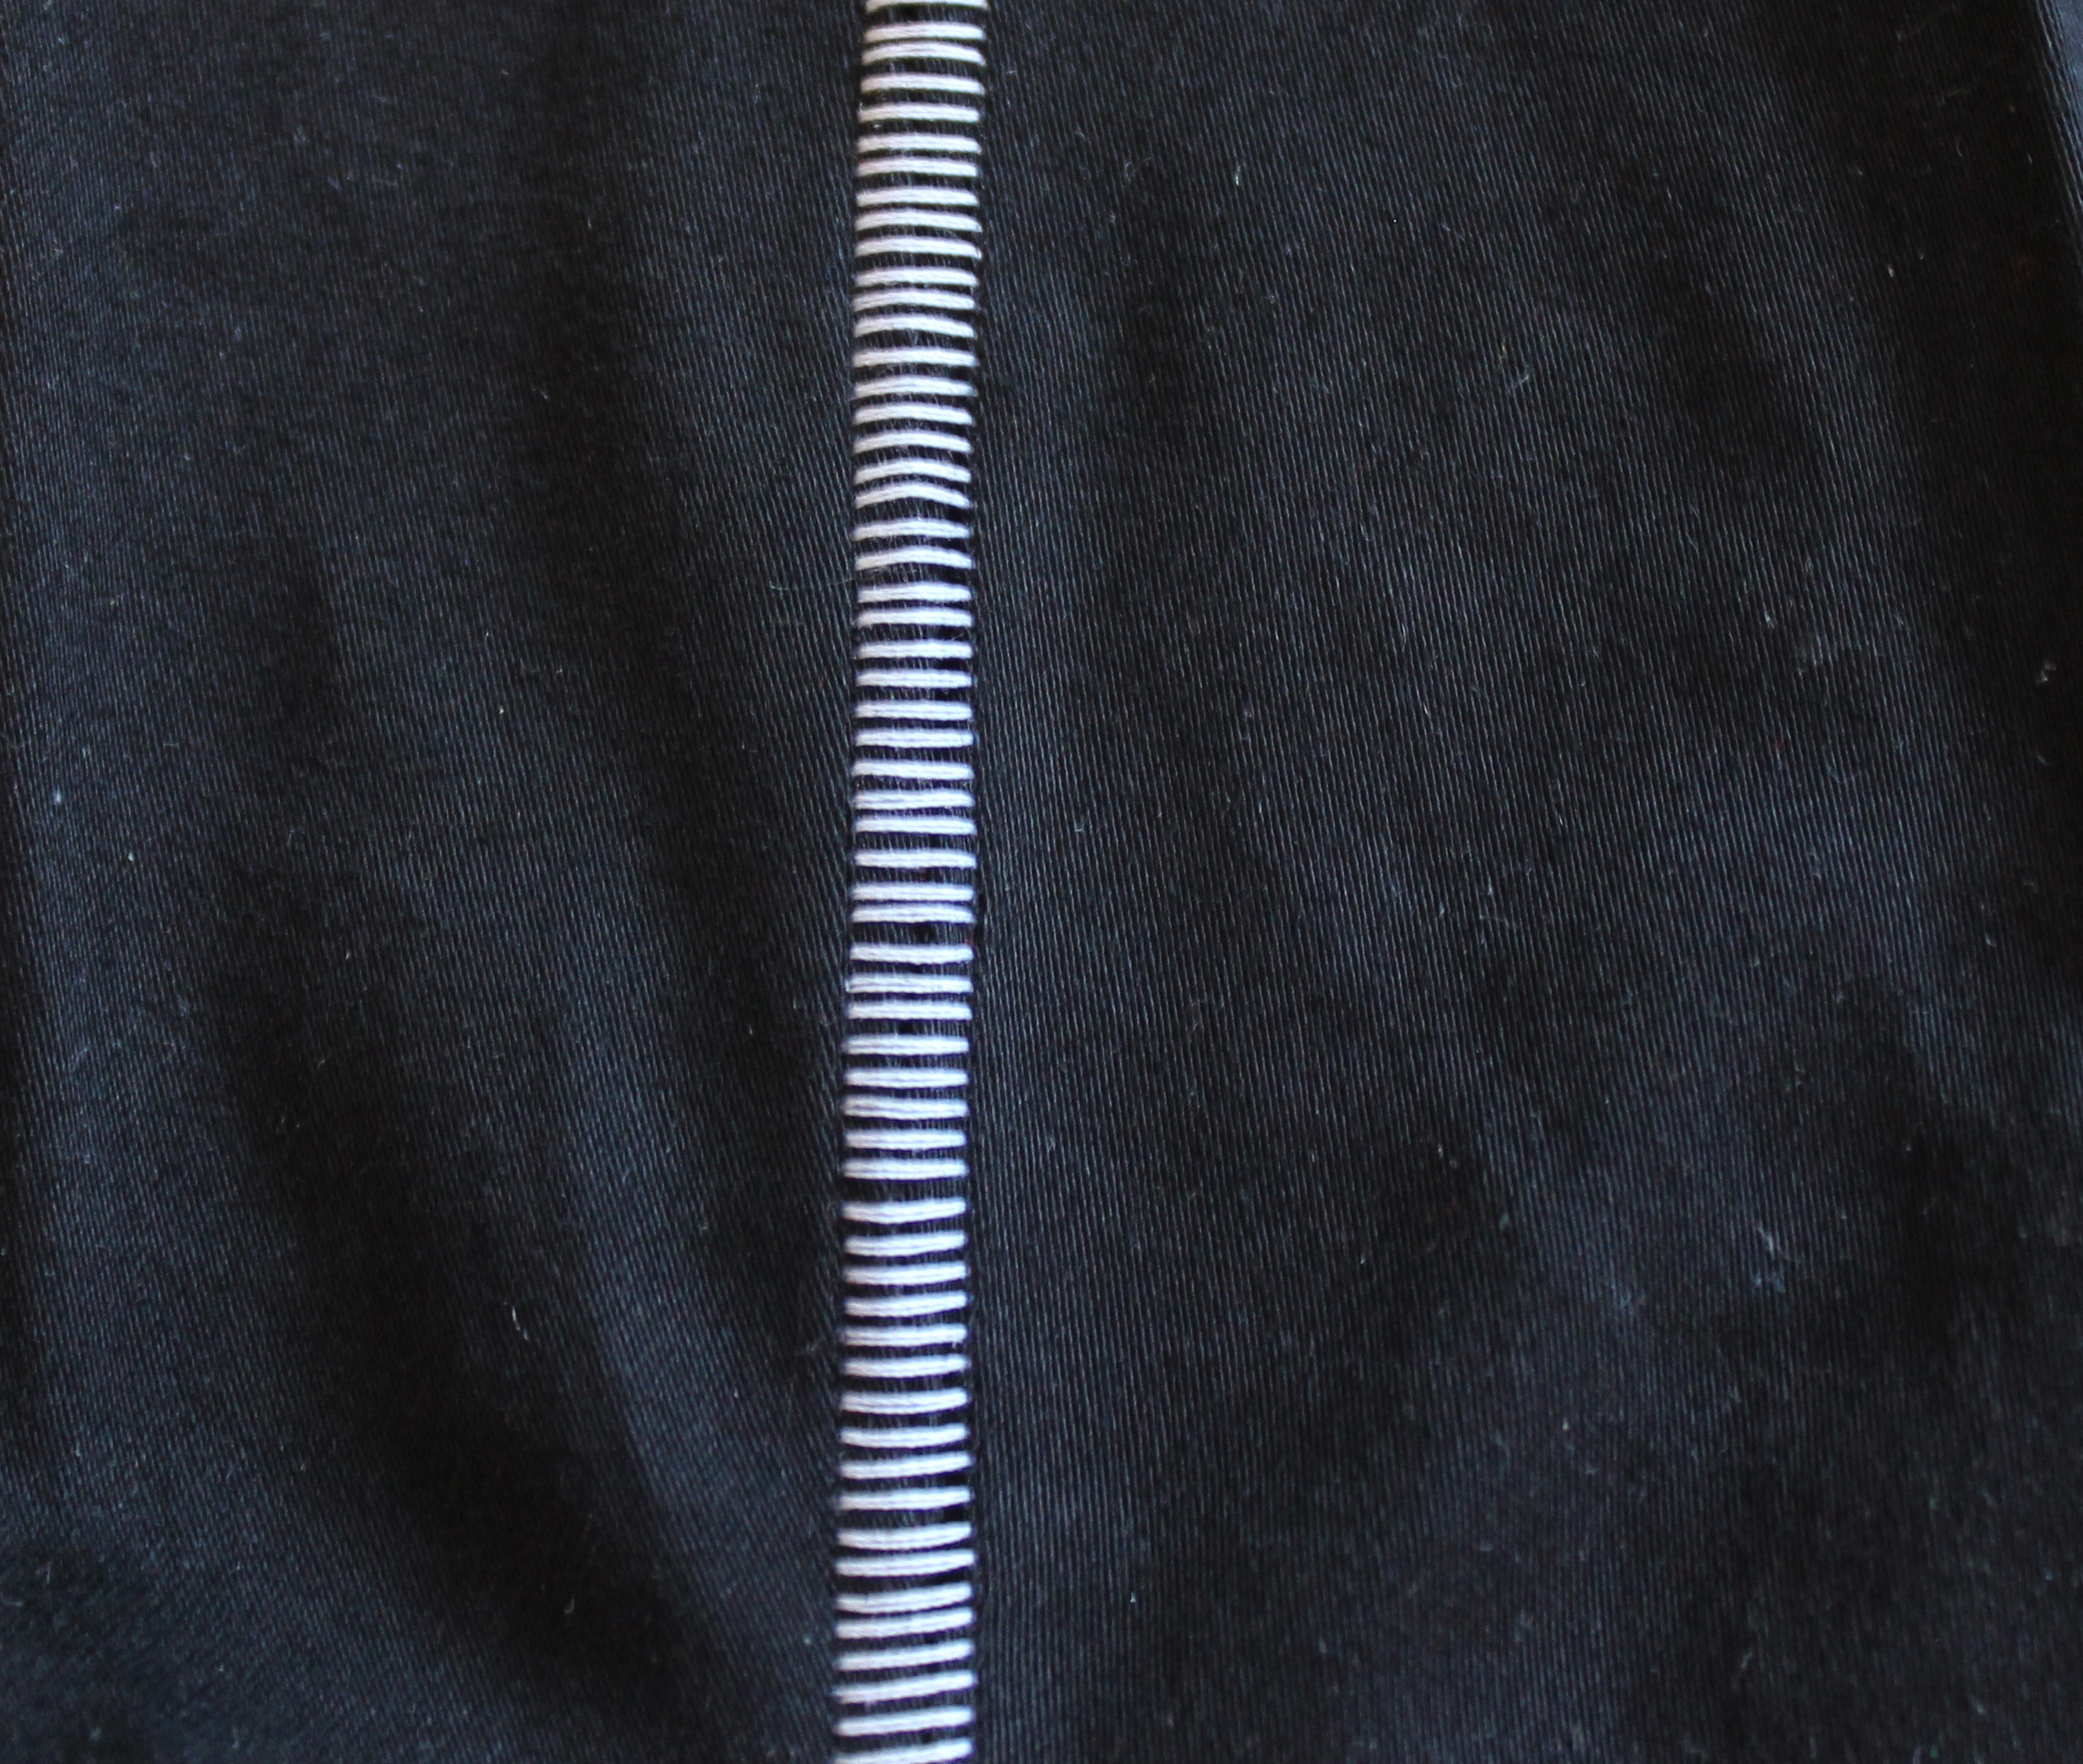
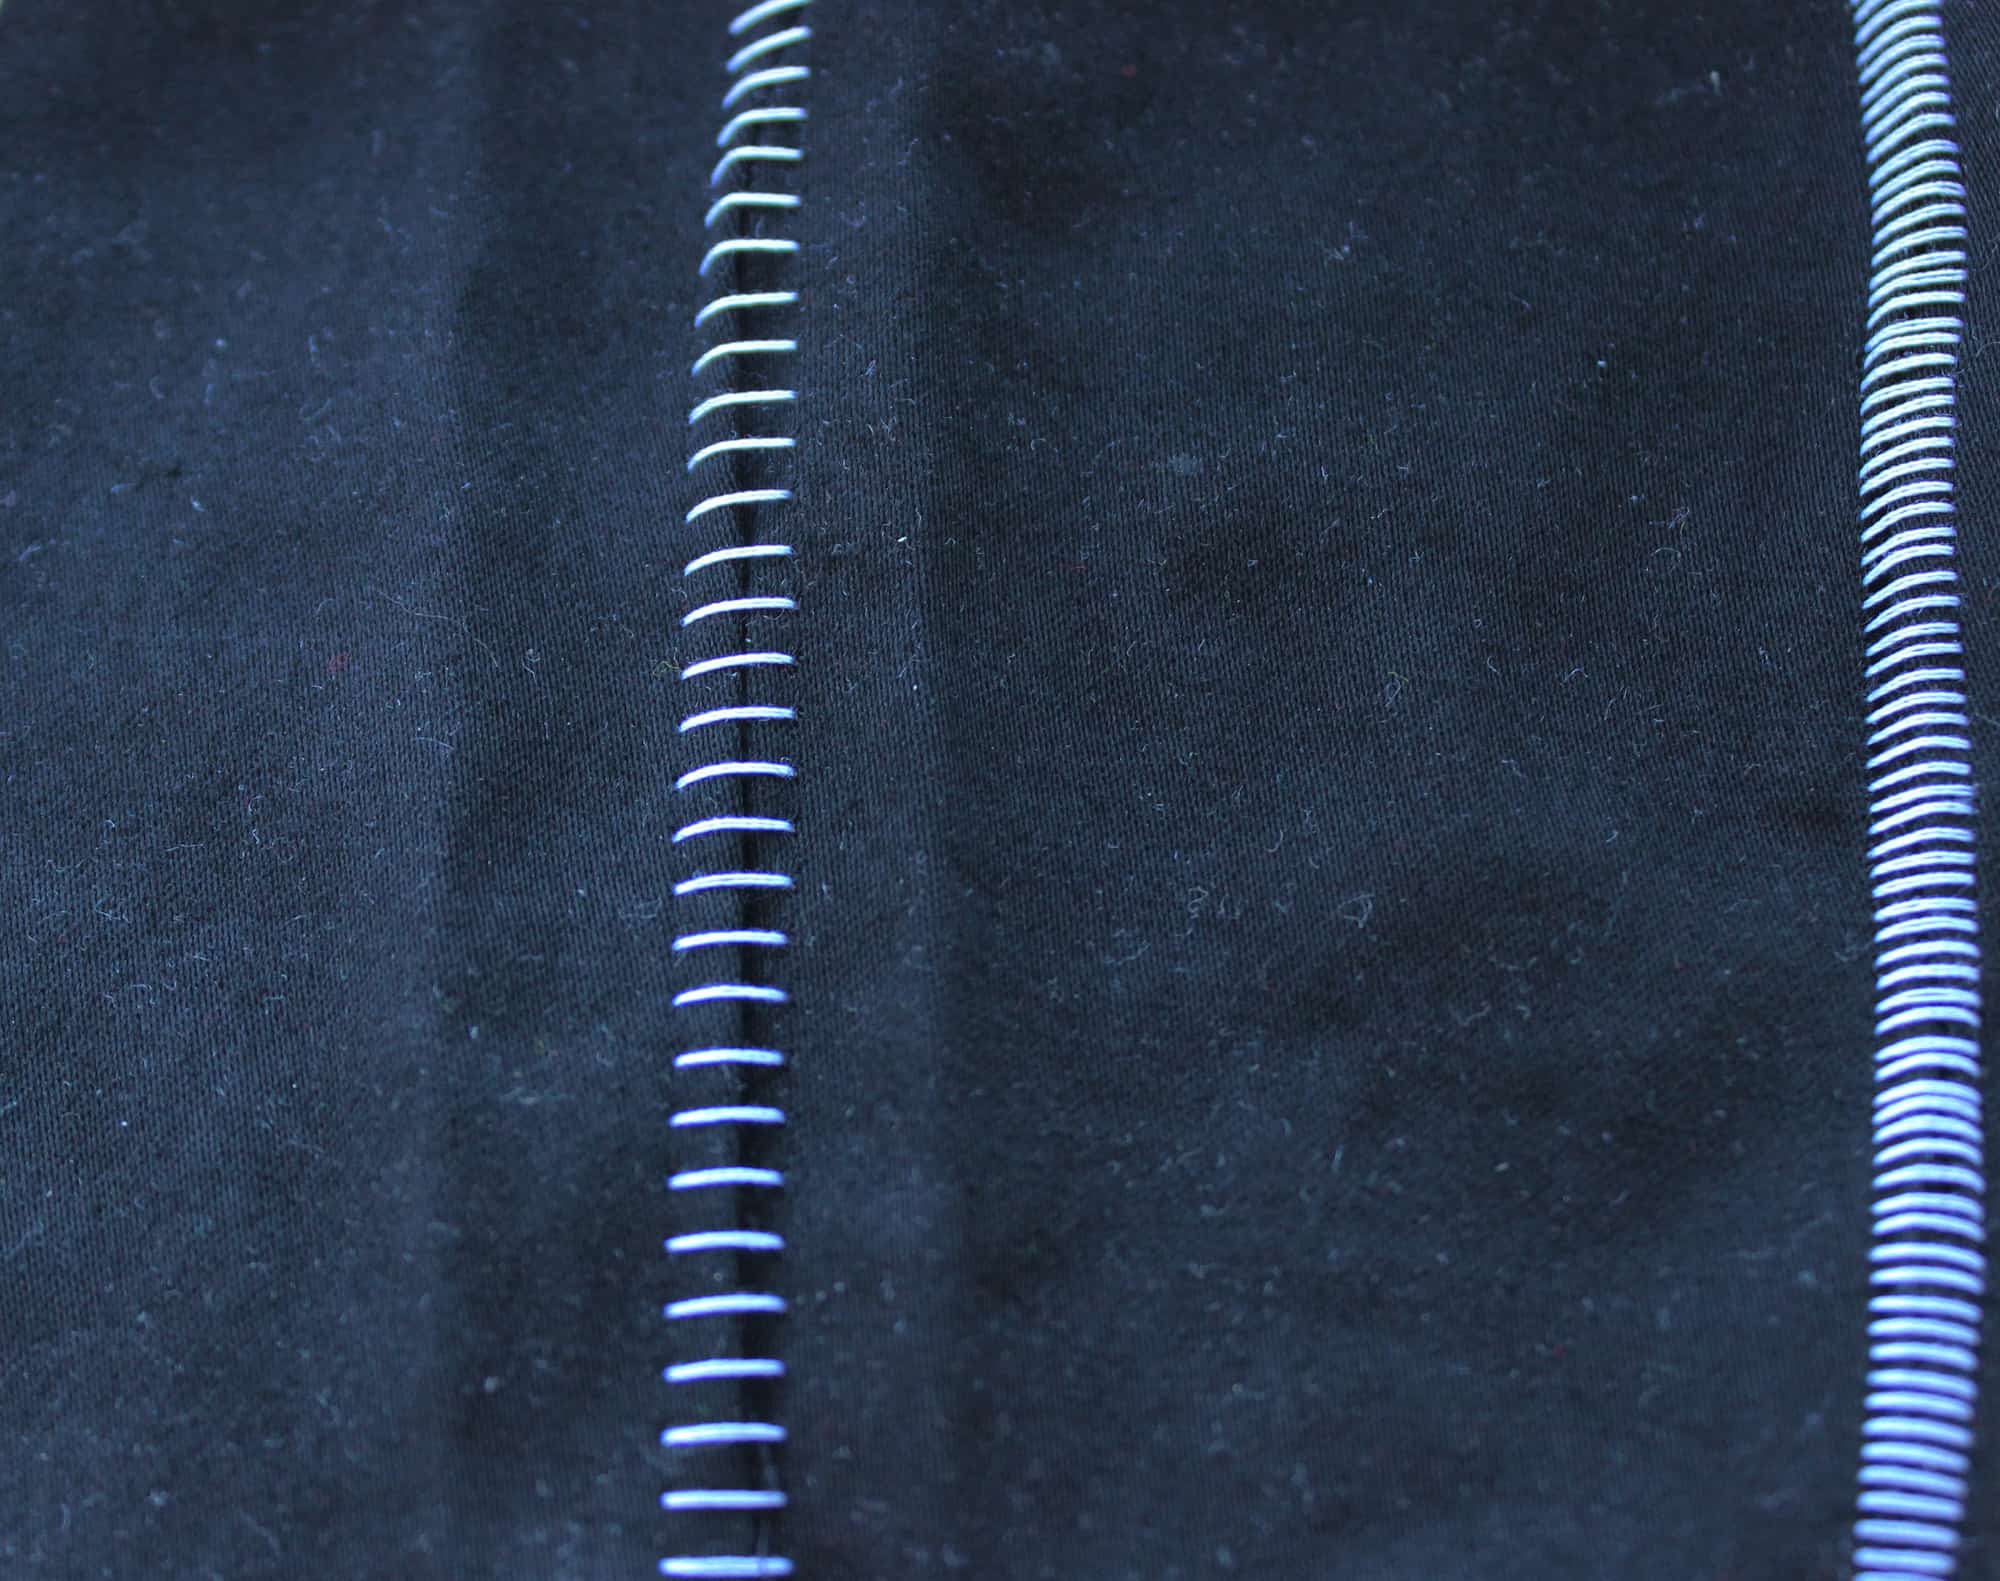
*Snip the seam allowance to create less bulk

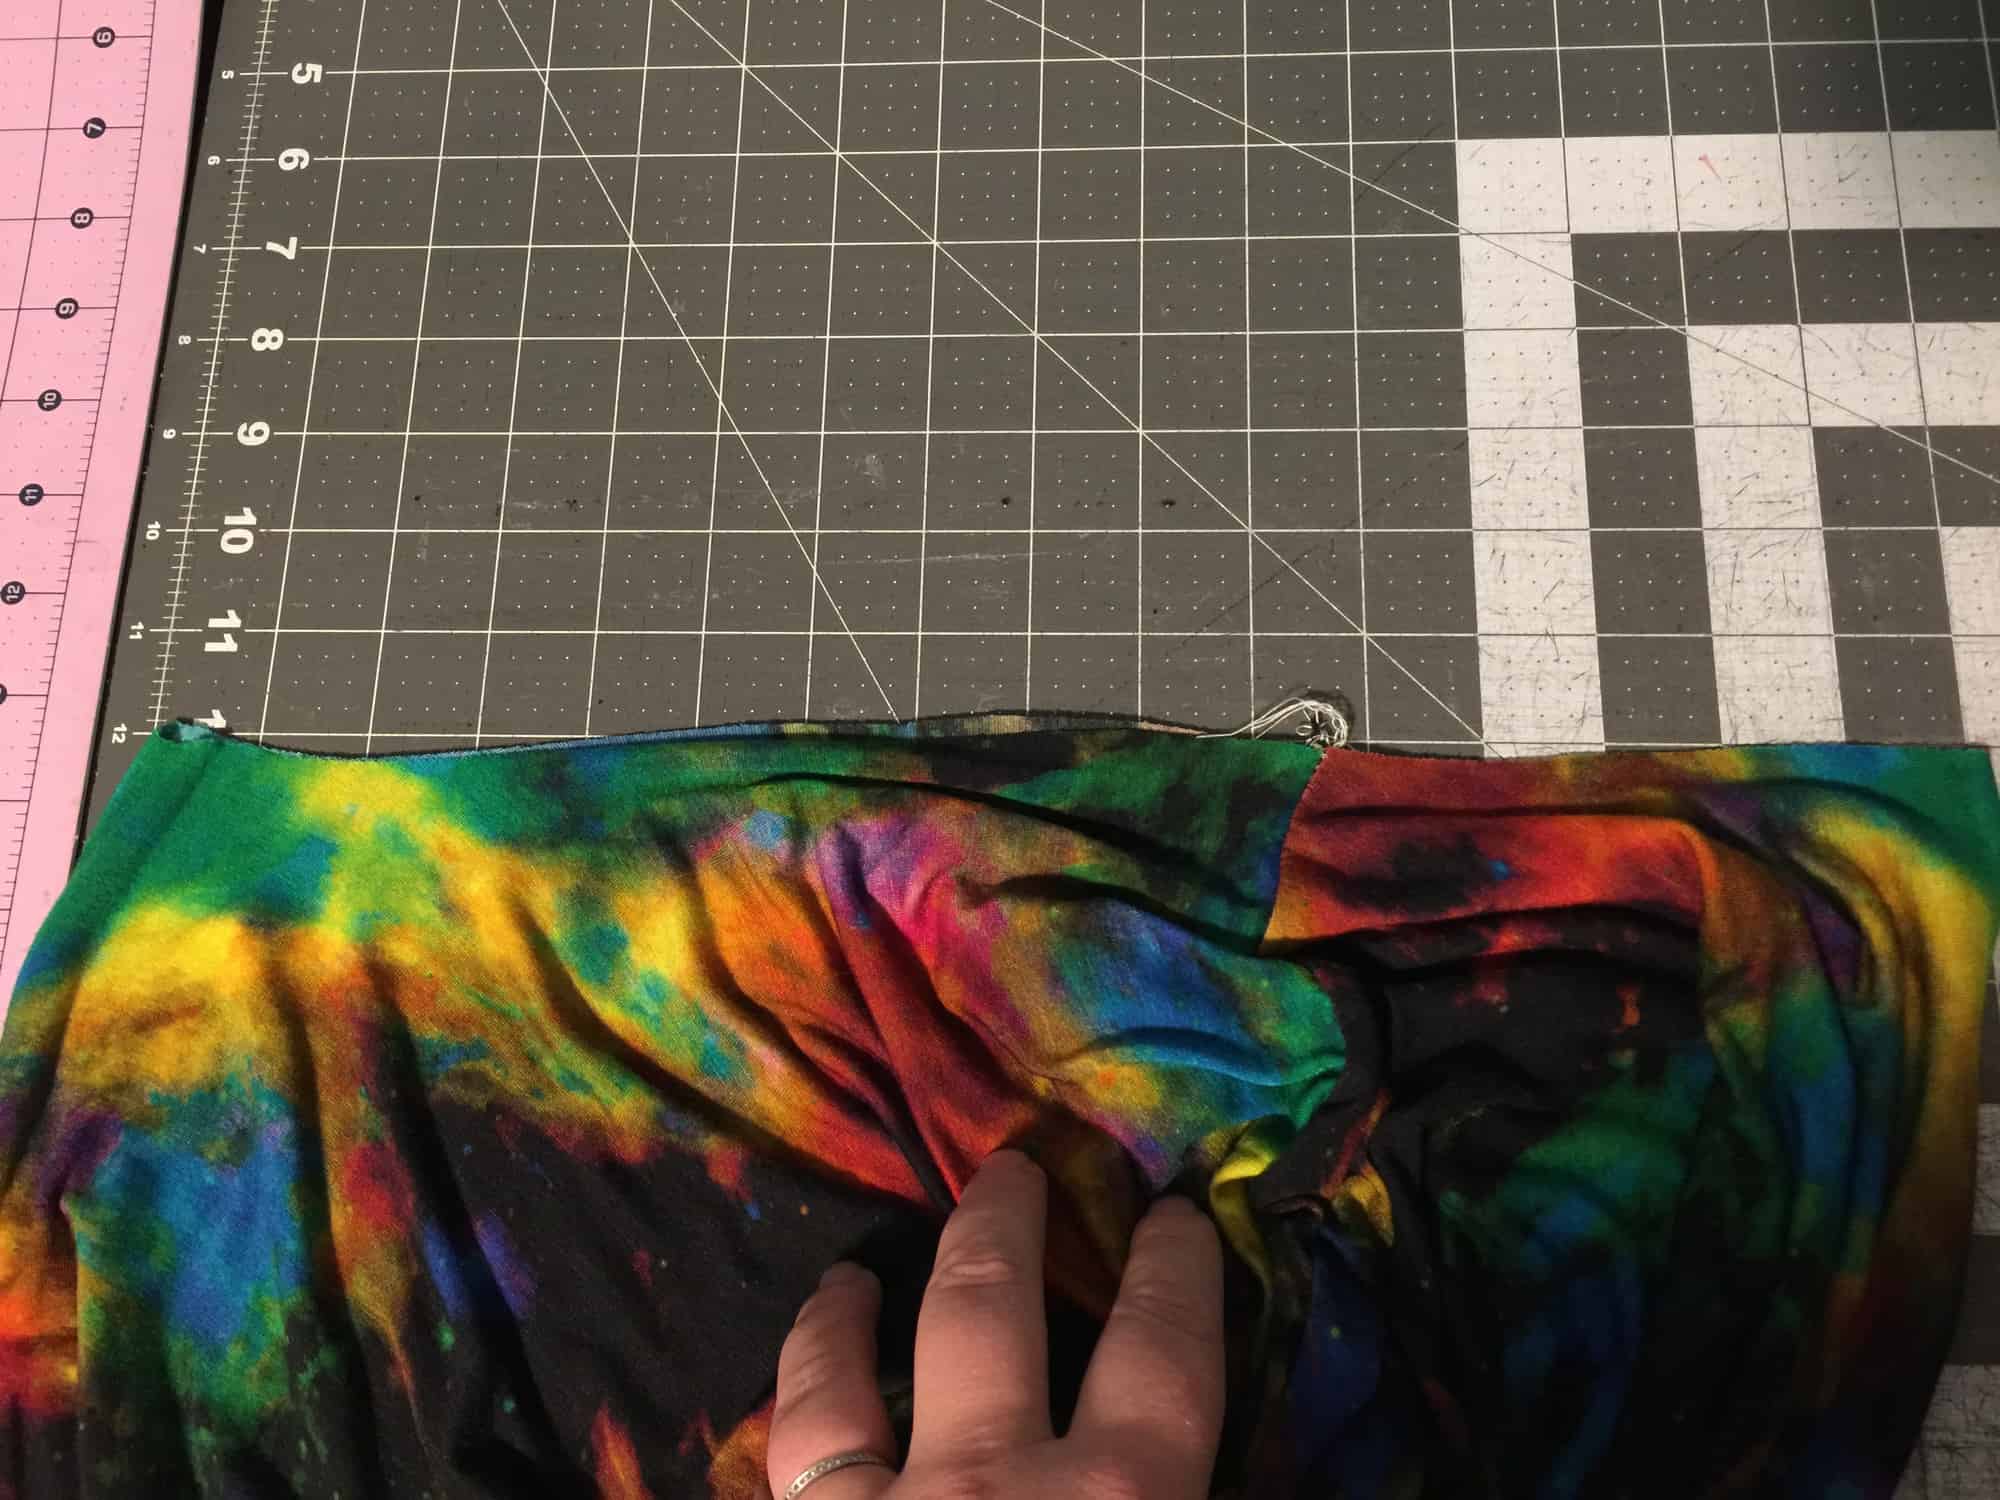
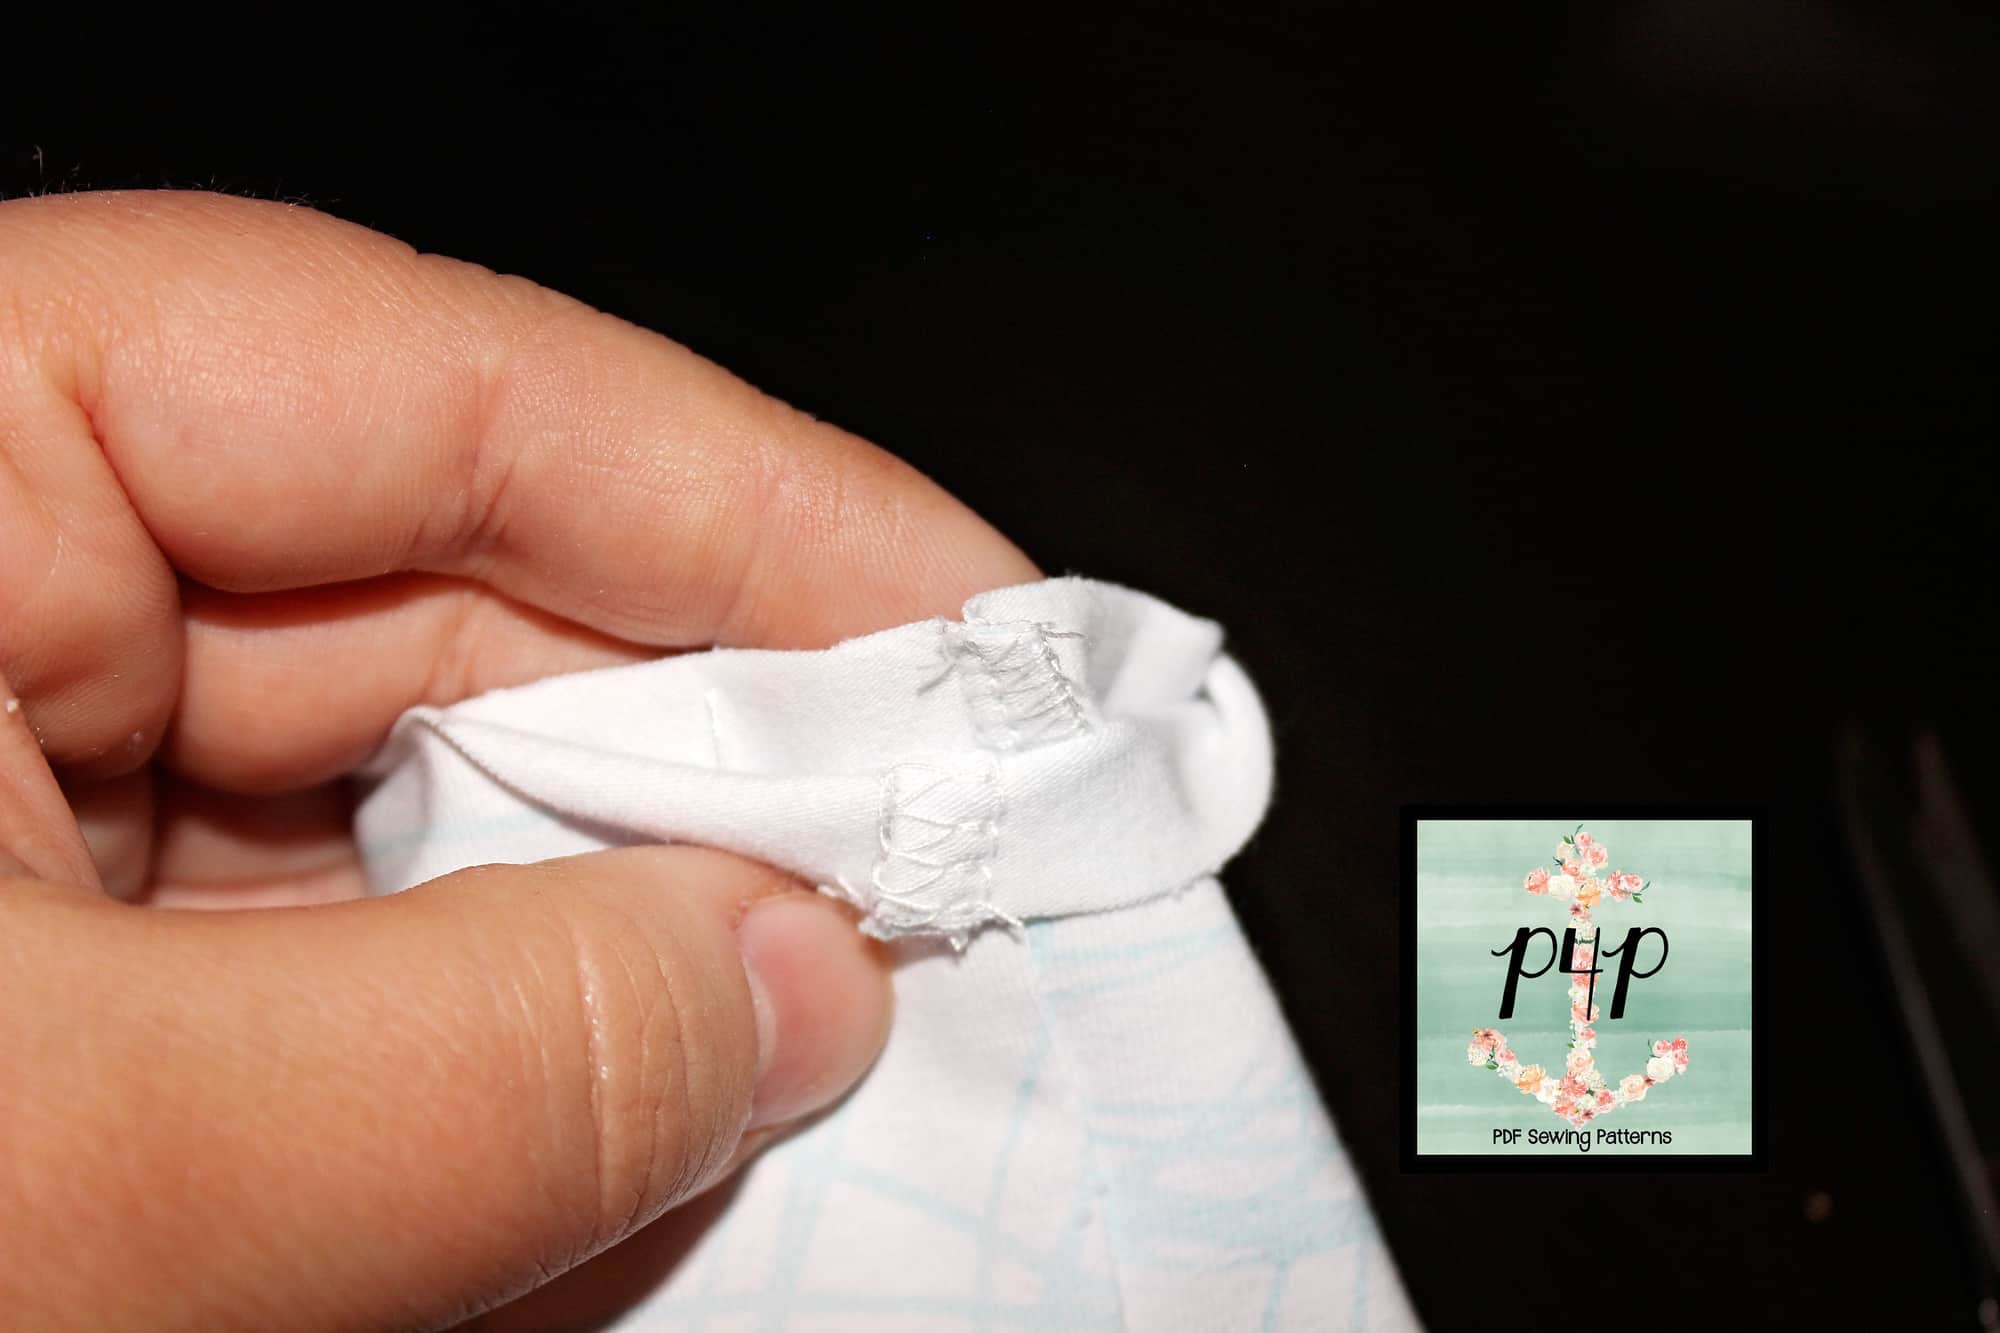
This is one of tricks for creating less bulk at he seam. Once you sew the cuff to create a loop, grab your sharpest scissors and make a cut as close to the stitch as possible without, of course, snipping the stitch.

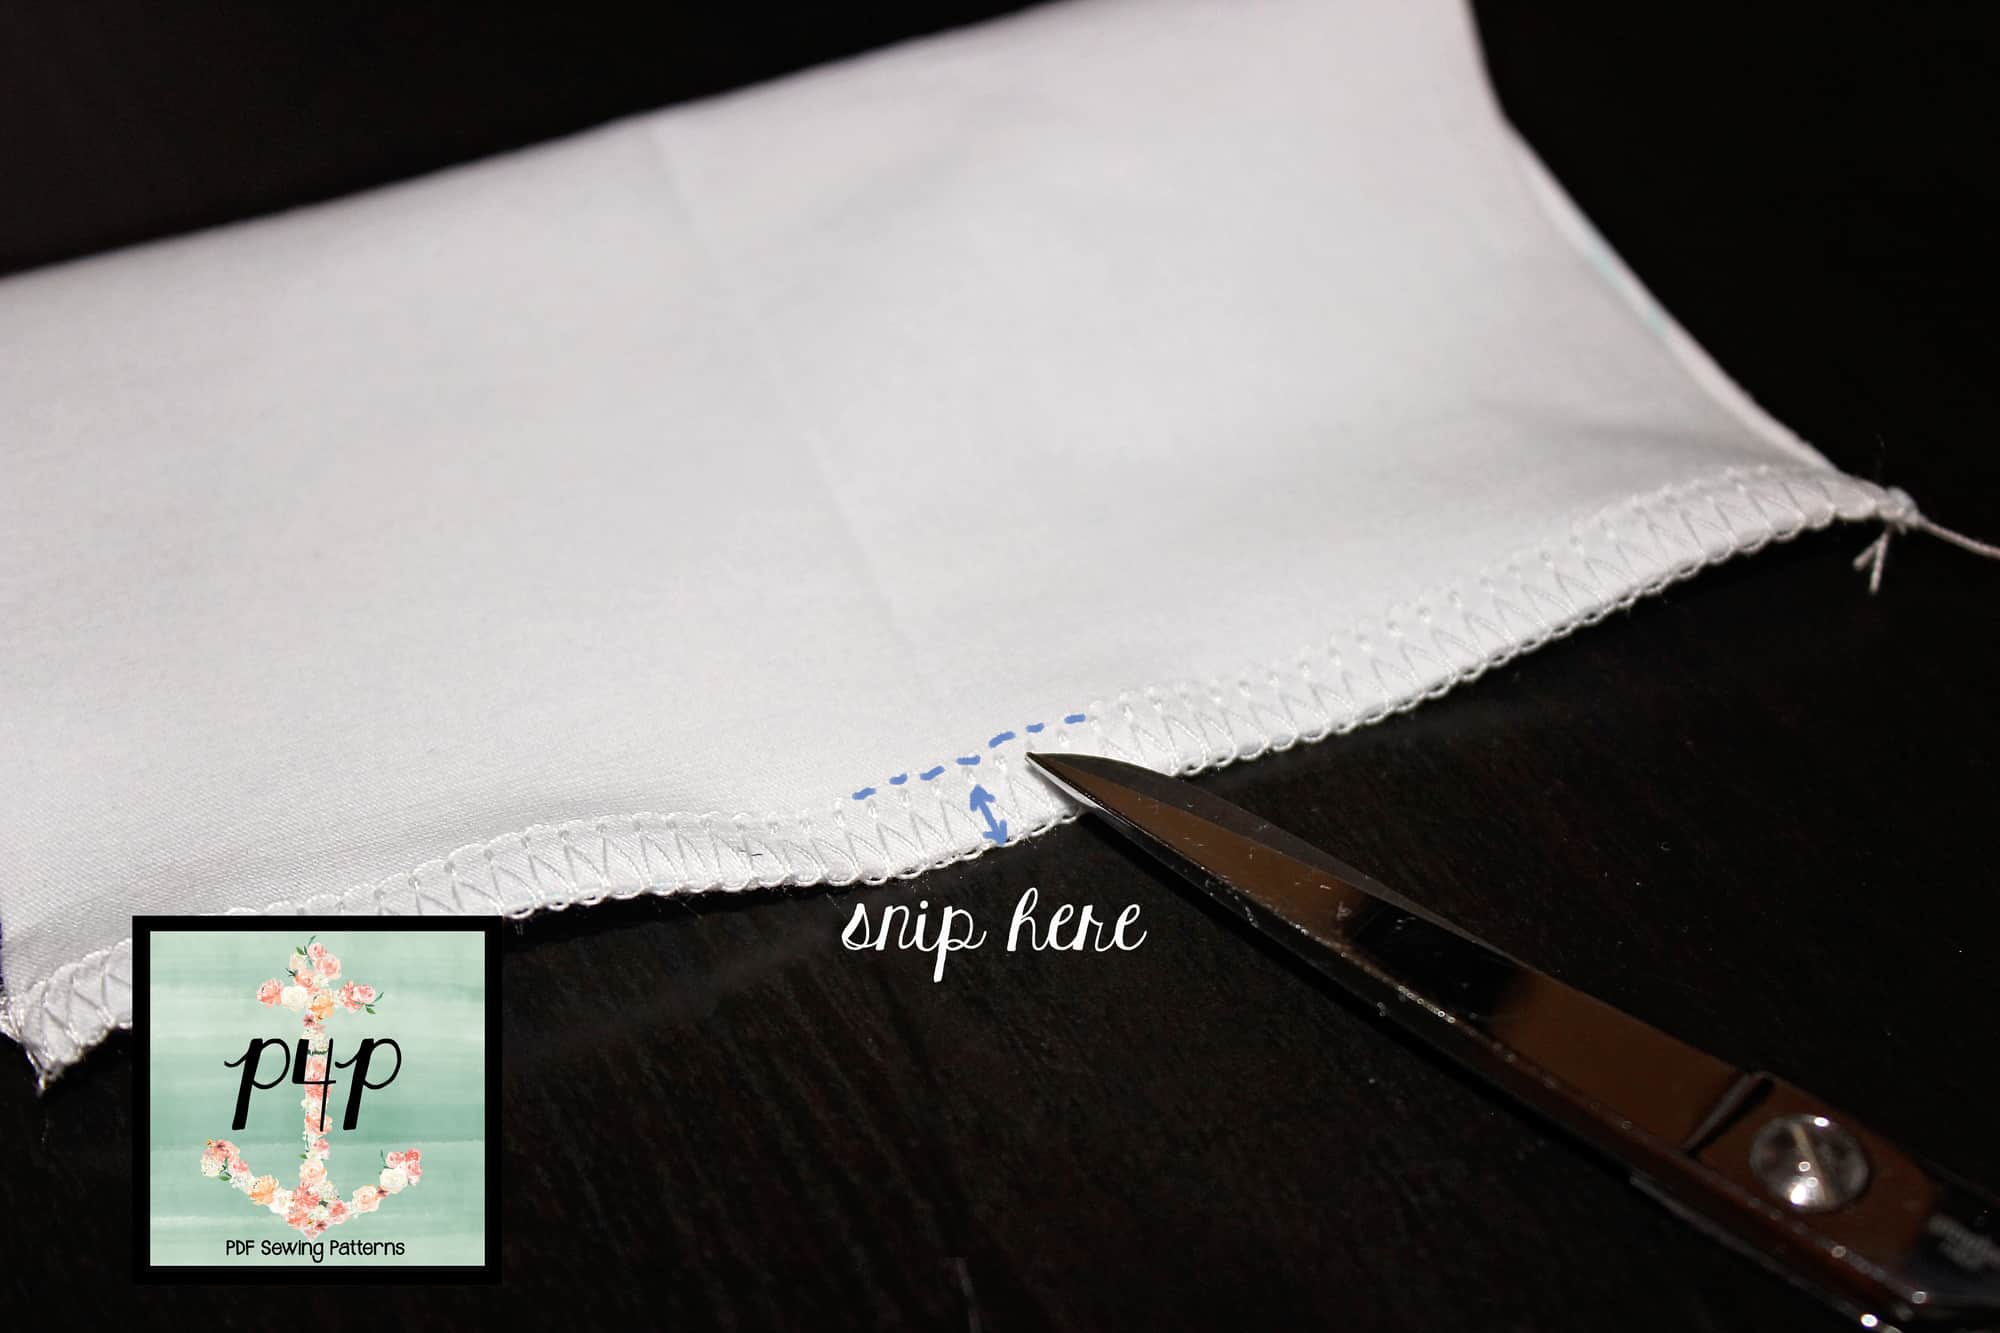
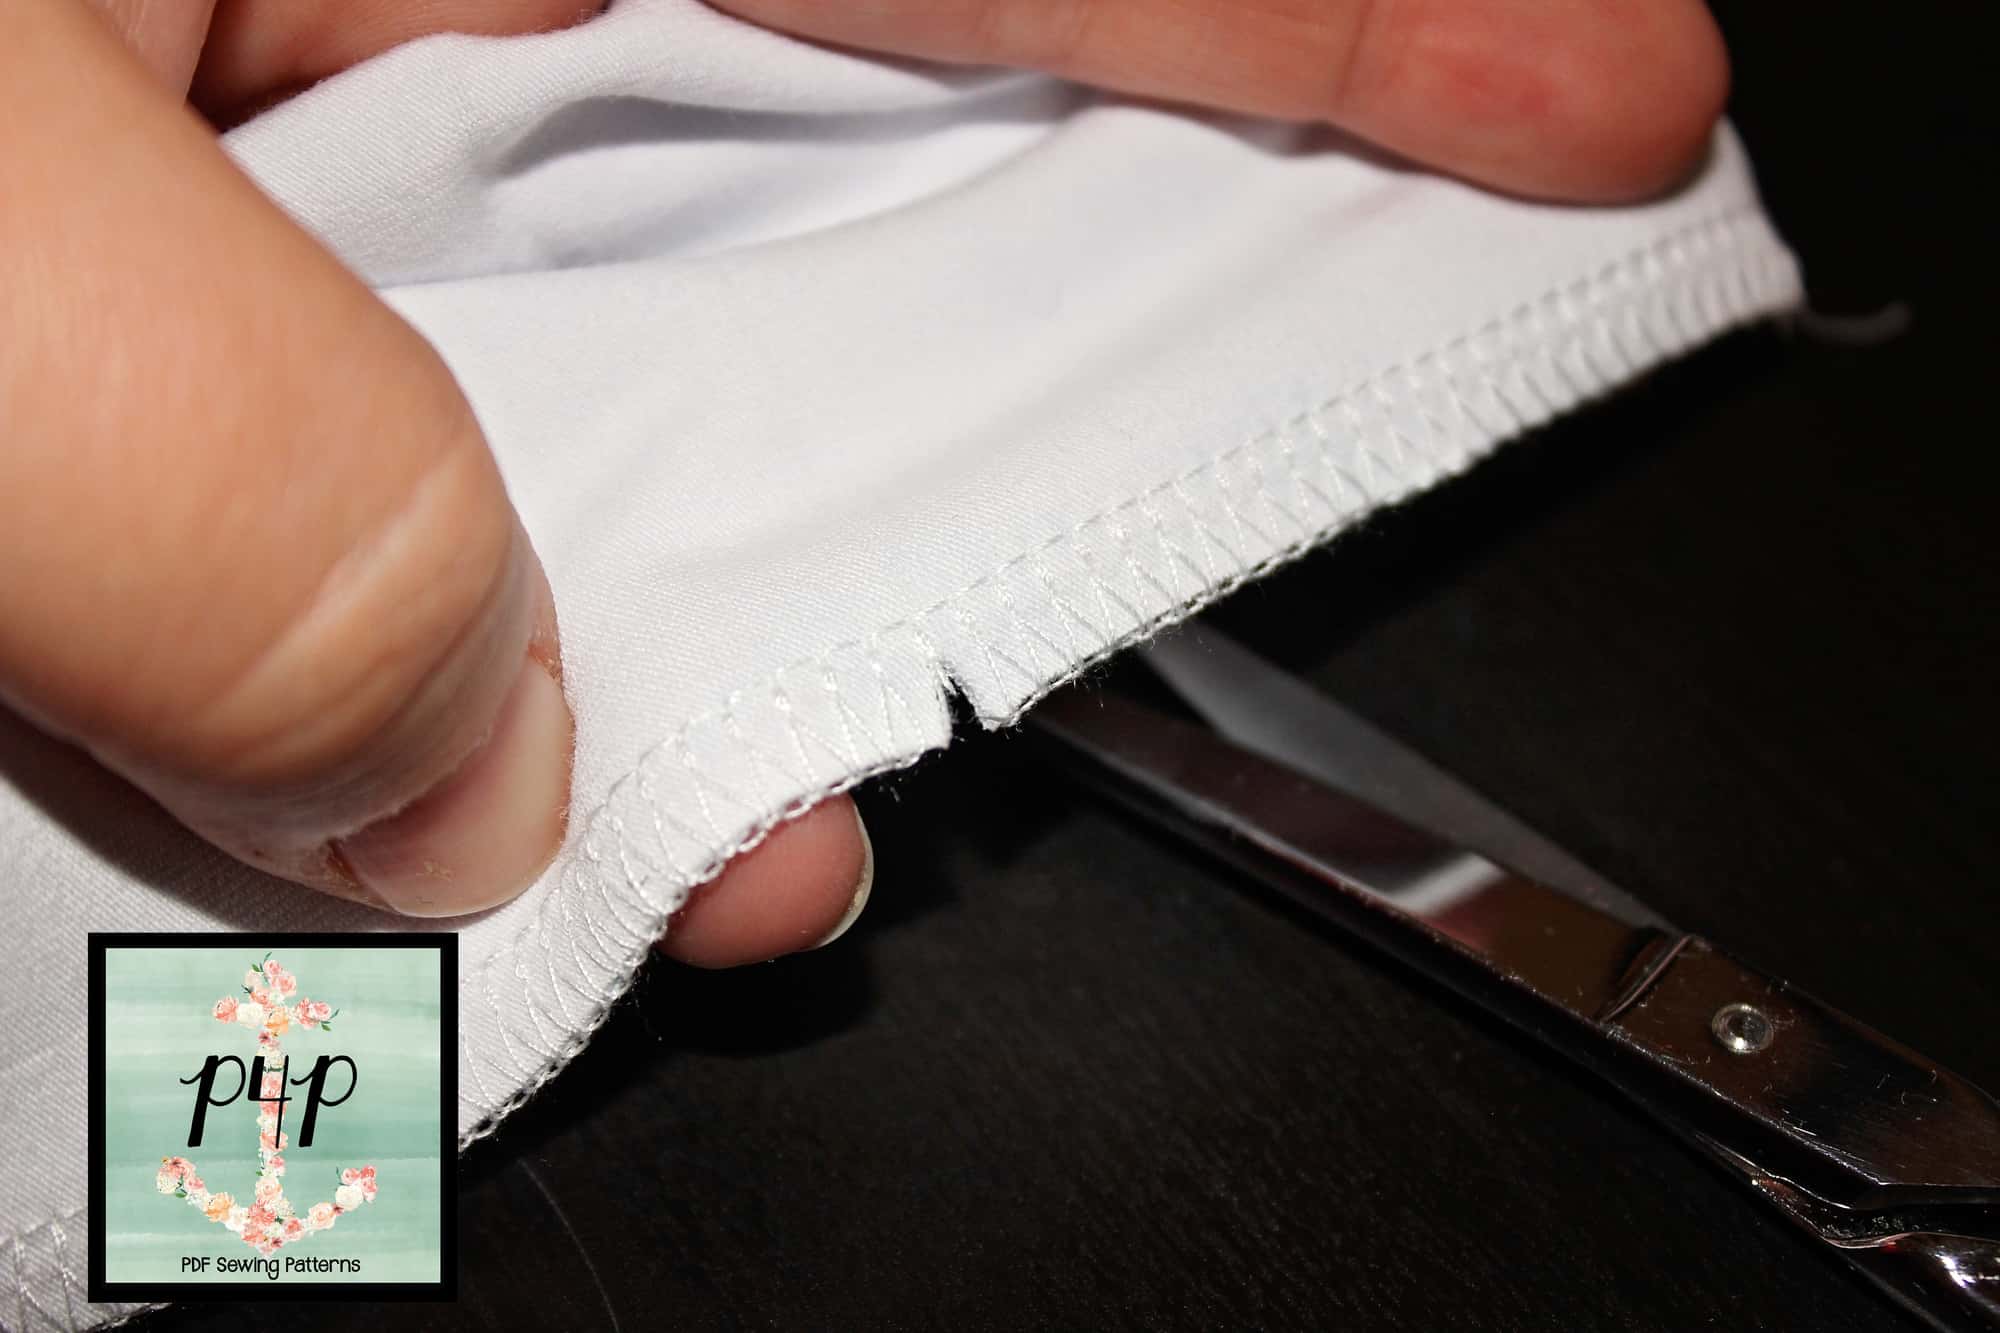
That little snip will make it so easy to please the seam allowances on opposite sides when you sew fold the cuff. In doing so, you will have so much less bulk at the seam, your serger will thank you! 🙂

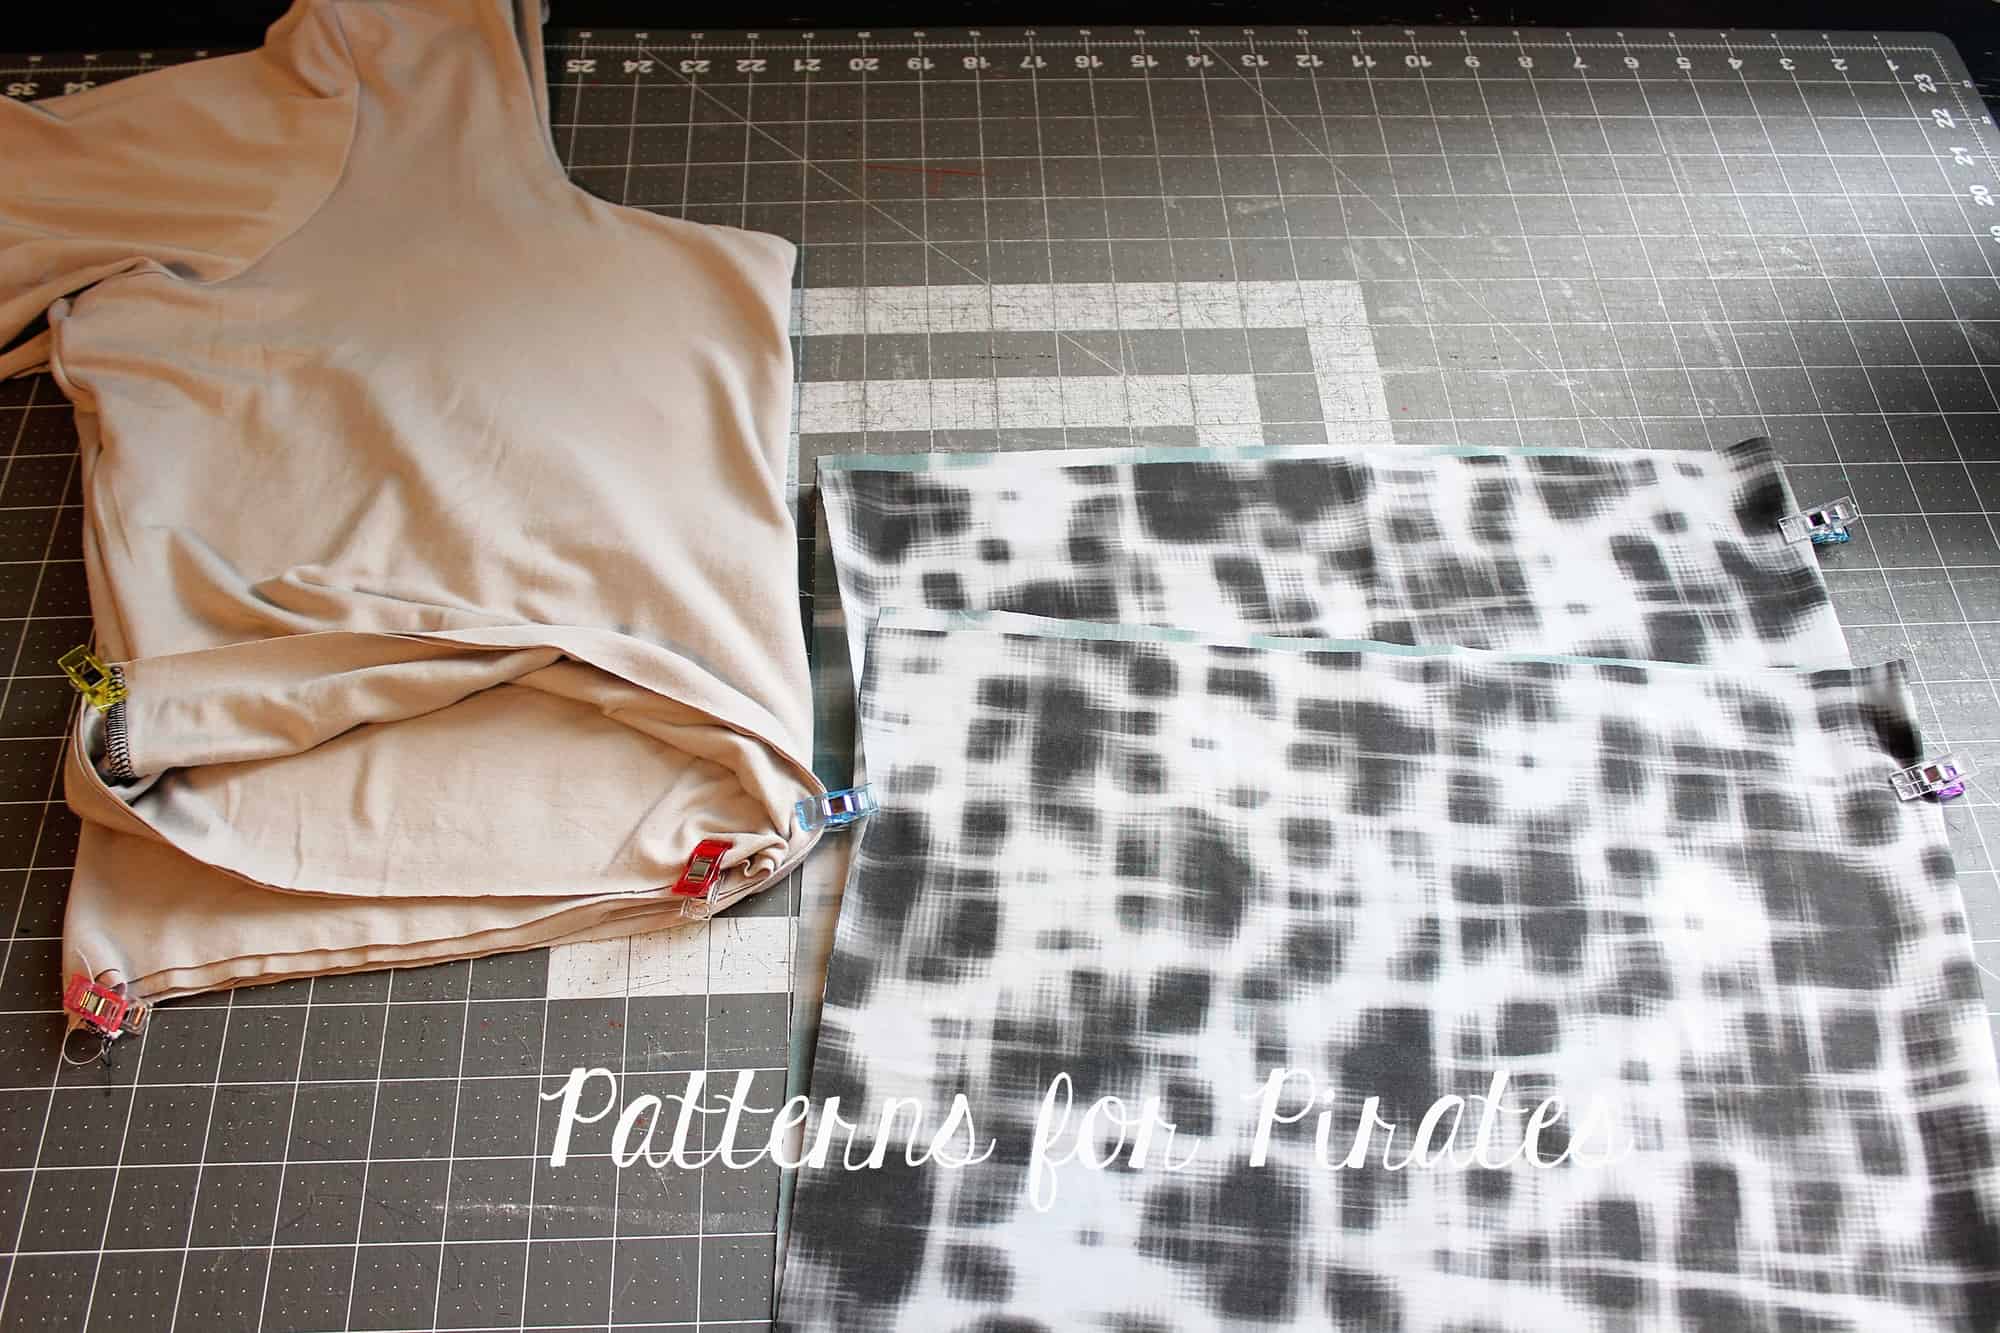
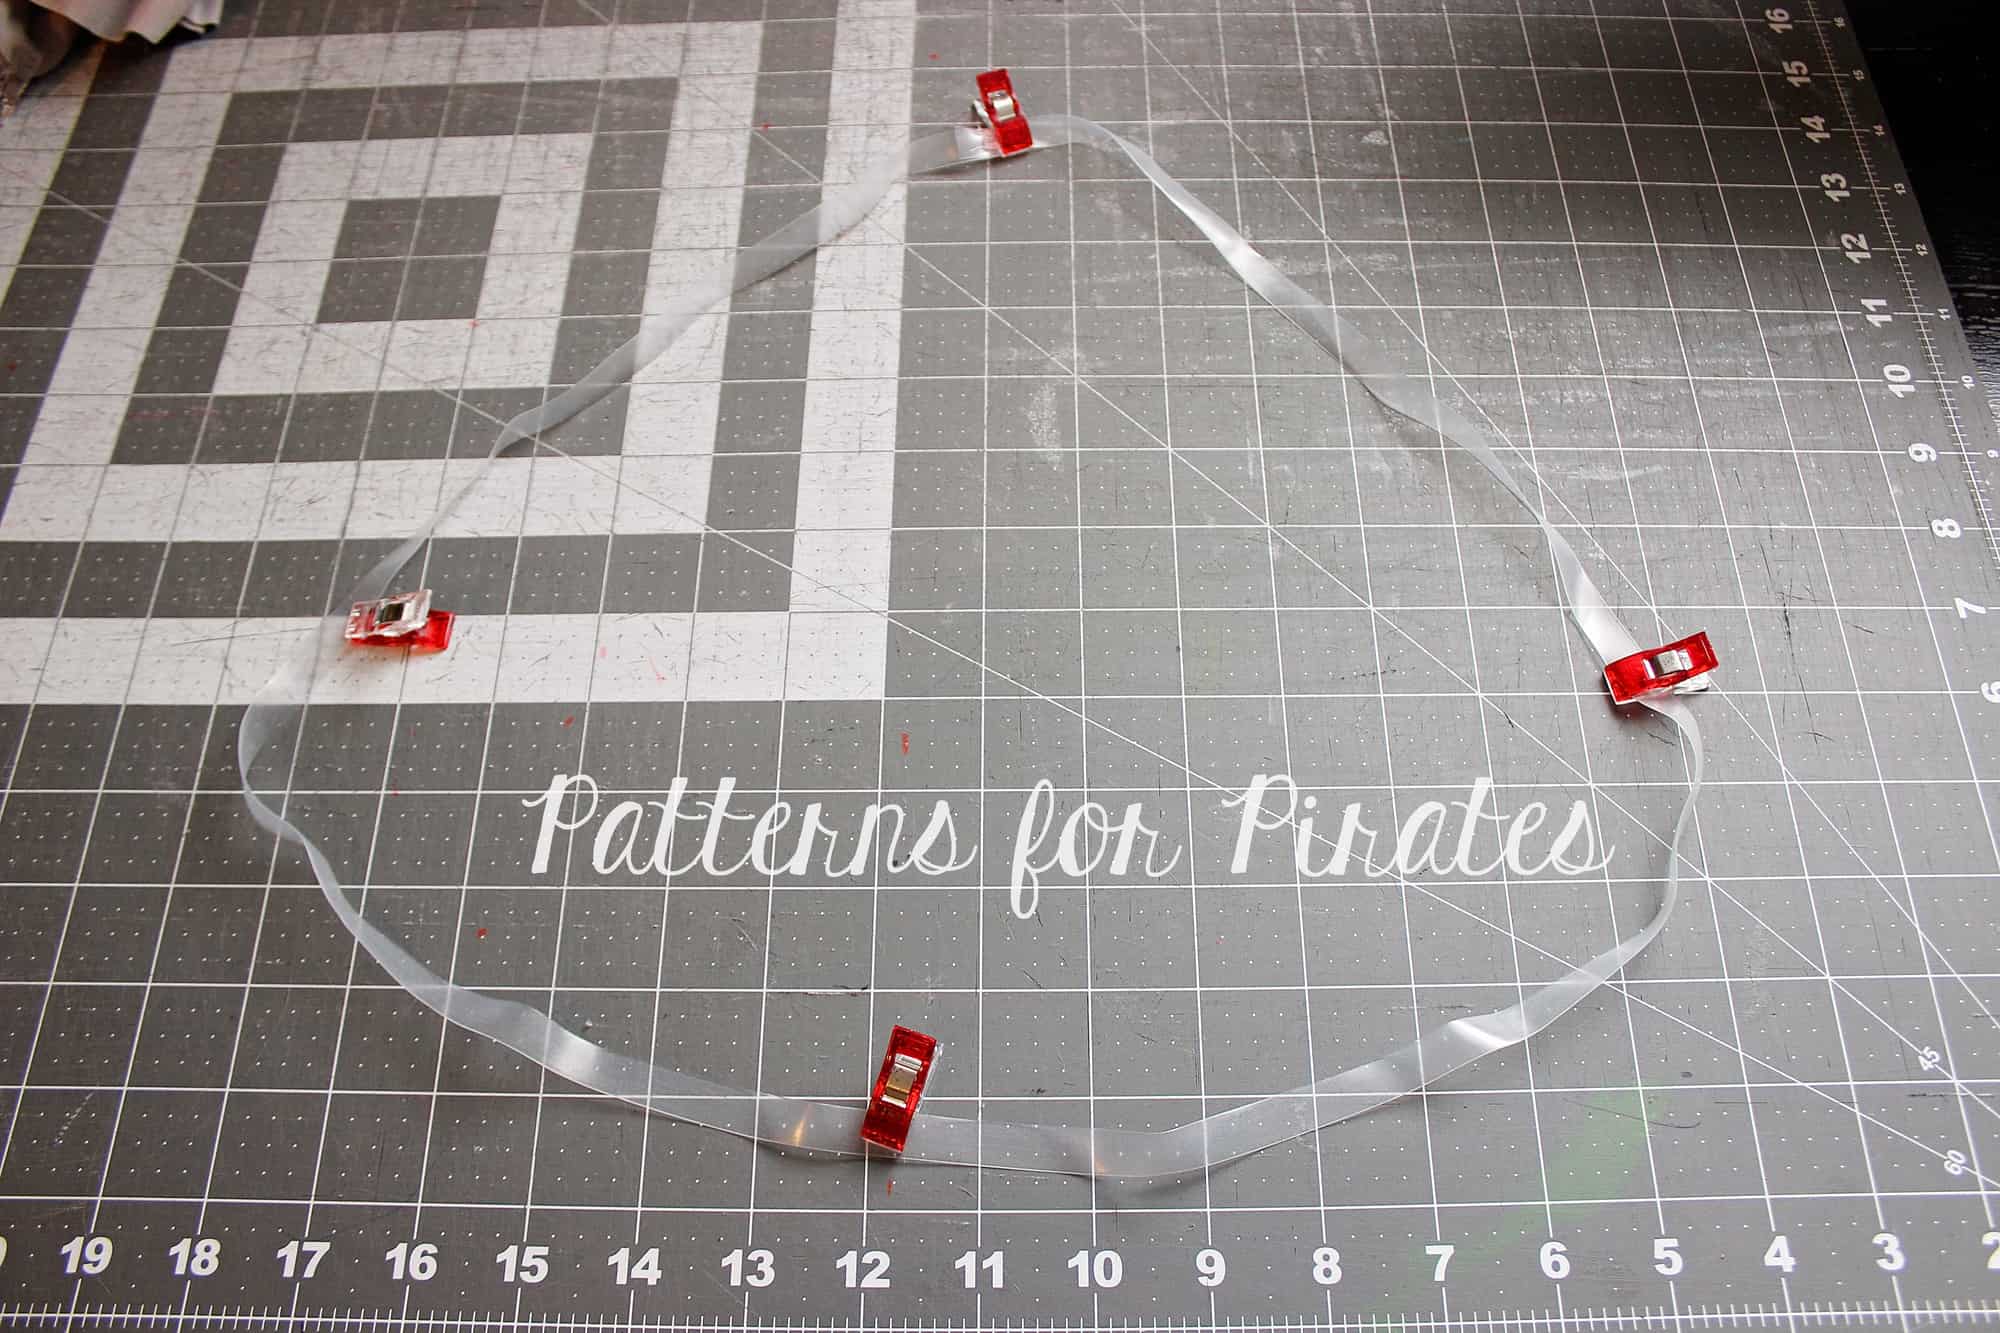
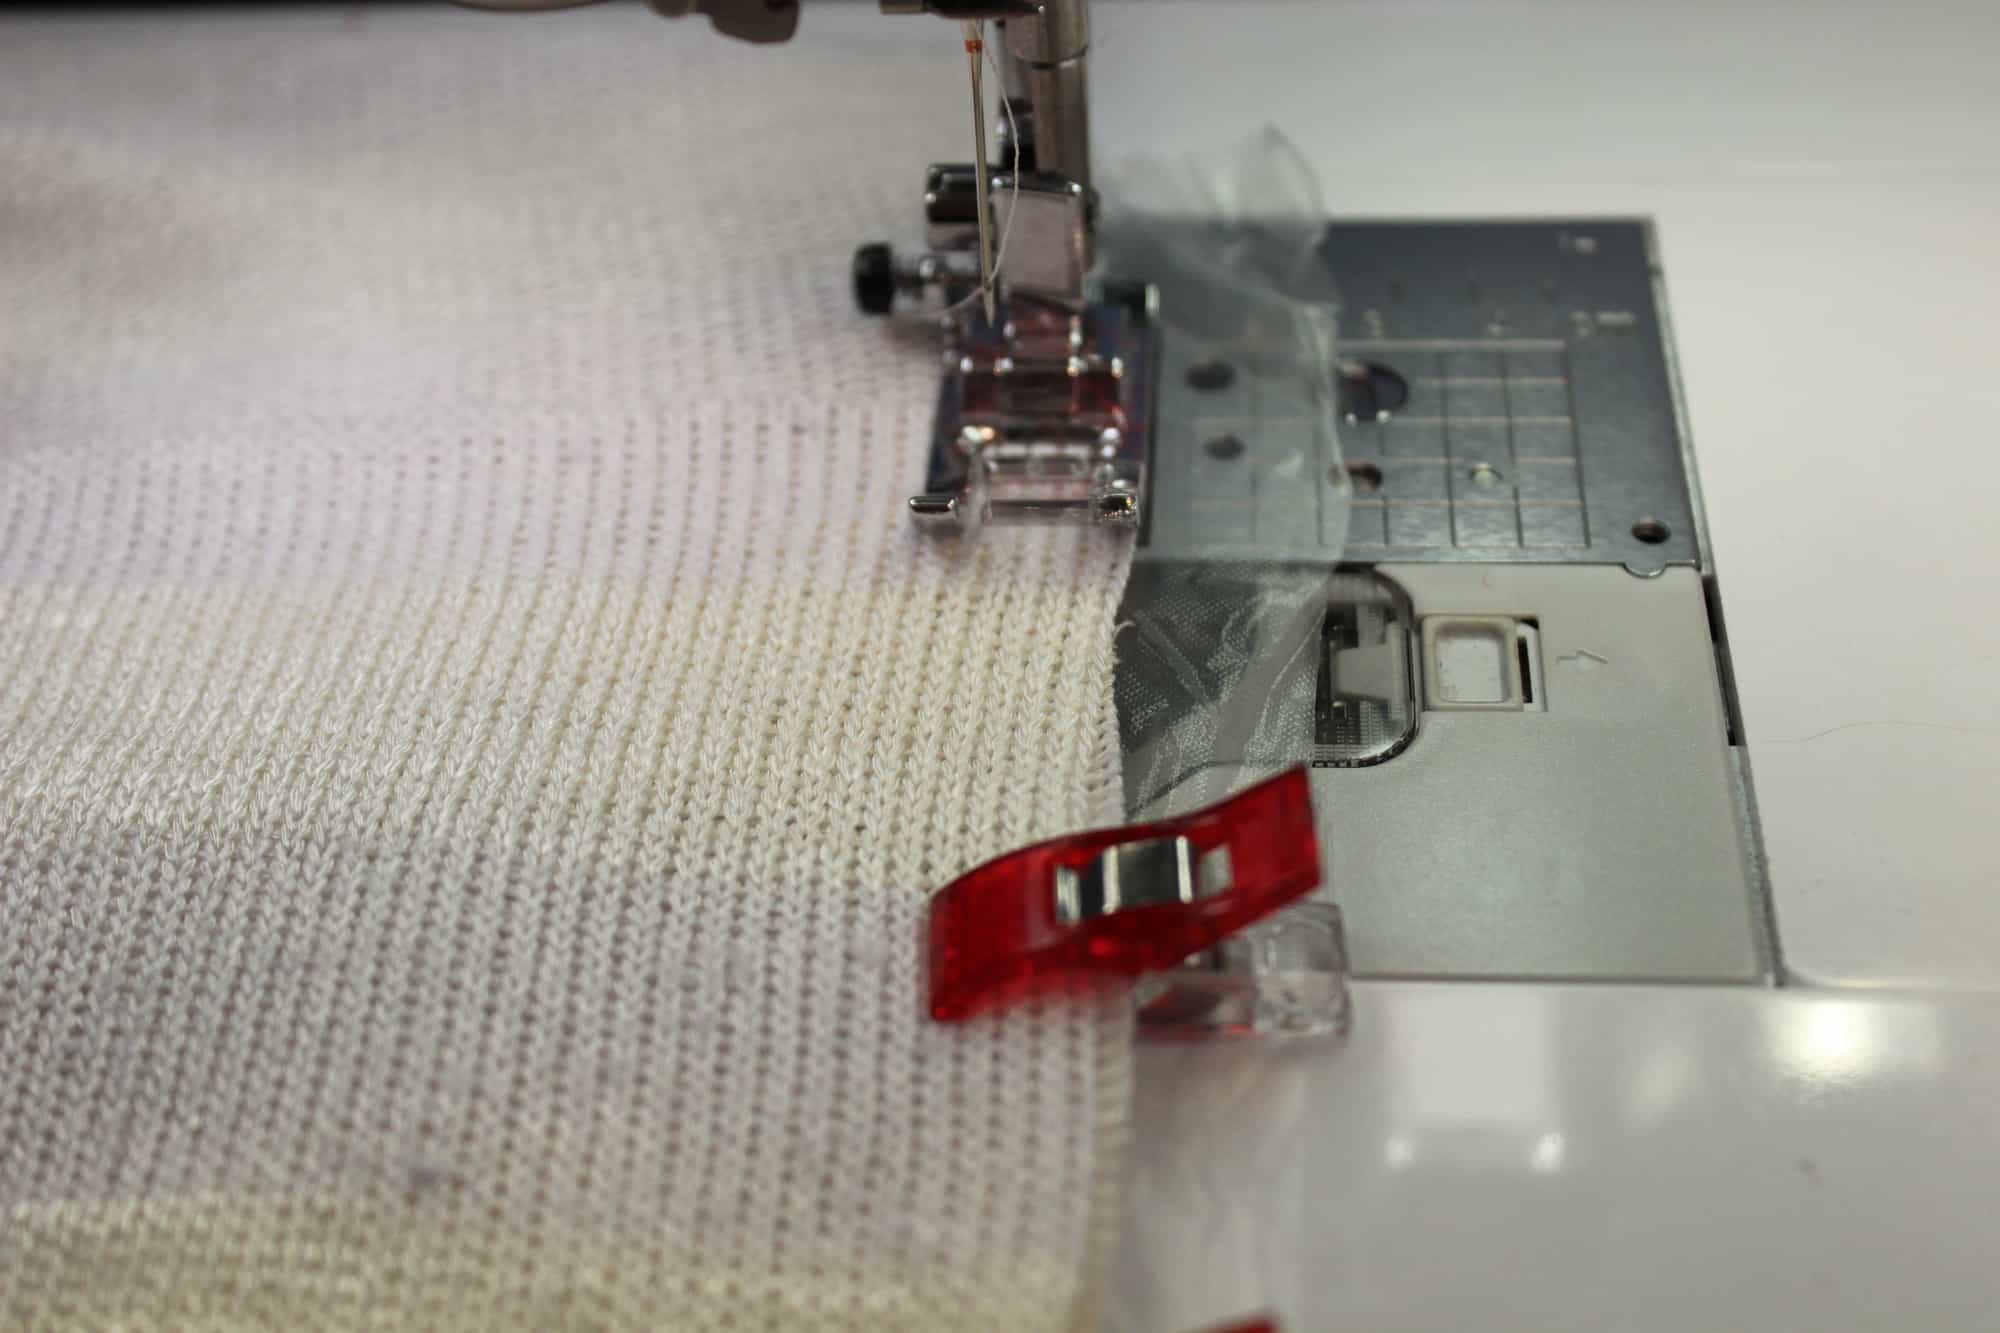
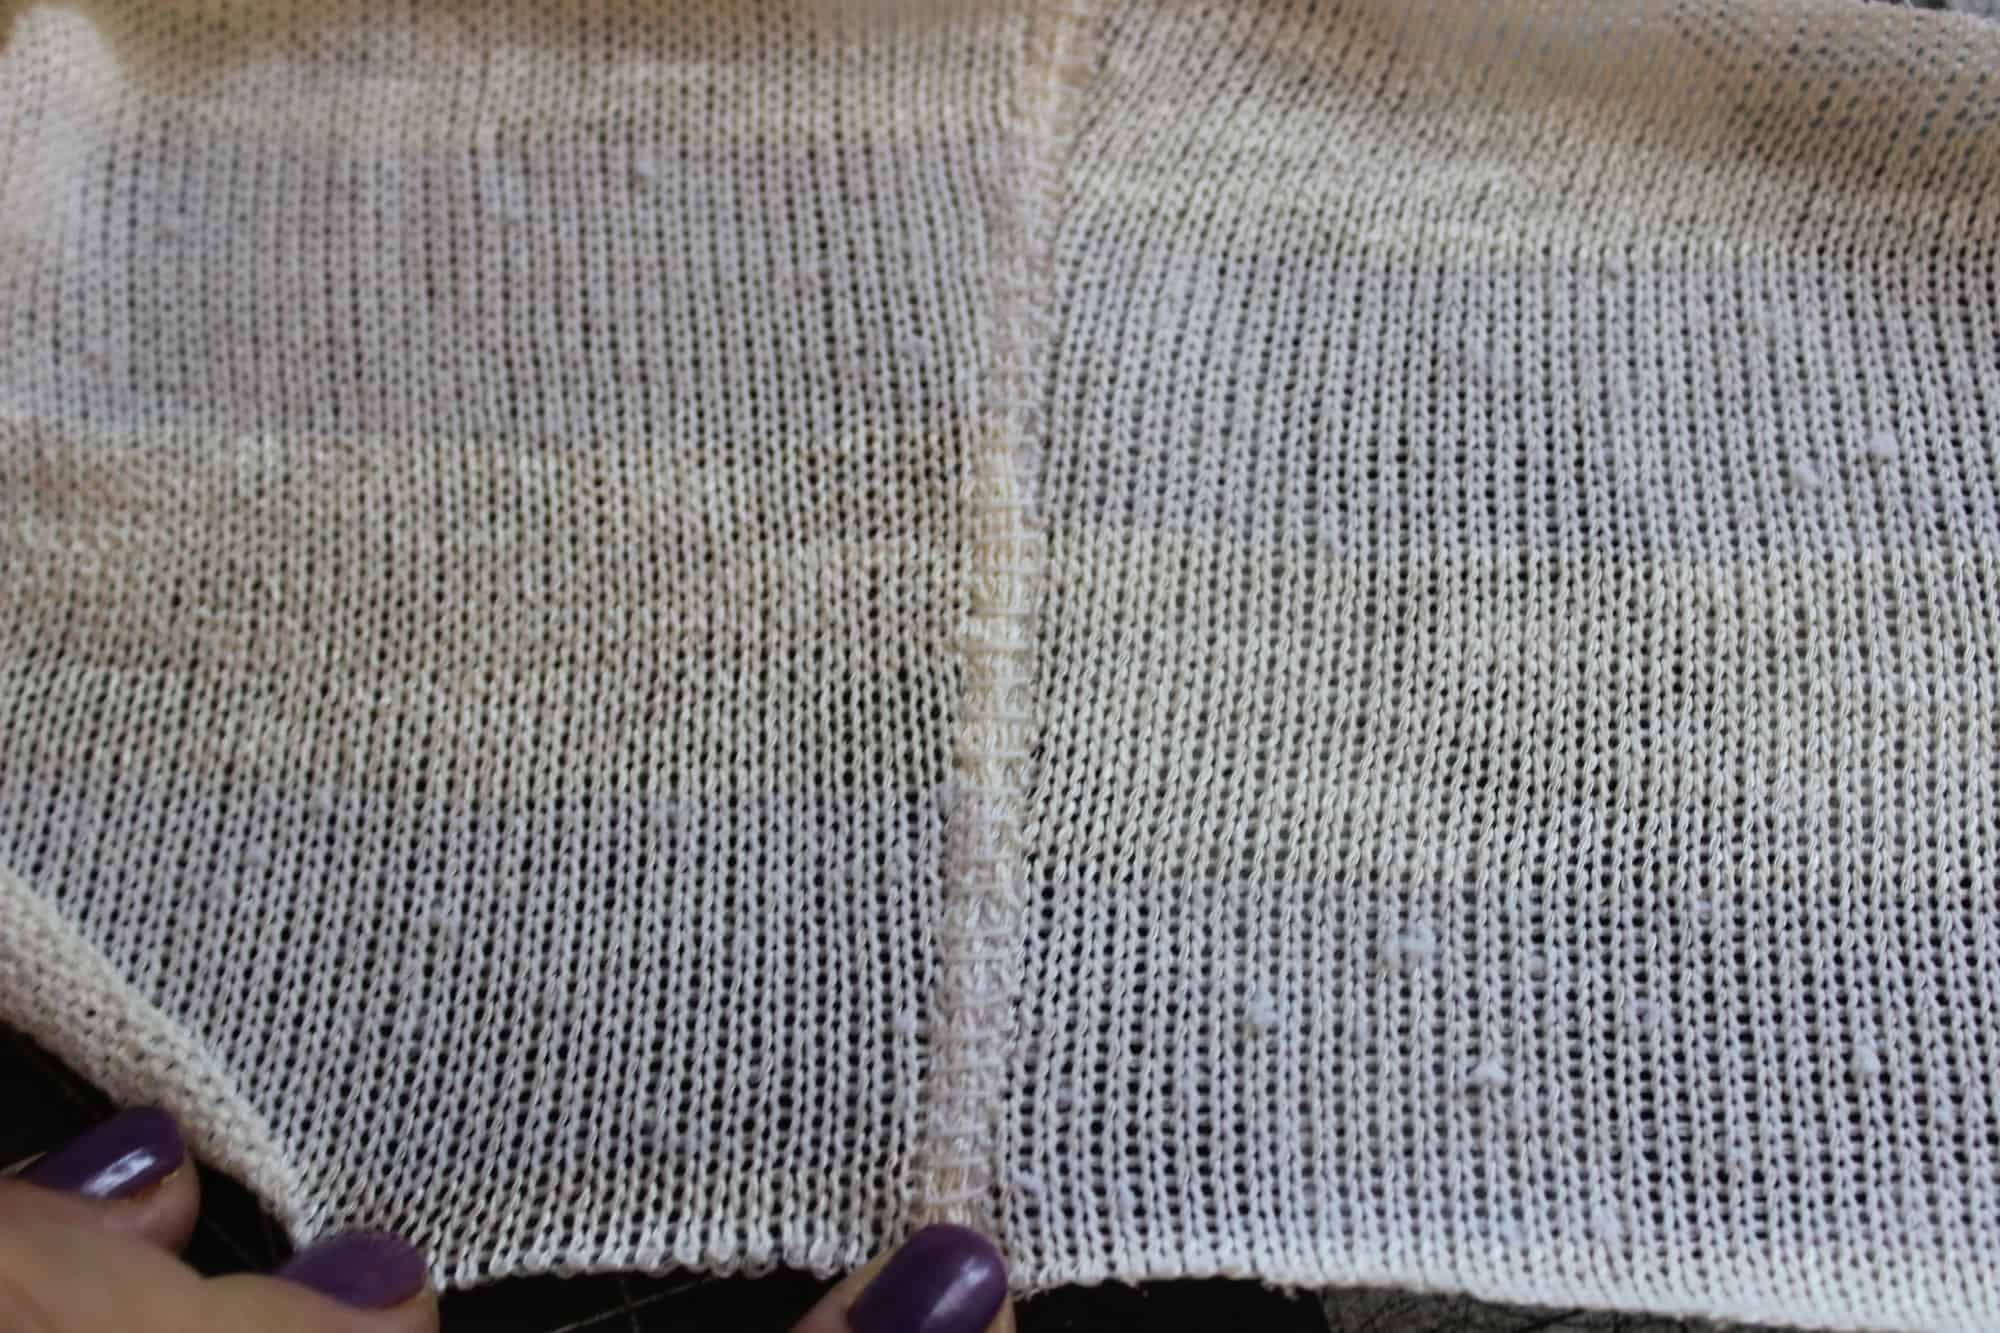
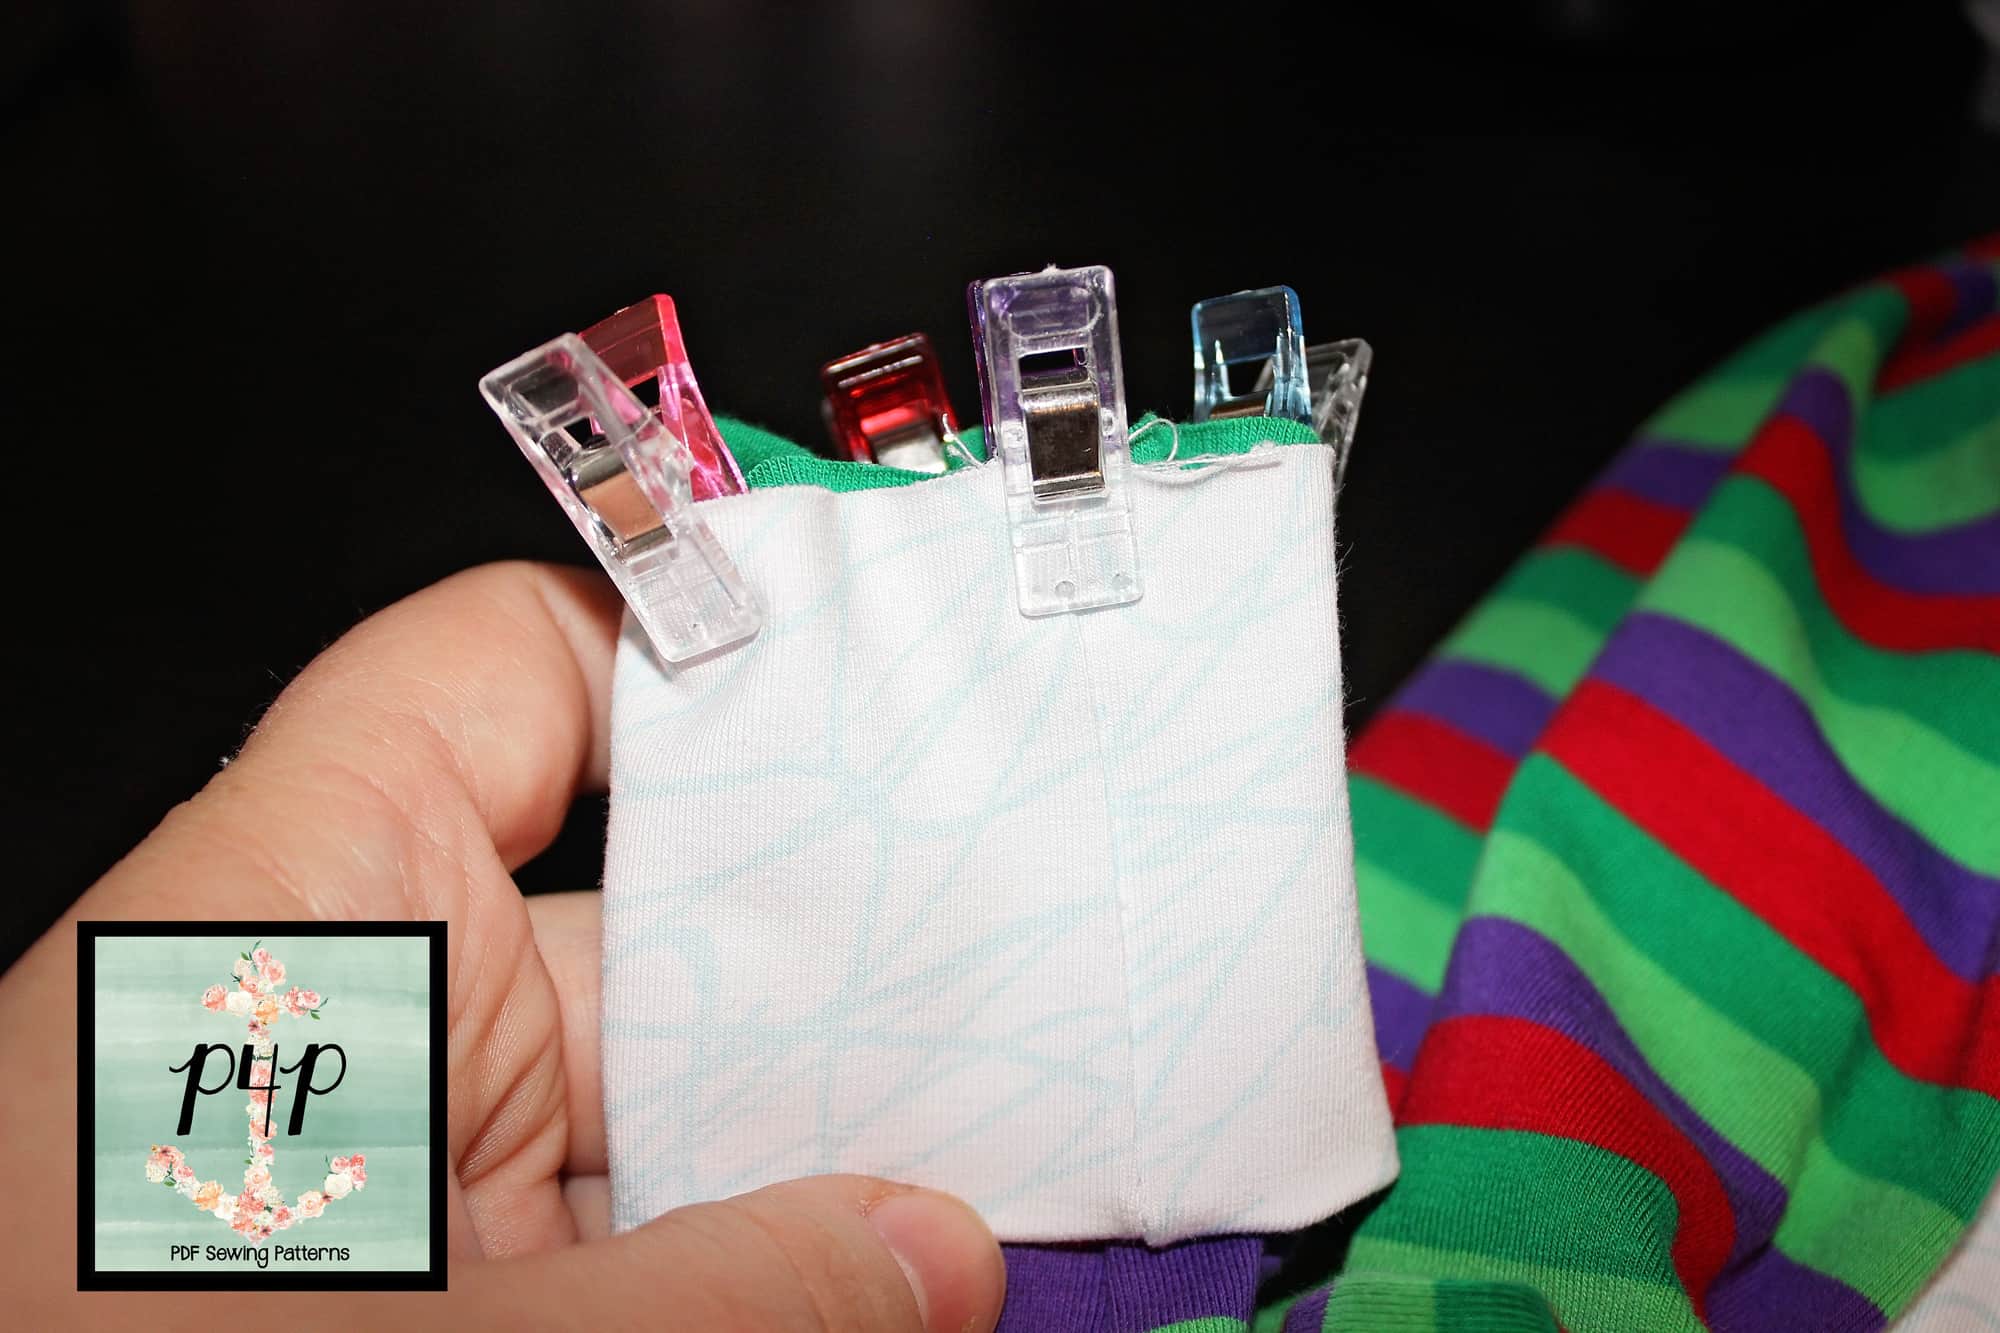
*Place your sleeve inside the cuffs

Mark the quarter points on the sleeve (or leg) opening as well as the cuffs. I find that for the smallest of sizes, marking just the half point is sufficient.

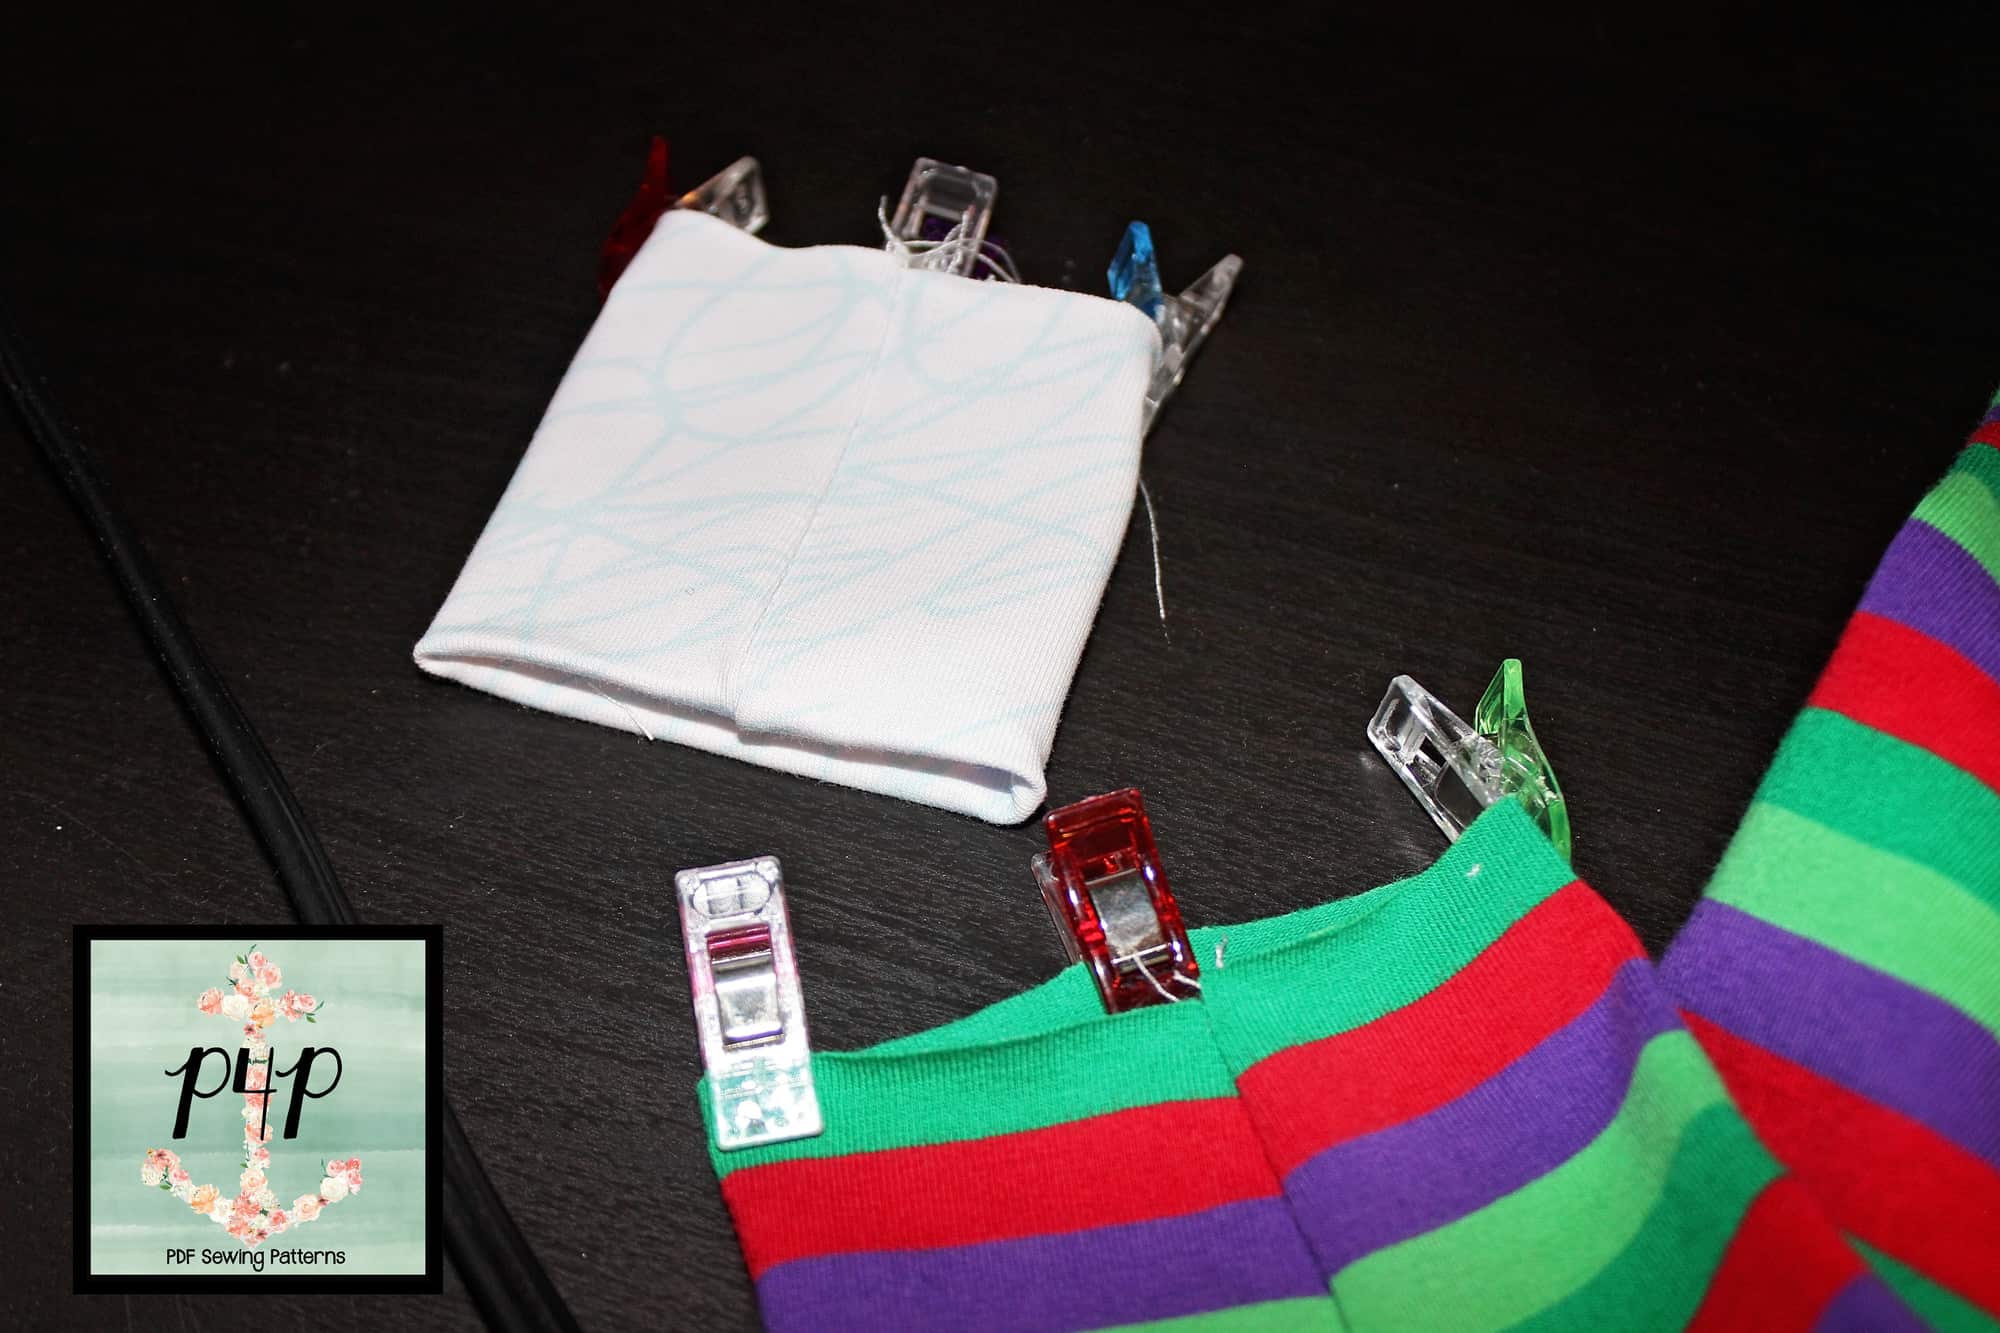
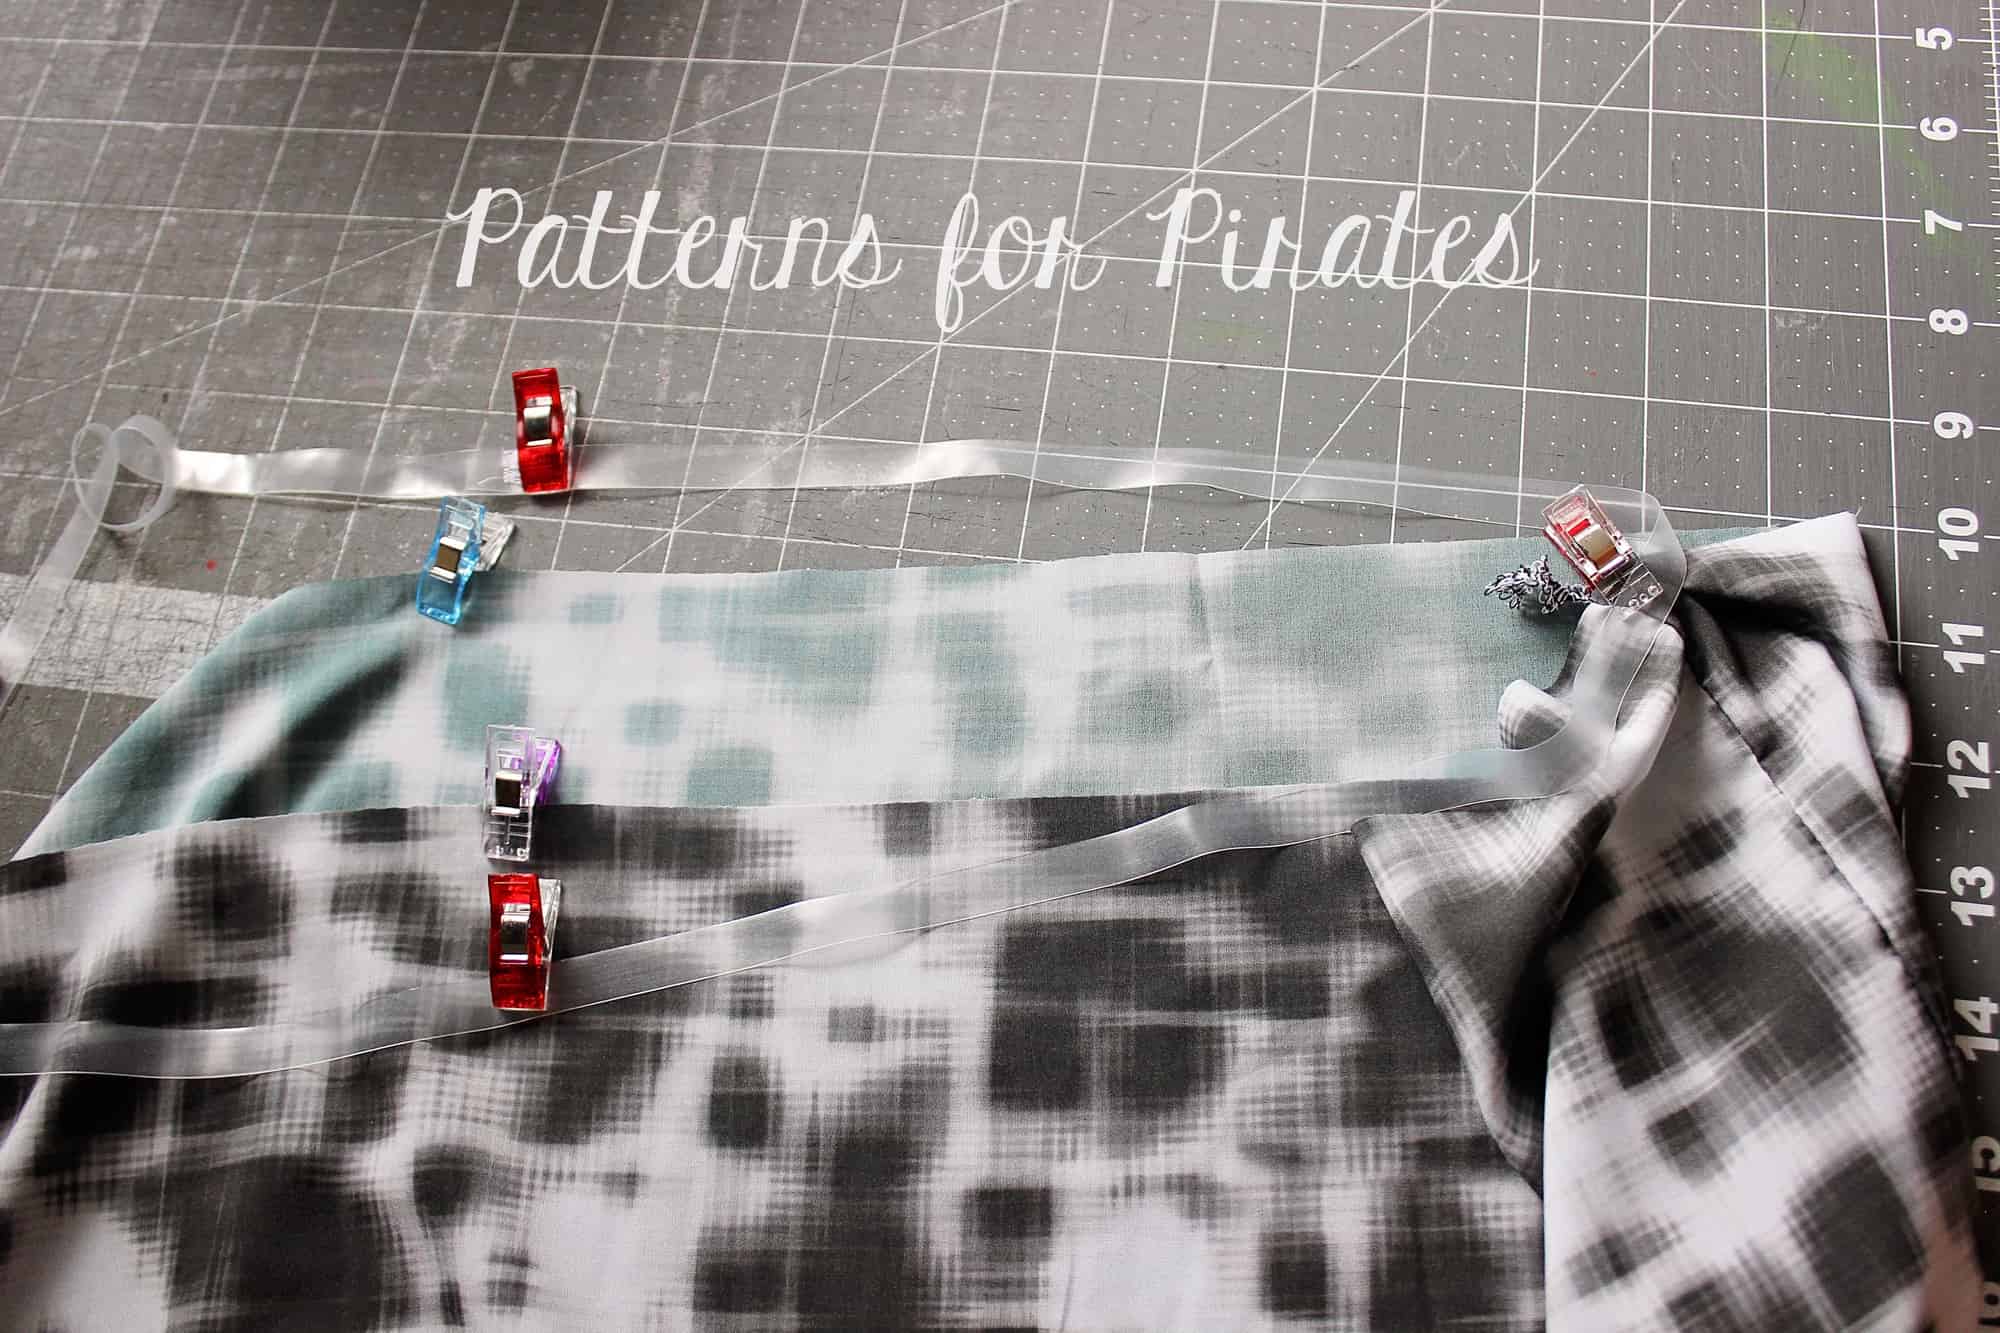
To make sure you will not have your seam allowance on the outside of your sleeve (or ankle) 😉 place the right side of your sleeve inside the cuff and match the quarter (or half way) points.

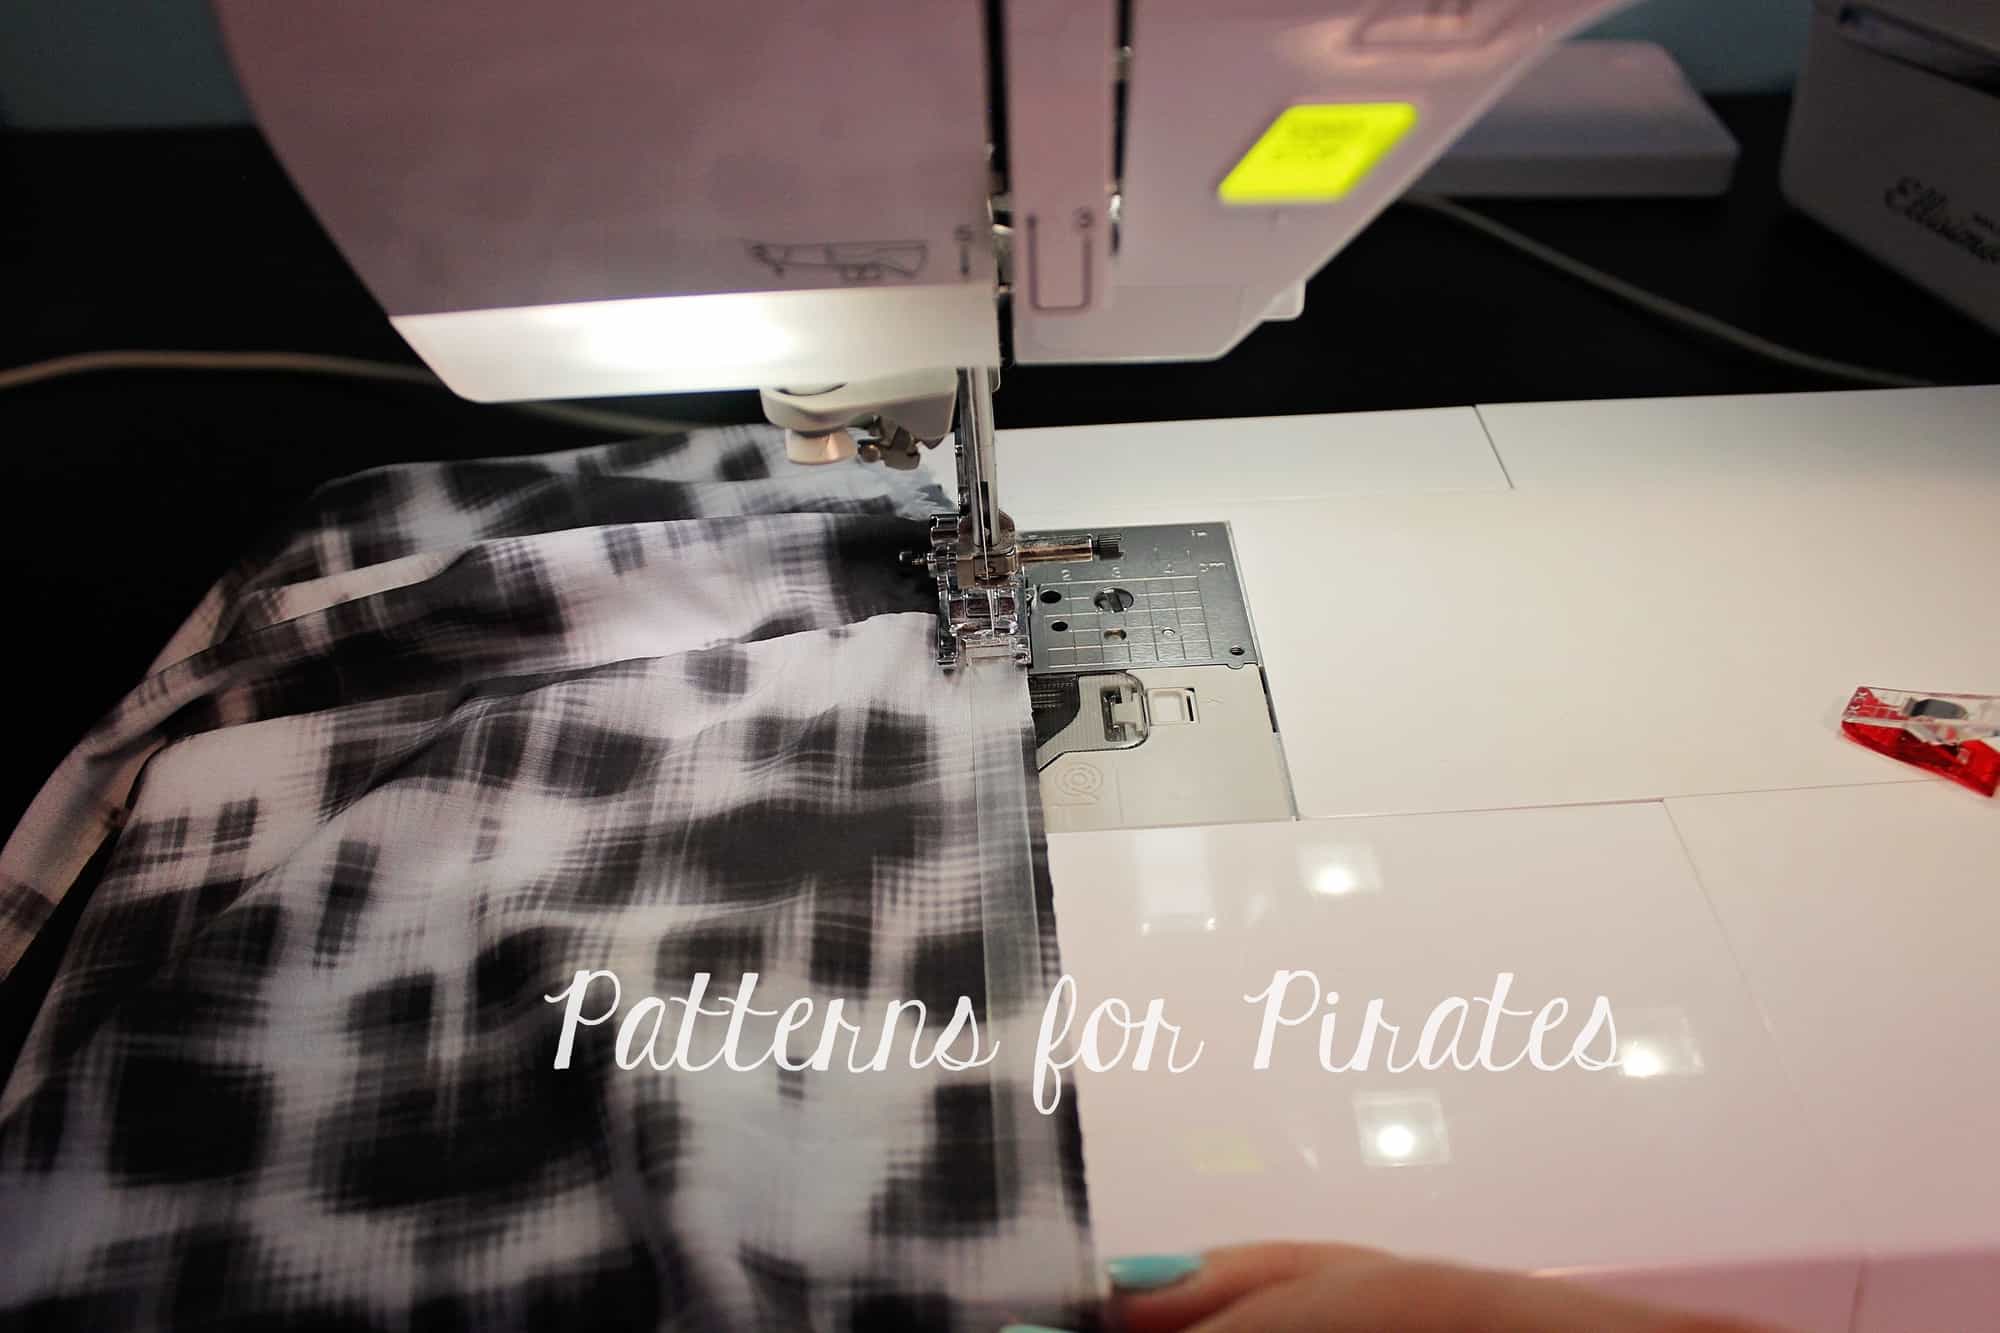
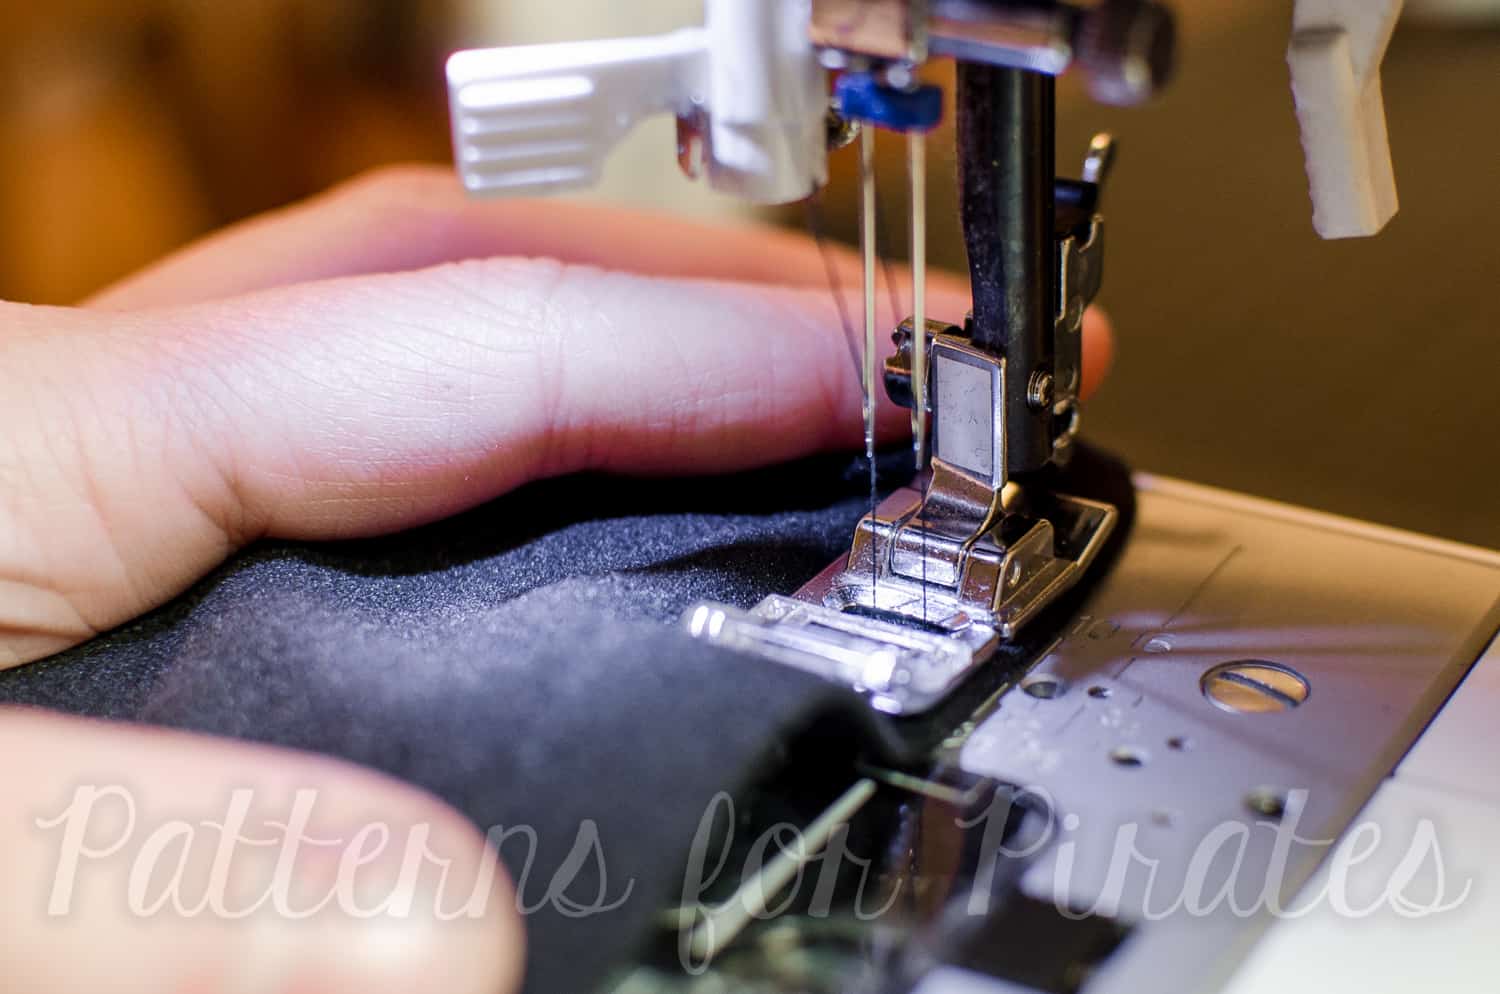
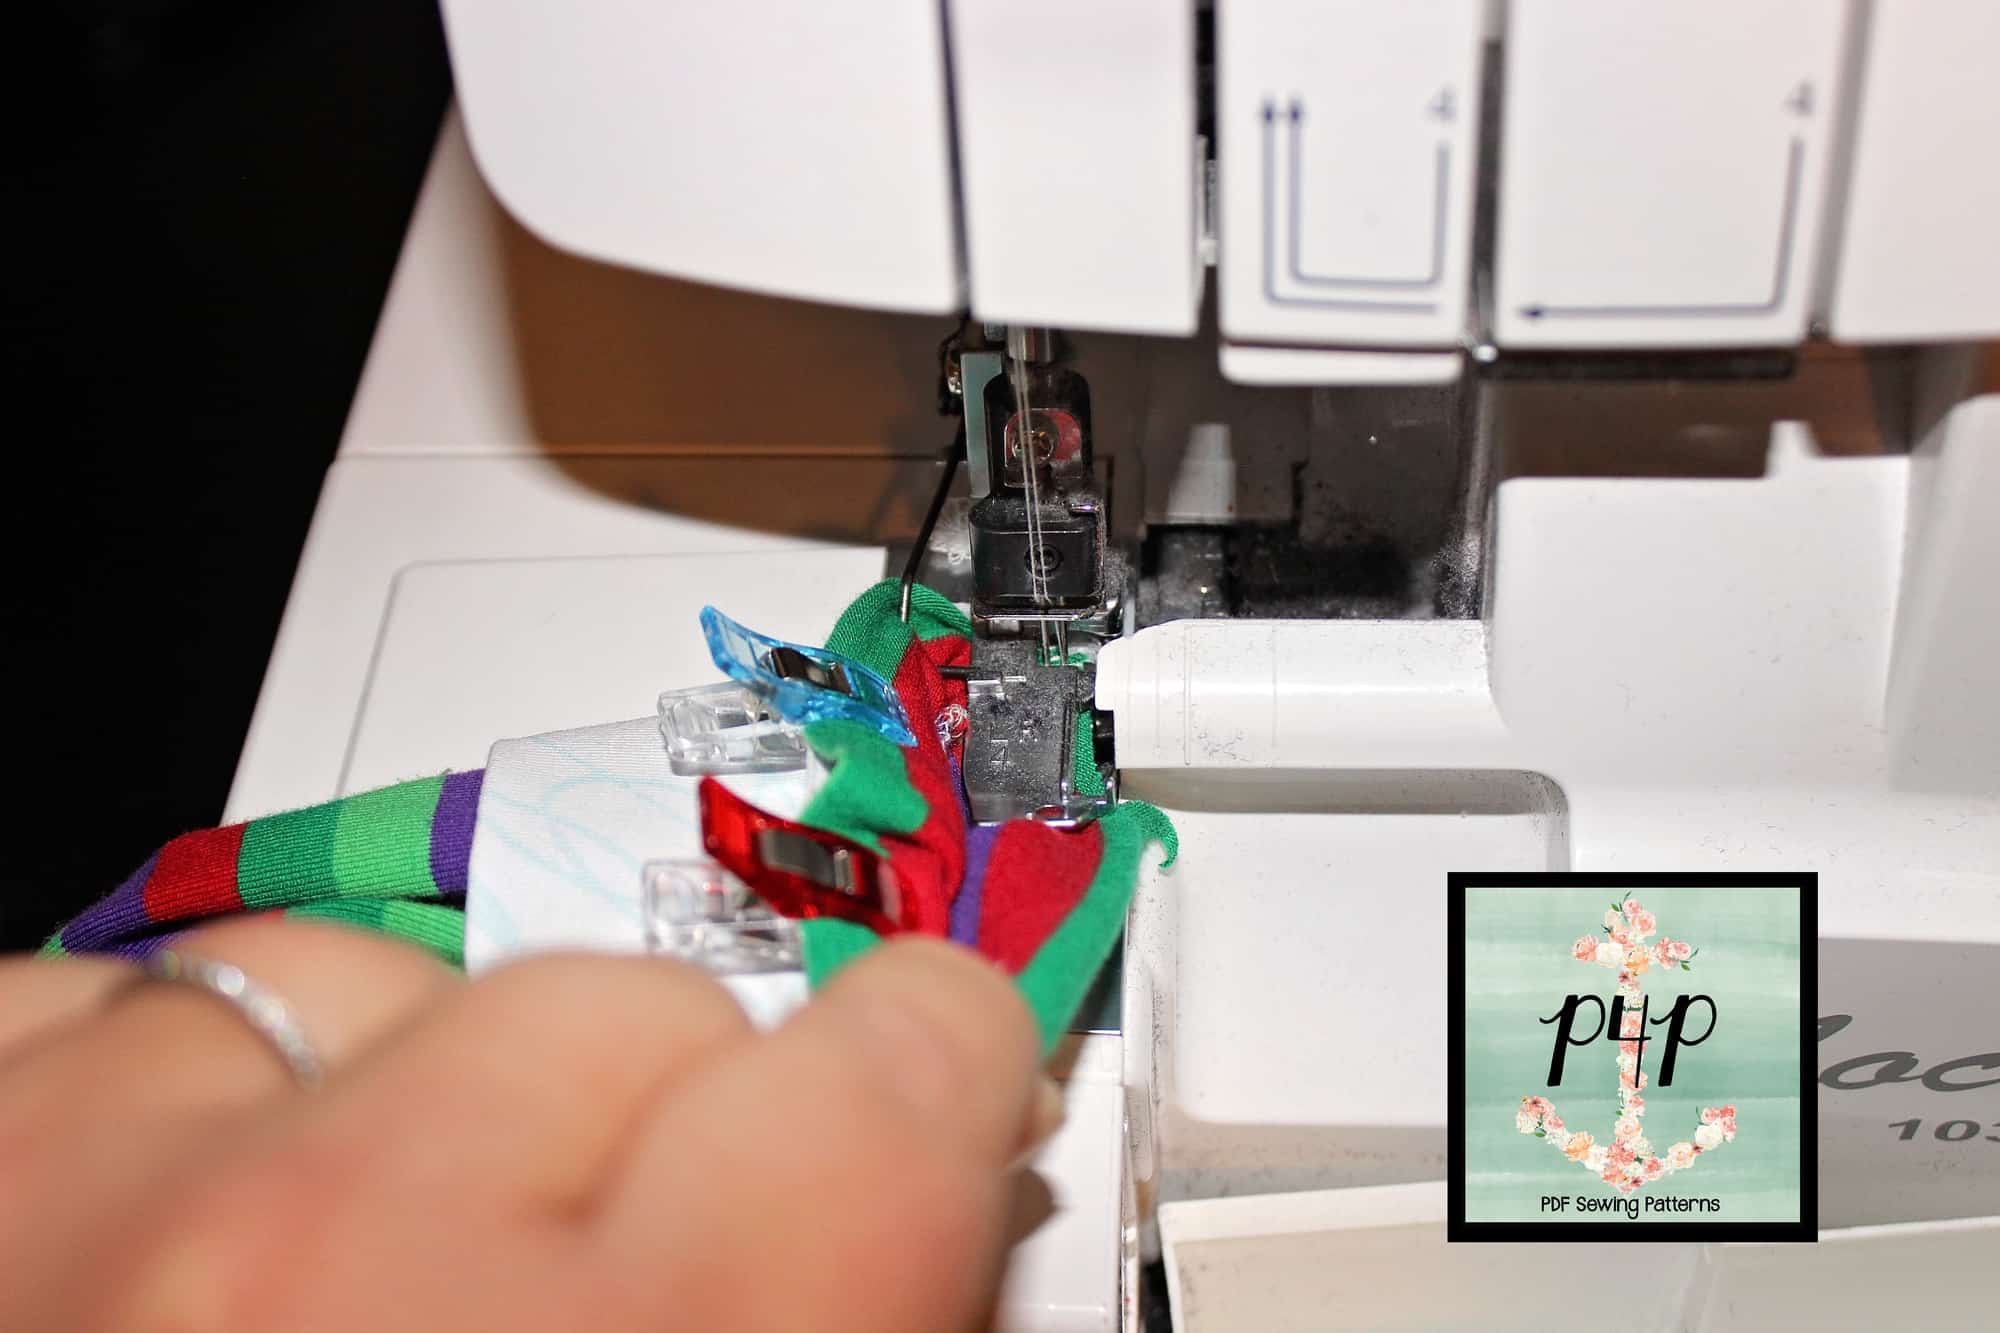
*Sew or serge with the presser foot inside the sleeve

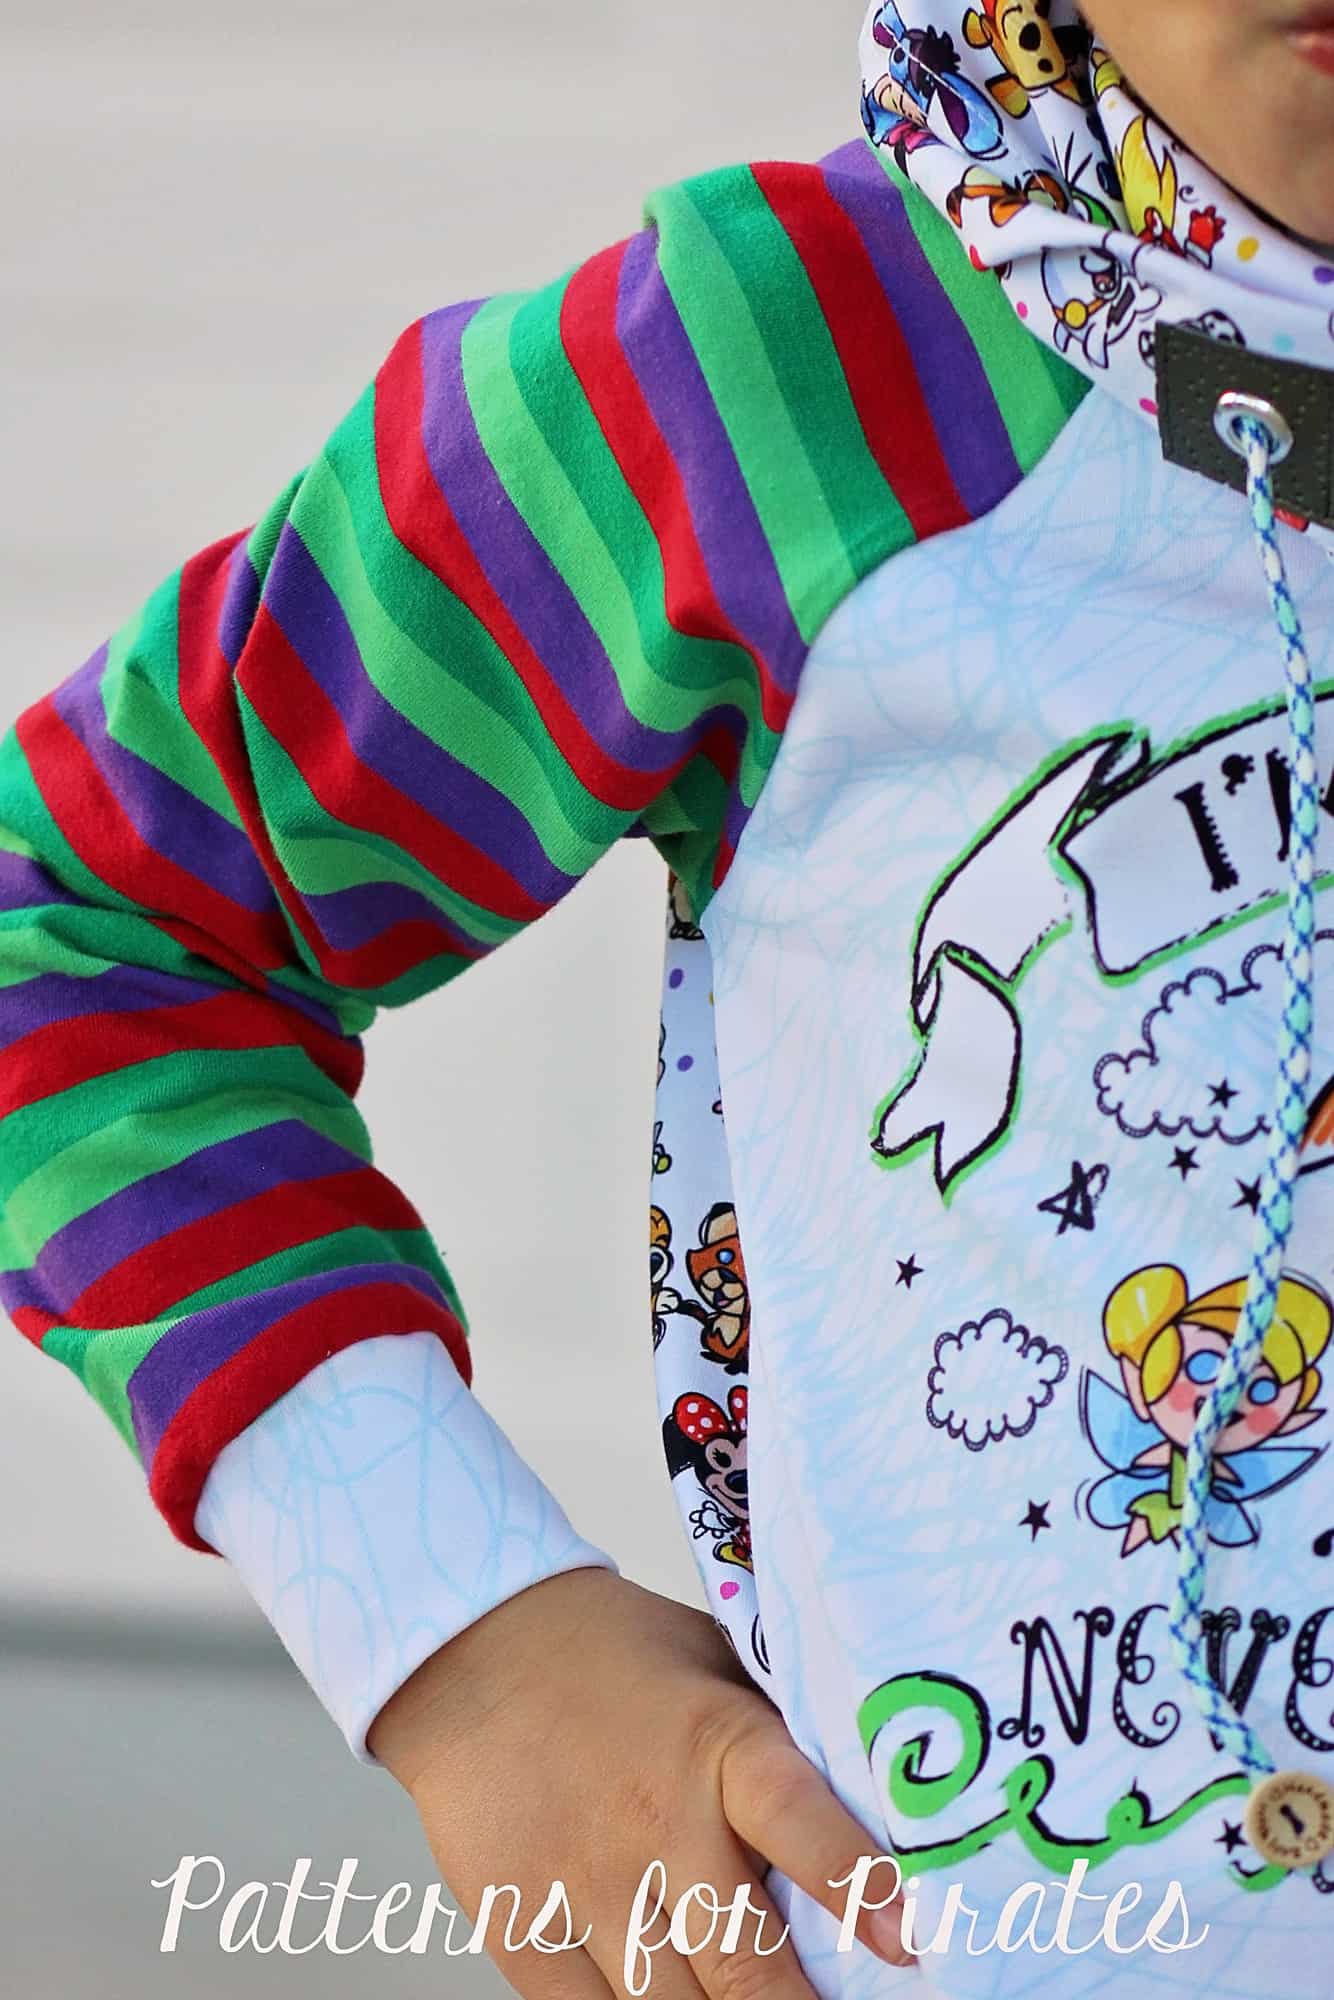
Most of the time the sleeve opening is pretty small so I find that it is easier the place the presser foot of my serger (or sewing machine) inside the sleeve as opposed to stitching on the outside. This is especially important when you make Baby Bear Joggers or and kids shirts with cuffs, like the Jolly Roger Raglan or the Yo Ho Henley.
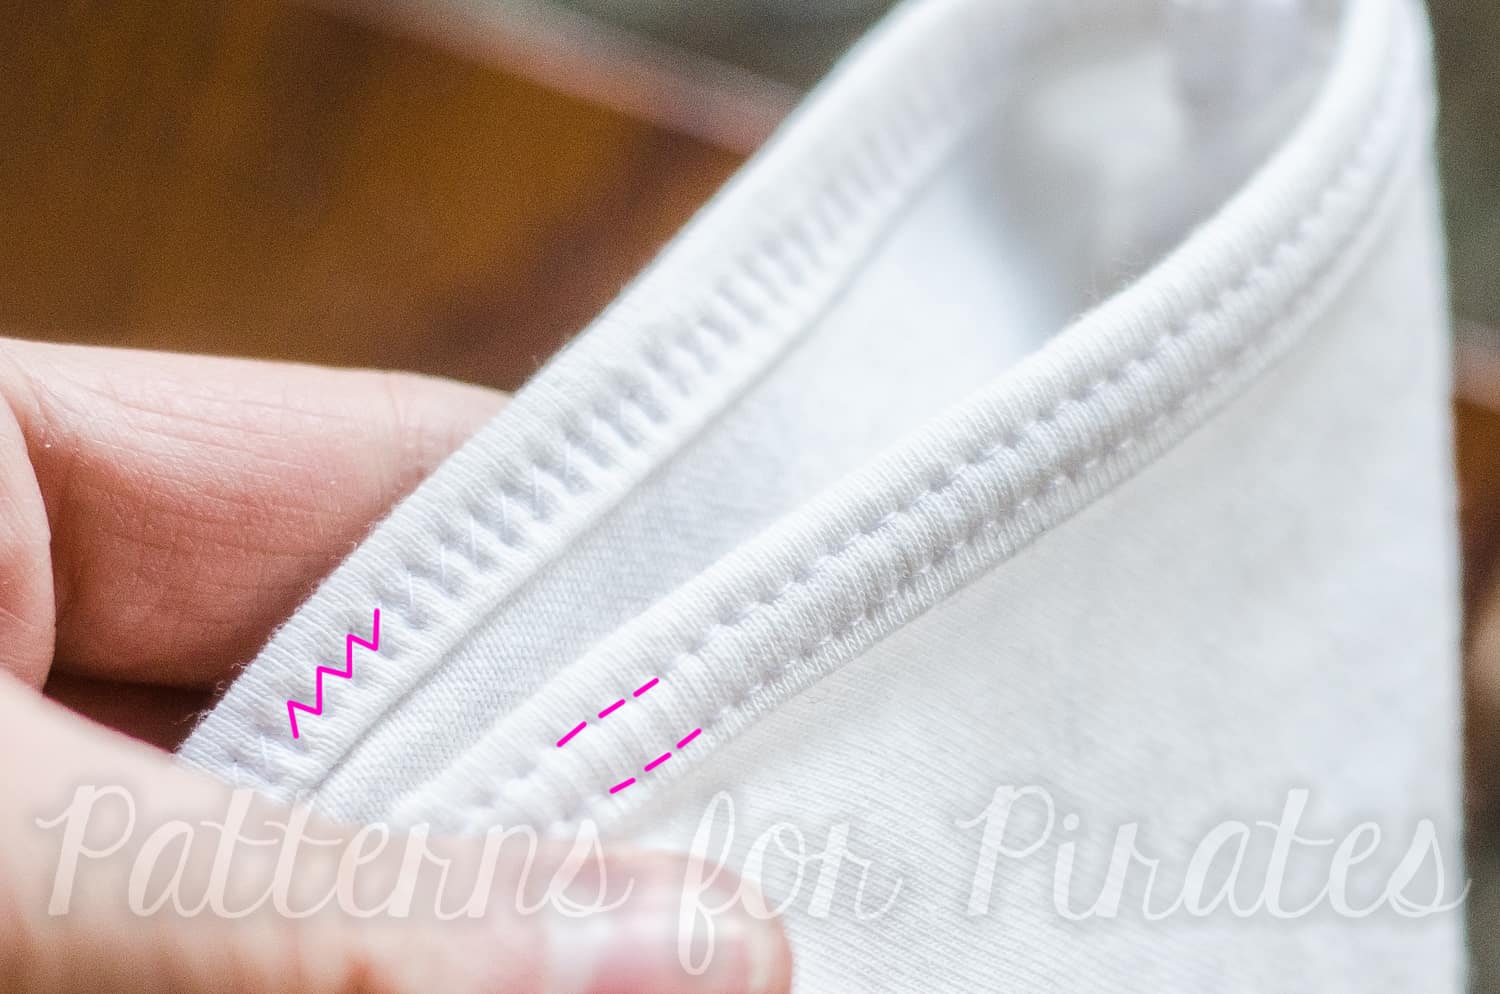
*Do not topstitch.

As opposed to necklines, I find that cuffs and waistbands look a lot better if you do not topstitch them down. I do encourage you to press your garments when you finish sewing it, including the cuffs.

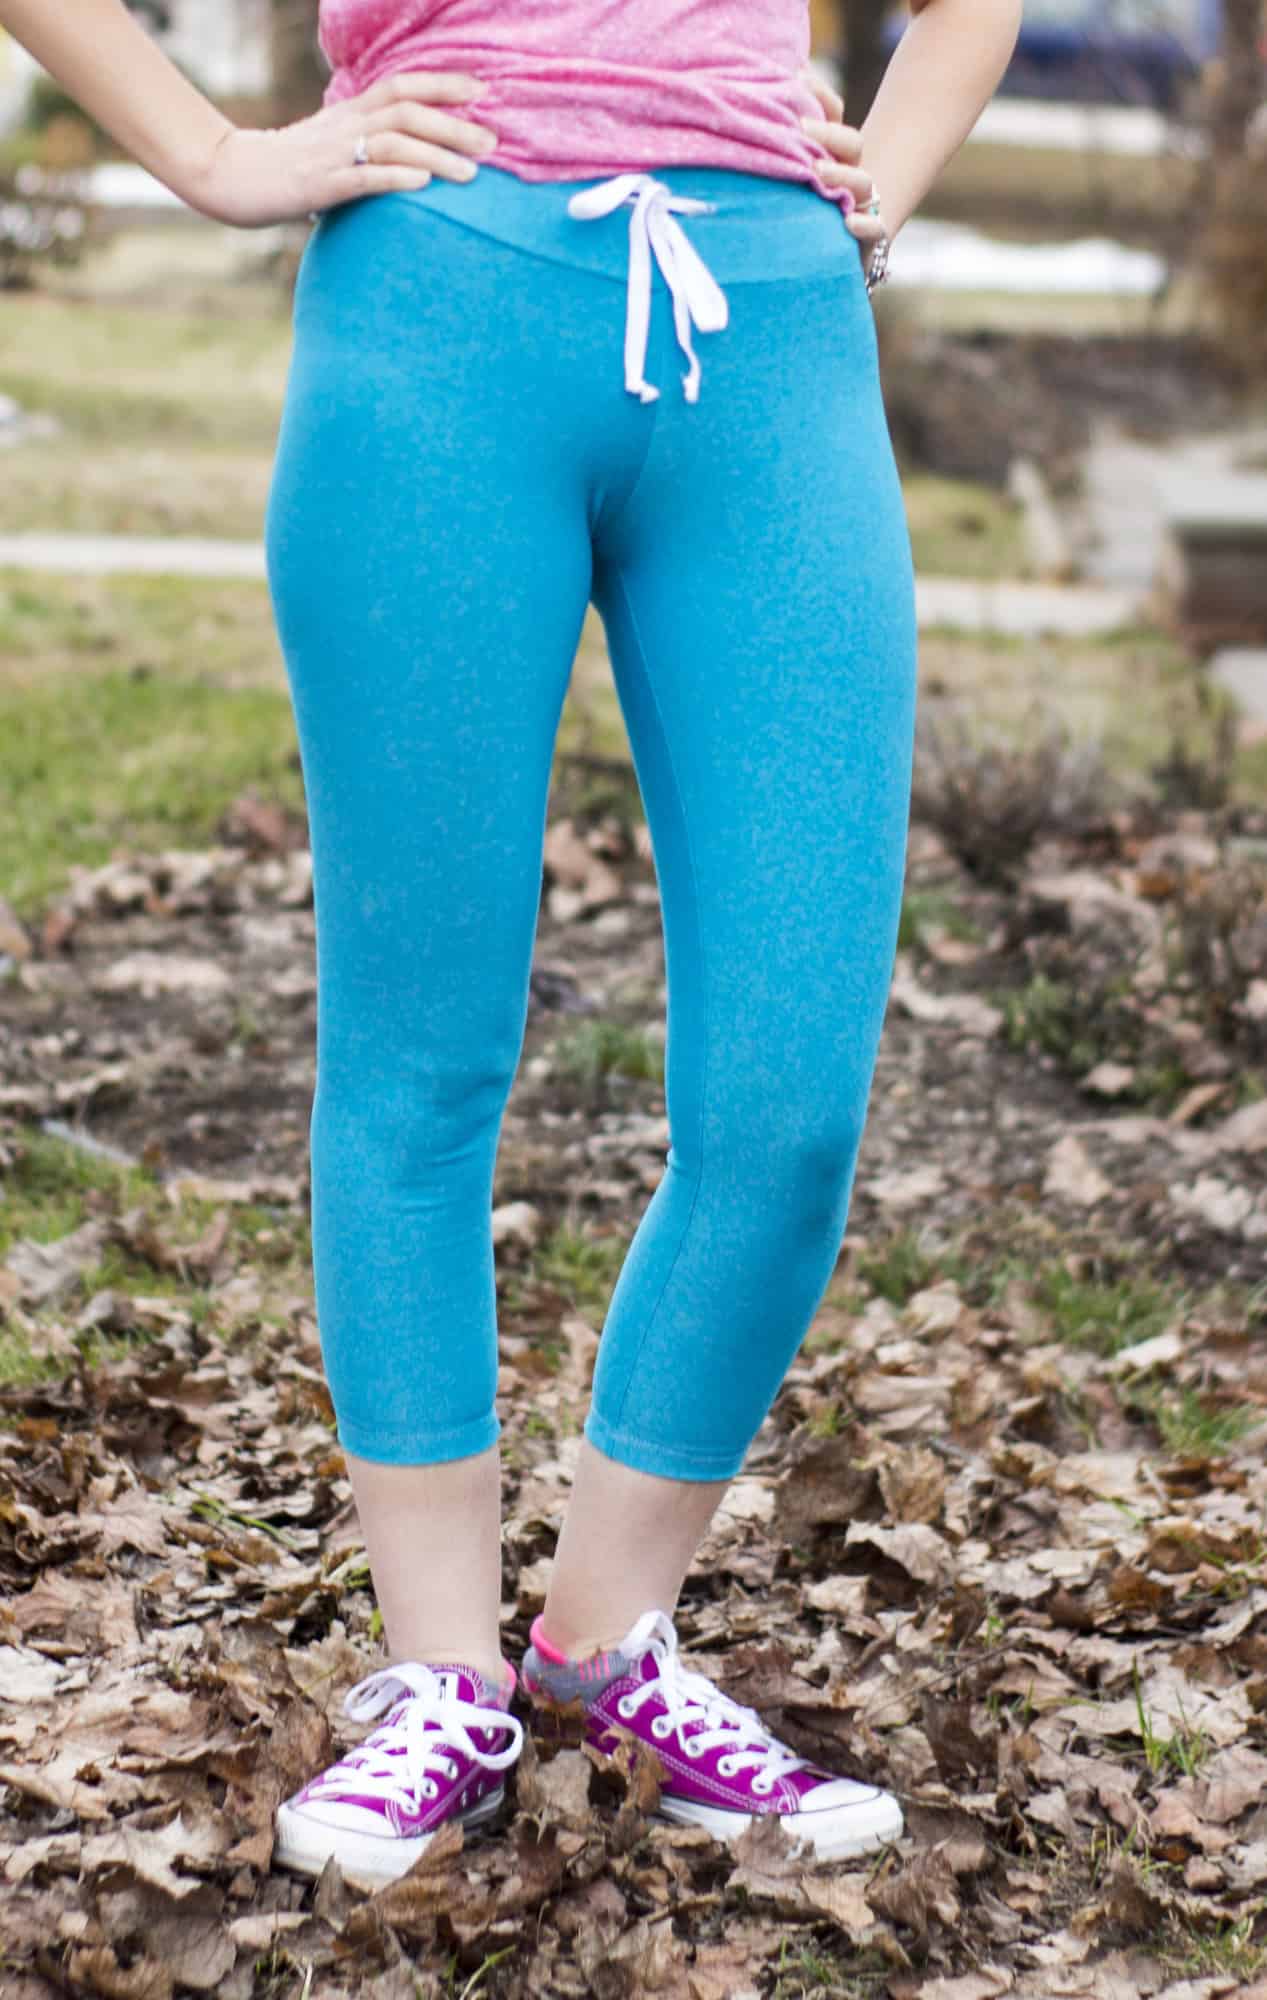
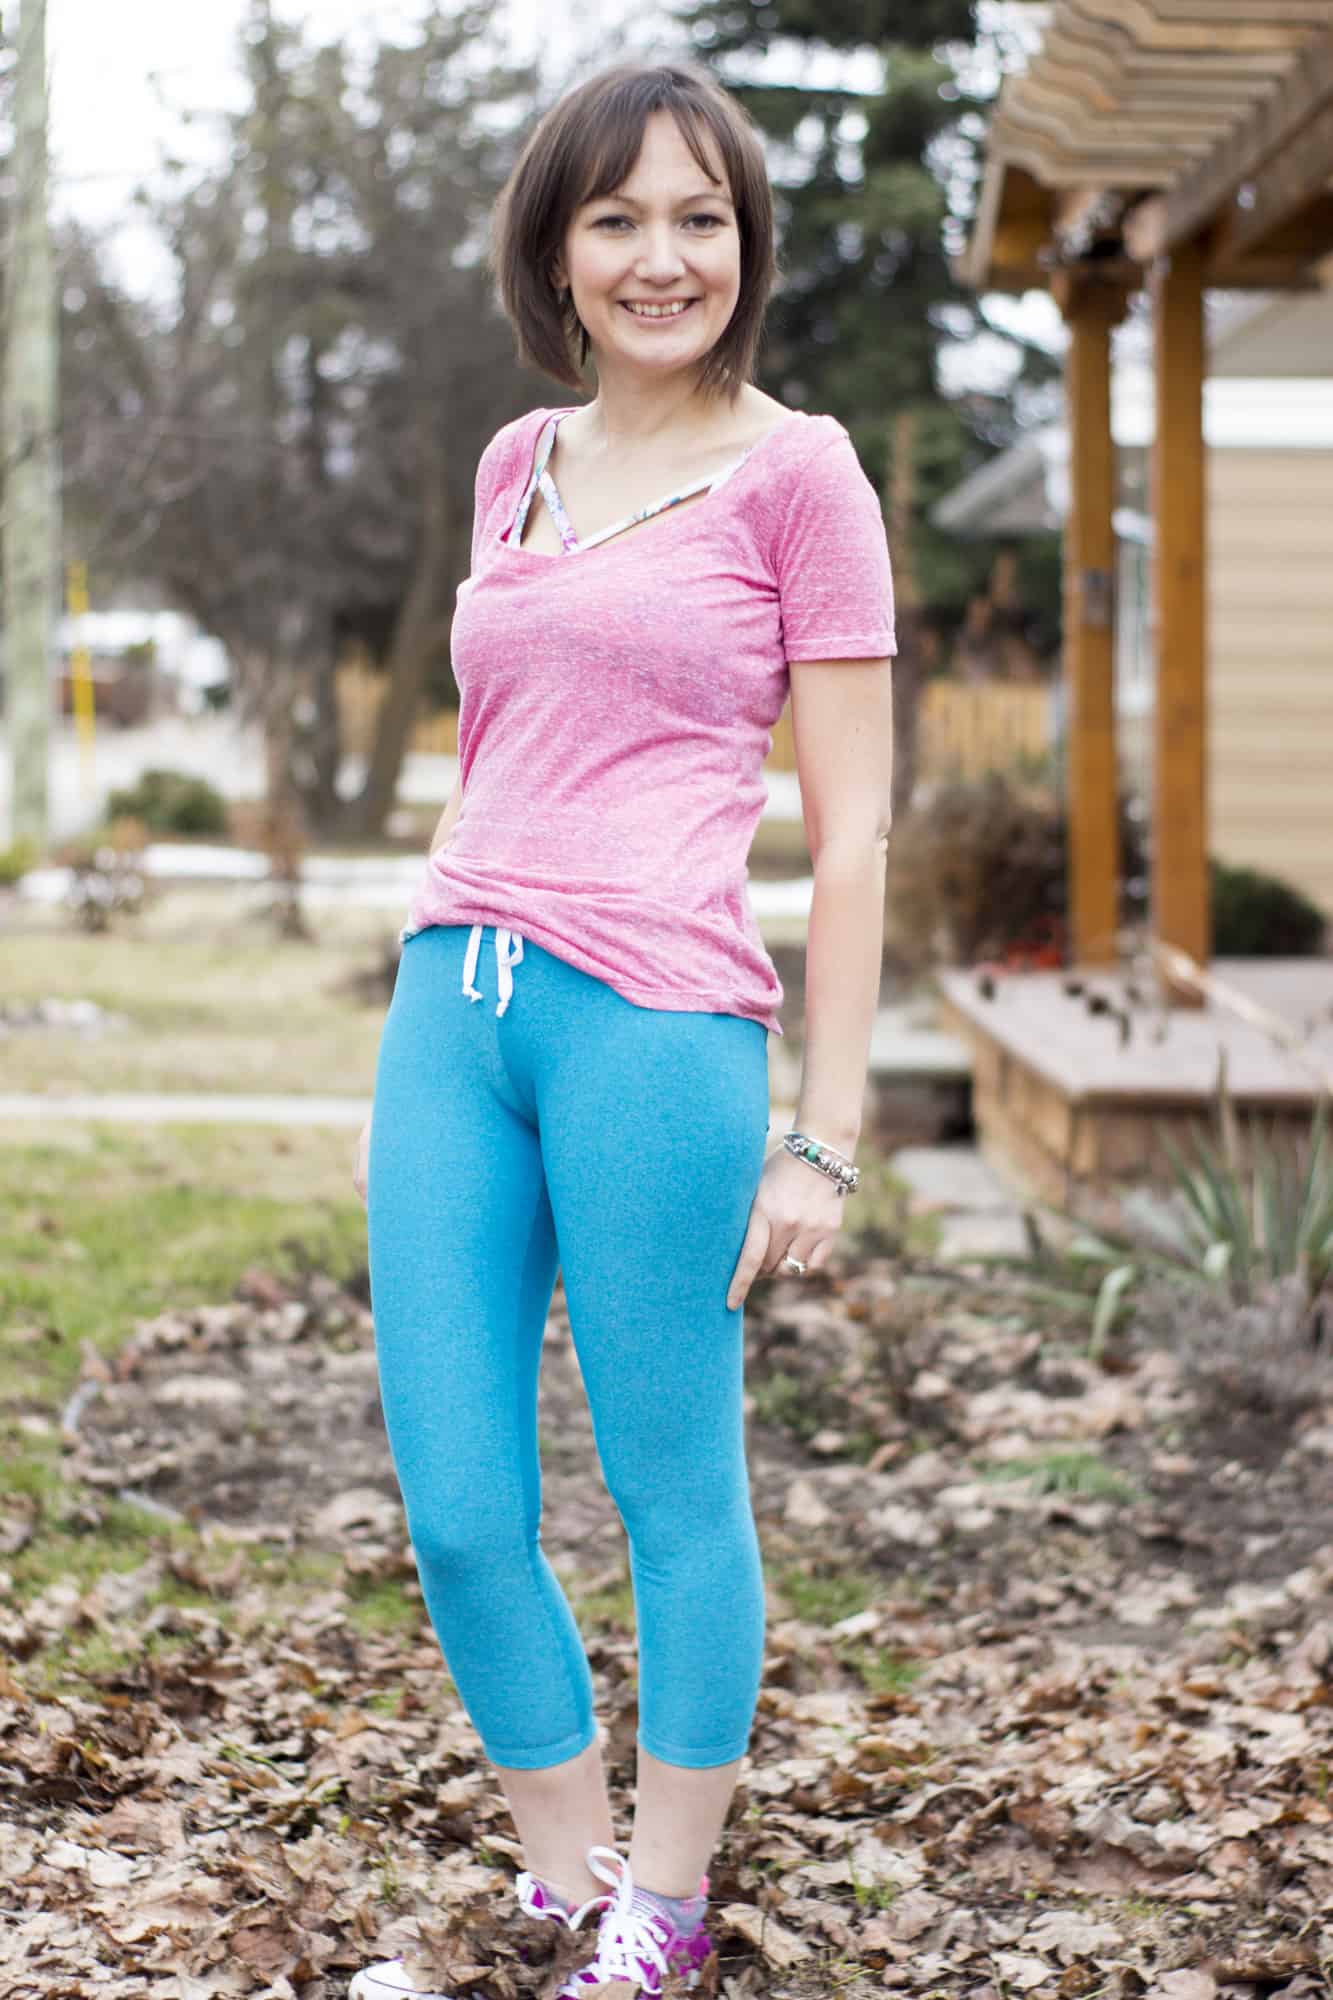
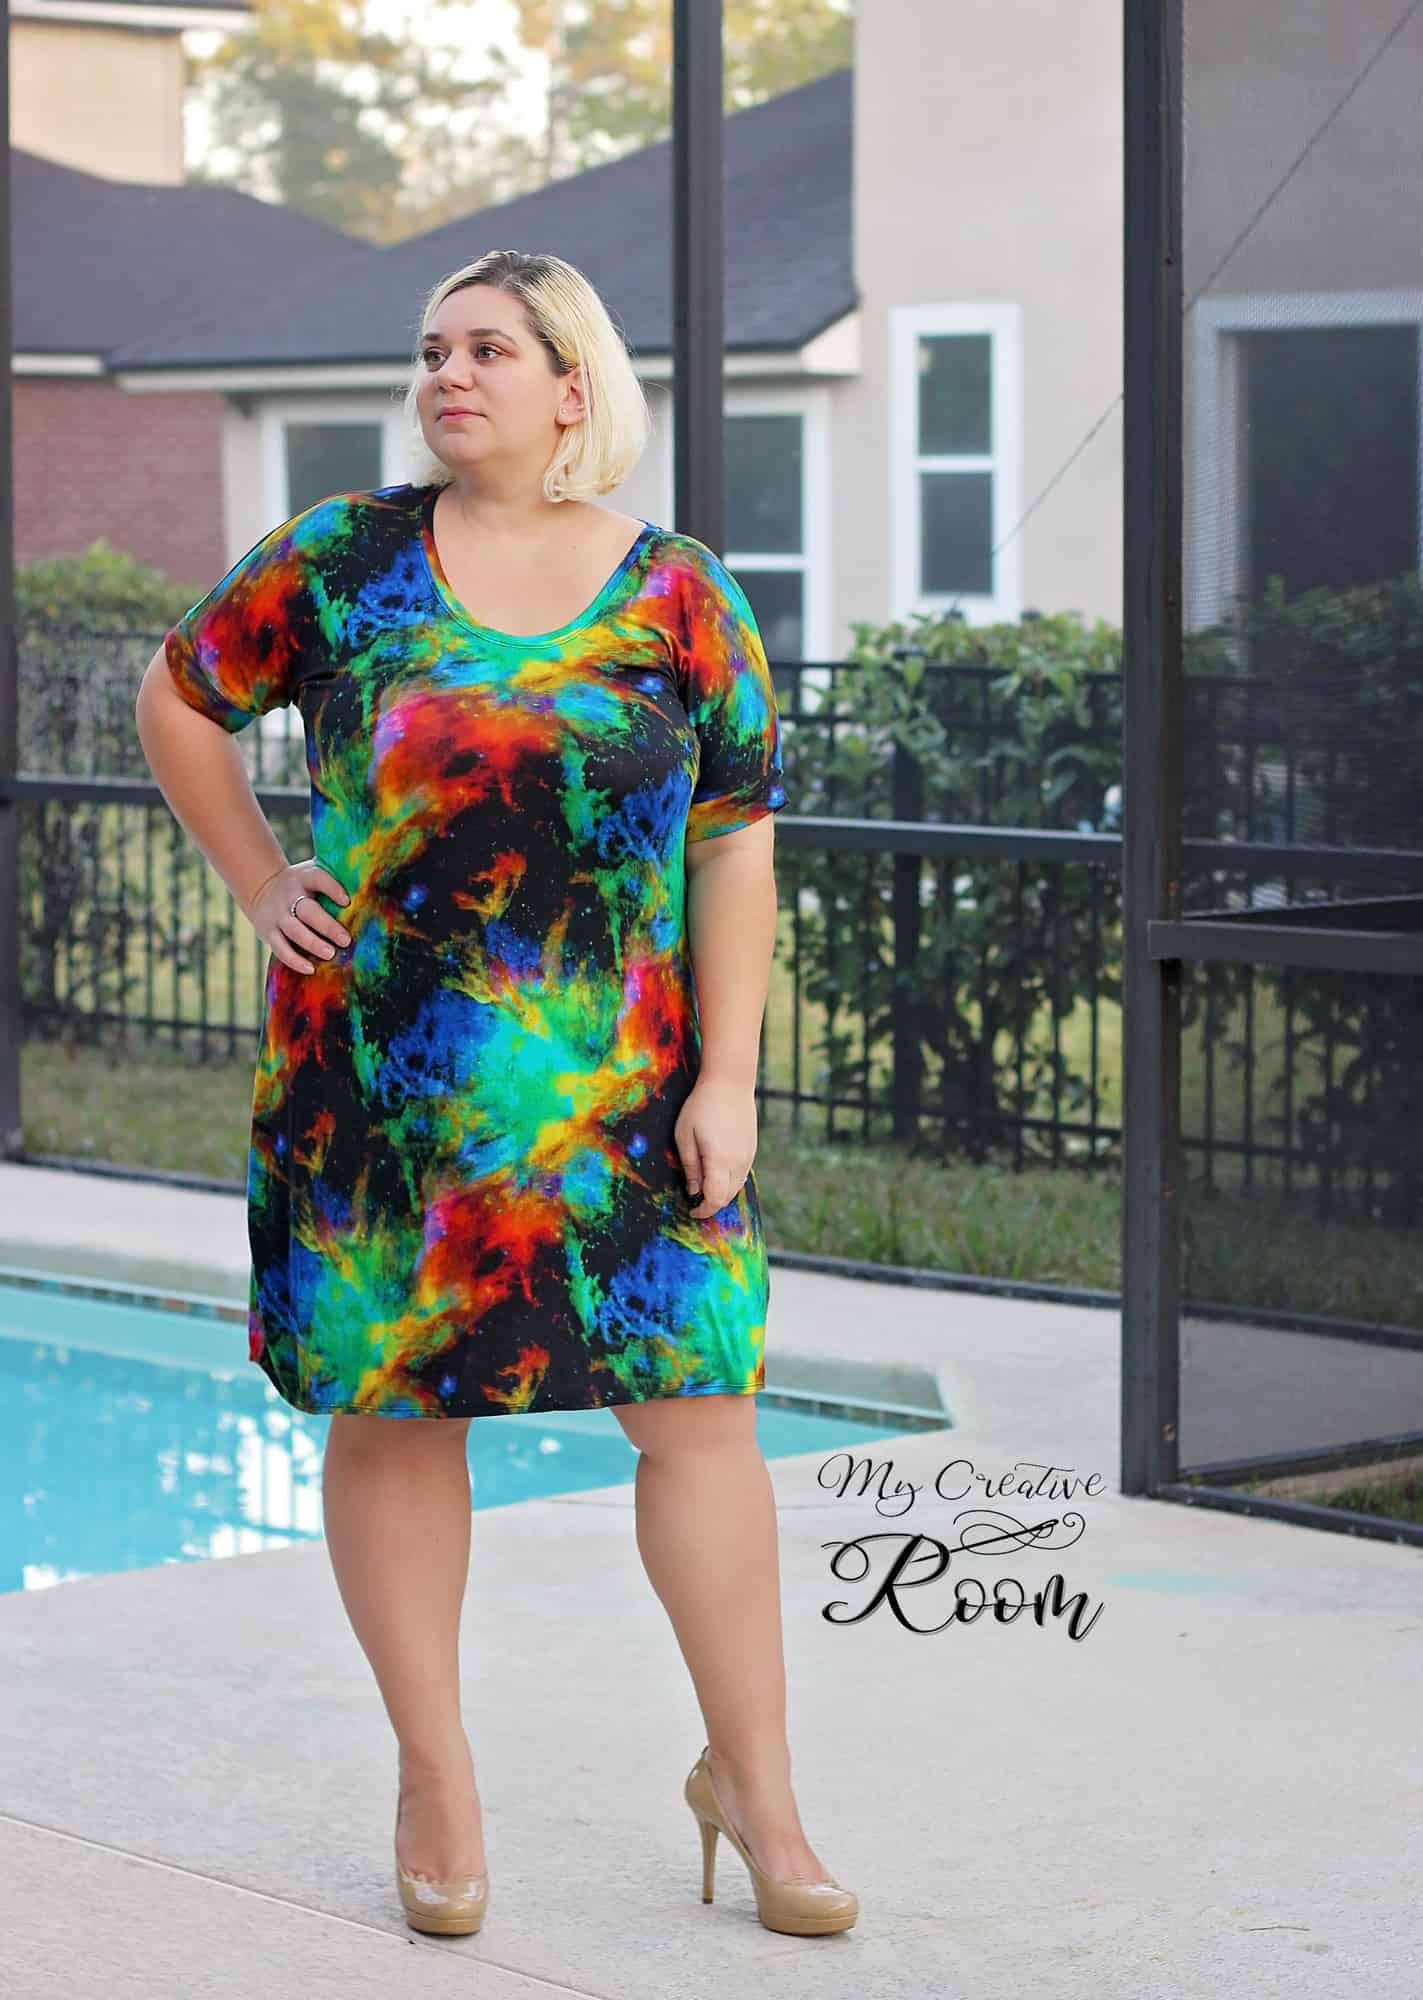
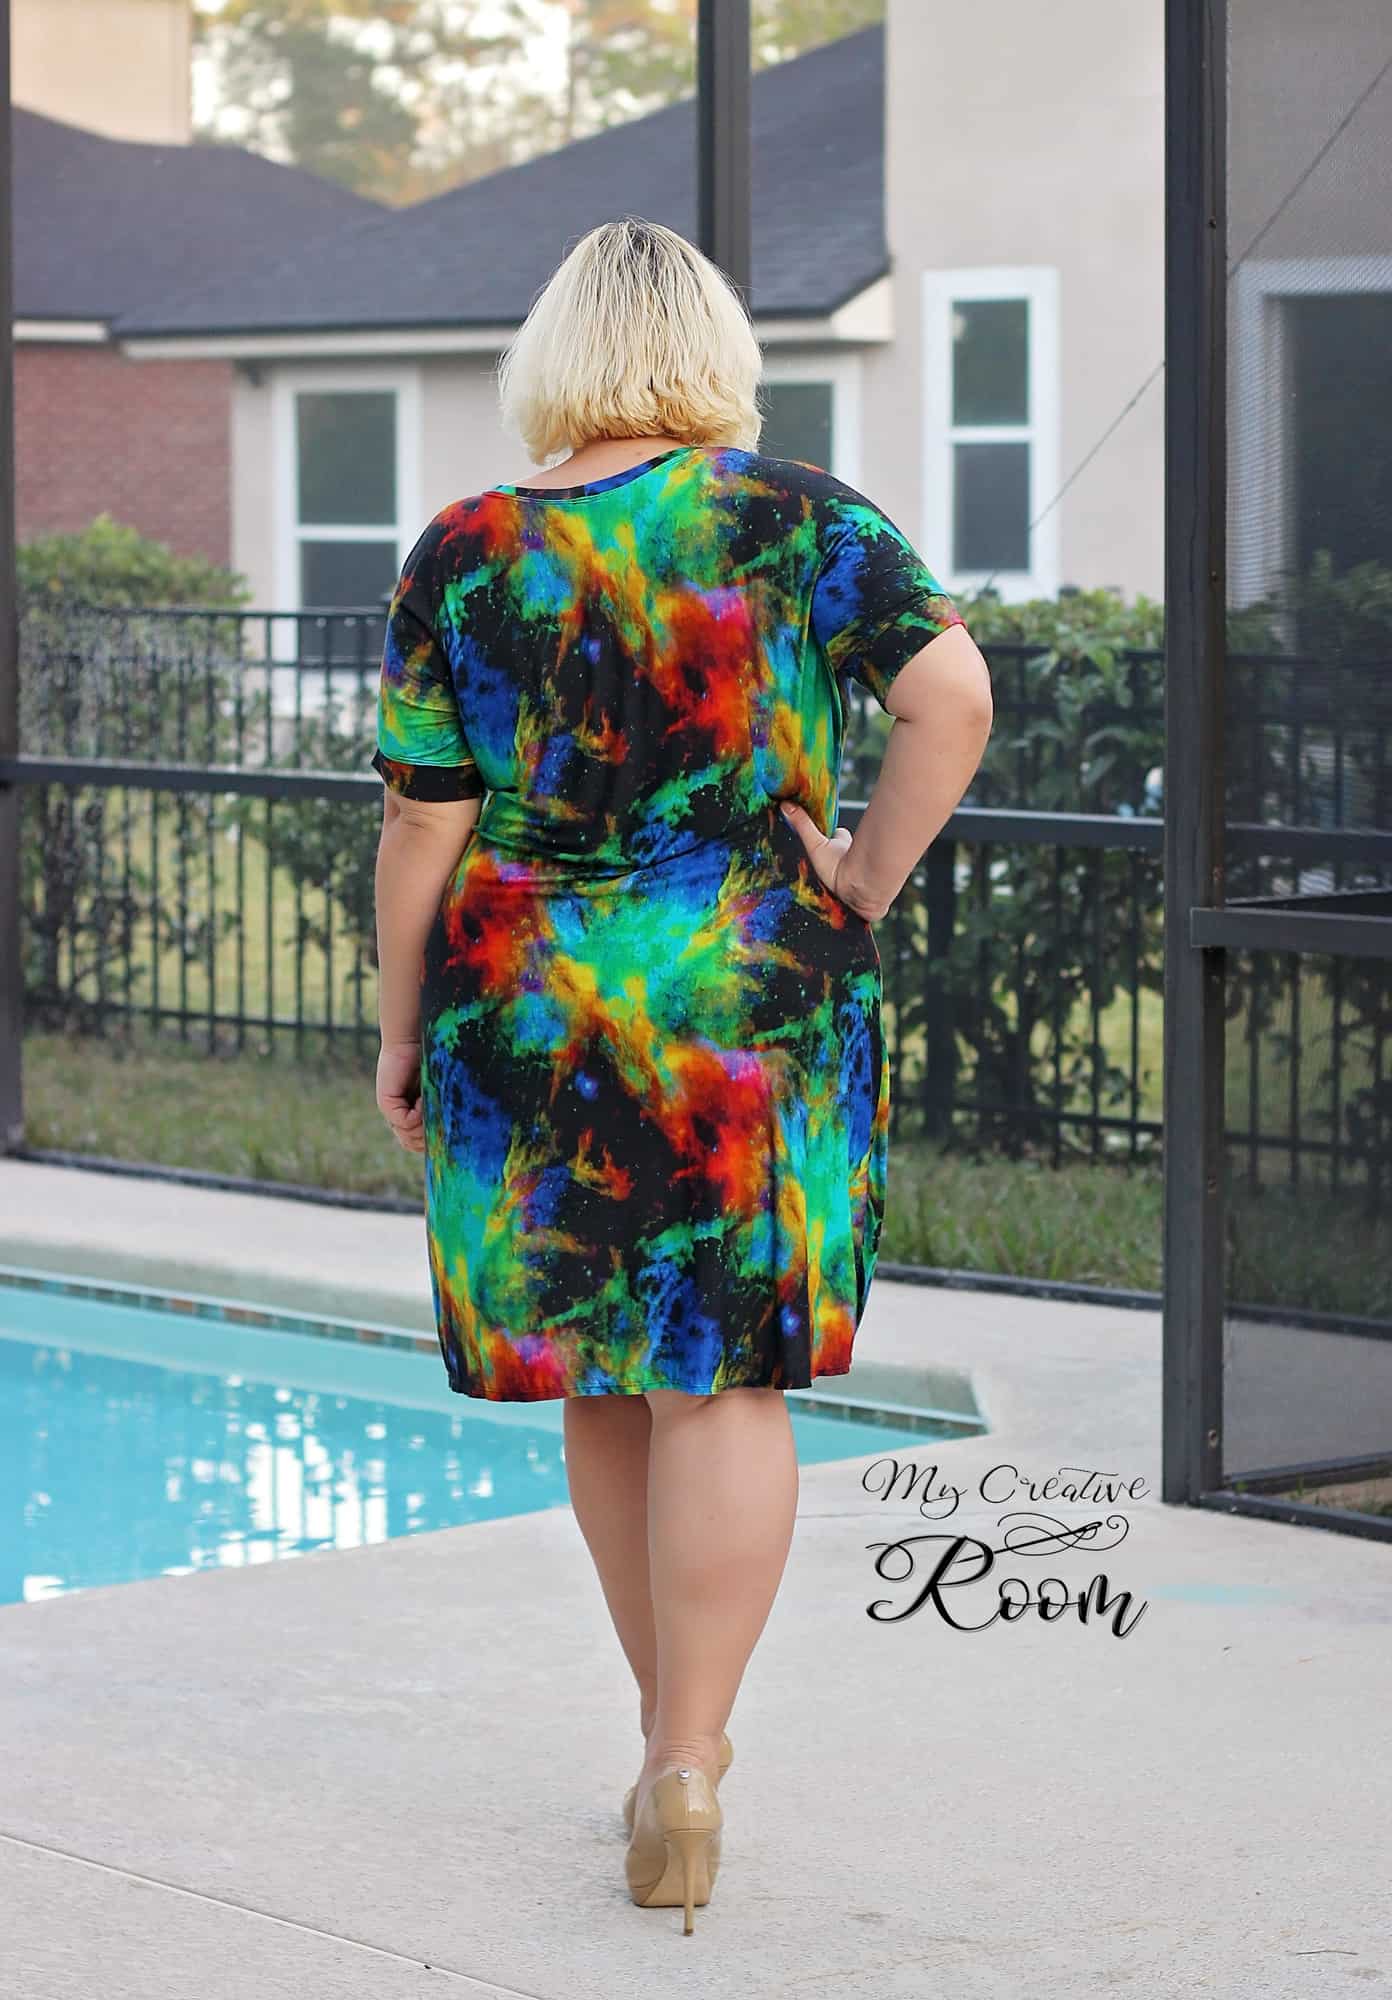
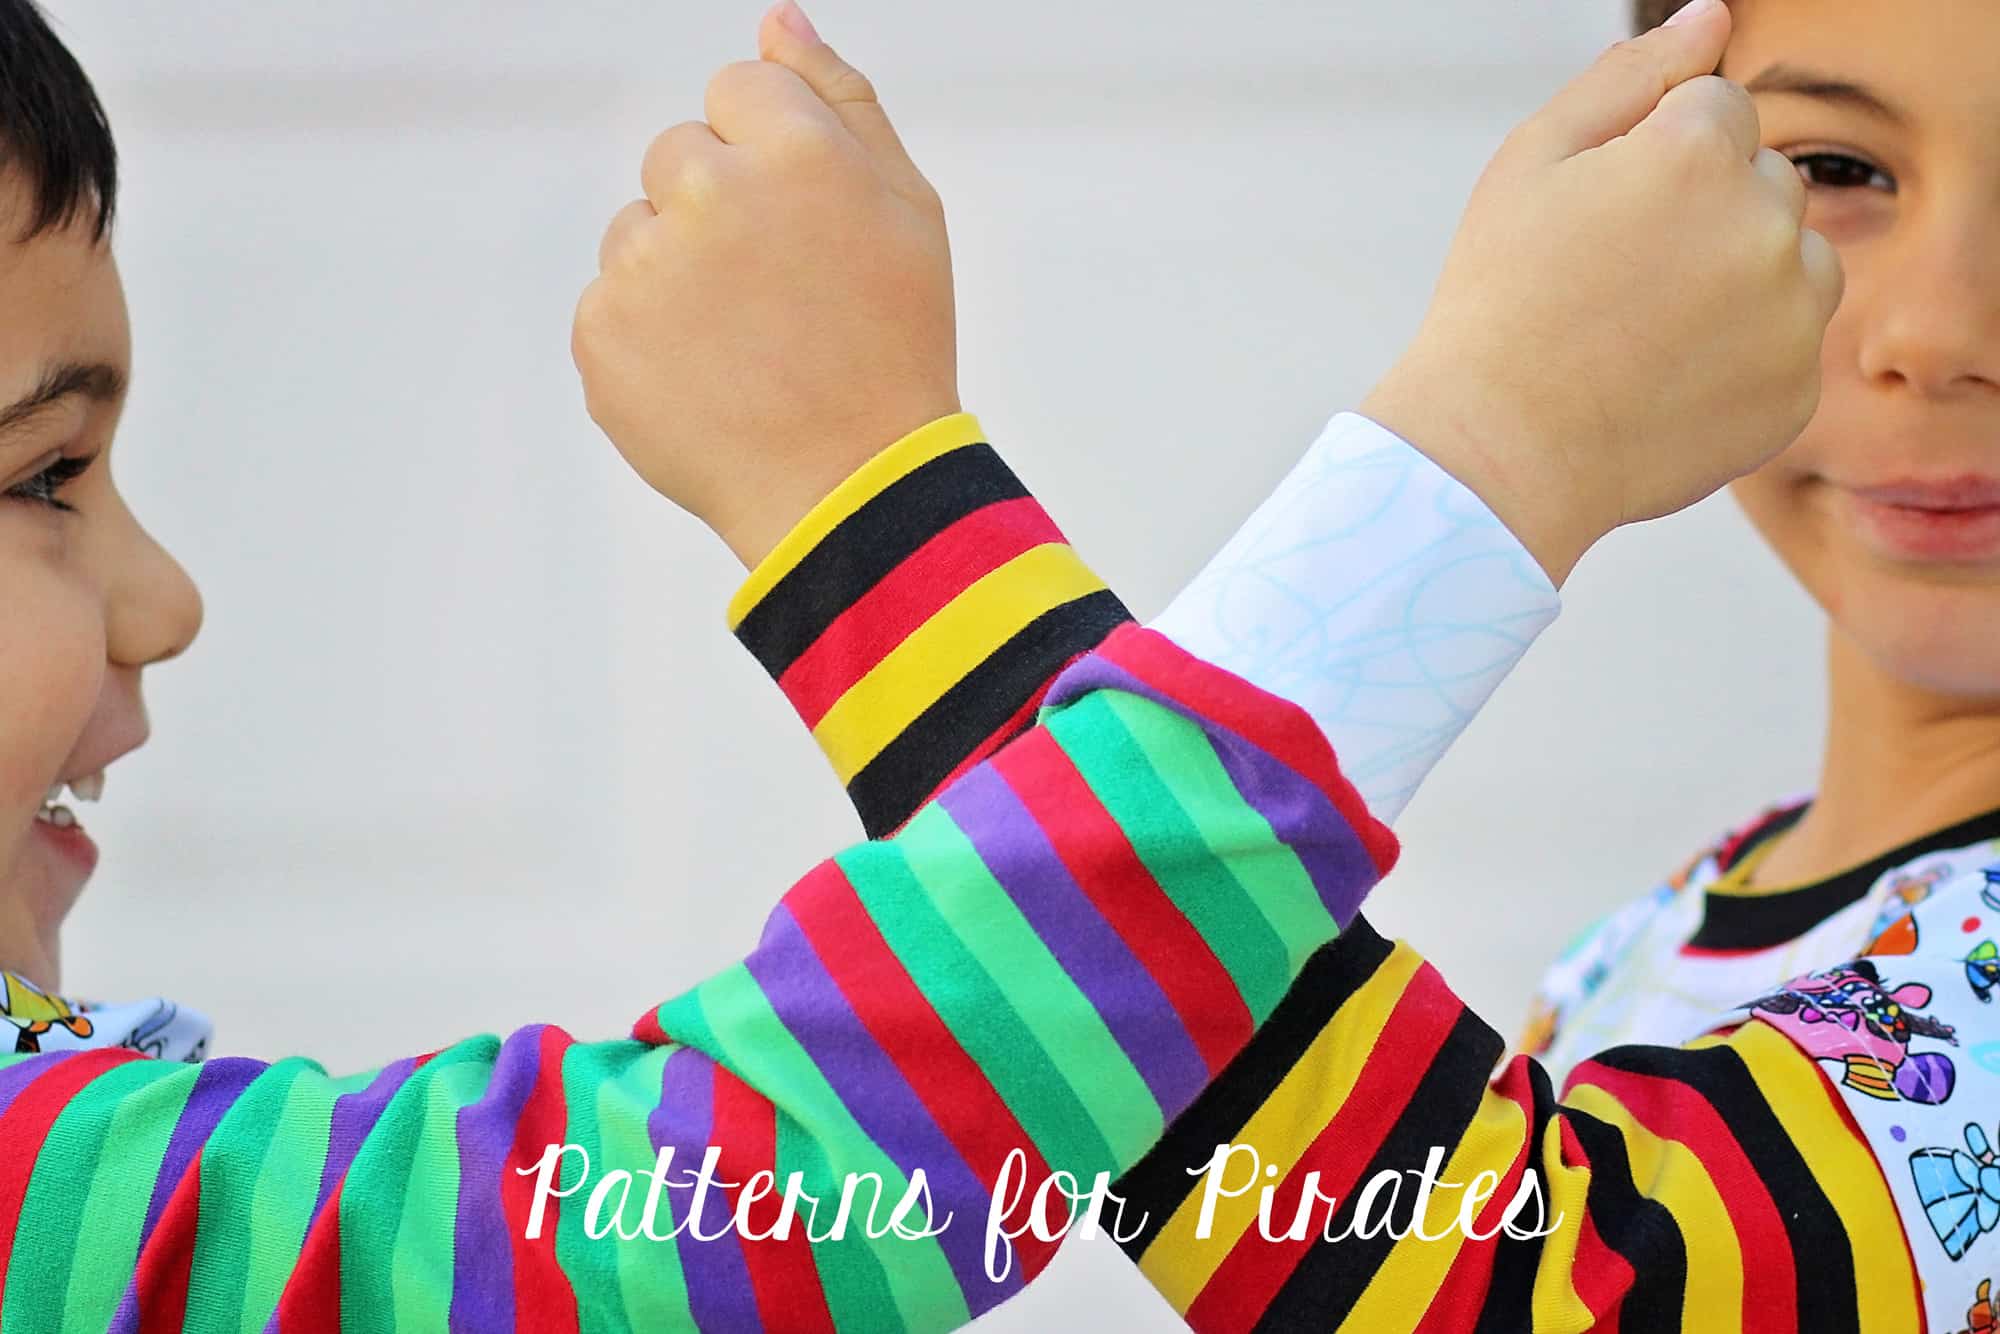
There you have it! 7 easy tips to follow when adding cuffs to your favorite P4P knit patterns. My boys are both rocking the JRR with add on cowl neck from the pack and faux layered sleeves from the blog.

Which one will you be making first? Make sure you post your creations in the P4P group and let me know if adding cuffs is now an easier “task”. 🙂


Filed Under: Frequently Asked Questions, P4P University, Sewing with Stretch, Knit Fabrics, Uncategorized 6 Comments

When It Goes Against the Grain

November 14, 2017

Woven Fabrics

We make woven fabrics on a loom. The weaver strings the lengthwise threads first, and we call them the “warp”. Then threads are woven through them creating the fabric. We call these horizontal threads  the “weft” or the “woof”. We’ve named the edges of the fabric the “selvages” or “selvedges”, and we weave them more tightly to prevent fraying.

The warp creates the “straight grain” of the fabric, and the weft creates the “cross grain”.

Pattern pieces have grainlines printed on them.  They are either arrows or fold lines.

Grainline


When we cut a pattern out, the best way is to fold the fabric carefully on the straight grain of the fabric, lining up the selvages .  If you need to straighten the ends of your fabric, take a snip through the selvage near one end. Then pull a horizontal thread. The missing thread will create a straight line for you to cut along.

Fold Placement

Then place the pattern pieces down carefully with the grain lines on the pattern piece lined up with the straight grain of the fabric.

Finding the Straight Grain

An easy way to check if your pattern piece is “on-grain” is to measure from the line on the pattern piece to the selvages in a couple of places. The distance should be the same.

It’s important for long pattern pieces, especially something like a pant leg, to be grain perfect. If it’s not, the garment will twist, and once you cut it, there’s nothing you can do to fix it. You’ll also never be able to match stripes or plaids if you cut off-grain.

Smaller pieces like pockets, collars, cuffs, and yokes can be cut on the straight grain, the cross grain, or the bias no matter what the lines on the pattern say. The “bias” is the direction that’s 45 degrees from the straight grain. It has more drape than either the straight grain or the cross, and edges cut on the bias don’t fray.

When you cut major pieces on the bias, it’s important to cut them in opposite directions or your whole garment will twist. But it’s not important for small pieces like pockets.

How to Position Bias Cut Pieces


You can mark the bias on your pattern piece with a protractor or a quilting ruler.

Marking the Grainlines


Over time fabrics cut on the cross grain will droop more than then fabric cut on the straight. It’s not a problem for something like a skirt or pants made from a border print. The droop won’t be noticeable in the normal lifetime of the garment. You might see it in heavy curtains, though.

Knit Fabrics

Technically, knit fabrics don’t have a grain, but the direction you cut your pieces out matters just as much. Big machines make knit fabric, but they work the same way we knit with yarn and needles. Some machines knit back and forth and some  knit in the round. One results in a fabric with selvage-like edges and other in a tube of fabric.

Close up of a Knit Fabric


No matter what yarn is used to create the knit fabric, the single knit process will result in a horizontal stretch in the fabric we call the “mechanical stretch”.  Fabrics that only have horizontal stretch are usually called “two-way stretch”.  The addition of elastane (Spandex, Lycra, etc.) to the yarns can create a fabric with both horizontal and vertical stretch, and it is usually described as “four-way stretch”. Whether the fabric is two-way or four-way,  the horizontal stretch should be the circumference of your garment.

Horizontal Stretch Line

While the amount of elastane in the yarns might make the fabric stretchy enough for the garment to fit you cut with the vertical stretch used as the circumference, you shouldn’t cut it that way. If the mechanical stretch in the fabric hangs vertically, you’ll get elephant knees, saggy elbows, and baggy crotches. You can use the same method for making sure your pattern is lined up so the grainlines on your pattern are parallel to the edges of your fabric that we use for wovens. Knit patterns often have the horizontal stretch line marked, too.

There’s a saying in sewing- The fabric always wins. There is probably nowhere in sewing where fighting the fabric is more futile than not paying attention to the grain.

Roberta

Filed Under: Frequently Asked Questions, P4P University, Sewing Techniques, Uncategorized 14 Comments

V-neckbands 101

October 12, 2017

We’ve been asked so many times how to achieve that perfect V neckline so today on the blog we will be covering a few tips that will help you get that look you’re striving for every time.

Let’s start with a reminder of the Neckbands 101 blog! All the tips I gave you there apply to the V neckbands too so take a look over it and come right back.

Now that you we have those tips covered let’s take a look at some V neck specific tricks that will ensure you will have the perfect neckline.

Don’t skip the stay stitch!

A stay stitch is a straight stitch that will help your fabric stay in place, it will keep it from stretching and distorting. You will be sewing a stay stitch on both the neckband and neckline, a couple of inches on both sides of the V point.

Here is a video of the Favorite Tee V neckband. The same tips can be applied to the Boyfriend V neck shirt or the kids’ Deep Sea V neck and Fave Tee.


Always press the V neckband!

Press the neckband before you attach it! It will make a world of difference! Pressing it will make it easier to maneuver when pining it to the neck opening and when attaching them.

Snip the V point as close to the stay stitch as possible!

As you can see in the video below, a snip in the right place can make a huge difference. Using sharp scissors, carefully make a vertical snip about 3/8″ long, getting as close as possible to the stay stitch without snipping the stitches.

Sew the V points with the sewing machine!

Taking the extra time to attach the V part of the neckband with the sewing machine will help you achieve that much desired crisp V point. Plus, if you’re not 100% happy with how it looks you can definitely seam rip it and reattach it a lot faster than if you were to have used your serger.

Here is how I attach the V neckband to the neck opening.


Are V necks less scary now? 🙂 I sure hope these tips will help you get that perfect look you’re aiming for. Don’t forget to brag about your awesome V neck shirts in the P4P group too!

Filed Under: Frequently Asked Questions, Uncategorized 3 Comments

P4P University – plackets

September 13, 2017


Ohhh….plackets! Why are you so scary? Today on the blog I’m hoping to change that perceptions of them and help you face this fear.

What are plackets?

Plackets are basically just a slit or an opening in the fabric that allows for garments to be easily put on or taken off. Sometimes plackets are purely decorative. You can find them on sleeves, on pants, back of skirts and neckline. You can have a placket on the back of the neckline or on the front. The most common neckline front plackets are for Henley or Polo style shirts. On this blog I will be using the new Brunch Blouse placket but you can certainly utilize the same principles for a Yo Ho Henley or a Women or Men Henley shirt too.


Interfacing? Yay or nay?

My first tip/recommendation is to always use light weight interfacing for the placket piece. Simply fuse a piece of interfacing to the wrong side of the pattern piece. You can get away with not using any if you’re making a woven pattern but even so, the result will be so much better if you do add it. Interfacing will help stabilize your piece which in turn will make it a lot easier to sew. ALWAYS use interfacing for knit plackets!

Mark and press!

As you can see in the video above, I use a tailor chalk to mark the pressing and sewing lines on the back of the placket piece. You can use a soluble fabric pen or a fabric marker too.

If you have a tailor clapper now would be a good time to use it. It will defiantly come in handy and help keep those pressing marks firm. Spray starch will help too!

Sew slowly!

Make sure you pin a lot and catch any notches that need to be enclosed! This may be the most tedious part of adding a front neckline placket so it is well worth paying extra attention and sewing slowly.

Enjoy the fruits of your labor! 🙂

Now that you took the time to create the perfect placket, show it off! Be proud of your achievement and don’t let sewing techniques intimidate you! Speaking of showing off…don’t forget to brag about your Henleys and Brunch Blouses in the P4P group.


Filed Under: P4P University, Sewing Techniques, Uncategorized 4 Comments

Tips for adding a woven skirt to a knit bodice

August 17, 2017

Ahoy, pirates! The Summer of Wovens is in full swing so I wanted to show you how easy it is to add a gathered woven skirt to a knit bodice. You can use this technique to the Boundless dress, like I have, or the Sunshine dress. If you love the bodice of the Sweetheart dress as much as I do you can use it and hack it with a woven gathered skirt too.

The most important thing to keep in mind when adding a woven skirt is CHOOSING THE RIGHT WOVEN fabric. Make sure to use a light weight fabric with great drape. I used a Nicole Miller chiffon and it worked beautifully. You can also use rayon, rayon challis  or crepe georgette. Avoid quilters cotton, it will look stiff and add visual width which we don’t want. Am I right, ladies? 😉

Cut the pieces as per the pattern. You do not need to size up or down, just be sure to measure yourself and choose the size based on that. I do recommend adding some width to the skirt for more comfortable wear. I did not add it to mine but you can certainly increase width by a couple of inches. You can see how to take your measurements here.

Sew the bodice as per the pattern tutorial. I marked the center of the front skirt piece and the back. I like to use clear elastic when I attach the skirt to the bodice. I do that for two reasons, the clear elastic will add stability to the seam and it will help you gather your skirt evenly. Simply cut a piece of elastic that matches the bodice bottom. Don’t forget to add seam allowance! I prefer to cut just one piece and match the elastic seam to the center back but if you prefer to cut two pieces and match the seams to the sides you’re welcome to do that as well.

Mark the quarters of the clear elastic. Mark the side seams and center back and front of the skirt. Remember to mark the to of the skirt if you’re using a fabric with a directional print 🙂

Match the quarters of the skirt to the quarters of the elastic.

Sew the clear elastic to the top of the skirt. Use a zig zag stitch and adjust the tension and width to better fit the type of fabric you are using. Stretch the elastic as you sew. If you use a 1/2″ clear elastic simply align the edge of the elastic to the edge of the skirt. I use 3/8″ clear elastic so I put it a little lower than the edge to accommodate the 1/2″ seam allowance that is followed in this pattern.

All you have to do now is attach the skirt to the bodice. The bottom of the bodice and the top of the skirt will be the same circumference. Match the side seams and the center backs and fronts, pin right sides together and sew.

I like to attach the skirt to the bodice using a zig zag stitch but you can also use a triple stretch stitch.

Optional: top stitch the seam allowance up towards the bodice.

Tadah! You’re all set to rock your new woven skirt Boundless (or Sunshine) dress! I can’t wait to see your take on this easy hack so be sure to post it in the P4P group too!

Filed Under: Frequently Asked Questions, Pattern Hacks, Uncategorized 6 Comments

50K Fan Celebration :: Drawstring Waistband PegLegs Hack

April 21, 2017

Today I’m sharing a quick cute hack to your peg legs to add a drawstring to your waistband.  I wear peglegs all year round and the drawstring changes up the look just a bit.  Let’s get started.

  1. First you sew your legs together as per the pattern.
  2. Before we start the waistband we are going to make some markings.  I am using a disappearing ink pen from my fabric store to mark mine.  I folded my waistband in half to find the center and marked the center with my pen in a few spots.  Next I found folded the fabric long sides together to mark where I wanted my buttonholes.  I wanted my buttonholes in the middle of my waistband. Your waistband is 7 inchs wide so folded it is 3.5 inchs but the bottom .5 inch is your seam allowance therefore I measured 1.5 inchs down from the top fold and marked that as being the center right across the other mark that I had made.  Now I have a little cross right marked.

3. Buttonholes can be a bit of a pain on knits so I added a little piece of interfacing on the back, I didn’t actually iron it on to my fabric I just wanted something to give it a bit of stability, a tear away stabilizer would also do the trick or you can iron on a piece of knit interfacing.  I happened to have a bit of regular interfacing sitting here so that is what I used. I sewed the buttonholes on either side of my cross .25 inch from the center. I just did a really small buttonhole, it doesn’t need to be big cause you are just threading through some drawstring.  Now for all those people that hate sewing buttonholes not to worry knits don’t fray so you can always just cut some little slits in the waistband if that is the option you choose make sure to iron on some knit interfacing thou, it would prevent the knit from stretching out while wearing them.


4. Once you have the buttonholes are done we are going to create a casing for your drawstring.  First you are going to match the short sides of your waistband as the pattern directs and sew them together, fold the waist band in half and then your going to sew all the way around about .25 of an inch above the waistband and below the waistband. Now you can mark your lines here that you are going to sew but I’m a rebel and just went for it by sewing 1.25 inchs from my fold, for the second row of stitching I sewed .5 down from the first line I made.  Once your casing is all done just attach the waistband to your legs as normal.

5. Now you just need to add your drawstring.  I used 50 inchs of drawstring on the xxs size and I just tied off each end but you could certainly fold the ends over and hem the edges of your drawstring.  I like to just put the drawstring around me and leave long tails and then insert it into my casing try it them on and you can always cut the drawstring shorter so start with a long piece and then cut them the length you like best.  Remember you have to leave your drawstring fairly loose or you won’t be able to pull your leggings on! I figured this out while trying mine on! Another simple solution to use elastic for most of your drawstring, I would use 1/4 inch or 3/8 inch elastic.  You could cut your elastic slightly shorter then your drawstring and then sew drawstring onto each end of your elastic and thread it through your casing, it would give you just a bit more give when pulling them on and off.


I hope you try adding some drawstring in your peglegs and don’t forget to show them off in our Facebook group! – Angela


We are celebrating reaching 50K fans in our Facebook group!  To make it a party, our beloved PegLegs pattern just got an update AND some new add-ons.  Before you go running to your machine to sew up your own leggings, make sure to read our PegLegs 101 blog post.  This way, you’ll have all the the information you’ll need to make the perfect pair before you even cut into your gorgeous fabric.

But wait, there’s more!  After any good party is an after-party.  We are taking it one step further and sharing some easy hacks that’ll bring even more flavor to your favorite leggings pattern!  We hope you check them out, make your new favorite pair of leggings, and know that we appreciate every single one of you amazing sewing guys and gals!

Here are our hacks / tutorials / latest tricks:

Lace Waistband Alternative | Drawstring Waistband Tutorial
Exposed Elastic Waistband | Stirrup Pant Hack
Ruched Ankles Adjustment | Decorative Topstitching Tutorial
Ruched Side Panel Hack

Filed Under: Free Pattern, Pattern Hacks, Uncategorized 1 Comment

P4P University :: Twin Needle Tips

March 16, 2017

Hello Pirates!  Today I’ll be walking through some tips on using a twin needle for topstitching as an alternative to a coverstitch machine.  The end goal (of either twin needles or a coverstitch) is two lines of parallel stitching on the right side of the fabric, with the ability to stretch and not break threads when pulled.  This is usually used when hemming, but these tricks will especially come in handy when topstitching binding on our new cami pattern!


1. Stretch Needles

The most important point is to make sure you buy stretch needles.  Schmetz is the most common brand that people tend to use, they are available on Amazon.  I prefer the wider 4.0 width the best because it works better for me; it also comes in a 2.5 width.  These are both 75/11 needle size.


2. Threading

When threading, it helps to thread as shown in the below picture.  This helps stop the threads from twisting when sewing.  Also, make sure your threads are not caught on anything (or each other) at the top of your machine.


5. Stitch Type

Use a regular straight stitch for this; no need to use a triple stretch stitch (|||) or any other stretch stitch like that.


4. Tension

Tunneling is what happens when there is a large bump in between your two rows of stitching.  To avoid this, I’ve found it helps to increase your top thread tension.  Your machine may vary, but I usually set my tension to 3.  If possible, you should also decrease your bobbin tension as well.


5. Stitch Length

Increasing stitching length usually also helps with tunneling, especially on trickier, slipperier fabrics.  Your machine may also vary on this too, but I set mine between 3.0 – 4.0, depending on fabric.  The lower number will help things stretch more though, so you may need to find a happy medium.


6. Go Slowly!

This is a huge one.  It’s so tempting to go full steam ahead, especially if you using a twin needle to hem.  You’re almost done with your project, but don’t ruin it with a sloppy hemming job!  Going slowly can make all the difference between a wavy hem and a perfectly flat one.  If you encounter any thicker areas of fabric, it may also be a good idea to use the hand crank on your machine, turning it slowly to ensure no mistakes as you pass over the thicker area.


7. Don’t Stretch as You Sew

This applies to all knit fabric projects, but especially when using a twin needle.  Don’t pull or stretch the fabric as you feed it into the needle area.  I’ve found that even creating a little extra negative tension as you guide the fabric can help to avoid any pulling as you sew.


8. Top vs. Bottom

When everything is done correctly, you should have two parallel lines on the top of your fabric, and a perfect zigzag on the back.  The zigzag is what allows your fabric to stretch after it’s sewn, so if you have super tight or non-existent zigzags, then you likely need to adjust (likely increase – confusing, I know) your top thread tension.  Here’s how it should look, the underside of the fabric is at the top of the picture and the right side is on the bottom.  Note the zigzags!


I hope these tips help you as you prepare to topstitch lots of fun binding or finish up a fancy new garment with a twin needle hem!  Let us know in our Facebook group or here in the comments if you have any questions about twin needles!

Elisabeth

Filed Under: Frequently Asked Questions 15 Comments

How to lower or raise a neckline

January 6, 2017

img_4108

We have seen a lot questions about raising or lowering the neckline of various P4P shirts or dresses. On the blog today I show you how easy it is to alter the neckline to achieve the look you want. For this tutorial I will use the Sweet Tee pattern in a beautiful viscose rayon (dress option lengthen 3.5″) but you can apply this technique to either one of the shirt patterns.

img_4118

Start by printing and cutting your pattern in the size needed. The only piece we will be altering will be the front of the shirt (or bodice).

For lowering the neckline you will need to mark on the center fold where you would like the new neckline to be. I usually lower my Sweet Tee neckline 1.5 inches. Using a French Curve (or going slowly) draw a curve similar to the original one from your mark to the inner shoulder point.

raiselowerneckline

img_4502

Cut your fabric using the new front pattern piece. The rest of the pattern pieces will remain the same. The only other change you will need to make is the length of the neckband or binding.

To raise the neckline you will need to grab your front bodice piece and a blank piece of paper. Align the center fold of the front pattern piece  with the side of your paper and glue them together.

Mark a point 1-2 inches above the original top center depending on how high you’d like the neckline. Using the French Curve draw a curve from the center point to the inner shoulder point. Cut the new front using this modified pattern piece and the rest of the pieces as in the original pattern.

img_4503

The only additional modification you will need  to make is to adjust the neckband or binding length. You will need to make it longer or shorter depending on the new neckline. I like to calculate the new neckband length after I sew the front and back pieces together at the shoulder. To find out the new neckline circumference lay the neck opening along a ruler and multiple it by 2.

img_4505

Your new neckband length will be 85% of this circumference plus 1 inch to accommodate the seam allowance. (C * 0.85 +1 ). Cut the new neckband/binding using the new length but keeping the width suggests in the pattern. All you have left to do now is sew the shirt or dress according to the tutorial and you have just made yourself a custom outfit. Easy peasy…right? 🙂

I can’t wait to see your creations in the Pattern for Pirates group.

img_4115

img_4113

Happy sewing, pirates!

Filed Under: Frequently Asked Questions, Pattern Hacks, Uncategorized 6 Comments

Tips for working with sweater knits

November 25, 2016

img_3505

Have you seen the sneak peek Judy posted on Instagram? Check it out if you haven’t already. If you did you might have noticed that soon you will be sewing those pretty sweater knits you’ve been saving. In the blog today I will give you some of my tips and tricks to work with this kind of fabric.

1.Grab the lint roller! No, I have not lost my mind…believe me, you will want the lint roller close by when you cut sweater knit. Whether it’s a open weave or a dense one, sweater knits tend to leave a lot of residue when being cut.

img_3488

TIP: Use the lint roller to not only clean your cutting mat but also the edges of the fabric pieces you just cut. That will help keep your sewing machine cleaner.

img_3491

2. If cutting with a rotary cutter, use a new or very sharp blade. I find sweater knits to be more prone to getting a run in the fabric if  the cutter or scissors is not very sharp.

img_3489

3. Water soluble stabilizer is not just for embroidery! When working with sweater knits on your sewing machine I highly recommend placing a piece of WSS under your fabric. This will not only make sewing it easier but it will also prevent puckering and even more important it will stop your machine from “eating” your fabric. Sweater knits, especially open weave ones have a lot of “holes” so your machine is basically sewing through air.

img_3493

Tear away the excess, the remaining water soluble stabilizer will disappear when you first wash the garment. I prefer transparent WSS but opaque ones work just as well.

img_3494

4. You can sew sweater knit entirely with your sewing machine however a serger will make the process faster and easier. You might need to adjust your settings a bit to accommodate this type of fabric. My favorite serger stitch when sewing sweater knits is the FLATLOCK stitch. Check your serger user manual to make the proper settings for a flatlock stitch, they will vary from model to model. Here is an example of how a white thread flatlock stitch looks like on a black piece of fabric.

img_3498

A narrower flat lock stitch

img_3501

A wider flat lock stitch

I use this type of serger stitch when I make sweater knit bands and hems. Use a matching thread so the stitch will blend in with the fabric.

img_3504

5. Just as with all knits, always use a ball point needle in your sewing machine and serger. You’ll also need to lower the pressure foot tension of your sewing machine.

6. The markings on open weave sweater knits will need to be added with chalk/ a tailor pen or by adding tailor tacks. Notches are impossible to see on sweater knits.

I hope you find these tips helpful when you will be sewing the new Cocoon pattern releases soon. I will leave you with another sneak peek of this amazing cardigan. Now get the sweater knits stash out and as always post your creations in the group so we can all ohh and ahhh over them.

img_3638img_3518

Alex


Filed Under: P4P University, Sewing with Stretch, Knit Fabrics, Uncategorized 1 Comment

5 TIPS for successfully hemming knits

July 28, 2016

IMG_9357

We have seen a lot of questions in the group about getting the perfect hem on your knit outfits. Most hems are sewn perpendicular to the grain and on the bias in the case of curved hems…this makes hemming sometimes appear stretched out, puckery or wavy.

I needed to sew a shirt to showcase this fabric so the first pattern that came to mind is the Women’s Henley. The only modification I did was to shorten the neckline placket so it would not interfere with the design of the fabric.listing pictures

I will give you my 5 best tips for avoiding stretched out hems (especially curved hems) and getting the perfect finish.

1. You IRON is your best friend!

Always have your iron hot and with plenty of water in the steamer. Iron your hem before your sew it, it will make hemming easier! This process is called a memory hem. Be sure to follow your pattern’s directions for the amount of fabric that needs to be folded. Pressing and steaming the seams once sewn will also remove the puckering and waviness back and make them look beautifully finished. Ironing and steaming your garment every step of the way is one of the most important parts of sewing. While steaming your hems may not fix all issues it will definitely fix most of them.

IMG_9203

Before pressing and removing excess fabric.

IMG_9210

After a good steam and press.

2. CLIPS and PINS galore!

When hemming, I clip/pin my fold over fabric almost every two inches. Having a stable seam will make sewing it a breeze. Whether you are using your coverstitch machine or your sewing machine having your fabric pinned every inch and a half or so will make your hemming experience much more pleasant. Sewing clips vs. pins is a matter of personal preference. I like sewing clips best because I find them to help me secure my hems faster than pinning used to. So, are you a “pin-er” or a “clip-ser”? 🙂 – insert pictures of the clipped hem

IMG_9197-1

3. HEMMING TAPE is magical!

Stitch Witchery or Easy Knit Tape will become your go to notions for hemming. Stitch Witchery is great for stabilizing and fusing together knit fabric. Simply lay the tape inside the memory hem and press it. This will not only fuse it but it will also give it more stability, making sewing so much smoother and hassle free. It is very important to make sure that the hemming tape you use it’s sew-able. Some no-sew tapes may leave a gooey residue that will damage your needles. Insert photo of hemming tape and photo of ironing it.

I also like to spray Best Press when I press my hems. The starch in it makes the hem more stable so it becomes easier to sew.

IMG_9193-1

Hemming tape can be transparent or opaque.

IMG_9196-1

4. Length of the STITCH and TENSION matters!

Whether you are using your sewing machine or your coverstitch machine, you must remember to adjust the stitch length and tension according to the type of fabric you use. Some coverstitch machines will adjust the tension automatically but most of them will not, so be sure to test your hemming on a scrap piece of fabric. It’s imperative that the scrap fabric you use is the same as your project. Usually hemming knits will require you to lower the tension and length the stitch. Some machines will prefer a longer stitch, some will work great with just a 3.0 length.

IMG_9199-1

If your machine will allow you to set up the stitching speed, do it!

IMG_9207-1

I tend to coverstitch at about 1/2 to 3/4 inches away from the fold so I remove the excess fabric with my applique scissors. You can use your regular scissors too, just be careful not to snip your stitches.

5. Last but not least, have PATIENCE! Go slow!

We all know that rush feeling we get when reach the hemming part of the project…one more step and then it’s ready!! Well, last thing you want is for this last step to ruin your hard work. Take a little more time and go slowly when hemming. Coverstitch machines sew pretty fast so remember to slow down and guide your fabric through.

IMG_9339-1

IMG_9211 IMG_9213-1

I hope you find my tips helpful and that you will tackle your next P4P project with more confidence. Don’t forget to post your creations in the group. Sew like a Pirate!

Filed Under: P4P University, Sewing Techniques, Sewing with Stretch, Knit Fabrics, Uncategorized 8 Comments

  • « Previous Page
  • 1
  • 2
  • 3
  • 4
  • 5
  • Next Page »

Featured Patterns

  • Mae Top - Bundle Mae Top - Bundle $20.00 Original price was: $20.00.$18.00Current price is: $18.00.
  • Mae Bottom - Bundle Mae Bottom - Bundle $20.00 Original price was: $20.00.$18.00Current price is: $18.00.
  • Loosey Goosey - Bundle Loosey Goosey - Bundle $20.00
  • Bacall Bodysuit Bacall Bodysuit $12.00
  • Privacy Policy
  • Refund Policy
  • Affliliate Program
  • Contact Us
  • About

Copyright © 2025 Patterns for Pirates

Copyright © 2025 · Genesis Framework · WordPress · Log in