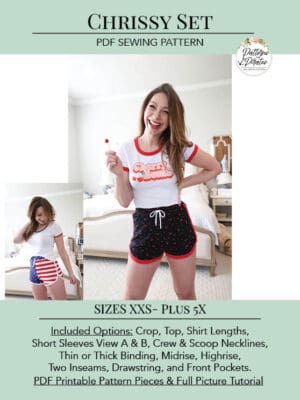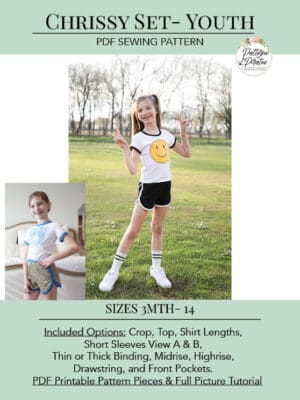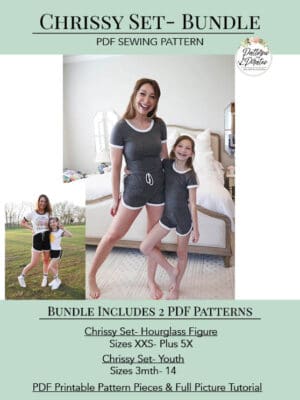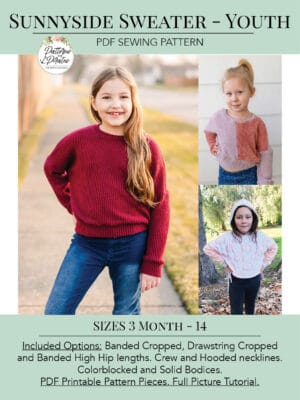
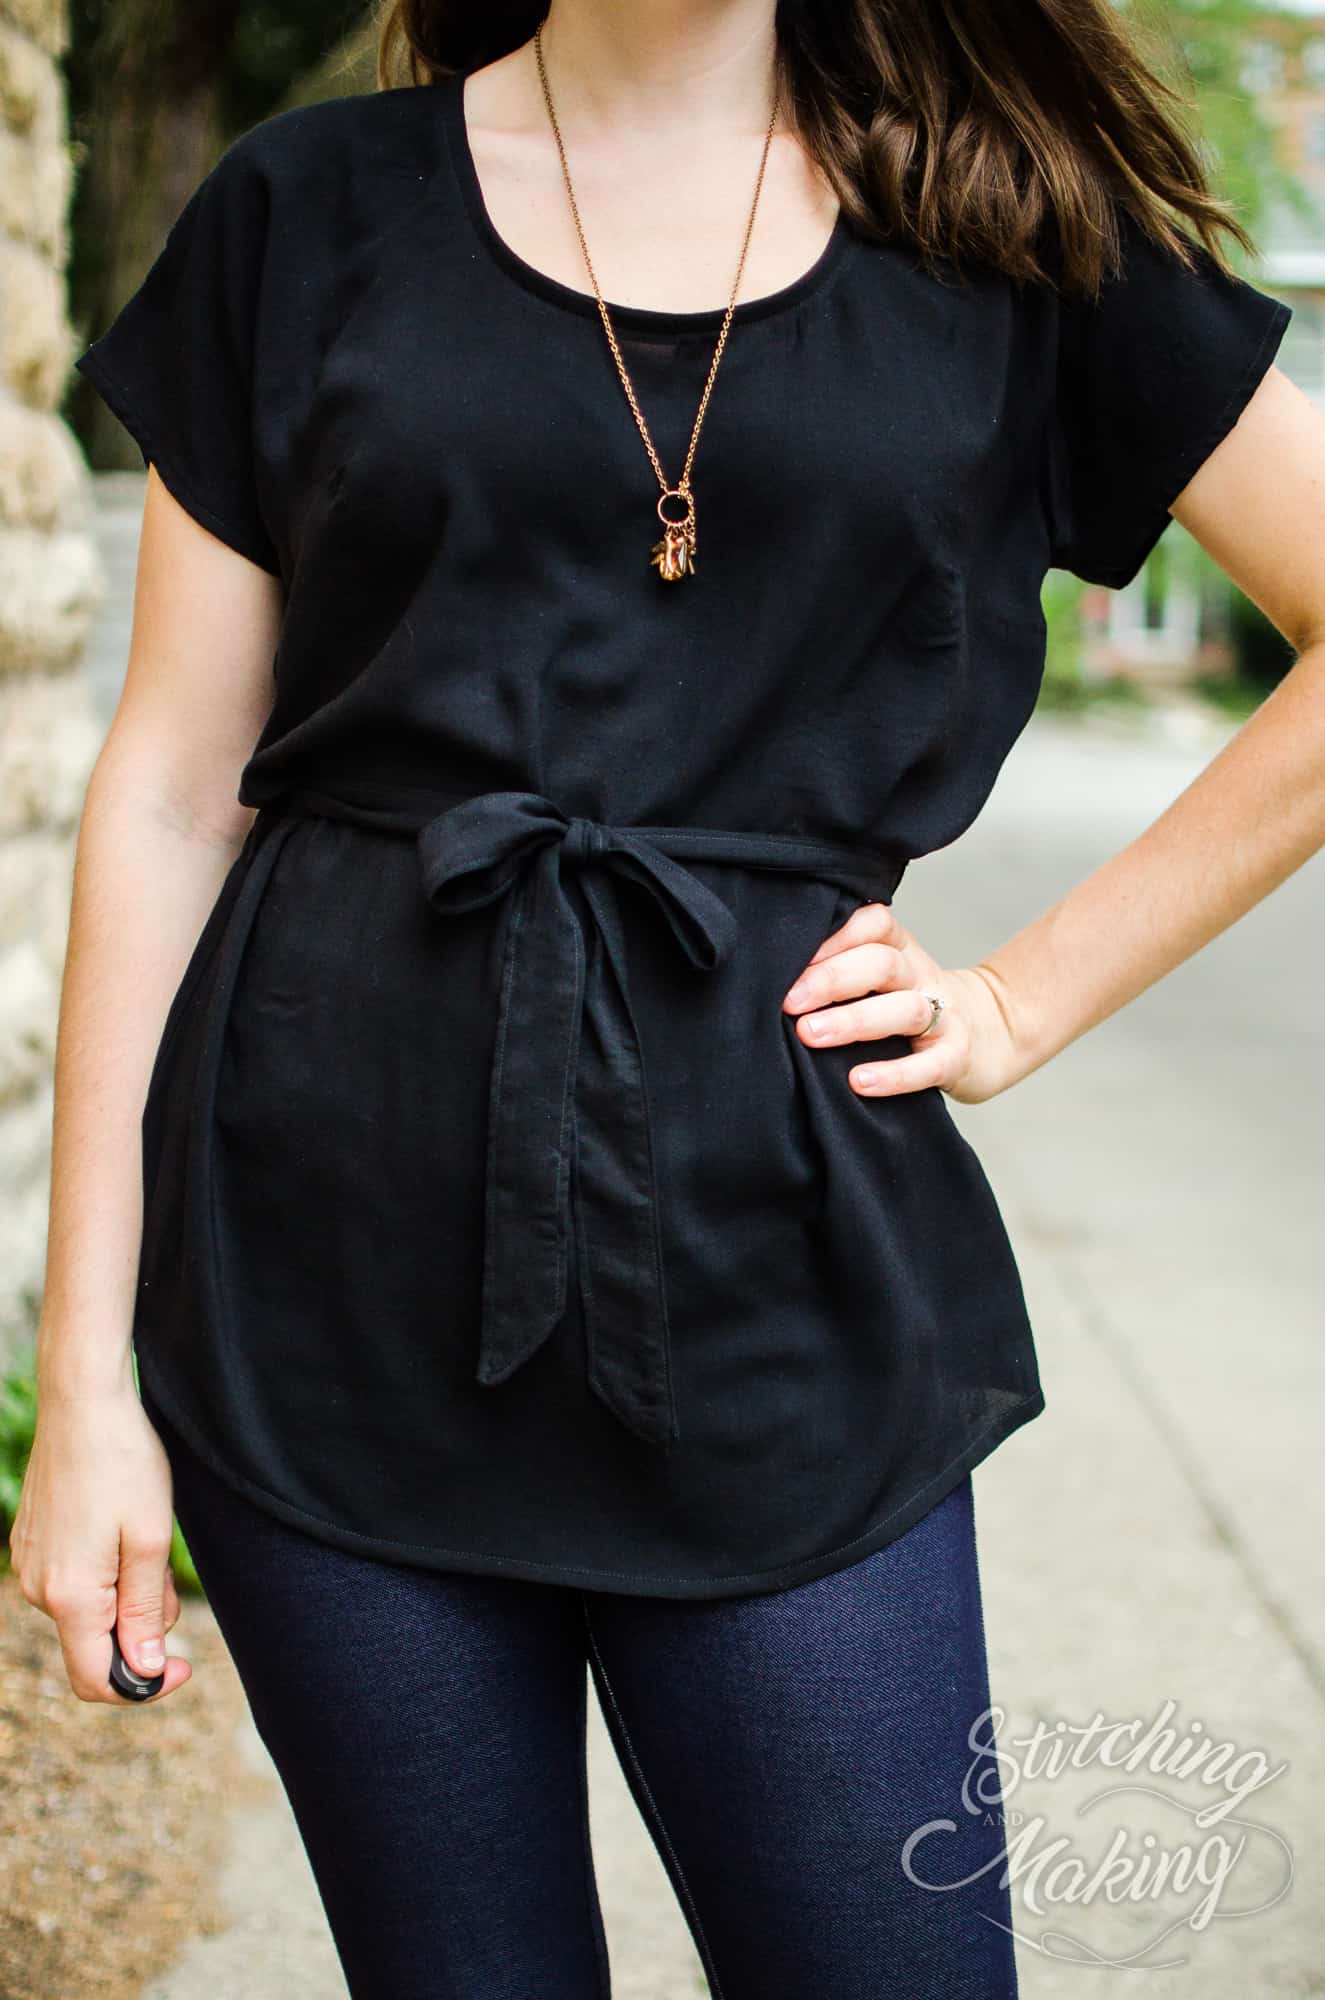
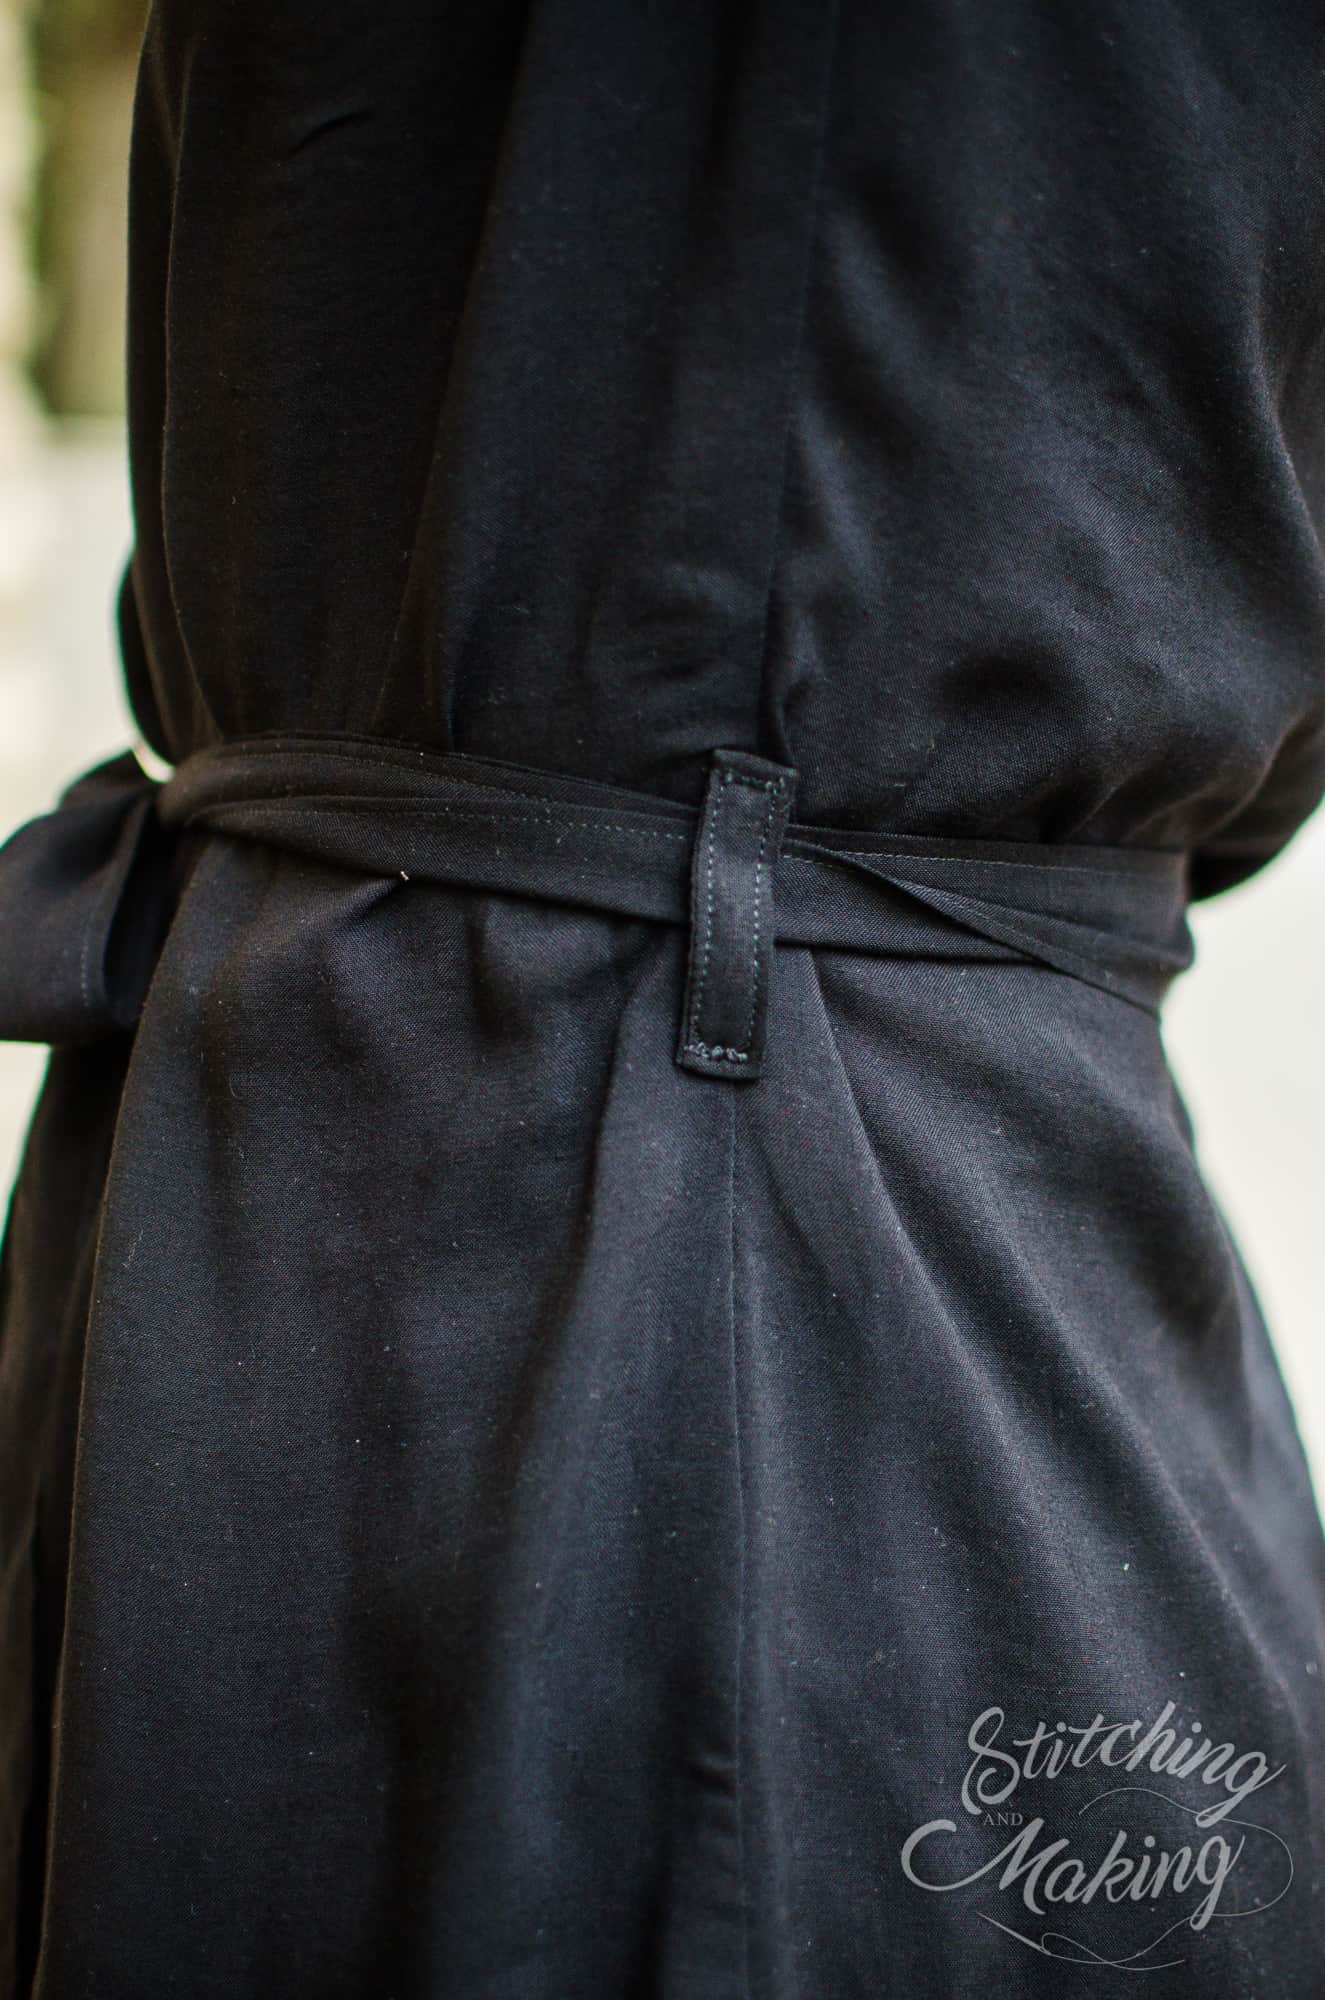
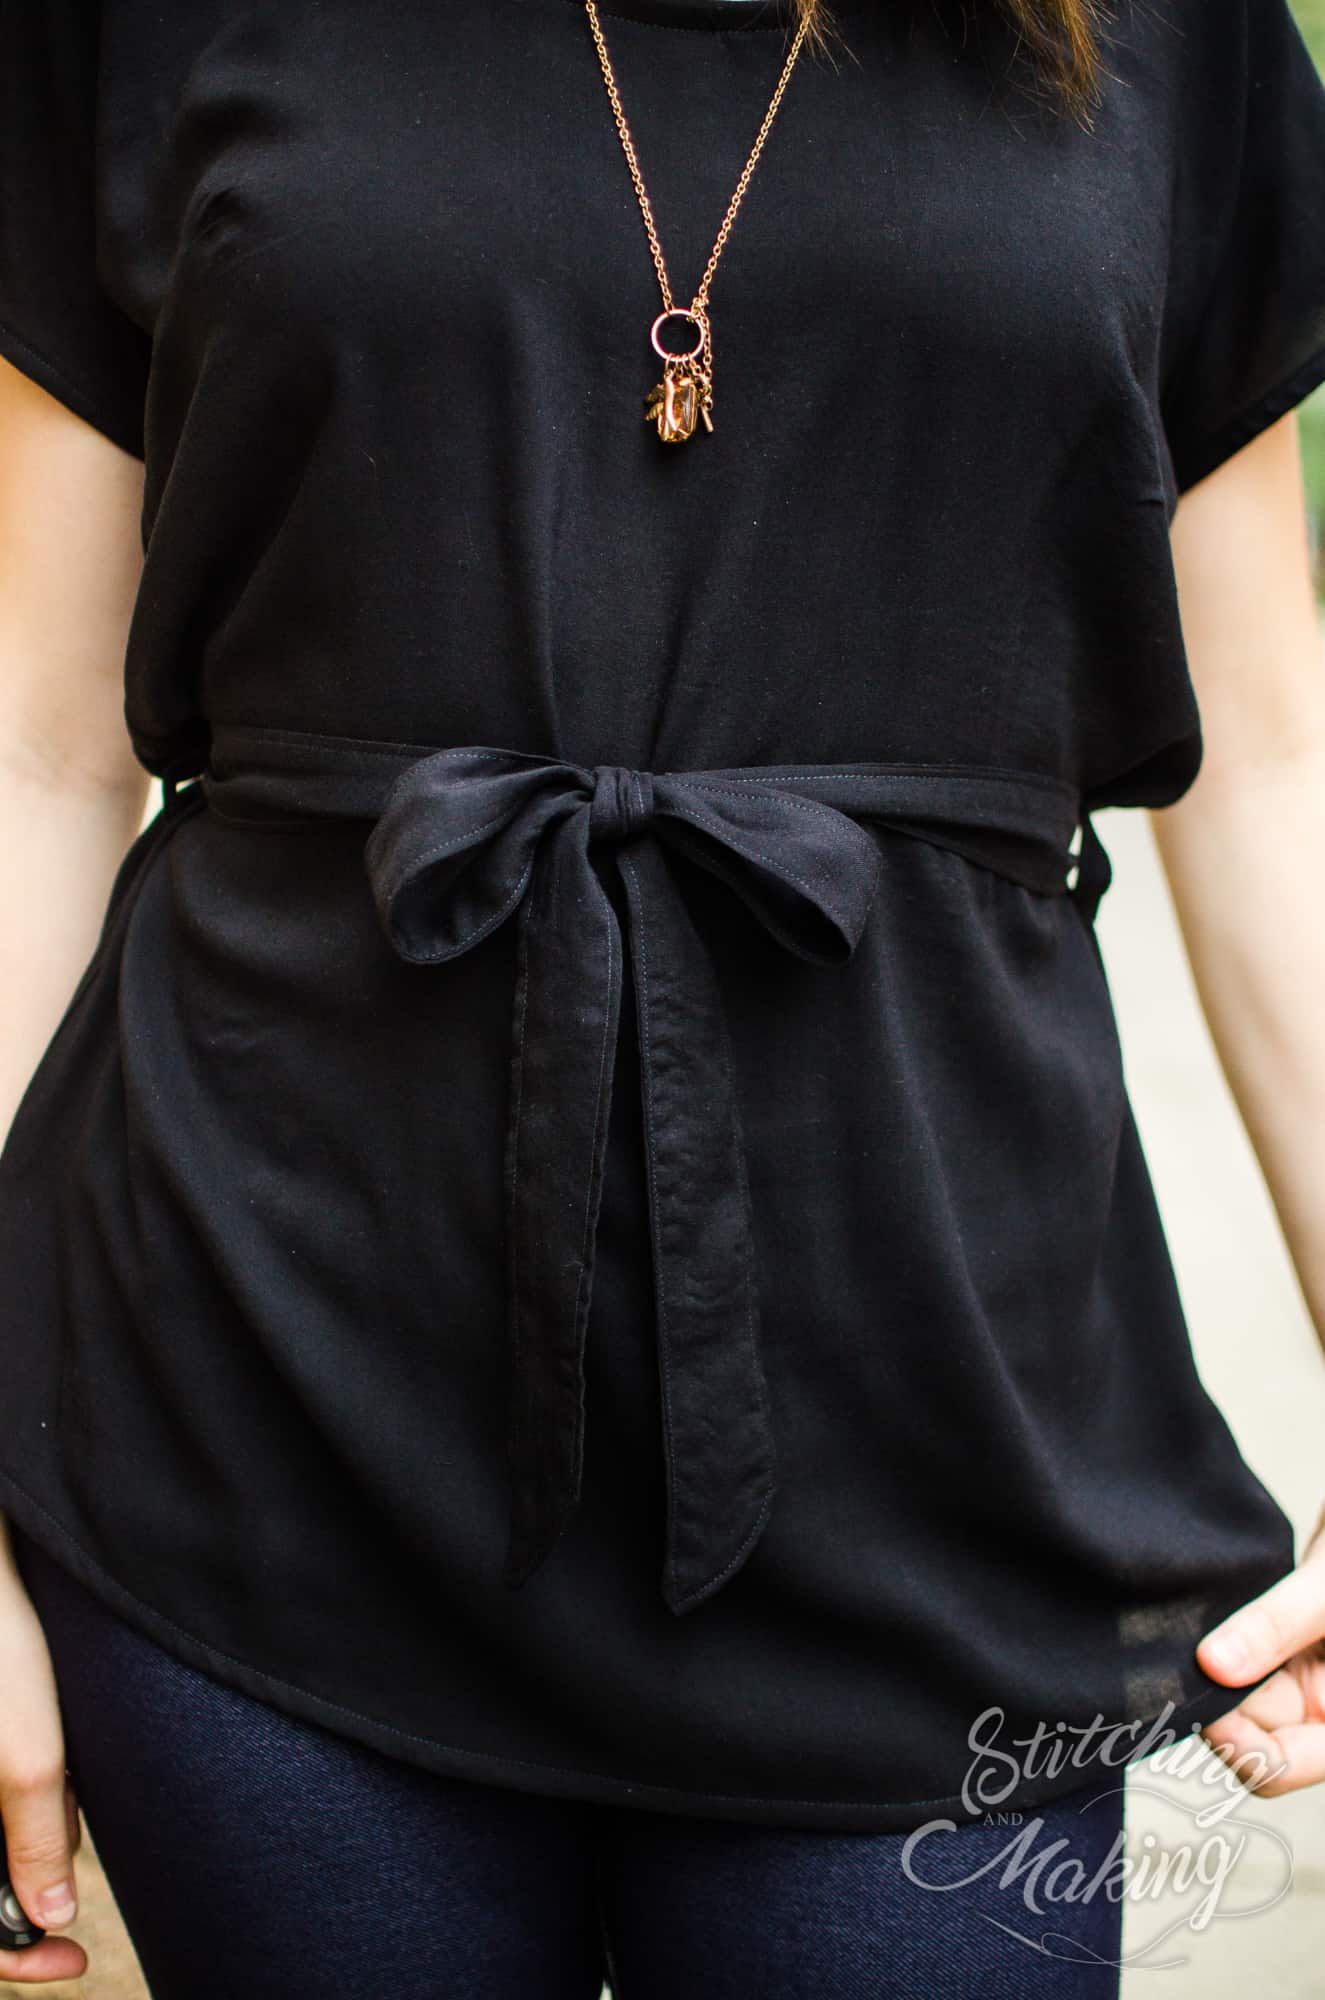
…..
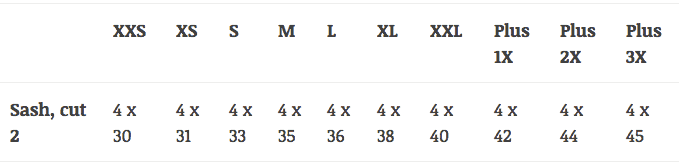
Separates
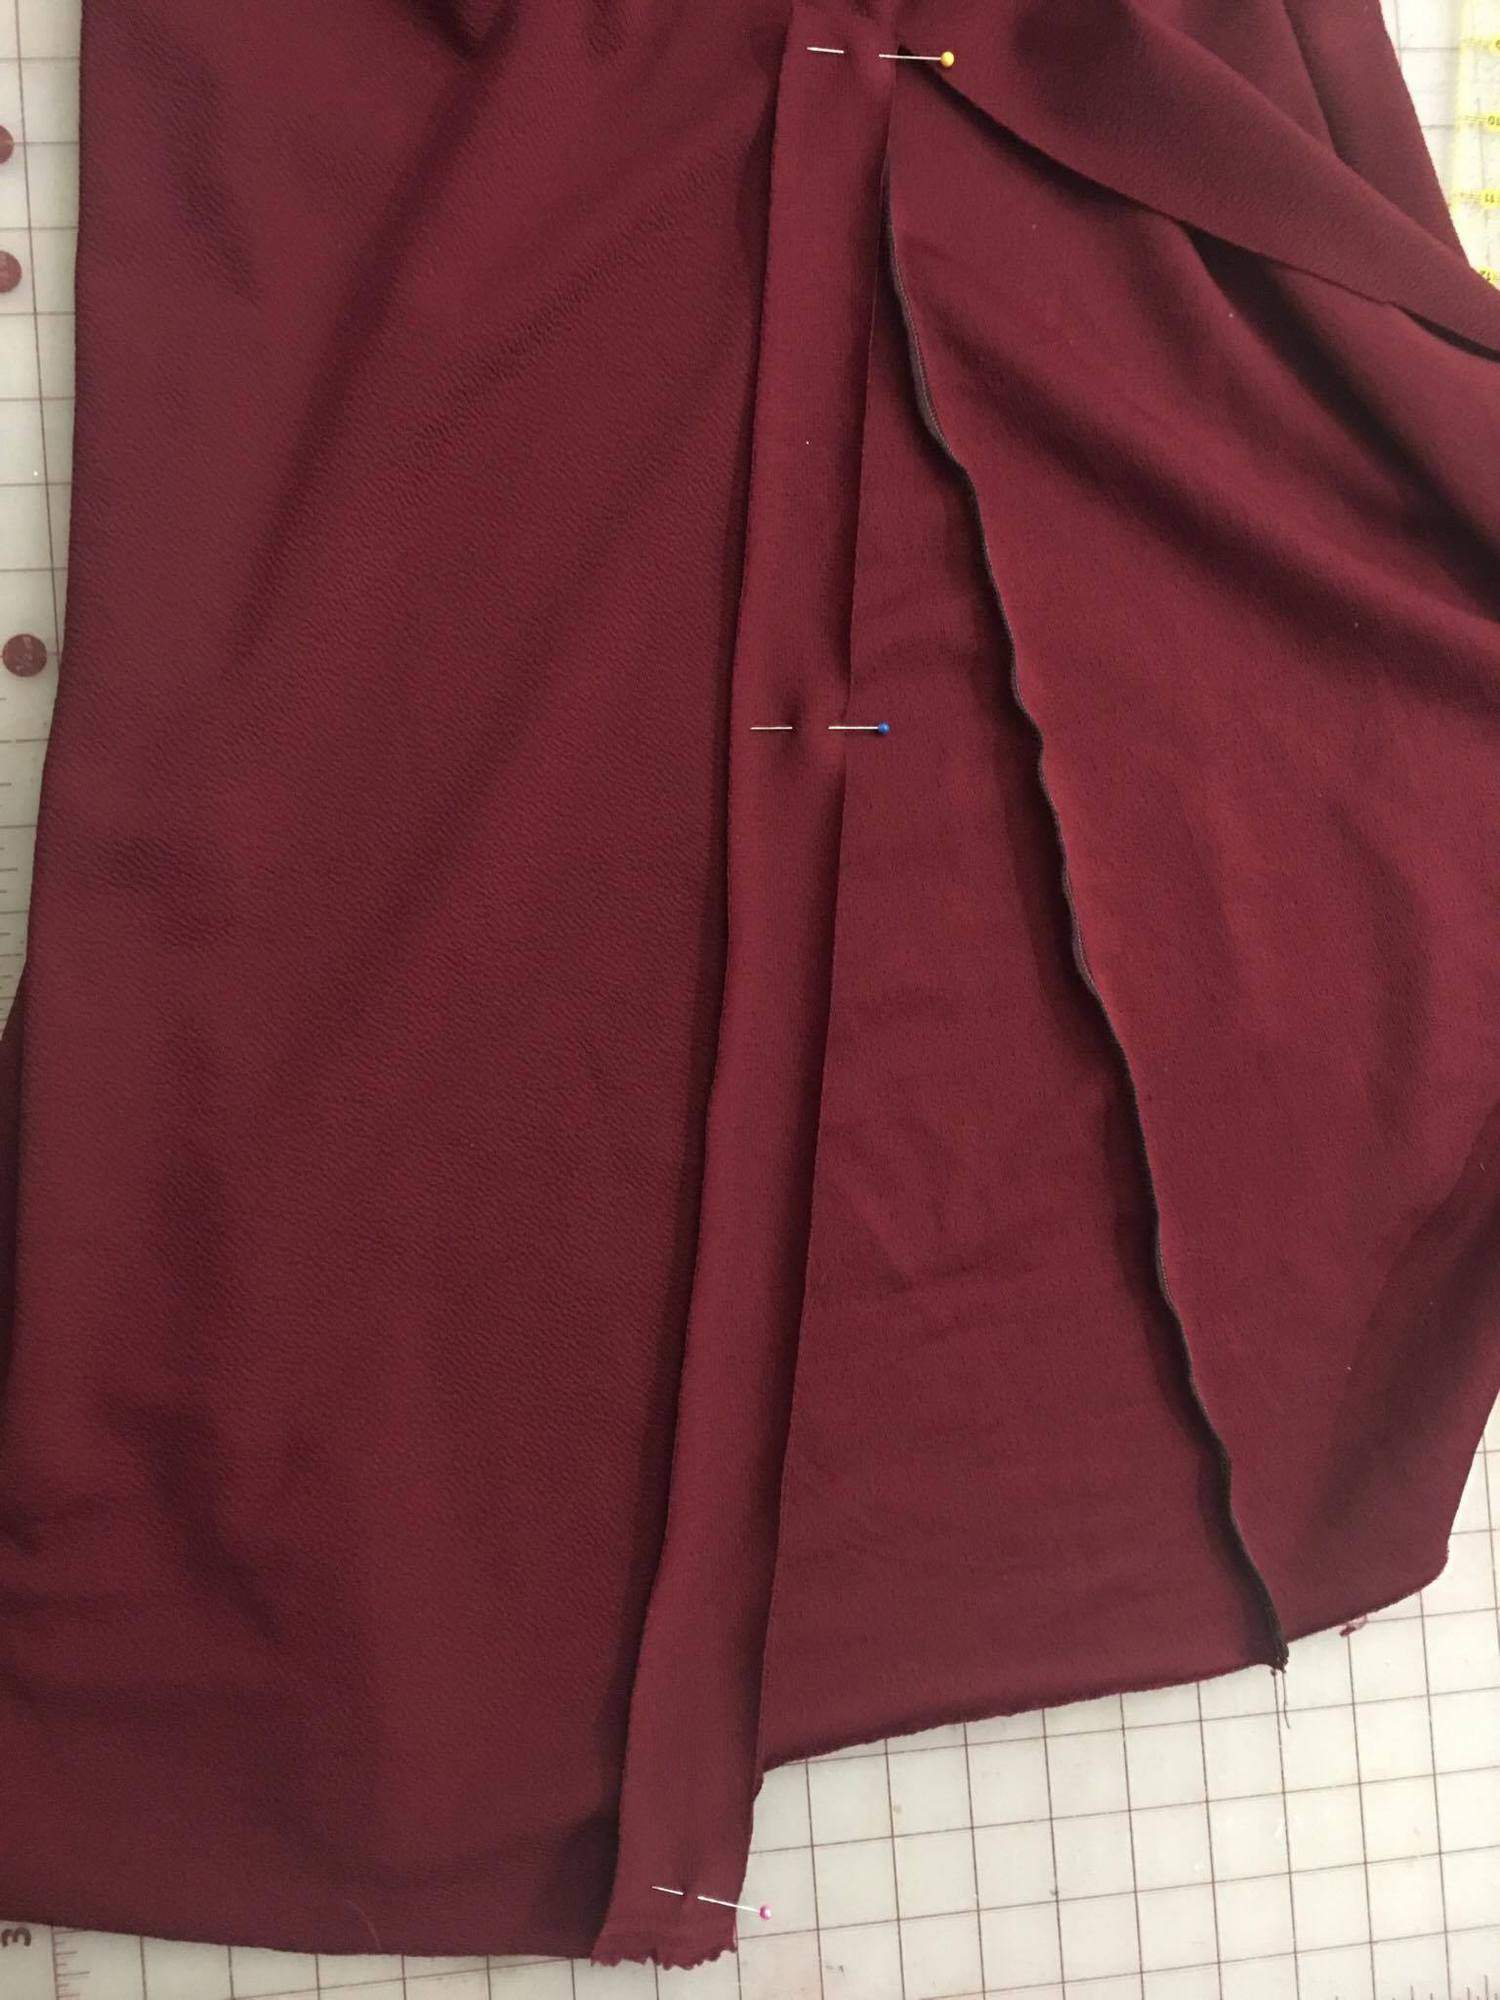
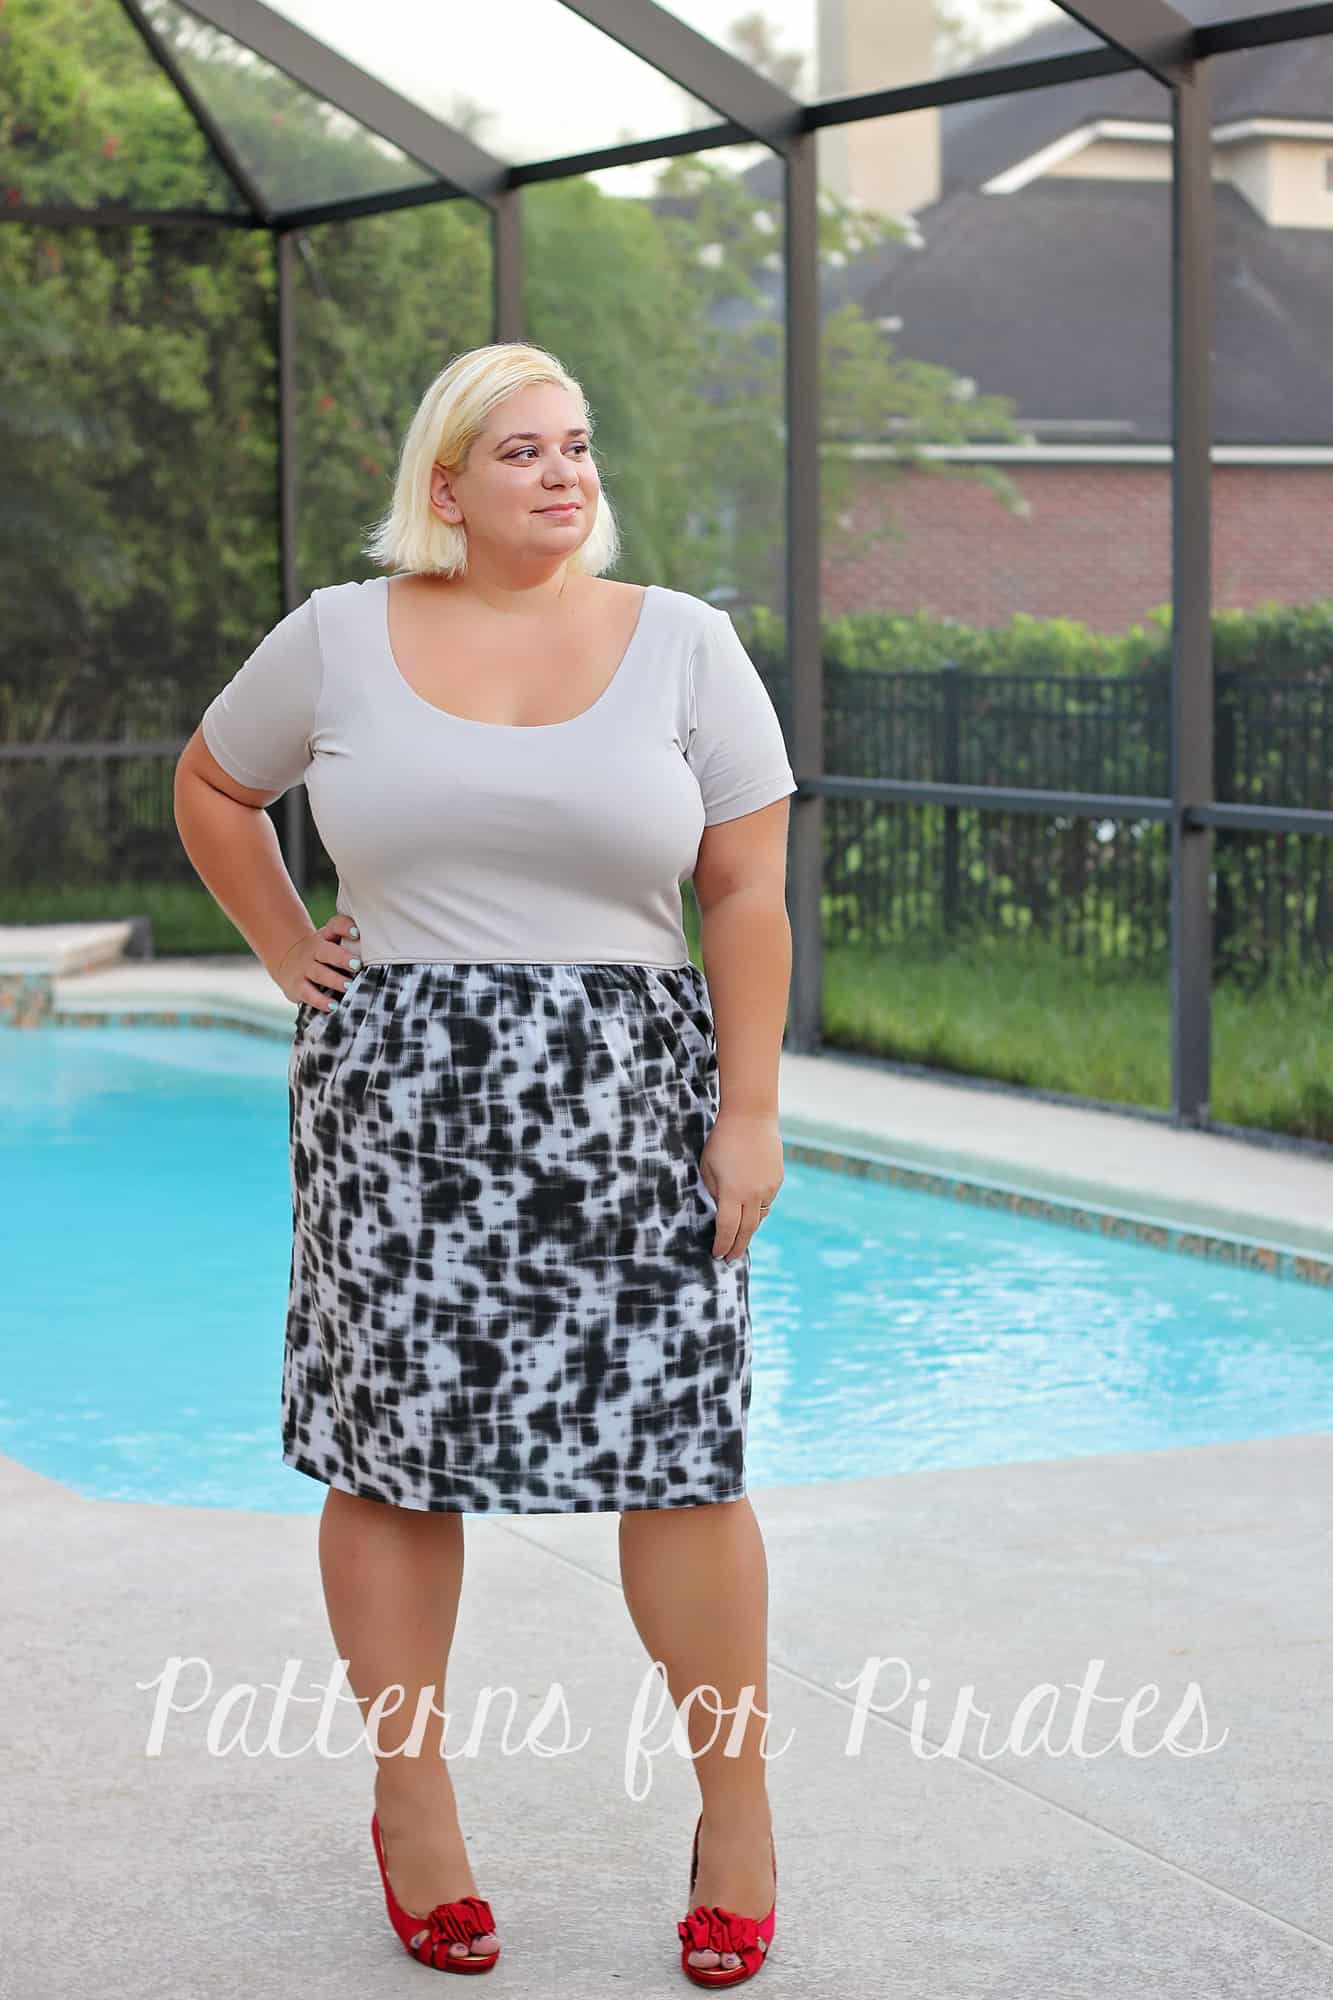
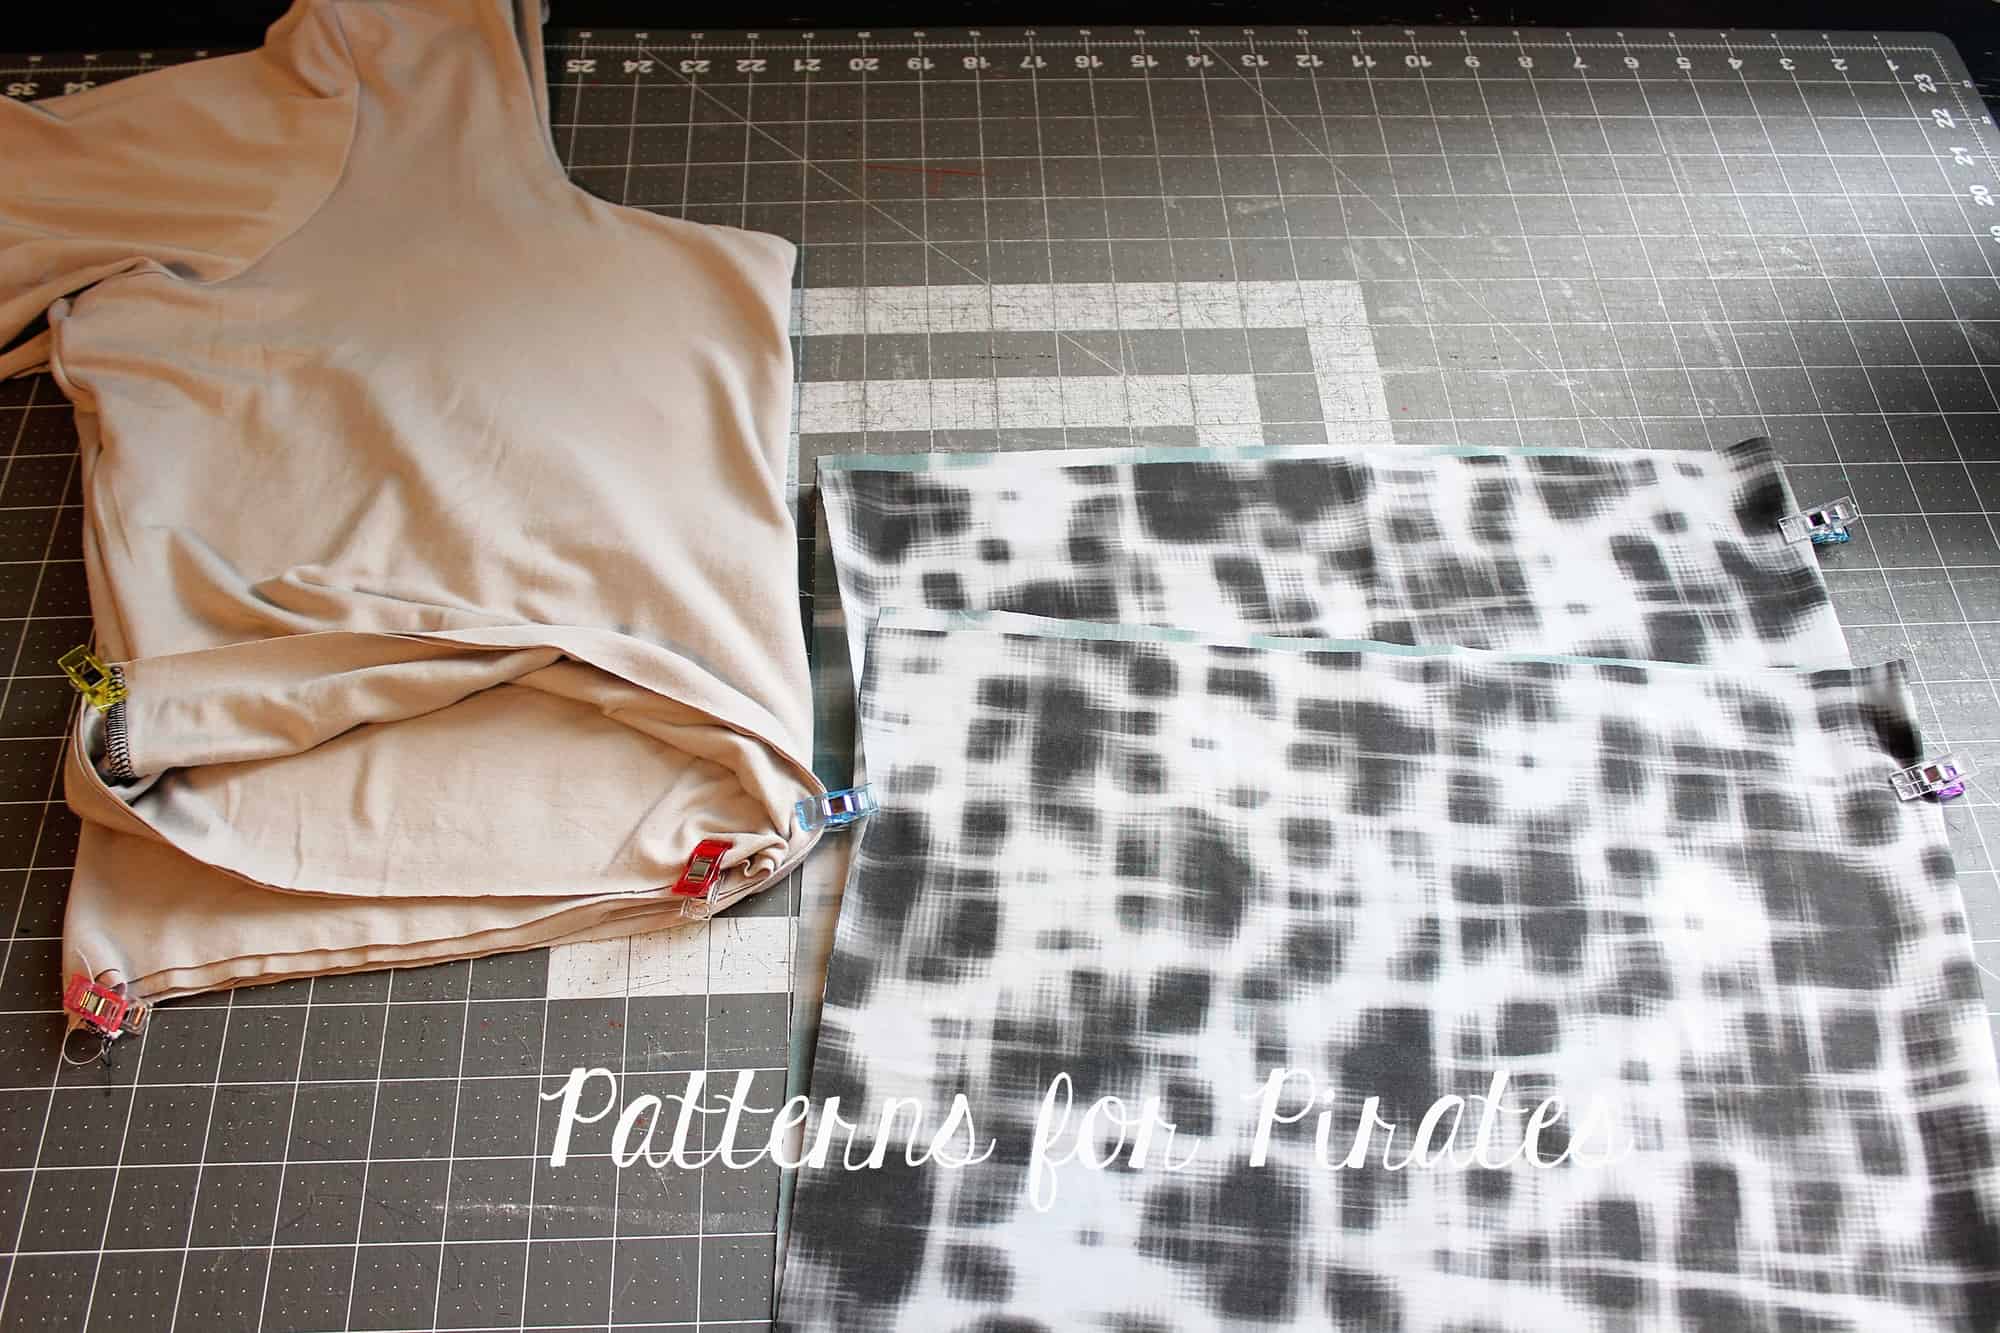
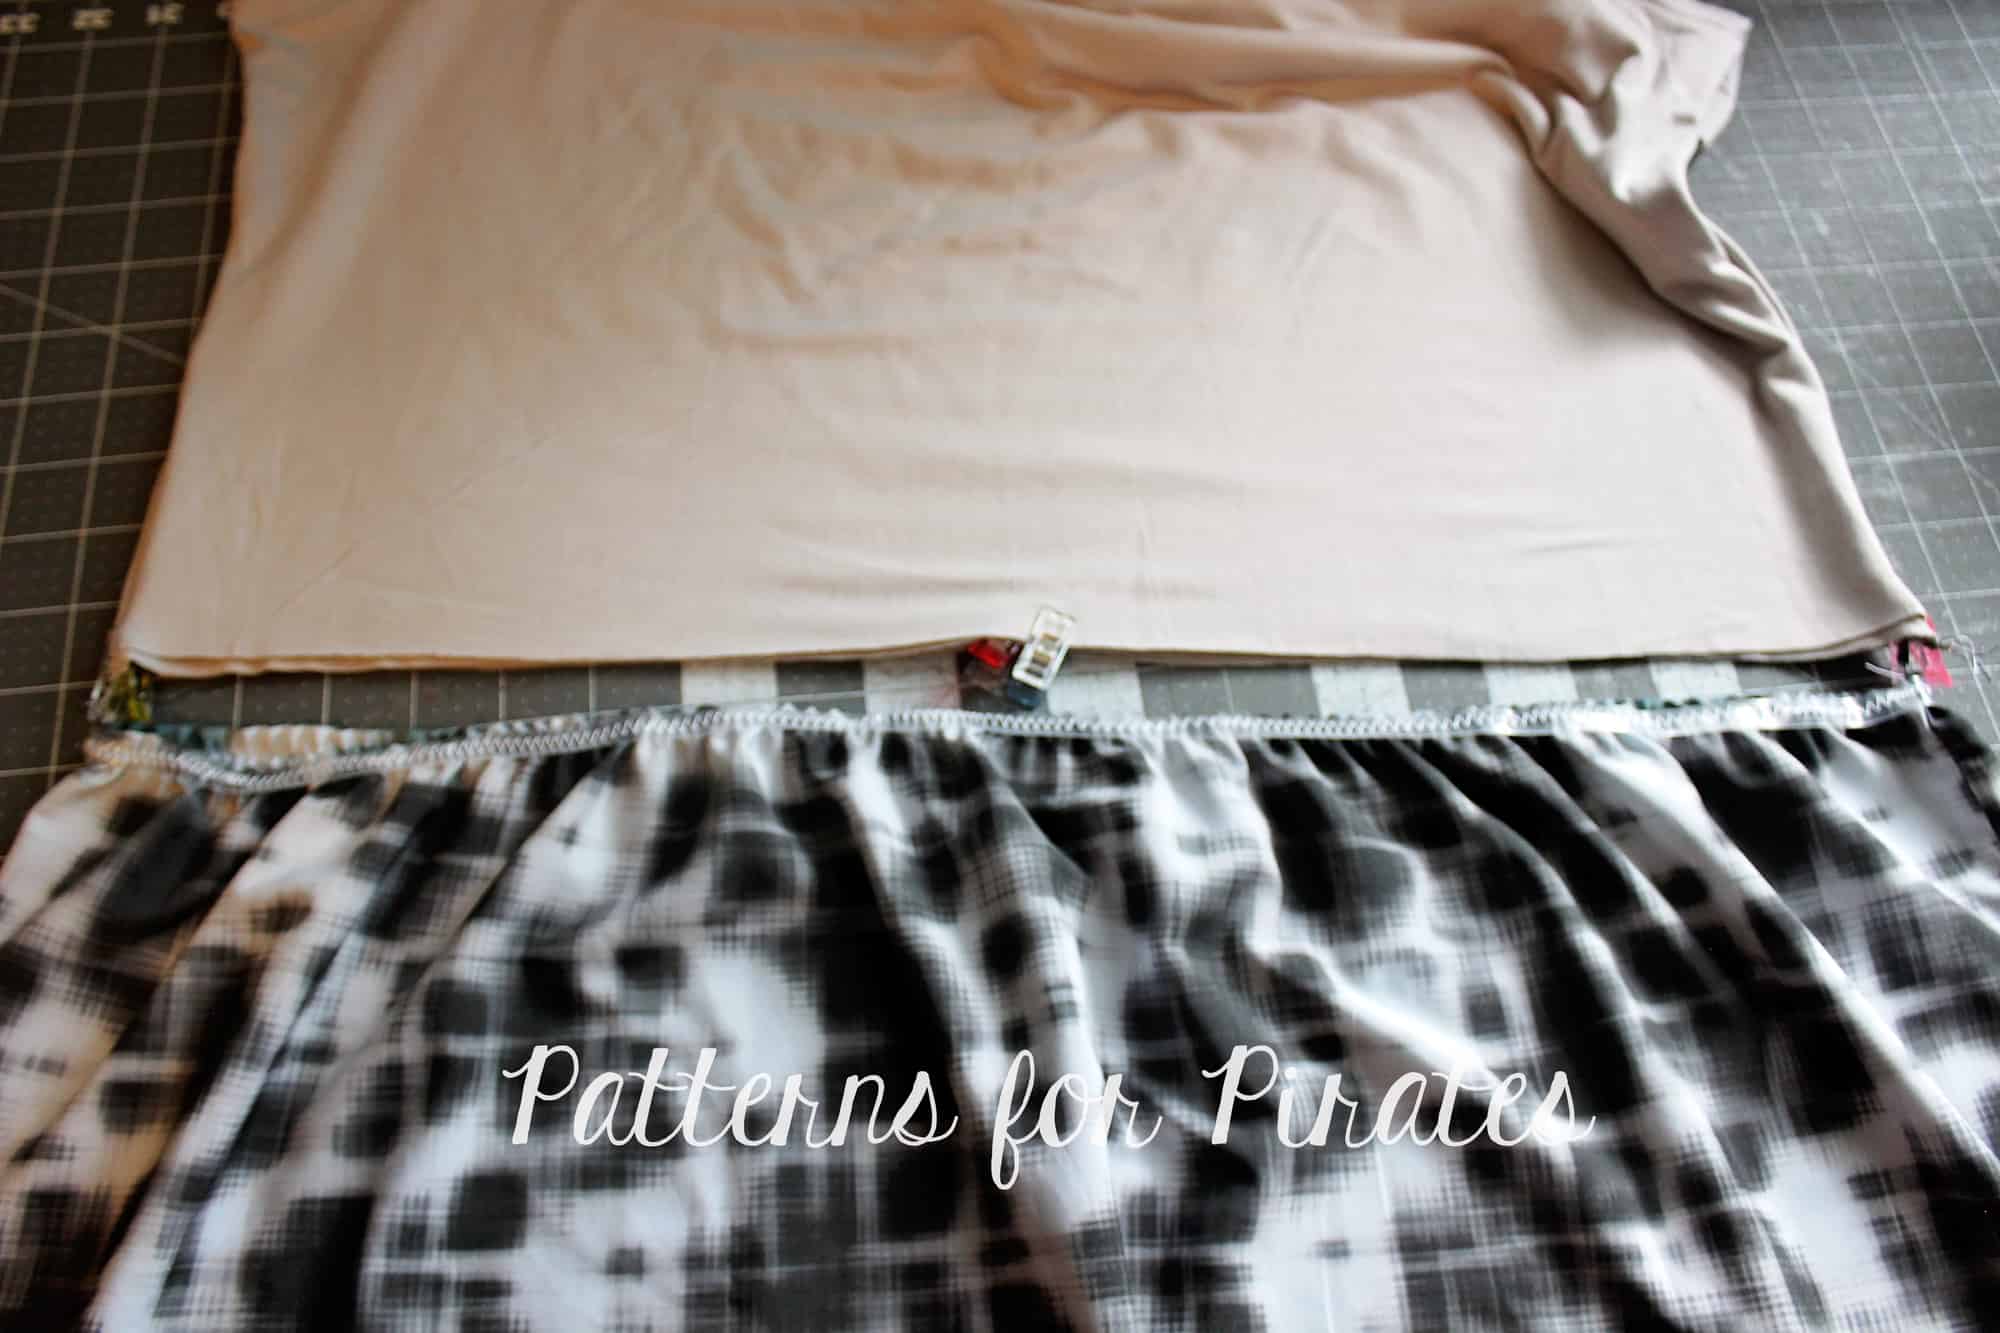
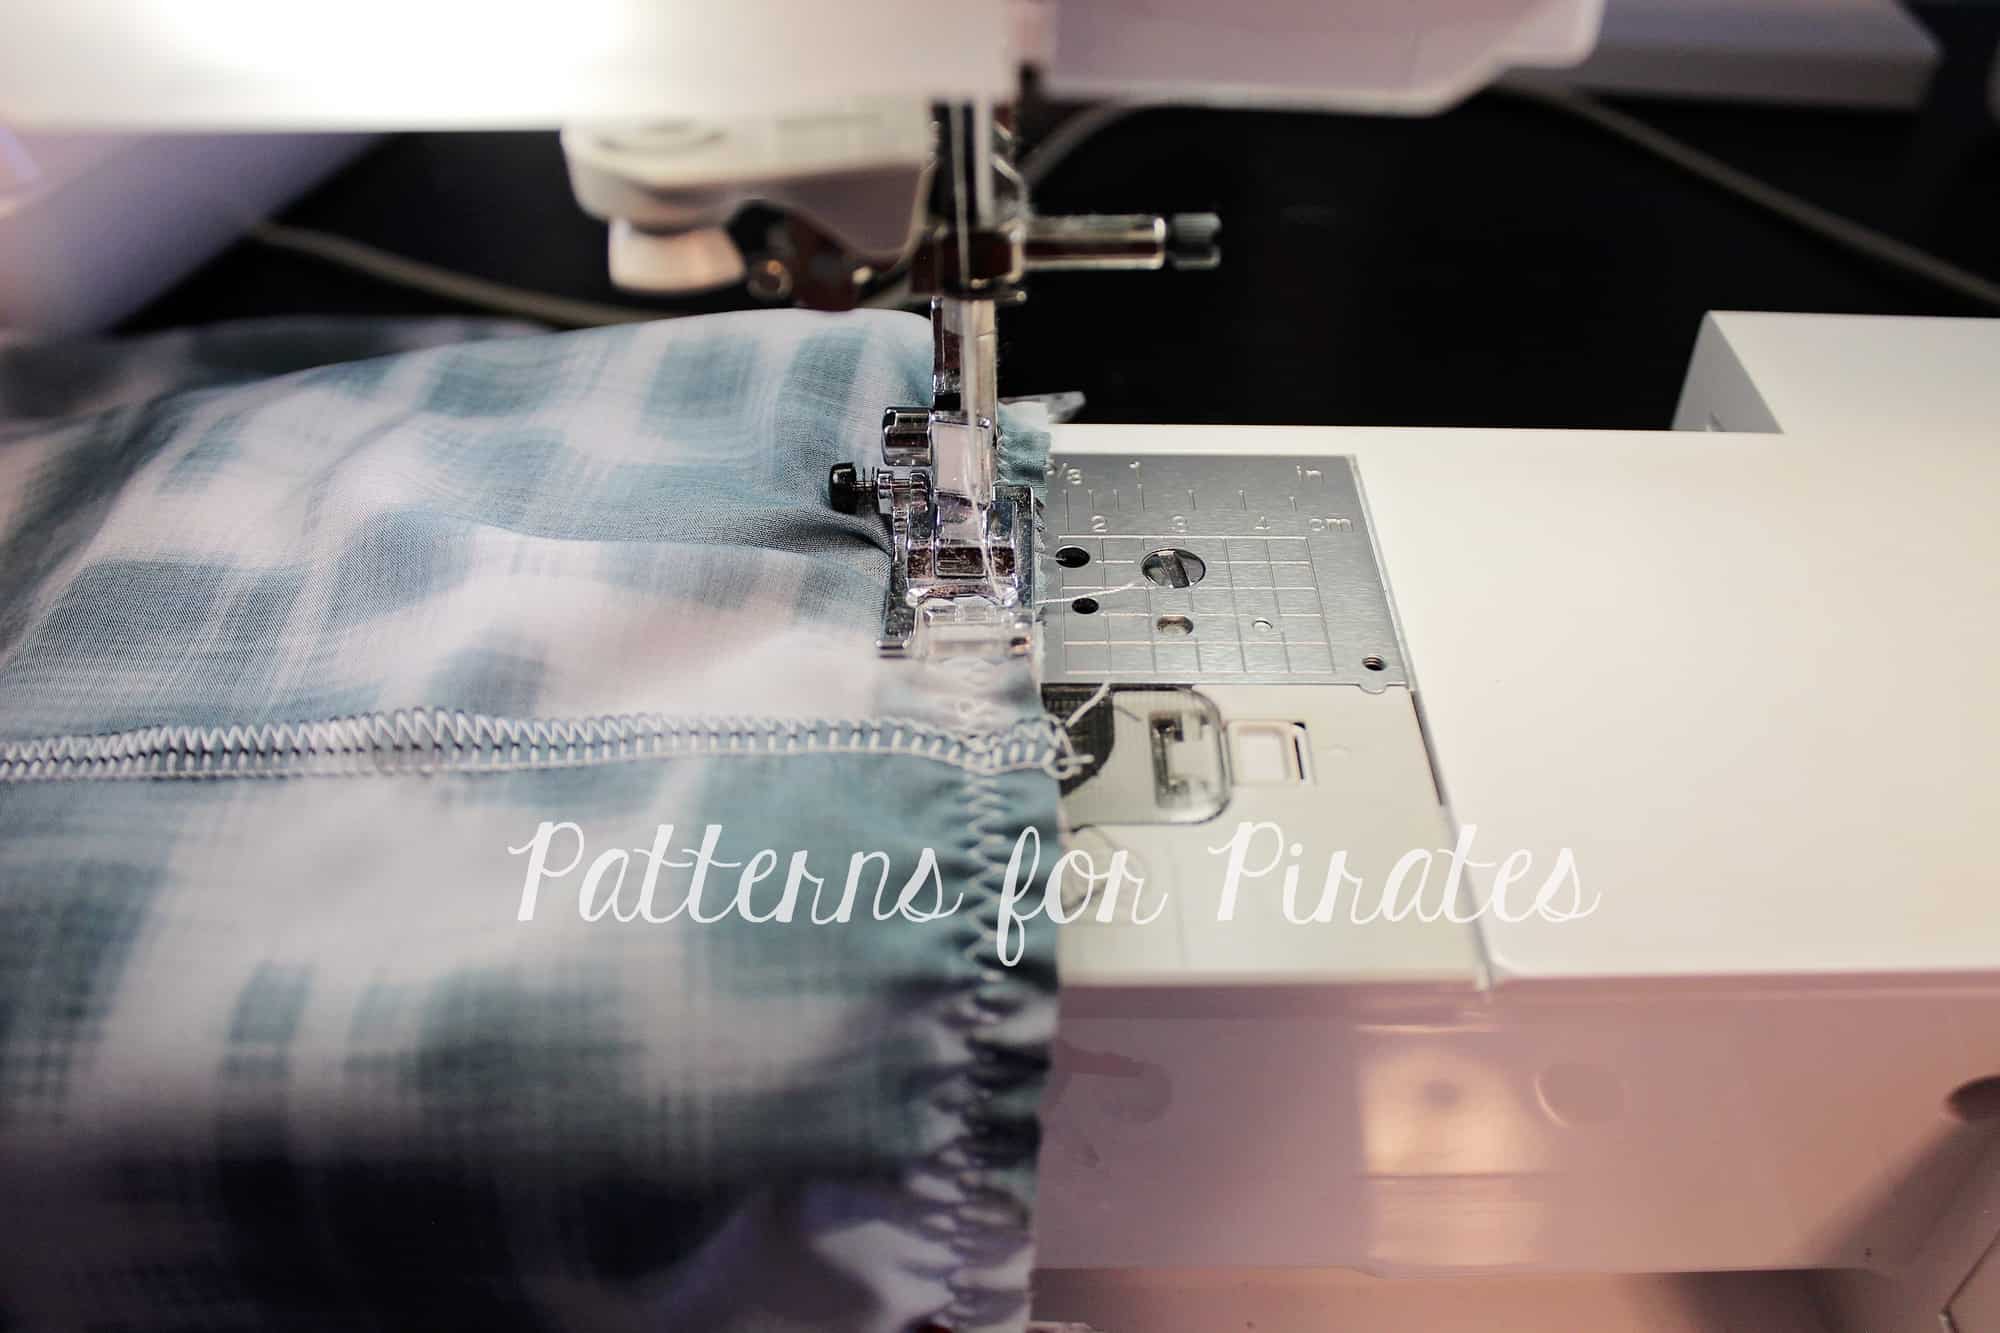
The full-length mermaid-esque dress is gorgeous, but maybe you want to pair it with a different top or choose different fabrics? With this simple hack, you can create a gorgeous set and wear them as separates. For the skirt, cut along the crop cutline. Stitch the center back seam and each side seam. Using the cropped band measurement and instructions, attach to the top edge of the skirt. Easy peasy!
How cute is Katy in this Ariel inspired Haloween outfit!
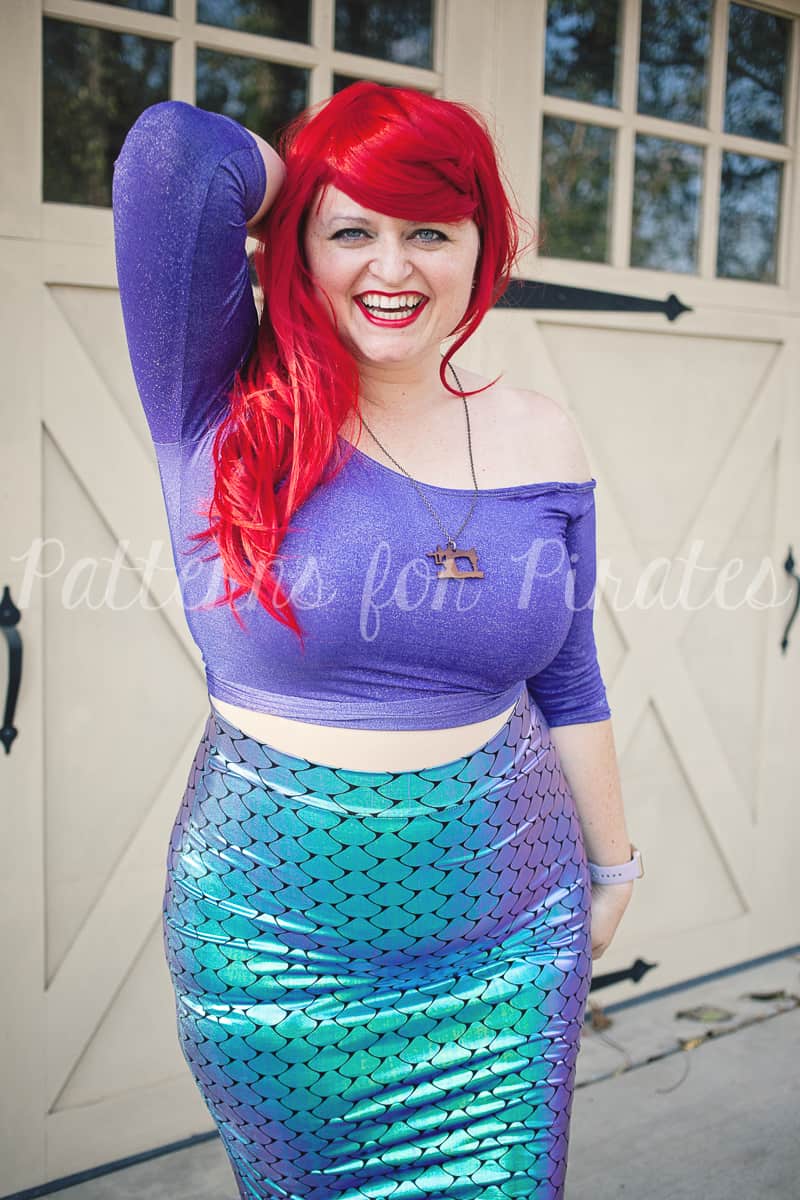

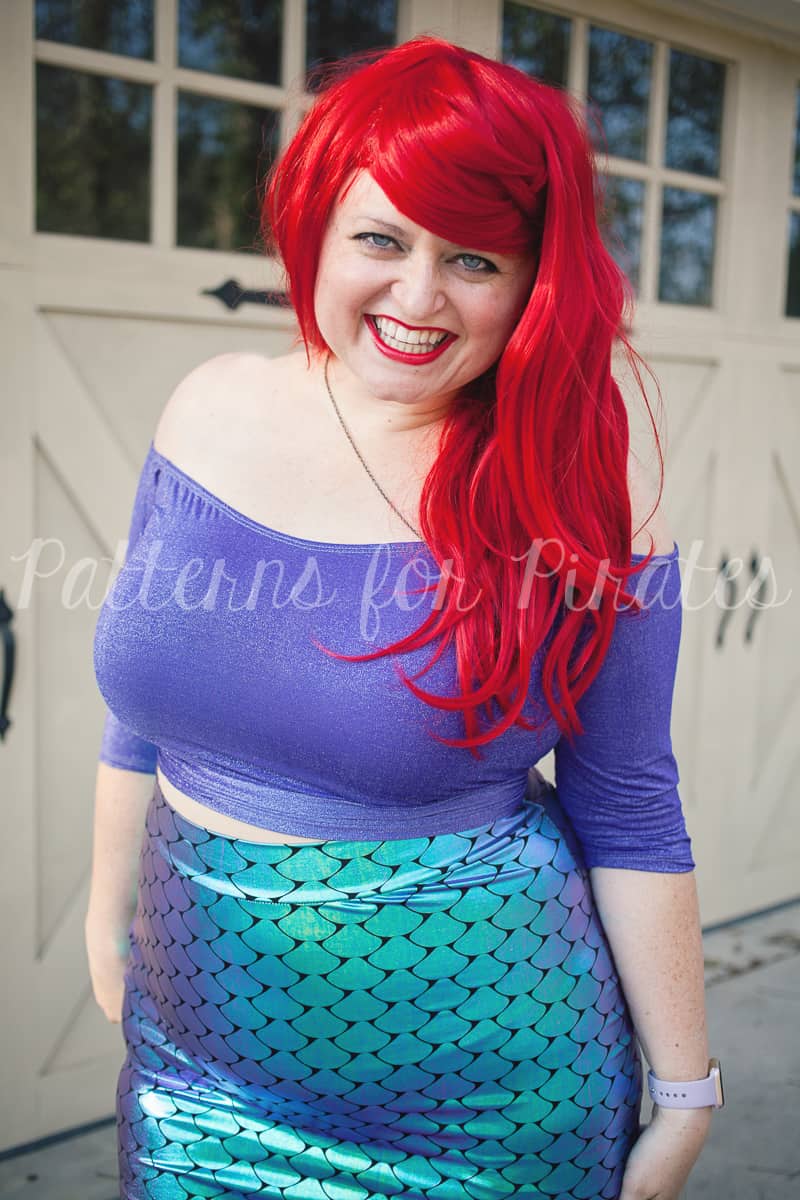
And seriously, how amazing is this sequin skirt!!


…..
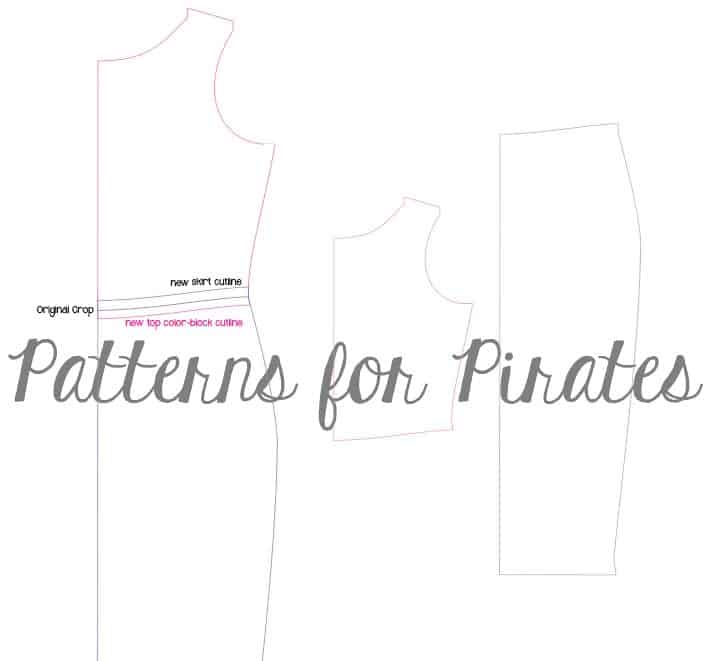
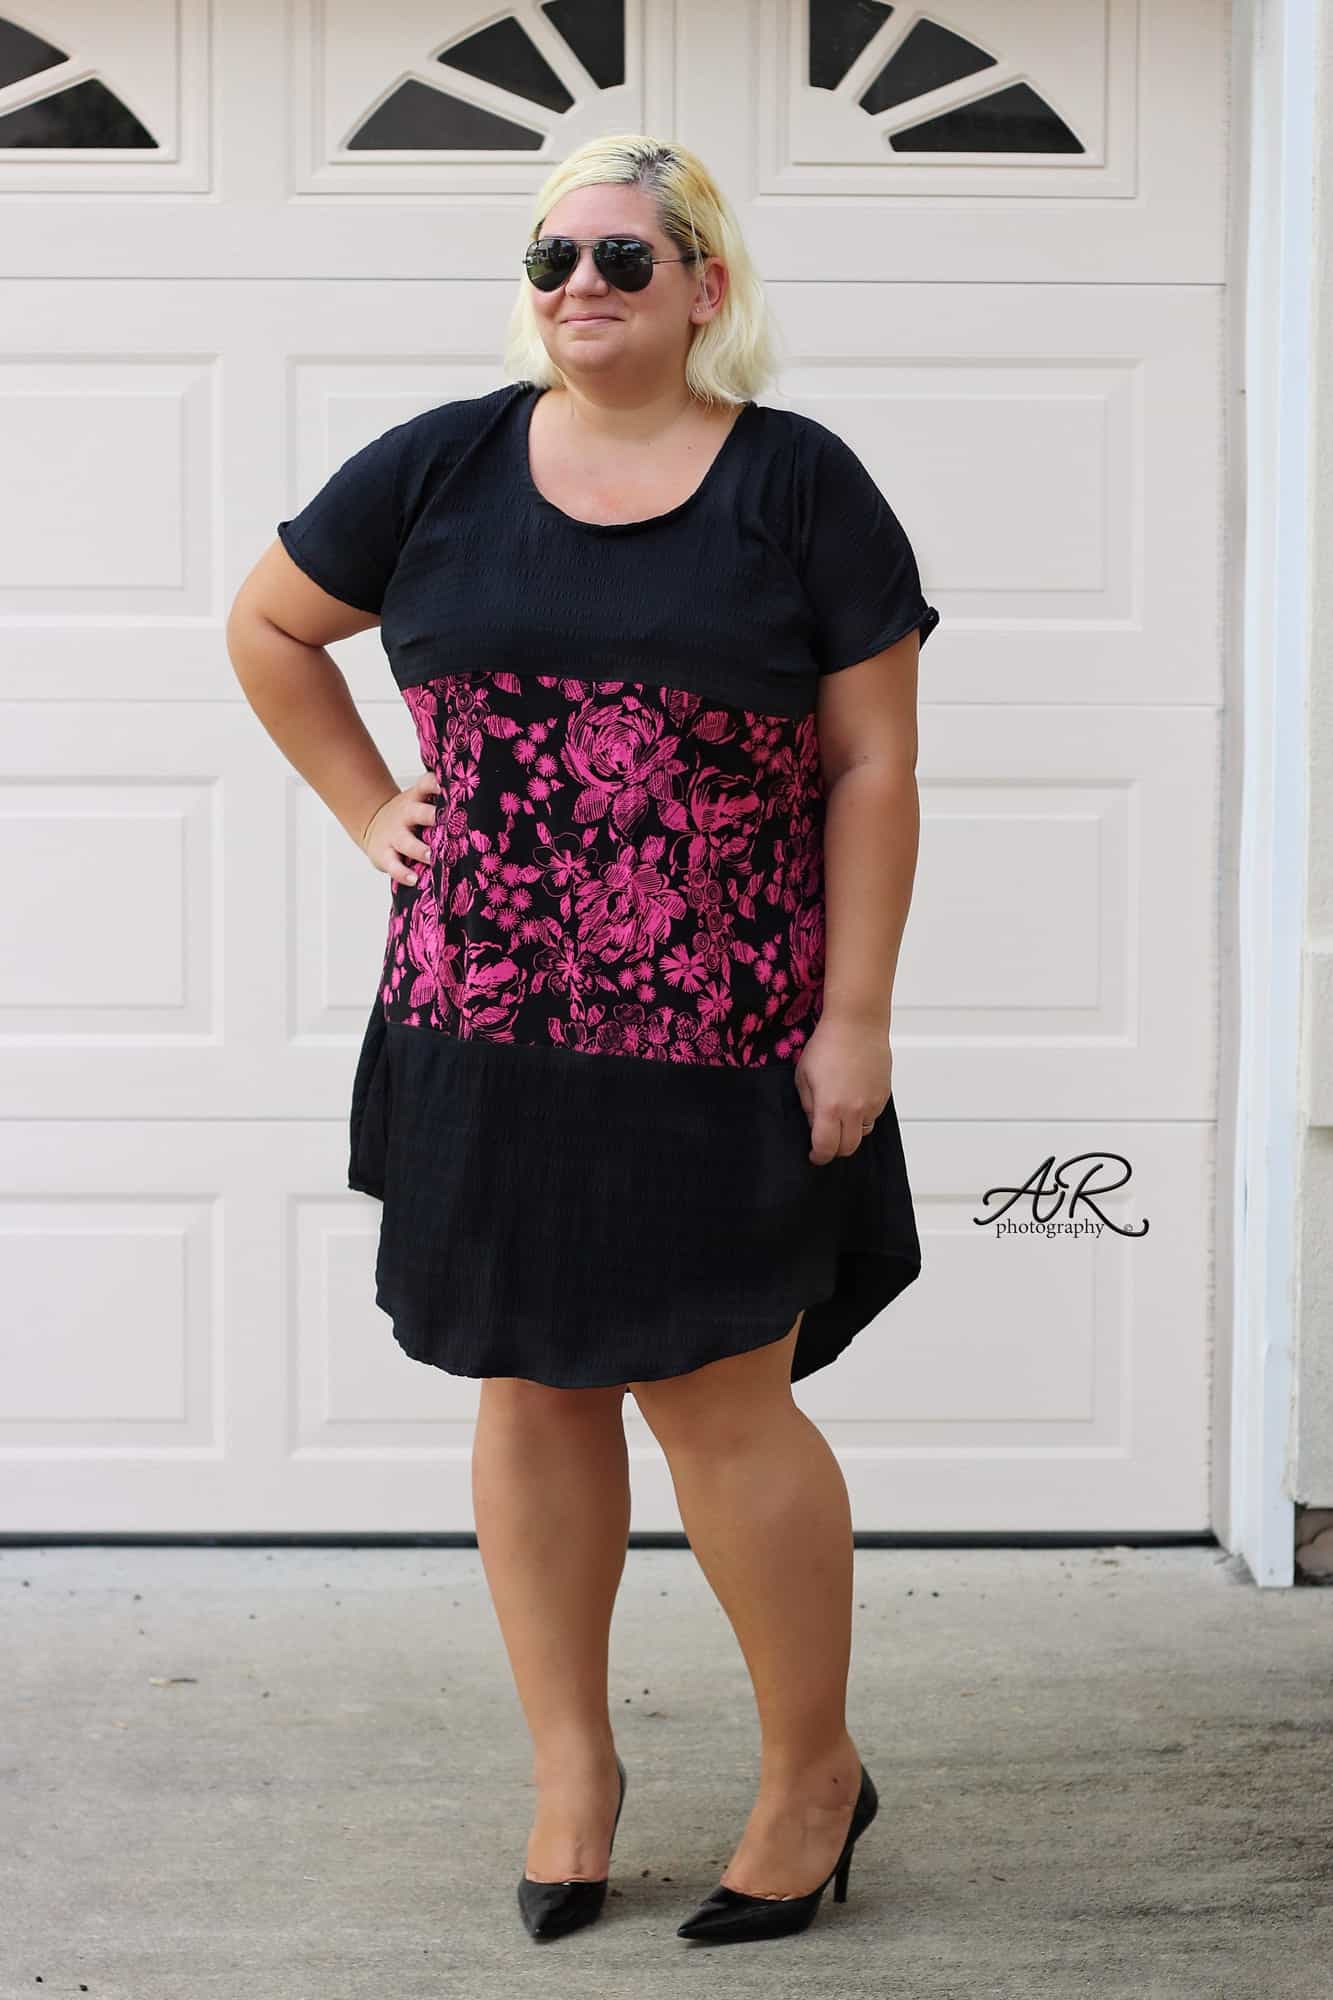
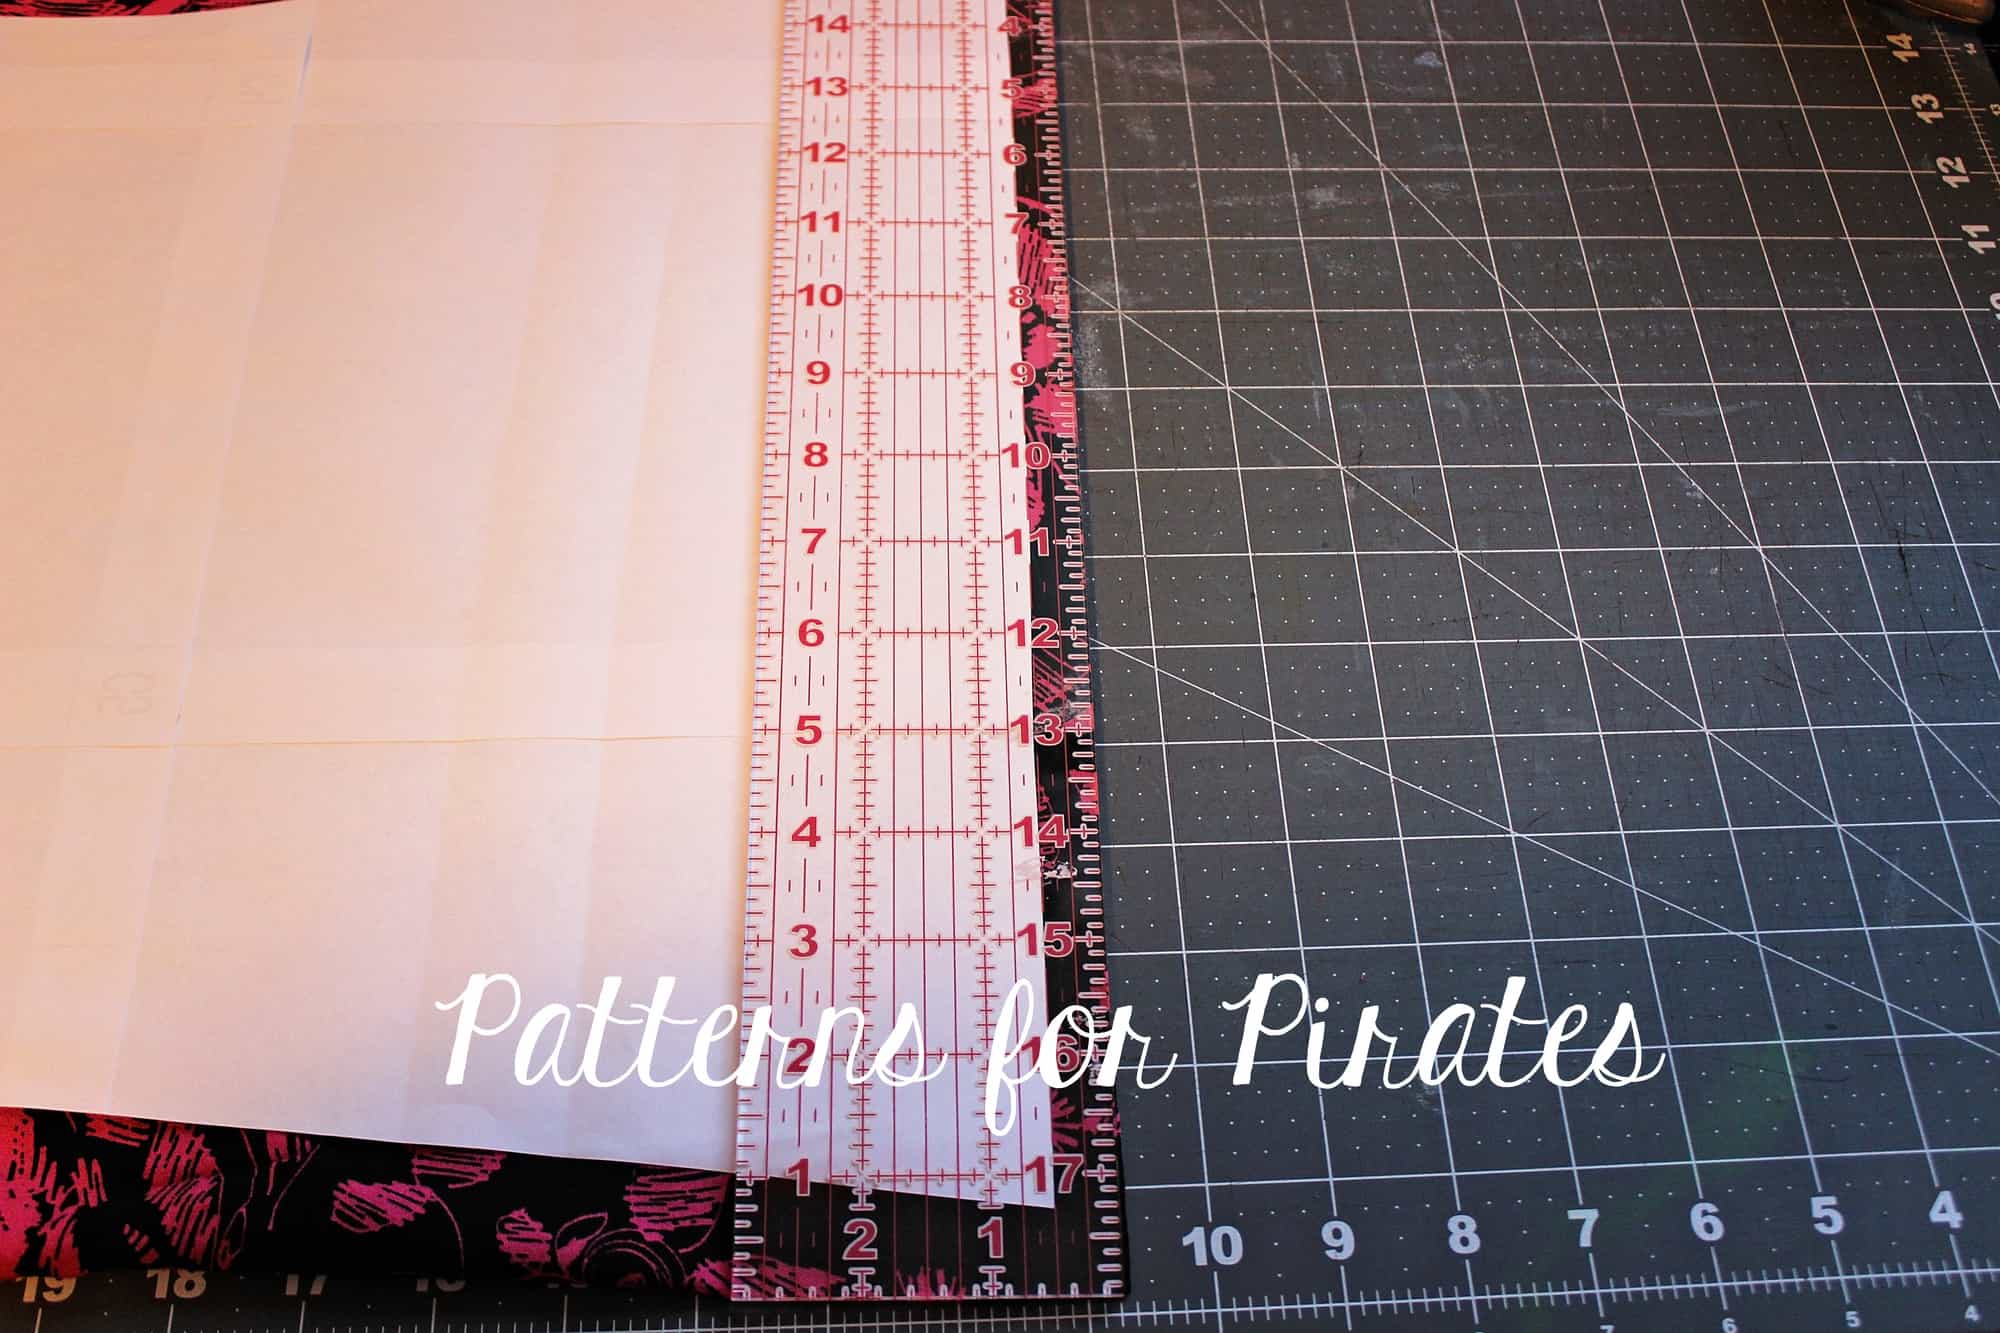
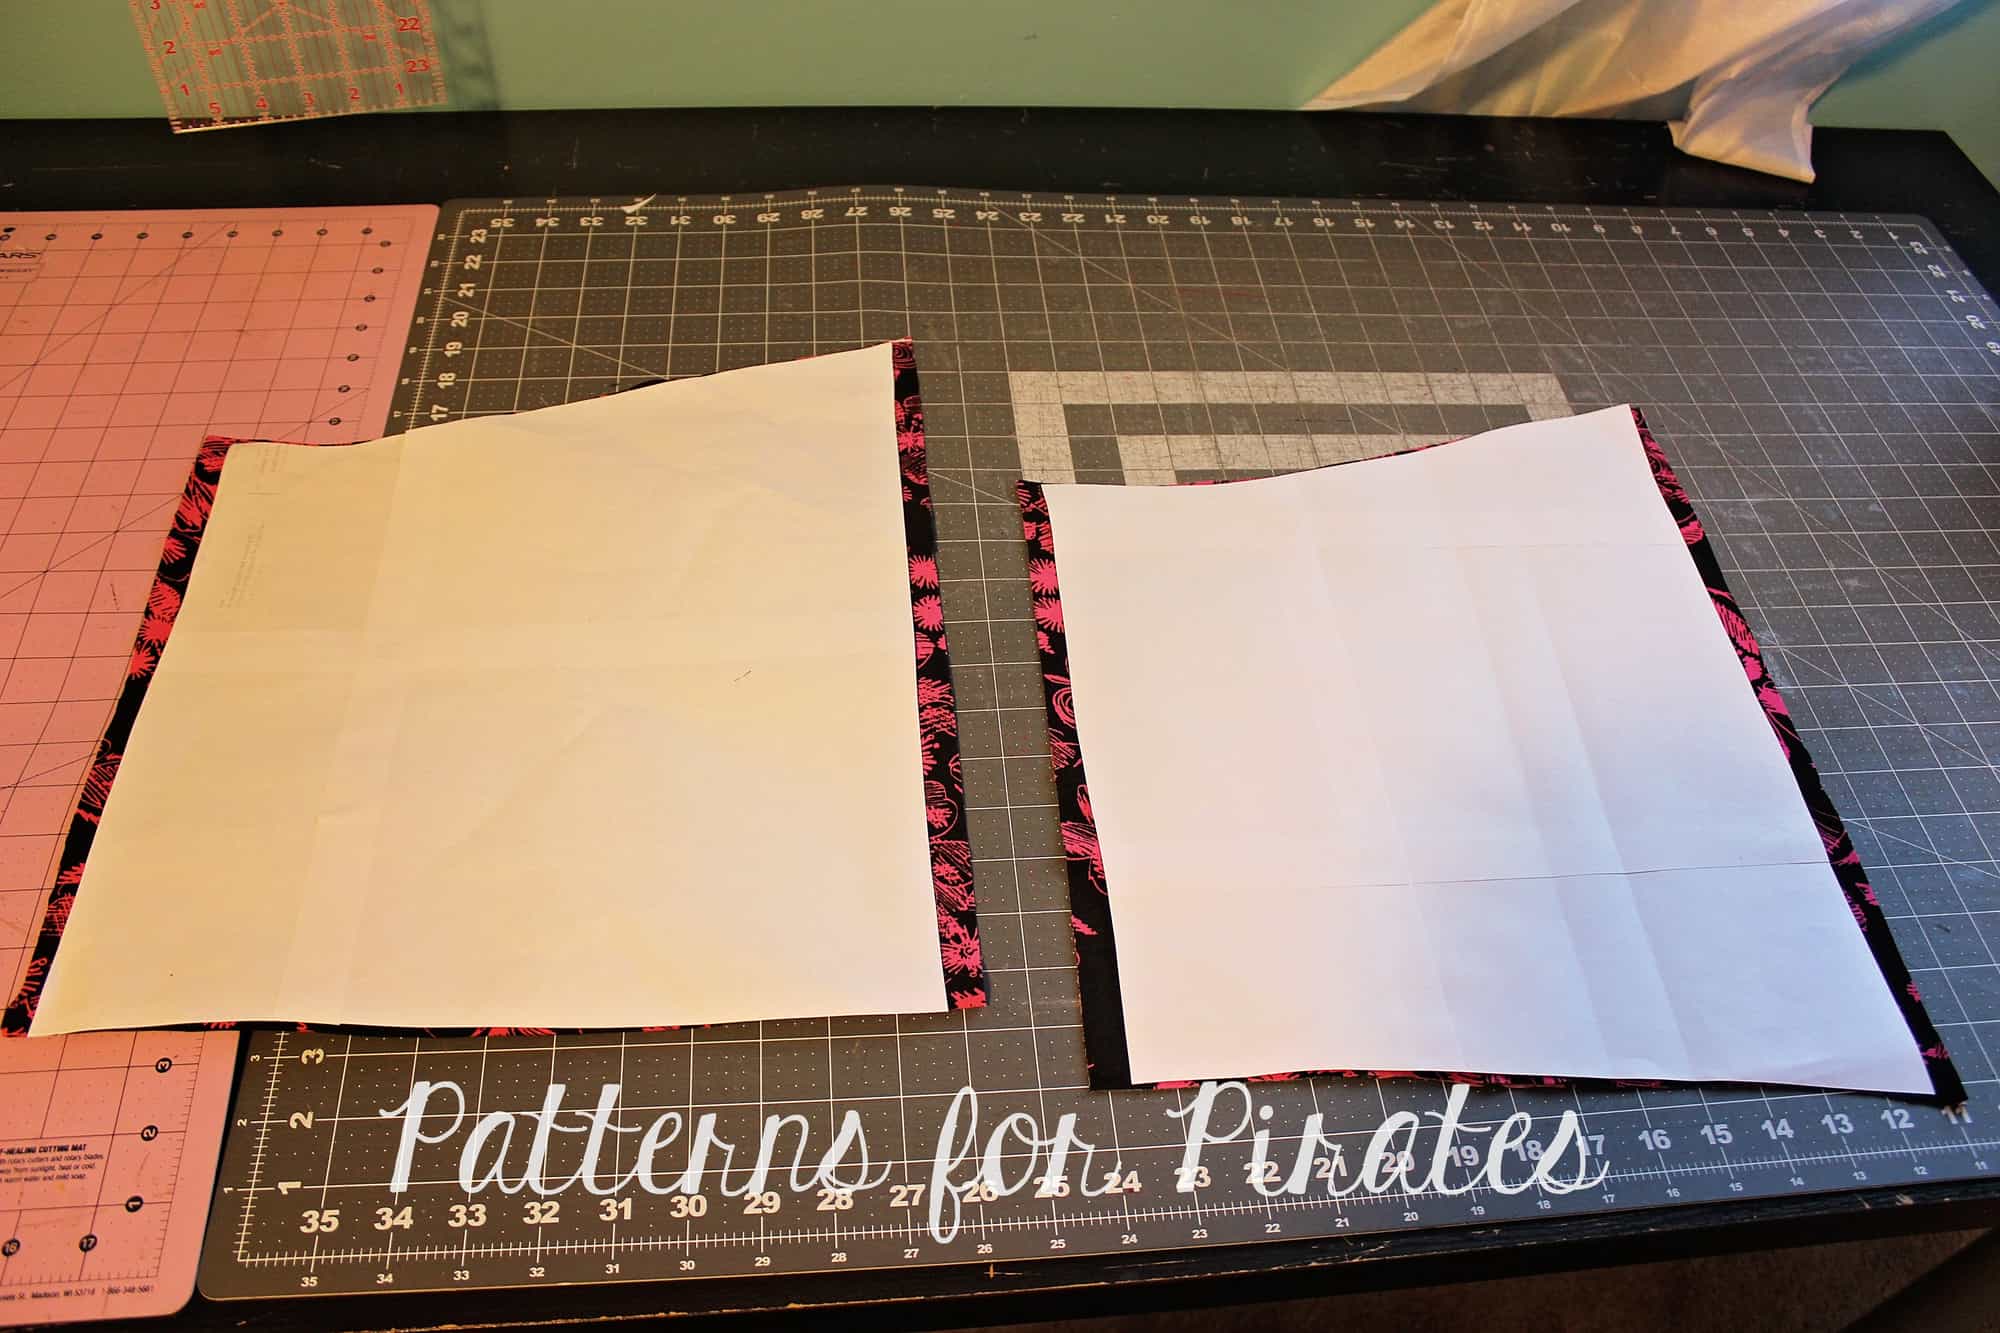
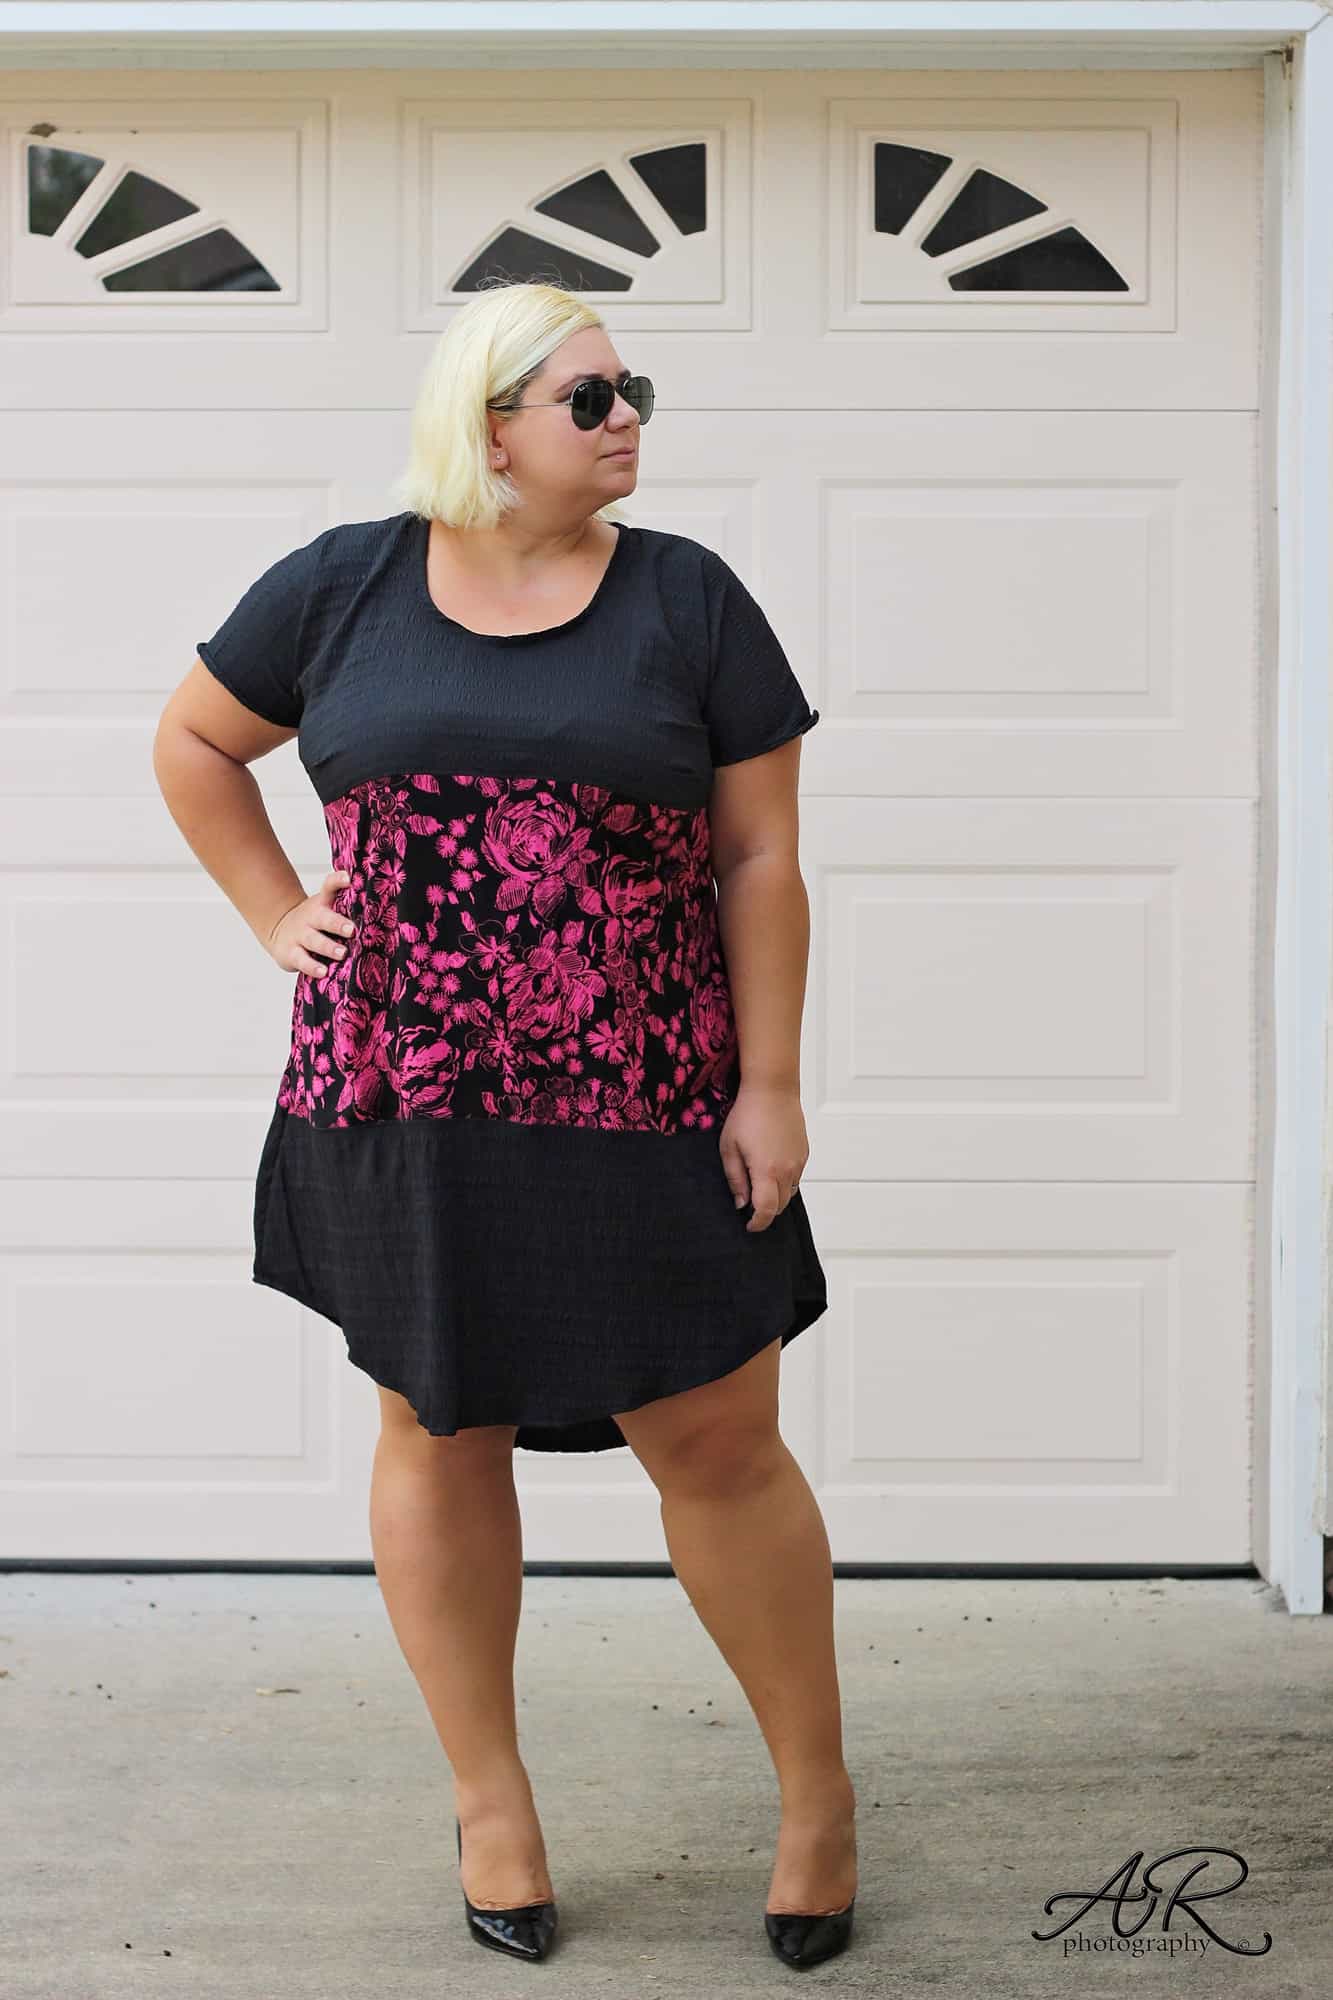
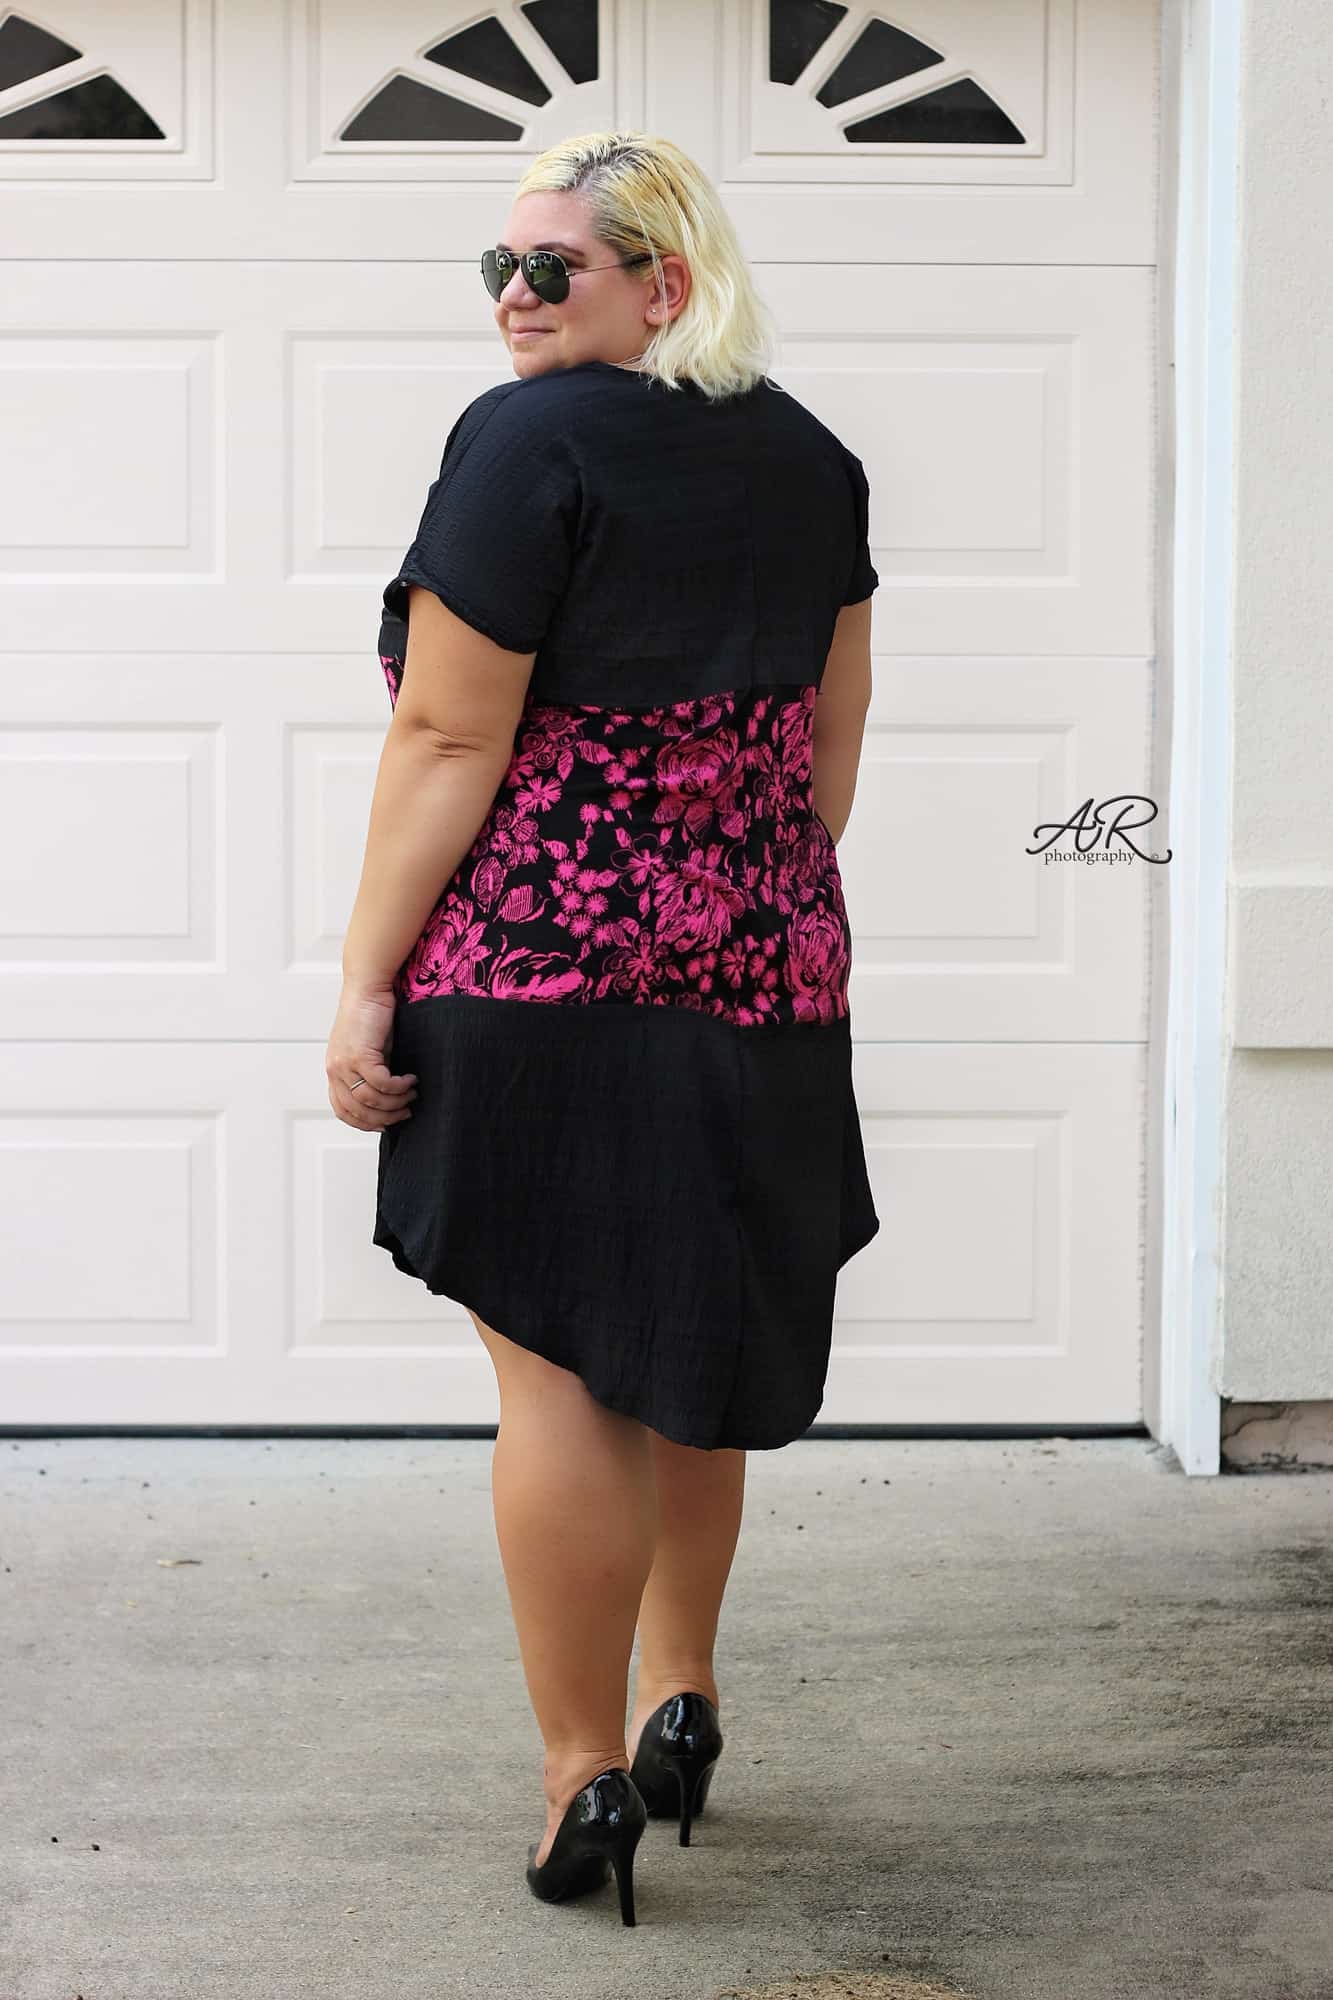
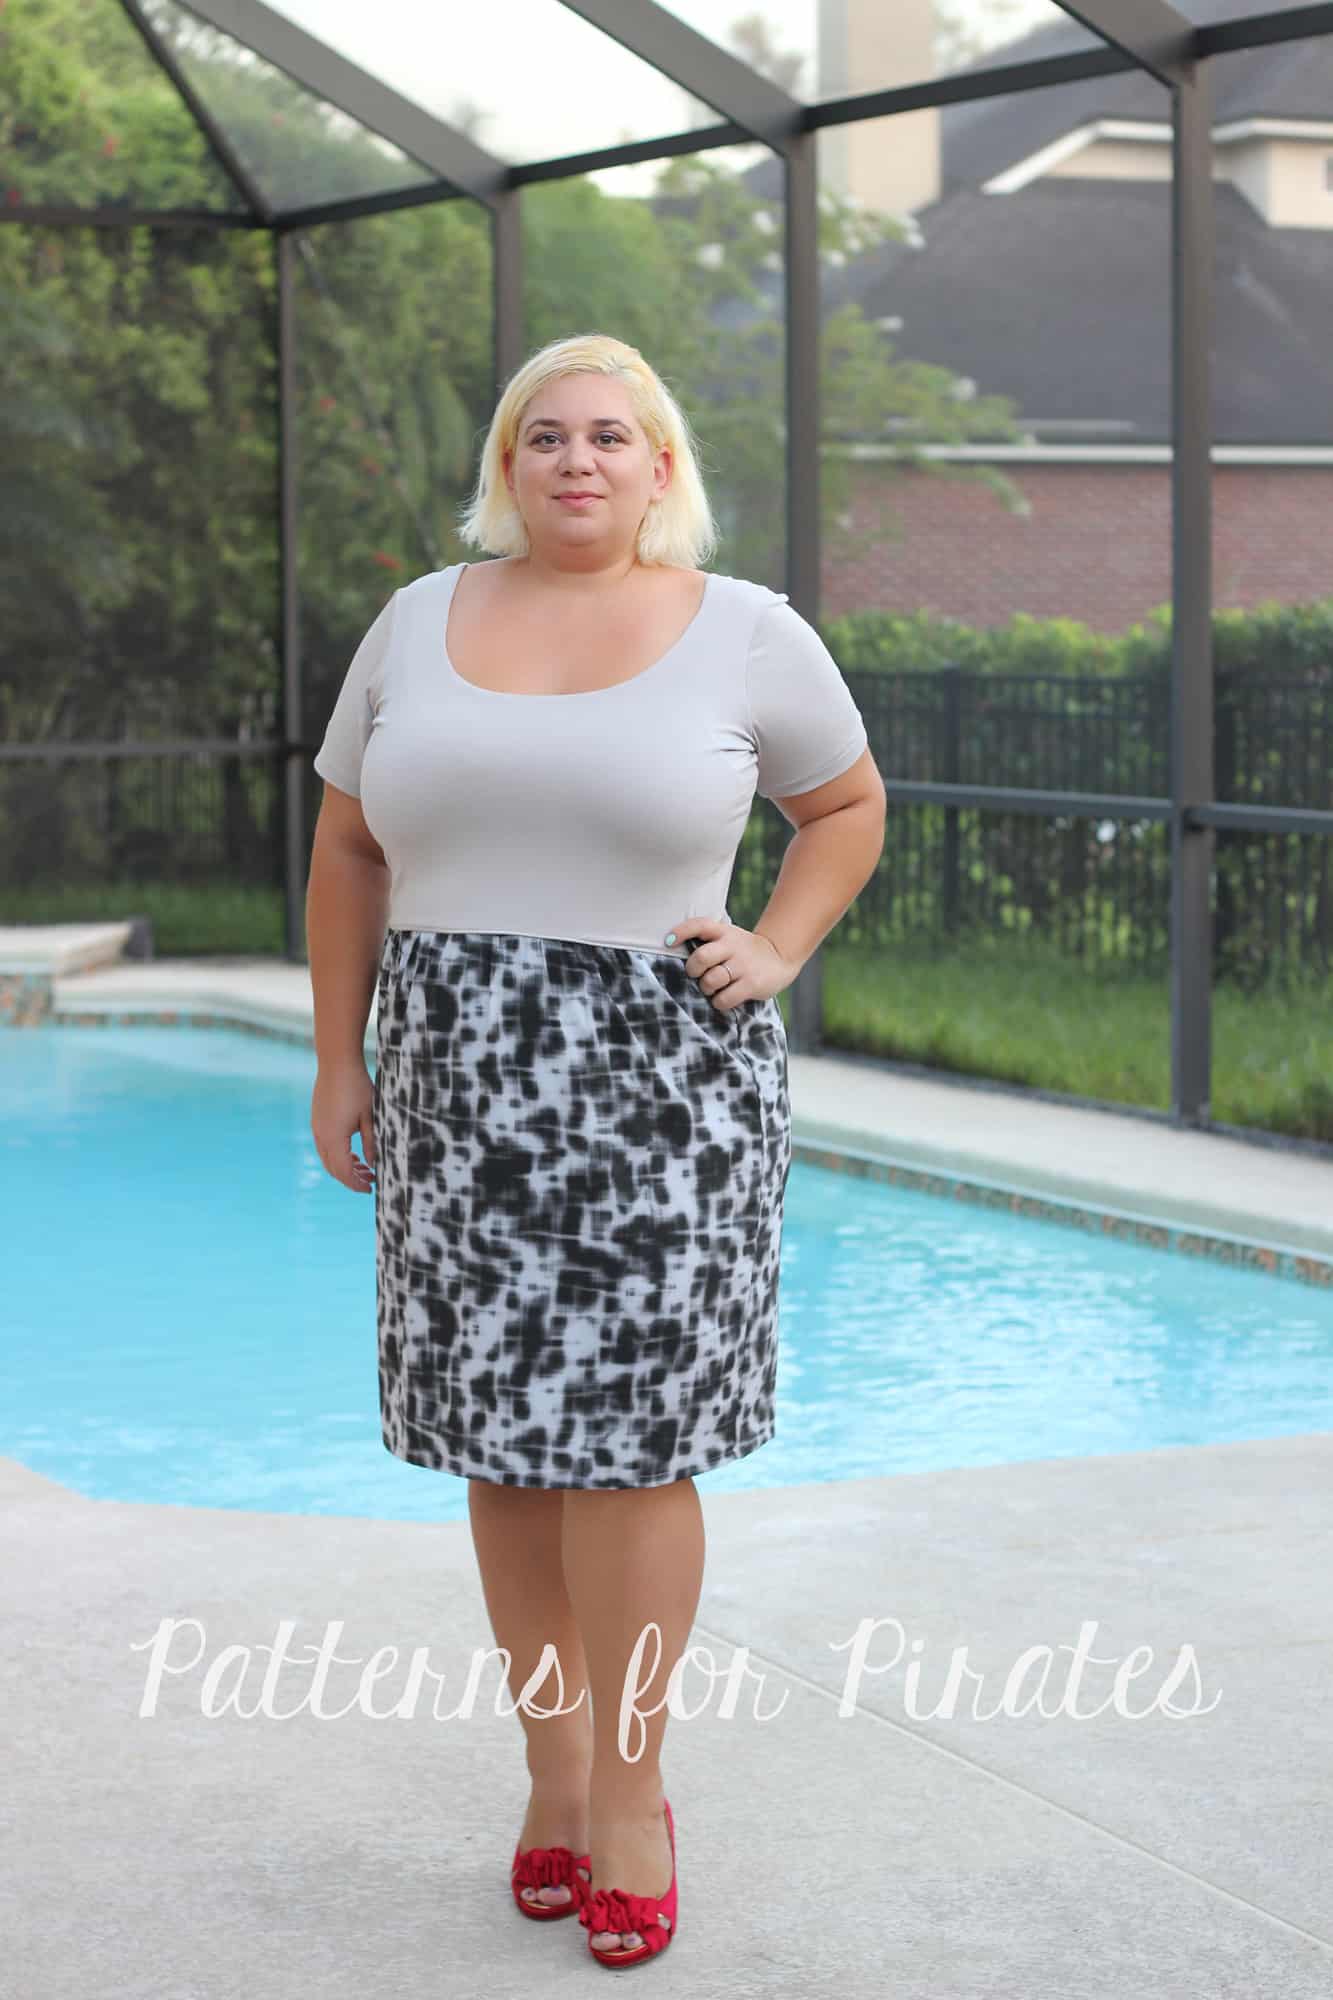
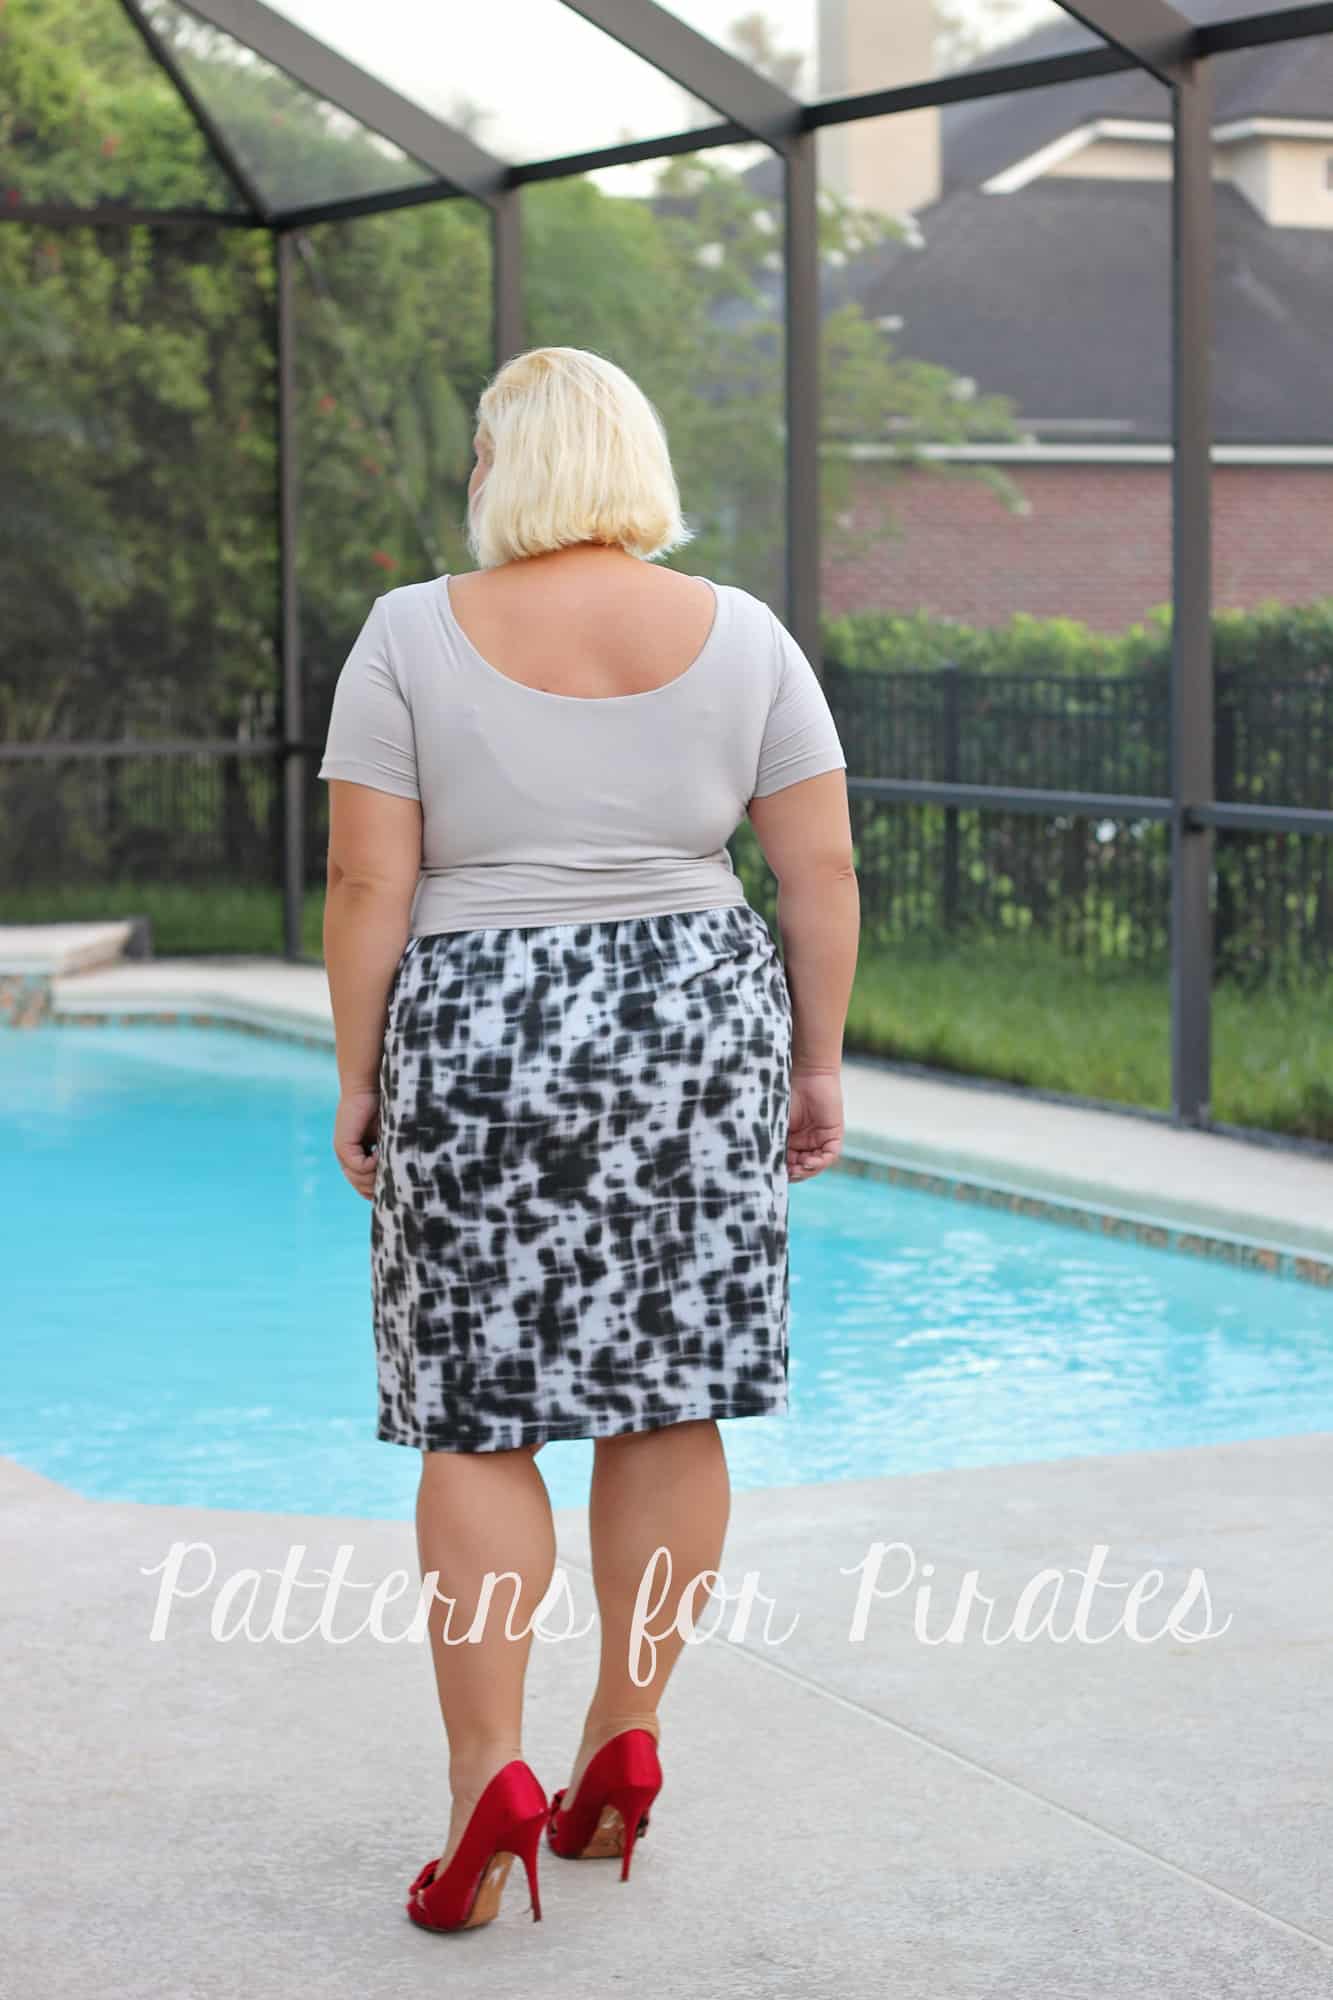
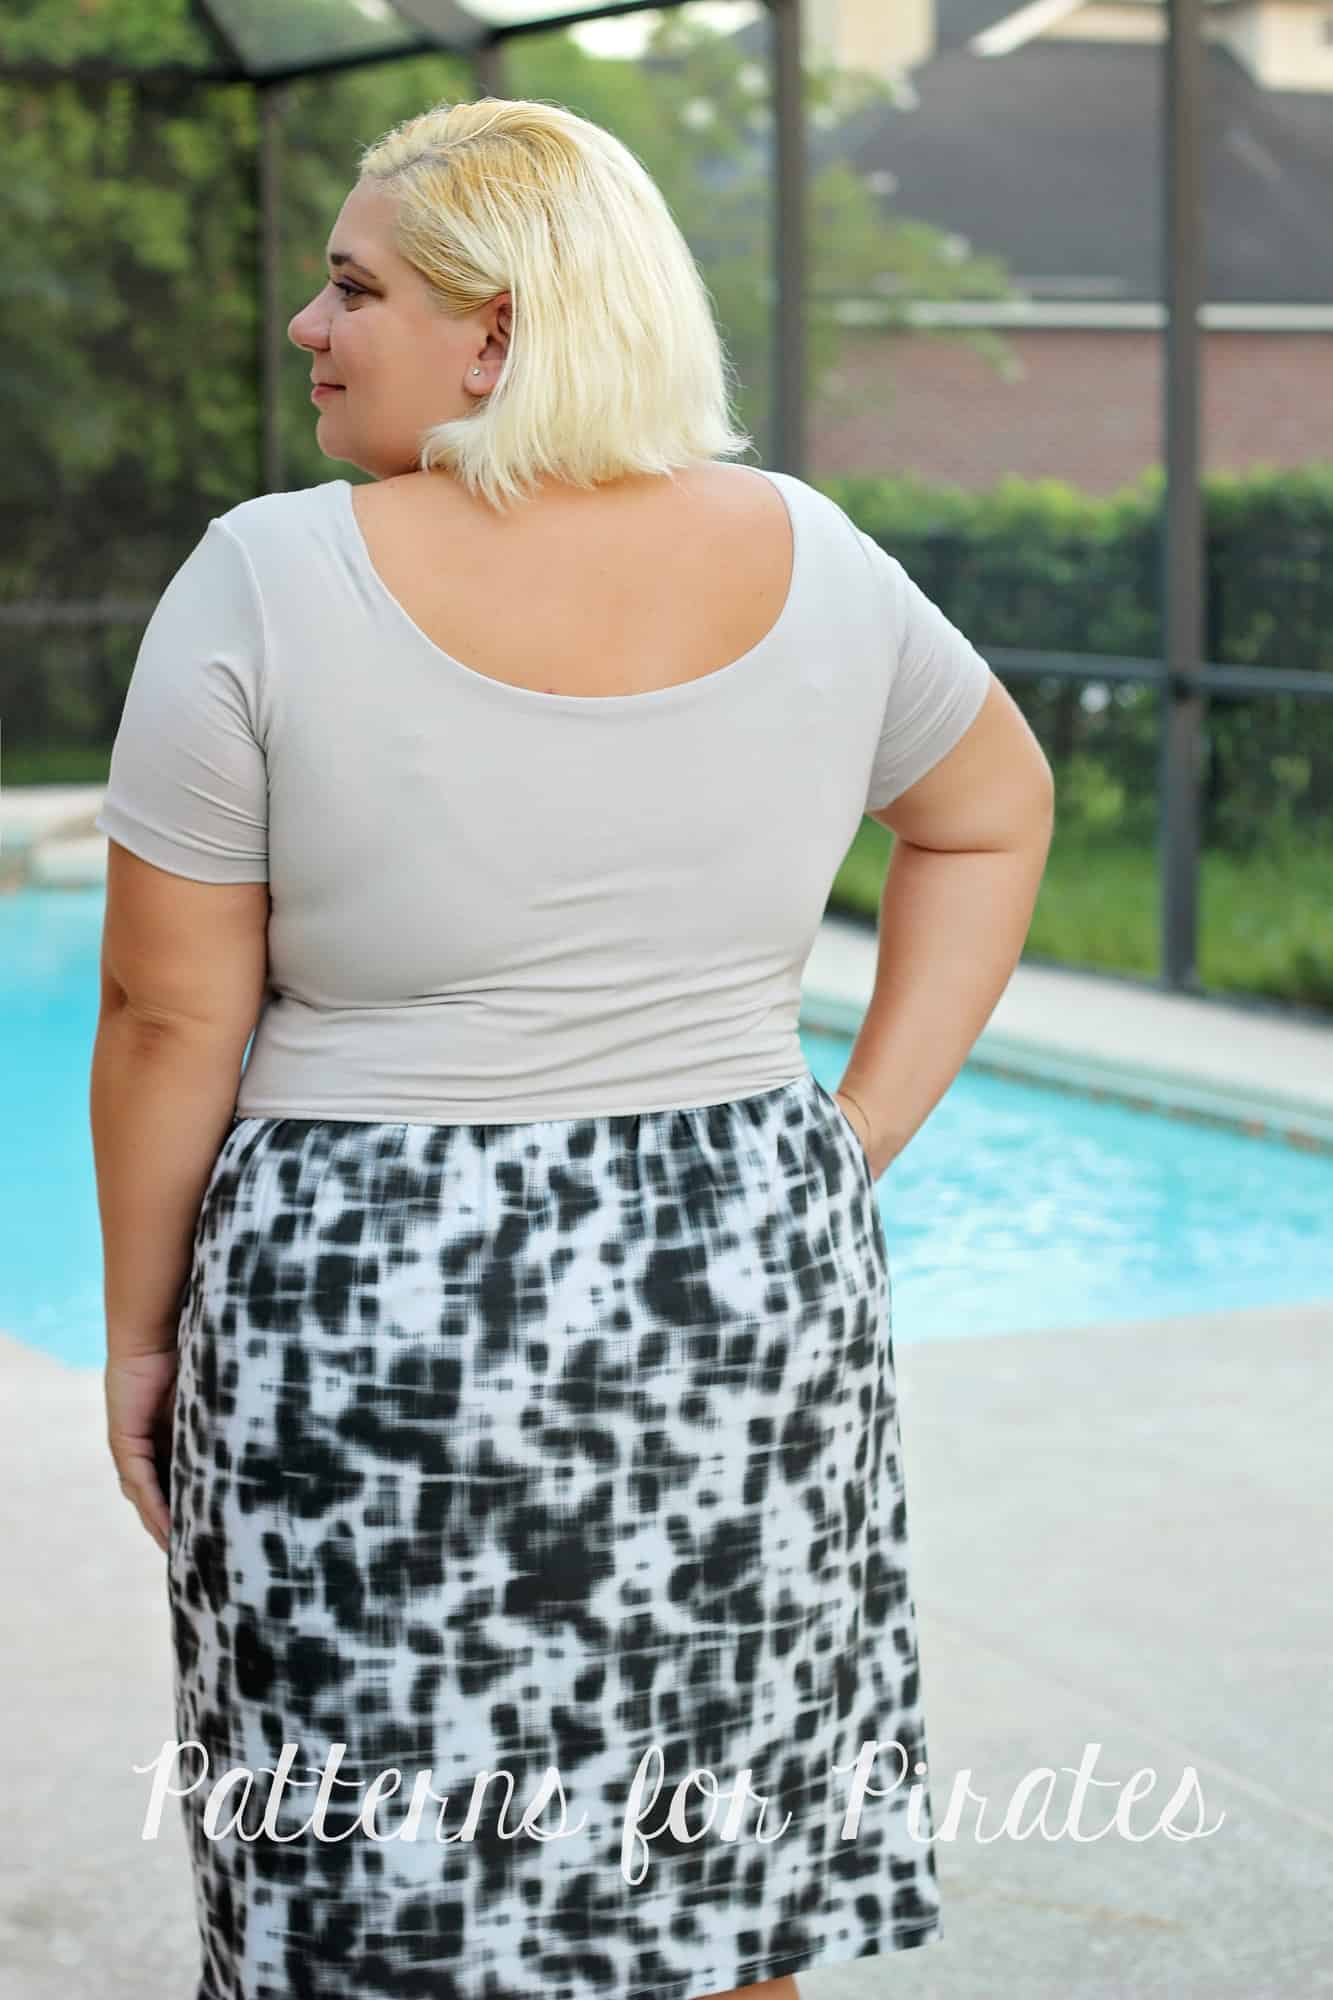
Color-Block Bodice

Keeping with the concept of separates, but perhaps you still wanted a dress. Doing a color-block bodice gives you a chance to mix up your fabrics. Since there is already a crop cutline on the pattern pieces that hits at the natural waist, we will be using that as a guideline. Re-trace the crop cutline 1/2″ above and below it to create your seam allowance on both the front and back pattern pieces. Cut your new top bodice and bottom skirt from both front and back. For the back, you will have 2 back top bodices (mirror image) and 2 back bottom skirt (mirror image) pieces. For assembly, with right sides together, stitch with a 1/2″ seam allowance the front bodice to the front skirt. Repeat for both back bodice and skirt pieces. Continue construction as provided int he pattern. 🙂


…..
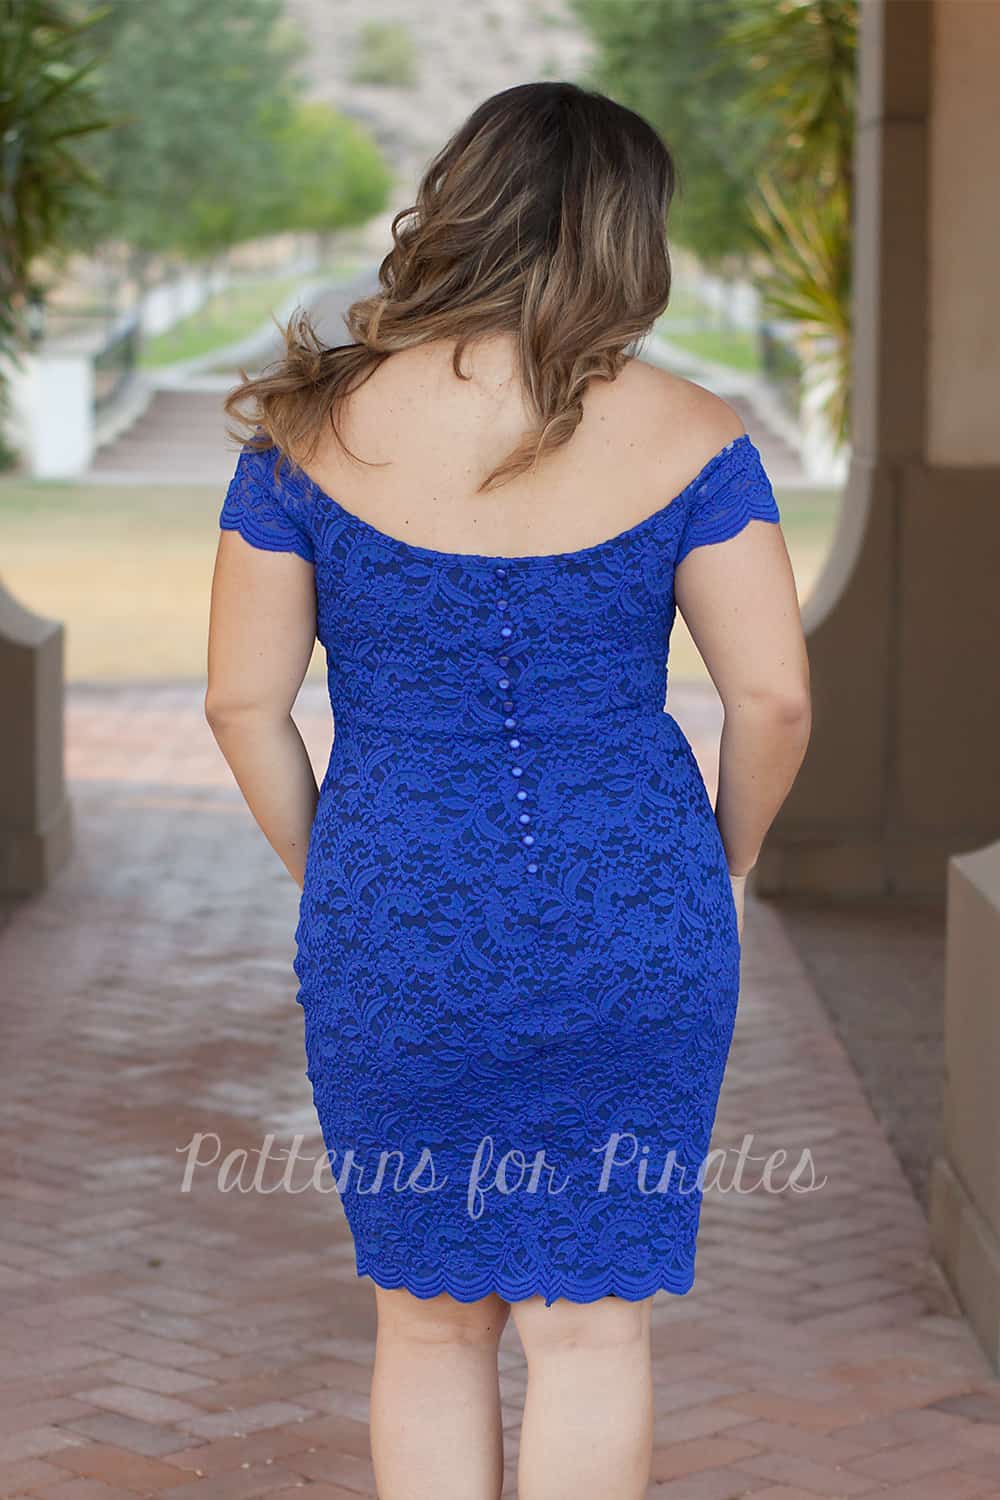
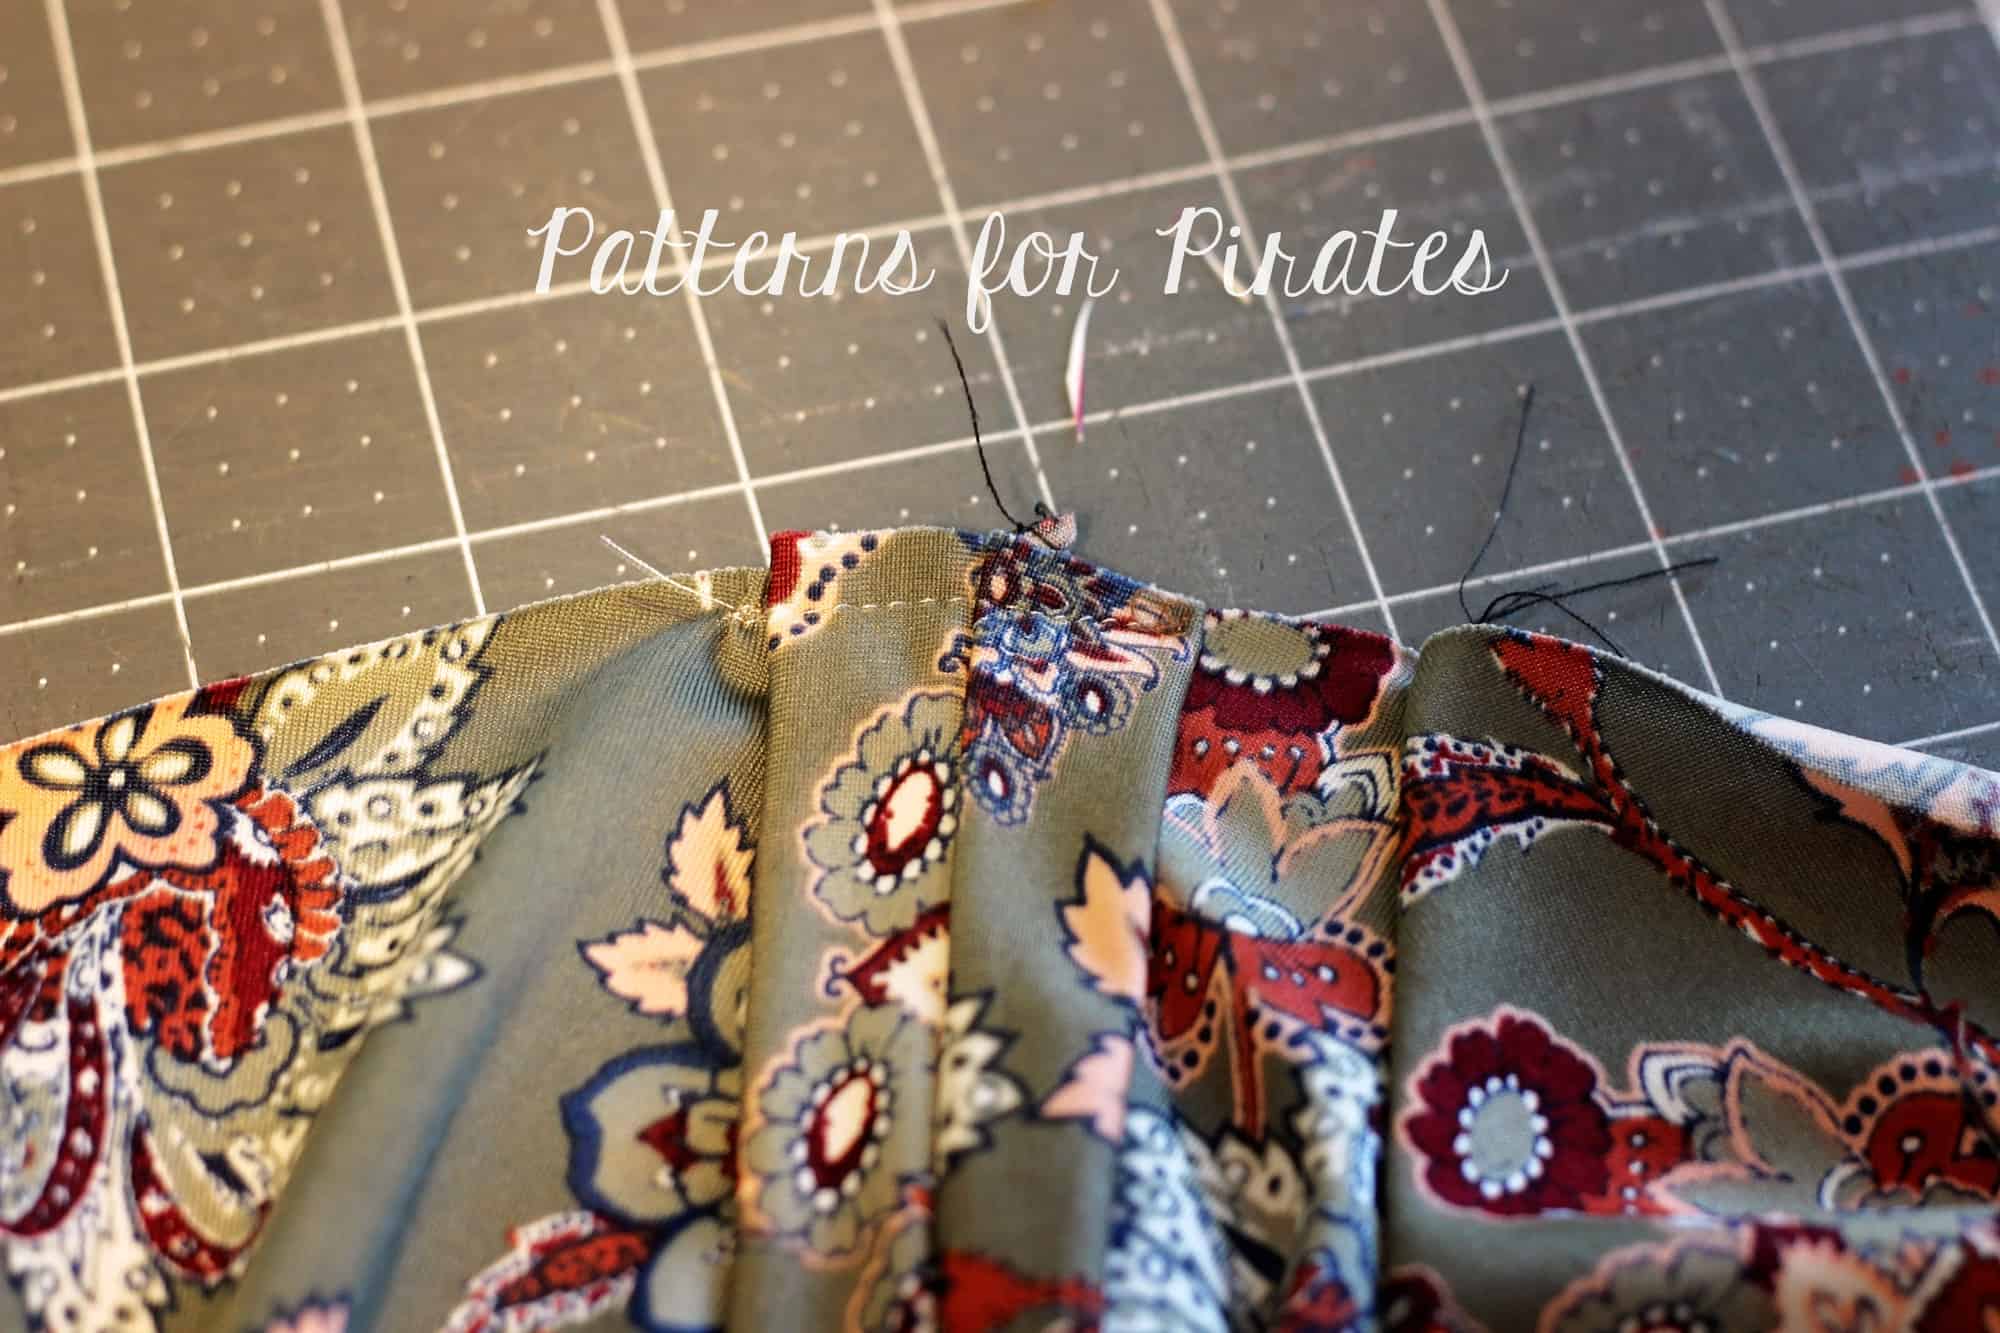
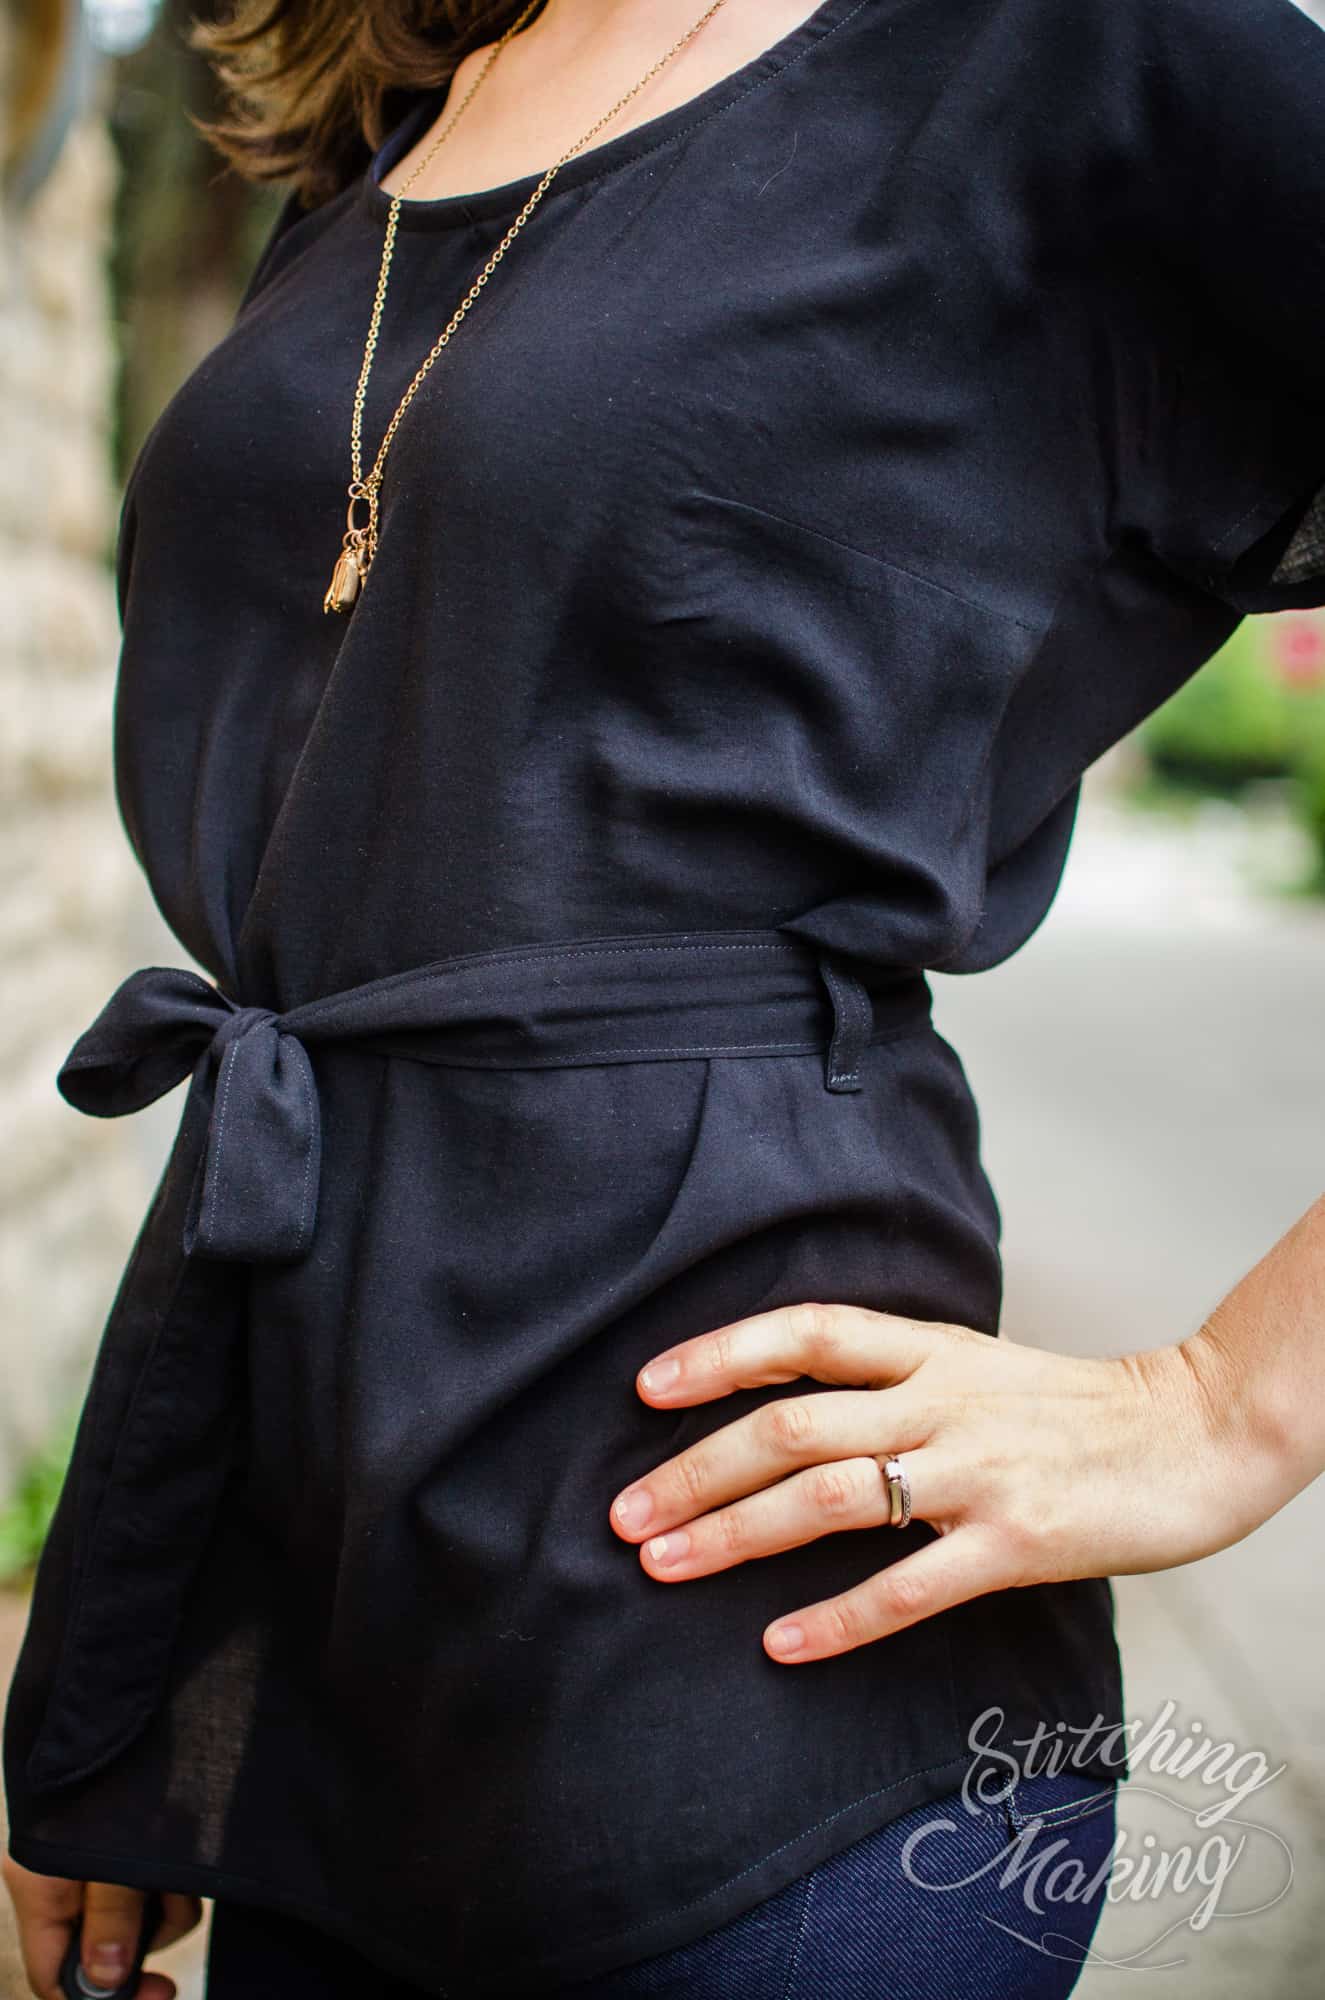
Decorative Button Back

Adding embellishments to your dress can give it some extra special details that will set it apart from the next. Since the pattern is drafted for stable knits, you do not need a zipper or functional buttons to put it on, so these buttons are purely for decorative reasons. I love the finishing touch it gives the back. Using the center back seam as a guideline, I hand stitched pearl buttons every 1/2″. I used the zipper lengths as mentioned in the tutorial as a guide where to end my button placement. For this version, I used a total of 13 buttons. ”


…..
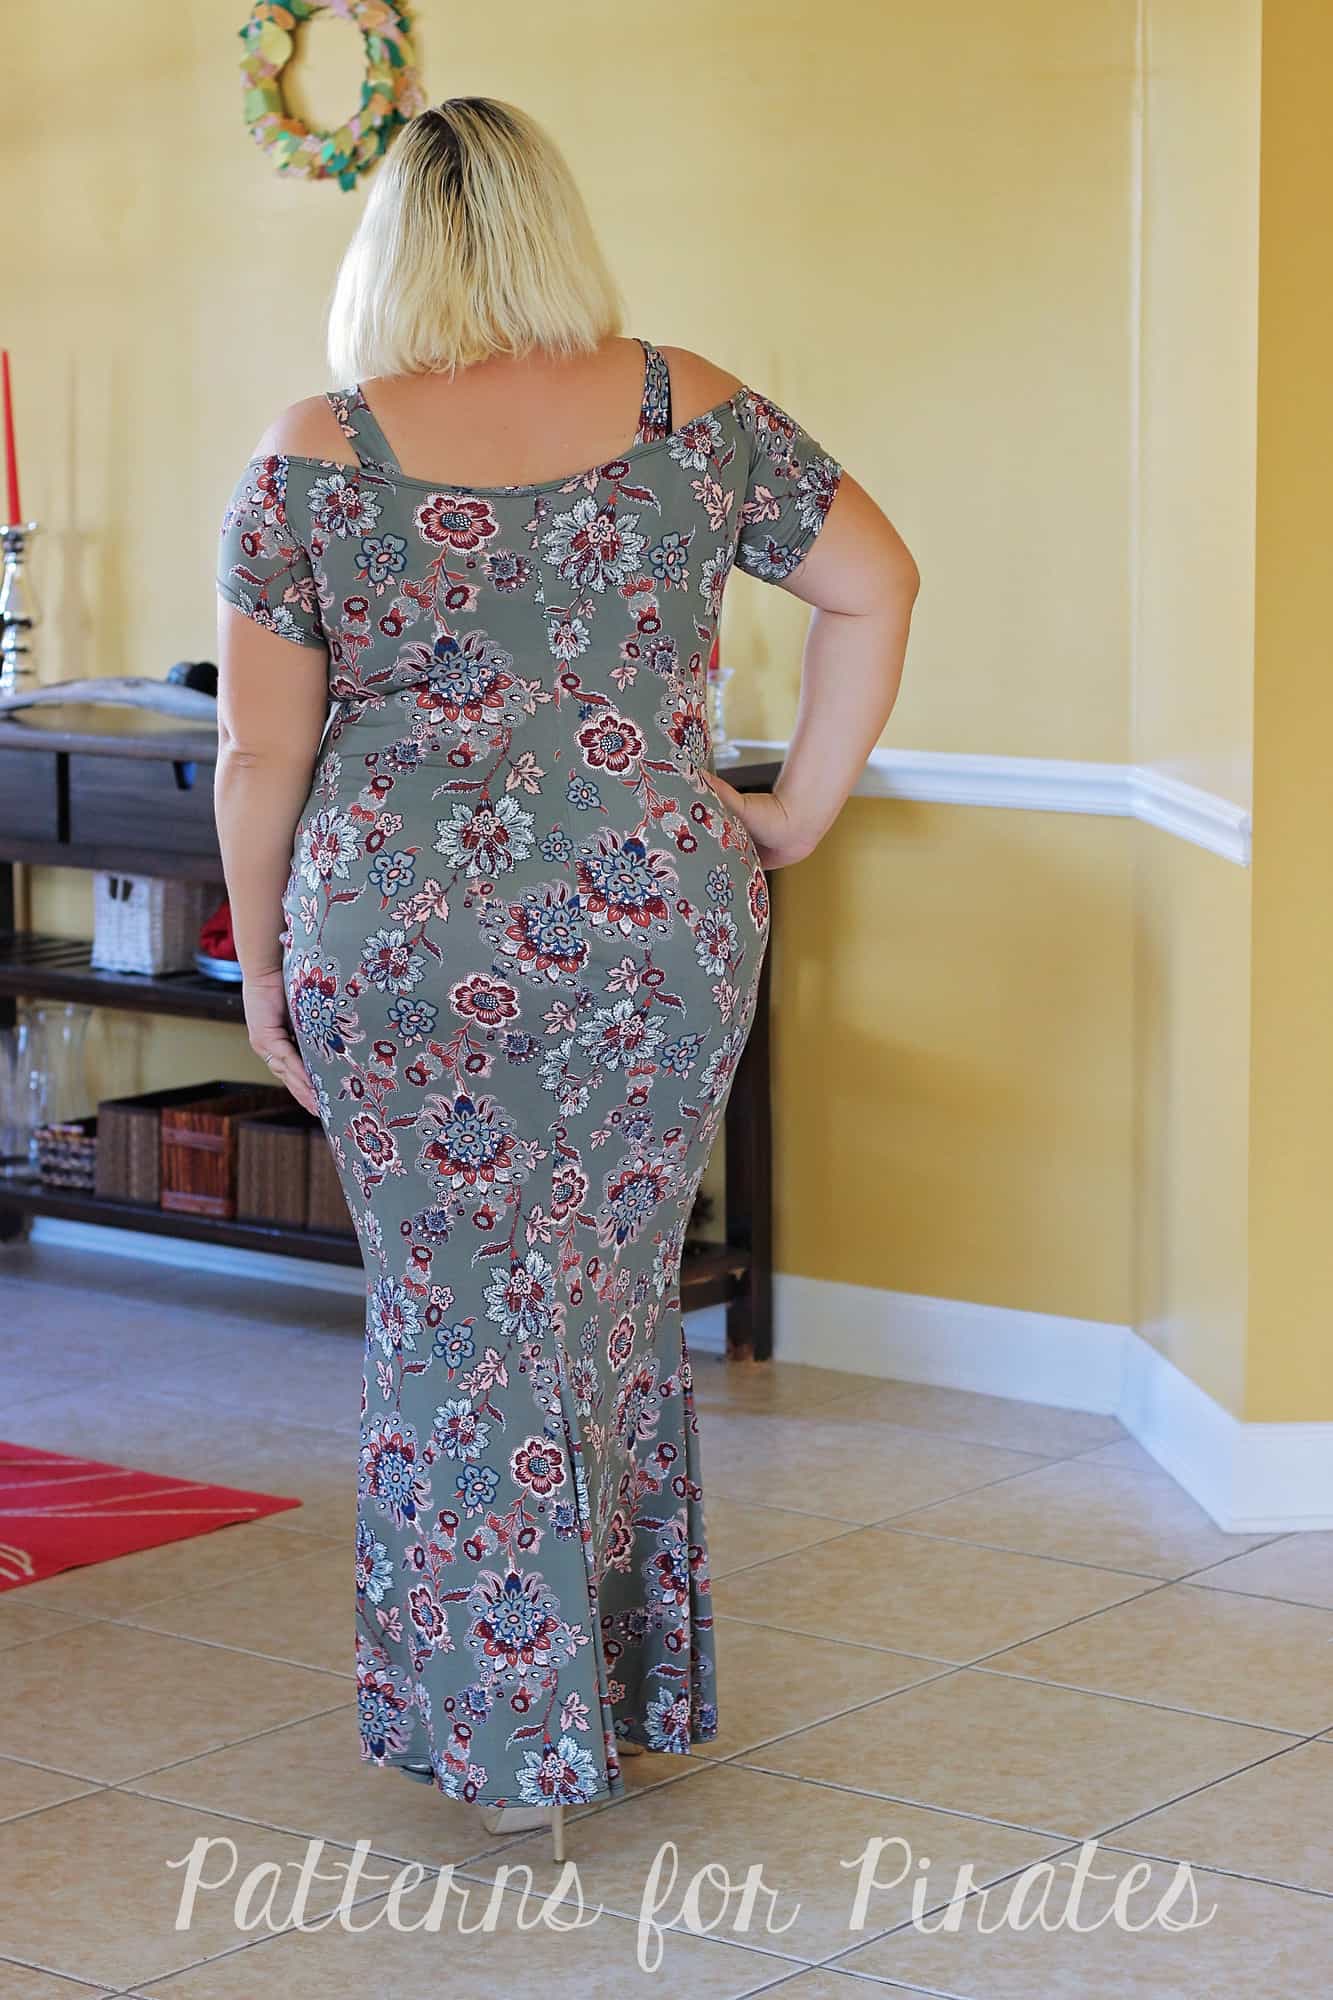
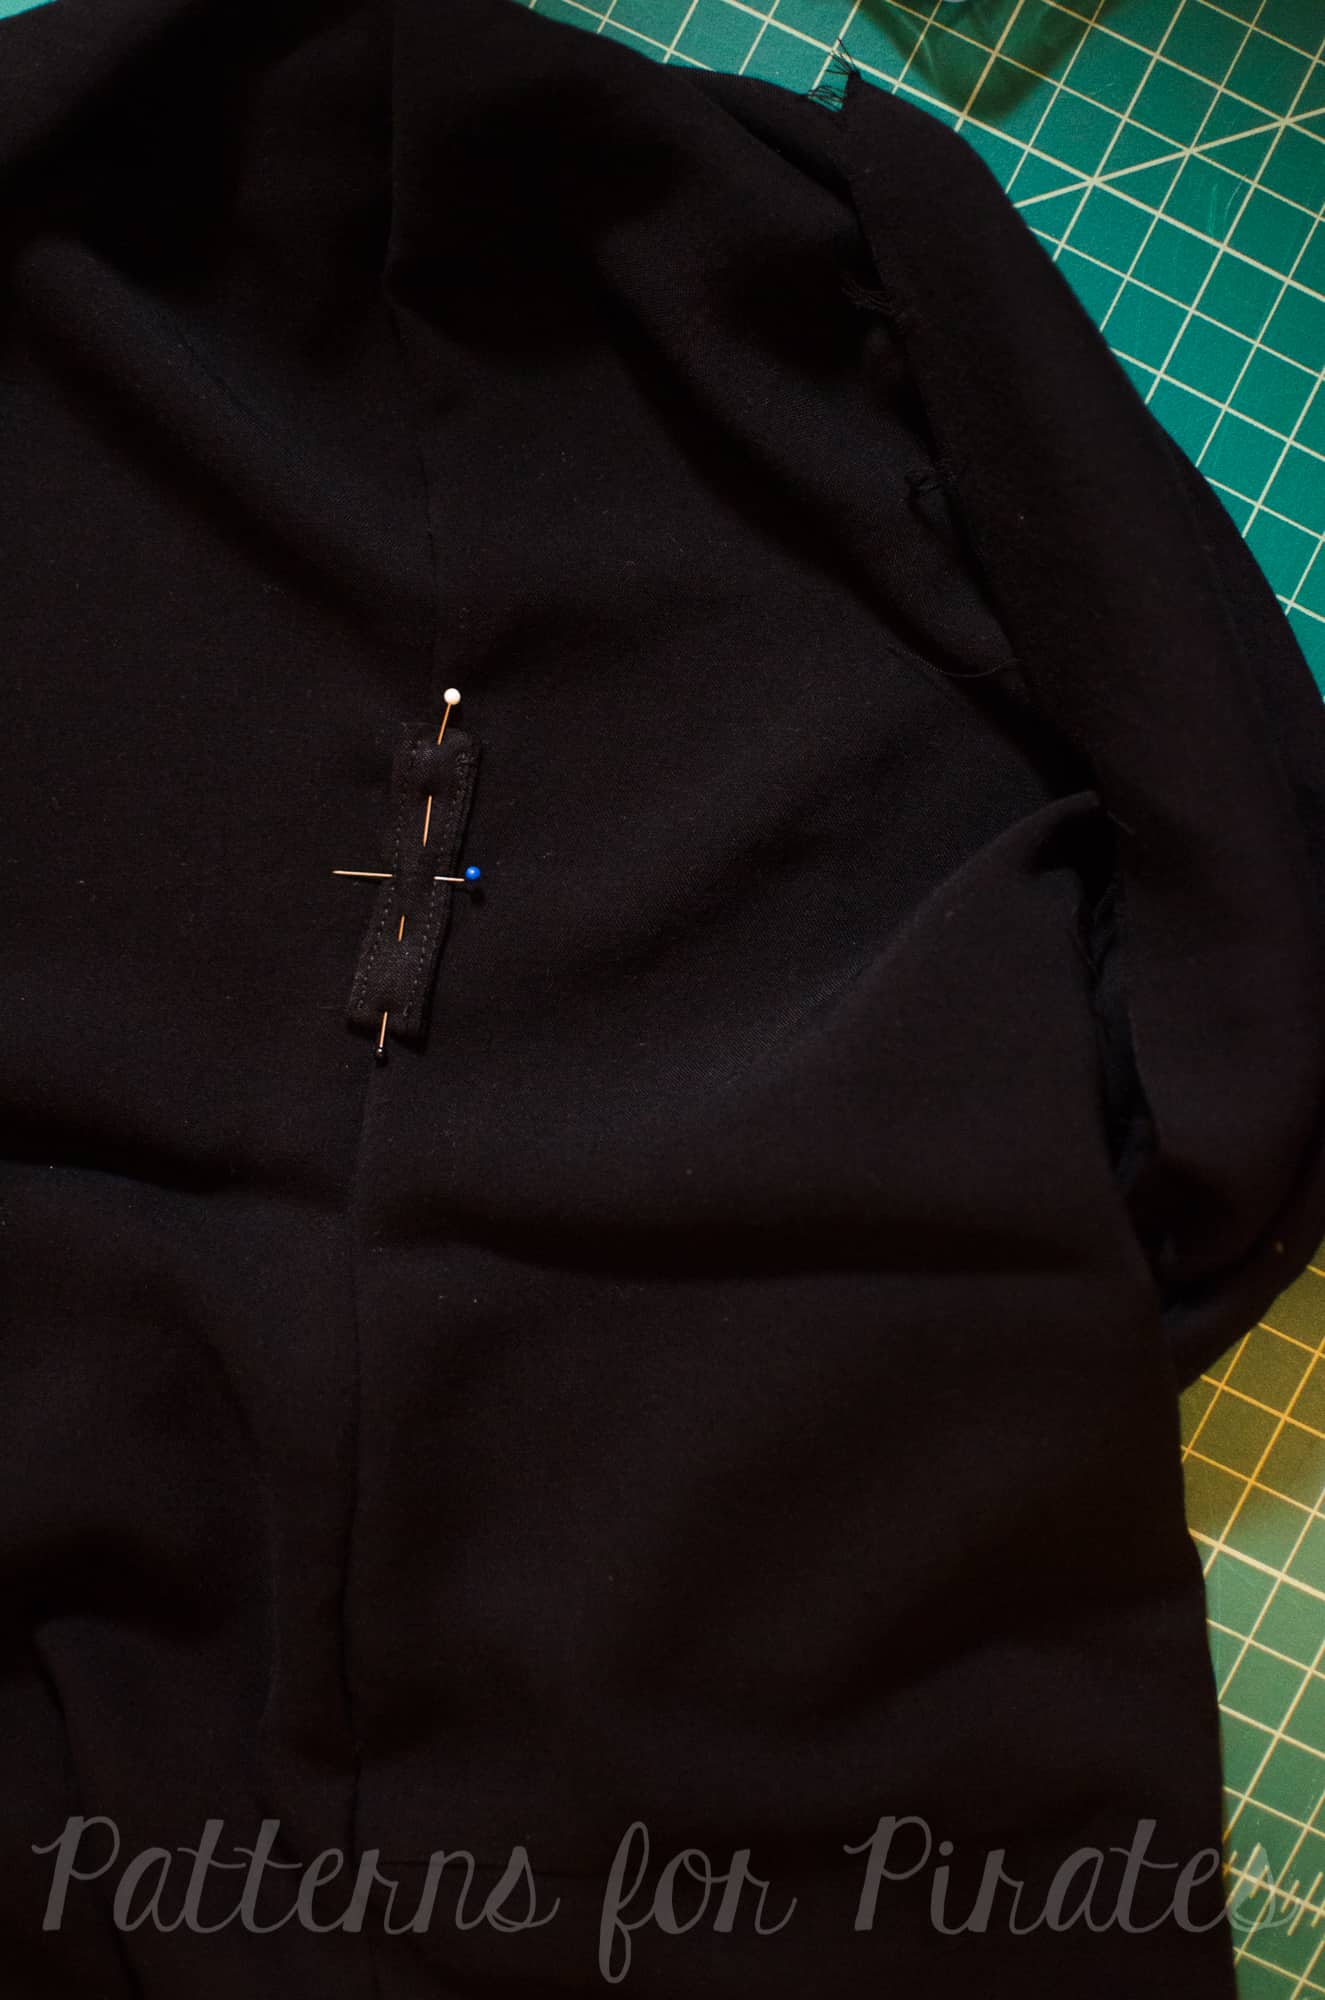
Straps for off the shoulder

Love the off the shoulder but hate wearing strapless bras? No problem! Let’s add some cute straps to the Wiggle off the shoulder dress that will cover your bra straps. Print the off the shoulder option of the pattern and sew it up as per the pattern tutorial. Stop at the neckline finishing steps. Cut two pieces of fabric 4″x 9.5″. These will be your straps. The length of your straps may vary slightly based on the size you make.

Fold the straps lengthwise and sew them side with a 1/2″ seam allowance.
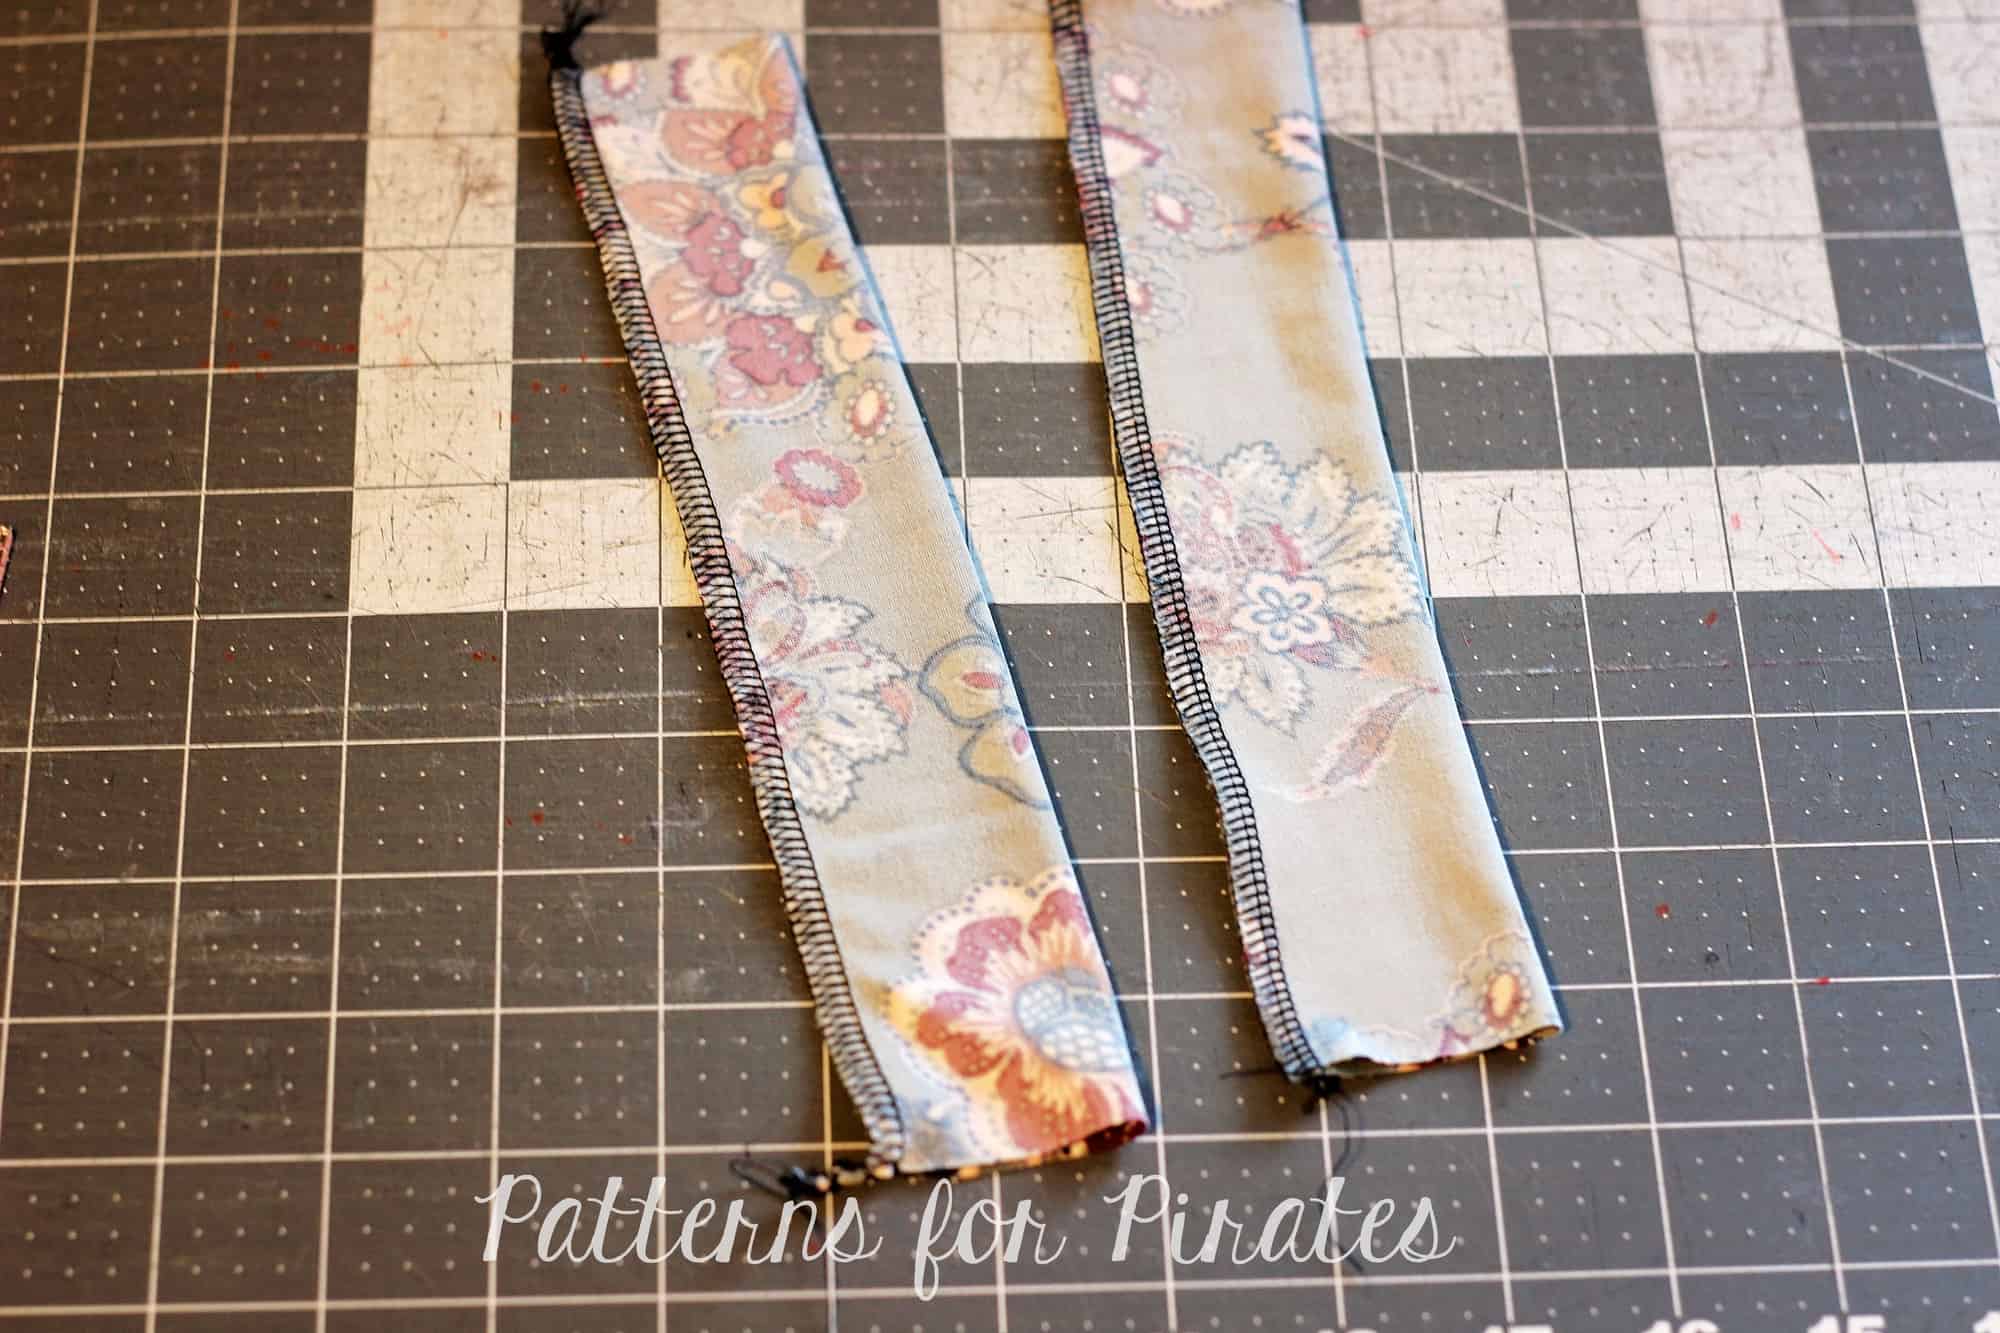
Turn the straps inside out and press them with the seam in the center.

For perfect straps placement, try the dress on with your favorite bra. Mark with a pin or a clip where the bra straps will be.
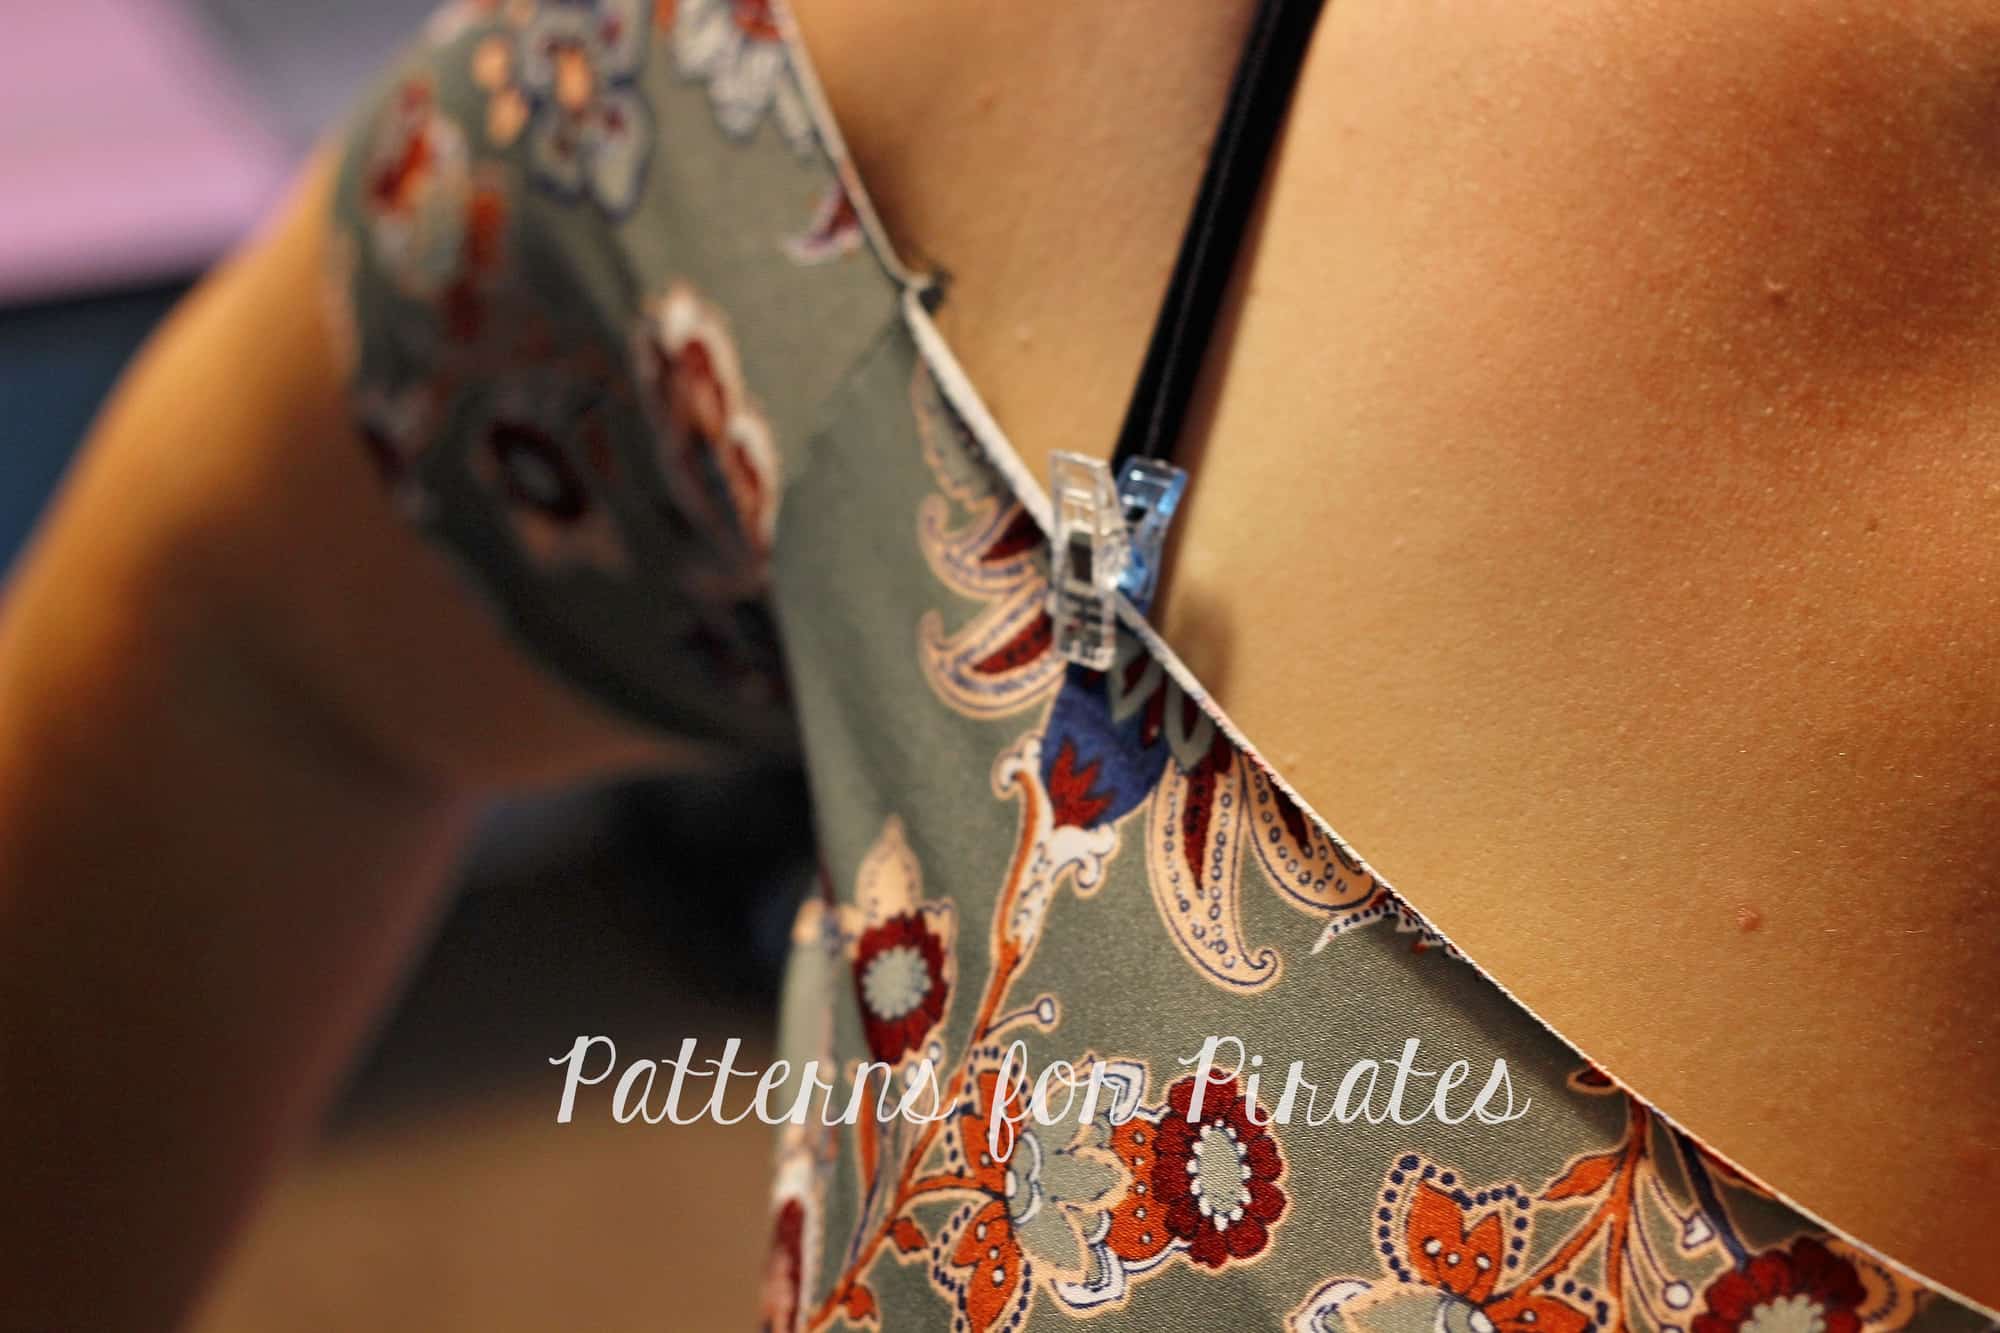
Sew the straps to the dress with the right sides together. Finish the neckline as per the pattern tutorial.
That’s all! You now have yet a new style of the new Wiggle dress!


…..
Sleeveless

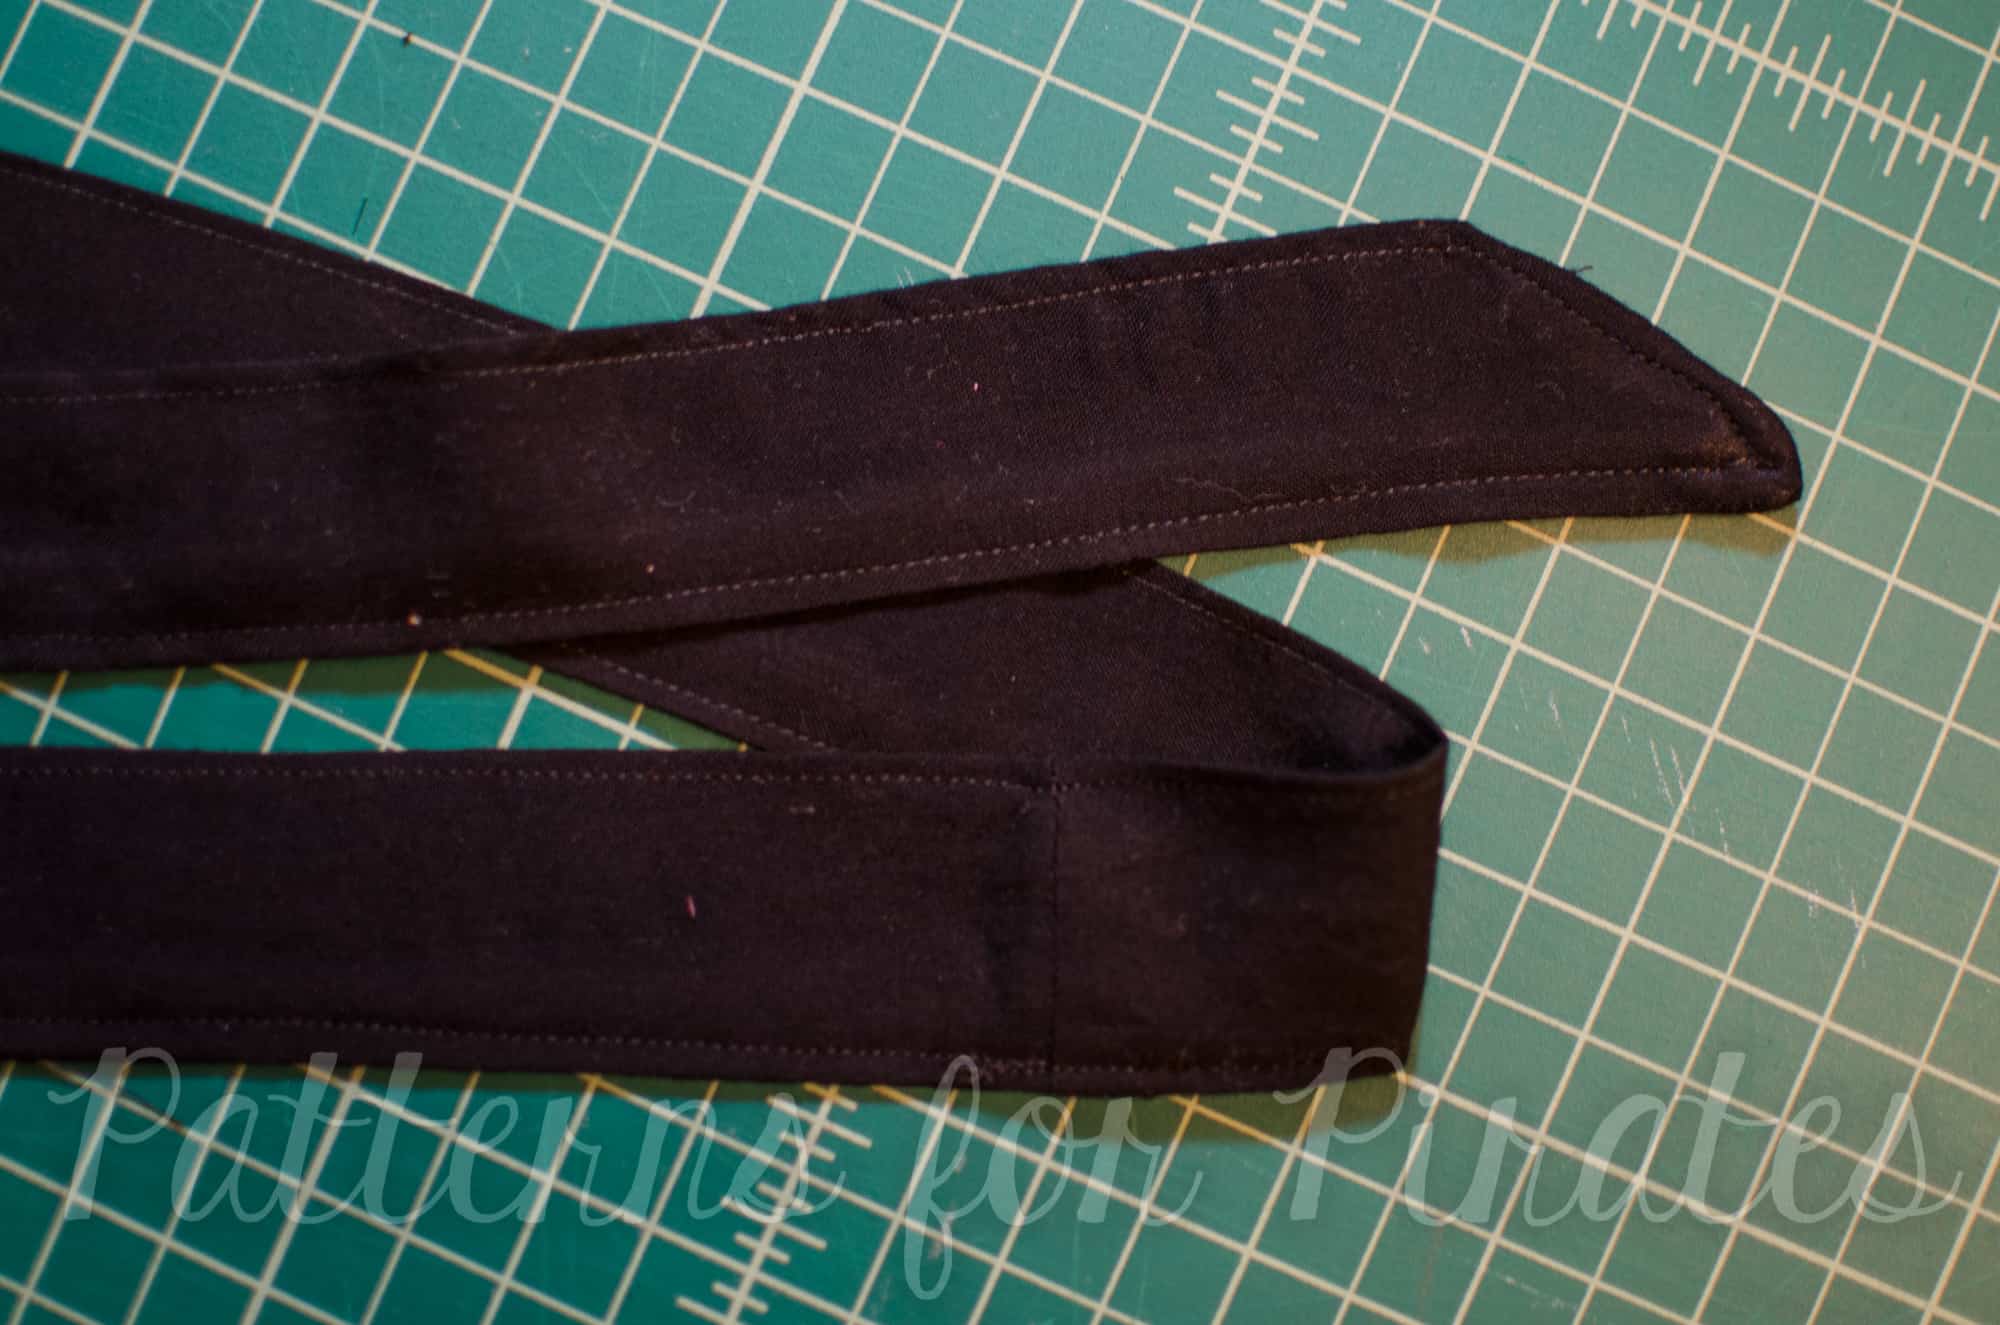
The Wiggle Dress is already packed with soo many options and great for every season but I don’t know about anyone else but summer here is HOT!! I can not handle any type of sleeves at all so a sleeveless version of the Wiggle dress would be what I would want for summer and lucky for me it is a really quick and easy hack. Let’s get started.
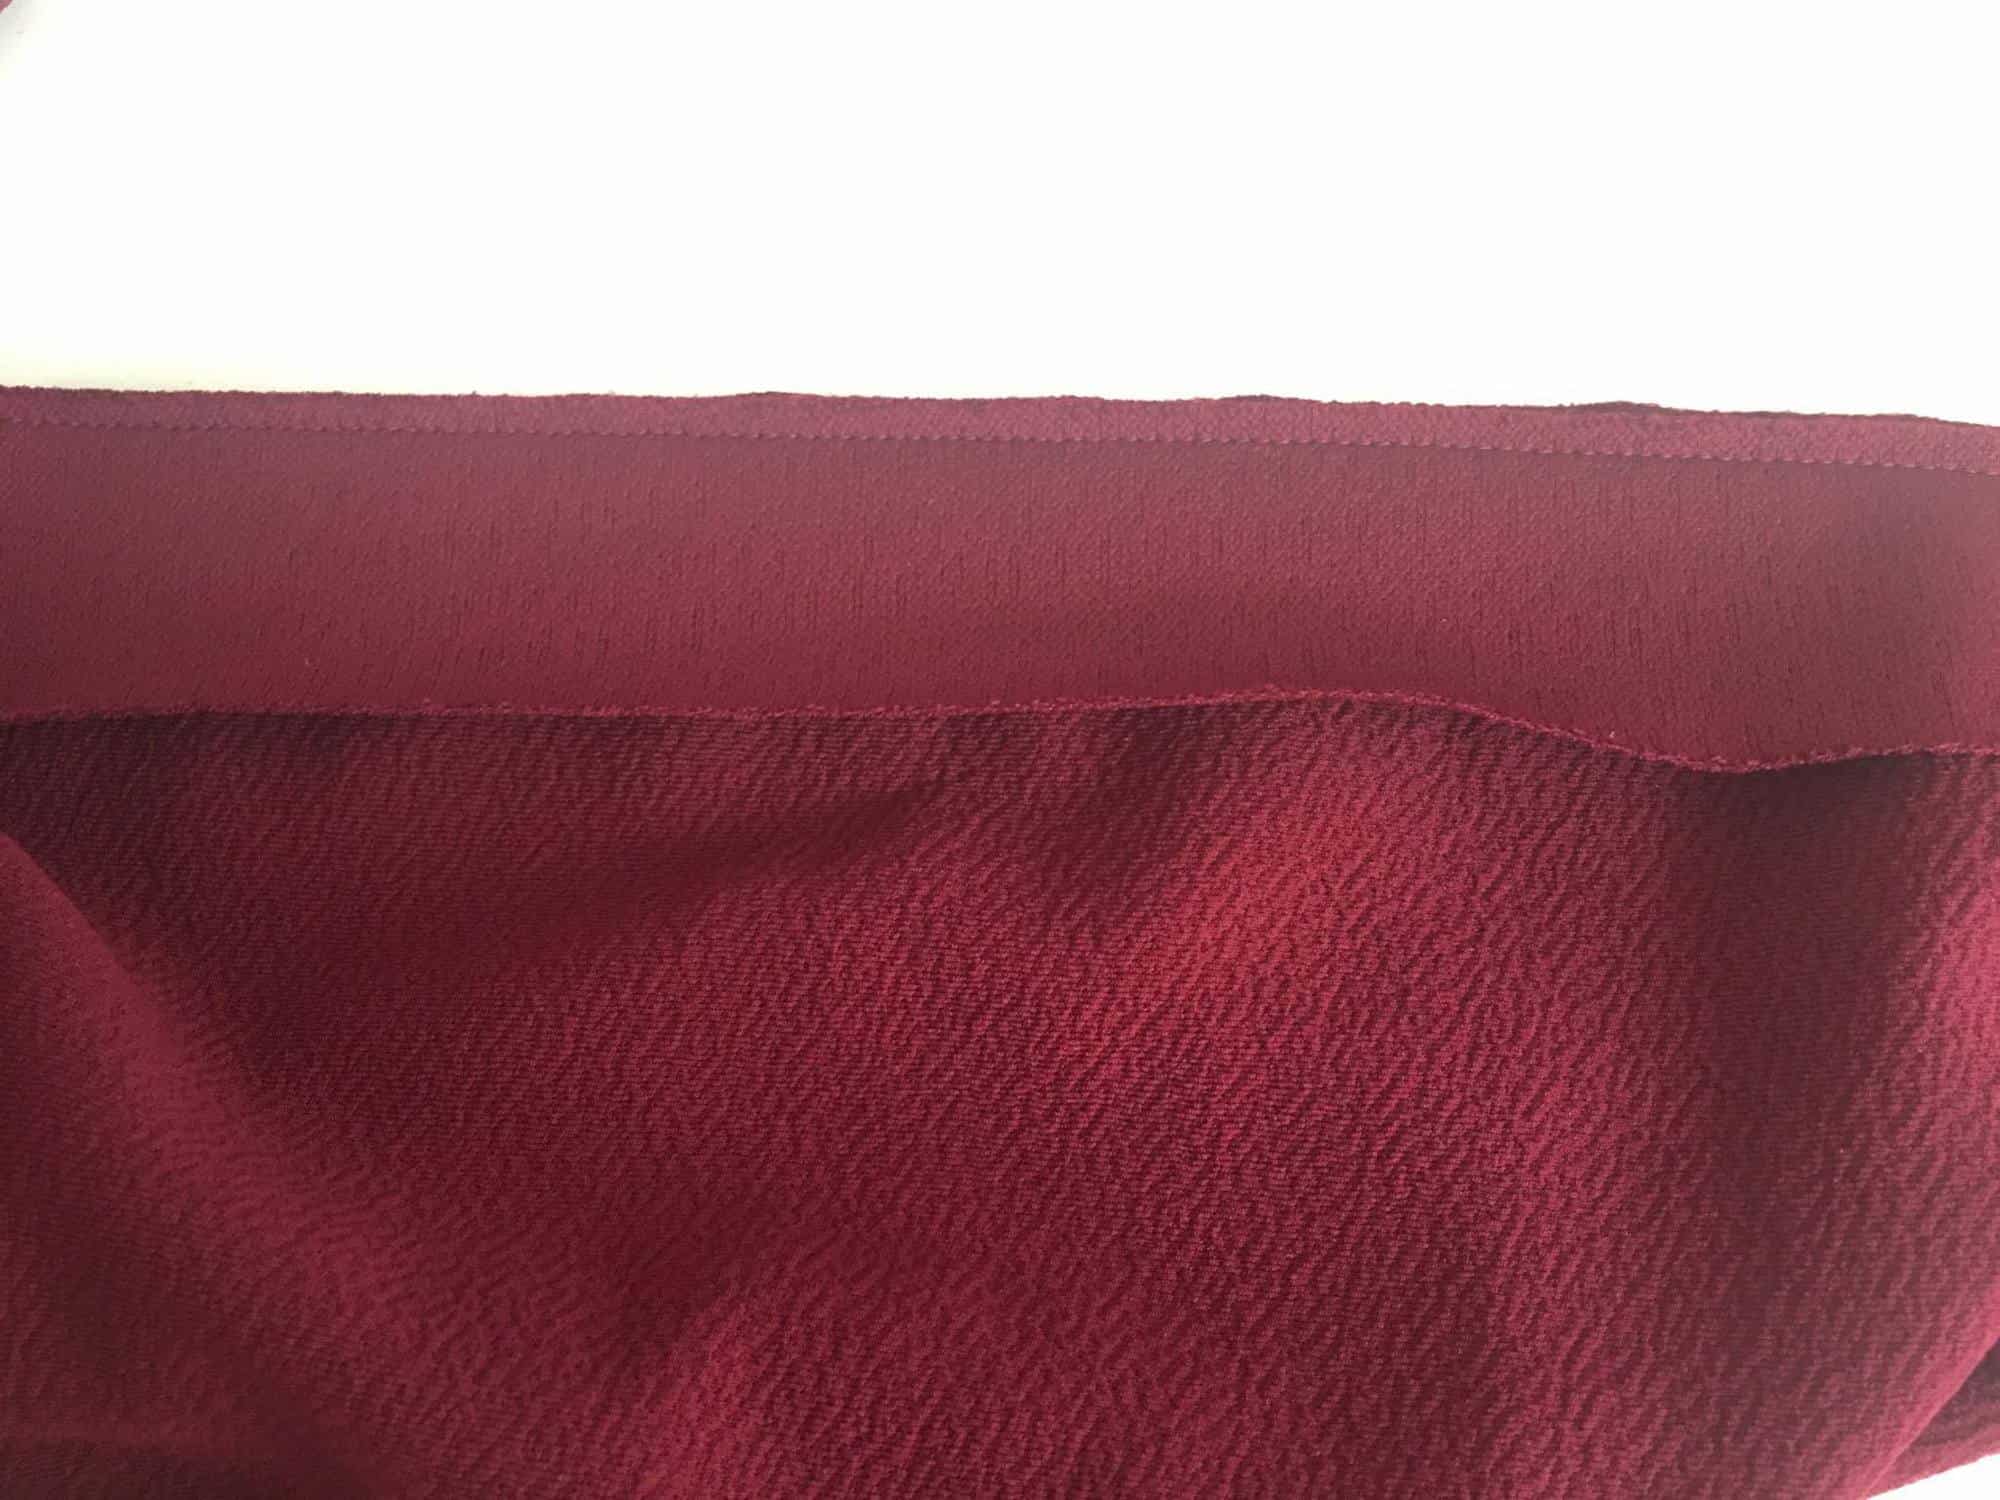
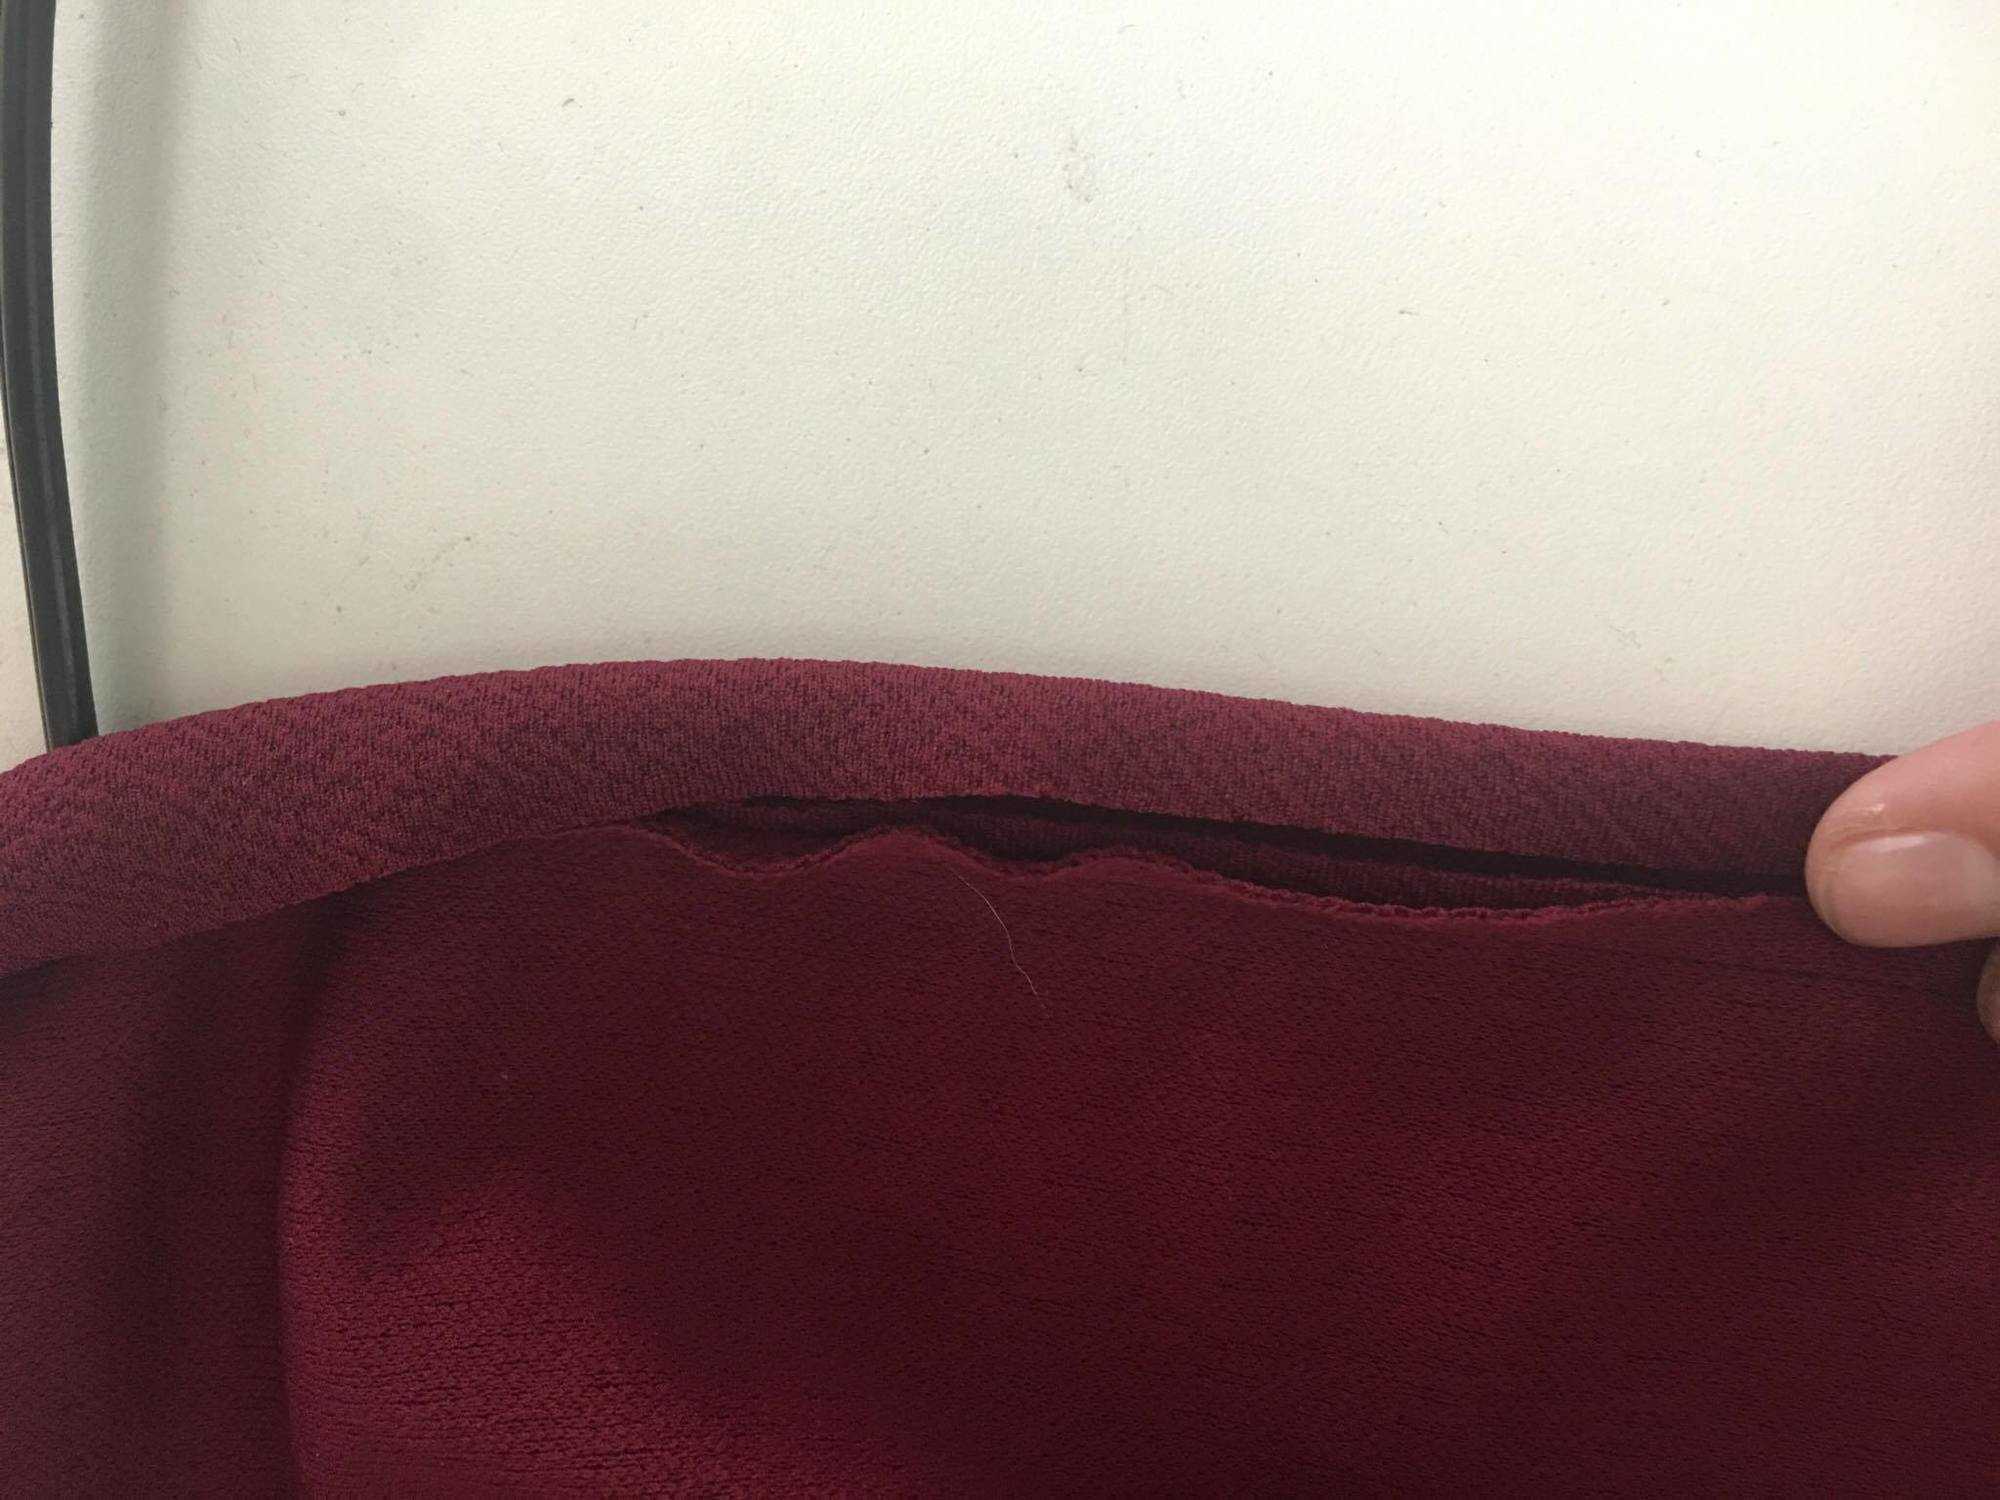
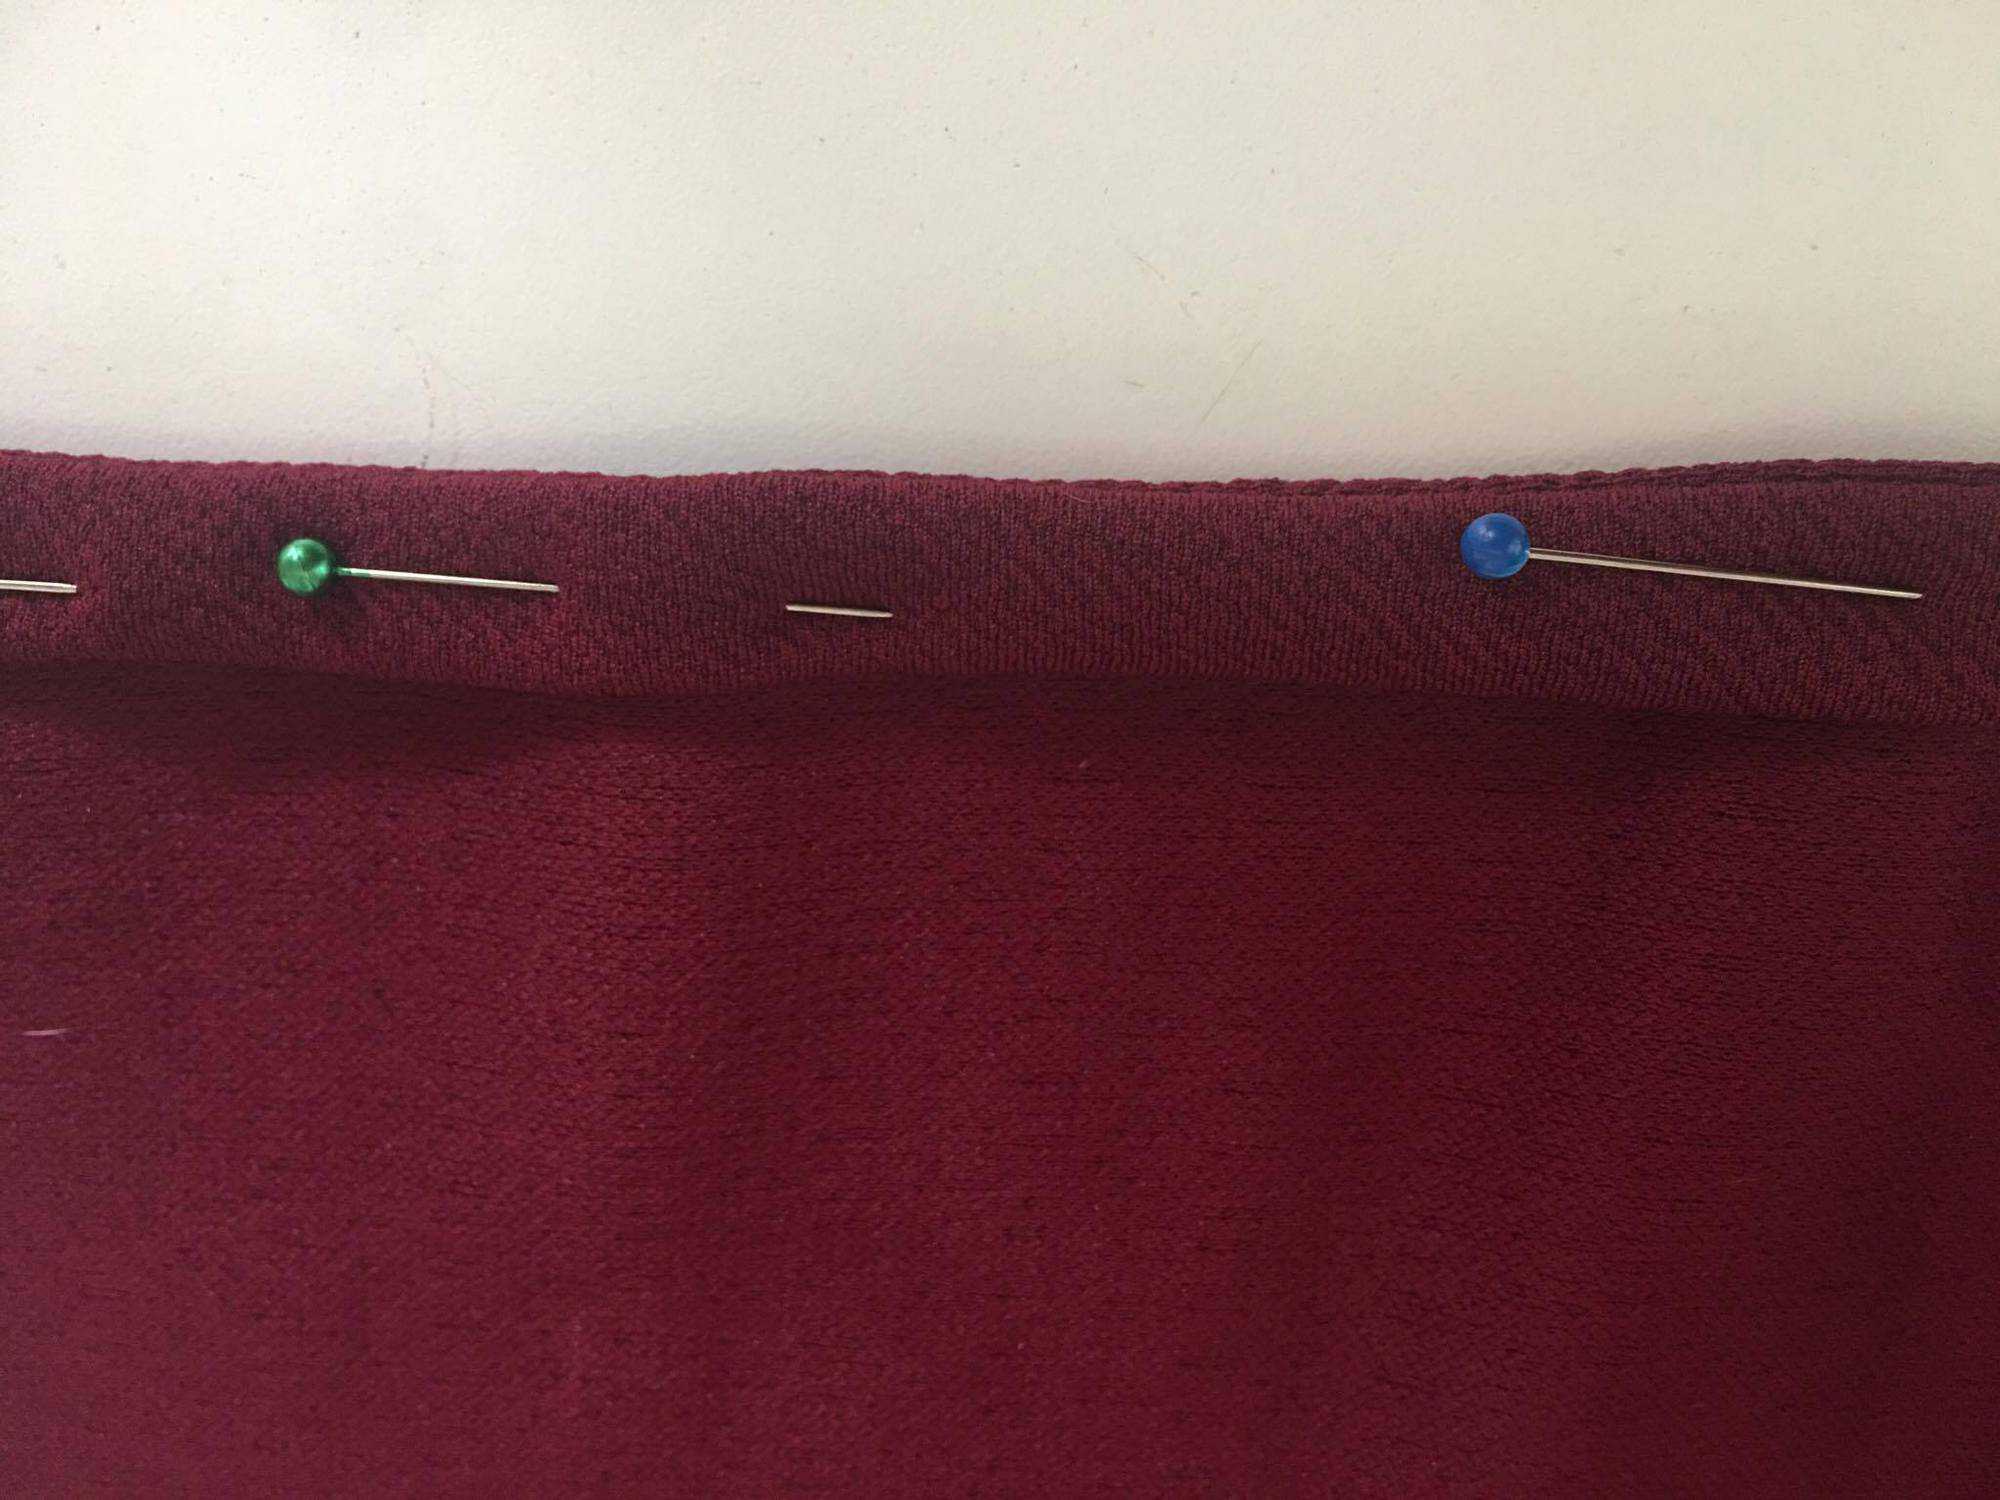
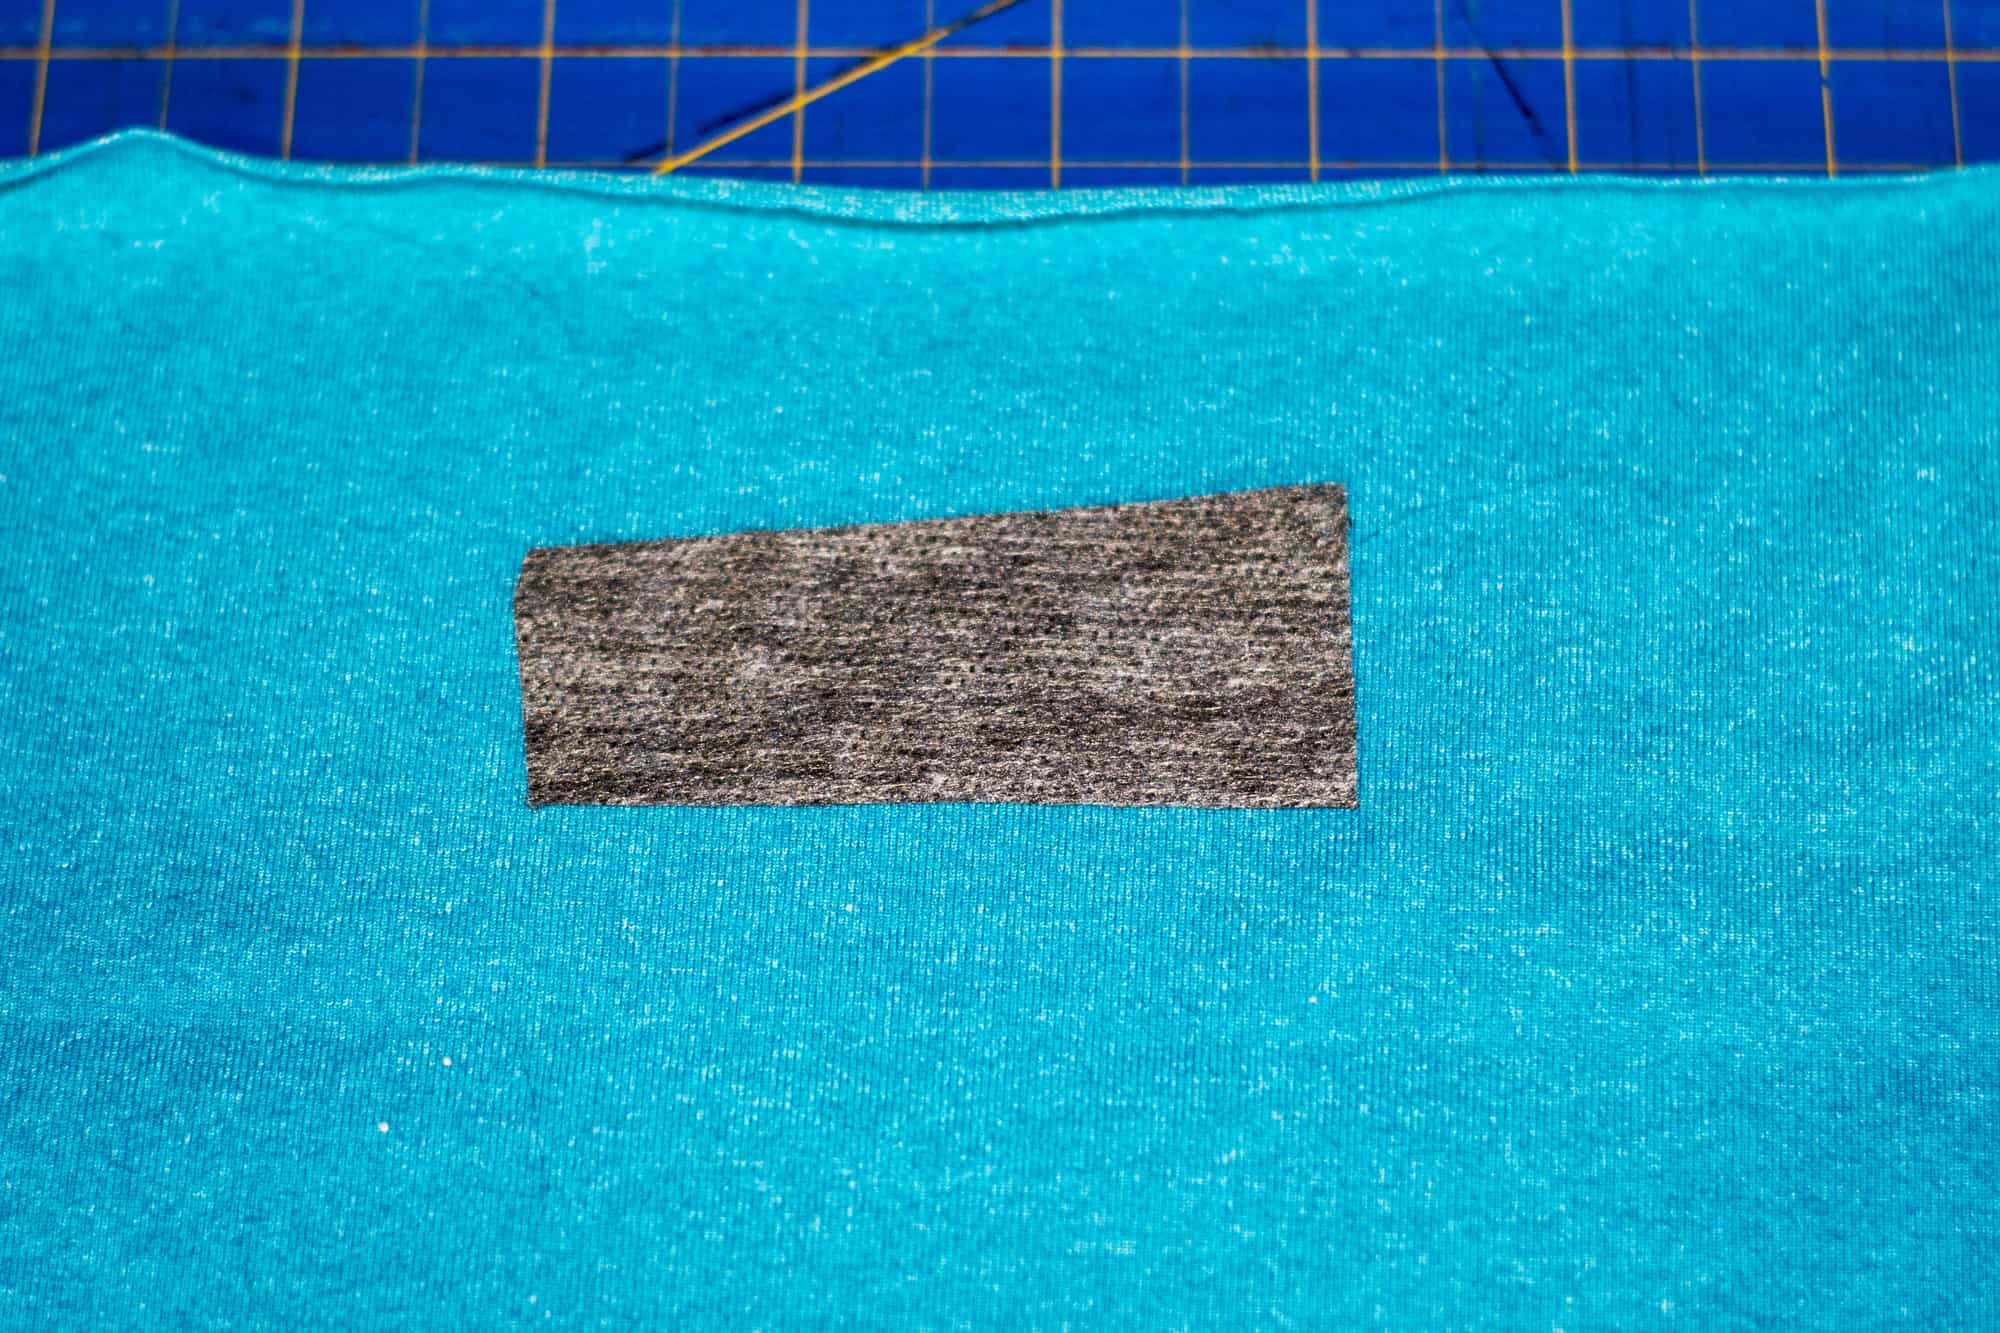
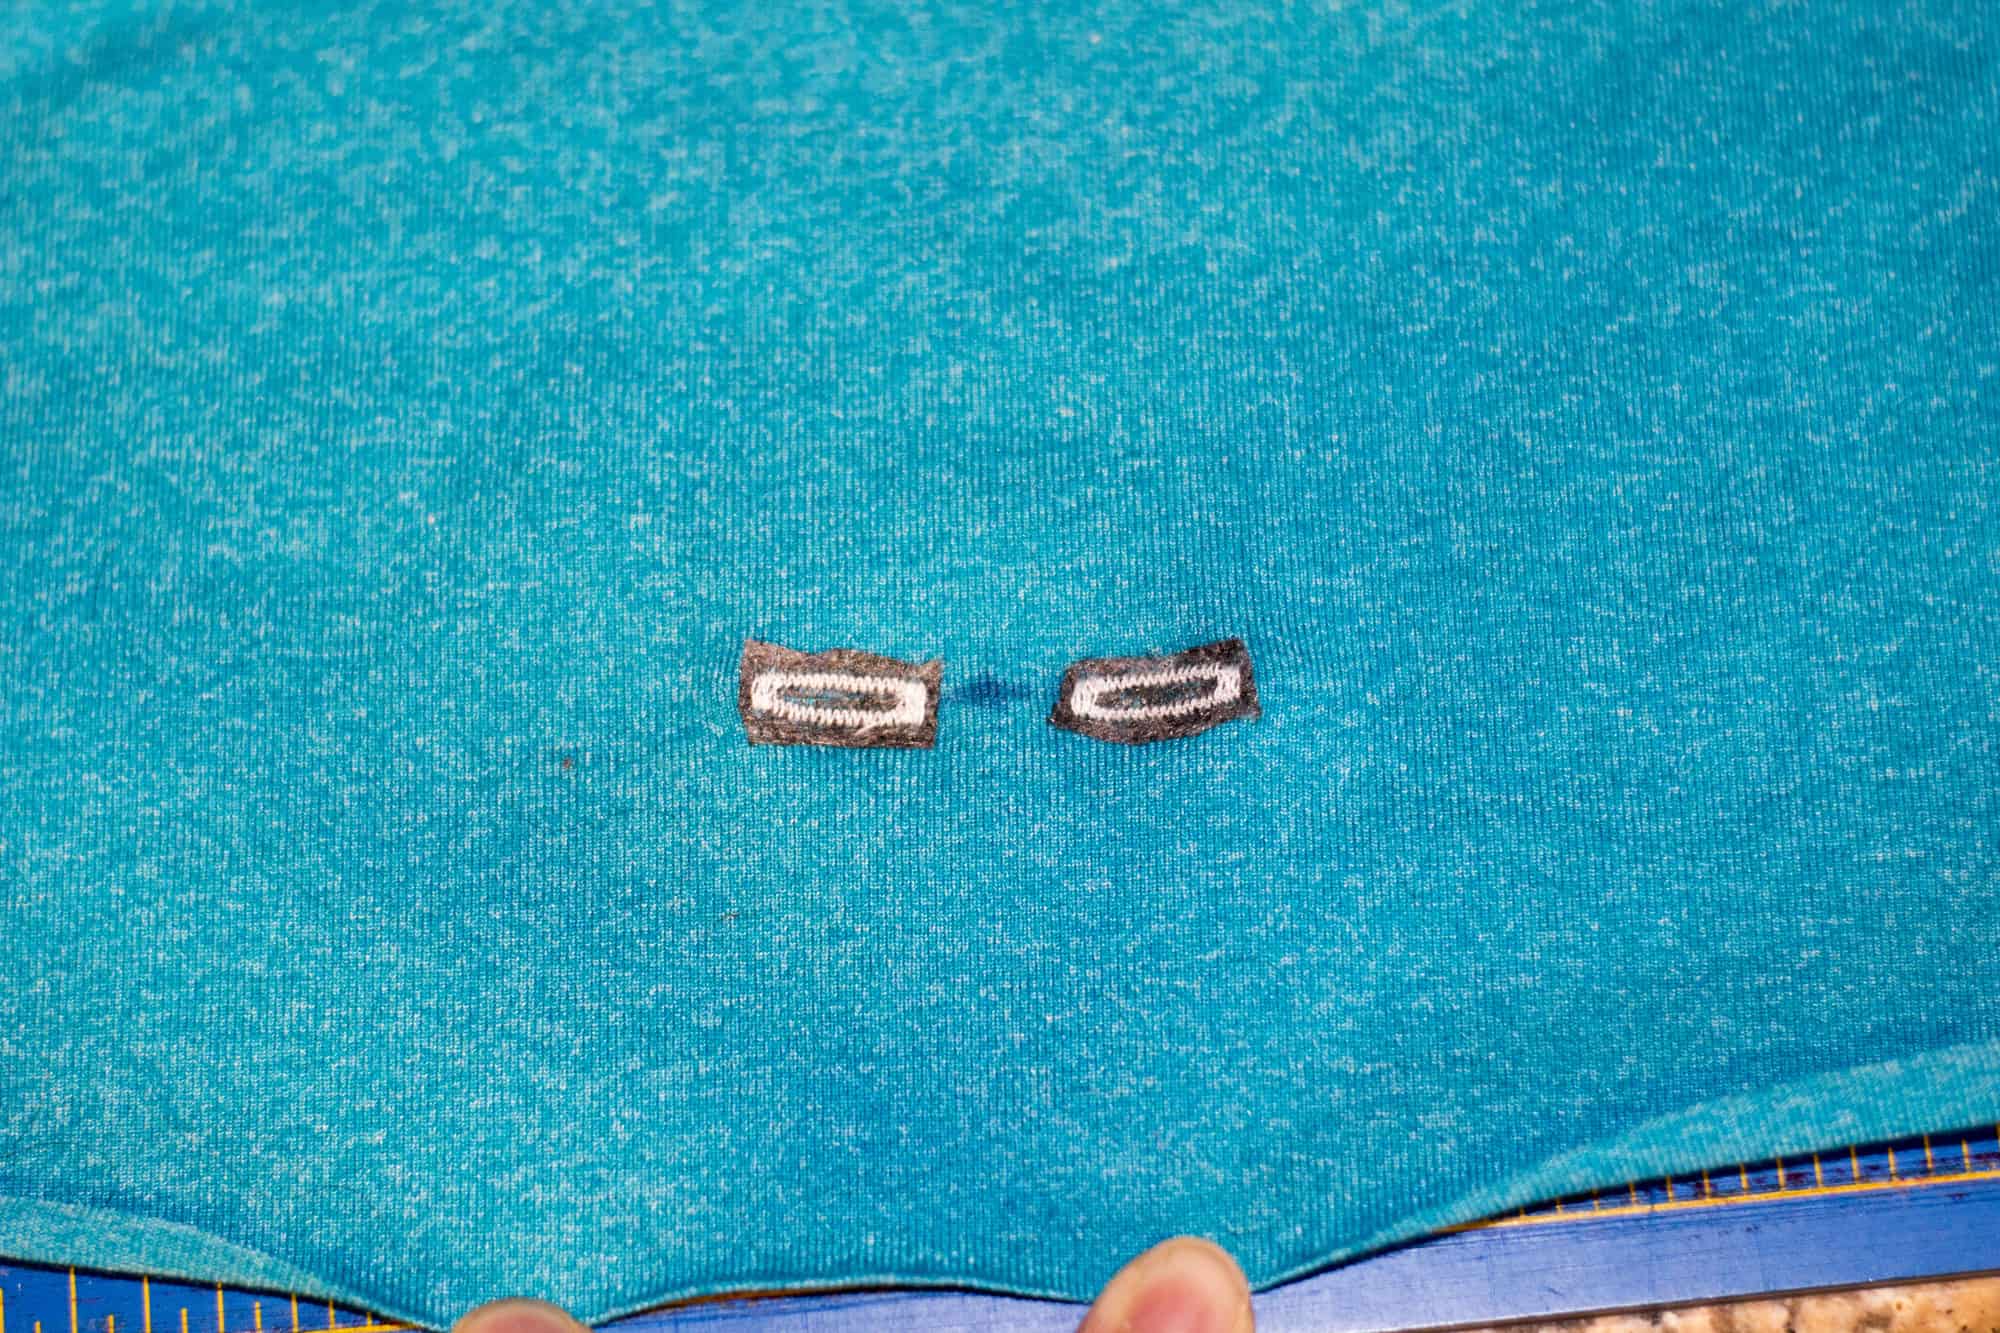
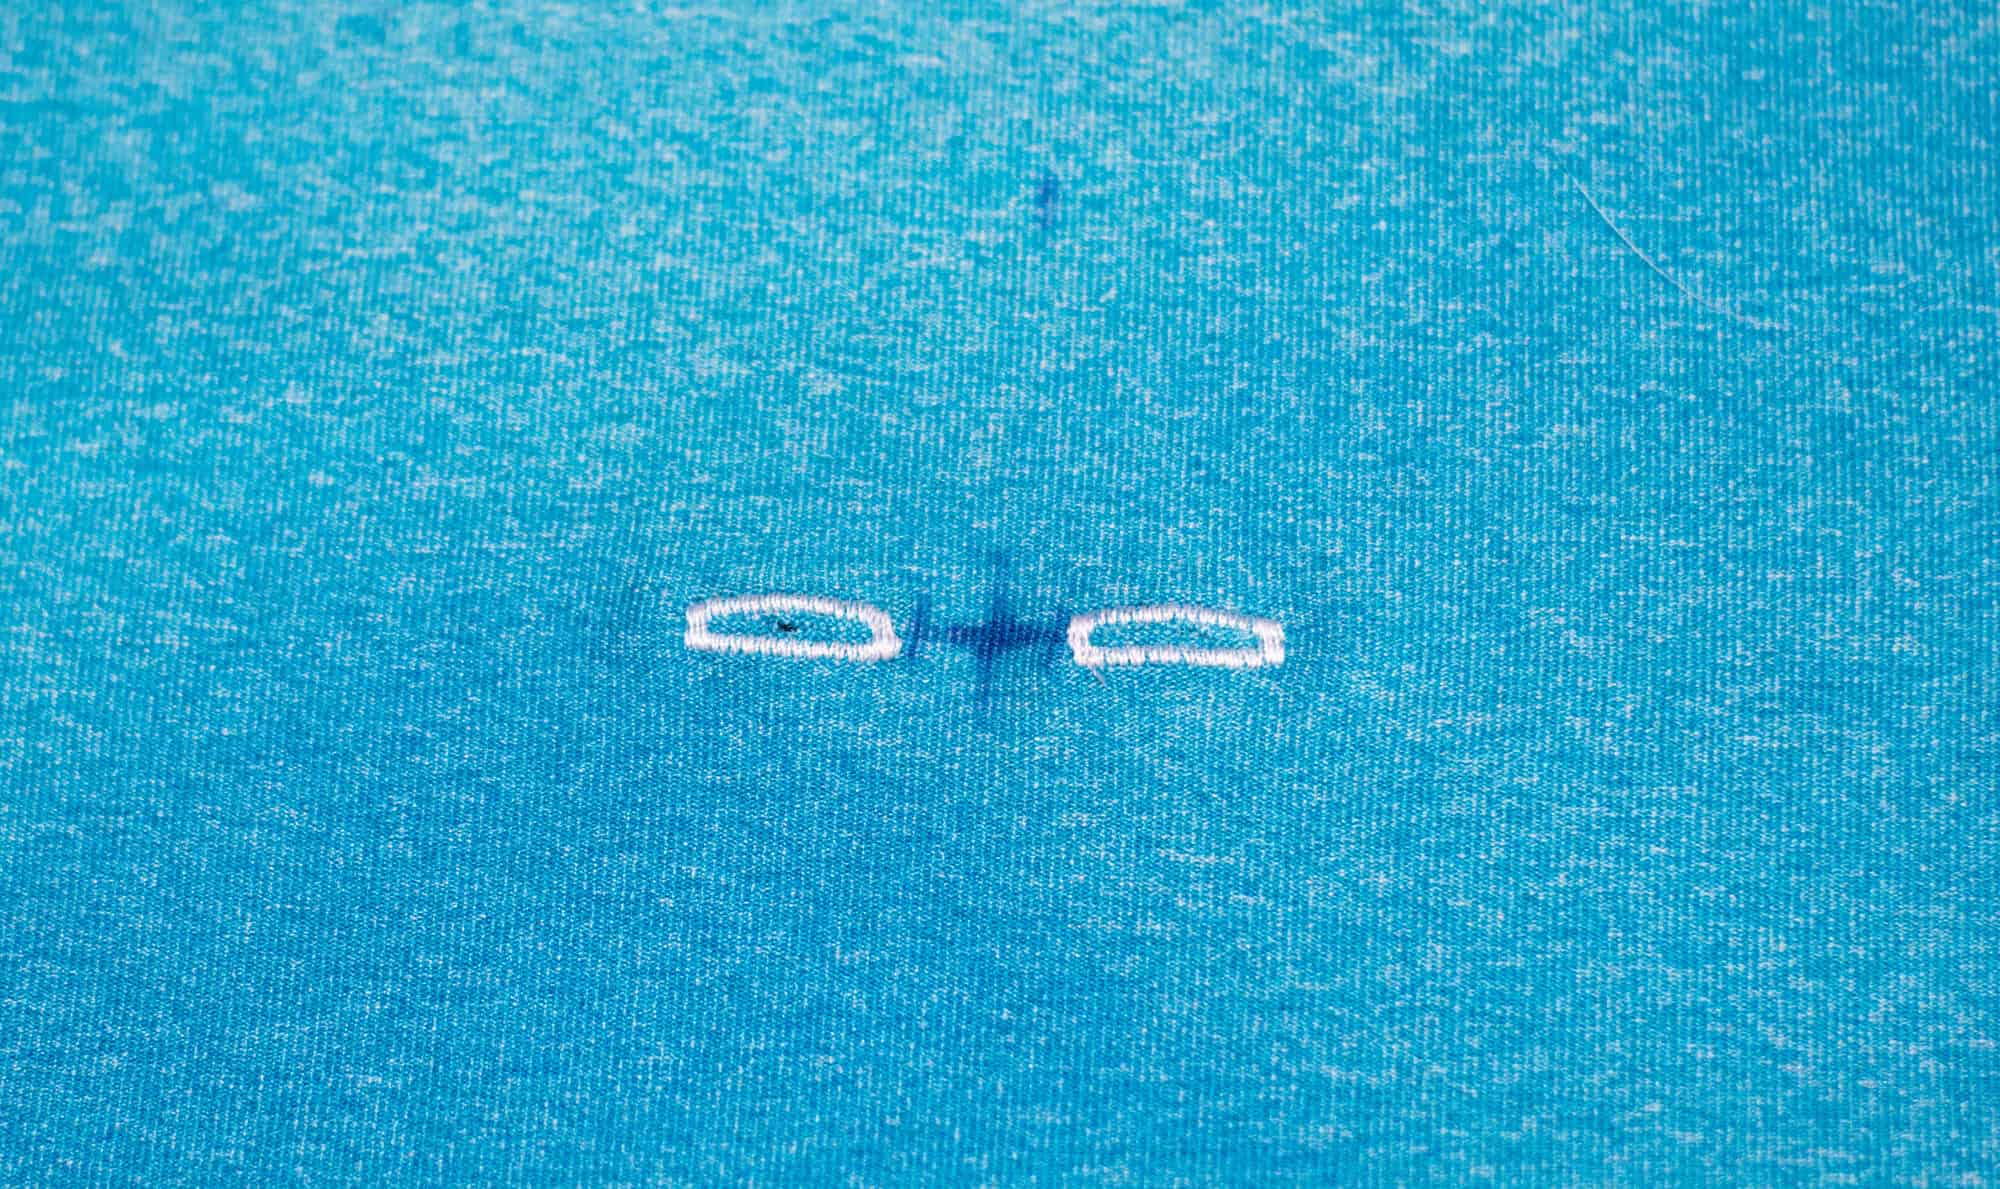
First, you are going to cut all your pieces except for your sleeves. You do not need to modify the armscye at all for this hack so just cut your front and back as usual. Sew the shoulder seams and side seams as directed in the pattern, but skip the section for adding a sleeve. Next, you will iron and pin your armscye to the wrong side 1/2″ inch as shown below. Topstitch using your favorite stretch stitch.
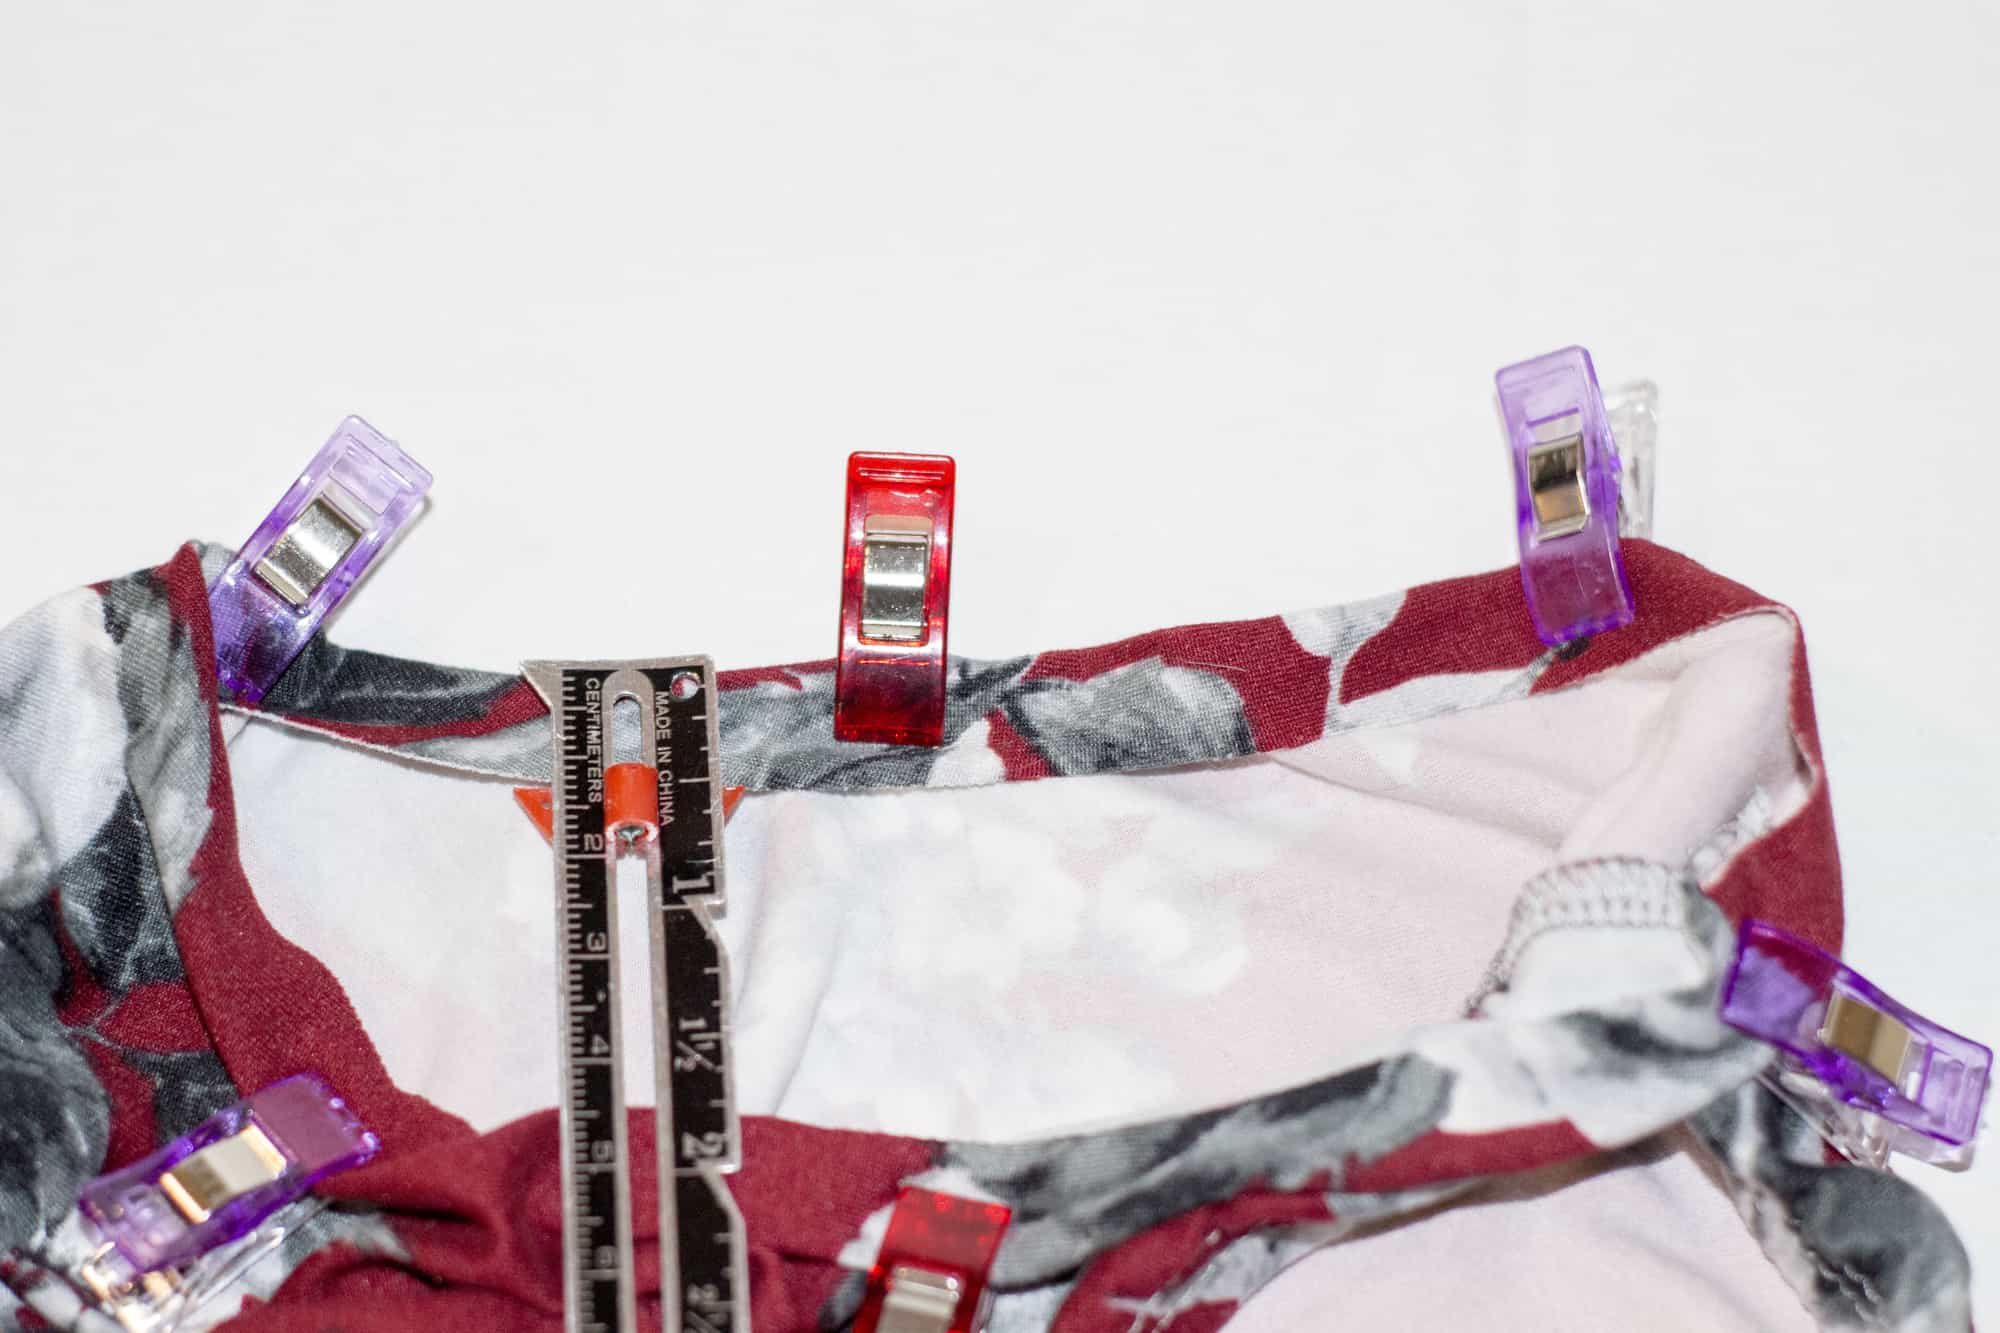
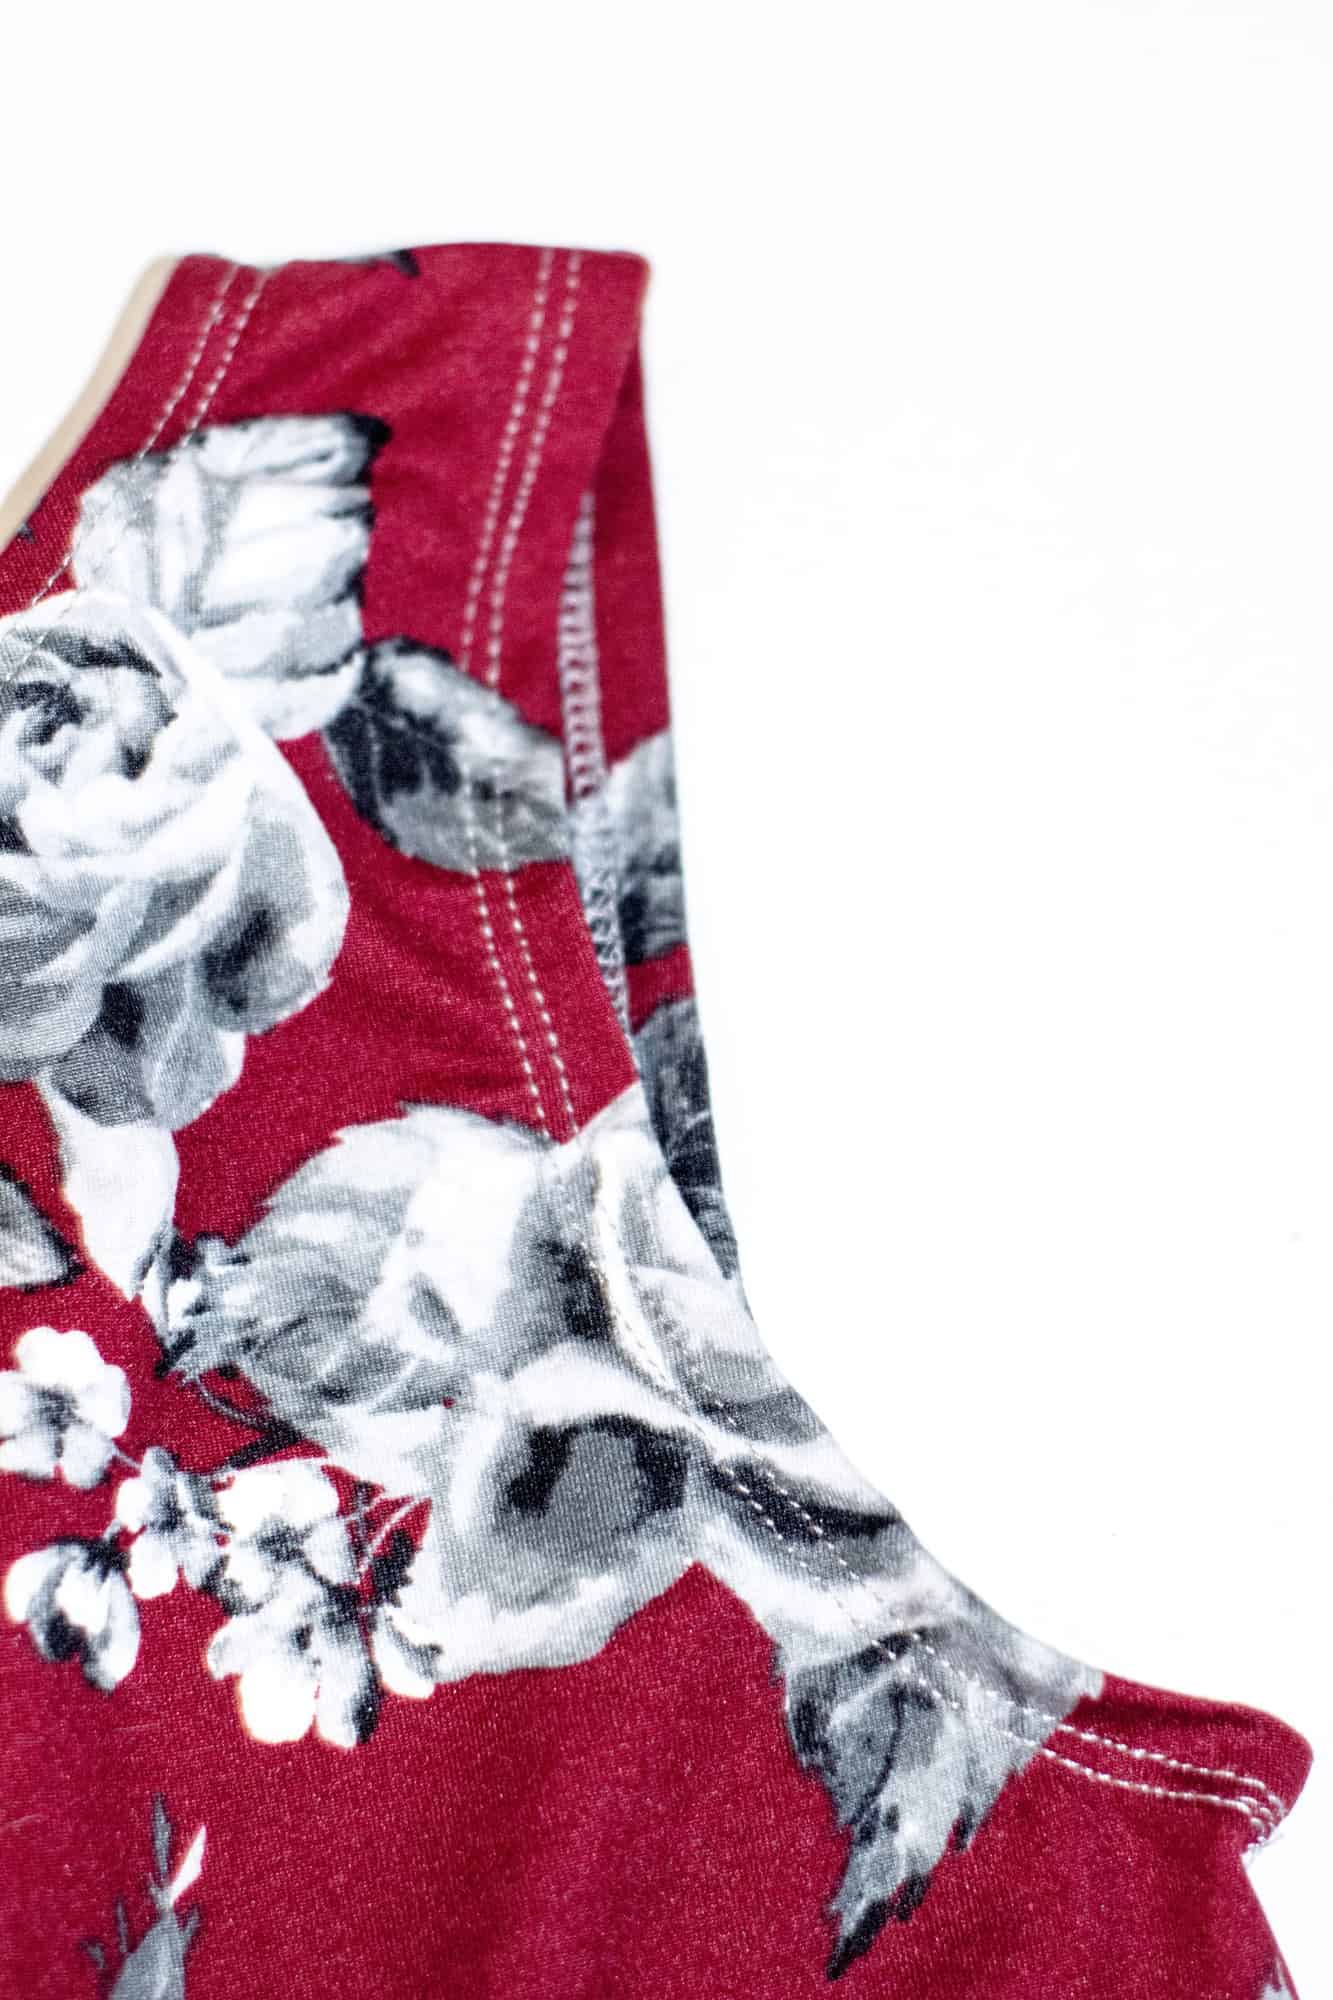
Now just finish up the dress or top as instructed in the pattern and you’re done. Quick, right!?


…..
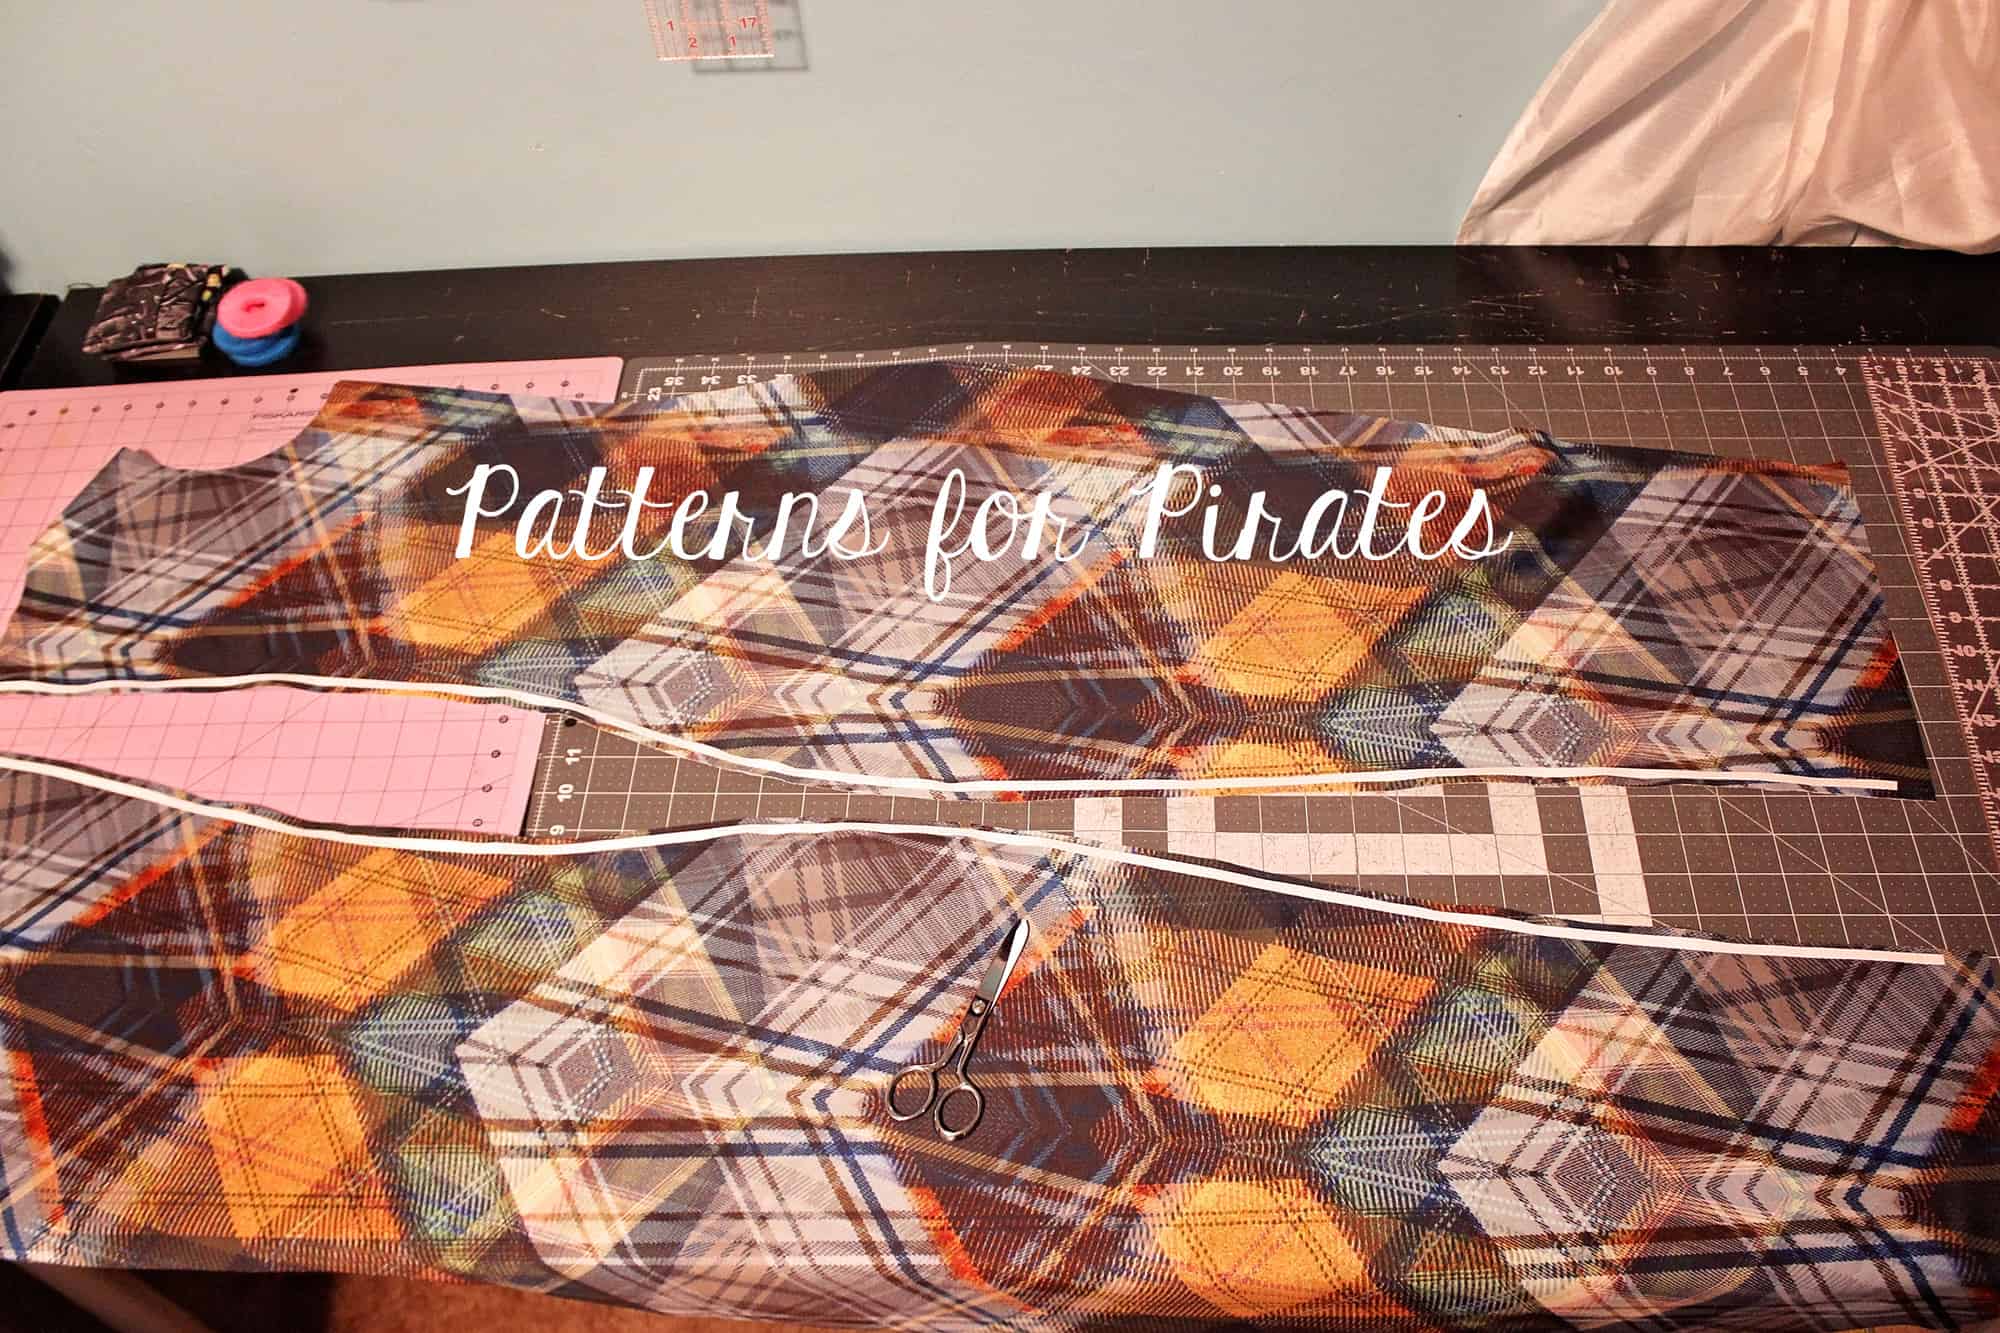
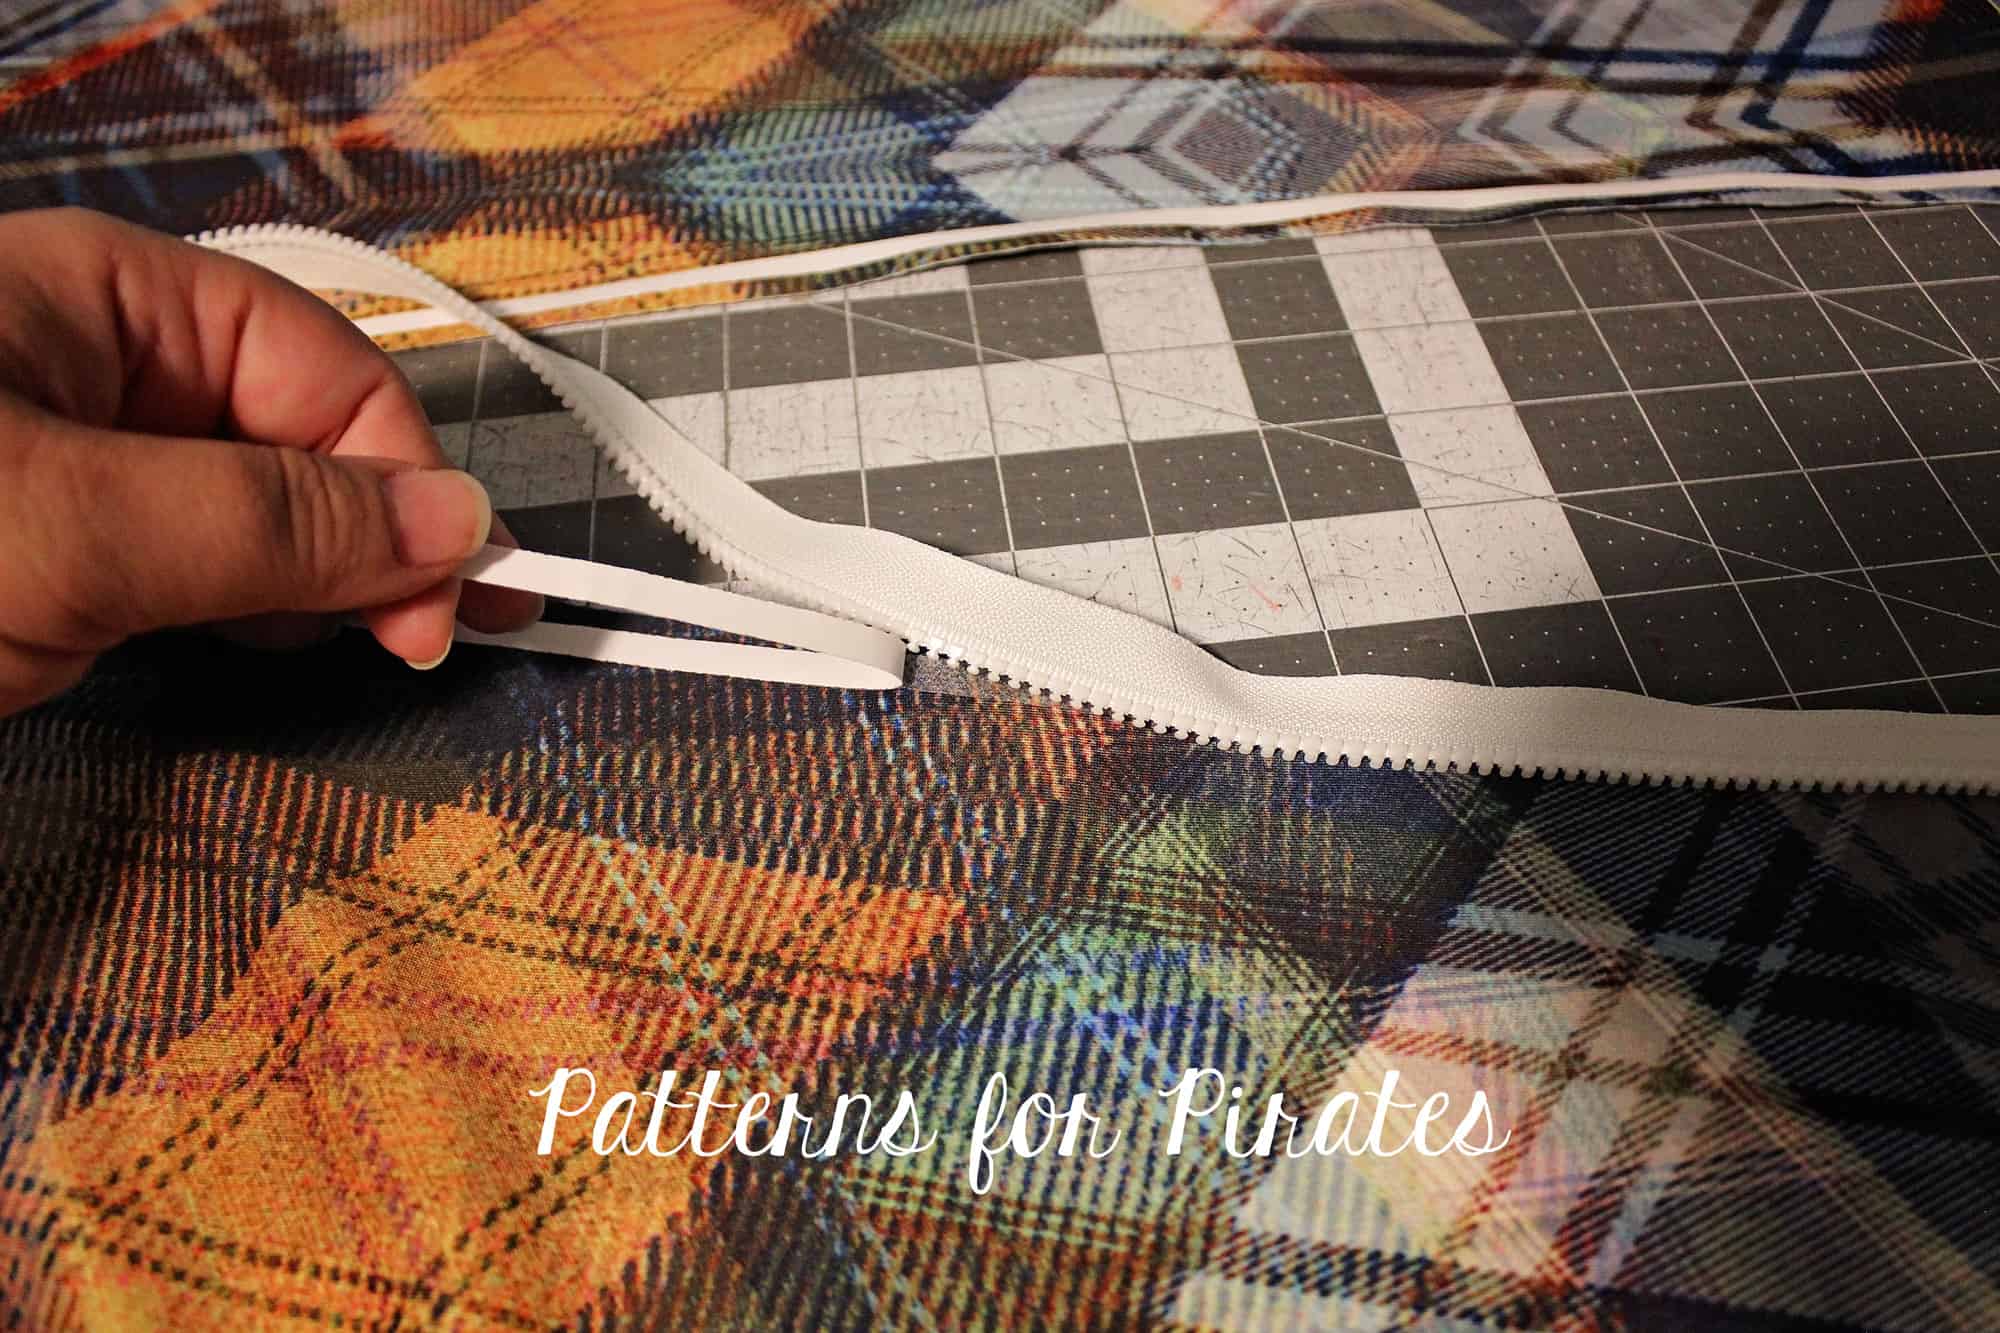
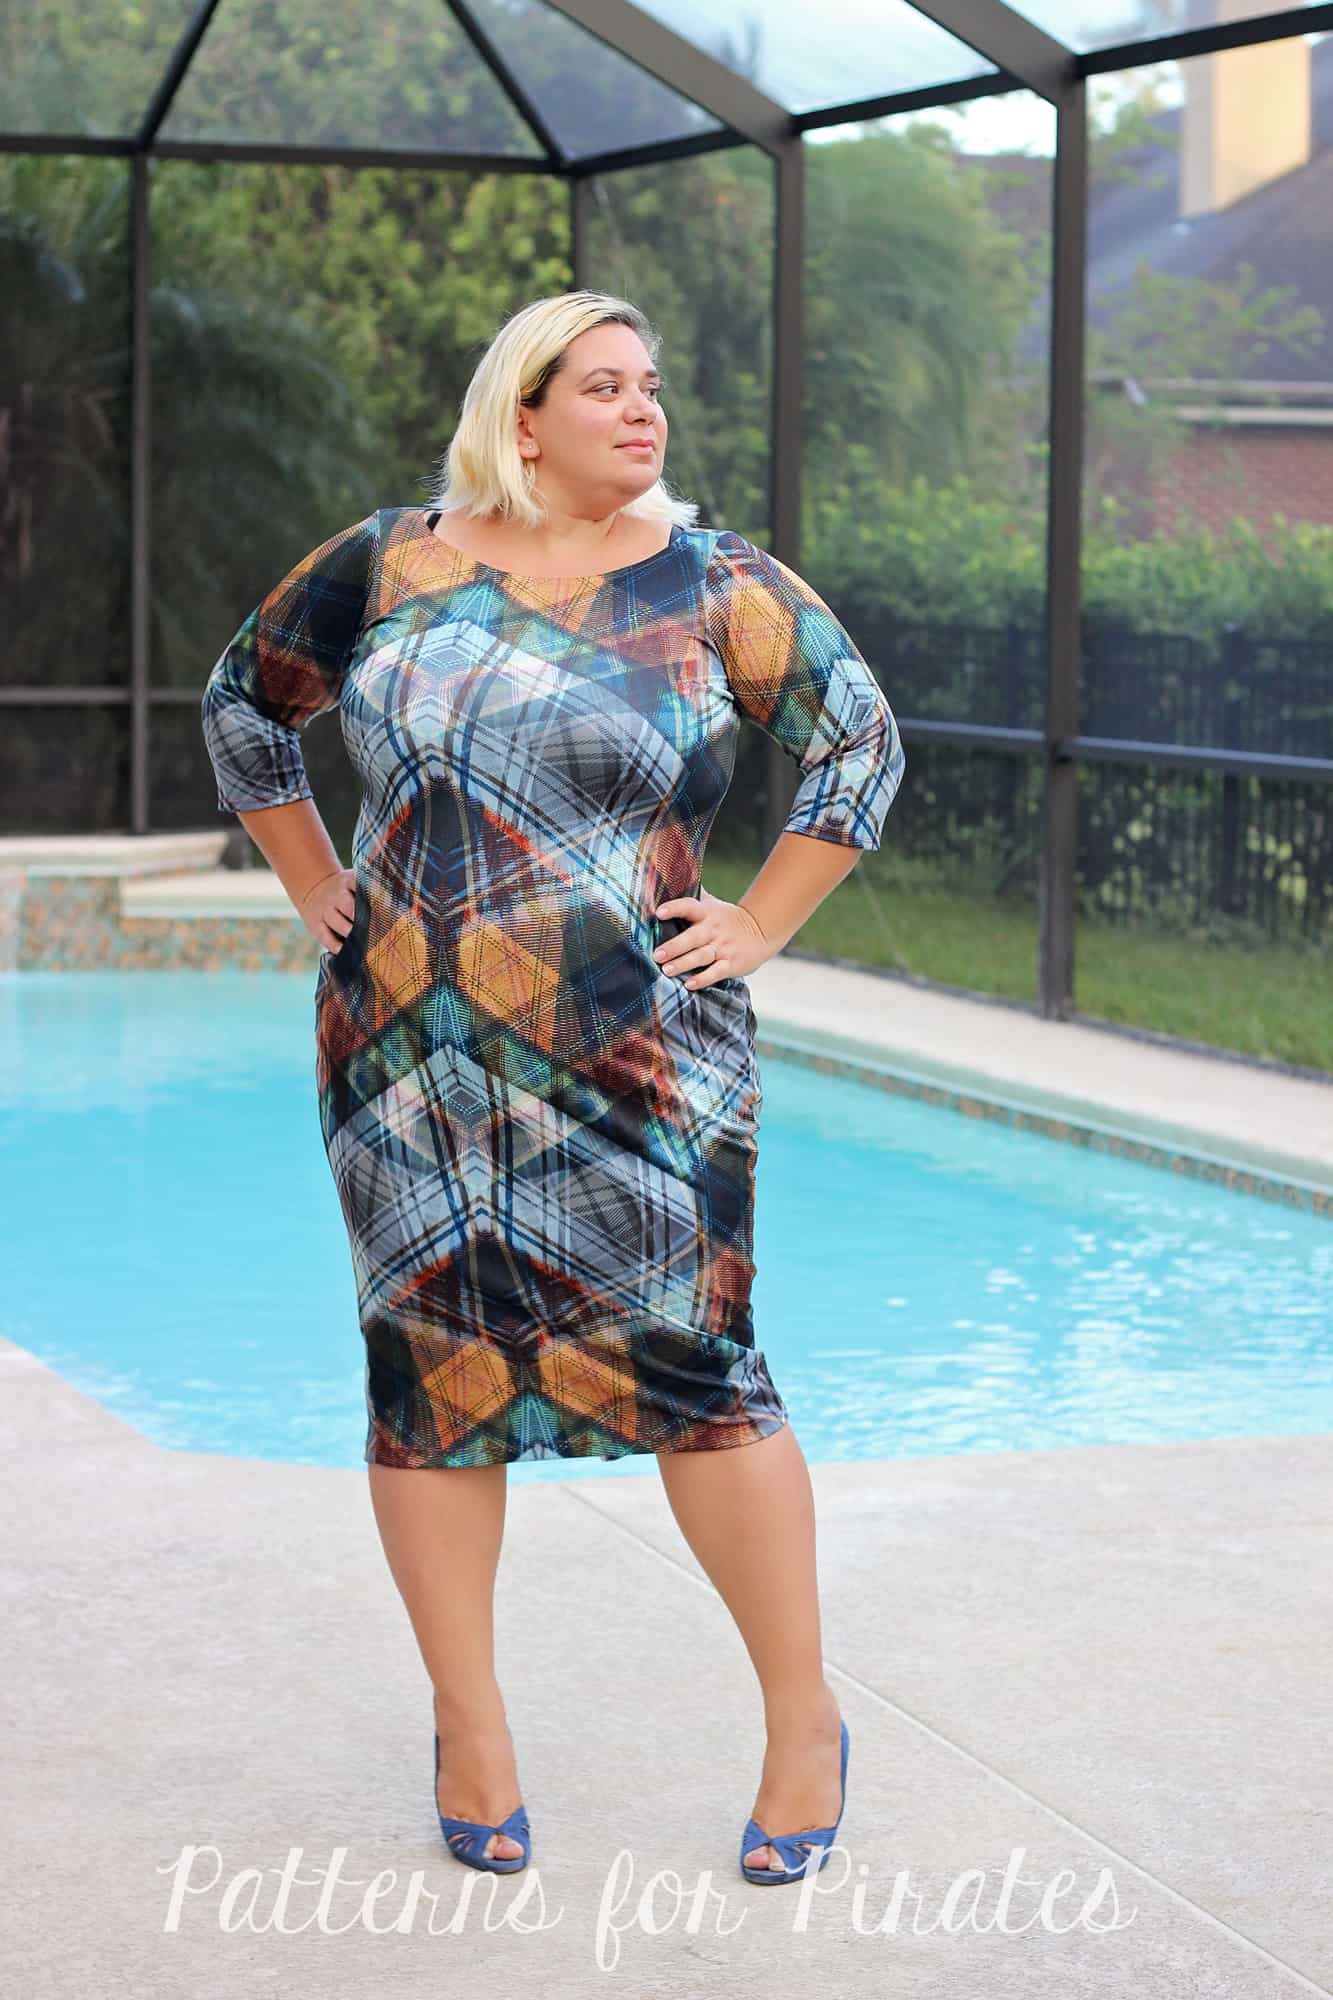
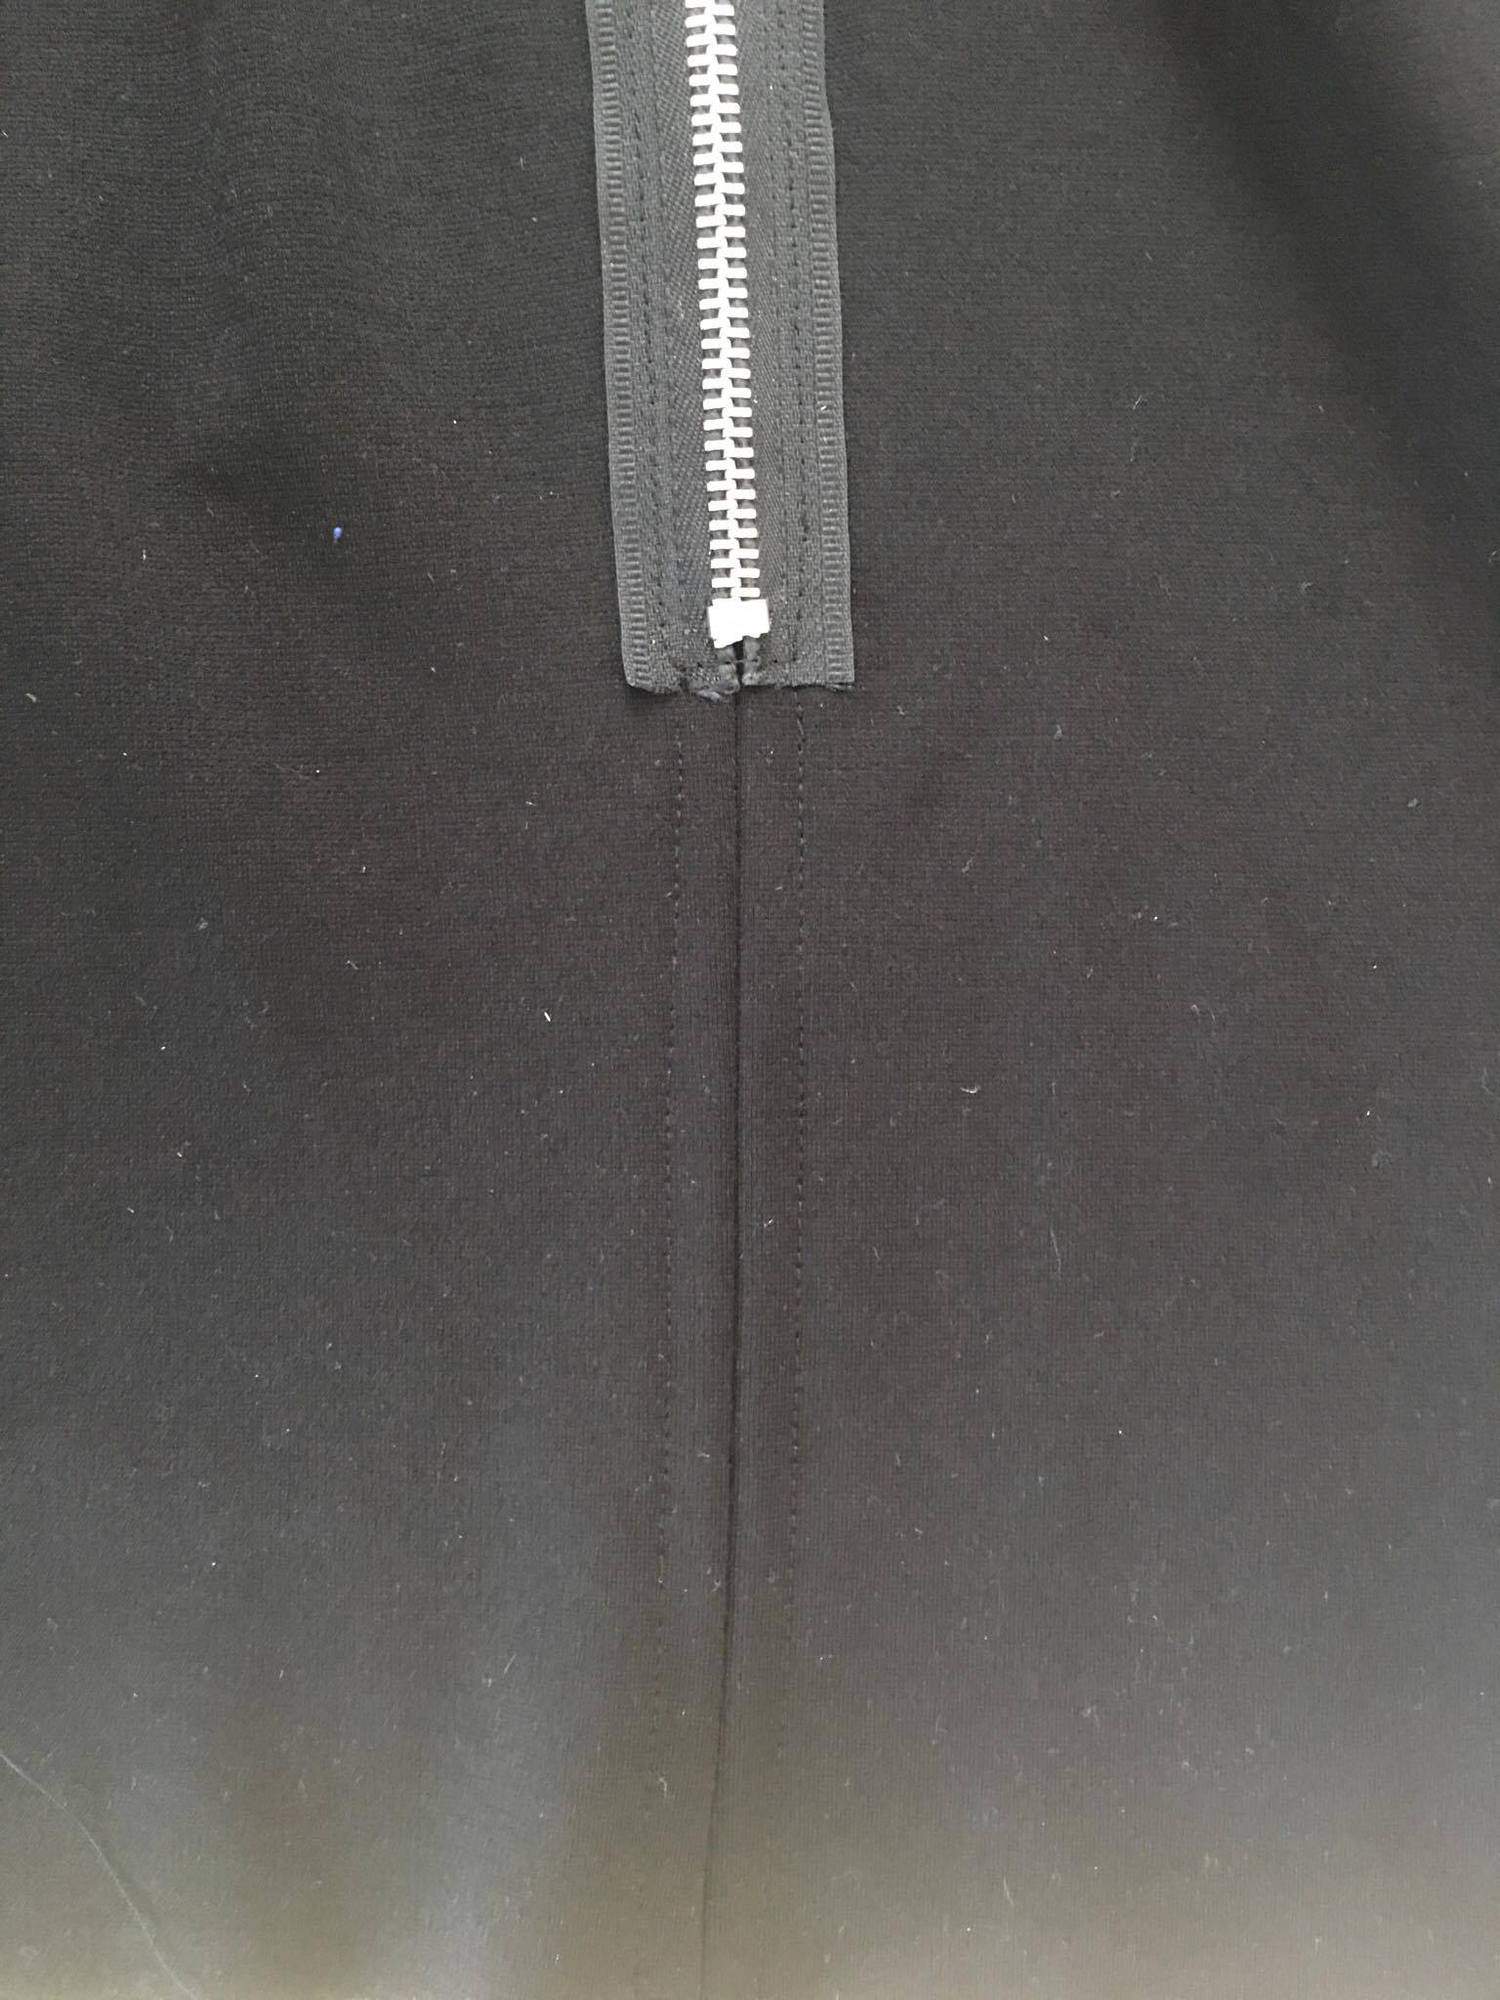
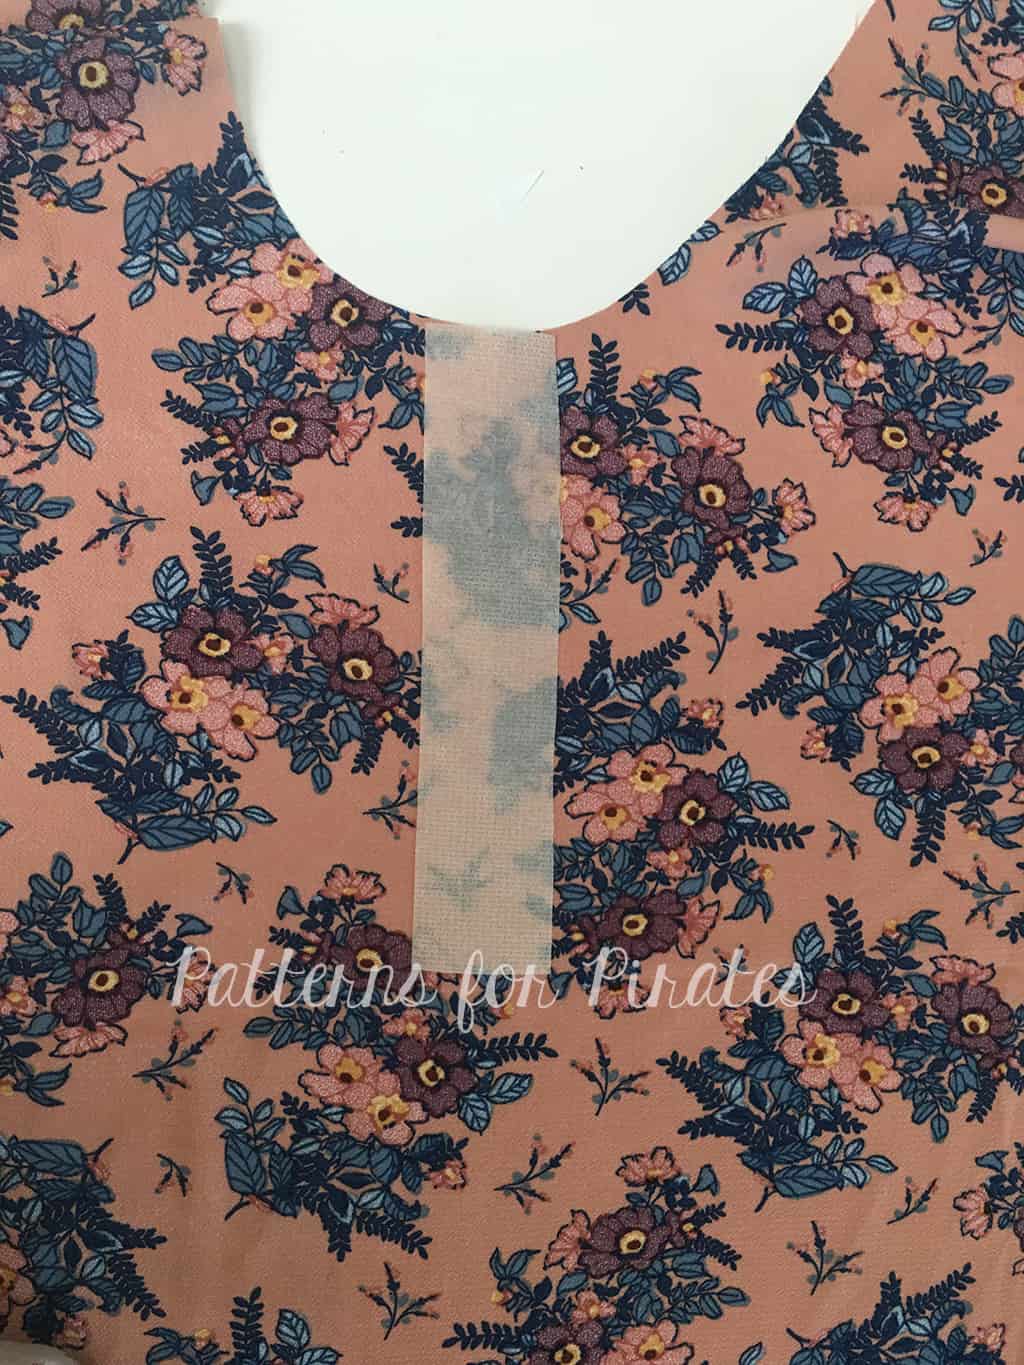
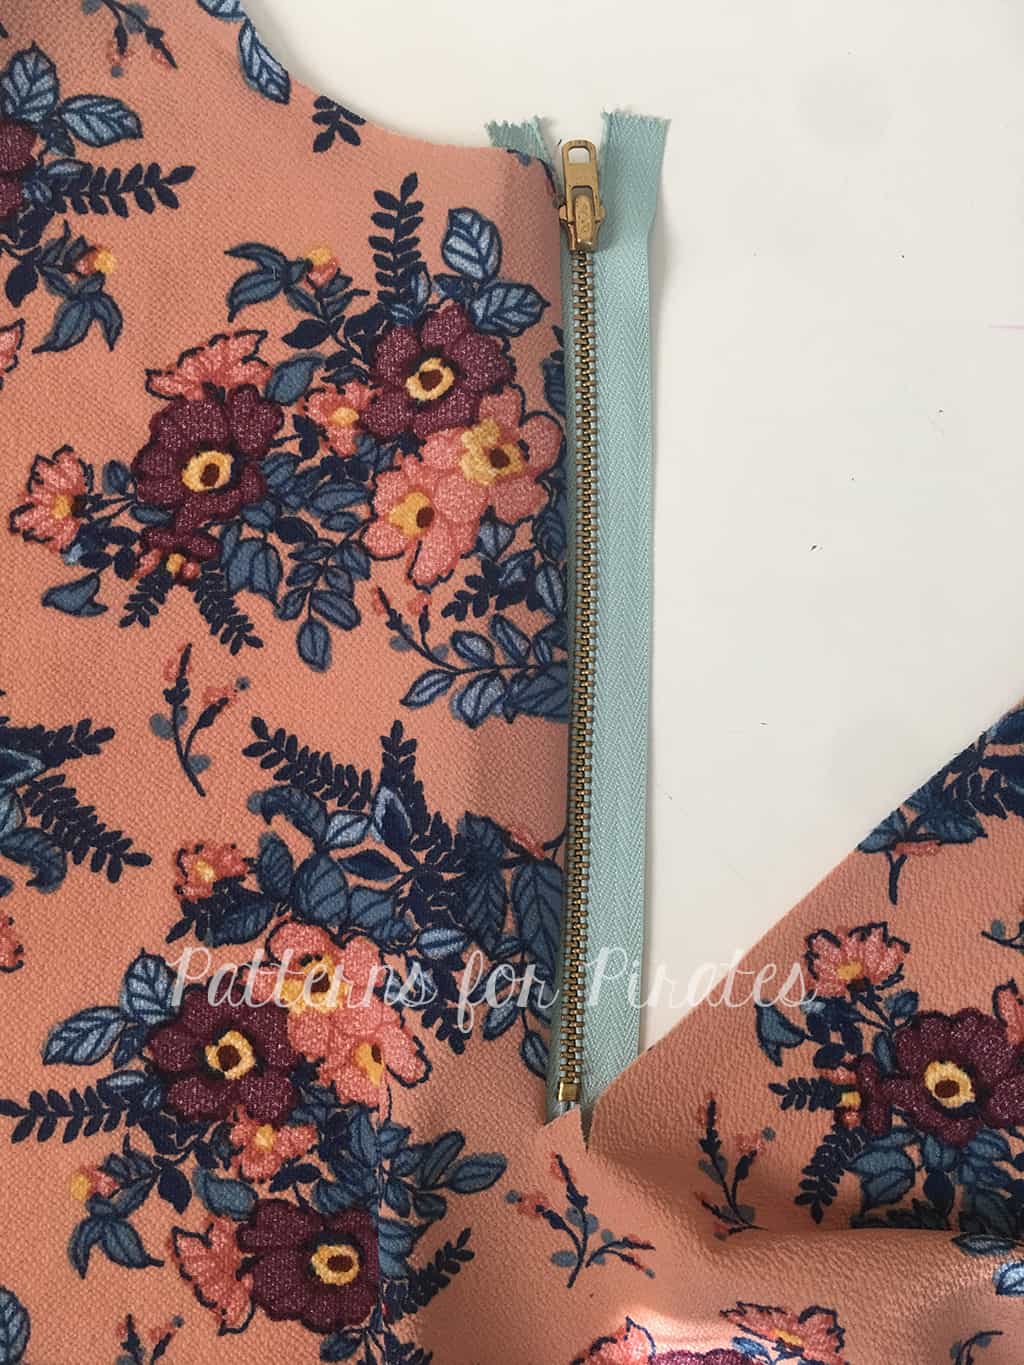
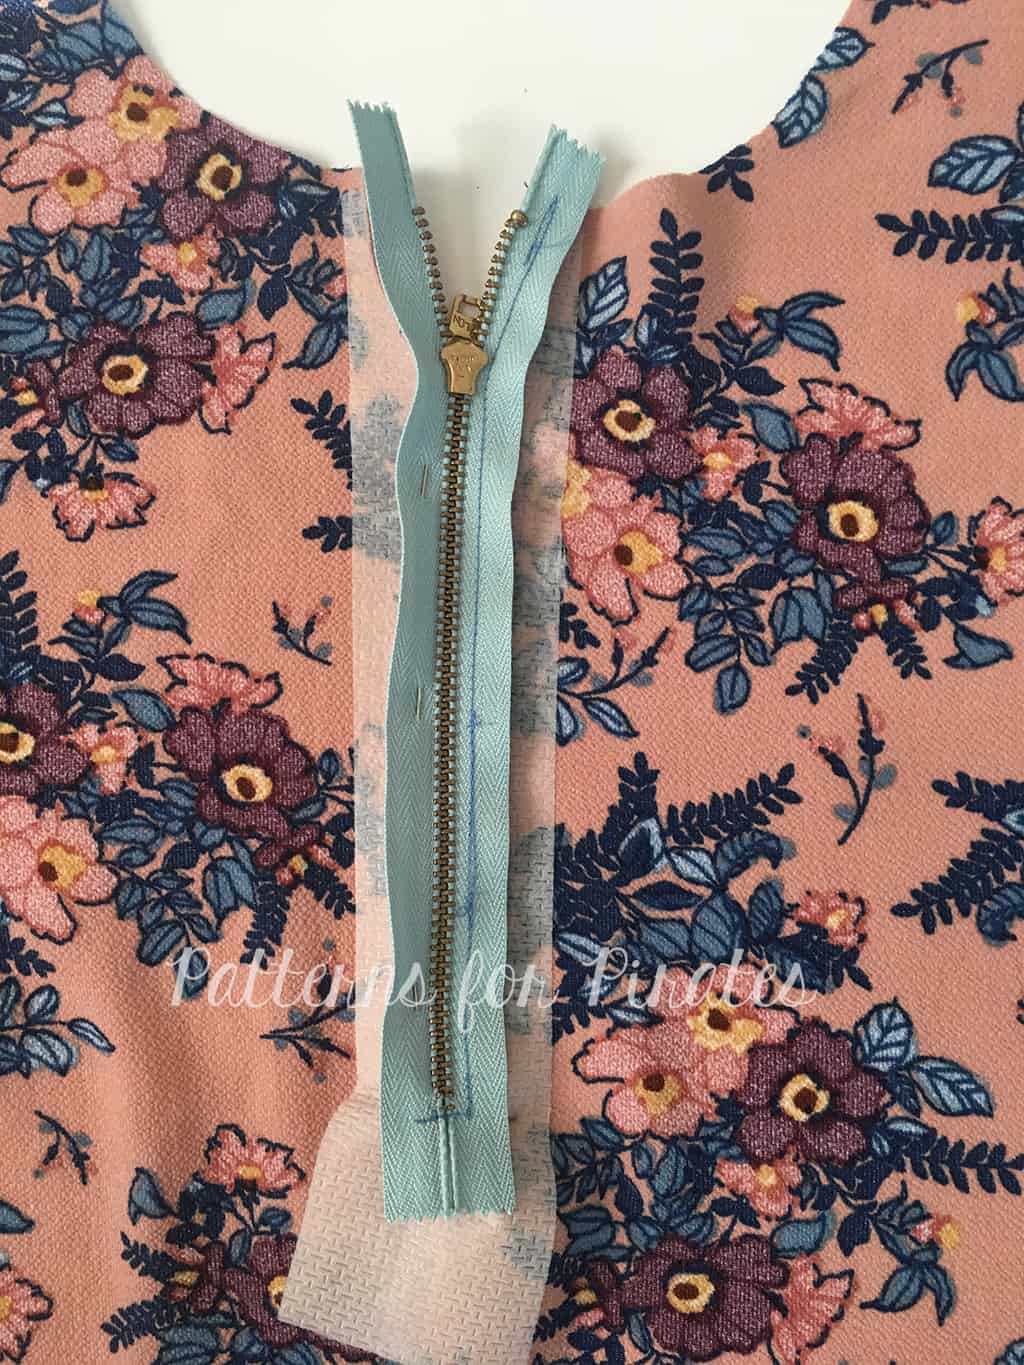
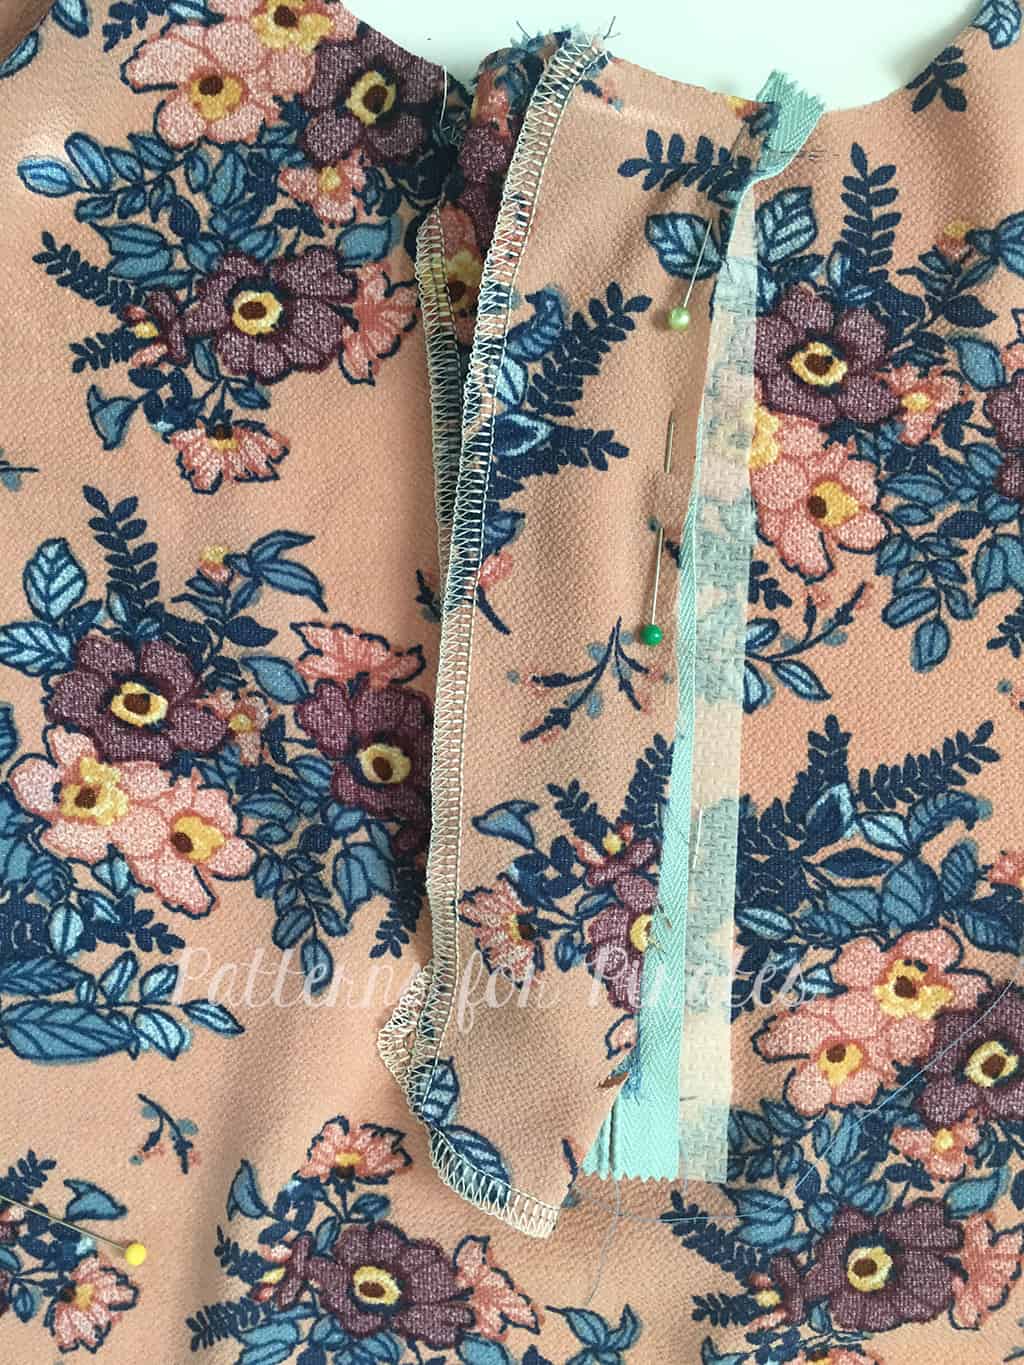
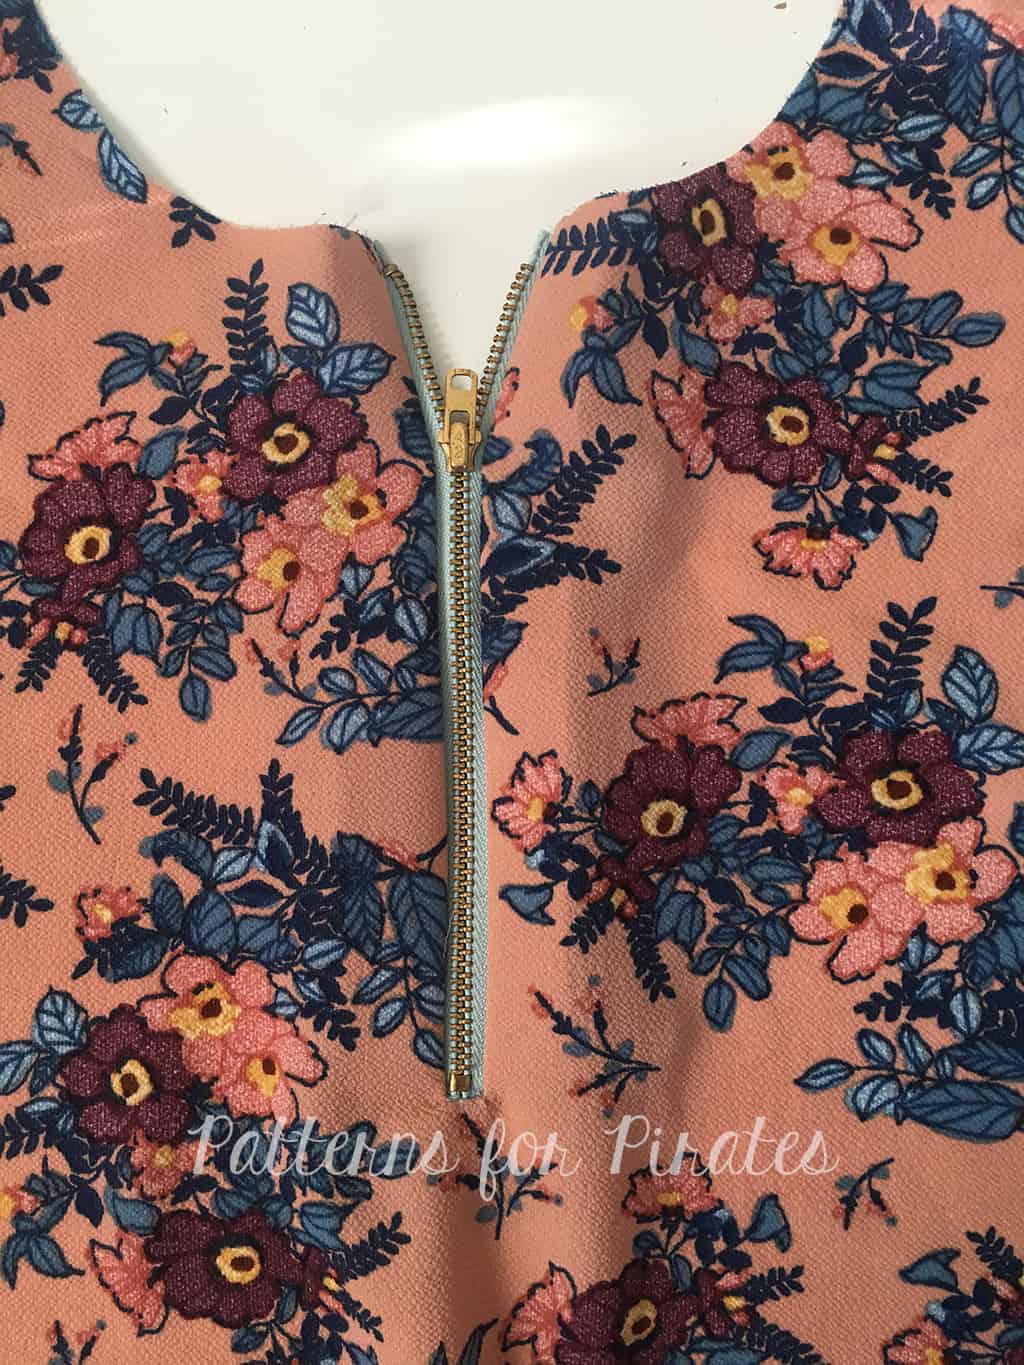
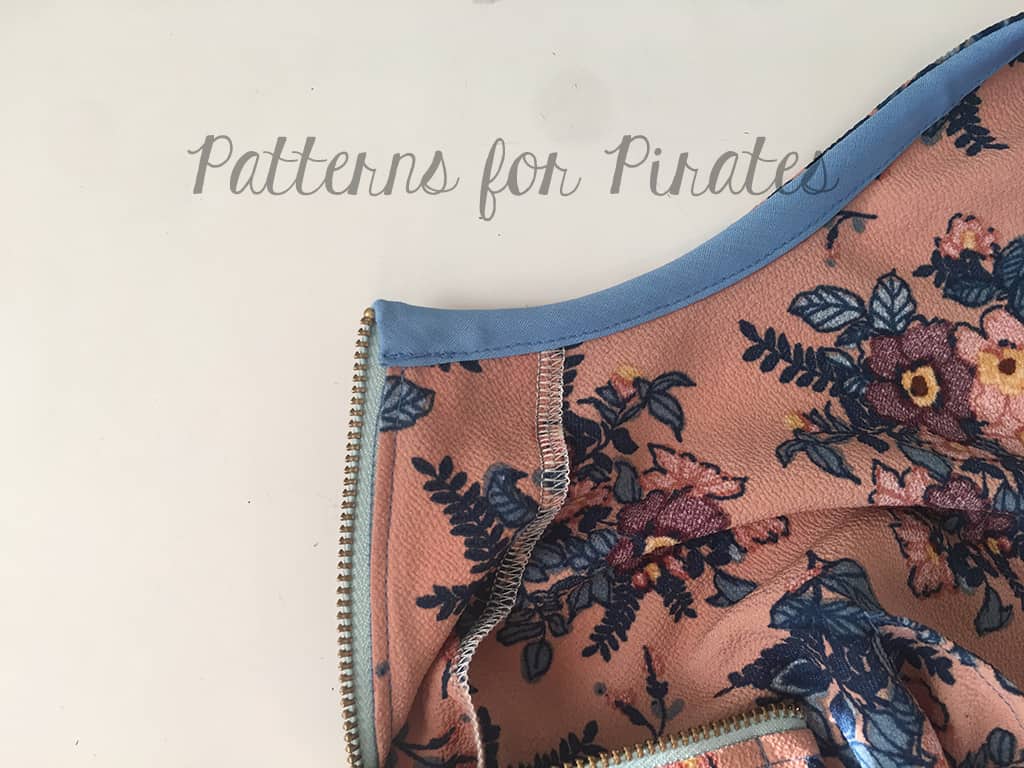
Full Zipper Back
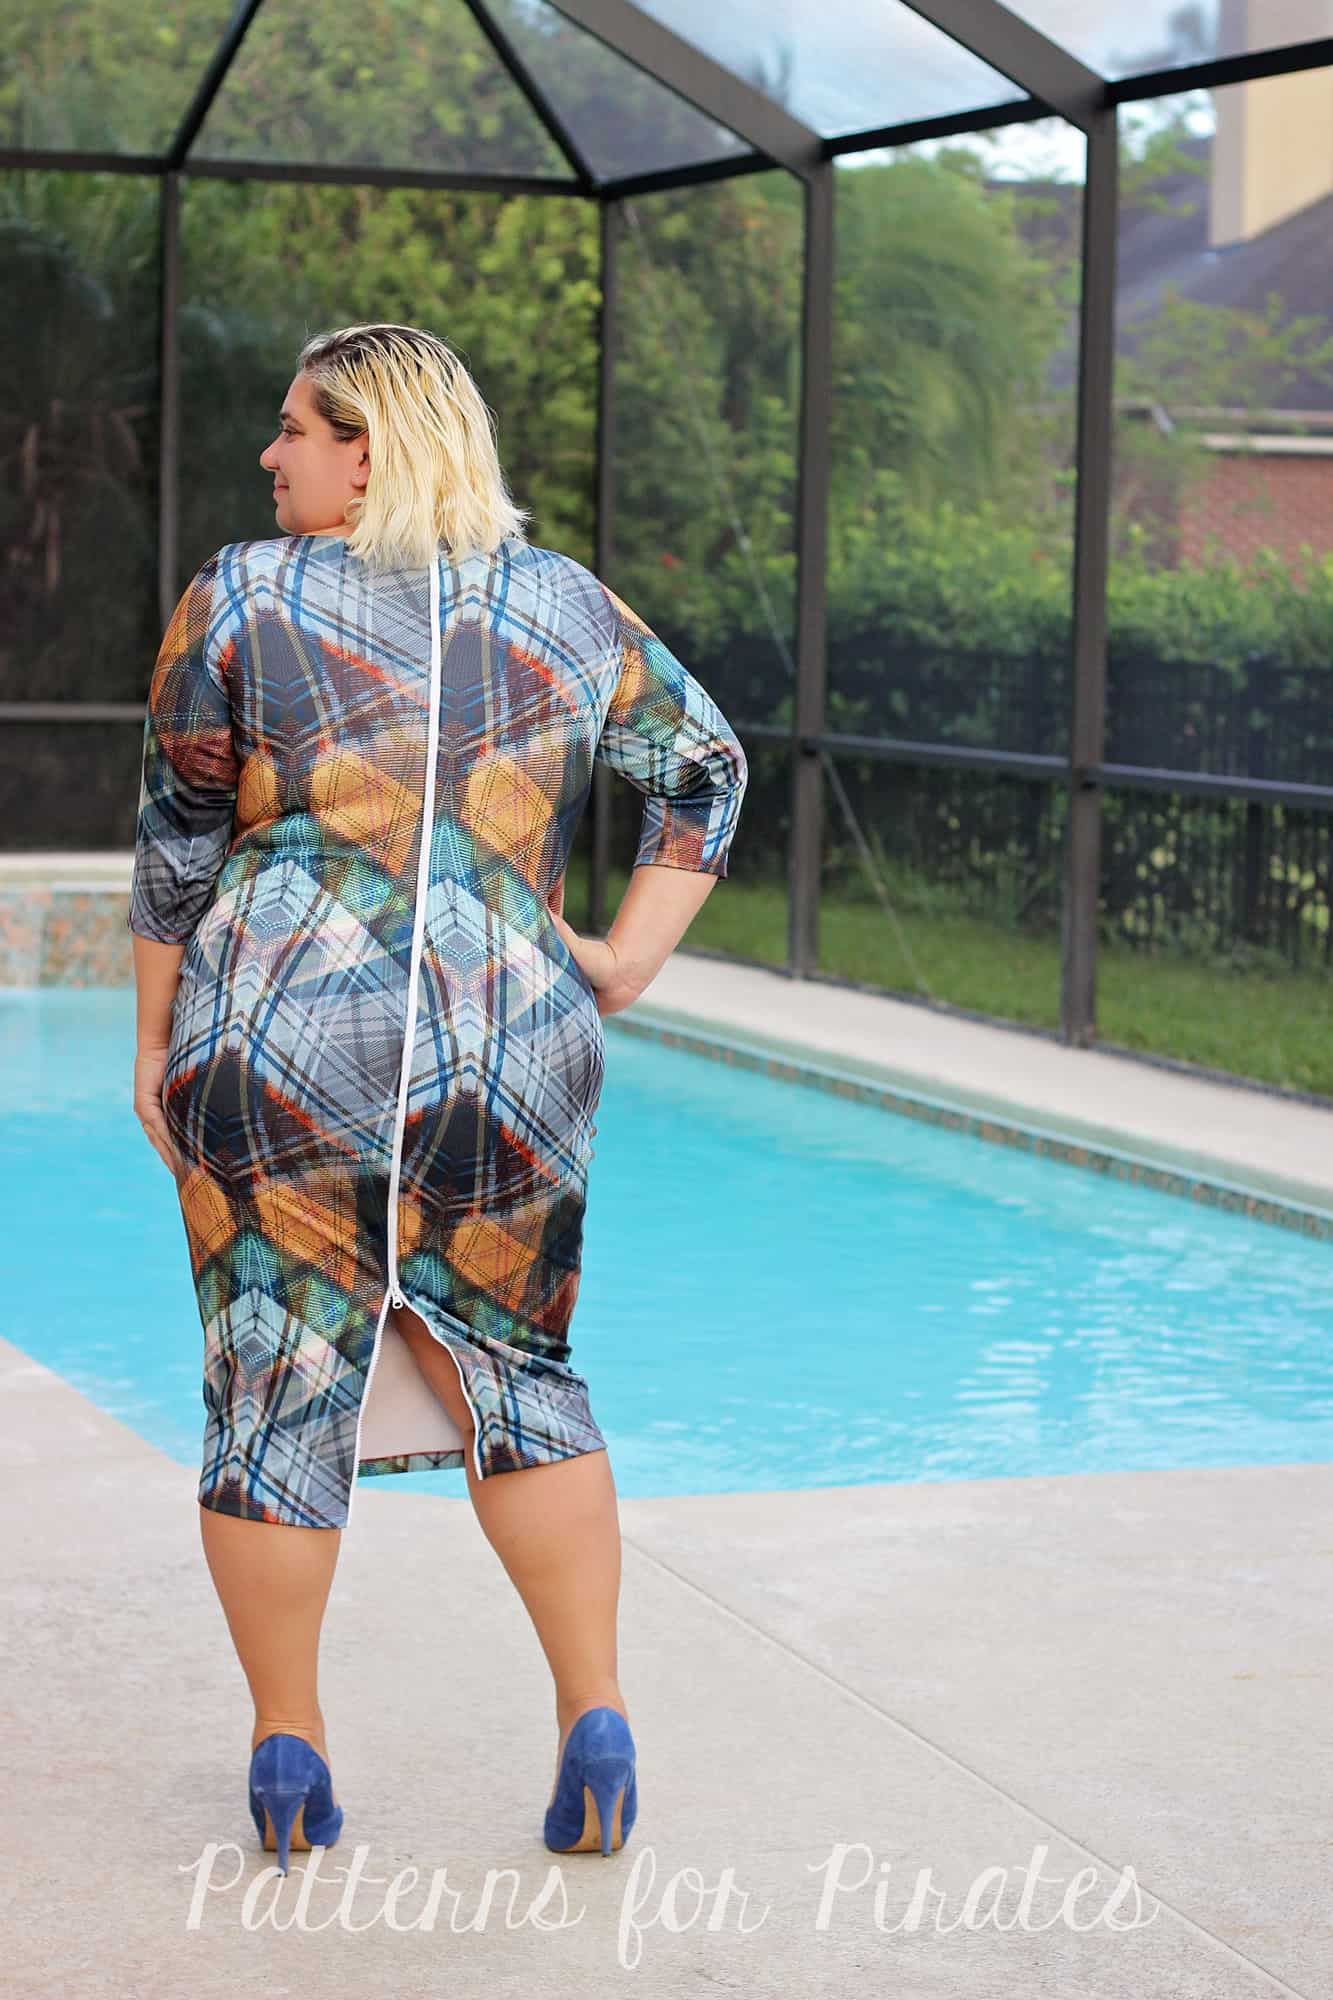
As soon as I saw the Wiggle dress I knew I had to make a full zipper back! So I took it up a notch and bought a dual zipper. This style zipper opens at the top and bottom. You can add this zipper to the high back, low back or even the off the shoulder option as well as the above, bellow or midi length. Just make sure the zipper you use is long enough! As a point of reference, I used a 48″ zipper for the high back, midi length style.
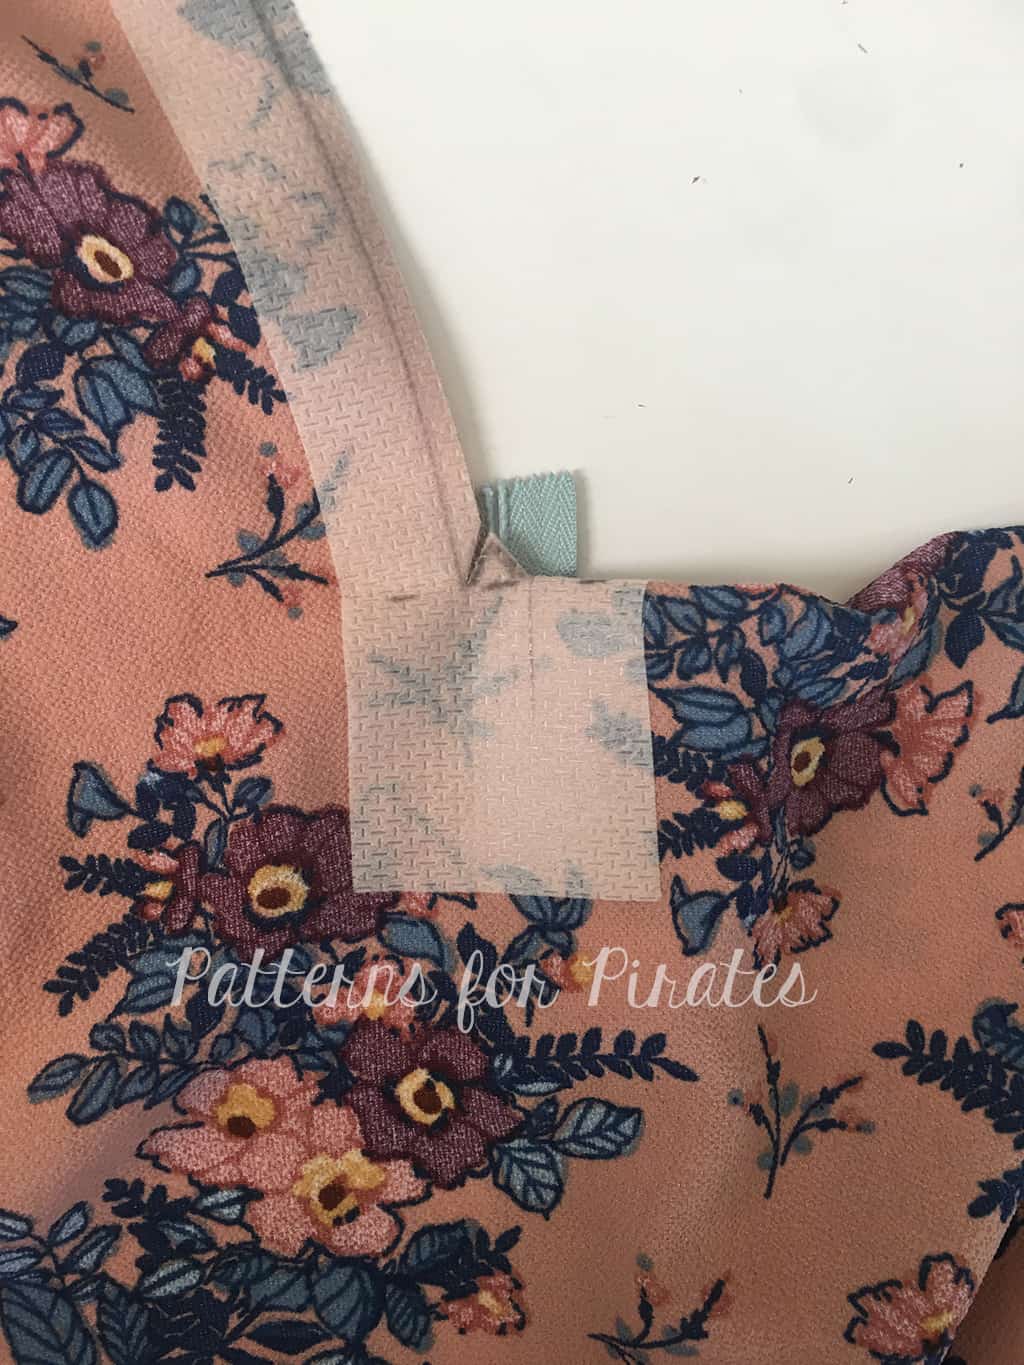
Start by marking the hem on the center back seam.

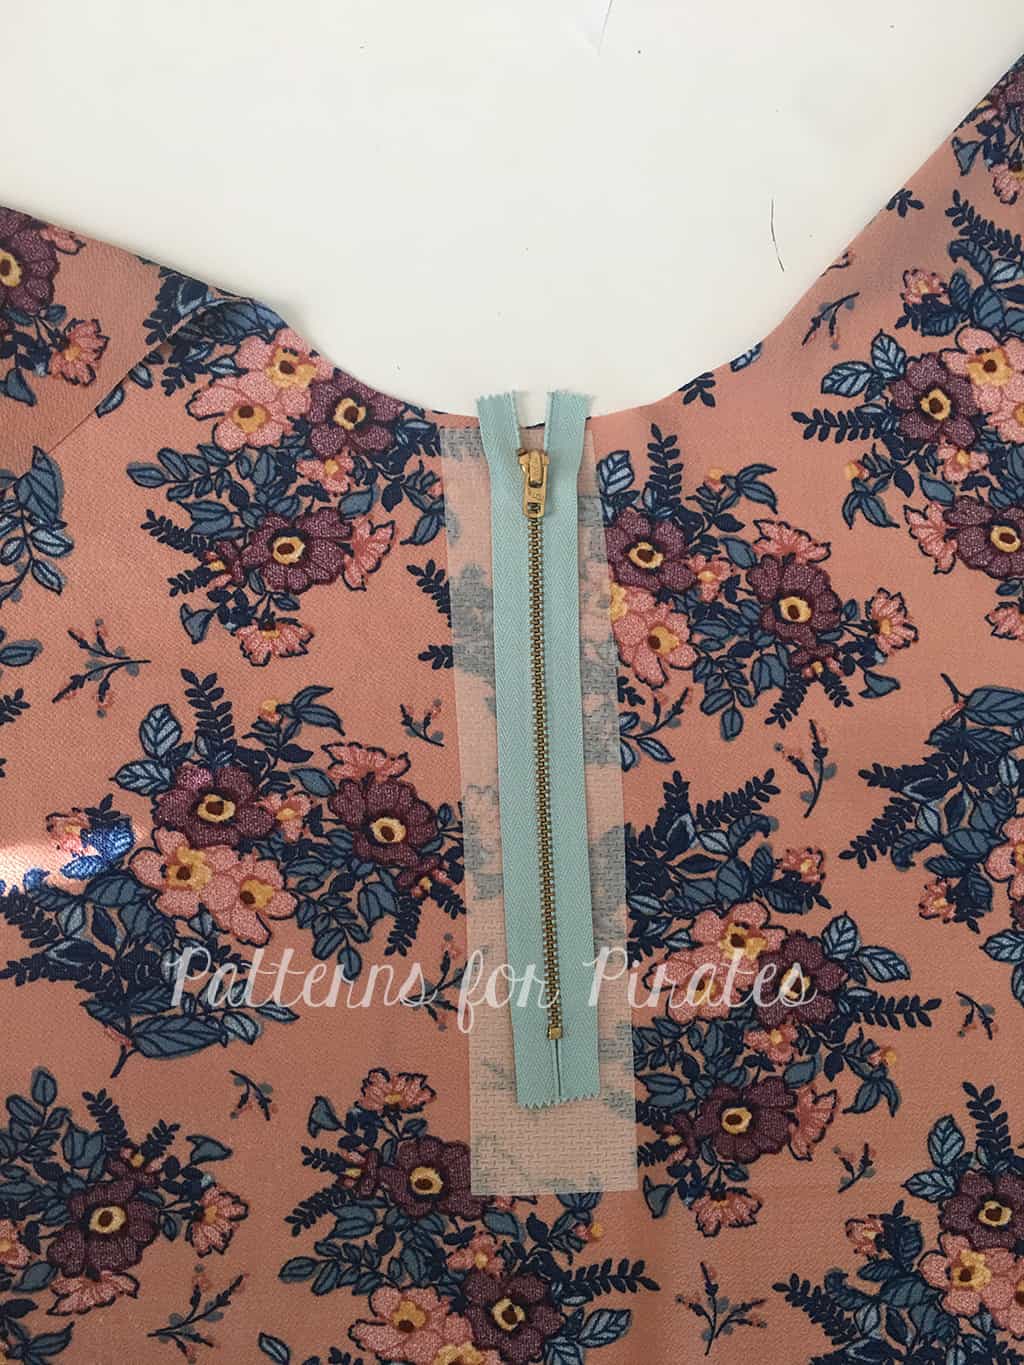
Add a strip of 1/4″ Wonder Tape to the center back seam, 1.4″ away from the edge. Start at the point you marked above and stop 1/2″ away from the top.

Repeat with the other back piece.
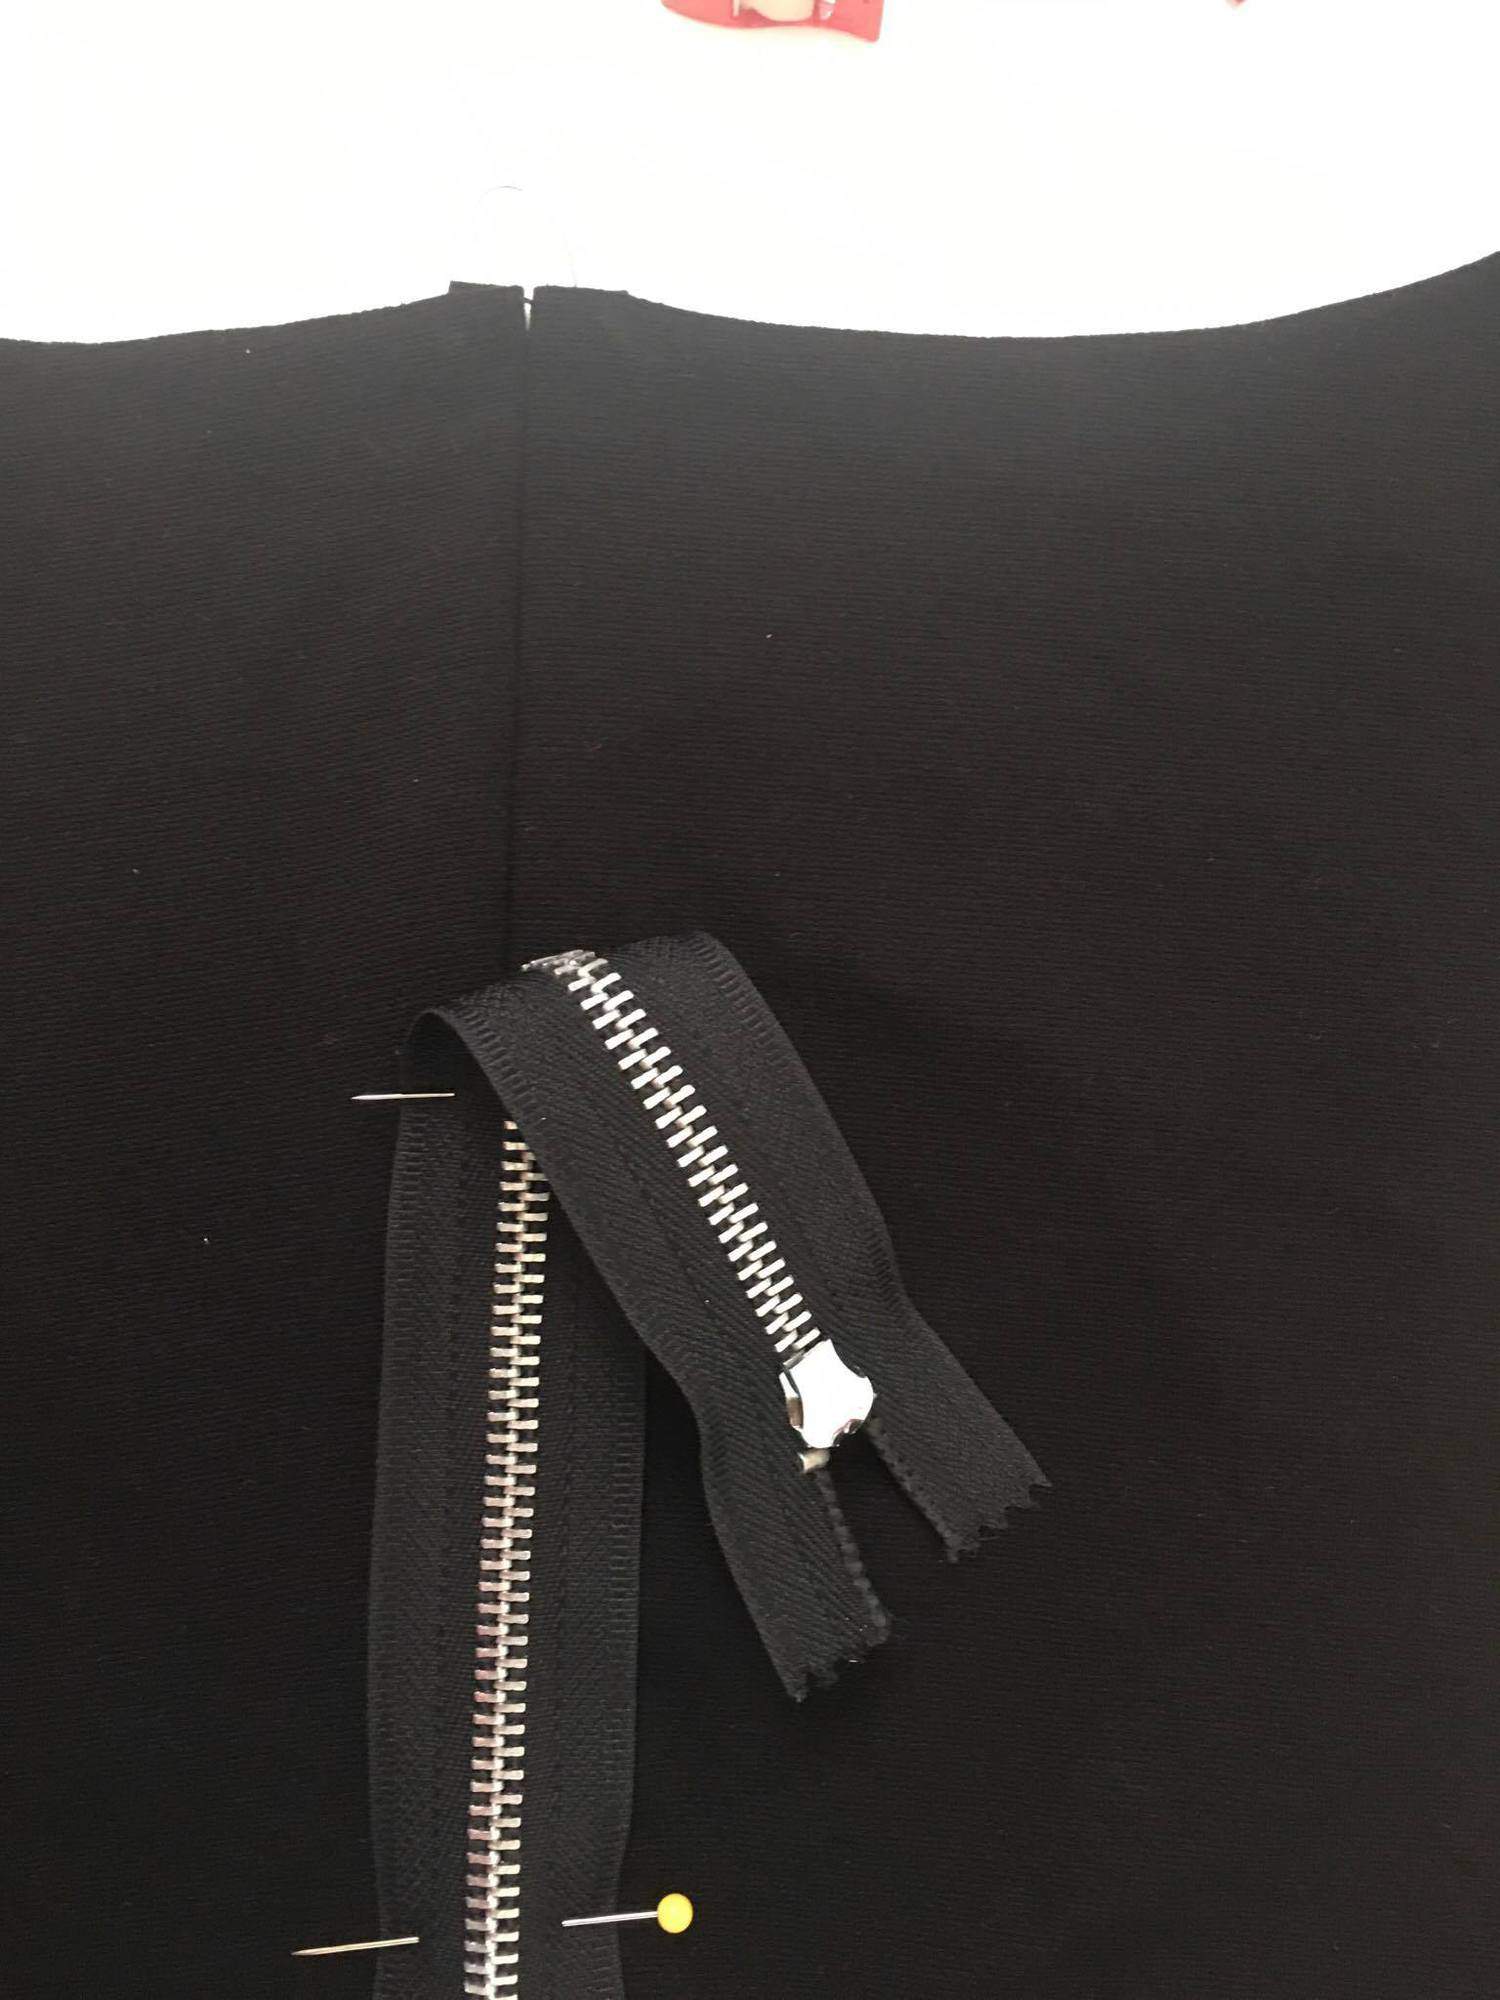
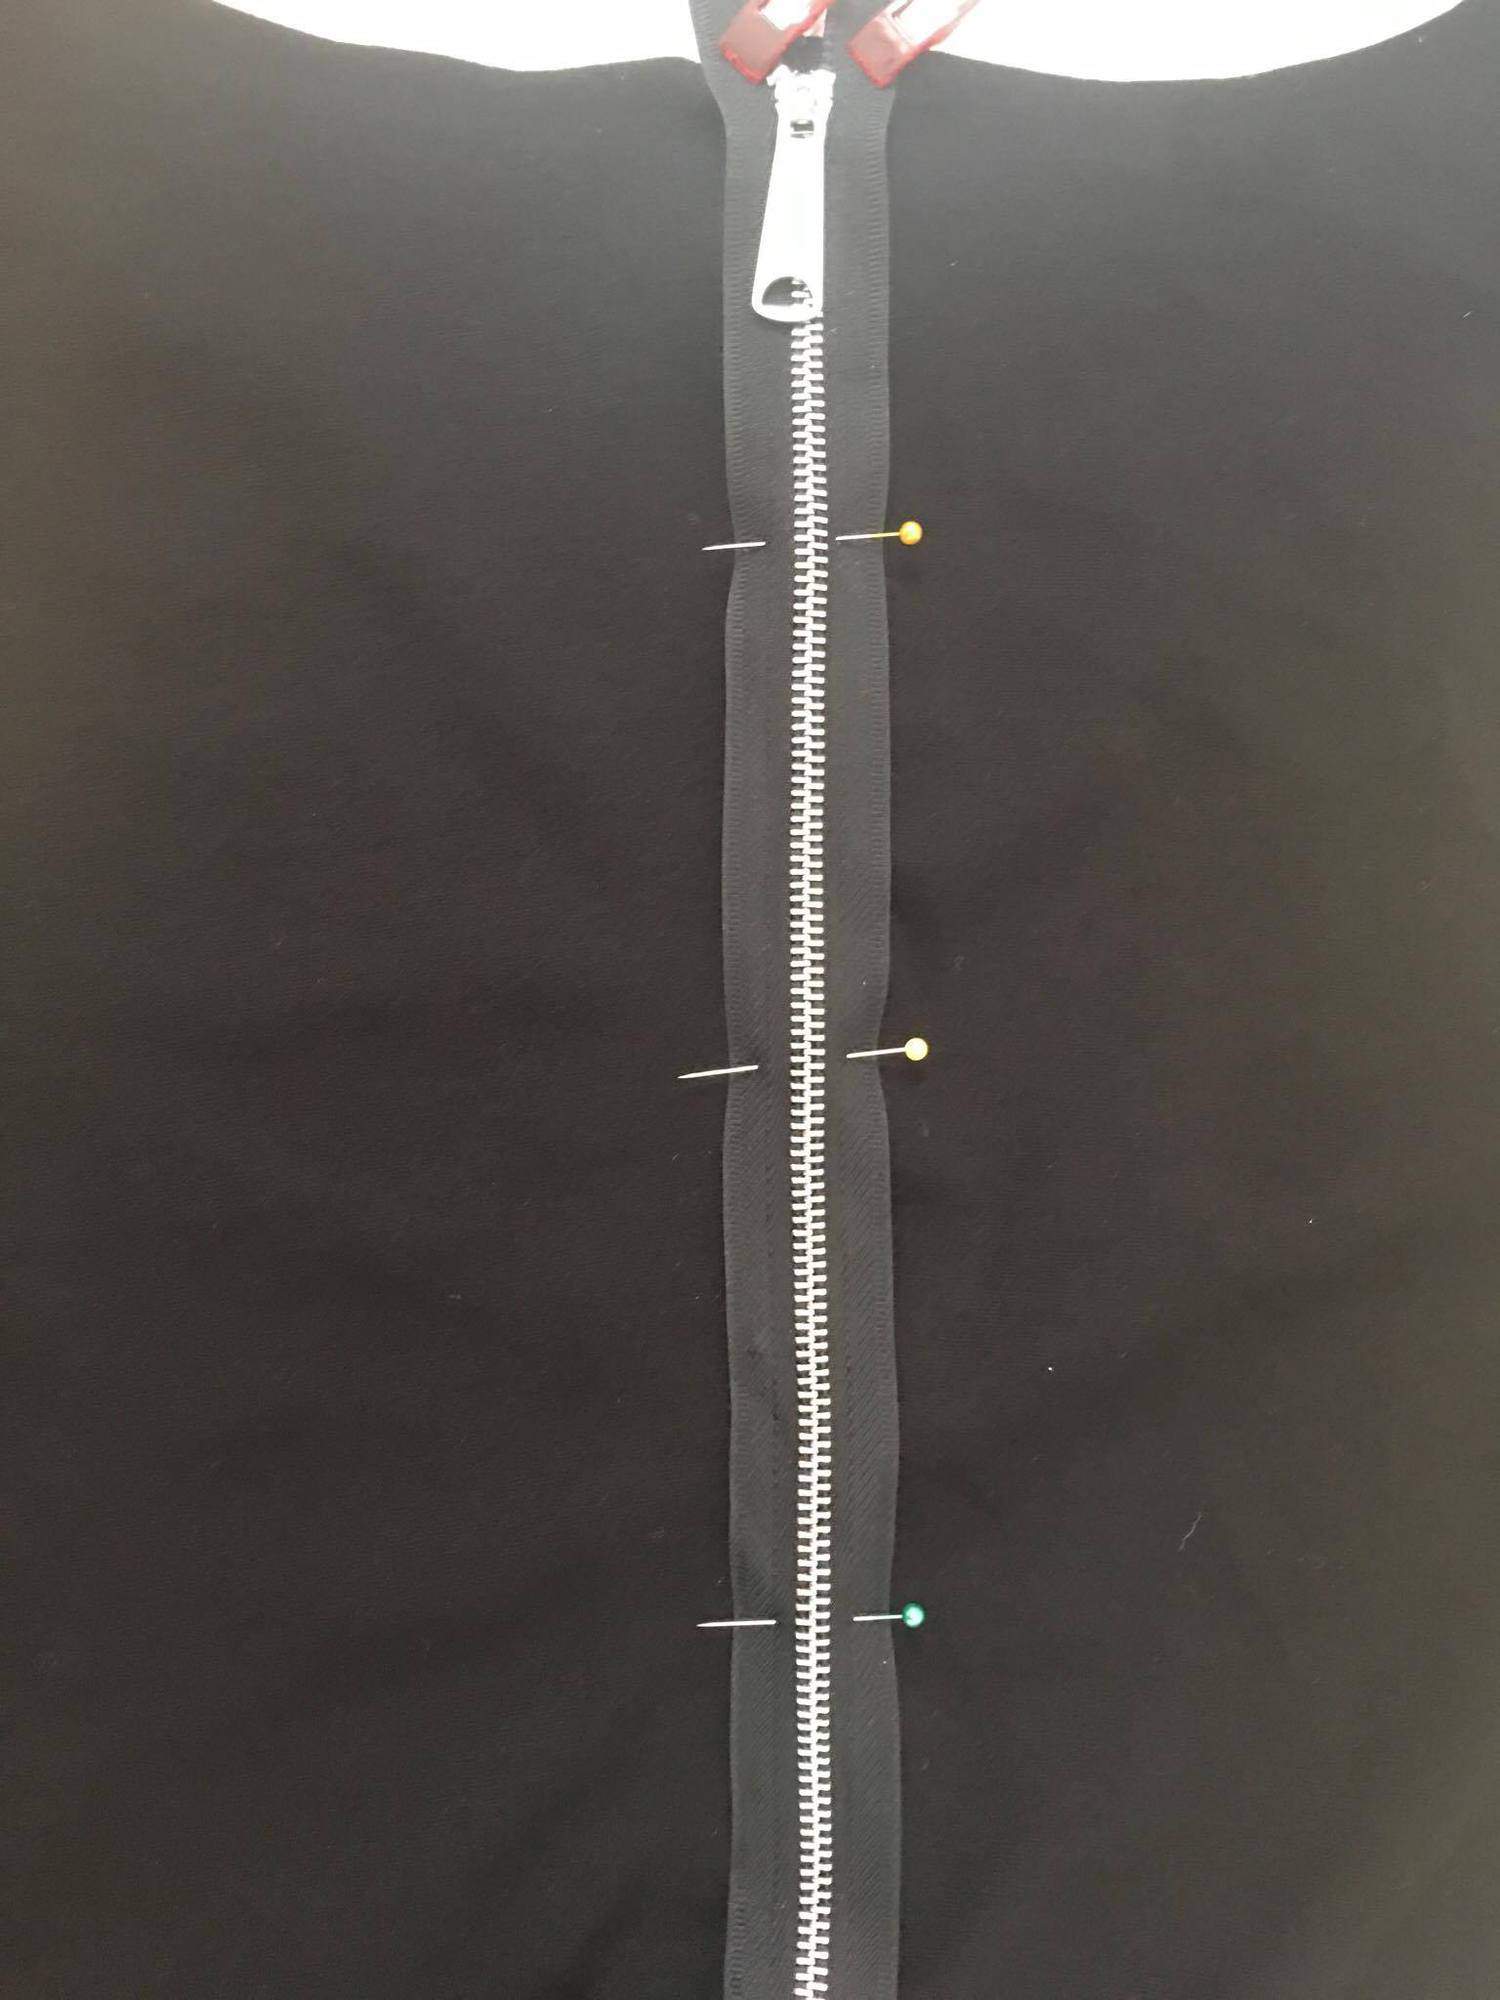
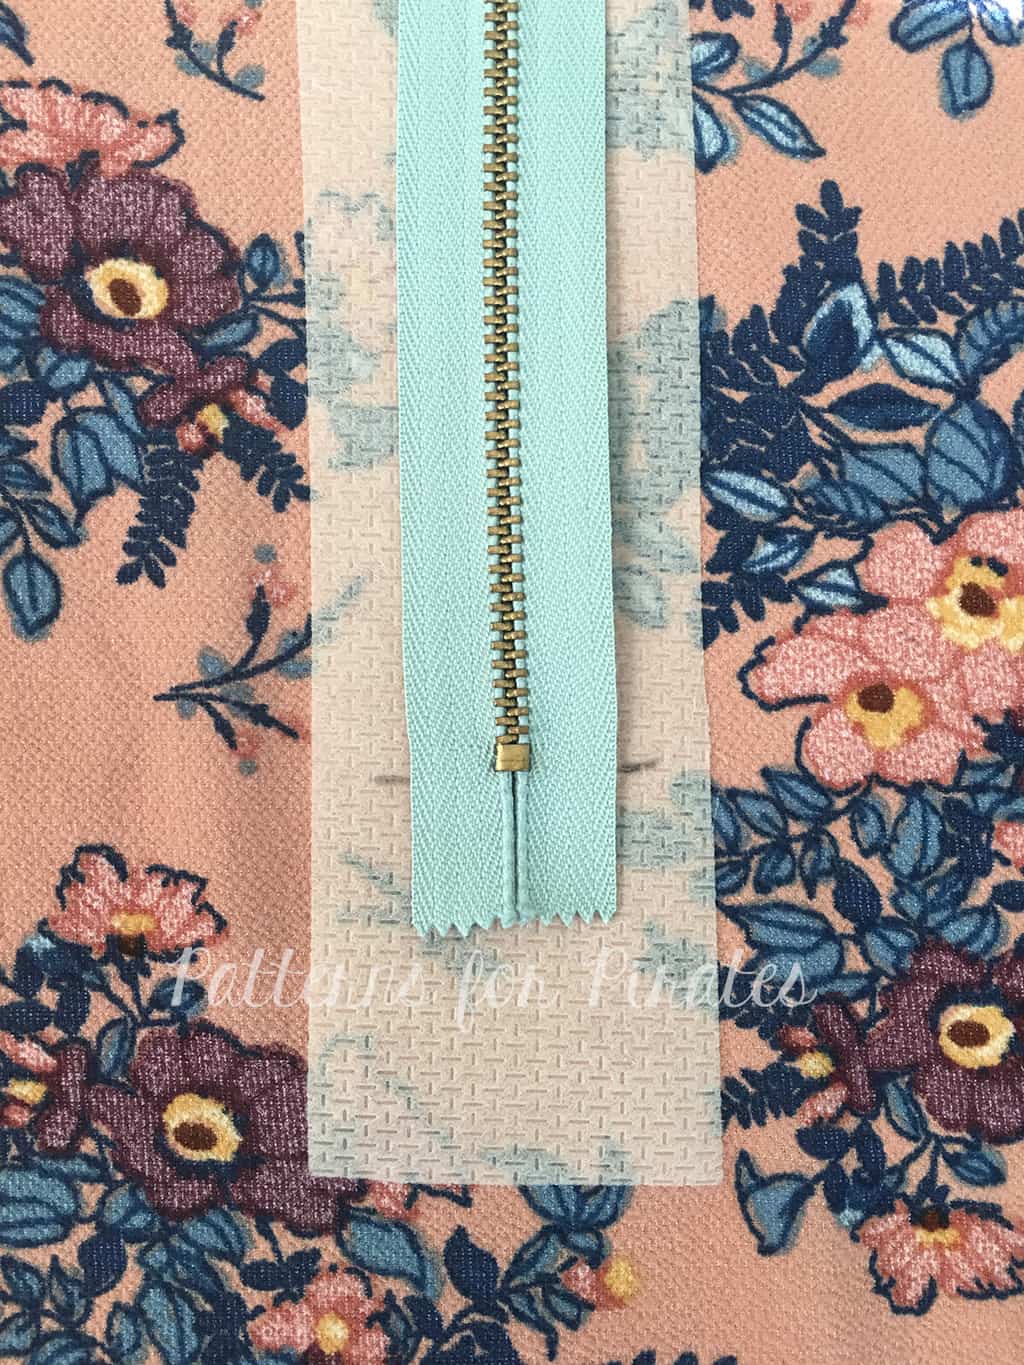
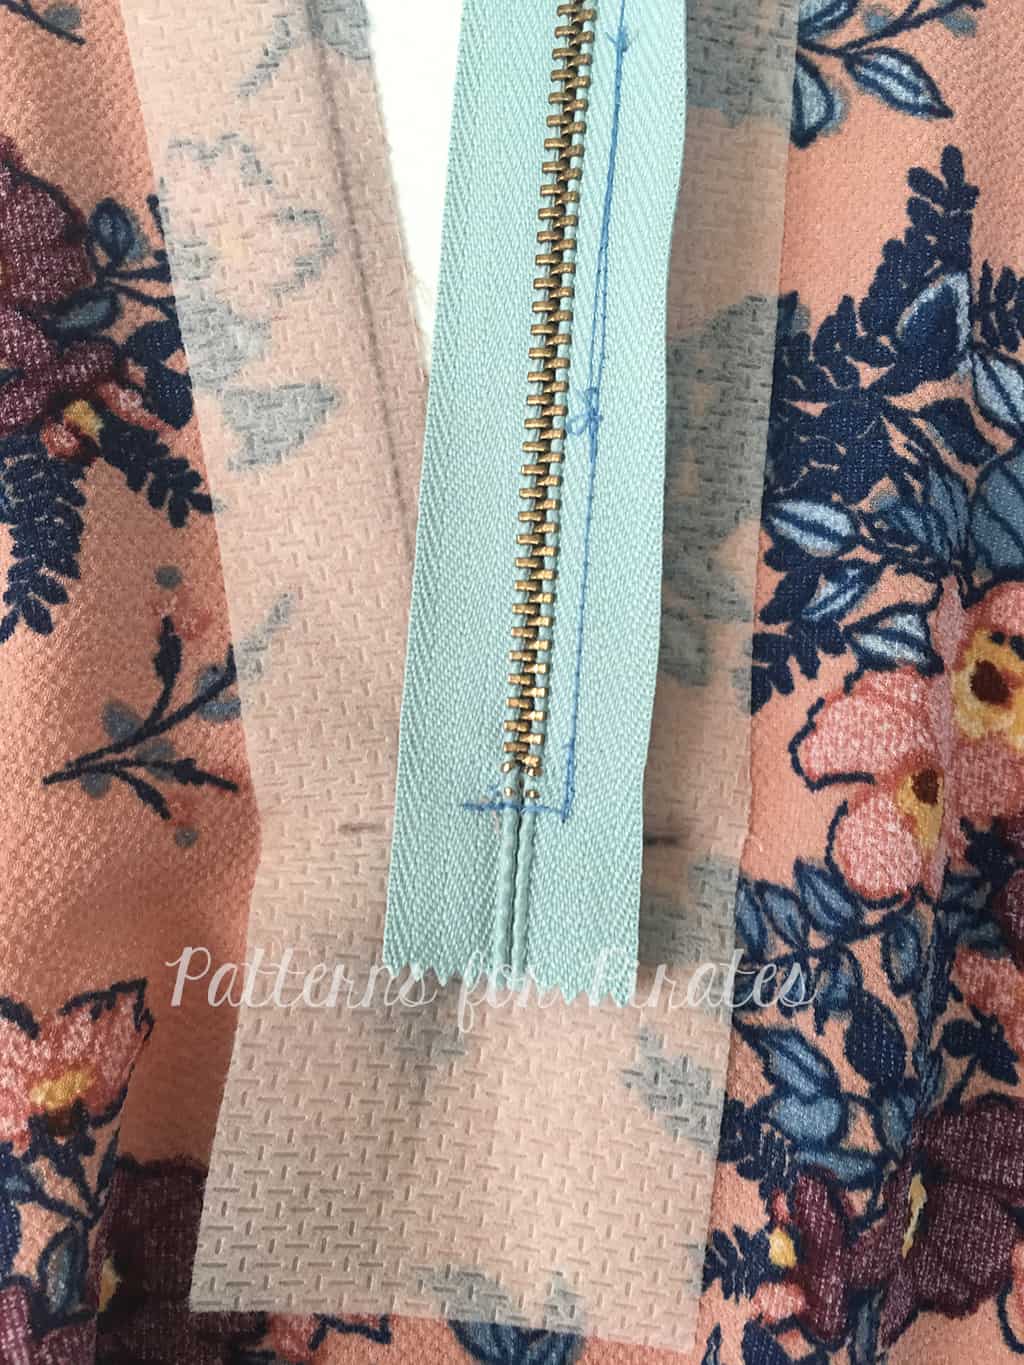
Remove the paper backing of the Wonder tape and adhere the zipper right sides together. Sew in place with a 1/2″ seam allowance.

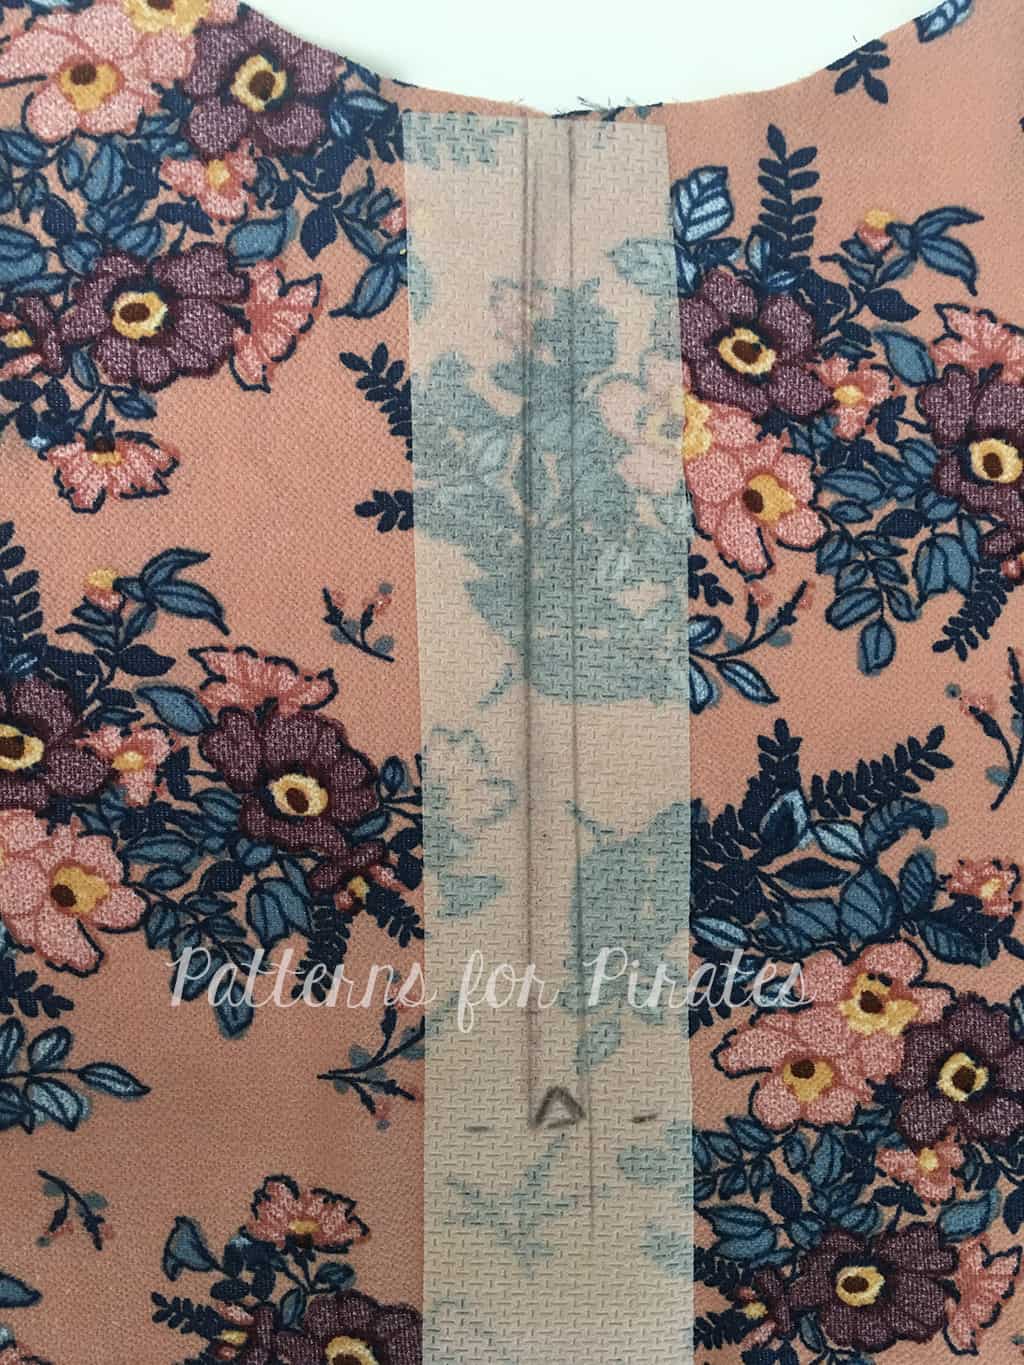
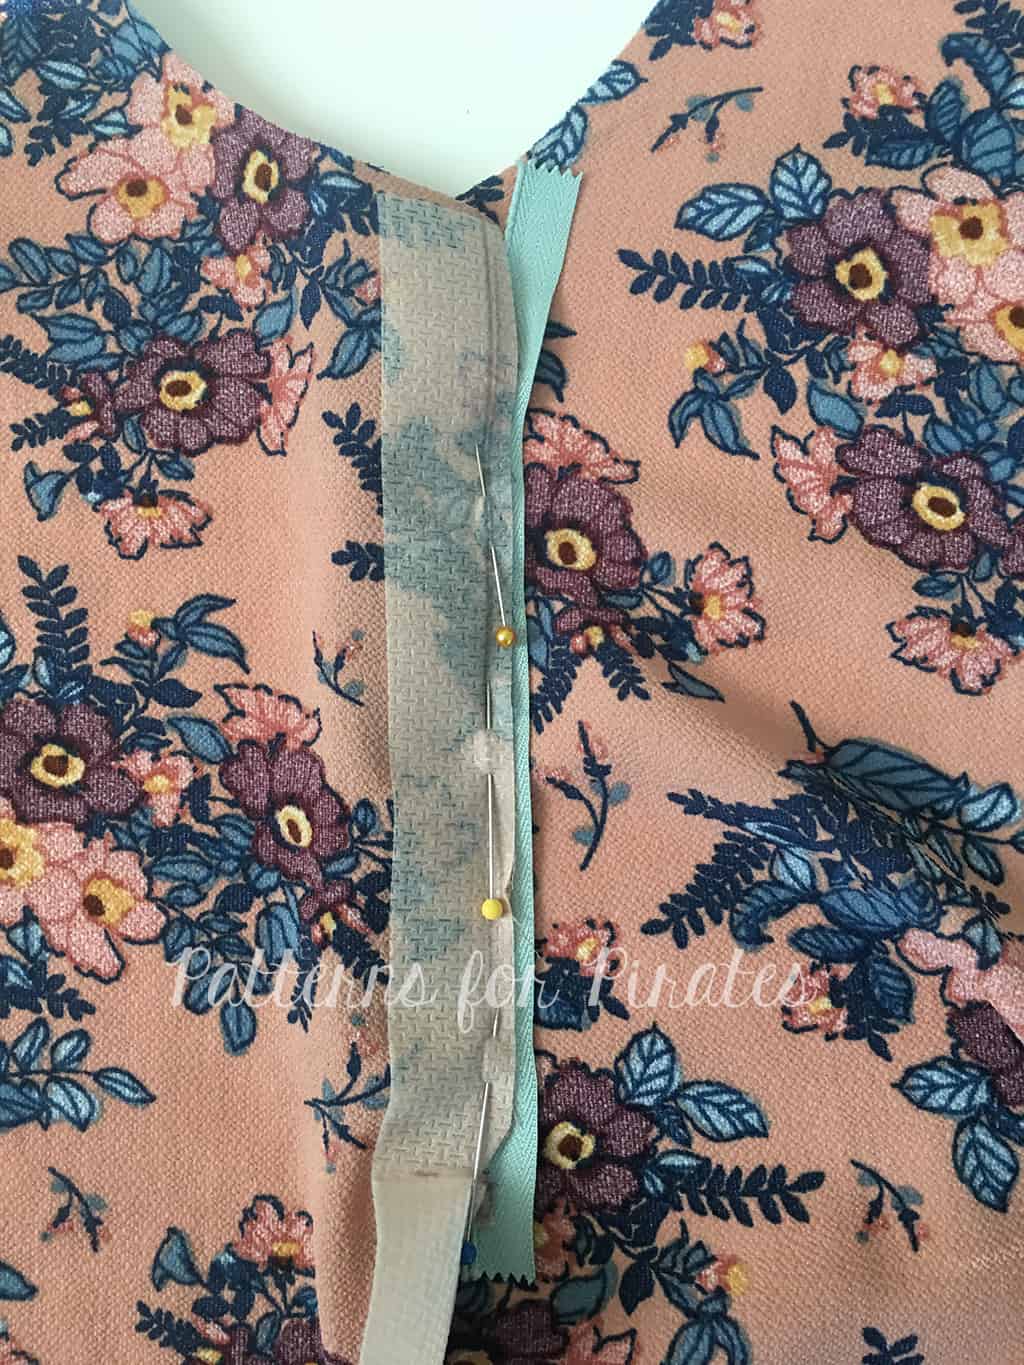
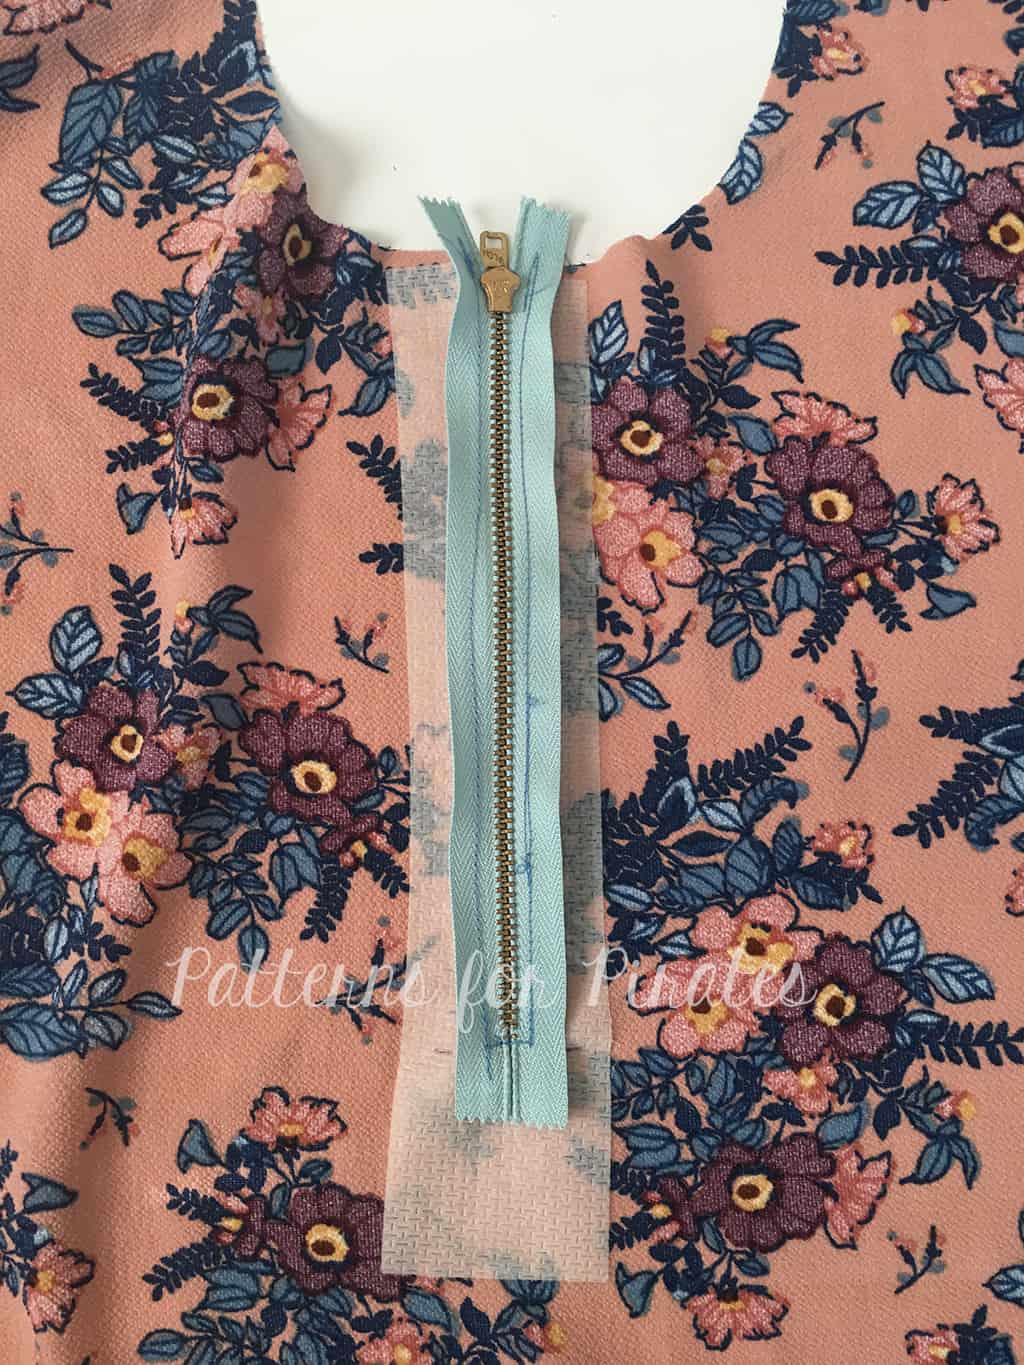
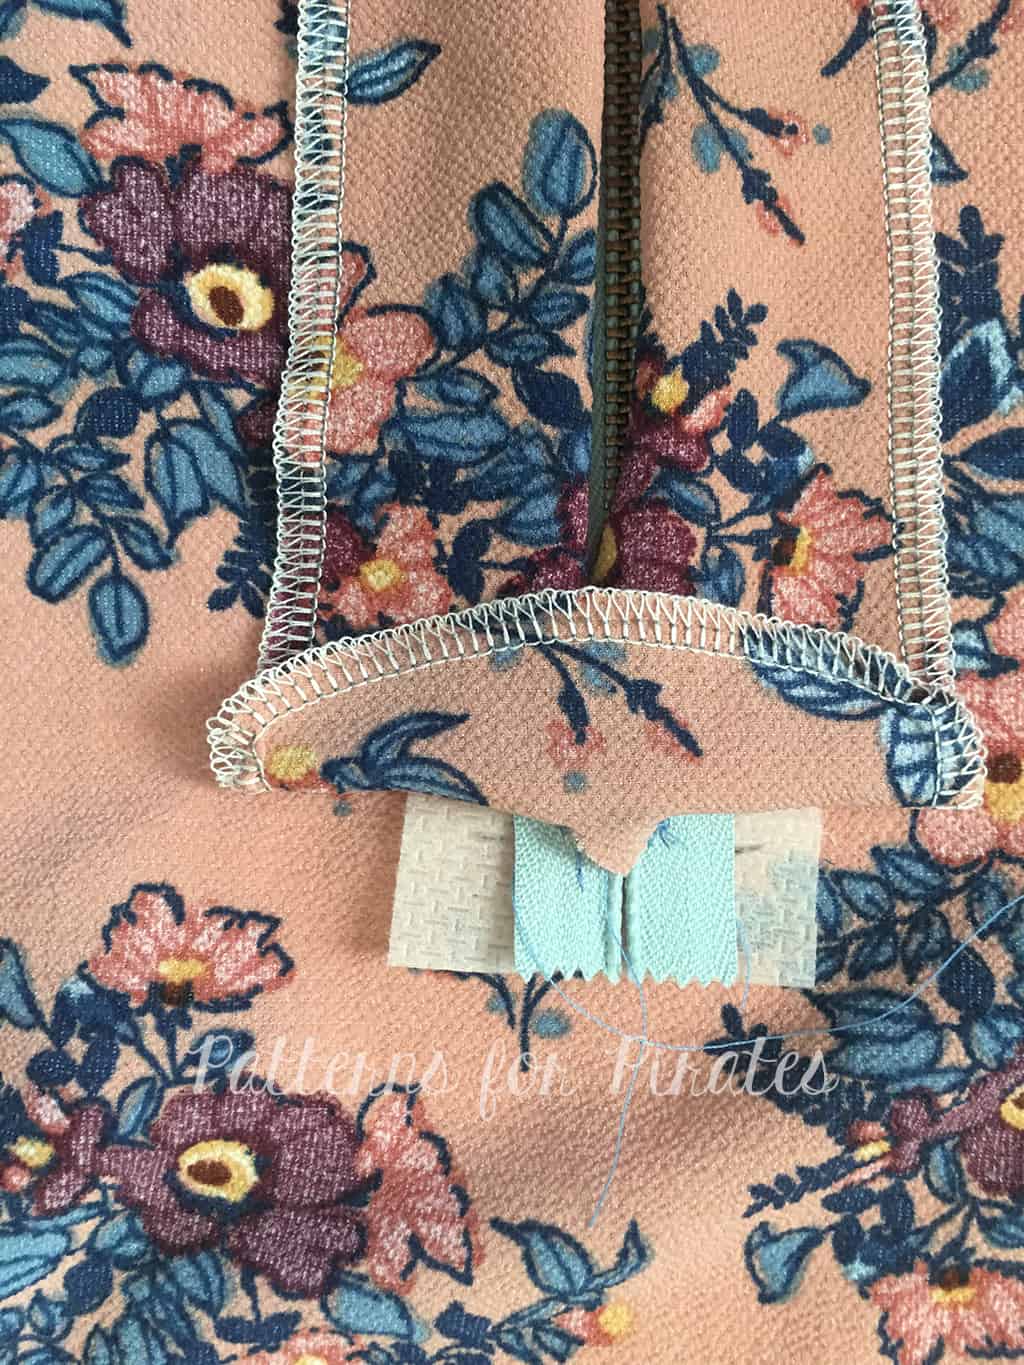
Zip up the zipper and place the other side of the back piece, right sides together, making sure that the bottom and top match.
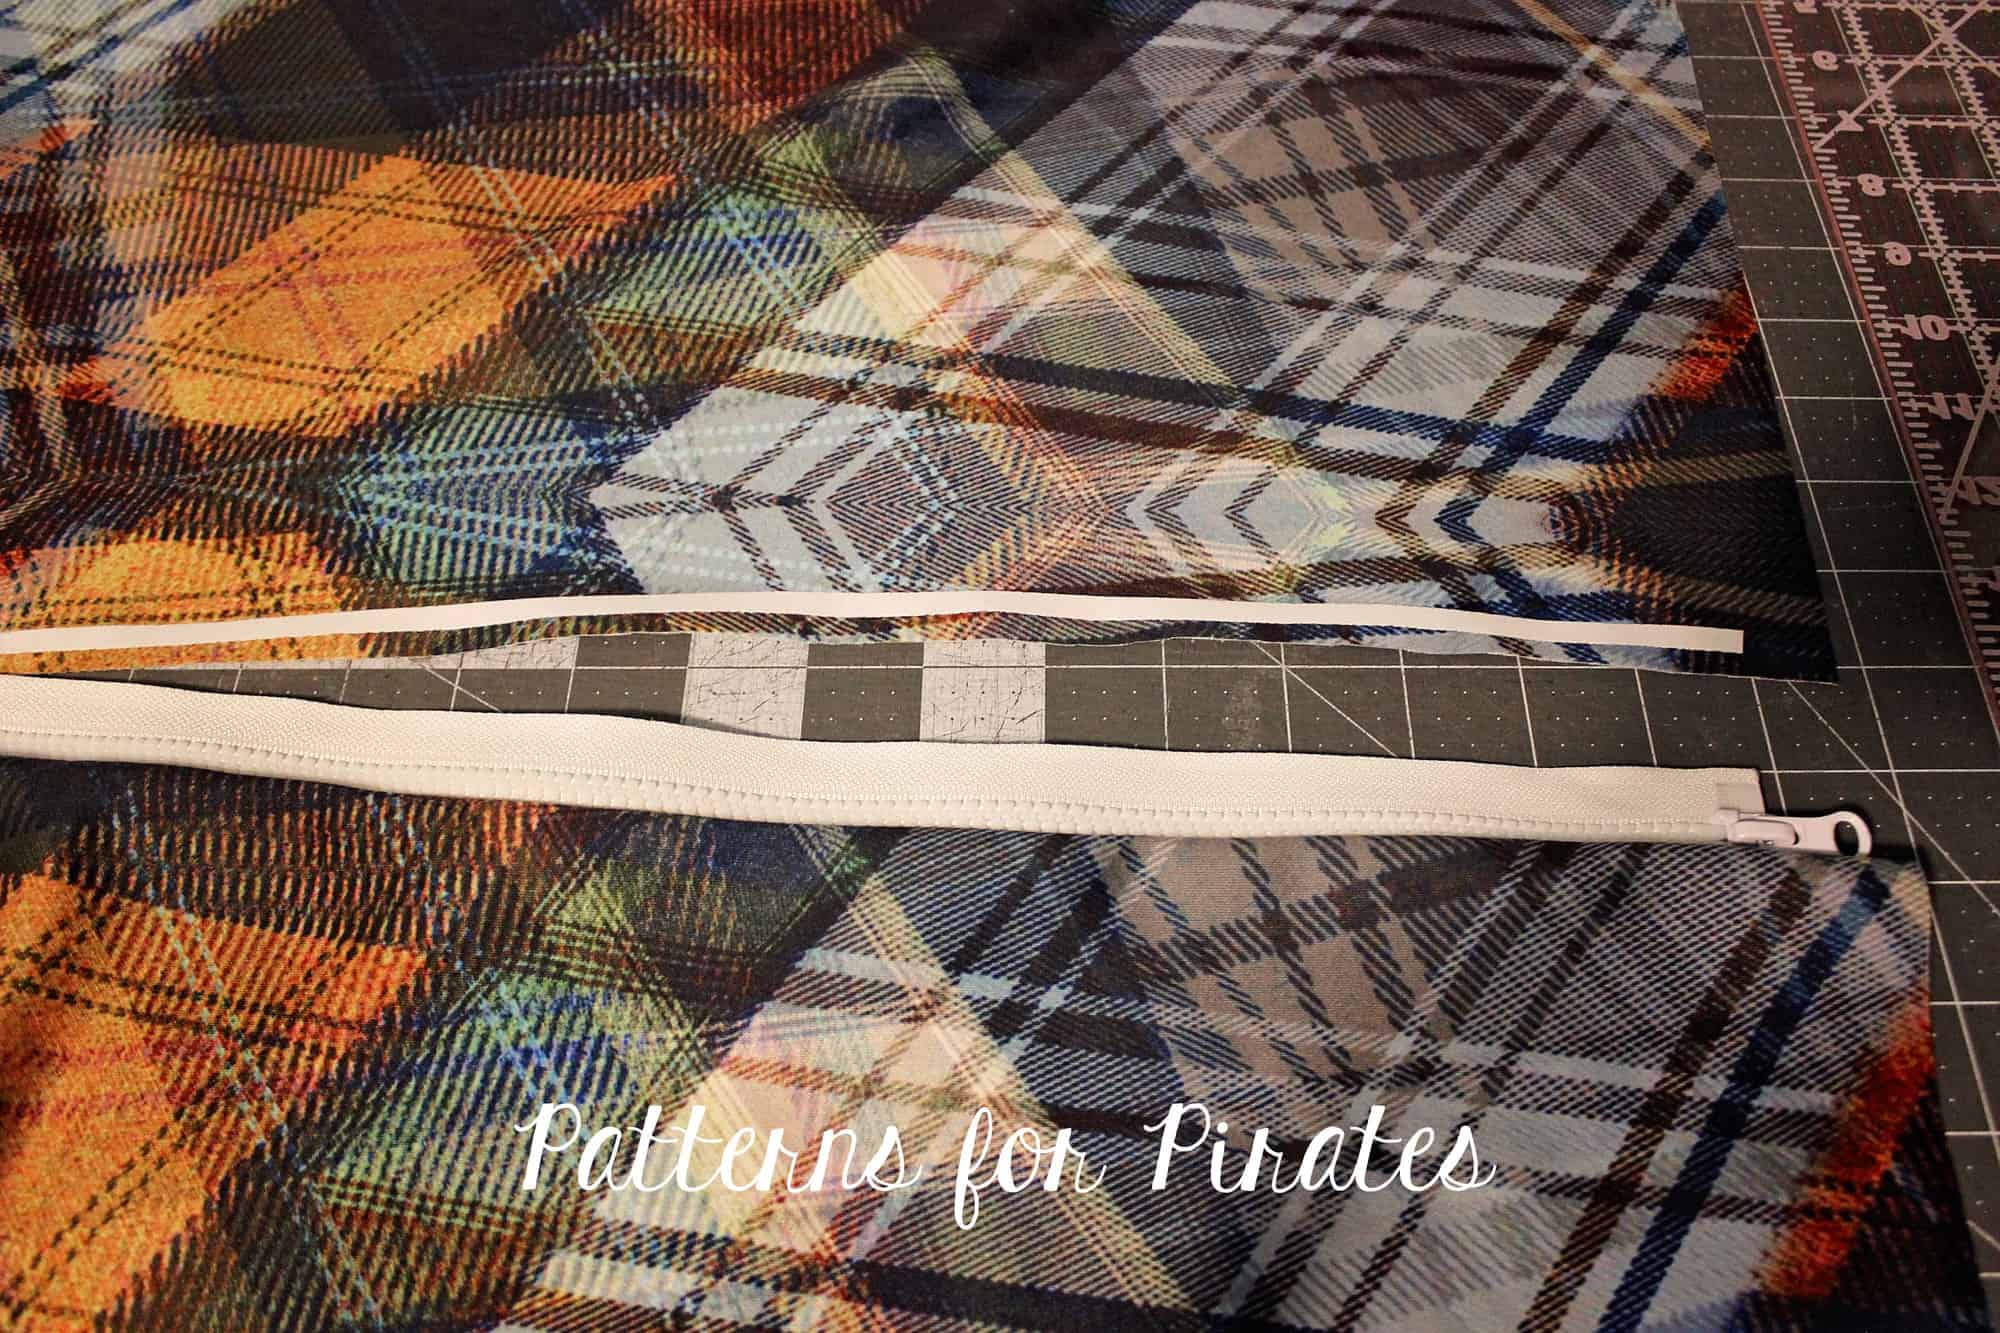
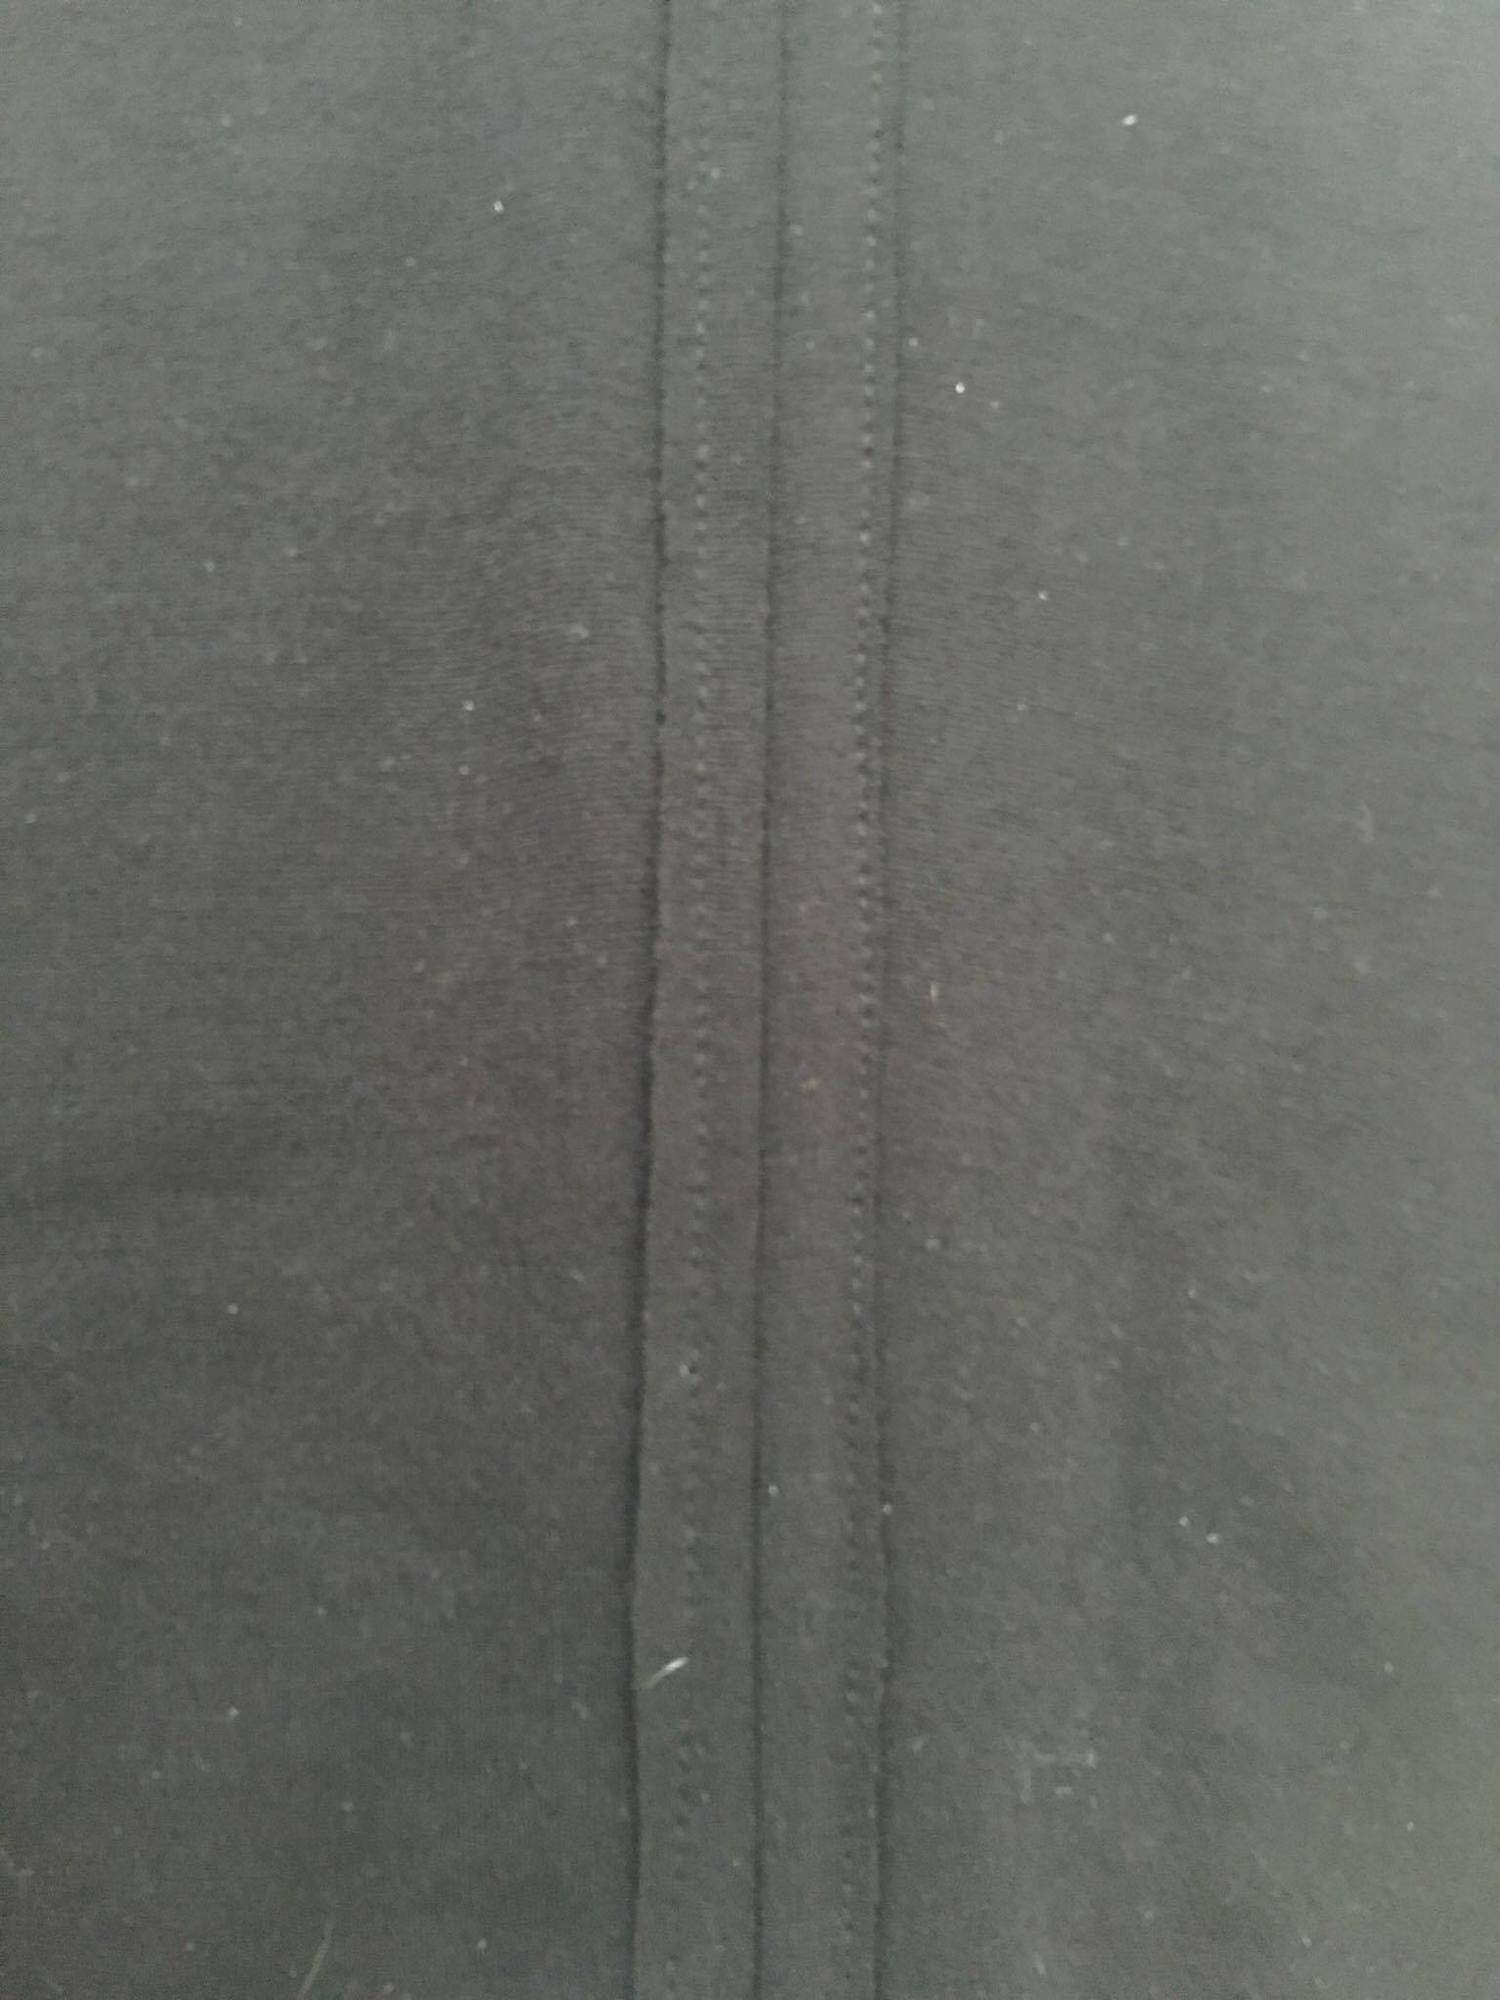
Sew in place and top stitch.

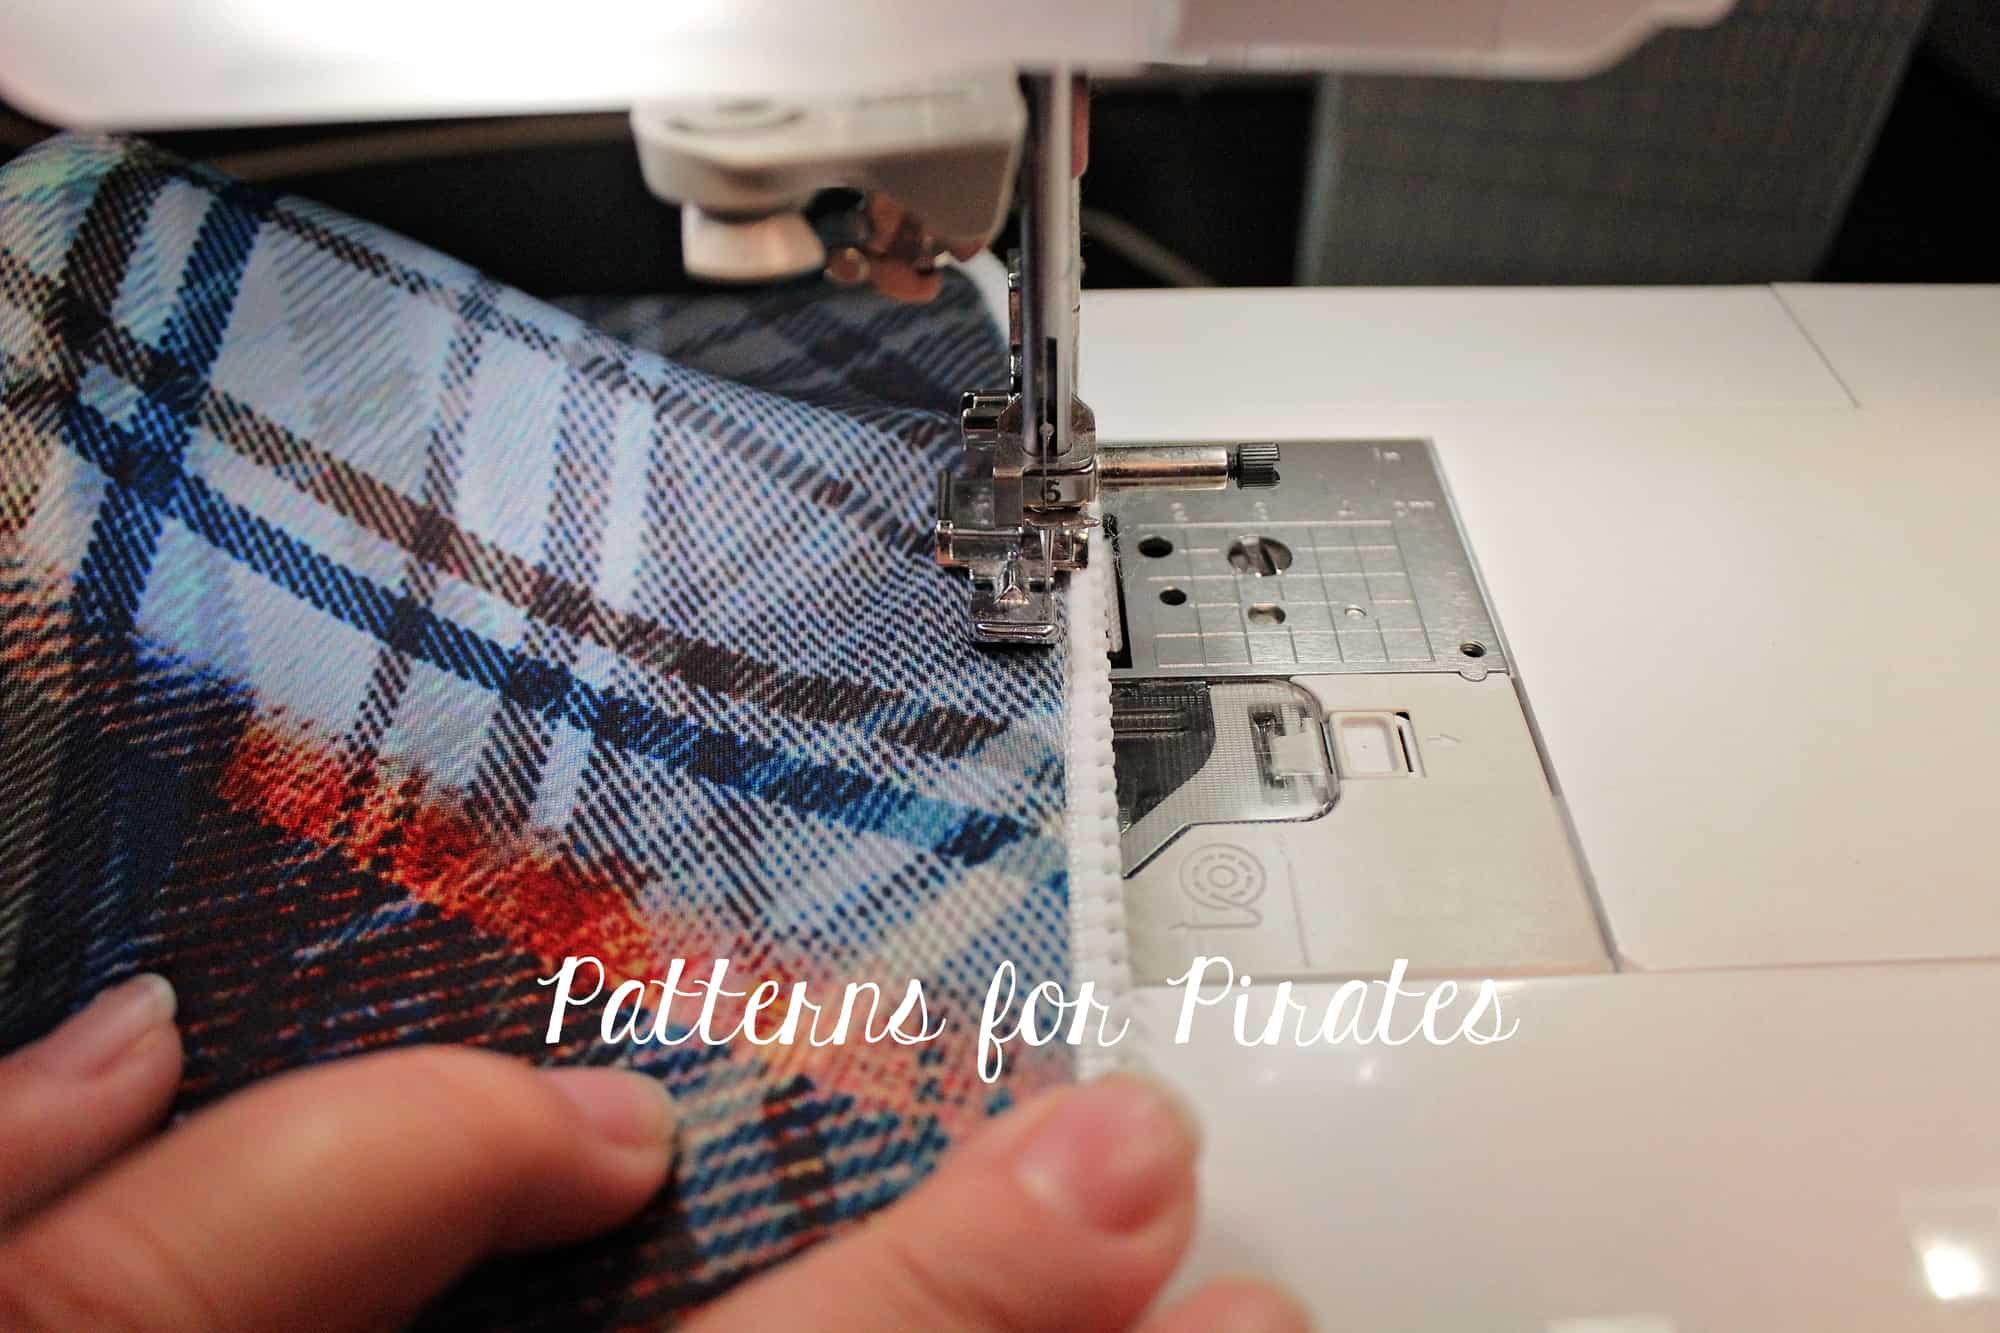
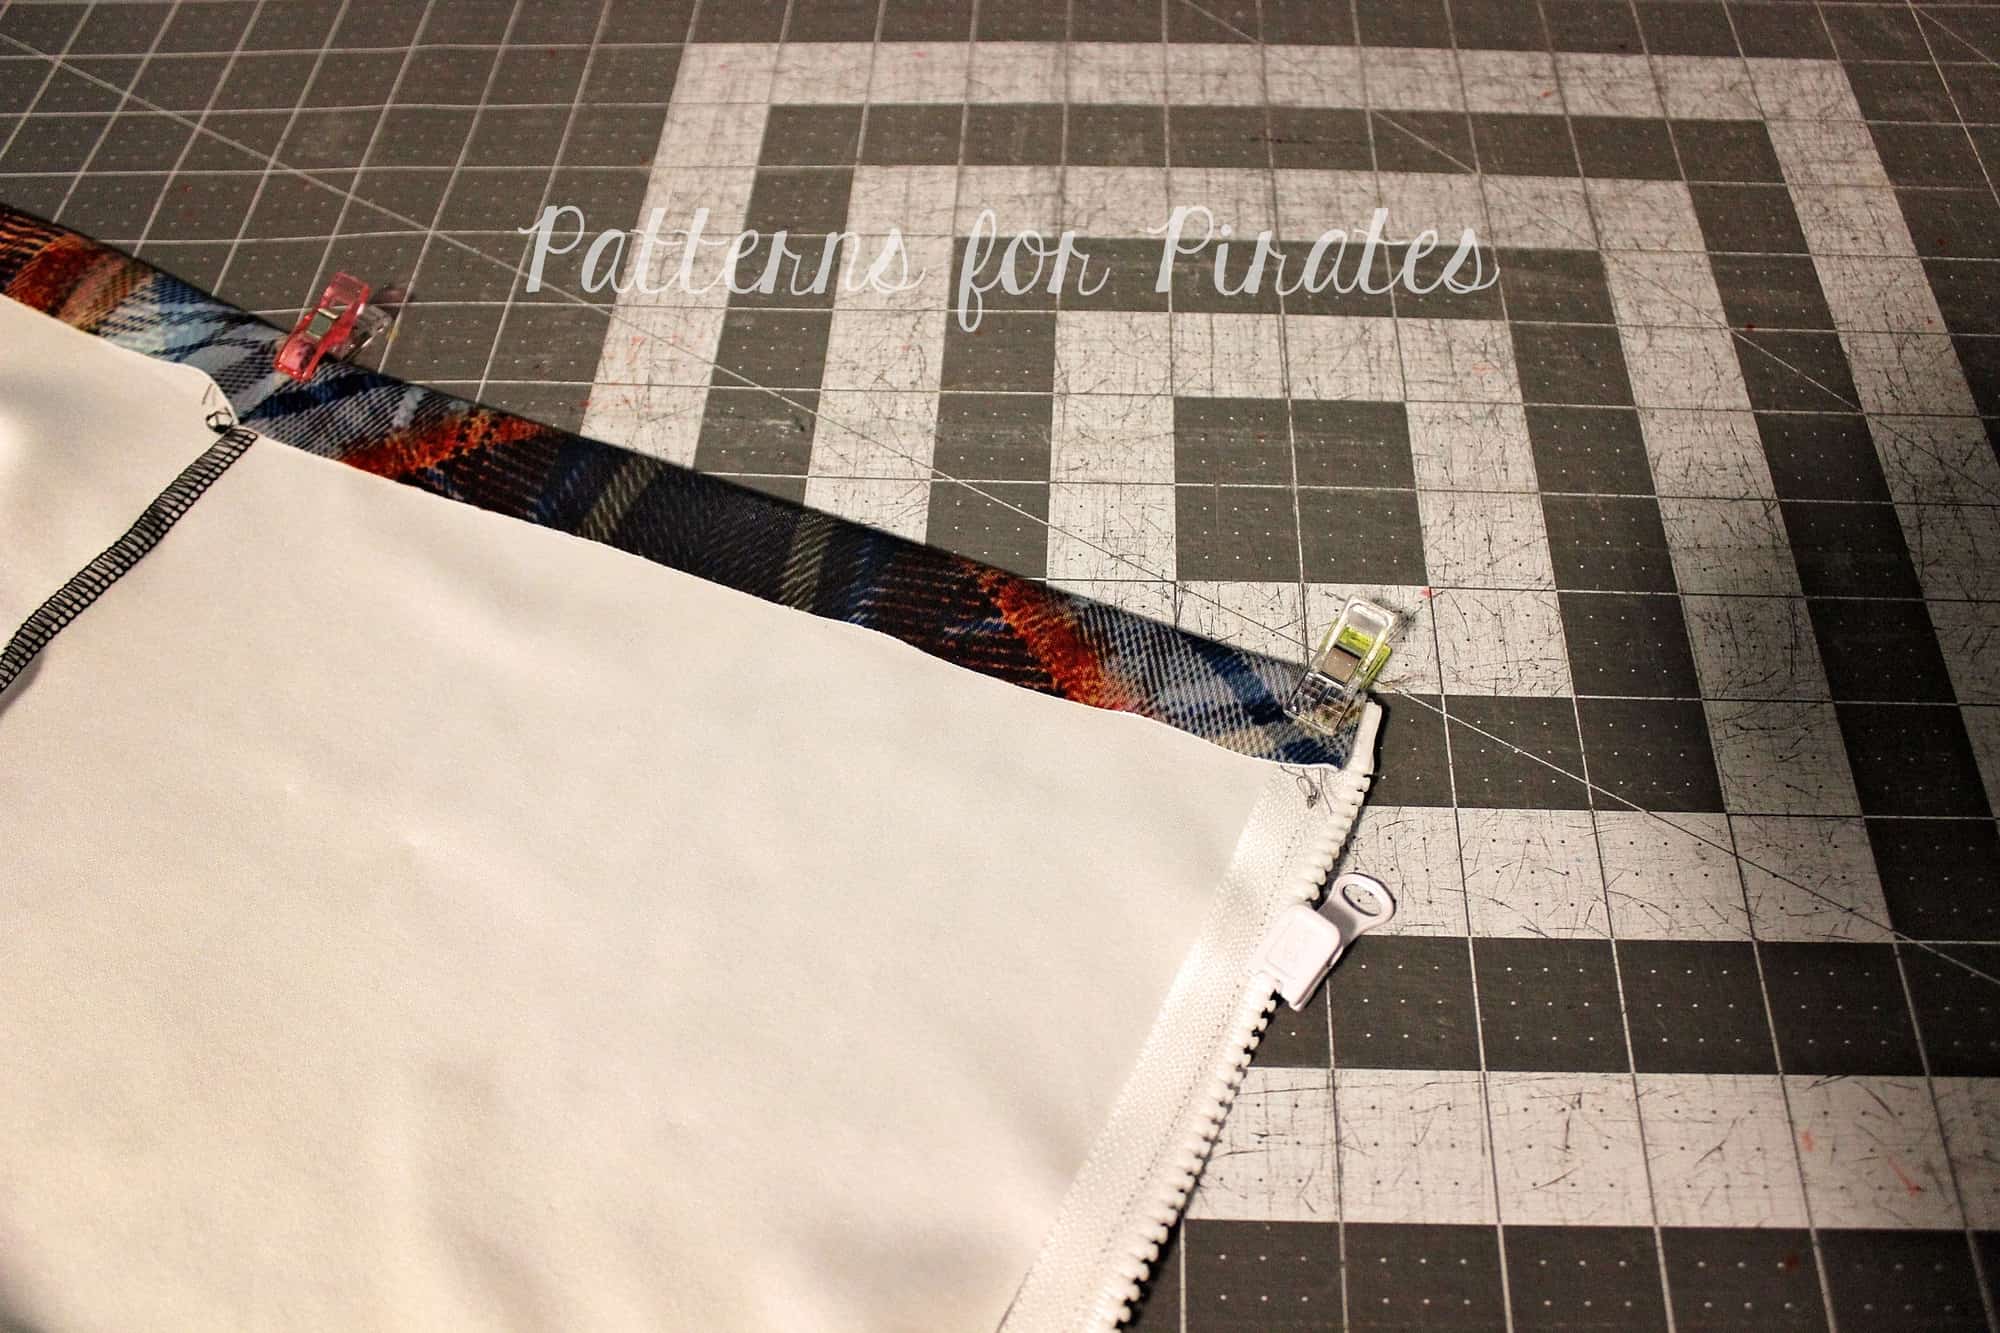
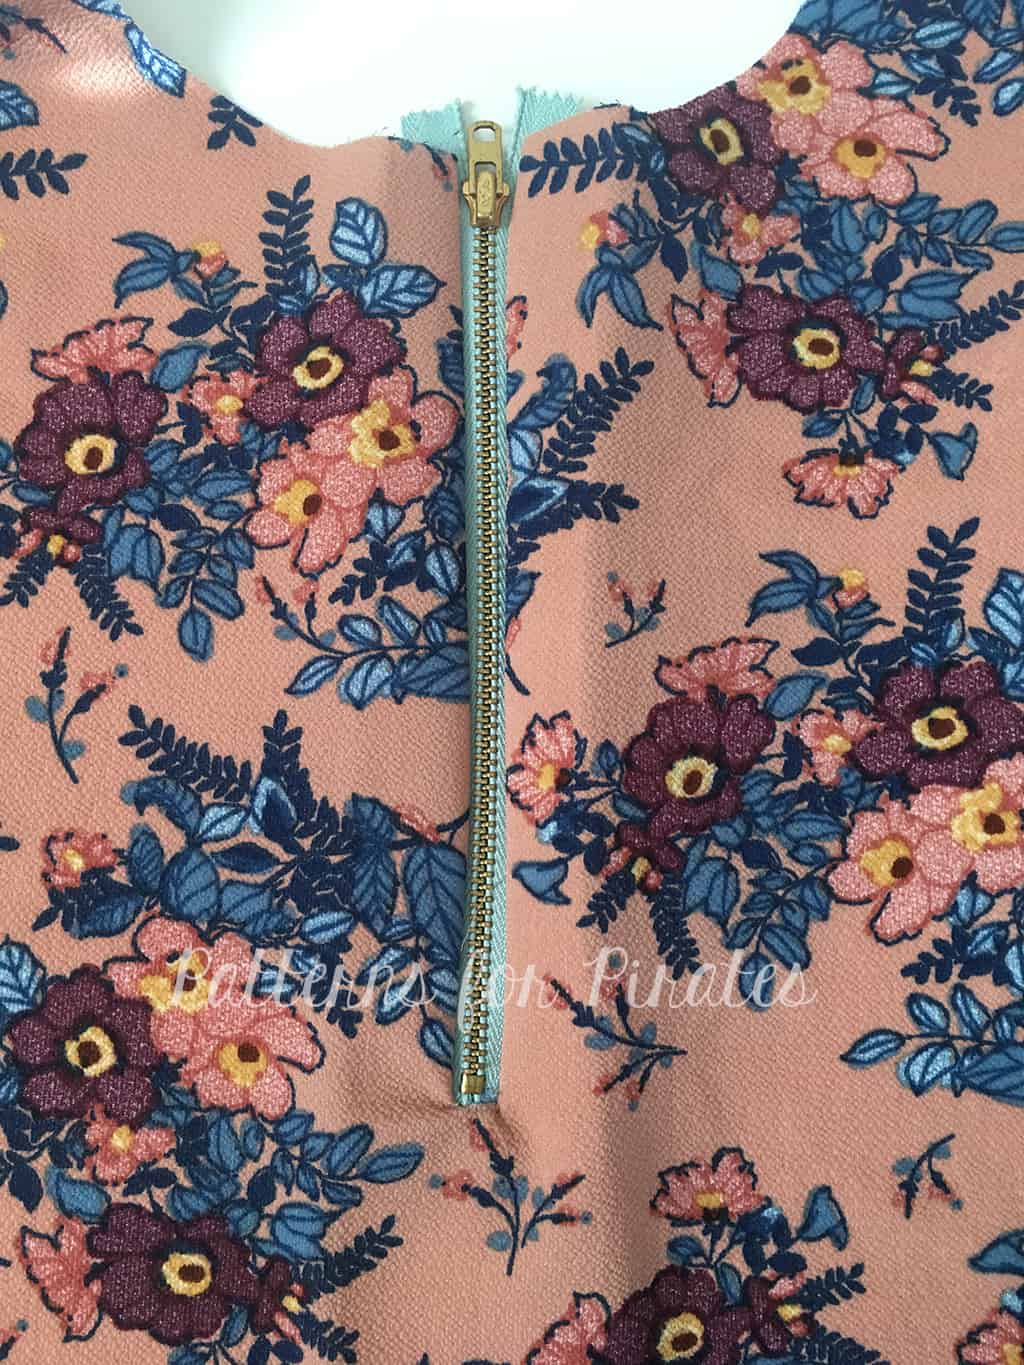
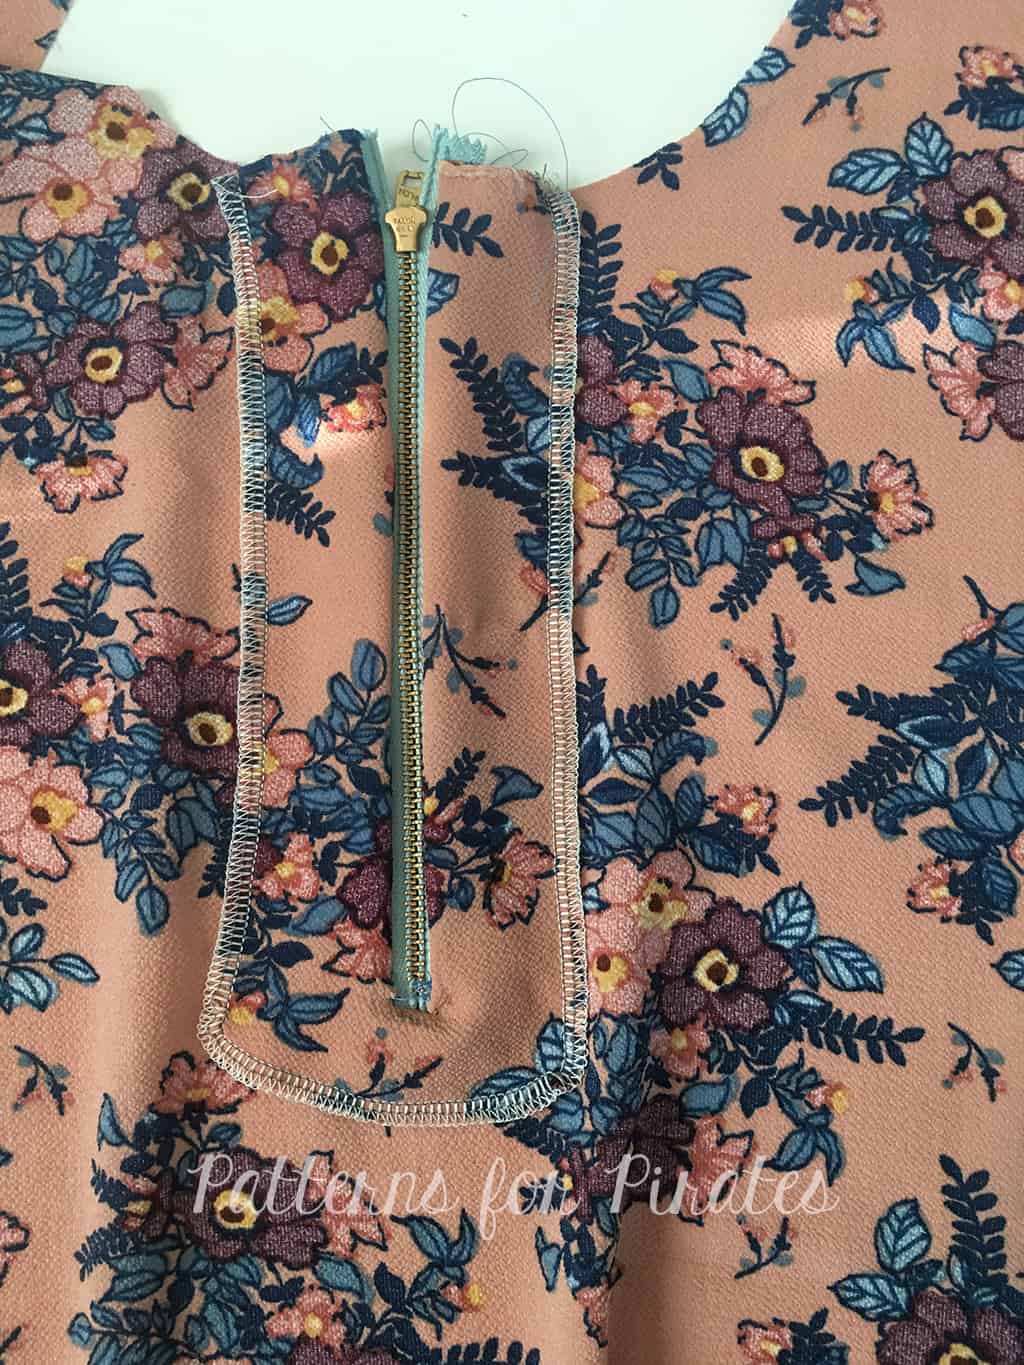
Now that you have your back piece ready, sew the dress as per the tutorial. You will be enclosing the zipper in the bottom hem as shown below.
All done! Now all you have to decide is where the next date night will be! 🙂


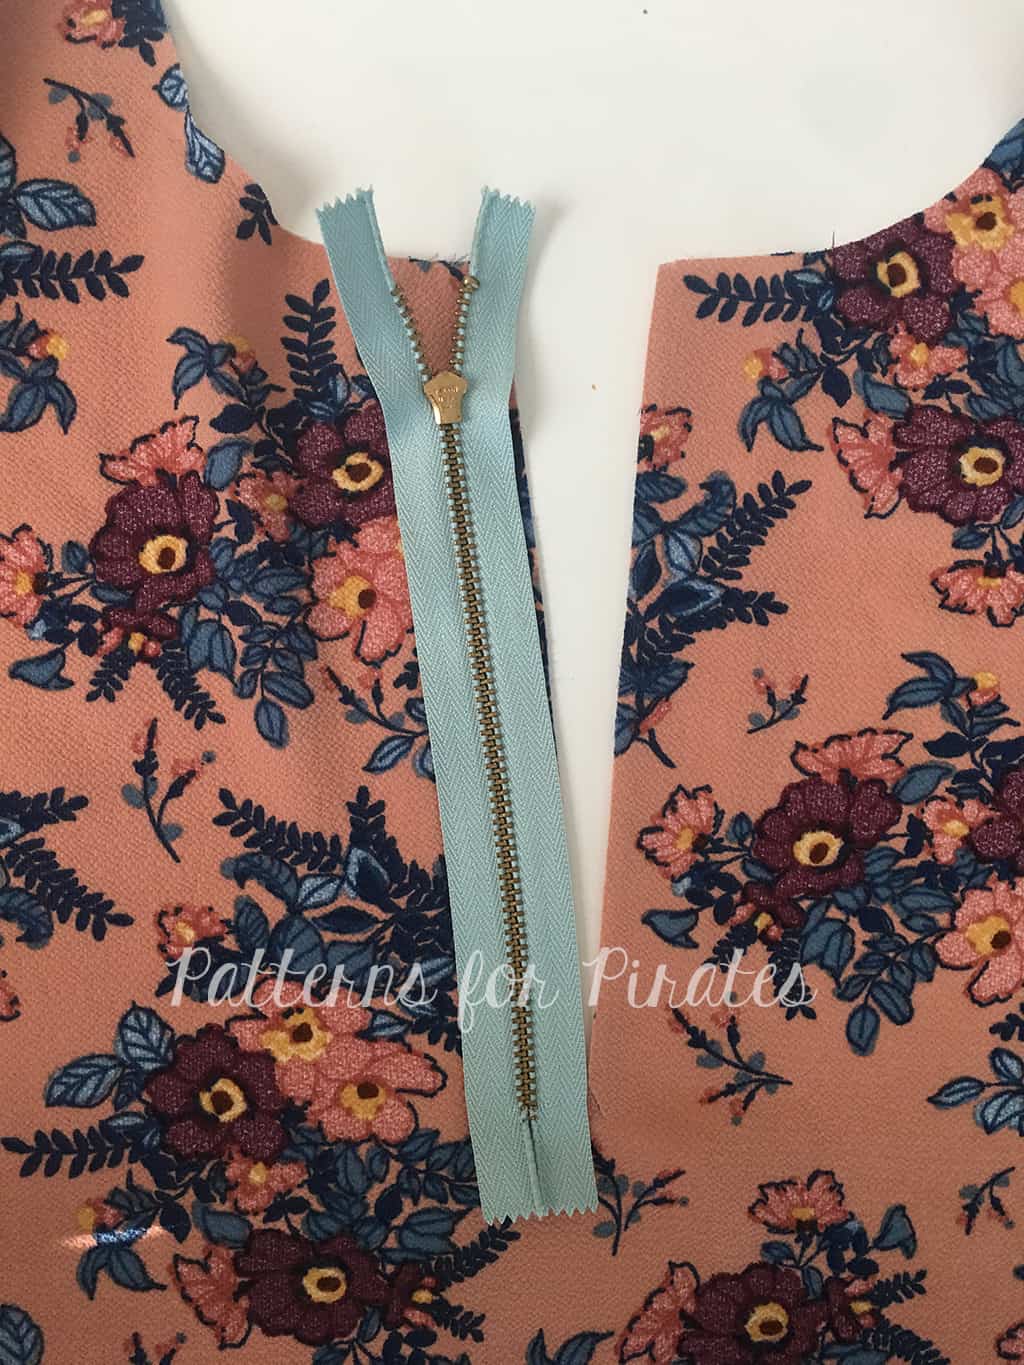
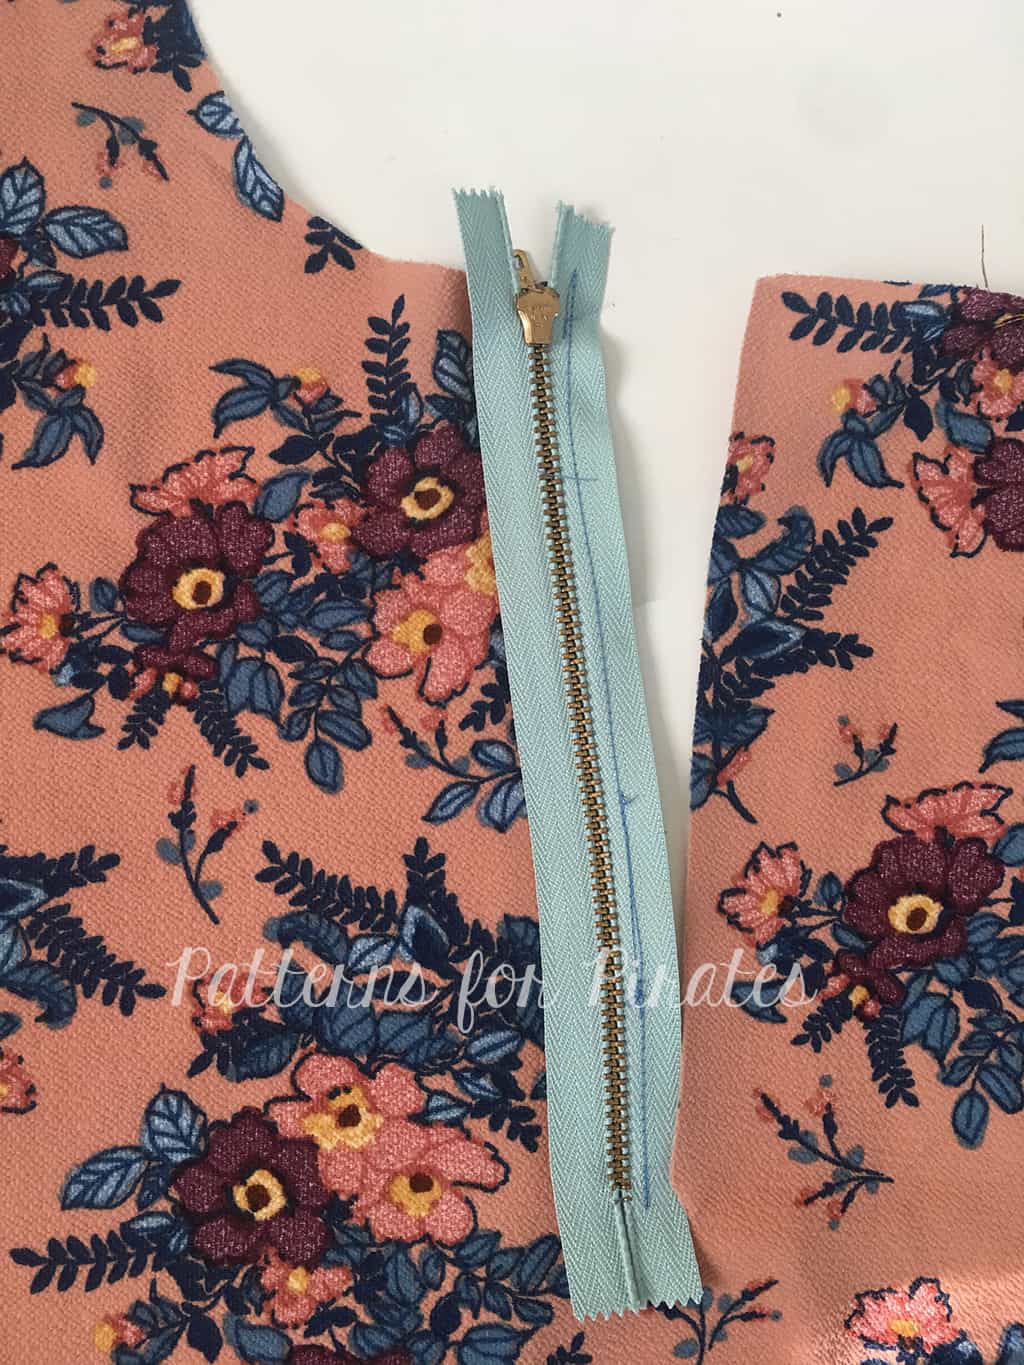
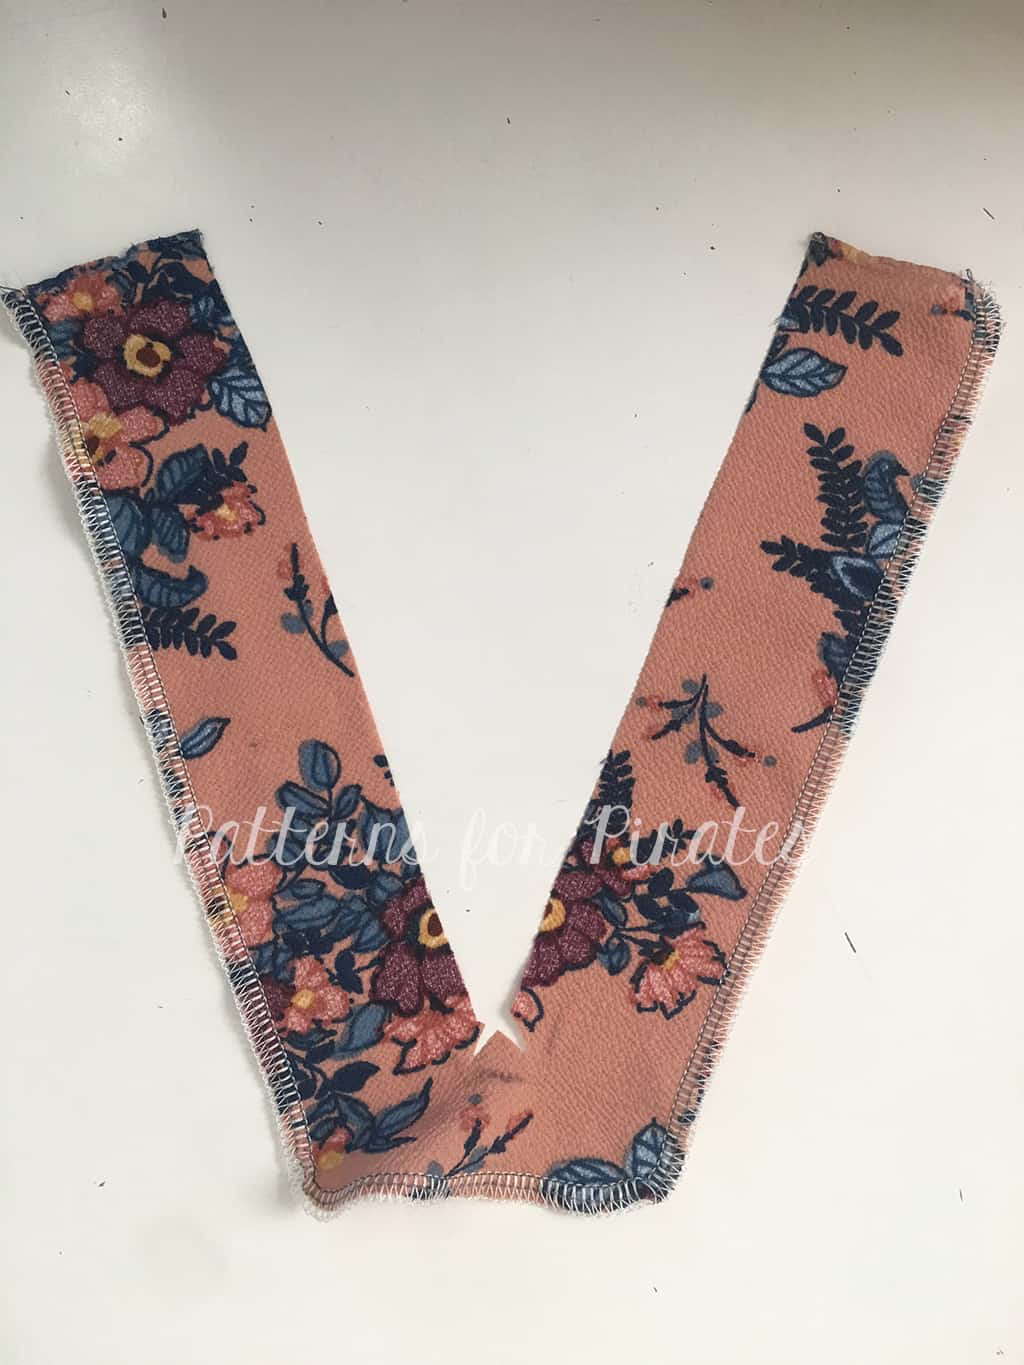
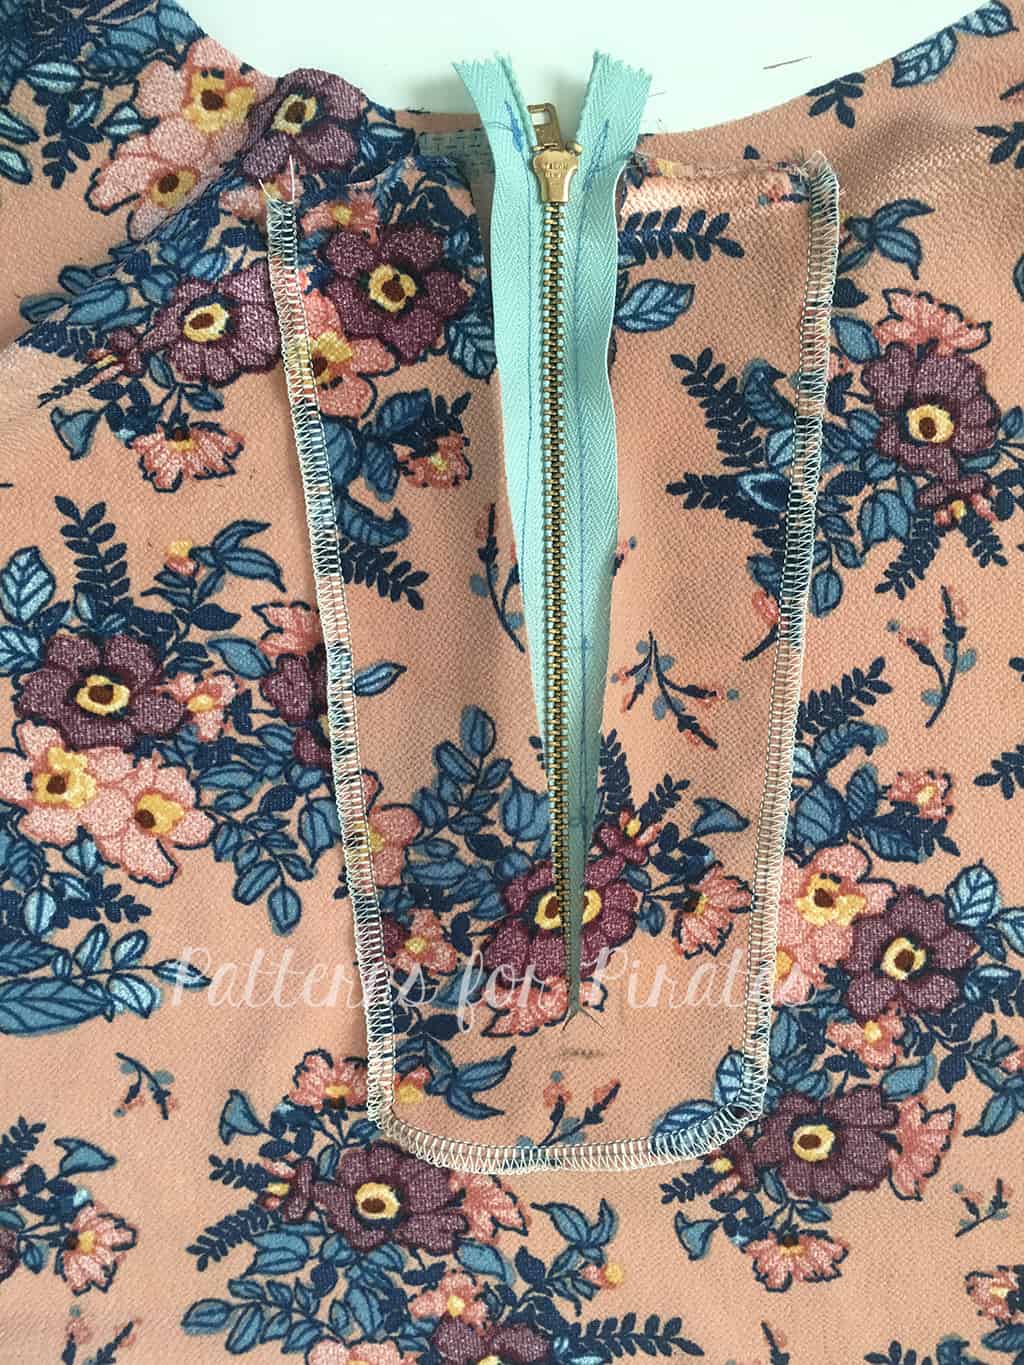
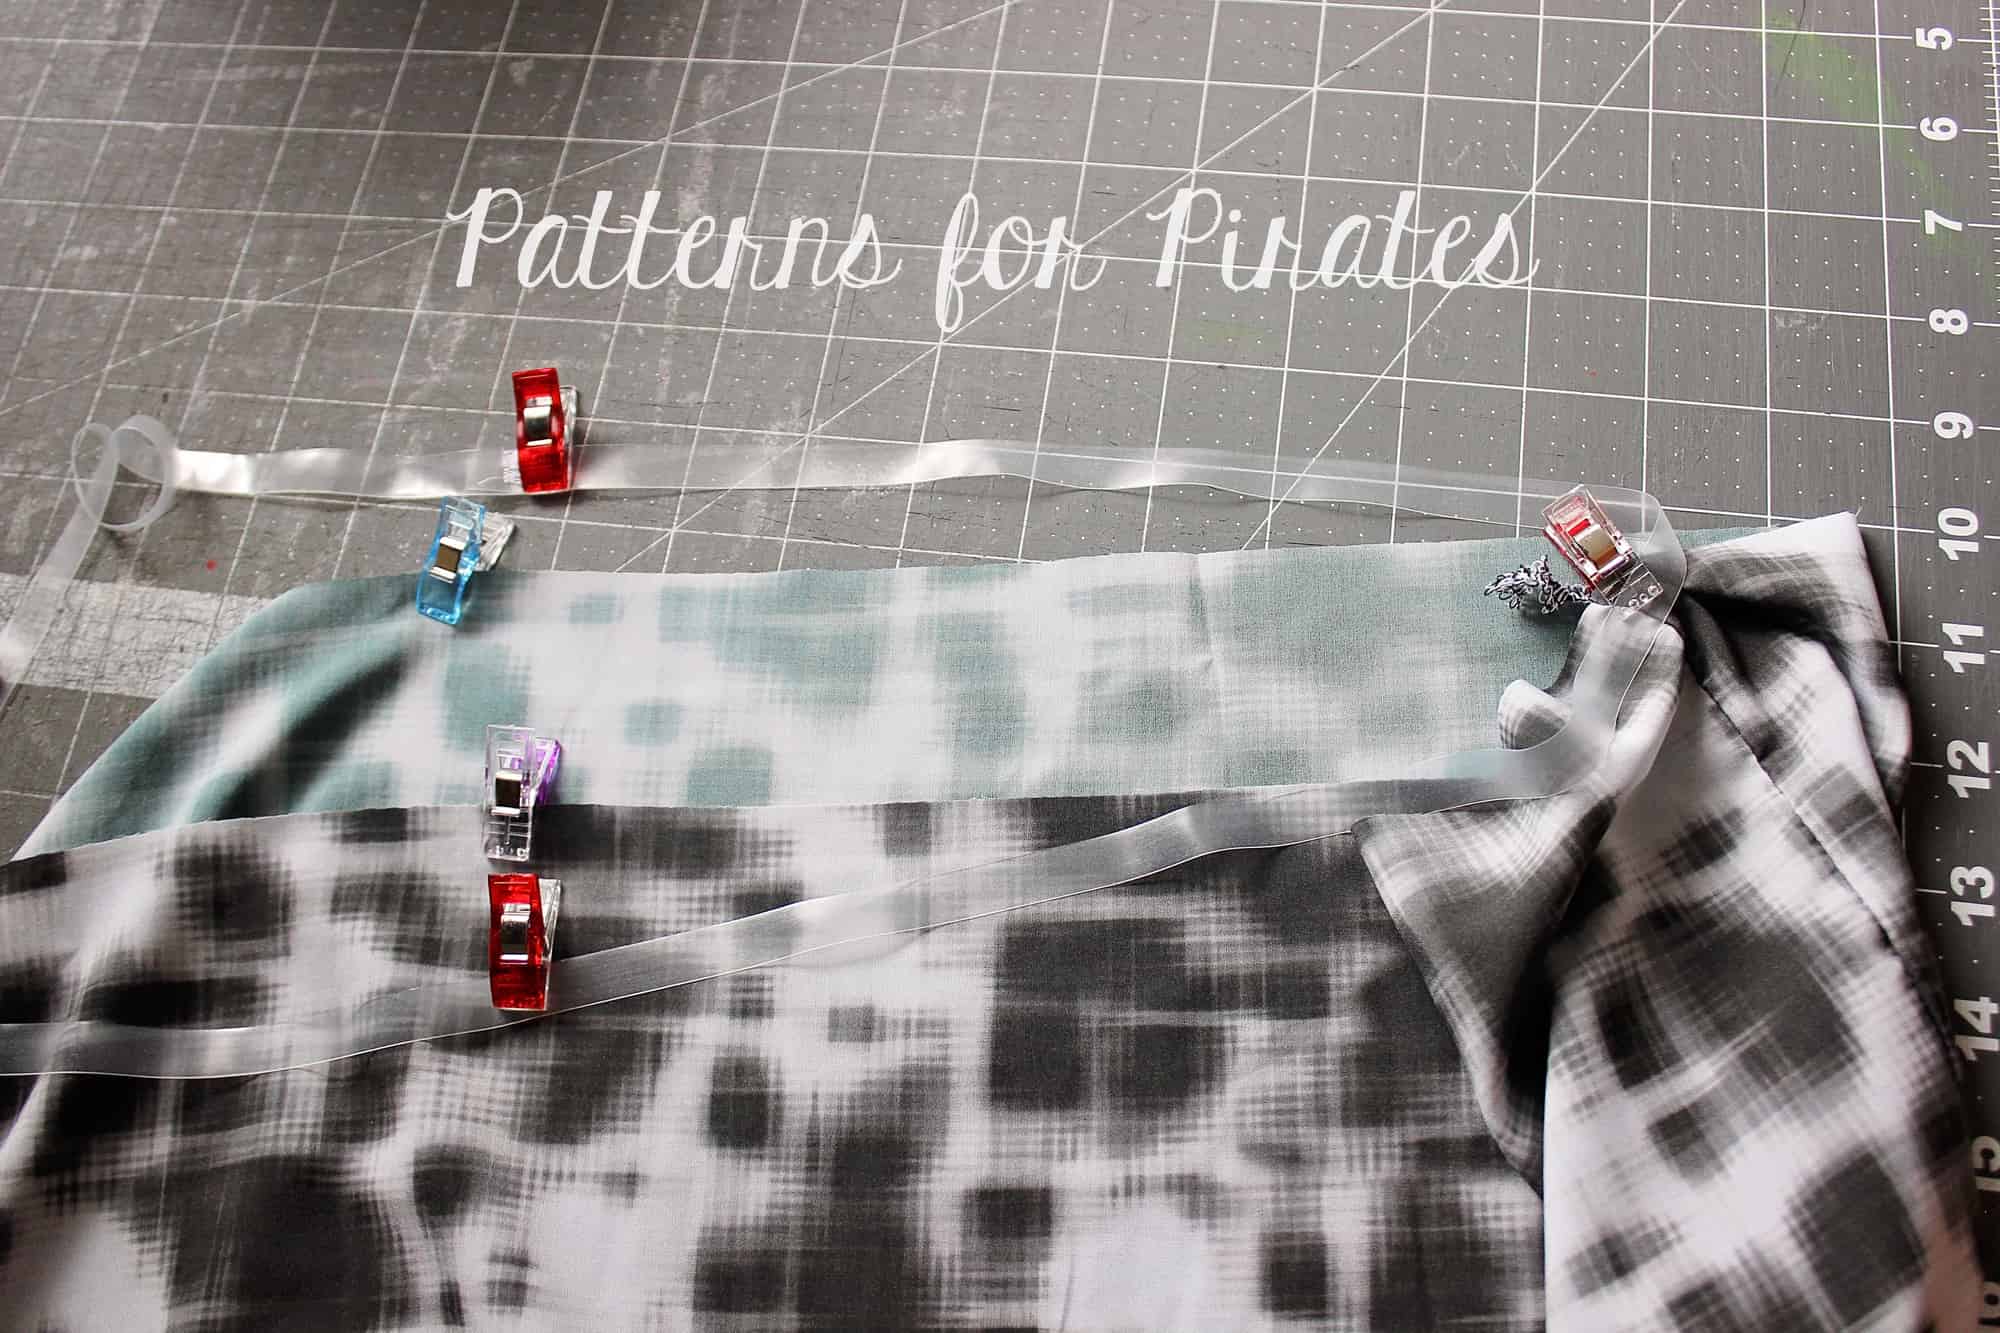
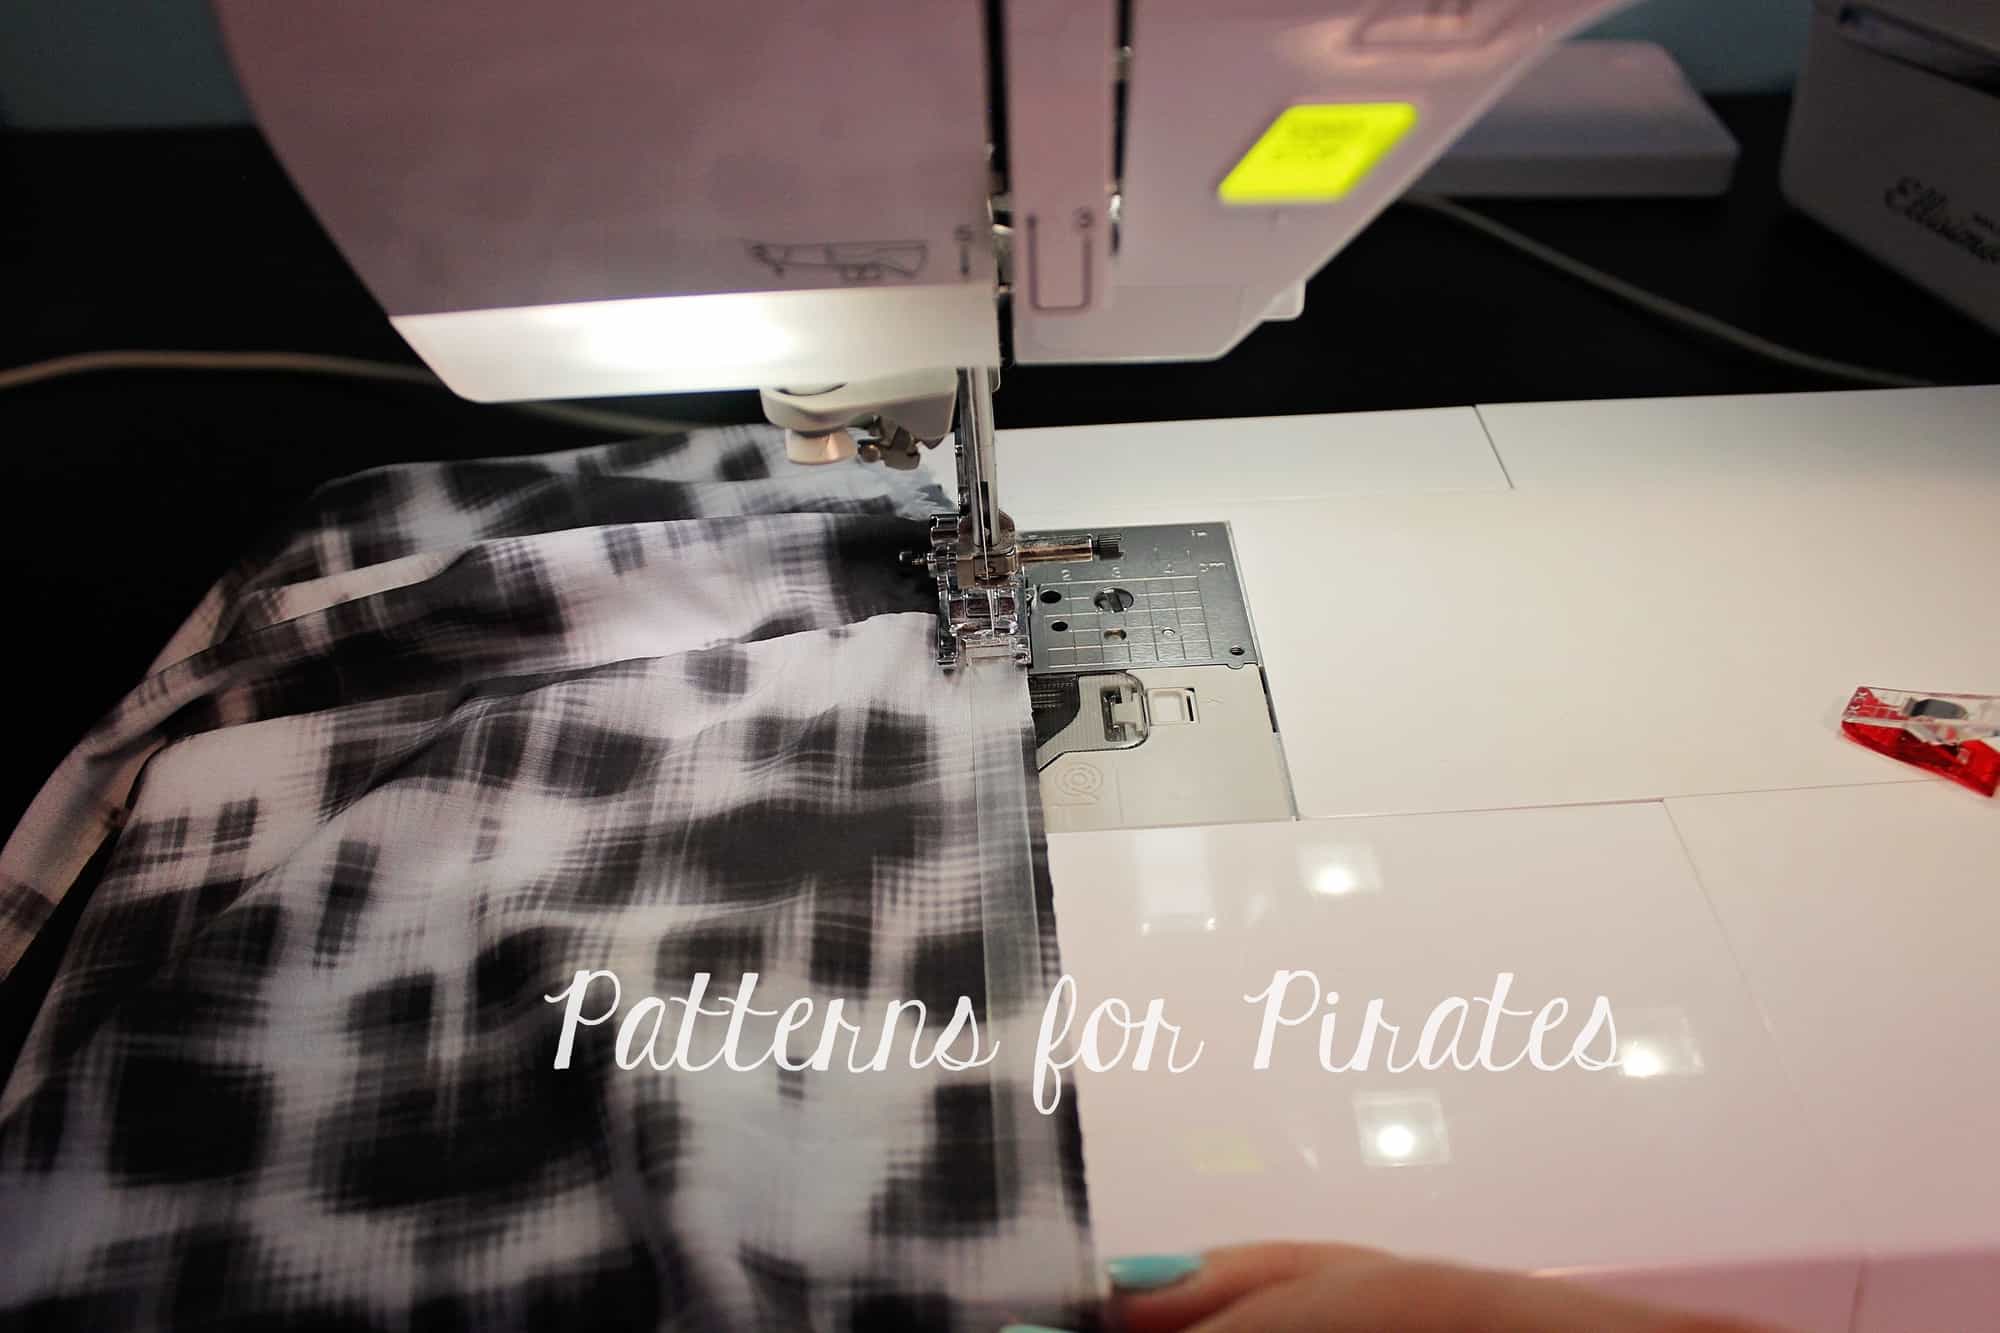
I loved the idea of a full-length zipper like Alex showed us above, but when it came to finding one locally, I wasn’t able to get one the length I needed. I did find a chunky zipper that would be perfect to use as an exposed zipper and just so happened to work out that it’s finished length was about knee length. I opted to go with the midi length and do a split hem at the center back. You will install your zipper the same as you would in the tutorial, except place it on the RIGHT side of the fabric with the wrong side of the zipper centered along the back seam.

-

- Place zipper on top of the center back seam.
-
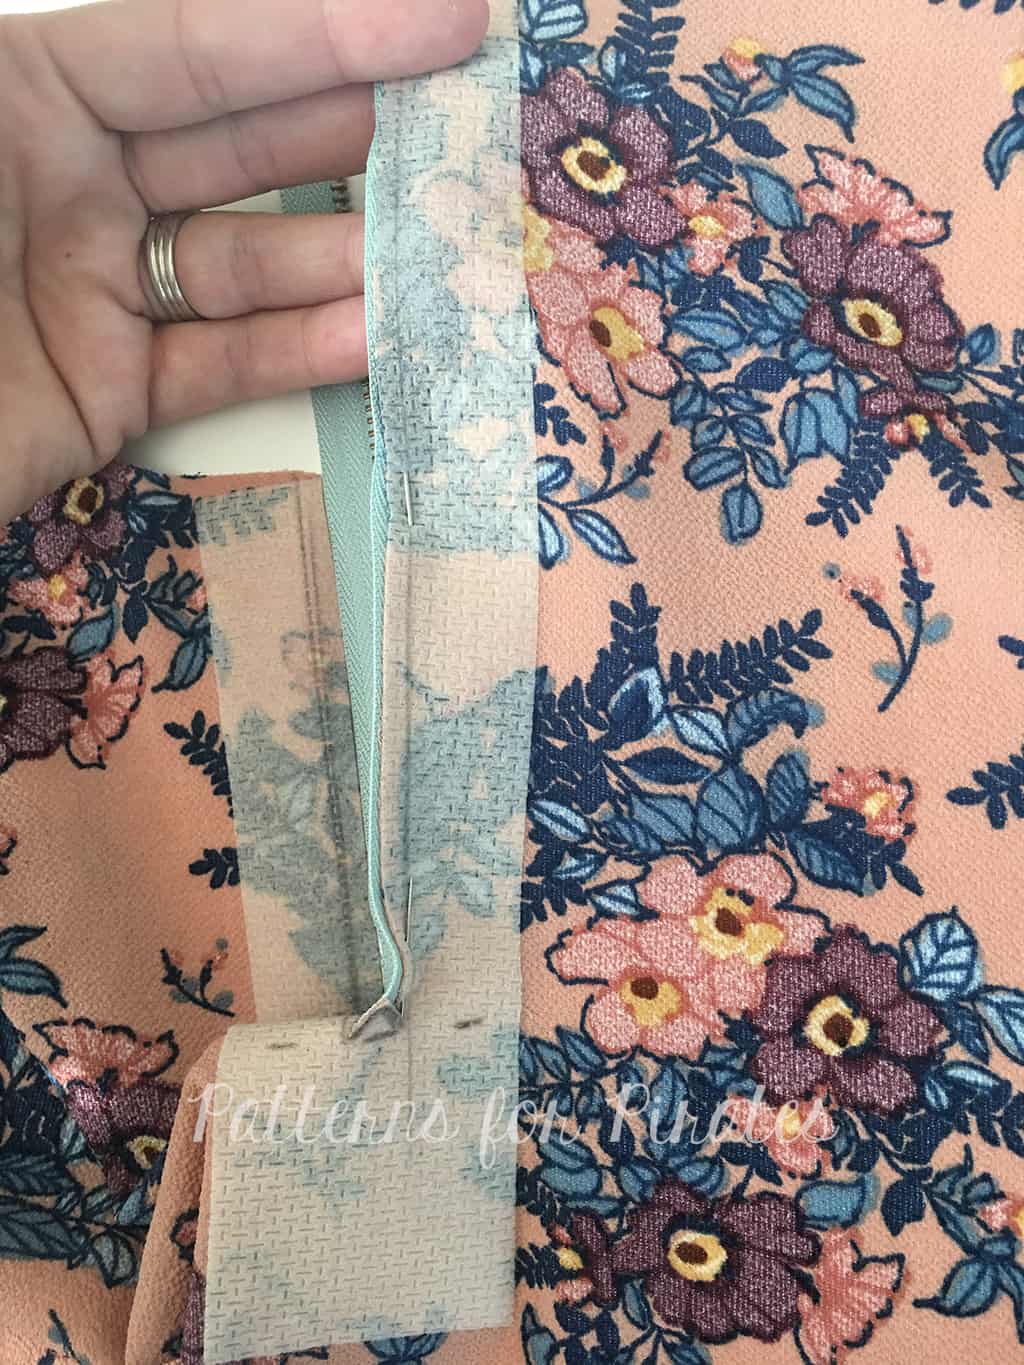
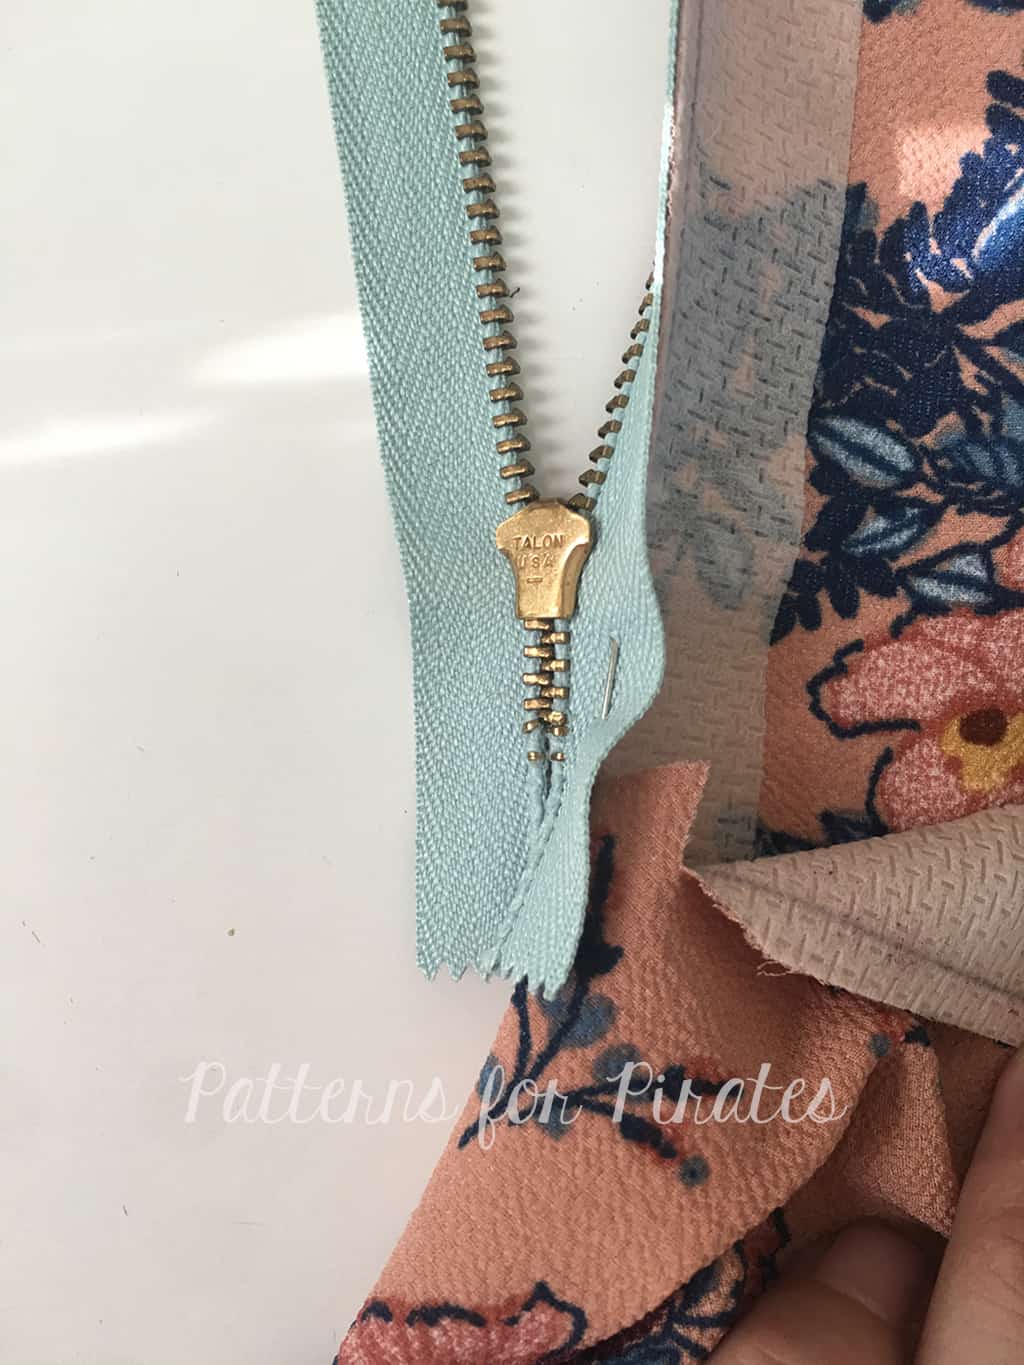
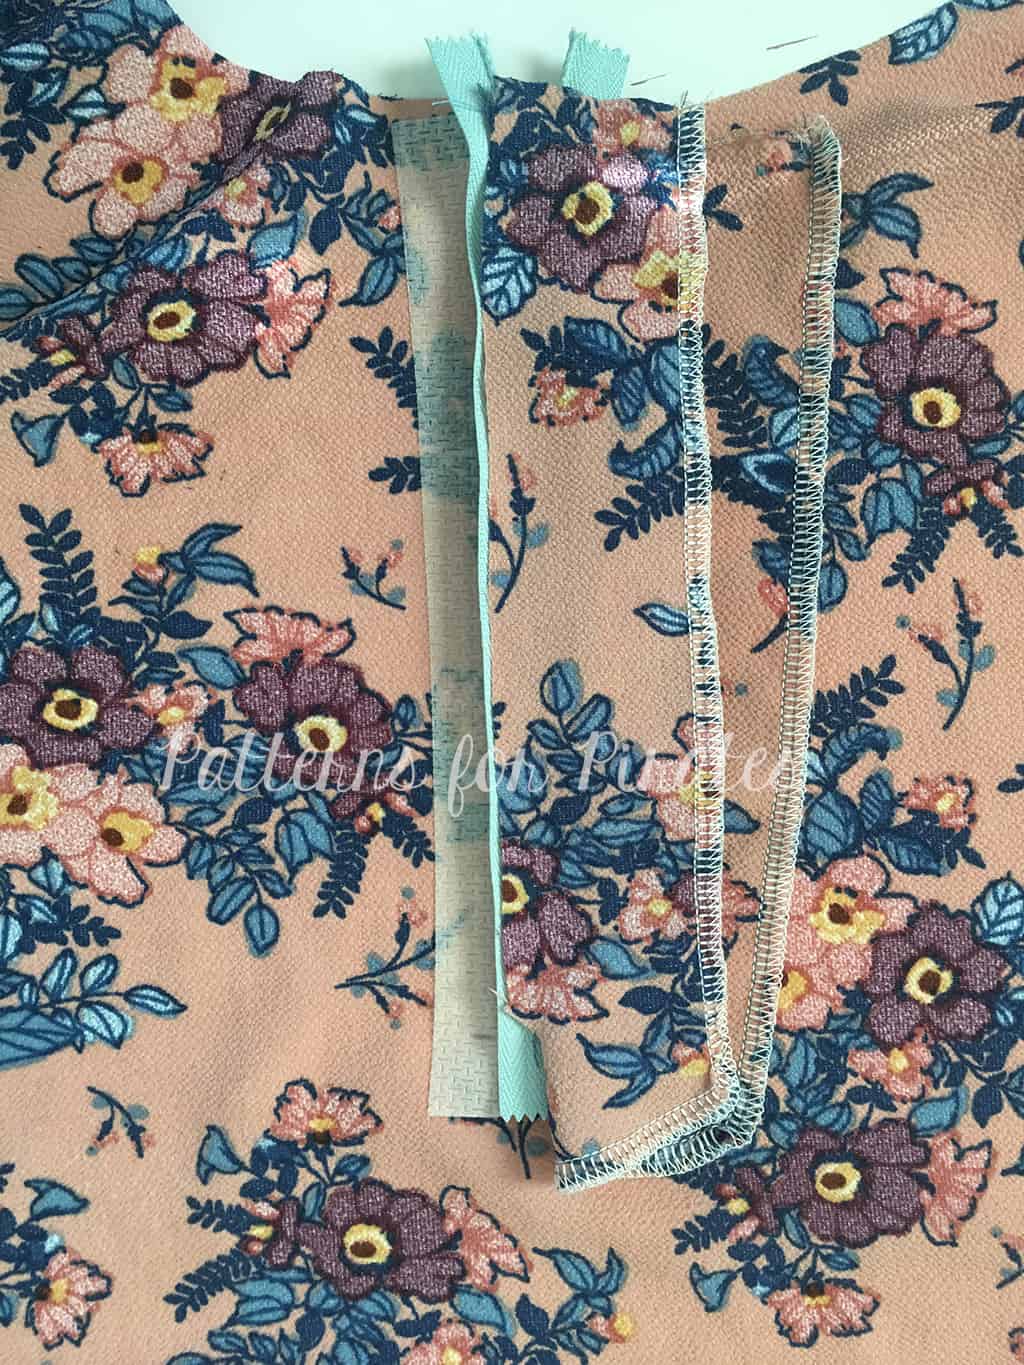
- Pin in place and topstitch.
-
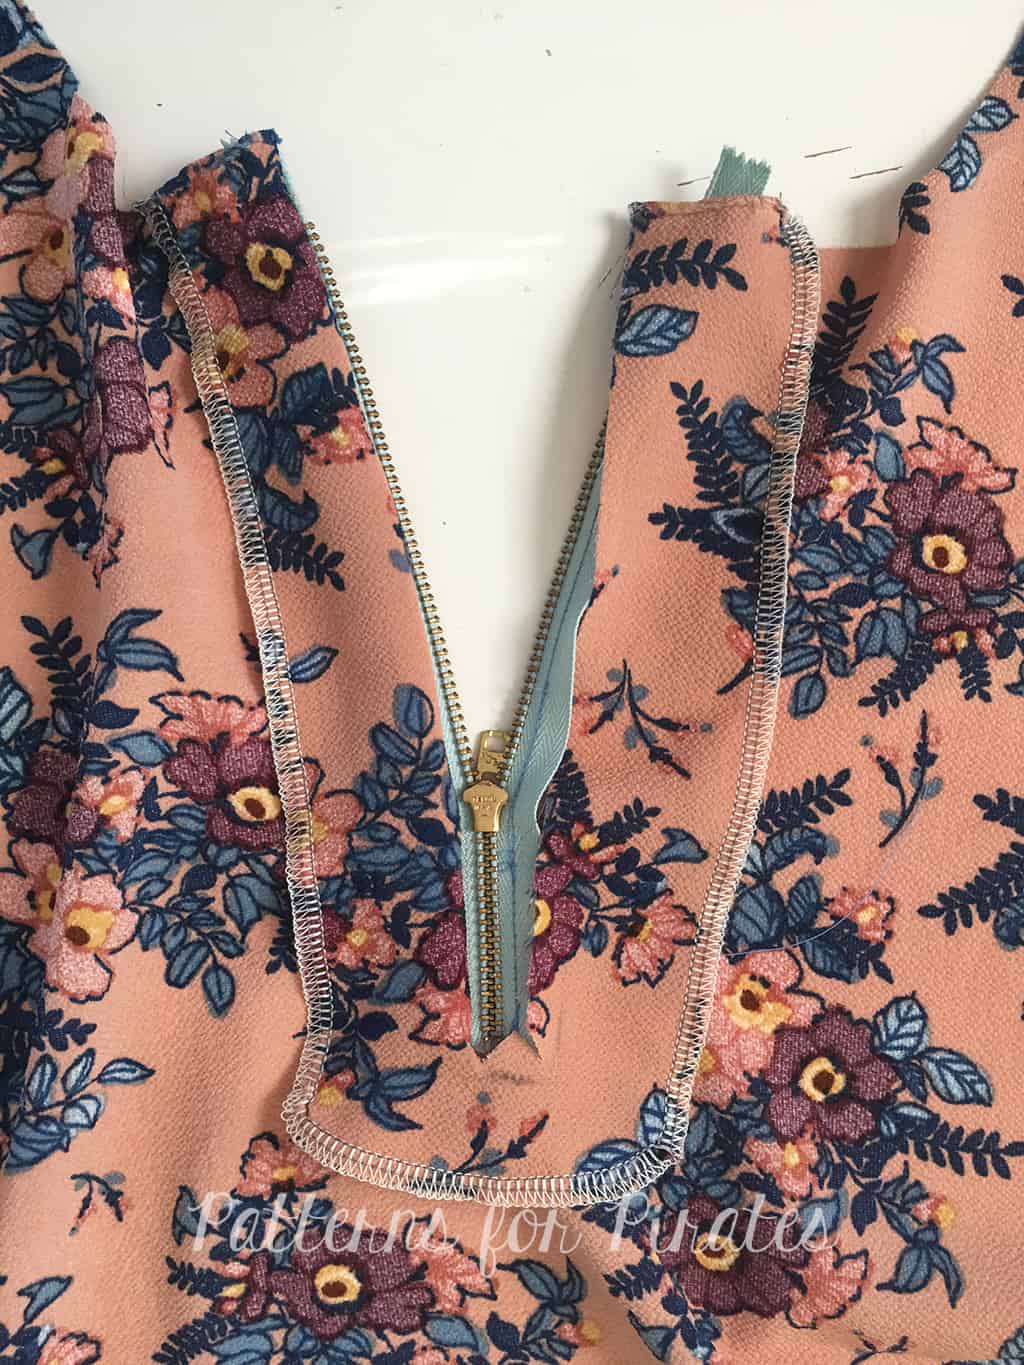
- View from Back
-
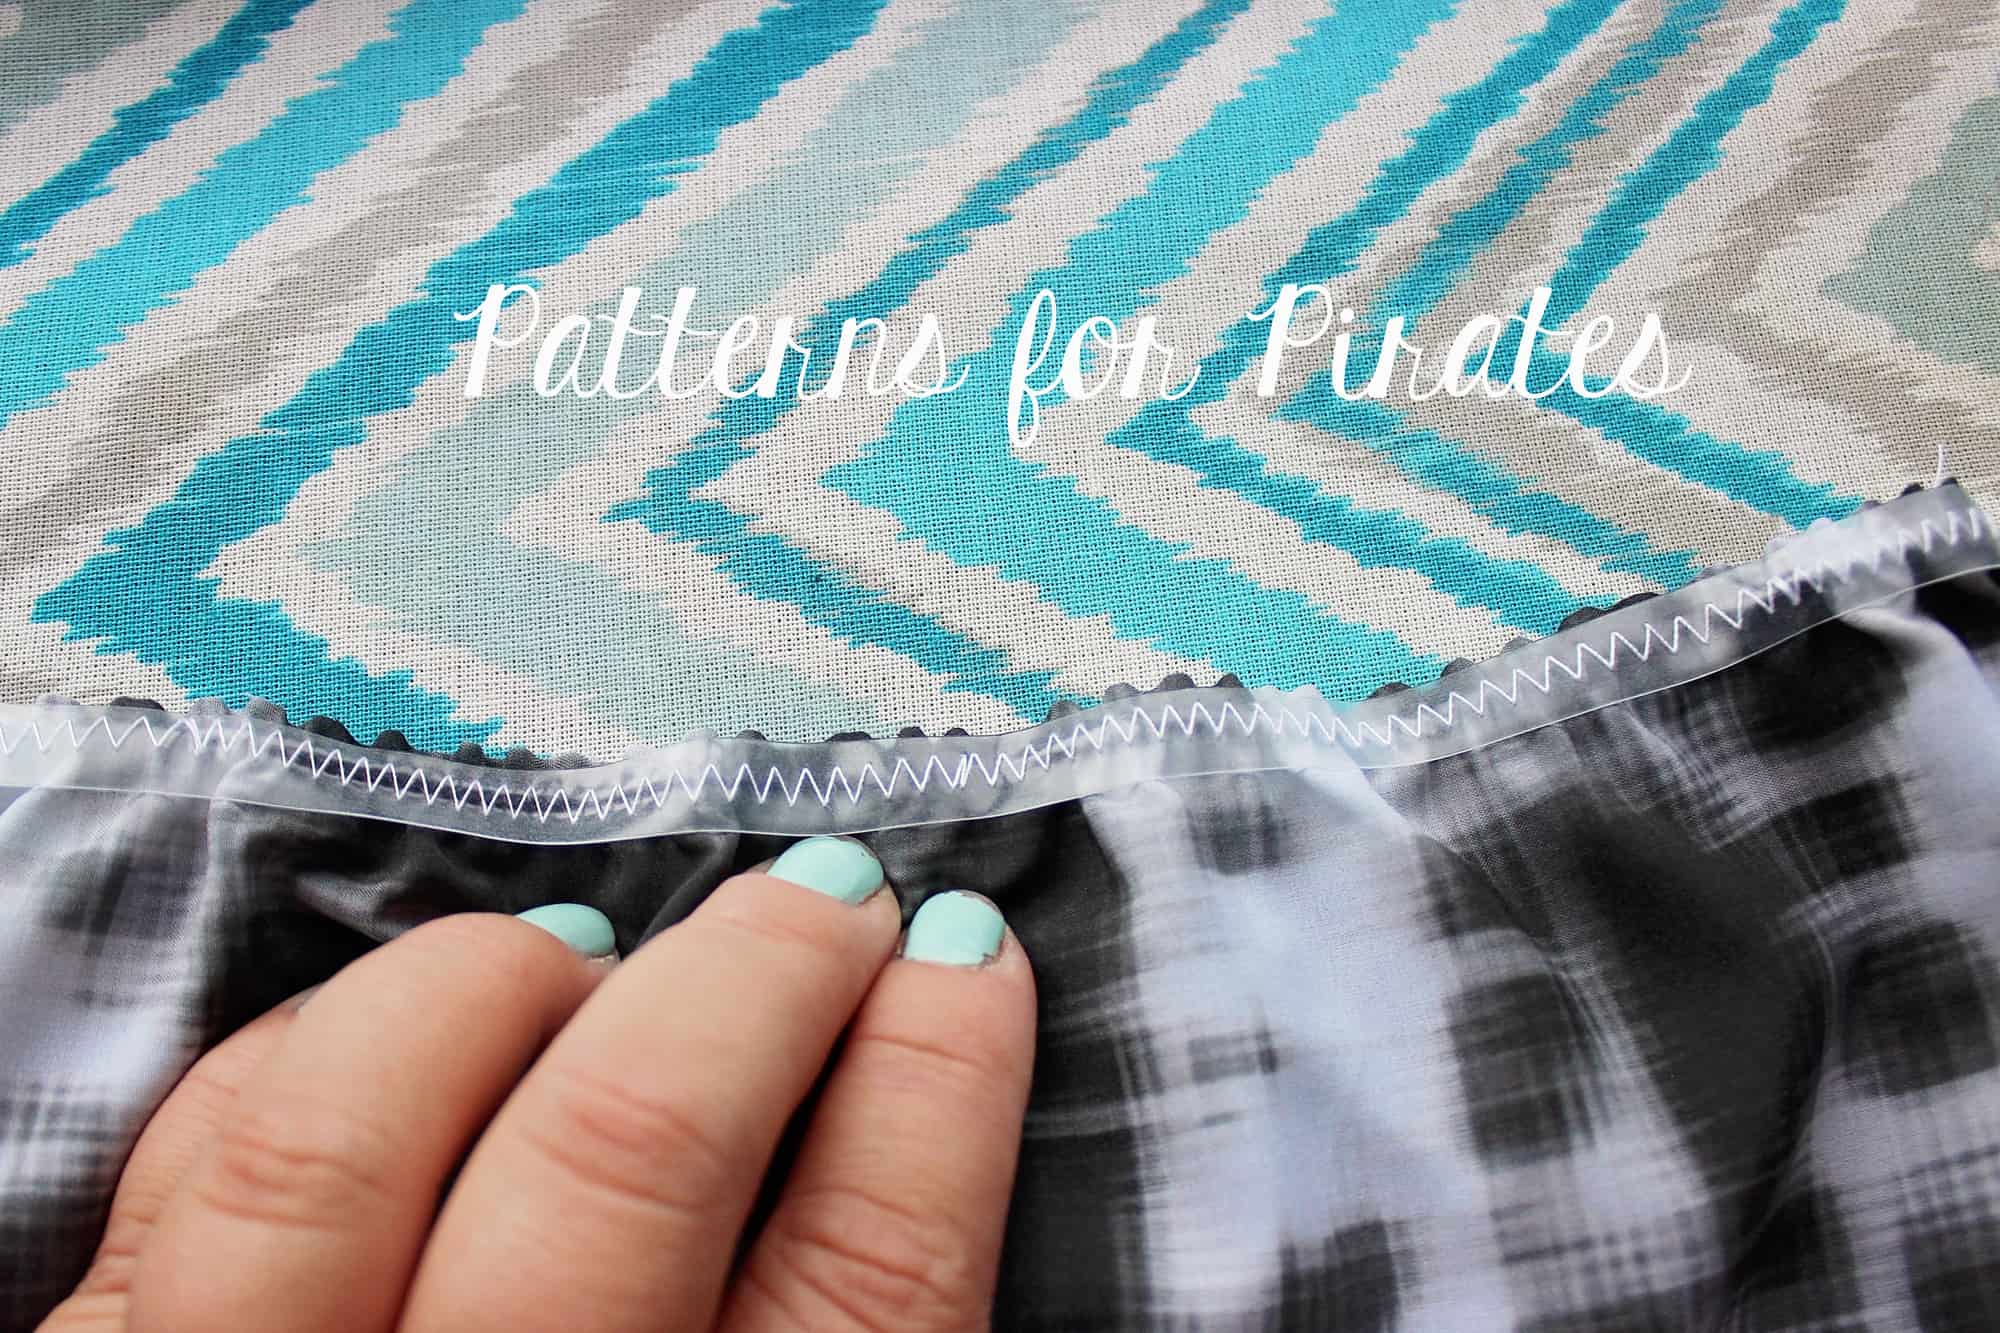
- Fold the remaining center back seam to the wrong side and topstitch.


…..
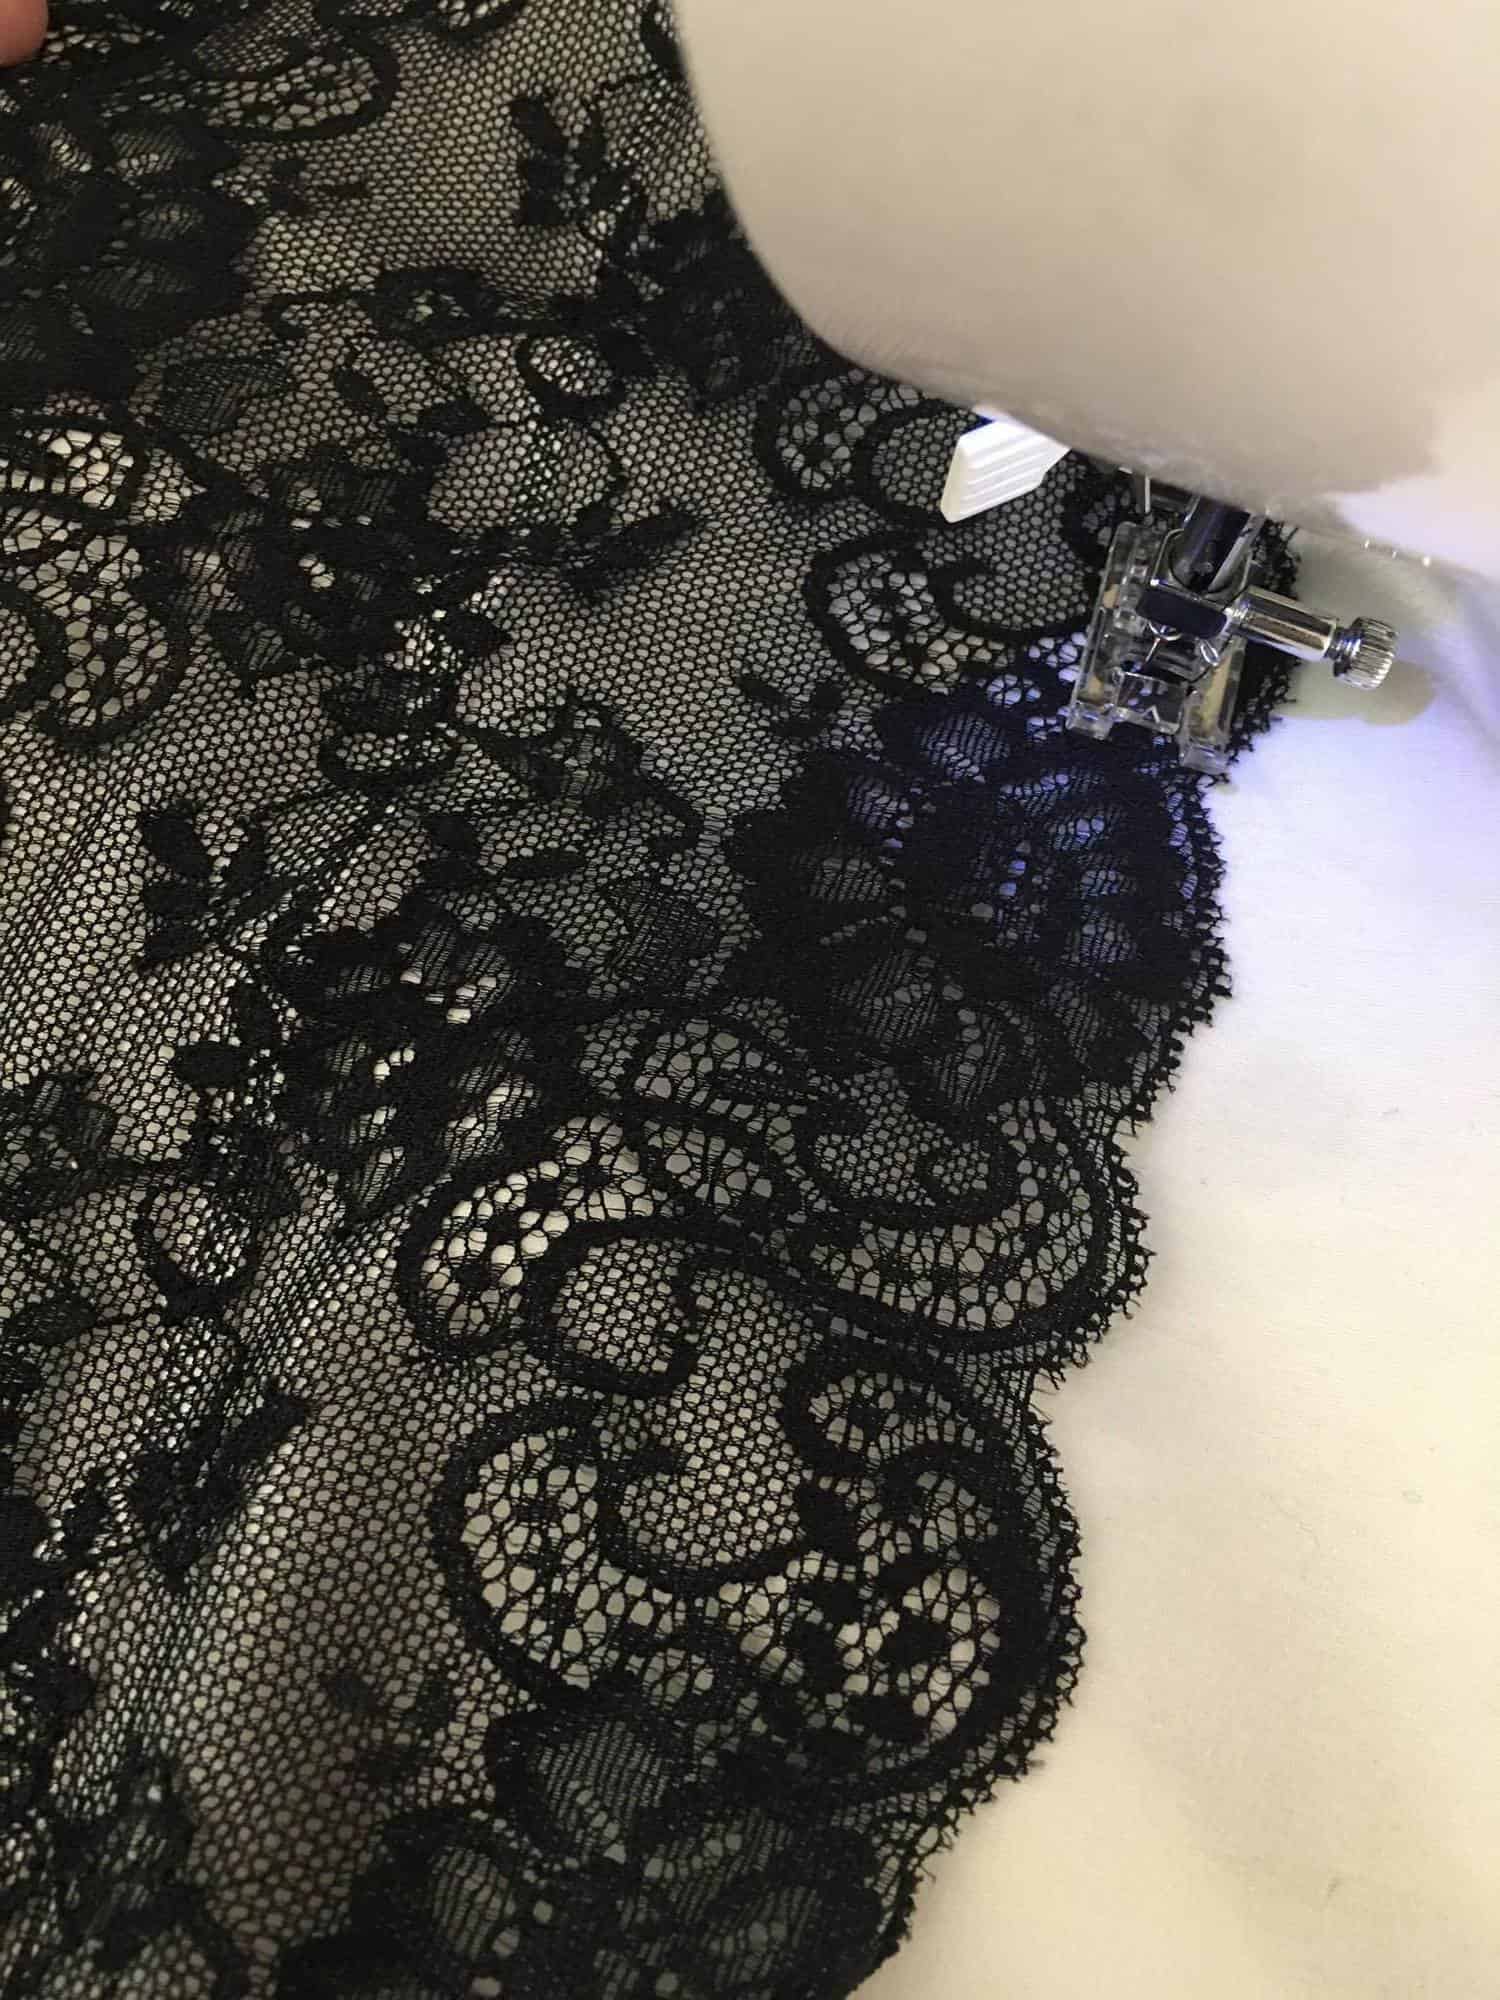
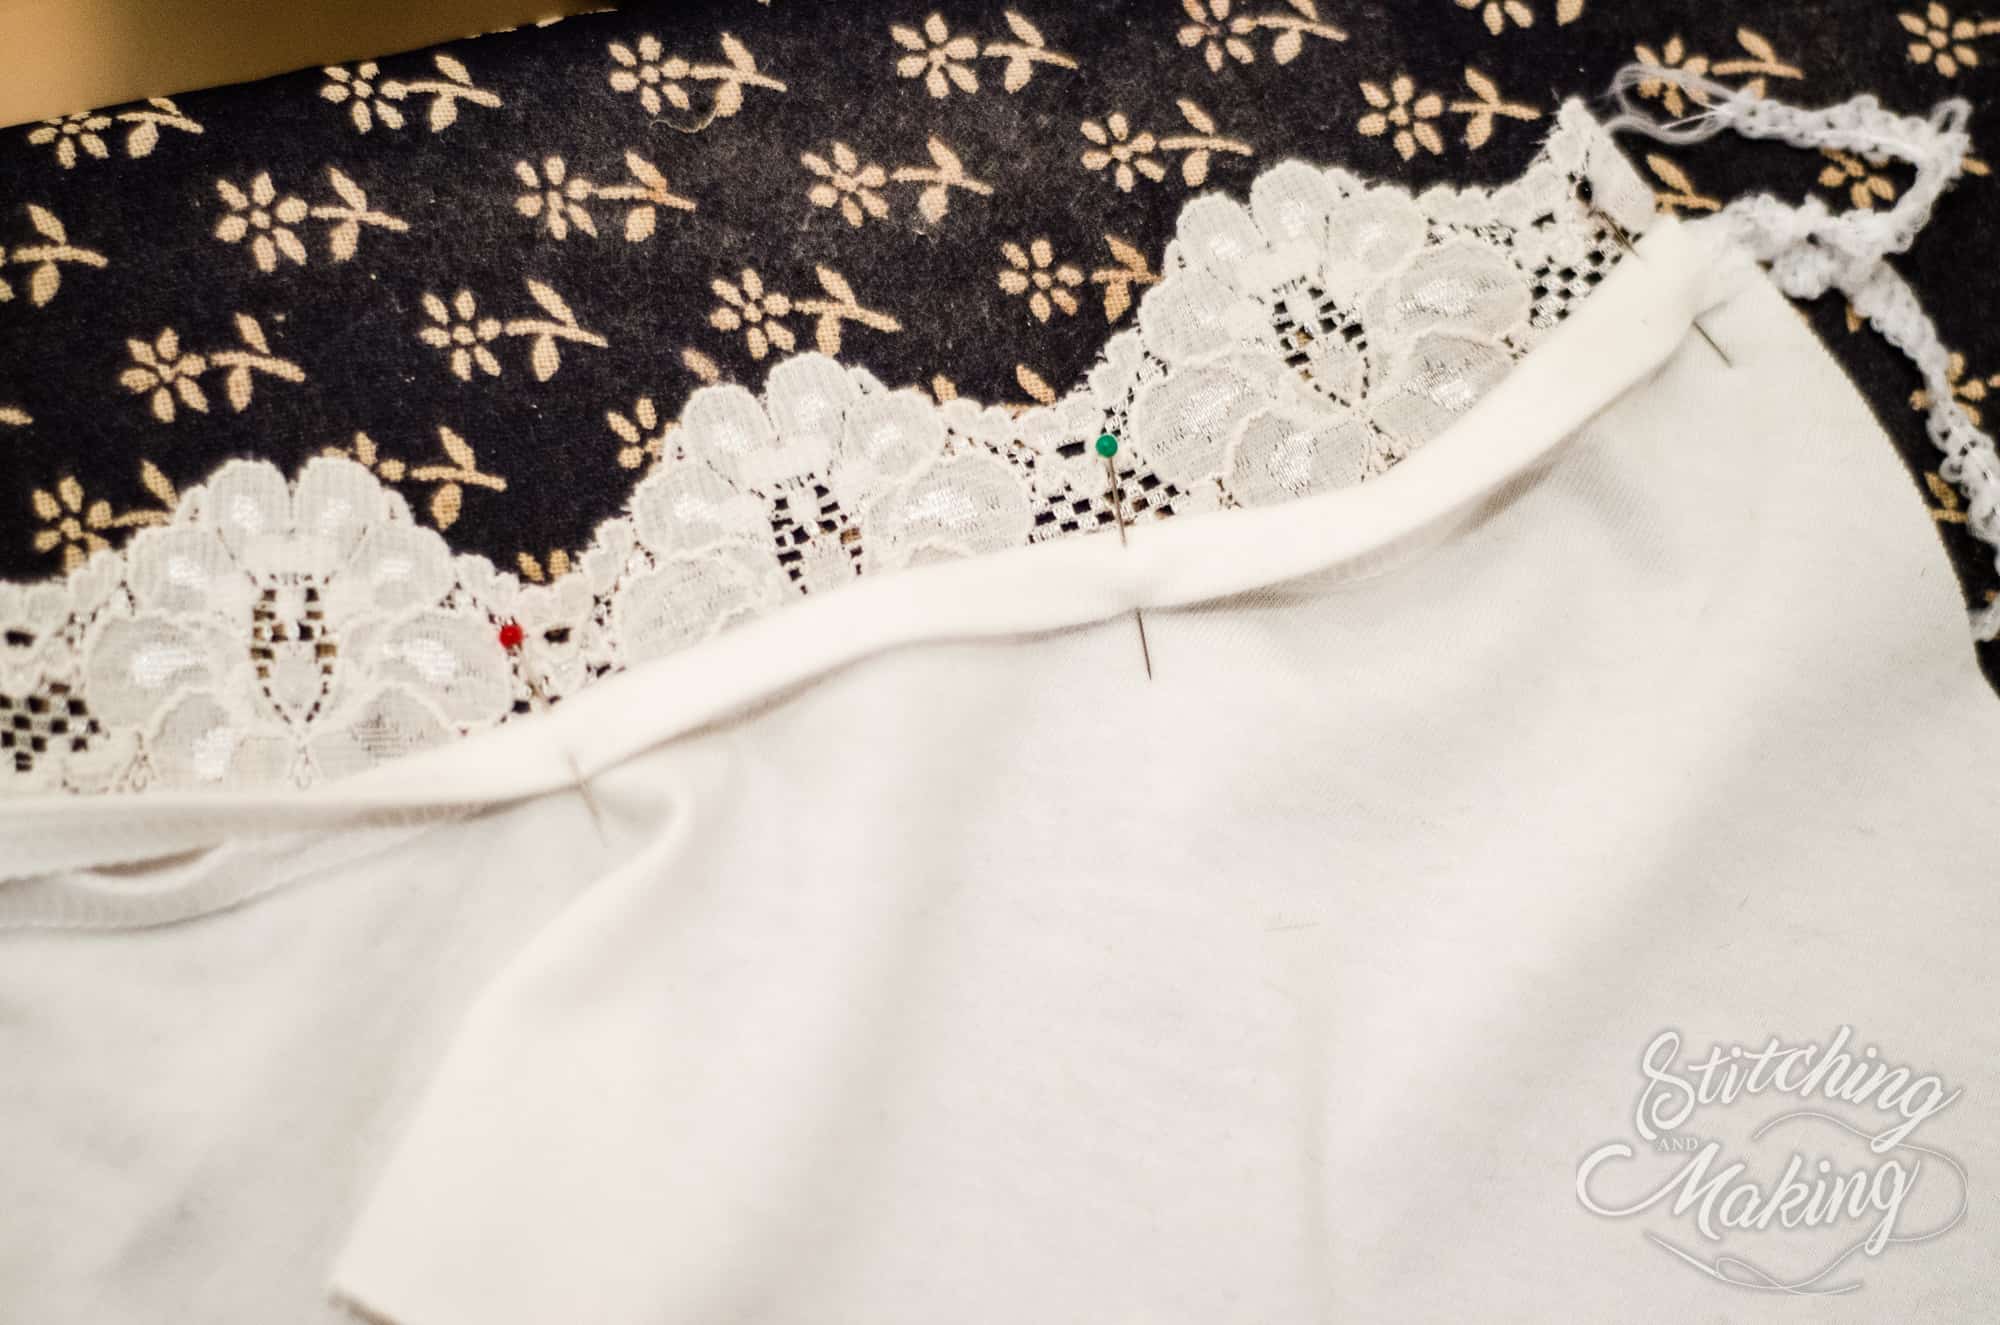
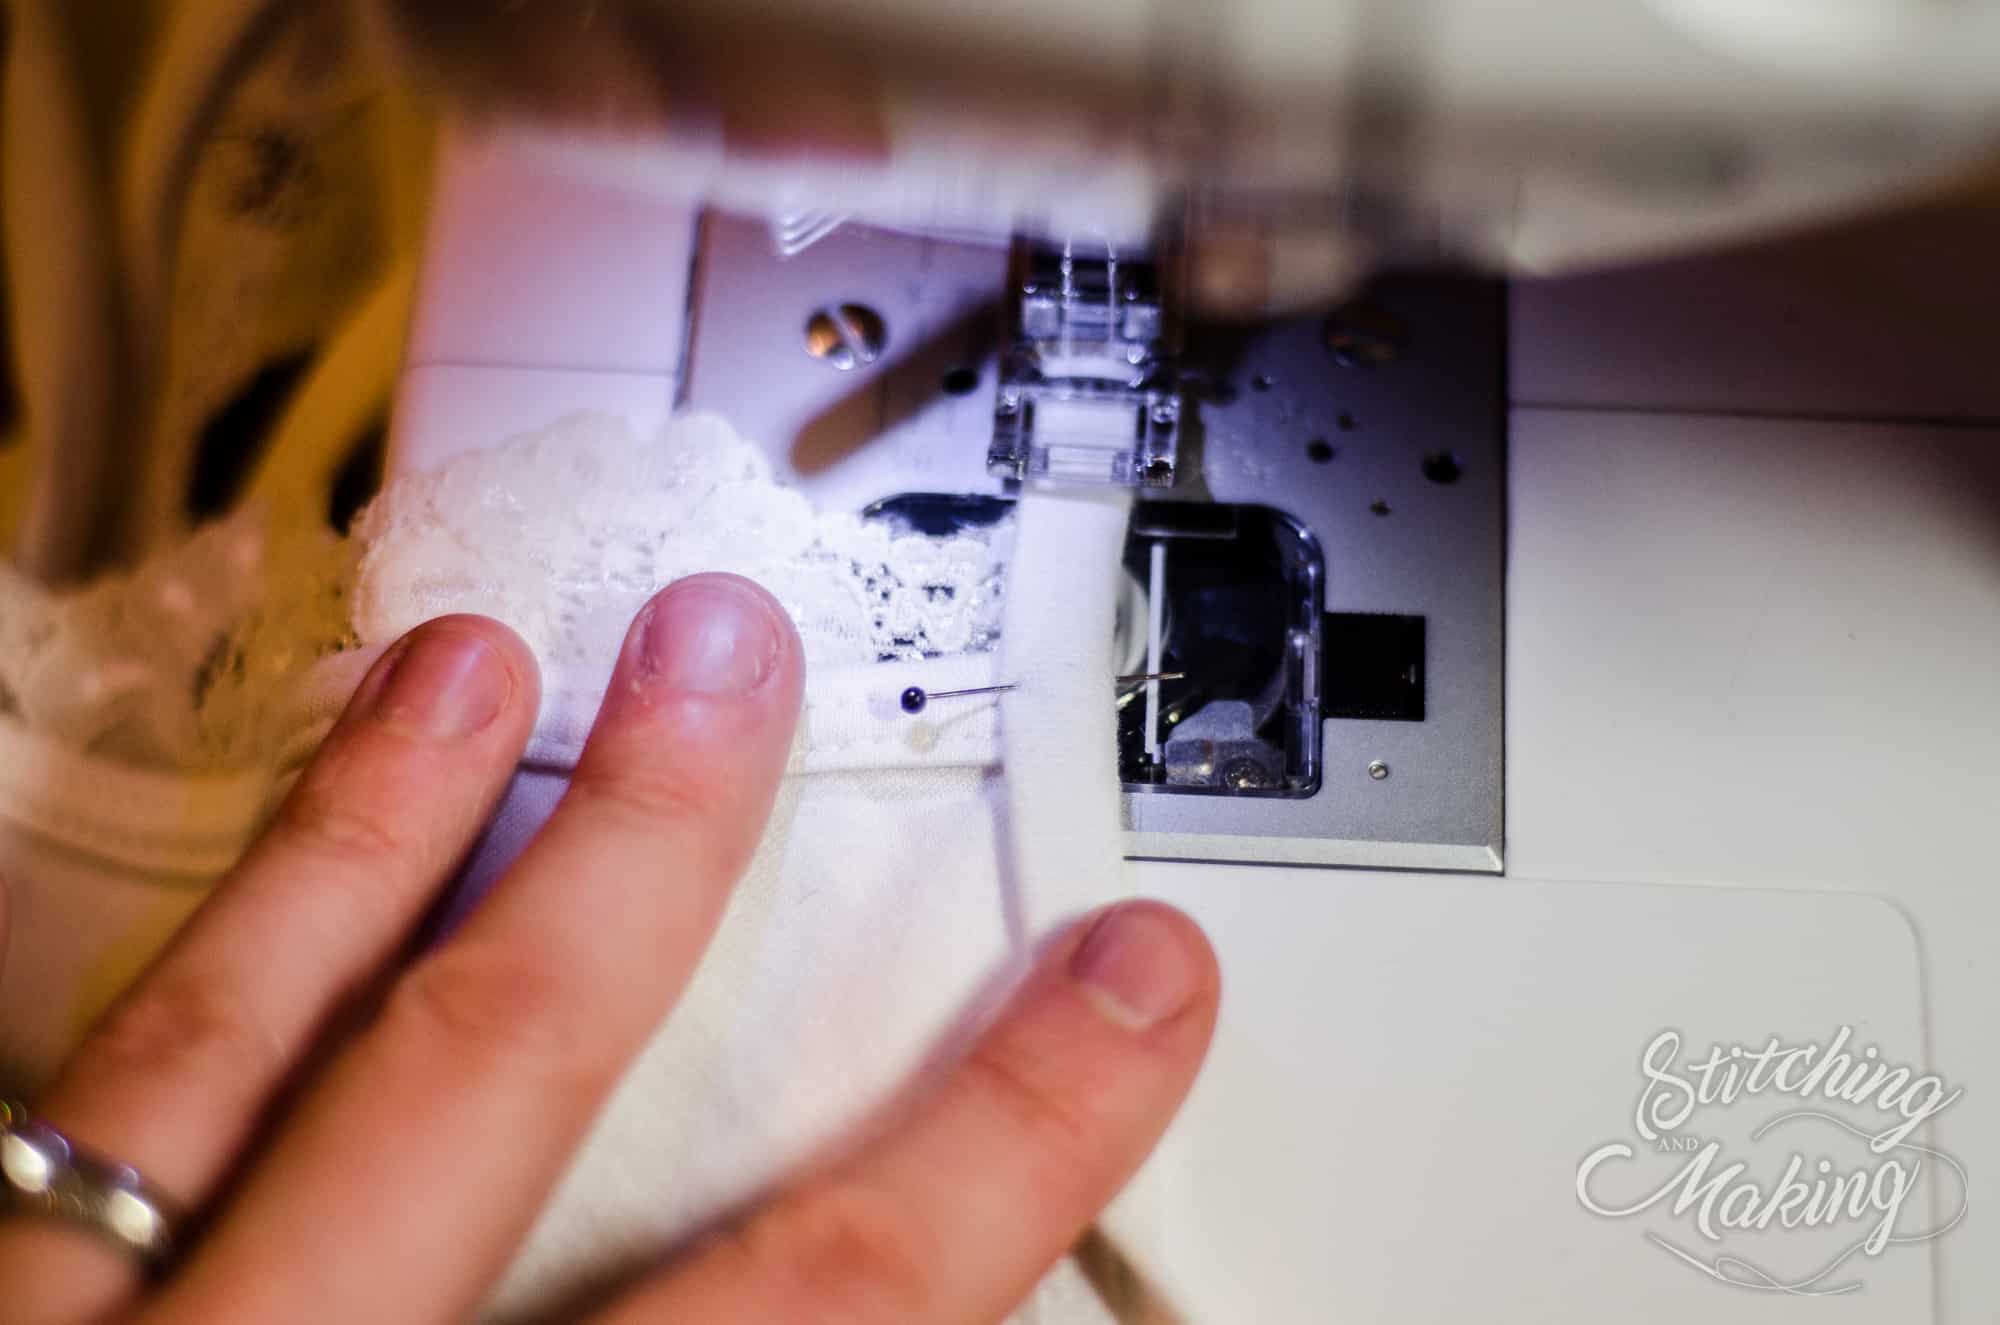
Lace Applique

I’ll be honest, Judy created this dress while we were pre-testing and I had to replicate it. Adding a lace applique is super easy but adds a super sexy and classic flair. For this particular version, the lace extends along the entire side seam, so I constructed my bodice first, added the lace to the top, then sewed my sleeves on so that the lace was enclosed in the armscye. You can, of course, add lace wherever you’d prefer, such as the neckline or bottom hem but I love the silhouette the wide stripe gave from the front and back. I used a fairly narrow zig-zag stitch down the center seam and along each edge of the stretch lace trim. Be sure to keep your lace taut as you sew along the waist and hip curves.


…..
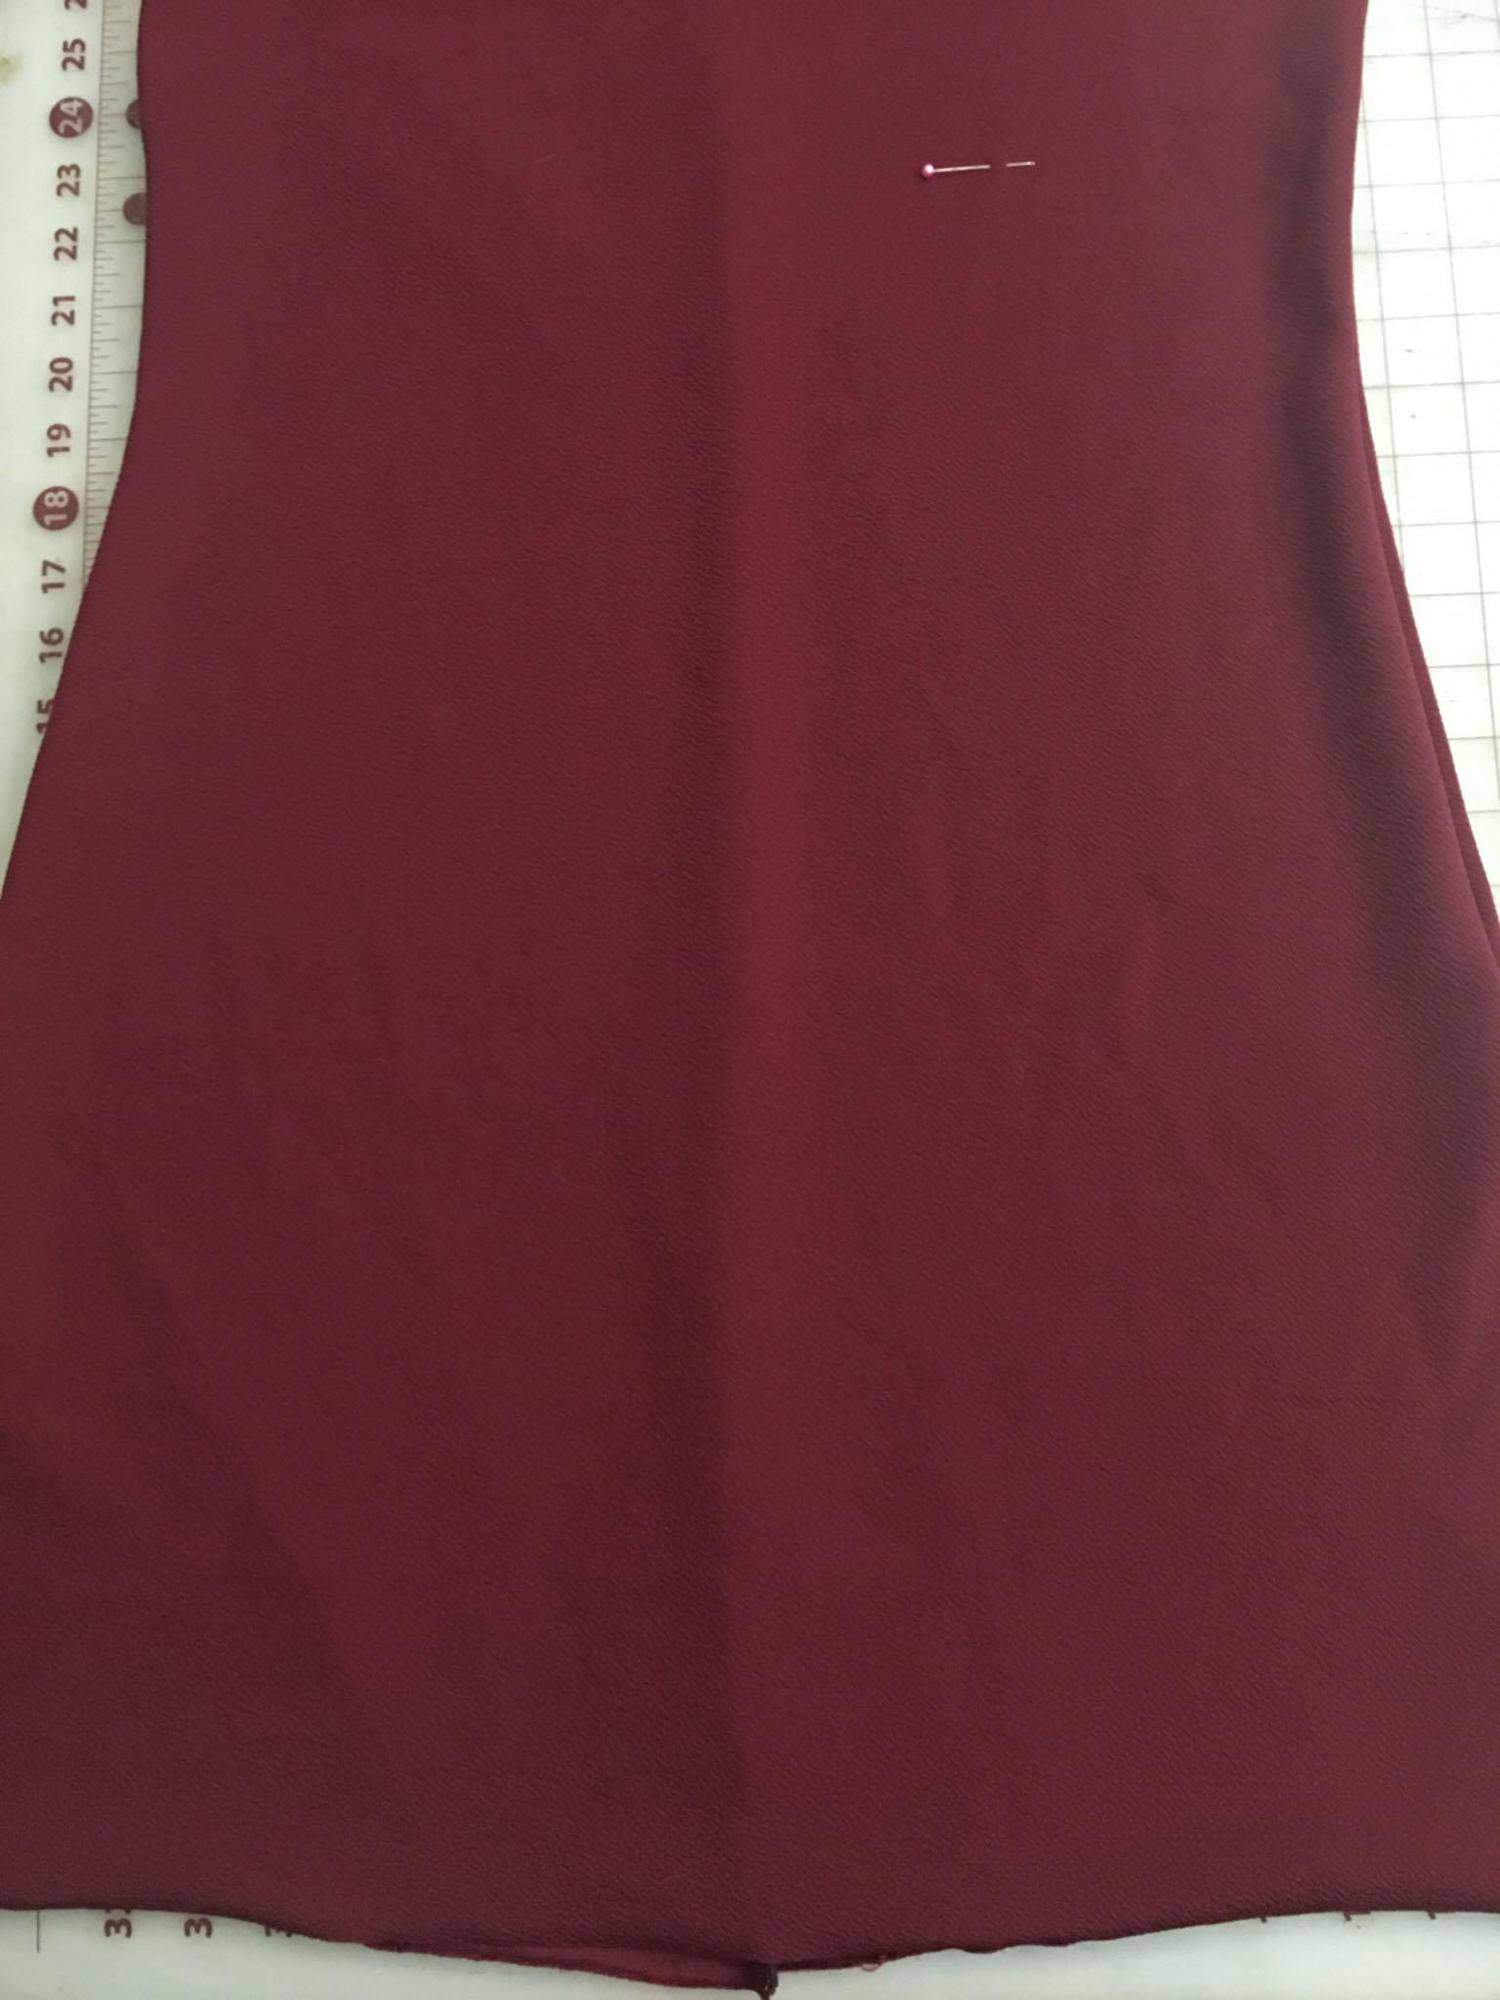
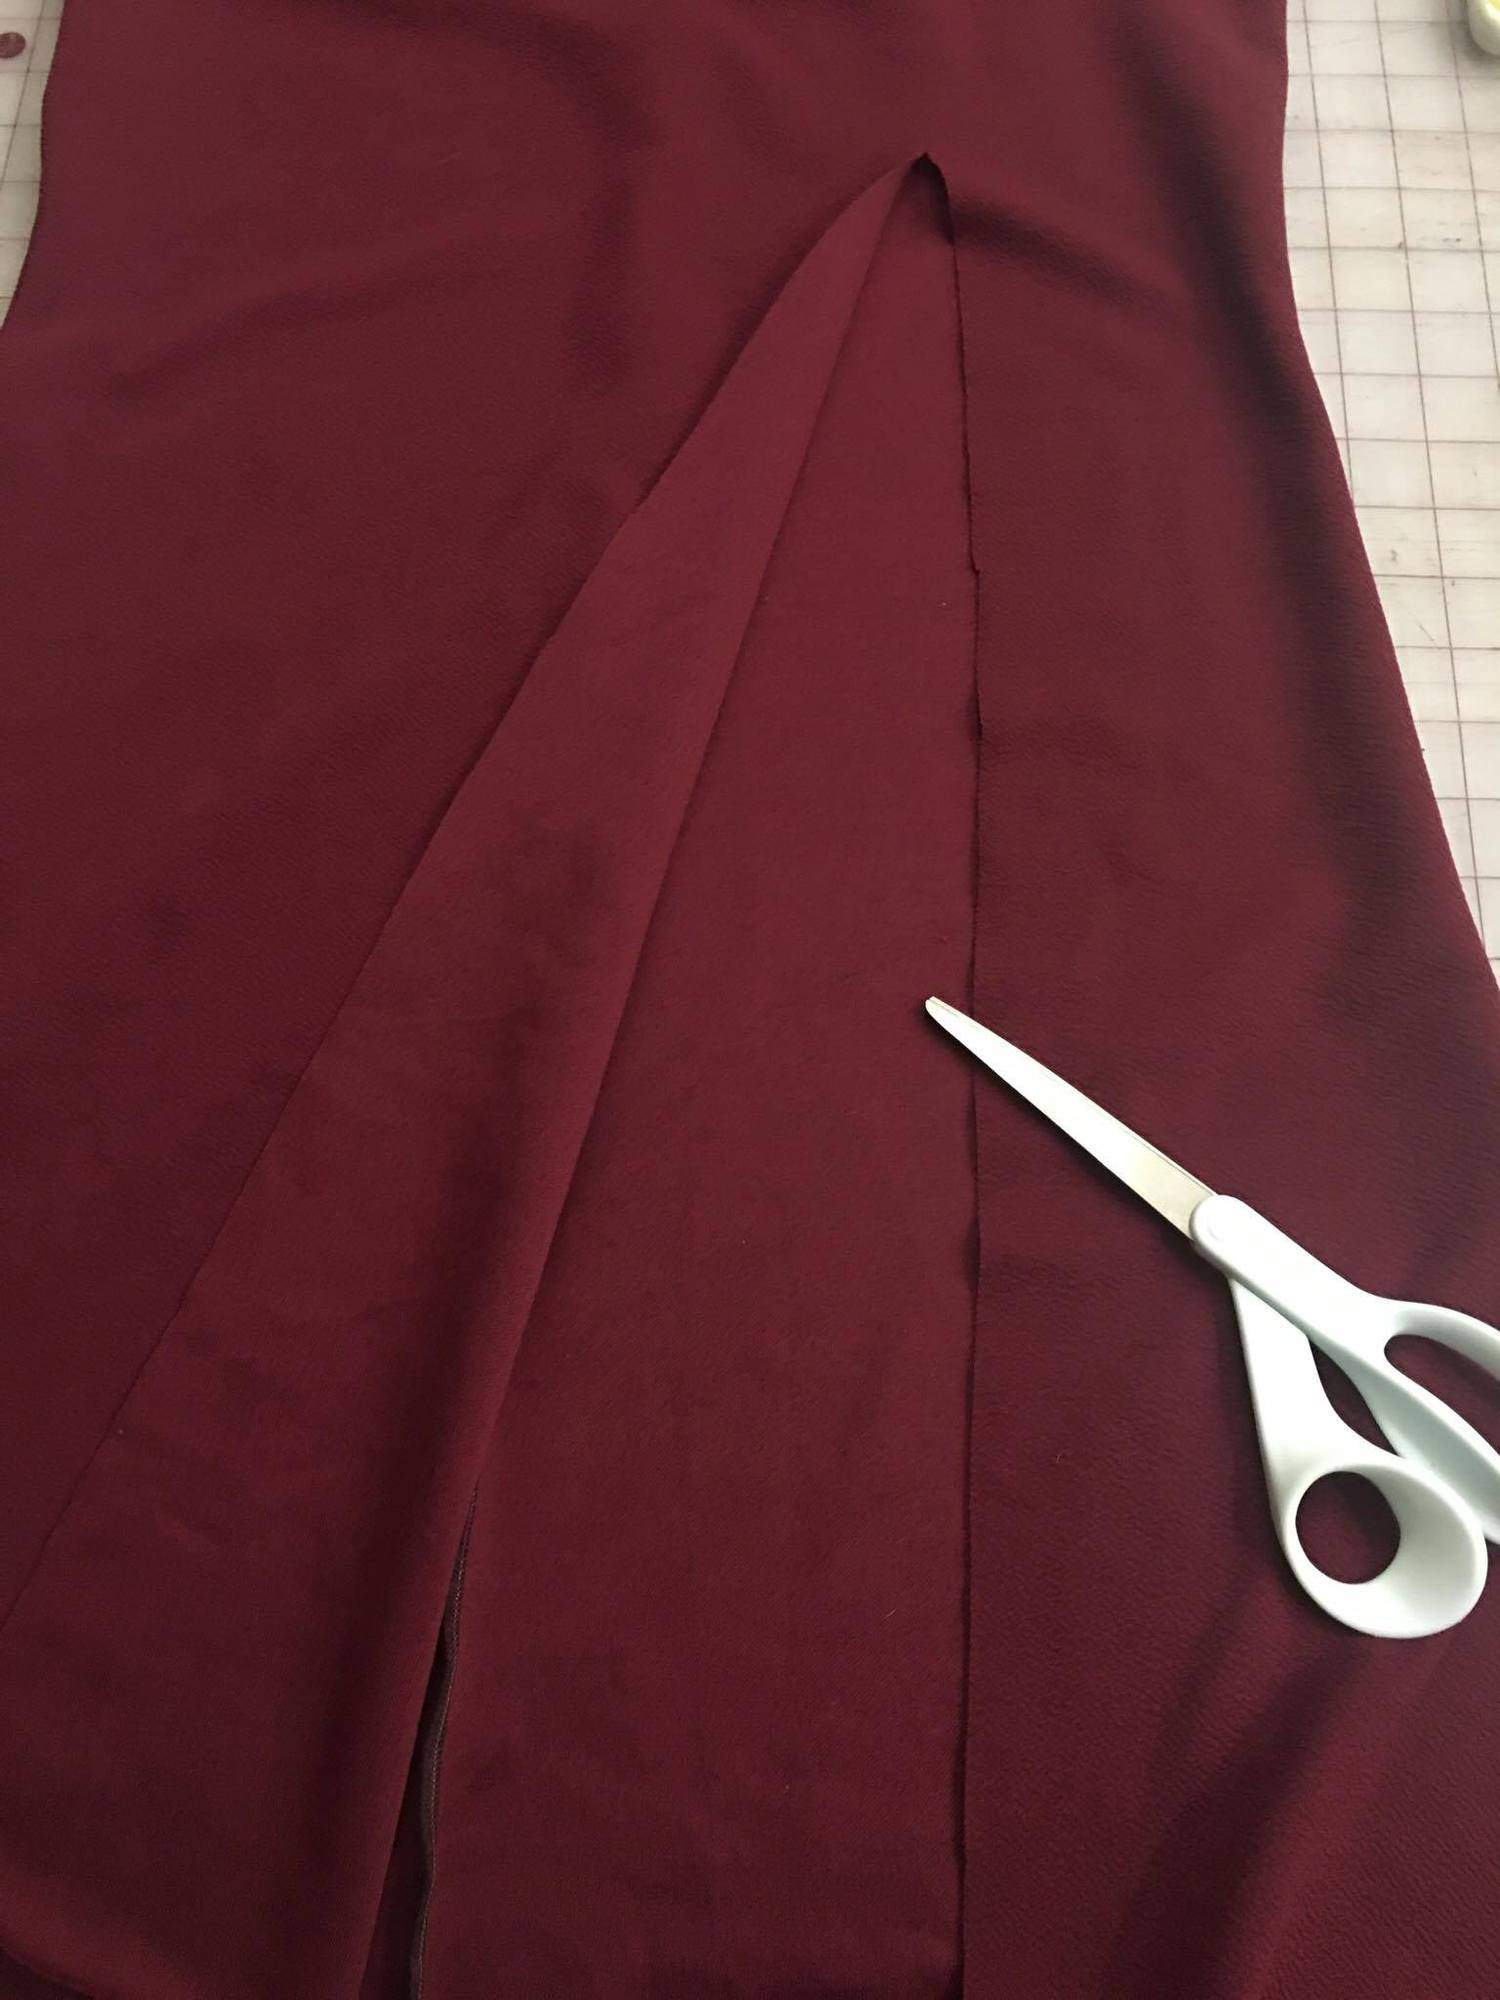
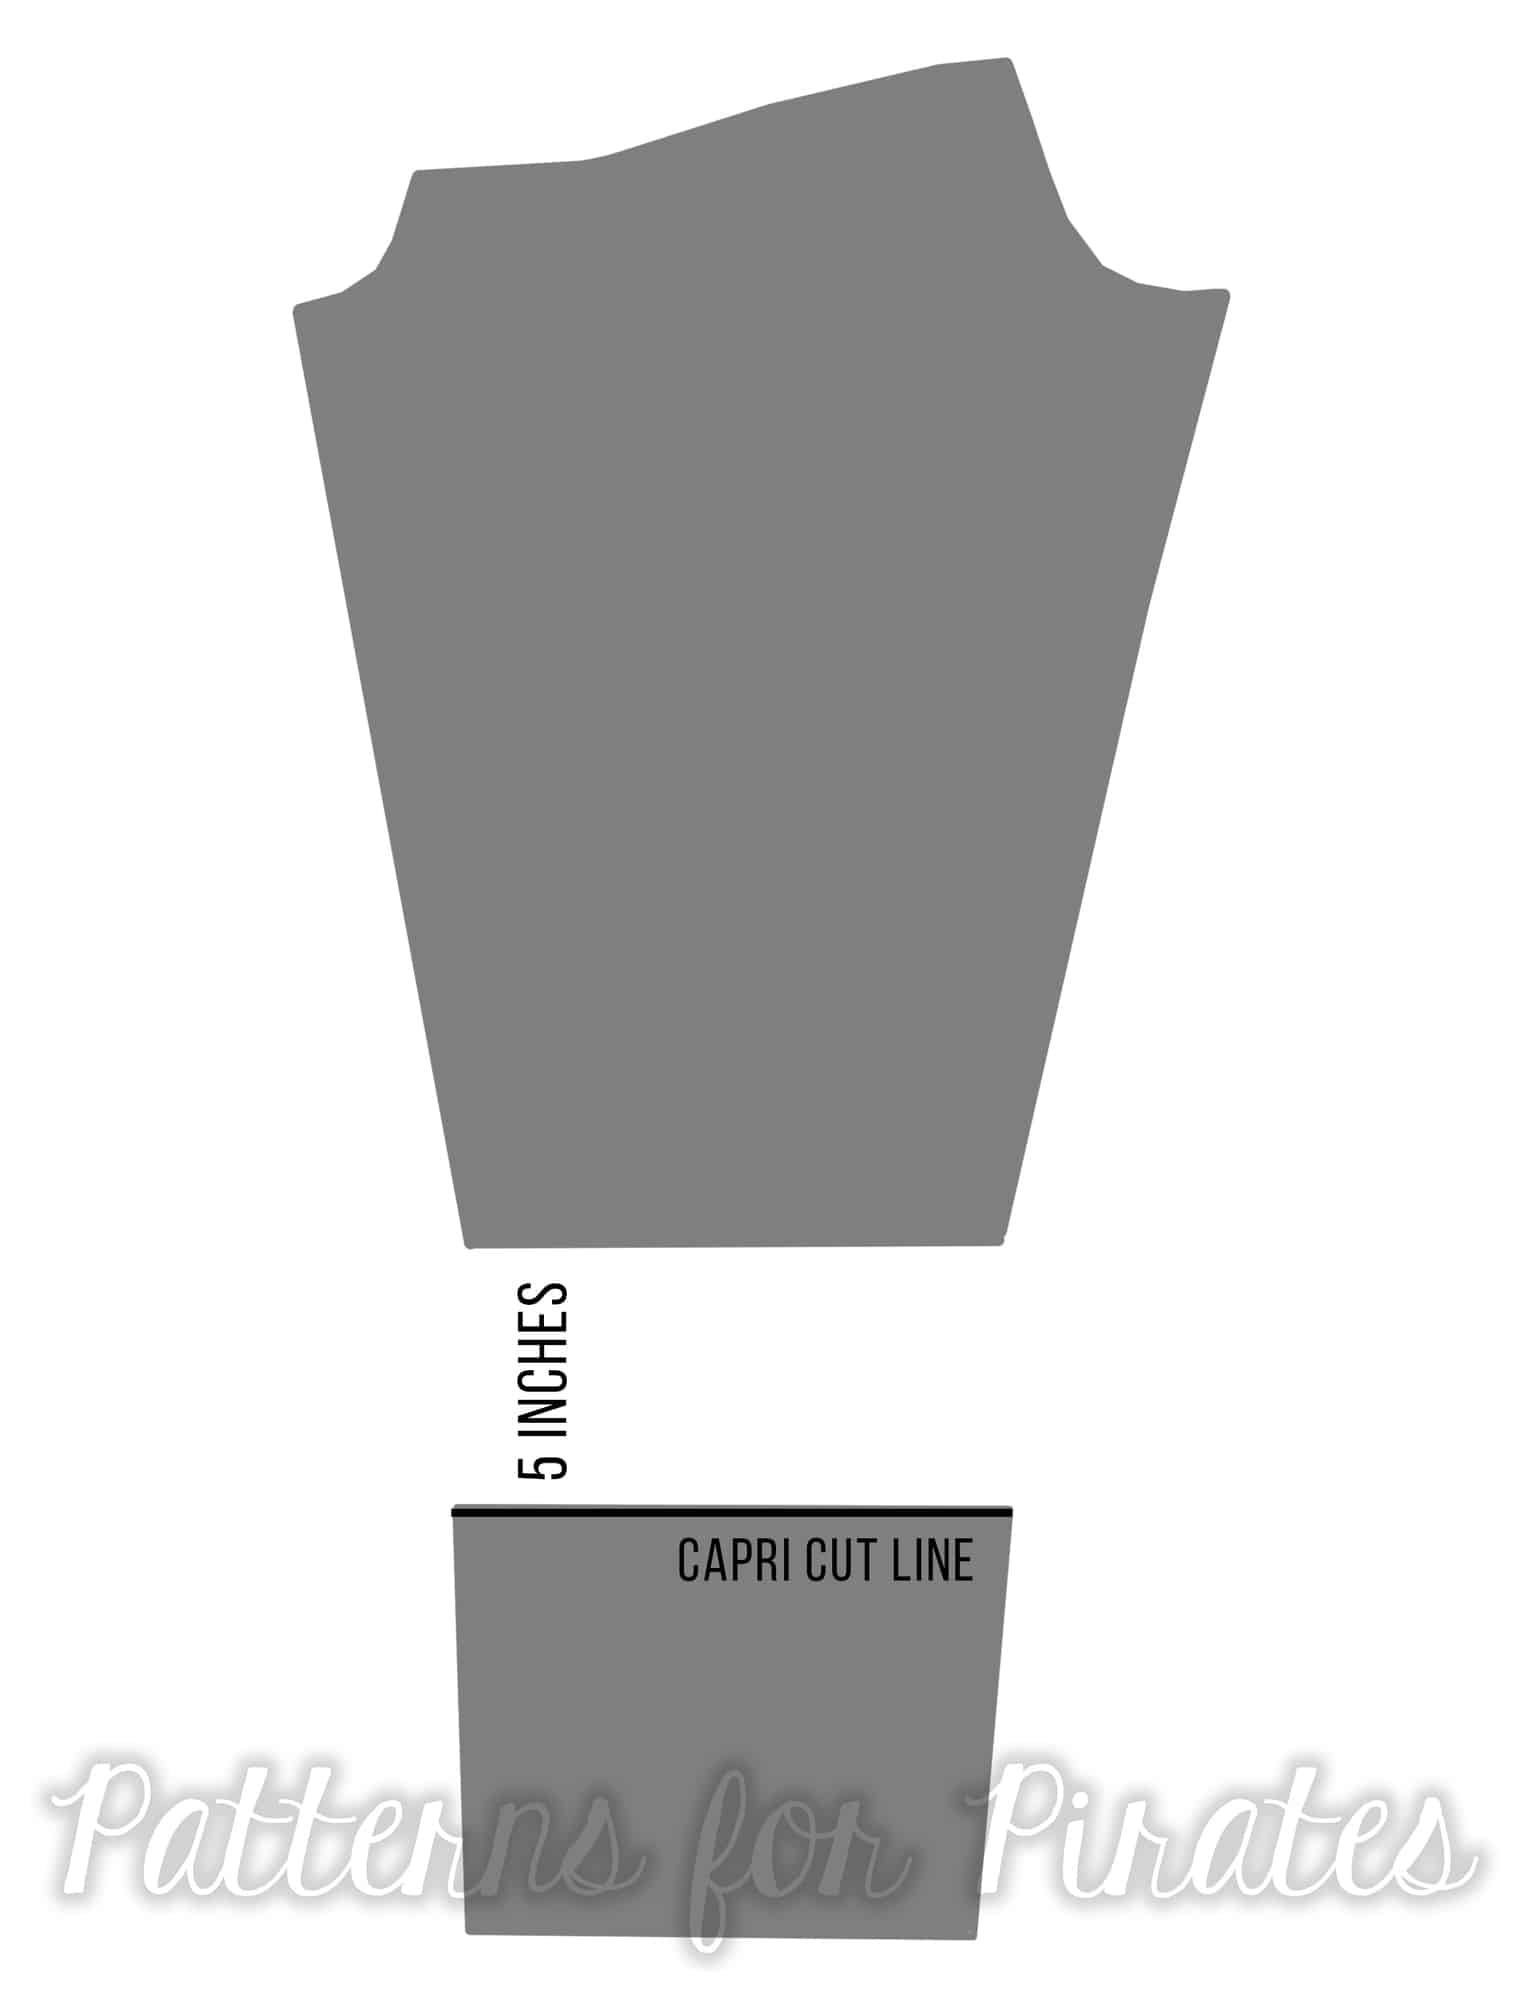
Front Leg Slit

What sexy dress doesn’t include a slit! Show off those legs and add a front slit to your wiggle.
-
- Try on your dress and mark where and how high you would like your slit. For reference, mine is 24″ from bottom hem (just above the knee) and is about half the distance from the center (1/4 point).
-
- Cut the slit.
-
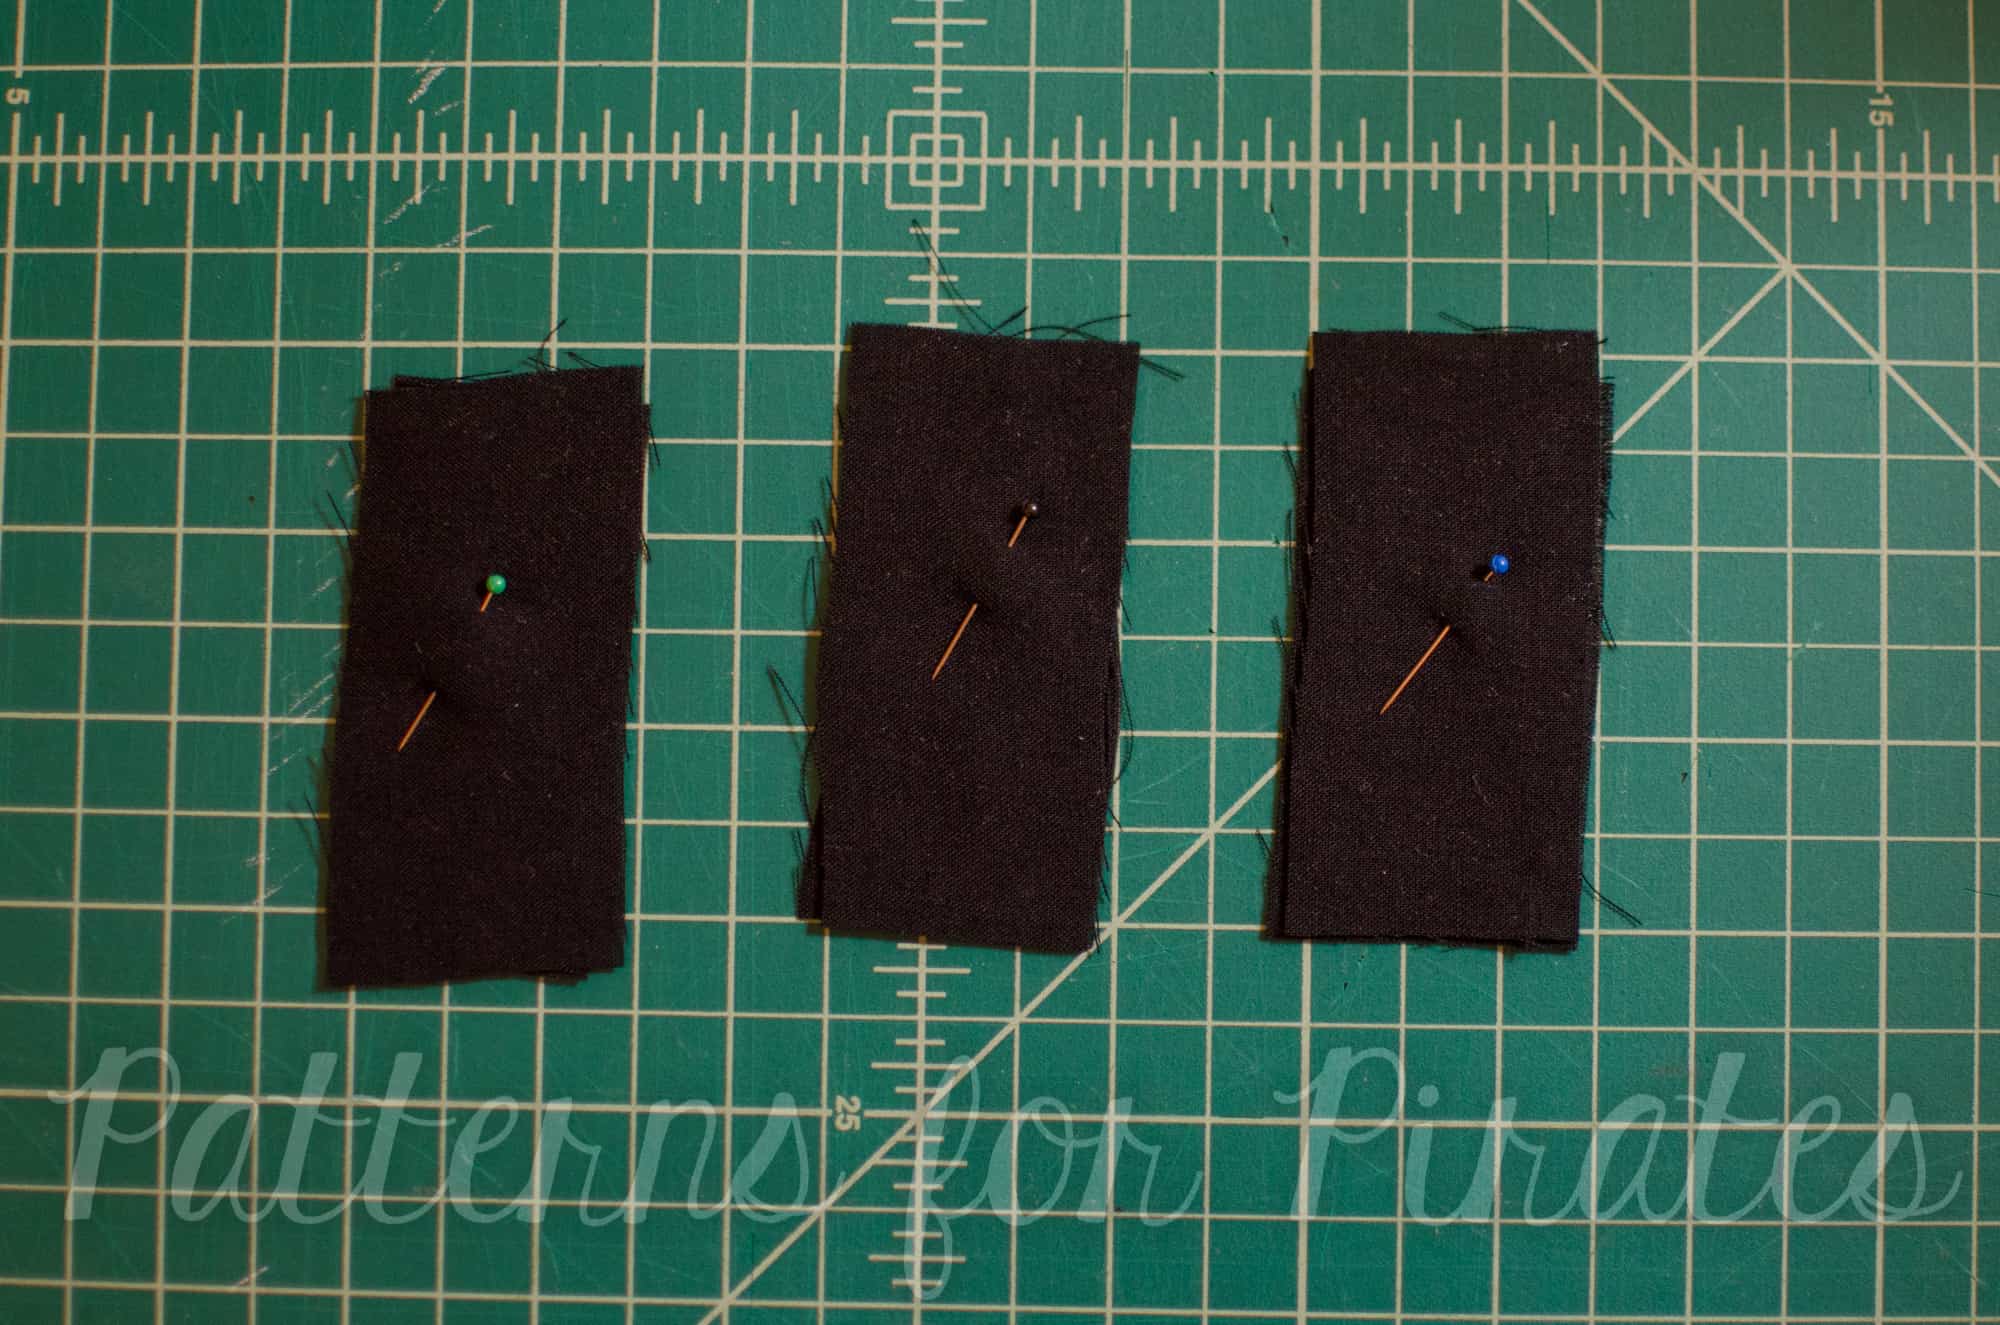
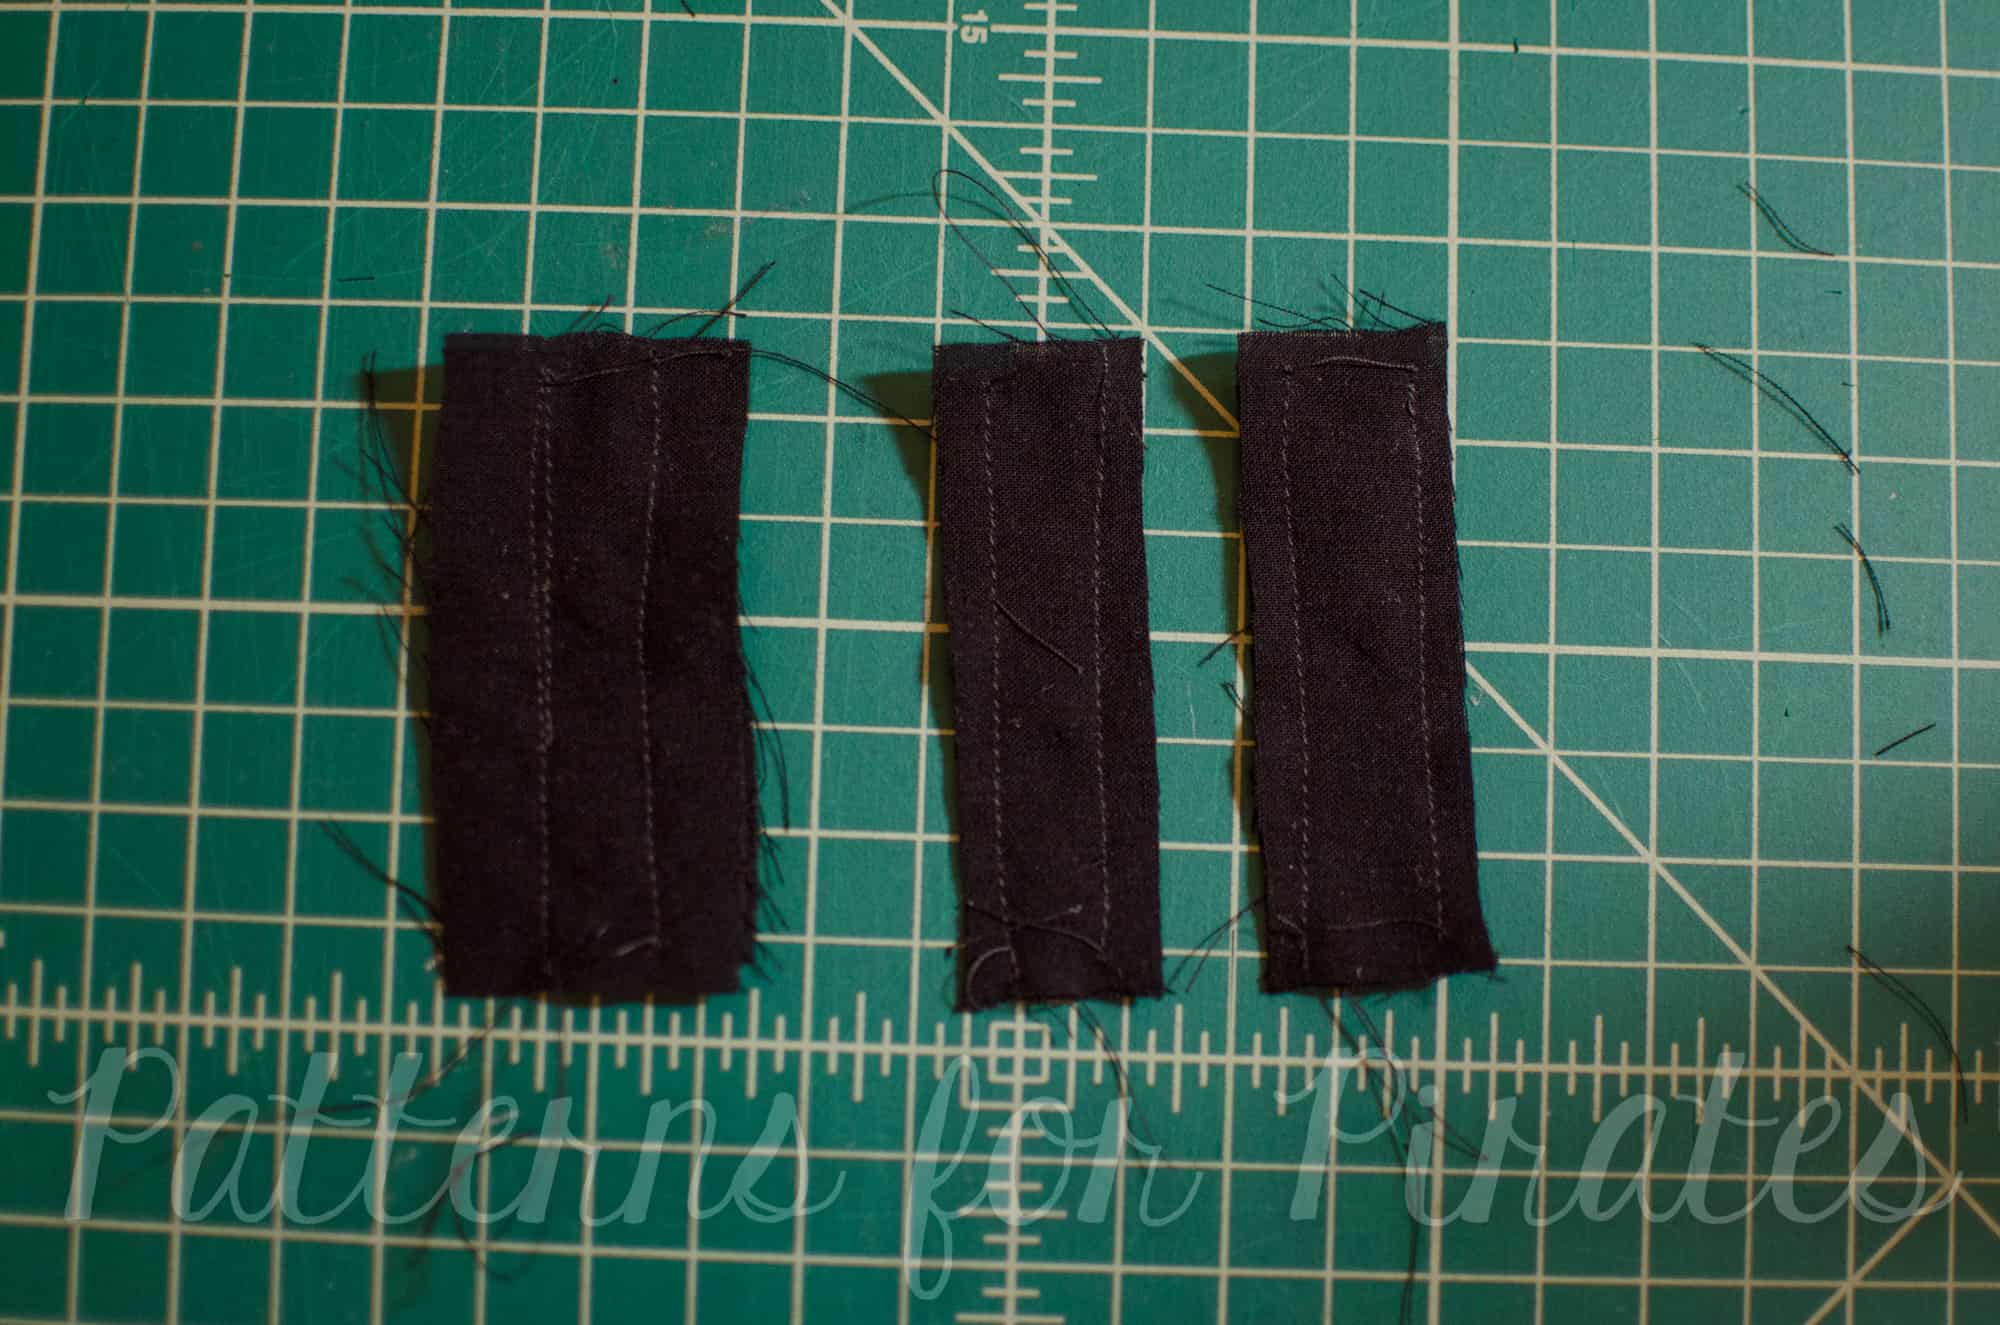
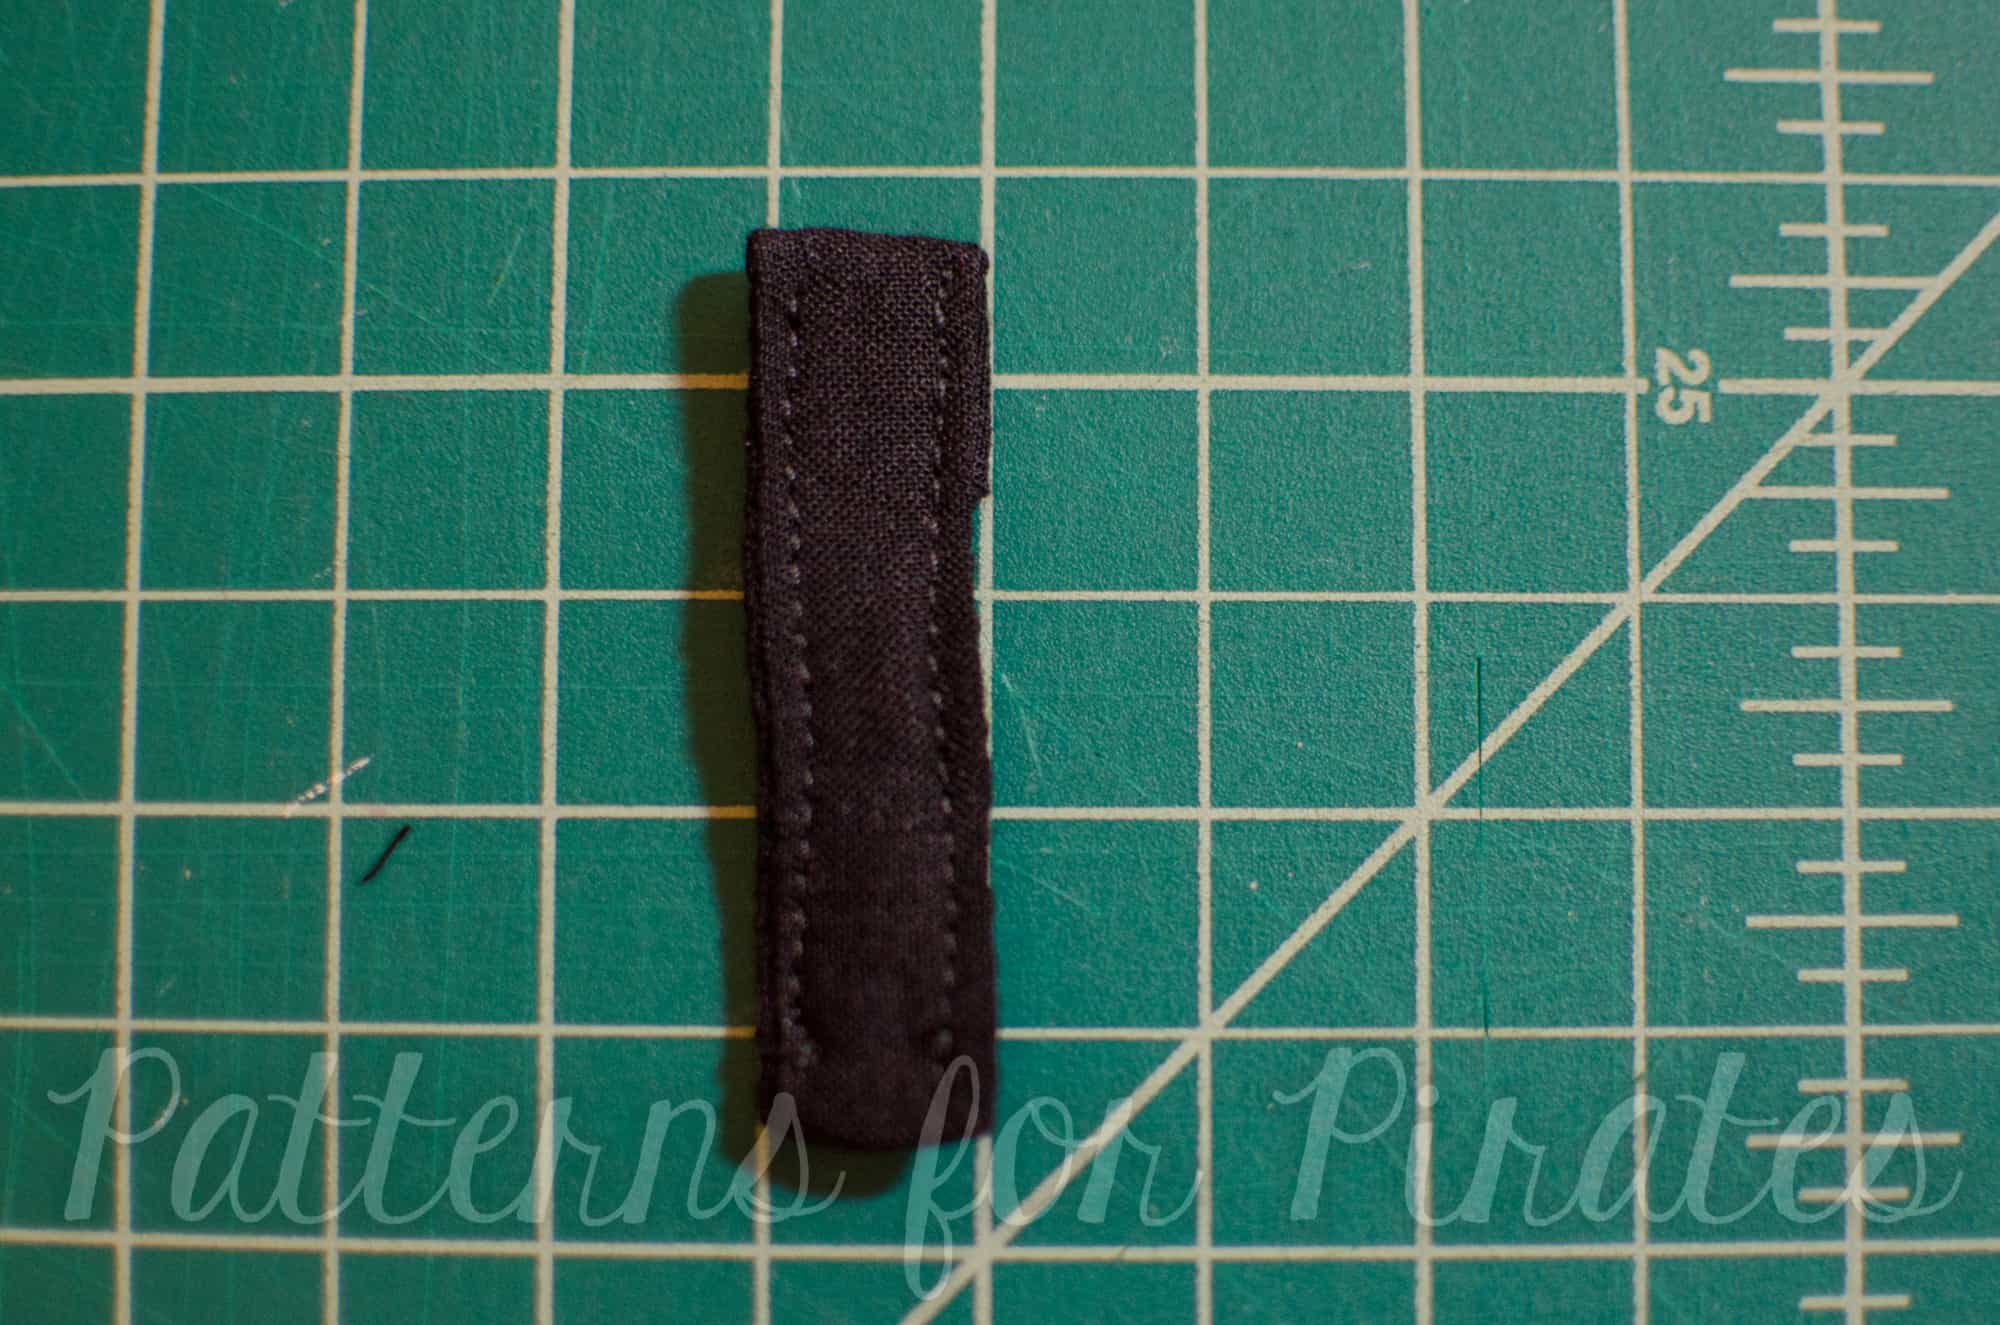
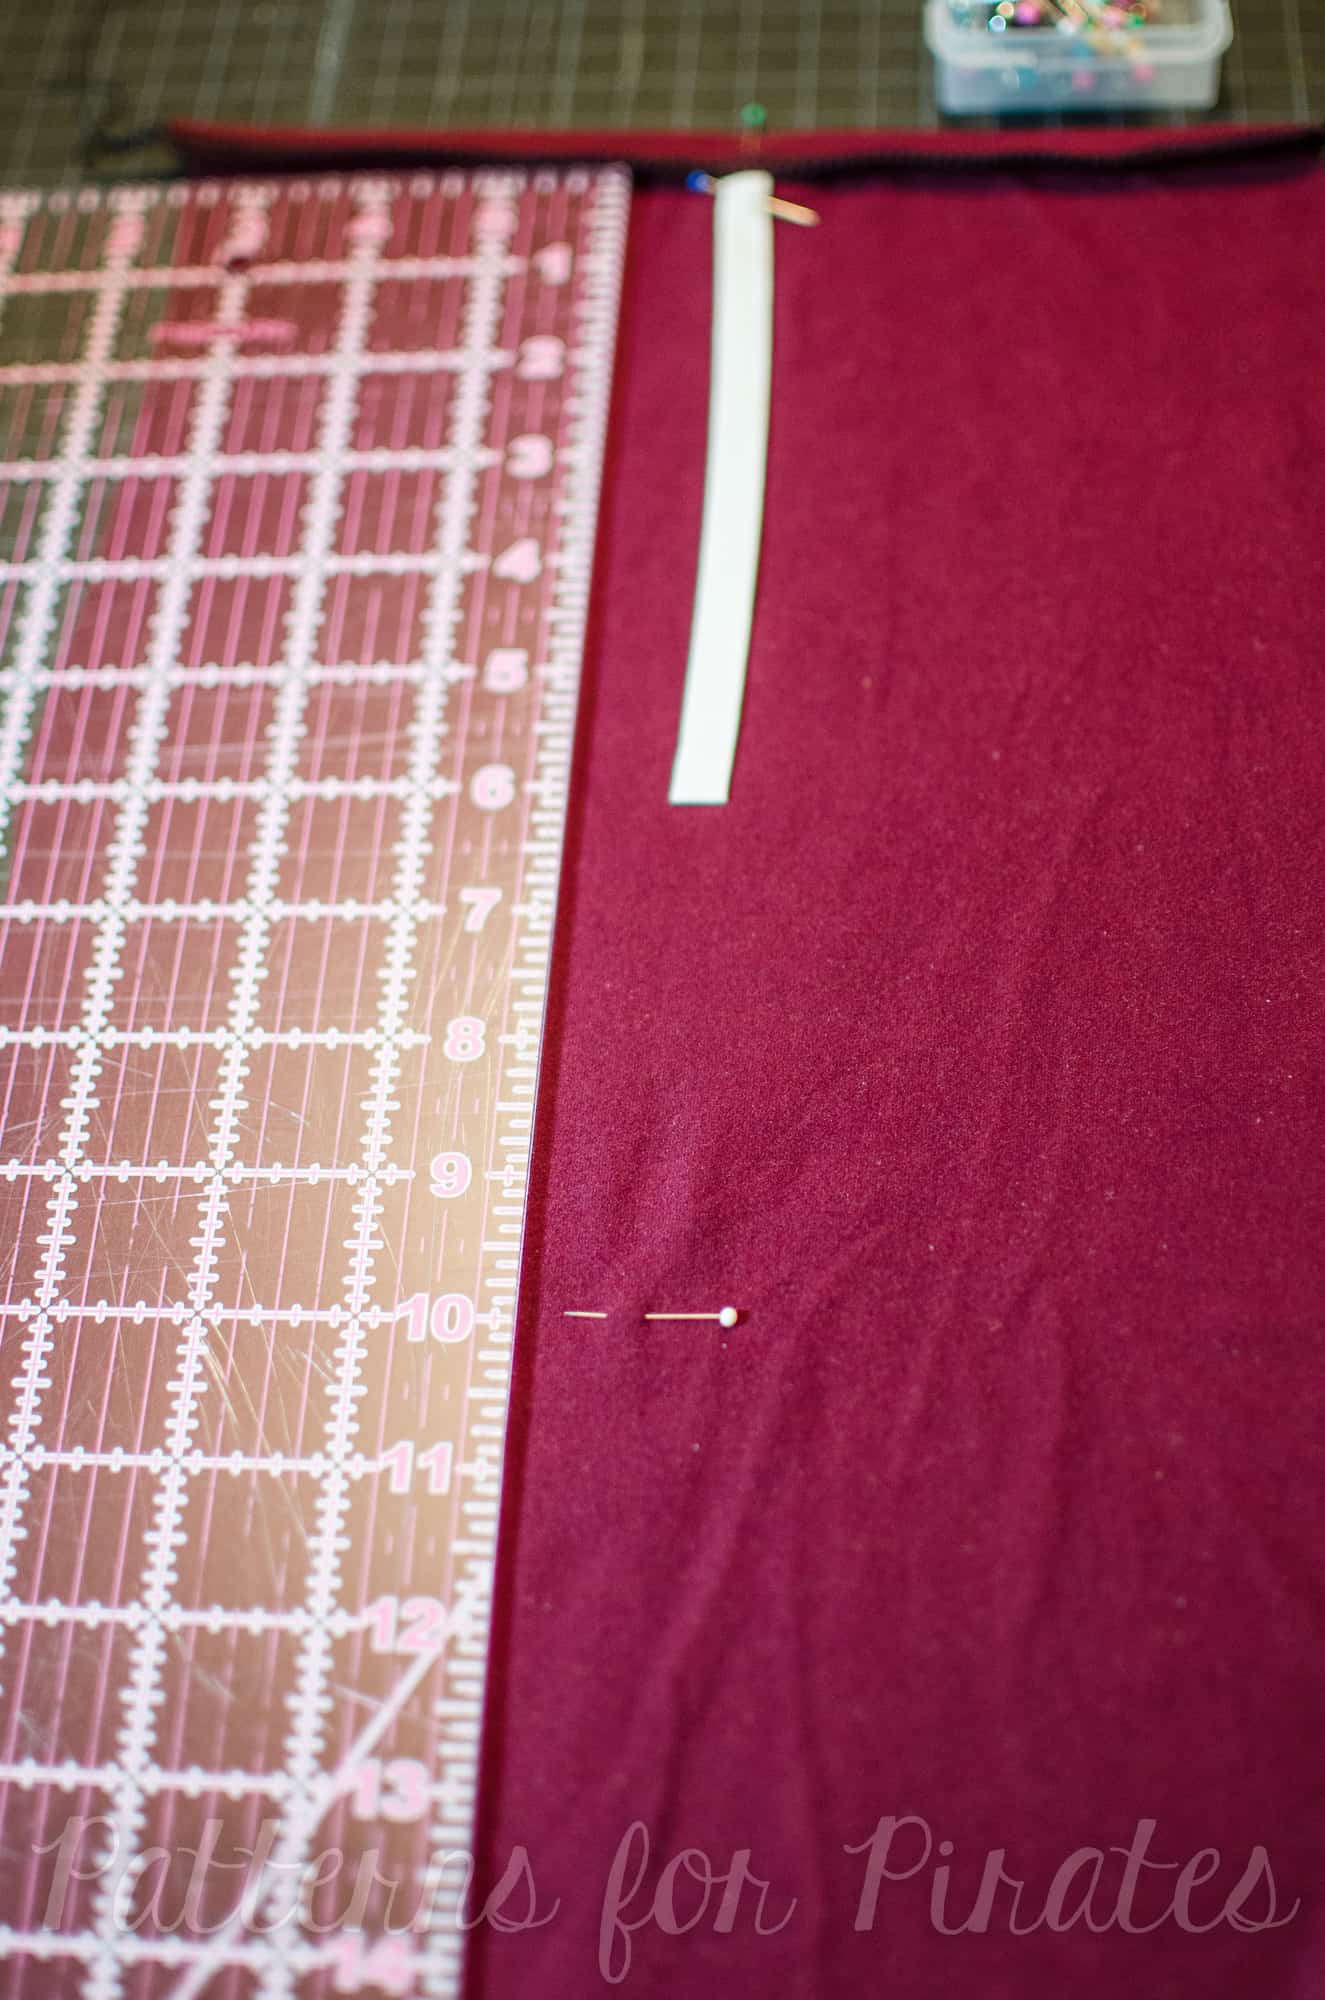
- Cut 2 binding strips 1 1/4″ by the length of your slit.
-

- With right sides together and using a 1/4″ seam allowance, stitch binding to each side of the slit.
-
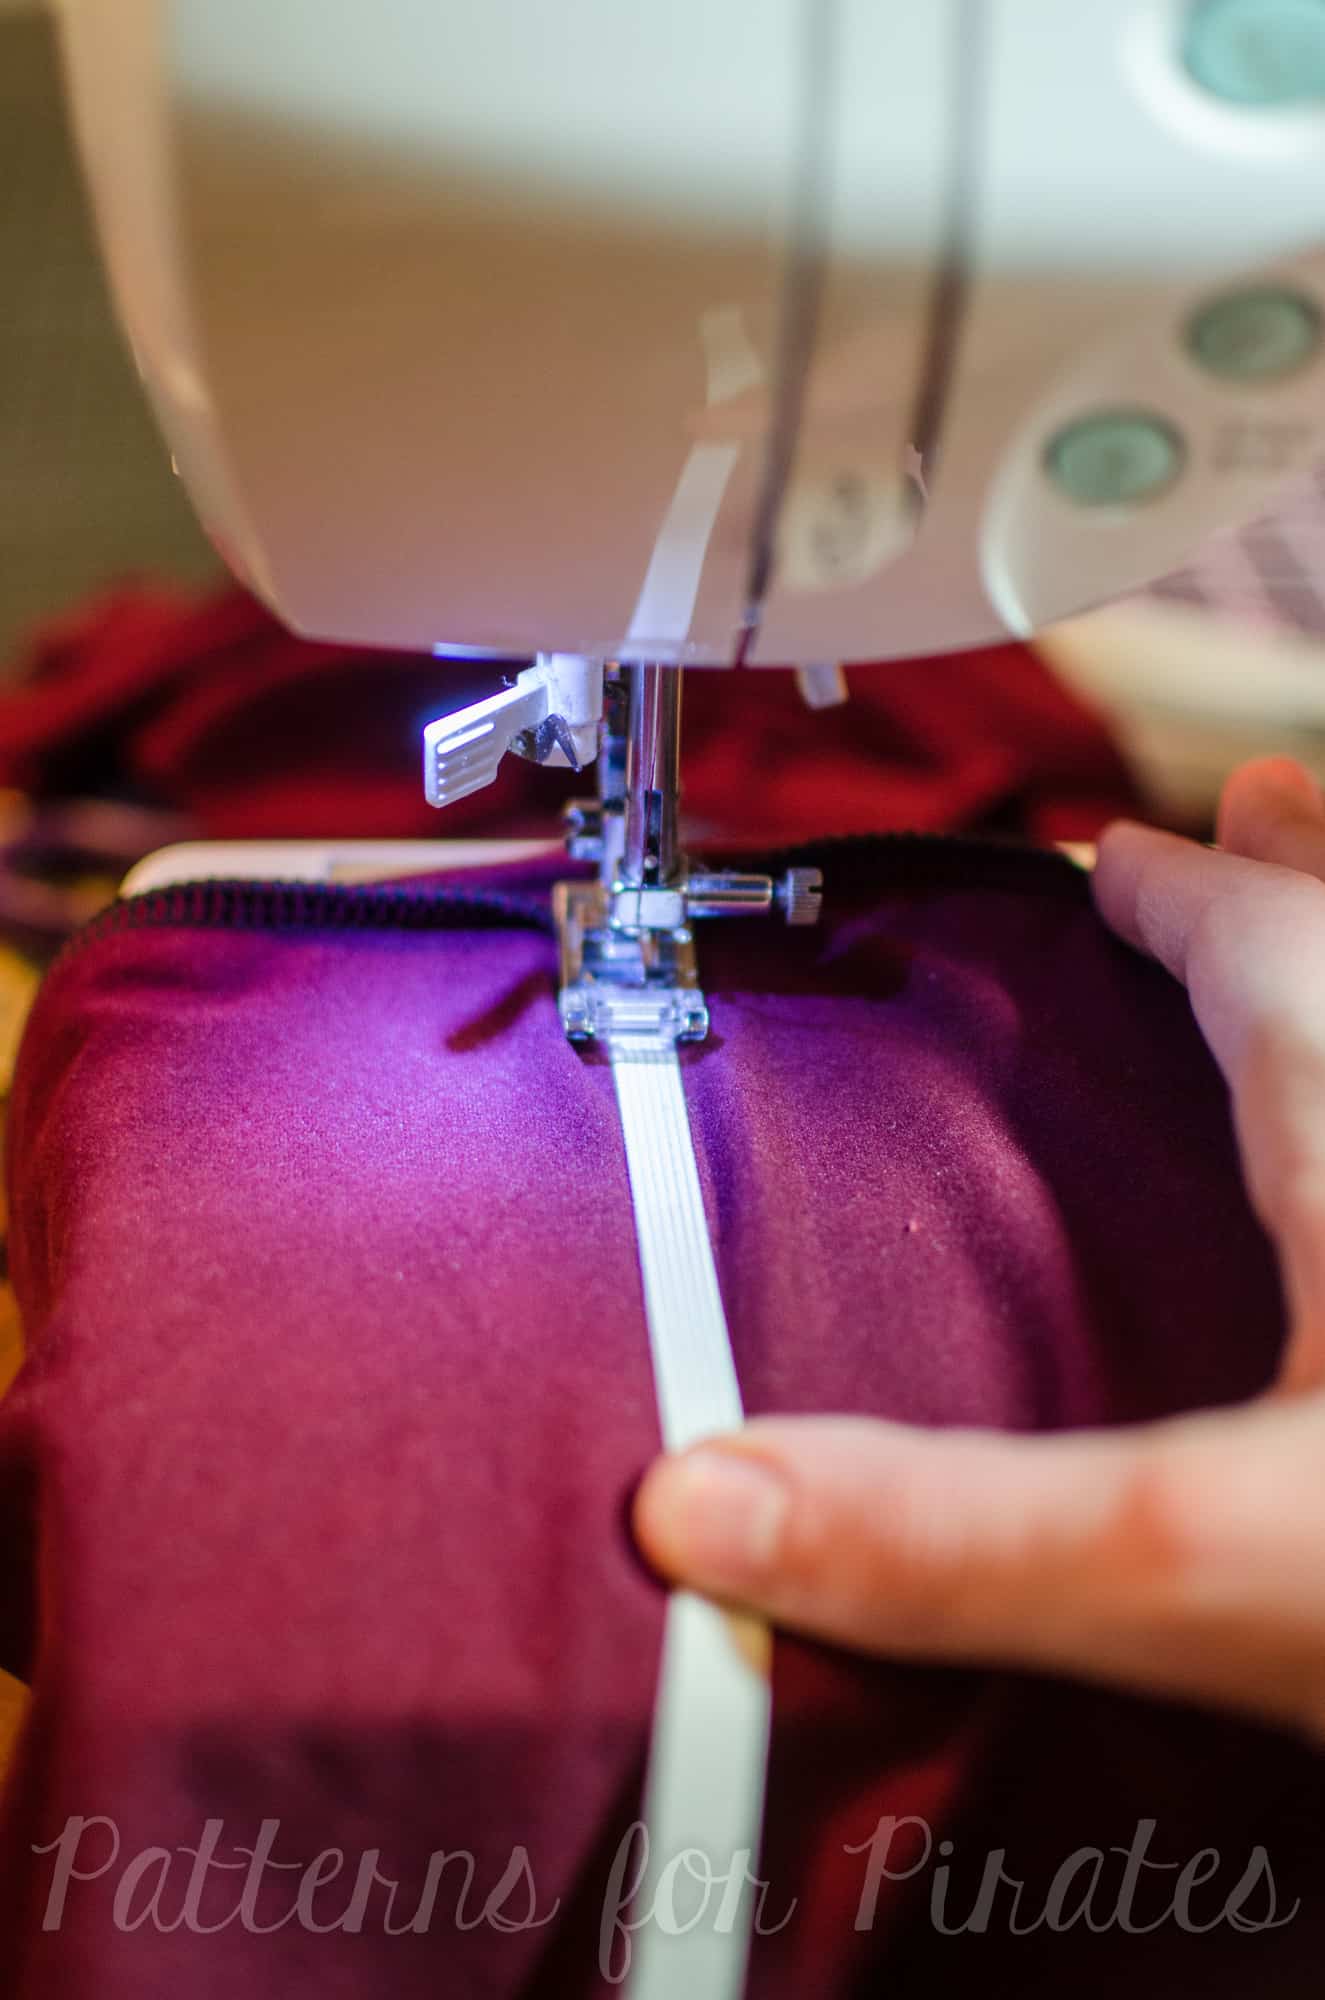
- Fold the binding to the wrong side.
-
- Fold the raw edge down to the previously sewn stitch line.

-
- Fold over to the wrong side again, and pin in place.
-
- Topstitch.

…..
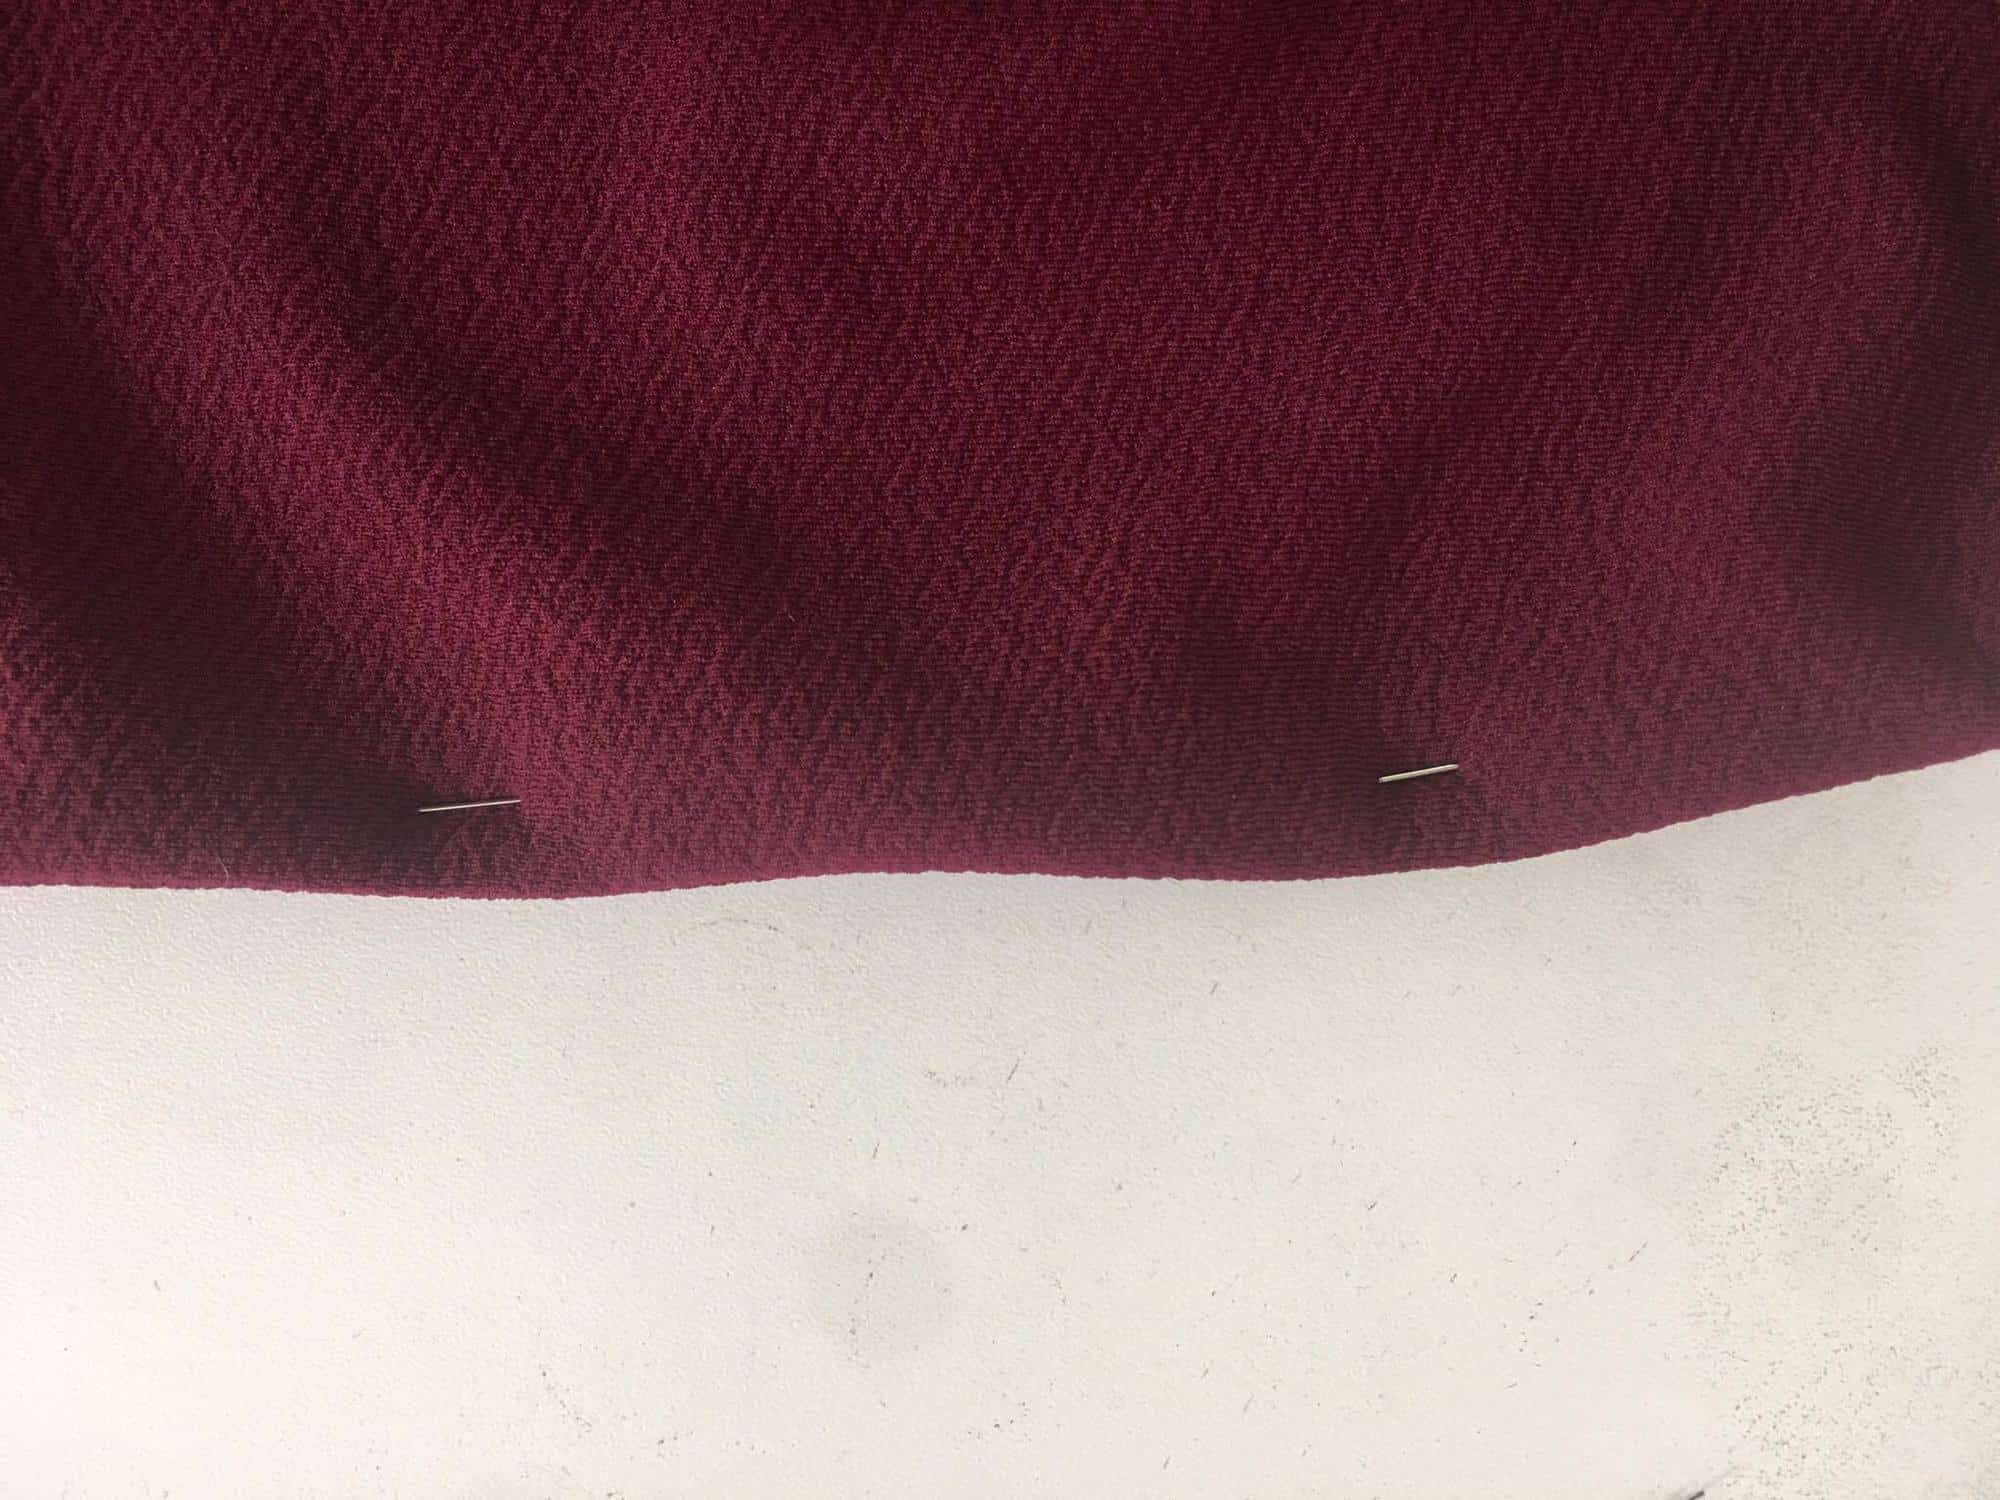
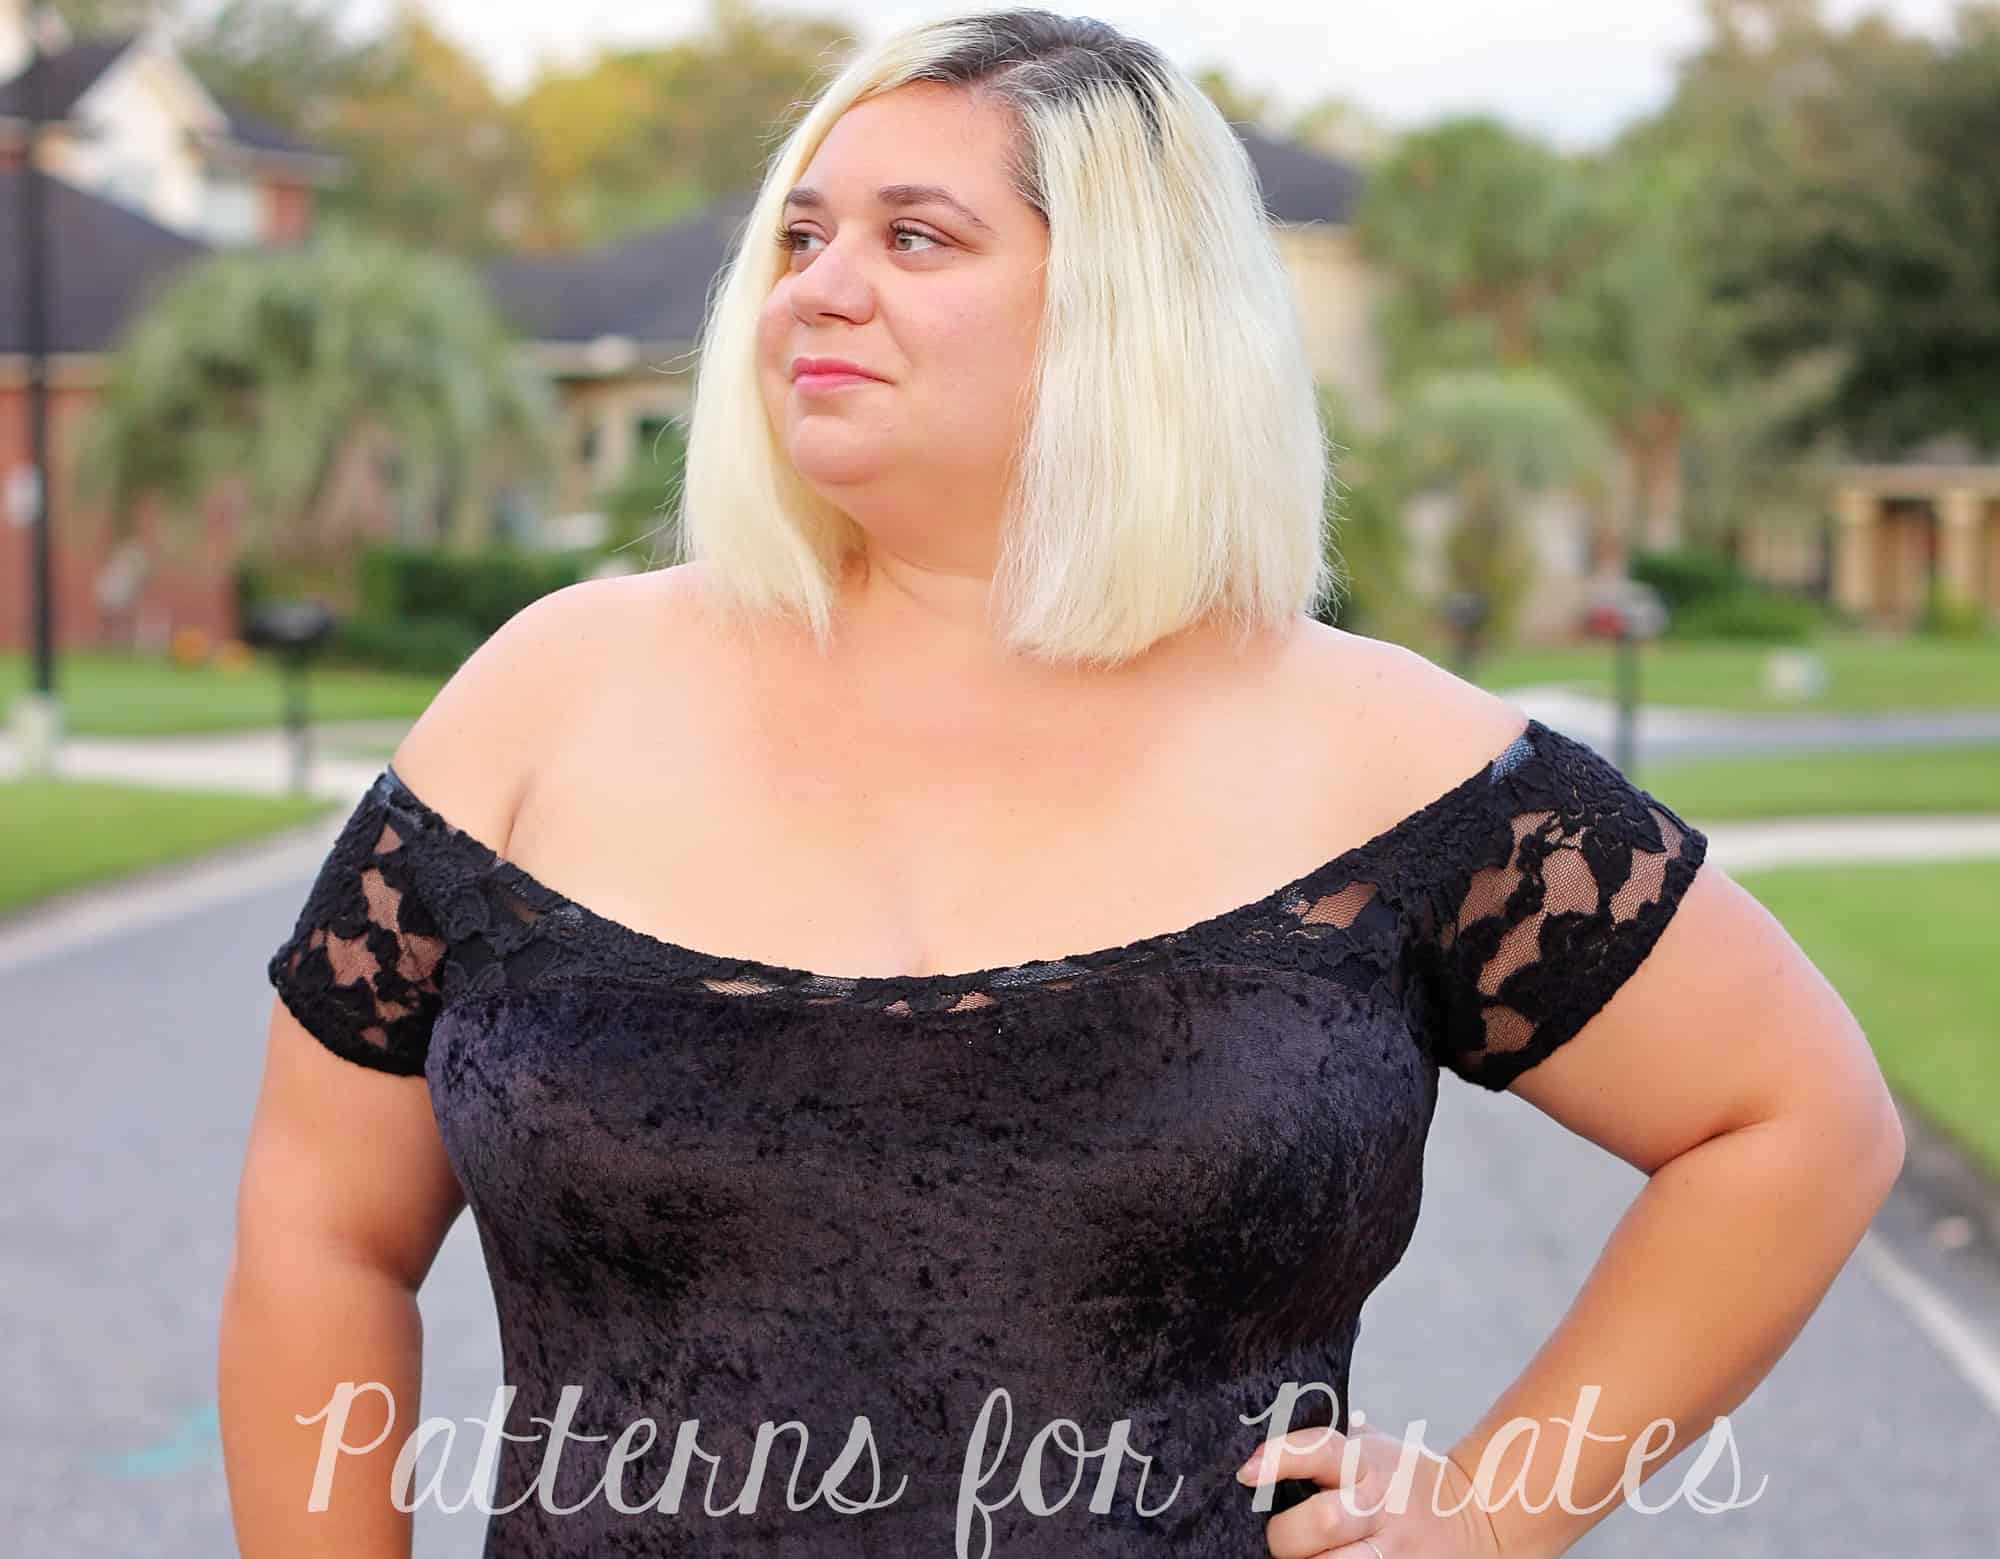
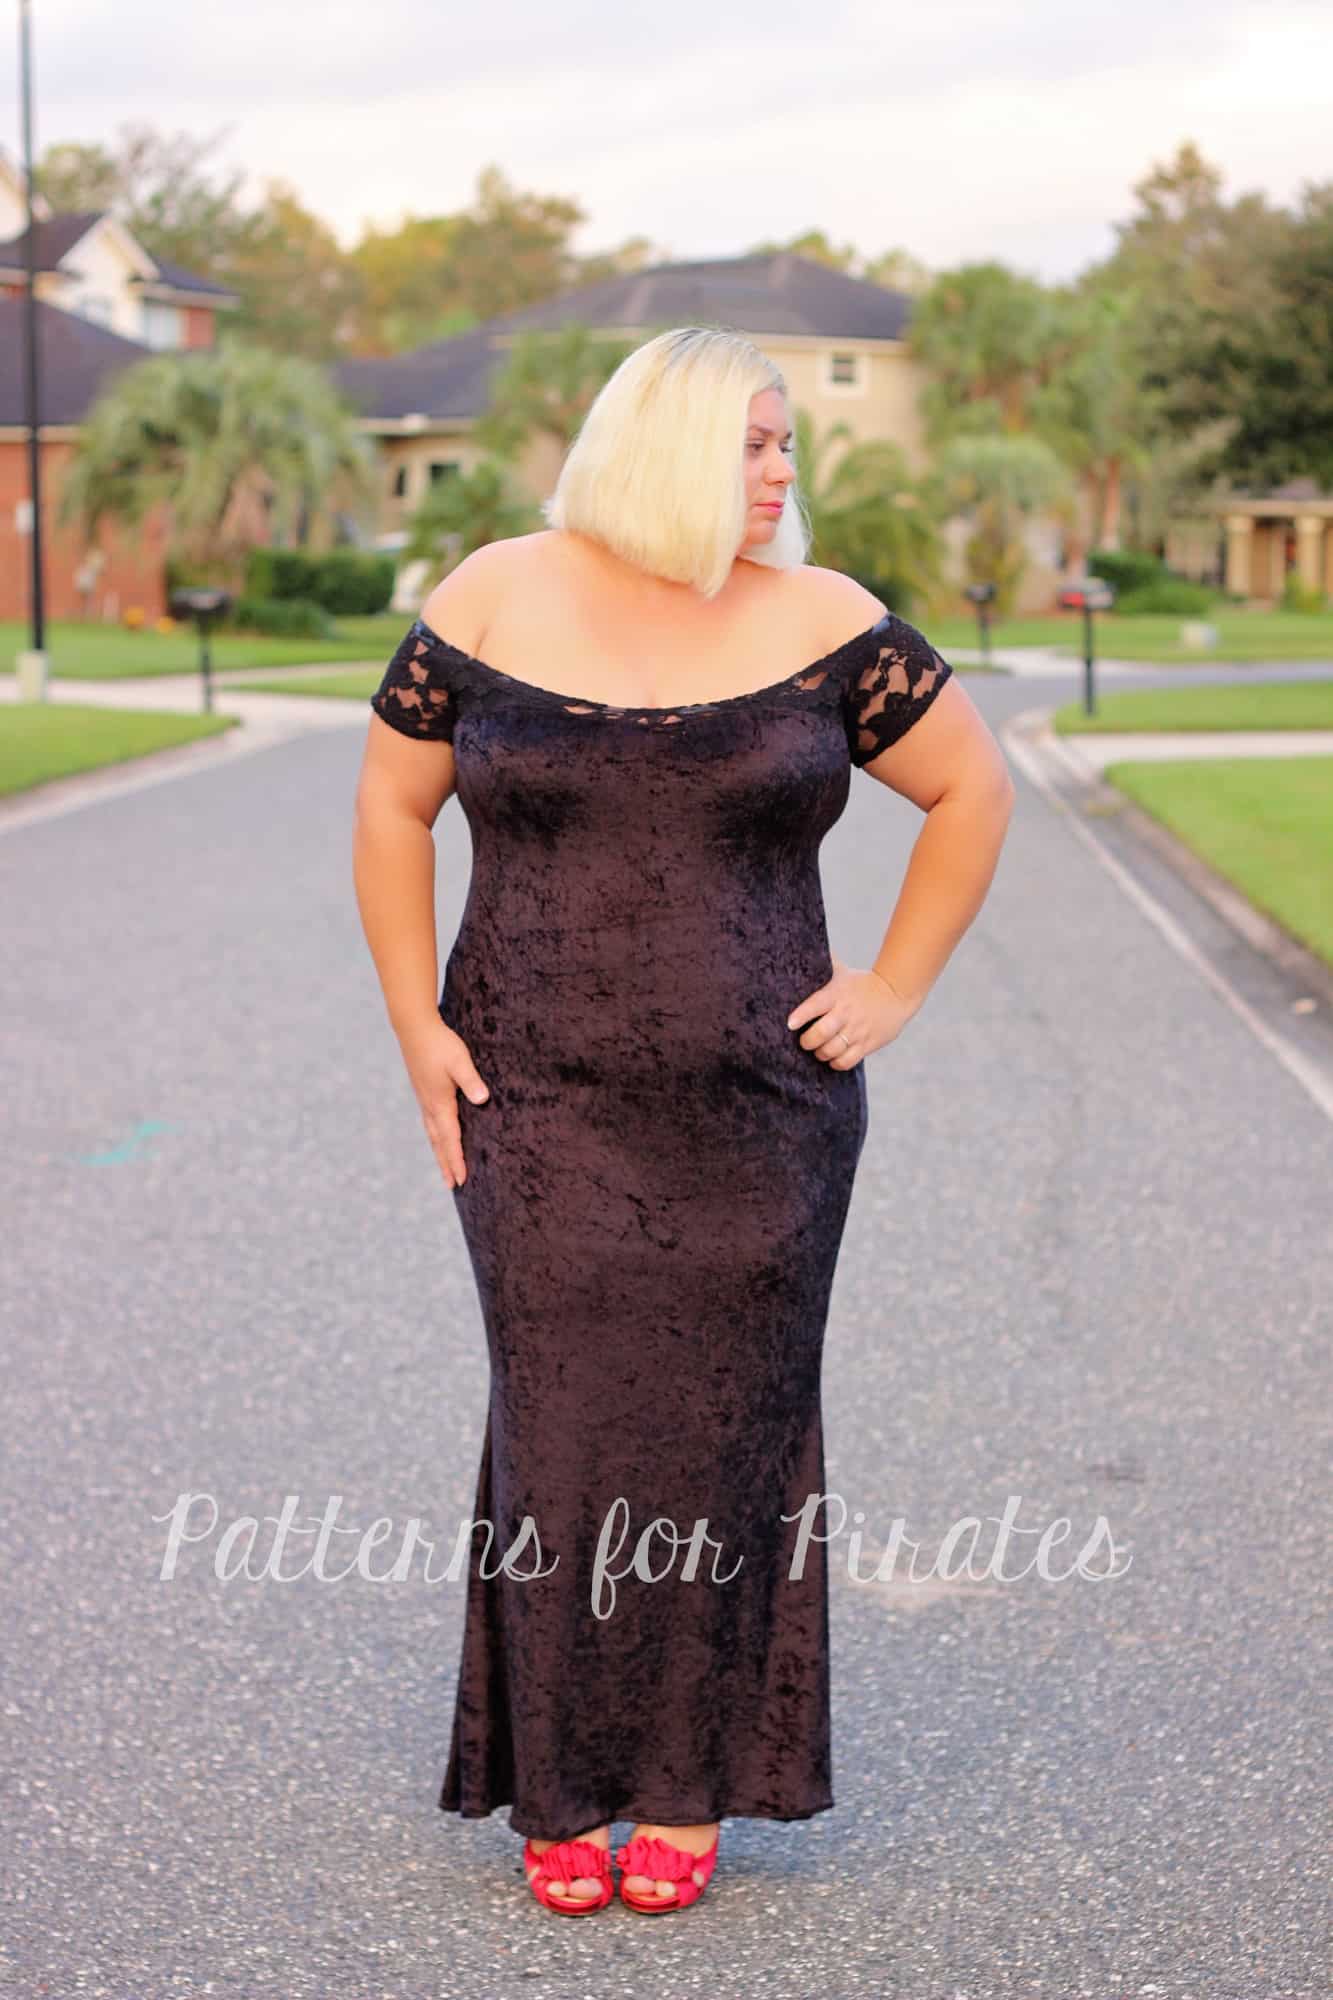
Sweetheart/Wiggle Mash
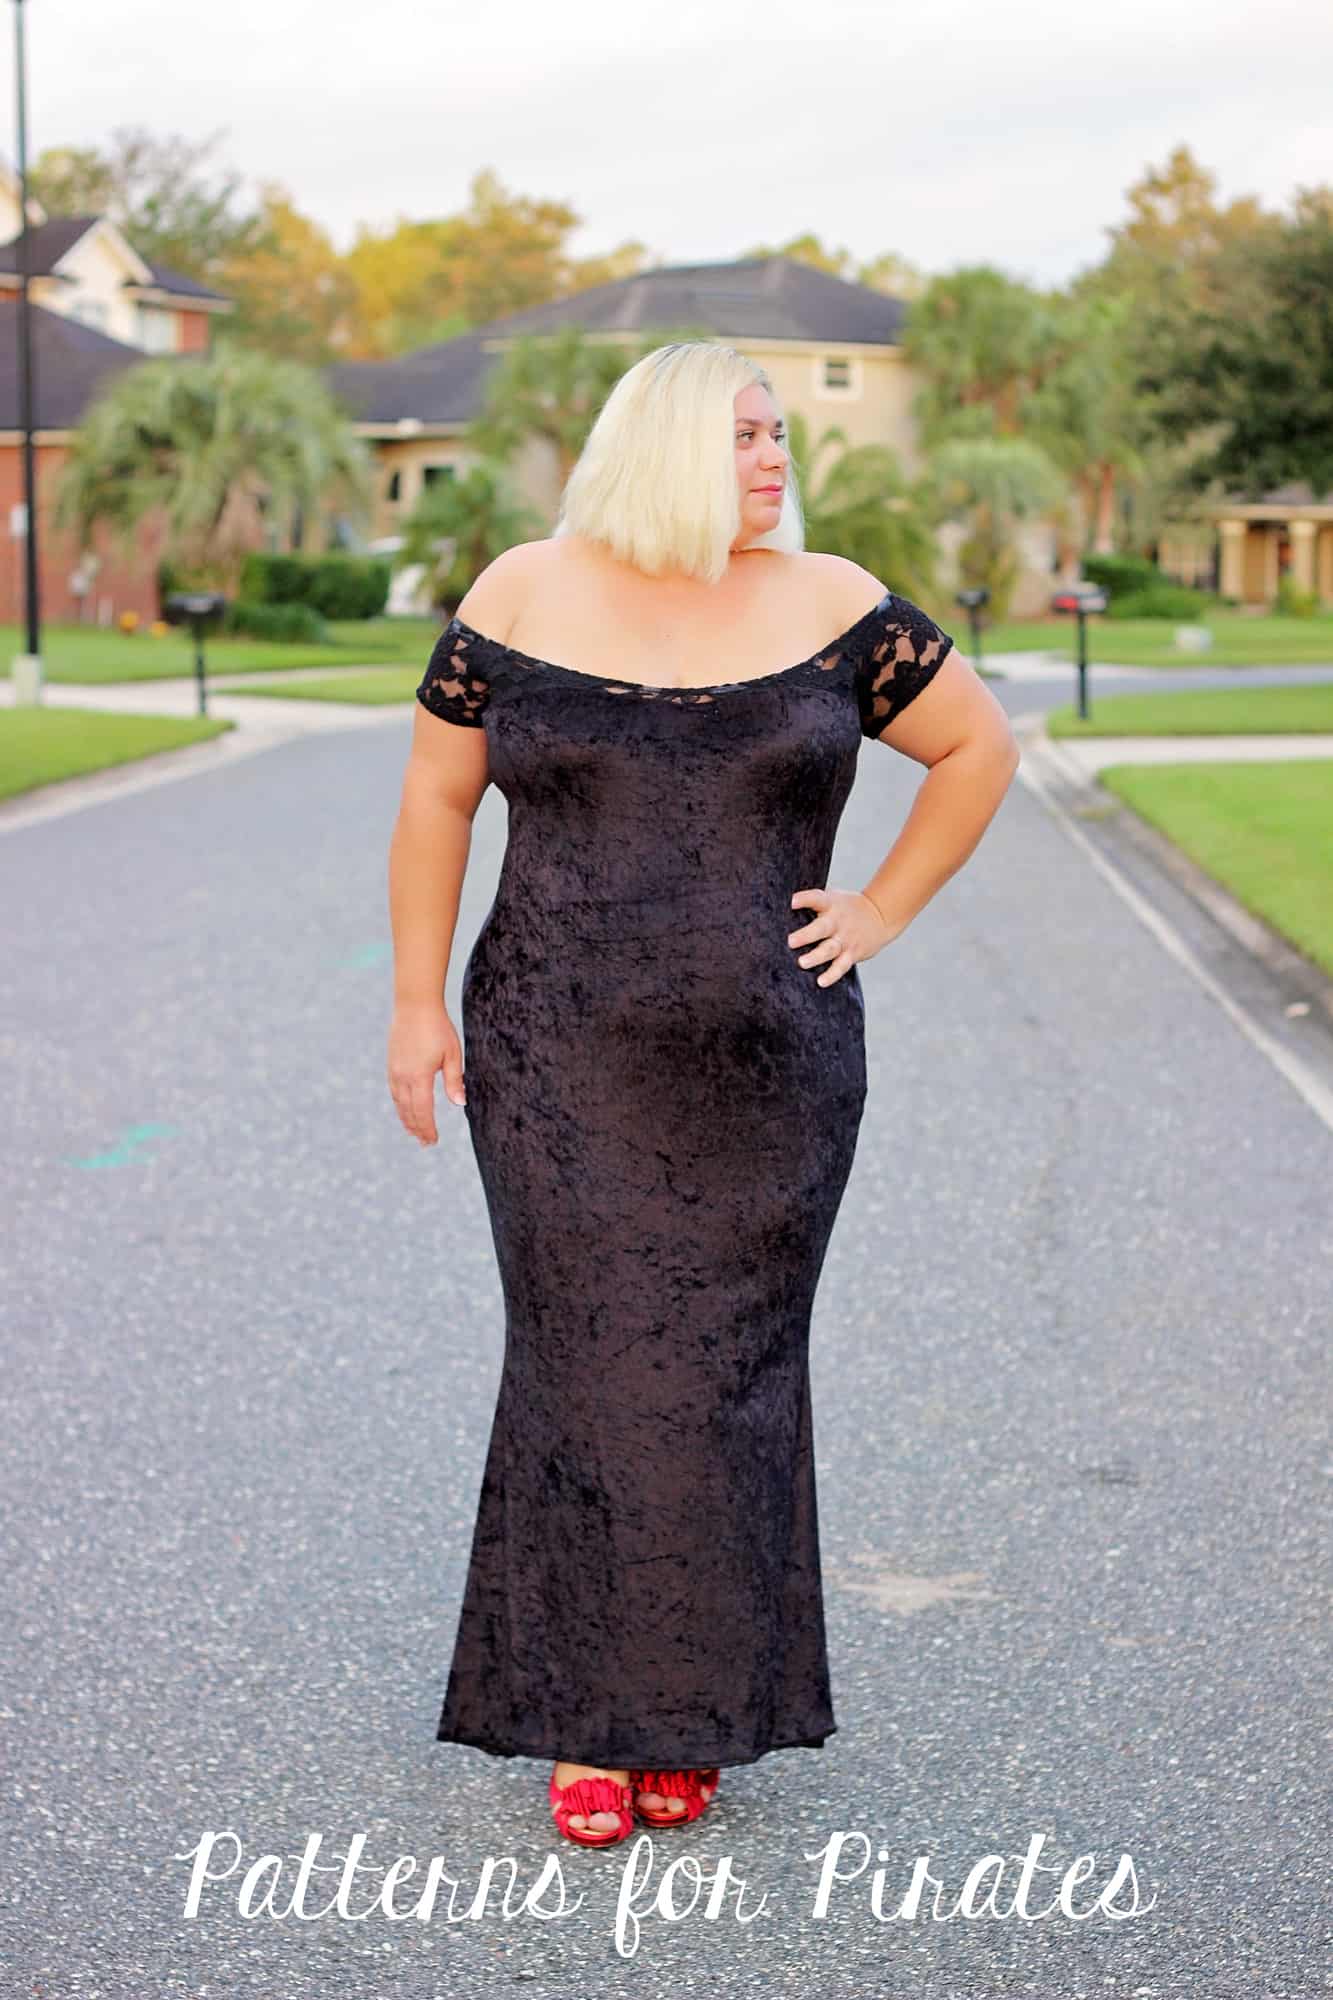
We couldn’t end this epic hacks series without a Wiggle dress/Sweetheart mash up. I just had to make myself a black velvet and lace long dress. We all need one in our closets, right?
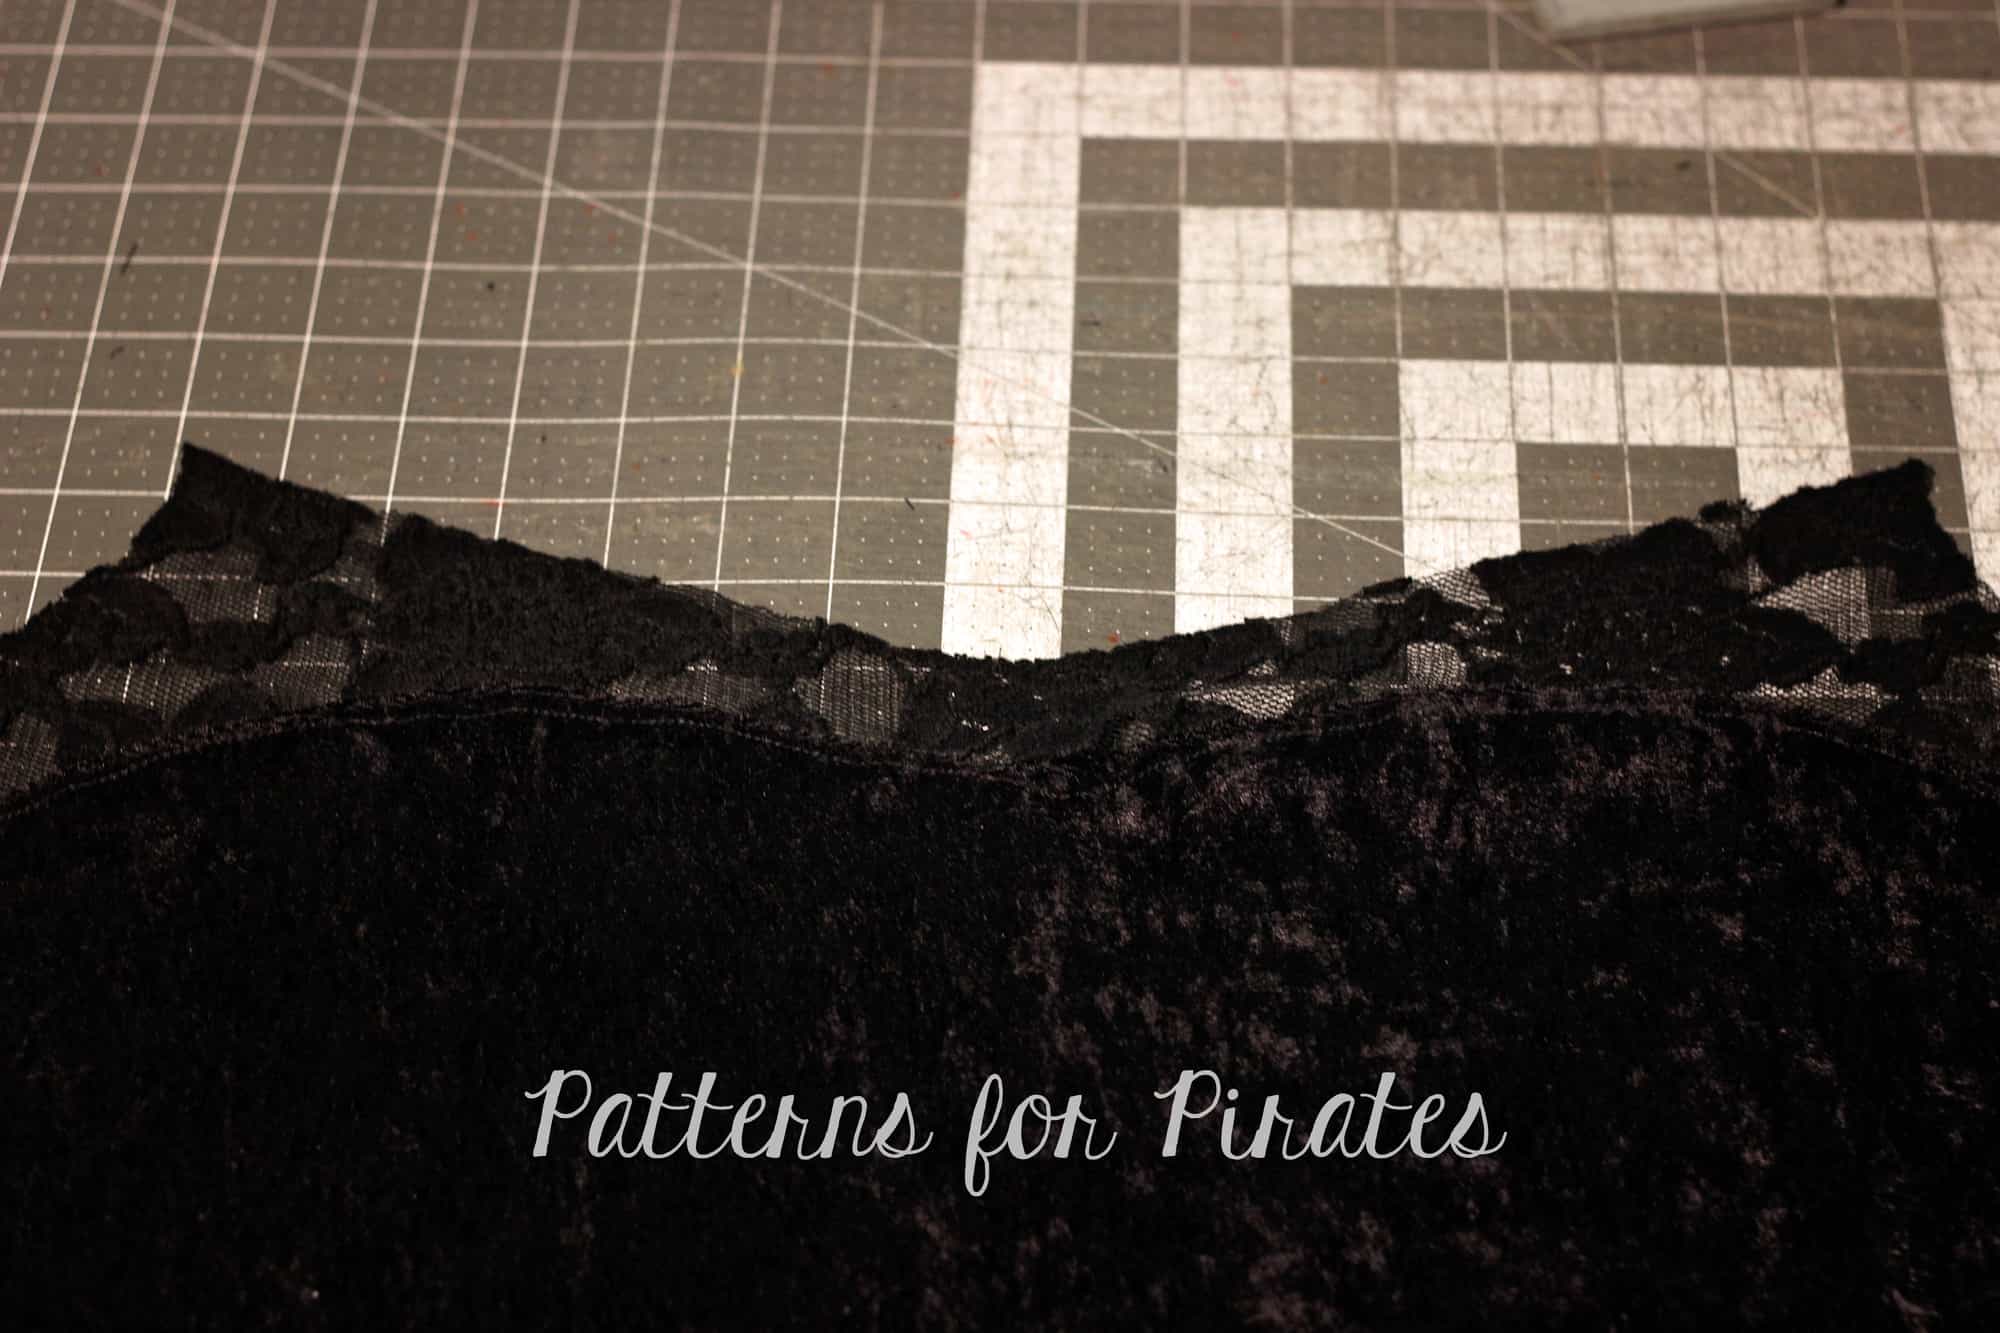
This mash is super easy. Simply take the front patterns of the wiggle dress and mark the sweetheart color-block lines using the Sweetheart dress top pattern piece. Don’t forget to add the seam allowance!

Sew the two front pieces (lace and velvet) as suggested in the Sweetheart pattern.
Once you do that simply follow the directions in the Wiggle Dress pattern to finish your dress. I used lace for my sleeves too. Since I didn’t have any black elastic and I certainly couldn’t use white elastic for the neckline, I used clear elastic instead. It worked like a charm!

Tadah! Just by adding a sexy sweetheart color block front, you took your Wiggle dress up a notch!


Holy Moly…. I think we covered just about every hack we could come up with to take The Wiggle Dress to the next level (if it wasn’t already on its own)! Make a Wiggle? Hop on over to the Facebook Group, and share your makes, we’d love to see it!


![IMG_6525[1]](http://www.patternsforpirates.com/wp-content/uploads/2017/01/IMG_65251.jpg)
![IMG_6526[1]](http://www.patternsforpirates.com/wp-content/uploads/2017/01/IMG_65261.jpg)
![IMG_6527[1]](http://www.patternsforpirates.com/wp-content/uploads/2017/01/IMG_65271.jpg)
![IMG_6528[1]](http://www.patternsforpirates.com/wp-content/uploads/2017/01/IMG_65281.jpg)
![IMG_6549[1]](http://www.patternsforpirates.com/wp-content/uploads/2017/01/IMG_65491.jpg)
![IMG_6542[1]](http://www.patternsforpirates.com/wp-content/uploads/2017/01/IMG_65421.jpg)