Patterns for Pirates

P4P stylish, modern, wearable patterns

  • Home
  • Blog
    • Frequently Asked Questions
    • Pattern Releases
      • Free Patterns
    • P4P University
      • Fitting
      • Sewing with Stretch, Knit Fabrics
      • Sewing with Woven Fabrics
      • Sewing Machines
    • Sew-A-Longs
    • Fabric for Pirates
    • Pattern Hacks
    • Announcement
      • Blog Tours
      • Contest/Giveaway
  • Shop
  • Bundle Discounts
  • Flash Friday
  • Gift Cards
  • My Account
  • Cart

P4P Holiday Freebies Roundup

December 1, 2018

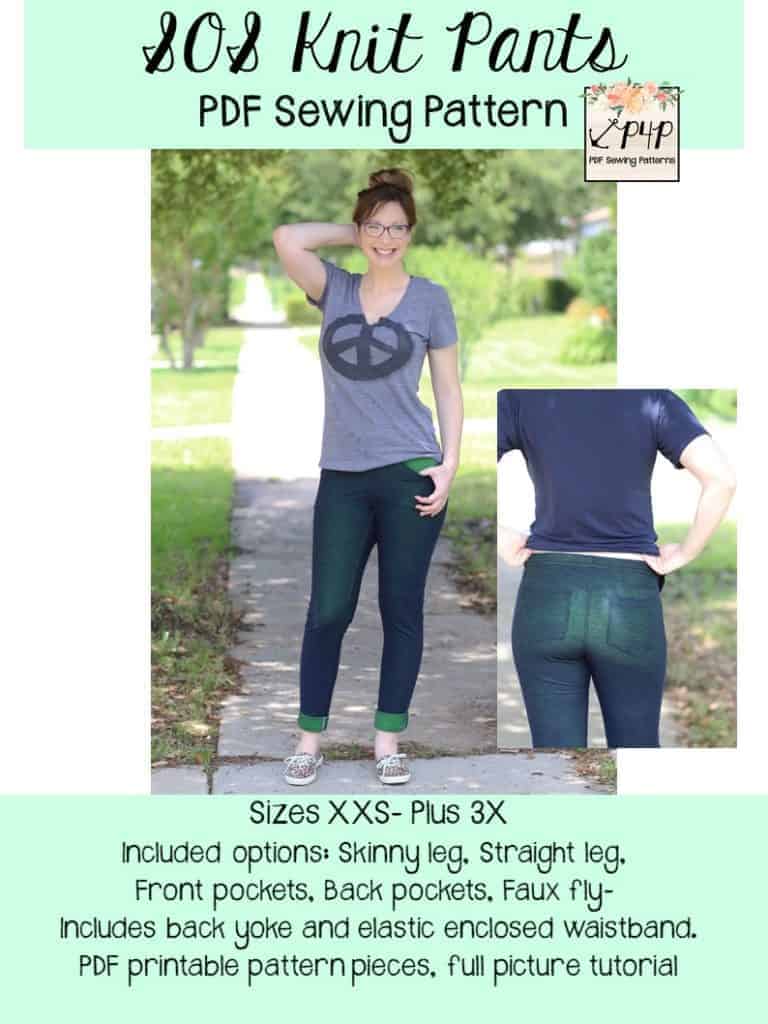
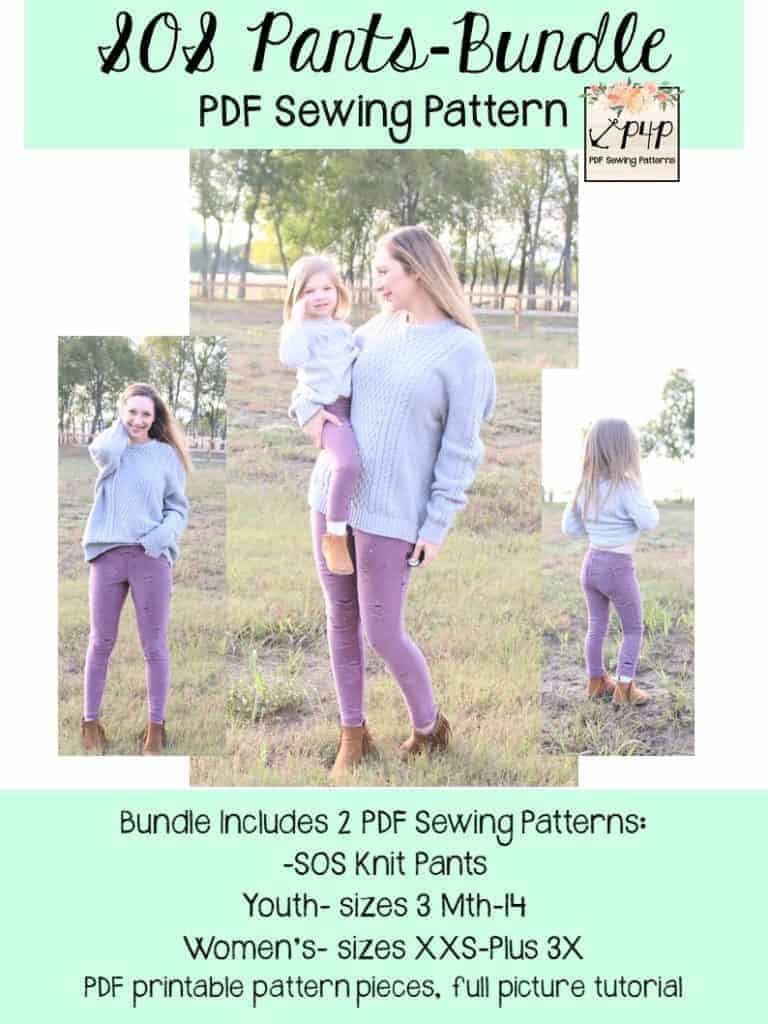
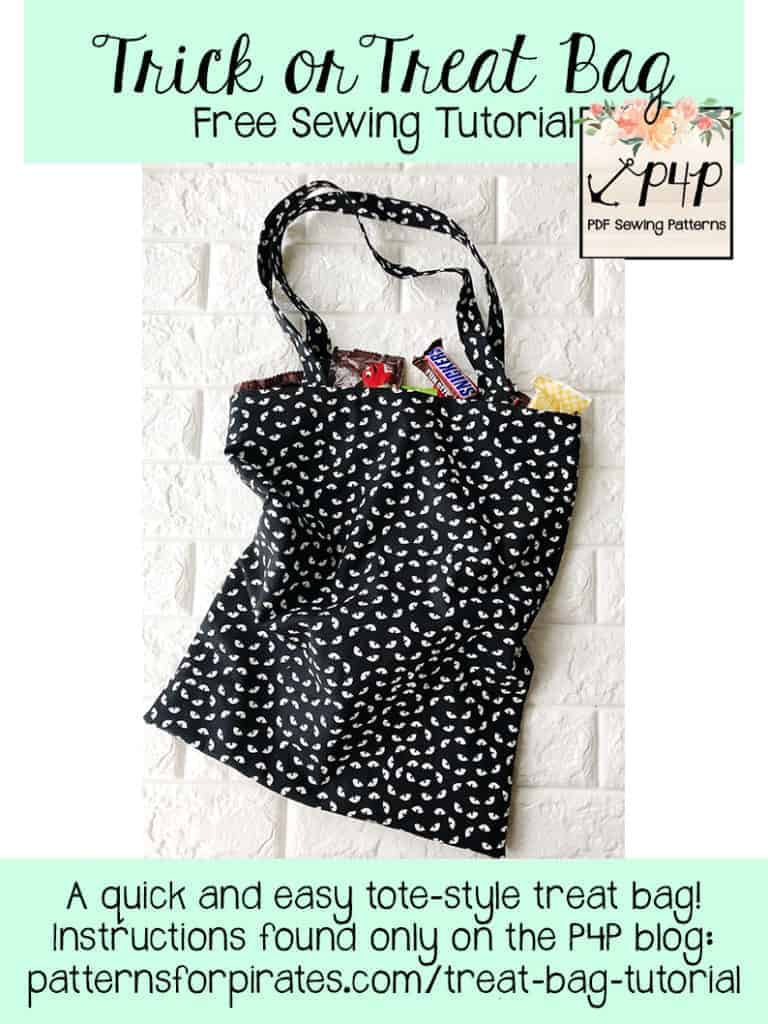
We know that November and December can be your busiest time of year….in general, but also in SEWING!  Here at P4P, we try and make it easier on you by giving you some gift-giving ideas.  (If you’re gifting these to yourself, none of us are judging you.  Not for a second.)

Here’s a quick look back at the different series of freebies we’ve given our favorite pirates!

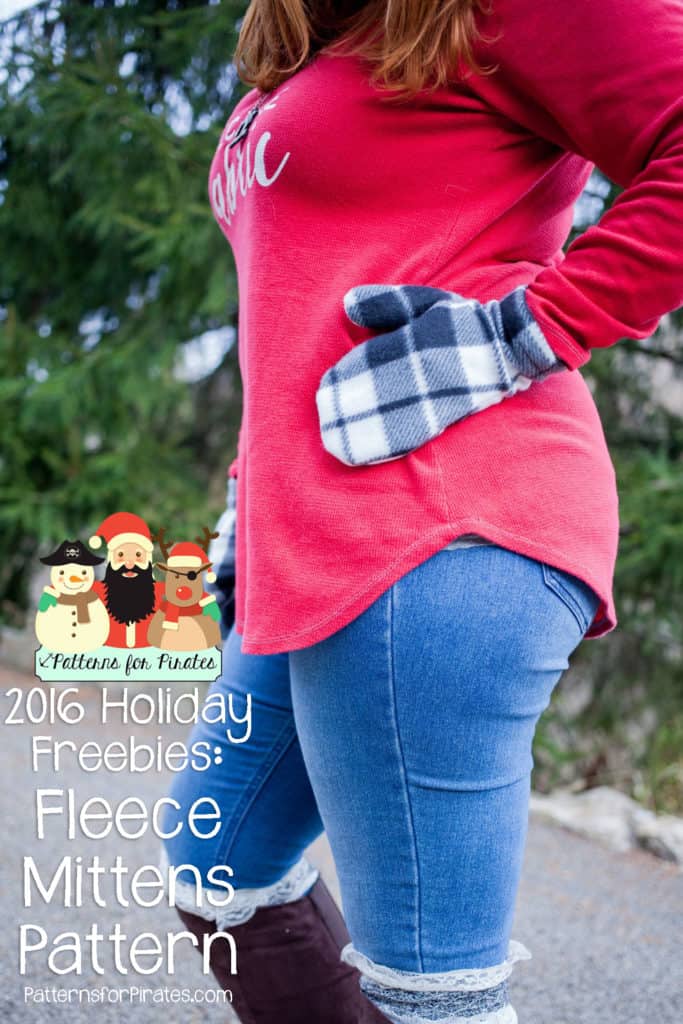
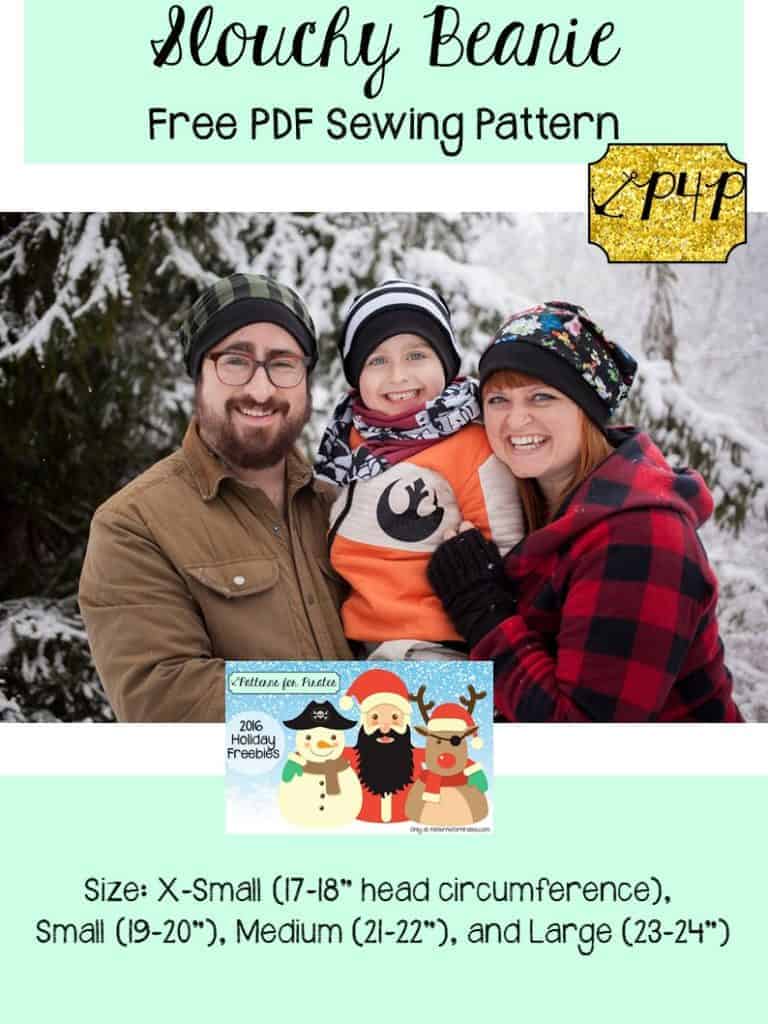
2016: FLEECE MITTENS | SLOUCHY BEANIE | BLANKET SCARF


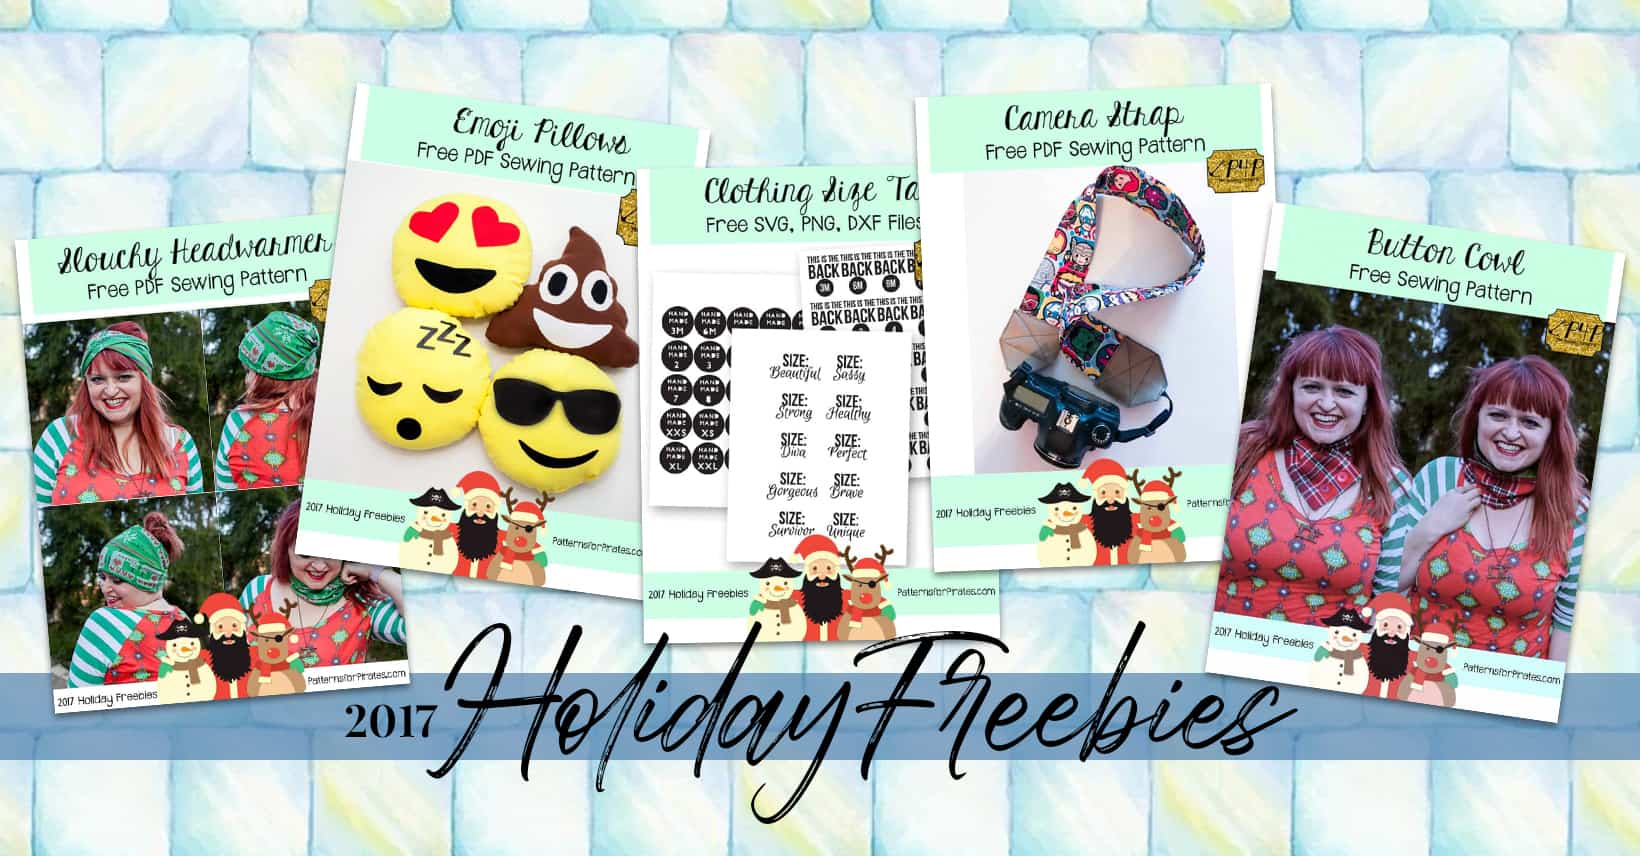
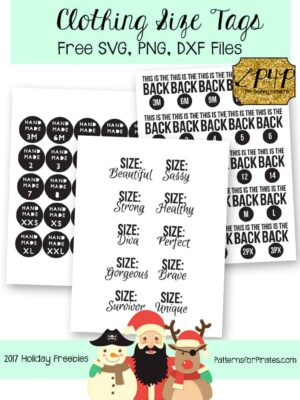
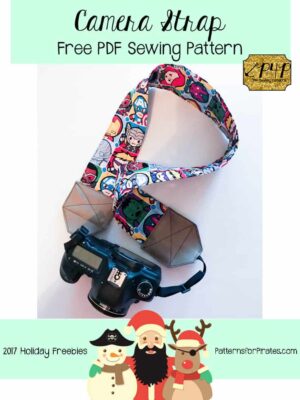
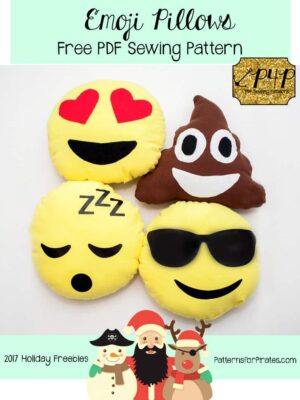
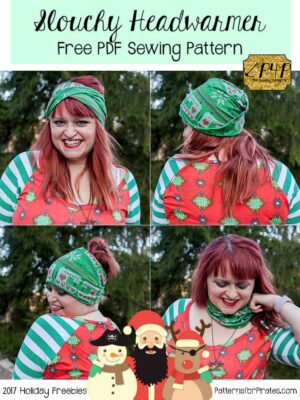
2017: SLOUCHY HEADWARMER | EMOJI PILLOWS | SIZE TAGS | CAMERA STRAP | EASY BUTTON COWL

  • Free Button Cowl
    Free Button Cowl
    Take me to the tutorial!
  • Free Size Tag Templates
    Free Size Tag Templates
    Add to cart
  • Free Camera Strap Pattern
    Free Camera Strap Pattern
    Add to cart
  • Free Emoji Pillow Pattern
    Free Emoji Pillow Pattern
    Add to cart
  • Free Slouchy Headwarmer
    Free Slouchy Headwarmer
    Add to cart

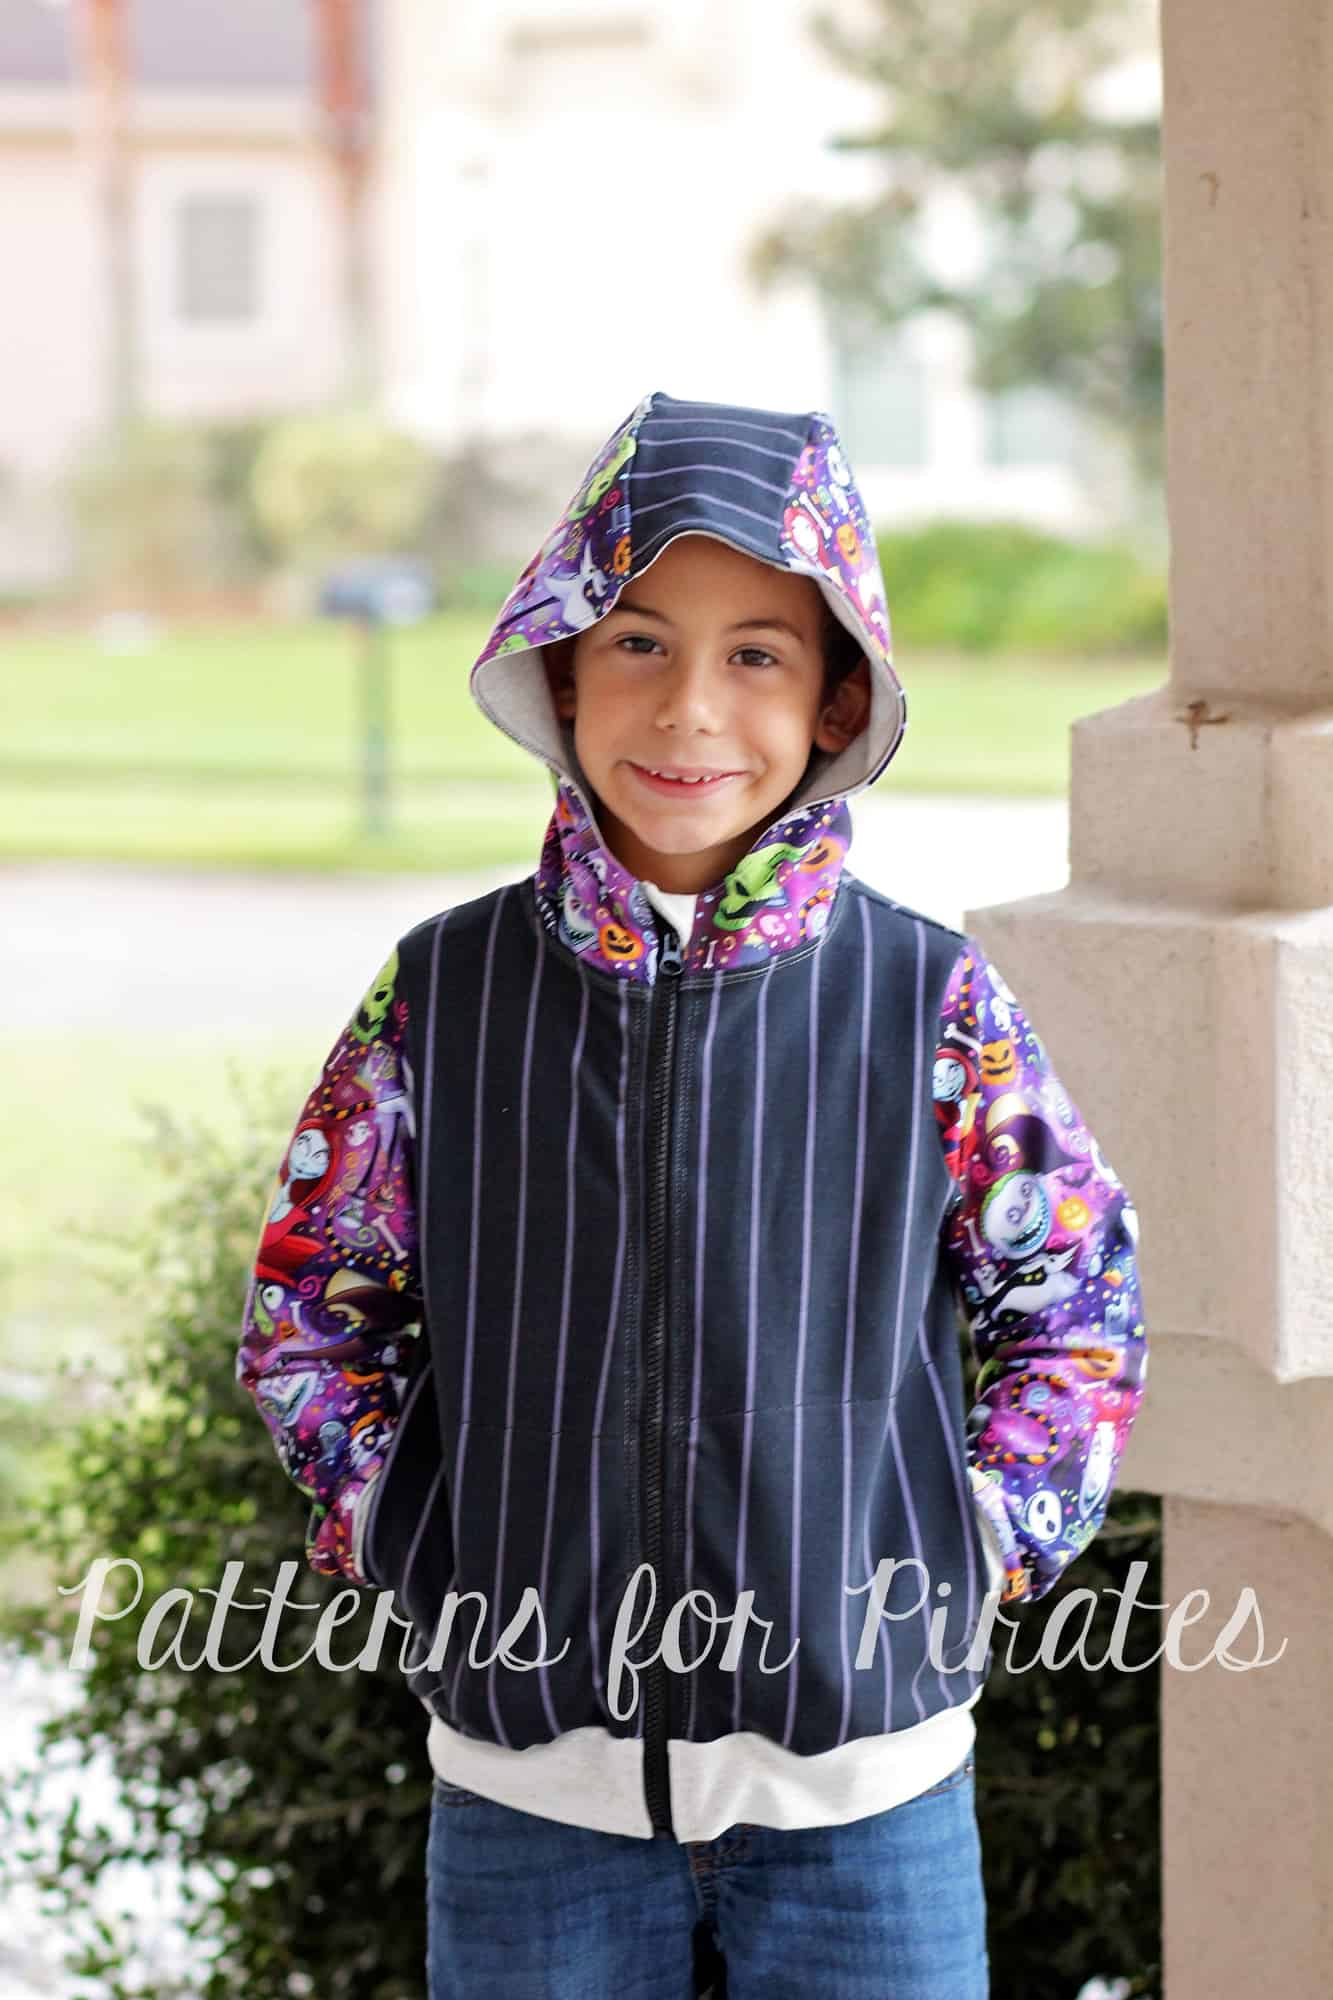
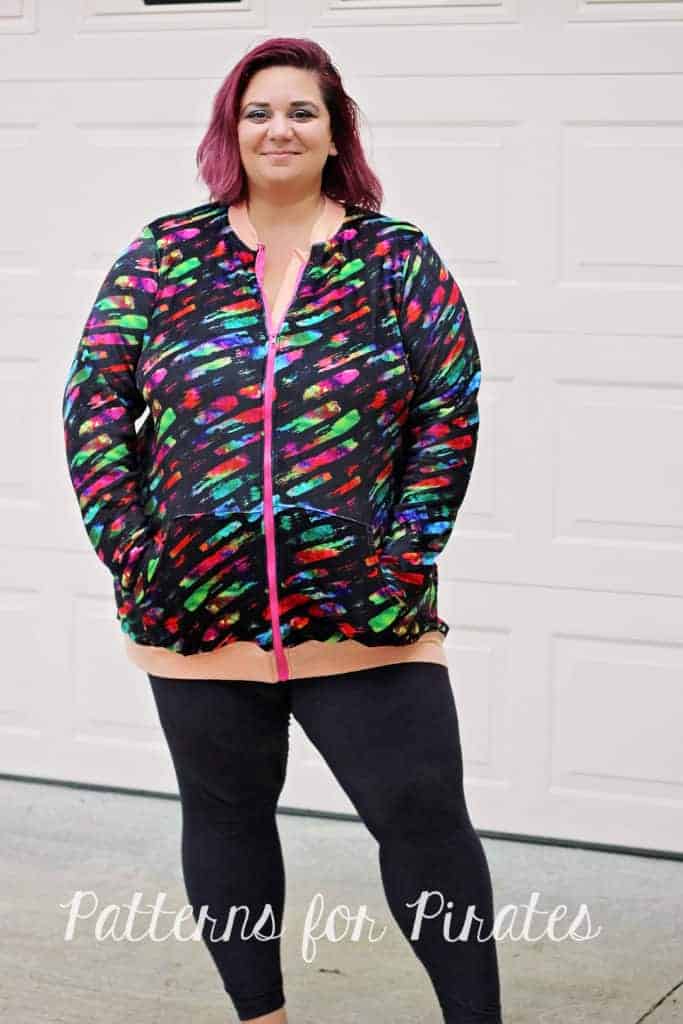
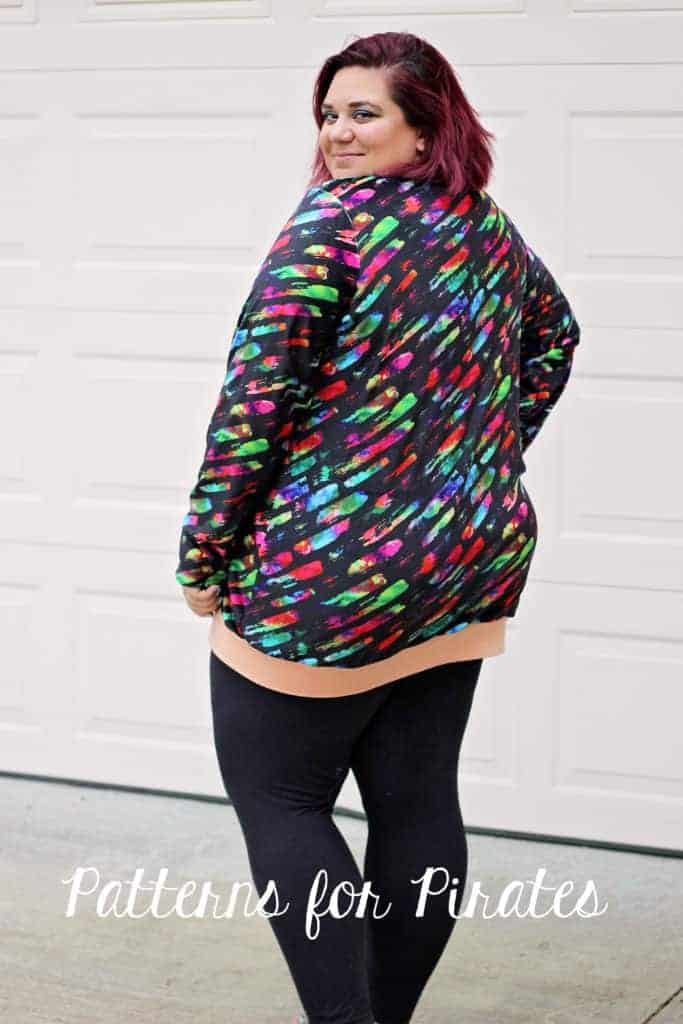
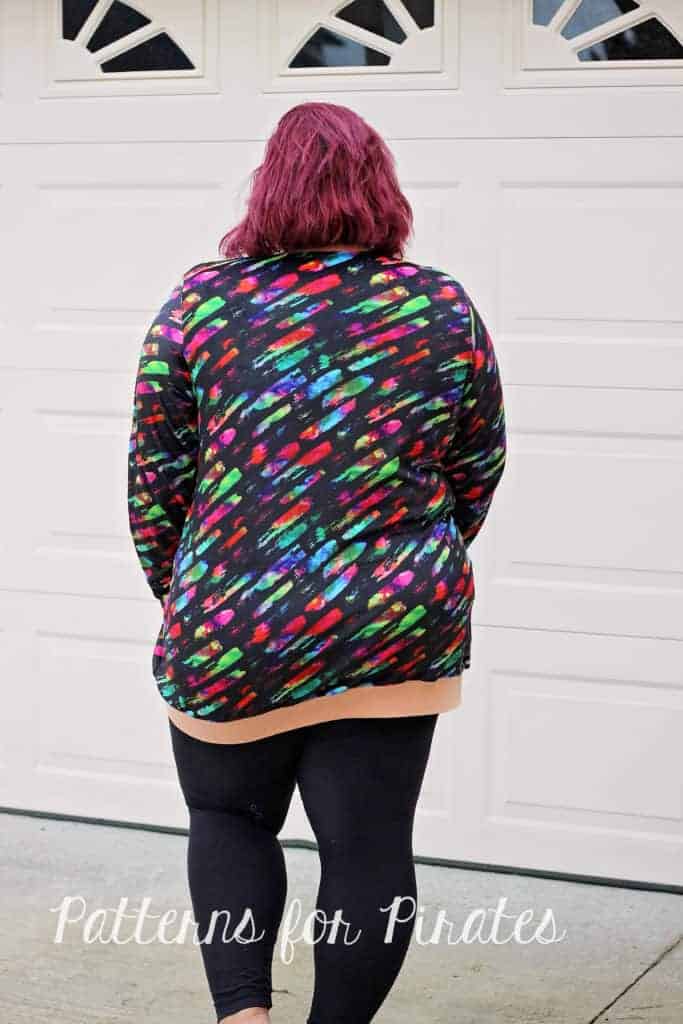
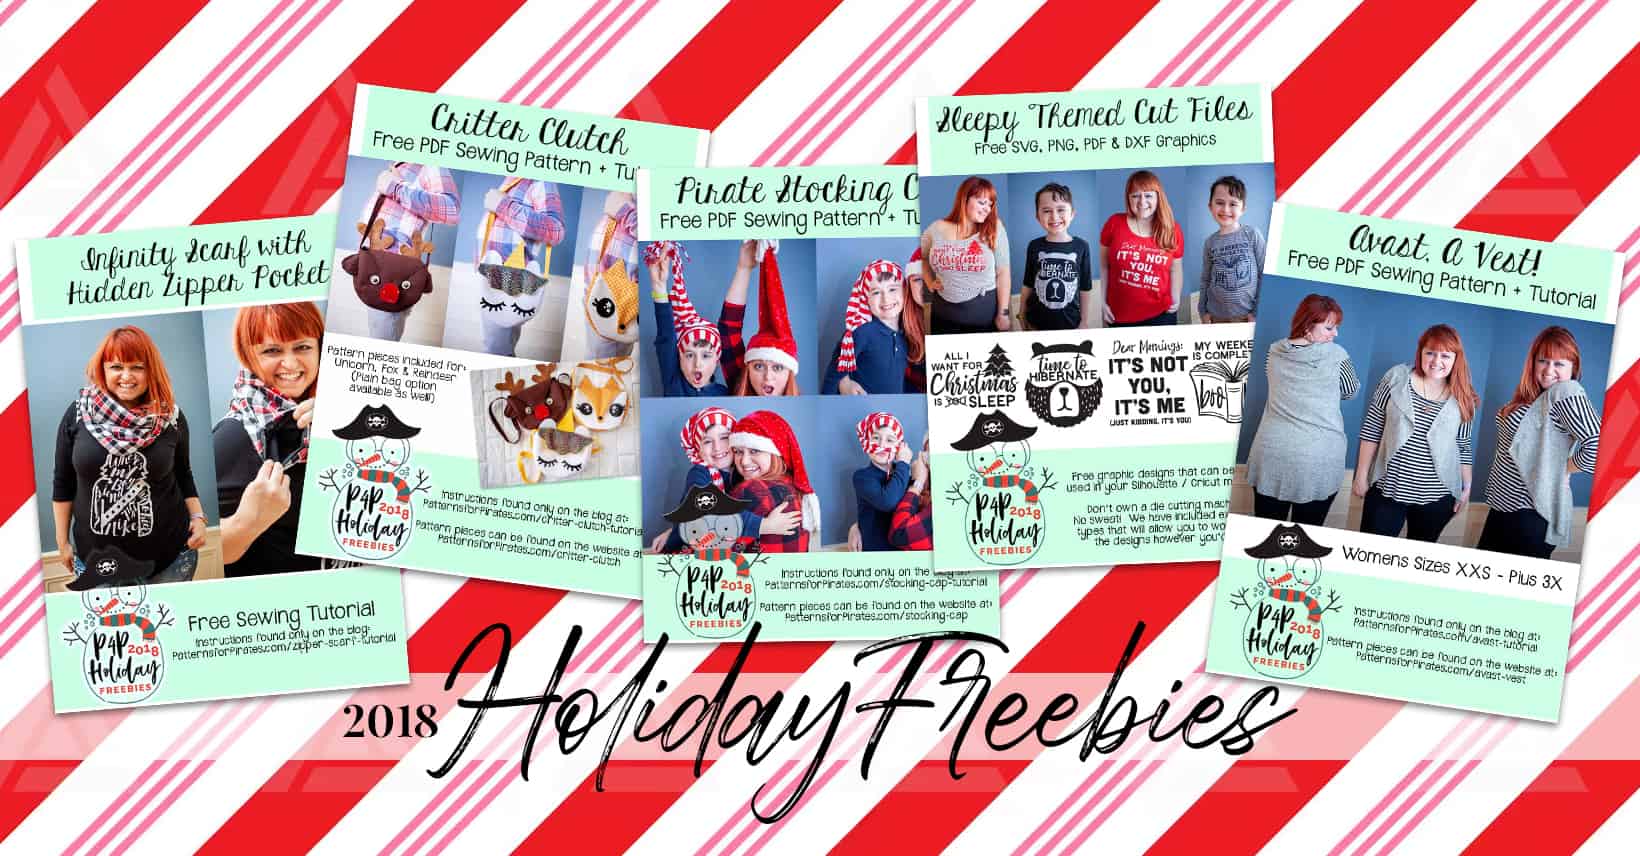
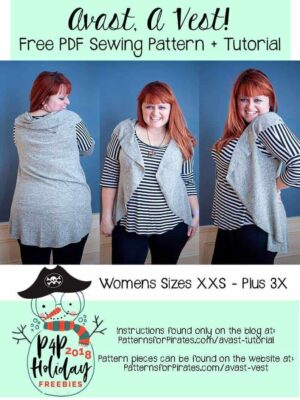
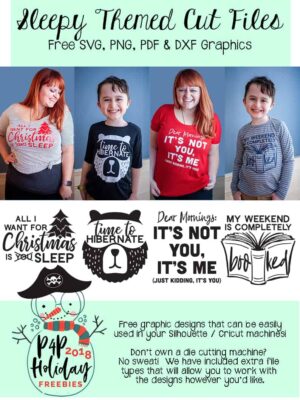
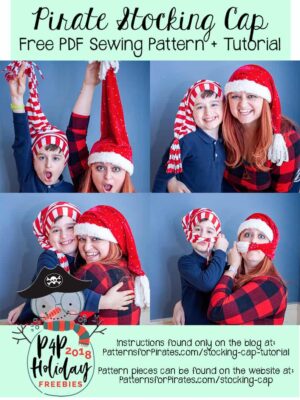
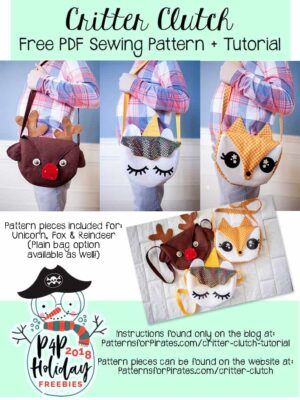
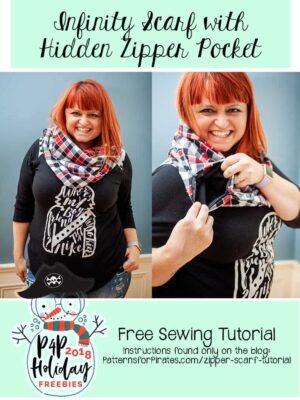
2018: INFINITY SCARF W/ZIPPERED POCKET | CRITTER CLUTCH | PIRATE STOCKING CAP | SLEEPY THEMED CUT FILES | AVAST, A VEST!

  • Free Avast, A Vest Circle Vest
    Free Avast, A Vest Circle Vest
    Add to cart
  • Free Sleepy Themed Cut Files
    Free Sleepy Themed Cut Files
    Add to cart
  • Free Pirate Stocking Cap
    Free Pirate Stocking Cap
    Add to cart
  • Free Critter Clutch Purse Pattern
    Free Critter Clutch Purse Pattern
    Add to cart
  • Free Hidden Pocket Infinity Scarf Tutorial
    Free Hidden Pocket Infinity Scarf Tutorial
    Add to cart

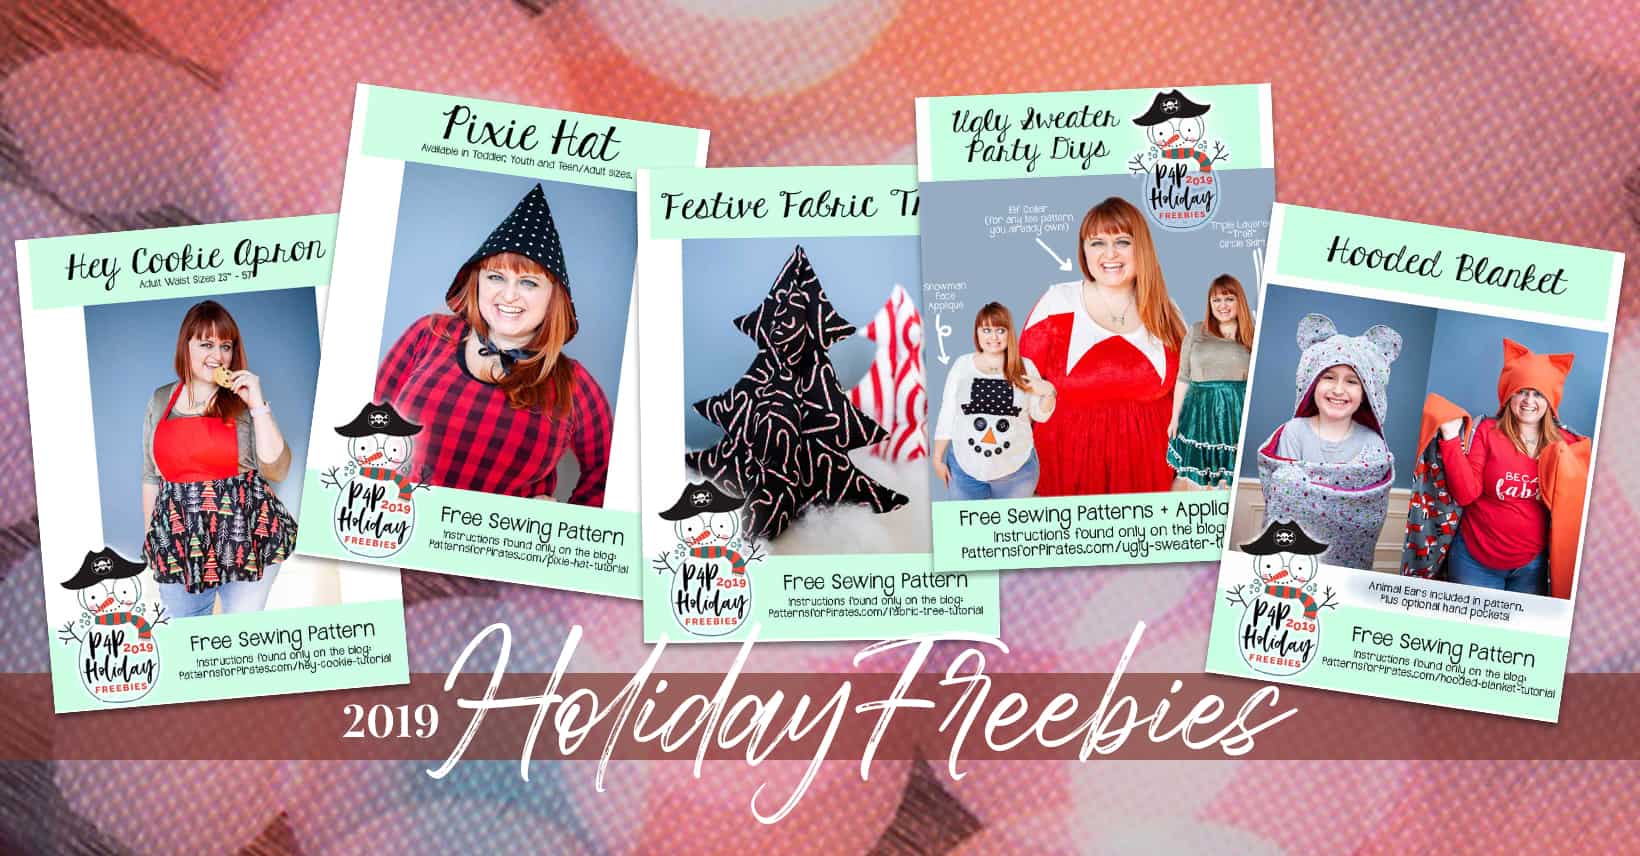
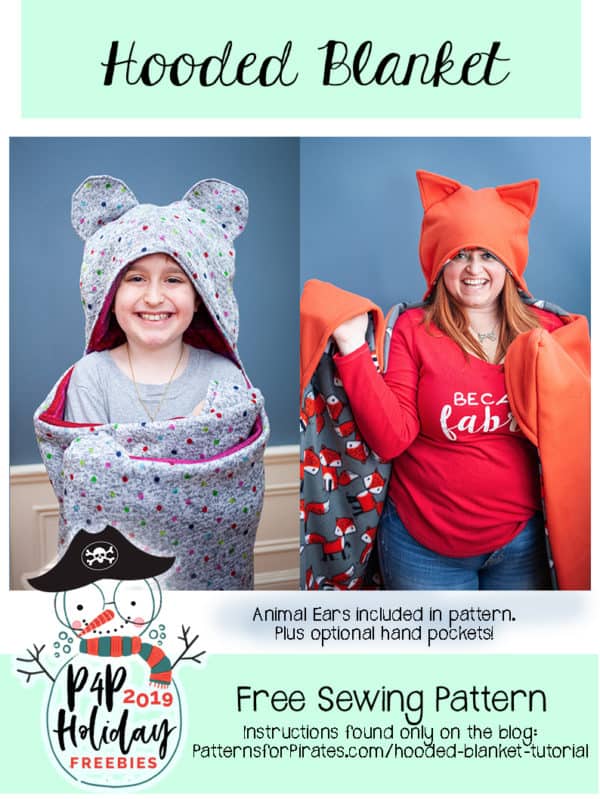
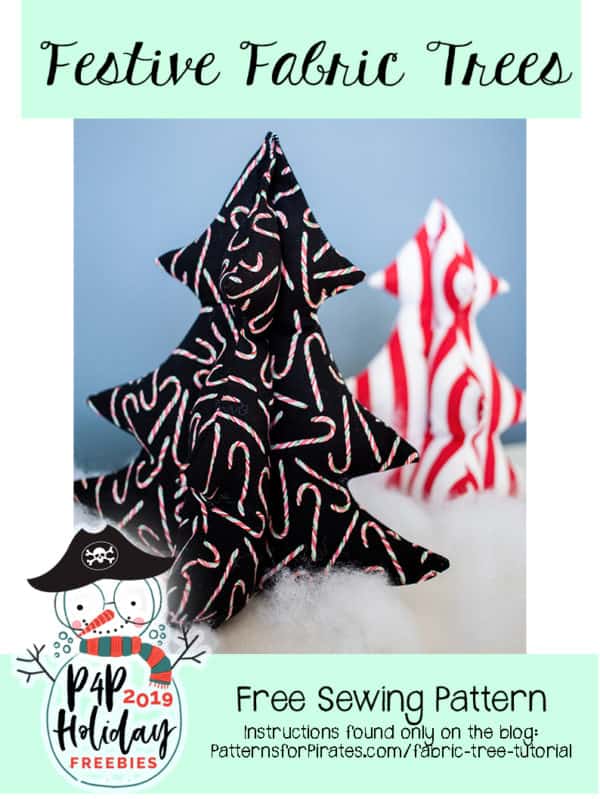
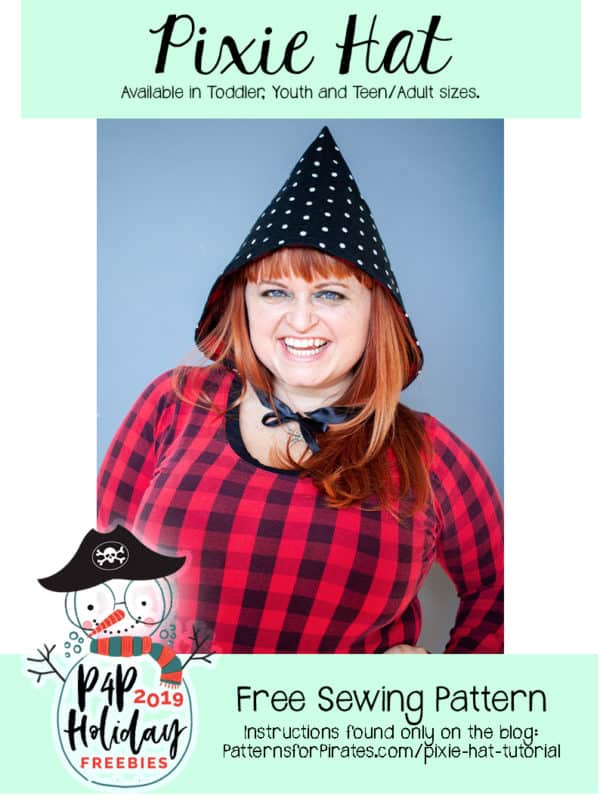
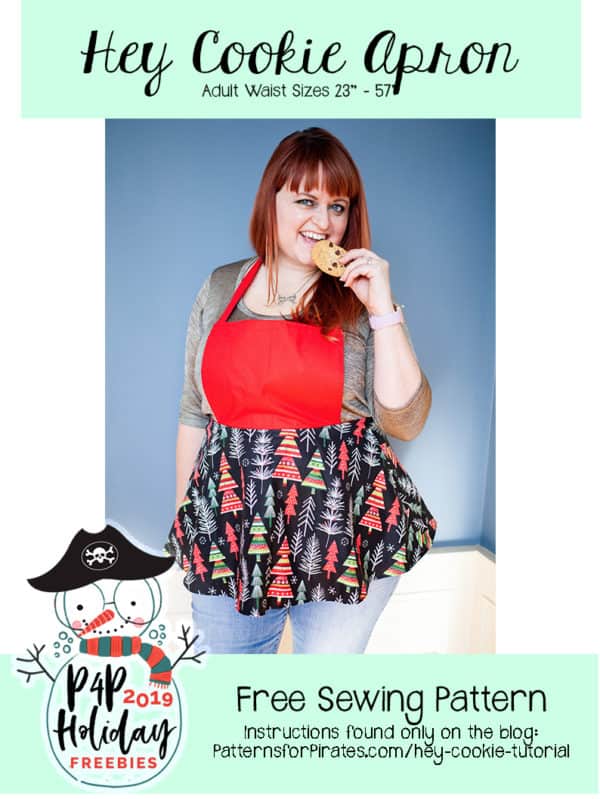
2019: HEY COOKIE APRON | PIXIE HAT | FESTIVE FABRIC TREES | UGLY SWEATER PARTY DIY | HOODED BLANKETS


  • Free Hooded Blanket
    Free Hooded Blanket
    Add to cart
  • Free Ugly Sweater Party DIY Designs
    Free Ugly Sweater Party DIY Designs
    Add to cart
  • Free Festive Fabric Trees
    Free Festive Fabric Trees
    Add to cart
  • Free Pixie Hat
    Free Pixie Hat
    Add to cart
  • Free Hey Cookie Apron
    Free Hey Cookie Apron
    Add to cart

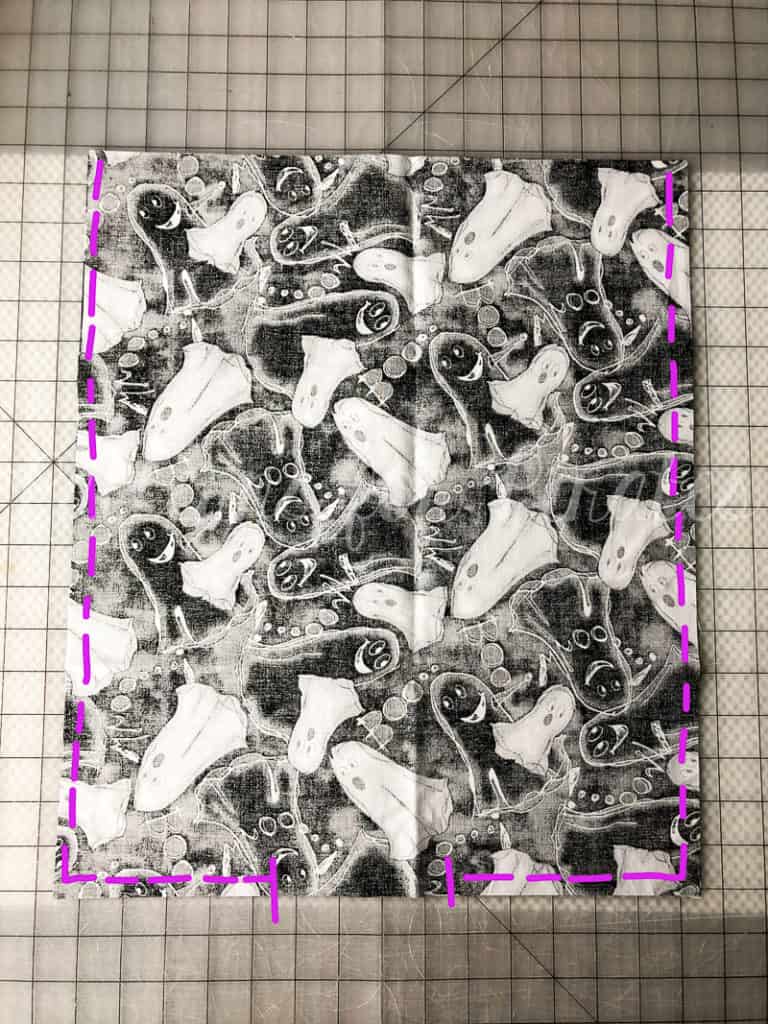
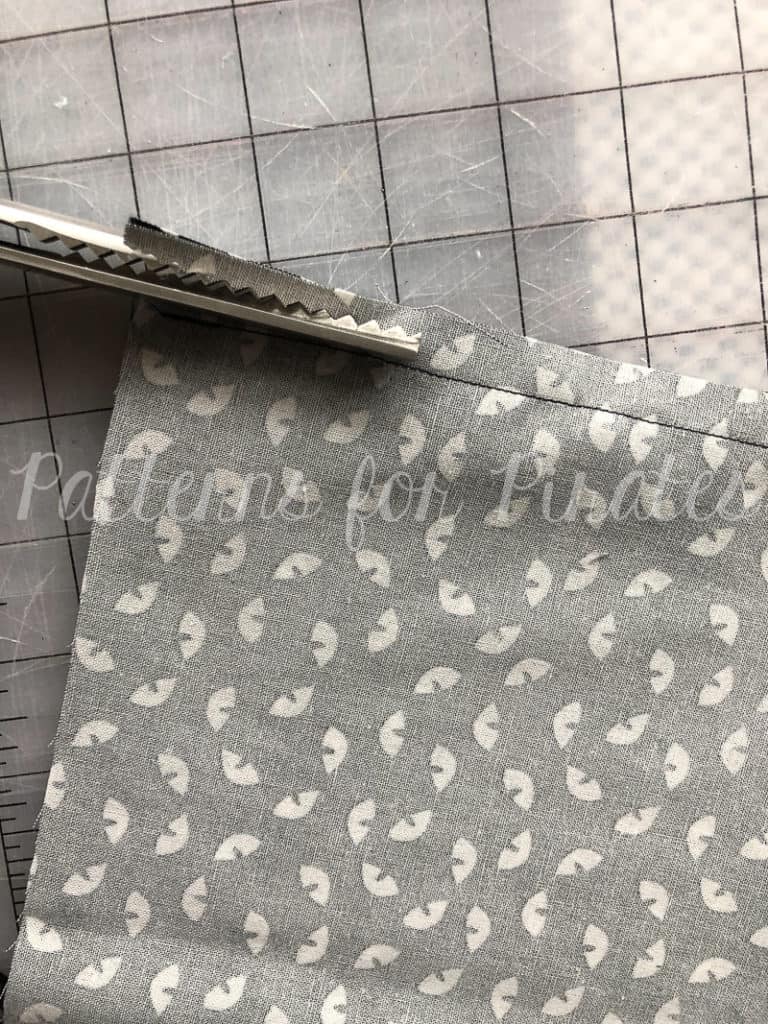
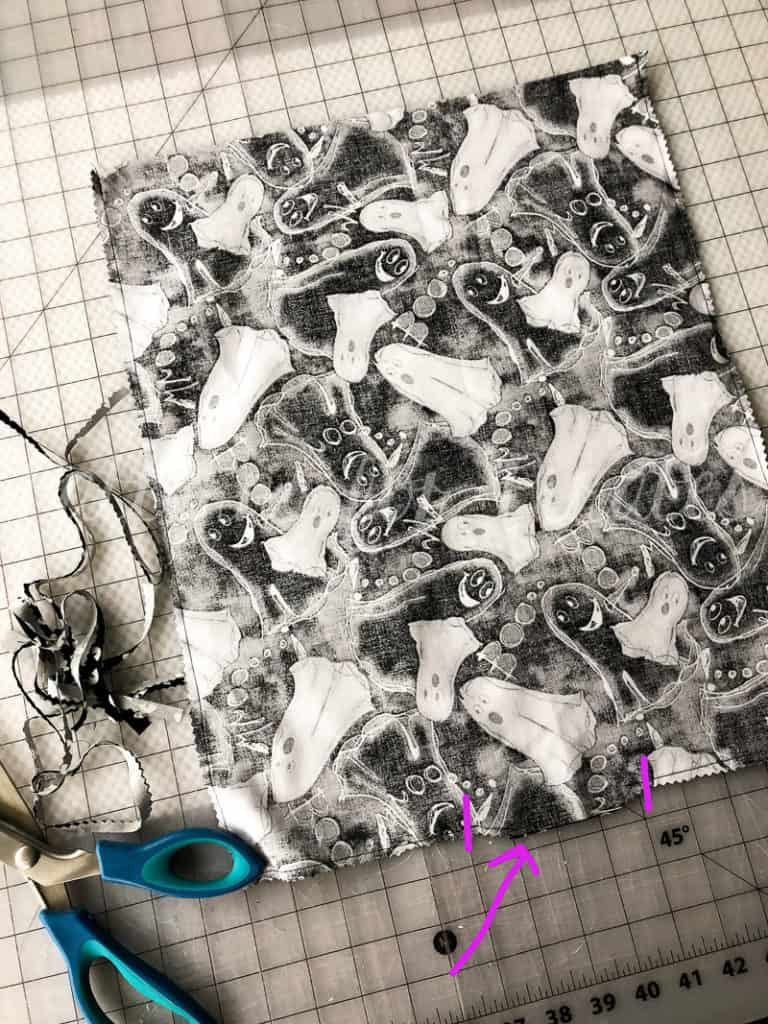
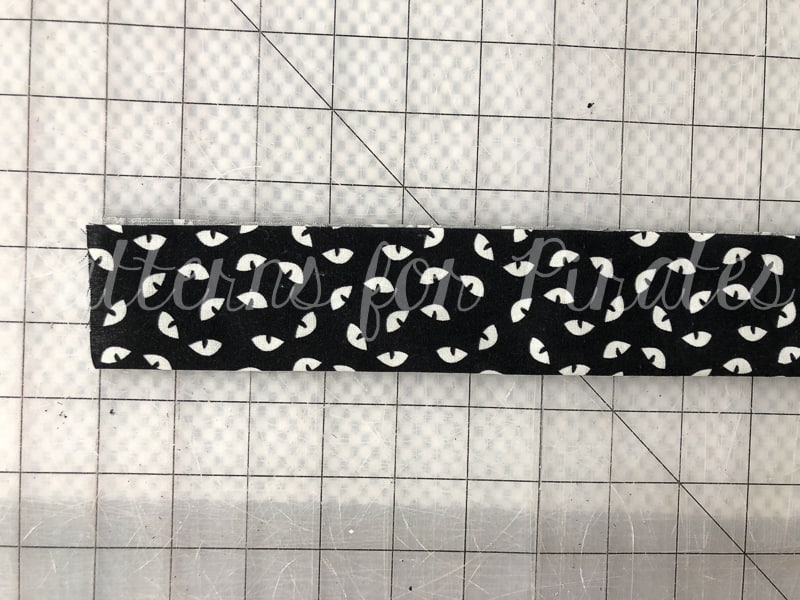
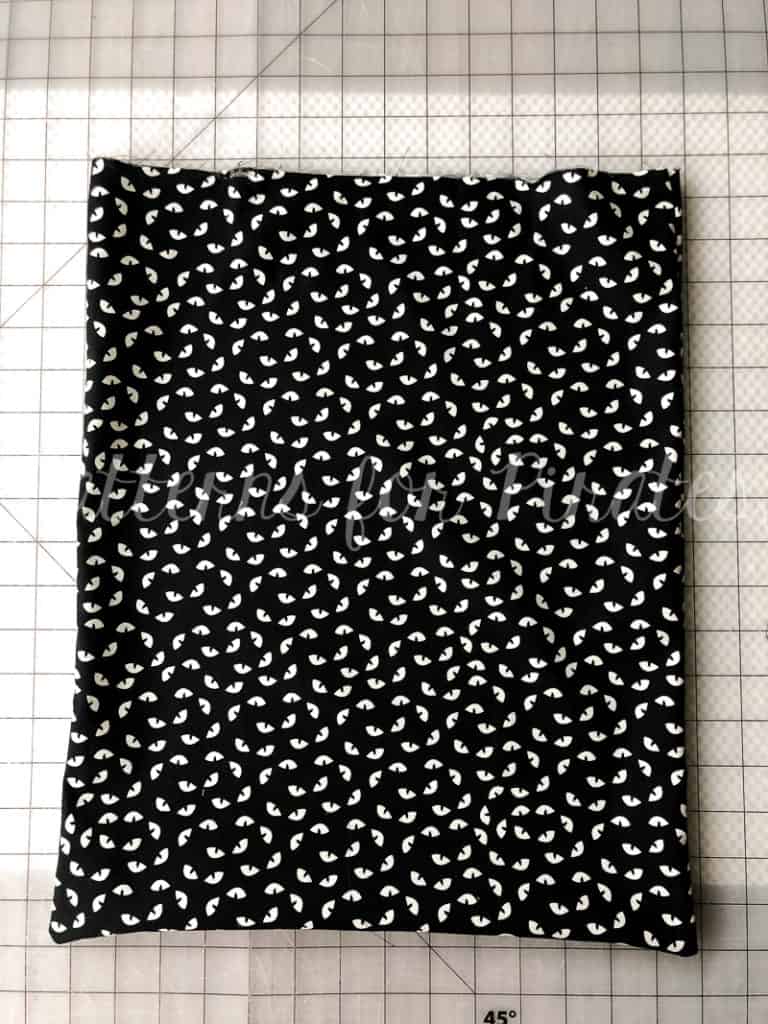
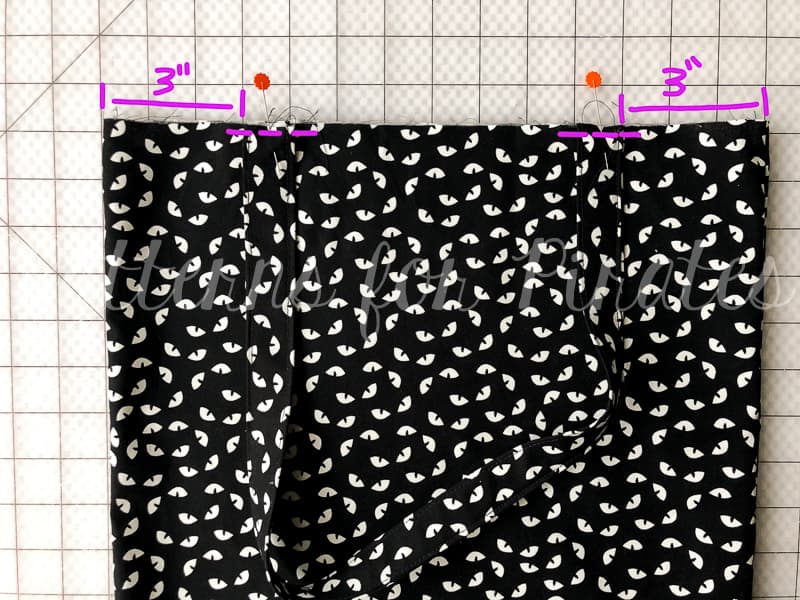
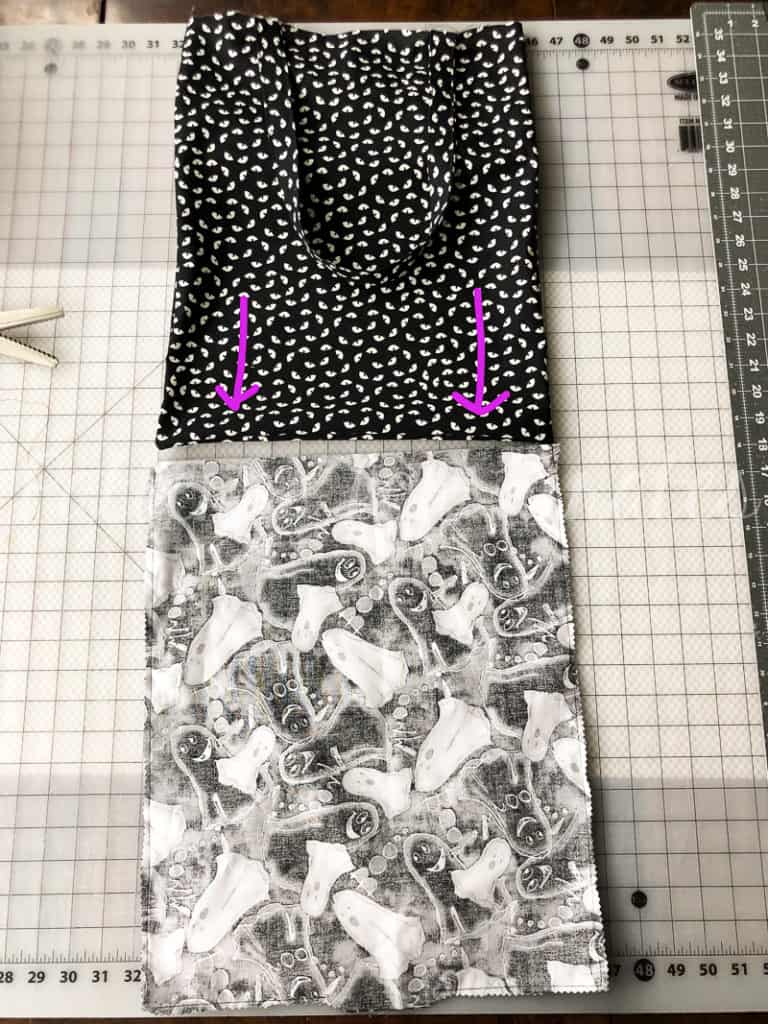
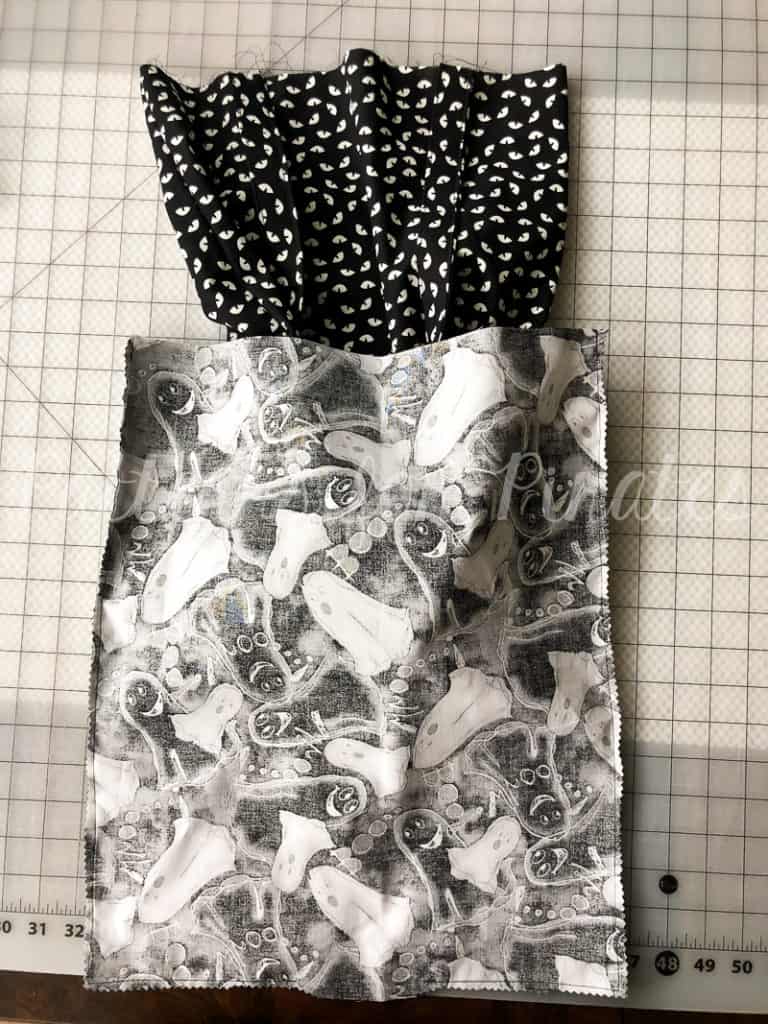
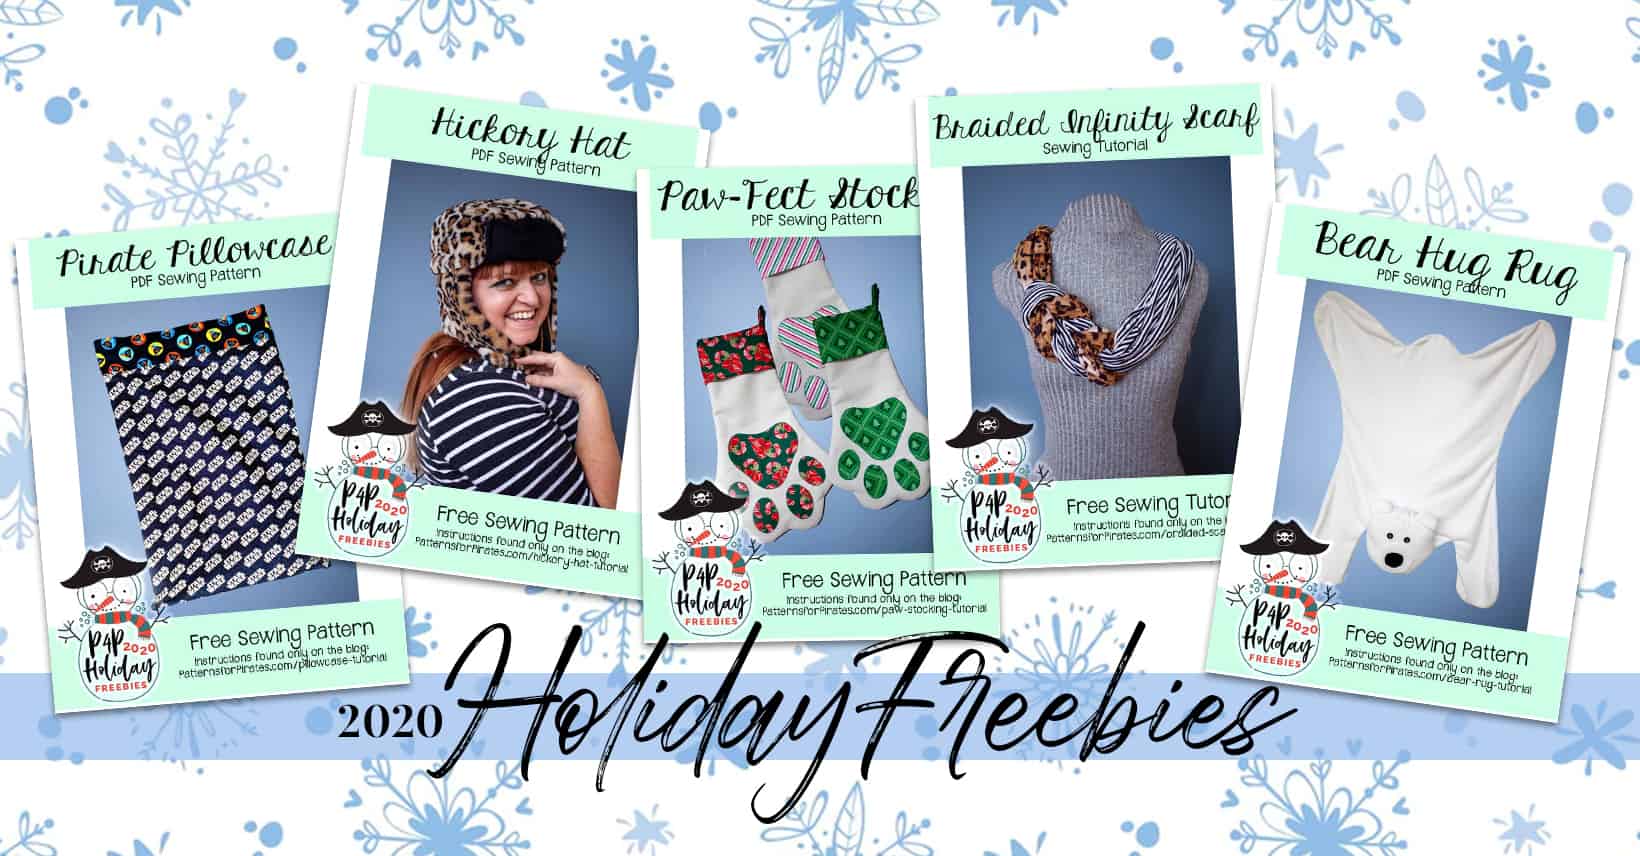
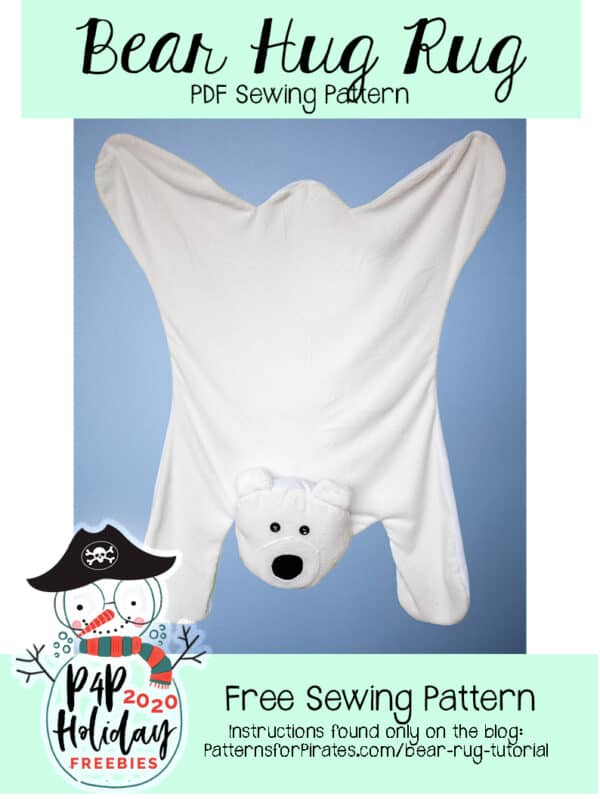
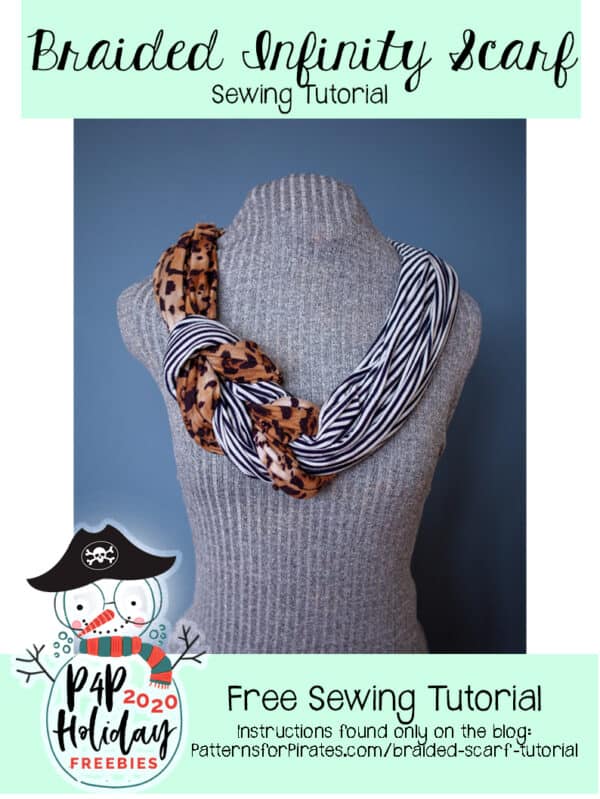
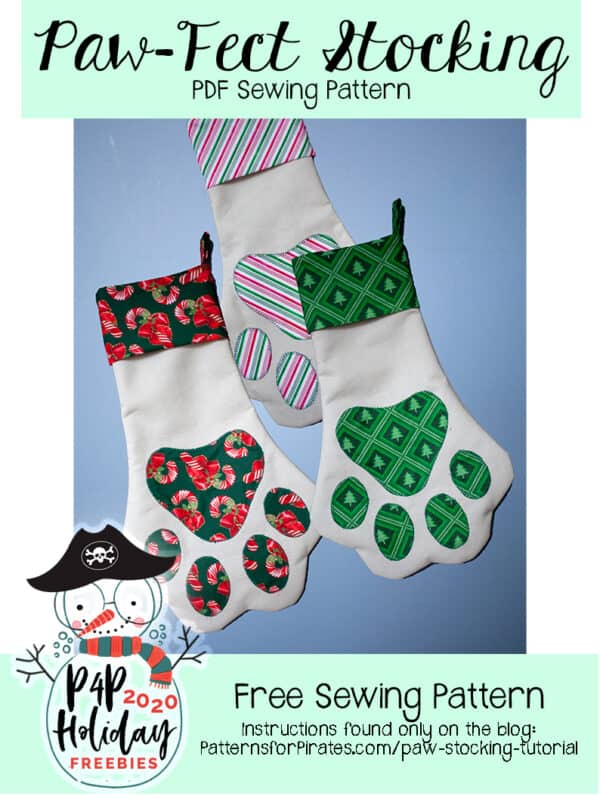
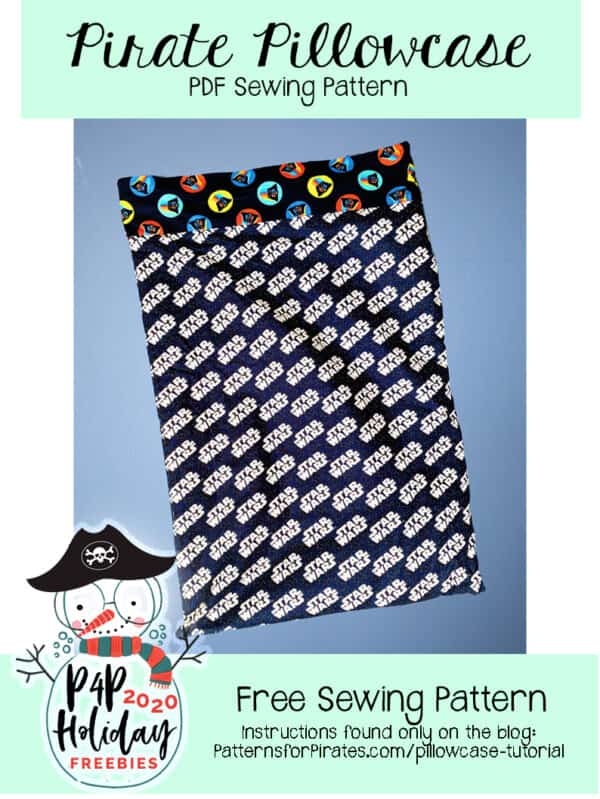
2020: PIRATE PILLOWCASE | HICKORY HAT | PAW-FECT STOCKING | BRAIDED INFINITY SCARF | BEAR HUG RUG

  • Free Bear Hug Rug
    Free Bear Hug Rug
    Add to cart
  • Free Braided Infinity Scarf
    Free Braided Infinity Scarf
    Add to cart
  • Free Paw-Fect Stocking
    Free Paw-Fect Stocking
    Add to cart
  • Free Hickory Hat
    Free Hickory Hat
    Add to cart
  • Free Pirate Pillowcase
    Free Pirate Pillowcase
    Add to cart

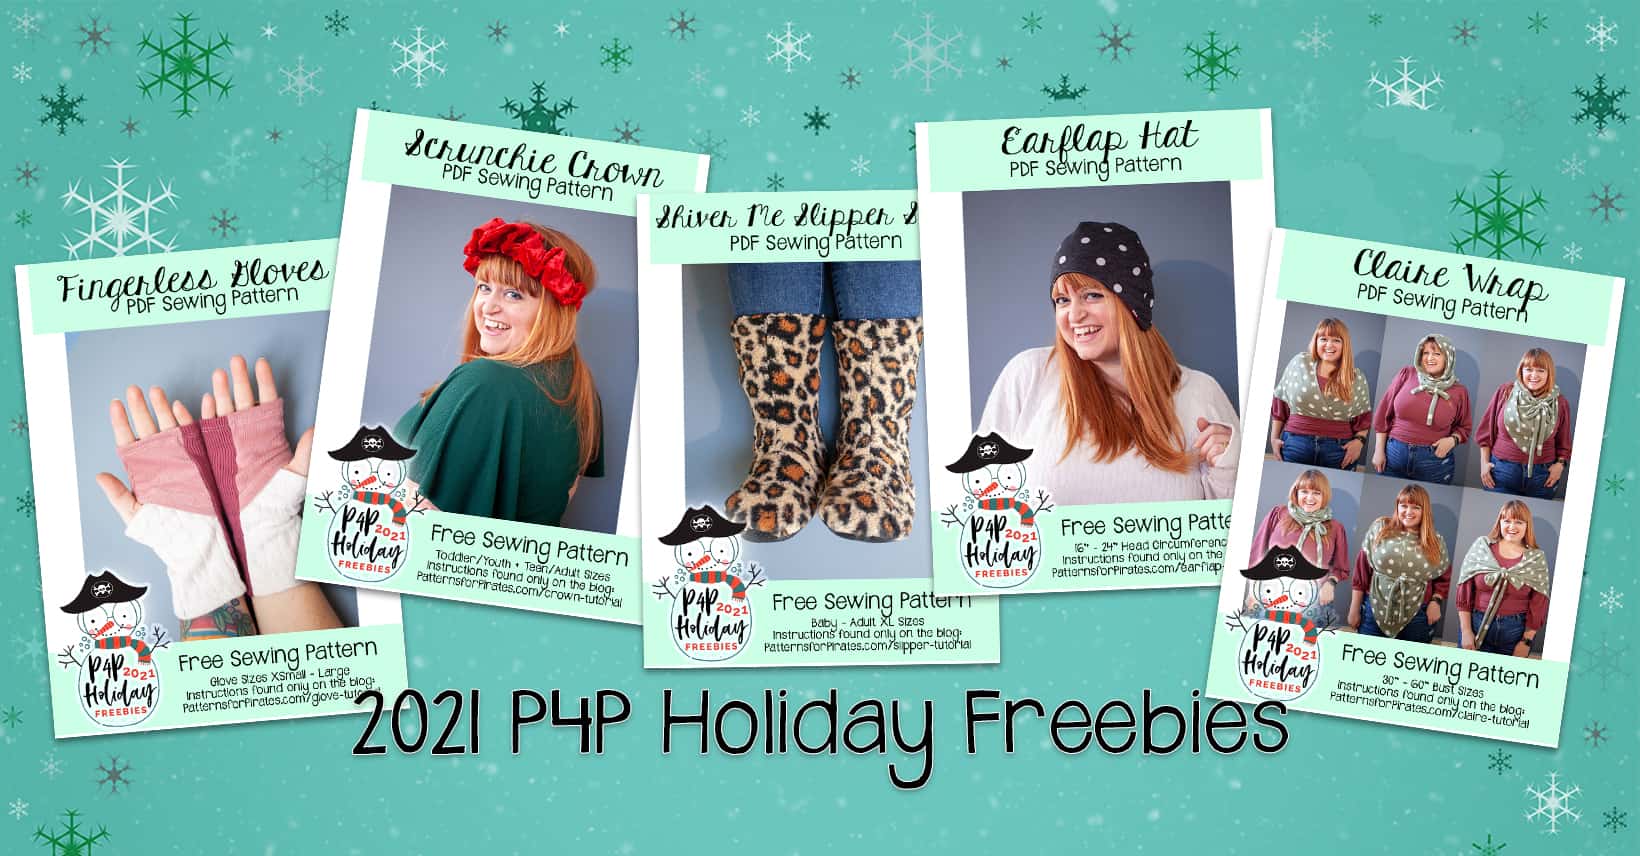
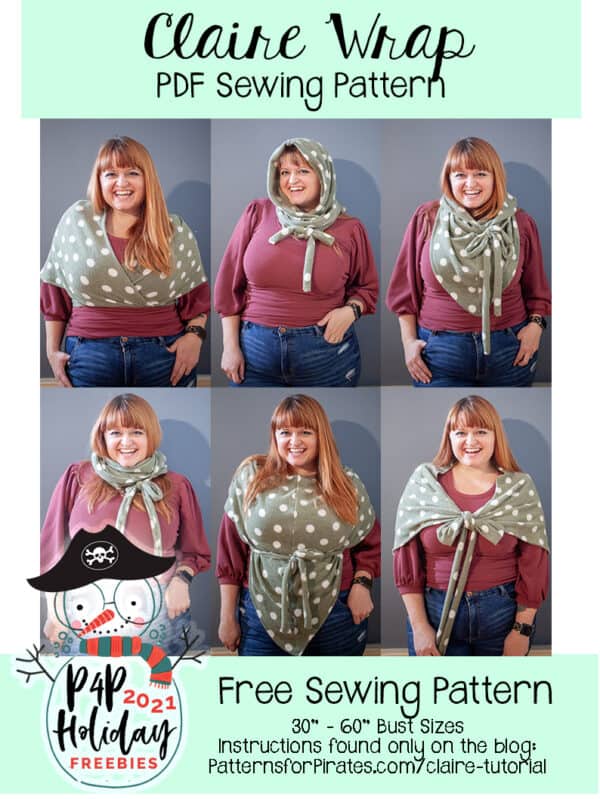
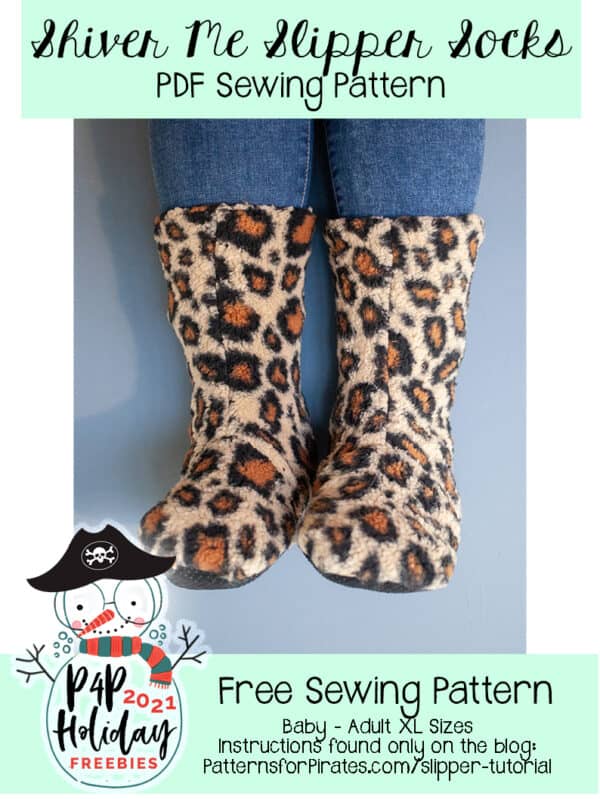
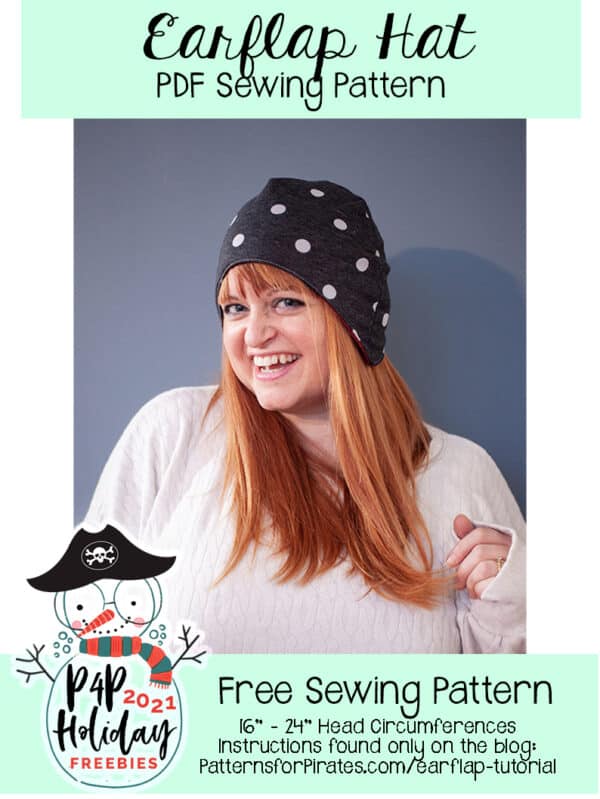
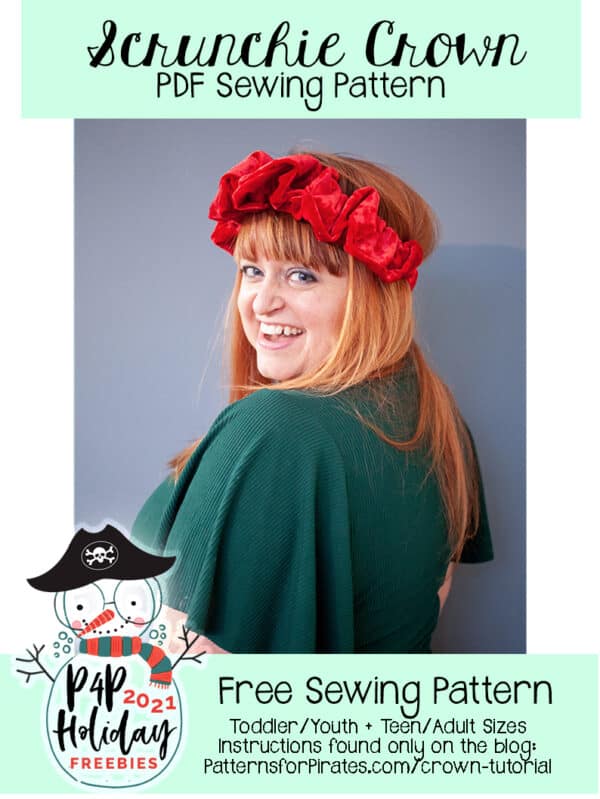
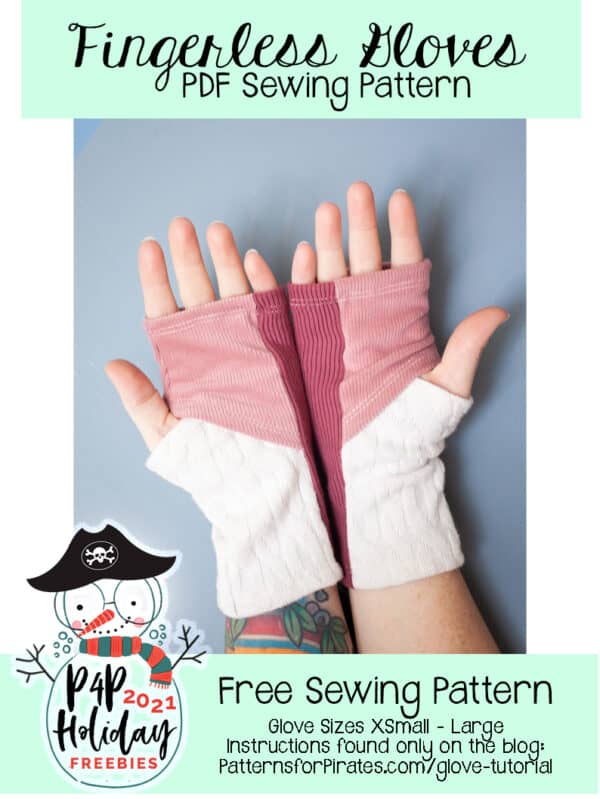
2021: FINGERLESS GLOVES| SCRUNCHIE CROWN | SHIVER ME SLIPPER SOCKS | EARFLAP HAT | CLAIRE WRAP

  • Free Claire Wrap
    Free Claire Wrap
    Add to cart
  • Free Shiver Me Slippers
    Free Shiver Me Slippers
    Add to cart
  • Free Ear Flap Hat
    Free Ear Flap Hat
    Add to cart
  • Free Scrunchie Crown
    Free Scrunchie Crown
    Add to cart
  • Free Fingerless Gloves
    Free Fingerless Gloves
    Add to cart

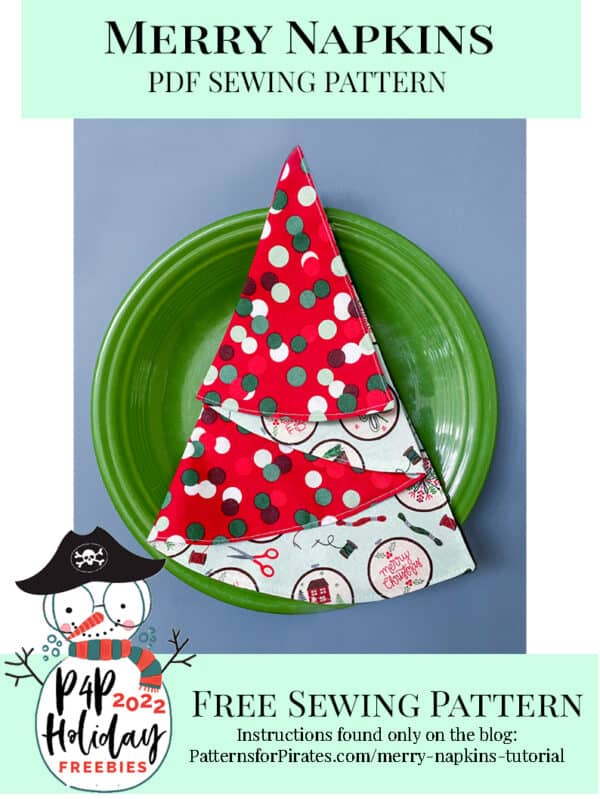
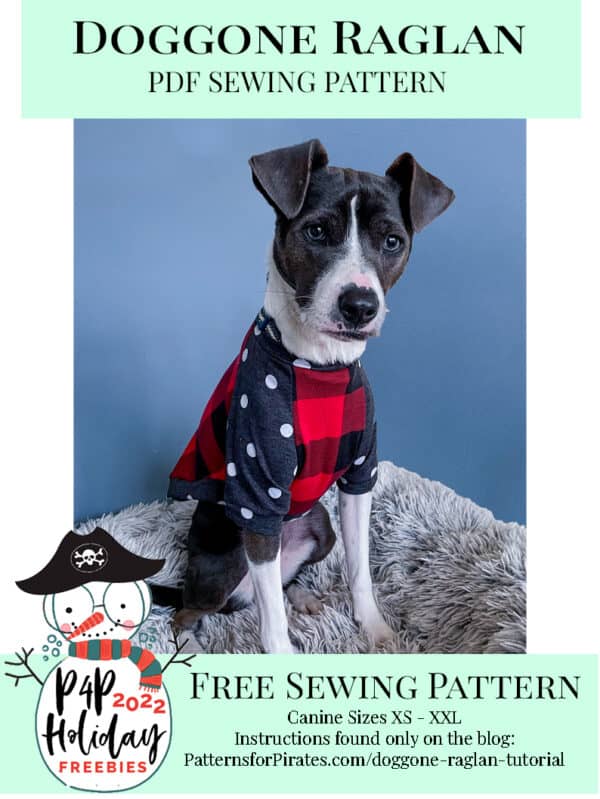
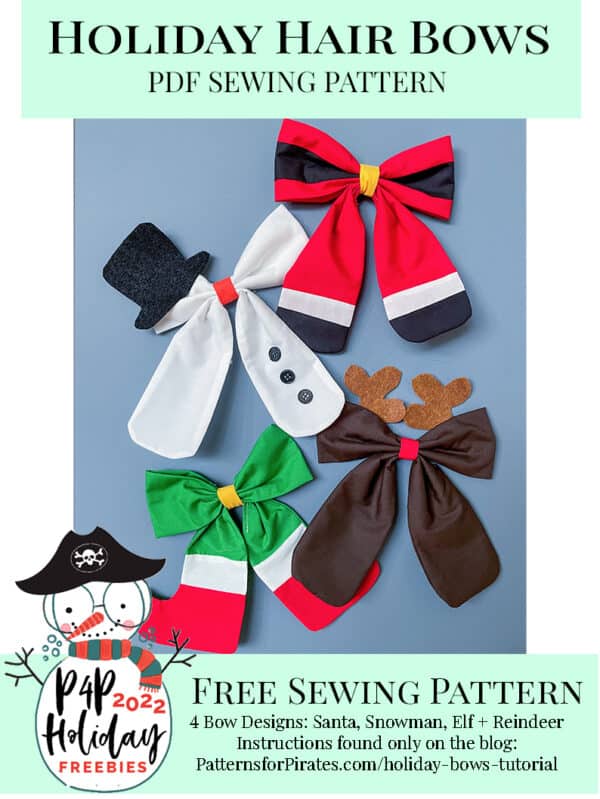
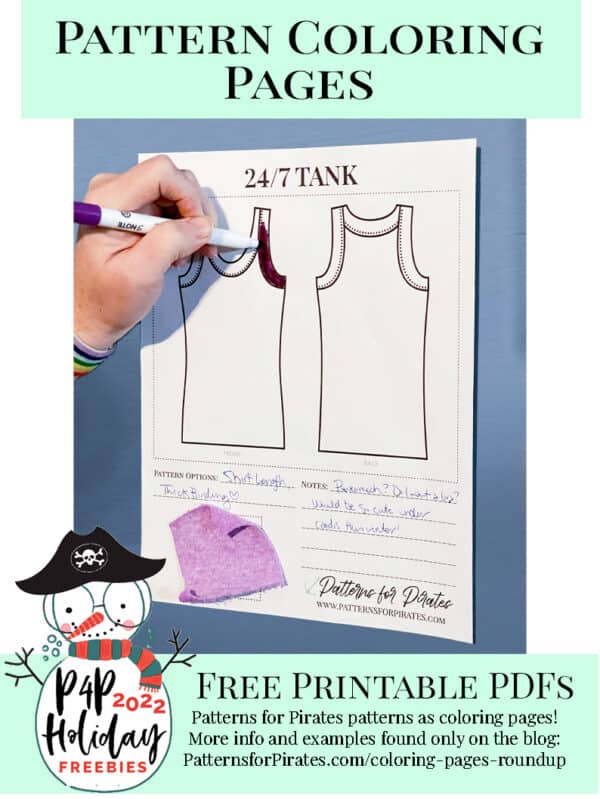
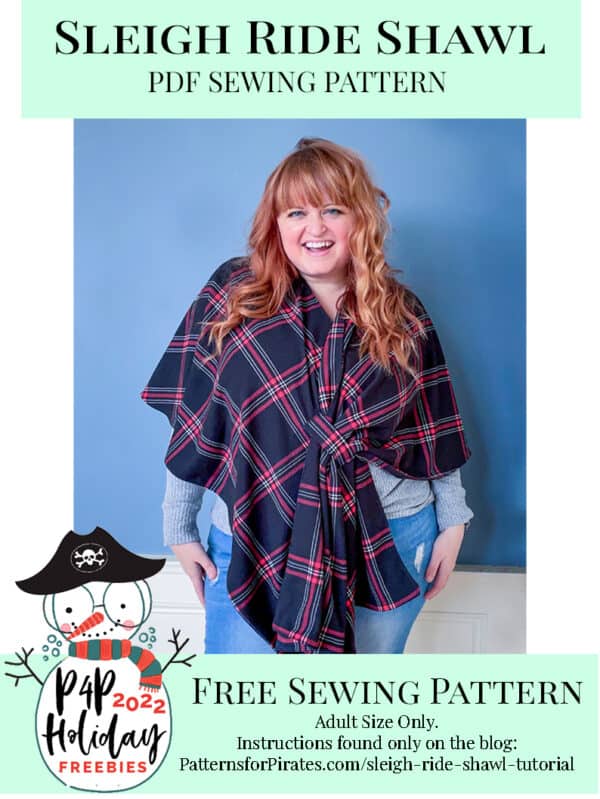
2022: SLEIGH RIDE SHAWL | PATTERN COLORING PAGES | HOLIDAY HAIR BOWS | DOGGONE RAGLAN | MERRY NAPKINS

  • Free Merry Napkins
    Free Merry Napkins
    Add to cart
  • Free Doggone Raglan
    Free Doggone Raglan
    Add to cart
  • Free Holiday Hair Bows
    Free Holiday Hair Bows
    Add to cart
  • Free P4P Pattern Coloring Pages
    Free P4P Pattern Coloring Pages
    Buy product
  • Free Sleigh Ride Shawl
    Free Sleigh Ride Shawl
    Add to cart

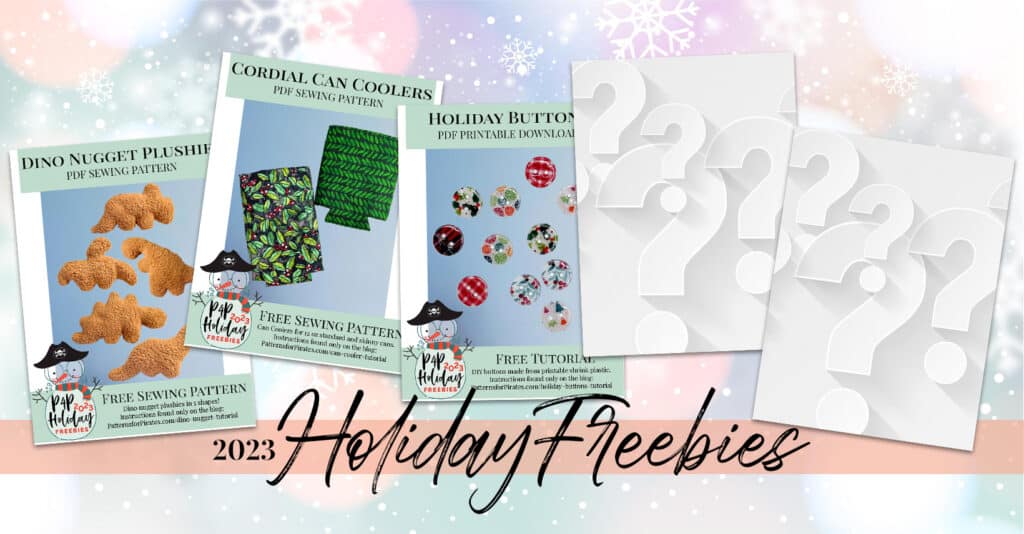
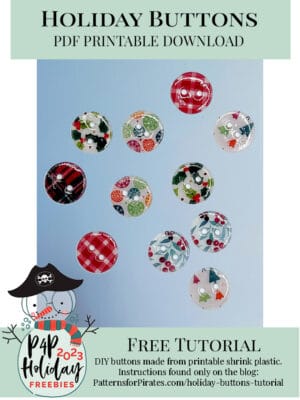
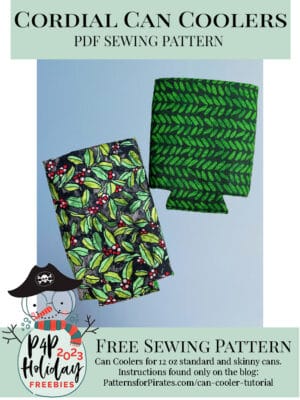
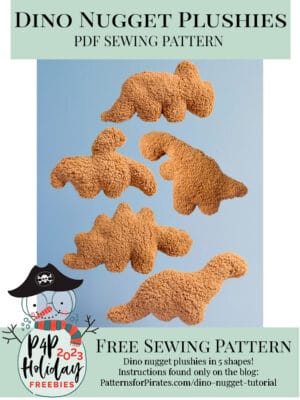
2023: DINO NUGGET PLUSHIES / CORDIAL CAN COOLERS / HOLIDAY BUTTONS / ??? / ???

  • Free Holiday Buttons
    Free Holiday Buttons
    Add to cart
  • Free Cordial Can Coolers
    Free Cordial Can Coolers
    Add to cart
  • Free Dino Nugget Plushies
    Free Dino Nugget Plushies
    Add to cart

Filed Under: Free Pattern 2 Comments

SOS Knit Pants :: Pattern Release + Update!

November 16, 2018

Quite possibly the most requested “can I get this in an A0 format” request that we get from you all is about the SOS Pants.  And we are always answering with “it’s on our list”.  Well guess who just crossed this off of their to-do list?!?!

We have officially updated the SOS Knit Pants pattern.  And then we took it one step further and made a girls version to match it.  If raising the roof was still considered cool, we’d totally be doing it right now.


Before we get started: If you already own a copy of the original SOS women’s pattern, you will NOT need to re-purchase to get the updates.  If you bought here (PatternsforPirates.com) or on the Craftsy store, you will simply need to sign into your account and re-download the file.  If your purchase was via Etsy, email help@patternsforpirates.com (WITH PROOF OF PURCHASE) and you will get an updated file.  It’s as easy as that!


Did you know that SOS stands for “Skinny or Straight”?  That’s because it’s a pant pattern that can be made into your favorite skinnies OR straight legged bottoms!

This intermediate pattern has all the style you need in a knit skinny and straight leg option! Drafted for knit (stretch) fabrics, these pants are fitted through hip/booty. Skinny leg option is fitted throughout leg to ankle. Straight leg option is fitted through hip/booty, then loose/straight through leg for a flattering and dressier option.  Both options include knit/enclosed elastic waistband, back yokes, front and back pocket options.  Make skinnies for the weekends and the straight leg for work – all while being so comfortable in knit/stretch fabric!

**Want to learn more about how to measure yourself / your little one for this pattern?  We’ve got you covered with an in-depth blog HERE.  And in case you’re new to Patterns for Pirates and PDF patterns in general, we have a great blog full of new user tips HERE to help you get started!  And, as with all of our current releases and updates, the pdfs now include our layers feature and can be found in Letter, A4 and A0 sizes.

SKINNY


STRAIGHT

edf

BACK YOKE


Are you ready to make your soon-to-be favorite pair of pants?  Grab your patterns now!

SOS PANTS – YOUTH | SOS PANTS – WOMEN’S | SOS KNIT PANTS BUNDLE

Need more convincing?  Just take a look at this pattern on all of the amazing shapes and sizes of our testers, and get a look at more examples of all the options in our albums in the P4P Facebook group! Women’s Album / Youth Album

And if that didn’t give you enough options, make sure to check out the hacks post to help take your patterns even further.

The release sale (no code needed) will be through Monday, November 19, 2018 (11:59PM US Central Time Zone).

Happy Sewing, pirates!

Filed Under: Pattern Release 3 Comments

2018 Halloween Costume Contest :: The Winners!

November 2, 2018

Hi friends!  It’s me, Katy, your Halloween-loving Pirate Crew Member!  And I’m here to announce the winners of this year’s Halloween Costume Contest.

We asked our fellow sewists to share their costume creations from this year — and you can see the entire album in our P4P Facebook Group HERE.  They were all amazing and I couldn’t help but pick a few winners, instead of just one.  Because how do you really choose from all of these incredible feats of creativity?

No automatic alt text available.

I almost chose everyone as a winner.  But that’s not allowed, so here are the top three that stood out to me:

Simply Robo-dorable: Erika Tatiana Maldonado
Her Rosie Robot was created using almost only Patterns for Pirates patterns: Relaxed Raglan, Wiggle Skirt, & Peg Leg Leggings.

Image may contain: one or more people and people standing

The Ghost With the Most: Cecsalea Shae Buhles‎
This adorable mini-Beetlejuice was created using the Lumberjack Shirt, Yo Ho Henley, Little Loungers patterns.

Image may contain: 1 person, standing, stripes and outdoor

How Delightfully Tragic: Taryn Renae‎
I love a good family ensemble!  Tish Addams was brought to life by Taryn using the Wiggle Dress.

Image may contain: 5 people, people smiling, people standing and outdoor

Thank you so much to everyone that shared their creations with us!  I can’t wait to see what next year brings!

Filed Under: Contest/Giveaway 3 Comments

Baby Set with Nancy’s Notions

October 30, 2018

This post was created in partnership with Nancy’s Notions.  All opinions are my own.

Today’s blog is a rare occasion here on the P4P site… Generally I don’t do a lot of sponsored posts, but when Nancy’s Notions contacted me to do a little show off for their 2018 holiday blogger gift program I just couldn’t resist. I grew up watching Nancy on PBS with my mom and was honored to hear from them <3

Nancy is absolutely a great sewing icon who taught so many so much! I still have her fitting book sitting right on my desk 🙂

They sent me some adorable kitty fabric, red interlock and red ribbing to match.

The kitty fabric is a cotton spandex – perfect for baby clothing since it’s natural fibers, soft and easy to get on and off with the high stretch.

I used it for the Petite Pegs and part of the Teeny Beanie.

The red interlock I used for the main body of the Wee Lap Tee and the matching driving worked perfectly for the neckband, wristbands, and the band for the hat as well.

Although Nancy’s Notions has been a go to shop for quilters  they’re starting to carry more and more apparel items as well! So, if you’ve never checked them out or haven’t looked in their shop for apparel sewing in some time I’d click on over and check it out.  You can use this code for free shipping on orders $49 or more as well: 189501-1121 🙂

All the patterns I used for this baby set you can find in our freebie section here on the site! A great little gift for a baby shower or an easy and quick basic set to fill up baby’s wardrobe!

It’s part of Nancy’s Notion’s Holiday Blogger Gift Program 2018!

Filed Under: Blog Tours, Sewing Techniques, Uncategorized 3 Comments

Trick or Treat Bag :: Free Sewing Tutorial + Pattern!

October 28, 2018

Let’s get to it, my Pirate friends!  This my favorite time of the year: HALLOWEEN!!  It’s full of kitchy decorations, creative costumes, and lots of sewing (at least for me!) and is also the start of the holiday season.

We are all treats and no tricks this year, by giving you a quick and easy Trick or Treat Bag that you can whip up in no time for your littles — or yourself!  It doesn’t take much fabric and is a great way to finally use up all of that fun cotton woven that you keep buying while browsing the fabric store, without any actual plan of what you’re going to make with it.

This tote is meant to be made with woven (non-stretch) fabrics.  You will need a little under 3/4 Yard of the main fabric, and 1/2 Yard of the lining fabric.  This bag ends up being reversible — so if you can’t decide between fabrics (which we couldn’t at all….the prints this time of year are SO CUTE!!), you can use it one way, and then turn it inside out and use it again.  It’s like two bags in one!

Step 1: Cut 2 Main Fabric pieces and 2 Lining Pieces 18″ long x 15″ wide.  Cut 2 Straps 24″ long x 4″ wide.

Step 2: Lay main bag pieces, right sides together.

Step 3: Using 1/2″ seam allowance, sew along the side and bottom edges.

Step 4: Repeat Steps 2 + 3 with lining fabric, only this time leaving a 3-4″ opening in the middle bottom for turning.

Step 5: Trim seam allowances and corners on both main and lining pieces.  Be careful not to clip through your seams, and leave the allowance on the opening of the lining piece.  Set aside main and lining bag pieces for now.

Step 6: With one of your strap pieces, lay with wrong side facing you.  Fold in half, meeting the long edges together.  Press.

Step 7: Open up your piece and fold one of the raw edges toward the middle crease you just made.

Step 8: Repeat with the second raw edge. Press.

Step 9: Fold along middle crease, meeting both folded edges. All of your raw edges will be fully enclosed now.

Step 10: Press you strap piece.  Then edge stitch along both long, outer edges.  Repeat with second strap.

Step 11: Grab your main bag piece and turn right sides out.

Step 12: Careful not to twist your strap, pin raw edges in place, measuring 3″ from the edge of your bag.  Baste, using 1/4″ allowance.  Repeat on other side of main bag piece, using the other strap.

Step 13: With your main bag piece (with straps now basted onto it) right sides out, and lining piece wrong sides out, slide the main bag inside of the lining.

Step 14:  Align raw edges and seams, and pin in place.

Step 15: Using 1/2″ seam allowance, stitch around entire top edge of bag.

Step 16: Through the opening that we left in the bottom of the lining piece, turn your bag right sides out.

Step 17: Using your favorite stitch (I recommend doing a blind hand stitch), close the opening in the bottom of the lining piece.

Step 18: Push lining inside of the main bag piece, press, and admire your new handiwork before your littles steal it and fill it with candy this Halloween!

Happy Halloween, friends!  I’m loving all of the costume photos that have been rolling in so far.  Can’t wait to see the rest of them (hopefully with some new P4P Trick or Treat bags in tow!)

Filed Under: Free Pattern 4 Comments

Go To Jacket – SAL day 8 (recap/catch up day)

October 15, 2018

Wow! What an amazing last week we had! We have seen so many beautiful Go To Jackets sewn this past 7 days. But fear not! You still have time to get yours done too. Today is catch up day, so go over the previous blogs and videos and get sewing. The links to all blogs is below.

This week I made myself a tunic length bomber style jacket that is unbelievably cozy and comfy. I used squish from RockerbyDestash Fabrics and cotton lycra for the waistband band, cuffs and neckband. I have a feeling those kanga pockets I added will be holding plenty of the boy’s little treasures.

I also made a youth Go To Jacket for my little men. They had to have the hood and I added inseam pockets to this one. This cute French Terry one will be a staple in their wardrobe as soon as we get some cooler weather here in Florida. This fabric is from Vintage Lace.

My next one will have to be the men Go To Jacket so my husband gets a comfy zippered hoodie too. He has already picked some fabric.


If you’re not sure which style to pick or which options, take a look over our Go To Jacket Round Up blog post as well as the GTJ albums in the P4P Facebook Group.


Tomorrow the P4P & M4M teams will be picking two SAL winners so be sure to finish up your jackets and post a picture of your project in the Day 7 comments photo of the GTJ Sew Along album in the M4M & P4P Sew Along Group.

Go To Jacket Sew Along

Day 1: Print + Cut Pattern

Day 2: Choose + Cut Fabric

Day 3: Sew Pockets

Day 4: Sew Shoulder Seams + Attach Sleeves

Day 5: Attach Neckband / Hood

Day 6: Add waistband + Finish Sleeves

Day 7: Add Zipper

Day 8: Recap + Catch Up

Day 9: Winners Announcement

Filed Under: Frequently Asked Questions, Sew-A-Long, Uncategorized Leave a Comment

Go To Jacket – SAL day 7 (add zipper)

October 14, 2018

THE day is here! The big ZIPPER day is today. 🙂 Let’s all take a deep breath and remind ourselves it’s really not hard, I promise you! Start by preparing your chin guard, make all markings and press.

If you need to shorten the zipper you are using, take a look over the the videos in this P4P University blog. Shortening plastic zippers is a breeze so don’t be afraid to purchase longer zippers in bulk.

TIP: The Wonder Tape is your best friend when adding zippers! It holds the zipper in place and you can sew through it without gumming up your needles. It will work like magic!

The zipper video is below so take a look over it before your start sewing. As always, don’t be shy to ask questions in the Sew Along group. Once you finish your jacket add a photo of your work in the Day 7 picture comments of the Go To Jacket SAL album. Keep in mind that only pictures posted in that thread will count towards the prizes. 🙂

YOU DID IT! Great job sewing your zippered jackets.

Go To Jacket Sew Along

Day 1: Print + Cut Pattern

Day 2: Choose + Cut Fabric

Day 3: Sew Pockets

Day 4: Sew Shoulder Seams + Attach Sleeves

Day 5: Attach Neckband / Hood

Day 6: Add waistband + Finish Sleeves

Day 7: Add Zipper

Day 8: Recap + Catch Up

Day 9: Winners Announcement

Filed Under: Frequently Asked Questions, Sew-A-Long, Uncategorized 1 Comment

Go To Jacket – SAL day 6 (add waistband/ finish sleeves)

October 13, 2018

Welcome to day 6! Today we are going to add the waistband and finish the sleeves. The key word of the day is: press! 😉 Press your waistband lengthwise, wrong sides together before you attach it, press  and steam it after too! Press and steam your cuffs before and after you add them as well!

  • If you went for the hemmed sleeves all you have to do is hem them 1/2″ allowance using either a zig zag stitch, a triple stretch stitch or your coverstitch. Remember that memory hem we did a few days ago? It makes hemming so easy now.
  • If you chose the sleeves cuffs take a look over our Knit Cuffs 101 blog post and remember to…PRESS! 🙂

In the video below I am adding the waistband and cuffs to my hooded jacket. Once you finished your sleeves post your progress in the day 6 picture comments of the Go To Jacket Sew Along album in the M4M & P4P Sew Along group.

Go To Jacket Sew Along

Day 1: Print + Cut Pattern

Day 2: Choose + Cut Fabric

Day 3: Sew Pockets

Day 4: Sew Shoulder Seams + Attach Sleeves

Day 5: Attach Neckband / Hood

Day 6: Add waistband + Finish Sleeves

Day 7: Add Zipper

Day 8: Recap + Catch Up

Day 9: Winners Announcement

Filed Under: Frequently Asked Questions, Sew-A-Long, Uncategorized 1 Comment

Go To Jacket – SAL day 5 (sew neckband / hood)

October 12, 2018

It’s FRIDAY!! On our 5th sew along day we’ll be attaching the neckband for the bomber style jacket or the hood for the hooded one.

The Go To Jacket hood features a center panel which makes it great for mixing and matching fabrics too. If you’d like to add a leather accents to the hood, you can follow the steps in the Go To Jacket hacks blog post.

TIP: If you like the look of the drawstrings and want to add them to the younger kids’ jackets, go for a FAUX DRAWSTRING. Simply cut two 5-6″ pieces of cord and tie a knot at one of the ends. Pull the other end through the drawstring hole and tack it down in the lining. Repeat with the other side. Done! Now you have the look of drawstrings without the safety concern of a real one.

Watch the video below for a visual step by step of the hood construction.

If you decided to go with the very trendy bomber style then all you have to do is press the neckband in half lengthwise, wrong sides together and attach it to the neckline opening. It is very important to remember to attach the neckband 3/8″ away from the front opening, on both sides!

Once you’ve added the hood or neckband post a picture of your progress on the day 5 photo comments of the Go To Jacket SAL album.

Go To Jacket Sew Along

Day 1: Print + Cut Pattern

Day 2: Choose + Cut Fabric

Day 3: Sew Pockets

Day 4: Sew Shoulder Seams + Attach Sleeves

Day 5: Attach Neckband / Hood

Day 6: Add waistband + Finish Sleeves

Day 7: Add Zipper

Day 8: Recap + Catch Up

Day 9: Winners Announcement

Filed Under: Frequently Asked Questions, Sew-A-Long, Uncategorized Leave a Comment

Go To Jacket – SAL day 4 (sew shoulder seams and add sleeves)

October 11, 2018

Day 4 is here! Today we sew the shoulder seams (easy peasy!) and add the set in sleeves. When attaching the sleeves it is very important to match the notch to the shoulder seam, pin in place and then match the side seams and pin in place.

TIP: If you’re doing a hemmed sleeve now would be a good time to press your memory hem. This will make it so much easier to hem later on. 

The Go To Jacket pattern follows a 1/2″ seam allowance so be sure to not deviate from it when you sew the shoulder seams RST or when you attach the sleeves.

Watch the day 4 video below and be sure to post a picture of today’s progress in the day 4 photo comments of the Go To Jacket album in the M4M & P4P Sew Along Group.

Go To Jacket Sew Along

Day 1: Print + Cut Pattern

Day 2: Choose + Cut Fabric

Day 3: Sew Pockets

Day 4: Sew Shoulder Seams + Attach Sleeves

Day 5: Attach Neckband / Hood

Day 6: Add waistband + Finish Sleeves

Day 7: Add Zipper

Day 8: Recap + Catch Up

Day 9: Winners Announcement

Filed Under: Frequently Asked Questions, Sew-A-Long, Uncategorized Leave a Comment

  • « Previous Page
  • 1
  • …
  • 15
  • 16
  • 17
  • 18
  • 19
  • …
  • 29
  • Next Page »

connect with me

  • Email
  • Facebook
  • Instagram
  • Pinterest
  • YouTube
Privacy & Cookies: This site uses cookies. By continuing to use this website, you agree to their use.

To find out more, including how to control cookies, see here: Cookie Policy
  • Privacy Policy
  • Refund Policy
  • Contact Us
  • About

Copyright © 2026 Patterns for Pirates

Copyright © 2026 · Genesis Framework · WordPress · Log in