Welcome to our Flutter Wrap Sew Along!
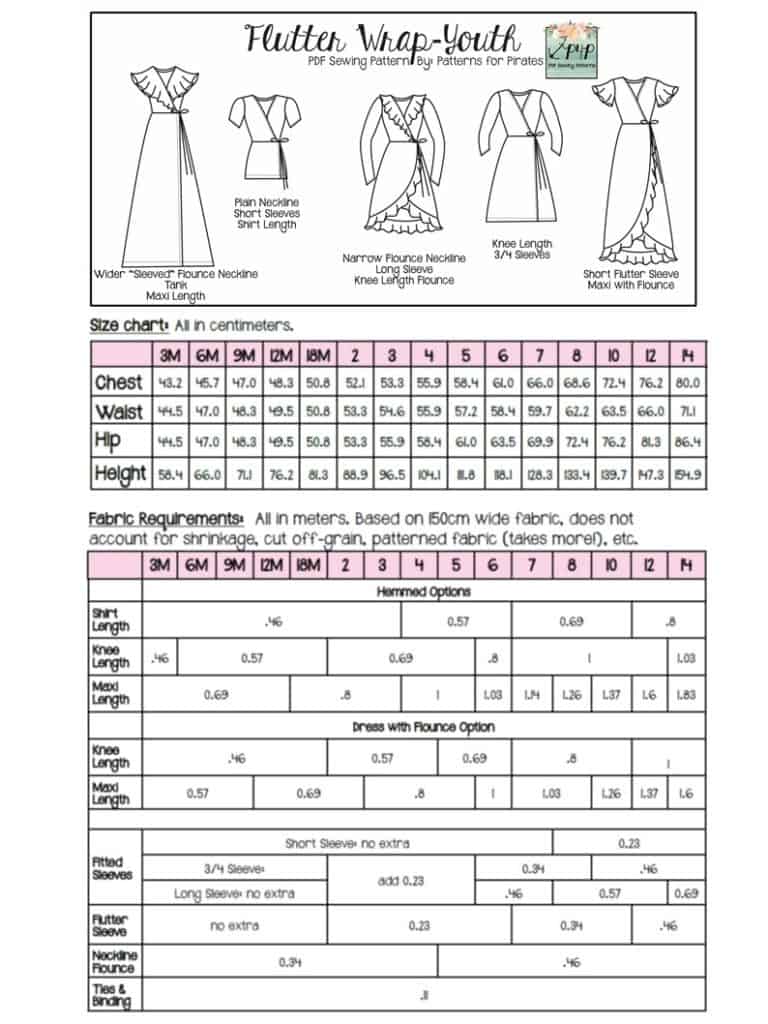
Day One is reserved to purchasing the pattern, printing and cutting the size(s) you need. If you plan on sewing for yourself you can get the Flutter Wrap here, if you’re sewing for your little one, the Flutter Wrap Youth can be purchased here and if you’re sewing for both of you (just think of the mommy and me matching outfits!) you can get the bundle. If you can’t decide which style to make, our Round Up blog will give you a glance at all options included with the pattern.
This sew along will be held in the the M4M & P4P Sew Along group so be sure to join the group not only for the exclusive discount code available for the Flutter Wrap patterns but also to post your progress this week. Don’t be shy about asking questions or suggestions, we are a helpful bunch. 🙂
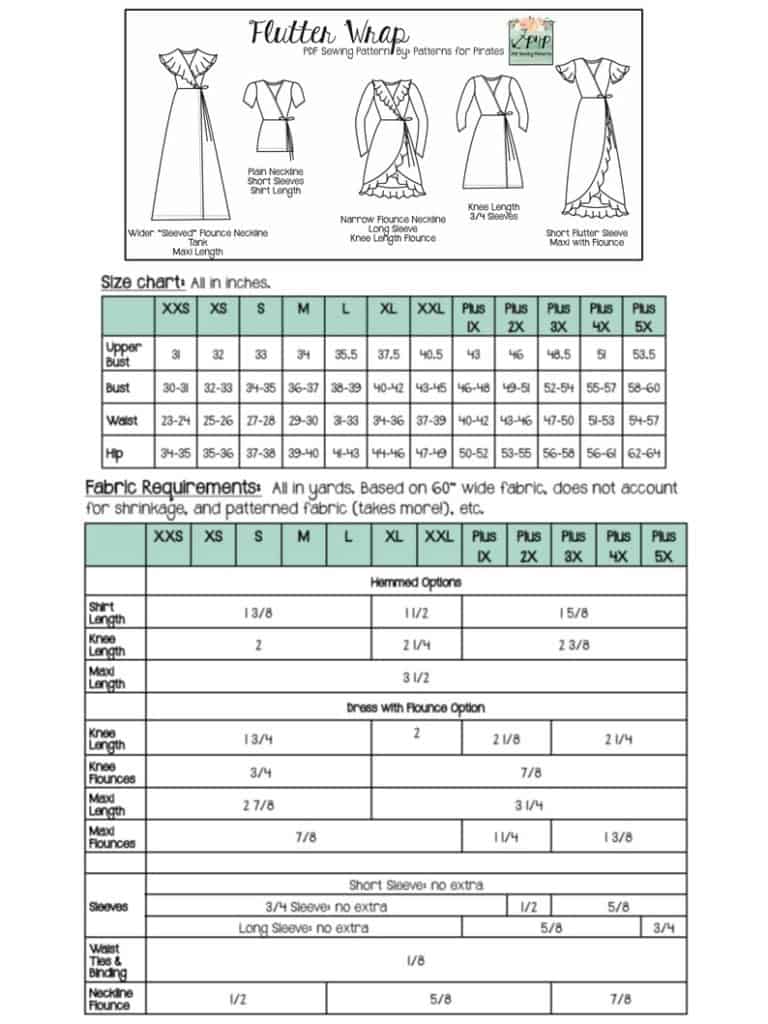
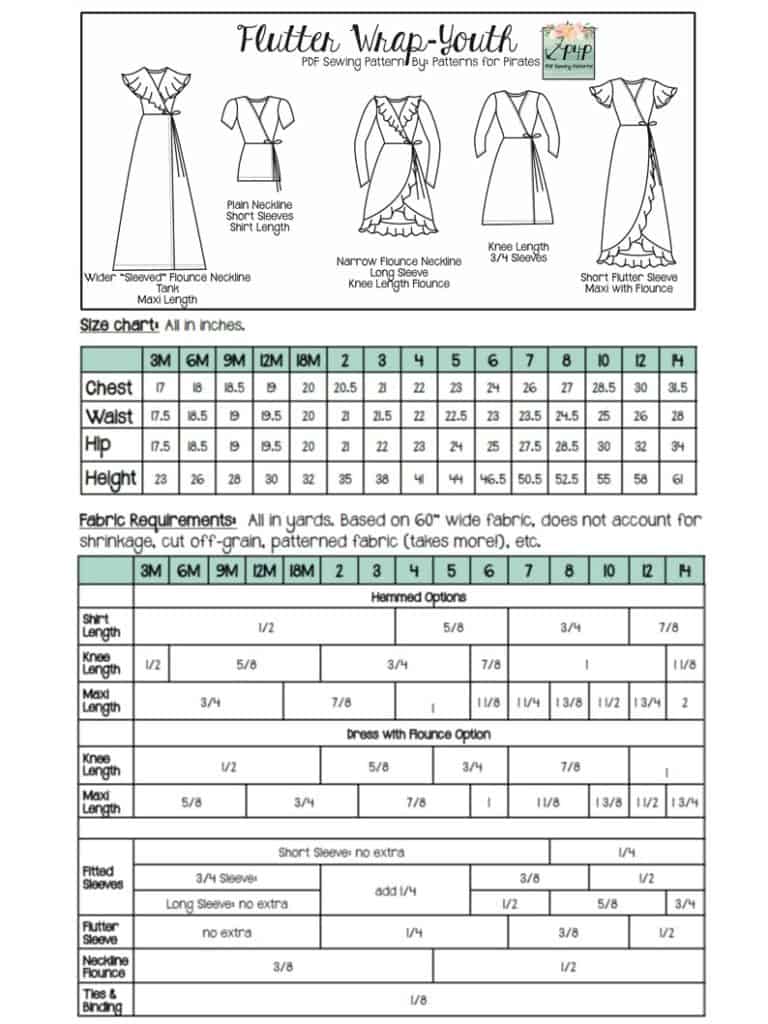
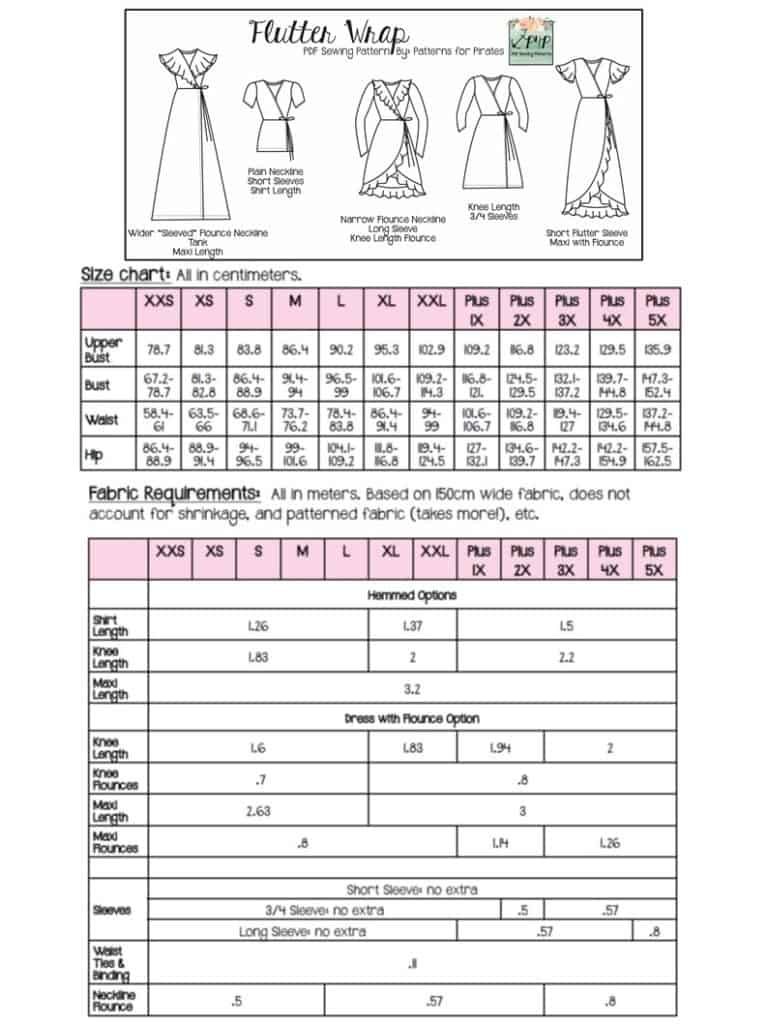
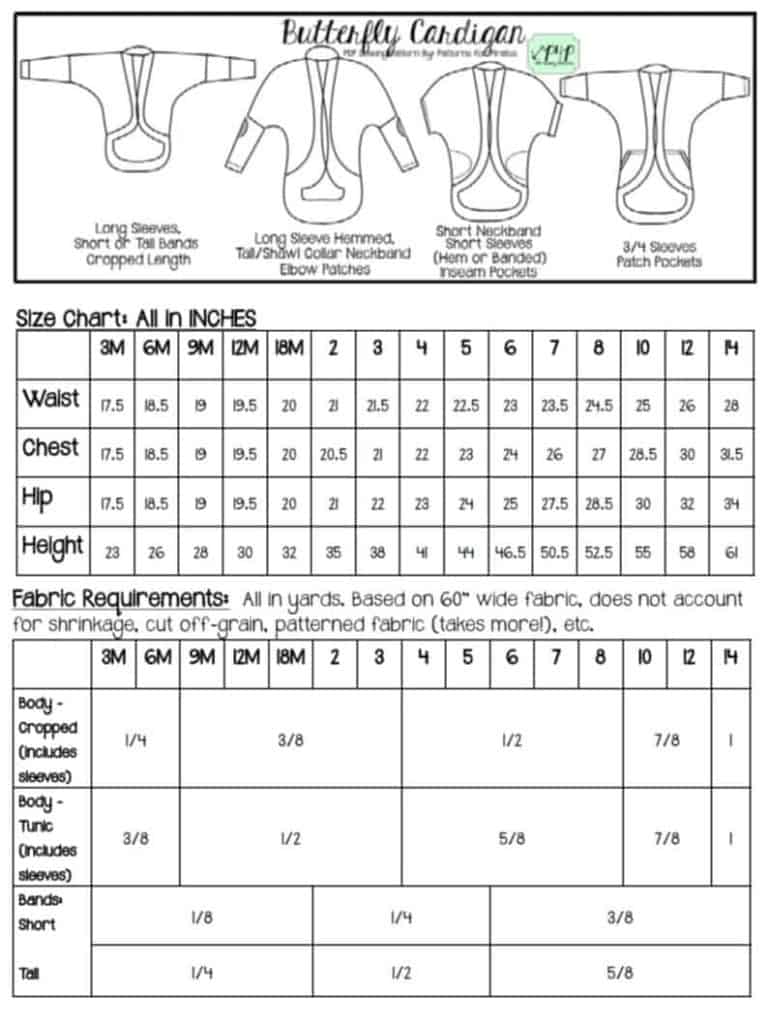
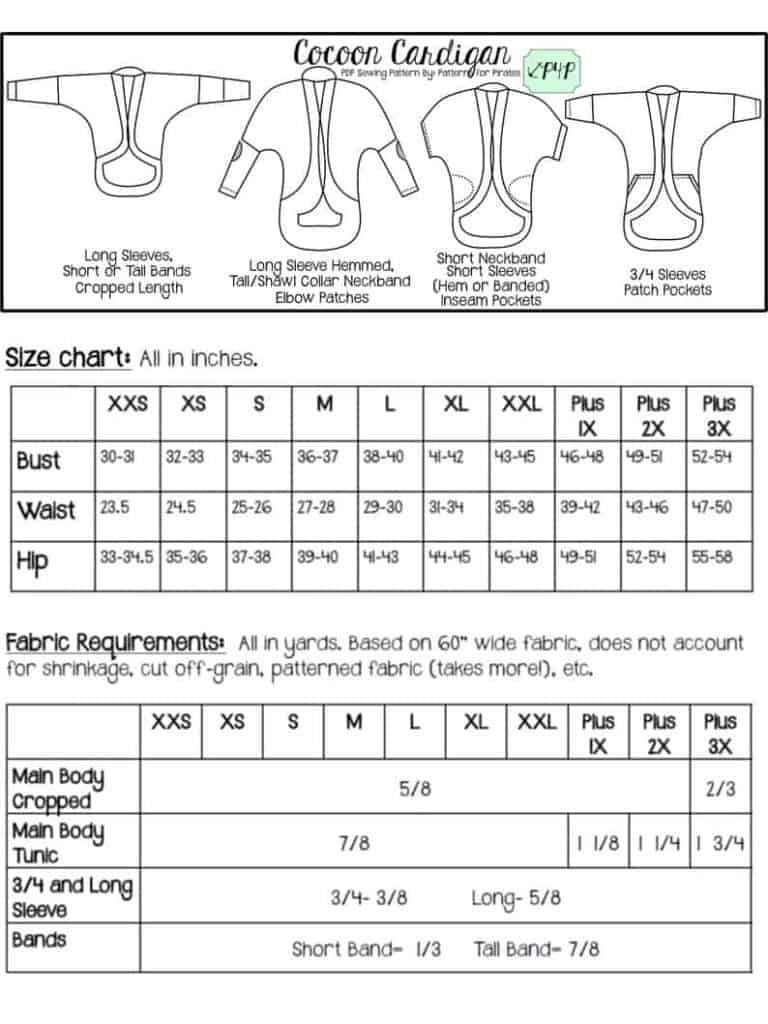
Now that you purchased the pattern(s), print the size needed. In order to do that it is very important that you take your most accurate measurements. You will need your waist, hips and chest measurements in order to choose the correct Flutter Wrap size. P4P has an amazing blog that gives you tip for accurately taking your measurements. You can read all about it here. If your measurements put you in a different size for chest/waist/hips be sure to check out our P4P University blog and grade to achieve the perfect fit.
You can see in the video below how I blend two sizes to make my Flutter Wrap knee length with flounce a flutter sleeves. Once you cut your pattern pieces post “done” in the comments of day 1 photo of the Flutter Wrap Sew Along album in the SAL group. We don’t allow pictures of the pattern pieces so this comment will count as your daily check in.
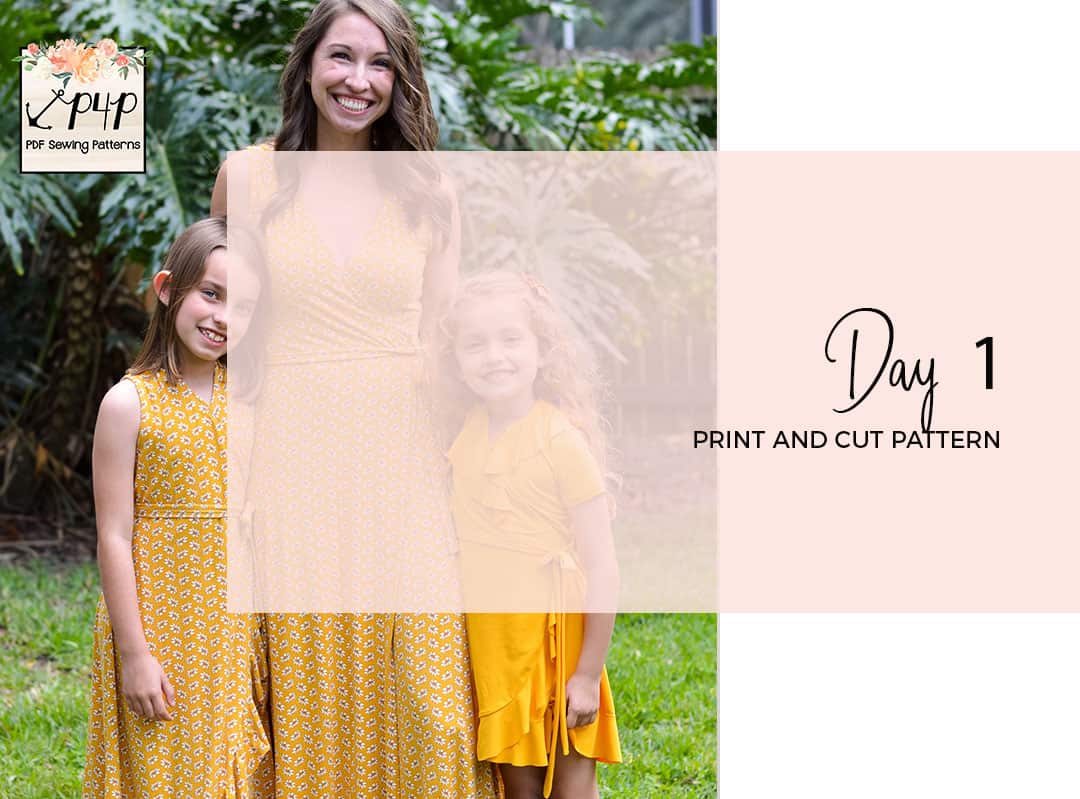
Flutter Wrap SAL day 1 | Print and cut pattern
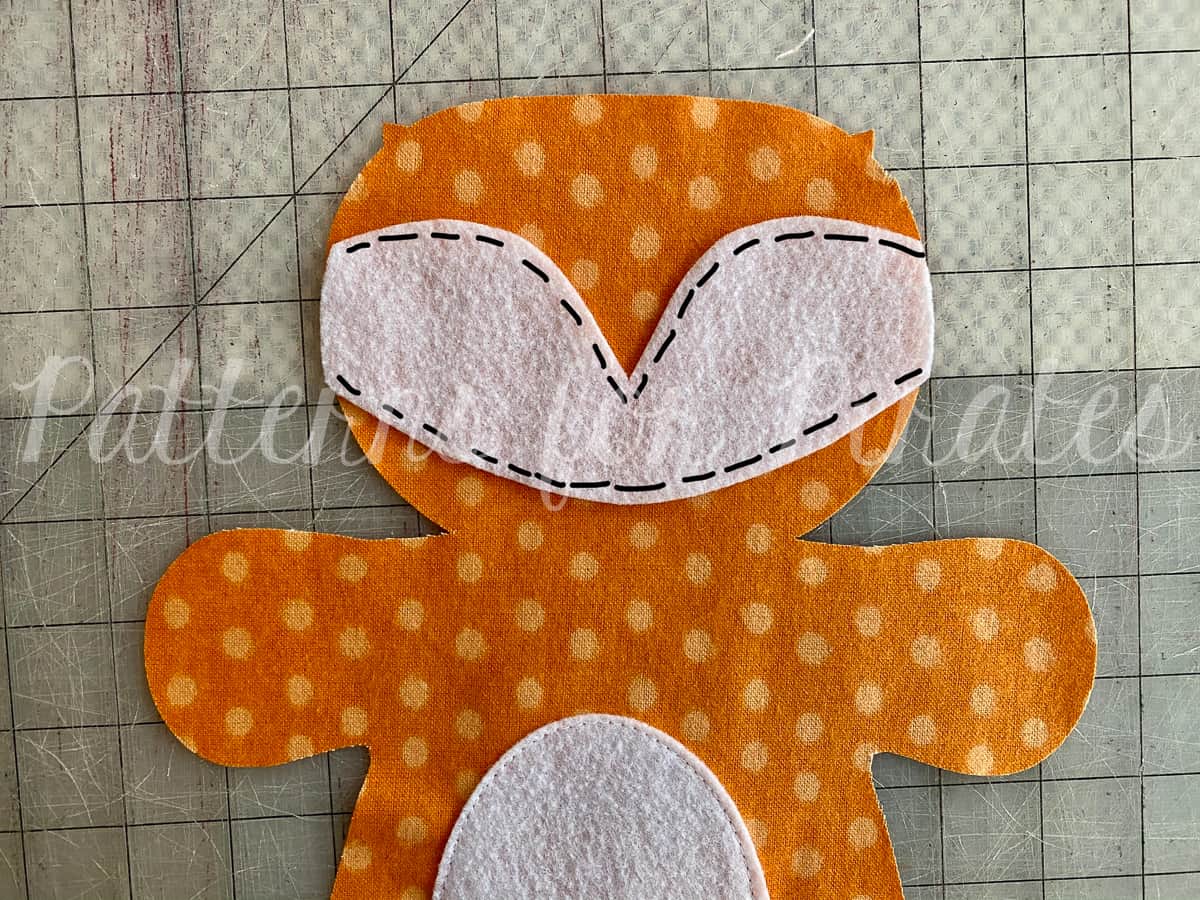
Flutter Wrap SAL day 2 | Cut fabric
Flutter Wrap SAL day 3 | Sew back, shoulder and side seams
Flutter Wrap SAL day 4 | Sew sleeves or tank binding
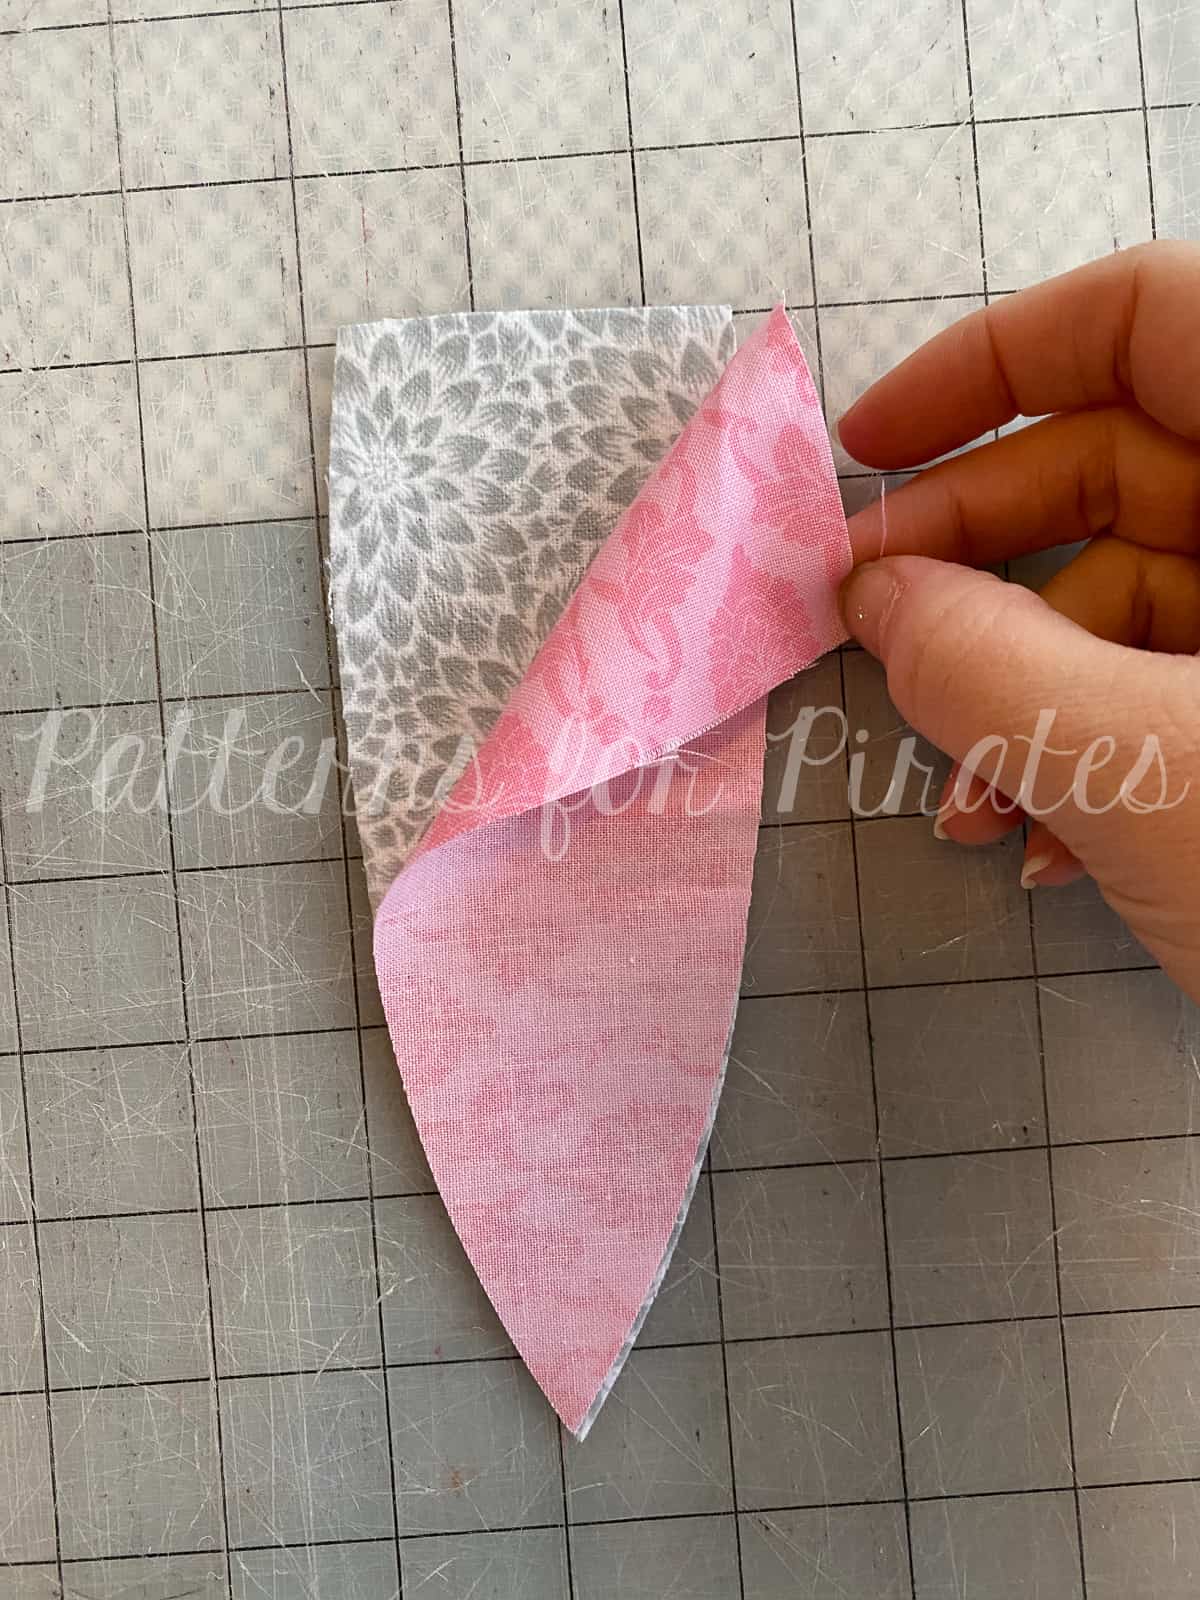
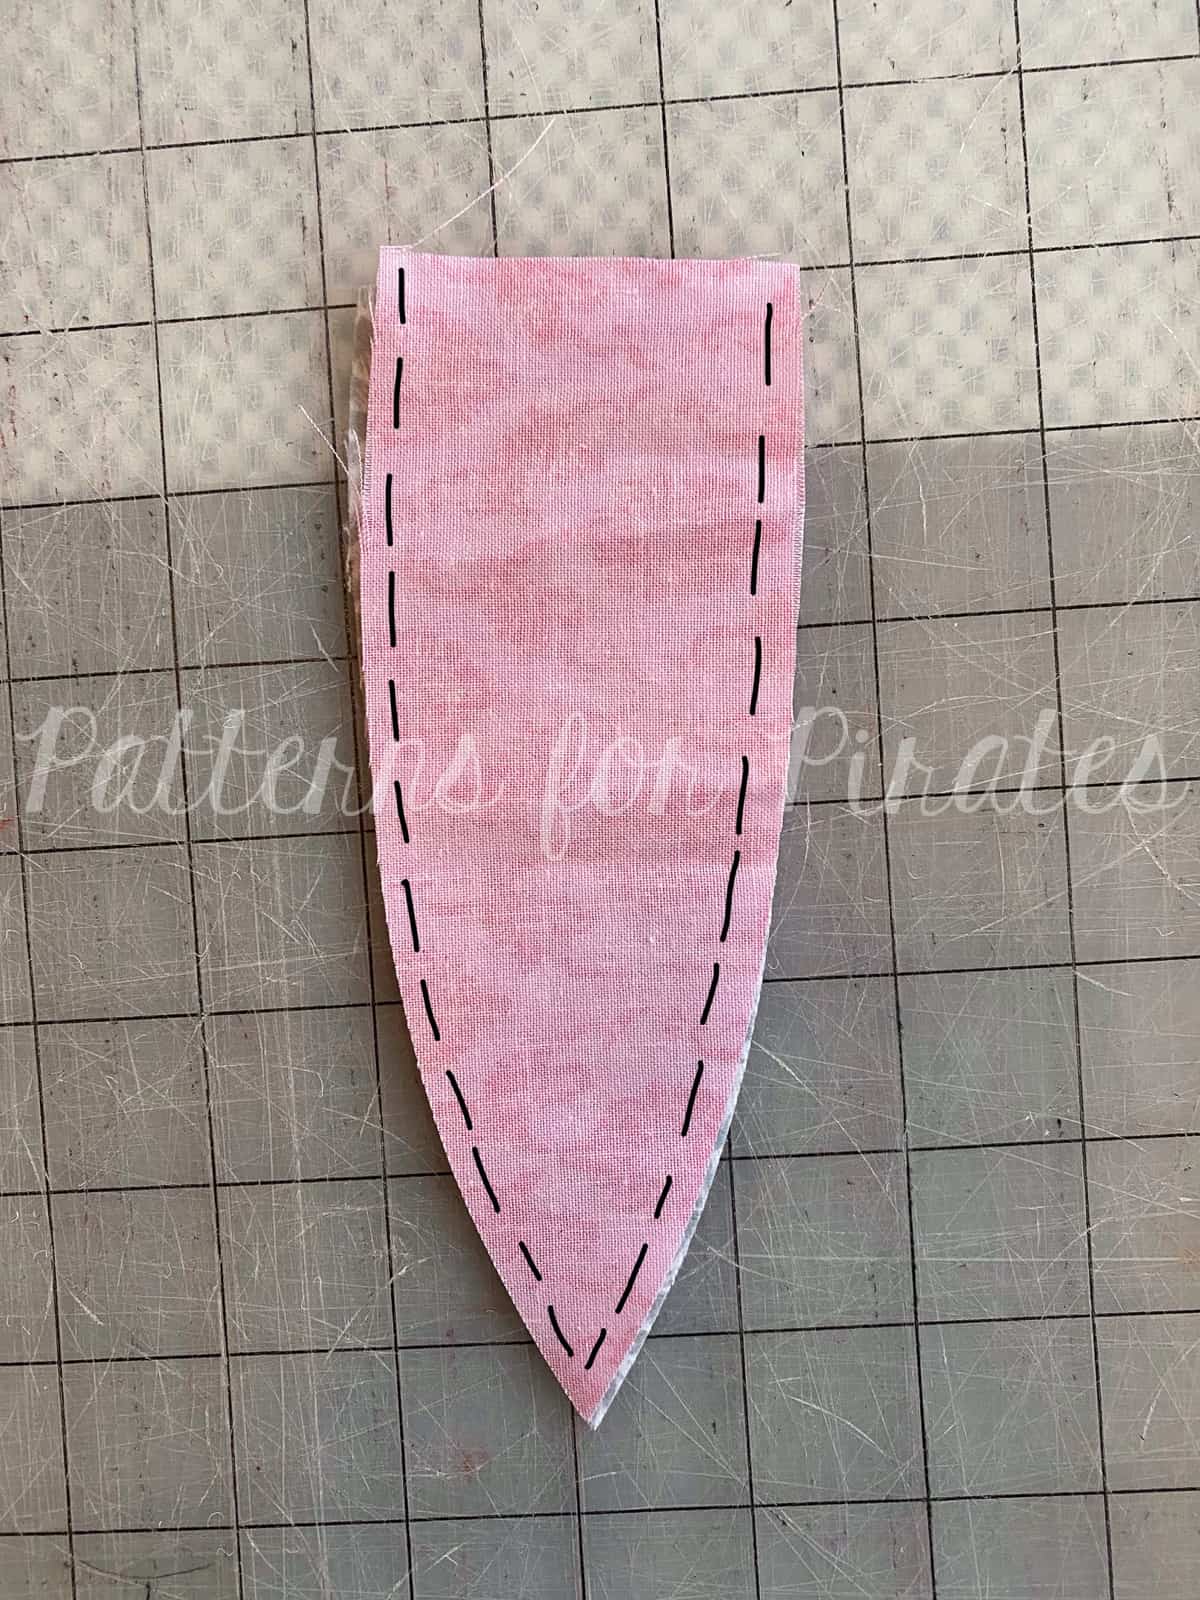
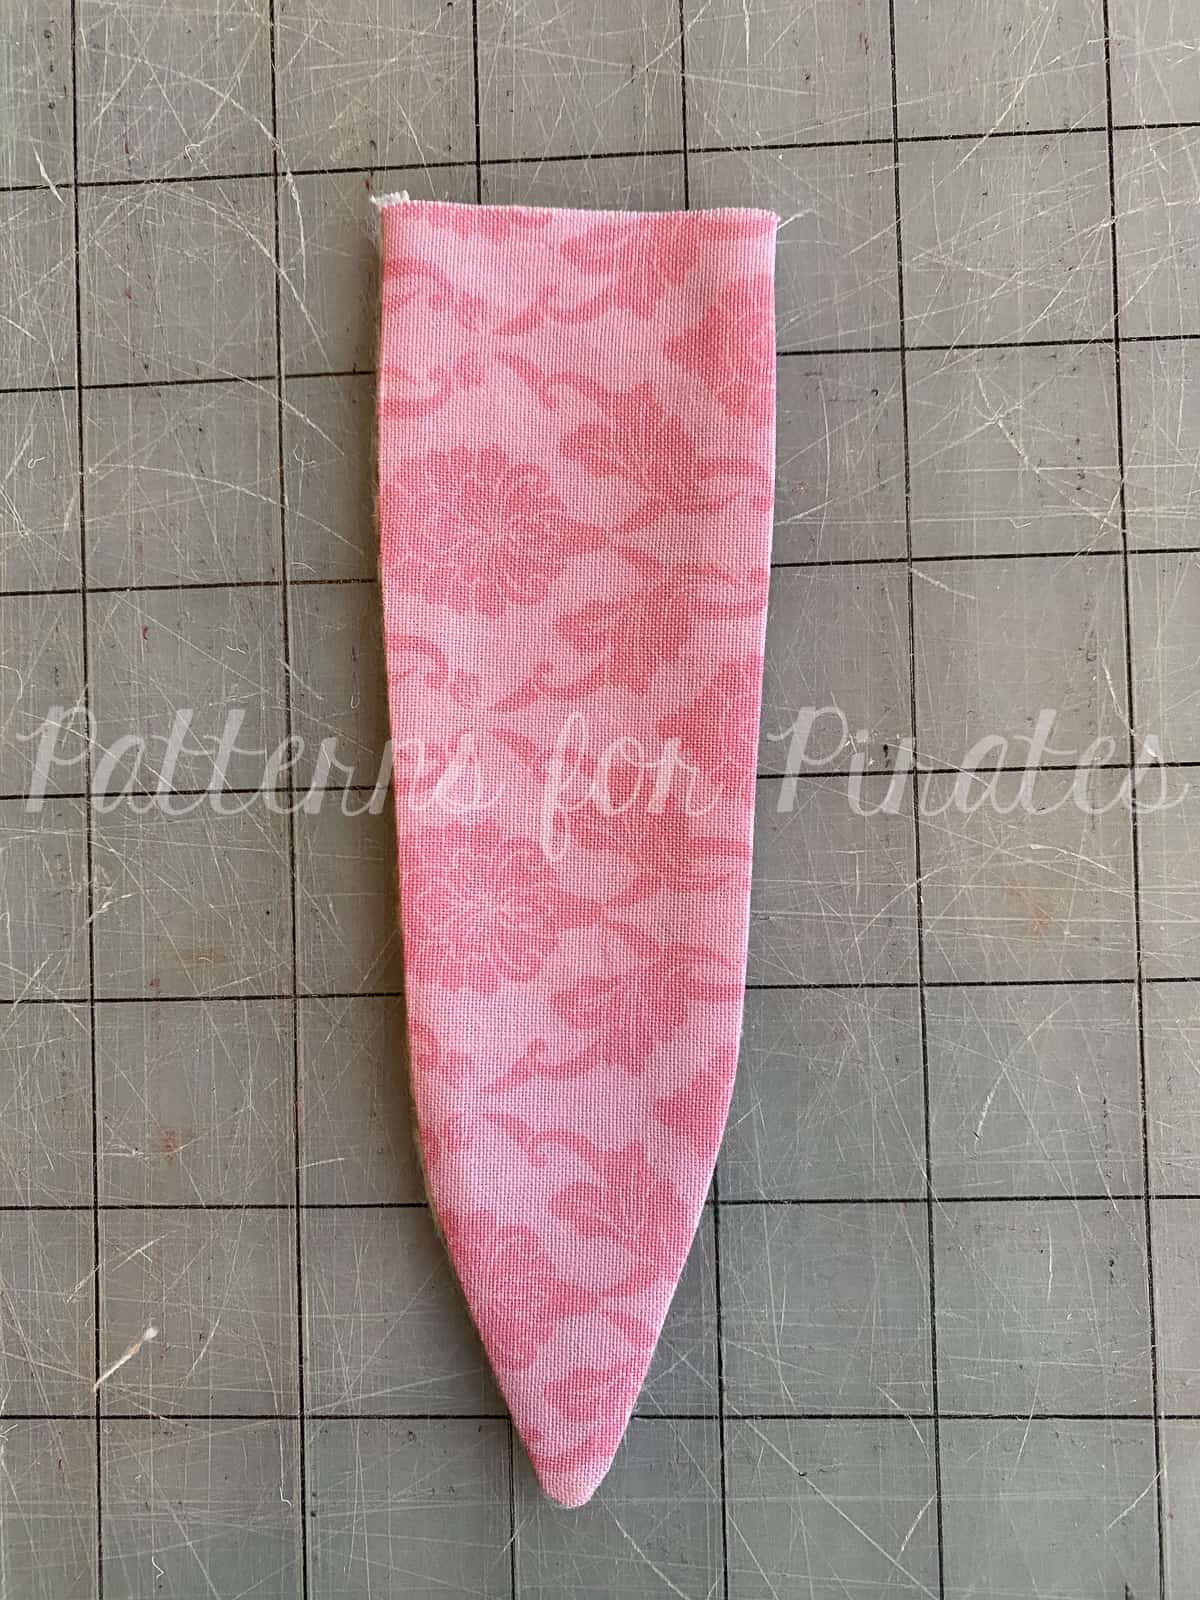
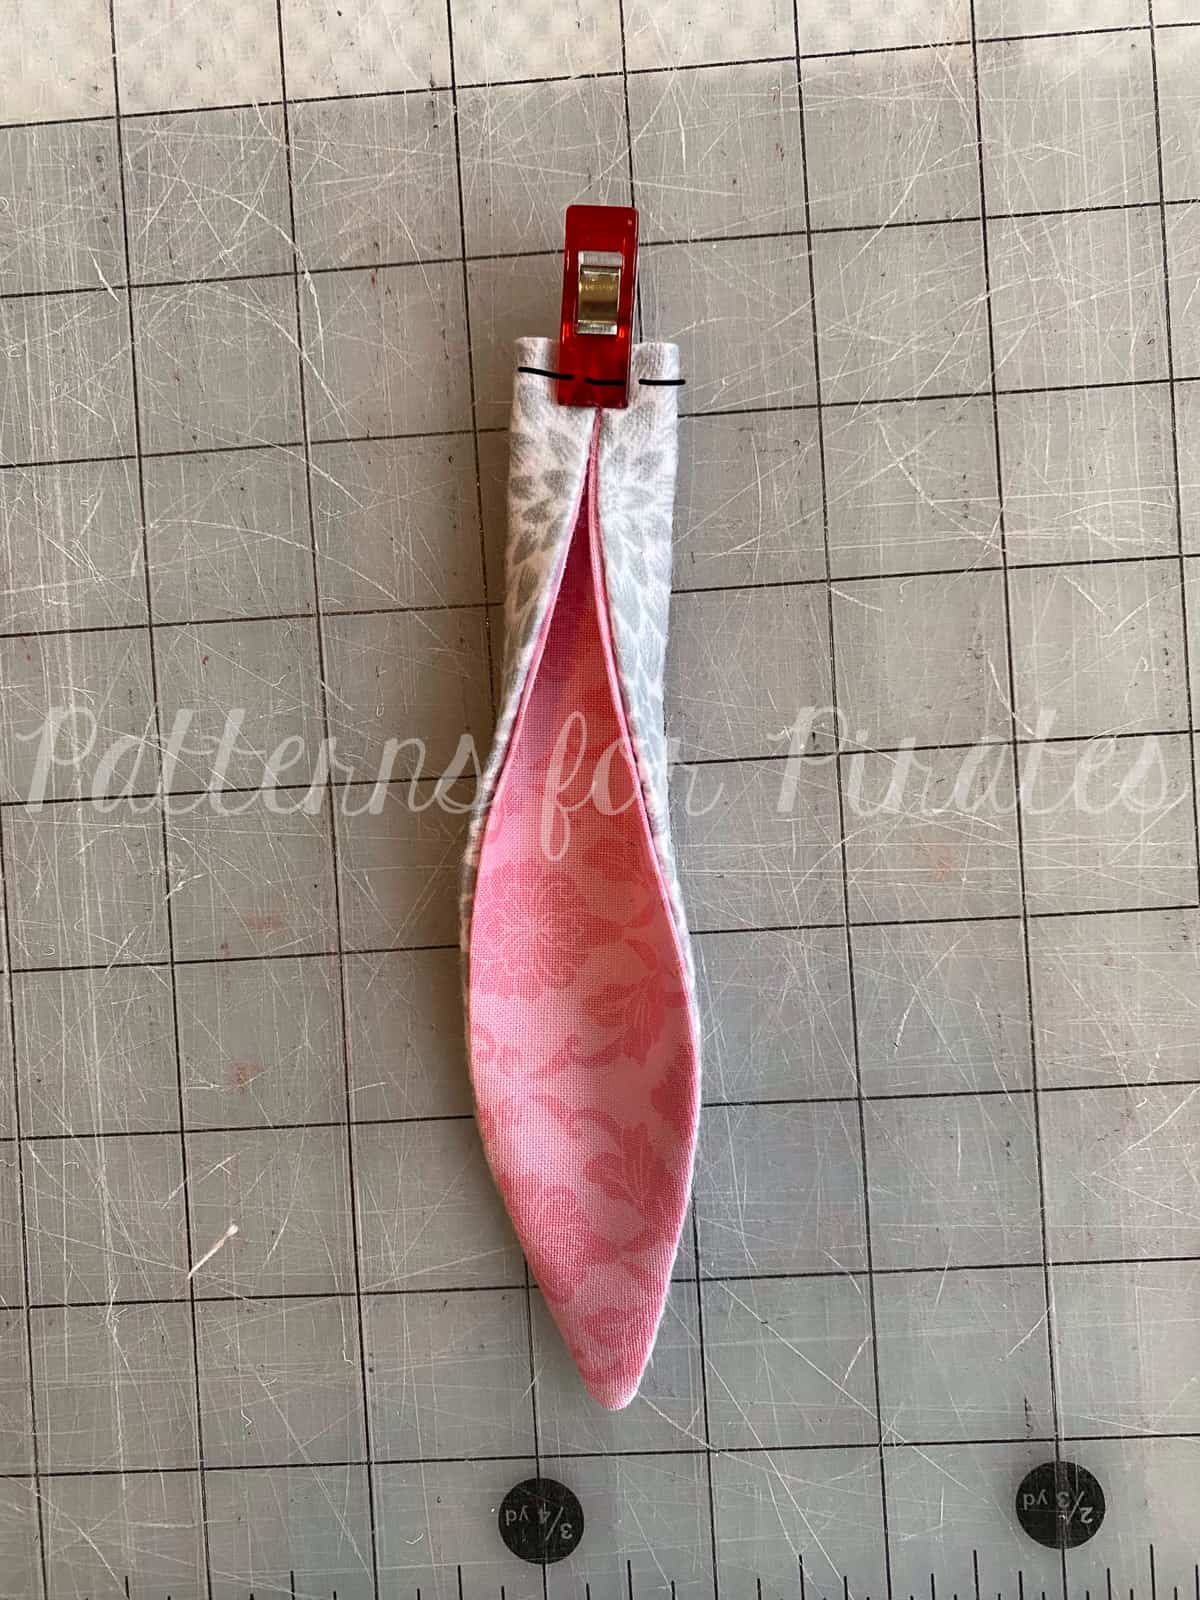
Flutter Wrap SAL day 5 | Add neckline binding and waist ties
Flutter Wrap SAL day 6 | Finish skirt
Flutter Wrap SAL day 7 | Winners announcement